elementary science curriculum grade 5 … 5 sci... · in this lab you will look at two types of...
TRANSCRIPT
VALLEY CENTRAL SCHOOL DISTRICT
944 STATE ROUTE 17K
MONTGOMERY, NY 12549
Telephone Number: (845) 457-2400 ext. 8121
Fax Number: (845) 457-4254
ELEMENTARY SCIENCE CURRICULUM
GRADE 5 LABORATORY EXPERIMENTS
May 2011 Approved by Board of Education
June 13, 2011
Unit A
Name ________________________
Date _____________________
Unit A – Chapter 1: Lesson 2
Observing Osmosis with Gummy Bears
Question: How will soaking Gummy Bear candies in water affect the size of the
candy?
Background information:
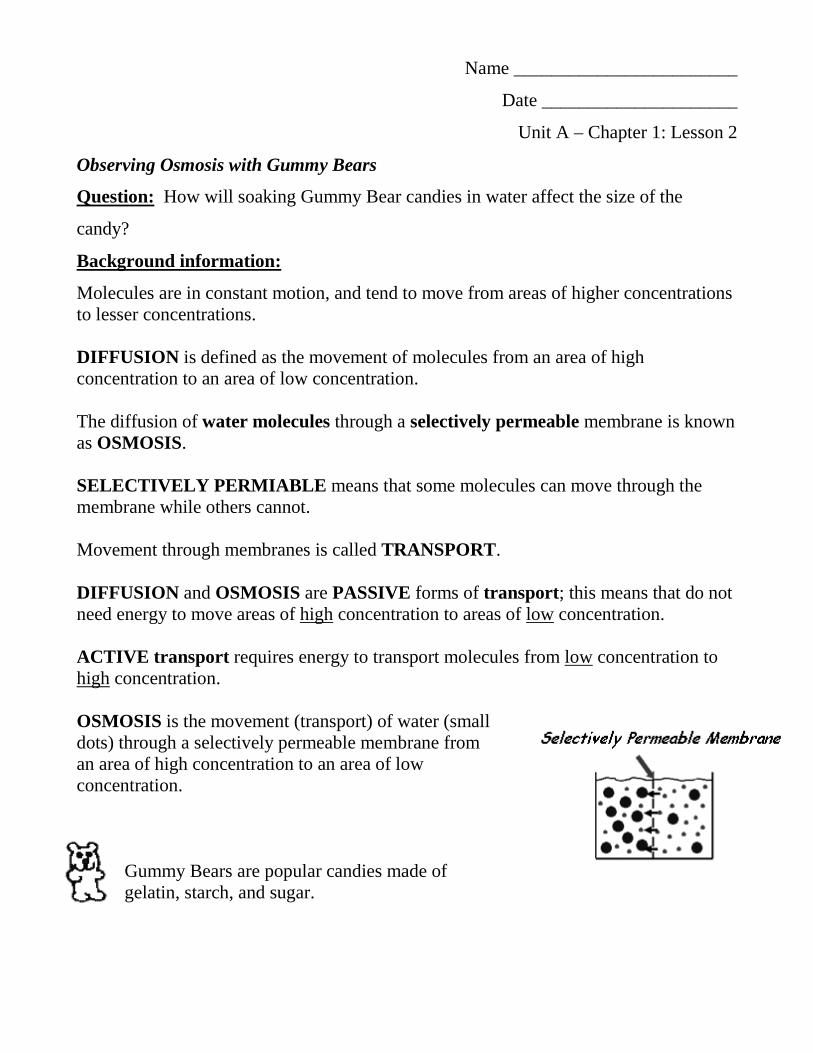
Molecules are in constant motion, and tend to move from areas of higher concentrations to lesser concentrations. DIFFUSION is defined as the movement of molecules from an area of high concentration to an area of low concentration. The diffusion of water molecules through a selectively permeable membrane is known as OSMOSIS. SELECTIVELY PERMIABLE means that some molecules can move through the membrane while others cannot. Movement through membranes is called TRANSPORT. DIFFUSION and OSMOSIS are PASSIVE forms of transport; this means that do not need energy to move areas of high concentration to areas of low concentration. ACTIVE transport requires energy to transport molecules from low concentration to high concentration. OSMOSIS is the movement (transport) of water (small dots) through a selectively permeable membrane from an area of high concentration to an area of low concentration.
Gummy Bears are popular candies made of gelatin, starch, and sugar.
Materials:
Beaker (plastic cup) Distilled water Masking tape Ruler Gummy bear Wax paper Triple Beam Balance Paper towel
Procedure:
1. Use the masking tape to label your beaker with your names & class period. 2. Use the ruler to find the height & width of your candy bear. 3. Use a triple beam balance to find the mass of your candy bear.
* Use a piece of wax paper to protect the pan of the balance. 4. Record descriptive observations about the candy bear. 5. Fill your beaker ½ way full with distilled water. 6. Put your candy bear in the water. 7. Set the beaker aside for one day. 8. After the candy bear has been in the distilled water overnight, gently
take it out of the water and pat it dry. Be very careful because the candy is now extremely breakable.
9. Repeat steps 2 – 4.
Hypothesis: If I soak Gummy Bears candies in water, then I predict that
_____________________________________________________________________
_____________________________________________________________________,
because ________________________________________________________________
______________________________________________________________________

Analysis:
Day 1 Day 2
Height (cm) Height (cm)
Width (cm) Width (cm)
Mass (g) Mass (g)
Observations
Observations
Conclusion:
1. What happened to the candy after soaking in water overnight? ______________________________________________________________________ ______________________________________________________________________ ______________________________________________________________________ 2. Explain the results of this experiment using the concept of osmosis. Use specific data to support what you say. ______________________________________________________________________ ______________________________________________________________________ ______________________________________________________________________ ______________________________________________________________________ 3. What do you think would happen to the candy if you let it soak in salt water overnight? Explain your answer. ______________________________________________________________________ ______________________________________________________________________ ______________________________________________________________________
Name ________________________
Date _____________________
Unit A – Chapter 1: Lesson 3
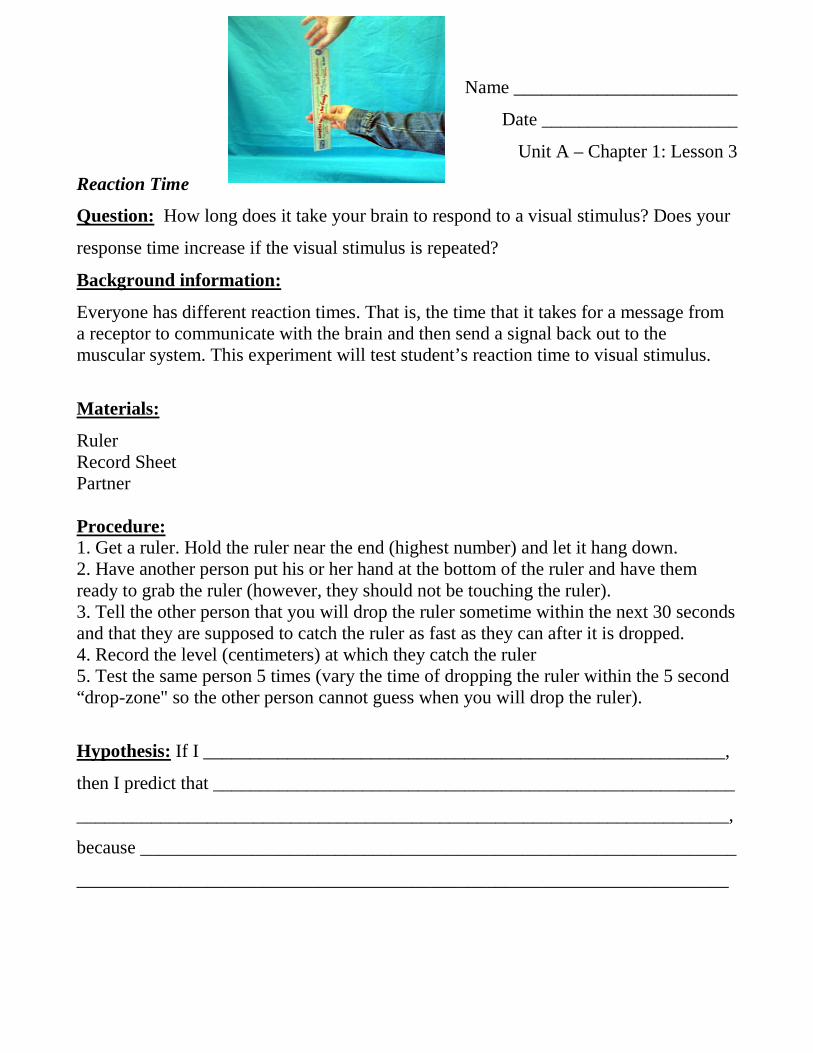
Reaction Time
Question: How long does it take your brain to respond to a visual stimulus? Does your
response time increase if the visual stimulus is repeated?
Background information:
Everyone has different reaction times. That is, the time that it takes for a message from a receptor to communicate with the brain and then send a signal back out to the muscular system. This experiment will test student’s reaction time to visual stimulus.
Materials:
Ruler Record Sheet Partner Procedure: 1. Get a ruler. Hold the ruler near the end (highest number) and let it hang down. 2. Have another person put his or her hand at the bottom of the ruler and have them ready to grab the ruler (however, they should not be touching the ruler). 3. Tell the other person that you will drop the ruler sometime within the next 30 seconds and that they are supposed to catch the ruler as fast as they can after it is dropped. 4. Record the level (centimeters) at which they catch the ruler 5. Test the same person 5 times (vary the time of dropping the ruler within the 5 second “drop-zone" so the other person cannot guess when you will drop the ruler).
Hypothesis: If I ________________________________________________________,
then I predict that ________________________________________________________
______________________________________________________________________,
because ________________________________________________________________
______________________________________________________________________

Analysis: Record your observation in the table below.
Then, convert the distance into reaction time with the chart below.
Distance Time
2 in (~5 cm) 0.10 sec (100 ms)
4 in (~10 cm) 0.14 sec (140 ms)
6 in (~15 cm) 0.17 sec (170 ms)
8 in (~20 cm) 0.20 sec (200 ms)
10 in (~25.5 cm) 0.23 sec (230 ms)
12 in (~30.5 cm) 0.25 sec (250 ms)
17 in (~43 cm) 0.30 sec (300 ms)
24 in (~61 cm) 0.35 sec (350 ms)
31 in (~79 cm) 0.40 sec (400 ms)
39 in (~99 cm) 0.45 sec (450 ms)
48 in (~123 cm) 0.50 sec (500 ms)
69 in (~175 cm) 0.60 sec (600 ms)
Test Level in cm
1
2
3
4
5
Test Reaction Time
1
2
3
4
5
Conclusion:
1. What can you conclude from what you observed and the information that you
recorded?
______________________________________________________________________
______________________________________________________________________
______________________________________________________________________
______________________________________________________________________
2. Explain what you think could cause this.
______________________________________________________________________
______________________________________________________________________
______________________________________________________________________
______________________________________________________________________
______________________________________________________________________
______________________________________________________________________
Name ________________________
Date _____________________
Unit A – Chapter 3: Lesson 3
Observing Plant and Animal Cells
Question: After observing both plant and animal cells, how will the shape of the
animal cell and plant cell differ?
Background information:
One of the first scientists to look at cells under a microscope was an English scientist by the name of Robert Hooke. He viewed and described the appearance of cork under the microscope and decided to name the tiny box-like structures that he observed “cells” because they looked like the small chambers where monks lived. By the early part of the 19th century, it was accepted that all living things are composed of cells. Cells come in a variety of shapes and sizes, and cells perform different functions. Although cells may appear outwardly different, they resemble each other because they share common structures. In this lab you will look at two types of cells, a human cheek cell and an onion cell and see how they are similar and how they are different Vocabulary Terms: cell membrane, cytoplasm, cell wall, vacuole, nuclear membrane, nucleus. Materials:
Microscope slide with cover-slip Onion tweezers Dropper toothpick water iodine blue methylene

Onion Cell Procedure: 1. Add 2 drops of iodine to the center of a glass slide. Be careful! Iodine can stain your clothes.
2. Take a small piece of onion. Use tweezers to peel off the skin from the underside (the rough, white side) of the onion. Throw the rest of the onion piece away. 3. Carefully lay the onion skin flat in the center of the slide on top of the iodine. 4. Add 2 drops of iodine to the top of the onion skin. 5. Stand a thin glass cover slip on its edge near the onion skin, next to the drop of iodine. 6. Slowly lower the other side of the cover slip until it covers the onion skin completely. If there are air bubbles, gently tap on the glass to “chase” them out. 7. Make sure the lowest power lens (the shortest lens) is in place over the stage and the microscope light is turned on. Place the slide onto the stage of the microscope. 8. Look through the eyepiece and turn the coarse focus knob (the largest knob) until an image comes into focus. It should look like a brick wall or like lizard skin. 9. Now use the fine focus knob (the smallest knob) to make the image as focused as possible. 10. On the attached page, draw a picture of what you see. Label the following: cell membrane, cytoplasm, cell wall, vacuole, nuclear membrane, nucleus. When drawing objects as seen under a microscope, it is important to:
a. draw clearly; make distinct lines b. only use pencil c. provide the name of the object and the power under which it was observed
11. Clean the slide and dry.
2 drops iodine onion skin 2 drops iodine glass slide
cover slip
Cheek Cell Procedure:
1. Put a drop of methylene blue on a slide. Caution: methylene blue will stain clothes and skin. 2. Gently scrape the inside of your cheek with the flat side of a toothpick. Scrape very lightly. 3. Stir the end of the toothpick into the stain and throw the toothpick away. 4. Place a cover-slip onto the slide 5. Use low power to focus. You probably will not see the cells at this power. Once you have found an area with several good cells, switch to high power. 6. Neatly draw one or two cheek cells on the attached page. Label the following: cell membrane, nucleus, nuclear membrane, cytoplasm 7. Throw out the cover slip, clean, and return slide.
Hypothesis: If I observe the size and shape of plant and animal cells, then I predict that
______________________________________________________________________
______________________________________________________________________,
because ________________________________________________________________
______________________________________________________________________
Analysis: Drawings: Onion Cell
Cheek Cell

Conclusion:
1. How did the shape of the onion cells differ from that of the cheek cells?
_________________________________________________________________
_________________________________________________________________
_________________________________________________________________
2. Which cells seem to be arranged in a more regular pattern?
_________________________________________________________________
_________________________________________________________________
_________________________________________________________________
3. What structures were you able to see in both types of cells?
_________________________________________________________________
_________________________________________________________________
_________________________________________________________________
4. In class and in your reading you learned that one difference between plant and animal cells is that plant cells contain chloroplasts. Were any chloroplasts visible in the onion cells? Why or why not? Explain your reasoning.
_________________________________________________________________
_________________________________________________________________
_________________________________________________________________
_________________________________________________________________
_________________________________________________________________
Name ________________________
Date _____________________
Unit A – Chapter 1: Lesson 2
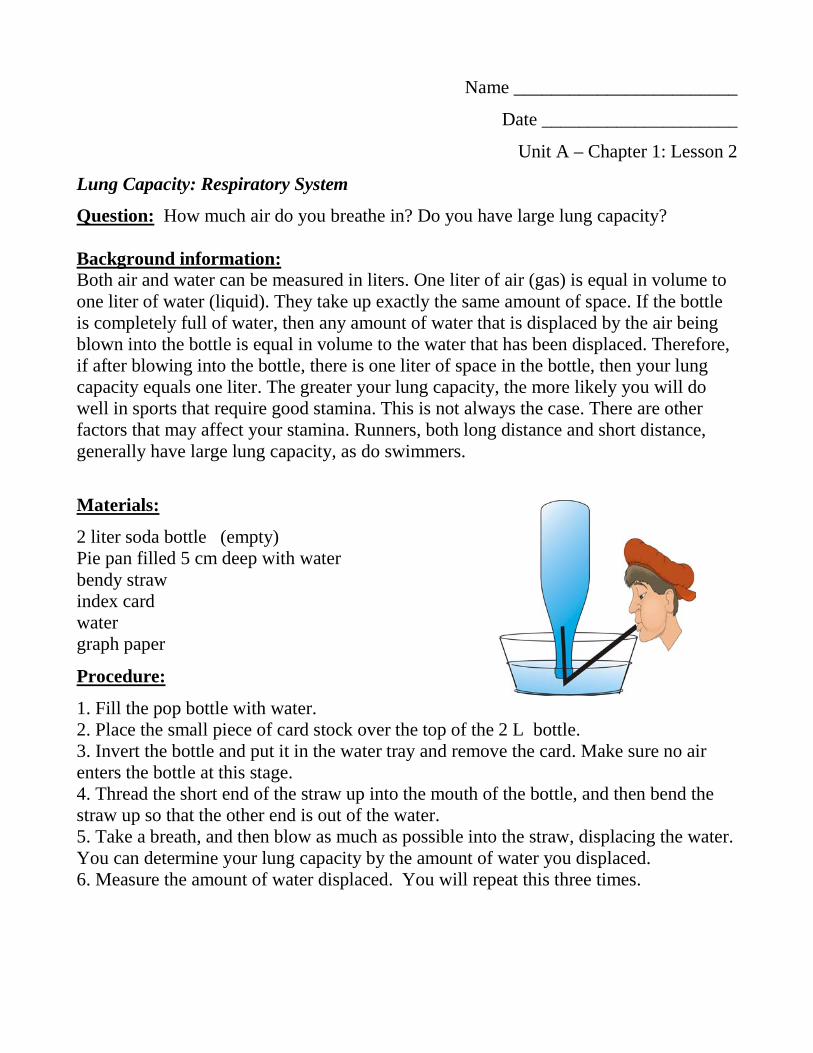
Lung Capacity: Respiratory System
Question: How much air do you breathe in? Do you have large lung capacity? Background information: Both air and water can be measured in liters. One liter of air (gas) is equal in volume to one liter of water (liquid). They take up exactly the same amount of space. If the bottle is completely full of water, then any amount of water that is displaced by the air being blown into the bottle is equal in volume to the water that has been displaced. Therefore, if after blowing into the bottle, there is one liter of space in the bottle, then your lung capacity equals one liter. The greater your lung capacity, the more likely you will do well in sports that require good stamina. This is not always the case. There are other factors that may affect your stamina. Runners, both long distance and short distance, generally have large lung capacity, as do swimmers.
Materials:
2 liter soda bottle (empty) Pie pan filled 5 cm deep with water bendy straw index card water graph paper
Procedure:
1. Fill the pop bottle with water. 2. Place the small piece of card stock over the top of the 2 L bottle. 3. Invert the bottle and put it in the water tray and remove the card. Make sure no air enters the bottle at this stage. 4. Thread the short end of the straw up into the mouth of the bottle, and then bend the straw up so that the other end is out of the water. 5. Take a breath, and then blow as much as possible into the straw, displacing the water. You can determine your lung capacity by the amount of water you displaced. 6. Measure the amount of water displaced. You will repeat this three times.
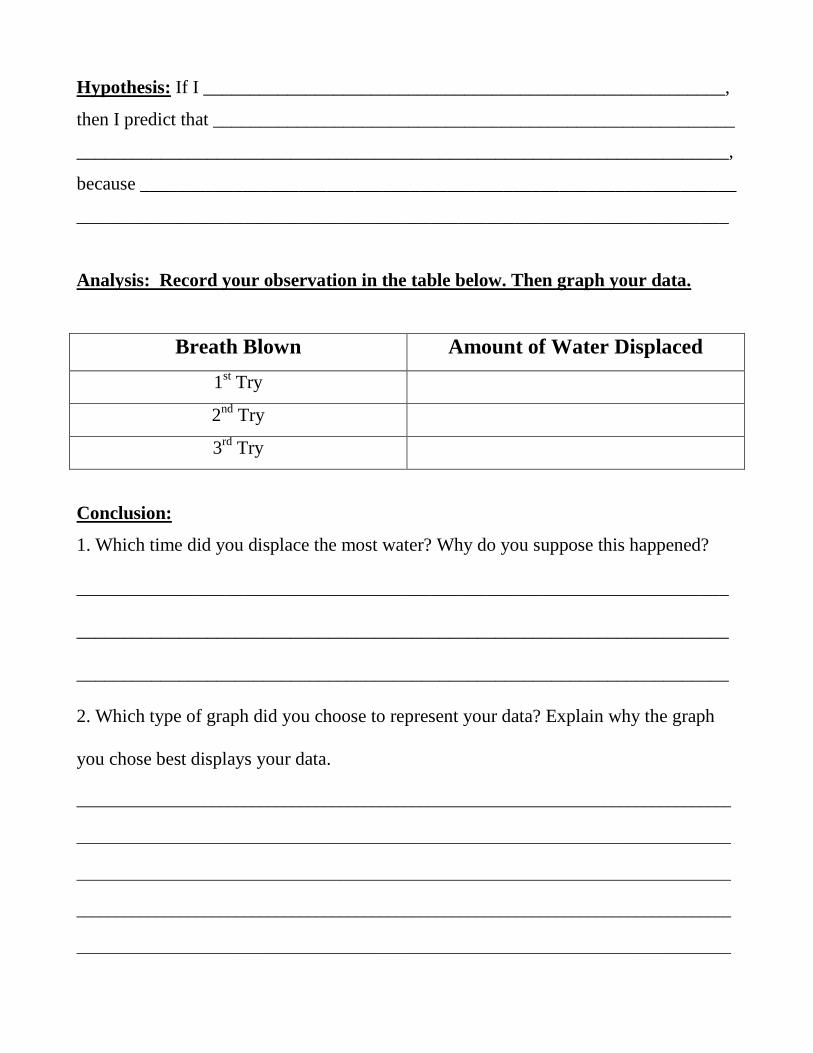
Hypothesis: If I ________________________________________________________,
then I predict that ________________________________________________________
______________________________________________________________________,
because ________________________________________________________________
______________________________________________________________________
Analysis: Record your observation in the table below. Then graph your data.
Breath Blown Amount of Water Displaced 1st Try
2nd Try
3rd Try
Conclusion:
1. Which time did you displace the most water? Why do you suppose this happened?
______________________________________________________________________
______________________________________________________________________
______________________________________________________________________
2. Which type of graph did you choose to represent your data? Explain why the graph
you chose best displays your data.
__________________________________________________________________________________
__________________________________________________________________________________
__________________________________________________________________________________
__________________________________________________________________________________
__________________________________________________________________________________

Name ________________________
Date _____________________
Unit A – Chapter 3: Lesson 3
Create –A-Face: Genetics
Question: How are traits inherited? What traits do parents need to carry in order to
produce specific traits in their offspring?
Background information:
Genes are the material that control which traits are expressed in an organism. There are two copies of each gene, one from the mother and one from the father. These genes can take different forms called alleles. For example, there is a gene for the height of a pea plant. The gene has two alleles, one for tall and one for short. Genes come in pairs and offspring inherit one copy of each gene from each parent. A dominant allele is one whose trait always shows up, even when only one of the two alleles is in the dominant form. A dominant allele is shown by a capital letter. A recessive allele is one that is hidden when the other copy of the gene contains the dominant allele. A recessive allele shows up only when there is no dominant allele present.
The probability of certain traits being shown can be figured by using Punnett Squares.
A Punnett Square is a chart that shows all the possible combinations of alleles that can result when genes are crossed
Materials:
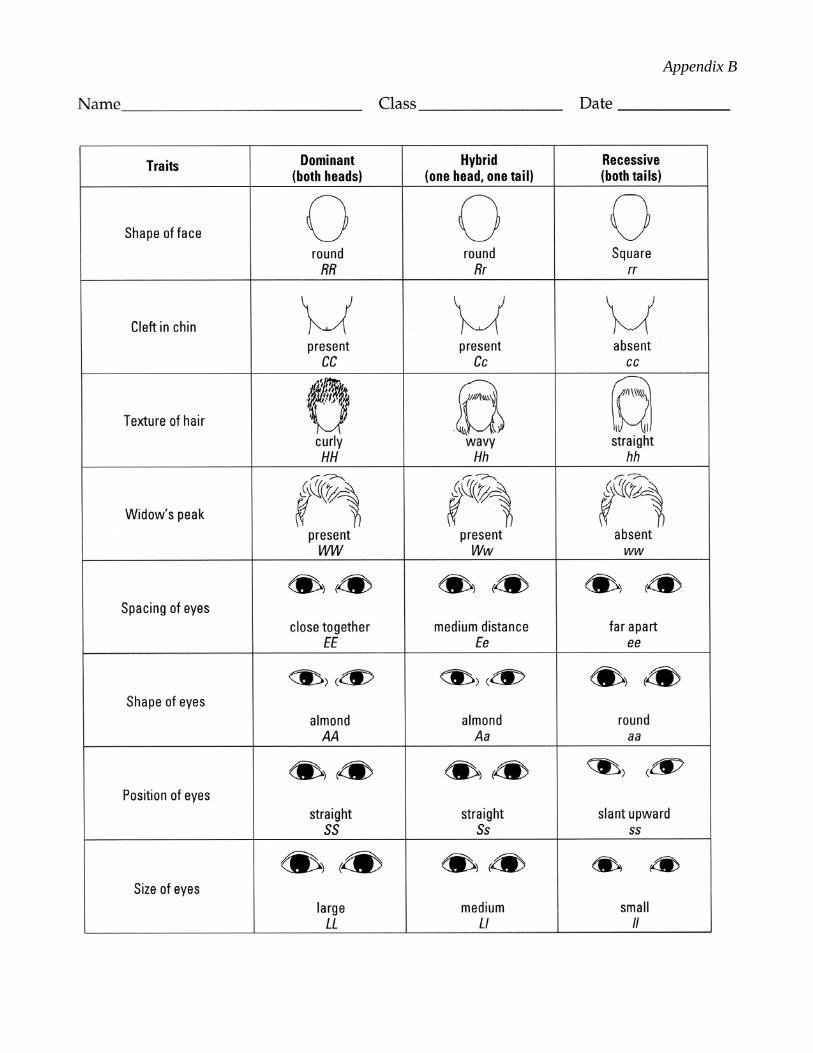
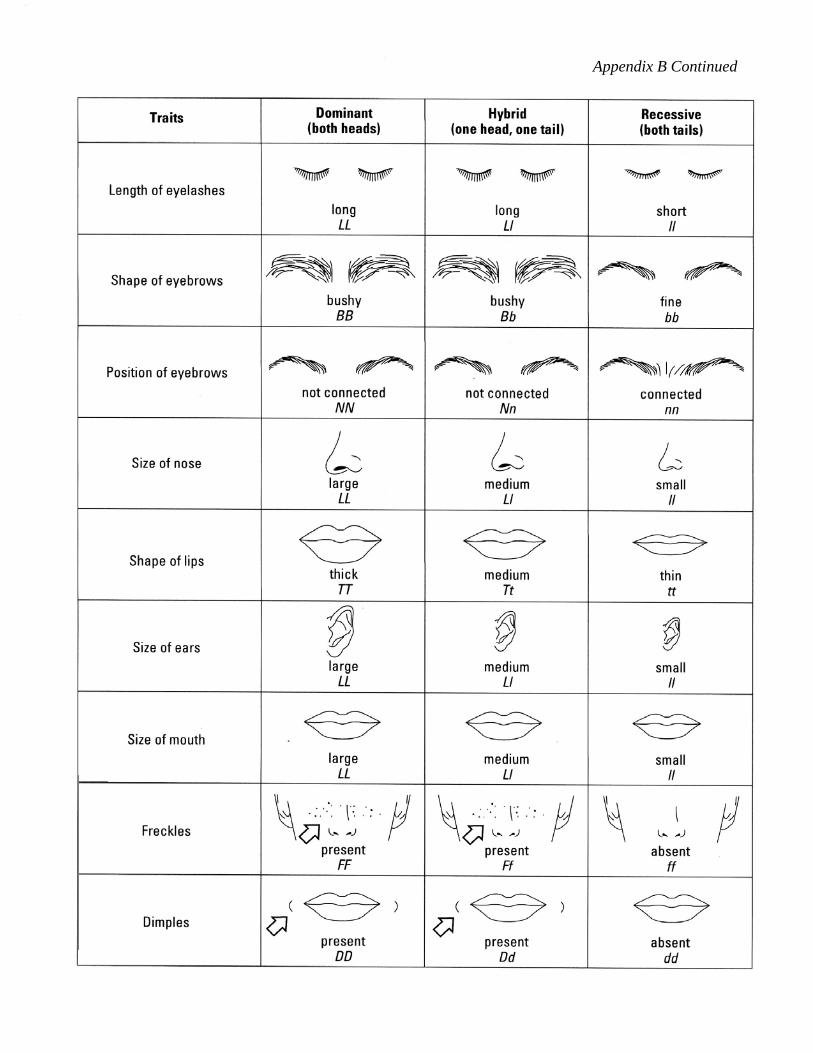
Red/yellow counters Punnett Square record sheet – Appendix A Traits Chart – Appendix B Drawing Paper
Procedure:
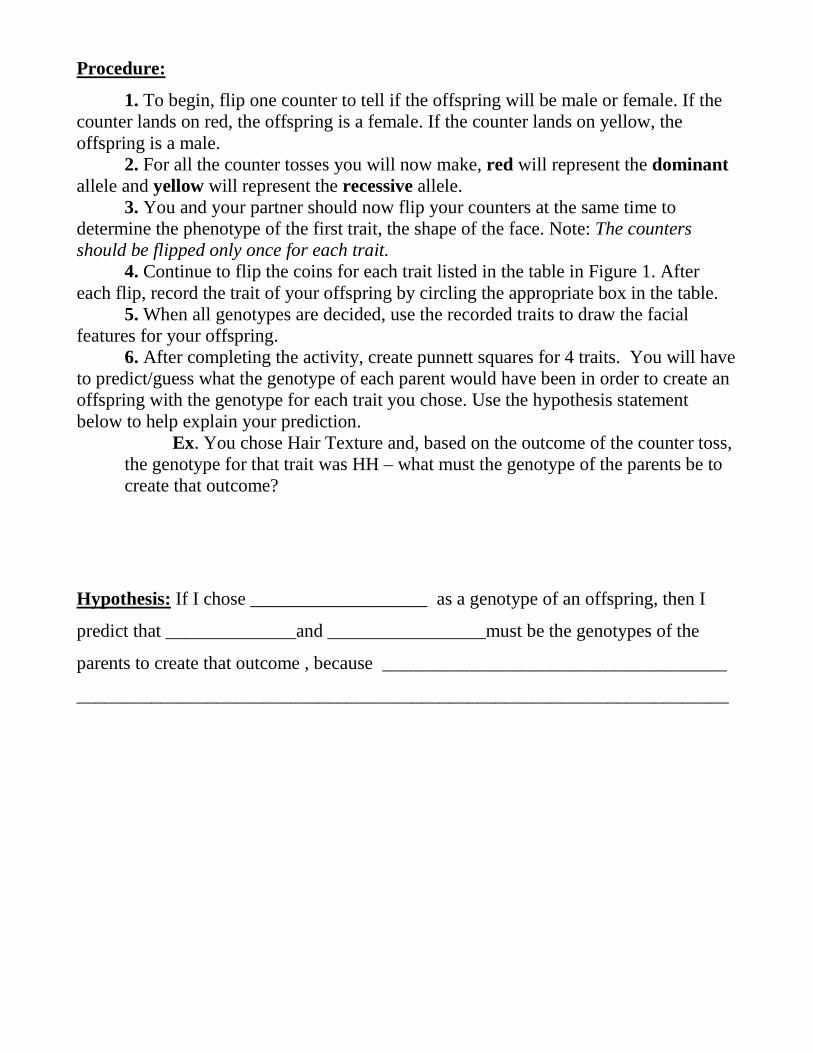
1. To begin, flip one counter to tell if the offspring will be male or female. If the counter lands on red, the offspring is a female. If the counter lands on yellow, the offspring is a male.
2. For all the counter tosses you will now make, red will represent the dominant allele and yellow will represent the recessive allele.
3. You and your partner should now flip your counters at the same time to determine the phenotype of the first trait, the shape of the face. Note: The counters should be flipped only once for each trait.
4. Continue to flip the coins for each trait listed in the table in Figure 1. After each flip, record the trait of your offspring by circling the appropriate box in the table.
5. When all genotypes are decided, use the recorded traits to draw the facial features for your offspring.
6. After completing the activity, create punnett squares for 4 traits. You will have to predict/guess what the genotype of each parent would have been in order to create an offspring with the genotype for each trait you chose. Use the hypothesis statement below to help explain your prediction.
Ex. You chose Hair Texture and, based on the outcome of the counter toss, the genotype for that trait was HH – what must the genotype of the parents be to create that outcome?
Hypothesis: If I chose ___________________ as a genotype of an offspring, then I
predict that ______________and _________________must be the genotypes of the
parents to create that outcome , because _____________________________________
______________________________________________________________________

Analysis:
Trait
Outcome
Trait
Outcome
Shape of Face
Spacing of Eyes
Cleft in chin
Shape of Eyes
Texture of Hair
Position of Eyes
Widow’s Peak
Size of Eyes
Conclusion:
The traits in this activity were created to illustrate how human heredity works in a simple model. In real life, the heritance of facial features is much more complex and is determined by the way several sets of genes work together.
1. How much does each parent contribute to a child’s genetic make-up? ______________________________________________________________________
______________________________________________________________________
______________________________________________________________________
______________________________________________________________________
______________________________________________________________________
2. How is this coin-toss model similar to the way in which traits are inherited in living
things? How is the model different?
______________________________________________________________________
______________________________________________________________________
______________________________________________________________________

Appendix A
Name __________________________ # __________ Partner’s Name __________________________ # __________
1.) Choose 4 traits from your Create-A-Face. Record the trait and the genotype from that trait based on the counter toss you performed.
2.) Predict what the genotype of each parent could have been in order to create
the outcome of your counter toss.
*Each partner must turn in a completed copy of this worksheet* Trait:_____________ Genotype _______
Trait:_____________ Genotype _______
Trait:_____________ Genotype _______
Trait:_____________ Genotype _______
Appendix B
Appendix B Continued
Unit B
Name ____________________________________
Date ____________________________________
Unit B- Chapter 2: Lesson 2 How Energy is Transferred in Ecosystems Question: How are living things interdependent on each other? What would happen if part of a food chain disappeared? Background information: Organisms get the energy they need from plants or other organisms. While a food chain shows how the consumers in an ecosystem are connected to one another by what they eat, a food web shows the relationships between many different food chains in a single ecosystem. A food web also shows how organisms may be part of several food chains at the same time. Materials: Lab report Balls of yarn Role cards depicting rain forest animals for food web activity Procedure:
1. Discuss examples of food chains from rain forest animals studied, depicting how animals can be prey for various predators.
2. Do Food Web Activity utilizing a rain forest ecosystem: a. Give each student a role card to pretend to be; put around their neck and form a large circle. b. Assign students without cards to be helpers. c. Have each student read aloud card of what they are and what they eat, students with matching cards raise hands. d. Have helpers give one end of yarn to student reading card and the other ends to students raising hands (yarn is symbol of energy being passed in form of food) a web will be formed when finished. 5. Closure: What might happen if the plants of the rain forest were destroyed? a. Cut the strings of the rain forest plant.
Hypothesis: If I ________________________________________________________,
then I predict that ________________________________________________________
______________________________________________________________________,
because ________________________________________________________________
______________________________________________________________________
Analysis:
Draw your food web below.
List each animal and what they eat below from your food web.
Animal What They Eat in the Food Web

Conclusion:
How do how living things affect each other in an ecosystem? What would happen if part
of a food chain disappeared?
______________________________________________________________________
______________________________________________________________________
______________________________________________________________________
______________________________________________________________________
______________________________________________________________________
Name ____________________________________
Date ____________________________________
Unit B- Chapter 3: Lesson 1
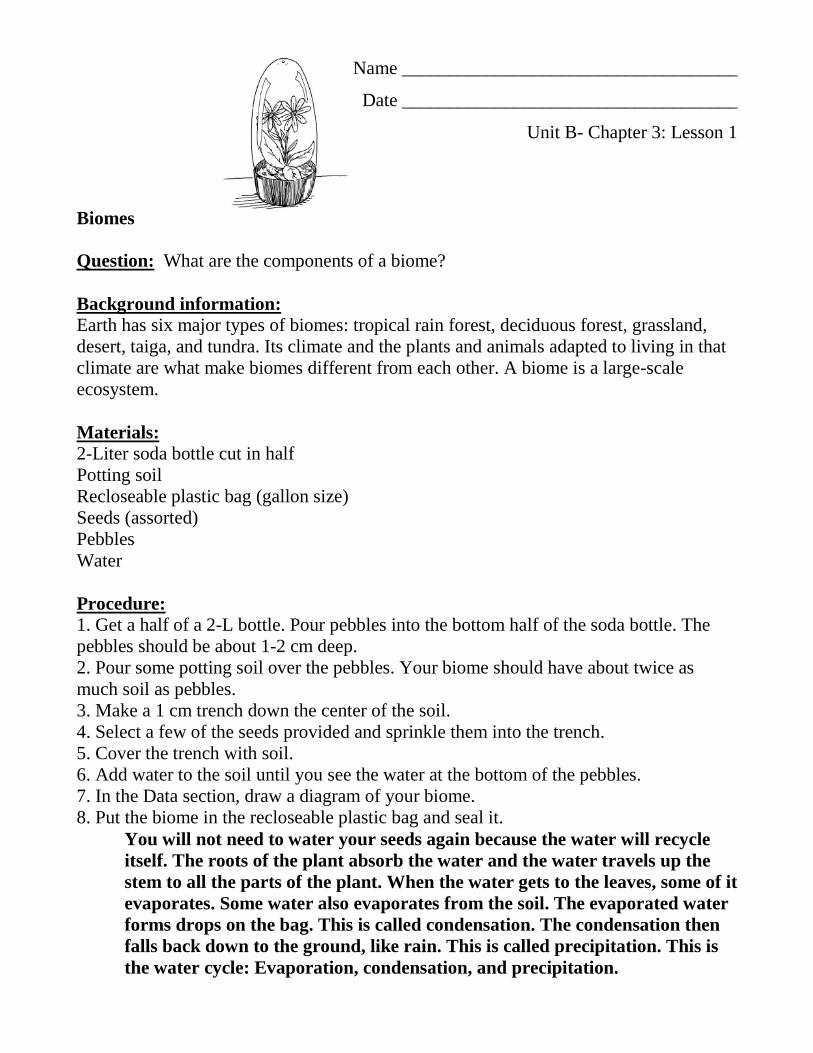
Biomes Question: What are the components of a biome? Background information: Earth has six major types of biomes: tropical rain forest, deciduous forest, grassland, desert, taiga, and tundra. Its climate and the plants and animals adapted to living in that climate are what make biomes different from each other. A biome is a large-scale ecosystem. Materials: 2-Liter soda bottle cut in half Potting soil Recloseable plastic bag (gallon size) Seeds (assorted) Pebbles Water Procedure: 1. Get a half of a 2-L bottle. Pour pebbles into the bottom half of the soda bottle. The pebbles should be about 1-2 cm deep. 2. Pour some potting soil over the pebbles. Your biome should have about twice as much soil as pebbles. 3. Make a 1 cm trench down the center of the soil. 4. Select a few of the seeds provided and sprinkle them into the trench. 5. Cover the trench with soil. 6. Add water to the soil until you see the water at the bottom of the pebbles. 7. In the Data section, draw a diagram of your biome. 8. Put the biome in the recloseable plastic bag and seal it.
You will not need to water your seeds again because the water will recycle itself. The roots of the plant absorb the water and the water travels up the stem to all the parts of the plant. When the water gets to the leaves, some of it evaporates. Some water also evaporates from the soil. The evaporated water forms drops on the bag. This is called condensation. The condensation then falls back down to the ground, like rain. This is called precipitation. This is the water cycle: Evaporation, condensation, and precipitation.
9. Put your biome in a sunny place. Over the next week, make daily observations of your biome and record your observations in the Data section. 10. After 1 week, draw a diagram of your biome in the Data section. Hypothesis: If I ________________________________________________________,
then I predict that ________________________________________________________
______________________________________________________________________,
because ________________________________________________________________
______________________________________________________________________
Analysis: Record your results below.
BAGGIE BIOME - DAY 1
BAGGIE BIOME - DAY 7
Day Observation
1
2
3
4
5
6
7
Conclusion: 1. What is the difference between an ecosystem and a biome? ______________________________________________________________________
______________________________________________________________________
______________________________________________________________________
2. What are the non-living components of your biome? ______________________________________________________________________
______________________________________________________________________
______________________________________________________________________
3. What are the living components of your biome? ______________________________________________________________________
______________________________________________________________________
______________________________________________________________________
4. How many days did it take for your seeds to sprout? ______________________________________________________________________
______________________________________________________________________
______________________________________________________________________
5. The plants in your biome will eventually run out of carbon dioxide. What would you need to do to keep your baggie biome going for a long time? ______________________________________________________________________
______________________________________________________________________
______________________________________________________________________
Name ____________________________________
Date ____________________________________
Unit B: Chapter 3 Lesson 1 Recognizing Climate Contributes to Different Biomes Question: What biotic and abiotic factors create different biomes around the world? Background information: Climate is one factor that affects where organisms live. A group of ecosystems with similar climates and organisms is called a biome. In this lab, you will investigate some key factors that make biomes different from each other. Materials: scissors index card 10 impatiens seeds 5 lima bean seeds about 30 rye grass seeds empty, clean cardboard milk carton sandy soil or potting soil clear plastic wrap lamp tape stapler Procedure: 1. Your teacher will assign your group a biome. You will also observe the other groups’ biomes. Based on the chart below, predict how well you think each of the three kinds of seeds will grow in each set of conditions. Record these predictions in your notebook. Then copy the data table on the next page four times, once for each biome. 2. Staple the spout of the milk carton closed. Completely cut away one of the four sides of the carton. Poke a few holes in the opposite side for drainage, then place that side down. 3. Fill the carton to 3 centimeters from the top with the type of soil given in the table. Divide the surface of the soil into three sections by making two lines in it with a pencil. 4. In the section near the spout, plant the impatiens seeds. In the middle section, plant the lima bean seeds. In the third section, scatter the rye grass seeds on the surface.

5. Water all the seeds well. Then cover the open part of the carton with plastic wrap. 6. On an index card, write the name of your biome, the names of the three types of seeds in the order you planted them, and the names of your group members. Tape the card to the carton. Put it in a warm place where it will not be disturbed. 7. Once the seeds have sprouted, provide your biome with the amount of light and water specified in the chart. Keep the carton covered with plastic wrap except when you are adding water. 8. Observe all the biomes daily for at least one week. Record your observations. Hypothesis: If I ________________________________________________________,
then I predict that ________________________________________________________
______________________________________________________________________,
because ________________________________________________________________
Growing Conditions Biome Soil Type Hours of Light
Per Day Watering Instructions
Forest Potting soil
1–2 hours direct light
Let the surface dry, then add water.
Desert Sandy soil
5–6 hours direct light
Let the soil dry to a depth of 2.5 cm below the surface.
Grassland Potting soil 5–6 hours direct light
Let the surface dry, then add water.
Rain forest Potting soil
No direct light; indirect light for 5–6 hours
Keep the surface of the soil moist.
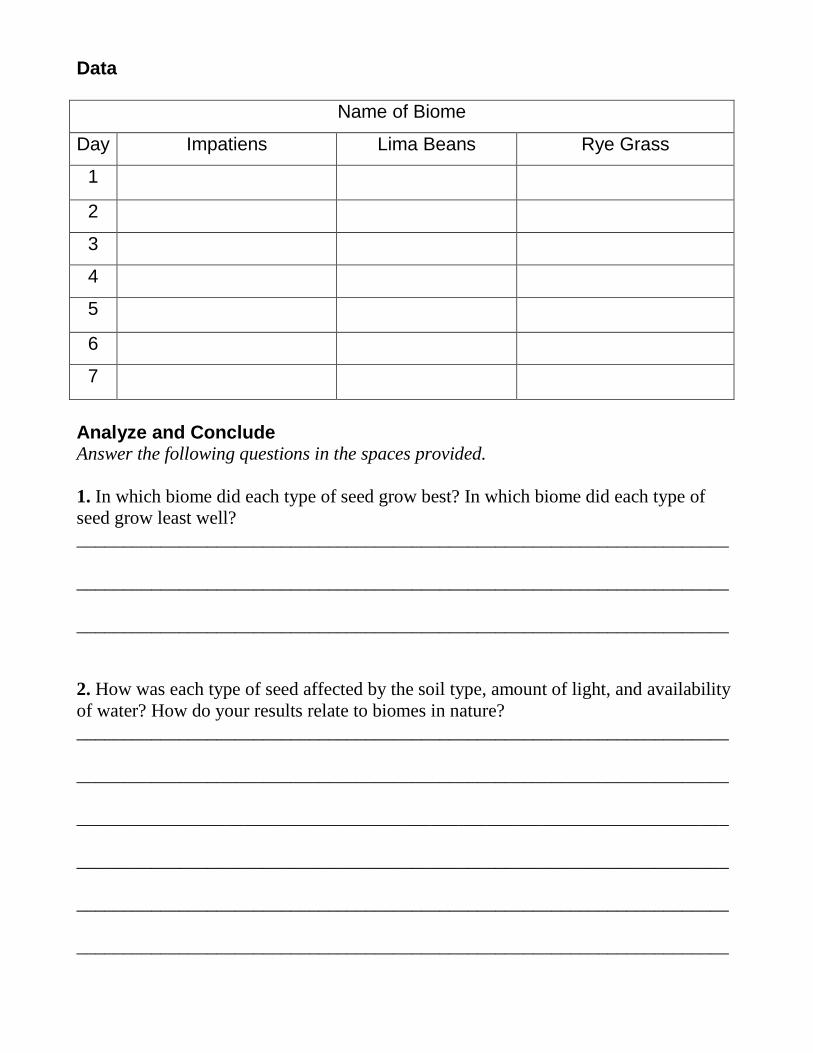
Data
Name of Biome
Day Impatiens Lima Beans Rye Grass
1
2
3
4
5
6
7
Analyze and Conclude Answer the following questions in the spaces provided. 1. In which biome did each type of seed grow best? In which biome did each type of seed grow least well? ______________________________________________________________________
______________________________________________________________________
______________________________________________________________________
2. How was each type of seed affected by the soil type, amount of light, and availability of water? How do your results relate to biomes in nature? ______________________________________________________________________
______________________________________________________________________
______________________________________________________________________
______________________________________________________________________
______________________________________________________________________
______________________________________________________________________
3. Ecologists studying land biomes often begin a description of the biome by describing key abiotic factors and the typical plants. Why do you think they do this? ______________________________________________________________________
______________________________________________________________________
______________________________________________________________________
______________________________________________________________________
4. Apply Describe the rainfall pattern and other abiotic factors that make up the climate where you live. How do those factors affect the kinds of plants and animals that live there? ______________________________________________________________________
______________________________________________________________________
______________________________________________________________________
______________________________________________________________________
Credit to: http://www.pearsonsuccessnet.com/ebook/products/0-13-036740-0/srla0523.pdf

Name ____________________________________
Date ____________________________________
Unit B- Chapter 4: Lesson 2 Effects of Pollution in an Ecosystem Question: How does acid rain affect ecosystems? What is or is not affected from this type of precipitation? Background information: Ecosystems are interrelated to the plants and animals that live in them. Together, a community and its physical environment make up an ecosystem. Human activity can alter this natural balance between ecosystems. In this lab, you will learn about the affects acid rain (pollution) has on a specific ecosystem. Control group- group of test subjects left untreated or unexposed to some procedure and then compared with treated subjects in order to validate the results of the test Test group- group of test subjects that are treated with a substance and then compared to the control group. Lemon juice is a weak acid. It will represent stronger chemicals in our experiment. Materials: Lab report two clean, clear 2-liter plastic soda bottles scissors clear plastic wrap two "loose" rubber bands a small watering can a small bottle of lemon juice some grass seed or bird seed small pail of good old garden dirt (not potting soil) ruler marking pen and two labels Part I Procedure:
1. Take off any labels on the bottles. Use the scissors to cut the top off each bottle about 20 cm. (8 in) from the bottom.
2. Fill each bottle about halfway with soil; scatter the seeds on the top. 3. Use the watering can to wrinkle about 250 ml (1 cup) of water into each bottle. 4. Place a piece of plastic wrap over the top of each bottle; use the rubber band to
keep the plastic down around the sides of the bottle. 5. Place the two bottles on a sunny, warm windowsill or near a bright lamp. 6. Label one bottle "control" and the other "test."
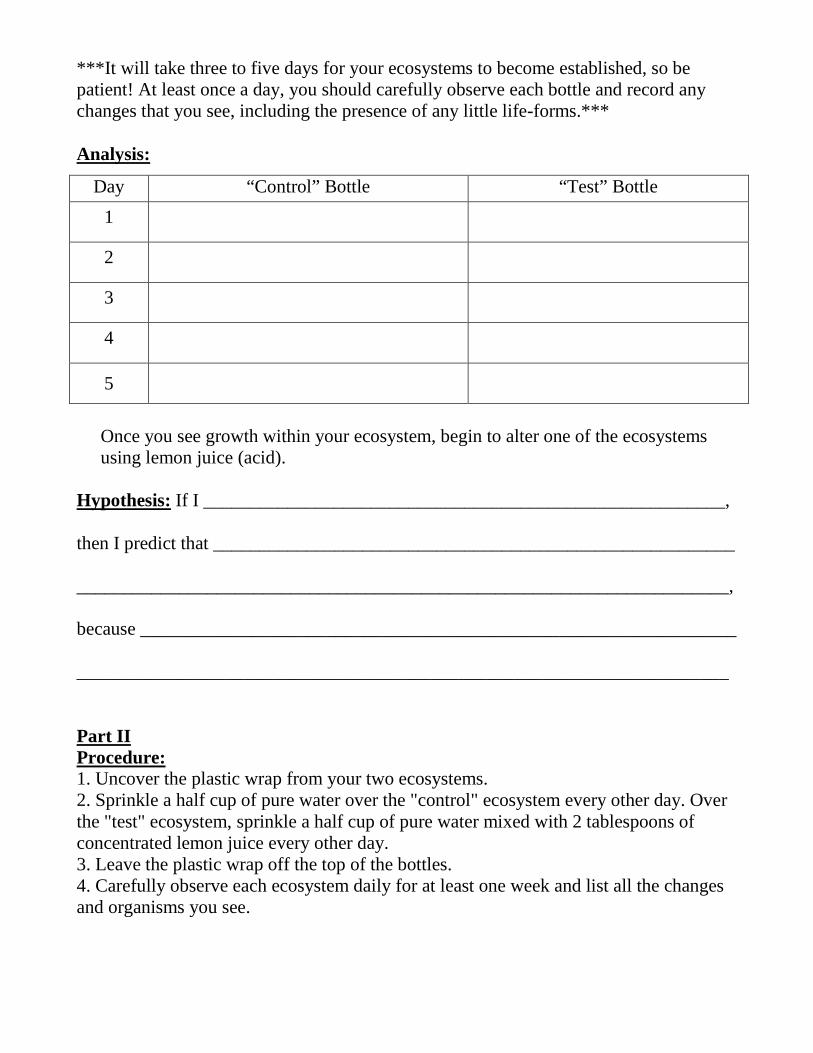
***It will take three to five days for your ecosystems to become established, so be patient! At least once a day, you should carefully observe each bottle and record any changes that you see, including the presence of any little life-forms.*** Analysis:
Day “Control” Bottle “Test” Bottle 1
2
3
4
5
Once you see growth within your ecosystem, begin to alter one of the ecosystems using lemon juice (acid).
Hypothesis: If I ________________________________________________________,
then I predict that ________________________________________________________
______________________________________________________________________,
because ________________________________________________________________
______________________________________________________________________
Part II Procedure: 1. Uncover the plastic wrap from your two ecosystems. 2. Sprinkle a half cup of pure water over the "control" ecosystem every other day. Over the "test" ecosystem, sprinkle a half cup of pure water mixed with 2 tablespoons of concentrated lemon juice every other day. 3. Leave the plastic wrap off the top of the bottles. 4. Carefully observe each ecosystem daily for at least one week and list all the changes and organisms you see.

Analysis:
Day “Control” Bottle “Test” Bottle
1
2
3
4
5
6
7
Conclusion: How did the ecosystem react to the weak solution of lemon juice (acid) and water? How is this similar to the ecosystem in our environment? ______________________________________________________________________
______________________________________________________________________
______________________________________________________________________
______________________________________________________________________
______________________________________________________________________

Name ____________________________________
Date ____________________________________
Unit B: Chapter 4 Lesson 4 Restoring Ecosystems Question: How can plants reclaim a damaged ecosystem? Background information: Reclamation is the restoring of a damaged ecosystem. Complete reclamation takes years of research and effort. The ecosystems that are still left must first be saved from destruction. Experimenting new ways to restore ecosystems is also important. Reclaiming ecosystems takes the efforts of many people in an area. Materials: Lab report two small clay pots potting soil 6 bean seeds water flour Procedure:
1. Fill both pots half-full of soil. Plant three bean seeds into each pot. Water them with equal amounts of water.
2. Label one pot “Experimental” and the other “Regular” 3. Mix the flour and water until it forms a thick batter. 4. Pour the batter into one pot, covering the soil and completely filling the space
between the soil and the top of the pot. 5. Place both pots in a warm, sunny place. Water the soil of the uncovered pot when
it feels dry. 6. Observe the pots every day for two weeks.
Hypothesis: If I ________________________________________________________,
then I predict that ________________________________________________________
______________________________________________________________________,
because ________________________________________________________________
______________________________________________________________________
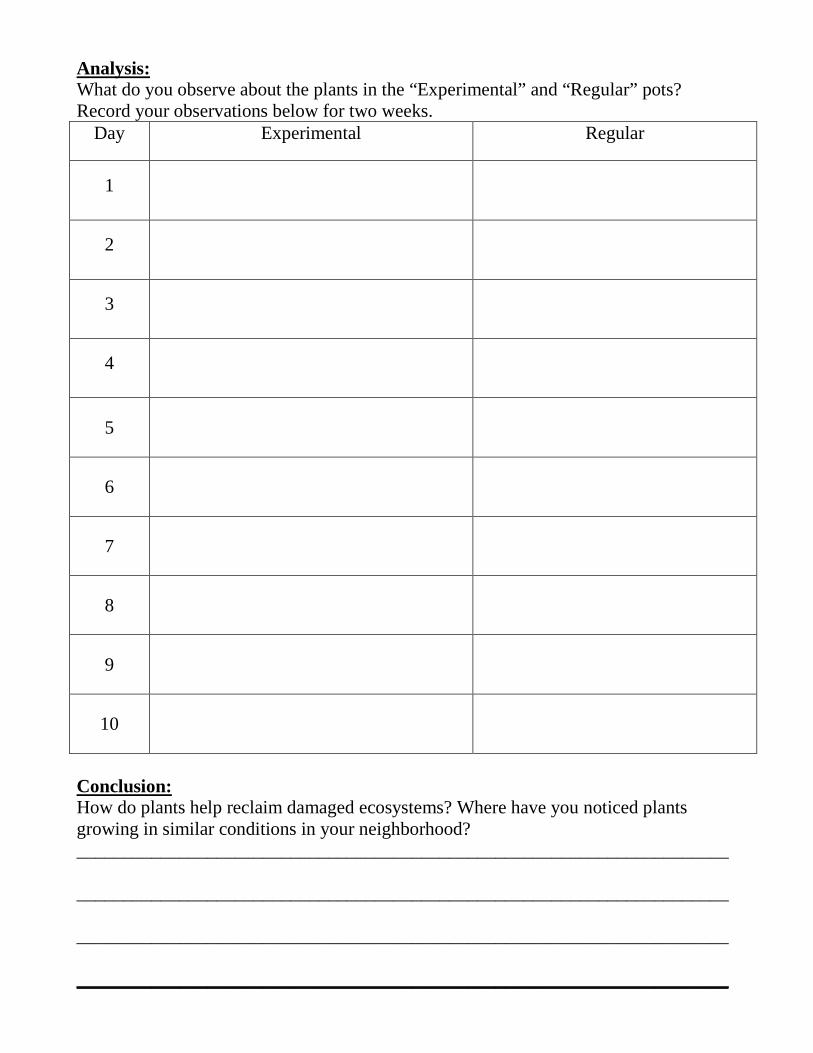
Analysis: What do you observe about the plants in the “Experimental” and “Regular” pots? Record your observations below for two weeks.
Day Experimental Regular
1
2
3
4
5
6
7
8
9
10
Conclusion: How do plants help reclaim damaged ecosystems? Where have you noticed plants growing in similar conditions in your neighborhood? ______________________________________________________________________
______________________________________________________________________
______________________________________________________________________
______________________________________________________________________

Unit C
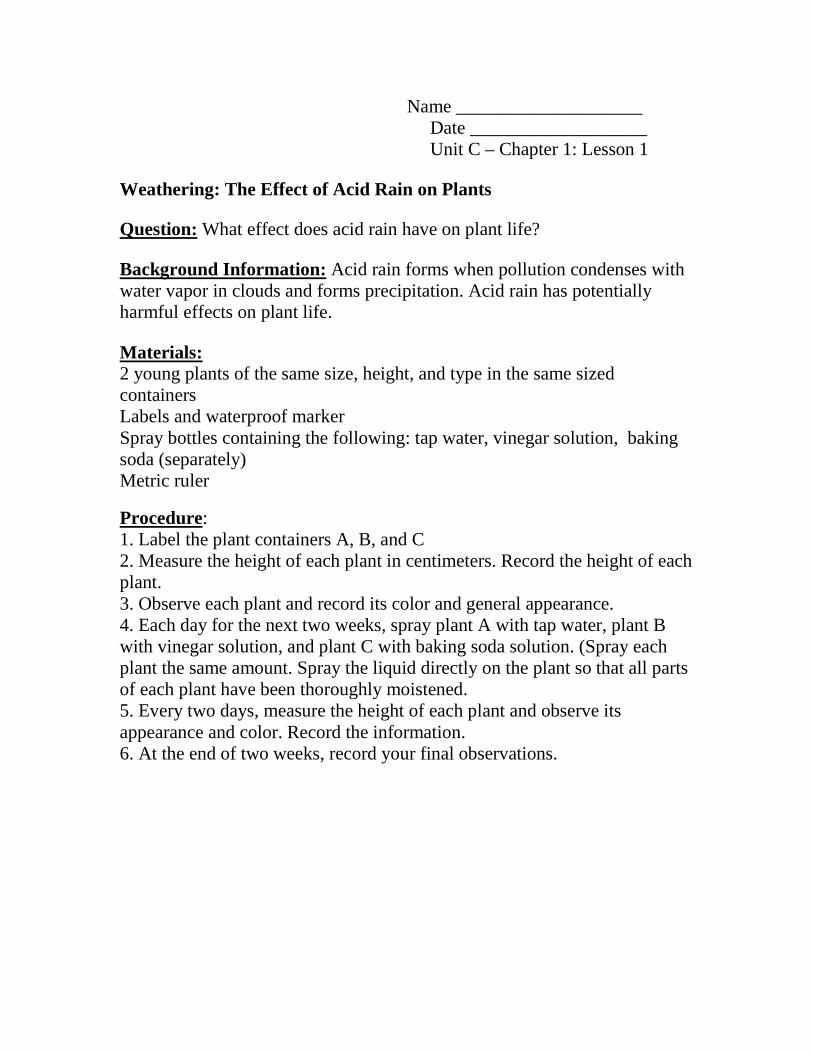
Name ____________________ Date ___________________ Unit C – Chapter 1: Lesson 1
Weathering: The Effect of Acid Rain on Plants
Question: What effect does acid rain have on plant life?
Background Information: Acid rain forms when pollution condenses with water vapor in clouds and forms precipitation. Acid rain has potentially harmful effects on plant life.
Materials: 2 young plants of the same size, height, and type in the same sized containers Labels and waterproof marker Spray bottles containing the following: tap water, vinegar solution, baking soda (separately) Metric ruler
Procedure: 1. Label the plant containers A, B, and C 2. Measure the height of each plant in centimeters. Record the height of each plant. 3. Observe each plant and record its color and general appearance. 4. Each day for the next two weeks, spray plant A with tap water, plant B with vinegar solution, and plant C with baking soda solution. (Spray each plant the same amount. Spray the liquid directly on the plant so that all parts of each plant have been thoroughly moistened. 5. Every two days, measure the height of each plant and observe its appearance and color. Record the information. 6. At the end of two weeks, record your final observations.
Hypothesis: Trial #1 (Plant A) If I ___________________________
then I predict _____________________________________________
because _________________________________________________.
Hypothesis: Trial #2 (Plant B) If I _____________________________
then I predict _____________________________________________
because __________________________________________________.
Hypothesis: Trial #3 (Plant C) If I______________________________
then I predict ______________________________________________
because __________________________________________________.

Observations:
Plant A Plant B Plant C
Height/Appearance Height/Appearance Height/Appearance
Beginning _______________ ________________ _______________
Day 2 _______________ ________________ _______________
Day 4 _______________ ________________ _______________
Day 6 _______________ ________________ _______________
Day 8 _______________ ________________ _______________
Day 10 _______________ ________________ _______________
Day 12 _______________ _________________ _______________
Day 14 _______________ _________________ _______________
Conclusions: Which plant grew the most during your experiment? Which plant grew the least? How did vinegar affect the growth of the plant? What do you think would have happened if you had continued this experiment for a month. Acid rain is very similar to vinegar. Explain why a farmer would be concerned about planting crops in an area of the country with acid rain. Acid rain is usually more common in areas with a great deal of industry and vehicular travel. Explain how you thin these things contribute to acid rain.
____________________________________________________________________
____________________________________________________________________
____________________________________________________________________
____________________________________________________________________
____________________________________________________________________
____________________________________________________________________
____________________________________________________________________
____________________________________________________________________
____________________________________________________________________
____________________________________________________________________
Name __________________________
Date ________________________ Unit C – Chapter 1: Lesson 2 Earthquakes Question: What effect do earthquakes have on the surface of the earth? Background Information: Earthquakes can occur when two plates in the Earth’s crust move against each other and slip. This is why they occur more frequently in places where two tectonic plates meet. Earthquakes are measured by using a seismograph and the Richter Scale. Materials: 2 long blocks of wood (about the size of a paper towel spool) Package of green or brown modeling clay Rolling pin (or canned good) Marker Richter Scale (attached) Procedures: 1. Place 2 blocks together. 2. Roll out the clay so it will completely cover about two-thirds of the center of the two pieces of wood. 3. Cover the center of the blocks with the clay. 4. Draw a road perpendicular to the 2 blocks of wood across the clay. 5. Slowly and gently move one of the blocks in one direction against the other block. 6. Record your observation. 7. Repair the clay and road. 8. Using a faster motion, move one of the blocks in one direction the other block. 9. Record your observation.
Hypothesis #1: If I _____________________________________ then I predict ____________________________________________________________ because _____________________________________________________. Hypothesis #2: If I ______________________________________________ then I predict ___________________________________________________________ because _____________________________________________________. Observations: Trial #1: ___________________________________________________ ___________________________________________________ Trial#2: ___________________________________________________ ___________________________________________________
Conclusions: What happened to the clay when you slowly and gently moved the wooden blocks? What might this “earthquake” have measured on the Richter Scale? What happened when you moved the blocks more forcefully? What might this “earthquake” have measured on the Richter Scale? How does this information help engineers plan when deciding how and where to construct roadways and buildings? _____________________________________________________________
_____________________________________________________________
_____________________________________________________________
_____________________________________________________________
_____________________________________________________________
_____________________________________________________________
_____________________________________________________________
_____________________________________________________________
_____________________________________________________________
_____________________________________________________________

Richter Scale Magnitude of Earthquake on Richter Scale
Description of the Earthquake Effects of the Earthquakes Occurrence
Frequency
Less than 2.0 Micro The earthquake is not felt Approximately, 8000 per day
2.0 to 2.9 Minor Normally not felt, but recorded Approximately 1000 per day
3.0 to 3.9 Minor Normally felt, but rarely are any damages caused
Approximately 49,000 per year
4.0 to 4.9 Light Often felt indoor, with shaking of indoor items and rattling noises. Significant damage is not caused
Approximately 6200 per year
5.0 to 5.9 Moderate
Major damage can be caused to poorly constructed buildings and little damage to well constructed buildings
Approximately 800 per year
6.0 to 6.9 Strong
It can be very destructive in areas as far as 160 kilometers from the epicenter in populated areas
Approximately 120 per year
7.0 to 7.9 Major It is known to cause severe damage over larger areas
Approximately 18 per year
8.0 to 8.9 Great It can cause severe damage in several hundred miles across
Approximately 1 per year
9.0 to 9.9 Great Devastating in areas for several thousands of miles
Approximately 1 per 20 years
10.0 + Epic Has never been recorded Extremely low and cannot be estimated

Name ____________________ Date ___________________ Unit C – Chapter 2: Lesson 1 Minerals and Weathering Question: How do various minerals react to an acid? Background Information: Minerals have specific physical characteristics. Some minerals react to acids, such as vinegar. Acid rain can cause weathering. Limestone can give off a gas when it comes into contact with vinegar. Such chemical reactions can create certain geographical structures. Materials: Several pieces of granite, sandstone, and limestone Vinegar (approximately 8 ounces) Clear container Procedure: 1. Fill the container with 8 ounces of vinegar. 2. Place granite in container for 5 minutes. 3. Record observation. 4. Remove granite. 5. Place sandstone in container for 5 minutes. 6. Record observation. 7. Place limestone in container for 5 minutes. 8. Record observation. Hypothesis #1: If I ______________________________________ then I predict ____________________________________________________ because ___________________________________________________.

Hypothesis #2: If I ____________________________________ then I predict ___________________________________________________ because ___________________________________________________. Hypothesis #3: If I _________________________________________ then I predict _____________________________________________________ because _____________________________________________________. Observations: Granite - ____________________________________________________ Sandstone - __________________________________________________ Limestone - __________________________________________________
Conclusions: How did each mineral react to the vinegar? What effect does acid rain have on our environment? _____________________________________________________________
_____________________________________________________________
_____________________________________________________________
_____________________________________________________________
_____________________________________________________________
Extra: Take a piece of white chalk and place in a container of vinegar for 5 – 10 minutes. What happened? Why?

Name _________________________ Date ________________________ Unit C – Chapter 3: Lesson 1 Weather – Precipitation/Condensation Question: How does a change in temperature cause condensation and precipitation? Background Information: When temperatures decrease, the molecules in water vapor (gas) come closer together to form a liquid. This process is called condensation. In this experiment the jar is surrounded by air, and air holds water vapor. When the water vapor comes in contact with the cold lid, it becomes cold and changes into liquid water. The amount of liquid builds up (like a rain cloud) and drops form on the underside of the lid. Materials: Quart jar with lid (glass) Several ice cubes (about 6) Water Procedure: 1. Pour enough water into the jar to cover the bottom about one-half inch. 2. Place several ice cubes (about 6) into the bottom and screw on the lid. 3. Turn jar upside down so the ice cubes are resting inside the lid. 4. Lift jar up to observe the underside of the jar for 10 minutes. 5. Continue to observe jar for an additional 10 minutes.
Hypothesis: If I __________________________________ then I predict ____________________________________________________________ because ____________________________________________________. Observations: Initial 10 minutes: _____________________________________________________________ _____________________________________________________________ Final 10 minutes: _____________________________________________________________ _____________________________________________________________

Conclusions: Why did the melting ice cubes cause droplets of water to form? What factors are needed for the ice to form the droplets? At one point does this experiment demonstrate precipitation? If water at room temperature was placed in the jar instead of ice cubes, would water droplets form on the underside of the lid? Why or why not? _____________________________________________________________
_____________________________________________________________
_____________________________________________________________
_____________________________________________________________
_____________________________________________________________
_____________________________________________________________
_____________________________________________________________

Name _________________________
Date ________________________ Unit C – Chapter 3: Lesson 2
Weather – Local Winds
Questions: Does land heat up more quickly than water? Does water retain heat longer than land? If so, how does this help to create local wind?
Background Information: During the day, land heats up more quickly than water allowing cooler sea air to move toward the land creating as a sea breeze. At night, land loses heat faster than water (sea) allowing cooler air over the land to move toward the sea creating a land breeze. Cold air is denser than warm air, therefore the colder air pushes the warmer air up.
Materials: 2 containers (basins, aluminum pans, large plastic or Styrofoam cups) 2 thermometers Soil to fill container Water to fill container
Procedure: 1. Place soil and water in separate containers. 2. Place both containers in direct sunlight. 3. Place thermometers in both containers. 4. Record initial temperature and hourly temperature for 2 hours. 5. Record observations. 6. After 2 hours, place containers in a shaded area. 7. Record initial temperatures and temperatures after 30 minutes and 1 hour.

Hypothesis:
If ______________________________________ then I
predict _________________________________________________
because ________________________________________________.
Observations:
Trial #1 - Temperature in Direct Sunlight
Soil Water
Initial _____________ _________________
1st hour ______________ _________________
2nd hour ______________ _________________
Observations:
Trial #2 – Temperature in Shaded Area
Soil Water
Initial ______________ __________________
30 min. _______________ __________________
1 hour _______________ __________________
Conclusions:
How did the temperatures of the soil compare to the temperatures of the water when placed in direct sunlight? How did they compare when placed in a shaded area? What effect would these temperature changes have on the air above the soil (land) and water (sea)? How do you think this experiment helps to explain sea and land breezes?
________________________________________________________________________
________________________________________________________________________
________________________________________________________________________
________________________________________________________________________
________________________________________________________________________
________________________________________________________________________
________________________________________________________________________
________________________________________________________________________

Unit D
1
Name _____________________________
Date _____________________
Unit D – Chapter 1
Moon vs. Earth Question: Why does the surface of the moon have so many craters when the Earth’s surface doesn’t? Background Information/Vocabulary:
Meteorite - _____________________________________________________________
Crater - ________________________________________________________________ Materials: Newspaper Aluminum pan Large spoon 5 cups water 10 cups flour Meter stick Marble Tennis ball Plastic wrap Procedure:
1. Mix 9 cups of the flour and the water in a large bowl. The mixture should have the look and feel of cake batter.
2. Spread the mixture into your aluminum pan. 3. Sprinkle the top of the mixture with some of the extra flour. 4. Put the newpaper on the floor. Place the pan in the center of the newspaper. 5. Drop meteorite (the marble) into the pan from different heights according the
chart in data collection. 6. Carefully pick up the meteorite (the marble) without adding to the mark it has
made. (You can use masking tape or tweezers.) 7. Measure the widths of the craters with each drop.

2
Hypothesis: If I drop meteorites onto the surface of the moon, then I predict that the biggest crater
will be made at trial________________, because ______________________________
______________________________________________________________________ Data Collection:
Teacher demonstration: Cover one aluminum pan with plastic wrap. This aluminum pan will simulate Earth, and the plastic wrap is the Earth’s atmosphere. Drop the marble onto the plastic wrap. Does the marble make a crater on Earth’s surface?
_______________________________________
Drop the tennis ball onto the plastic wrap. Does the tennis ball make a crater on Earth’s surface?
_____________________________________
Trial # Height Width of crater (cm.) Observations
1 20 cm
2 40 cm
3 80 cm
4 100 cm
3
Conclusion: What does this experiment teach you about why the Moon’s surface looks like it does?
______________________________________________________________________
______________________________________________________________________
______________________________________________________________________
______________________________________________________________________
Why does the surface of the moon have so many craters when the Earth’s surface
doesn’t?
______________________________________________________________________
______________________________________________________________________
______________________________________________________________________
______________________________________________________________________
______________________________________________________________________
______________________________________________________________________
Source: Harcourt textbook series
Name _______________________________
Date ___________________________
Unit D – Chapter 1
Moon Survival Task Question: What items are crucial for survival on the moon? Background Information: Work together with your team to brainstorm some facts that you know about the moon that might help you with this task. Hypothesis: If I were stranded on the moon, then I predict that ______________________________
would be the most crucial to survival, because _________________________________
______________________________________________________________________
______________________________________________________________________ Materials: NASA Moon Survival Task list NASA answer page Procedure:
1. Complete the first column on the ranking sheet attached with your team. 2. When your ranking is complete, grade your ranking using NASA’s rankings.

Analysis: Scoring: For each item, mark the number of points that your score differs from the NASA ranking. Then add up all the points. Disregard plus or minus differences. The lower the total, the better your score. Your team’s score ____________________ 0 - 25 excellent 26 - 32 good 33 - 45 average 46 - 55 fair 56 - 70 poor -- suggests use of Earth-bound logic 71 - 112 very poor – you’re one of the casualties of the space program! Conclusion: What conclusions can you draw about how survival on the moon differs from survival on Earth? ______________________________________________________________________
______________________________________________________________________
______________________________________________________________________
______________________________________________________________________
______________________________________________________________________
______________________________________________________________________
______________________________________________________________________
______________________________________________________________________
______________________________________________________________________
______________________________________________________________________

NASA Exercise: Survival on the Moon
Scenario:
You are a member of a space crew originally scheduled to rendezvous with a mother ship on the lighted surface of the moon. However, due to mechanical difficulties, your ship was forced to land at a spot some 200 miles from the rendezvous point. During reentry and landing, much of the equipment aboard was damaged and, since survival depends on reaching the mother ship, the most critical items available must be chosen for the 200-mile trip. Below are listed the 15 items left intact and undamaged after landing.
Your task is to rank order them in terms of their importance for your crew in allowing them to reach the rendezvous point. Place the number 1 by the most important item, the number 2 by the second most important, and so on through number 15 for the least important.
Your Ranking NASA Ranking Difference
_______ Box of matches _______ _______
_______ Food concentrate _______ _______
_______ 50 feet of nylon rope _______ _______
_______ Parachute silk _______ _______
_______ Portable heating unit _______ _______
_______ Two .45 caliber pistols _______ _______
_______ One case of dehydrated milk _______ _______
_______ Two 100 lb. tanks of oxygen _______ _______
_______ Stellar map (of the moon’s constellation) _______ _______
_______ Self-inflating life raft _______ _______
_______ Magnetic compass _______ _______
_______ 5 gallons of water _______ _______
_______ Signal flares _______ _______
_______ First aid kit, including injection needle _______ _______
_______ Solar-powered FM receiver-transmitter _______ _______

Answers to the Survival on the Moon Exercise Item NASA
Ranking NASA's Reasoning
Box of matches 15 Virtually worthless -- there's no oxygen on the moon to sustain combustion
Food concentrate 4 Efficient means of supplying energy requirements
50 feet of nylon rope 6 Useful in scaling cliffs and tying injured together
Parachute silk 8 Protection from the sun's rays
Portable heating unit 13 Not needed unless on the dark side
Two .45 caliber pistols 11 Possible means of self-propulsion
One case of dehydrated milk 12 Bulkier duplication of food concentrate
Two 100 lb. tanks of oxygen 1 Most pressing survival need (weight is not a factor since gravity is one-sixth of the Earth's -- each tank would weigh only about 17 lbs. on the moon)
Stellar map 3 Primary means of navigation - star patterns appear essentially identical on the moon as on Earth
Self-inflating life raft 9 CO2 bottle in military raft may be used for propulsion
Magnetic compass 14 The magnetic field on the moon is not polarized, so it's worthless for navigation
5 gallons of water 2 Needed for replacement of tremendous liquid loss on the light side
Signal flares 10 Use as distress signal when the mother ship is sighted
First aid kit, including injection needle
7 Needles connected to vials of vitamins, medicines, etc. will fit special aperture in NASA space suit
Solar-powered FM receiver-transmitter
5 For communication with mother ship (but FM requires line-of-sight transmission and can only be used over short ranges)

1
Name _____________________________
Date __________________________
Unit D – Chapter 1
The Earth’s Tilt and the Seasons
Question: What causes the change in seasons?
Background Information: Describe the conditions in each of the following seasons as we experience them.
Winter - _______________________________________________________________
______________________________________________________________________
Spring - ______________________________________________________________
______________________________________________________________________
Summer - ______________________________________________________________
______________________________________________________________________
Autumn - ______________________________________________________________
______________________________________________________________________ Hypothesis: I predict that we have seasons because _______________________________________
______________________________________________________________________
______________________________________________________________________
Materials: Light source A globe that can be tilted clay
2
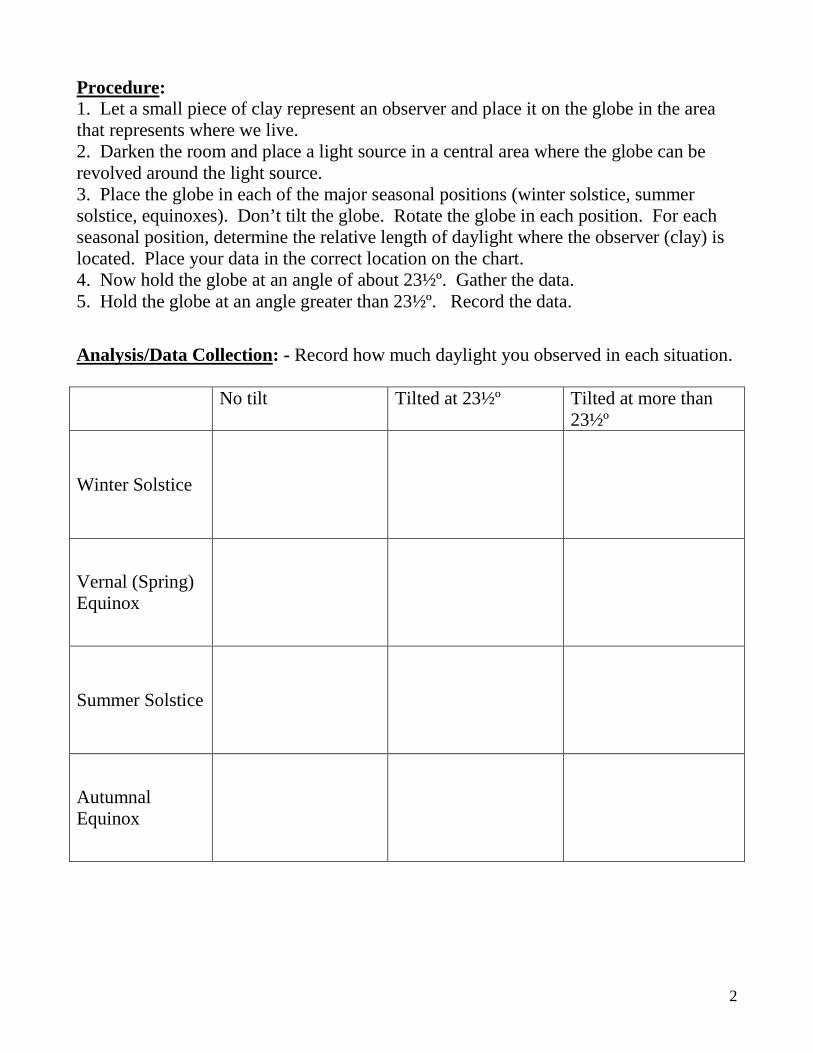
Procedure: 1. Let a small piece of clay represent an observer and place it on the globe in the area that represents where we live. 2. Darken the room and place a light source in a central area where the globe can be revolved around the light source. 3. Place the globe in each of the major seasonal positions (winter solstice, summer solstice, equinoxes). Don’t tilt the globe. Rotate the globe in each position. For each seasonal position, determine the relative length of daylight where the observer (clay) is located. Place your data in the correct location on the chart. 4. Now hold the globe at an angle of about 23½º. Gather the data. 5. Hold the globe at an angle greater than 23½º. Record the data.
Analysis/Data Collection: - Record how much daylight you observed in each situation.
No tilt Tilted at 23½º Tilted at more than 23½º
Winter Solstice
Vernal (Spring) Equinox
Summer Solstice
Autumnal Equinox

3
Conclusion: What causes the seasons?
______________________________________________________________________
______________________________________________________________________
______________________________________________________________________
______________________________________________________________________
______________________________________________________________________
______________________________________________________________________
______________________________________________________________________
______________________________________________________________________

1
Name __________________________________
Date ______________________________
Unit D – Chapter 1
Solar Eclipse Question: What causes a solar eclipse? Background Information/Vocabulary:
Solar - ________________________________________________
Hypothesis: If I move a moon model in an orbit around an Earth model, then I predict that I will see
a solar eclipse when _____________________________________________________
_________________________, because ______________________________________
______________________________________________________________________ Materials: Flashlight Orange Ball of clay, about ¼ the size of an orange Toothpick Ruler Procedure: 1. Put the Earth (the orange) on the center of a table. 2. One partner should stand about 1 meter away from the table, holding the flashlight. 3. Hold the flashlight at the same level as the orange, then shine the light toward the orange. *** Be sure that throughout the simulation, the flashlight does not move. 4. Imagine an orbit around the Earth (orange) that the moon (clay) can travel on. 5. The other partner should simulate the revolution of the moon around the Earth by poking the toothpick into the clay and moving the clay around the orange along the orbit. The clay moon should stay very close to the table at all times. 5. Check out the shadow on the orange. Watch for the moment the solar eclipse happens. 6. Switch with your partner.

2
Analysis/Data Collection: Draw a diagram showing the moment of the solar eclipse. Label the sun, the Earth, and the moon. Conclusion: What causes a solar eclipse?
______________________________________________________________________
______________________________________________________________________
______________________________________________________________________
______________________________________________________________________
______________________________________________________________________
______________________________________________________________________
______________________________________________________________________
Source: http://www.factmonster.com/ipka/A0920901.html
1
Name _____________________________
Date _________________________
Unit D – Chapter 2
NASA Investigation Report – Are all stars like the Sun? Question: Are all stars like the Sun? Background Knowledge: Brainstorm things that you already know about the Sun.
Begin with, the sun is a ____________________________.
Hypothesis: If I examine an image of stars taken by NASA, then I predict that
______________________________________________________________________
_______________________________________________________________, because
______________________________________________________________________
______________________________________________________________________
Materials: Star Image from NASA (http://www.nasa.gov/pdf/145908main_Sun.As.A.Star.Guide.pdf last page of pdf) Magnifying glass
2
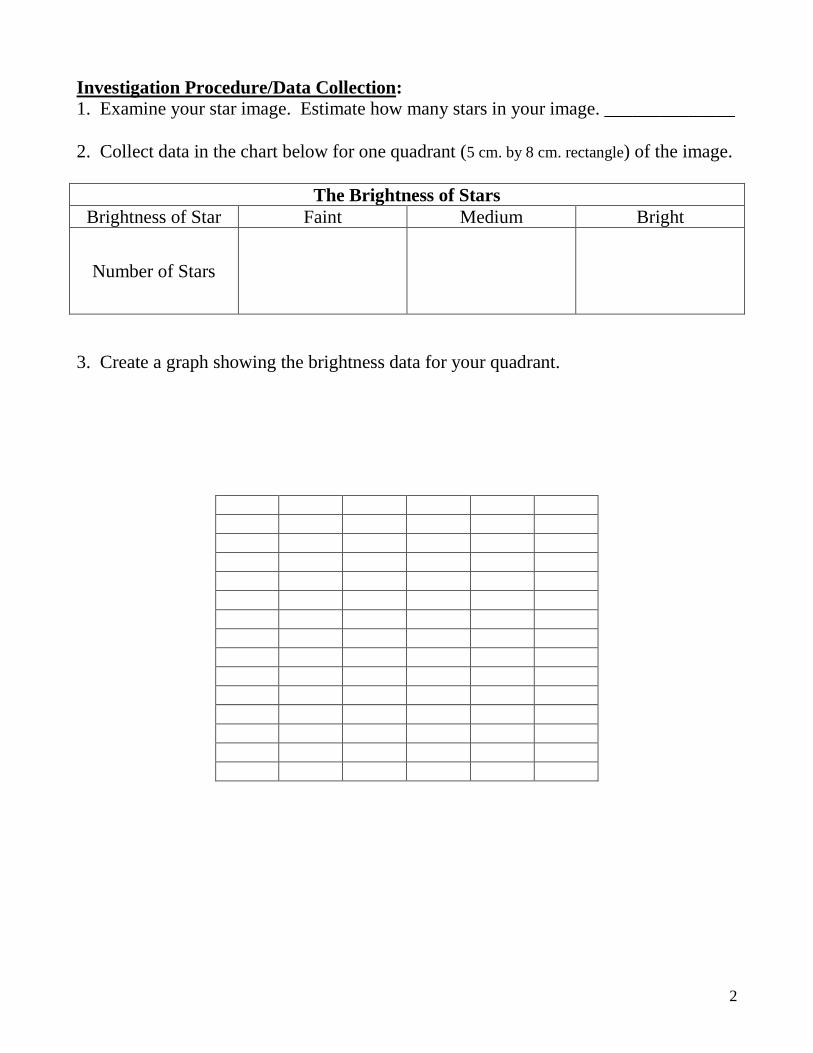
Investigation Procedure/Data Collection: 1. Examine your star image. Estimate how many stars in your image. ______________
2. Collect data in the chart below for one quadrant (5 cm. by 8 cm. rectangle) of the image.
The Brightness of Stars Brightness of Star Faint Medium Bright
Number of Stars
3. Create a graph showing the brightness data for your quadrant.
3
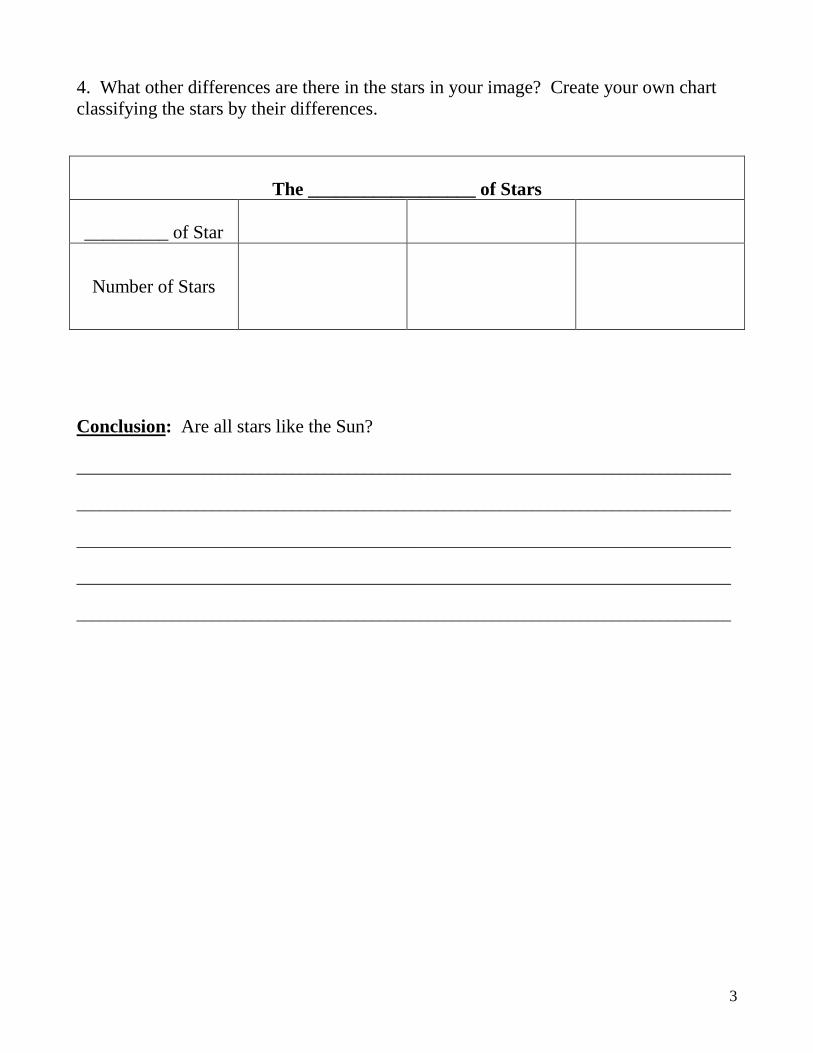
4. What other differences are there in the stars in your image? Create your own chart classifying the stars by their differences.
The __________________ of Stars
_________ of Star
Number of Stars
Conclusion: Are all stars like the Sun?
__________________________________________________________________________________
__________________________________________________________________________________
__________________________________________________________________________________
__________________________________________________________________________________
__________________________________________________________________________________
Unit E

Name: ___________________ Date: __________________ Unit E – Chapter 1: Lesson 1 Matter – Density Question: What happens to the density of water when it changes from a solid to a liquid? Background information: Density is the concentration of matter in an object. If you measure the mass and volume of an object, you can calculate its density. (Density = mass ÷ volume) A solid has a definite shape and a definite volume. A liquid has a definite volume but no definite shape. Materials:
3 clear 1-liter soda bottles with tops cut off 15 cm from the bottom cooking oil water 3 ice cubes Ruler 6-oz plastic cup
Procedure:
1. Fill two cylinders with 7 centimeters (3 in.) of oil. (Measure from the bottom of the cylinder.) Fill the third cylinder with exactly the same amount of water.
2. Prepare to drop an ice cube in the cylinder with the water. Make your first prediction in the hypothesis section.
3. Place the ice in the water and observe what happens. Make your first observation in the observation section
4. Fill the small cup with water and prepare to pour it into one of the cylinders of oil. Make your second prediction in the hypothesis section.
5. Pour the water into the oil and observe what happens. Make your second observation in the observation section.
6. Based on your first two trials, predict what will happen if you place a piece of ice in the second cylinder of oil. Make your third prediction in the hypothesis section.
7. What will happen when the ice begins to melt and turn into liquid water? Make your fourth prediction in the observation section.

8. Place one or two ice cubes in the second cylinder of oil and observe what happens when you placed a piece of ice in the second cylinder of oil. Make your third observation in the observation section. What happens when the ice starts to melt. Record your fourth observation in the observation section.
Hypothesis: 1. If I________________________________________________________, then I predict that ______________________________________________, because ______________________________________________________ _____________________________________________________________. 2.If I_________________________________________________________, then I predict that ______________________________________________, because ______________________________________________________ _____________________________________________________________. 3. If I________________________________________________________, then I predict that ______________________________________________, because ______________________________________________________ _____________________________________________________________. 4. If I________________________________________________________, then I predict that_______________________________________________, because ______________________________________________________ _____________________________________________________________.
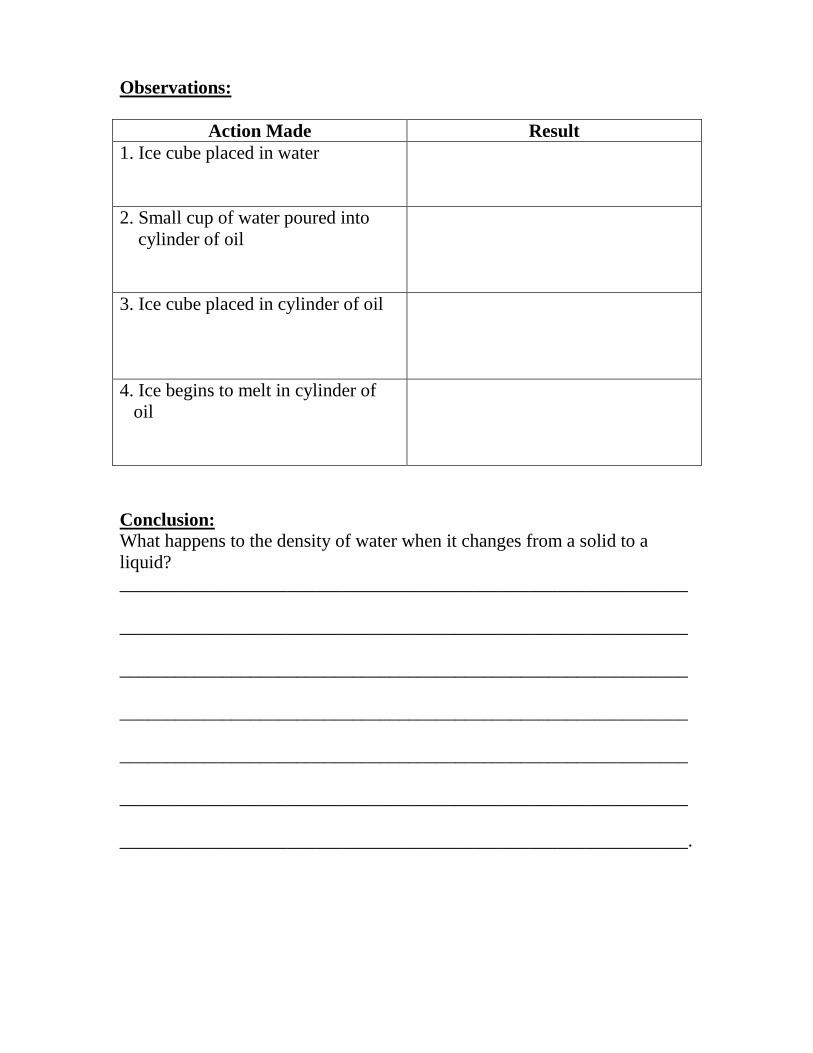
Observations:
Action Made Result 1. Ice cube placed in water
2. Small cup of water poured into cylinder of oil
3. Ice cube placed in cylinder of oil
4. Ice begins to melt in cylinder of oil
Conclusion: What happens to the density of water when it changes from a solid to a liquid? _____________________________________________________________ _____________________________________________________________ _____________________________________________________________ _____________________________________________________________ _____________________________________________________________ _____________________________________________________________ _____________________________________________________________.
Name: ___________________ Date: ___________________
Unit E – Chapter 1: Lesson 1 Matter - Solutions, Suspensions, and Mixtures Question: How are suspensions different from solutions? And, which powder(s) create a solution and which powder(s) create a suspension? Background information: A mixture is a substance made from two or more materials mixed together. In a heterogeneous mixture, one can see the different components; for example, sand in water. In a solution, solid particles are completely dissolved so that the entire solution is in a liquid phase. (Ex. Salt Water) In suspensions, solid particles are spread evenly but remain solid, floating in the liquid. (Ex. Milk) Materials:
3 clear 2-liter soda bottles with caps water measuring cup 1 tsp of baking soda 1 tsp of cornstarch 1 tsp of sugar 3 pieces of 3-by-5 inch paper
Procedure:
1. Fill each soda bottle with about 16 ounces of water. 2. Set the three pieces of paper on the table in front of you. On the
first, put a teaspoonful of sugar; on the next, a teaspoonful of cornstarch; and on the last a teaspoonful of baking soda.
3. Carefully observe each powder. Pick a tiny pinch of each one and feel the texture in you fingers. Write down as many properties of each powder as you can in the observation section.
4. Based on each powder’s properties, predict whether each substance will make a solution or a suspension when it mixes with the water. Write your predictions in the prediction section. 5. Carefully lift each paper and pour each powder into a different
bottle of water. Place the caps on the three bottles and shake each vigorously for 10 seconds. Allow the bottles to stand for about one minute and then observe the mixtures. Record your observations in the observation section.
Hypothesis: 1. (Baking Soda) If I____________________________________________, then I predict that _______________________________________________ because ______________________________________________________ _____________________________________________________________. 2. (Cornstarch) If I______________________________________________, then I predict that_______________________________________________, because ______________________________________________________ _____________________________________________________________. 3. (Sugar) If I_________________________________________________, then I predict that ______________________________________________, because ______________________________________________________ _____________________________________________________________. Observations: 1. List properties for each powder. Sugar: _____________________________________________________________ Cornstarch: _____________________________________________________________ Baking Soda: ____________________________________________________________
2. What do you observe after mixing the following the powders with water? Sugar: _____________________________________________________________ Cornstarch: ____________________________________________________________ Baking Soda: ____________________________________________________________ Conclusion: How are suspensions different from solutions? Which powder(s) created a solution and which powder(s) created a suspension? __________________ _____________________________________________________________ _____________________________________________________________ _____________________________________________________________ _____________________________________________________________ _____________________________________________________________

Name: ___________________ Date: ___________________
Unit E – Chapter 1: Lesson 1 Matter - Mixtures Question: Once salt and water are mixed can it be separated any way except by evaporation? Background information: A mixture is a substance made from two or more materials mixed together. In a heterogeneous mixture, one can see the different components; for example, sand in water. In a solution, solid particles are completely dissolved so that the entire solution is in a liquid phase. In suspensions, solid particles are spread evenly but remain solid, floating in the liquid. (Ex. Milk) Materials:
water filter salt cup
Procedure:
1. Fill cup half way with water. 2. Add tablespoon of salt and mix. 3. Attempt to remove salt using filter. 4. Record Observation 5. Answer why or why not you could not remove salt from water 6. Does this make our experiment a solution or mixture
Hypothesis: If I_______________________________________________________, then I predict that _____________________________________________, because _____________________________________________________ _____________________________________________________________.
Observations: _____________________________________________________________ _____________________________________________________________ _____________________________________________________________ _____________________________________________________________ Conclusion: Once salt and water are mixed can it be separated any way except by evaporation? Why? _____________________________________________________________ _____________________________________________________________ _____________________________________________________________ _____________________________________________________________ _____________________________________________________________ _____________________________________________________________ _____________________________________________________________
Name: ___________________ Date: __________________ Unit E – Chapter 1: Lesson 3 Matter-Reactivity Question: Will the eggshells dissolve in water, vinegar or both? Background information: Some substances are more likely than others to react. The ability of a substance to react chemically is called reactivity. Vinegar is a weak acid (acetic acid). Water can be an acid or a base, depending on what it is mixed with. Materials:
2 jars 1 cup of water 1 cup of vinegar 2 eggs
Procedure: Fill one jar with 1 cup of water. Fill a second jar with 1 cup of vinegar.
Place an uncooked egg into each jar. Cover each jar with plastic wrap. Observe for the next several days Hypothesis: If I_______________________________________________________, then I predict that _____________________________________________ because _____________________________________________________ _____________________________________________________________.
Observations: Sample Day 1 Day 2 Egg in Water
Egg in Vinegar
Conclusion: What happened to the egg that was placed in water, and the egg that was placed in vinegar? After making you observations, is the egg shell a base or an acid? _____________________________________________________________ _____________________________________________________________ _____________________________________________________________ _____________________________________________________________ _____________________________________________________________ _____________________________________________________________ ____________________________________________________________.

Name: ___________________ Date: ___________________
Unit E – Chapter 1 Topic: Freezing and Mixing Question: Does temperature affect mixing? Background information: A mixture is a substance made from two or more materials mixed together. In a heterogeneous mixture, once can see the different components; for example, sand in water. In a solution, solid particles are completely dissolved so that the entire solution is in a liquid phase. (Ex. Salt Water) In suspensions, solid particles are spread evenly but remain solid, floating in the liquid. (Ex. Milk) Heat or the absence of heat affects how well the solution can be mixed. Materials:
sugar spoon water ice labels “A” and “B” cup clock watcher
Procedure:
1. Record hypothesis if temperature affects mixing of a solution. 2. Take two cups fill half way. 3. Label one cup “A” and the other “B” 4. In cup “A” put a spoonful of ice. Mix until ice is melted and repeat. 5. In cup “B” do not put any ice. 6. Put a spoonful of sugar in both cups. 7. Timer must time how long it takes for sugar to mix with water. 8. Record the time difference

Hypothesis: If I_______________________________________________________, then I predict that _____________________________________________, because ______________________________________________________ _____________________________________________________________. Observations: Sample Observations (Incl. elapsed time) Cup A – with ice Elapsed Time: ________________
Cup B – without ice Elapsed Time: _________________
Conclusion: Does temperature affect mixing? _____________________________________________________________ _____________________________________________________________ _____________________________________________________________ _____________________________________________________________

Unit F

Name _______________________
Date ________________________
Unit F: Chapter 1 Lesson 1
Friction
Question: What happens when an object encounters friction? What materials create
the most friction?
Background information:
Friction – force that opposes, or acts against, motion when 2 surfaces rub against each
other.
Materials:
2 rulers Tape Measuring Tape 12” of wax paper, crumpled aluminum foil and sandpaper Marble Long flat surface Textbook Procedure:
1. Make an incline track by leaning the two rulers next to each other on top of the
book.
2. Place the wax paper at the end of the ruler track.
3. Release the marble near the top of the track.
4. Measure the distance from the bottom of the track to the location where the
marble stopped.
5. Do this 3 times and use the average distance.
6. Repeat steps 3, 4, and 5 using the aluminum foil and then the sandpaper.

Hypothesis: If I _______________________________________________, then I
predict that ________________________________________________________
______________________________________________________________________,
because ________________________________________________________________
______________________________________________________________________
Analysis:
Trial Material Observations 1
2
3
Wax Paper
Wax Paper
Wax Paper
1
2
3
Foil
Foil
Foil
1
2
3
Sandpaper
Sandpaper
Sandpaper
Work Space To Calculate Averages:

Conclusion:
What happened when you rolled the marble onto the different materials? What can you
conclude about which material creates the most friction?
______________________________________________________________________
______________________________________________________________________
______________________________________________________________________
______________________________________________________________________
______________________________________________________________________
______________________________________________________________________
______________________________________________________________________
______________________________________________________________________
______________________________________________________________________
______________________________________________________________________

Name _________________________
Date __________________________
Unit F: Chapter 1 – Lesson 1
Magnetism
Question: What materials are attracted to a magnet? What happens when you mix
magnetic and non-magnetic materials?
Background information:
Magnetism is a force that affects your life everyday and is defined as the force of
attraction between magnets and magnetic objects.
Materials:
Lab report Sand Pencil Sugar Paper Plates Iron Filings Magnets Dirt or Soil Procedure:
Part 1:
1. Separate your materials (dirt/soil, iron filings, sugar, sand) onto separate plates
and label them A, B, C, D.
2. Bring the magnet close to the plate and stir each material individually to see if
they are or are not attracted to the magnet.
3. Record your observations.
Part 2:
4. Now mix the iron filings with the each of the other materials.
5. Repeat step 2 and record what happens when the materials are combined.

Hypothesis Part 1: If I ___________________________________________________,
then I predict that ________________________________________________________
______________________________________________________________________,
because ________________________________________________________________
______________________________________________________________________
Hypothesis Part 2: If I ___________________________________________________,
then I predict that ________________________________________________________
______________________________________________________________________,
because ________________________________________________________________
______________________________________________________________________
Analysis:
Sample Material Observations – trial 1 A
B
C
D
Sample Material w/
Iron Observations – trial 2
A
B
C

Conclusion:
Which materials were attracted to the magnet? What happened when you mixed the
materials with the iron filings?
______________________________________________________________________
______________________________________________________________________
______________________________________________________________________
______________________________________________________________________
______________________________________________________________________
______________________________________________________________________
______________________________________________________________________
______________________________________________________________________
______________________________________________________________________

Name ____________________________
Date _____________________________
Unit F: Chapter 3 – Lesson 1
Kinetic & Potential Energy
Question: What happens when potential energy is converted to kinetic energy? What
happens when you have more potential energy (i.e. the higher ramp)?
Background information:
Potential Energy – Energy that an object has because of where it is or because of its
condition.
Kinetic Energy – Energy of motion; or energy in use.
Materials:
2 identical long planks of wood 4 thick books (textbooks) 2 sets of identical balls (i.e. tennis, golf, etc…) 2 yard sticks Procedure:
1. Set up the 2 ramps next to each other. For one ramp use only 1 book and for the
other ramp use 3 books.
2. Place the yard sticks on the floor to measure how far each ball will travel.
3. Roll 1 ball down each ramp at the same time.
4. Record your observations.
5. Repeat with the other set of balls.
Hypothesis (First Set): If I _______________________________________________,
then I predict that ________________________________________________________
______________________________________________________________________,
because ________________________________________________________________
______________________________________________________________________
Hypothesis (Second Set): If I _____________________________________________,
then I predict that ________________________________________________________
______________________________________________________________________,
because ________________________________________________________________
______________________________________________________________________
Analysis:
Ramp Material Observations – 1
2
1
2
Conclusion:
What happened when you rolled each set of balls down the different ramps? What can
you conclude about the results of your experiment?
______________________________________________________________________
______________________________________________________________________
______________________________________________________________________
______________________________________________________________________
______________________________________________________________________
______________________________________________________________________
Name _____________________________
Date ______________________________
Unit F: Chapter 3 – Lesson 4
Heat
Question: Does metal or plastic transfer heat faster?
Background information:
Heat is the transfer of thermal energy from one substance to another.
Thermal Energy, Temperature and Heat are all related.
Thermal Energy is the kinetic energy of molecules.
Materials:
Lab report Styrofoam Cups Pencil Hot Water Margarine Clock Metal Butter Knife Plastic knife Procedure:
Part 1:
1. Place a dab of cold margarine near the middle of the metal knife. Place another
dab of margarine, the same size, near the tip.
2. Be careful when pouring the water. Fill the cup half way with hot water. Put the
handle of the metal knife in the water. The dabs of margarine should be above
the level of the water.
3. Predict which dab of margarine will melt first – the one near the middle of the
knife or the one near the end.
Hypothesis: If I ___________________________________________________, then I
predict that ________________________________________________________
______________________________________________________________________,
because ________________________________________________________________
______________________________________________________________________
______________________________________________________________________
______________________________________________________________________.
4. Observe the metal knife for ten minutes and record your observations below.
Time Observation
Beginning of
the Experiment
After 5 Minutes
Conclusion –
10 Minutes
5. Repeat steps 1 – 4, using the plastic knife and record your observations below.
Time Observation
Beginning of
the Experiment
After 5 Minutes
Conclusion –
10 Minutes

Conclusion:
Which material transfers heat faster – metal or plastic? Explain how you determined
this and use information from your observations during this experiment to explain your
answer.
______________________________________________________________________
______________________________________________________________________
______________________________________________________________________
______________________________________________________________________
______________________________________________________________________
______________________________________________________________________
______________________________________________________________________
______________________________________________________________________
______________________________________________________________________
______________________________________________________________________
______________________________________________________________________

Name _________________________
Date __________________________
Unit F: Chapter 4 Lesson 3
Saving Energy
Question: What materials make good heat insulators?
Background information:
Scientists have to come up with ways to conserve energy. It is important to develop
ways to keep warm or cold air in our homes during different times of the year, and
depending on what type of climate you live in.
Materials:
Lab report cotton batting Pencil newspaper 4 tin cans Styrofoam peanuts 4 thermometers Procedure:
1. Place a thermometer in each can.
2. Pack cotton batting around one thermometer, shredded newspaper around another
and Styrofoam peanuts around a third. The control can will have a thermometer
only.
3. Predict which item will be the best insulator.
4. Put all four cans in a sunny window.
5. Record the temperature of each can every 2 minutes for a total of 10 minutes.

Hypothesis: If I ___________________________________________________, then I
predict that ________________________________________________________
______________________________________________________________________,
because ________________________________________________________________
______________________________________________________________________
Analysis:
Sample Material Observations – Start A Cotton Batting
B Newspaper
C Styrofoam
D Thermometer
Sample Material Observations – 2 minutes
A Cotton Batting
B Newspaper
C Styrofoam
D Thermometer
Sample Material Observations – 4 minutes
A Cotton Batting
B Newspaper
C Styrofoam
D Thermometer
Sample Material Observations – 6 minutes
A Cotton Batting
B Newspaper
C Styrofoam

D Thermometer
Sample Material Observations – 8 minutes
A Cotton Batting
B Newspaper
C Styrofoam
D Thermometer
Sample Material Observations – 10 minutes
A Cotton Batting
B Newspaper
C Styrofoam
D Thermometer
Conclusion:
Which material was the best insulator? Why is this material a better insulator than the
others?
______________________________________________________________________
______________________________________________________________________
______________________________________________________________________
______________________________________________________________________
______________________________________________________________________
______________________________________________________________________
______________________________________________________________________
______________________________________________________________________
______________________________________________________________________
______________________________________________________________________