email and e-documents database -...
TRANSCRIPT
Email and E-documents Database
This step by step guide will walk you through creating an E-mail and E-documents database using out nifty templates and joining them together for ease of searching and printing.
Setting up your email database 1 Setting up your E-documents database 9 Please don’t hesitate to let us know if you have any problems, concerns or feel that this document has left something out. You can contact us at [email protected] or 1-866-495-2397. Thank you
Created by Natalie Biggs

When importing PST’s and Native documents I suggest using LexisNexis’ template databases.
I. Setting up your email database: Open Concordance and click File | New and click on the E-docs tab
Click on the E-Mail template database to create the field structure that will match the data import for the PST file. After you highlight the E-mail template and click OK you will be prompted for a directory location and database name. In the E-mail database click Documents | Import | Email
You will be prompted to choose an MS Outlook profile. If you have more than one profile choose the one you wish to import and Click OK.
Created by Natalie Biggs

Here you have the option to import all of the email within the Personal Folders or a specific folder within the personal folder (PST). “Import subdirectories” by default is checked.
Click Next
Created by Natalie Biggs
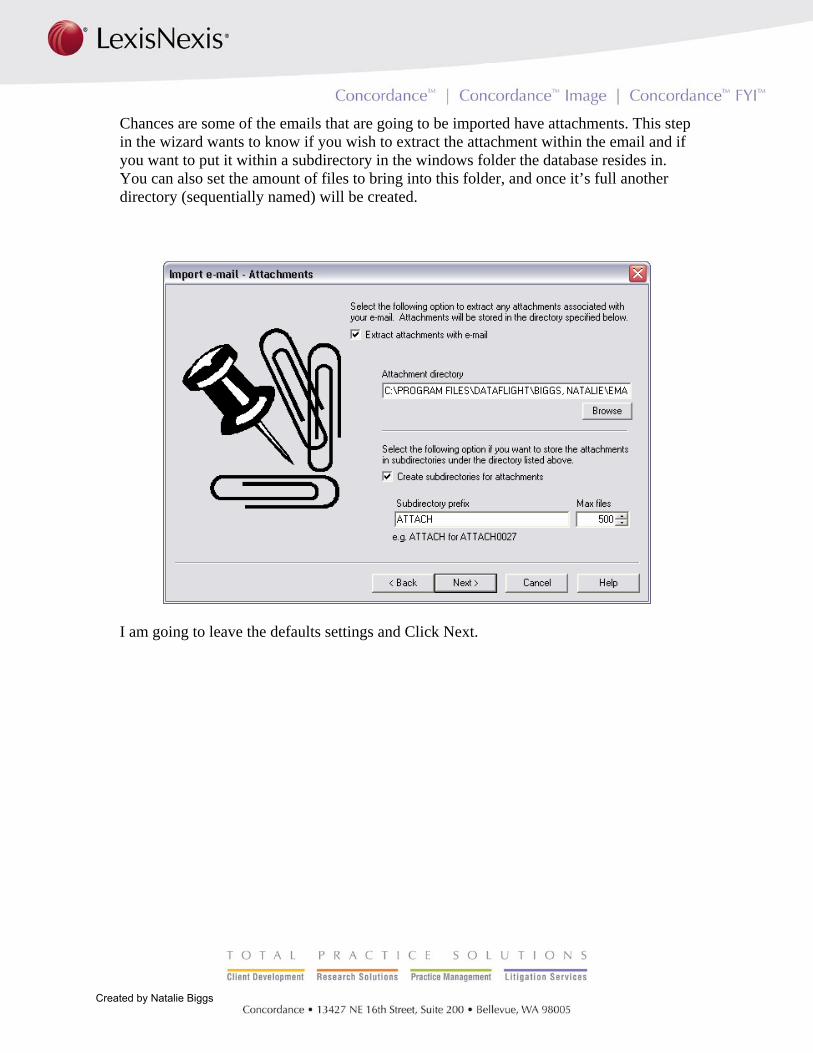
Chances are some of the emails that are going to be imported have attachments. This step in the wizard wants to know if you wish to extract the attachment within the email and if you want to put it within a subdirectory in the windows folder the database resides in. You can also set the amount of files to bring into this folder, and once it’s full another directory (sequentially named) will be created.
I am going to leave the defaults settings and Click Next.
Created by Natalie Biggs

This step allows you to choose specific dates of emails to import within the PST.
At this time I am bringing all the emails in I am going to Click Next.
Created by Natalie Biggs

The E-mail template database created the field names to match the data type we are going to be importing from the PST file, this step matches the names for you. If you used a different database with different fields you would have to manually match the field names you created to the data type that is being imported
The “Do not allow duplicates e-mails” is checked by default Click Next
Created by Natalie Biggs

Now we are ready to import the PST into Concordance
Click Import
Created by Natalie Biggs

When the import is completed click done
Click Done
Created by Natalie Biggs
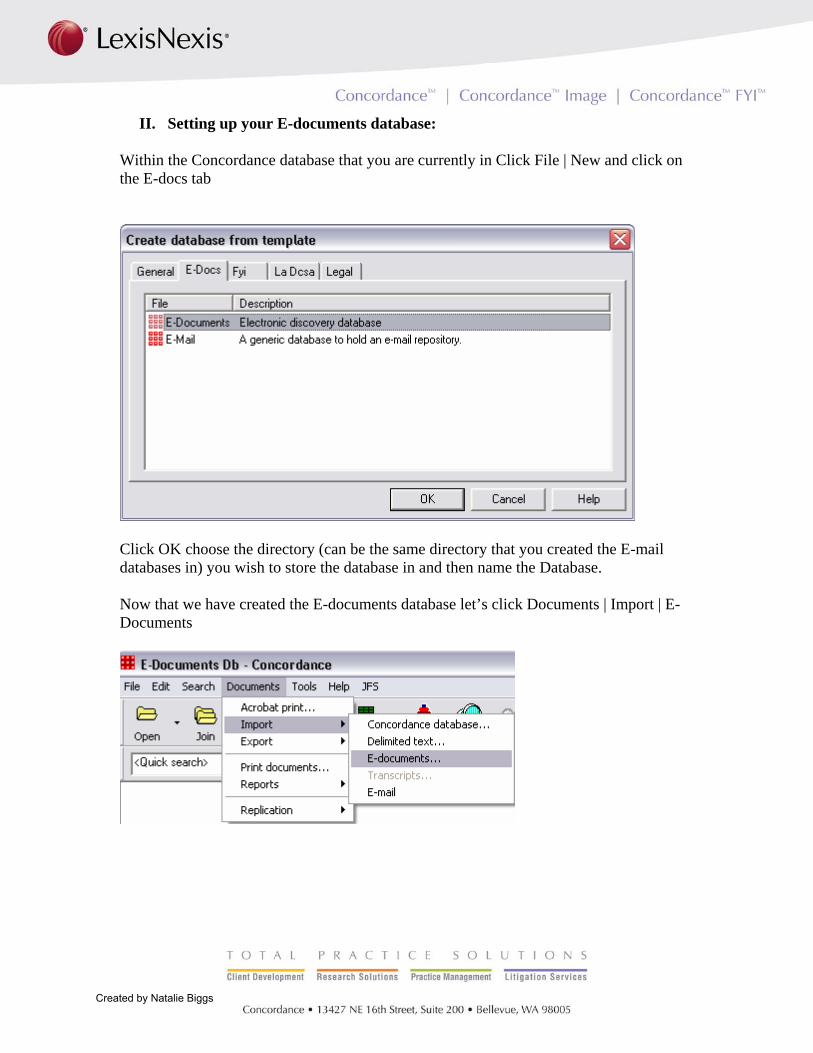
II. Setting up your E-documents database:
Within the Concordance database that you are currently in Click File | New and click on the E-docs tab
Click OK choose the directory (can be the same directory that you created the E-mail databases in) you wish to store the database in and then name the Database. Now that we have created the E-documents database let’s click Documents | Import | E-Documents
Created by Natalie Biggs
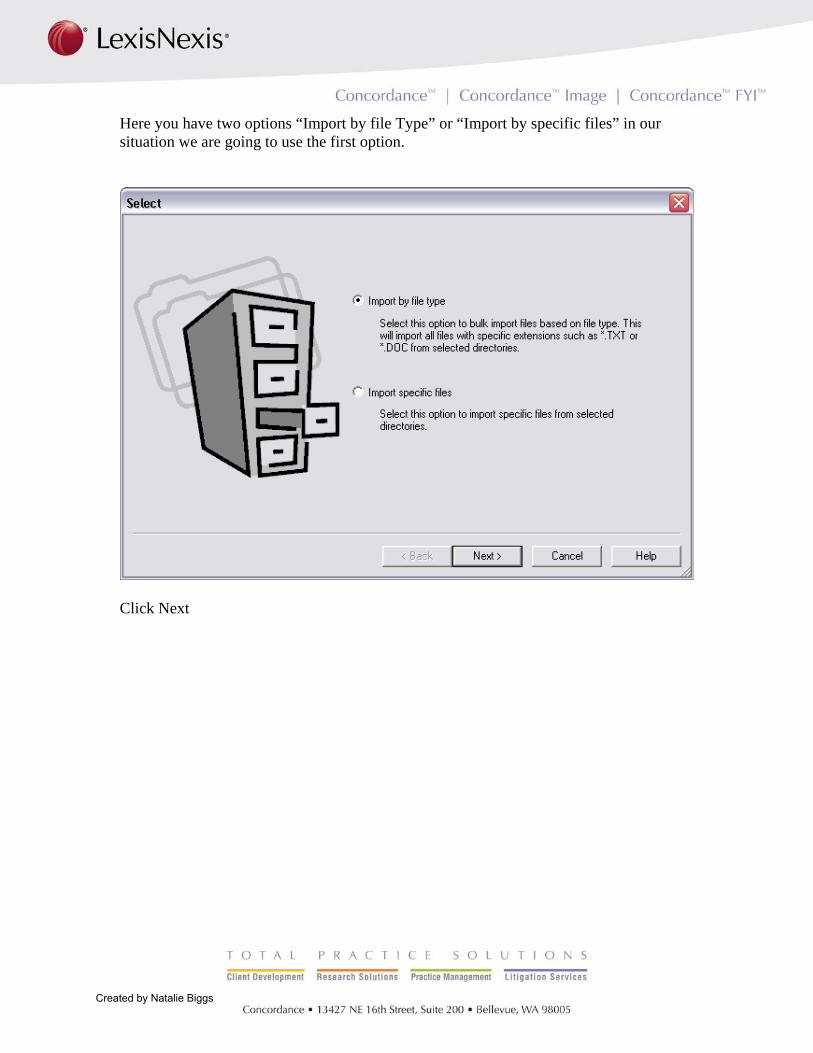
Here you have two options “Import by file Type” or “Import by specific files” in our situation we are going to use the first option.
Click Next
Created by Natalie Biggs

You can choose specific file types or all extensions on this window. I want to make sure that we get all of the documents regardless of file types that is why I click “Import all extensions”.
Click Next
Created by Natalie Biggs
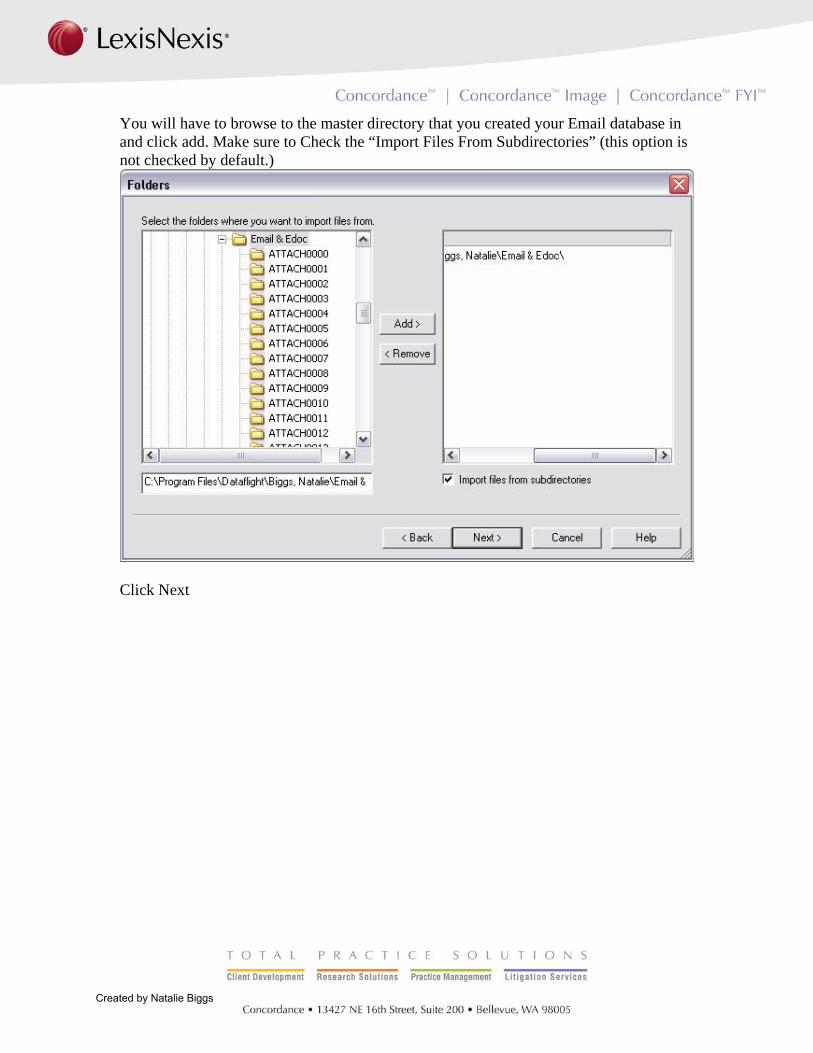
You will have to browse to the master directory that you created your Email database in and click add. Make sure to Check the “Import Files From Subdirectories” (this option is not checked by default.)
Click Next
Created by Natalie Biggs

This is why I had you choose the template database here you can see that the fields match the metadata to the native documents. As the fields are defaulted to the mapped metadata, I would leave this as the default.
Click Next
Created by Natalie Biggs

You can choose to create a log file that will suppress errors during importing. I generally leave the defaults “Match metadata field names” and Create hyperlinks to the original document”.
Click Next
Created by Natalie Biggs

All set to import the native documents into Concordance.
Click Import
Created by Natalie Biggs
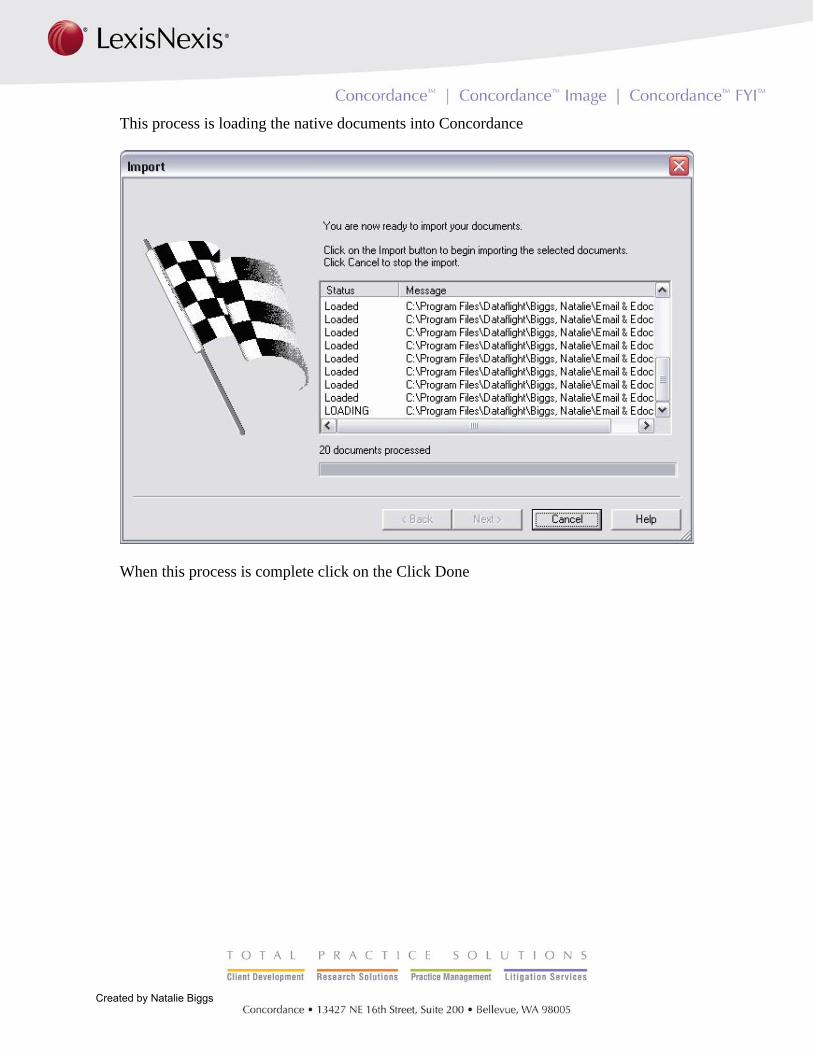
This process is loading the native documents into Concordance
When this process is complete click on the Click Done
Created by Natalie Biggs

Within the Email or E-documents database that you have just created and click the join button.
Click Add and browse to the DCB file of the database you wish to concatenate.
Click Open
Created by Natalie Biggs

Click the Save button
This is where you are going to save the CAT (concatenation file); this file should be the same name as the main database. When you launch the database the concatenation will be automatic each time. Click Save
Created by Natalie Biggs
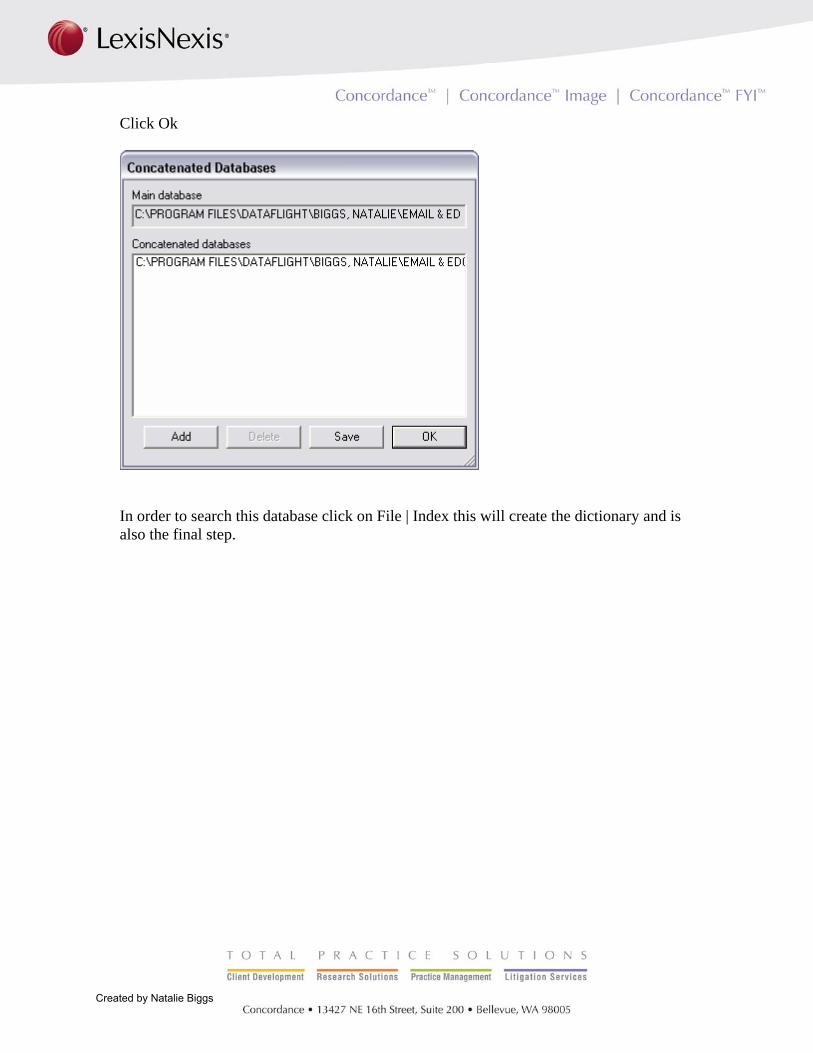
Click Ok
In order to search this database click on File | Index this will create the dictionary and is also the final step.
Created by Natalie Biggs