endoscopic tendon sheath release for trigger · pdf fileendoscopic tendon sheath release for...
TRANSCRIPT
Endoscopic Tendon Sheath
Release for Trigger Finger
A Smith & Nephew Technique Plus™ Illustrated Guide

A Smith & Nephew Technique Plus™ Illustrated Guide
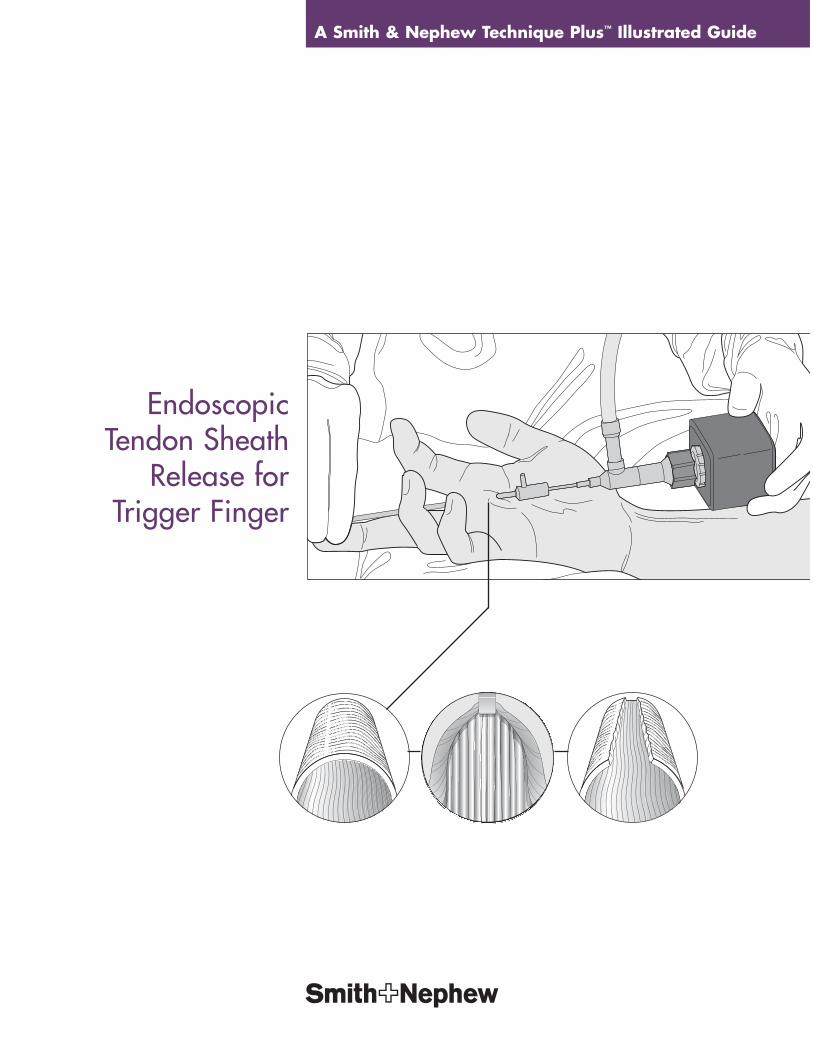
Endoscopic Tendon SheathRelease for Trigger Finger
Yasushi Nakao, M.D.
Keio University, School of MedicineDepartment of Orthopaedic SurgeryTokyo, Japan
In conjunction with Yasushi Nakao, M.D., Smith & Nephew has developedan endoscopic approach to “Flexor Tendon Sheath Release” for triggeringand stiffness of fingers/thumb due to stenosing tenosynovitis. This minimallyinvasive approach is designed to maximize patient outcomes whileincorporating the maximum safety element of releasing the A1 Pulley underdirect endoscopic visualization. The system and technique combine tominimize patient risk commonly associated with conventional “Open” or“Blind Percutaneous” techniques.
As described by Yasushi Nakao, M.D.

Endoscopic Tendon Sheath Release for Trigger Finger
3
IntroductionTriggering and stiffness of fingers/thumb arecommon symptoms of tenosynovitis affectingthe digital flexor tendon. In the morning, thesephenomena are more apparent and handfunction is significantly obstructed. In theadvanced condition, patients show difficultycompleting flexion or extension of digits andexperience painful contracture at the PIPjoints. Operative treatment is generallyperformed via a 2.0–2.5 cm palmar incisionand involves resection of the A1 pulley andproliferated synovial sheath. Although thisconventional open release of the flexor tendonis considered a safe and reliable procedure,postoperative discomfort due to scartenderness and delayed wound healing hasbeen reported. The procedure of endoscopicrelease of the flexor tendon was designed fortriggering and stiffness of fingers/thumb as aminimally invasive surgery to achieve rapidreturn to daily activity.
It is well known that triggering and stiffness of fingers/thumb frequently occurs in patientswith diabetes mellitus, especially in a multiplemanner. In addition, delayed wound healing,infection, and hypertrophic postoperativescarring are common complications in apatient with diabetes mellitus. Taken together,the endoscopic tendon sheath release appearsto be an appropriate alternative in diabeticpatients or for multiple trigger fingers.
Procedure
Surgery for Fingers
Step 1: Incision Location
Preoperative palpation should be performed todetermine accurate outline of flexor tendonsand location of A1 pulleys. Make twotransverse incisions on the flexor tendon, 2.5 mm in length, for each finger (Figure 1).Proximal incisions (1 cm proximal and 1 cmdistal to the A1 pulley) should be carefullypositioned since flexor tendons converge at the proximal palm. Distal incisions are located on the palmar digital crease at the center of the fingers.
Figure 1. Palm of hand with the incisionlocations marked with marking pen.Dotted lines illustrate center line of theflexor tendons.
Note: For the surgery of stiff digits, proximalincisions should be located 2–3 cm proximalto the A1 pulley, and the use of the longcannula assembly may be needed to releasethe proximal synovial sheath.
Figure 2. A curved, blunt dissector isinserted distally to create the channel.
Step 2: Positioning andSubcutaneous Tissue Release
Surgery is performed using a pneumatictourniquet under local anesthesia or wristblock, and fingers are positioned in ahyperextended manner at the MP joints. Afterincisions are made, separation of the flexortendon and subcutaneous tissue is performedusing curved, blunt dissector (Figure 2).
4
Endoscopic Tendon Sheath Release for Trigger Finger
Figure 4. The endoscope is passed into theproximal portal, while a probe and knife areinserted into the distal portal.
Fig. 3 Rev
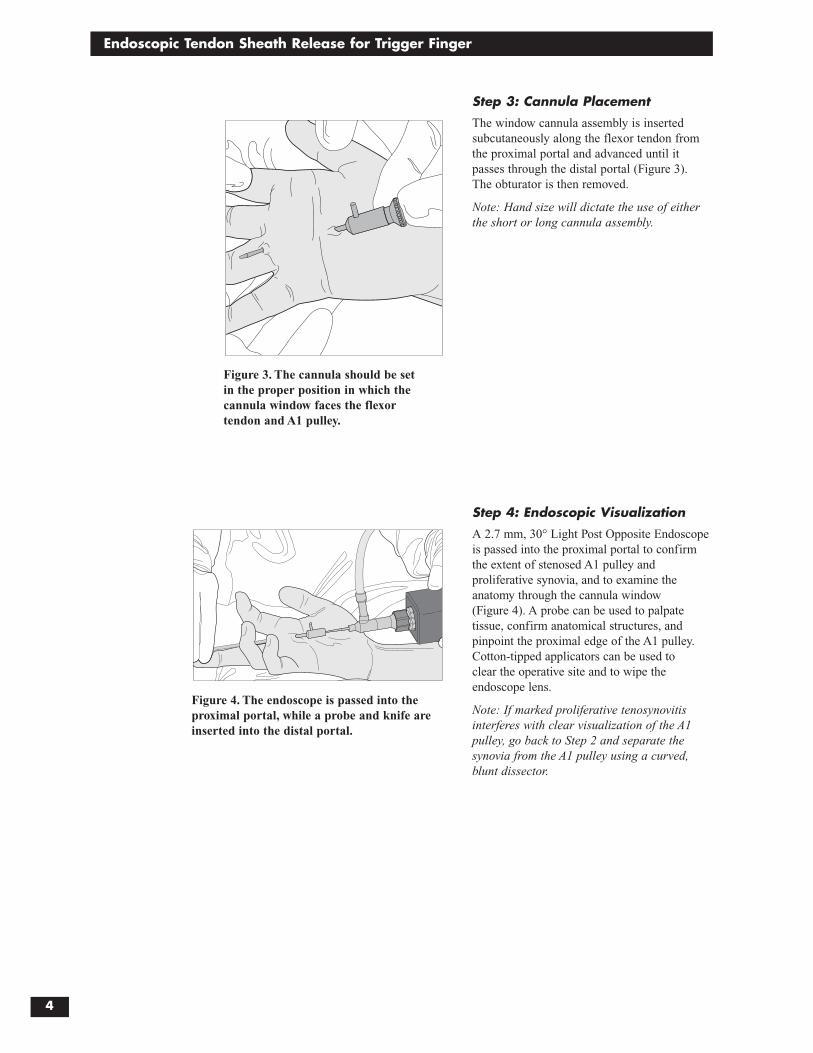
Figure 3. The cannula should be set in the proper position in which thecannula window faces the flexor tendon and A1 pulley.
Step 3: Cannula Placement
The window cannula assembly is insertedsubcutaneously along the flexor tendon fromthe proximal portal and advanced until itpasses through the distal portal (Figure 3). The obturator is then removed.
Note: Hand size will dictate the use of eitherthe short or long cannula assembly.
Step 4: Endoscopic Visualization
A 2.7 mm, 30° Light Post Opposite Endoscopeis passed into the proximal portal to confirmthe extent of stenosed A1 pulley andproliferative synovia, and to examine theanatomy through the cannula window (Figure 4). A probe can be used to palpatetissue, confirm anatomical structures, andpinpoint the proximal edge of the A1 pulley.Cotton-tipped applicators can be used to clear the operative site and to wipe theendoscope lens.
Note: If marked proliferative tenosynovitisinterferes with clear visualization of the A1pulley, go back to Step 2 and separate thesynovia from the A1 pulley using a curved,blunt dissector.
Endoscopic Tendon Sheath Release for Trigger Finger
5
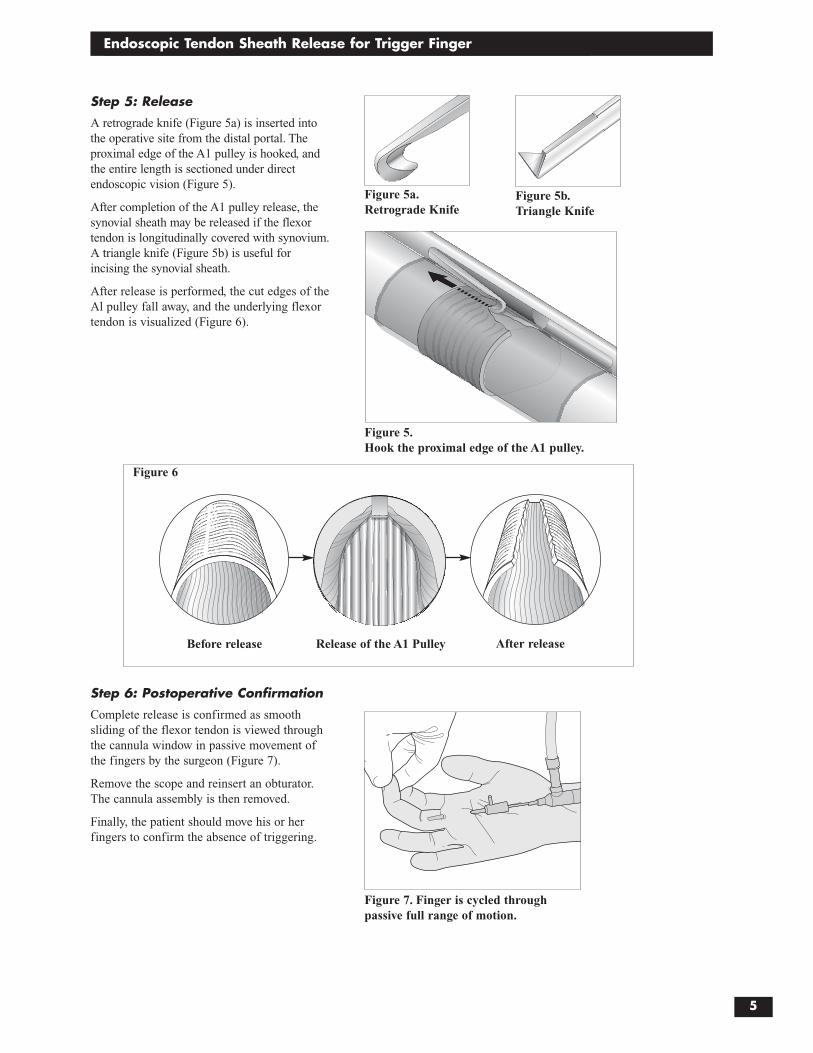
Figure 5.Hook the proximal edge of the A1 pulley.
Step 5: Release
A retrograde knife (Figure 5a) is inserted intothe operative site from the distal portal. Theproximal edge of the A1 pulley is hooked, andthe entire length is sectioned under directendoscopic vision (Figure 5).
After completion of the A1 pulley release, the synovial sheath may be released if the flexortendon is longitudinally covered with synovium.A triangle knife (Figure 5b) is useful forincising the synovial sheath.
After release is performed, the cut edges of theAl pulley fall away, and the underlying flexortendon is visualized (Figure 6).
Figure 5a.Retrograde Knife
Figure 5b.Triangle Knife
Before release Release of the A1 Pulley After release
Step 6: Postoperative Confirmation
Complete release is confirmed as smoothsliding of the flexor tendon is viewed throughthe cannula window in passive movement ofthe fingers by the surgeon (Figure 7).
Remove the scope and reinsert an obturator.The cannula assembly is then removed.
Finally, the patient should move his or herfingers to confirm the absence of triggering.
Figure 7. Finger is cycled through passive full range of motion.
Figure 6
6
Endoscopic Tendon Sheath Release for Trigger Finger
Surgery for Thumbs
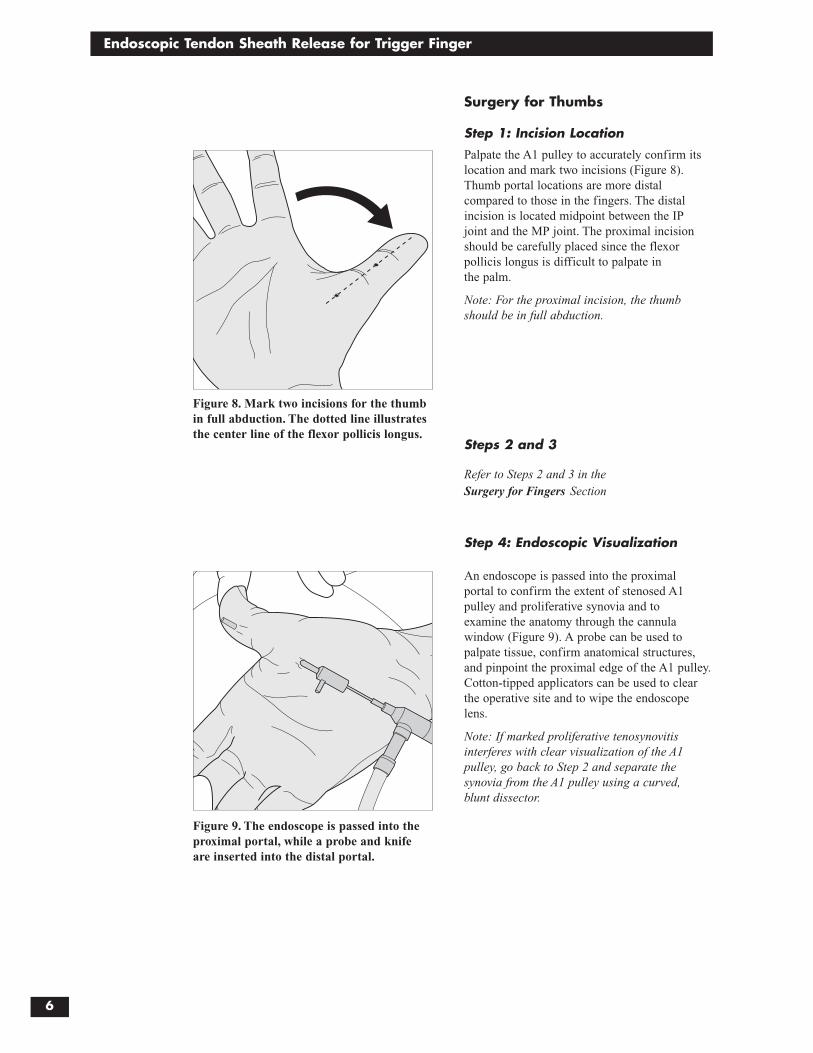
Step 1: Incision Location
Palpate the A1 pulley to accurately confirm itslocation and mark two incisions (Figure 8).Thumb portal locations are more distalcompared to those in the fingers. The distalincision is located midpoint between the IP joint and the MP joint. The proximal incisionshould be carefully placed since the flexorpollicis longus is difficult to palpate in the palm.
Note: For the proximal incision, the thumbshould be in full abduction.
Steps 2 and 3
Refer to Steps 2 and 3 in the Surgery for Fingers Section
Step 4: Endoscopic Visualization
An endoscope is passed into the proximal portal to confirm the extent of stenosed A1pulley and proliferative synovia and to examine the anatomy through the cannulawindow (Figure 9). A probe can be used topalpate tissue, confirm anatomical structures,and pinpoint the proximal edge of the A1 pulley.Cotton-tipped applicators can be used to clearthe operative site and to wipe the endoscopelens.
Note: If marked proliferative tenosynovitisinterferes with clear visualization of the A1pulley, go back to Step 2 and separate thesynovia from the A1 pulley using a curved, blunt dissector.
Figure 8. Mark two incisions for the thumbin full abduction. The dotted line illustratesthe center line of the flexor pollicis longus.
Figure 9. The endoscope is passed into theproximal portal, while a probe and knifeare inserted into the distal portal.

Endoscopic Tendon Sheath Release for Trigger Finger
7
Step 5: Release
The thumb procedure is performed in fullabduction to avoid digital nerve injury.
In the thumb, it is common for a gap to existbetween the cannula window and the A1pulley (Figure 10a). The assistant shouldcompress the cannula against the flexor tendon so that no gap exists (Figure 10b).
Note: Marked proliferative tenosynovitis iscommon in the thumb. Use a curved, bluntdissector and probe to reveal the proximaledge of the A1 pulley. If access to the A1pulley is difficult, change your approach to a conventional open technique.
Step 6
Refer to Step 6 in the Surgery for Fingers Section
Postoperative CareNo suture is necessary for the incisions; a small compression dressing is applied.Patients are allowed to return to their dailyactivities within the limits of the dressing. The dressing is generally removed five toseven days after surgery and patients areallowed to immerse their hand in water.
Figure 10a. Gap between the cannula windowand the A1 pulley.
Figure 10b. Cannula compressed against theflexor tendon.

8
Endoscopic Tendon Sheath Release for Trigger Finger
Ordering Information
REF Description7207698 Endoscopic Trigger Finger Release System
(Dissector, Short Window Cannula, Short Obturator, Long Window Cannula, Long Obturator, Probe, Sterilization Tray)
7207697 Dissector, Blunt Curved
7207689 Cannula, Operative, 2.9 mm, short window
7207741 Cannula, Operative, 2.9 mm, long window
3807 Obturator, Conical, 2.9 mm, short
7207721 Obturator, Conical, 2.9 mm, long
7207875 Probe, 2.2 mm
7207696 Trigger Finger Sterilization Tray
Single Use Items7207690 Trigger Finger Retrograde Knife, yellow, sterile, box of 6
7207693 Trigger Finger Triangle Knife, pumpkin, sterile, box of 6
7207730 Cotton-Tipped Applicators, sterile, 20 pkgs. of 5 each
Arthroscopes4131* 30° Light Post Opposite, 2.7 mm, 25 mm focal length, videoarthroscope
3768 30° Light Post Opposite, 2.7 mm, 35 mm focal length, videoarthroscope
7205682 30° Light Post Opposite, 2.7 mm, direct-view arthroscope, autoclavable
3947 30° Light Post Opposite, 2.7 mm, direct-view arthroscope, non-autoclavable
*MTO: This item can be purchased on a “Made to Order” basis.


©2001 Smith & Nephew, Inc. All rights reserved. Printed in U.S.A. 07/01 1061118 Rev. A
Caution: U.S. Federal law restricts this device to sale by or onthe order of a physician.
Additional InstructionPrior to performing this technique, consult the Instruction for Usedocumentation provided with individual components — includingindications, contraindications, warnings, cautions, and instructions.
Courtesy of Smith & Nephew, Inc., Endoscopy Division