enterprise product group (epg) - dell · enterprise product group (epg) ... using the oracle silent...
TRANSCRIPT
October 2005
Deploying Oracle 10g with Altiris Deployment
Solution on Dell PowerEdge Servers
Enterprise Product Group (EPG)
Dell White Paper
By Chethan Kumar, Mahmoud Ahmadian, and Eric Szewczyk

February 2005 Page 2 Dell Enterprise Product Group
Contents Executive Summary.................................................................................................................... 3
Introduction................................................................................................................................. 4
Altiris Deployment Solution for Dell Servers ............................................................... 4
Tested and Validated Oracle 10g Database Solutions .................................................. 5
Hardware Deployment .............................................................................................................. 7
Software Deployment.............................................................................................................. 11
Oracle 10g SE1 Deployment ................................................................................................... 14
Windows.............................................................................................................................. 14
Linux..................................................................................................................................... 16
Conclusions ............................................................................................................................... 19
Acknowledgements.................................................................................................................. 20
Appendecies .............................................................................................................................. 21
Appendix A. ........................................................................................................................ 21
Appendix B.......................................................................................................................... 27
Appendix C. ........................................................................................................................ 37
February 2005 Page 3 Dell Enterprise Product Group
Section 1 Executive Summary Altiris and Dell offer an integrated solution for deploying Dell servers from bare metal. Altiris Deployment Solution for Dell Servers ™ offers a single management framework for a complete automated server build process. It significantly reduces the deployment time and provides consistency in server builds as compared to manually configuring server components and deploying operating systems through conventional methods (Windows Media and Dell Server Assistant CD’s) by automating the build process including the configuration and deployment of hardware and software. The whole process can be encapsulated in a simple “drag‐and‐drop” job which then can be executed on one or more servers by simply dragging and dropping in the Altiris console. For more information, see the “Time Savings Validation for Dell Server Deployment with Altiris Deployment Solution” article in the Dell Power Solutions August 2005 edition available at: http://www.dell.com/downloads/global/power/ps3q05‐20050221‐Altiris.pdf. Dell and Oracle provide validated configurations of Dell servers and storage with Oracle databases. Extensive system testing is involved to help ensure that all components down to specific firmware and driver versions are tested and validated to work in a Dell and Oracle database solution. This article explores the possibility of integrating an Oracle 10g Standard Edition ONE database installation with the Altiris Server deployment process to offer a single integrated solution.

February 2005 Page 4 Dell Enterprise Product Group
Section 2
Introduction Customers tend to prefer cost‐effective, easy‐to‐use, easy‐to‐manage solutions. Dell offers tested and validated database solution stacks to help customers meet their database needs. These configurations alleviate the complexity involved in choosing the appropriate hardware and software for setting up the database infrastructure and provide easy‐to‐install, easy‐to‐manage database solutions. As part of its solution portfolio, Dell offers Oracle 10g Database Standard Edition (SE) ONE on a validated standalone Dell PowerEdge™ server, providing a simple yet reliable and robust database solution.
Dell has partnered with Altiris to provide solutions that help customers simplify and automate the complexity of setup and management of its servers. Altiris, through its Deployment Solution for Dell Servers™ product, offers an automated process for building a server. The server build process includes predefined jobs that integrate with Dell PowerEdge servers to provide pre‐OS hardware configuration, installation of OS, deployment of software, and the update of drivers and patches. Deployment Solution makes the server build process as simple as a drag‐and‐drop job. Taking advantage of both of the integration points creates a great solution. This article describes an automated process of building a Dell Server and explores the option of integrating an Oracle 10g Standard Edition ONE database installation with Altiris Deployment solution using the Oracle silent install method; offering a single integrated solution for installing a database server from bare metal.
Altiris Deployment Solution for Dell Servers Altiris provides over 60+ products to help manage the complete IT Lifecycle from cradle to grave focusing on 5 areas of management: Servers, Client and Mobile, Asset, Network, and Security. A few of Altiris’ value propositions consist of: The ability to manage heterogeneous hardware and software environments consisting of Windows, Linux, and UNIX from one console, ease of use in installing, configuring, and using the products, and a quick return on investment (ROI).
Deployment Solution for Dell Servers is an Altiris and Dell jointly developed product created from a strong partnership that has been in existence since 2001. This product utilizes the bundled Dell OpenManage™ Tool Kit (DTK) and provides the ability to fully provision Dell PowerEdge Servers from a complete bare metal state by configuring hardware components such as the BIOS, Dell Remote Access Controller (DRAC), Baseboard Management Controller (BMC), and the PowerEdge Expandable RAID Controller (PERC). Deployment Solution also offers the ability to perform scripted or image based deployments of Windows or Linux operating systems, deploy popular software such as Dell OpenManage Server Administrator, Oracle 10g, SQL Server, Apache Web Server, and so on. Deployment Solution also offers the capability to fully patch the hardware components (BIOS, DRAC, BMC, RAID) utilizing the Dell Update Packages (DUPs) as part of the provisioning process. The end result is an automated approach to deploying Dell PowerEdge Servers while helping to reduce administrator and build times from literally hours to minutes. This provides consistency in server builds, allows IT departments to keep their staff minimal, and allows administrators to continue focusing on strategic initiatives.
February 2005 Page 5 Dell Enterprise Product Group
Deployment Solution for Dell Servers is an add‐on product to the Deployment Server console. Altiris offers the flexibility of installing this add‐on as part of a bundled install (including Deployment Server and any applicable updates) for first time Deployment Server users or by installing it separately for existing users that may already have a Deployment Server infrastructure in place. This add‐on provides predefined drag‐and‐drop jobs which snap into the Jobs pane of the console and installs the underlying Dell Tool Kit software. This makes the provisioning of Dell PowerEdge Servers possible in a Pre‐OS environment utilizing the optional methods to kick off the provisioning process: Pre‐boot Execution Environment (PXE), Altiris BootWorks (5MB hidden boot partition), or a floppy disk.
Tested and Validated Oracle 10g Database Solutions Oracle is a leading provider of enterprise class database and application software. Dell and Oracle have partnered over the past several years to produce validated configurations that can be ordered directly from Dell and are designed to decrease deployment time by reducing installation and setup complexity.
Many hardware components are available for Database Administrators (DBA) when choosing the appropriate hardware for a database server. Adding to the complexity is the installation of components which requires knowledge much more than the traditional DBA skills – hardware configuration, OS, drivers, patches and any third party software required for the management. Dell Tested and Validated configurations remove the complexity by publishing a Solution Deliverable List (SDL) which tells the customer exactly which revision of the drivers and patches have been validated for a given release.
With Dell recommended Database solutions, managing vital data can become easier. Dell offers servers using industry standard hardware components with high‐end performance, reliability and high availability to power business critical applications and provides a growth path. Whether customers are looking for an affordable entry‐level server or a high performance server for mission critical applications, Dell offers a range of server products that meet all kinds of business needs – small, medium, and enterprise class. With a proven industry standard hardware platform, installation and management becomes less stressful.
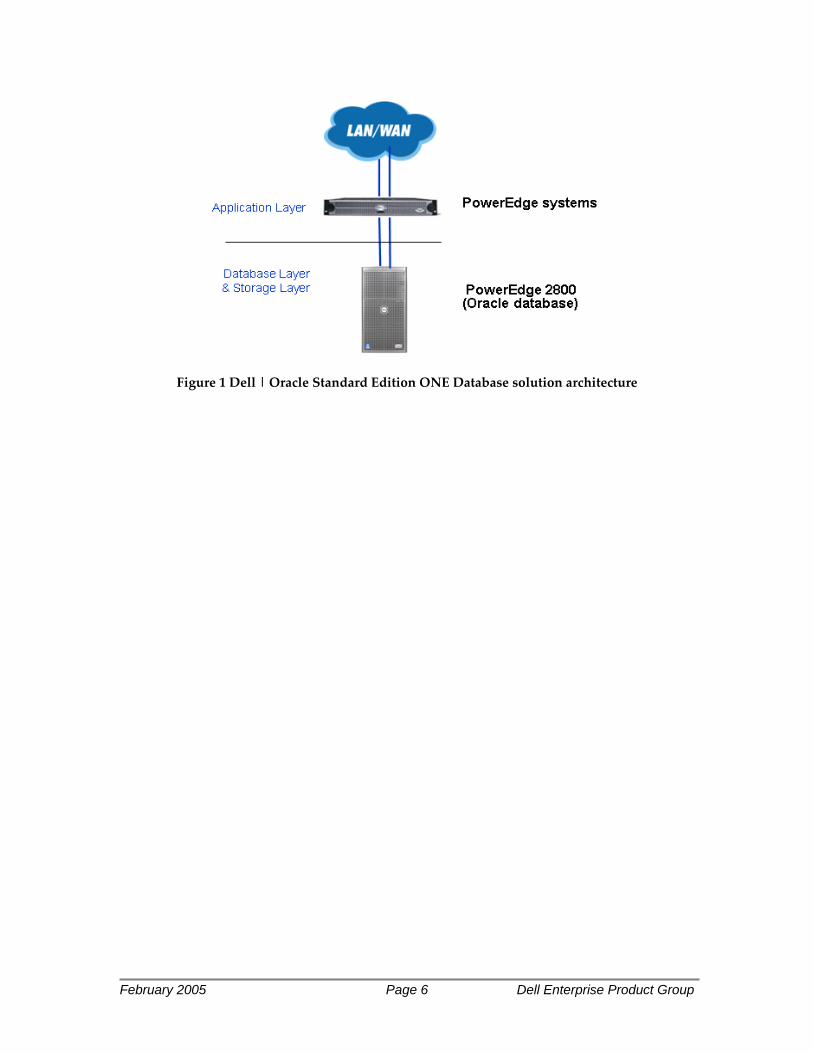
As part of its tested and validated configurations, Dell offers single node database solutions based on Oracle 10g Standard Edition ONE on Windows and Linux platforms1. The database is installed on a single PowerEdge server and the database files are stored on the internal hard disks configured in RAID‐10 mode. Figure 1 shows the architecture of the solution. The authors used Altiris DS to automate the installation of the tested and validated Oracle 10g Standard Edition ONE based database solution offered by Dell.
February 2005 Page 6 Dell Enterprise Product Group
Figure 1 Dell | Oracle Standard Edition ONE Database solution architecture
February 2005 Page 7 Dell Enterprise Product Group
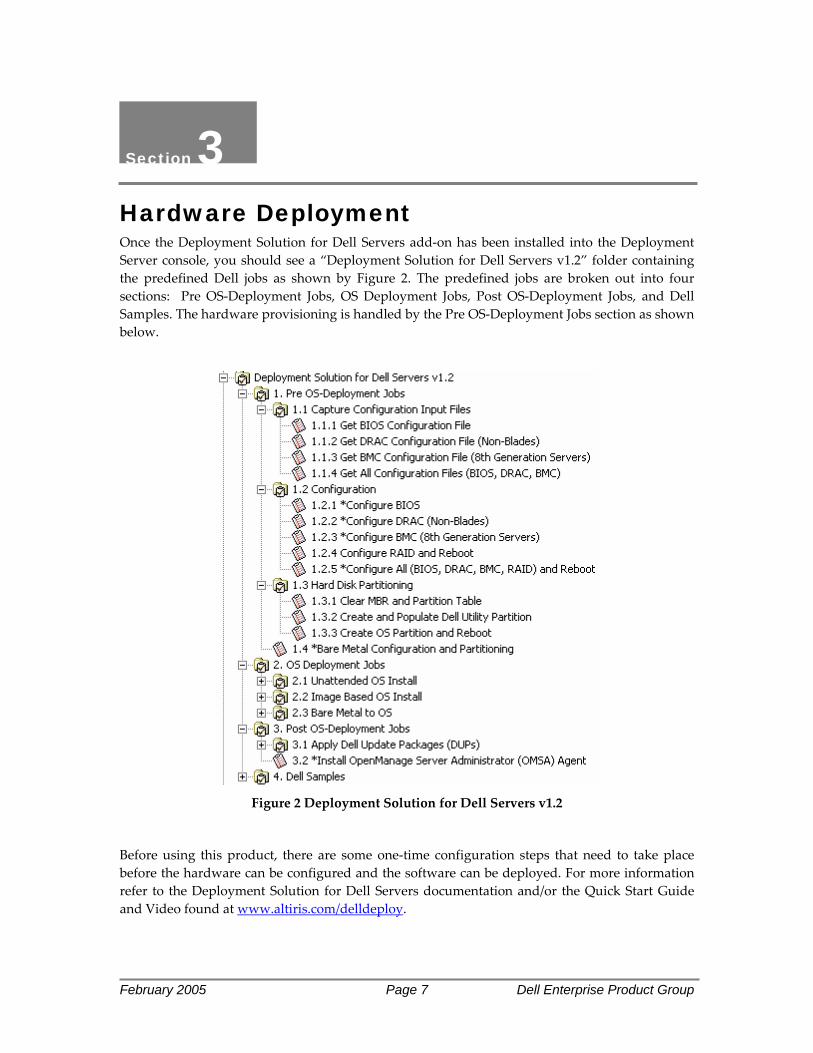
Section 3 Hardware Deployment Once the Deployment Solution for Dell Servers add‐on has been installed into the Deployment Server console, you should see a “Deployment Solution for Dell Servers v1.2” folder containing the predefined Dell jobs as shown by Figure 2. The predefined jobs are broken out into four sections: Pre OS‐Deployment Jobs, OS Deployment Jobs, Post OS‐Deployment Jobs, and Dell Samples. The hardware provisioning is handled by the Pre OS‐Deployment Jobs section as shown below.
Figure 2 Deployment Solution for Dell Servers v1.2
Before using this product, there are some one‐time configuration steps that need to take place before the hardware can be configured and the software can be deployed. For more information refer to the Deployment Solution for Dell Servers documentation and/or the Quick Start Guide and Video found at www.altiris.com/delldeploy.
February 2005 Page 8 Dell Enterprise Product Group
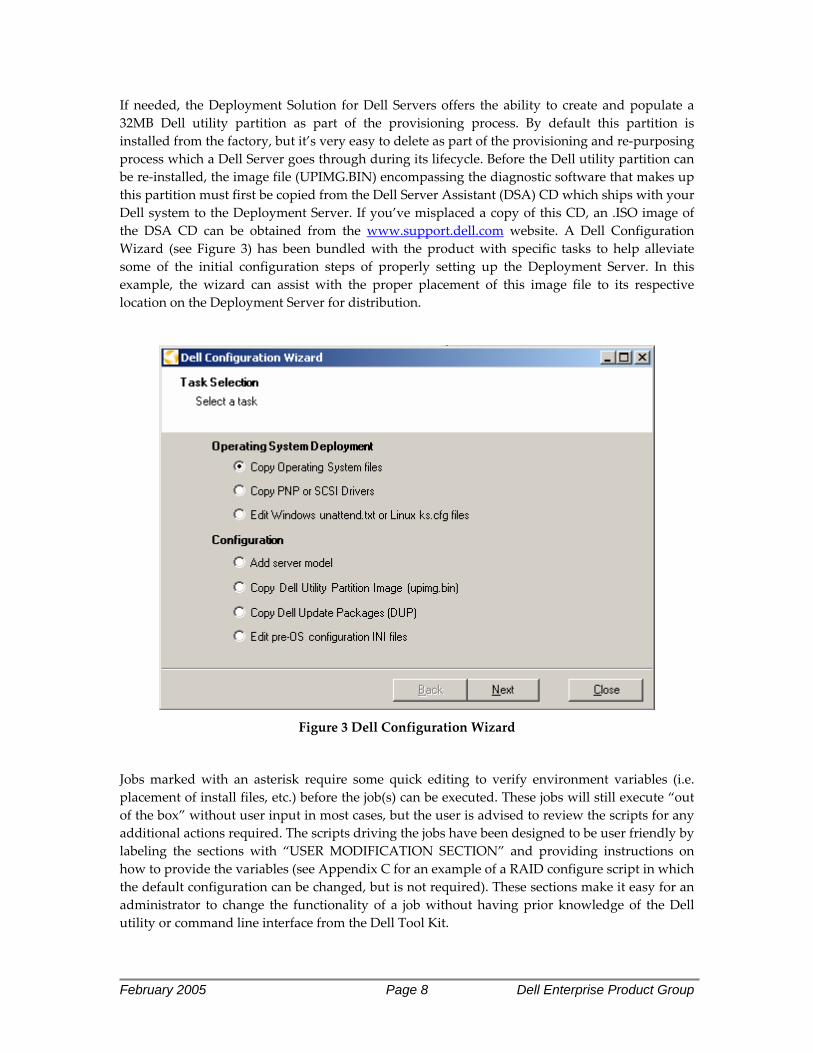
If needed, the Deployment Solution for Dell Servers offers the ability to create and populate a 32MB Dell utility partition as part of the provisioning process. By default this partition is installed from the factory, but it’s very easy to delete as part of the provisioning and re‐purposing process which a Dell Server goes through during its lifecycle. Before the Dell utility partition can be re‐installed, the image file (UPIMG.BIN) encompassing the diagnostic software that makes up this partition must first be copied from the Dell Server Assistant (DSA) CD which ships with your Dell system to the Deployment Server. If you’ve misplaced a copy of this CD, an .ISO image of the DSA CD can be obtained from the www.support.dell.com website. A Dell Configuration Wizard (see Figure 3) has been bundled with the product with specific tasks to help alleviate some of the initial configuration steps of properly setting up the Deployment Server. In this example, the wizard can assist with the proper placement of this image file to its respective location on the Deployment Server for distribution.
Figure 3 Dell Configuration Wizard
Jobs marked with an asterisk require some quick editing to verify environment variables (i.e. placement of install files, etc.) before the job(s) can be executed. These jobs will still execute “out of the box” without user input in most cases, but the user is advised to review the scripts for any additional actions required. The scripts driving the jobs have been designed to be user friendly by labeling the sections with “USER MODIFICATION SECTION” and providing instructions on how to provide the variables (see Appendix C for an example of a RAID configure script in which the default configuration can be changed, but is not required). These sections make it easy for an administrator to change the functionality of a job without having prior knowledge of the Dell utility or command line interface from the Dell Tool Kit.
February 2005 Page 9 Dell Enterprise Product Group
Another initial configuration step that needs to be completed is the copying of the Dell Update Packages (DUPs) that allow the hardware to be updated to the latest revisions as part of the provisioning process. This updating occurs as part of the post‐configuration process after the operating system has been deployed. The predefined jobs that allow the updating of the server components appear in the Post OS‐Deployment Jobs section of this product. The DUPs are designed to be self‐executing and run in either a Windows or Linux environment in which Deployment Solution for Dell Servers can deploy. The Dell Configuration Wizard can help with the placement of the DUPs to their respective locations on the Deployment Server in preparation for distribution once they have been downloaded from support.dell.com or copied from the Dell Server Update Utility (SUU) CD also obtained from support.dell.com.
The final configuration step required in regards to hardware provisioning is to capture the configuration information from the hardware components (BIOS, BMC, and DRAC) of each PowerEdge model to be deployed. This configuration information acts as a template file to be used for a one‐to‐many configuration of these components across the board as part of the provisioning process. Although not required, it is a best practice to manually configure each of these components using standard methods on the reference server and then run the predefined jobs from the Pre OS‐Deployment Jobs section (as listed in Figure 1) to capture the configurations as output files. An example of the output files generated from these components (captured from a PowerEdge 2800) can be referenced in Appendix B. In addition, the Dell Configuration Wizard can help with the editing of these configuration files (if necessary) before they are applied. It’s worthy to note that these configuration files can not be crossed with other non‐like PowerEdge models. This means that a BIOS configuration file captured from a PowerEdge 2800 can not be used to configure the BIOS for a PowerEdge 2650 for example. Also a DRAC configuration can not be captured from a Dell blade model of server (PE1855 or PE1655) because of the way the DRAC is embedded on the chassis and not the actual blade server itself.
From a performance perspective, a RAID 1+0 (10) configuration for all data disks will provide optimum I/O performance for an Oracle database. This RAID level requires a minimum of 4 disks to implement. Currently the Deployment Toolkit (DTK) v1.3 software only supports RAID 0, 1, and 5. It is possible however to use a third party vendor specific utility such as MEGARC.EXE from LSI Logic (if applicable to your type of PERC controller) to configure this level of RAID using Altiris Deployment Solution as a “Run Script” task. Some common best practices to implement this RAID 10 level on a one‐to‐many scale would involve configuring the reference server with the RAID 10 configuration, creating a Deployment Server job to run a script to execute the MEGARC.EXE utility to capture its configuration as an output file, and then using this output file as a template to configure the Oracle servers that require this specific RAID 10 level as a one‐to‐many configuration. This is essentially how Altiris Deployment Solution for Dell Servers provisions servers by capturing its configurations from the Dell server components (BIOS, BMC, and DRAC) as output files and then using them as template files to configure the components as explained earlier. For more information and to download the MEGARC.EXE utility mentioned above, browse to the downloads page of the www.lsilogic.com website.
If using the standard predefined “1.2.4 Configure RAID and Reboot” job as shown in Figure 1, the configuration of the RAID controller is handled a little differently than using the MEGARC.EXE utility. Rather than configuring from a template file, the RAID level is determined by the type of RAID controller and the number of drives in the system and is then dynamically configured. For example, a PowerEdge 1855 server typically has 2 drives ‐ so by default a RAID 1 level would be configured using the predefined job. If using a different model of PowerEdge that
February 2005 Page 10 Dell Enterprise Product Group
would typically accommodate 3 or more drives then a RAID 5 level configuration would be applied. This dynamic configuration can always be overridden using the RAIDCFG.EXE’s command line options from the DTK with the ability to input the desired RAID level into the user modification section of the user friendly script (as long as it’s supported by the DTK and the target server’s hardware). See Appendix C for an example of the RAID configure script. One of the powerful features of Deployment Server is the ability to execute DOS, Windows, or Linux scripts in a Pre‐OS or Post‐OS environment. This is the basis for how the Deployment Solution for Dell Servers product uses the underlying DTK software to provision Dell servers in a Pre‐OS environment by using this script execution functionality.
February 2005 Page 11 Dell Enterprise Product Group
Section 4 Software Deployment In addition to being able to deploy hardware with Deployment Solution for Dell Servers (as discussed in the previous section), the capability exists to deploy software as well. Any software that can be installed with a script or setup in an unattended fashion can be deployed with Altiris ‐ this includes operating systems and many applications.
With regard to operating system installs, the “OS Deployment Jobs” folder of the predefined Dell jobs allow for a scripted or image based install of Windows or Linux based operating systems. If deploying via image based, an embedded imaging engine called RapiDeploy is launched in a Pre‐OS environment to allow the capture and deployment of the image(s).
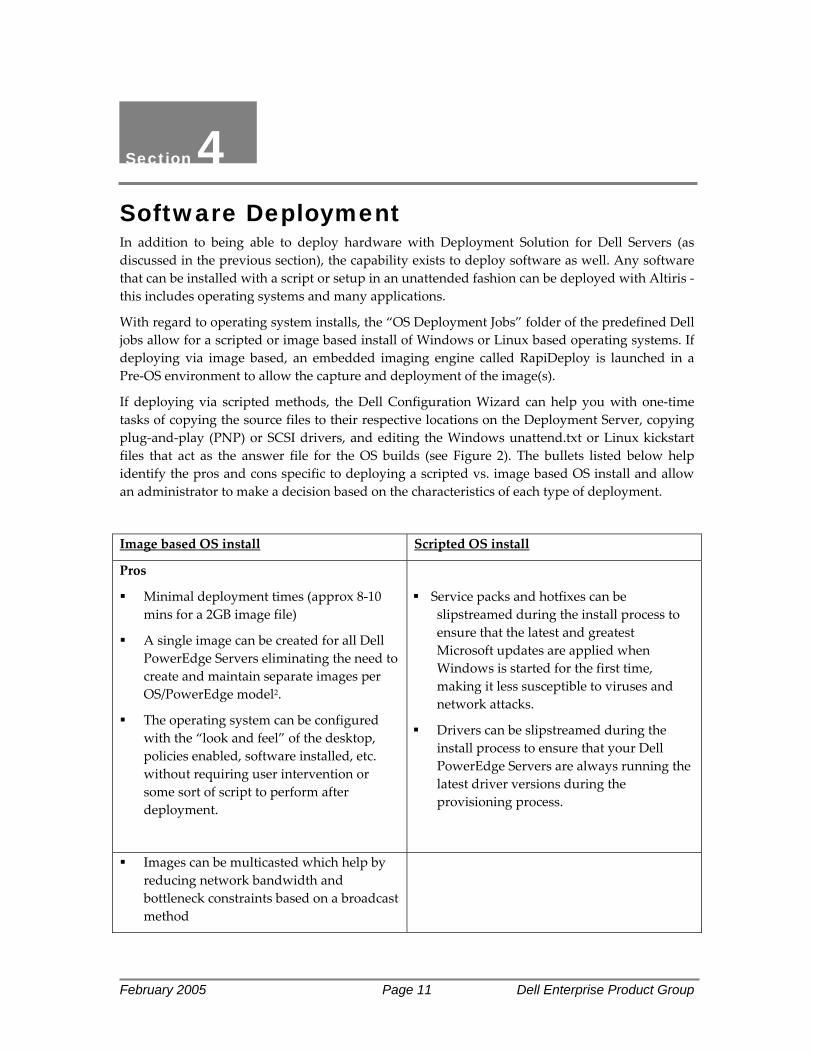
If deploying via scripted methods, the Dell Configuration Wizard can help you with one‐time tasks of copying the source files to their respective locations on the Deployment Server, copying plug‐and‐play (PNP) or SCSI drivers, and editing the Windows unattend.txt or Linux kickstart files that act as the answer file for the OS builds (see Figure 2). The bullets listed below help identify the pros and cons specific to deploying a scripted vs. image based OS install and allow an administrator to make a decision based on the characteristics of each type of deployment.
Image based OS install Scripted OS install
Pros
Minimal deployment times (approx 8‐10 mins for a 2GB image file)
A single image can be created for all Dell PowerEdge Servers eliminating the need to create and maintain separate images per OS/PowerEdge model2.
The operating system can be configured with the “look and feel” of the desktop, policies enabled, software installed, etc. without requiring user intervention or some sort of script to perform after deployment.
Service packs and hotfixes can be slipstreamed during the install process to ensure that the latest and greatest Microsoft updates are applied when Windows is started for the first time, making it less susceptible to viruses and network attacks.
Drivers can be slipstreamed during the install process to ensure that your Dell PowerEdge Servers are always running the latest driver versions during the provisioning process.
Images can be multicasted which help by reducing network bandwidth and bottleneck constraints based on a broadcast method
February 2005 Page 12 Dell Enterprise Product Group
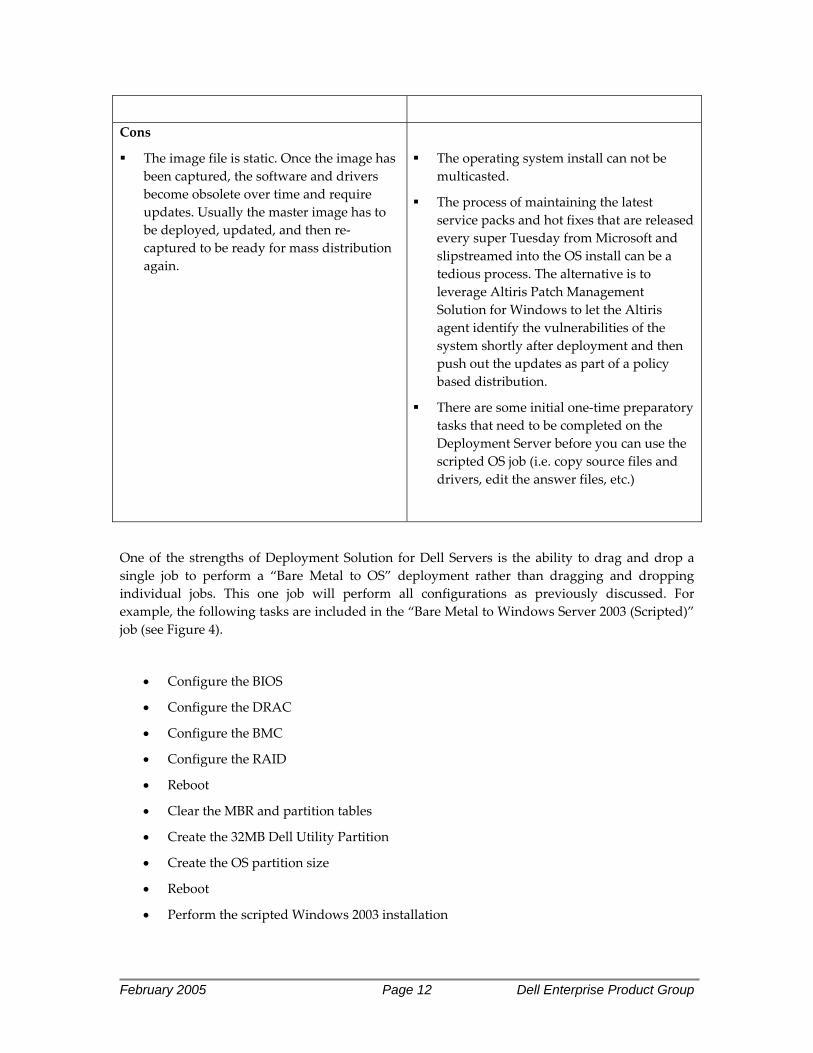
Cons
The image file is static. Once the image has been captured, the software and drivers become obsolete over time and require updates. Usually the master image has to be deployed, updated, and then re‐captured to be ready for mass distribution again.
The operating system install can not be multicasted.
The process of maintaining the latest service packs and hot fixes that are released every super Tuesday from Microsoft and slipstreamed into the OS install can be a tedious process. The alternative is to leverage Altiris Patch Management Solution for Windows to let the Altiris agent identify the vulnerabilities of the system shortly after deployment and then push out the updates as part of a policy based distribution.
There are some initial one‐time preparatory tasks that need to be completed on the Deployment Server before you can use the scripted OS job (i.e. copy source files and drivers, edit the answer files, etc.)
One of the strengths of Deployment Solution for Dell Servers is the ability to drag and drop a single job to perform a “Bare Metal to OS” deployment rather than dragging and dropping individual jobs. This one job will perform all configurations as previously discussed. For example, the following tasks are included in the “Bare Metal to Windows Server 2003 (Scripted)” job (see Figure 4).
• Configure the BIOS
• Configure the DRAC
• Configure the BMC
• Configure the RAID
• Reboot
• Clear the MBR and partition tables
• Create the 32MB Dell Utility Partition
• Create the OS partition size
• Reboot
• Perform the scripted Windows 2003 installation
February 2005 Page 13 Dell Enterprise Product Group
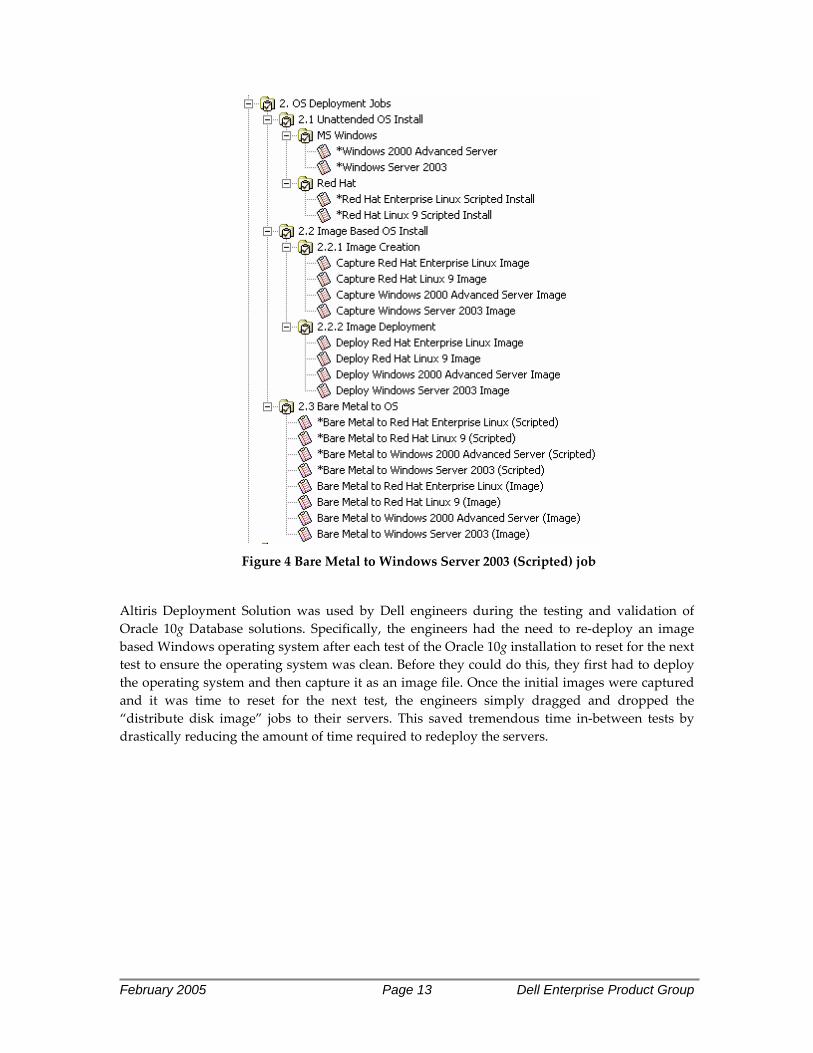
Figure 4 Bare Metal to Windows Server 2003 (Scripted) job
Altiris Deployment Solution was used by Dell engineers during the testing and validation of Oracle 10g Database solutions. Specifically, the engineers had the need to re‐deploy an image based Windows operating system after each test of the Oracle 10g installation to reset for the next test to ensure the operating system was clean. Before they could do this, they first had to deploy the operating system and then capture it as an image file. Once the initial images were captured and it was time to reset for the next test, the engineers simply dragged and dropped the “distribute disk image” jobs to their servers. This saved tremendous time in‐between tests by drastically reducing the amount of time required to redeploy the servers.
February 2005 Page 14 Dell Enterprise Product Group
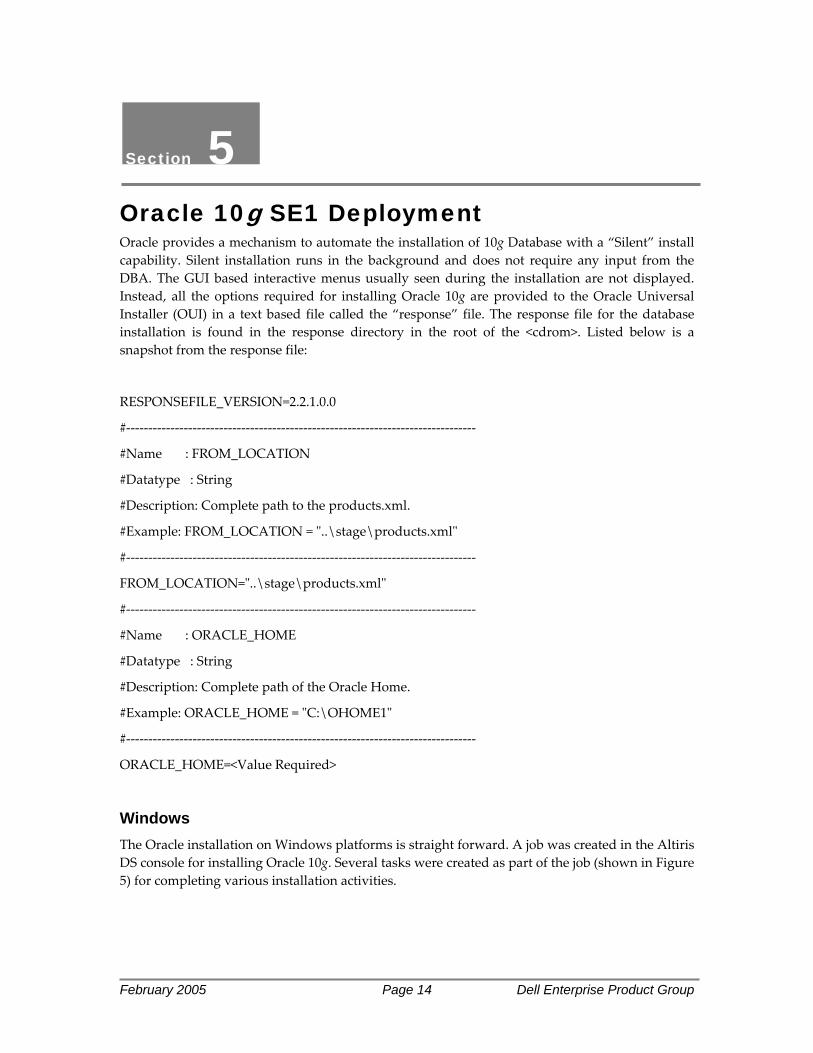
Section 5 Oracle 10g SE1 Deployment Oracle provides a mechanism to automate the installation of 10g Database with a “Silent” install capability. Silent installation runs in the background and does not require any input from the DBA. The GUI based interactive menus usually seen during the installation are not displayed. Instead, all the options required for installing Oracle 10g are provided to the Oracle Universal Installer (OUI) in a text based file called the “response” file. The response file for the database installation is found in the response directory in the root of the <cdrom>. Listed below is a snapshot from the response file:
RESPONSEFILE_VERSION=2.2.1.0.0
#‐‐‐‐‐‐‐‐‐‐‐‐‐‐‐‐‐‐‐‐‐‐‐‐‐‐‐‐‐‐‐‐‐‐‐‐‐‐‐‐‐‐‐‐‐‐‐‐‐‐‐‐‐‐‐‐‐‐‐‐‐‐‐‐‐‐‐‐‐‐‐‐‐‐‐‐‐‐‐
#Name : FROM_LOCATION
#Datatype : String
#Description: Complete path to the products.xml.
#Example: FROM_LOCATION = ʺ..\stage\products.xmlʺ
#‐‐‐‐‐‐‐‐‐‐‐‐‐‐‐‐‐‐‐‐‐‐‐‐‐‐‐‐‐‐‐‐‐‐‐‐‐‐‐‐‐‐‐‐‐‐‐‐‐‐‐‐‐‐‐‐‐‐‐‐‐‐‐‐‐‐‐‐‐‐‐‐‐‐‐‐‐‐‐
FROM_LOCATION=ʺ..\stage\products.xmlʺ
#‐‐‐‐‐‐‐‐‐‐‐‐‐‐‐‐‐‐‐‐‐‐‐‐‐‐‐‐‐‐‐‐‐‐‐‐‐‐‐‐‐‐‐‐‐‐‐‐‐‐‐‐‐‐‐‐‐‐‐‐‐‐‐‐‐‐‐‐‐‐‐‐‐‐‐‐‐‐‐
#Name : ORACLE_HOME
#Datatype : String
#Description: Complete path of the Oracle Home.
#Example: ORACLE_HOME = ʺC:\OHOME1ʺ
#‐‐‐‐‐‐‐‐‐‐‐‐‐‐‐‐‐‐‐‐‐‐‐‐‐‐‐‐‐‐‐‐‐‐‐‐‐‐‐‐‐‐‐‐‐‐‐‐‐‐‐‐‐‐‐‐‐‐‐‐‐‐‐‐‐‐‐‐‐‐‐‐‐‐‐‐‐‐‐
ORACLE_HOME=<Value Required>
Windows The Oracle installation on Windows platforms is straight forward. A job was created in the Altiris DS console for installing Oracle 10g. Several tasks were created as part of the job (shown in Figure 5) for completing various installation activities.
February 2005 Page 15 Dell Enterprise Product Group
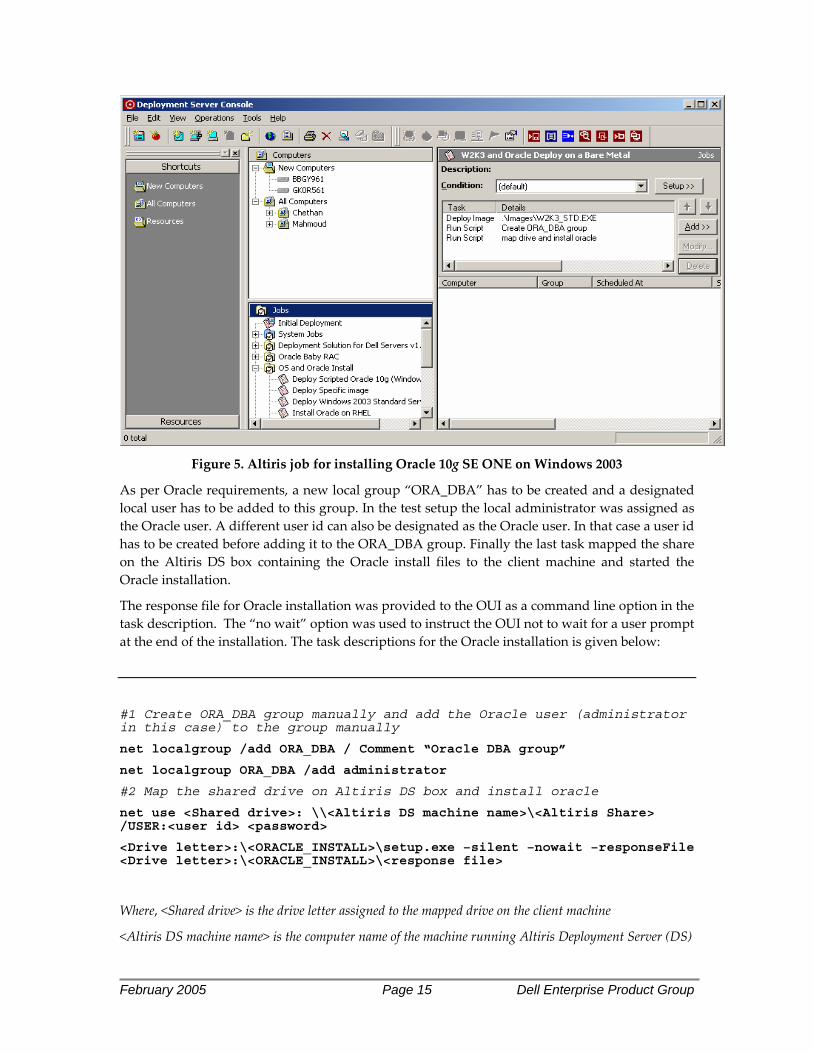
Figure 5. Altiris job for installing Oracle 10g SE ONE on Windows 2003
As per Oracle requirements, a new local group “ORA_DBA” has to be created and a designated local user has to be added to this group. In the test setup the local administrator was assigned as the Oracle user. A different user id can also be designated as the Oracle user. In that case a user id has to be created before adding it to the ORA_DBA group. Finally the last task mapped the share on the Altiris DS box containing the Oracle install files to the client machine and started the Oracle installation.
The response file for Oracle installation was provided to the OUI as a command line option in the task description. The “no wait” option was used to instruct the OUI not to wait for a user prompt at the end of the installation. The task descriptions for the Oracle installation is given below:
#1 Create ORA_DBA group manually and add the Oracle user (administrator in this case) to the group manually
net localgroup /add ORA_DBA / Comment “Oracle DBA group”
net localgroup ORA_DBA /add administrator
#2 Map the shared drive on Altiris DS box and install oracle
net use <Shared drive>: \\<Altiris DS machine name>\<Altiris Share> /USER:<user id> <password>
<Drive letter>:\<ORACLE_INSTALL>\setup.exe –silent –nowait –responseFile <Drive letter>:\<ORACLE_INSTALL>\<response file>
Where, <Shared drive> is the drive letter assigned to the mapped drive on the client machine
<Altiris DS machine name> is the computer name of the machine running Altiris Deployment Server (DS)
February 2005 Page 16 Dell Enterprise Product Group
<Altiris share> is the share on the Altiris DS containing the Oracle install files.
<User id> is the id of the user in the Altiris DS box that has access privileges to shared drive and <password> is the password for that user id.
<ORACLE_INSTALL> is the folder containing the Oracle install files
Linux Oracle 10g Database installation tasks on a Linux platform are grouped into pre‐installation, Oracle installation, and post‐installation categories. The pre‐installation tasks include the creation of an “Oracle” user and “oinstall, dba” groups, creation of directories for Oracle binaries, and setting proper permissions for the directories. As part of the pre‐installation steps, Oracle also recommends setting shell limits and configuring certain kernel parameters. For more information on pre‐installation activities, refer to Oracle 10g documentation. For the purpose of this paper separate python scripts for completing the Oracle recommended pre‐installation tasks were written.
A job was created in the Altiris Deployment Server console for installing Oracle (shown in figure. 6). As a part of this job, several tasks were created for the purpose of mapping the shared drive containing the Oracle install files on the Deployment Server, running the scripts for completing pre‐installation activities, installing Oracle, and completing the post‐installation tasks. Deployment Server starts the job on the client machine as soon as the job is scheduled in the console. The first task creates a folder to be used as a mount point for sharing the folder containing the Oracle install files on the Deployment Server. It then mounts the shared drive on the Deployment Server to the client machine and executes the “users.py” and “kernel.py” scripts to complete pre‐installation tasks. Refer to Appendix A for more details on these scripts.
#1 Create a mount point for the shared drive on the Altiris DS machine
mkdir /mnt/Altiris
#2 Mount the shared drive on the client machine
mount –t smbfs //<Altiris DS machine>/<shared folder> /mnt/Altiris -o username=<user id>,password=<password>
#3 Change the current path to the folder containing the scripts for implementing pre-installation tasks
cd /mnt/Altiris/<folder containing pre_install_scripts>
#4 Run the scripts
./users.py
./kernel_config.py

February 2005 Page 17 Dell Enterprise Product Group
Figure 6. Altiris job for installing Oracle 10g SE ONE on RHEL
After completing the pre‐installation tasks, Deployment Server starts the Oracle installation in a silent install mode. Please note that the Oracle installer has to be executed as an oracle user. A response file containing all the configuration parameters was provided to the OUI by specifying it in the task description (given below).
#1 Run Oracle installer
su – oracle “-c /mnt/Altiris/<ORACLE_INSTALL>/runInstaller – silent –waitforcompletion –responseFile <response file>
After the Oracle database installation is complete, OUI requires the user to execute the “root.sh” script as a root user. This script starts all CRS services in a consistent manner. The root.sh script prompts the users to input the path for the bin folder. For the purpose of an automated installation through Altiris, a customized “root.sh” script was written which accepts the default path for the bin (/usr/local/bin/) without prompting the user for the path. The post‐Oracle‐installation task created in the Deployment Server console backed up the original root.sh script and renamed it as “root_promptuser.sh”. It then copied the modified root.sh script to the ORACLE_RDBMS_HOME directory. Finally, it executed the customized “root.sh” script to start the CRS services.
#1 Change the path to the folder containing Oracle database files (e.g., /opt/oracle/product/10.1.0/db_1 if the default path is used for sinstallation)
cd /<ORACLE_RDBMS_HOME>/
#2 Rename the original root.sh script

February 2005 Page 18 Dell Enterprise Product Group
mv root.sh root_promptuser.sh
#3 Copy the customized root.sh script to the ORACLE_RDBMS_HOME folder
cp /mnt/Altiris/<folder containing the scripts implementing Oracle post installation tasks>/root.sh
#4 Execute the customized root.sh script
./root.sh
The next step in installing Oracle 10g Database is configuring listeners and creating databases. In addition to 10g database software installation, Oracle also provides response files for configuring listeners (through the netca wizard) and creating the database (through the dbca wizard). They are found in the response folder in the root of the <cd‐rom> (same folder which has the response file for the database software installation). These response files have to be edited with the appropriate configuration parameters and used with the netca and dbca utilities in a “silent install” mode. For this paper, even though the netca and dbca utilities were not tested with Altiris Deployment Solution in silent install mode, it should be possible to create separate tasks in the Altiris Deployment Server console to run netca and dbca in a silent mode by providing the corresponding response files for configuring listeners and creating databases.
By scheduling the various jobs explained in the previous sections for deploying the hardware, installing the OS, and installing Oracle 10g Database in the Altiris Deployment Server console; a Dell PowerEdge Server can be configured to run Oracle 10g Database services from a bare metal state. All the jobs are scheduled to run in an appropriate sequence without needing any manual intervention. Altiris Deployment Solution enables the automation of all the tasks required to set up the database server thus saving valuable time for the Database Administrators.
February 2005 Page 19 Dell Enterprise Product Group
Section 6 Conclusions The integrated server deployment process described in this article, tested jointly by Dell and Altiris, verifies that the Altiris Deployment Solution framework can effectively support the Oracle database installation process, thus providing customers with a single, simple, cost‐effective solution to deploy Oracle database solutions on Dell PowerEdge servers. By automating the server build and database deployment process, Altiris Deployment Solution streamlines the installation and configuration of Oracle 10g Database on Dell servers – helping to significantly reduce the set‐up time and enabling the administrators to do more important business critical tasks.
For your convenience and use, the scripted Oracle 10g Database jobs created as a result of the testing and validation of this paper are provided as predefined sample jobs in the Deployment Server 6.5 product available for download at http://www.altiris.com/eval/dell .
THIS WHITE PAPER IS FOR INFORMATIONAL PURPOSES ONLY, AND MAY CONTAIN TYPOGRAPHICAL ERRORS AND TECHNICAL INACCURACIES. THE CONTENT IS PROVIDED AS IS, WITHOUT EXPRESS OR IMPLIED WARRANTIES OF ANY KIND. 1 For more information click on “Oracle Database Standard Edition One” under Microsoft Windows 2003 SP1 in http://www.dell.com/10g.
2 For more information refer to the article titled “Building a Single Image for Dell PowerEdge Servers” located online at www.altiris.com/dell.
Dell and PowerEdge are trademarks of Dell Inc. EMC, Navisphere and PowerPath are registered trademarks and Access Logix is a trademark of EMC Corp. Intel and Xeon are registered trademark of Intel Corp. Red Hat is a registered trademark of Red Hat Inc. Linux is a registered trademark of Linus Torvalds. Microsoft and Windows are registered trademarks of Microsoft Corporation. Other trademarks and trade names may be used in this document to refer to either the entities claiming the marks and names or their products. Dell disclaims proprietary interest in the marks and names of others.
©Copyright 2005 Dell Inc. All rights reserved. Reproduction in any manner whatsoever without the express written permission of Dell Inc. is strictly forbidden. For more information, contact Dell.
Information in this document is subject to change without notice.

February 2005 Page 20 Dell Enterprise Product Group
Section 8 Acknowledgements The authors would like to thank Shawn Kelley and Matt Bush for the Oracle scripts and response files and Todd Muirhead for the valuable discussions and feedback on this article.
February 2005 Page 21 Dell Enterprise Product Group
Appendices
Appendix A Python scripts for completing the Oracle recommended pre-installation tasks 1. Script to create “oracle” users and groups #!/bin/env python # FILE: users.py # DESC: create the required oracle users and groups import os import sys from OraCommon import * ### # bash_profile locations ### ROOT_PROFILE = '/root/.bash_profile' ORA_PROFILE = '/home/oracle/.bash_profile' ### # Oracle directories ### ORACLE_BASE = '/opt/oracle/' ORACLE_INV = '/opt/oracle/oraInventory' ORACLE_HOME = '/opt/oracle/product/10.1.0/db_1' ORACLE_DATABASE = '/opt/oracle/product/10.1.0/oradata' ORACLE_FLASH = '/opt/oracle/product/10.1.0/flash_recovery_area' CRS_HOME = '/opt/oracle/product/10.1.0/crs_1' ORA_INST = '/etc/oraInst.loc' ### # backup dir for original copies ### BACKUP_DIR = '/tmp/ora_backups/' ORA_PROFILE_BACKUP='/tmp/ora_backups/ora_bash_profile' ROOT_PROFILE_BACKUP='/tmp/ora_backups/root_bash_profile' ### # Required Users and Groups ### # user OSUSER = 'oracle' # os user with dba privs ROOT = 'root' # root user # groups OSDBA = 'dba' # os user group
February 2005 Page 22 Dell Enterprise Product Group
OINV = 'oinstall' # oracle inventory group # GIDs :: UIDs OSDBA_GID = '500' OINV_GID = '501' OSUSER_GID = '500' ### # methods ### def create_groups(): os.system("groupadd -g" + OSDBA_GID + " " + OSDBA) os.system("groupadd -g" + OINV_GID + " " + OINV) def create_user(): os.system("adduser -u " + OSUSER_GID + " -g " + OINV_GID + " -G " + OSDBA_GID + " " + OSUSER) os.system("passwd -d " + OSUSER) def oraInst(): if ORA_INST != None: backupCopy(ORA_INST,BACKUP_DIR) f = open(ORA_INST, 'w+') text = """inventory_loc=/opt/oracle/oraInventory inst_group=oinstall """ f.write(text) f.close() def oraDirs(): os.system("/bin/mkdir -p " + ORACLE_BASE) os.system("/bin/mkdir -p " + ORACLE_INV) os.system("/bin/mkdir -p " + ORACLE_HOME) os.system("/bin/mkdir -p " + ORACLE_DATABASE) os.system("/bin/mkdir -p " + ORACLE_FLASH) os.system("/bin/mkdir -p " + BACKUP_DIR) os.system("/bin/mkdir -p " + CRS_HOME) # set the proper ownership values os.system("/bin/chown -R " + OSUSER + "." + OINV + " " + ORACLE_BASE) # set the appropriate dir mode os.system("/bin/chmod -R 775 " + ORACLE_BASE) os.system("/bin/chmod -R 775 " + ORACLE_DATABASE) os.system("/bin/chmod -R 775 " + ORACLE_FLASH) os.system("/bin/chmod -R 775 " + CRS_HOME) def profileSettings(): backupCopy(ROOT_PROFILE,ROOT_PROFILE_BACKUP) backupCopy(ORA_PROFILE,ORA_PROFILE_BACKUP) root_profile = open(ROOT_PROFILE, 'a+') ora_profile = open(ORA_PROFILE, 'a+')

February 2005 Page 23 Dell Enterprise Product Group
# update root's profile root_update = ('\n# Oracle specific environment' + '\nexport ORACLE_BASE=' + ORACLE_BASE + '\nexport ORACLE_HOME=' + ORACLE_HOME + '\nexport ORA_CRS_HOME=' + CRS_HOME + '\nexport PATH=$PATH:$ORA_CRS_HOME/bin\n') root_profile.write(root_update) root_profile.close() # update oracle's profile ora_update = ('\n# Oracle specific environment' + '\nexport ORACLE_BASE=' + ORACLE_BASE + '\nexport ORACLE_HOME=' + ORACLE_HOME + '\nexport ORA_CRS_HOME=' + CRS_HOME + '\nexport LD_LIBRARY_PATH=$ORACLE_HOME/lib:/lib:/usr/lib' + '\nexport PATH=$PATH:$ORACLE_HOME/bin:$ORA_CRS_HOME/bin') ora_profile.write(ora_update) ora_profile.close() ### # main ### create_groups() create_user() oraInst() oraDirs() profileSettings() sys.exit()
February 2005 Page 24 Dell Enterprise Product Group
2. Script to configure kernel parameters #!/usr/bin/env python # FILE: kernel_config.py # DESC: set the appropriate kernel parameters prior to the oracle
install import os import sys from OraCommon import * SYSCTL_CONF = '/etc/sysctl.conf' LIMITS_CONF = '/etc/security/limits.conf' PAMD_LOGIN = '/etc/pam.d/login' ULIMIT = '/etc/profile' BACKUP_DIR = '/tmp/ora_backups' ### ## Kernel parameters to be appended to /etc/sysctl ## ### ## # /proc/sys/kernel/ values ## SEMMSL = '250' SEMMNS = '32000' SEMOPM = '100' SEMMNI = '128' SHMMAX = '2104721408' SHMMNI = '4096' SHMALL = '2097152' ### # /proc/sys/fs ### FILE_MAX = '65536' ### # /proc/sys/net/ipv4 ### IP_LOCAL_PORT_RANGE = '1024 65000' ### # /proc/sys/net/core ### RMEM_DEFAULT = '262144' RMEM_MAX = '262144' WMEM_DEFAULT = '262144' WMEM_MAX = '262144' ### # methods ### def updateKernel(): backupCopy(SYSCTL_CONF, BACKUP_DIR) f = open(SYSCTL_CONF, "a")
February 2005 Page 25 Dell Enterprise Product Group
update_info = ('\n# oracle kernel parameters' + '\nkernel.shmall = ' + SHMALL + '\nkernel.shmmax = ' + SHMMAX + '\nkernel.shmmni = ' + SHMMNI + '\nkernel.sem = ' + SEMMSL + " " + SEMMNS + " " + SEMOPM + " " + SEMMNI + '\nfs.file-max = ' + FILE_MAX + '\nnet.ipv4.ip_local_port_range = ' + IP_LOCAL_PORT_RANGE + '\n') f.write(update_info) f.close() os.system('/sbin/sysctl -p > /tmp/sysctl.out') def setLimits(): backupCopy(LIMITS_CONF, BACKUP_DIR) f = open(LIMITS_CONF, "a") limits = """# Oracle Shell Limits oracle soft nproc 2047 oracle hard nproc 16384 oracle soft nofile 1024 oracle hard nofile 65536 """ f.write(limits) f.close() def pamdLogin(): backupCopy(PAMD_LOGIN,BACKUP_DIR) f = open(PAMD_LOGIN, "a") session = 'session required /lib/security/pam_limits.so\n' f.write(session) f.close() def profileUlimit(): backupCopy(ULIMIT,BACKUP_DIR) f = open(ULIMIT, "a") ulimit = """ # Oracle ulimit settings if [ $USER = "oracle" ]; then if [ $SHELL = "/bin/ksh" ]; then ulimit -p 16384 ulimit -n 65536 else ulimit -u 16384 -n 65536 fi fi """ f.write(ulimit) f.close() ### # main ### updateKernel() setLimits()
February 2005 Page 26 Dell Enterprise Product Group
pamdLogin() profileUlimit() sys.exit() 3. Script to backup files #!/usr/bin/env python # FILE: OraCommon.py # DESC: common methods for making a backup of existing files import os ### # backupCopy(): place a copy of the original file in /tmp/ora_backups ### def backupCopy(src,dest): os.system('cp ' + src + " " + dest)
February 2005 Page 27 Dell Enterprise Product Group
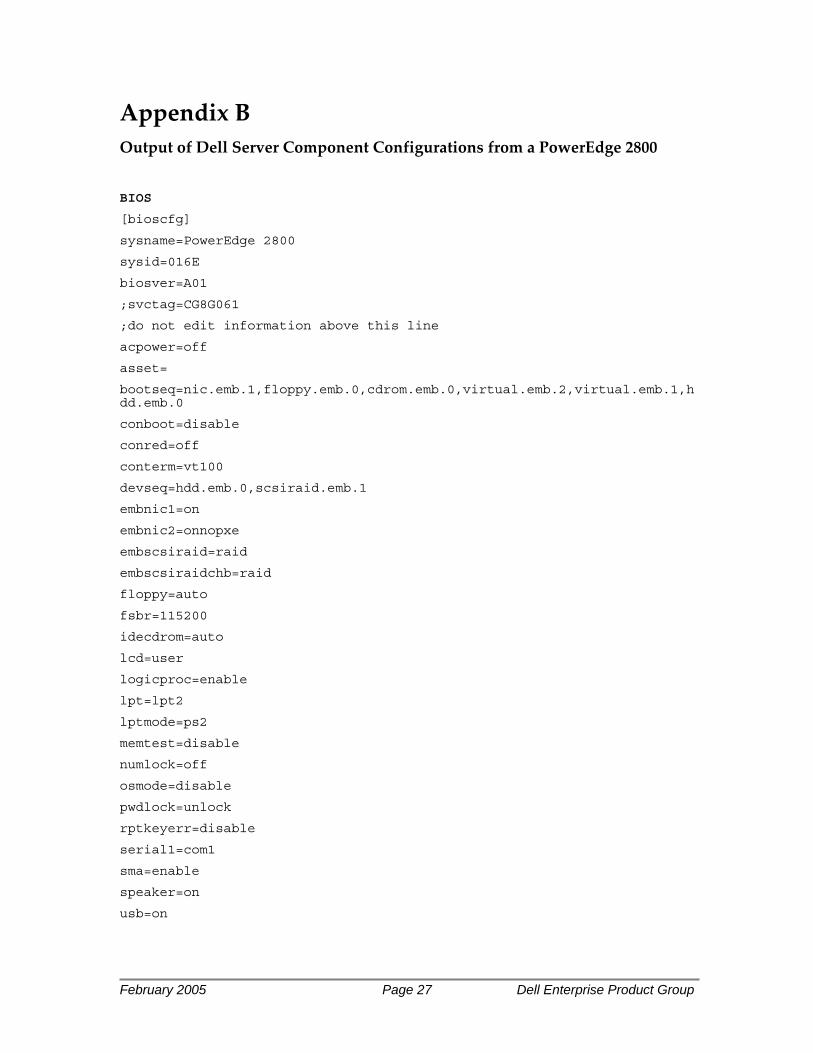
Appendix B Output of Dell Server Component Configurations from a PowerEdge 2800
BIOS
[bioscfg]
sysname=PowerEdge 2800
sysid=016E
biosver=A01
;svctag=CG8G061
;do not edit information above this line
acpower=off
asset=
bootseq=nic.emb.1,floppy.emb.0,cdrom.emb.0,virtual.emb.2,virtual.emb.1,hdd.emb.0
conboot=disable
conred=off
conterm=vt100
devseq=hdd.emb.0,scsiraid.emb.1
embnic1=on
embnic2=onnopxe
embscsiraid=raid
embscsiraidchb=raid
floppy=auto
fsbr=115200
idecdrom=auto
lcd=user
logicproc=enable
lpt=lpt2
lptmode=ps2
memtest=disable
numlock=off
osmode=disable
pwdlock=unlock
rptkeyerr=disable
serial1=com1
sma=enable
speaker=on
usb=on
February 2005 Page 28 Dell Enterprise Product Group
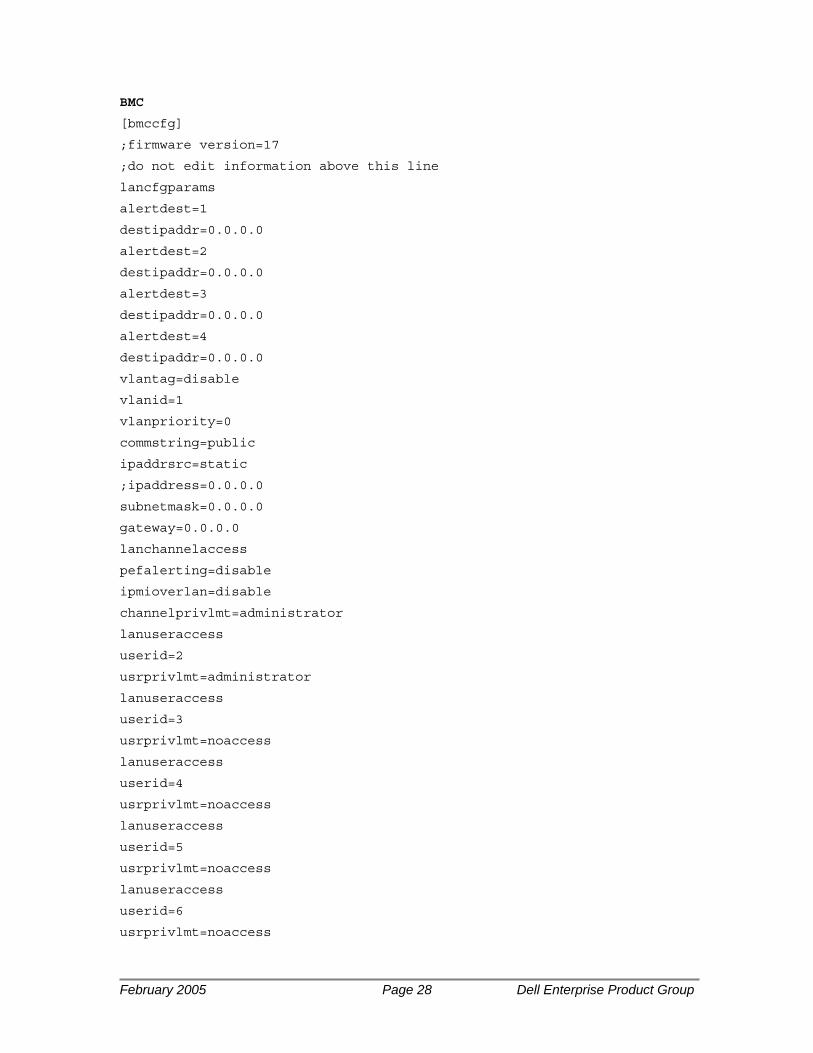
BMC
[bmccfg]
;firmware version=17
;do not edit information above this line
lancfgparams
alertdest=1
destipaddr=0.0.0.0
alertdest=2
destipaddr=0.0.0.0
alertdest=3
destipaddr=0.0.0.0
alertdest=4
destipaddr=0.0.0.0
vlantag=disable
vlanid=1
vlanpriority=0
commstring=public
ipaddrsrc=static
;ipaddress=0.0.0.0
subnetmask=0.0.0.0
gateway=0.0.0.0
lanchannelaccess
pefalerting=disable
ipmioverlan=disable
channelprivlmt=administrator
lanuseraccess
userid=2
usrprivlmt=administrator
lanuseraccess
userid=3
usrprivlmt=noaccess
lanuseraccess
userid=4
usrprivlmt=noaccess
lanuseraccess
userid=5
usrprivlmt=noaccess
lanuseraccess
userid=6
usrprivlmt=noaccess
February 2005 Page 29 Dell Enterprise Product Group
lanuseraccess
userid=7
usrprivlmt=noaccess
lanuseraccess
userid=8
usrprivlmt=noaccess
lanuseraccess
userid=9
usrprivlmt=noaccess
lanuseraccess
userid=10
usrprivlmt=noaccess
nmibutton=enable
pefcfgparams
alertpolnum=1
alertpolstatus=enable
pefcfgparams
alertpolnum=2
alertpolstatus=enable
pefcfgparams
alertpolnum=3
alertpolstatus=enable
pefcfgparams
alertpolnum=4
alertpolstatus=enable
pefcfgparams
filter=fanfail
filteralert=enable
filteraction=none
pefcfgparams
filter=voltfail
filteralert=enable
filteraction=none
pefcfgparams
filter=discretevoltfail
filteralert=enable
filteraction=none
pefcfgparams
filter=tempwarn
filteralert=enable
February 2005 Page 30 Dell Enterprise Product Group
filteraction=none
pefcfgparams
filter=tempfail
filteralert=enable
filteraction=none
pefcfgparams
filter=intrusion
filteralert=enable
filteraction=none
pefcfgparams
filter=redundegraded
filteralert=enable
filteraction=none
pefcfgparams
filter=redunlost
filteralert=enable
filteraction=none
pefcfgparams
filter=procwarn
filteralert=enable
filteraction=none
pefcfgparams
filter=procfail
filteralert=enable
filteraction=none
pefcfgparams
filter=powerwarn
filteralert=enable
filteraction=none
pefcfgparams
filter=powerfail
filteralert=enable
filteraction=none
pefcfgparams
filter=hardwarelogfail
filteralert=enable
pefcfgparams
filter=autorecovery
filteralert=enable
pefcfgparams
February 2005 Page 31 Dell Enterprise Product Group
hostname=DELL-6RSPZYDFVP
powerbutton=enable
serialcfgparams
tmcfgdelctrl=bksp
tmcfgechoctrl=echo
tmcfghandshakectrl=enable
connectionmode=basic
tmcfgnewlineseq=crlf
msgcommflowctrl=rtscts
tmcfginputnewlineseq=cr
msgcommbitrate=19200
tmcfglineediting=enable
serialchannelaccess
ipmioverserial=alwaysavail
channelprivlmt=administrator
serialuseraccess
userid=2
usrprivlmt=administrator
serialuseraccess
userid=3
usrprivlmt=noaccess
serialuseraccess
userid=4
usrprivlmt=noaccess
serialuseraccess
userid=5
usrprivlmt=noaccess
serialuseraccess
userid=6
usrprivlmt=noaccess
serialuseraccess
userid=7
usrprivlmt=noaccess
serialuseraccess
userid=8
usrprivlmt=noaccess
serialuseraccess
userid=9
usrprivlmt=noaccess
serialuseraccess
February 2005 Page 32 Dell Enterprise Product Group
userid=10
usrprivlmt=noaccess
solcfgparams
solcharsendthreshold=220
solbitrate=19200
solenable=enable
solprivlevel=user
solcharaccuminterval=30
useraction
userid=2
action=enable
useraction
userid=3
action=disable
useraction
userid=4
action=disable
useraction
userid=5
action=disable
useraction
userid=6
action=disable
useraction
userid=7
action=disable
useraction
userid=8
action=disable
useraction
userid=9
action=disable
useraction
userid=10
action=disable
username
userid=2
name=root
username
userid=3
February 2005 Page 33 Dell Enterprise Product Group
name=NULL
username
userid=4
name=NULL
username
userid=5
name=NULL
username
userid=6
name=NULL
username
userid=7
name=NULL
username
userid=8
name=NULL
username
userid=9
name=NULL
username
userid=10
name=NULL
DRAC
[idRacInfo]
#idRacType=0x05
#idRacProductInfo=Dell Remote Access Controller 4/I
#idRacDescriptionInfo=This system component provides a complete set of remote management functions for Dell PowerEdge servers.
#idRacVersionInfo=1.0 (Build 07.26)
idRacName=DRAC 4/I
idRacMisc=
[cfgLanNetworking]
cfgNicEnable=1
cfgNicIpAddress=192.168.0.120
cfgNicNetmask=255.255.255.0
cfgNicGateway=192.168.0.1
cfgNicUseDhcp=0
#cfgNicMacAddress=00:11:43:37:45:40
cfgDNSServersFromDHCP=0
February 2005 Page 34 Dell Enterprise Product Group
cfgDNSServer1=192.168.0.5
cfgDNSServer2=192.168.0.6
[cfgCurrentLanNetworking]
#cfgNicCurrentIpAddress=192.168.0.120
#cfgNicCurrentNetmask=255.255.255.0
#cfgNicCurrentGateway=192.168.0.1
#cfgNicCurrentDhcpWasUsed=0
#cfgDNSCurrentDhcpWasUsed=0
#cfgDNSCurrentServer1=192.168.0.5
#cfgDNSCurrentServer2=192.168.0.6
[cfgRemoteHosts]
cfgRhostsSmtpEmailEnable=1
cfgRhostsFwUpdateTftpEnable=1
cfgRhostsSmtpServerIpAddr=127.0.0.1
cfgRhostsFwUpdateIpAddr=192.168.0.4
cfgRhostsFwUpdatePath=
[cfgUserAdmin]
#cfgUserAdminIndex=1
cfgUserAdminUserName=root
cfgUserAdminPrivilege=0
cfgUserAdminAlertFilterRacEventMask=0x300000
cfgUserAdminAlertFilterSysEventMask=0x77777
cfgUserAdminEmailEnable=0
cfgUserAdminEmailAddress=
cfgUserAdminEmailCustomMsg=
[cfgSessionManagement]
cfgSsnMgtMaxSessions=0x4
cfgSsnMgtMaxSessionsPerUser=0x4
[cfgSerial]
cfgSerialBaudRate=115200
cfgSerialConsoleEnable=0
cfgSerialConsoleQuitKey=<CR>~.
cfgSerialConsoleIdleTimeout=0x12c
cfgSerialConsoleShellType=0x2
cfgSerialConsoleNoAuth=0
February 2005 Page 35 Dell Enterprise Product Group
cfgSerialConsoleCommand=
cfgSerialTelnetEnable=0
cfgSerialCom2RedirEnable=1
cfgSerialTelnet7fIsBackspace=0
[cfgNetTuning]
cfgNetTuningNicMtu=0x5dc
cfgNetTuningIpTtl=0x40
cfgNetTuningTcpSrttBase=0x0
cfgNetTuningTcpSrttDflt=0x6
cfgNetTuningTcpReXmtMin=0x2
cfgNetTuningTcpReXmtMax=0x80
cfgNetTuningIpSubnetsAreLocal=0x1
cfgNetTuningIpReassTtl=0x3c
cfgNetTuningTcpMsl=0x3c
cfgNetTuningNicAutoneg=1
cfgNetTuningNic100MB=1
cfgNetTuningNicFullDuplex=1
[cfgOobSnmp]
cfgOobSnmpTrapsEnable=1
cfgOobSnmpAgentEnable=1
cfgOobSnmpAgentCommunity=public
[cfgRacTuning]
cfgRacTuneFwUpdateResetDelay=0x46
cfgRacTuneD3debugEnable=1
cfgRacTuneRemoteRacadmEnable=1
cfgRacTuneHostCom2BaudRate=57600
cfgRacTuneHttpPort=0x50
cfgRacTuneHttpsPort=0x1bb
cfgRacTuneTelnetPort=0x17
cfgRacTuneConRedirPort=0x170c
[ifcRacManagedNodeOs]
ifcRacMnOsHostname=DELL-6RSPZYDFVP
ifcRacMnOsOsName=Microsoft Windows 2003 version 5.2, Build Number 3790
ifcRacMnOsOsType=0x400
[cfgRacSecurity]
February 2005 Page 36 Dell Enterprise Product Group
cfgRacSecCsrKeySize=0x400
cfgRacSecCsrCommonName=
cfgRacSecCsrOrganizationName=
cfgRacSecCsrOrganizationUnit=
cfgRacSecCsrLocalityName=
cfgRacSecCsrStateName=
cfgRacSecCsrCountryCode=
cfgRacSecCsrEmailAddr=
[cfgRacVirtual]
cfgVirAtapiSvrPort=0xe54
[cfgActiveDirectory]
cfgADRacDomain=
cfgADRacName=
cfgADEnable=0
cfgADAuthTimeout=0x78
cfgADRootDomain=
February 2005 Page 37 Dell Enterprise Product Group
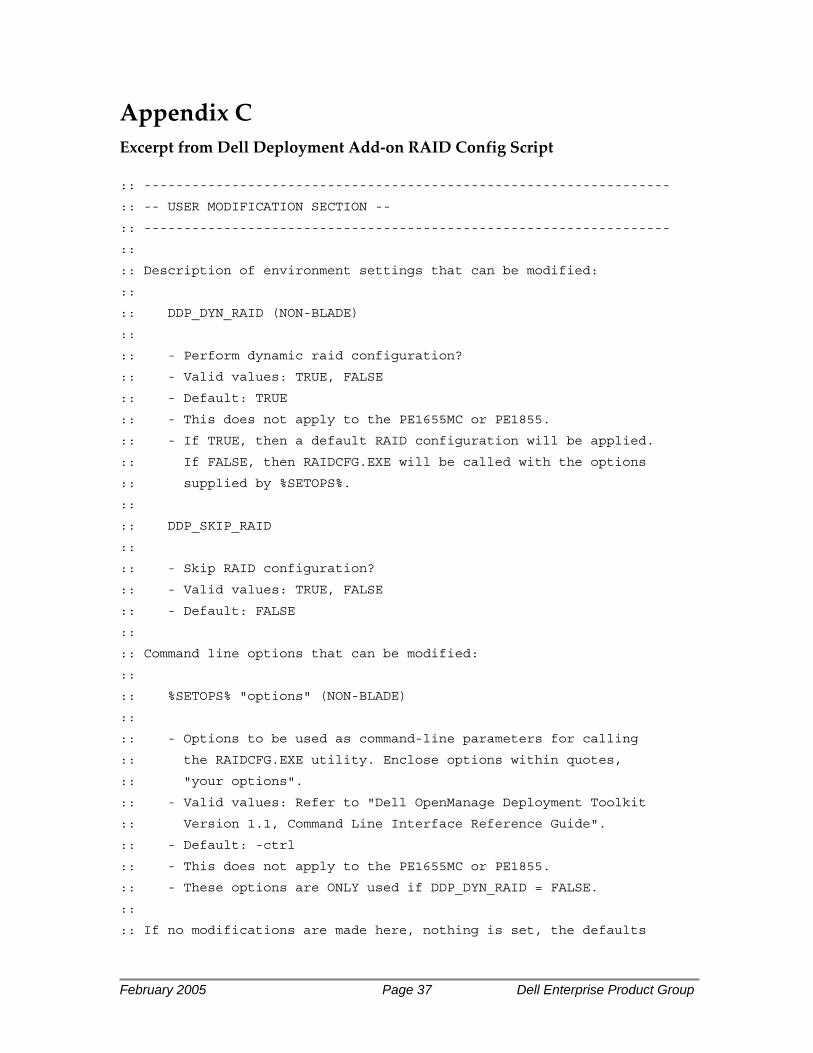
Appendix C Excerpt from Dell Deployment Add‐on RAID Config Script
:: ------------------------------------------------------------------
:: -- USER MODIFICATION SECTION --
:: ------------------------------------------------------------------
::
:: Description of environment settings that can be modified:
::
:: DDP_DYN_RAID (NON-BLADE)
::
:: - Perform dynamic raid configuration?
:: - Valid values: TRUE, FALSE
:: - Default: TRUE
:: - This does not apply to the PE1655MC or PE1855.
:: - If TRUE, then a default RAID configuration will be applied.
:: If FALSE, then RAIDCFG.EXE will be called with the options
:: supplied by %SETOPS%.
::
:: DDP_SKIP_RAID
::
:: - Skip RAID configuration?
:: - Valid values: TRUE, FALSE
:: - Default: FALSE
::
:: Command line options that can be modified:
::
:: %SETOPS% "options" (NON-BLADE)
::
:: - Options to be used as command-line parameters for calling
:: the RAIDCFG.EXE utility. Enclose options within quotes,
:: "your options".
:: - Valid values: Refer to "Dell OpenManage Deployment Toolkit
:: Version 1.1, Command Line Interface Reference Guide".
:: - Default: -ctrl
:: - This does not apply to the PE1655MC or PE1855.
:: - These options are ONLY used if DDP_DYN_RAID = FALSE.
::
:: If no modifications are made here, nothing is set, the defaults
February 2005 Page 38 Dell Enterprise Product Group
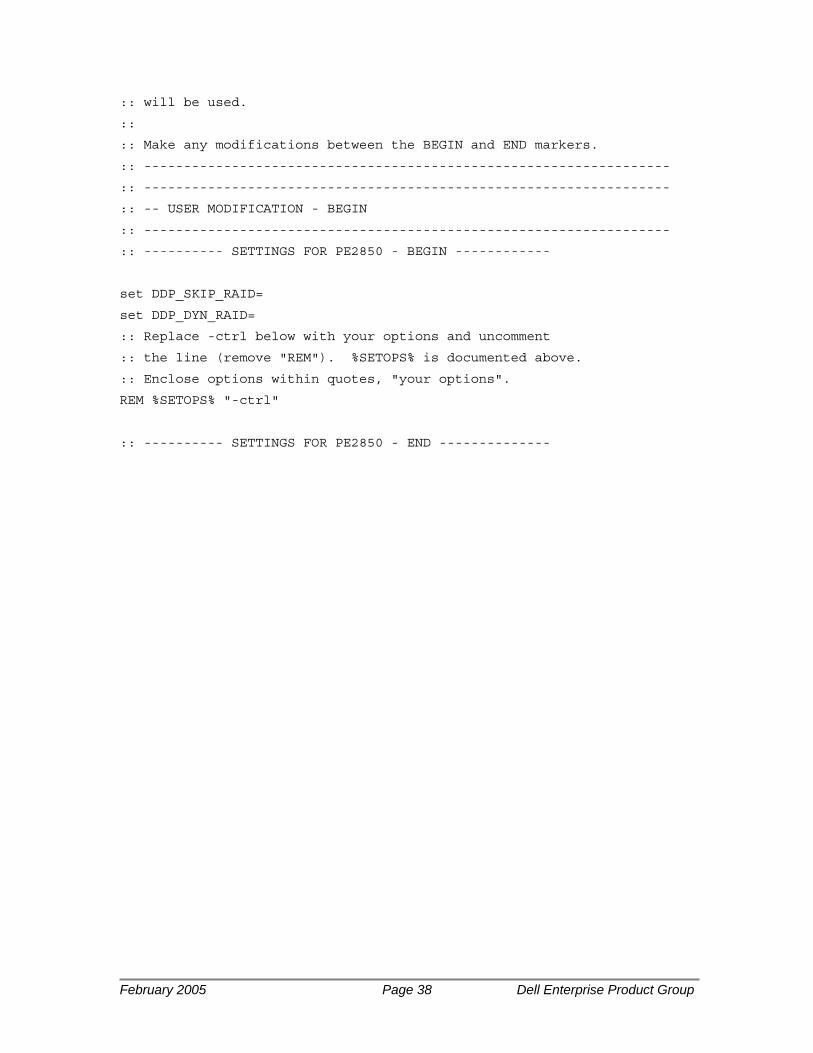
:: will be used.
::
:: Make any modifications between the BEGIN and END markers.
:: ------------------------------------------------------------------
:: ------------------------------------------------------------------
:: -- USER MODIFICATION - BEGIN
:: ------------------------------------------------------------------
:: ---------- SETTINGS FOR PE2850 - BEGIN ------------
set DDP_SKIP_RAID=
set DDP_DYN_RAID=
:: Replace -ctrl below with your options and uncomment
:: the line (remove "REM"). %SETOPS% is documented above.
:: Enclose options within quotes, "your options".
REM %SETOPS% "-ctrl"
:: ---------- SETTINGS FOR PE2850 - END --------------