espresso multi capsule machine - gourmia.com manual.pdf · 2.place the capsule espresso machine on...
TRANSCRIPT
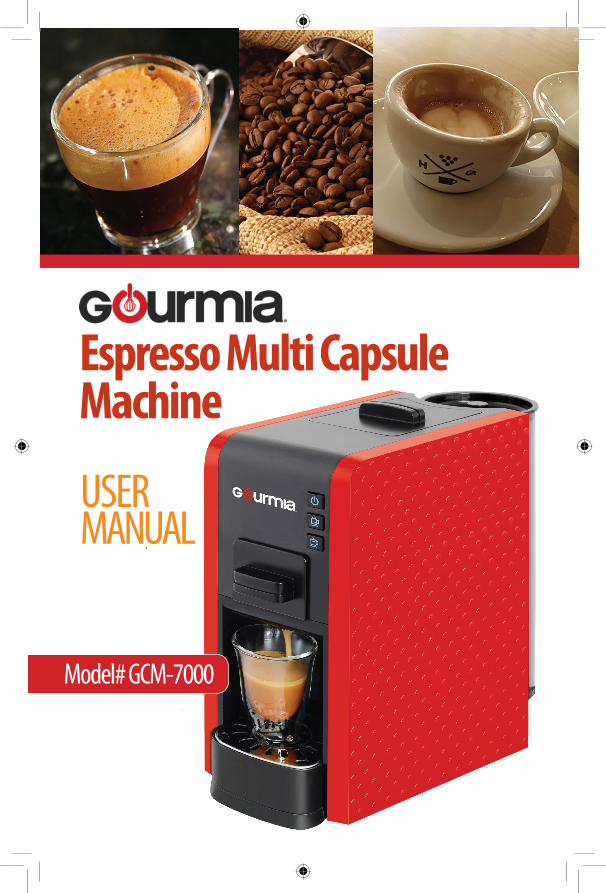
Model# GCM-7000
USER MANUAL
Espresso Multi Capsule Machine

Model: CG9129-GS
© 2016 Gourmiawww.gourmia.comThe Steelstone GroupBrooklyn, NY
All rights reserved. No portion of this manual may be reproduced by any means whatsoever without written permission from The Steelstone Group, except for the inclusion of quotations in a media review.
Although every precaution has been taken in the preparation of this manual, The Steelstone Group assumes no responsibility for errors or omissions. Nor is any liability assumed for damages resulting from the use of the information contained herein. Although every effort has been made to ensure that the information contained in this manual is complete and accurate, The Steelstone Group is not engaged in rendering professional advice or services to the individual consumer; further, The Steelstone Group shall not be held responsible for any loss or damage allegedly arising from any information or suggestion in this manual.
Read this manual thoroughly before using and save it for future reference
2

Welcome to the Exciting World of Fresh Espresso from Gourmia
Congratulations on your purchase of the Capsule and Ground Espresso Machine from Gourmia, exclusively designed for the discerning espresso lover!
If you are one the those people who cherishes, or maybe even worships, a good fresh ground cup of espresso – that “pick-me-up” goodness when you walk into the room and the smell of freshly brewed, real, delicious espresso - you’ve made the right choice.
With your new Gourmia Capsule and Ground Espresso Machine, preparing fresh espresso that exceeds the expectations of your most demanding coffee connoisseurs is only moments away. Whether you prefer fresh ground, or the convenience and variety of capsules, we’re confident that you’ll find your new compact Espresso Machine from Gourmia easy and fun to use, with the end results being is a fresh full-bodied espresso experience that you are sure to love over and over again!
The pages of this manual offer full and comprehensive instructions to guide you through the functions and features of the Gourmia Espresso Maker. Inside this guide you will also find information on its modes of operation, complete step-by-step instructions for the operation, assembly, cleaning, and maintenance of your appliance.
Please read all safety instructions thoroughly to ensure safe usage at all times.
Thank you for your purchase! We sincerely hope you will enjoy this as well as all the many innovative products brought to you by our family at Gourmia.
3
4
IMPO
RTAN
T SAF
EGUA
RDS
IMPORTANT SAFEGUARDS1. Please read the Manual and safety notes thoroughly before beginning
operation.
2. Keep Coffee Machine out of children’s reach.
3. Make sure voltage indicated on the rating plate agrees with that of the electrical installation.
4. Damaged power cord cannot be used, the machine shall stay away from heat sources and flammable materials:
5. Do not use the machine outdoors, immersed in liquid or close to heat source.
6. If the power supply cord is damaged, it must be replaced by the manufacturer or its services agent or a similarly qualified person in order to avoid a hazard.Please keepthe circuit dry and the use original accessories.
7. Turn off the power and unplug the power before moving the ma-chine.
8. The original packaging can well protect the coffee machine during the transportation, please retain the packaging box.
9. Proper use and maintenance will extend the life of your coffee ma-chine.
10. Do not open any component or cut off the power supply of the coffee machine during operation.
11. If machine does not work properly, contact the distributor. Do not dismantle the machine or try to fix it on you own. Bring the machine to authorized service center for repair if necessary. The manufacturer will assume no liability for any damage due to unauthorized servicing.
12. The machine should not be operated by the following people: Children, people with mental illness, physical defect, or have a lack of knowlege or experience using this product. Unless the said people have been supervised or guided by qualified personnel who will take full responsibility for their safety during operation.
FOR HOUSEHOLD USE ONLY

TABLE OF CONTENTS
Know Your Espresso Machine ..........6
Before Using The Espresso Machine .7
Using Your Espresso Machine ..........8
Setting Your Espresso Machine .........9
Trouble Shooting .........................10
Maintenance and Care .................11
5
TABLE OF CONTENTS

KNOW YOUR ESPRESSO MACHINE
6
KNOW
YOUR
ESPR
ESSO
MAC
HINE
Choose the correct drawer for your capsule brand. Choice of 4 drawers. More are available for your specific sysytem.
Nespresso CBTL/Caffitaly, K-fee, Verismo*
Water Tank
Drawer Storage Compartment
Drawer Storage Compartment
Cover
Drawer
Drawer
ON/OFF Button
Short Cup ButtonLong Cup Button
Drip Tray
Drip Tray
NC Drawer CK Drawer
* by Starbucks
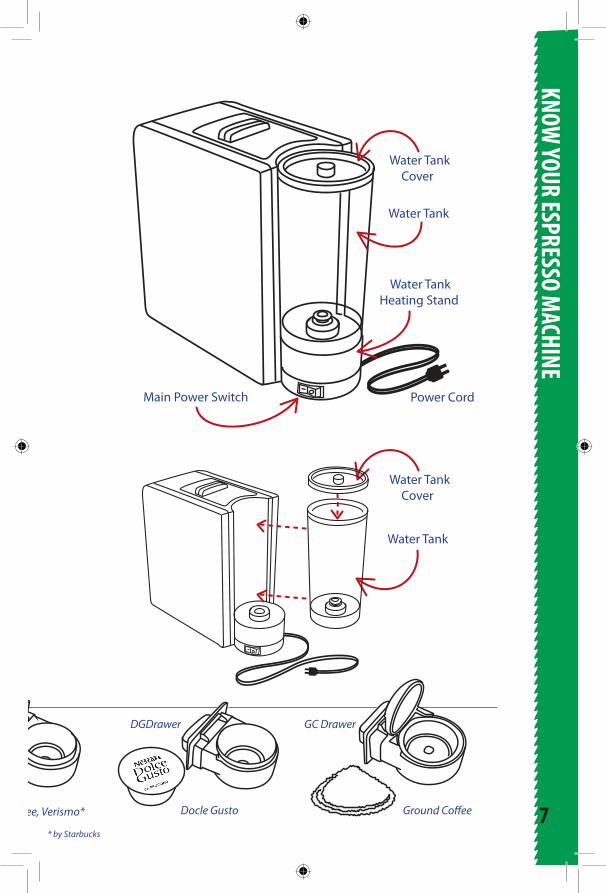
Water Tank Heating Stand
7
KNOW YOUR ESPRESSO M
ACHINE
Docle Gusto Ground CoffeeCBTL/Caffitaly, K-fee, Verismo*
Water Tank
Power Cord
Water Tank Cover
Main Power Switch
DGDrawer GC Drawer
Water Tank
Water Tank Cover
* by Starbucks

8
USIN
G YO
UR ES
PRES
SO M
ACHI
NE
1. Remove all items from the box carfully, and inspect to make sure that there is no damage to any part.
2. Place the Capsule Espresso Machine on a dry secure surface near a wall outlet.
3. The Water Tank should first be cleaned thoroughly with warm water, rinsed and dried before use.
4. Fill the Water Tank with cool purified water only. Make sure not to over fill the Water Tank.
5. Cover the Water Tank with its lid, and place it firmly on the Water Tank Heating Stand.
6. Connect the power plug to thewall outlet, turn on the powerby pressing the Main Switch onthe bottom of the Water TankHeating Stand.
Once the power has been turned on the ON/OFF button will turn on red.
7. Press the redbutton to turnthe unit on.
Using Your Espresso Machine
The button will begin flashing blue light. After flashing numerous times all the buttons will turn Blue - indicating Stand-by Mode. Your Capsule Espresso Machine is now ready to make espresso, or to be programmed. (See instructions on next page)
8. Select your desired coffeecapsule along with its corre-sponding drawer. (See chart on previous page for available choices.)
9. Place the coffee capsule intothe drawer, and slide the drawerinto its slot in the front of theunit.
10. Place your espresso cup ontothe Drip Tray below the coffeenozzle.
11. Choose the size of drink youwould like.For a Long (65ml default) cup -press the bottom blue button.For a Short (30 ml default) cup -press the middle button.
12. Time and volume may varydepending on the capsulebrand you choose.
Water Tank
Water Tank Cover
Main Switch

9
SETTING YOUR ESPRESSO MACHINE
Setting the Quantity1. While each button has a default setting for the amount of coffee it will
dispense, you can also adjust its amount to suit your needs.This can be accomplished while the unit is in standby mode - with ALL THREE BUTTONS in BLUE.
2. For the short setting, press and hold down the Short Cup Button for as long as you want it dispense coffee (from 15 seconds but no longer than 80 seconds) and then release it. The machine will remember this setting when this button is used. To change the Long Cup setting simply repeat the above instructions while holding down the Long Cup Button.
3. To return back to the default setting: Press both the Short and Long Cup buttons at the same time, until they flash 3 times. The buttons will now return to their default settings.
Setting the Temperature1. While the unit has a default temperature setting, six more temperature
settings are available. The coffee temperature may be increased 4 levelsand decreased 2 levels. (To change back to default setting follow #3 step from above)
2. TO DECREASE TEMPERATURE LEVEL:Unit must be in standby mode - with ON/OFF button in RED.Note: Default level is considered Level 3.
• To increase tem-perature by1one level, press the Long Cup Button for one second - it will flash 1 time, indicating that the Long Cup Button was increased by one level, to level 4.
• To increase tem-perature by two levels, press the Long Cup Button two times - it will flash 2 times, indicating that the Long Cup Button was increased by two levels, to level 5.
• To increase tem-perature by three levels, press the Long Cup Button three times - it will flash 3 times, indicating that the Long Cup Button was increased by three levels, to level 6.
• To increase tem- perature by four levels, press the Long Cup Button four times - it will flash 4 times, indicating that the Long Cup Button was increased by 4 levels, to level 7. (the maximum)
• To decrease temperature by one level, press the Short Cup Button for one second - it will flash two times, indicating that the Short Cup Button will now dispense at level 2 heat setting.
• To decrease by two levels, press the Short Cup Button two times -it will now flash 1 time, indicating that the Short Cup Button will now dispense at level 1 heat setting.(the lowest)
3. TO INCREASE TEMPERATURE LEVEL:Unit must be in standby mode - with ON/OFF button in RED.Note: Default level is considered Level 3.

10
TROU
BLE S
HOOT
ING
Trouble Shooting
NO LIGHT:
Check the power supply, fuse and main switch.
NO COFFEE: Water tank may be empty. Fill water tank and press the button several times to make sure the water tank supplies water smoothly.
NOTHING HAPPENS AFTER PRESSING THE BUTTON: Check to make the drawer is in the right position. Pull drawer out and slide it back in carefully.
THE DRAWER CAN'T BE PULLED OUT: Turn off the machine to release the pressure inside the machine, then try to pull out the drawer again.
LOUD NOISE: Check to see if the water tank is filled and the tank is properly inserted.
THE MACHINE TURNS OFF BY ITSELF: If the machine is not used for 25 minutes it will automatically go into Energy Saving mode to protect the machine.
ALL LIGHTS ARE FLASHING: Switch off the machine for 1 minute and restart it again.
11
MAINTENANCE AND CARE
WARRANTY & SERVICEThis Limited Warranty is for one full year from the date of purchase. It is applicable to the original purchaser only and is not transferable to a third party user. Repair or replacement of defective parts is solely at the seller’s discretion. In the event that repair isn’t possible, the seller will replace the product/part. If product repair/replacement won’t suffice, the seller has the option of refunding the cash value of the product or component returned.
Product defects not covered under the Warranty provisions include normal wear and damage incurred from use or accidental negligence, misuse of instruction specifications or repair by unauthorized parties. The manufacturing company is not liable for any incidental or consequential damages incurred by such circumstances.
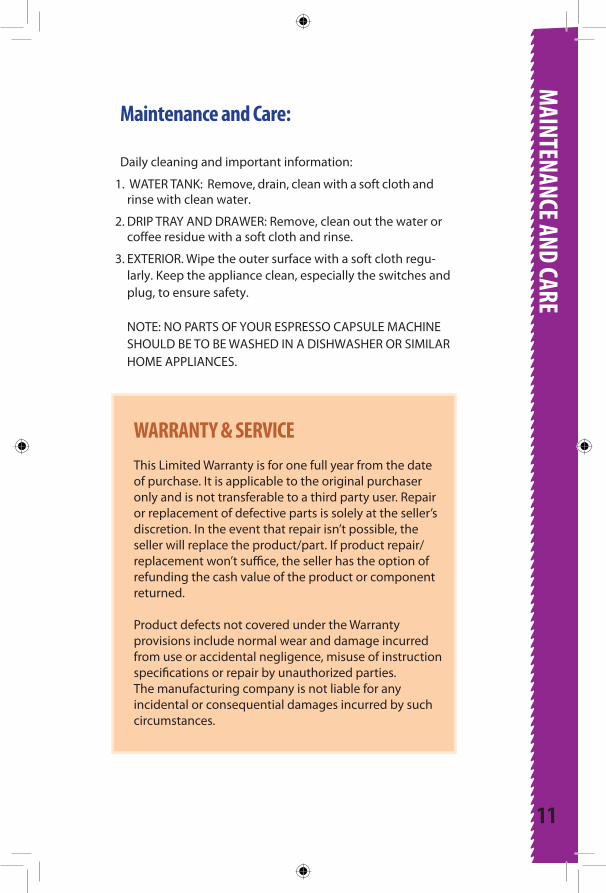
Maintenance and Care:
Daily cleaning and important information:
1. WATER TANK: Remove, drain, clean with a soft cloth and rinse with clean water.
2. DRIP TRAY AND DRAWER: Remove, clean out the water or coffee residue with a soft cloth and rinse.
3. EXTERIOR. Wipe the outer surface with a soft cloth regu-larly. Keep the appliance clean, especially the switches and plug, to ensure safety.
NOTE: NO PARTS OF YOUR ESPRESSO CAPSULE MACHINE SHOULD BE TO BE WASHED IN A DISHWASHER OR SIMILAR HOME APPLIANCES.

FOR CUSTOMER SERVICEQUESTIONS OR COMMENTSVISIT US @ GOURMIA.COM
OR CALL 888.552.0033