evx-534/-539 - commusa
TRANSCRIPT

EVX-539
A
B
C
D
1
4
PQRS
WXYZ
GHI
ABC
JKL
TUV
DEF
MNO
DEL
5 6
7 8 9
0 #
2 3
�
CXL
OK
EVX-534
A B C D
EVX-534 EVX-539
EVX-534/-539 (Dot Matrix Display)operating Manual prograMMable Functions/Features
IP57Submersible(1m/30min.) AvailableProgrammableFunctionKeys 2-ToneEncode/Decodeø1 5-ToneEncode/Decodeø1 MDC-1200®Encode/Decodeø1 Scan GroupScan DualWatch FM-Scan(Follow-MeScan) TAScan DirectModeø2 SiteSearchø2 TransmitInterruptø2 DTMFSignaling(AnalogandDigital) Encryptionø1 Privacy(Basic/Enhanced) 256bitAESEnhancedEncryptionø2 VOX TalkAround Emergency LoneWorker TXSaveDisable DirectChannelEntry CodeUp/Downø1 CodeSetø1 SpeedDialø1 DTMFCodeSetø1,3 IDCheckø1 TextMessageø2 ARTS™ø1/ARTSII™(AutoRangeTranspondSystem)
ø1:Analogmodeø2:Digitalmodeø3:EVX-539only

Introduction...............................................................1Warning!.FCC.RF.Exposure.Requirements...........2Warning!.IC.RSS.General.Requirement................4Before.You.Begin.......................................................6 BatteryPackInstallationandRemoval...............6 BatteryCharging..................................................6 LowBatteryIndication........................................7 BeltClipInstallationandRemoval.....................8 MIC/SPCapInstallation......................................8Controls.&.Connectors...........................................10 EVX-534............................................................11 EVX-539............................................................12
LCD.Icons.&.Indicators.........................................13Operation.................................................................14 PreliminarySteps...............................................14 OperationQuickStart........................................14 AutomaticTime-OutTimer...............................17Advanced.Operation...............................................18 ProgrammableKeyFunctions..........................18 DescriptionofOperatingFunctions.................21Lock..........................................................................42ARTS™/ARTSII™.(Auto.Range.Transpond.System)....42User.Set.Mode.........................................................43Optional.Accessories...............................................44
contents
Congratulations!Younowhaveatyourfingertipsavaluablecommunicationstool,aVertexStandardtwo-wayradio!Rugged,reliableandeasytouse,yourVertexStandardradiowillkeepyouinconstanttouchwithyourcolleaguesforyearstocome,withnegligiblemaintenancedown-time.Please takeafewminutes toreadthismanualcarefully.Theinformationpresentedherewillallowyoutoderivemaximumperformancefromyourradio,incasequestionsariselateron.
Important.Noter Therearenoowner-serviceablepartsinsidetheradio.Allservicejobsmustbereferredtoanauthorized
VertexStandardServiceRepresentative.r Inordertomaintainthespecifiedwaterintegrityperformance,periodicmaintenanceisrecommended.r Shouldtheradiosustainasevereshock(e.g.ifitisdropped),thewaterintegritymaybecompromised,
requiringservice.Shouldthisoccur,contactyourAuthorizedVertexStandardDealer.

EVX-534/-539 OpErating Manual 1
introDuctionTheEVX-534/-539 are full-featuredHand-HeldDigital/AnalogTransceiver designed for business communica-tionsintheVHF/UHFLandMobilebands.Bothtransceiversaredesignedforreliablebusinesscommunicationsinawidevarietyofapplicationswithawiderangeofoperatingcapabilityprovidedbytheirleading-edgedesign.
Both transceiver supports up to 512 channelswithin amaximumof 32groups, and each channel canbepro-grammedwithauniquealphanumerictaginoneofsixdifferentlanguages.
Importantchannelfrequencydataisstoredintheflashmemory,andiseasilyprogrammablebyaVertexStandardlicenseddealersusingapersonalcomputerwithVertexStandardProgrammingequipment:FIF-12USBProgram-mingInterface,andCT-106ConnectioncablewithCE151Software.Or,onceasingleradioisprogrammed,clon-ingcableCT-27canbeusedtoprogramadditionalradiosdirectly.
ThepageswhichfollowwilldetailthemanyadvancedfeaturesprovidedintheEVX-534/-539transceiver.Afterreading thismanual, youmaywish to consultwithyourNetworkAdministrator regardingprecisedetailsof theconfigurationofthisequipmentforuseinyourapplication.
Important.notIce.for.north.amerIcan.Users.regardIng.406.mhz.gUard.BandTheU.S.CoastGuard andNationalOceanographic andAtmosphericAdministration have requested thecooperationoftheU.S.FederalCommunicationsCommissioninpreservingtheintegrityoftheprotectedfrequencyrange406.0to406.1MHz,whichisreservedforusebydistressbeacons.Donotattempttopro-gramthisapparatus,underanycircumstances,foroperationinthefrequencyrange406.0-406.1MHziftheapparatusistobeusedinornearNorthAmerica.Warning-Frequencyband406-406.1MHzisreservedforuseONLYasadistressbeaconbytheUSCoastGuardandNOAA.Undernocircumstanceshouldthisfrequencybandbepartofthepreprogrammedoper-atingfrequenciesofthisradio.

EVX-534/-539 OpErating Manual2
Warning! Fcc rF exposure requireMentsThisRadiohasbeentestedandcomplieswiththeFederalCommunicationsCommission(FCC)RFexposurelimitsforOccupationalUse/Controlledexposureenvironment.Inaddition,itcomplieswiththefollowingStandardsandGuidelines:
r FCC96-326,GuidelinesforEvaluatingtheEnvironmentalEffectsofRadio-FrequencyRadiation.r FCCOETBulletin65Edition97-01(2001)SupplementC,EvaluatingCompliancewithFCCGuidelinesfor
HumanExposuretoRadioFrequencyElectromagneticFields.r ANSI/IEEEC95.1-1992,IEEEStandardforSafetyLevelswithRespecttoHumanExposuretoRadioFrequen-
cyElectromagneticFields,3kHzto300GHz.r ANSI/IEEEC95.3-1992,IEEERecommendedPracticefortheMeasurementofPotentiallyHazardousElectro-
magneticFields-RFandMicrowave.
.WARNING:ThisradiogeneratesRFelectromagneticenergyduringtransmitmode.Thisradioisdesignedforandclas-sifiedasOccupational Use Only,meaningitmustbeusedonlyduringthecourseofemploymentbyindi-vidualsawareofthehazards,andthewaystominimizesuchhazards.ThisradioisnotintendedforusebytheGeneralPopulationinanuncontrolledenvironment.
.CAUTION:ToensurethatyourexposetoRFelectromagneticenergyiswithintheFCCallowablelimitsforoccupa-tionaluse,alwaysadheretothefollowingguidelines:
. This.radio.is.NOT.approved.for.use.by.the.general.population.in.an.uncontrolled.exposure.environment..This.radio.is.restricted.to.occupational.use,.work.related.operations.only.where.the.radio.operator.must.have.the.knowledge.to.control.his.or.her.RF.exposure.conditions.
EVX-534/-539 OpErating Manual 3
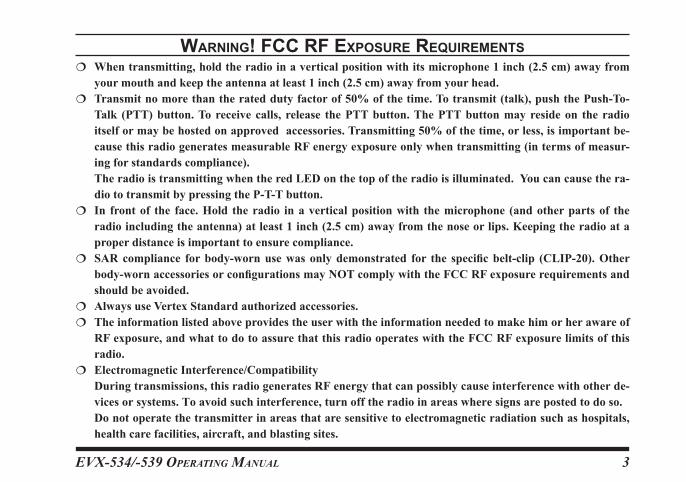
Warning! Fcc rF exposure requireMents. When.transmitting,.hold.the.radio.in.a.vertical.position.with.its.microphone.1.inch.(2.5.cm).away.from.
your.mouth.and.keep.the.antenna.at.least.1.inch.(2.5.cm).away.from.your.head.. Transmit.no.more.than.the.rated.duty.factor.of.50%.of.the.time..To.transmit.(talk),.push.the.Push-To-
Talk. (PTT).button..To.receive.calls,. release. the.PTT.button..The.PTT.button.may.reside.on. the.radio.itself.or.may.be.hosted.on.approved..accessories..Transmitting.50%.of.the.time,.or.less,.is.important.be-cause.this.radio.generates.measurable.RF.energy.exposure.only.when.transmitting.(in.terms.of.measur-ing.for.standards.compliance).
. The.radio.is.transmitting.when.the.red.LED.on.the.top.of.the.radio.is.illuminated...You.can.cause.the.ra-dio.to.transmit.by.pressing.the.P-T-T.button.
. In. front.of. the. face..Hold. the.radio. in.a.vertical.position.with. the.microphone. (and.other.parts.of. the.radio.including.the.antenna).at.least.1.inch.(2.5.cm).away.from.the.nose.or.lips..Keeping.the.radio.at.a.proper.distance.is.important.to.ensure.compliance..
. SAR.compliance. for.body-worn.use.was.only.demonstrated. for. the. specific.belt-clip. (CLIP-20)..Other.body-worn.accessories.or.configurations.may.NOT.comply.with.the.FCC.RF.exposure.requirements.and.should.be.avoided.
. Always.use.Vertex.Standard.authorized.accessories.. The.information.listed.above.provides.the.user.with.the.information.needed.to.make.him.or.her.aware.of.
RF.exposure,.and.what.to.do.to.assure.that.this.radio.operates.with.the.FCC.RF.exposure.limits.of.this.radio.
. Electromagnetic.Interference/Compatibility. During.transmissions,.this.radio.generates.RF.energy.that.can.possibly.cause.interference.with.other.de-
vices.or.systems..To.avoid.such.interference,.turn.off.the.radio.in.areas.where.signs.are.posted.to.do.so.. Do.not.operate.the.transmitter.in.areas.that.are.sensitive.to.electromagnetic.radiation.such.as.hospitals,.
health.care.facilities,.aircraft,.and.blasting.sites.
EVX-534/-539 OpErating Manual4
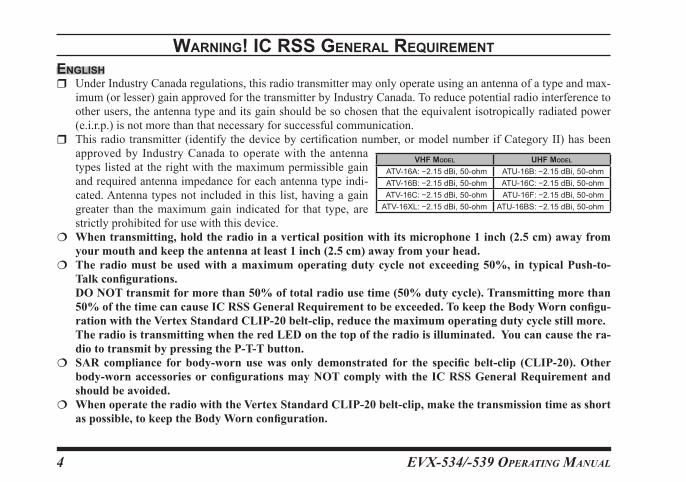
Warning! ic rss general requireMentenglishr UnderIndustryCanadaregulations,thisradiotransmittermayonlyoperateusinganantennaofatypeandmax-
imum(orlesser)gainapprovedforthetransmitterbyIndustryCanada.Toreducepotentialradiointerferencetootherusers,theantennatypeanditsgainshouldbesochosenthattheequivalentisotropicallyradiatedpower(e.i.r.p.)isnotmorethanthatnecessaryforsuccessfulcommunication.
r Thisradiotransmitter(identifythedevicebycertificationnumber,ormodelnumberifCategoryII)hasbeenapprovedby IndustryCanada to operatewith the antennatypeslistedattherightwiththemaximumpermissiblegainandrequiredantennaimpedanceforeachantennatypeindi-cated.Antennatypesnotincludedinthislist,havingagaingreater than themaximumgain indicated for that type, arestrictlyprohibitedforusewiththisdevice.
. When.transmitting,.hold.the.radio.in.a.vertical.position.with.its.microphone.1.inch.(2.5.cm).away.from.your.mouth.and.keep.the.antenna.at.least.1.inch.(2.5.cm).away.from.your.head.
. The.radio.must.be.used.with.a.maximum.operating.duty.cycle.not.exceeding.50%,. in. typical.Push-to-Talk.configurations.
. DO.NOT.transmit.for.more.than.50%.of.total.radio.use.time.(50%.duty.cycle)..Transmitting.more.than.50%.of.the.time.can.cause.IC.RSS.General.Requirement.to.be.exceeded..To.keep.the.Body.Worn.configu-ration.with.the.Vertex.Standard.CLIP-20.belt-clip,.reduce.the.maximum.operating.duty.cycle.still.more.
. The.radio.is.transmitting.when.the.red.LED.on.the.top.of.the.radio.is.illuminated...You.can.cause.the.ra-dio.to.transmit.by.pressing.the.P-T-T.button.
. SAR.compliance. for.body-worn.use.was.only.demonstrated. for. the. specific.belt-clip. (CLIP-20)..Other.body-worn.accessories.or.configurations.may.NOT.comply.with.the.IC.RSS.General.Requirement.and.should.be.avoided.
. When.operate.the.radio.with.the.Vertex.Standard.CLIP-20.belt-clip,.make.the.transmission.time.as.short.as.possible,.to.keep.the.Body.Worn.configuration.
VhF MoDel uhF MoDel
ATV-16A:−2.15dBi,50-ohm ATU-16B:−2.15dBi,50-ohm ATV-16B:−2.15dBi,50-ohm ATU-16C:−2.15dBi,50-ohm ATV-16C:−2.15dBi,50-ohm ATU-16F:−2.15dBi,50-ohmATV-16XL:−2.15dBi,50-ohm ATU-16BS:−2.15dBi,50-ohm

EVX-534/-539 OpErating Manual 5
Frenchr Conformément à la réglementationd’IndustrieCanada, le présent émetteur radiopeut fonctionner avecune
antenned’untypeetd’ungainmaximal(ouinférieur)approuvépourl’émetteurparIndustrieCanada.Danslebutderéduirelesrisquesdebrouillageradioélectriqueàl’intentiondesautresutilisateurs,ilfautchoisirletyped’antenneetsongaindesortequelapuissanceisotroperayonnéequivalente(p.i.r.e.)nedépassepasl’intensiténécessaireàl’établissementd’unecommunicationsatisfaisante.
r Leprésent émetteur radio (identifier le dispositif par sonnumérode certificationou sonnumérodemodèles’ilfaitpartiedumatérieldecatégorieI)aétéapprouvéparIndustrieCanadapourfonctionneraveclestypesd’antenneénumérésdansledroitetayantungainadmissiblemaximaletl’impédancerequisepourchaquetyped’antenne.Les typesd’antennenon inclusdans cette liste, oudont legainestsupérieuraugainmaximalindiqué,sontstrictementinterditspourl’exploitationdel’émetteur.
. Pour.émettre,.tenez.votre.radio.verticalement.en.plaçant.le.microphone.entre.2,5.cm.de.la.bouche..L’an-tenne.doit.toujours.être.à.plus.de.2,5.cm.de.votre.tête.
. .Le.temps.total.d’émission.de.la.radio.ne.doit.pas.dépasser.50%.du.temps.de.fonctionnement.dans.une.confi-guration.normale.avec.alternat..Par.conséquent,.vous.ne.devez.PAS.émettre.pendant.plus.de.50%.du.temps.total.d’utilisation.de.la.radio..Si.cette.règle.n’est.pas.respectée,.vous.exposez.à.un.dépassement.de.l’exposi-tion.aux.fréquences.électromagnétiques.telle.que.définie.par.la.norme.de.sécurité..La.radio.émet.lorsque.le.voyant.LED.rouge.(situé.au.sommet.de.la.radio).est.allumé..Vous.pouvez.déclencher.l’émission.en.appuyant.sur.le.bouton.Alternat.ou.avec.un.micro-casque.VOX,.si.la.radio.permet.d’utiliser.cet.accessoire.
. La.conformité.SAR.pour.utilisation.sur.le.corps.n’a.été.confirmée.que.pour.l’attache.ceinture.de.nomen-clature.CLIP-20..L’utilisation.de.tout.autre.accessoire.pour.port.sur.le.corps.PEUT.être.non.conforme.aux.normes.d’exposition.aux.radio-fréquences.et.doit.donc.être.évitée.
. N’opérez.pas.votre.radio.en.mode.d’émission.lorsque.vous.la.portez.fixée.sur.le.corps.à.l’aide.de.l’acces-soire.suivant.:.CLIP-20.attache.ceinture.
Warning! ic rss general requireMent
VhF MoDèle uhF MoDèle
ATV-16A:−2.15dBi,50-ohm ATU-16B:−2.15dBi,50-ohm ATV-16B:−2.15dBi,50-ohm ATU-16C:−2.15dBi,50-ohm ATV-16C:−2.15dBi,50-ohm ATU-16F:−2.15dBi,50-ohmATV-16XL:−2.15dBi,50-ohm ATU-16BS:−2.15dBi,50-ohm

EVX-534/-539 OpErating Manual6
beFore you begin
r To remove thebattery, turn the radiooffand re-moveanyprotectivecases.SlidetheBatteryPackLatchonthebottomoftheradiotowardthefrontpanelwhile sliding thebattery downabout 1/2inch (1.5cm).Then lift thebatteryout from theradio.
Do.not. attempt. to. open. any. of. the. re-chargeable.Lithium-Ion.packs,. as. they.
could.explode.if.accidentally.short-circuited.
Battery.Pack.Installation.and.Removalr Toinstallthebatterypack,alignthebatterypack
totheradiowithanoffsetabout1/2inch(1.5cm)from the top edgeof battery compartment, thenslide thebattery packupwarduntil it locks inplacewitha“Click.”
Battery.Chargingr Remove theSpacerPlate from thenest of the
optionalCD-58DesktopCharger, if theBatterySpacerisinstalled.
r Insert theDCplugfromtheoptionalPA-55ACAdapterintotheDCjackontherearpaneloftheoptionalCD-58DesktopCharger,and thencon-nectthePA-55ACAdaptertotheAClineoutlet.
r Insert thebatterypack into theCD-58DesktopChargerwhile aligning the slots of thebatterypackwith theguides in thenest of theCD-58;refer to the following illustration for details on
PA-55
CD-58
SpacerPlate ACLineOutlet

EVX-534/-539 OpErating Manual 7
beFore you beginproperpositioningofthebatterypack.Ifchargingwiththetransceiverattached,turnthetransceiveroff.The antenna jack shouldbe at the left sidewhenviewingthechargerfromthefront.
r If thebatterypackis insertedcorrectly, theLEDindicatorwillglowred.Afully-dischargedbatterypackwill charge completely in 1.5 - 4.5 hours(dependingonthebatterypackbeingcharged).
r When charging is completed, theLED indicatorwillchangetogreen.
r Disconnect thebattery pack from theCD-58DesktopCharger andunplug thePA-55ACAdapterfromtheAClineoutlet.
1) Always use the Vertex Standard FNB-V133LI-UNI, FNB-V134LI-UNI Lithium-
Ion Battery Pack, or FNB-V136-UNI Nickel-Metal Hydride Battery Pack.2) Use only the Vertex Standard CD-58 Desktop Charger and the Vertex Standard PA-55 AC Adapter.3) To reduce the risk of explosion, recharge the bat-teries outside of hazardous locations.4) Perform the battery charging where the ambient temperature range +41 °F to +104 °F (+5 °C to +40 °C). Charge out of this range could cause damage
to the battery pack.5) Battery Pack should not be exposed to excessive heat such as sunshine, fire, or the like.6) Risk of explosion if battery is replaced by an in-correct type. Refer to the enclosed instructions for disposal of used batteries.7) For further details and cautions of the charging, refer to the Operating Manual of the CD-58 Desk-top Charger.
Low.Battery.IndicationAs thebattery discharges duringuse, thevoltagegradually becomes lower.When the battery voltagebecomestoolow,substituteafreshlychargedbatteryand recharge thedepletedpack.TheLED indicatoronthetopoftheradiowillblinkredwhenthebatteryvoltageislow.
YoumayconfirmthebatteryconditionbytheBatteryIcononthedisplay.Seepage13formoreinformation.
CAUTION Dangerof explosion if battery is replacedwith an incorrect battery.Replaceonlywiththesameorequivalenttype.

EVX-534/-539 OpErating Manual8
Belt.Clip.Installation.and.RemovalbeFore you begin
r To install theBeltClip: aligntheBeltClip to the grooveoftheBattery pack, thenpresstheBeltClipdownwarduntilitlocksinplacewitha“Click.”
Belt Clip Tab
r ToremovetheBeltClip:useaflat head screwdriver to presstheBeltClipTab away fromthebatterypack to unlock theBeltClip, then slide theBeltClipupwardtoremoveit.
MIC/SP.CAP.InstallationInstall theMIC/SP capwith thesuppliedscrews.
r Use.only. the. supplied. screws.when.install.the.MIC/SP cap.
r This.radio.does.not.keep. the.submersible.Rating. (IP57:. 1.meter./.30.minutes).when.the.MIC/SP. cap. is.not. installed.in.the.MIC/SP.jack.

EVX-534/-539 OpErating Manual 9
note

EVX-534/-539 OpErating Manual10
EVX-534
A B C D
PTTSwitch
SIDE-1Button
SIDE-2Button
MIC/SPJack(ExternalMIC/SP)
Speaker Microphone
AntennaJack
TOP SEL(TopSelect)Key
CH(Channel)Selector
VOL(Volume)/PWR(Power)Knob
BatteryPackLatch
controls & connectors (eVx-534)
LCD(LiquidCrystalDisplay) 4-ButtonProgrammableKey
LEDIndicator(Programmable) Defaultsettingsare: SteadyRed: Transmittinginprogress(Analog) SteadyBlue: Transmittinginprogress(Digital) BlinkingGreen:BusyChannel SteadyGreen: ToneSquelchindefeatedcondition

EVX-534/-539 OpErating Manual 11
EVX-539
A
B
C
D
1
4
PQRS
WXYZ
GHI
ABC
JKL
TUV
DEF
MNO
DEL
5 6
7 8 9
0 #
2 3
�
CXL
OK
PTTSwitch
SIDE-1Button
SIDE-2Button
MIC/SPJack(ExternalMIC/SP)
Speaker Microphone
AntennaJack
TOP SEL(TopSelect)Key
CH(Channel)Selector
VOL(Volume)/PWR(Power)Knob
BatteryPackLatch
controls & connectors (eVx-539)
LCD(LiquidCrystalDisplay) 16-ButtonDTMFKeypad
LEDIndicator(Programmable) Defaultsettingsare: SteadyRed: Transmittinginprogress(Analog) SteadyBlue: Transmittinginprogress(Digital) BlinkingGreen:BusyChannel SteadyGreen: ToneSquelchindefeatedcondition

EVX-534/-539 OpErating Manual12
lcD icons & inDicators
GroupNumber“Privacy”or“Encryption”isactivated
LowTransmitPowerMode“On”
“CALL”IndicatorReceiverMonitor
BatteryIcon
“Group Scan”isenabled
Priority-2Channel
:“Dual Watch”isactivated:“Talk-Around”isenabled
:“Scan”isenabled:“Priority Scan”isactivated
DotMatrixDisplay
“VOX”isactivated
“5-tone Status Call”or“Digital Text Message”isreceived
battery icon
:::
w/blink:
FullBatteryPowerModerateBatteryPowerLowBatteryPowerPoorBatteryPower(ChargetheBattery)
TXPower&RSSIIndicator(foursteps)

EVX-534/-539 OpErating Manual 13
operationPreliminary.Stepsr Installachargedbatterypackontothetransceiver,
asdescribedpreviously.r Screw the supplied antenna
ontotheAntennajack. Itisnotrecommendedtoop-
eratethistransceiverwithoutanantennaconnected.
r If youhave aSpeaker/Mi-crophone,we recommendthat i t not be connecteduntilyouarefamiliarwiththebasicoperationoftheEVX-534/-539.Refer tonextpageformoreinformationaboutSpeaker/Microphoneusage.
IMPORTANT NOTEWater resistanceof the transceiver (IP57: 1meter/30minutes)isassuredonlywhenthefollowingconditions:r Batterypackisattachedtothetransceiver;r Antennaisconnectedtotheantennajack;randMIC/SPcap is installed in theMIC/
SPjack.r Useofaspeakermicrophoneintheacces-
soryconnectornegatestheIP57rating.
Operation.Quick.Startr Turn the top panel’s
VOL/PWR knob clock-wise to turn the radioon.
r Turnthetoppanel’sCHSelectorknob tochoosethe desired operatingchannel.AchannelnamewillappearontheLCD.Theradioannouncesthechannel number, if theChannelAnnouncementFeatureisenabledviathePCProgrammingSoft-ware.
r IfyouwanttoselecttheoperatingchannelfromadifferentChannelGroup,press(orpressandhold)theProgrammablekey assigned to the “group up/DoWn” function to changedesiredChannelGroupbeforeselectingtheoperatingchannel.
Note: Somemodels are programmed so that theoperating channels are selectedby theProgram-mablekeyandtheChannelGroupisselectedby
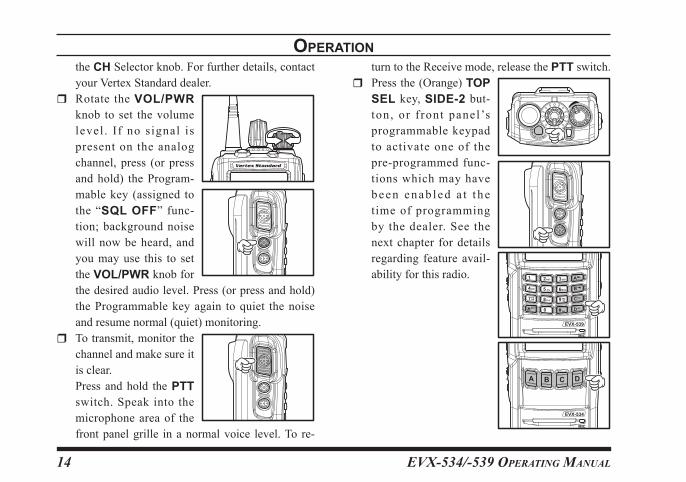
EVX-534/-539 OpErating Manual14
operationtheCHSelectorknob.Forfurtherdetails,contactyourVertexStandarddealer.
r Rotate theVOL/PWRknob to set thevolumelevel . If no signal ispresent on the analogchannel, press (or pressandhold) theProgram-mable key (assigned tothe “sql oFF” func-tion; backgroundnoisewill nowbeheard, andyoumayuse this to settheVOL/PWRknobforthedesiredaudiolevel.Press(orpressandhold)theProgrammable key again to quiet thenoiseandresumenormal(quiet)monitoring.
r Totransmit,monitorthechannelandmakesureitisclear.
Press andhold thePTTswitch.Speak into themicrophone areaof thefrontpanelgrille inanormalvoice level.To re-
turntotheReceivemode,releasethePTTswitch.r Pressthe(Orange)TOP
SEL key,SIDE-2 but-ton, or f ront panel’sprogrammablekeypadto activate one of thepre-programmed func-tionswhichmayhavebeen enab l ed a t t hetime of programmingby the dealer. See thenext chapter for detailsregarding feature avail-abilityforthisradio.
EVX-539
A
B
C
D
1
4
PQRS
WXYZ
GHI
ABC
JKL
TUV
DEF
MNO
DEL
5 6
7 8 9
0 #
2 3
�
CXL
OK
EVX-534
A B C D

EVX-534/-539 OpErating Manual 15
A
B
CWXYZ
DEF
MNO
CXL
operationr IfaSpeaker/Microphone
is available, remove theplastic cap and its twomounting screws fromthe r ight s ide of thetransceiver, then alignthe connector of theSpeaker/Microphoneon the radio; secure the connector pinusing thescrews suppliedwith theSpeaker/Microphone.Holdthespeakergrilleupnexttoyourearwhilereceiving.To transmit, press thePTT switchontheSpeaker/Microphone, just as youwouldonthemain transceiver’s body, and speak into themicrophoneonanormalvoicelevel.
Note 1): Save the original plastic cap and its mounting screws. They should be reinstalled when not using the Speaker/Microphone.
2) When you press the PTT switch on the Speak-er/Microphone, it disables the internal micro-phone, and vice versa.
r EVX-534/-539 radioshave twomodesofDMRoperationtomaximizespectrumefficiency.Stan-dardoperation requiresuseofaTDMArepeater
(such as theEVX-R70) to utilize the repeater’sdual timeslotcapability fordoublingyour radiofleet’scommunicationpathsforuptotwosimul-taneoustransmissions.ThesecondmodeisDirect mode,which enables twocommunicationspathson a single frequency, doublingyour capacitywithonly the subscriber radios.No repeater isnecessarywhenoperatinginDirectmode.
r If theBCLO (BusyChannelLockout) featurehasbeenprogrammedonananalog channel,theradiowillnot transmitwhenacarrier ispresent.Instead, the radiowill generate short beep threetimes.Release thePTT switch andwait for thechanneltobeclearofactivity.
r If theBTLO (BusyToneLockout) featurehasbeen programmedon ananalog channel orCCLO (ColorCodeLockout) feature has beenprogrammedon adigital channel, the radiocan transmit onlywhen there is no carrier be-ing receivedorwhen the carrier being receivedincludes the correct tone (CTCSS toneorDCScode)onananalog channelorcorrectcodeonadigital channel.

EVX-534/-539 OpErating Manual16
operation
Automatic.Time-Out.TimerIftheselectedchannelhasbeenprogrammedforau-tomatic time-out, youmust limit the length of eachtransmission.While transmitting, a beepwill sound10secondsbeforetime-out.Anotherbeepwillsoundjustbeforethedeadline;thetoppanel’sredLED(“TX”indicator)willdisappearand transmissionwillceasesoonthereafter.Toresumetransmitting,youmustre-leasethePTTswitchandwaitforthe“penaltytimer”toexpire.

EVX-534/-539 OpErating Manual 17
aDVanceD operationProgrammable.Key.FunctionsTheEVX-534 provides sevenprogrammable func-tion(PF)keys:TOP SEL,SIDE-1,SIDE-2,[A],[B],[C], and [D] keys.EVX-539 also includes the [Ý]and[#]keys.
ThesePFkeyscanbecustomized,viaprogrammingbyyourVertexStandarddealer,tomeetyourcommu-nications/networkrequirements.
ThepossiblePF keyprogramming features are il-lustratedon the next page, and their functions areexplainedbeginningafterpage20.Forfurtherdetails,contactyourVertexStandarddealer.
In thischapter, the following iconsareused to indi-cate features supported ineither the“Analog”modeor“Digital”mode:
:Indicatesa“Analog”modeonlyfeature.:Indicatesa“Digital”modeonlyfeature.
For features thatareavailable inboth“Analog”and“Digital”modes,noiconisshown.
Forfuturereference,checktheboxnexttoeachfunc-tion that has been assigned to thePF keyonyourparticularradio,andkeepithandy.

EVX-534/-539 OpErating Manual18
aDVanceD operation
FunctionprograMMable Key (press Key / press anD holD Key)
TOP SEL SIDE-1 SIDE-2 [A] [B] [C] [D] [Ü] [#]None / / / / / / / / /Monitor / / / / / / / / /Monitor-Momentarily- /--- /--- /--- /--- /--- /--- /--- /--- /---Lamp / / / / / / / / /LowPower / / / / / / / / /Privacy/Encryption / / / / / / / / /PrivacySet / / / / / / / / /SET / / / / / / / / /SQLOFF / / / / / / / / /SQLOFF-Momentarily- /--- /--- /--- /--- /--- /--- /--- /--- /---SQLLevel / / / / / / / / /BeepOFF / / / / / / / / /AFMinimumVolume / / / / / / / / /CHAnnouncement / / / / / / / / /Whisper / / / / / / / / /VOX / / / / / / / / /VOXLevel / / / / / / / / /VOXAnti-Trip / / / / / / / / /Emergency ---/ ---/ ---/ ---/ ---/ ---/ ---/ ---/ ---/LoneWorker / / / / / / / / /GroupUp / / / / / / / / /GroupDown / / / / / / / / /ChannelUp / / / / / / / / /ChannelDown / / / / / / / / /SpeedChannelUp ---/ ---/ ---/ ---/ ---/ ---/ ---/ ---/ ---/SpeedChannelDown ---/ ---/ ---/ ---/ ---/ ---/ ---/ ---/ ---/PRI-1 / / / / / / / / /PRI-2 / / / / / / / / /PRI-2Set / / / / / / / / /PRI-2Disable / / / / / / / / /DirectCH1 / / / / / / / / /DirectCH2 / / / / / / / / /DirectCH3 / / / / / / / / /DirectCH4 / / / / / / / / /DirectCHEntry / / / / / / / / /Scan / / / / / / / / /

EVX-534/-539 OpErating Manual 19
aDVanceD operation
FunctionprograMMable Key (press Key / press anD holD Key)
TOP SEL SIDE-1 SIDE-2 [A] [B] [C] [D] [Ü] [#]GroupScan / / / / / / / / /DualWatch / / / / / / / / /FollowMeScan / / / / / / / / /ScanSet / / / / / / / / /GroupScanSet / / / / / / / / /TA(TalkAround)Scan / / / / / / / / /TalkAround / / / / / / / / /Search[SiteSearch] / / / / / / / / /Reset / / / / / / / / /Call1 / / / / / / / / /Call2 / / / / / / / / /Call3 / / / / / / / / /Call4 / / / / / / / / /Call5 / / / / / / / / /CodeUp / / / / / / / / /CodeDown / / / / / / / / /CodeSet / / / / / / / / /SpeedDial / / / / / / / / /DTMFCodeSetø / / / / / / / / /Call / / / / / / / / /StatusSet / / / / / / / / /StatusUp / / / / / / / / /StatusDown / / / / / / / / /StatusCheck / / / / / / / / /Duty / / / / / / / / /IDCheck / / / / / / / / /ARTSLogin / / / / / / / / /TextMessage / / / / / / / / /RemoteHaltTX[TransmitInterrupt] / / / / / / / / /OptionSW1 /--- /--- /--- /--- /--- /--- /--- /--- /---OptionSW2 / / / / / / / / /TXSaveDisable / / / / / / / / /Lock / / / / / / / / /ø:activatedinEVX-539
ø:activatedinEVX-539

EVX-534/-539 OpErating Manual20
aDVanceD operationDescription.of.Operating.Functions
loW poWerPress,(orpressandhold),theassignedPFkeytosetthe radio’s transmitter to “LowPower”mode, thusextendingbatterylife.Press,(orpressandhold),thekeyagaintoreturnto“Normal”transmitpowerwhenindifficultterrain.
The “L” iconwill be indicatedon thedisplaywhentheradio’stransmitterissetto“LowPower”mode.
priVacy Press, (or press andhold), the assignedPF key totoggle thePrivacy feature“On”and“Off”.ThePri-vacy feature initiates an encryption algorithm thatwill protect your communication fromunauthorizedeavesdropping.
The“ ”iconwillbeindicatedonthedisplaywhenthePrivacyfeatureisactivated.
Monitor Press, (or press andhold), the assignedPF key tocancel any signaling features; theLED indicatorwill glowwith a pre-defined color (Factorydefault:green).
The“ ” iconwillbe indicatedon thedisplay,whentheMonitorfunctionisactivated.
Monitor -MoMentarily- Cancel any signaling featureswhilepressing the as-signedPFkey.
The“ ” iconwillbe indicatedon thedisplaywhilecancelinganysignalingfeatures.
laMpPress, (or press andhold), the assignedPF key totogglethebacklightofthedisplayandkeypad“On”and“Off”.

EVX-534/-539 OpErating Manual 21
aDVanceD operationpriVacy set Youcanchangetheprivacysettingstobestmeetyoursecurityrequirementsusingthisfunction:r Press, (or press andhold), the assignedPF key.
Atonewillsound,andthecurrentPrivacyCodenumberand its tagnamewillappearon thedis-play.
r Press theSIDE-1/SIDE-2 buttons (or [A]/[B]keys) to select thedesiredPrivacyCode.16Pri-vacyCodesareavailableforselection.
r Press the [D] key to store thenew setting.Thedisplayindicates“-.Set.-”briefly,thenrevertstothenormalchannelindication.
Youmay cancel thenew settingbypressingthe [C] key. In this case, thedisplay indicates“-.Cancel.-”briefly.
encryption When theVoiceScrambler feature isenabled,press,(orpressandhold),theassignedPFkeytotoggletheVoiceEncryption“On”and“Off”.
The“ ”iconwillbeindicatedonthedisplaywhentheVoiceScramblerisactivated.
setPress,(orpressandhold),theassignedPFkeytoac-tivate the“UserSet(Menu)”mode.Seepage43formoreinformationofthe“UserSet(Menu)”mode.
sql oFF Press,(orpressandhold),theassignedPFkeytoopentheSQLtohearbackgroundnoise(unmutetheaudio).
The“ ”iconwillbeblinkedonthedisplaywhentheSQLOFFfunctionisactivated.
sql oFF -MoMentarily- OpenstheSQLtohearbackgroundnoise(unmutetheaudio)whilepressingtheassignedPFkey.
The “ ” iconwill beblinkedon thedisplaywhileopeningtheSQL.

EVX-534/-539 OpErating Manual22
aDVanceD operationsql leVel Youcanmanuallyadjustthesquelchlevelusingthisfunction:r Press,(orpressandhold),theassignedPFkey.A
tonewillsound,andthecurrentsquelchlevelwillappearonthedisplay.
r Press theSIDE-1/SIDE-2 buttons (or [A]/[B]keys)toselectthedesiredsquelchlevel.Availableselections are “Open”, “Threshold”, “Normal”and“Tight”.
r Press the [D] key to store thenew setting.Thedisplayindicates“-.Set.-”briefly,thenrevertstothenormalchannelindication.
Youmay cancel thenew settingbypressingthe [C] key. In this case, thedisplay indicates“-.Cancel.-”briefly.
beep oFFPress, (or press andhold), the assignedPF key todisable the radiobeeps temporarily. Press again, (orpressandholdagain),theassignedPFkeytoenabletheradiobeeps.
When theBeepOff function is “on” and “off”, thedisplay indicates briefly “Beep.OFF” and “Beep.ON”.
Note: if theChannelAnnouncement feature is acti-vated, theChannelAnnouncement alsodisables andenableswhentheBeepOfffunctionis“on”and“off”.
aF MiniMuM VoluMePress, (or press andhold), the assignedPF key, thedisplay indicates “AF.ATT.ON”briefly, and reducethe audiooutput to the (lower) level programmed.Againpress,(orpressandhold),theassignedPFkey,thedisplayindicates“AF.ATT.OFF”briefly,andre-sumenormalaudiooutputlevel.Youmaychangetheprogrammed(lower)levelbythe“UserSet(Menu)”mode.Seepage43formoreinformation.

EVX-534/-539 OpErating Manual 23
ch announceMentPress,(orpressandhold),theassignedPFkeytose-lectthechannelchangeconfirmationbetween“beep”and“announcement”.
Thedisplay indicates “Beep” and “Announce”function activationbrieflywhenever the setting ischanged.
WhisperPress, (or press andhold), the assignedPF key toincreasethemicrophonegain;thusyoucanspeakina lowvoice (whisper) temporarily.Press again, (orpressandholdagain),theassignedPFkeytoresumenormalmicrophonegain.
WhentheWhisperfunctionis“on”and“off”,thedis-play indicates “Whisper.ON” and “Whisper.OFF”briefly.
Vox (requires Vox coMpatible heaDset)Press, (or press andhold), the assignedPF key toactivate theVOX function; allowinghands-free, au-tomatic activationof the transmitter, basedonvoiceinputintothemicrophone.YoumaydisabletheVOXfunctiontemporarilybypressingthePTTswitch.
Press again, (or press andhold again), the assignedPFkeytoresumenormaloperation.
Note 1:when theVOX function is activatedbyop-erationfromtheexternalequipment,asmalldot(“.”)willappearintheupperrightcornerofthedisplay.Note 2:whentheVOXfunctionis“on”and“off”,thedisplayindicates“Vox.ON”and“Vox.OFF”briefly.
Vox leVelYoucanmanually adjust theVOXGainusing thisfunction:r Press,(orpressandhold),theassignedPFkey.A
tonewillsound,andthecurrentVOXGainlevelwillappearonthedisplay.
r Press the [A]/[B] button to select thedesiredVOXGainlevel.
r Press the [D] key to store thenew setting.Thedisplayindicates“-.Saved.-”briefly,thenrevertstothenormalchannelindication.
Youmay cancel thenew settingbypressingthe [C] key. In this case, thedisplay indicates“-.Cancel.-”briefly.
aDVanceD operation

EVX-534/-539 OpErating Manual24
aDVanceD operationVox anti-tripPress, (or press andhold), the assignedPF key totoggletheVOXAnti-Tripfeature“On”and“Off”.
When theVOXAnti-Trip feature isset to“On”, thetransceiver does not activate the transmitter sectionfromthereceiveraudioorownbeepsound.
When theVOXAnti-Trip feature is “on” and “off”,thedisplay indicates “Vox.AntiTrip.ON” and “Vox.AntiTrip.OFF”briefly.
eMergencyTheEVX-534/-539includesan“Emergency”featureineitheranalogordigitalmodes,whichmaybeuse-fulforalertinganotherpartymonitoringonthesamefrequencyasyourtransceiver’schannel.
Press andhold the assignedPF key for a pre-pro-grammedperiodtoinitiateanemergencycallonthepre-definedchannel.The“-.Emergency.-”indicationwill be indicatedon thedisplay.For further detailscontactyourVertexStandarddealer.
To revive the radio from theEmergencymode, justpressandholdagaintheassignedPFkeyorturnofftheradio.
lone WorKerPress, (or press andhold), the assignedPF key toactivate theLoneWorker feature.TheLoneWorkerfeature is designed to emit an alarm for 30 secondswhen theLoneWorkerTimer (programmedbyyourVertexStandarddealer)hasexpired.
Press again, (or press andhold again), the assignedPF key, theLoneWorker feature is disabled. If theuser doesnot reset the timer bypressing thePTTswitch,theradioswitchestoEmergencymode.
Note:whentheLoneWorkerfeatureis“on”and“off”,thedisplayindicates“Lone.Walker.ON”and“Lone.Walker.OFF”briefly.
group up/DoWnPress, (or press andhold), the assignedPF key toselectadifferentgroupofchannels.Agroupnumberwill appear at the upper right corner and a groupnamewillappearbrieflyonthedisplay.

EVX-534/-539 OpErating Manual 25
aDVanceD operationch up/DoWnPress,(orpressandhold),theassignedPFkeytose-lectadifferentchannel.Achannelnamewillappearbrieflyonthedisplay.
speeD ch up/DoWnPressandholdtheassignedPFkeytocausetheradioto begin stepping (repeatedly) upwardor downwardthroughthechannels.
pri-1Press,(orpressandhold),theassignedPFkeytore-callthepre-programmedPriorityChannel(Priority-1)byyourVertexStandarddealer directly.The “P1”willappearattheupperrightcorneronthedisplay.
pri-2Press, (or press andhold), the assignedPF key torecall thepre-programmedPriorityChannel of thecurrent group (Priority-2) byyourVertexStandarddealer directly.WhenPRI-2 channel is recalled, the“P”iconwillappearonthedisplay.
pri-2 setPress, (or press andhold), the assignedPF key totoggle the current channel to thepriority channel 2“enable” and “disable”.WhenPRI-2 channel is re-called,the“P”iconwillbeindicatedonthedisplay.
pri-2 DisablePress (or press andhold) the assignedPF key, thedisplay indicates“Pri2.Disable”briefly,anddisabletheprioritychannel2ofthegrouptemporarily.
Press again, (or press andhold again), the assignedPFkey, thedisplay indicates“Pri2.Enable”briefly,andenablingtheprioritychannel2ofthegroup.
Direct ch 1 to ch 4Press, (or press andhold), the assignedPF key torecall thepre-programmedchannel byyourVertexStandarddealerdirectly.

EVX-534/-539 OpErating Manual26
Direct ch entryYoucan call thedesired channel directlyusing thisfunction:r Press, (or press andhold), the assignedPF key.
Atonewillsound,andthecurrentgroup/channelwillappearonthedisplay.
r In theEVX-534, select thedesireddigit of thegroupnumber and channel numberusing the[A]/[B] keys, then change thenumberusing theSIDE-1/SIDE-2buttons.
IntheEVX-539,enterthedesiredgroupnumber(twodigits) and channel number (three digits)fromthekeypad([0]-[9]key).
r Pressthe[D]keytocallthenewchannel. Youmaycancelthedirectchannelentrybypress-
ingthe[C]key.Inthiscase,thedisplayindicates“-.Cancel.-”briefly.
scanTheScanning feature is used tomonitormultiplechannels programmed into the transceiver.Whilescanning,thetransceiverwillcheckeachchannelforthepresenceof a signal, andwill stopon a channelif a signal is present.EVX-534/-539 can scanboth
digital and analog frequencyprogrammedchannelssimultaneously.
To activate scanning:r Press,(orpressandhold),theassignedPFkeyto
activatescanning.r The scannerwill search the channels of each
channel, looking for active ones; itwill pauseeachtimeitfindsachannelonwhichsomeoneisspeaking.
r Press again, (or press andhold again), the as-signedPF key to disable scanning, and receivethechannelwhichwaschosenwhenpressed thePFkey.
Note:YourdealermayhaveprogrammedyourradiotostayononeofthefollowingchannelsifyoupressthePTTswitchduringscanningpause:“ScanPause”channel(“TalkBack”)“LastBusy”channel“Priority-1”channel“Priority-2”channel“UserProgrammed”channel(“SelectChannel”) ThechannelwhichdefinedintheCHSelector
knob.
aDVanceD operation

EVX-534/-539 OpErating Manual 27
group scanThe scanning feature is used tomonitormultiplechannels programmed into the transceiver.Whilescanning, the transceiverwillcheckeachchanneloftheprogrammedgroupforthepresenceofthesignal,andwillstoponachannelifasignalispresent.
Press,(orpressandhold),theassignedPFkeytoac-tivatethescanningontheselectedgroups.
Press again, (or press andhold again), the assignedPFkey todisable thegroupscanmode,andreceivethechannelwhichwaschosenwhenpressed thePFkey.
When theGroupScan is activated, the display in-dicates “Group.Scan”, and current group channelnumberwill appear at theupper right corner on thedisplay.
aDVanceD operationDual WatchTheDualWatchfeature issimilar to theSCANfea-ture,exceptthatonlytwochannelsaremonitored: Thecurrentoperatingchannel;and ThePriority-2channel.
To activate Dual Watch:r Press,(orpressandhold),theassignedPFkeyto
activatetheDualWatchfeature.r Thescannerwillsearchthetwochannels;itwill
pauseeachtimeitfindsachannelonwhichsome-oneisspeaking.
When theDualWatch feature is activated, the“ ”iconwillbeindicatedonthedisplay.
To stop Dual Watch:r Press,(orpressandhold),theassignedPFkeyto
disabletheDualWatchfeature.r Theradioreceivesthechannelwhichwaschosen
whenpressedthePFkey.

EVX-534/-539 OpErating Manual28
FolloW Me scanTheFollowMeScan featurechecksauser-assignedprioritychannelregularlyasyouscanotherchannels.Thus, if onlyChannels 1, 3, and5 (of the8 avail-able channels) are designated for “Scanning”, theusermaynonethelessassignChannel2asthe“user-assigned”prioritychannelviatheFollowMeScan.
ToactivateFollowMeScan,first select thechannelyouwant to designate as the “user-assignedprior-ity channel” andpress, (or press andhold), the as-signedPF key (thedisplay indicates “Follow.Me.Scan”).Then rotate theCH Selector knob to recallto the “ScanningStart” channelwhichhas beenprogrammedbyyour dealer to activate the scanner.Whenthescannerstopsonan“Active”channel, theuser-assignedpriority channelwill automatically becheckedeveryfewseconds;ifactivityisfoundontheuser-assignedpriority channel, the radiowill switchbetweenitandthedealer-assignedprioritychannel,ifany.
scan setPress,(orpressandhold),theassignedPFkeytoadd/deletethecurrentchannelto/fromyourscanninglist.
To store a particular channel to your scanning list,press,(orpressandhold),theassignedPFkey.Ifyoudelete a channel fromyour scanning list, press, (orpressandhold),theassignedPFkeyagain.
When the scanner is paused, youmay remove thechannelfromthescanlisttemporarilybypressing,(orpressandholding),thesamekey.
Note 1:whenstoreaparticularchanneltoyourscan-ning list, the display indicates “Scan.Stop”brieflyand“ ”iconwillappearonthedisplay.Note 2:whendelete a channel fromyour scanninglist,thedisplayindicates“Scan.Skip”brieflyandthe“ ”iconwilldisappearfromthedisplay.
aDVanceD operation

EVX-534/-539 OpErating Manual 29
group scan setYoumaywishtohavetheScannerpassthroughmorethanoneGroupduringthescanningprocess(normally,scanningisperformedwithinthecurrentgrouponly).
To include the currentGroup in the scanning loop,press, (or press andhold), the assignedPF key.ToremoveacurrentGroupfromGroupScan,press,(orpressandhold),theassignedPFkeyagain.
Note 1:when include thecurrentgroup in the scanloop,the“”iconwillappearonthedisplay.Note 2:when removea currentgroup fromgroupscan,the“”iconwilldisappearfromthedisplay.
ta (talK arounD) scanPress, (or press andhold), the assignedPF key totoggletheTAScanfeature“On”and“Off”.
WhileTAScan is proceeding, the transceiverwillsearchboth the transmit and receive frequencies.Whenasignalisencounteredonthereceivefrequen-cy, the transceiverwill pauseuntil the signal disap-pears.Whena signal is encounteredon the transmitfrequency, the transceiverwill check for activityonthe receive frequency every few seconds (interval
programmedbyyourVertexStandarddealer).
WhentheTAScanfeatureisactivated,the“ ”iconwillblinkonthedisplay.
Note:TheTAScan feature does not activate on theSimplexChannel.
talK arounDPress, (or press andhold), the assignedPF key toactivatetheTalkAroundfeaturewhenyouareoperat-ingonduplexchannelsystems(separatereceiveandtransmit frequencies, utilizing a “repeater” station).TheTalkAround feature allowsyou to bypass therepeater station and talk directly to a station that isnearby.Thisfeaturehasnoeffectwhenyouareoper-atingon “simplex” channels,where the receive andtransmitfrequenciesarealreadythesame.
When theTalkAround feature is activated, the“ ”iconwillbeindicatedonthedisplay.
Note that your dealermayhavemodeprovision for“TalkAround” channels byprogramming “repeater”and“TalkAround”frequenciesontwoadjacentchan-nels.Ifso, thekeymaybeusedforoneoftheotherPre-ProgrammedFunctions.
aDVanceD operation
EVX-534/-539 OpErating Manual30
Note:TheTalkAround feature does not activate ontheSimplexChannel.
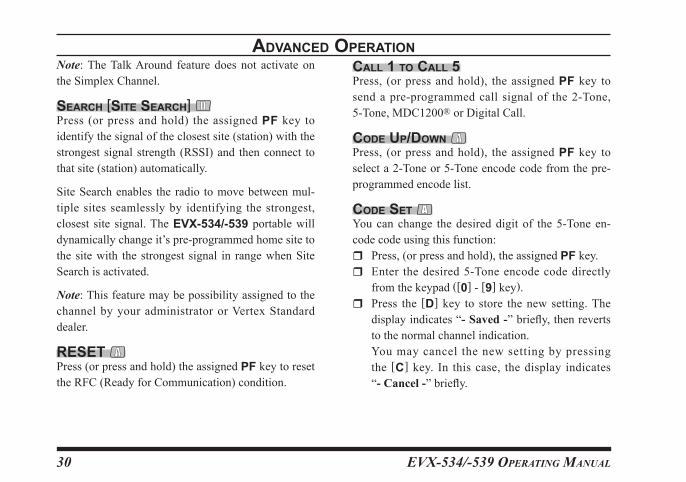
search [site search] Press (or press andhold) the assignedPF key toidentifythesignaloftheclosestsite(station)withthestrongest signal strength (RSSI)and thenconnect tothatsite(station)automatically.
SiteSearchenables theradio tomovebetweenmul-tiple sites seamlesslyby identifying the strongest,closest site signal.TheEVX-534/-539 portablewilldynamicallychangeit’spre-programmedhomesitetothe sitewith the strongest signal in rangewhenSiteSearchisactivated.
Note:Thisfeaturemaybepossibilityassignedtothechannel byyour administrator orVertexStandarddealer.
reset Press(orpressandhold)theassignedPFkeytoresettheRFC(ReadyforCommunication)condition.
call 1 to call 5 Press, (or press andhold), the assignedPF key tosend a pre-programmed call signal of the2-Tone,5-Tone,MDC1200®orDigitalCall.
coDe up/DoWn Press, (or press andhold), the assignedPF key toselecta2-Toneor5-Toneencodecodefromthepre-programmedencodelist.
coDe set Youcan change thedesireddigit of the5-Tone en-codecodeusingthisfunction:r Press,(orpressandhold),theassignedPFkey.r Enter thedesired5-Tone encode codedirectly
fromthekeypad([0]-[9]key).r Press the [D] key to store thenew setting.The
displayindicates“-.Saved.-”briefly,thenrevertstothenormalchannelindication.
Youmay cancel thenew settingbypressingthe [C] key. In this case, thedisplay indicates“-.Cancel.-”briefly.
aDVanceD operation

EVX-534/-539 OpErating Manual 31
speeD Dial YourVertexStandarddealermayhavepre-programmedAuto-Dialtelephonenumbermemoriesintoyourradio.
Todialanumber:In theEVX-534, press, (orpress andhold), the as-signedPF key, thenpress theSIDE-1/SIDE-2 but-tons(or[A]/[B]keys)toselecttheAuto-Dialmemorynumberyouwishtodial.PressthePTTswitchtosendapre-definedDTMFtone.TheDTMFtonessentdur-ingthedialingsequencewillbeheardinthespeaker.
In theEVX-539, press, (or press andhold), the as-signedPFkey,thenpressthekeypad([0]-[9]key)correspondingtotheAuto-Dialmemorynumberyouwishtodial.TheEVX-539sendapre-definedDTMFtone,andtheDTMFtonessentduringthedialingse-quencewillbeheardinthespeaker.
DtMF coDe set (eVx-539)r Press,(orpressandhold),theassignedPFkeyto
startenteringtheDTMFdialingsequence.r Enter theDTMFdigit directly from thekeypad
([0]-[9]key).r After entering allDTMFdigits, press thePTT
switchtotransmittheDTMFcode.
aDVanceD operationcallTheCallfeatureisdifferentbytheoperatingsystemandoperatingmode.
When using the DTMF Paging System (eVx-539)
This feature, if enabled,allows theuser to sendany3-digit PageCall code, used to call other similarly-equippedstations.Press, (orpressandhold), theas-signedPFkey,followedbythethreedigitsrepresent-ingthePageCallcodeofthestationyouwishtocall.Threetoneswillbeheardafterthelastkeyispressed(thenewcodewillnowbetransmitted).
The receiver squelchof theother stationwill beopened,andyoucanbegincommunication.
When using the 2-tone/5-tone Signaling SystemThisfeature, ifenabled,press,(orpressandhold), theassignedPFkeytosenda2-tone/5-tonesequentialtone.
When using the MDC1200 SystemThisfeature,ifenabled,Press,(orpressandhold),theassignedPF key to send anMDC1200 code.Avail-ablecodesare“Call.Alert”,“Selective.Call”,“Radio.Check”,“Stun”and“Revive”.r Press,(orpressandhold),theassignedPFkeyto
EVX-534/-539 OpErating Manual32
enterthe“CallMenu”mode.r Press theSIDE-1/SIDE-2 buttons to select the
desiredCallmode, thenpress the[D]key toac-cepttheselection.(Youmaycanceltheselectionbypressingthe[C]key).
r Press theSIDE-1/SIDE-2 buttons to select thestationtobecalled.
Note:Youmayenterthestation’sIDnumber(fourdigits)directly from thekeypad ([0] - [9], [A] -[D],[#]:substitutefor“E”,and[Ý]:wildcard).
r PressthePTTswitchtosendanMDC1200call.
When operating in the Digital modeThisfeature,ifenabled,allowstheuserconfirmand/oredittheContactAlias.r Press,(orpressandhold),theassignedPFkeyto
enterthe“CallMenu”mode.r Press theSIDE-1/SIDE-2 buttons (or [A]/[B]
keys)toselectthedesiredContactAlias.Youmayfindthe“NewList”and“Manual”categoryatthelast of the indication loop.Describes these twofunctionslater.
r Pressthe[D]keytoaccepttheselection. Youmaycanceltheselectionbypressingthe[C]key.
I)IftheTXIDTypeoftheselectedContactAliasis“GroupCall”or“AllCall”,youmayconfirmtheCallIDoftheContactAliasbythefollowingoperation: Pressthe[D]keytoconfirmthe“CallID”ofthe
selectedContactAlias. Pressthe[C]keytoreturnthedisplaytothe“Tag
Name”indication.
II)IftheTXIDTypeoftheselectedContactAliasis“PrivateCall”,youmayconfirmandedittheContactAliasbythefollowingoperation: Press theSIDE-1/SIDE-2 buttons (or [A]/[B]
keys) to select the functionyouwish to.Avail-able selections are “Call.Alert”, “View. ID”,“Edit.Tagø”,“Edit.IDø”,“Alert.Select”,“Delete..Listø”, “Radio.Check, “Radio.Monitor”, “Re-vive”and“Stun”(ø:EVX-539only).
Pressthe[D]keytoaccepttheselectedfunction.Refer to follows for detailedoperationof eachfunction.
Pressthe[C]keytocancelthe“Call”featureandreturntothenormaloperation,ifdesired.
Call.Alert:Youmay contactwith the selectedContactAlias.
aDVanceD operation

EVX-534/-539 OpErating Manual 33
Press the [D]key to transmit thecall alert com-mand to thedesignated radio. If thedesignatedradioisactive,thedesignatedradiotransmitstheACKcommandanddisplaysyourIDnumberonthedisplay. Ifnot,your radio’sdisplay indicates“No.Response”.
View. ID:Youmay confirm theCall IDof theContactAlias.Pressthe[D]keytoconfirmthe“CallID”.Pressthe[C]keytwicetoreturnthedisplaytothe“TagName”indication.
Edit.Tag:Youmay edit the “TagName”of theselectedContactAliasifyourtransceiverisEVX-539.However,youcannoteditthe“TagName”of theContactAliaswhichdeterminedby theCE151ProgrammingSoftware.Press the [D]key, thenedit the“TagName”us-ingthe[0]-[9]key(forselectthecharacter)and[A]/[B]key(forselectthedigit).Youmaydeletethecurrentcharacterbypressingthe[Ý]key,orinsertthespacebypressingthe[#]key.Pressthe[D] key again, thedisplay indicates “-Saved-”brieflyandstorethenewsetting.Youmaycancel
thenewsettingbypressingthe[C]key.
Edit. ID:Youmay edit the “IDnumber”of theselectedContactAliasifyourtransceiverisEVX-539.However,youcannoteditthe“IDnumber”of theContactAliaswhichdeterminedby theCE151ProgrammingSoftware.Pressthe[D]key,theneditthe“IDnumber”us-ingthe[0]-[9]key(forselectthecharacter)and[A]/[B] key (for select thedigit). Press the [D]keyagain,thedisplayindicates“-Saved-”brieflyand store thenew setting.Youmay cancel thenewsettingbypressingthe[C]key.
Alert.Select:Youmay change the alert tonewhichassignedtotheselectedContactAlias.Press the [D]key, thenpress theSIDE-1/SIDE-2 buttons (or [A]/[B] keys) to select thedesiredalerttone.Availableselectionsare“TONE.A”to“TONE.J”and“None”.Pressthe[D]keyagain,thedisplay indicates “-Saved-”brieflyand storethenewsetting.Youmaycancel thenewsettingbypressingthe[C]key.
Delete..List:YoumaydeletethedesiredContactAlias from the contact list if your transceiver is
aDVanceD operation

EVX-534/-539 OpErating Manual34
EVX-539. Important Note: the deletedContactAliascannotberestored,andyoucannotdeletetheContactAliaswhichdeterminedbytheCE151ProgrammingSoftware.Press the [D] key, thedisplay indicates “Delete.Yes/No”(“Yes” is blinking). Press the [D] keyagain, thedisplay indicates “-Saved-”briefly,then reverts tofirstContactAlias of the contactlist.Youmay cancel thedeleting theContactAliasbypressingthe[C]key.
Radio.Check:YoumaychecktheradiostatusoftheselectedContactAlias.Pressthe[D]keytotransmittheradiostatuscom-mand to thedesignated radio. If thedesignatedradio is alive, the designated radio transmits theACKcommand, and thenyour radio’s displayindicates“Ack.Receive”.Ifnot,yourradio’sdis-playindicates“No.Response”.
Radio.Monitor:Youmaymonitor the situationaroundthedesignatedradiobyremotecontrol.Press the [D] key to remote-control the desig-nated radio. If thedesignated radio is alive, thedesignated radiowill automatically transmit for
aDVanceD operationthe programmedperiod to transmit the situationaroundtheradio toyou.Yourradio’sdisplay in-dicates“Ack.Receive”,andoutputsthesituationaround thedesignated radio from the speaker. Ifthedesignatedradioisnotalive,yourradio’sdis-playindicates“No.Response”andnoresponses.
Revive:Youmayrevivethestunnedradiobyre-motecontrol.Pressthe[D]keytotransmittherevivecommandto the stunned radio.When the stunned radioreceives the revive command, the stunned radiorevives, and then transmits theACKcommandautomatically.Yourradio’sdisplayindicates“Ack.Receive”. If your radio’s display indicates “No.Response”,therevivecommanddidnotsucceed.
Stun:Youmaystunthedesignatedradioforciblybyremotecontrol.Press the [D]key to transmit the stuncommandto the designated radio. If the designated radiois alive, the designated radio transmits theACKcommandandstunsit.Ifnot,yourradio’sdisplayindicates“No.Response”,thestuncommanddidnotsucceed.

EVX-534/-539 OpErating Manual 35
ThestunnedradiowillrevivebytheRevivefunc-tiondescribedpreviously.
III)New.List:Thiscategoryallowsyoutocreate thedesiredContactAliasandsaveitintothecontactlist.r Press the [D] key, thedisplay indicates “Enter.
ID”briefly, enter the “IDnumber” youwish to,usingthe[0]-[9]key(forselectthenumber)and[A]/[B]key(forselectthedigit).
r Press the [D] key again, thedisplay indicates“Enter.Tag” briefly, enter the desired “TagName”usingthe[0]-[9]key(forselectthechar-acter)and[A]/[B]key(forselectthedigit).
Youmaydelete the current character bypress-ing the[Ý]key,or insert thespacecharacterbypressingthe[#]key.
r Press the [D] key again, thedisplay indicates“Alert.Select”briefly,selectthedesiredalerttoneusing theSIDE-1/SIDE-2 buttons (or [A]/[B]keys).
r Press the [D] key again, thedisplay indicates“-Saved-”briefly and store thenew setting intothecontactlistasthePrivateCall.Youmaycan-celthenewsettingbypressingthe[C]key.
aDVanceD operationIV)Manual:This category allowsyou to performthe“Call.Alert”,“Radio.Check,“Radio.Monitor”,“Revive”and“Stun”functionforthedesiredContactAliasmanuallybythefollowingoperation.r Pressthe[D]key,thenenterthe“IDnumber”you
wish to operate the function, using the [0] - [9]key(forselect thenumber)and[A]/[B]key(forselectthedigit).
r Press the [D]keyagain, thenpress theSIDE-1/SIDE-2buttons(or[A]/[B]keys)toselectthede-siredfunctiondescribedabove.
r Press the [D] key to perform the function.Youmaycancelthefunctionbypressingthe[C]key.
status set Youcan change the5-tone status codeusing thisfunction:r Press,(orpressandhold),theassignedPFkeyto
changethe5-tonestatuscode.r Enter the5-tone status codedirectly from the
keypad([0]-[9]key).r Pressthe[D]key,Thedisplayindicates“-.Set.-”
briefly and store the newnumber to the 5-tonestatuscode.
Youmay cancel thenew settingbypressing

EVX-534/-539 OpErating Manual36
the [C] key. In this case, thedisplay indicates“-.Cancel.-”briefly.
status up/DoWn Press, (or press andhold), the assignedPF key toselecta5-tonestatuscodefromthepre-definedstatuslist.
status checK Press, (or press andhold), the assignedPF key tocheckthe5-tonereceivestatuscode.Whenyoupressthiskey,thedisplaywillindicatethe“Message”cor-respondingtothereceivestatusconditionperthepre-definedstatuslist.
Duty Press, (or press andhold), the assignedPF key totoggle theDuty functionof the2-tone, 5-tone, orMDC1200®“On”and“Off”.
When theDuty function is set to “On”, the displayindicates“Duty.ON”brieflyandtheuserwillalwayshear (dependingon thesub-audiosignaling)all traf-ficon the paging channel.The radiowill sound thepagingalertwhenitreceivestheprogrammed2-tone,5-tone,orMDC1200®.
When theDuty function is set to “Off”, thedisplayindicates“Duty.OFF”brieflyandtheuserwillNOThearnormalradiotrafficonthepagingchannel.Theradiowill sound thepaging alert andunmuteonlywhen it receives theprogrammed2-tone, 5-tone, orMDC1200®.
iD checK ThisfunctionallowsloggedIDoftheDTMFSignal-ingor 5-toneSignaling to be reviewed and relayed(5-toneSignalingonly)toaspecificstation:r Press,(orpressandhold),theassignedPFkeyto
displaytheloggedIDoftheDTMFSignalingor5-toneSignaling.
r Press theSIDE-1/SIDE-2 buttons to select theloggedIDoftheDTMFSignalingor5-toneSig-naling.
r Press the [B] key to toggle thedisplaybetweenthe“IDCodedisplay”and“ChannelTagdisplay”.
r Pressthe[D]keytosendtheCallback,whenre-callingtheIDofthe“5-toneSignaling”,ifdesired.
Youmaycancel theCallbacksendingbypress-ingthe[C]key.Inthiscase,thedisplayindicates“-.Cancel.-”briefly.
aDVanceD operation

EVX-534/-539 OpErating Manual 37
aDVanceD operationarts loginThis function enable thedisplaying the logged IDof theMDC1200®ARTS™(ARTSII™)orDigitalARTS™(ARTSII™).r Press, (or press andhold), the assignedPF key
to display thenumberof the logged stationoftheMDC1200®ARTS™(orARTSII™) for 1.5seconds, and then thedisplay indicates the “IDnumber”oftheloggedstation.
r Press the [A]/[B] keys (orSIDE-1/SIDE-2 but-tons) to indicate the “IDnumber”of other sta-tions,ifneeded.
r Pressthe[C]keytoresumenormaldisplay.
text Message Youmayreceive/sendthemessagefrom/tootherradio.r Press,(orpressandhold),theassignedPFkeyto
enterthe“TextMessage”mode.r Press the [A]/[B] keys (orSIDE-1/SIDE-2 but-
tons)toselectthefunctionyouwishto.Availablefunctionsare“Inbox”,“Write”(EVX-539 only),and“Select.Message”.
r Pressthe[D]keytoaccepttheselectedfunction.Refer to follows for detailedoperationof eachfunction.
r Press the [C] key to cancel the “TextMessage”featureandreturntothenormaloperation,ifde-sired.
Inbox:Youmayconfirm/deletethereceivedmessageinthisfunction.
Confirm Pressthe[A]/[B]keystoselectthereceivedmes-
sageyouwishtoconfirm.Thedisplaywillscrollthe selectedmessage automatically.TheEVX-534/-539canmemorizeupto28messages(first-infirst-outbasis).Themessagenumberindicatesattheupperrightcornerofthedisplay.Youmayfindthe“All.Delete”menuwhichislocatedatthelastmessageloop.Describesthismenulater.
Press theSIDE-1 button at once (or press theSIDE-2buttontwice)toconfirmthe“CallID”oftheselectedmessage,ifdesired.
Press the [A]/[B] keys to select other receivedmessage,orpressthe[C]keytoreturntothetopofthe“INBOX”function.
Delete(Individualmessage) Pressthe[A]/[B]keystoselectthereceivedmes-
sageyouwishtodelete.

EVX-534/-539 OpErating Manual38
aDVanceD operation Press theSIDE-2 button at once (or press the
SIDE-1 button twice) to select the “Delete”menu, thenpress the [D] key.Thedisplay indi-cates“Delete.Yes/No”(“Yes”isblinking).
Press the [D] key again to delete the selectedmessage.Youmay cancel thedeleting themes-sagebypressingthe[C]key.
Press the [A]/[B] keys to select other receivedmessageyouwishtodelete,orpressthe[C]keytoreturntothetopofthe“Inbox”function.
Delete(Allmessages) Pressthe[A]/[B]keystoselectthe“All.Delete”
menuwhich is located at the lastmessage loop,thenpressthe[D]key.Thedisplayindicates“De-lete.Yes/No”(“Yes”isblinking).
Pressthe[D]keyagaintodeletetheallmessages.Youmaycancelthedeletingtheallmessagesbypressingthe[C]key.
Write:IfyourtransceiverisEVX-539,youmaycre-atea sendingmessageandsend/save it in this func-tion.TheEVX-539canmemorizeupto24messagesincludepre-programmedmessagewhichdeterminedbytheCE151ProgrammingSoftware.
Create the message Createthemessageusingthe[0]-[9]key(forse-
lectthecharacter)and[A]/[B]key(forselectthedigit).TheEVX-539 cancreateupto32charac-ters.
Youmaydelete the current character bypress-ing the[Ý]key,or insert thespacecharacterbypressingthe[#]key.
Pressthe[D]key,thenpressthe[A]/[B]keys(orSIDE-1/SIDE-2 buttons) to select the “Send”or“Save”menudependingonyourpurpose,andmovetoeachstepasfollow.
Send the message Pressthe[D]key,thenpressthe[A]/[B]keys(or
SIDE-1/SIDE-2buttons) toselect the“Call ID”youwishtosendamessage.
Youmayenteranew“CallID”manuallybyfol-lowingoperation:
Press theSIDE-1/SIDE-2 buttons to select the“Manual”menuwhichislocatedatthelast“CallID”loop.
Pressthe[D]key,thenenterthe“CallID”usingthe[0]-[9]key.

EVX-534/-539 OpErating Manual 39
aDVanceD operation Pressthe[D]keyagaintosendthemessage.The
display indicates “TEXTMSG”and “Call ID”alternatelywhilesendingthemessage.
Save the message Pressthe[D]keytosavethecreatedmessage.
Select Message:Youmay send/edit/delete themes-sageinthisfunction.
Send the message Press the [A]/[B] keys (orSIDE-1/SIDE-2 but-
tons)toselectthemessageyouwishtosend. Pressthe[D]key,thenpressthe[A]/[B]keys(or
SIDE-1/SIDE-2 buttons) to select the “Send”menu.
Press the [D] key again, thenpress the [A]/[B]keys (orSIDE-1/SIDE-2 buttons) to select the“CallID”youwishtosendamessage.
Youmayenteranew“CallID”manuallybyfol-lowingoperation:l Press the [A]/[B] keys (orSIDE-1/SIDE-2
buttons)toselectthe“Manual”menuwhichislocatedatthelast“CallID”loop.
l Pressthe[D]key,thenenterthe“CallID”us-ingthe[0]-[9]key.
Pressthe[D]keyagaintosendthemessage.Thedisplay indicates “TEXTMSG”and “Call ID”alternatelywhilesendingthemessage.
Edit the messageImportantNote:YoucannoteditthemessagewhichdeterminedbytheCE151ProgrammingSoftware. Press the [A]/[B] keys (orSIDE-1/SIDE-2 but-
tons)toselectmessageyouwishtoedit. Pressthe[D]key,thenpressthe[A]/[B]keys(or
SIDE-1/SIDE-2 buttons) to select the “Edit”menu.
Pressthe[D]keyagain,theneditthemessageus-ingthe[0]-[9]]key(forselectthecharacter)and[A]/[B]key(forselectthedigit).
Pressthe[D]key,thenpressthe[A]/[B]keys(orSIDE-1/SIDE-2 buttons) to select the “Save”menu.
Press the [D] key again to save the editedmes-sage.
Delete the messageImportantNote:You cannot delete themessagewhichdeterminedby theCE151ProgrammingSoft-ware.

EVX-534/-539 OpErating Manual40
aDVanceD operation Press the [A]/[B] keys (orSIDE-1/SIDE-2 but-
tons)toselectthemessageyouwishtodelete. Pressthe[D]key,thenpressthe[A]/[B]keys(or
SIDE-1/SIDE-2 buttons) to select the “Delete”menu.
Press the [D]key.Thedisplay indicates “Delete.Yes/No”(“Yes”isblinking).
Press the [D] key again to delete the selectedmessage.Youmay cancel thedeleting themes-sagebypressingthe[C]key.
reMote halt tx [transMit interrupt] Transmit Interrupt allows a priorityuser (assignedwiththeprogrammingsoftware)theabilitytohaltor“interrupt” any current transmission.The channel isthenopenforaprioritymessagetobesent.TransmitInterrupt functionality ensures connectionof criticalmessages.
Press(orpressandhold)theassignedPFkeytohaltanycurrenttransmission.Thechannelwillclear,thenpressthePTTbuttontotransmittheprioritymessage.
option sWitch 1Activates theoptional accessorywhile pressing theassignedPFkey.
option sWitch 2Press, (or press andhold), the assignedPF key totoggletheoptionalaccessory“On”and“Off”.
tx saVe DisableTheTransmitBatterySaverhelpsextendbatterylifebyreducingtransmitpowerwhenaverystrongsignalfromanapparentlynearby station isbeing received.Under some circumstances, though, your hand-heldradiomaynot beheardwell at the other endof thecommunicationpath,andhighpowermaybeneces-saryatalltimes.
Press, (or press andhold), the assignedPF key todisabletheTransmitBatterySaver,ifyouareoperat-inginalocationwherehighpowerisalmostalwaysneeded.
Press again, (or press andhold again), the assignedPF key, theTransmitBatterySaver activates to re-duce the transmit powerwhen a very strong signalfromanapparentlynearbystationisbeingreceived.
When theTransmitBatterySaver is “on”and“off”,thedisplay indicates “Tx.Save.ON” and “Tx.Save.OFF”briefly.

EVX-534/-539 OpErating Manual 41
locKPress(orpressandhold)theassignedPFkeytolocktheCHSelectorknob,Programmablekeys,andPTTswitch.Youmaychangethelockoutconfigurationbythe“UserSet (Menu)”mode.Seepage43 formoreinformation.
aDVanceD operation

EVX-534/-539 OpErating Manual42
locK In order to prevent accidental channel changeorinadvertent transmission, various aspects of theCH Selector knob,Programmable keys, andPTTswitchmaybelocked.Thepreciselockoutconfigura-tionisprogrammedbyyourDealer.
To lockedout thekey locking, turn the radiooff.Now,pressandholdthePTTandSIDE-2keywhileturningtheradioonagain.
Tocancellocking,repeatthisprocess.
artstM (auto range transponD systeM)Thissystemisdesignedtoinformtheoperatorwhenyou and anotherARTS™-equipped transceivers andstations arewithin communication rangeusing theDCSEncoder/Decoder.
DuringARTS™operation,whentheradioreceivesanincomingARTS™signal,ashortbeepwillsoundand“IN.Service”will be indicatedon thedisplay for 2seconds.Ifyoumoveoutofrangeformorethantwominutes,yourradiosensesthatnosignalhasbeenre-ceived;ashorttriple-beepwillsoundand“OUT.Ser-vice”willbe indicatedonthedisplayfor2seconds.Ifyoumovebackintocommunicationrange,assoonastheotherstationtransmits,ashortbeepwillsoundagainand“IN.Service”willbeindicatedagainonthedisplayfor2seconds.
artsIItM (auto range transponD systeM)ARTSIITMisanenhancedfeatureoftheARTSTMsys-temwhichidentifiestheradioid’sbothinandoutofrangeindviduallyusingeitherdigitalmode,orMDC-1200®encode/decodeinanalogmode.

EVX-534/-539 OpErating Manual 43
user set MoDeThe“UserSet”(Menu)Modeallowstheusertodefineorconfigurevarioussettings,suchasSquelch,Keylockoutconfiguration,etc.Toactivatethe“UserSet”(Menu)Mode:r PressthePFkeyassignedtothe“SET”function
toenterthe“UserSet”(Menu)Mode.r Select theSetMode itemyouwish to change
using the [A]/[B] keys, thenuse theSIDE-1/SIDE-2keystoadjustthesettingoftheselecteditem.
r Repeat previous step to adjust otherSetModeitem,ifdesired.
r Pressthe[D]keytosavethenewsettingandthedisplay indicates “-.Saved. -”briefly, then exitstonormaloperation.
Youmayexittonormaloperationwithoutsavingthenewsettingbypressingthe[C]key.
set MoDe iteM Description aVailable Values
SQL SetstheSquelchlevel.ThisSetModeItemisappearedontheAnalogchannelonly.
Open,Threshold,Normal,Tight
Beep Enables/DisablestheKeyBeeper. ON,OFFBell Enables/DisablestheBellfunction(Alerttoneactivatedbyincomingsignaling). ON,OFFLight Enables/Disablesthebacklightofthedisplayandkeypad. ON,OFFKey Enables/DisablestheKeyLockfunction. Free,LockPTT Enables/DisablesthePTTLockfunction. Free,LockScan Engages/DisengagesScanning. ON,
GroupScan,FMScan,OFF
Dual.Watch Engages/DisengagesDualWatch. ON,OFFAF.Minimum.Volume SetstheminimumAudioVolumelevel. 000~255Contrast SetstheLCDContrastlevel 00~15Vox SetstheVOXsensitivity.
ThisSetModeItemisappearedontheVOXfunctionenabledchannelonly. –8~0~+8
Tx.Save Enables/DisablestheTXSavefunction. ON,OFFEncryption Enables/DisablestheEncryption(foranalog)orPrivacy(fordigital)function.
ThisSetModeItemisappearedontheEncryption/Privacyfunctionenabledchannelonly. ON,OFF

EVX-534/-539 OpErating Manual44
optional accessoriesFNB-V133LI-UNI 7.4V,1380mAhLi-IonBatteryPackFNB-V134LI-UNI 7.4V,2300mAhLi-IonBatteryPackFNB-V136-UNI 7.2V,1200mAhHi-MHBatteryPackFBA-41 AlkalineBatteryCase(6xAA)CD-58 DesktopChargerPA-55 ACAdapterforCD-58VAC-UNI DesktopCharger(CD-58+PA-55)VAC-6058 Multi-UnitChargerVCM-5 VehicularChargerMountingAdapter (forCD-58)MH-100 ReceiveOnlyEarpiece(forMH-360S/-450S)MH-66A4B SubmersibleSpeakerMicrophoneMH-81A4B OvertheHeadVOXCompatibleHeadsetMH-101A4B 1WireSurveillanceKitMH-102A4B 2WireSurveillanceKitMH-360S CompactSpeakerMicrophoneMH-450S SpeakerMicrophoneVH-150A BehindTypeVOXCompatibleMicrophoneVH-150B OvertheHeadVOXCompatibleMicrophone
ATV-16A VHFAntenna(136-150MHz)ATV-16B VHFAntenna(150-162MHz)ATV-16C VHFAntenna(162-174MHz)ATV-16XL VHFAntenna(Untuned)ATU-16B UHFAntenna(400-420MHz)ATU-16C UHFAntenna(420-450MHz)ATU-16D UHFAntenna(450-470MHz)ATU-16F UHFAntenna(470-520MHz)ATU-16BS UHFStubbyAntenna(400-430MHz)ATU-16DS UHFStubbyAntenna(450-490MHz)CN-2A AntennaAdapterCLIP-20 BeltClipCE151 PCProgrammingSoftwareFIF-12 USBProgrammingInterfaceCT-106 ConnectionCableforFIF-12CT-27 RadiotoRadioCloningCable
Availability of accessories may vary; some accessories are supplied standard per local requirements, others may be unavailable in some regions. Check with your Vertex Standard Dealer for changes to this list.

Part15.21:ChangesormodificationstothisdevicenotexpresslyapprovedbyVertexStandardcouldvoidtheuser’sauthorizationtooperatethisdevice.
TheAMBE+2™voicecodingTechnologyembodied in thisproduct isprotectedby intellectualpropertyrightsincludingpatentrights,copyrightsandtradesecretsofDigitalVoiceSystems,Inc.ThisvoicecodingTechnologyislicensedsolelyforusewithinthisCommunicationsEquipment.TheuserofthisTechnologyisexplicitlyprohibitedfromattemptingtodecompile,reverseengineer,ordisassembletheObjectCode,orinanyotherwayconverttheObjectCodeintoahuman-readableform.U.S.Pat.Nos. #5,870,405,#5,826,222,#5,754,974,#5,701,390,#5,715,365,#5,649,050,#5,630,011,#5,581,656,#5,517,511,#5,491,772,#5,247,579,#5,226,084and#5,195,166.
dIsposal.of.yoUr.electronIc.and.electrIc.eqUIpmentProductswiththesymbol(crossed-outwheeledbin)cannotbedisposedashouseholdwaste.ElectronicandElectricEquipmentshouldberecycledatafacilitycapableofhandlingtheseitemsandtheirwastebyproducts.InEUcountries,pleasecontactyourlocalequipmentsupplierrepresentativeorservicecenterforinformationaboutthewastecollectionsysteminyourcountry.
Warranty policyVertexStandardwarrants,totheoriginalpurchaseronly,itsVertexStandardmanufacturedcommunicationsprod-uctsagainstdefectsinmaterialsandworkmanshipundernormaluseandserviceforagivenperiodoftimefromthedateofpurchase.LimitedWarrantyDetails:� NorthAmericacustomers(USAandCanada):http://www.vertexstandard.com/lmr/warranty-terms.aspx� CustomersoutsideofNorthAmerica:contacttheauthorizeddealerinyourcountry.

Vertex Standard LMR, Inc.4-6-8Shibaura,Minato-ku,Tokyo108-0023,Japan
Noportionof thismanualmaybereproducedwithout theper-missionofVertexStandardLMR,Inc.
VertexStandardisatrademarkofVertexStandardLMR,Inc.Allothertrademarksarethepropertyoftheirrespectiveowners.
©2015VertexStandardLMR,Inc.Allrightsreserved.