fabrication of the crow boot - delphi orthodelphiortho.com/crowdelphipandgnotes.pdf · ¾flair...
TRANSCRIPT

Fabrication of theFabrication of theCROW BootCROW Boot
From
Steve Hill, COSteve Hill, CO

Walking BootWalking BootC.R.O.W. C.R.O.W. –– Charcot Restraint Charcot Restraint
Orthotic WalkerOrthotic Walker
There are several names for the Walking Boot. CROW boot, which is short for Charcot Restraint Orthotic Walker.

Walking BootWalking BootC.R.O.W. C.R.O.W. –– Charcot Restraint Charcot Restraint
Orthotic WalkerOrthotic Walker
Neuropathic Walking BootNeuropathic Walking Boot
Neuropathic Walker, referring to it’s use in treating neuropathic afflictions.

Walking BootWalking BootC.R.O.W. C.R.O.W. –– Charcot Restraint Charcot Restraint
Orthotic WalkerOrthotic Walker
Neuropathic Walking BootNeuropathic Walking Boot
Anterior/Posterior Clamshell AFOAnterior/Posterior Clamshell AFO
Or simply anterior posterior, clamshell AFO.

IndicationsIndicationsCharcot AnkleCharcot Ankle
Indications include Charcot Ankle,

IndicationsIndicationsCharcot AnkleCharcot Ankle
DiabetesDiabetes
Diabetes,

IndicationsIndicationsCharcot AnkleCharcot Ankle
DiabetesDiabetes
Degenerative Skin DiseasesDegenerative Skin Diseases
and a wide variety of degenerative skin diseases.

CastingCasting
Take a Take a PERFECTPERFECT CastCast
When casting for the Walking Boot, bear in mind the fact that this will be a total contact orthosis. A perfect cast is absolutely necessary. This cannot be overstated. If you have taken a cast that is roped or in the incorrect position, do yourself and your patient a favor and recast.

CastingCasting
Take a Take a PERFECTPERFECT CastCast
Cast as close to 90Cast as close to 90oo as possible without as possible without making correctionsmaking corrections
Make sure that the cast is taken as close to neutral as anatomically possible. Sure, you can try and fake the position with mold corrections, but you’re taking a big risk in compromising the fit. If the cast is good the mold won’t need to be faked.

CastingCasting
Take a Take a PERFECTPERFECT CastCast
Cast as close to 90Cast as close to 90oo as possible without as possible without making correctionsmaking corrections
Brace is Supportive, not Corrective Brace is Supportive, not Corrective
Because these orthoses are supportive and not corrective, any anatomical anomalies can be accommodated for externally. For example, any varus/valgus, plantar/dorsi, supination/pronation positions that are not correctable can accommodated for in the rocker sole build up. Don’t worry about casting in full weight bearing, for example.

Fabrication InstructionsFabrication Instructions
Clean off castClean off cast
Starting with a filled cast, remove all soap and seams using a sureform and sandscreen.

Fabrication InstructionsFabrication Instructions
Sand plantar surfaceSand plantar surface
The patient will frequently have decubitus ulcers on the bottom of the affected foot and these need to be accommodated for. Don’t carve it flat like you normally might.

Fabrication InstructionsFabrication Instructions
Carve dorsumCarve dorsum11//88”” –– ¼¼””
At the dorsal aspect, from the ankle crease to about midfoot, carve off about an eighth to a quarter inch. This will allow some space for the foot to compress into the half inch thick foam on the plantar aspect. You don’t want the patient to sink ¼” into the foot bed and leave a ¼” gap on the top of the foot. This could cause rubbing on an insensate foot.

Fabrication InstructionsFabrication Instructions
Build up bonyBuild up bonyprominences prominences
Build ups on a Walking Boot are small. It should ideally be a total contact brace, so all boney prominences should built up with minimal clearance. Build up the Achilles Tendon (slightly, to allow for tendon movement), both malleolus, the first and fifth metatarsals, the Cuboid and the Navicular. If there are any other abnormal boney protrusions build them up as well.

Fabrication InstructionsFabrication Instructions
Extend footplate Extend footplate ½”½”
To avoid smashing them during the gait cycle, the end of the toes must be extended. Add about a half inch straight forward, leaving ample room for toenail growth and movement. This is the only part of the orthosis that is not total contact.

Fabrication InstructionsFabrication Instructions
Flair proximal brimFlair proximal brim
Once the cast has been completely modified, add a flair to the proximal border, if so desired.

Fabrication InstructionsFabrication Instructions
Sand cast smoothSand cast smooth
Then sand the cast smooth as you normally might.

Fabrication InstructionsFabrication Instructions
Apply stockingApply stocking
The cast in now ready for vacuum forming. Apply one stocking over the cast. A standard nylon stocking is suggested.

Fabrication InstructionsFabrication Instructions
Form foam UCBForm foam UCB
Now we can fabricate the removable foam insert. These can be made of many different materials depending patient requirements. One of the most common uses a half inch thick, closed cell, soft, polyethylene foam as pictured but many other materials find themselves part of the UCB. Poron, Tri-Lam, EVA/Cloud, cork are all commonly used to one extent or another.

Fabrication InstructionsFabrication Instructions
Sand and skive edge Sand and skive edge of UCBof UCB
Skive the edges to flow onto the cast. Don’t flow them to long and thin at the ends. The thinner the foam, the more likely it will curl over. A short conservative skive works best.

Fabrication InstructionsFabrication Instructions
UCB or SMOUCB or SMO
These inserts may take a couple of forms. On a fairly normal shaped foot it should be a standard UCB shape, full foot to the toes. Just as often though, the shape will be more like an SMO, covering one or both ankles. This will be done in cases of severe Charcot ankle, where the ankle,usually the medial, is in a exaggerated valgus position nearly touching the floor.

Fabrication InstructionsFabrication Instructions
Glue UCB to mold Glue UCB to mold (contact cement at edges)(contact cement at edges)
Once the UCB is shaped it needs to be glued to the cast. This is accomplished with just a little contact cement at the edges, just enough to hold it in place.
Fabrication InstructionsFabrication Instructions
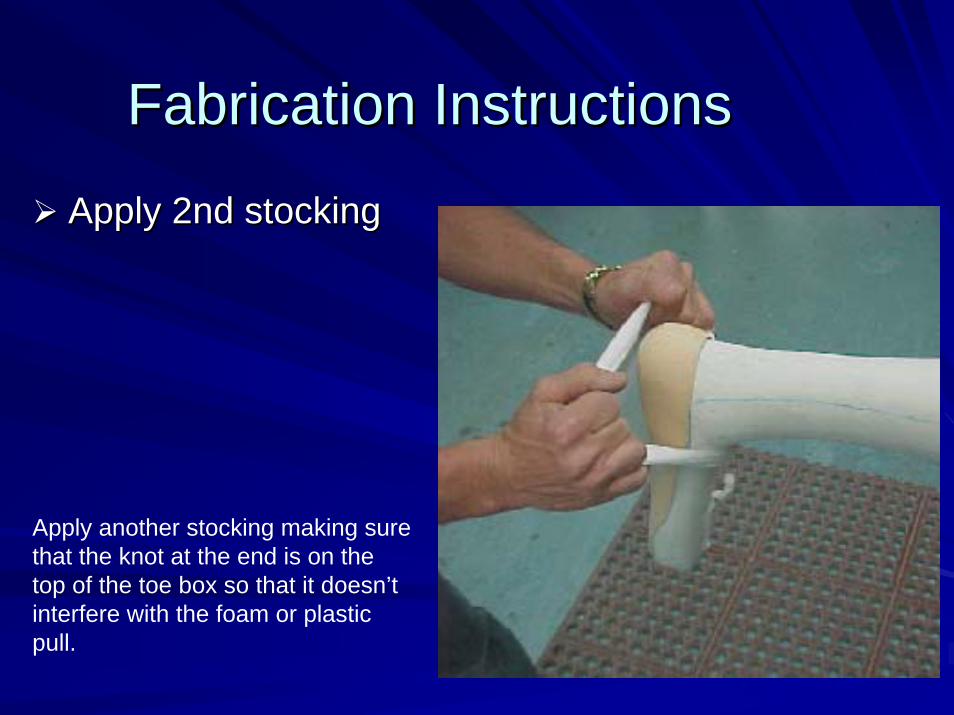
Apply 2nd stockingApply 2nd stocking
Apply another stocking making sure that the knot at the end is on the top of the toe box so that it doesn’t interfere with the foam or plastic pull.
Fabrication InstructionsFabrication Instructions
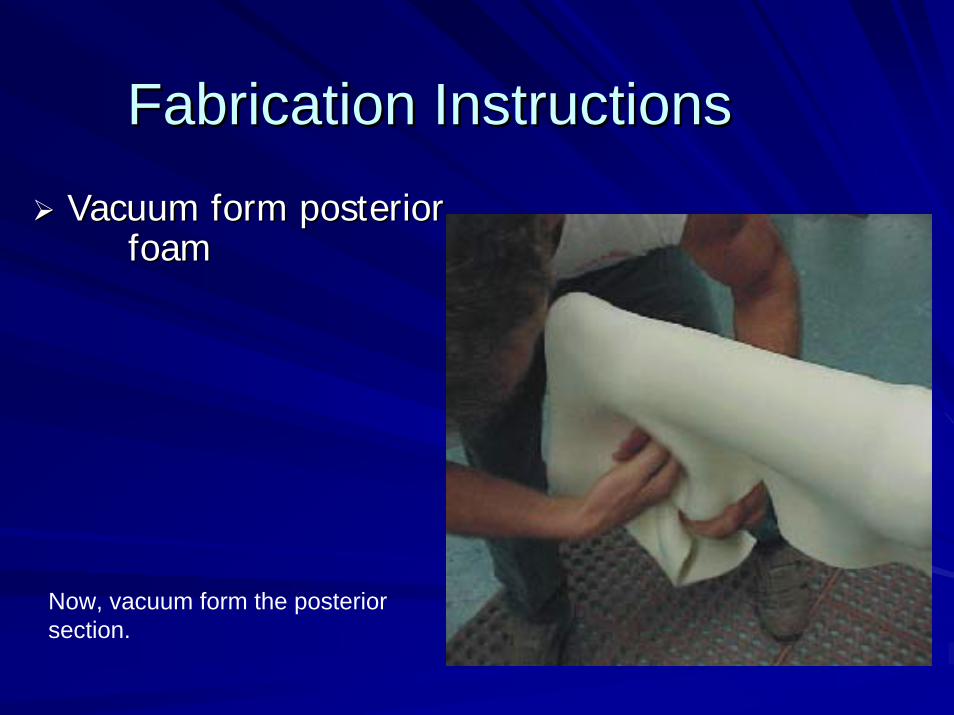
Vacuum form posterior Vacuum form posterior foamfoam
Now, vacuum form the posterior section.

Fabrication InstructionsFabrication Instructions
Apply 3Apply 3rdrd stockingstocking
Perforate the foam and apply a third stocking to insure good vacuum.

Fabrication InstructionsFabrication Instructions
Pull posterior plasticPull posterior plastic
Pull the posterior plastic as normal, except that the seam needs to stop on the dorsum, and not extend to the end of the toes.

Fabrication InstructionsFabrication Instructions
Cut off posteriorCut off posterior
After the plastic has cooled, cut it off the cast. The trim line should run just anterior of midline and along the top of the toes.

Fabrication InstructionsFabrication Instructions
Sand posterior smoothSand posterior smooth
Sand the plastic smooth.

Fabrication InstructionsFabrication Instructions
Carve distal plantarCarve distal plantartoes on casttoes on cast
Now the posterior section needs to be replaced back onto the cast. In order to do this, some of the cast needs to be carved off at the distal, plantar toe.

Fabrication InstructionsFabrication Instructions
Reapply posteriorReapply posterior
Once you have removed some plaster there, try to reapply the plastic. If you are unable to get it back onto the cast, remove some more plaster until you can get it back on.

Fabrication InstructionsFabrication Instructions
Rope down posteriorRope down posterior
Apply a cutting barrier down the posterior (use rope, cardboard, foam, whatever you would normally use) to allow the anterior to be cut off without damaging the posterior.

Fabrication InstructionsFabrication Instructions
Apply 4Apply 4thth stockingstocking
Apply another stocking, the fourth so far, making sure the knot is now on the bottom so that is does not interfere with the anterior pull.

Fabrication InstructionsFabrication Instructions
Vacuum form foamVacuum form foamon anterioron anterior
Vacuum form the foam for the anterior section making sure to get a good impression of the posterior section.

Fabrication InstructionsFabrication Instructions
Apply a 5Apply a 5thth stockingstocking
Cut off excess foam at overlap with razor knife. Perforate the foam and pull another stocking for an air barrier.

Fabrication InstructionsFabrication Instructions
Vacuum form anterior Vacuum form anterior plastic sectionplastic section
Vacuum form the plastic for the anterior section, once again, making sure that the seam stops on the plantar surface and does not extend to the end of the toes where the anterior and the posterior will overlap.

Fabrication InstructionsFabrication Instructions
Cut off anterior sectionCut off anterior section
Once the plastic has cooled, cut it off of the cast and sand it smooth. The overlap should not be much more than an inch or so. The less of the posterior that wraps around the anterior, the easier it will be for the patient to don and doff.

Fabrication InstructionsFabrication Instructions
Sand anterior smoothSand anterior smooth
Sand the edges of the anterior section smooth and be mindful of the amount of material overlapping the posterior.

Fabrication InstructionsFabrication Instructions
Trace shape of footplate Trace shape of footplate onto crepeonto crepe
Now we can begin making the rocker bottom. Stand the posterior section on a piece of crepe (or whatever material you would normally use for a walking surface. Trace around the foot giving at least two inches extra all the way around. This will provide plenty of extra material to wrap around the sides.

Fabrication InstructionsFabrication Instructions
Rough sand plantar Rough sand plantar surfacesurface
Sand the bottom of the posterior section rough so that the glue will have something to bond to.

Fabrication InstructionsFabrication Instructions
Apply glue to AFOApply glue to AFOand crepeand crepe
Apply a generous amount of glue to both the bottom of the posterior section and to the crepe. Use your favorite cement for the type of material you choose for your rocker bottom.

Fabrication InstructionsFabrication Instructions
Heat crepe and apply Heat crepe and apply to orthosisto orthosis
When the glue has dried, put the crepe into your oven and heat until flexible. Mold the crepe to the bottom of the AFO section and contour it around the sides.

Fabrication InstructionsFabrication Instructions
Wrap it with an elastic Wrap it with an elastic bandagebandage
Wrap the crepe around the AFO using elastic bandage or similar material. Having plenty of crepe around the sides of the foot will allow a wider margin for error in sanding it to shape.

Fabrication InstructionsFabrication Instructions
Add crepe as neededAdd crepe as needed& sand to shape& sand to shape
The idea here is to provide a wide, stable platform on which to stand and ambulate. You can always easily remove excess material, but it is more difficult to add it later on. Keep adding layers until you have achieved the desired build up height. Shape the sole until you get a generic rocker shape.

Fabrication InstructionsFabrication Instructions
Apply a thin layer of Apply a thin layer of textured crepe or soletextured crepe or sole
The next step is to add a layer of textured crepe to the bottom of the rocker sole. Most of the time you may want to leave off the final, textured layer until fitting the patient. That way you can fine tune the rocker shape to fit the patients toe out and gait.

Fabrication InstructionsFabrication Instructions
Flame polish roughFlame polish roughplastic areasplastic areas
Using a technique known as flame polishing, take a flaming torch and carefully heat the rough areas until they become glossy. This will help to hide the areas that were hit, inadvertently, while sanding the rocker sole. Be very careful not to overheat the plastic as it will burn easily.

Fabrication InstructionsFabrication Instructions
Apply strapsApply straps
Apply the straps as you like and the orthosis is complete.

Fitting the Walking BootFitting the Walking Boot
Contour rocker bottom before adding Contour rocker bottom before adding textured crepe bottomtextured crepe bottom
While fitting the Walking Boot there are a few additional things that should be taken into account. If it has not already been done, shape the rocker bottom and attach a layer of thin, textured crepe.

Fitting the Walking BootFitting the Walking Boot
Fit should be snug (not too loose, Fit should be snug (not too loose, not too tight)not too tight)
The overall fit should be snug but not tight. It is a total contact orthosis and any gapping can cause rubbing which can, in turn, cause skin breakdown. Many of these patients are diabetic so it’s critical that the brace fit correctly and not exacerbate the problem.

Fitting the Walking BootFitting the Walking Boot
Replace removable foam UCB when Replace removable foam UCB when it becomes compacted or filthyit becomes compacted or filthy
Most of the time a patient will require more than one of the UCB inserts. Over a period of time, they will compact and become filthy, especially on patients that have decubitus ulcers. While fabricating the first insert, you may want to consider making several for this contingency.

Fitting the Walking BootFitting the Walking Boot
Patient may require frequent followPatient may require frequent follow--ups ups
Finally, due to the ‘last ditch effort’ nature of this type of orthosis, the patient will be well advised to keep an eye on their skin condition and return for frequent follow up visits, particularly in the weeks following the initial fitting. The patient is also well advised to keep their toenails trimmed so they don’t become dislodged on the anterior shell.

Fabrication of the Fabrication of the CROW BootCROW Boot
To receive CE credits,
send test & payment to:
Delphi Ortho
PO Box 19851
Asheville, NC 28815