fieldplan user guide - fieldplan.landmarksoftware.com · fieldplan user guide 1. login page. to...
TRANSCRIPT

FieldPlan User Guide
1. Login page. To view demo projects click on the “Start Now” button or to view your own projects
click on the “Log In” button on top right corner. Follow the on screen guide below.
(Note: Halliburton users with Internet Explorer browser will be logged in automatically.)

2. Projects list. This is the main control panel where you can access your projects, manage them
(create, delete, import and export), search, filter and sort them as well as edit project inputs and
view project results.
3. Projects sorting. Click on the desired column header to sort the column (in this example Region
Name). Click on the column name again to change the sorting direction (toggle between
ascending and descending sorting).
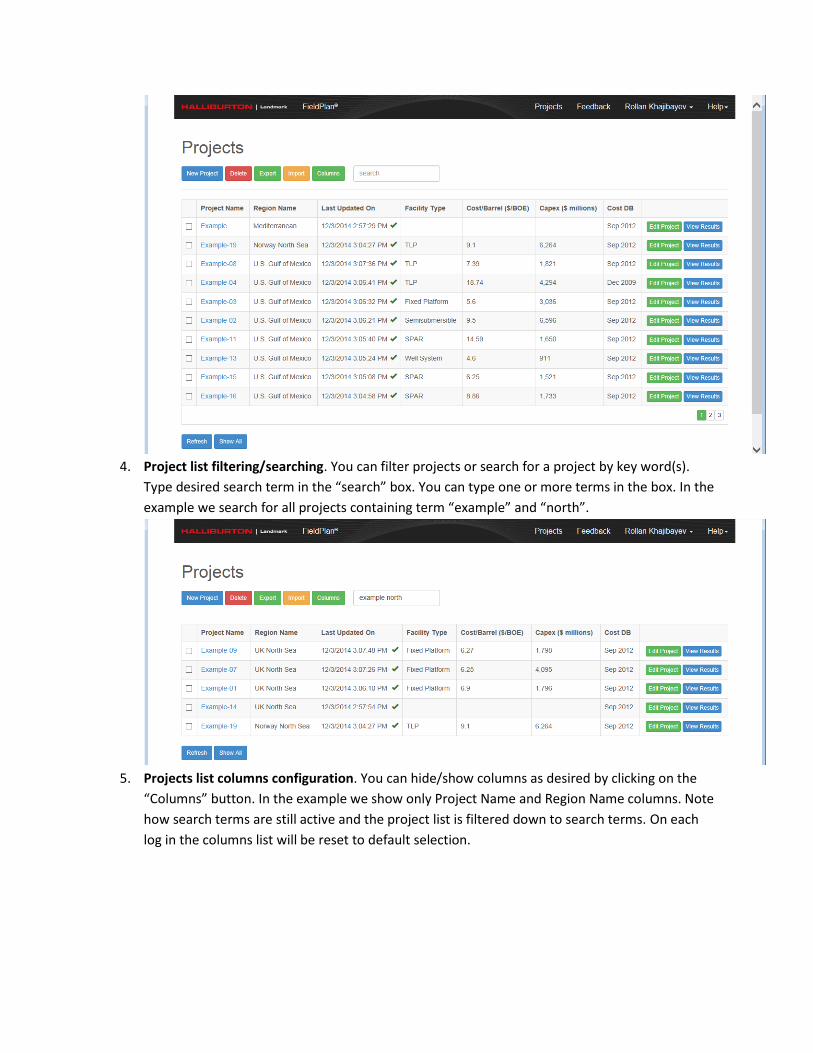
4. Project list filtering/searching. You can filter projects or search for a project by key word(s).
Type desired search term in the “search” box. You can type one or more terms in the box. In the
example we search for all projects containing term “example” and “north”.
5. Projects list columns configuration. You can hide/show columns as desired by clicking on the
“Columns” button. In the example we show only Project Name and Region Name columns. Note
how search terms are still active and the project list is filtered down to search terms. On each
log in the columns list will be reset to default selection.

6. Project list show all records in one page. You can choose to show all project in one page or
show 10 projects per page by clicking on the “Show All”/”Show Less” buttons.

7. Project list refresh. You can always refresh project list in case there are calculations running for
some projects in the background.
8. New Project. Click on the “New Project” button to create a new project and fill out the form.
Project name has to be unique across your projects. A message will be displayed if project name
is already in use. Select the region and hit next. Note: each field in FieldPlan has validation
messages marked red (as seen on the screen below).

9. Edit Project. Once you have successfully created a project you can start editing the project
inputs. New project screen will be automatically followed by the Edit project screen.
Alternatively you can choose a project from the projects list screen and click on the project
name or “Edit Project” button on the right.
10. Save project inputs. Click on the “Save” button to save the project inputs after you fill out all the
required fields. Validation messages will be shown for each missing or incorrectly entered data
with possible range of values. Once you correct all the validation errors the inputs will be saved.
11. Save project as a copy. By clicking on the “Save As…” button you can create a copy of the
project you are editing. This can be helpful to compare different input results. In the dialog box

select the new project name (has to be unique) and hit “Save”. Note: all inputs have to be valid
before you can save the project as a copy. Next screen will be the newly created project.
12. Open Project Results. The project results can be seen by clicking on the “Results” button in the
Edit project screen or by clicking on the “View Results” from the project list screen. Calculation

can take some time and it runs in the background. You can always review the generated results
in case your connection disrupted, your browser crashed or you log out and log in later. The
results will be reset whenever you changed project inputs. Project calculation results can be
seen in the project list in the “Project Status” and “Status Message” columns.

13. View the project results. There are 7 different project result screens: Executive Summary,
Report Summary, Cash Flow, Schedule, Development Concept, Project Information and
Benchmark Data. Report screens can be changed by clicking on numbered buttons (from 1 to 7)
on the top left corner below the project name. Each report screen can be exported to Excel and
Development Concept to Visio format.


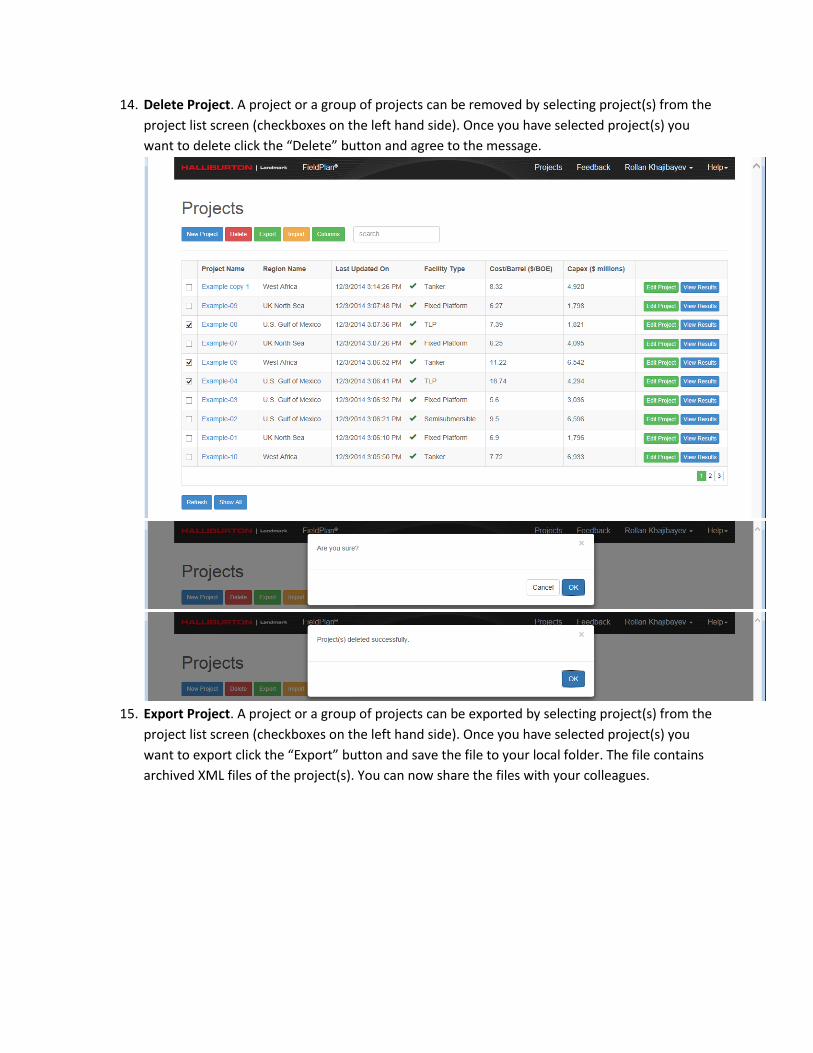
14. Delete Project. A project or a group of projects can be removed by selecting project(s) from the
project list screen (checkboxes on the left hand side). Once you have selected project(s) you
want to delete click the “Delete” button and agree to the message.
15. Export Project. A project or a group of projects can be exported by selecting project(s) from the
project list screen (checkboxes on the left hand side). Once you have selected project(s) you
want to export click the “Export” button and save the file to your local folder. The file contains
archived XML files of the project(s). You can now share the files with your colleagues.

16. Import Project. Previously exported projects can be imported by clicking the “Import” button
and selecting one or many file (some browsers does not allow multiple file selection). Note: if
project name already exists in your project list the imported project name will be modified
automatically, order number will be appended to the name, i.e. Example1-01, Example21-03
etc.

17. Mobile Devices. When using a mobile device or when resizing your browser window to a smaller
size the layout of the FieldPlan may change to better fit your screen size. Some examples below
Menu

New project

Project inputs
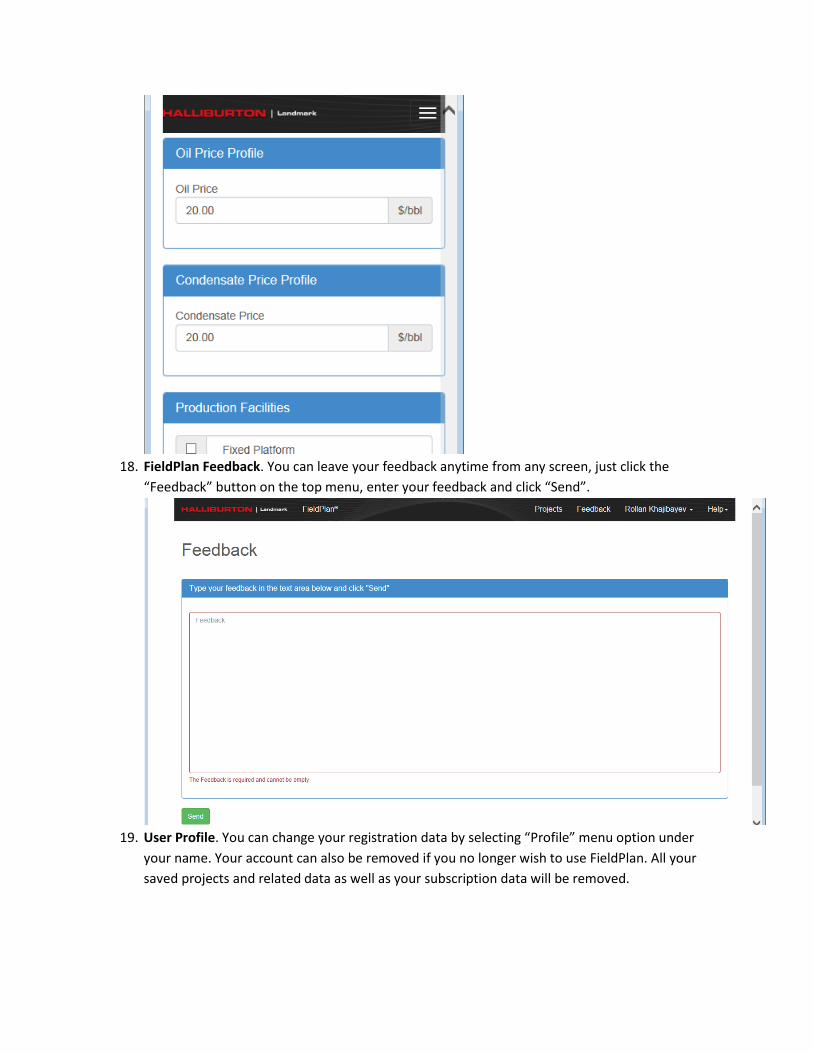
18. FieldPlan Feedback. You can leave your feedback anytime from any screen, just click the
“Feedback” button on the top menu, enter your feedback and click “Send”.
19. User Profile. You can change your registration data by selecting “Profile” menu option under
your name. Your account can also be removed if you no longer wish to use FieldPlan. All your
saved projects and related data as well as your subscription data will be removed.

20. Subscriptions. To subscribe to FieldPlan go to “Subscribe” menu under your name. Select your
desired subscription level and duration, read the terms and conditions and click the “Subscribe”
button. The Customer Operations Specialist will contact you shortly by the phone number you
provided.

21. Help. Help is available under “Help” menu option.
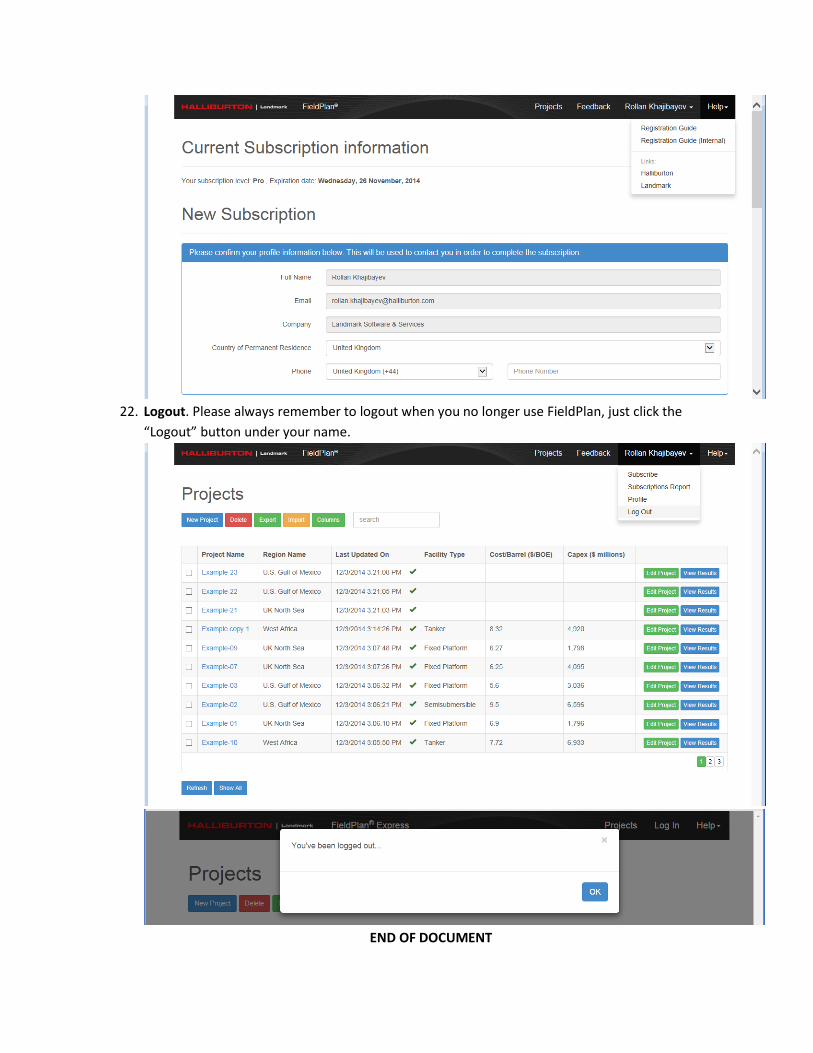
22. Logout. Please always remember to logout when you no longer use FieldPlan, just click the
“Logout” button under your name.
END OF DOCUMENT