fleece projects
TRANSCRIPT

8/7/2019 Fleece projects
http://slidepdf.com/reader/full/fleece-projects 1/8
QUICK-N-EASY PROJECTS• Borders of Diamonds Fleece Throw
• Easy Fleece Vest Cover-Up
• A la Carte Flange Pillow
• Fleece Carriage Pillow
and more!
Funwith F
L E E C E
FREE
8/7/2019 Fleece projects
http://slidepdf.com/reader/full/fleece-projects 2/8
2
Borders of Diamonds Fleece Throw
Create this peek-a-boo, diamond border eece throw using the june tailor ® Fancy Fleece Ruler TM , a print and contrast solid eece.
Materials: approximate fnished size 53" x 59" throw
• 15/8yds.outerweareeceprint • 21/4yds.outerweareecesolid • junetailor®FancyFleeceslottedruler • junetailor®FringeCutSlottedRuler • 45mmrotarycutter,matandlong,clearruler • threadtomatchsolideece
Cut:
•55"x58"(crosswisegrain)pieceprintedeece
Directions:
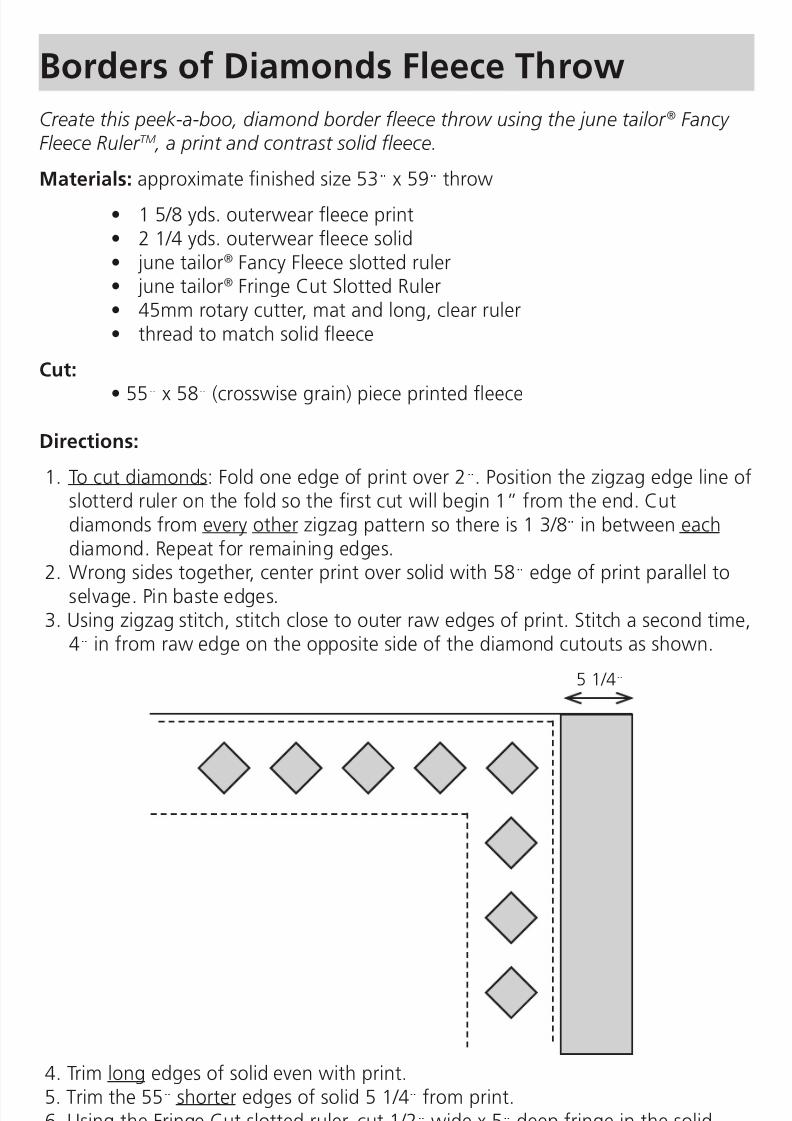
1.Tocutdiamonds:Foldoneedgeofprintover2".Positionthezigzagedgelineof slotterdruleronthefoldsotherstcutwillbegin1”fromtheend.Cut diamondsfromevery otherzigzagpatternsothereis13/8"inbetweeneach diamond.Repeatforremainingedges.2.Wrongsidestogether,centerprintoversolidwith58"edgeofprintparallelto
selvage.Pinbasteedges.3.Usingzigzagstitch,stitchclosetoouterrawedgesofprint.Stitchasecondtime, 4"infromrawedgeontheoppositesideofthediamondcutoutsasshown.
4.Trimlongedgesofsolidevenwithprint.5.Trimthe55" shorteredgesofsolid51/4"fromprint.6.UsingtheFringeCutslottedruler,cut1/2" wide x 5"deepfringeinthesolid eece.
51/4"
8/7/2019 Fleece projects
http://slidepdf.com/reader/full/fleece-projects 3/8
3
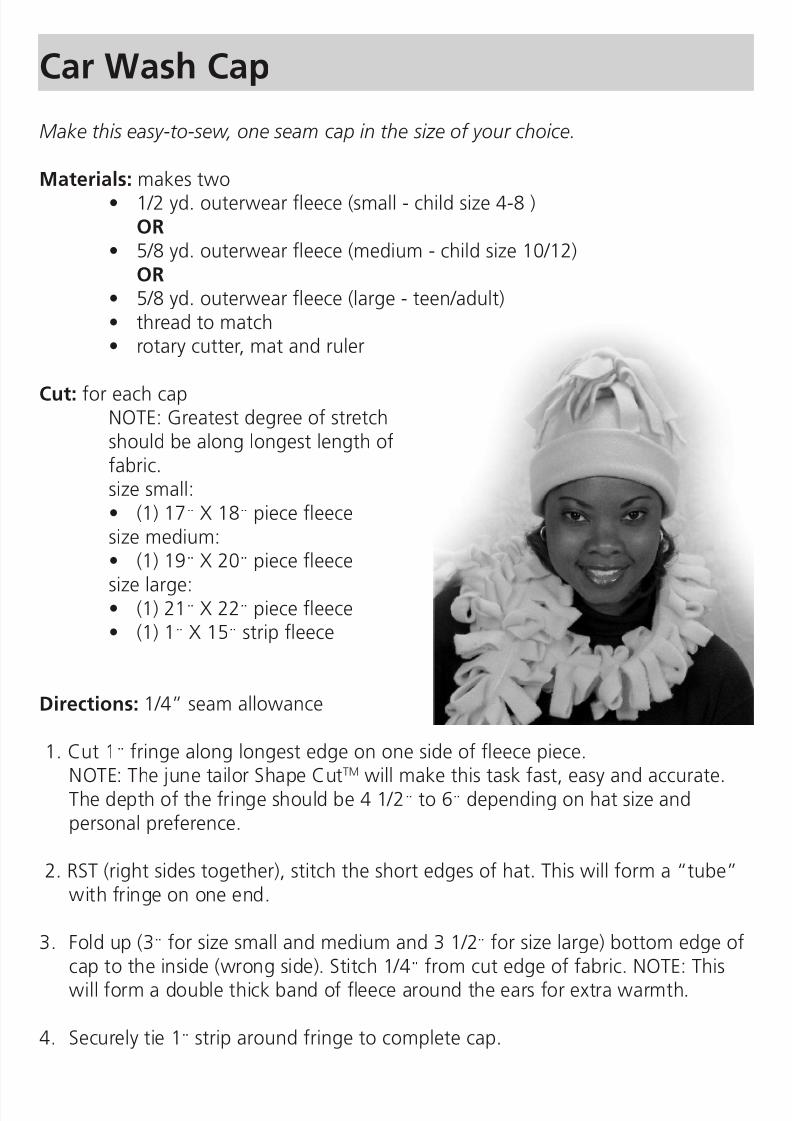
Car Wash Cap
Make this easy-to-sew, one seam cap in the size o your choice.
Materials: makes two
• 1/2yd.outerweareece(small-childsize4-8) OR • 5/8yd.outerweareece(medium-childsize10/12) OR • 5/8yd.outerweareece(large-teen/adult) • threadtomatch • rotarycutter,matandruler
Cut:foreachcap NOTE:Greatestdegreeofstretch shouldbealonglongestlengthof fabric. sizesmall: • (1)17"X18"pieceeece sizemedium: • (1)19"X20"pieceeece
sizelarge: • (1)21"X22"pieceeece • (1)1"X15"stripeece
Directions: 1/4”seamallowance
1.Cut1"fringealonglongestedgeononesideofeecepiece.
NOTE:ThejunetailorShapeCut
TM
willmakethistaskfast,easyandaccurate. Thedepthofthefringeshouldbe41/2" to 6" depending on hat size and personalpreference.
2.RST(rightsidestogether),stitchtheshortedgesofhat.Thiswillforma“tube” withfringeononeend.
3. Foldup(3"forsizesmallandmediumand31/2"forsizelarge)bottomedgeof captotheinside(wrongside).Stitch1/4"fromcutedgeoffabric.NOTE:This
willformadoublethickbandofeecearoundtheearsforextrawarmth.
4. Securelytie1"striparoundfringetocompletecap.
8/7/2019 Fleece projects
http://slidepdf.com/reader/full/fleece-projects 4/8
4
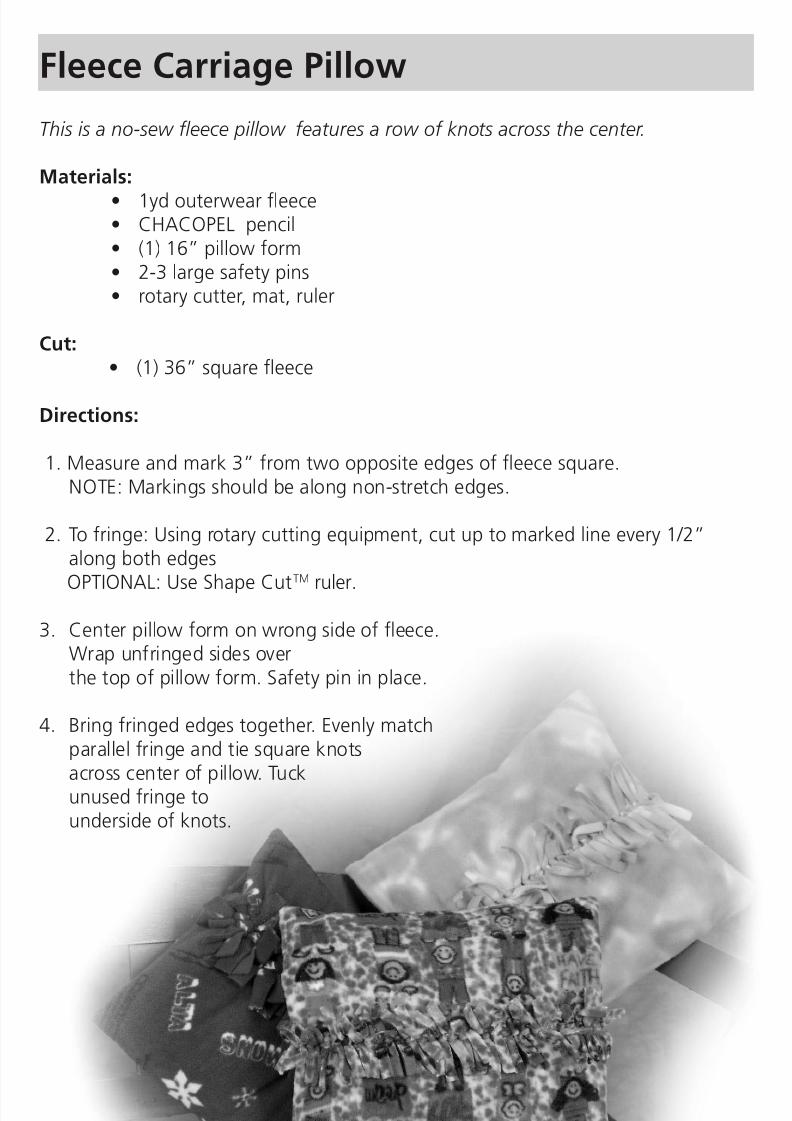
Fleece Carriage Pillow
This is a no-sew eece pillow eatures a row o knots across the center.
Materials:
• 1ydouterweareece • CHACOPELpencil • (1)16”pillowform • 2-3largesafetypins • rotarycutter,mat,ruler Cut: • (1)36”squareeece
Directions:
1.Measureandmark3”fromtwooppositeedgesofeecesquare. NOTE:Markingsshouldbealongnon-stretchedges.
2.Tofringe:Usingrotarycuttingequipment,cutuptomarkedlineevery1/2” alongbothedges
OPTIONAL:UseShapeCutTM
ruler.
3. Centerpillowformonwrongsideofeece. Wrapunfringedsidesover thetopofpillowform.Safetypininplace.
4. Bringfringededgestogether.Evenlymatch parallelfringeandtiesquareknots acrosscenterofpillow.Tuck unusedfringeto undersideofknots.
8/7/2019 Fleece projects
http://slidepdf.com/reader/full/fleece-projects 5/8
8/7/2019 Fleece projects
http://slidepdf.com/reader/full/fleece-projects 6/8
6
Materials:Makes2
• 2-21/2yds.outerweareece(dependingonheightand/ordesired length) • threadtomatchorcontrast • OLFA®45mmergonomichandlerotarycutterwithOLFA®PinkingBlade, ScallopBladeORWaveBlade,mat,longclearruler
• (2)3/4”-11/8”buttons
Cut:
• (2)26”wideXdesiredlengthpieceeece
Directions:1/2”seamallowanceRST=RightSideTogether
Foreachvest:NoteNecklineguidefoundonpage7.
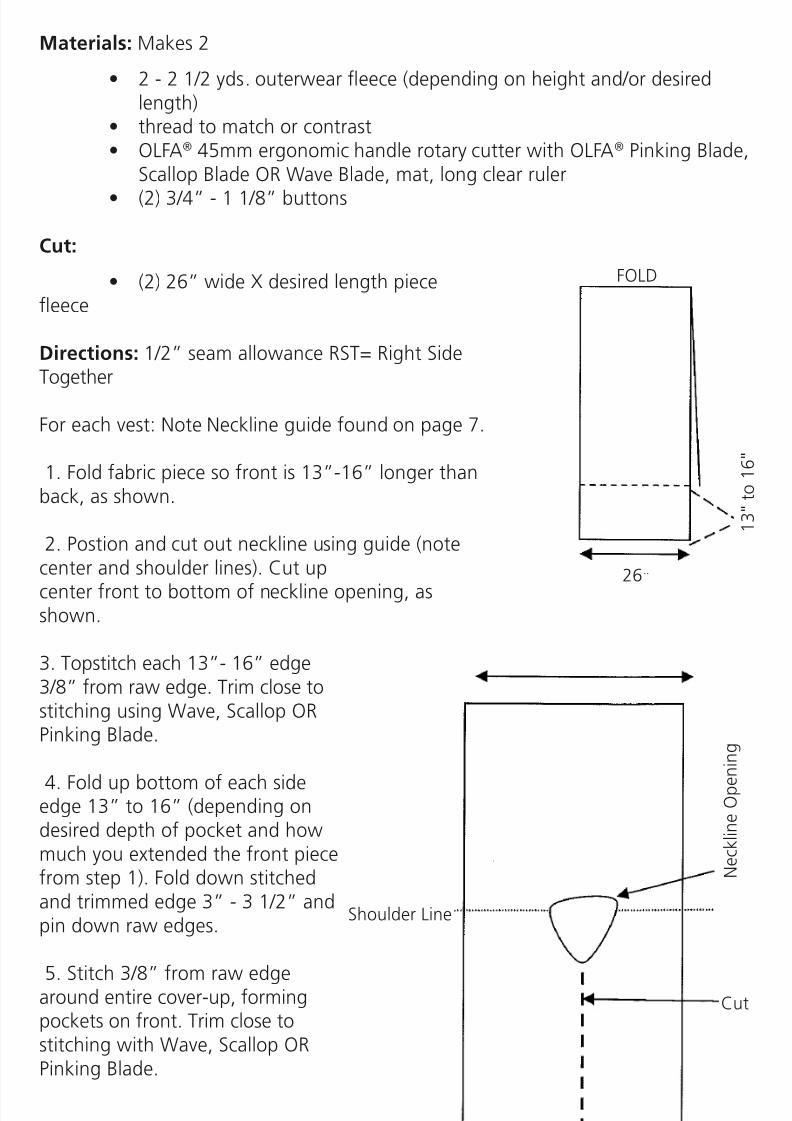
1.Foldfabricpiecesofrontis13”-16”longerthanback,asshown.
2.Postionandcutoutnecklineusingguide(notecenterandshoulderlines).Cutup
centerfronttobottomofnecklineopening,asshown.
3.Topstitcheach13”-16”edge3/8”fromrawedge.TrimclosetostitchingusingWave,ScallopORPinkingBlade.
4.Foldupbottomofeachsideedge13”to16”(dependingondesireddepthofpocketandhowmuchyouextendedthefrontpiecefromstep1).Folddownstitchedandtrimmededge3”-31/2”andpindownrawedges.
5.Stitch3/8”fromrawedgearoundentirecover-up,formingpocketsonfront.TrimclosetostitchingwithWave,ScallopORPinkingBlade.
1 3 "
t o
1 6 "
FOLD
26"
ShoulderLine
N e c k l i n e O p e n i n g
Cut
13" 13"

8/7/2019 Fleece projects
http://slidepdf.com/reader/full/fleece-projects 7/8
7
6.RST(rightsidestogether),stitchfronttobackatsideseamasfarupasdesired,creatingarmholes.NOTE:thelongeryoumakethisseam,thesmallerthearmholeopeningwillbe.
7.Centerandstitchbuttontofolded,topedgeofeachpocketthroughalllayers.
Variations to Try: The raw edges may be fnished o using Lycra, knitted suede, ORbias cut corduroy binding, i desired.
FOLD,topedgeofpocket
Raw,trimmededge
FOLD,bottomedgeofpocket/cover-up
ShoulderLine
C e n t e r F r on t
NecklinepatternforEasyFleeceCover-UpVest
8/7/2019 Fleece projects
http://slidepdf.com/reader/full/fleece-projects 8/8
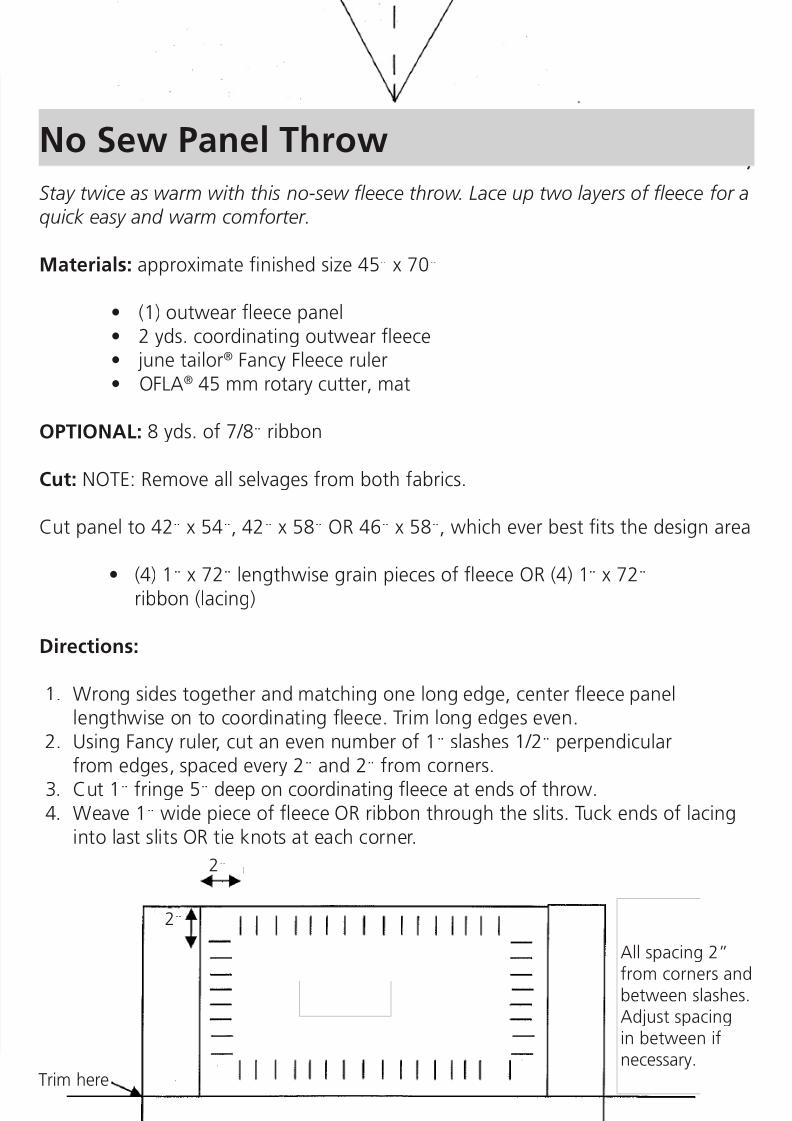
No Sew Panel Throw
Stay twice as warm with this no-sew eece throw. Lace up two layers o eece or aquick easy and warm comorter.
Materials:approximatenishedsize45"x70
"
• (1)outweareecepanel • 2yds.coordinatingoutweareece • junetailor®FancyFleeceruler • OFLA®45mmrotarycutter,mat
OPTIONAL:8yds.of7/8"ribbon
Cut:NOTE:Removeallselvagesfrombothfabrics.
Cutpanelto42"x54",42"x58"OR46"x58",whicheverbesttsthedesignarea
• (4)1"x72"lengthwisegrainpiecesofeeceOR(4)1"x72" ribbon(lacing)
Directions:
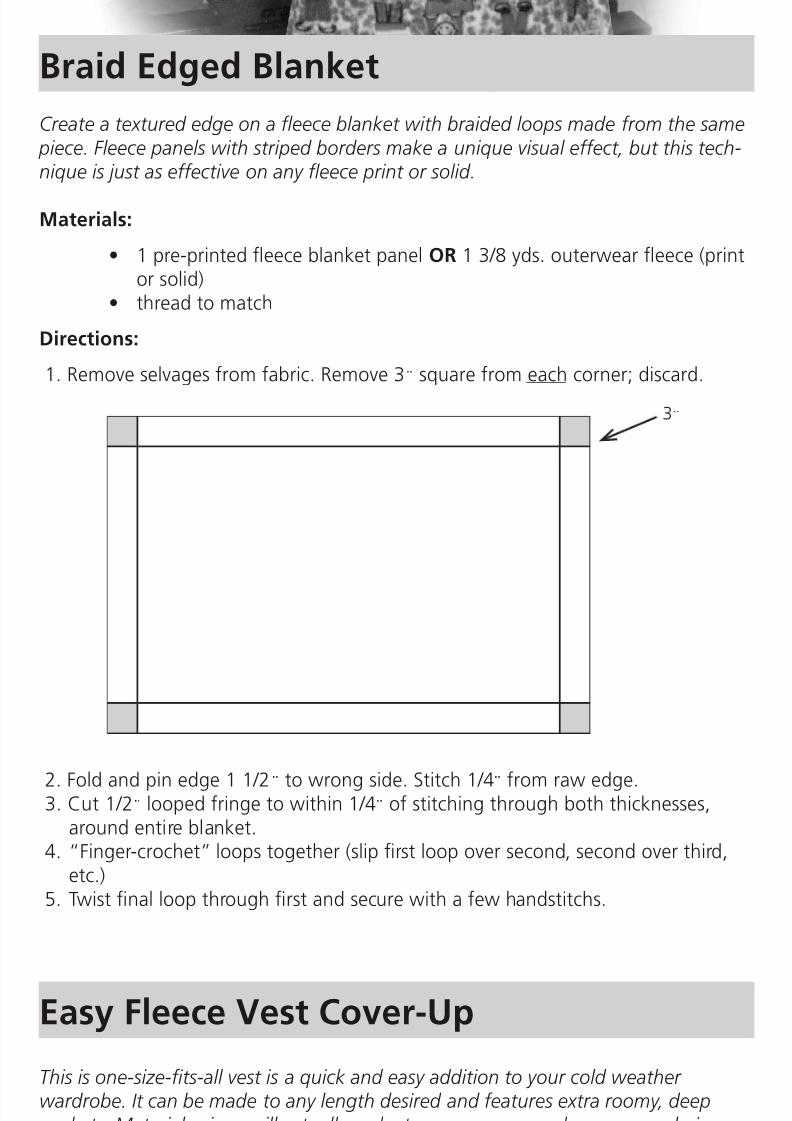
1. Wrongsidestogetherandmatchingonelongedge,centereecepanel lengthwiseontocoordinatingeece.Trimlongedgeseven.2. UsingFancyruler,cutanevennumberof1"slashes1/2"perpendicular fromedges,spacedevery2"and2"fromcorners.3. Cut1"fringe5"deeponcoordinatingeeceatendsofthrow.4. Weave1"widepieceofeeceORribbonthroughtheslits.Tuckendsoflacing intolastslitsORtieknotsateachcorner.
Panel
2"
2"
Trim here
Allspacing2”fromcornersandbetweenslashes.Adjustspacinginbetweenif
necessary.
hancockfabrics com