for more recycling information please visit the … answer is backyard composting and yard waste...
TRANSCRIPT
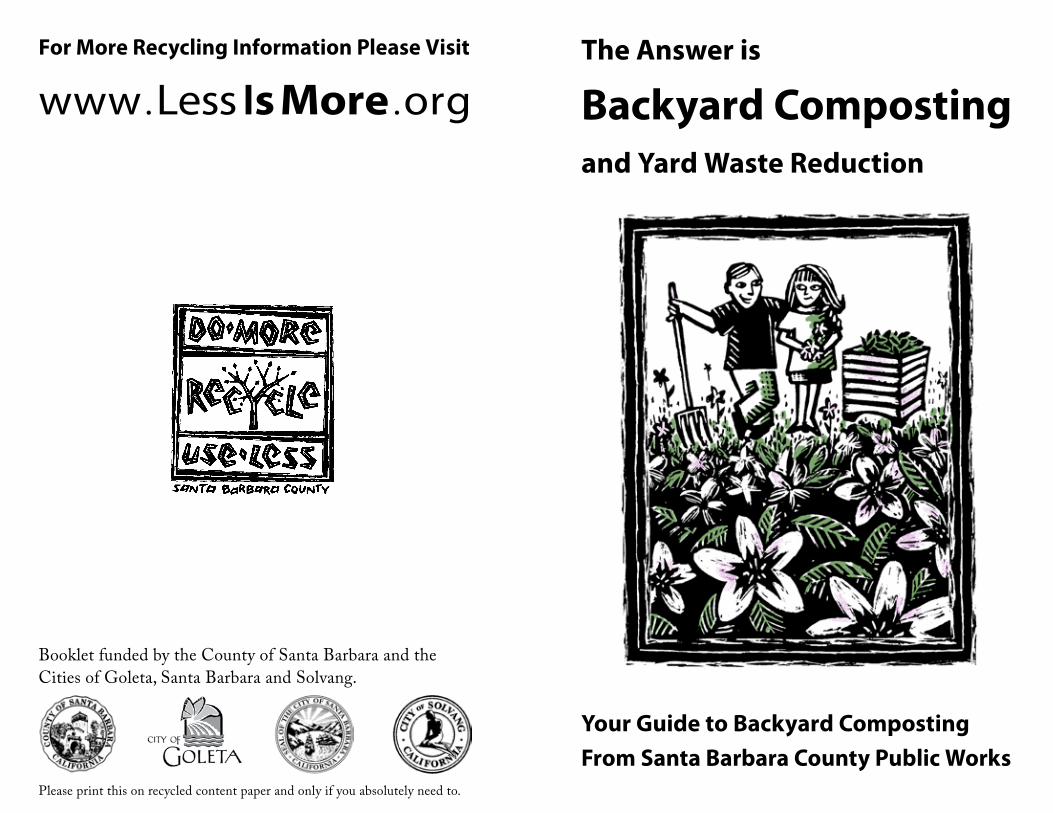
The Answer is
Backyard Compostingand Yard Waste Reduction
Your Guide to Backyard CompostingFrom Santa Barbara County Public Works
For More Recycling Information Please Visit
www . Less Is More . org
Please print this on recycled content paper and only if you absolutely need to.
Booklet funded by the County of Santa Barbara and the Cities of Goleta, Santa Barbara and Solvang.

Table of Contents
Introduction i
Section 1 Choosing The Right Composting System 1
Section 2 Aerobic Composting 3
Section 3 Anaerobic Composting 8
Section 4 Vermicomposting 13
Section 5 Building Your Composting System 18
Section 6 Using Your Finished Compost 23
Section 7 Yard Waste Reduction 24
Section 8 Composting & Yard Waste Resources 29
The Answer is Backyard Composting and Yard Waste Reduction
County of Santa Barbara Public Works Department Resource Recovery & Waste Management Division 130 East Victoria Street, Suite 100 Santa Barbara, California 93101 Main Office: (805) 882-3600 www. Less Is More .org
Original Design, Layout & ImagesDavid Cowan
Horticulture ConsultantMarshal Chrostowski
Second Edition Design and LayoutJeffrey Simeon
Special ThanksCMM Staff
Originally Printed 1994
Second Edition Released 2009

Section 1
Choosing The Right Composting System
Before making a decision on what type of system you need, ask yourself these four simple questions...
What materials do I want to compost?1.
What volume of materials do I generate for composting?2.
How much time and effort can I dedicate to the 3. maintenance of a composting system?
How much yard space, if any, do I have available for a 4. composting system?
Write your answers down and compare them to the chart on page 2. Determine what system(s) will fulfill your needs, and read more about it in the corresponding chapters.
Composting bin cost.Retail composting bins can be purchased from local hardware stores and garden supply centers. Market prices for a bin can
Introduction
What is Compost?Compost is a humus and nutrient rich soil-like material formed by the decomposition of natural materials. It improves the structural and nutritional quality of the soil, which is fundamental to all plant growth. It helps create the right type of environment for beneficial insects, worms and other organisms, which in turn improves disease resistance and a healthy root system. Compost also enhances moisture retention, thereby reducing the need for water, a precious resource.
Why Compost?
Much of what people throw away as trash at home could be composted instead of landfilled. Composting allows you to beneficially reuse food scraps and yard trimmings right in your own backyard. That is preferable to the alternative of burial in a landfill or inclusion in a less environmentally friendly yard waste collection system.
This booklet will introduce you to the different types of composting and help you determine which type is right for your home. That way you can start recycling compostable materials at your own home, and reduce your negative impact on the environment while improving the land around your home.
If you still have questions about composting after reading this booklet, please contact the County of Santa Barbara’s Composting Specialist. See the inside cover for contact information.i 1

Section 2
Aerobic Composting
What is Aerobic Composting?Aerobic composting is the decomposition of organic matter by air-breathing microorganisms and larger soil life forms. These decomposers are naturally present in the soil and thrive in a moist and nutrient-rich environment. Primary consumers such as bacteria and fungi begin the decomposition process. In ideal conditions, the metabolism of bacteria creates the heat of the composting pile.Second and third level consumers, such as beetles, centipedes, earthworms, and millipedes, complete the composting cycle, leaving behind a dark brown humus that is soil enhancing.
range from $30 to $300. The County of Santa Barbara offers discounted aerobic compost bins. Visit www.LessIsMore.org for information about pricing and availability. Homemade bins can be built from a variety of materials such as pallets, cinder blocks, or wire fencing (see Section 5). Building costs vary from $0 to $90.
Compost System
Compost Materials
Weekly Volume
Time & Effort
Yard Space
Vermi- composting
Non-fatty food waste, soft green trimmings.
Less than 8 gallons.
Initial bin set-up & maintenance of bedding moisture. No turning.
Minimal: Can be indoors or outdoors.
Aerobic Composting
Non-fatty food waste, soft green trimmings.
Less than 6 gallons.
Minimal: Soil & water must be added once per month. No turning.
Minimal.
Anaerobic Composting
Yard Waste: shredded tree limbs, leaves & grass.
Flexible depending on the volume of materials & number of bins.
Recommend-ed weekly to biweekly turnings and watering.
Minimal to unlimited.
Two Bin System/Aerobic & Anaerobic
See above. See above. See above.
Minimal to unlimited. Most adaptable.
2 3

Composition of the Aerobic Pile.The compost pile will require a mixture of materials rich in carbon and nitrogen for efficient decomposition. Nitrogen is most abundant in fresh green yard and garden trimmings and vegetable scraps. Other good sources are livestock manures and fresh seaweed. Carbon dominates in brown materials, such as leaves (oak leaves are an excellent source of carbon), chipped woody brush, sawdust, and straw.
The proper compost mixture contains approximately three parts carbon-rich ingredients to two parts nitrogen-rich ingredients. If manures or nitrogen-rich fertilizers are used, increase the volume of carbon-rich materials in the pile. Excessive concentration of nitrogen-rich matter will often cause putrification of your compost pile marked by a strong ammonia odor. Too little nitrogen will not feed the microorganisms, causing decomposition to stop.
Increasing Surface Area Speeds the Process.For quicker composting, shred or chop materials being added to the compost pile. The more surface area the microorganisms have to work on, the faster the materials are decomposed. Yard trimmings can be chopped up with a machete or shovel, or run through a shredding machine or lawn mower. Material that is too fine, however, may lead to poor aeration and death of the organisms in the pile.
Choosing the Right Composting Site.When setting up your composting system, choose a site that is level and has good drainage. Accessibility, aesthetics, and convenience should also be considered. To prevent groundwater contamination, avoid placing a bin near drainage courses or waterways. Plan your composting routine before you assemble your bin to be certain that an important necessity such as sufficient work space or access to a water supply has not been overlooked.
Setting Up your Aerobic System.Using a shovel or garden fork, loosen the ground where the composting bin will rest. This will help with drainage and aeration of the pile. Placing small branches or other bulky organic material at the bottom of the bin will also help to aerate the pile.
Materials to Aerobically Compost:Leaves Grass Clippings Yard & Garden Trimmings
Manure Seaweed Coffee Grounds & Filters
Egg Shells (Crushed) Pet & Human Hair Most Plant Matter
Note: Eucalyptus leaves, pine needles and palm fronds decompose slowly.
Small Amounts of the following:Untreated Paper Towels Untreated Tissue Paper Fruit & Vegetable Scraps
Wood Ash Sawdust Wood Shavings
Do NOT Aerobically Compost:Meat or Bones Animal Fat or Oils Charcoal Briquette Ash
Dairy Products Pet or Human Waste (contains pathogens & parasites)
4 5

When It’s Time to Harvest.Compost can be harvested when it is a rich dark brown color; crumbly; and has a sweet, earthy smell. Before applying to your yard or garden (see Section 6), allow the finished compost to cool down for three days to several weeks.
Amounts of Moisture and Aeration.The compost should be kept slightly moist, like a damp sponge, in order to ensure bacterial decomposition. As you build the pile, be sure to moisten all materials by layer. In dry, hot weather, it will be necessary to water the compost once or twice a week. This is a good opportunity to reuse your household rinse waters that do not contain concentrated detergents. Covering a compost pile with a tarp will also help to retain moisture and will prevent nutrient leaching on rainy days.
For quicker compost, aerate your pile at least once a week for the first few weeks. For the best results, turn the fresher outside materials into the center of the newly turned pile. In addition to the traditional pitchfork, special tools can be purchased to aerate piles without tedious hand turnings.
Time and Temperature.The speed of composting is dependent on the moisture, aeration, and carbon-to-nitrogen ratio. A hot, steamy compost pile is a definite indication that the ideal conditions have been met. Only the outside of the pile will remain cool and minimally affected by decomposing organisms. Aeration and moisture are generally the main factors affecting the time necessary to produce finished compost. Weekly turnings of the pile will produce compost in one to two months; monthly turnings will produce compost in four to six months.
Troubleshooting.
Symptom Problem Solution
Compost pile center is damp, but cold. Lack of Nitrogen.
Add Nitrogen-rich materials such as animal manure, fresh grass clippings, seaweed or blood meal.
Compost has a bad odor. Anaerobic conditions.
Turn pile. Add a bulk-ing material (like straw) if the pile materials are too fine.
Compost has an ammonia-like odor. Too much Nitrogen. Turn pile, add carbon-
rich materials.
Center of pile is dry. Not enough moisture. Water pile while you turn it.
Compost is warm and damp in the middle, but nowhere else.
Pile is too small.
Increase the volume of the pile with yard waste, grass clippings, or garden trimmings.
6 7

An anaerobic composting bin should be located in a spot with good drainage. Accessibility, aesthetics, and convenience should also influence where your bin is placed. If located under or next to fruit trees, they will benefit from the added moisture and nutrients. To prevent the contamination of water, avoid a bin location near waterways or drainage courses. To prepare the site, dig a hole 6 to 12 inches deep, set the bin into the hole, and pack the ground firmly around the bin. Lining the bottom of your bin with ¼-inch poultry wire will fortify it from scavengers but still allow earthworms to enter.
How the System Works.Anaerobic composting works best with nitrogen-rich materials such as non-fatty kitchen scraps and soft
Section 3
Anaerobic Composting
What is Anaerobic Composting?Anaerobic composting is the slow decay of organic matter through fermentation. Unlike aerobic composting, the pile will not heat up. Microorganisms that thrive in a low-oxygen environment (mostly bacteria) reduce nitrogen-containing or sulfur-containing compounds found in organic matter to yield humus, organic acids, and gases.
Setting up your Anaerobic System.Ideally, two anaerobic composting bins should be used to allow for continuous composting. While one is finishing composting, the other can be filled. If you plan to construct a homemade composting bin, be sure to choose a bottomless barrel with a lid that seals tightly and has a capacity of 35 gallons or more (see Section 5).
Materials to Anaerobically Compost:Non-Fatty Kitchen Scraps Houseplant Clippings Coffee Grounds & Filters
Egg Shells (Crushed) Pet & Human Hair Tea Bags
Untreated Paper Towels Untreated Tissue Paper
Small Amounts of the following:Wood Ash Grass Clippings Leaves
Do NOT Anaerobically Compost:Meat or Bones Animal Fat or Oils Charcoal Briquette Ash
Dairy Products Woody Yard Trimmings Saw Dust
Pet or Human Waste (contains pathogens & parasites)
8 9

Time and Temperature.
Anaerobic compost will require up to three months to mature once the bin is full, depending on the moisture content and the type of materials being composted. Although this system will not achieve high, sustained temperatures, pathogens dangerous to people and pets will be destroyed over time.
Harvesting your Finished Anaerobic Compost.Organic material added to the composting bin will, over time, reduce in volume due to the fermentation process. When the bin reaches full capacity, a second bin can be started. Finished compost will be dark brown and moist. It should be allowed to dry and aerate for one to two weeks before using. To harvest the finished compost, simply pull up the container, shovel the contents aside, and place the bin back in the hole. Anaerobic compost can be applied to the yard and garden using techniques described in Section 6.
Keeping the Anaerobic Composting Bin Healthy.A moist anaerobic composting pile with a slimy consistency and a slight sulfur odor are sure signs that your bin is working properly. Do not be alarmed by the presence of insect larvae, worms, beetles and other scavenging organisms. They are all part of the composting process and also indicate a productive bin.
green clippings. It is important to avoid adding carbon-rich materials such as dry leaves, sawdust and woody yard waste. These materials will retard or even halt the anaerobic composting process and should be composted aerobically or placed in a green waste collection container.
Do not open your anaerobic composting bin more than two times per week. Over-exposure to oxygen impedes beneficial microorganisms and slows efficient composting. Frequent trips to the composting bin can be reduced by simply storing daily food scraps in a sealed garbage pail that can be placed under the sink or in the refrigerator.
Two inches of soil or finished compost should be added to your bin once a month to inoculate it with the necessary microorganisms and to keep the fruit fly population down.
Increasing Surface Area Speeds the Process.As with aerobic composting, the more surface area the microorganisms have to work on, the faster the materials will decompose. Chopping or bruising kitchen scraps and soft green clippings will speed up the composting process.
Keep it Moist.Always keep the materials in your anaerobic composing bin moist. If the material gets too dry, it will not compost. Proper moisture content will help to exclude oxygen from your compost and keep fruit flies and ants from invading your bin. An anaerobic composting bin should be watered at least once a month. It can never be over watered, so take advantage of household rinse waters which do not contain detergents, bleach or boron/borax to water compost.
10 11

A healthy anaerobic bin often has traits considered unhealthy in an aerobic bin; review Section 2 to see the qualities of an unhealthy aerobic composting bin, and contact the County Composting Specialist whenever you have questions or need technical assistance.
Section 4
Vermicomposting
What is Vermicomposting?Vermicomposting is the use of worms to consume organic waste. This efficient and odor free method of composting produces nutrient-rich worm castings. Organisms, such as bacteria and sow bugs, also assist in this aerobic composting process. Vermicomposting is ideal for small amounts of non-fatty food scraps, leaves and soft green trimmings.
Vermicomposting Bins.A worm bin can be built for around $40 (see Section 5) or purchased through mail order gardening supply catalogs. The bin must have sufficient aeration, drainage, and a secure lid to exclude scavengers, flies and cats (it can be an appealing litter box!). Bin size depends on the average amount of food waste your household produces in one week. To figure out how large your vermicomposting
Troubleshooting.
Symptom Problem Solution
Ant population around the base and in the bin. Bin is dry.
Soak bin contents with water. Pack down if necessary. Never use pesticides.
Interior of composting bin has large fruit fly population.
Bin is dry.
Soak bin contents with water, add two inches of soil, limit bin opening to one or two times per week. Never use pesticides.
Bin materials will not compost.
Too much woody waste has been added and/or bin is dry.
Soak bin contents with water, discontinue add-ing woody waste.
Outside of bin is being dug up.
Opossums, skunks, rac-coons or other scav-engers are feeding on your bin’s compost and earthworms.
Line the bottom and sides of the composting bin with ¼” bird wire. Discontinue adding fatty kitchen scraps.
Soup-like compost with a large fly population.
Insufficient drainage (rarely occurs).
If homemade bin, be certain that the bottom of the compost bin is removed, relocate to an area with better drainage.
12 13

bin needs to be, use the following formula:One square foot of surface area per pound of garbage produced per week.
For example, a bin that is 8”x 24”x 24” (4 square feet) would be suitable for a household producing 4 pounds of garbage per week.
Those Hungry Little Creatures, Worms.Red worms (Eisenia foetida and Lubricus rubellus) are excellent for vermicomposting. They thrive in confinement, reproduce quickly, and in one day eat their weight in food. Red worms are surface feeders naturally found under decaying organic matter or animal manures. They can be purchased from internet retailers, mail order catalogs and some gardening stores and bait shops. Do not use night crawlers and common garden worms which require tunnels and deep soils. To determine how many worms your bin will require, use this simple formula:Two pounds of worms to every one pound of garbage produced per day.
As an example, a family producing an average of two pounds of kitchen scraps per day will need approximately four pounds of worms for their bin. There are approximately 1000 worms per pound. If you are adding more food waste than you originally estimated, do not add more worms. The population will naturally increase with the larger food supply.
Bedding Materials and Moisture.The bedding in a vermicomposting bin retains moisture, reduces odors, and serves as food for the worms. It is
also used as a retreat for the worms when the heat of decomposing food waste becomes intolerable for them. Worm bedding can be purchased or made from animal manure, leaf mold, decaying leaves, newspaper strips, or shredded cardboard. Newspaper (no colored ink) ripped into one inch strips is a simple and inexpensive choice. Although acidic, peat moss in small amounts can be mixed with a newspaper or animal manure bedding to aid in moister retention and decrease bedding density. The bedding must have a moisture content of 75% to 95% water while maintaining proper aeration. These conditions are essential for the worms to respire.
Setting up your Vermicomposting System.Place your vermicomposting bin in a location that is accessible, like your porch, garage or under the kitchen sink. Make sure that the area you choose is shady and has moderate temperatures (55° to 75° F.). The following materials will then be needed to prepare your bin for vermicomposting.
Moistened bedding1.
2 to 3 handfuls of soil2.
Red worms3.
Peat moss (optional)4.
Black tarp or trash bag (optional)5.
Combine moistened bedding, peat moss (no more than ¼ of the total mixture), and soil in the bin. Spread the worms onto the bedding to exclude flies. Organic waste can then be discarded into a
14 15

carefully dug hole in the medium and covered with one inch of bedding to exclude flies. Rotate garbage burial spots each time to minimize the disturbance of the worms. If your bin does not have a lid, cover the entire bedding surface with a black tarp or plastic trash bag. This will block out light and aid in moisture retention.
Healthy, Happy, Hungry Worms.Although a vermicomposting bin does not require a balanced carbon-to-nitrogen ratio like aerobic composting, a proper diet will help maintain a healthy stock of worms. To aid in the decomposition processes chop, shred, or bruise all organic waste prior to placement in the vermicomposting system.
Harvesting your Finished Vermicompost.As worms digest the bedding and food waste, dark brown castings will be produced. After four to six months, the vermicompost should be pushed to one side of the bin and fresh bedding placed in the other. For approximately one
month bury garbage in the fresh bedding to allow the older compost to complete the maturation process. After harvesting the finished compost, add more bedding. Vermicompost is a nutrient-rich soil amendment that is excellent for your garden, yard, and houseplants (see Section 6).
Keeping your Vermicomposting System Healthy.The success of a worm composting bin depends on minimal, but essential, upkeep. Maintaining proper moisture content, aeration, food supply, temperature, and bedding will keep your worm population strong. Disease, scavengers, or the presence of a natural predator (such as ants) may explain a reduced population. If your bin does go into decline, don’t give up hope. A worm population can be restored by correcting the problem and reducing the amount of food normally added to the bin until their numbers increase.
Materials to Vermicompost:Vegetable Scraps Fruit Peels & Scraps Coffee Grounds & Filters
Plant Clippings & Leaves Egg Shells (Crushed) Stale Bread & Grains
Tea Bags Untreated Paper Towels and Tissue Paper
Do NOT Vermicompost:Meat or Bones Animal Fat or Oils Charcoal Briquette Ash
Woody Waste Pesticide-Treated Plant Trimmings
Dairy Products Detergents & Other Laundry Aids
Pet or Human Waste (contains pathogens & parasites)Troubleshooting.
Symptom Problem Solution
Large fly population, fungus or gnats.
Exposed food, acidic con-ditions, fungus growth.**Surface fungus occurs natu-rally in the bin and provides food for the worms.
Add one inch of fresh bedding, water thor-oughly, secure bin cover or lid. Add a small amount of baking soda. Never use pesticides.
Bin has a rotten egg odor, worm population has decreased dramatically.
Anaerobic conditions.Add fresh bedding and fluff up, allow material to dry some.
Large ant population. Bedding is too dry.
Keep bedding moist. Eliminate ant route and nest site. Never use pesticides.
16 17

Section 5
Building Your Composting System
Aerobic Composting Systems:
Anaerobic Composting:
The Wire Fencing Bin:Materials: Plastic coated wire fencing that is
14 ft long and 3 ft tall. Three metal hooks, snaps or wire ties. Three tee posts or wooden stakes (optional).
Cost: Approximately $20.00 to $25.00.
Tools: Wire cutters, sledgehammer.
Directions: Roll out wire fencing and set upright in chosen composting site. Latch the bin ends with metal hooks or ties. For extra stability, use tee posts or wooden stakes.
The Cinder Block Bin:Materials: Approximately 50 cinder blocks (8”x8”x16”)
Cost: Under $90.00. Directions on next page…
The Cinder Block Bin:Directions: Please use caution while lifting the
cinder blocks. Construct a three-sided cinder block bin by laying each block without mortar approx-imately 2” apart to ensure sufficient air flow. Stagger placement of the blocks to ensure greater stability (see drawing). Each side should be 3 ft to 4 ft long and approximately 3 ft high.
The Pallet Bin System:Materials: Five wooden pallets (check with
local businesses who may dispose of these pallets). Heavy twine or wire. Three wooden stakes or tee posts.
Cost: Free to under $10.00.
Tools: Sledgehammer.
Directions: Erect wooden pallets into an E-shape depicted in the drawing. Secure bin joints together with heavy twine or wire. For bin stability, use stakes or tee posts to support the sides.
Anaerobic Composting Bin:Materials: One 32- to 50-gallon plastic trash
can with a tightly sealed lid.
Cost: $20.00 to $70.00.
Tools: Saw.
Directions: Using the saw, cut off the bottom of the plastic trash can. To prepare the bin site, follow the directions described in Section 3.
18 19

Vermicomposting System:
20”
45”
Lid.2x4 Frame with Top Plywood.
Ol’ Willie’s Wooden Wild Worm Bin:Materials: One 4 x 8 ft sheet of ½” plywood,
one 12 ft 2x4, one 16 ft 2x4, 2 lb of 6d galvanized nails, two galvanized door hinges with screws.
Cost: Approximately $40.00.
Tools: Tape measure, skill saw or rip handsaw, hammer, sawhorses, straight edge, screwdriver, drill with ½” bit and matching screws.
Directions: Please, use common sense when constructing this container. Make sure to follow the manufacturer’s safety instructions when using any power tool; additional personal safety equipment (such as protective goggles) may be required.
Measure and cut plywood as indicated in Diagram 5-A (see page 21). Cut the 12 ft 2x4 into five pieces: two 39”, two 23” and one 20” long. Nail the 2x4’s together on edge with 16d nails at each joint as illustrated in the Base Frame diagram. Nail the plywood base piece onto the 2x4 frame.
Cut four 1 ft lengths out of the 16 ft 2x4. Take each plywood side piece and place a 1 ft 2x4 under each of its ends so that the 2x4 is flush with the top and side edges of the plywood, and nail the boards into place. Nail the side pieces onto the base frame. To complete the box, nail the ends onto the base and sides. To rein-force the box make sure there is a nail staggered at least every 3” wherever plywood and 2x4’s meet. Drill twelve ½” holes through the bottom for drainage.
To build the lid, take the remaining 12 ft 2x4 and cut it into two 45” pieces and two 20” pieces and lay them flat, short pieces on the inside as indicated in Diagram 5-A, so that the plywood top is inset from the edges of the 2x4 by 1 ½” all the way around the pe-rimeter. Nail the plywood onto the 2x4 securely. Place the hinges on the backside of the box at both ends on the 2x4’s, and on the underside of the 2x4 lid frame, so that the lid will stand upright when opened.
Construction Details (Diagram 5-A)
24” 24” 23” 24”
16”
End End
Base Top
16”
Side
42”
16”
Side
4 x 8 ft Sheet of Plywood
42”
39”
23”
20”
Base Frame.2x4’s on edge.
20 21
End Base 2x4’s Can be Notched for Hand Holds.
23”
Top

Compost Sifter: Section 6
Using Your Finished Compost
Compost is an excellent soil amendment. It improves the permeability of compacted clay soil and the water retention ability of sandy soil. It is a great alternative to expensive petroleum-based fertilizers and will increase the organic matter content of the soil. Over months, nutrients are slowly released as soil organisms continue working on the compost.
Hand Held Sifter:
Materials: One 2”x2”x72”, one 2”x2”x48”, one 2”x¼”x72” lath, one 2 ft x¼”x48” lath, 3 ft of hardware cloth or avi-ary wire that is 3 ft wide (¼” or ½” mesh), four L-brackets, 30 galva-nized staples, 16 1¾” galvanized nails (5d), eight 2⅛” galvanized nails.
Cost: Approximately $30.00.
Tools: Hammer, wire cutters, handsaw, screwdriver, tape measure.
Directions: Please, use common sense when constructing this container. Make sure to follow the manufacturer’s safety instructions when using any tool; additional personal safety equipment (such as protective goggles) may be required.
Measure and cut the 2”x2”x72” into two 3 ft pieces and the 2”x¼”x72” into two 2 ft pieces. Then as indicated in Diagram 5-B, attach the 2x2’s together with the L-brackets. Cut the wire to match the frame’s outside diameter and secure by nailing staples approximately one inch apart. To cover exposed wire, nail lath to the frame flush to the frame’s rim.
Diagram 5-B2 ft
3 ft
2” • • L-Bracket
Location Application
Garden Work into soil. Use as a top dressing alone or with other mulching or natural fertilizer material.
Lawn Sprinkle sifted compost over lawn before watering or rainfall. Also helps suppress lawn diseases.
Houseplants
Steep a couple of tablespoons in a quart of hot water and use as a mild fertilizer. Spread compost at the base of plants to act as mulch. For potting plants, replace ¼ to ½ of the potting soil with compost.
Shrubs, Hedges &Trees
Scatter at the drip lines (not against the trunks) as a nutrient-rich mulch.
22 23

Section 7
Yard Waste Reduction
In addition to backyard composting, another way to keep your yard wastes out of the landfill is to reduce the amount that you generate in the first place. The following is a list of practices that will help you to do more by doing less – while you reduce yard wastes and conserve water, you will also cut down on yard maintenance.
Use Mulch.Mulch is organic material such as wood chips, leaves or compost that is spread over the soil surface. It reduces evaporation from the soil surface, keeps down weeds, and keeps soil temperatures from becoming too hot or too cold. Mulch also protects sloping ground from soil erosion. As the mulch decomposes, valuable nutrients are released to the soil and plant roots. Inorganic mulches, such as gravel, offer similar benefits but do not act as ready sources of nutrients.
Flowers and vegetables should be mulched with a thin, one- to two-inch layer of light, fine mulch such as grass clippings and leaves. Spreading mulch around plants such as tomatoes and melons will keep the fruit off the ground, so it is less likely to mold or rot.
Woody plants and shrubbery can be mulched with a thick, three- to four-inch layer of shredded or chipped wood that will look good and require little maintenance. Paths can also be covered with shredded or chipped wood to keep down weeds. Pine needles are good mulch for acid-loving plants such as rhododendrons, azaleas and blueberries.
The best place to find mulch materials is your own backyard.Compost or dispose of diseased materials, but many others can be used for mulching. If you need additional chipped or shredded woody wastes, contact the County of Santa Barbara and ask about our free and low cost mulch programs.
Grass-cycling.Grass-cycling is the recycling of grass clippings by leaving them on the lawn when mowing. Grass-cycling will also reduce your lawn’s fertilizer needs, reduce water evaporation from the lawn, and increase biological activity near the soil surface, resulting in a healthier lawn.
Raise your mowing height to the upper recommended levels for your type of turf: one- to one-and-a-half-inch for Bermuda and other fine-leaved subtropical grasses and three to four-inches for the cool season turfs like fescues and ryes. Mow when the clippings produced are one-inch or less; the finer the fragments, the more quickly they will decay and return to the soil. Always mow your lawn
24 25

when it is dry, and remember to keep the mower blade sharp (this will result in finer clippings).
Although mulching mowers are specifically designed for grass-cycling, any mower will work. Many manufacturers also have attachments available which will improve your mower’s grass-cycling performance.
Proper Pruning.When and how you prune your plants will affect both yard waste generation and your plants’ water and fertilizer needs. Take some time to study and experiment with your plants’ life cycles: When do they grow vigorously? How do they respond to increasing or decreasing amounts of water and fertilizer?
Most plants are best pruned or trimmed following their major flush of growth, including most evergreen perennials. Deciduous trees and shrubs are more likely to respond to dormant season pruning. Observe how your trees, shrubs and hedges respond to pruning. If the plant throws out vigorous sprouts or heavy new growth after pruning, you probably trimmed too much or at the wrong time. Try to time your pruning to periods of limited growth. Appropriate timing can also reduce the frequency of pruning. For vigorous hedges, such as Eugenia, you can reduce coarse waste generation by more frequent trimmings, which yield softer and readily compostable material.
Each plant has its own natural structure and seeks to achieve
its destined size in competition with other nearby plants. Let this fact guide your style of pruning. Most plants do not like to be bobbed. Native trees and shrubs prefer light trimming, not heavy limb removal.
With most plants you can reduce water demand and regulate size and growth by carefully thinning shade growth within the tree or shrub canopy. Thinned trees and shrubs are often more attractive than those severely headed back and will produce less yard waste. When adding new plants, remember that plants that are appropriate in scale to your landscape at maturity will require little or no pruning.
Proper Watering and Fertilizing.Outdoor landscaping consumes 36% of Santa Barbara’s water supply. Much of this water is wasted. Landscape architects estimate that many turf areas are over-watered by a whopping 100-300 percent! Over-watering often leads to over growth, generating more yard waste. Following some basic rules will help you maintain healthy plants without wasting water or encouraging unnecessary growth. Proper watering is directly linked to the growth of plants. Perennial plants (including trees and shrubs) often have only one to two flushes of top growth per year, preceded by or interspersed with active root growth. Annual and biennial plants complete their life cycles in one and two years, respectively. They tend to have periods of vigorous top and root growth, followed by flowering and fruiting. Evergreen perennials, such as citrus, require more even irrigation over the year than do deciduous perennials, such as ash trees, which go dormant during the colder months.
Most perennial plants require deep, infrequent watering, but 26 27

definitely ample water in spring at the time of maximum leaf and stem growth. Most fruit trees root and feed in the upper one to two feet of soil, so deeper watering is required infrequently to wash down (and out) accumulated salts. Fruit trees will need thorough irrigation during fruit development until just following harvest. Water annual plants deeply early on to get them off to a vigorous start; then use mulch to retain water and reduce watering levels consistent with the plant’s needs.Golden Rule #1: Do not sprinkle the soil surface; water as thoroughly and as infrequently as required by your plants.
Golden Rule #2: Do not over-fertilize lawns and other plants; follow label directions and reduce fertilizations if you limit watering.
Cutting Down on Lawn Size.Considering some of the facts you have just read, it is probably apparent to you that lawns are a major source of waste generation and also demand a large percentage of our precious water. Please take time to consider how much of your lawn you actually use on a regular basis and what areas of your lawn do not get used at all. There are many ornamental landscape alternatives which produce less waste, require less water, and also require less work than a lawn!
Many local nurseries and the Santa Barbara Botanic Garden offer assistance and ideas for changing your landscape. Take a walk down your street and see what your neighbors are doing!
Section 8
Composting & Yard Waste Resources
The Santa Barbara Library and its Black Gold Cooperative Library System has dozens of books on compost and hundreds of titles related to gardening. Check with the Library for availability. Some notable books include:
Backyard Composting, Your Complete Guide to Recycling Yard Clippings, Harmonious Technologies, Harmonious Press, Ojai, CA, 1992
Let It Rot!: The Gardener’s Guide To Composting, Stu Campbell, Storey Communications, Inc., Pownal, VT, 1990
The Mulch Book, Stu Campbell, 1991
The Rodale Guide to Composting, Organic Gardening Editors, Rodale Press, Inc., Emmous, PA
Worms Eat My Garbage, Mary Appelhof, Flower Press, Kalamazoo, MI, 1982
28 29

Online Resources.The internet is a valuable resource for answering your questions about composting. In addition to doing internet searches, you can explore these websites to find more information and help answer your questions.
The County of Santa Barbara’s Recycling Website: www.LessIsMore.org/compost
The US EPA website on composting: www.EPA.gov/osw/conserve/rrr/composting/
Vermicomposters.com, a great resource for worm bins: www.Vermicomposters.com
Instructables.com, for additional building instructions: www.Instructables.com
Happy composting!
30
Want to learn more?For more information call the County ’s Composting Specialist at
(805) 882-3618or visit
www. Less Is More .org/compost
County of Santa Barbara Public Works Department Resource Recovery & Waste Management Division 130 East Victoria Street, Suite 100 Santa Barbara, California 93101