forces and simple machines an integrated science learning ... machines... · forces and simple...
TRANSCRIPT

Forces and Simple Machines
An Integrated Science Learning Unit for Yukon Grade 5 Students
Centre for Youth, Research, Science Teaching and Learning
University of Manitoba
Social Sciences and Humanities Research Council
November 2011

2
Acknowledgments
In 2008, the Yukon First Nation Education Advisory Committee proposed several goals and priorities for education in the Yukon. Central priorities included the development of curriculum and resources that integrate into curricula, First Nations content, perspectives, values, knowledge and ways of teaching and learning. This resource provides teachers with the support
for providing learning experiences that allow for learning to be grounded in the heritage of northern students including culturally preferred learning styles rather than just learning about their heritage. The development of this resource for teachers and students in the northern Yukon has been made possible through the granting agency Social Sciences and Humanities Research Council. Their support has ensured that northern students are provided with the opportunity to learn about their heritage through means responsive to their learning style preferences, especially when they study core curriculum areas such as science. The development of this resource has also been made possible through the support of the Tr'ondëk Hwëch'in community of Dawson City. The elders and community members have given their time and knowledge to ensure that their experiences can be recorded and incorporated into learning activities valuable for their community‟s children. As well, the school community of Robert Service School, especially the teachers of the Intermediate grades is thanked for its support in the development of the learning activities outlined in this resource. Contact details: Dr. Brian Lewthwaite Faculty of Education University of Manitoba

3
Guiding Principles of the Unit
Draw upon teaching orientations that are identified as culturally located
practices.
Affirm cultural competencies honored by the local community.
Provide two-way learning experiences by integrating traditional knowledge, beliefs and values and contemporary scientific knowledge, processes and attitudes.
Use traditional and contemporary cultural examples as contexts for student learning.
Include the local community and its people in students‟ learning opportunities, especially in the use of narratives including local people.
Foster Han language development where possible.
Use diagnostic and formative assessment to inform planning and teaching and monitor student learning.
Engage students by starting lessons by providing first-hand experiences for students or drawing upon common experience.
When using story to engage students, use the interrupted-story-line as a vehicle to prompt consideration and first-hand investigations.
Deliberately promote scientific attitudes of mind (curiosity, problem-solving, working to end) student through thoughtful independent consideration of questions and challenges posed.
Move from the experiential, first-hand experiences to the psychological; that is, after providing concrete experiences assist students in making sense of experiences by using purposeful strategies to promote understanding such as role plays, illustrations and analogies.
Assist students in their consolidation of ideas only as an extension of the initial experiential and psychological learning experiences.
Provide opportunities for student-initiated and directed investigations.
Provide opportunity for students to make connections among science and all other learning areas.
Foster student independence, creativity and curiosity by providing opportunity for students‟ ideas and questions and follow-up opportunities for problem-solving and investigation.
Provide students the opportunity to make connections between what they are learning and career opportunities specific to the local context.

4
Cross-Curricular Applications
This unit is developed to reinforce learning outcomes of Science, Social Studies and English Language Arts relating to the Science unit of Simple Machines, experienced during Grade 5. These include:
Physical Sciences: Forces and Simple Machines It is expected that students will:
Identify the six different simple machines; lever, wedge, inclined plane, pulley, screw, wheel.
Classify the six different machines into everyday devices that are used primarily in the Yukon.
Exploring and comparing the different simple machines for identical tasks.(Choosing the right machine(s) for the right job)
Recognize several examples of heavy machines that contain simple machines that are primarily in the Yukon.
The unit is also developed to reinforce or address the learning outcomes of the Social Studies curriculum of British Columbia (2005). These include: Skills and Processes: It is expected that students will:
Use inference, imagination and pattern identification to clarify and define and issue or problem.
Use an outline to organize information into a coherent format.
Identify alternative interpretations and viewpoints on a selected topic (ex. Which simple machine(s) would be appropriate to complete a particular task?)
Individually or in groups, implement a plan of action to address a problem or issue (How to bring large quantities of food up into a cache through the use of simple machines)
English Language Arts: Oral Language (Purposes, Strategies, Thinking and Features) It is expected that students will:

5
Share ideas relevant to class activities and discussions.
Listen to classmates and others without interrupting.
Speak respectfully and use appropriate language and tone when disagreeing.
Speak and listen in partner, small group, and whole class discussion to accomplish a task.
Contribute relevant responses to class/group discussions.
Use vocabulary appropriate to topic and audience. (ex. Using the appropriate terminology when referring to the different simple machines or structures i.e. pulley)
Follow multi‐step oral instructions and demonstrations (conducting and experiment using simple machines)
Ask questions, independently or with classmates, to explore a topic further.
Use new vocabulary introduced in texts and class discussions.
Build on others‟ ideas.
question and speculate on possibilities regarding the ideas and information presented (e.g., “What if...,” “I wonder if...,” “What would happen if...”)
English Language Arts: Reading and Viewing (Purposes, Strategies, Thinking and Features) It is expected that students will:
Follow written procedures (e.g., carry out a simple machines experiment)
Extract accurate and important information from text and „text features‟, including specific details from graphics. (Students will interpret narratives surrounding simple machines)
Interpret images and make some relevant inferences (e.g. construct meaning from visual texts and identify relevant detail)
Write down and/or share what they already know about a topic or idea.
Ask and respond to questions related to the material read or viewed.
The emphasis in Social Studies on the validation of Aboriginal Cultures and Continuity and Change in Society are emphasized in

6
this unit. As students are engaged in science, they will also be engaged in social studies learning. They will also be developing oral and written language and numeracy skills specific to Grade 5. The unit has strong connections to experiencing simple machines within the northern Yukon environment, both within an historical and contemporary social context. Students are encouraged to explore the characteristics of simple machines especially through the stories and accounts of persons from the community. By hearing these accounts and having their own first-hand experiences with simple machines, students can develop a rich understanding of simple machines and greater sense of their own culture. There are obvious connections to social and environmental change and personal health and well-being. The activities suggested are starting points. Broaden the focus by adding stories and activities of your own or from the experiential base of your community.

7
Conceptual Ideas and Progression
The recommended sequence for supporting student conceptual development of the phenomenon of simple machines is suggested below. For the most part, the activities and the conceptual and skill development embedded within the activities is sequential. Lower elementary experiences and ideas primarily focus on experiencing and communicating these experiences. Upper elementary experiences focus on understanding and investigating these experiences and appreciating applications of this understanding to their students‟ everyday world. It is suggested teachers address the following key ideas: Introduction to Forces:
Unbalanced and balanced forces
Pulling and pushing forces
Spring scales and effort meters
Friction
The affect of frictional forces, mass, surface texture, and slope on the movement of an object
Introduction to the six simple machines:
Identifying the six simple machines
Recognizing examples of simple machines in our surroundings
Basic understanding of how simple machines work and their function or purpose in the past and present.
Learning about inclined plane:
Construct Effort Meter and conduct experiments using measurement and different inclines to pull up a weight.

8
Learning about levers:
Look at, and identify common levers found in our everyday lives
Apply knowledge learned about how levers work to make and test a lever
Learning about the Pulley:
Construct a flag pole for the Yukon flag Learning about the Screw:
Comparison of different types of screws
Understanding how different types of screws work
Investigation to discover how augers work and are used in placer mining
Learning about the Wheel and Axle:
Constructing own wheel and axle Learning about the Wedge:
Students will examine how the wedge has been used in the Yukon both in the past and present; i.e. scraping hides and making tools.
Students will use their knowledge to compare different types of wedges used in the Yukon for chopping and splitting wood
Learning about Compound Machines:
Identifying simple machines found in compound machines
Learning that compound machines are made up of simple machines
Building a compound machine using knowledge learned about the six simple machines

9
Skills Development
This unit emphasizes that the learning of science ideas is inextricably linked to the development of the processes of science. As asserted by British Columbia Science Grade 5 (2005), the legislated curriculum for Yukon schools, science experiences should provide opportunity for the development of conceptual understanding within the context of relevant investigative experiences. Although individual scientific process skills may be emphasized in specific activities, they are to be supported more holistically in teacher-facilitated or student-directed inquiry. The skills to be developed are expected to be appropriate to the level of the learner. These skills and a typical developmental sequence are outlined in detail in the Science Grade 5 (2005) guide. These skills involve coordination between cognitive and psychomotor skills. Handling and manipulating equipment require not just the physical ability to perform a task but also the intellect to know how to measure or observe accurately. It is anticipated that by the end of intermediate school, a student might be able to, with assistance, conduct a scientific investigation. This unit provides opportunities for students to work physically and cognitively towards this end. There is no universal list of scientific process skills. Those identified in this curriculum are not intended to be a linear scope and sequence; instead, they suggest multiple ways in which learning science can be explored. At each grade level, two processes are introduced and then reinforced with the curriculum content in the subsequent grades; but teachers are expected to involve all of the skills their students are capable of using. Process skills are best learned in hands-on activities where students engage in a problem-solving task while doing science. The hands-on model of learning science allows students to construct meaningful connections within the brain. In young children, process skills can be found in the natural practice of manipulating materials while asking questions and being curious. The names of the skills can be used

10
and reinforced by teachers as students use and learn to apply these skills to science activities. The science process names will become familiar to students, enabling them to use the correct vocabulary when they explain their involvement in science and technology inquiries.

11
Attitudes and Beliefs Development
An explicit goal in the development of this resource and the other resources being developed in this northern Yukon project and the accompanying professional development provided for teachers is to use these as a vehicle to contribute to student „success‟ in science. Although success in science is often attributed to measurable outcomes such as knowledge acquisition and development, the intent of this development project is much more encompassing. It extends this notion of success to investigate the influence of „two-way‟ learning experiences on students‟ perceptions of success in their personal attitudes and beliefs. What does success in science mean to northern Yukon students? It is anticipated that students will experience success in a variety of ways, beyond the border of knowledge into the domain of attitudes and beliefs. Attitudes are regarded as states of mind, behavior or conduct regarding some matter, as indicating opinion or purpose. The program of study suggested in the activities that follow will foster student curiosity and creativity, and openness to new ideas of thinking. As well students will develop confidence in their perceptions of self as students of science. Similarly they will develop confidence as evidenced in risk-taking and their effort to conduct science investigations. Their participation in the processes of science will foster their perseverance, precision and objectivity in solving scientific problems. As members of a team they will develop in their respect for and ability to work co-operatively towards purposeful goals with their peers.
Above all, it is anticipated that students will develop a more positive sense of themselves in contemporary society as they learn about the inextricable link between science and the world in which they live. It is anticipated that students will see science as part of their life trajectory both in future formal and informal settings as a result of science study that advocates „two-way‟ learning.

12
Introductory Stories
Today we just expect there to be a house for us to live in. Back then it was different. You had to build that cabin on your own. You might be able to buy a stove and some glass for windows, but everything else you do on your own. It was much work. You would build a cabin where there were good trees. If there were no good trees, you would be doing much work. It was easiest if you had dogs and sled. You would cut down a tree. Then cut it down in size and then scrape bark. Then the dogs would pull the logs to river. Then we would load a few logs on the sled and haul the logs to where the cabin would be built. It was easiest to do this when the river was frozen. Even doing this when the river was not frozen and floating the logs was difficult. Then you had to haul it on the ground and it was easier on snow and ice. The dogs made it all easier. One person would not move the big logs, so it was essential we had dogs. Lifting the logs was difficult. We had to use ropes to pull and lift. You had to think about how to do all this work. It was not easy.
How is life different today? Why was the work harder then, than now? Why was thinking about how to do the work important?

13
What do these pictures and short stories have in common? With a partner, read each. When you have an idea of what they have in common, write it in the space provided. Example 1: Jolene caught a fish while ice fishing. As she was drawing the fish up to the hole, she could see the fish in the clear water. The fish gave a big tug and the line broke and the fish got away. Example 2: Brad was playing hockey. His teammate, Sam took a shot at the net. As the puck cruised to the net, Brad put his stick out and tipped the puck in a different direction and into the net for the winning goal. Idea: ____________________________________________________________ Example 3: There was a huge snowfall last night. The snow accumulated on the roof of the church and the roof collapsed from the snow. Idea: ____________________________________________________________ Example 4: Tom was stuck in the snow. All it took was a push to get him moving. Idea: ____________________________________________________________ Example 5:
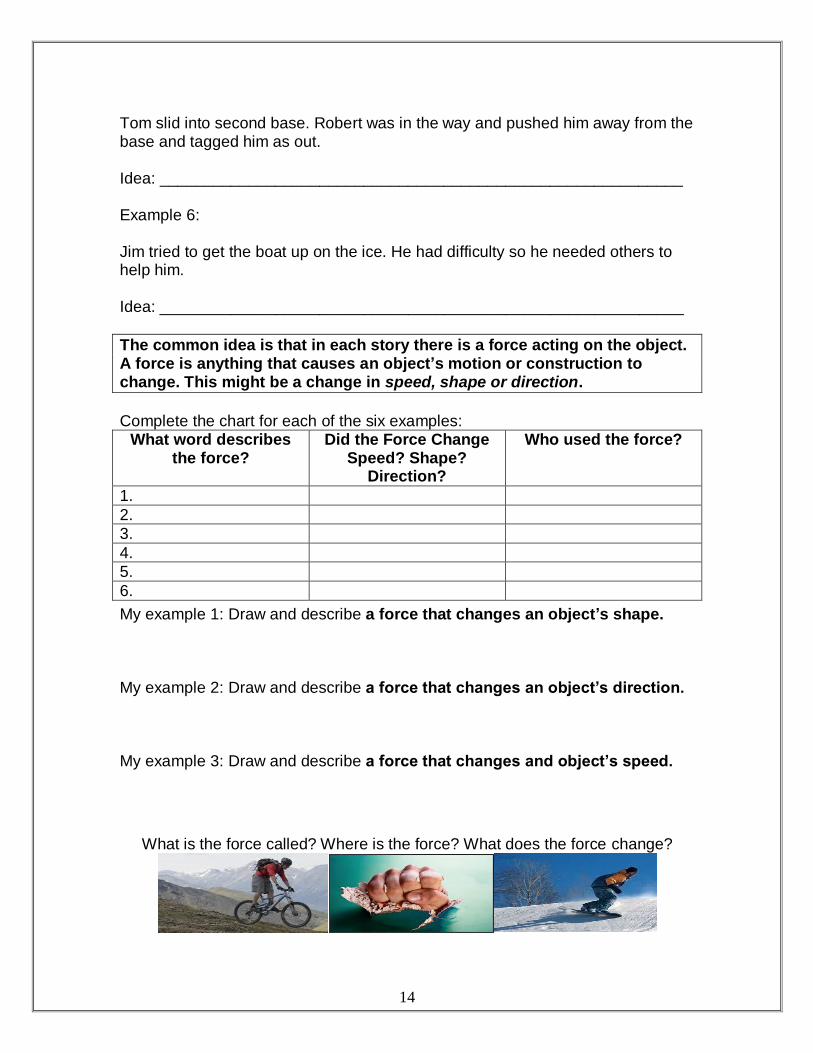
14
Tom slid into second base. Robert was in the way and pushed him away from the base and tagged him as out. Idea: ___________________________________________________________ Example 6: Jim tried to get the boat up on the ice. He had difficulty so he needed others to help him. Idea: ___________________________________________________________
The common idea is that in each story there is a force acting on the object. A force is anything that causes an object’s motion or construction to change. This might be a change in speed, shape or direction.
Complete the chart for each of the six examples: What word describes
the force? Did the Force Change
Speed? Shape? Direction?
Who used the force?
1.
2.
3.
4.
5.
6.
My example 1: Draw and describe a force that changes an object’s shape. My example 2: Draw and describe a force that changes an object’s direction. My example 3: Draw and describe a force that changes and object’s speed.
What is the force called? Where is the force? What does the force change?

15
Forces in Action
Demonstration Action Force that caused motion
Is it a Push or Pull force
1 Shove a motionless cart
2 Drag a motionless cart
3 Drop a penny
4 Kick a soccer ball rolling towards you
5 Crush a pop can
A man tries to push against a truck. The truck pushes the man backwards. This is an unbalanced force.
An unbalanced force is _____________________________________________ ________________________________________________________________________________________________________________________________
Example of an unbalanced force ________________________________
Two grizzlies are pushing against each other but neither are moving. This is a balanced force. A balanced force is ________________________________________________ ________________________________________________________________________________________________________________________________
Example of a balanced force __________________________

16
In the space below draw a picture of balanced and unbalanced forces in arm wrestling. Draw in arrows to show the direction of the opposing forces. Draw a bigger arrow to show the direction of movement in an unbalanced force. Draw same sized arrows to show no movement in balanced forces.
In the space below draw a picture of a tug-of-war where the forces are balanced and unbalanced
What happens when one person suddenly lets go? Why does this happen?
Activity
Arm Wrestling
Leg Wrestling
Balanced Forces
Unbalanced Forces
Activity
Tug-of war
Balanced Forces
Unbalanced Forces

17
Measuring Force: Making Our Own Effort Meters
Effort meters are also called push-pull meters. They measure how much effort or force is needed to move an object. In groups, use the effort meter frames you have been given and follow the directions to make an effort meter.
Directions:
1. Cut the cardboard into a rectangle shape that will cover the front of a ruler or meter stick. The piece should be small enough to easily lift by hand but long enough for the elastic band or string to stretch when weights are attached to the meter stick.
2. Attach the elastic band or spring near the top of the cardboard using tape or paper clip. Test the band or spring by pulling gently on it to make sure that it is securely attached.
3. Reshape a paperclip into an S shape. Wrap one of the ends of the S around bottom of band or spring and attach firmly. Test by pulling slightly on the apparatus again to make sure everything holds.
4. Place a small mark on the cardboard where the band and paperclip join together. This should be marked as 0 which stands for zero force. This is where the entire apparatus is balanced with no additional force in weight acting upon it.
5. Use a ruler to mark out intervals of 1 cm for every unit of 1 force unit. Try to make the force meter can stretch at least 20 cm or 20 force units.
How it works: When you use the push-pull meter to push, pull, or lift an object, the rubber band stretches according to the amount of force applied to the object. The greater the force pushing or pulling on the rubber band the farther the rubber band will stretch and the higher the reading on the meter‟s scale.
Using our Effort Meters
1. Practice using your effort meter by applying the following amounts of force
to your partner‟s finger:
a. 2 units of force b. 4 units of force c. 8 units of force

18
Which unit of force felt the strongest? Weakest? _________________
2. How much force does it take to move the following objects? Write your
answers in the table below.
Object moved Amount of force used
Pull empty soda can
Pull full soda can
Pick up scissors
Push book
Pull book
Pick up book
3. How much force does it take to lift a book 1 cm? 10 cm? 20 cm? Before
testing: Do you think it takes more force to lift a book 1 cm off the desk or 10 cm? _______________________ ________________________________________________________
Distance Moved Amount of force used
Lift 1 cm
Lift10 cm
Lift 20 cm
Discussion Questions
1. Which object took the most force to move?
2. Does it take more force to push an object or to pull it?
3. Does it take more force to pick up an object or slide it across the desk or floor?

19
4. Think of a game you play in which you apply force to an object. Draw a
picture of you playing this sport below.
a. Where do you apply the force? Show this in the picture.
b. What happens to the object when force is applied to it? Show the
direction of the force.
c. How does the object move?
d. Look at the pictures below. On each picture find ALL the sources of the forces (pushes & pulls) and draw in arrows to show the
direction (1) of the forces and (2) the direction in which the object moves by using a larger or another arrow.
.

20
Understanding Motion
Look at the pictures below with a partner. What does each one show? What do they have in common? List some of your ideas below:
In all of the pictures, a moving object is in contact with another object. The object might be moving or not moving (stationary). When there is this contact, friction occurs. Friction is a force. It is usually a grip or drag force that pushes against or resists the object in motion. This drag can cause the object to (1) change its speed, (2) produce heat and (3) wear. In what pictures (circle the answer) above does the object:
1. Change its speed? 1 2 3 4 5 6 2. Produce heat? 1 2 3 4 5 6 3. Wear? 1 2 3 4 5 6
Friction can assist us and be helpful. In which pictures is it useful? Why?
______________________________________________________________________________________________________________

21
Friction Race!
Friction is the force between two surfaces in contact. It can cause objects to wear, slowdown and/or heat
Directions:
1. Create a ramp with the stack of books and foam board. The ramp should be about 30 cm high.
2. Roll an object – ball, car, marble - down the board and time how long it
takes to get to the bottom.
3. Record this in the table below.
4. Repeat again and record answer.
5. If the answer is quite different repeat again until you get a consistent result.
6. Collect other materials to put on the board. Estimate how long it will take for the object to get down the board.
7. Record your estimation.
8. Run several races with different materials on the racetrack.
9. Record each trial and calculate the average time.
Results:
Ramp Material
Trial 1 Trial 2 Trial 3 Average

22
Discussion Questions:
1. Explain how you conducted this experiment to make sure you got accurate and fair results.
2. Draw a picture of your test ramp and the car and show where friction force is taking place.
3. What were the results of your test? Which surface was the fastest? Which was the slowest?
4. Think about what you know about friction. Explain why you think you got the results that you did. Why were some slower? Why were some faster?
5. Look at the fur on a hide and note how the hair runs in one direction. In winter, women with the aid of dogs often towed belongings in a „skin drag‟. Also, these simple drags were used to haul meat from hunting sites. Strips of skin from caribou legs were sewn together on the skin drags so that the hair ran in one direction. When the bag was dragged up a slope, the fur would glide easily forward but resist slipping backwards because of the direction the hair ran. Draw a picture of a skin drag up an incline and show which way the hair runs in the drag. The picture below shows „scales‟ used for the same purpose for skiing.

23
In the pictures below, is friction trying to be reduced or increased? Explain how and why?
Activity Reduced or Increased? Explanation How & Why?

24
Six Simple Machines
There are six simple machines. They all make doing work easier. We need less effort to make something move when we use a machine. They are:
Screw Pulley (Winch) Inclined Plane (Ramp) Wedge Wheel & Axle Lever
What to Do:
1. With a partner, look at each of the photos that follow. 2. Under each, name the object or the action. 3. Talk about how each machine makes life easier. 4. What type of the six machines is it?
Name: Name: Name: Name: Type: Type: Type: Type:
Name: Name: Name: Name: Type: Type: Type: Type:

25
The Dilemma of Chief Isaac: A story of how Chief Isaac relied on his people
to help him solve the problem of the great load of Moose!
It was early in the morning on a Monday, just before the crack of dawn. This was when Chief Isaac would get up before his people everyday. He stepped out of his tent into the crisp winter air and took in a BIG breath. “There is something about this air today”, he thought to himself. Chief Isaac could sense something about this upcoming day that was going to be different. It was as if the spirits were giving him a sign. The plan was to spend the day hunting for moose. Many of his people‟s tents were starting to wither away, and moose hide was needed to build new ones. They also needed moose for food, and to make new warm clothing.
It was time to make his morning announcement. This always served as a wakeup call for his people. It informed them of what the plan for the day was. They weren‟t having much luck with moose hunting lately, but Chief Isaac somehow knew that today would be different. The Chief and the hunters set off towards the creek in the mountainous areas in the Yukon. Near the ridges of the creek, they would wait along the cirque close to the head of the stream. They waited patiently for a moose to come for several hours. Then there it was! The biggest moose they had ever seen!

26
The men quietly crept closer to the moose. Chief Isaac decided to let his youngest and newest hunter make the kill. When the moose was dead, they walked up to it. They could not believe how large it was! The men loaded the moose onto their sled. It barely fit, and took all of the hunters working together to drag it home.
When the men finally reached the base of their camp, Chief Isaac realized there was a problem. The slope from the river up to their camp was very steep. This moose was a very heavy load and he knew all of his men and dogs would not be able to get it up to the camp. He realized that they would need to change the incline that they were pulling it up, to make it easier and use less effort. He decided to have his men work in teams to test out different inclines. He sent some of the hunters off to get the materials he needed; Long flat pieces of wood, strong rope made from willow, and a handmade effort meters (like those made in previous lesson) to measure the different inclines.
EFFORT
METER
-1
-2
-3
-4
-5

27
You are Chief Isaac‟s people and you must measure and test out the different inclines (ramps) for him. This will help him figure out at what incline they can pull the gigantic moose load up to camp with the least effort or force. Draw a picture of the incline you described above.
Before you start experimenting, make a prediction about the type of incline that will require the least effort. Describe in words what that best incline would look like; really steep, steep, slightly inclined, or flat? Why did you make that prediction?
Now to test out the different inclines…
Angle of the Slope (draw what it looks like and measure the angle for
each)
Effort Length of elastic (what number does
the elastic end up on once load is brought to the top of the board)
Flat (0 degrees)
Gentle (10 degrees)
Steep
Really Steep
Now you must report to Chief Isaac!!!!
Which incline required the least effort? ________________________________________________________________________________________________________________________________

28
Which incline required the most effort? _____________________________________________________________________________________________________________________________ Further Questioning:
1. When talking about simple machines we often use the words load and effort. The load is a heavy or bulky object that is being pulled or carried. What is the load in this story? _______________________________________ What is the effort? ________________________________________________ 2. What other factors affect movement of a load and the amount of effort required? (Hint: Think about other frictional forces we have learned about, and factors that were presented in this story) ________________________________________________________________________________________________________________________________________________________________________________________________ 3. Why do you think an inclined plane is a useful simple machine? ________________________________________________________________________________________________________________________________ 4.What other examples of inclined planes can you think of that are found around us at school, at home, or in town? List and draw examples of the many inclined planes that are around your town. Make a poster or a model of different inclined planes.

29
Levers: The Moosehide Slide Story told by Mary McLeod
In the early days, there were cannibals everywhere and they bothered people. So one time, people climbed up on the Dome to get away. There were lots of big trees in those days. They cut down the
biggest tree with a stone axe.
They wanted to push that big tree down the hill onto the cannibals but it took too much effort. It was too heavy. They had to think about how to get that tree down the hill. They got a small rock and put is beside tree. Then they got a tree pole and put it under the tree. They lean back and pull. When the pole touches the rock, it can go no further. They keep pulling and then the bottom of the pole begins to push on the log. Pretty soon the log rolls down the hill on the cannibals. That tree started a big slide. That slide is shaped like hide of moose so people call that place Moosehide Slide. When I was a young girl, my old grandma took me one time. She showed me the bones of those cannibals. They are all covered with moss now. So I know this is a true story. In the space below, draw the „lever‟. Label the (1) load, (2) effort and (3) fulcrum (pivot point).

30
Levers
The pictures below show different types of tools. Each one is a lever. In each picture identify (1) the load (L), (2) the effort (E) and (3) the fulcrum (F) or pivot point.

31
Create your own catapult lever!
Using what you have learned about levers, create a catapult with the materials provided. You have 25 minutes to create your catapult. We will then test them out and see who can launch a marshmallow the farthest! You can use any of the following materials to make your catapult:
Plastic spoon Rubber bands Masking tape Popsicle sticks Index cards Scissors Glue Clothespins Wooden skewer sticks String/yarn Paper/Styrofoam cups Small boxes
Draw a picture of the catapult below and explain how it works.
Catapults have been used through history and are still used for a variety of purposes, even in hunting. Research one use of the catapult and explain and illustrate this below.

32
Constructing A Flagpole For Robert Service School
ATTENTION STUDENTS!
Robert Service School‟s Yukon and Canadian flags and flagpoles have been stolen!!! Now, how could a person steal a flag and a flagpole??? I have no idea! But the fact is, IT IS GONE!
WE NEED YOUR HELP!!
Grade 5, because you have been learning about Simple Machines, and are aware that a flagpole is a pulley, you have been asked to construct a new
flagpole and flag for school! It‟s time to build your flags! Here is what you need: Yukon Canadian Flag

33
Flag Base String Hooks (2) ( Or 2 Loops of Wire)
Flag Pole First you need to draw a picture of the flag and flagpole. Make sure you show the PULLEY in the picture and label the force/effort and the load.
COLOUR YOUR FLAG MAKE SURE THAT YOU USE THE CORRECT COLOURS ON YOUR
FLAG – USE THE PICTURES ON THE PREVIOUS PAGE IF YOU AREN‟T SURE…
Now it is time to construct the flagpole!

34
Follow the instructions step by step!
1. Insert the flagpole into the flag base.
2. Attach the flagpole hooks to the flagpole. One hook should be thumb width from the top, and one hook should be 2 thumb widths from the bottom. 3. HERE IS WHERE WE CREATE THE PULLEY! Take one end of the string and string it through both of the flagpole hooks. Then tie the string together at the ends.
Great Job! You have now created a PULLEY. When you pull down on the string it should move in a constant circle through the hooks…try it! Now there is only one thing left to do!
4. Attach your flag to the string at the bottom of the flagpole.
NOW RAISE YOUR FLAG TO THE TOP OF THE FLAGPOLE!!!

35
In the space below draw examples of pulleys you have seen.

36
Screw
Screws are one of the 6 simple machines. Screws are an inclined plane wrapped around a pole. When you look at the thread of a screw, you are looking at an inclined plane wrapped around a central pole. An inclined plane makes work easier by allowing the work to be done over a longer distance. So does the screw! The closer together the threads of a screw, the longer the distance over which the effort is applied, and the more the force is multiplied. Screws hold things together or lift materials. There are many different types of screws. For example: the lid of a jar, car jack, drills, light bulb, wrench, key ring, and a spiral staircase. Look at the pictures below and identify where the screw is located on each item:
A screw can also be used as a motion machine to raise or lower heavy objects. An example of this type of screw is an auger, which works as a conveyer to draw objects upward. Augers are useful tools for placer mining. They are used to draw samples from the ground. Miners use the samples to figure out where there is gold in the ground. Augers are fairly inexpensive to operate and can provide large volume samples.

37
Making an Auger Follow the steps below to create your own auger and see how they work!
1. Collect all materials needed:
Bowl of Rice Krispies (to be shared amongst groups when finished building auger)
2L bottle
Dowel
Pencils
Scissors
Cardstock paper
2. Cut the bottom and top off of a 2L bottle
3. Trace the open bottle circle onto a piece of cardstock
4. Cut 6 circles that size
5. On each cardstock circle, trace the bottom of the dowel rod in the middle
of the circle
6. Cut a line into the middle circle
7. Cut out the small dowel sized circle you traced in the middle of the cardstock
8. Lay the circle on top of each other and tape the opposite cut sides of
the circle to the one below
9. Pull the circles apart so that you have a screw/continuous spiral
10. Tape the top and bottom circle slit to the rod
11. Place your paper screw/spiral inside the cut 2L bottle
12. Place your auger in a large bowl of Rice Krispies
13. Turn the auger in circles to spin the cereal to the top!

38
Salmon Wheels
Yukon, meaning "Big River" in Athabaskan, starts in Canada and empties into Alaska's Bering Sea. The Yukon ties as the 2nd longest river in North America (2,300 miles / 3,185 km) behind the Mississippi and Missouri River. The Yukon valley that runs horizontally thru Alaska is believed by some anthropologists to have been the main immigration route for North America's first human inhabitants.
Every year, the Yukon River hosts the longest upstream migration of Pacific salmon stocks in the world. The people of the Yukon River drainage have been utilizing these returning salmon for over 10,000 years. Native groups who have, and are still residing in the drainage, fish resources provide the foundation for their survival and livelihood. Following tradition, annual fish camps are set up with nets and fish wheels to harvest the plentiful salmon resource.
Today, close to 900 local residents catch Yukon salmon along the river. Many of their techniques have been used for hundreds of years. Since the 1980s, people have been allowed to commercially harvest salmon by using fish wheels. In that time, the catching of salmon on the river chose rapidly.
In recent years the salmon population has dropped significantly, mainly because of over harvest. Some think the salmon wheel allowed for over-harvest and its use should have been controlled. Today there is serious concern about the salmon population. The salmon wheel is still used but in a regulated manner. Also, biologists use it to live capture salmon so they can be studied.
There are many people in your town who now much about salmon and the salmon. Ask them about their experiences, especially with salmon wheels.

39
The Nugget of Gold Rescue: An account of how young Michael was able to
save his treasured piece of gold and help his family.
Michael was living with his family just outside of Dawson City. His dad worked odd jobs here and there and panned for gold during his time off. He never really seemed to have much luck. Michael‟s dad could only work part time because he had a bone problem in his legs, and walking a lot was difficult for him. Michael had three brothers in his family and his mom passed away when he was really young. His dad struggled to support his children because he couldn‟t work much. They also lived in a small shack that was falling apart, because Michael‟s dad was unable to maintain it.
One day Michael was walking along Hunker Creek, which was very close to his home. He often wandered there when he wanted to be alone or play. There was one part of the river where he liked to sit on a rock and look at the water.

40
While he was staring down into the water, he noticed something shiny just at the shore, directly under his rock. He laid flat on his stomach and brought his head right to the edge of the rock so he could have a closer look. To his surprise there appeared to be a large fist sized piece of gold!! He could not believe his eyes.
The only problem was that the nugget was out of his reach. There was no possible way to get it. He was hesitant to leave the nugget, but he needed help. Michael ran to his house and found his dad. He told him the whole story. He was surprised and excited. His dad knew that this gold nugget could get his family enough money to survive. He immediately knew what he had to do. After some searching around the shack, he returned with a few items. He gave Michael an old shovel head, a long piece of string, a barrel with some holes, and a long cylinder shaped metal rod that was bent at one end. Unfortunately Michael‟s dad wasn‟t going to be able to help him with this because of his legs. He told Michael he would be making a wheel and axle to scoop the golden nugget out of the water. What he would need to do first was slide the metal rod through the holes of the barrel. Then he would need to attach the string to the metal rod at the end where it is not bent. After that he must attach the head of the shovel to the other end of the string.

41
With these instructions in mind he grabbed the materials his dad gave him and ran down back to the river. You are Michael! Draw what you think this wheel and axle will look like below. Use a paper cup, bendable straw, string and paper clip.
Now construct the wheel and axle so Michael can lift the golden nugget out of the water, and use it help his family.
Once you have constructed your wheel and axle test it out!
Draw what your wheel and axle looks like after you have constructed it. Label the parts to show the wheel and the axle. Was it the same as your original drawing?
Please answer the following questions: Did you find this difficult to make? Why or Why not? ______________________________________________________________
______________________________________________________________
______________________________________________________________
______________________________________________________________

42
______________________________________________________________
______________________________________________________________
What could you have done differently to get Michael‟s nugget?
______________________________________________________________
______________________________________________________________
______________________________________________________________
______________________________________________________________
______________________________________________________________
_____________________________________________________________
In the space below, draw pictures of wheel and axles that you see around your Town.

43
Wedge
A wedge is a type of inclined plane that moves. It is really 2 inclined planes put together and turned on its side. A wedge is thin at one end and thicker at the other end. A wedge can lift something, or split something apart. Wedges are usually made of wood or metal.
Identify the wedge in the following pictures:

44
Testing a Wedge
Materials needed:
Pencil with one flat end and 2 pointed end
Modeling clay
Heavy book Working in small groups follow the steps below, and answer the questions to see how a wedge works!
1. Roll a ball of modeling clay about the size of a golf ball
2. Press down on the ball of modeling clay to slightly flatten the top
3. Stand the flat end of the pencil in the clay
4. Try to balance the book on the tip of the pencil.
What happened? _______________________________________
5. Now turn the pencil over and try again. (try balancing the book on the flat end of the pencil with the pointed end in the clay)
What happened? _____________________________________
6. Which way was easier to balance? ____________________________
7. Why do you think this is? Think about wedges when you explain your answer. ____________________________________________________ _________________________________________________________________________________________________________________________________________________________________________________

45
Wedges in History
The wedge was one of the first tools that people used. They made wedge shaped cutting tools and arrowheads by chipping stones into shape. First Nations people found the simple machine the wedge very useful. They used it in a variety of ways.
To harvest and build with cedar, the First nations used many tools such as the hammer, and chisel.
They used wedges to split wood for building houses, furniture, and canoes.
The chisel was an essential cutting tool
Arrowheads are an example of a wedge, and were important to the First Nations who used them to hunt and fish.

46
The traditional tool used to scrape hides is also an example of a wedge.
Adze was a tool used for carving down bone, ivory, and wood. This was necessary to the First Nations people for a variety of reasons, such as rough shaping and chopping to remove branches, and carving out the basic shape of a canoe.
How a Wedge Works
A wedge is actually more like a moving inclined plane. Instead of objects being pushed up the incline, the plane moves forward. This raises the object. The force pushes the wedge forward and the load (object being moved) moves to the side, which is perpendicular to the direction of the force. The small pointed part of the wedge enters and makes a path for the larger part of the wedge that follows.

47
Once an opening is made by the point of the wedge, materials (or the load) are easily pried apart by the gradually widening part of the wedge. It takes less force (or effort) to move an object using a wedge than if it were moved only with your hands.
Splitting Wood
Applying what you know
Many people live in houses or cabins that are heated by wood stoves and fireplaces in the winter. This means that people have to chop and split a lot of wood. We now know that the easiest machine to do this with would be a type of wedge! Thinking about what you have learned about wedges and forces, choose the tool that you think would be them most appropriate choice to use when chopping a large amount of wood. Explain your choice on the back of this page.
1. Axe
2.
2. Hatchet
3. Maul
4. Sledge hammer and wedge
5. Wood Splitter

48
Simple Machines at School
Tour the school and the schoolyard to identify simple machines.
Complete the chart below.
See how many of each of the 6 simple machines you can find!
Item Name Location at School Type of Simple Machine

49
Compound Machine Project
Working in small groups you will construct your own Rube Goldberg compound
machine!
Directions:
1. Choose a simple task that your machine will perform: ___________________________________________
2. You must include all 6 simple machines that we have learned about: Inclined plane, lever, pulley, screw, and wedge.
3. The machine should have several steps and parts to complete the simple task.
4. Before you begin constructing your compound machine draw a detailed
diagram of how it will work. Be sure to label where the 6 simple machines are found, and what is happening.
5. Feel free to use any materials found at school or bring things from home.
6. Label the 6 simple machines on your final project
7. The only time a human can touch the device is to start it.
8. Be creative!!!