fusionviewer user’s guidefusionviewer.sourceforge.net/docs/fusionviewerusersguide.pdf ·...
TRANSCRIPT
FusionViewer User’s Guide 1
FusionViewer User’s Guide ―for FusionViewer 1.0.beta
January 8, 2007
Introduction FusionViewer is an open source medical image display package developed by Insightful Corporation
and University of Washington. It is designed to improve the physician's ability to interpret the results of
combined positron emission tomography (PET) and computed tomography (CT) studies by providing a
multi-platform open source display application. As PET/CT combined studies are increasingly being
used for the diagnosis, treatment decisions, and follow-up of cancer patients, improving the interpretive
value of these studies would directly benefit cancer patients. This software is a display application for
validating and improving visualization. It facilitates the quantitative measurements on the fused image
series. An effective display of the fused data permits easy viewing of the anatomical information
provided by the CT images while simultaneously displaying the functional data provided by PET.
This guide is for FusionViewer 1.0 beta release. The best way to get started is to download the
FusionViewer demo and test data set from project website at http://fusionviewer.sourceforge.net/. You
are also encouraged to join the mailing list at https://lists.sourceforge.net/lists/listinfo/fusionviewer-users
so that you know what is going on in FusionViewer community.
Operating System: Windows 2000/XP, Mac OS X 10.3.9 or later Java Runtime Environment (JRE): 1.4 or later Current version: 1.0 beta License: General Public License (GPL) [Version 2]
Download Please visit http://sourceforge.net/project/showfiles.php?group_id=162712 to download the application.
Note: This is a beta release. If you find a bug or have any suggestion, please visit project tracker system at http://sourceforge.net/tracker/?group_id=162712&atid=824874.
Installation For Mac OS users, unzip the downloaded file. In the unzipped folder, you will find a FusionViewer
application icon (FusionViewer.app). Drag it to your hard disk.
FusionViewer User’s Guide 2
For Windows users, unzip downloaded file. In the unzipped folder, you will find an executable file
called “FusionViewer Setup”, double click the executable file to install FusionViewer into your system.
Note: JRE1.6 is recommended to run FusionViewer. If there is no JRE or old version of JRE installed in your
system, you can download the corresponding JRE installer (Mac OS or Windows) from the project download
site from Sourceforge.net at (http://sourceforge.net/project/showfiles.php?group_id=162712). Alternatively,
you can get it from http://www.apple.com or http://java.sun.com/.
Opening Image Files
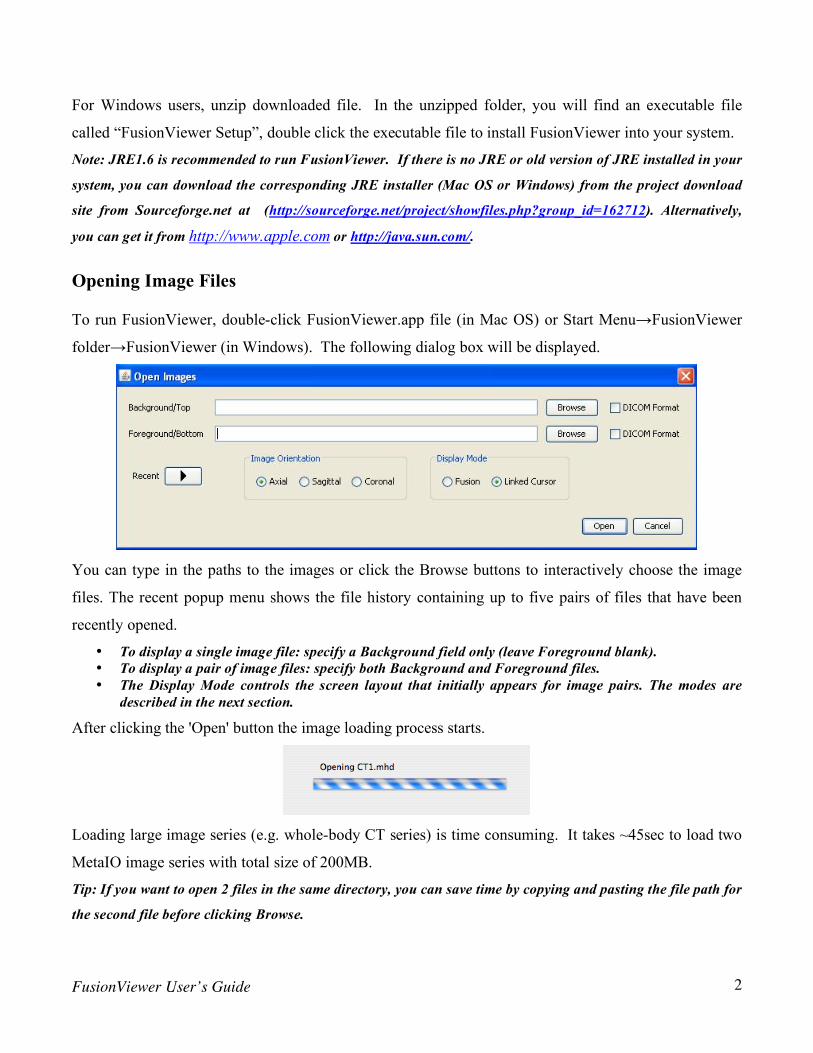
To run FusionViewer, double-click FusionViewer.app file (in Mac OS) or Start Menu→FusionViewer
folder→FusionViewer (in Windows). The following dialog box will be displayed.
You can type in the paths to the images or click the Browse buttons to interactively choose the image
files. The recent popup menu shows the file history containing up to five pairs of files that have been
recently opened.
• To display a single image file: specify a Background field only (leave Foreground blank). • To display a pair of image files: specify both Background and Foreground files. • The Display Mode controls the screen layout that initially appears for image pairs. The modes are
described in the next section.
After clicking the 'Open' button the image loading process starts.
Loading large image series (e.g. whole-body CT series) is time consuming. It takes ~45sec to load two
MetaIO image series with total size of 200MB.
Tip: If you want to open 2 files in the same directory, you can save time by copying and pasting the file path for
the second file before clicking Browse.
FusionViewer User’s Guide 3
Supported File Types
FusionViewer can read the following file types: PNG, TIFF, JPEG, BMP, Interfile, MetaIO, and
DICOM. If you have a raw image or a raw image with a header, you may be able to import the image by
constructing a MetaIO header file. See the following URL for more information:
http://www.itk.org/Wiki/MetaIO.
For Beta version, FusionViewer application can read DICOM images directly. To do so, browse to the
folder that contains one or more DICOM series by clicking “Browse” button. Then click the “DICOM
format” check box, new window will pop-up allowing you to select the images with the same series
unique identifier (UID).
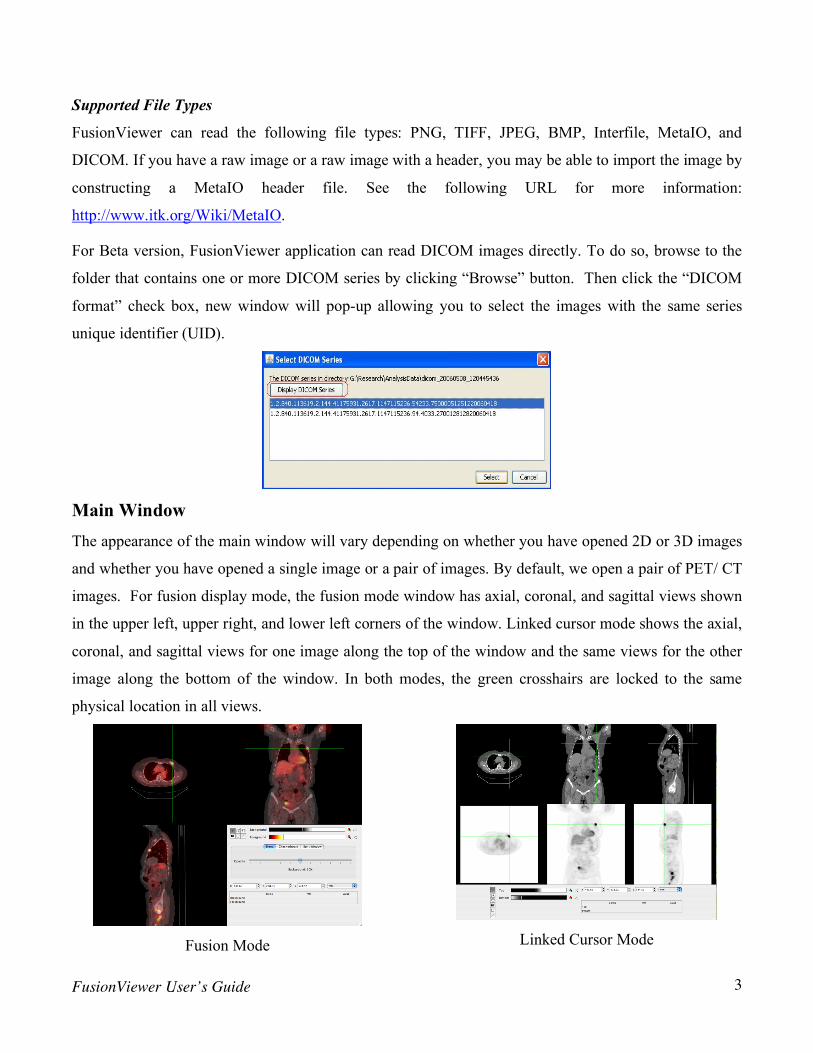
Main Window The appearance of the main window will vary depending on whether you have opened 2D or 3D images
and whether you have opened a single image or a pair of images. By default, we open a pair of PET/ CT
images. For fusion display mode, the fusion mode window has axial, coronal, and sagittal views shown
in the upper left, upper right, and lower left corners of the window. Linked cursor mode shows the axial,
coronal, and sagittal views for one image along the top of the window and the same views for the other
image along the bottom of the window. In both modes, the green crosshairs are locked to the same
physical location in all views.
Fusion Mode
Linked Cursor Mode
FusionViewer User’s Guide 4
Image Toolbar
The active tool controls the function of the left mouse button.
Tool Usage Shortcut
Click to move the 3D cursor
Click and drag towards the top of the screen to zoom in. Click and drag towards the bottom to zoom out
Option/Alt-left click
Click and drag to scroll the view when zoomed in Right-click
Click on a view to copy its contents to the clipboard
Draw a rectangle ROI on the image to get the statistical data of that region
Draw a line on the surface of an image to get the length and the profile of the line
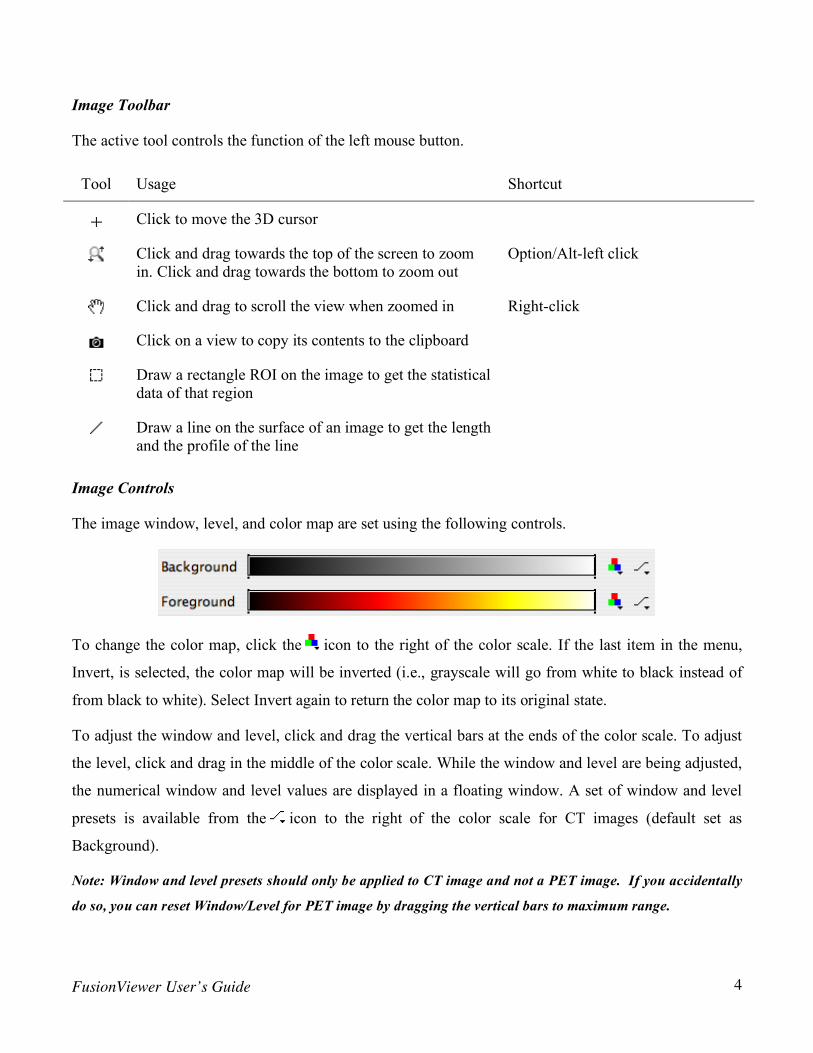
Image Controls
The image window, level, and color map are set using the following controls.
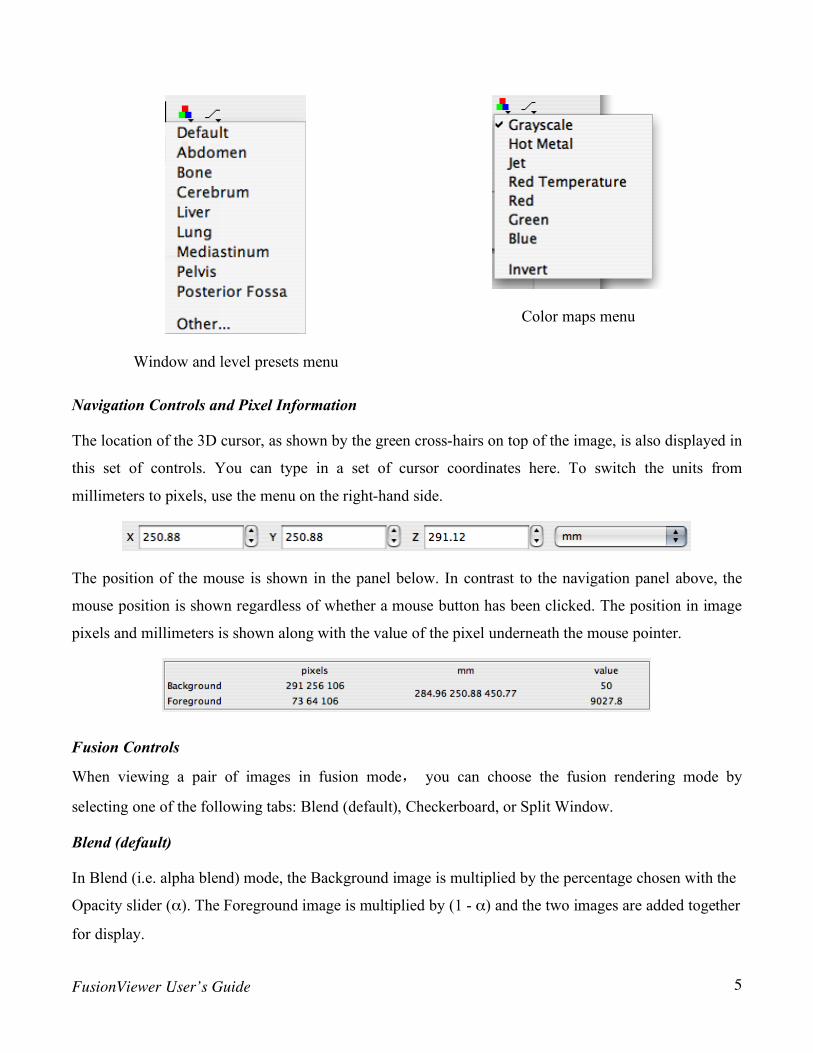
To change the color map, click the icon to the right of the color scale. If the last item in the menu,
Invert, is selected, the color map will be inverted (i.e., grayscale will go from white to black instead of
from black to white). Select Invert again to return the color map to its original state.
To adjust the window and level, click and drag the vertical bars at the ends of the color scale. To adjust
the level, click and drag in the middle of the color scale. While the window and level are being adjusted,
the numerical window and level values are displayed in a floating window. A set of window and level
presets is available from the icon to the right of the color scale for CT images (default set as
Background).
Note: Window and level presets should only be applied to CT image and not a PET image. If you accidentally
do so, you can reset Window/Level for PET image by dragging the vertical bars to maximum range.
FusionViewer User’s Guide 5
Window and level presets menu
Color maps menu
Navigation Controls and Pixel Information
The location of the 3D cursor, as shown by the green cross-hairs on top of the image, is also displayed in
this set of controls. You can type in a set of cursor coordinates here. To switch the units from
millimeters to pixels, use the menu on the right-hand side.
The position of the mouse is shown in the panel below. In contrast to the navigation panel above, the
mouse position is shown regardless of whether a mouse button has been clicked. The position in image
pixels and millimeters is shown along with the value of the pixel underneath the mouse pointer.
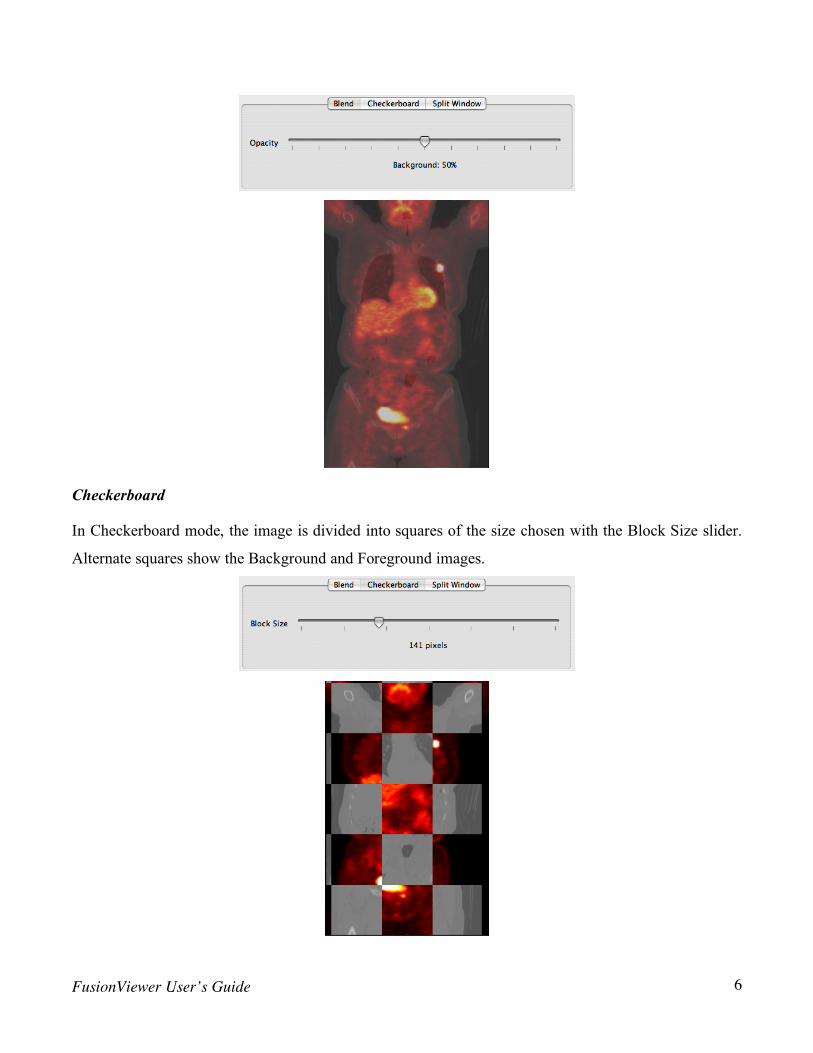
Fusion Controls
When viewing a pair of images in fusion mode, you can choose the fusion rendering mode by
selecting one of the following tabs: Blend (default), Checkerboard, or Split Window.
Blend (default)
In Blend (i.e. alpha blend) mode, the Background image is multiplied by the percentage chosen with the
Opacity slider (α). The Foreground image is multiplied by (1 - α) and the two images are added together
for display.
FusionViewer User’s Guide 6
Checkerboard
In Checkerboard mode, the image is divided into squares of the size chosen with the Block Size slider.
Alternate squares show the Background and Foreground images.
FusionViewer User’s Guide 7
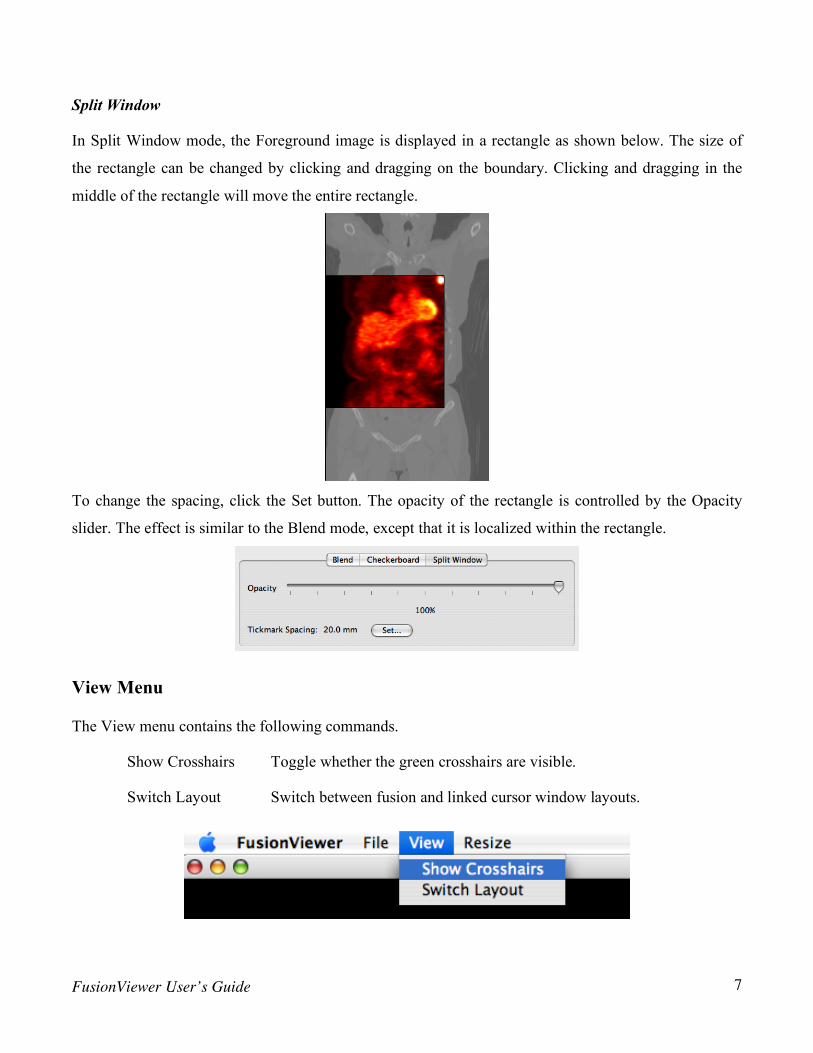
Split Window
In Split Window mode, the Foreground image is displayed in a rectangle as shown below. The size of
the rectangle can be changed by clicking and dragging on the boundary. Clicking and dragging in the
middle of the rectangle will move the entire rectangle.
To change the spacing, click the Set button. The opacity of the rectangle is controlled by the Opacity
slider. The effect is similar to the Blend mode, except that it is localized within the rectangle.
View Menu
The View menu contains the following commands.
Show Crosshairs Toggle whether the green crosshairs are visible.
Switch Layout Switch between fusion and linked cursor window layouts.
FusionViewer User’s Guide 8
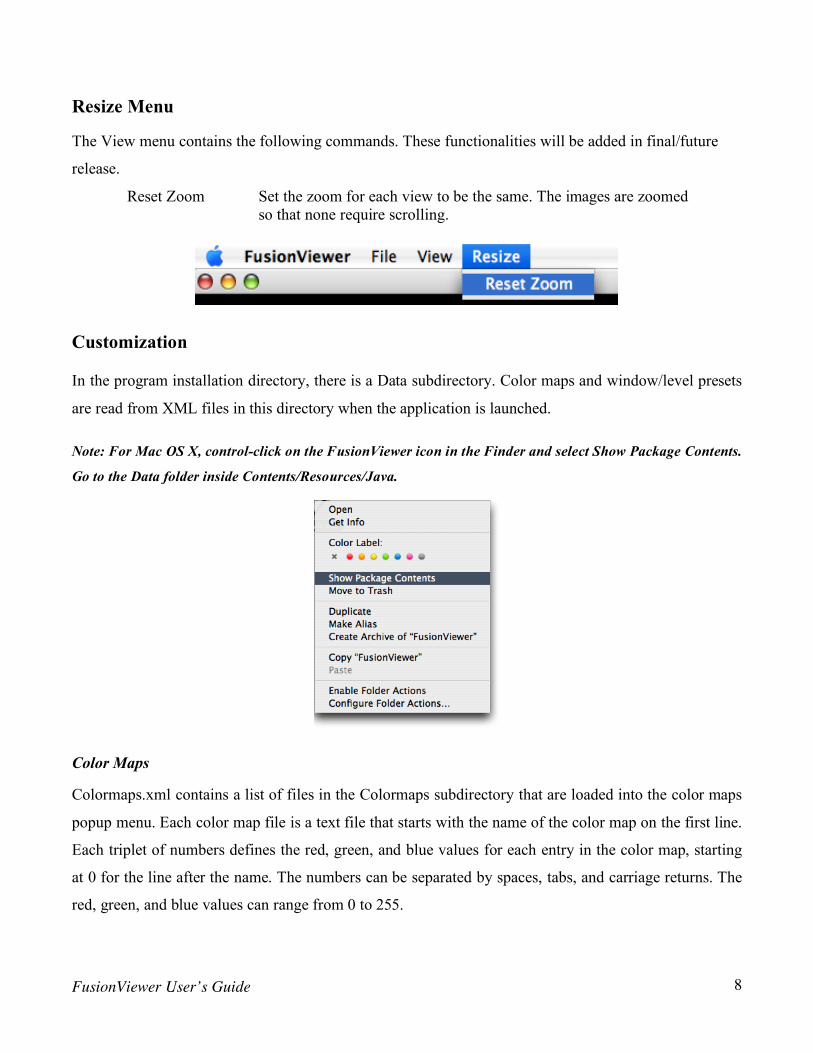
Resize Menu
The View menu contains the following commands. These functionalities will be added in final/future
release.
Reset Zoom Set the zoom for each view to be the same. The images are zoomed so that none require scrolling.
Customization
In the program installation directory, there is a Data subdirectory. Color maps and window/level presets
are read from XML files in this directory when the application is launched.
Note: For Mac OS X, control-click on the FusionViewer icon in the Finder and select Show Package Contents.
Go to the Data folder inside Contents/Resources/Java.
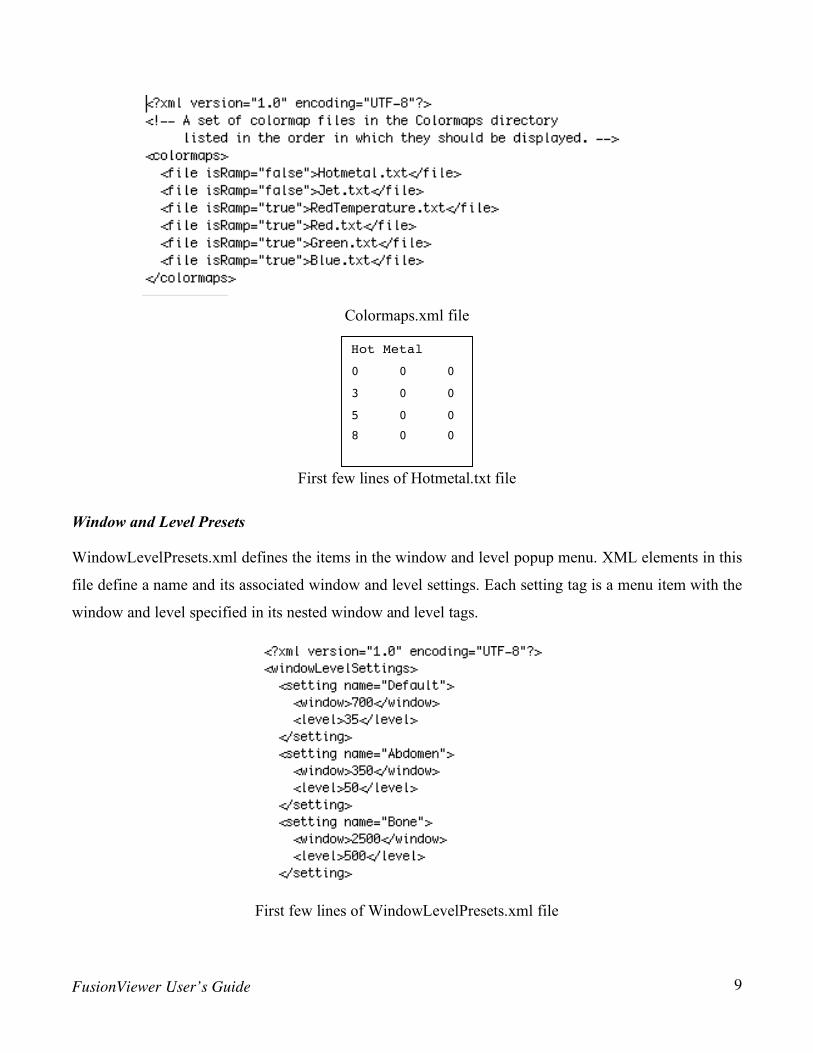
Color Maps
Colormaps.xml contains a list of files in the Colormaps subdirectory that are loaded into the color maps
popup menu. Each color map file is a text file that starts with the name of the color map on the first line.
Each triplet of numbers defines the red, green, and blue values for each entry in the color map, starting
at 0 for the line after the name. The numbers can be separated by spaces, tabs, and carriage returns. The
red, green, and blue values can range from 0 to 255.
FusionViewer User’s Guide 9
Colormaps.xml file
First few lines of Hotmetal.txt file
Window and Level Presets
WindowLevelPresets.xml defines the items in the window and level popup menu. XML elements in this
file define a name and its associated window and level settings. Each setting tag is a menu item with the
window and level specified in its nested window and level tags.
First few lines of WindowLevelPresets.xml file
Hot Metal
0 0 0
3 0 0
5 0 0
8 0 0

FusionViewer User’s Guide 10
Short-Cuts
Note: On Mac OS X, the short-cut key is the Command/Apple key instead of Control.
Control-O Open a set of images
Control-1 Switch to top-most tool in the toolbar
Control-2 Switch to second tool from the top in the toolbar
Control-3 Switch to third tool from the top in the toolbar