fxws06—sampling on the fantom-x - …cms.rolandus.com/assets/media/pdf/fxws06.pdf · sampling on...
TRANSCRIPT

��
Sampling on the Fantom-X
®ÂØÒňΙ
Workshop
© 2005, 2006 Roland Corporation U.S.All rights reserved. No part of this publication may be reproduced in any form without the written permission of Roland Corporation U.S.
FXWS06

�
About the Fantom-X Workshop Booklets
The Fantom-X Workshop booklets explain some of the exciting features of Roland’s Fantom-X family of products. Each Workshop booklet covers a single topic, and is intended as a companion to the Fantom-X manuals.
This booklet requires Fantom-X O.S. Version 2.10 or higher. To learn about the latest Fantom-X software, visit www.RolandUS.com, or call Roland U.S. Product Support at 323-890-3745.
Other Fantom-X Workshop Booklets
• The Fantom-X Experience—A quick tour of how the major Fantom-X creative tools interact.
• The Sounds of the Fantom-X—A tour of the Fantom-X sounds and Patch mode.
• The Rhythms of the Fantom-X—Exploring the pads, drum sounds, and rhythms of the Fantom-X.
• The Fantom-X Effects—This booklet helps you get the most out the powerful effects processing in the Fantom-X.
• Sequencing on the Fantom-X—Learn how to record using the Fantom-X sounds and its full-featured sequencer.
• Smart Storage in the Fantom-X—Learn all about the Fantom-X’s storage options for samples and other data.
• Performing with the Fantom-X—Splits, layers, realtime controllers, and more make the Fantom-X hot onstage.
• Making a CD of Your Fantom-X Music—Learn how to turn your Fantom-X music into a final audio CD.
• Advanced Fantom-X Sequencing Techniques—Learn how to use time-based effects, create arpeggios, work with mastering effects, and record realtime patch tweaks.
• Audio Tracks—This booklet explains how to record live vocals and instruments in your Fantom-X songs.
About This Booklet
As you’d expect of Roland’s flagship keyboard workstation, the Fantom-X contains a powerful, full-featured sampler that allows you to capture any sound—a loop, instrument or vocal sound, a noise—and incorporate it as a sample in your music.
You can create your own samples or transfer them from a computer—this is a great way to load samples and beat loops from sampling CDs you’ve purchased. The Fantom-X’s Tempo Sync feature automatically keeps beat loops in time with the built-in drum machine and sequencer. You can also manipulate Fantom-X samples in a variety of ways using a range of sample-editing tools.
This booklet introduces you to Fantom-X sampling, showing you how to use some of its most important features.
When you’re recording songs, audio tracks also utilize the Fantom-X’s sampling capabilities. This special form of sampling is discussed separately, in the Audio Tracks Workshop booklet.
Understanding the Symbols in This Booklet
Throughout this booklet, you’ll come across information that deserves special attention—that’s the reason it’s labeled with one of the following symbols.
A note is something that adds information about the topic at hand.
A tip offers suggestions for using the feature being discussed.
Warnings contain important information that can help you avoid possible damage to your equipment, your data, or yourself.

�
A Very Few Important Concepts. Really.
Sample Creation
Thump!=
A sample is simply a digital recording of a sound. There are three ways such a recording can get into your Fantom-X:
• You capture the sample—by “sampling” the sound directly into the Fantom-X (or by recording audio tracks).
• You load the sample—from the Fantom-X’s user memory or from a PC memory card installed in your Fantom-X.
• You import an audio file—via USB from your personal computer.
Technically, the built-in PCM waveforms the Fantom-X uses as the foundation of its patches and rhythm sets are samples, too. In this booklet, though, we’re talking about samples you put into your Fantom-X.
About the Fantom-X’s Sample RAM
Whether you capture, load, or import a sample, it’s held in an area within the Fantom-X called “sample RAM.” This is an area of fast, fluid, temporary memory derived from SDRAM chips, the same kind found in many computers. It’s called “sample RAM” because it’s where you work with your samples.
The Fantom-X sample RAM is 32 MB (MegaBytes) in size as shipped from the factory, a good-sized chunk of space to get you started with sampling.
In case you’re curious, “RAM” stands for “Random Access Memory,” and “SDRAM” stands for “Synchronous Dynamic Random Access Memory.”
How Much Sample RAM Do You Need?
The Fantom-X performs CD-quality sampling—using a 44.1 kHz sample rate and a 16-bit word length. This means that:
• a one-minute-long mono sample—uses up 5 MB of your sample RAM.
• a one-minute stereo sample—uses 10 MB of sample RAM.
If you’re the type of person whose samples will be mostly short snippets of audio lasting only a second or so, you can see that 32 MB may be fine for you.
On the other hand, if you intend to work with beat loops, capture vocal or instrumental performances as samples or as audio tracks, or use long samples, you’ll want to add more SDRAM memory—for a total of up to 544 MB—as described on Page 244 in the Fantom-X Owner’s Manual.
You can see the size of each of your samples in the Fantom-X’s Sample List, described later on in this booklet.
Nice Place to Visit, But a Sample Can’t Live Here
In the same way you can’t live in your office or classroom, a sample can’t permanently reside in sample RAM. When you turn off the Fantom-X, it completely clears sample RAM, starting you off with a clean slate when you next power-on.
Obviously then, it’s absolutely critical that you put your samples somewhere more permanent before you shut off the Fantom-X.
�
The Fantom-X provides two places to store samples. Both utilize a form of long-lasting memory called “flash” memory. You can store your samples in:
• user memory—The Fantom-X contains 32 MB of user memory for permanent storage.
• card memory—You can install a PC memory card (purchased separately) in the Fantom-X’s rear-panel PC CARD slot for up to 1 GB of permanent storage. You can also use a Compact Flash or Smart Media card with a Compact Flash-to-PCMCIA or Smart Media-to-PCMCIA adaptor.
When we say “PC card” or “memory card” in this booklet, we’re referring to all three types of cards you can use with the Fantom-X.
To learn how to install a PC card and prepare it for use in the Fantom-X, see the Fantom-X Owner’s Manual.
The Value of PC Memory Cards
Using the built-in user memory as the only place you store samples can be fine if you won’t be expanding your sample RAM—user memory’s always there, it doesn’t cost anything and you don’t have to keep track of memory cards. Still, there are good reasons for any Fantom-X user to install a PC card:
• It can store a backup of user memory—including all of your samples, patches, rhythm sets, and more, for safety’s sake.
• It can provide a place to put additional samples—so that you can have on hand alternative samples for loading into sample RAM.
• It can give you plenty of room for large samples—even if you haven’t expanded your sample RAM. You can stash large samples on the card, any one of which can be big enough to fill the entire sample RAM.
• It can hold the contents of expanded sample RAM—if your samples are going to require more space than 32 MB, they won’t fit in user memory. This can easily happen when you’re working with vocal tracks, instrumental performances, or entire mixes as samples or audio tracks on the Fantom-X.
• You can keep data for different projects on different cards—so you can simply pop in the card and have access to the data you need in any given situation.
We’ll be describing how to save and load samples later in this booklet. To learn even more about memory and storage in the Fantom-X, see the Smart Storage in the Fantom-X Workshop booklet.
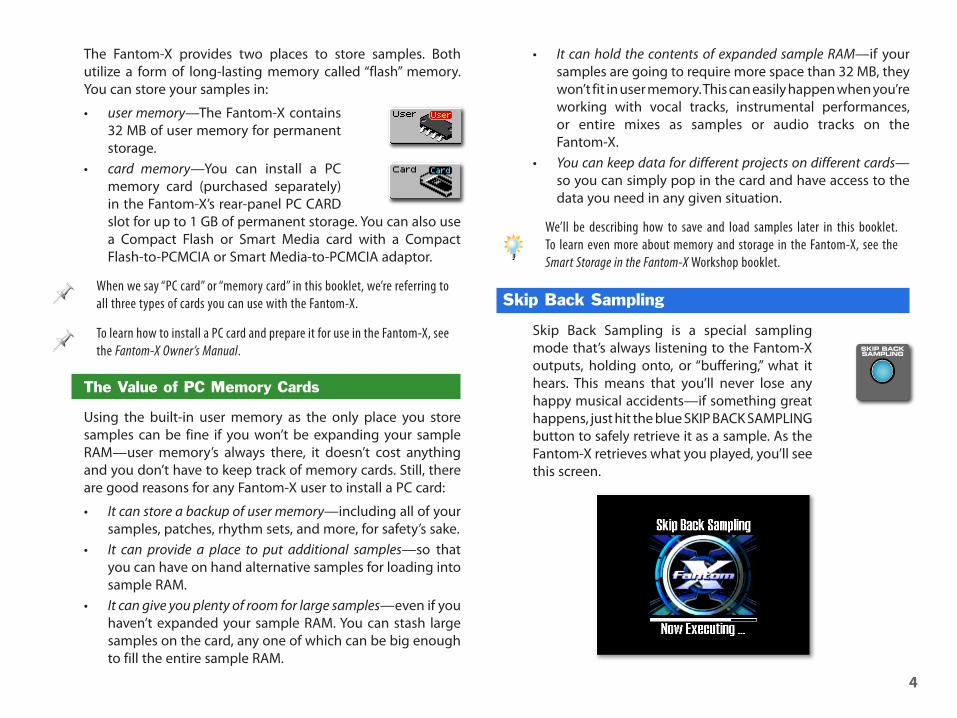
Skip Back Sampling
Skip Back Sampling is a special sampling mode that’s always listening to the Fantom-X outputs, holding onto, or “buffering,” what it hears. This means that you’ll never lose any happy musical accidents—if something great happens, just hit the blue SKIP BACK SAMPLING button to safely retrieve it as a sample. As the Fantom-X retrieves what you played, you’ll see this screen.

�
Skip Back Sampling stashes the audio it’s buffering in sample RAM. If there’s no room left there, Skip Back Sampling’s not available.
When the Fantom-X has captured your sample, it displays the Skip Back Preview screen.
On the Skip Back Preview screen, you can:
• audition the sample—by pressing F8 (Preview).• trim the sample—by using the F1 and F2 (← Start Beat →)
buttons to find the beginning of what you played, and F3 and F4 (← End Beat →) to find the end of it.
• set up the sample for use:• in the currently selected patch or rhythm set—by
pressing F6 (Assign KB/Pad). (We’ll explain how to assign samples to patches and rhythm sets in detail later on.)
• on an audio track in the currently loaded song—by pressing F7 (Assign Audio).
You don’t have to assign a Skip Back sample to a patch, rhythm set, or audio track right away—you can always do this later on if you like.
Once you’ve captured a Skip Back sample, save it to its current user memory location before powering off the Fantom-X.
Setting the Skip Back Length
Since Skip Back Sampling’s always listening, it constantly refreshes what it’s holding onto. By default, it retains the last ten seconds of time. Here’s how to change this if you wish:
1. Press PATCH/RHYTHM, and then press MENU.2. Select System from the menu onscreen, and press ENTER.3. Press F2 (↓) or F1 (↑) to select the Sampling tab.4. Set Skip Back Time to the desired value, from Off to 40
seconds, in five-second increments.5. Press F8 (System Write) to save your setting, and then press
EXIT.
Smaller Skip Back Time settings give you smaller samples to work with, which can be convenient if you’re interested in catching brief snippets of inspiration—they also require less room in sample RAM. On the other hand, if you’re looking to nab longer passages, use a higher value.
Sampling
The Fantom-X offers six different ways to sample, not counting Skip Back Sampling, which we’ve already discussed. Procedurally, all five sampling operations are essentially the same—we’ll get into the differences between them a bit later. Let’s start with what they have in common: the SAMPLING button, and the Sampling Menu screen.

�
The Sampling Screens
1. Press SAMPLING—the Sampling Menu screen appears.
On the Sampling Menu screen, you can see how much space you’ve used—and how much space you have left—in sample RAM.
The Sampling Standby Screen Parameters
On the Sampling Menu screen, press the F button for the desired type of sampling—the Sampling Standby screen appears. The Sampling Standby screen offers a selection of options that allow you to set up your sampling session.
If you select any type of sampling other than resampling, the front-panel MIX IN button lights to show that you’re sampling input signals.
Here’s what the Sampling Standby screen’s parameters do:
• Input Select—The setting for this parameter instructs the Fantom-X to sample from a specific input. You can select:• DIGITAL IN—to sample from the Fantom-X’s stereo
coaxial DIGITAL IN jack.• LINE IN L/R—to sample the analog outputs of a CD
player or other line-level device in stereo connected to the Fantom-X’s L(MONO) and R INPUT jacks.
• LINE IN L—to sample a line-level device in mono from the L(MONO) INPUT jack.
• MICROPHONE—to sample from a mic or other mic-level device connected to the L(MONO) INPUT jack.
The Input Select parameter is unavailable during resampling, where you always capture the Fantom-X’s own stereo outputs, not an input signal.
When you’re sampling from the AUDIO INPUT jacks, set your sampling level by turning the Fantom-X’s LEVEL knob as high as you can without causing its PEAK indicator to light.
• Stereo Switch—This switch determines whether the Fantom-X samples in stereo or mono.
• Pre Sample Time—The Fantom-X can add a little bit of time to the front of a sample to help ensure that the very beginning of your audio doesn’t get chopped off. Try leaving it set to 0ms (“0 milliseconds”). If you’re missing anything at the front of your samples, increase its value.

�
• Stop Trigger—The Fantom-X can stop sampling automatically after a specified number of beats or length of time. You can set this parameter to:• MANUAL—so that sampling stops when you press F7
(Stop), or when you run out of room in sample RAM.• BEAT—so that sampling ends after the number of
beats specified by the Sampling Length parameter.
When using BEAT, be sure to press TEMPO and set the Fantom-X’s tempo so it matches the sample’s.
• TIME—so that sampling ends after the amount of time specified by the Sampling Length parameter.
• Sampling Length—When Stop Trigger is set to BEAT or TIME, Sampling Length allows you to specify the number of beats or the amount of time after which sampling automatically stops.
The Sampling Length parameter is only available when Stop Trigger is set to BEAT or TIME.
• Auto Trigger Level—(see “Start Sampling Automatically” in the next column).
The Auto Trigger Level parameter is available only when F2 (Auto Trig) is enabled, as described in “Start Sampling Automatically.”
• Gap Time—During Auto Divide sampling, this parameter sets the length of silence that causes the creation of a new sample.
The Gap Time parameter is only available for Auto Divide sampling, described later on.
Start Sampling Automatically
You can automatically start sampling when the Fantom-X receives an input signal of a specified level.
• F2 (Auto Trig), for “Auto Triggering”—When this feature’s turned on, sampling automatically starts when the selected input receives audio at the level set by the Auto Trigger Level parameter. Press F2 (Auto Trig) so it turns red to enable this feature.
When Auto Trig is turned on, F8 (Start) is disabled, since you no longer need it to begin sampling.
• Auto Trigger Level—When the Auto Trigger feature is turned on, the Fantom-X automatically starts sampling when the input signal reaches the level specified by this parameter.
Automatic Trimming Setup
Press F3 (Trim Sw) so it turns red to enable the trim switch. When the trim switch is turned on, the Fantom-X automatically places the sample’s Start and End points on the Sample Edit screen at the beginning and end of the captured audio to set you up for trimming, or “truncating,” the sample. (We’ll discuss truncating later on.)
Dividing Audio Into Separate Samples on the Fly
During sampling, you can manually divide up your audio into separate samples. To do this, press F8 (Divide) whenever you want a new, separate sample to begin.
The Fantom-X’s Auto Divide sampling can automatically create a new sample for you each time a specified gap between sounds occurs, as we’ll discuss in a little bit.

�
Input Settings
On the Sampling Standby screen, press F1 (Input Setting) to display the Input Settings screen where you can select from a variety of input options.
The diagram at the left of the screen shows the components through which the input signal flows on its way to sampling, and then on to the Fantom-X outputs for monitoring.
• Input Select—is the same parameter found on the Sample Standby screen, repeated here for your convenience.
• Digital Input Level—When DIGITAL IN is selected as the Input Select value, you can adjust the input signal’s level using this parameter.
Applying Effects as You Sample
The Fantom-X allows you to add up to four effects to an incoming audio signal as you sample so the audio is captured with the effects permanently applied. Use the remaining parameters and buttons on this screen to set up these effects.
The first of the four effects is called the “input effect.”
• F7 (In FX Sw)—Press this button so it turns red to enable the input effect.
When the Input FX switch is turned on, you see the currently selected input effect added to the signal-flow diagram at the left of the screen.
• Input Effect Type—This parameter selects the input effect algorithm, or “type.” You can select EQ, ENHANCER, COMPRESSOR, LIMITER, NOISE SUP (for “Noise Suppressor”), or C CANCELER (for “Center Canceller”).
The Center Canceller effect can remove lead vocals and soloists’ instruments from the center of a stereo mix.
• F8 (In FX Setup)—Press this button to display a window in which you can customize the currently selected input effect.
You can also add effects from an MFX processor—or the Fantom-X’s chorus or reverb—to a sample.
To learn about the Fantom-X’s MFX, chorus, and reverb, see the Workshop booklet The Fantom-X Effects.
• Mix In Output Assign—allows you to sample the input signal dry, without applying any MFX processing, or to send the signal to the desired MFX processor.
Once you assign Mix In Output Assign to one of the MFX processors, you can press F6 (MFX Edit) to quickly jump to the selected processor, allowing you to select and/or tweak the desired effect. To return to the Input Setting screen, press the EXIT button.
• Mix In Output Level—sets the amount of the input signal to be sent directly to the Mix In Output Assign destination.
• Mix In Chorus Send Level—sets the amount of chorus to be added to the sampled input signal.
• Mix In Reverb Send Level—sets the amount of reverb to be added to the sampled input signal.
To return to the Sampling Standby screen, press EXIT.

�
What Happens Each Time You Sample
Every time you sample, the same things happen:
• You capture audio as a new sample—from the selected input(s), or in the case of resampling, from the Fantom-X’s A output pair. It begins when you press F8 (Start), or when the audio’s level reaches the Auto-Trigger parameter’s threshold if Auto-Triggering is turned on.
• You stop sampling—when you press F7 (Stop), or when the designated number of beats or period of time has elapsed if the Stop Trigger parameter is set to BEAT or TIME.
• The Fantom-X puts the new sample in sample RAM—so you can play and/or edit the samples.
• The Fantom-X temporarily allocates a card or user memory location—as the sample’s address so a patch or rhythm set that’s to play the sample can find it. If it’s a stereo sample, a pair of consecutive locations are set aside for the sample.
If a memory card is installed in your Fantom-X, the Fantom-X allocates a card memory location to each new sample. If there’s no card, a user memory location is assigned instead.
This address is strictly temporary. Be sure to permanently store the new sample in card or user memory before turning off the Fantom-X.
• The Sample Edit screen is displayed—where you can see your sample and set its parameters, as described later on. You can also audition your sample on this screen by pressing and holding down F8 (Preview).
The Five Flavors of Sampling
(Basic) Sampling
Basic sampling captures audio coming into the Fantom-X while nothing else is going on—no patch or rhythm set is being played, no arpeggios or rhythms are playing, and the sequencer isn’t running.
To perform basic sampling:
1. Press SAMPLING, and then press F1 (Sampling) to display the Sampling Standby screen.
2. Set the following parameters and switches as desired:• Input Select• Stereo Switch• Pre Sample Time• Stop Trigger and Sampling Length• F2 (Auto Trig) and Auto Triggering Level• F3 (Trim Sw)
3. If you want to adjust the digital input level or add input effects, press F1 (Input Setting) and set the parameters on the Input Settings screen. Press EXIT when you’re done.
4. Use Auto Triggering to start sampling, or press F8 (Start).5. If you haven’t set Stop Trigger and Sampling Length, press
F7 (Stop) to finish sampling.6. Save the new sample to user or card memory as described
in “How to Save an Individual Sample” later in this booklet (click here to jump there).

�0
Resampling
Resampling captures the sound of the Fantom-X itself, or, more specifically, the stereo sound of its main OUTPUT A signal. It allows you to:
• capture an entire mix as a stereo sample—that you can transfer to a computer for burning on a CD or for editing.
• create insanely complex sounds—by sampling a sound over and over, tweaking it or adding more effects each time.
Transfer a resampled mix to a computer via USB, and use CD-burning software to create an audio CD. For detailed instructions, see the Making a CD of Your Fantom-X Music Workshop booklet.
To resample:
1. Press SAMPLING, and then press F2 (Resampl) to display the Sampling Standby screen.
2. Set the following parameters and switches as desired:• Stereo Switch• Pre Sample Time• Stop Trigger and Sampling Length• F2 (Auto Trig) and Auto Triggering Level• F3 (Trim Sw)
3. Use Auto Triggering to start sampling, or press F8 (Start).4. If you haven’t set Stop Trigger and Sampling Length, press
F7 (Stop) to finish sampling.5. Save the new sample to user or card memory as described
in “How to Save an Individual Sample” later in this booklet (click here to jump there).
Mix Sampling
With Mix sampling, you can simultaneously capture audio coming into the Fantom-X input(s) along with audio from its keyboard, pads, rhythms, arpeggiator, or sequencer. Mix sampling allows you to:
• perform “live bouncing”—You can combine already-sequenced or sampled materials with new live sounds to create new samples.
• capture live sounds along with Fantom-X sounds—You can record a vocal/keyboard performance or jam with another connected instrument and capture it all as a new sample.
1. Press SAMPLING, and then press F3 (Mix) to display the Sampling Standby screen.
2. Set the following parameters and switches as desired:• Input Select• Stereo Switch• Pre Sample Time• Stop Trigger and Sampling Length• F2 (Auto Trig) and Auto Triggering Level• F3 (Trim Sw)
3. If you want to adjust the digital input level or add input effects, press F1 (Input Setting) and set the parameters on the Input Settings screen. Press EXIT when you’re done.
4. Use Auto Triggering to start sampling, or press F8 (Start).5. If you haven’t set Stop Trigger and Sampling Length, press
F7 (Stop) to finish sampling.6. Save the new sample to user or card memory as described
in “How to Save an Individual Sample” later in this booklet (click here to jump there).

��
Auto-Divide Sampling
Auto Divide sampling creates a new sample each time a sufficient amount of silence, or a “gap,” occurs in your audio. This is great for sampling a series of related, one-after-another sounds on a sampling CD. Rather than capturing each selection individually, you can just play the CD into the Fantom-X once and allow Auto Divide to turn each sound into an individual sample.
1. Press SAMPLING, and then press F4 (Auto Divide) to display the Sampling Standby screen.
2. Set the following parameters and switches as desired:• Input Select• Stereo Switch• Pre Sample Time• Stop Trigger and Sampling Length• F2 (Auto Trig) and Auto Triggering Level• Gap Time—This parameter sets the length of silence
in-between sounds that causes Auto Divide to create a new sample.
• F3 (Trim Sw)
3. If you want to adjust the digital input level or add input effects, press F1 (Input Setting) and set the parameters on the Input Settings screen. Press EXIT when you’re done.
4. Use Auto Triggering to start sampling, or press F8 (Start).5. If you haven’t set Stop Trigger and Sampling Length, press
F7 (Stop) to finish sampling.6. Save the new samples to user or card memory.
The Save All Samples feature—described later (click here)—can store all of your Auto Divide samples to user memory in a single operation.
Solo Sampling With or Without Effects
With solo sampling, you can perform along with music playing on the Fantom-X and capture only your live audio. Solo w/ FX sampling grabs your live audio with MFX, chorus, and/or reverb effects added.
1. Press SAMPLING, and then F5 (Solo) or F6 (Solo w/ FX) to display the Sampling Standby screen.
2. Set the following parameters and switches as desired:• Input Select• Stereo Switch• Pre Sample Time• Stop Trigger and Sampling Length• F2 (Auto Trig) and Auto Triggering Level• F3 (Trim Sw)
3. If you want to adjust the digital input level or add effects, press F1 (Input Setting) and set the parameters on the Input Settings screen. Press EXIT when you’re done.
While the input effect is available for both types of solo sampling, the remaining effects are captured only during solo sampling with effects.
4. Use Auto Triggering to start sampling, or press F8 (Start).
It’s a good idea to begin playback a few beats before the location at which you want to record to give yourself a count-in-like period.
5. Start playback of the song section to which you want to add live audio, and then begin performing.
6. If you haven’t set Stop Trigger and Sampling Length, press F7 (Stop) to finish sampling.
7. Save the new samples to user or card memory as described later on in “How to Save an Individual Sample” (click here).

��
How a Sample Gets Played
We’ve already noted that you can audition a sample by pressing F8 (Preview) on the Sample Edit screen; you can also do this in the Sample Parameters screen.
However, to use a sample in your music, you play it:
• in a patch—Each one of a patch’s four tones can play a stereo sample, or two mono samples, instead of the Fantom-X’s built-in PCM waveforms.
To learn more about patches and tones, see the Workshop booklet The Sounds of the Fantom-X.
• in a rhythm set—Each of the four waves in a rhythm set’s drum keys can play a stereo, or two mono, samples instead of the built-in PCM waveforms.
To learn more about rhythm sets and drum keys, see the Workshop booklet The Rhythms of the Fantom-X.
• as an audio track—in a song.
To learn more about audio tracks, see the Audio Tracks Workshop booklet.
You can use samples in new or existing patches or rhythm sets (or audio tracks). We’ll discuss how to go about doing this shortly.
How the Fantom-X Keep Track of Samples
Sample-playing patches, rhythm sets, and audio tracks identify the samples they play by the samples’ locations in user or card memory. Every sample—even a new one—is assigned a memory location.
• Samples you’ve saved—are stored in the user or card memory locations you’ve selected.
• Unsaved new, imported or edited samples—are automatically allocated temporary memory locations for use as long as the Fantom-X remains powered-on.
Be sure to store unsaved new or edited samples into user or card memory before turning off the Fantom-X to avoid losing them.
Patches, rhythm sets, and audio tracks don’t actually know anything about the sample other than where it’s located.
The section later in this booklet called “Saving Samples, Their Patches and Rhythm Sets” describes how to save your sample-playing patches and rhythm sets successfully.
The Sample List
All of the samples in sample RAM or stored in user or card memory are shown on the Sample List screen. You display the screen by pressing the SAMPLE LIST button.
At the top of the screen is a graphic representation—called a “waveform”—of the list’s currently selected sample.

��
In the sample list, when a:
• sample’s information is in black type—the sample is currently loaded in sample RAM.
• sample’s information is gray, and has “UNLOAD” to its right—the sample’s saved in user or card memory, but is currently not loaded.
• sample has the word “NEW” to its right—it hasn’t yet been stored to user or card memory. Its location is temporary.
• sample has the word “EDIT” to its right—the sample has been edited, and its newly edited version hasn’t yet been saved to user or card memory.
Mono samples are shown in the sample list with “MONO” in the Ch (for “Channel”) column. With stereo samples:
• the left side and right sides—show “L” and “R” in the Ch column, respectively.
• the sample’s name—is shown in the left-side sample’s Sample Name column only.
We’ll discuss sample sizes shown in the sample list a bit later.
For most operations involving a single sample, all you need to do to select the sample in the sample list is to highlight it.
Checkmark samples when you want to load or unload, delete, or import multiple samples at once, or when you’re creating a new multisample patch (more on this later) or rhythm set.
• To checkmark a sample—highlight the sample and press F5 (Mark Set).
When you mark a pair of stereo samples, the checkmark appears to the left of the left-side sample’s name.
• To un-checkmark a sample—highlight the sample and press F4 (Mark Clear).
Using a Sample in a Patch or Rhythm Set
You can play a sample in a patch or rhythm set before or after editing the sample.
As noted earlier, you play a sample—or use it in a sequence—as an element within a patch or rhythm set. There are a few ways to do this, which we’ll discuss in a moment. First, though, let’s take a moment to talk about Tempo Sync.
Tempo Sync: Automatically Keep Samples in Time
The Fantom-X’s Tempo Sync feature can automatically time-stretch a sample so it’s always in time with the built-in sequencer, rhythm or arpeggio. This is especially handy when you’re laying sampled beat loops into a sequence. As you tweak the sequence’s tempo, the sample automatically stays in time.
Tempo Sync is non-destructive—it only changes how the sample plays, not the sample itself. You can also time-stretch a sample permanently, as we’ll explain later on.
When you play the sample in a sample “auto patch”—which we’ll talk about on the next page—Tempo Sync is already turned on. Otherwise, you can turn it on for a sample:
• as you assign the sample to a patch or rhythm set. More on this later.
• by manually setting the Wave Tempo Sync parameter.
The Wave Tempo Sync parameter belongs to the patch tone or the rhythm set drum key wave playing the sample. To edit the parameter’s setting, select the patch or rhythm set playing the sample, press PATCH EDIT—in a rhythm set, play the drum key’s note on the keyboard to select it—and then press F2 (↓) to reveal the Wave parameters. You can turn off Tempo Sync at any time by turning off the Wave Tempo Sync parameter.

��
For Tempo Sync to work properly, the Fantom-X needs to know the sample’s original tempo. You can set a sample’s tempo on the Sample Edit screen, as we’ll describe later.
You don’t need to manually set the sample’s tempo if you’ve captured the sample:
• using Skip Back sampling while playing along with a rhythm.
• using solo sampling as the sequencer plays.
If you turn on Tempo Sync while assigning a sample to a patch or rhythm set, be sure to set the sample’s original tempo afterwards if it hasn’t been set already.
Playing a Single Sample In a Patch
Playing a Sample in a Sample Auto Patch
The Fantom-X’s Sample Auto Patch feature allows you to immediately play any currently loaded stereo or mono sample as a patch—or use it in a song—simply by choosing it from the patch list in Patch or Performance mode. Here’s how:
1. In:• Patch mode—press the PATCH/RHYTHM button.• Performance mode—press the SPLIT/LAYER or MIXER
button.
2. Press F1 (Patch List).3. Press F2 (↓) and/or F1 (↑) to select the:
• User Sample tab—if your sample’s stored in user memory.
• Card Sample tab—if your sample’s stored in card memory.
4. Use 6 or 5 or the VALUE dial to select the sample you want to play. For a stereo sample, select its left side (the right side appears as “--------.”)
If a sample you want to play doesn’t appear where you expect it to in the User or Card Sample tab, it’s not currently loaded—press SAMPLE LIST and load the sample in order to play it. We’ll explain how to do this later. (If you’d like to skip directly to that section, click here.)
Customizing a Sample Auto Patch
The patch that plays your sample is just like any other Fantom-X patch—you can press PATCH EDIT and do anything you’d like to customize the way the patch plays your sample.
To learn about patch editing, see the Workshop booklet The Sounds of the Fantom-X.
Tempo Sync is turned on by default in a sample auto patch because the most common type of sample Fantom-X users make is a sample of a beat loop. (This is also why auto patches are assigned by default to the BTS, or “Beats,” category.) If your sample plays back at an unexpected tempo, Tempo Sync is probably the reason it’s doing so. If you want to turn it off, press PATCH EDIT, F6 (Pro Edit) navigate to the Wave tab, and turn off Wave Tempo Sync.
Saving a Sample Auto Patch
Before saving a sample auto patch, make sure you’ve already saved the sample it plays. This gives the sample a permanent memory address at which the Fantom-X can find it, and also ensures that it won’t be lost when you power off.
Save a sample auto patch just as you would any other patch. This procedure is explained in detail in Workshop booklet The Sounds of the Fantom-X.

��
Making a Patch Using Assign to KBD
You can also create a new patch from playing a sample from the Sample List or Sample edit screens using the Assign to KBD operation. However, we recommend using Sample Auto Patch, since it’s the faster and easier way to go.
Making a Sample-Playing Rhythm Set
While the Sample Auto Patch feature provides all you need to play or record with a single sample, the Fantom-X’s rhythm sets offer another great way to use samples. You can add your own special sounds to an existing rhythm set. Even better, you can gather together new samples to make a killer percussion machine that’s uniquely your own.
In order to play a sample in a rhythm set, the sample must be currently loaded.
Adding a Sample to an Existing Rhythm Set
Begin by selecting the rhythm set to which you want to add your sample. In Patch mode, select a rhythm set for the pads to play. In Performance mode, select the desired rhythm set you want for the performance’s designated pad part.
You can add a sample to the rhythm set from the Sample List or Sample Edit screens. In either case, you send the sample to its pad from the Assign to Pad Screen.
Getting to the Assign To Pad Screen—Sample List
1. Highlight the desired sample in the sample list.2. Press F7 (Load Utility).3. Press F2 (Assign to Pad)—the Assign to Pad screen
appears.
Getting to the Assign To Pad Screen—Sample Edit
1. On the Sample Edit screen, press F2 (Assign KB/Pad)—the Assign to KB/Pad window opens.
2. Press F7 (Assign to Pad)—the Assign to Pad screen appears.
Using the Assign to Pad Screen
1. Press F1 (Tempo Sync) to turn on Tempo Sync if desired.2. Press the pad to which you’d like to assign the sample, or
select it onscreen using 3, 4, 5, 6, or the VALUE dial—the currently selected pad appears in orange onscreen.
3. Press F8 (Exec).4. When the Fantom-X asks if you’re sure, press F8 (Exec)
again.
After adding a sample to a rhythm set, you can tweak its level and other characteristics by editing the rhythm set. See the Workshop booklet The Rhythms of the Fantom-X.

��
Creating a New Sample-Playing Rhythm Set
When you’ve generated a bunch of related percussion samples using Auto Divide sampling, or when you’ve chopped up a sample—we’ll get into this later—this is a great way to quickly build a new rhythm set for playing all of your new samples.
When you create a new rhythm set from two or more samples, the samples are mapped to consecutive drum keys starting at C2, in the same order they’re shown in the sample list.
1. Press SAMPLE LIST.2. Highlight the first sample you want to use and press F5
(Mark Set) to checkmark it.3. Repeat Step 2 for all of the samples you want to include in
the rhythm set.4. Press F7 (Load Utility).5. Press F4 (Create Rhythm).6. Select where the new rhythm set is to be placed. In:
• Patch mode—by turning VALUE to select the keyboard or pads.
• Performance mode—by turning VALUE to select the desired performance part.
7. Press F8 (Select).8. Press F1 (Tempo Sync) to turn on Tempo Sync for all of the
selected samples if desired.
Tempo Sync can be turned on or off for individual samples later on by setting the Wave Tempo Sync parameter, as we noted earlier.
9. Press F8 (Exec) to finish creating the new rhythm set.
After creating a rhythm set, you can tweak the level and other characteristics of its samples by editing the rhythm set—and don’t forget to save it when you’re done! See the Workshop booklet The Rhythms of the Fantom-X.
Creating a Patch that Plays Multiple Samples
You can select up to 128 samples in the sample list and create a single “multisample” that uses them all. Both user and card memory can hold up to 128 of these multisamples each.
Multisample patches that use samples in user memory can be stored in user memory. Multisample patches that use samples in card memory can be stored in card memory.
Once you’ve created a multisample, you assign it to a new patch so it can be played.
Multisample Patches vs Rhythm Sets
Since multisample patches and rhythm sets both play more than one sample, what’s the difference between them?
In a Multi-Sample Patch: In a Rhythm Set:
You map each sample to multiple keys—stretching the sample’s pitch up or down above and below its designated note—so there are no silent keys between samples.
Each sample plays only on its own single drum key.
All of the multisamples are played by the same patch tone, so they share tone parameter settings, and can take advantage of certain tone settings unavailable to drum keys.
Each drum key has its own parameters
See The Sounds of the Fantom-X to learn about tones, and The Rhythms of the Fantom-X to learn about programming rhythm sets.

��
Creating a Multi-Sample Patch
1. Press SAMPLE LIST, highlight each sample you want to use in your multisample patch, and press F5 (Mark Set) to checkmark it.
2. Press F7 (Load Utility).3. Press F3 (Create Multi-Sample).4. Name the new multisample and press F8 (Write).5. Select the desired memory location and press F8 (Write).6. When the Fantom-X asks if you’re sure, press F8 (Exec).7. If you’re in:
• Patch mode—the Assign to Keyboard window opens.• Performance mode—the Fantom-X asks if you’d like to
select a keyboard part for playing the multisample. Choose the desired part and press F8 (Select) to display the Assign to Keyboard window, or F7 (Cancel) if you don’t want to assign the multisample to a part.
8. In the Assign to Keyboard window, press F1 (Tempo Sync) to turn on Tempo Sync if desired.
Tempo Sync can be turned on for the multisample by setting the new patch’s Wave Tempo Sync parameter, as described earlier.
9. Press F8 (Exec), or F7 (Cancel) you’d rather not create a new patch for playing your multisample right now. The Fantom-X places you on the Multisample Edit screen, which we’ll explain on Page 18.
You can set up a patch for playing the multisample later. We’ll explain how to do this in “Programming a Patch to Play a Multisample.”
10. When the Fantom-X asks if you’re sure you want to proceed, press F8 (Exec) again. The Fantom-X places you on the Multisample Edit screen.
11. Save the new patch as described in the next section.
Saving Your Multisample Patch
1. If you’re in:• Patch mode—press the PATCH/RHYTHM button.• Performance mode—press the SPLIT/LAYER button.
2. Press WRITE.3. Press F2 (Patch/Rhythm).4. Name the patch as desired.5. Select the desired memory location for the patch.
To help ensure that your patch can always find its multisamples and samples, we recommend you save the patch to the same memory area as the multisample and its samples.
6. Press F8 (Write), and when the Fantom-X asks if you’re sure, press F8 (Exec) to finish storing the patch.
Programming a Patch to Play a Multisample
Any patch can be set to play a multisample at any time. Here’s how to get this to happen:
1. In Patch mode, select the patch, and then press PATCH EDIT.
2. Press F6 (Pro Edit), and then F2 (↓) and/or F1 (↑) to select the Wave tab.
3. Set the Wave Group parameter to MSAM (for “Multisample”).
4. Set Wave Bank to the area of memory in which the multisample you want to use is stored.
5. Set Wave No. L (Mono) to select the desired multisample. If the multisample is stereo, set Wave No. R to the same value.

��
• region—play the desired region’s low and then high keys on the keyboard, or hold down SHIFT and use the VALUE dial, the INC/DEC buttons, or 3 and 4.
What’s In the Multisample Editor Info Area
The info area provides information about the patch that plays the multisample, and about the overall multisample.
Patch information
Name of the multisample being edited Unsaved edit indicator
The patch information area shows, from left to right:
• the tones that are enabled in the patch—active tones’ indicators are lit.
• the tone being edited—is shown with a checkmark.• the patch’s effects.
What’s in the Multisample Editor Sample Area
The sample area provides visual feedback as you edit the multisample. As you select and edit zones or regions, the display presents visual feedback about what you’re doing.
Key display
Zone info
Sample list
Editing Multisamples
If you’ve just created a multisample—and haven’t created a new patch to play it—you’re already viewing the Multisample Edit screen. Otherwise, to get there:
1. In Patch mode, select the patch that plays the multisample, and press PATCH EDIT.
2. Press F6 (Pro Edit).3. Press F5 (Msmpl) to display the Multisample Edit screen.
Info area
Sample area
If you’ve got a computer, the Version Two Fantom-X Editor software can make it even easier to edit your multisamples.
About Editing Zones and Regions
When you edit a multisample, you can edit either a “zone” or a “region.” Here’s what we mean:
• a zone—is the set of keys that plays a single sample.• a region—is an area of the keyboard that may or may not
include multiple zones.
To select a:
• zone—play a key in the zone on a keyboard, or use the VALUE dial, the INC/DEC buttons, or 3 and 4. The entire set of notes that plays the sample is selected.

��
In the zone info area, you can see:
The currently selected note
The sample the note plays
The sample’s original key
The note’s distance from the original key
We’ll explain the term “original key” later on this page.
When you’re working with a region, the zone info area shows details about the last zone your region boundary crossed as you selected the desired keyboard area.
The key display provides an overview of the multisample, as well as information about the currently selected zone’s sample.
Keys beneath the blue areas play a sample. The blue keys beneath the orange area show the currently selected zone. The other keys don’t play a sample.
The orange arrow shows the original note of the currently selected note’s sample.
The red key shows the currently selected note.
When you select a region, a red box outlines the selected keys in the onscreen keyboard.
The sample list shows the samples in the multisample, along with information about each sample. You can select any sample—and its zone—directly using the 6 and 5 buttons. The currently selected sample is highlighted in orange.
As you edit, keep your eye on this list to make sure that the sample you think is selected really is!
Mapping Out the Multisample’s Samples
The two main things you’ll want to do in the Multisample Edit screen are to get each sample to play:
• at the desired pitch• over the desired range of keys.
Each sample plays it its correct pitch from a single key on the keyboard, called the “original key.” Keys above this key or below it stretch the sample in pitch upward or downward, respectively. This set of keys are the sample’s zone.
Here’s the fastest, simplest way to set each sample’s original key, and then to map all of the multisample’s keys to good starting-point zones.
You can edit these default key ranges manually using the multisample editing tools described on Page 20.
1. Play a key on the keyboard that plays the first sample you want to set up, or use 6 or 5 to highlight the sample in the sample list.
2. Press F5 (Org Key) to open the Sample Original Key window.
3. Set the desired original key, and press F8 (Close).4. Repeat Steps 1-3 for all of the multisample’s samples.5. Hold down SHIFT and press F4 (Sort).

�0
6 When the Fantom-X asks if you’re sure you want to proceed, press F8 (Exec)—the Fantom-X sets up zones for all of the samples so that they all play on their original keys, spreading their notes down and up as necessary so there are no silent keys between zones.
Other Multisample Editing Tools
Tool: How it Works:F1 (List) To select a different multisample for editing,
press F1 (List) to display the multisample list and select the desired multisample.
F2 (Erase) Press F2 (Erase) to un-assign the currently selected region’s sample(s).
F3 (Assign) To assign a sample to the currently selected region, press F3 (Assign) to display the sample list and select a new sample.
F4 (Copy) To copy the current note’s sample to another note, press F4 (Copy) so it lights red, and then play the key to which you want to copy the sample.
F6 (Tone Sw/Sel) Use this button to display the Tone Sw/Select window in which you can turn patch tones on or off, or select a different tone for editing.
F7/F8 (Split Point ←)/→) Use these two buttons to select the highest key in the currently selected sample’s zone.
SHIFT + F1 (Reload)
Hold down SHIFT and press F1 (Reload) to undo all edits you’ve made to the multisample since it was last saved.
SHIFT + F2 (Erase All)
To clear all of the multisample’s zones—so none of them play samples—hold down SHIFT and press F2 (Erase All).
Tool: How it Works:SHIFT + F3 (Sample Select)
Hold down SHIFT and press F3 (Sample Select) to replace the currently selected zone’s sample.
SHIFT + F5/F6 (Shift ←)/→)
To shift all of the multisample’s samples up or down on the keyboard, hold down SHIFT and use F5 and F6 to position them as desired.
SHIFT + F7/F8 (Move ←)/→)
Hold down SHIFT and use F7 and F8 to move the entire currently selected zone upward or downward on the keyboard.
Multisample Sample Tweaks
To adjust the behavior of any individual sample in a multisample, you can select the sample on the Sample List screen, and then press SAMPLE EDIT to modify the sample or adjust its sample parameters, as described later in this booklet.
Saving an Edited Multisample
Since editing a multisample means editing parameters for its samples, the best way to save your multisample editing work is by pressing the SAVE/LOAD button and using the Save All Samples operation, described on Page 24. (To jump to this section now, click here.)
If there are any samples in sample RAM you don’t want to re-save, unload them before performing a Save All Samples operation.

��
Saving and Loading Samples
Saving Samples, Their Patches and Rhythm Sets
To store samples and their patches and rhythm sets:
1. Save the sample or group of samples—to user or card memory before placing it in a patch or rhythm set since the patch or rhythm set will need to know where it permanently lives.
2. Save the patch or rhythm set—to user or card memory.
The specific procedures for saving patches and rhythm sets are described in the Workshop booklets The Sounds of the Fantom-X and Rhythms of the Fantom-X, respectively.
To further help ensure that your storage and retrieval of samples and their patches and rhythm sets are trouble-free:
• Store samples and their patch/rhythm sets together—To make sure that each patch or rhythm set can find its sample(s), store the patch/rhythm set and its samples in the same area: to user memory or on the same memory card. This way, if you’ve got the desired patches and rhythm sets, you’ll also have the samples they need.
• More card memory space is better—If you decide to use card memory, you’ll appreciate having a few larger memory cards more than having a greater number of smaller cards. Samples can get big, especially when you’re recording long beat loops or vocal and instrumental audio tracks, and each sample must fit in a single storage area.
• Store songs and samples together—When a song uses patches and/or rhythm sets that play samples (or audio tracks), store everything in user memory or onto the same memory card. Once you’ve done so, use the Fantom-X’s Save Song + Samples feature, described later, when you re-save your work as your song and samples evolve. This’ll
grab everything at once that you need for the song: the song data, samples, patches, rhythm sets, performance and so on.
Checking the Available Sample Storage Space
You can make sure you’ve got enough storage space before attempting to save a sample or a group of samples.
The following two sections involve a little math. If this bothers you, you can always just try to save your data. The Fantom-X will tell you if you don’t have enough storage space.
Learning the Size of Your Samples
The first thing you’ll want to know is how big your samples are. You can find this out by pressing SAMPLE LIST.
Samples are measured in bytes, the way things are usually measured in computer-based devices. Since most samples you record are thousands of bytes in size, the Fantom-X counts them in thousands to make life easier. Each thousand bytes is called a “kilobyte,” and is abbreviated on the Fantom-X’s display as simply “KB,” as in “100KB,” “32752KB,” and so on.

��
Samples in the Preset sample list can demonstrate how a sample’s length—and whether it’s stereo or mono—affects its size. If you’re not currently viewing the Preset sample list as shown on the previous page, press F1 (Preset).
Turn VALUE to display samples P0019, P0020 and P0021.
If you’ve already set your Fantom-X so it doesn’t automatically load its preset samples at startup—as described later in this booklet—you won’t see the samples’ sizes displayed, as shown here. Sizes are shown only for loaded samples.
P0019 and P0020 are the left and right sides of the stereo Sample BG Stack. The left and right sides of this roughly four-second sample are both 359KB in size. “359KB” means 359,000 bytes, so the sample’s size is 718,000 bytes in total. On the other hand, the brief, mono bass-slap sample P0021 BassPhr 01/16 is only 11KB. Most straight samples you’re likely to create will be in the hundreds of KBs—audio track samples are likely to be longer.
• If you’re saving a single sample—check its size on this screen.
• If you’re saving a new group of samples—add their sizes together to learn how much space you need in KB.
• If you’re re-saving samples you’ve been tweaking—add their sizes together to learn how much space you need in KB since editing may have changed their sizes slightly.
Displaying the Available Storage Space
Once you know how much room your sample data needs, you can easily find out how much storage space you have.
1. Press PATCH/RHYTHM, and then press MENU.2. Press 6 once to select System, and then press ENTER.3. Press F4 (Info).4. Press F2 (↓) once to select Memory Info.
On this screen, you can see how much space is available in your sample RAM—shown as “Sample”—in user memory and in card memory.
The amount of memory you have for sample storage is counted in “megabytes,” or “MB.” A MB is 1,000 KBs, or one million bytes—yipes! You’ll obviously need to do a little math to make sure you’ve got enough room in user memory or on a card.

��
How to Save an Individual Sample
When you save a stereo sample, its left and right sides—which are really two separate samples—are automatically saved together in a consecutive pair of memory locations.
1. Press WRITE—the Write menu appears. If you were on a sampling screen prior to
pressing WRITE, sample-saving is already selected onscreen, as shown here.
2. Press F3 (Sample), or, if Sample is already selected as shown above, you can press ENTER instead to display the sample-naming screen.
When you name a sample, you’re giving it a name for use within the Fantom-X. When the sample is written to user or card memory, it’s written there as an audio file, and the audio file is automatically named after its user or card memory location. When you connect the Fantom-X to a computer, it’s the audio file name you see—not the name of the sample as shown in the Fantom-X.
To name a sample:
1. The first character position is underlined, so turn VALUE to select the first character of the sample’s name.
2. Press 4 to move the underline to the next character’s position, and turn VALUE to select the second character.
3. Repeat Step 2 to complete the sample’s name.
As you name the sample, you can:
• Press F1 (Change Type) repeatedly to jump between upper-case, lower-case and numeric characters.
• Press F2 (Delete) to remove the character at the underline’s current location, or
• Press F3 (Insert) to insert a new character or space there.
When you’ve finished naming the sample, press F8 (Write). The Sample Write window pops up:
1. Use F3 (↓) and/or F2 (↑) to select the Fantom-X’s internal user memory as the location in which the sample is to be saved, or to select Card if you’ve installed a memory card.
2. Turn VALUE to select the user or card location in which you’d like to store the sample, and then press F8 (Write) to store the sample.
3. The Fantom-X asks if you’re sure you want to proceed. Press F8 (Exec) to finish storing the sample.

��
Deleting an Individual Sample
Here’s how to completely erase a sample from user or card memory—and from sample RAM:
1. Press SAMPLE LIST and highlight the sample you want to delete.
If you want to delete multiple samples, checkmark them as described earlier.
2. Press F7 (Load Utility).3. Press F5 (Delete Sample).4. When the Fantom-X asks if you’re sure, press F8 (Exec) to
remove the sample from user or card memory and from sample RAM.
How to Save Everything in Sample RAM at Once
The Fantom-X’s Save All Samples feature offers a way to quickly store everything currently in sample RAM.
• New, unsaved samples—are stored in card memory locations automatically set aside for their use. (If no card is installed, they’re assigned and saved to user memory locations.)
• Imported samples—are stored in card memory locations automatically set aside for their use. (Again, with no card, they’re assigned and saved to user memory locations.)
• Already-saved samples you’ve been editing—are re-stored into their previous memory locations.
In order to successfully save the entire contents of your sample RAM at once, your user and/or card memory must have enough room available to hold all of the workspace’s sample data.
1. Press SAVE/LOAD—the Save/Load menu appears.
2. Either:• Press 3, 4, 5, or 6 as necessary to highlight Save all
Samples as shown above and then press ENTER, or• Press F3 (SaveAllSmpl).
3. When the Fantom-X asks for confirmation that you want to proceed, press F8 (Exec), or F7 (Cancel) to halt the operation.
If you see “Memory Full!” when you’re saving only new samples, it means they’re too big to fit in their automatically assigned locations in card or user memory. You can save the new samples to a larger memory card.
How to Save a Song and Its Samples
1. Press SAVE/LOAD—the Save/Load menu appears.

��
2. Either:• Press 3, 4, 5, or 6 as necessary to highlight Save
Song + Samples as shown on the previous page and then press ENTER, or
• Press F1 (Save S+S).
3. The Song File Name screen appears on which you can name the song file using the name-entry techniques described earlier—when you’re done, press F8 (Write).
4. Use F3 (↓) and/or F2 (↑) to select the Fantom-X’s internal user memory as the location in which your data is to be saved, or to select Card if you’ve installed a memory card.
5. Turn VALUE to select the user or card location in which you’d like to store the song and the sample data currently in sample RAM, and then press F8 (Write).
6. The Fantom-X asks if you’re sure you want to proceed. Press F8 (Exec) to finish storing the song and samples.
As with the Save All Samples operation, if the Fantom-X informs you that you don’t have enough storage space when you’re saving new samples—you see “Memory Full!”—it probably means they’re too big to fit in card user memory, where they’ve automatically been assigned locations. Save the new samples individually to a larger memory card.
Loading Samples, Their Patches and Rhythm Sets
Before your stored samples—or samples you wish to import into the Fantom-X—can be played in a patch or rhythm set, they must be loaded into sample RAM.
Use the technique described in “Checking the Available Sample Storage Space” to make sure you have enough room in sample RAM to hold the sample data you want to load, or just give it a try—the Fantom-X will tell you if you don’t have enough room.
Manually Loading A Specific Fantom-X Sample
1. Press SAMPLE LIST.2. Locate a sample you wish to load.3. Turn the VALUE dial to highlight the sample.
To load multiple samples, checkmark them as described earlier.
4. Press F7 (Load Utility).5. Press F7 (Load).6. When the Fantom-X asks if you’re sure you want to proceed,
press F8 (Exec) to complete the loading procedure.
Unloading Samples
There may be any number of reasons to remove a sample from sample RAM: to save room, because you’re done using the sample, and so on. To unload a sample:
1. Press SAMPLE LIST and highlight the sample you want to remove from sample RAM.
To unload multiple samples, checkmark them as described earlier.
2. Press F7 (Load Utility).3. Press F6 (Unload).4. When the Fantom-X asks if you’re sure, press F8 (Exec). The Fantom-X unloads the sample. If the sample’s already
stored in preset, user or card memory, “UNLOAD” appears to the right of its name in the sample list.

��
Loading All User or Card Memory at Once
The Fantom-X’s Load All Samples operation loads the entire contents of user memory and card memory into sample RAM at once.
You can use Load All Samples only when sample RAM is the same size, or larger than, the amount of data you intend to load.
When you use Load All Samples, the sample data you load replaces what’s in sample RAM. If there’s something in sample RAM you don’t want to lose, be sure to save it before using this feature.
1. Press SAVE/LOAD—the Save/Load menu appears.
2. Either:• Press 3, 4, 5, or 6 as necessary to highlight Load all
Samples as shown above and then press ENTER, or• Press F7 (LoadAllSmpl).
3. When the Fantom-X asks for confirmation that you want to proceed, press F8 (Exec), or F7 (Cancel) to halt the operation.
The Load Song + Samples command works much like Load All Samples. When you load the desired song, all samples in user and card memory are loaded along with it.
Importing Samples Into the Fantom-X
The Fantom-X can import .wav- and AIFF-format audio files created and/or edited on other instruments, on your computer, or by other people. The Import Audio command loads audio files stored in the AUDIO_IMPORT folder located both in user memory and on any Fantom-X-formatted memory card. You can put audio files in an AUDIO_IMPORT folder by:
• copying the audio files via USB—when the Fantom-X is connected to a personal computer. The Fantom-X’s user memory AUDIO_IMPORT folder and the AUDIO_IMPORT folder on a currently installed memory card can both be opened from the computer’s desktop.
• working with a Fantom-X memory card in a card reader—connected to a personal computer. With this setup, you can copy audio files into the card’s AUDIO_IMPORT folder on the computer, remove the card from the reader, and then install the card in the Fantom-X.
Installing Audio Files for Import Via USB
This procedure is possible only with USB-supporting computers using the following operating systems: Windows XP/2000/Me or higher, Mac OS X, or Mac OS 9.04 or higher.
Before activating the Fantom-X’s USB connection to your computer, do the following:
1. Turn off the Fantom-X, and with it powered down, start up your computer.

��
2. Using a USB A/B-type cable, connect the A-type USB plug to a USB jack on your computer, and the other end to the B-type USB jack on the Fantom-X.
USB A plug USB B plug
3. Turn on the Fantom-X.
To activate USB communication between the Fantom-X and the computer:
1. Press PATCH/RHYTHM and then the MENU button.2. Turn VALUE to select USB Storage as shown here.
3. Press ENTER—the USB Select screen appears.
4. On this screen, you allow your computer access to either your user memory or your card memory. To choose:• user memory—press F3 (Internal).• card memory—F6 (Memory Card).
The Fantom-X establishes contact with the computer and displays “Connected” when communication is established. The Fantom-X’s user or card memory appears in a new window or on the desktop of your computer as a removable storage device. The Fantom-X user memory appears as “FANX USER.” Card memory appears as “FANX CARD.”
5. Open FANX USER or FANX CARD on your computer.6. Open the TMP folder.7. Open the AUDIO_IMPORT folder.8. Drag the desired audio files into the AUDIO_IMPORT folder
to copy them there.9. Eject the Fantom-X’s user or card memory from your
computer as you would a CD or other removable media.10. On the Fantom-X, press EXIT to leave the USB screen.
Installing Audio Files for Import with a Card Reader
This method requires the connection of an appropriate card reader to a personal computer. Please see the documentation for your card reader and computer for operational details.
1. Format the memory card on the Fantom-X.2. Insert the card in the reader connected to your computer.3. Open the card’s directory.4. Open the TMP folder.5. Open the AUDIO_IMPORT folder.6. Drag the desired audio files into the AUDIO_IMPORT folder
to copy them there.7. Remove the card from the reader according to the
instructions for the reader and your computer.8. Install the card in the Fantom-X, and follow the procedure
in “Using the Import Audio Command” on the next page.

��
Using the Import Audio Command
1. Press SAVE/LOAD—the Save/Load menu appears.
2. Either:• Press 3, 4, 5, or 6 as necessary to highlight Import
Audio as shown above, and then press ENTER, or• Press F8 (Import Audio).
The Fantom-X shows you a list of what’s in the user memory’s AUDIO_IMPORT folder.
If you’ve copied your audio files using Mac OS X, you may see additional items that begin with a period. Ignore these files—they’re required by Mac OS X, and can’t be loaded by the Fantom-X.
3. If your audio file’s in:• user memory—proceed to Step 4.• card memory—press F2 (Card) to open the card’s
AUDIO_IMPORT folder, and then proceed to Step 4.
4. Press 6 or 5 as necessary to highlight the audio file you want to import.
5. Press F8 (Import Audio).6. When the Fantom-X asks for confirmation that you want to
proceed, press F8 (Exec). The Fantom-X imports the audio file into sample RAM, and
sets aside a location in card memory for the new sample.
If there’s no memory card installed, the Fantom-X assigns each imported sample a temporary user memory location.
As with anything else in sample RAM, you’ll need to save the new sample to user or card memory before powering off to avoid losing it.
Auto-Loading Sample-Related Stuff at Startup
The Fantom-X can automatically load various samples at startup. To configure this feature:
1. Press PATCH/RHYTHM, and then press MENU.2. Select System from the menu onscreen, and press ENTER.3. Press F2 (↓) or F1 (↑) to select the Startup tab.

��
4. To automatically:• load the Fantom-X demos’ samples at startup—set Load
Preset Samples at Startup to On.• load all of your user and card samples at startup—set
Load User Samples at Startup to On.5. Press F8 (System Write) to save your settings.
You can’t load more sample data at startup than your sample RAM can hold, as described below in “Avoiding Startup Auto-Load Overload.”
To avoid using up sample workspace you may need once you’ve listened to the Fantom-X demos, turn off Load Preset Samples at Startup.
To get the maximum amount of sample workspace for new and/or imported samples, and for editing, turn off both Load Preset Samples at Startup and Load User Samples at Startup.
Avoiding Startup Auto-Load Overload
The Fantom-X’s auto-load features can only load as much sample data as your sample RAM can hold—an attempt to exceed this limit will result in a error message from the Fantom-X.
If your sample RAM isn’t large enough to hold:
• all of the demo samples, and the samples in user memory and on the installed memory card—turn off Load Preset Samples at Startup.
• all of the samples in user memory and on the installed memory card—turn off Load User Samples at Startup.
Sample Editing
You can edit samples before or after they’ve been saved to user or card memory. However, we strongly recommend saving a sample immediately after it’s been created or imported for safety’s sake, and to provide greater freedom for you as you edit.
Here’s why. When you edit a sample that’s already been stored, you’re actually working with a copy of the sample in sample RAM. You’re free to try anything you want to try, secure in the knowledge that the original, unedited sample is safe and sound in user or card memory until you re-save the sample.
This booklet discusses sampling—and things you can do to a sample—on the Fantom-X itself. It’s worth noting, though, that the Fantom-X’s Version Two Editing software can make editing samples even easier if you have a computer to connect to your Fantom-X.
Selecting a Sample for Editing
To select a currently loaded sample for editing, press SAMPLE LIST and turn VALUE to highlight the sample. (Only loaded samples can be edited.) You can edit one sample at a time.
Listening to Samples During Editing
While you can listen to any sample you’re editing by pressing F8 (Preview) on a sample-editing screen, you may find it easier to select the patch or rhythm set that plays the sample so you can hear it by playing on the keyboard or pads.
There is an advantage to using F8 (Preview), though: When you use Preview, you can see the playback cursor as it moves through the sample’s waveform onscreen. This can be informative when editing.

�0
Setting Sample Parameters
Probably the best first place to go when editing a sample is to its Sample Parameter screen, which holds the sample’s basic settings that determine its behavior, as well as important information for the Fantom-X’s Tempo Sync feature.
Press SAMPLE EDIT and then F2 (Sample Param) to display the Sample Parameter screen.
You can set any parameter on this screen by typing in the desired value on the pads. Select the parameter and press ENTER—a window opens in which you see the available values for the parameter. Press the pad, or pair of pads, that chooses the desired value and then press F8 (Select).
Here’s what the parameters on this screen do:
• Loop Mode—sets how the sample plays. You can set it to:• FWD—so the sample loops, playing over and over
when you hold down its key or pad.• ONE-SHOT—so the sample plays through once and
stops. This is the default setting for new samples.• REV—so the sample loops in reverse, playing backwards
over and over when you hold down its key or pad.• REV-ONE—so the sample plays backwards once.
• Loop Tune—allows you to change the pitch of the looped section of a sample, from -50 cents to + 50 cents.
• Original Key—maps the sample to a keyboard note or pad where the sample will play at its original pitch.
There’s a quick way to set the Original Key parameter. Highlight the parameter and play the desired note on the keyboard to set the parameter. (Don’t worry about what the sample sounds like when you first strike the key—the Fantom-X hasn’t yet re-mapped the sample at that point.)
• BPM—tells the Fantom-X the sample’s original tempo in beats-per-minute. This is especially important for rhythm-based samples, since it accomplishes two things:• it makes editing easier—by allowing the Fantom-X to
show the sample against a beat grid so you can see what you’re doing more easily as you edit.
• it helps Tempo Sync work—by giving the Fantom-X a rhythmic basis to use for time-stretching the sample.
The Fantom-X can calculate a sample’s BPM for you using its BPM Calculator feature, which we’ll describe on Page 31.
After re-setting a sample’s BPM value, press F7 (Reset Grid) and F8 (Exec) to update the editing grid so it reflects the sample’s new BPM setting.
• Time Stretch Type—selects the best time-stretch algorithm for the sample’s content. There are 10 time-stretch types. Try lower-numbered types for samples containing quick phrases, and higher-numbered types for samples with slower content.
• Start Fine, Loop Start Fine and Loop End Fine—provide fine adjustments for the coarse Start Point, Loop Start and End Point parameters, respectively, on the Sample Edit screen.
• Sample Gain—allows you to boost the volume of the sample to regain anything it’s lost during editing.

��
• Sample Fine Tune—lets you make precise adjustments to a sample’s tuning so it fits in with other sounds you’re using. You can adjust its tuning up or down by 50 100ths of a semitone.
• Sample Level— allows you to adjust a sample’s volume up or down when you’re using the sample in a rhythm set, a multisample, or want to tweak its level in a mix.
Having the Fantom-X Figure out a Sample’s BPM
The Fantom-X can figure out a sample’s BPM for you if you know the number of beats it lasts, and know its time signature.
In order for BPM Calc to work, make the sample’s Start and End points are set at the beginning and end, respectively, of the audio you want to use. Do this by pressing EXIT and setting the Start and End points as described in the next section—then return to the Sample Prm screen to make fine start and end adjustments before running the BPM Calculator.
To use it:
1. On the Sample Prm screen, press F6 (BPM Calc) to open the BPM Calculator window.
2. Enter the number of beats in the sample.3. Enter the sample’s time signature.
If you don’t know the sample’s time signature, try 4/4, since almost all modern music uses this time signature.
4. Press F8 (Exec)—the Fantom-X calculates the sample’s BPM and enters it for you as the BPM parameter’s value.
The Sample Edit Screen
To display a sample’s Sample Edit screen, highlight the sample in the sample list, and then press SAMPLE EDIT.
In the top of the Sample Edit screen, you can see an overview of the entire sample. The middle of the screen shows a magnified section of the sample.
On the Sample Edit screen, you can set the sample’s:
• Start Point—that determines the location in the sample at which it’s to start playing. Start Point also identifies the beginning of the sample in the Truncate Sample Modify operation.
• Loop Start—that determines the place at which the sample begins to repeat when the sample’s Loop Mode on the Sample Parameters screen is set to Fwd or Rev.
• End Point—that identifies the end of the sample for playback and in the Truncate operation.
If your sample is a beat loop you’ll be triggering throughout a song, set its End Point value one beat past the section of the sample you’ll be using—this will help smooth the transition each time you restart playback of the sample.
The parameters above are coarse adjustments that follow the editing grid based on the sample’s BPM. For finer adjustments, use the Fine parameters on the Sample Parameters screen.
��
The remaining parameter fields on this screen can’t be edited directly—they’re there to provide helpful information.
As you change the parameters’ values, the screen shows you the changes you’re making. You can edit the settings:
• by selecting the parameter and turning VALUE.• with the REALTIME CONTROL knobs—Press
the REALTIME CONTROL button so none of its LEDs are lit and turn:• Knob 1—to set the Start Point value.• Knob 2—to set the Loop Start value.• Knob 3—to set the End Point value.
• using the F4 (Beat ←) and F5 (Beat →) buttons—Select the desired parameter and press F4 or F5 to move its value to the desired beat in the editing grid.
Navigating the Sample Edit Screen
The view of the sample in the Sample Edit screen can be customized using its zooming tools:
1. Press F7 (Zoom In/Out) to display the Zoom In/Out window.
2. Adjust the display magnification as desired using the 3, 4, 5, and/or 6 buttons.
3. Press F8 (Close) to close the window.
You can zoom in or out horizontally by turning REALTIME CONTROL Knob 4 when the REALTIME CONTROL button’s LEDs are unlit.
You can zoom in and out horizontally using 3 and 4 even when the Zoom In/Out window is closed.
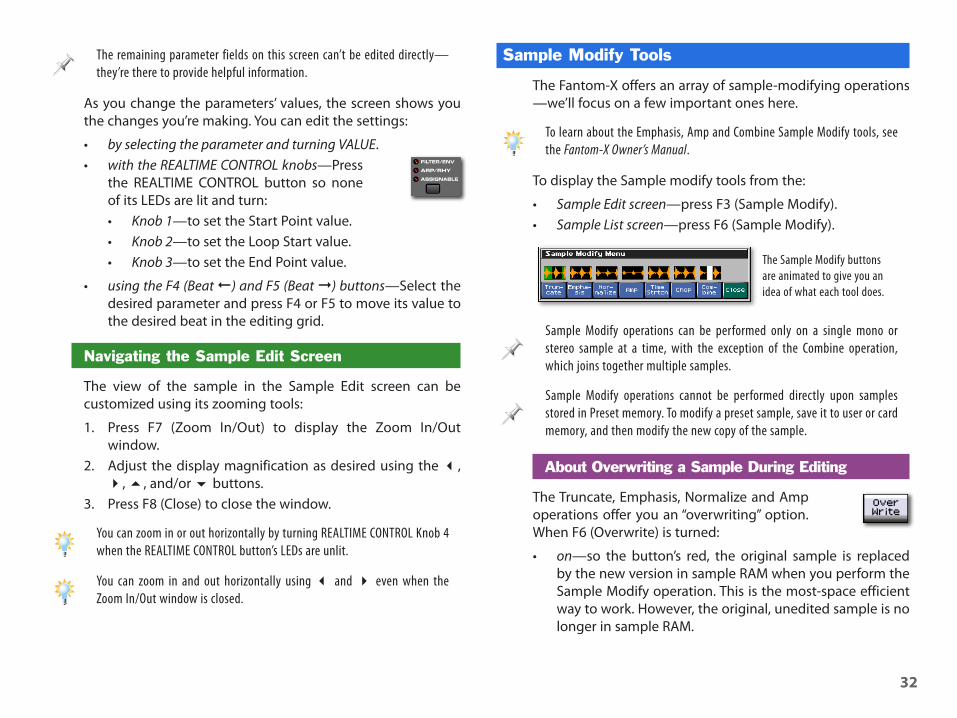
Sample Modify Tools
The Fantom-X offers an array of sample-modifying operations —we’ll focus on a few important ones here.
To learn about the Emphasis, Amp and Combine Sample Modify tools, see the Fantom-X Owner’s Manual.
To display the Sample modify tools from the:
• Sample Edit screen—press F3 (Sample Modify).• Sample List screen—press F6 (Sample Modify).
The Sample Modify buttons are animated to give you an idea of what each tool does.
Sample Modify operations can be performed only on a single mono or stereo sample at a time, with the exception of the Combine operation, which joins together multiple samples.
Sample Modify operations cannot be performed directly upon samples stored in Preset memory. To modify a preset sample, save it to user or card memory, and then modify the new copy of the sample.
About Overwriting a Sample During Editing
The Truncate, Emphasis, Normalize and Amp operations offer you an “overwriting” option. When F6 (Overwrite) is turned:
• on—so the button’s red, the original sample is replaced by the new version in sample RAM when you perform the Sample Modify operation. This is the most-space efficient way to work. However, the original, unedited sample is no longer in sample RAM.
��
• off—the Fantom-X sets aside a memory location for the new version of the sample. This allows you to re-trace your steps easily; however, having multiple copies of a sample in sample RAM uses up more room, and can also become confusing if you do numerous edits.
Even when F6 (Overwrite) is on, you can undo the last operation by pressing EXIT, MENU, and then ENTER.
Whether you use Overwrite or not, your edited sample exists only in sample RAM until you save it to user or card memory.
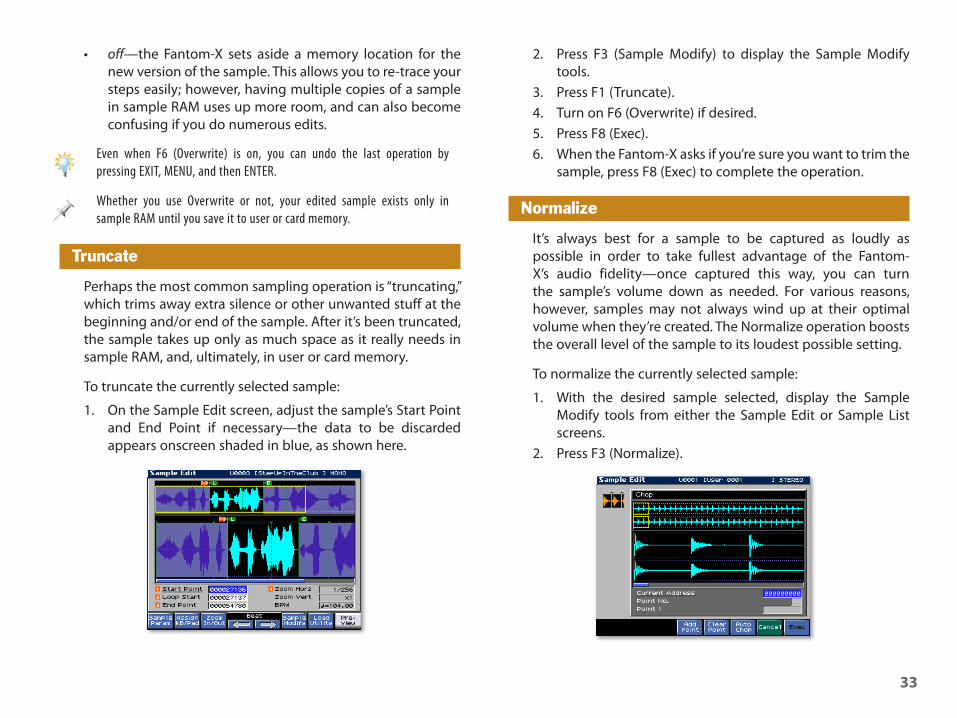
Truncate
Perhaps the most common sampling operation is “truncating,” which trims away extra silence or other unwanted stuff at the beginning and/or end of the sample. After it’s been truncated, the sample takes up only as much space as it really needs in sample RAM, and, ultimately, in user or card memory.
To truncate the currently selected sample:
1. On the Sample Edit screen, adjust the sample’s Start Point and End Point if necessary—the data to be discarded appears onscreen shaded in blue, as shown here.
2. Press F3 (Sample Modify) to display the Sample Modify tools.
3. Press F1 (Truncate).4. Turn on F6 (Overwrite) if desired.5. Press F8 (Exec).6. When the Fantom-X asks if you’re sure you want to trim the
sample, press F8 (Exec) to complete the operation.
Normalize
It’s always best for a sample to be captured as loudly as possible in order to take fullest advantage of the Fantom-X’s audio fidelity—once captured this way, you can turn the sample’s volume down as needed. For various reasons, however, samples may not always wind up at their optimal volume when they’re created. The Normalize operation boosts the overall level of the sample to its loudest possible setting.
To normalize the currently selected sample:
1. With the desired sample selected, display the Sample Modify tools from either the Sample Edit or Sample List screens.
2. Press F3 (Normalize).

��
3. Turn on F6 (Overwrite) if desired. There are no other parameters to set for normalization
since the Fantom-X automatically analyzes the sample and performs the required gain adjustment.
4. Press F8 (Exec).5. When the Fantom-X asks if you’re sure you want to
normalize the sample, press F8 (Exec) to complete the operation.
Chopping Samples
The Fantom-X’s Chop feature—and its even-more-powerful cousin, Auto Chop—make dividing up larger samples into smaller ones a snap. It’s great when you want to:
• capture a group of related sounds—such as multiple drum or percussion hits from a sampling CD. Create one sample containing all of the sounds, and then chop them up.
• pull individual elements out of a rhythm loop—by slicing up a phrase into its individual instrument sounds.
• divide up a long rhythm phrase into sections—for use as separate beat loops in different parts of songs.
When you’ve chopped up a sample into a group of smaller samples, it’s easy to create a new rhythm set out of the samples, as we’ve seen. Rhythm sets don’t have to contain rhythmic materials—they can hold any sample you’d like to trigger from the pads.
The Fantom-X chops up a single sample by dividing the sample at every “chop point” it encounters—each chop point signifies the start of a new sample. The difference between Chop and Auto Chop is simple:
• Chop—divides the sample at chop points you’ve set.• Auto Chop—automatically places chop points for you to
audition and approve before the sample is divided.
In most situations, you’ll want to use Auto Chop, since it’s the fastest and easiest way to work, and usually works well.
When you want to chop up a sample, we recommend trying Auto Chop first. If it doesn’t work for your particular needs, use Chop, described in the Fantom-X Owner’s Manual on Page 157.
Using Auto Chop
Auto Chop can divide a sample at its quiet points—if you think you may want it to use this method, normalize the sample first. If you want to auto chop a sample by beats, first set the sample’s BPM on the Sample Parameters screen.
1. With the desired sample selected, display the Sample Modify tools from either the Sample Edit or Sample List screens.
2. Press F6 (Chop).3. Press F5 (Auto Chop)—the
Auto Chop window pops open. In this window, you tell the Fantom-X how you want your sample chopped up.

��
4. Select the Chop Type parameter and set it to:• Level—so Auto Chop places a chop point each time
the sample’s volume reaches a specified level. Try this method when you’re chopping up a large sample containing multiple sounds.
• Beat—so Auto Chop places chop points at each beat. (It knows where the beats are from the Sample Parameter screen’s BPM setting.) Try this method when you want to pull separate instruments out of a rhythm phrase.
• Divide X—sets Auto Chop to divide the sample into a specified number of equal chunks. Try this method if you’re dividing a longer rhythm phrase into a few smaller equal-length sections.
Divide X works best with samples whose length is accurately trimmed. One way to ensure this happens when capturing a rhythm phrase is to use the Auto-Trig and Stop Trigger (set to BEAT) features when sampling.
5. If you’ve set Chop Type to:• Level—set Level to the desired value. Lower settings
make Auto Chop more sensitive, causing it to place chop points when it detects more subtle level changes. At higher values, only dramatic level changes result in chop points.
• Beats—set Beat to determine the rhythmic interval at which chop points are to be placed.
• Divide X—set Times to determine the number of equal-sized samples to be created from the original sample.
6. Press F8 (Exec)—the Fantom-X takes a few moments to create chop points for you to audition, laying the proposed new samples out on the pads, with the beginning of the original sample on Pad 1, the audio at Chop Point 1 on Pad 2, and so on.
The chop points are shown as vertical dotted green lines.
If more than 16 new samples are created, they won’t all fit on the pads at once.
7. Play the pads to try out the chop points.
If the results aren’t close to what you want, you can try different Auto Chop settings. Press F7 (Cancel), followed by F3 (Sample Modify), F6 (Chop), and then F5 (Auto Chop) to return to the Auto Chop window.
The Fantom-X sets aside a location for each of the new samples, even when you cancel the Auto Chop operation. You can clear them using the Delete command on the Sample List screen.
8. If some of the pads’ chop points are good, but you’d like to refine some others’, press 6 twice to highlight the Point “X” parameter at the bottom of the screen. (”X” is the number of the last chop point you auditioned.)
9. Play a pad for the chop point you want to tweak—”Point X” changes to show the name of the point you’ll be editing.

��
10. Turn VALUE to move the chop point to the desired location—onscreen, you can see the chop point’s location relative to its sound.
11. Repeat Steps 9 and 10 for each chop point you want to refine.
12. When you’re done, press 5 twice to highlight the Current Address parameter.
13. Press F8 (Exec) to divide up the sample using the current chop points.
14. When the Fantom-X asks if you’re sure, press F8 (Exec) to continue.
15. The Fantom-X asks if you’d like to create a new rhythm set from your new chopped-up samples—press F8 (Exec) to say “yes.”
16. Turn VALUE or press 6 or 5 to select the keyboard or the pads as the destination for your newly-created rhythm set if you’re in Patch mode, or the desired part in Performance mode.
17. The Fantom-X asks if you’re sure you want to continue—press F8 (Exec) to finish the process.
After creating the rhythm set, you can tweak the level and other characteristics of its samples by editing the rhythm set. See the Workshop booklet The Rhythms of the Fantom-X.
Remember to save all of your new samples to user or card memory—you can use Save All Samples to do this in one step, or write each sample individually to the desired location. And be sure save your new rhythm set to user or card memory, too!
Time-Stretching a Sample
Unlike Tempo Sync—which only affects how a sample plays back—the Sample Modify Time Stretch operation permanently changes a sample’s timing. You can re-clock a beat loop you’ve imported or sampled yourself, and lock in its new timing.
To time-stretch a sample:
1. With the desired sample selected, display the Sample Modify tools from the Sample Edit or Sample List screens.
2. Press F5 (Time Strtch) to display the Edit Time Stretch screen.
3. Set the Edit Time Stretch parameter to choose the amount of time-stretching, as measured by:• BPM—Dial in the desired beats-per-minute value for
the sample.• Time—Dial in the desired duration for the sample.• Rate—Dial in the desired amount of change by
percentage. (100% equals no change.)

��
When you set the amount of time-stretching using any one of these parameters, the others are automatically updated to match your setting.
4. Set the Type to choose the desired time-stretching method, from Type01-Type10. The optimal setting depends on the sample’s content. As a general rule, for fast phrases, use a lower type, and for slower phrases, use a higher value. Try out different types to find the best one for your sample.
5. Quality Adjust sets the accuracy of the time-stretching process in terms of audio fidelity. Try the default setting, or experiment with different values, if you like.
6. When you’ve set the parameters as desired, press F8 (Exec).
7. When the Fantom-X asks you if you’re sure you want to proceed, press F8 (Exec) to finish the time-stretching operation.
The End
We hope you’ve enjoyed this introduction to the Fantom-X’s sampling capabilities. Check out the other Workshop booklets, as well your Fantom-X Handbook, Owner’s Manual, and Audio Track Expansion guide. We’re confident you’ll have a great time with the exciting, inspiring Fantom-X.
For the latest Fantom-X updates and support tools, visit the Roland U.S. Web site at www.RolandUS.com. If you need personal assistance, call our amazing Product Support team at 323-890-3745.