geforce - nvidia.de€¦ · geforce 3d vision. all games that have been tested are listed ... good,...
TRANSCRIPT
QUICK START GUIDE
GEFORCE® 3D VISION™
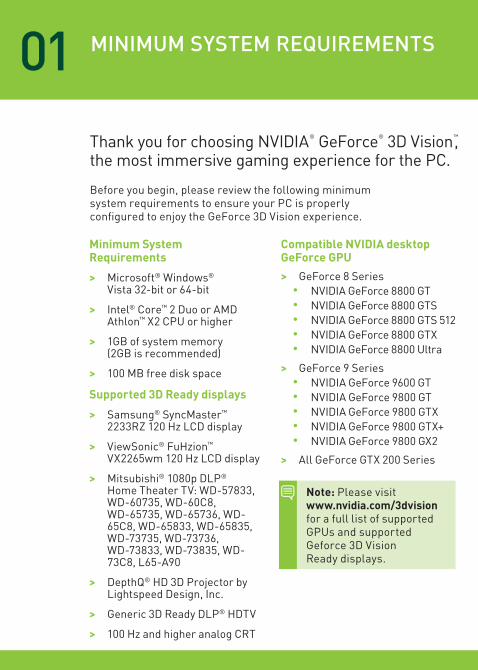
01 mINImUm SySTEm REQUIREmENTS
Thank you for choosing NVIDIA® GeForce® 3D Vision™, the most immersive gaming experience for the PC.
Before you begin, please review the following minimum system requirements to ensure your PC is properly configured to enjoy the GeForce 3D Vision experience.
Minimum System Requirements
Microsoft > ® Windows® Vista 32-bit or 64-bit
Intel > ® Core™ 2 Duo or AMD Athlon™ X2 CPU or higher
1GB of system memory >(2GB is recommended)
100 MB free disk space >
Supported 3D Ready displays
Samsung > ® SyncMaster™ 2233RZ 120 Hz LCD display
ViewSonic > ® FuHzion™ VX2265wm 120 Hz LCD display
Mitsubishi > ® 1080p DLP® Home Theater TV: WD-57833, WD-60735, WD-60C8, WD-65735, WD-65736, WD-65C8, WD-65833, WD-65835, WD-73735, WD-73736, WD-73833, WD-73835, WD-73C8, L65-A90
DepthQ > ® HD 3D Projector by Lightspeed Design, Inc.
Generic 3D Ready DLP > ® HDTV
100 Hz and higher analog CRT >
Compatible NVIDIA desktop GeForce GPU
GeForce 8 Series >NVIDIA GeForce 8800 GT•NVIDIA GeForce 8800 GTS•NVIDIA GeForce 8800 GTS 512•NVIDIA GeForce 8800 GTX•NVIDIA GeForce 8800 Ultra•
GeForce 9 Series >NVIDIA GeForce 9600 GT•NVIDIA GeForce 9800 GT•NVIDIA GeForce 9800 GTX•NVIDIA GeForce 9800 GTX+•NVIDIA GeForce 9800 GX2•
All GeForce GTX 200 Series >
Note: Please visit www.nvidia.com/3dvision for a full list of supported GPUs and supported Geforce 3D Vision Ready displays.
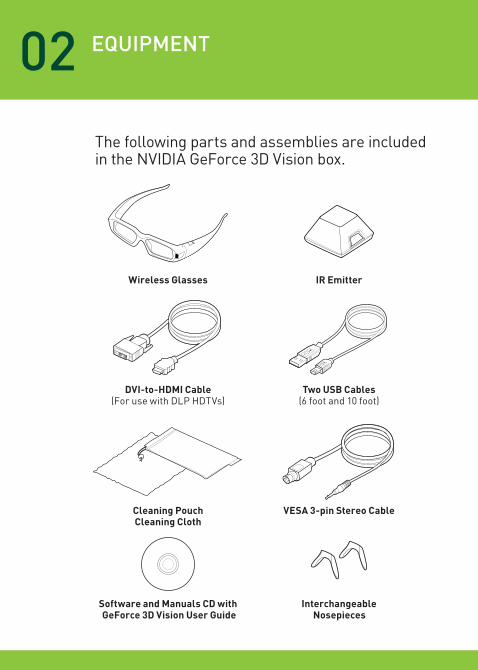
02 EQUIPmENT
Wireless Glasses
DVI-to-HDMI Cable (For use with DLP HDTVs)
Cleaning Pouch Cleaning Cloth
Software and Manuals CD with GeForce 3D Vision User Guide
IR Emitter
Two USB Cables (6 foot and 10 foot)
VESA 3-pin Stereo Cable
Interchangeable Nosepieces
The following parts and assemblies are included in the NVIDIA GeForce 3D Vision box.
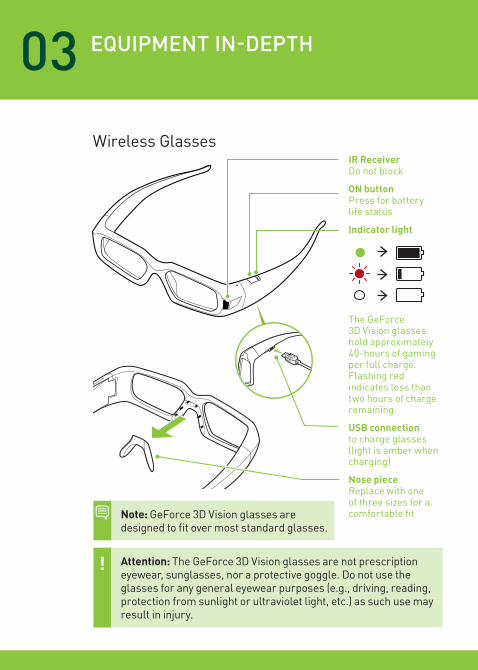
EQUIPmENT IN-DEPTH03Wireless Glasses
Attention: The GeForce 3D Vision glasses are not prescription eyewear, sunglasses, nor a protective goggle. Do not use the glasses for any general eyewear purposes (e.g., driving, reading, protection from sunlight or ultraviolet light, etc.) as such use may result in injury.
Note: GeForce 3D Vision glasses are designed to fit over most standard glasses.
IR Receiver Do not block
ON button Press for battery life status
Indicator light
The GeForce 3D Vision glasses hold approximately 40-hours of gaming per full charge. Flashing red indicates less than two hours of charge remaining.
USB connection to charge glasses (light is amber when charging)
Nose piece Replace with one of three sizes for a comfortable fit
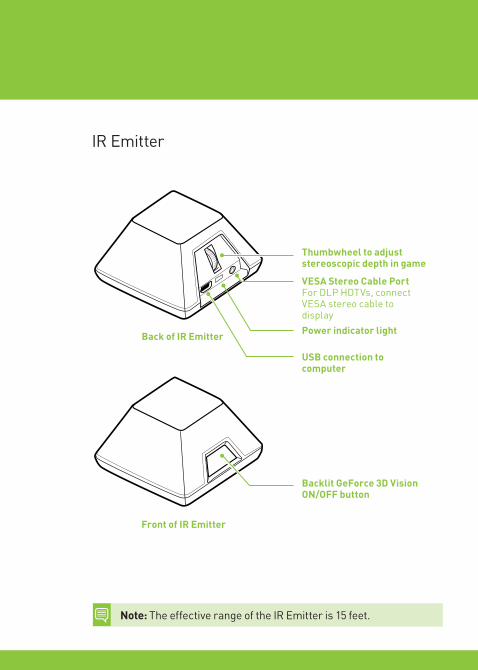
IR Emitter
Thumbwheel to adjust stereoscopic depth in game
VESA Stereo Cable Port For DLP HDTVs, connect VESA stereo cable to display
USB connection to computer
Power indicator light
Backlit GeForce 3D Vision ON/OFF button
Back of IR Emitter
Front of IR Emitter
Note: The effective range of the IR Emitter is 15 feet.
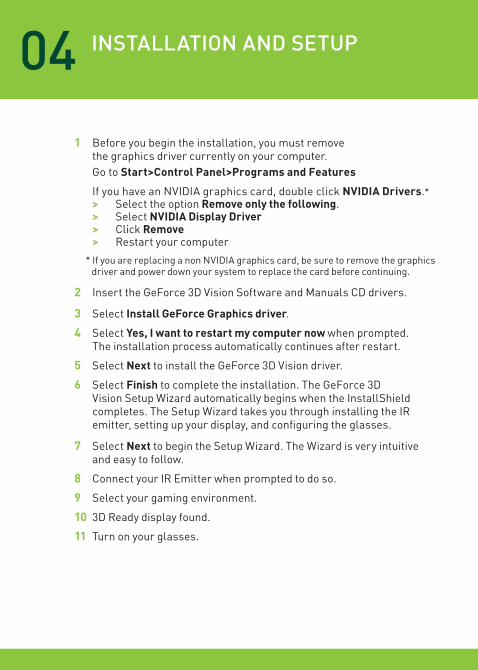
INSTALLATION AND SETUP04Before you begin the installation, you must remove 1 the graphics driver currently on your computer.Go to Start>Control Panel>Programs and Features
If you have an NVIDIA graphics card, double click NVIDIA Drivers.* Select the option > Remove only the following. Select > NVIDIA Display Driver Click > Remove Restart your computer >
* If you are replacing a non NVIDIA graphics card, be sure to remove the graphics driver and power down your system to replace the card before continuing.
Insert the GeForce 3D Vision Software and Manuals CD drivers.2
Select 3 Install GeForce Graphics driver.
Select 4 Yes, I want to restart my computer now when prompted. The installation process automatically continues after restart.
Select 5 Next to install the GeForce 3D Vision driver.
Select 6 Finish to complete the installation. The GeForce 3D Vision Setup Wizard automatically begins when the InstallShield completes. The Setup Wizard takes you through installing the IR emitter, setting up your display, and configuring the glasses.
Select 7 Next to begin the Setup Wizard. The Wizard is very intuitive and easy to follow.
Connect your IR Emitter when prompted to do so.8
Select your gaming environment.9
3D Ready display found.10
Turn on your glasses.11
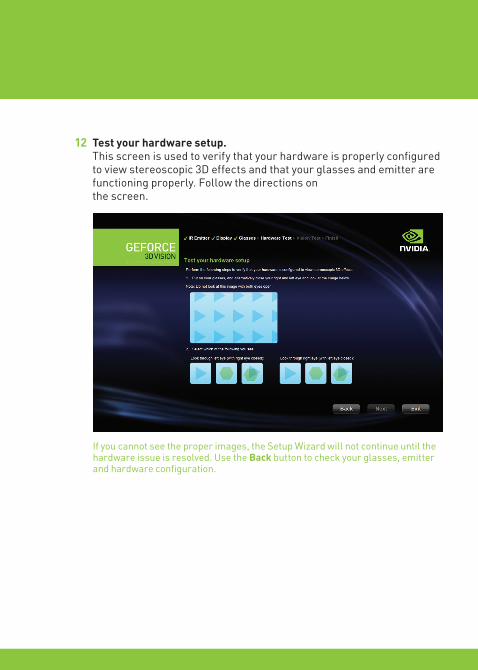
Test your hardware setup. 12 This screen is used to verify that your hardware is properly configured to view stereoscopic 3D effects and that your glasses and emitter are functioning properly. Follow the directions on the screen.
If you cannot see the proper images, the Setup Wizard will not continue until the hardware issue is resolved. Use the Back button to check your glasses, emitter and hardware configuration.
INSTALLATION AND SETUP (CONTINUED)
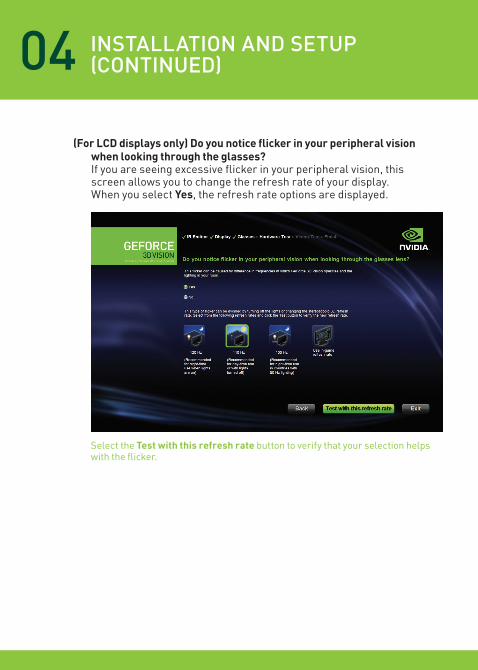
(For LCD displays only) Do you notice flicker in your peripheral vision when looking through the glasses? If you are seeing excessive flicker in your peripheral vision, this screen allows you to change the refresh rate of your display. When you select Yes, the refresh rate options are displayed.
04
Select the Test with this refresh rate button to verify that your selection helps with the flicker.
Verify your ability to view stereoscopic 3D content13 . Now that we know your hardware can interpret stereoscopic 3D content, we need to make sure you can. Inability to see the Medical Test image in stereoscopic 3D may be due to:
Adjustments needed for improved stereoscopic 3D viewing. >Select Back and verify that you can see stereoscopic 3D on the Test your hardware setup screen.
Visual problems. >Refer to the Safety Requirements located in the User Guide for precautions. Consult a physician if you suspect a physical problem seeing stereoscopic 3D.
Setup Complete.14
Congratulations! You are now ready to see in stereoscopic 3D! For detailed information on the NVIDIA Control Panel, refer to the GeForce 3D Vision User Guide located on the CD.
Please visit www.nvidia.com/support to access our 24x7x365 online knowledgebase system, where you can submit questions to our tech support staff. GeForce 3D Vision customers also have access to toll free technical support at 1-800-797-6530 from 9AM-6PM PST, M-F.
Attention: If you fail the medical test and can not see the test image, NVIDIA recommends that you do not use GeForce 3D Vision. Please consult your eye doctor for any possible vision anomalies. GeForce 3D Vision will not be enabled.
GAmE COmPATIBILITy05NVIDIA has tested and provided built-in driver profiles for many of the top selling games to ensure they work properly with GeForce 3D Vision. All games that have been tested are listed in the NVIDIA Control Panel with their Compatibility rating.
To open the NVIDIA Control Panel, right click on the desktop and select the NVIDIA Control Panel. You can also go to Start › NVIDIA Corporation › NVIDIA Control Panel. Select View compatibility with games from the topics in the left window pane. This option displays a list of all the games that have been tested by NVIDIA using stereoscopic 3D software. Each game has been rated with Excellent, Good, Fair, Not Recommended. These ratings are based on how well the games work in stereoscopic 3D and if there are any issues in the game that may interfere with your GeForce 3D Vision experience. To view a game in the best possible quality, you must follow the Issues and Recommended settings noted by NVIDIA. Not following these settings could result in the game not running in stereoscopic 3D or artifacts.
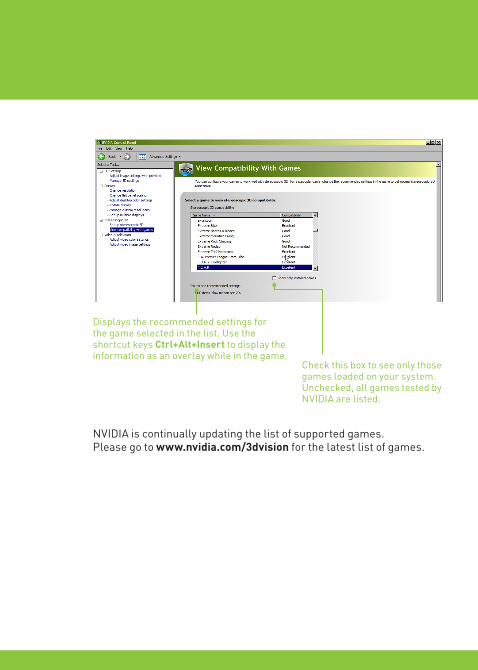
Check this box to see only those games loaded on your system. Unchecked, all games tested by NVIDIA are listed.
Displays the recommended settings for the game selected in the list. Use the shortcut keys Ctrl+Alt+Insert to display the information as an overlay while in the game.
NVIDIA is continually updating the list of supported games. Please go to www.nvidia.com/3dvision for the latest list of games.
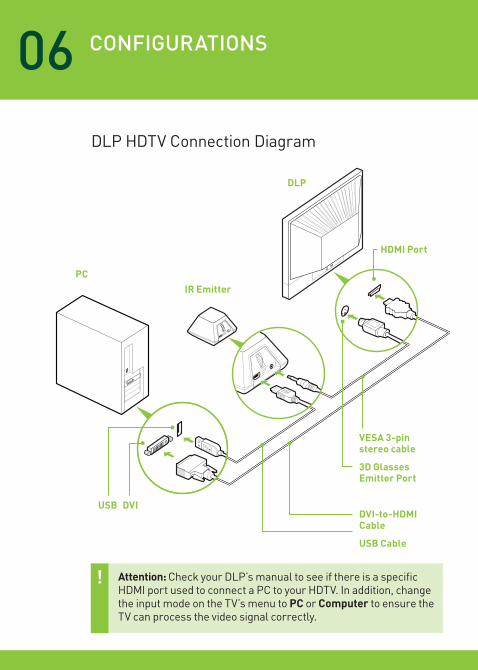
CONFIGURATIONS06DLP HDTV Connection Diagram
IR EmitterPC
DLP
DVIUSB
HDMI Port
VESA 3-pin stereo cable
3D Glasses Emitter Port
DVI-to-HDMI Cable
USB Cable
Attention: Check your DLP’s manual to see if there is a specific HDMI port used to connect a PC to your HDTV. In addition, change the input mode on the TV’s menu to PC or Computer to ensure the TV can process the video signal correctly.
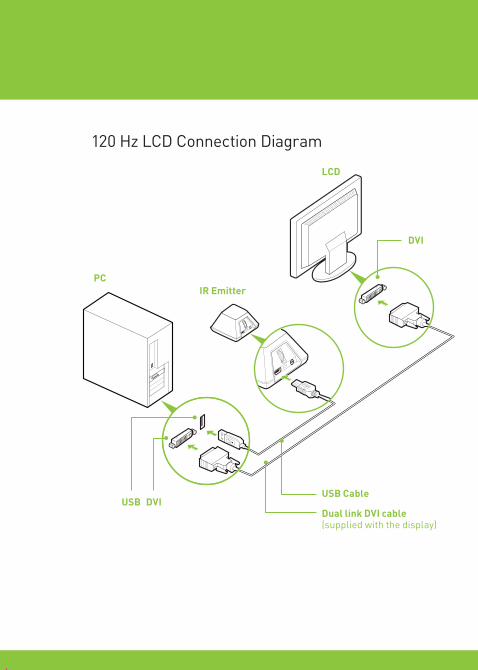
120 Hz LCD Connection Diagram
IR EmitterPC
DVI
LCD
DVIUSBUSB Cable
Dual link DVI cable (supplied with the display)
www.nvidia.com