general navigation - insperity · web viewthe top right of the time and attendance system houses...
TRANSCRIPT

S
General Navigation
User Guide
User Guide
Insperity™, a trusted advisor to America’s best businesses for more than 26 years, provides an array of human resources and business solutions designed to help improve business performance.
Insperity and the compass icon, and the Inspiring Business Performance tagline are trademarks of Insperity, Inc.
Microsoft and Internet Explorer are registered trademarks of Microsoft Corporation in the United States and/or other countries.
Google and Chrome are trademarks of Google Inc.
Mozilla and Firefox are registered trademarks of the Mozilla Foundation.
The information contained in this document is subject to change without notice. Nothing in this document should be construed as constituting an additional warranty. Insperity shall not be liable for technical or editorial errors or omissions contained in this document.
Copyright © 2017 Insperity.All Rights Reserved.
First Edition: January 2017
1 General Navigation
User Guide
ContentsIntroduction.................................................................................................................................................3
Overview.....................................................................................................................................................3
Main Navigation Menu................................................................................................................................4
Employee Toolbar........................................................................................................................................5
Home Page Widgets....................................................................................................................................8
Header Navigation.....................................................................................................................................10
Frequently Asked Questions......................................................................................................................11
Is there a shortcut to finding a name in a long employee list?..............................................................11
Why does the employee that I’m looking for not show in the Employee drop down?..........................11
2 General Navigation

User Guide
IntroductionOnce logged in to Time and Attendance, views and access differ largely based on specific company set up and individual security. This guide explores each area and how to use it.
Overview The screenshot below shows an example of the Time and Attendance home screen upon logging in to the system. Items 1, 2, and 4 remain static when moving throughout the system, while item 3 changes based on the selected page.
1. Main Navigation Menu – The location of all Time and Attendance pages, organized within folders. Also provides notifications/shortcuts to requests and alerts. For more information on this area, see the section titled “Main Navigation Menu.”
2. Employee Toolbar – Used to select the employees and pay periods to display in any employee or pay period-specific pages. For more information on this area, see the section titled “Employee Toolbar.”
3. Page – Displays the page that has been selected using the Main Navigation Menu. This is where most activity in Time and Attendance will take place. Upon initial log in, the home page widgets will show here. For more information on this area, see the section titled “Home Page Widgets.”
4. Header Navigation – Houses general information about the system, a place to edit login information, and the log out button. For more information on this area, see the section titled “Header Navigation.”
The remainder of this document describes, in depth, each section of the main navigation.
3 General Navigation
4321
User Guide
4 General Navigation
User Guide
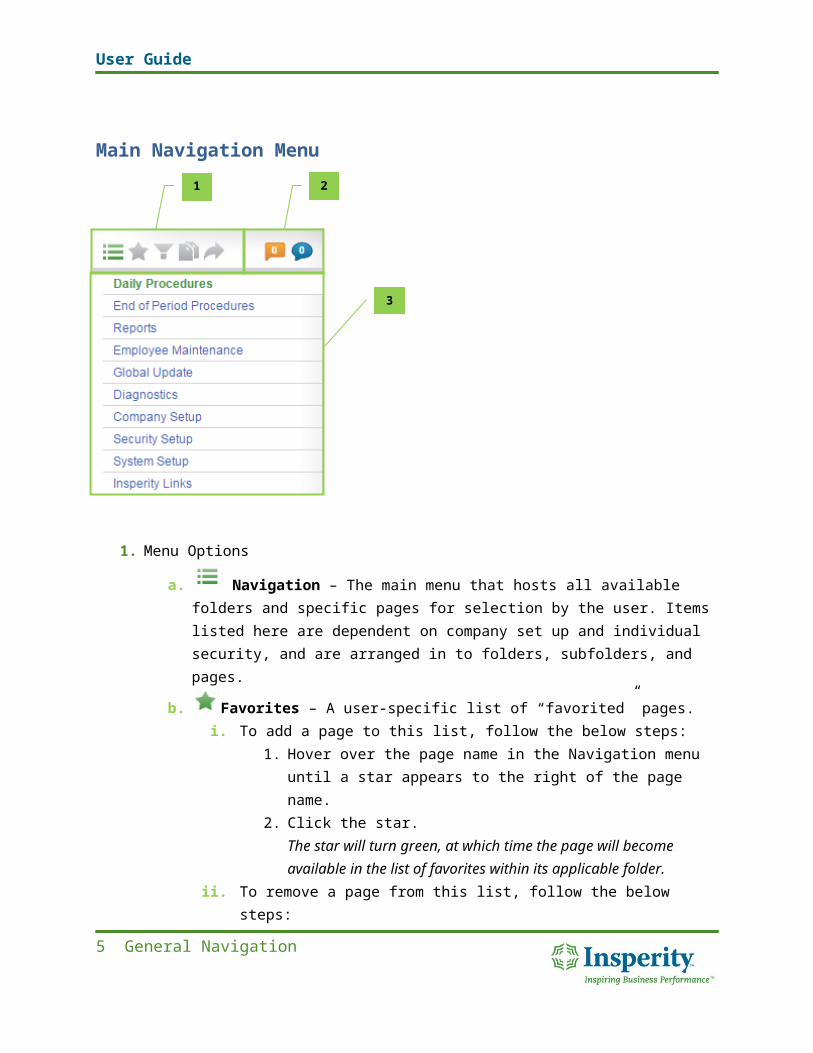
Main Navigation Menu
1. Menu Options
a. Navigation – The main menu that hosts all available folders and specific pages for selection by the user. Items listed here are dependent on company set up and individual security, and are arranged in to folders, subfolders, and pages.
b. Favorites – A user-specific list of “favorited” pages. i. To add a page to this list, follow the below steps:
1. Hover over the page name in the Navigation menu until a star appears to the right of the page name.
2. Click the star.The star will turn green, at which time the page will become available in the list of favorites within its applicable folder.
ii. To remove a page from this list, follow the below steps:1. Hover over the page in the Favorites menu until a star appears to the
right of the page name.2. Click the star.
Time and Attendance will no longer be green, at which time the page will be removed from the favorites menu.
c. Filters – A user-specific list of saved filters. To learn how to create a filter, see the section titled “Employee Toolbar”, bullet point “f” for Filters.
5 General Navigation
3
21

User Guide
d. Reports – A list of available reports in the Time and Attendance system. Alternatively, Reports can also be accessed through the Generate Reports page located under the Reports folder. For more information on reports, see the user guide titled “Reports.”
e. Quick Launch – A preset list of the most often frequently used pages in Time and Attendance.
2. Alerts and Requests Bubblesa. Alerts – Launches the Alerts page. Alternatively, Alerts can also be accessed through the
Alerts page located under the Daily Procedures folder within the Exceptions subfolder. b. Requests – Launches the Requests page. Alternatively, Requests can also be accessed
through the Requests page located under the Daily Procedures folder. 3. Navigation Menu – List of available pages, filters, and reports based on the menu option
selected.
Employee Toolbar
1. Employee List
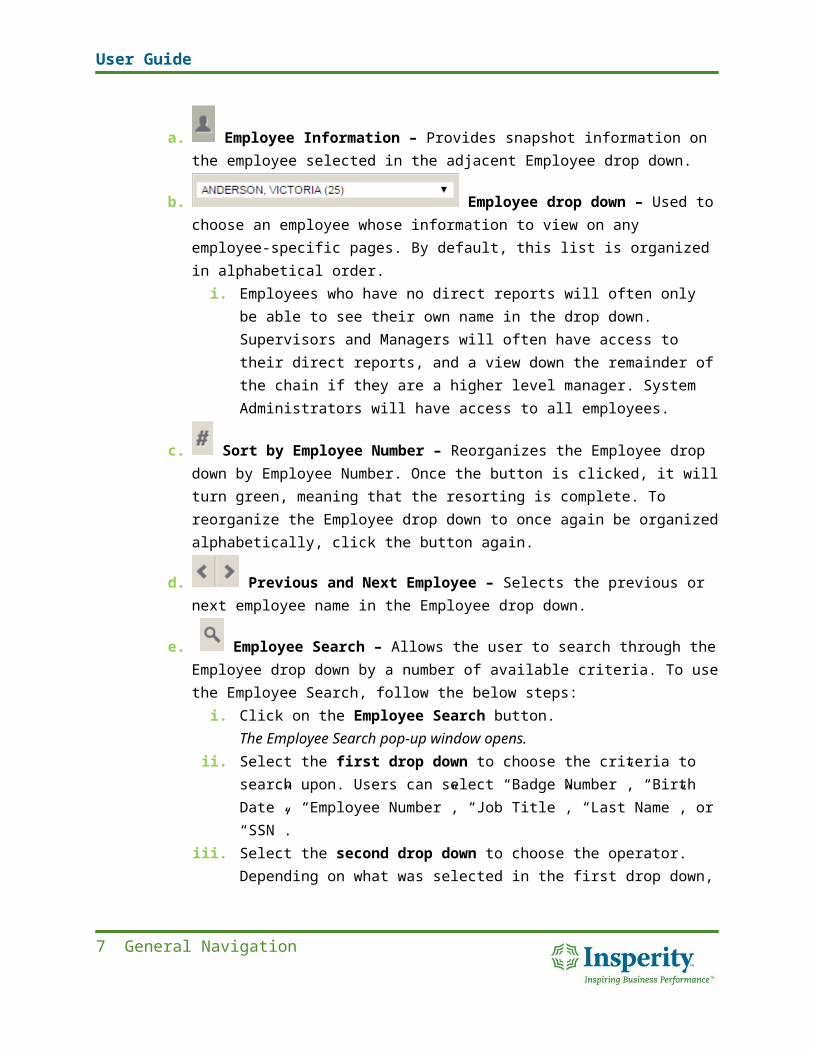
a. Employee Information – Provides snapshot information on the employee selected in the adjacent Employee drop down.
b. Employee drop down – Used to choose an employee whose information to view on any employee-specific pages. By default, this list is organized in alphabetical order.
i. Employees who have no direct reports will often only be able to see their own name in the drop down. Supervisors and Managers will often have access to their direct reports, and a view down the remainder of the chain if they are a higher level manager. System Administrators will have access to all employees.
c. Sort by Employee Number – Reorganizes the Employee drop down by Employee Number. Once the button is clicked, it will turn green, meaning that the resorting is complete. To reorganize the Employee drop down to once again be organized alphabetically, click the button again.
6 General Navigation
321
User Guide
d. Previous and Next Employee – Selects the previous or next employee name in the Employee drop down.
e. Employee Search – Allows the user to search through the Employee drop down by a number of available criteria. To use the Employee Search, follow the below steps:
i. Click on the Employee Search button. The Employee Search pop-up window opens.
ii. Select the first drop down to choose the criteria to search upon. Users can select “Badge Number”, “Birth Date”, “Employee Number”, “Job Title”, “Last Name”, or “SSN”.
iii. Select the second drop down to choose the operator. Depending on what was selected in the first drop down, available options may include “includes”, “begins with”, “ends with”, or “exactly”.
iv. Fill in the blank space adjacent to the drop downs with the item to search upon. v. Click Search.
The window will display the employee name(s) that meet the search criteria. vi. Click on the appropriate employee name.
The employee will be selected and the window will close.
f. Employee Filter – Filters the Employee drop down by a number of user-defined criteria. To use the Employee Filter, follow the below steps:
i. Click on the Employee Filter button. The Filter Maintenance pop-up window opens.
ii. Fill out the drop downs in the green bar.i. Select the first drop down to choose the criteria to filter upon. Users
can select “Active Status”, “Earning Group”, “Employee”, “Employment Type”, “Pay Group”, “Pay Period”, “Pay Status”, “Schedule Group”, “Shift”, “Supervisor”, “Termination Status”, “Accrual Plan”, “Accrual Group”, “Org: <Org Level>”.
ii. Select the second drop down to choose the operator. Available options include “IS”, “IS NOT”, “IN”, or “NOT IN”.
a. If “IN” or “NOT IN” is selected, a Select Items pop-up window will open. Select items from the right box to include (“IN”) or suppress (“NOT IN”) the right box and used the left facing arrows button to add them to the left box. Click Apply.
b. If “IS” or “IS NOT” is selected, select the third drop down to select the item to filter upon. This field will populate based on the item selected in the first drop down.
iii. Additional comparisons can be added by clicking on the green Plus button .
7 General Navigation

User Guide
i. If additional comparisons are added, use the Filter Type drop down to select whether to require employees to meet all set conditions (“Match ALL”), any of the set conditions (“Match ANY”), or create custom requirements between each filter (“Complex”).
a. If a Complex filter is created, the left of the green lines will become dotted. Click and hold down the mouse button on the dots to drag one line over the top of another. The line will turn brown and provide drop downs to customize the filter type.
iv. To save a filter that will be frequently used, type in a name within the Filter Name field and click Save.
v. Click Apply to set the filter. The Employee drop down list will update based on the set filter criteria, and the filter button will turn green, showing that the filter is in place.
To remove a set filter, follow the below steps:i. Click on the Filter button.
The Filter Maintenance pop-up window opens. ii. Click Clear Filter.
iii. Close the window.
2. Pay Period List
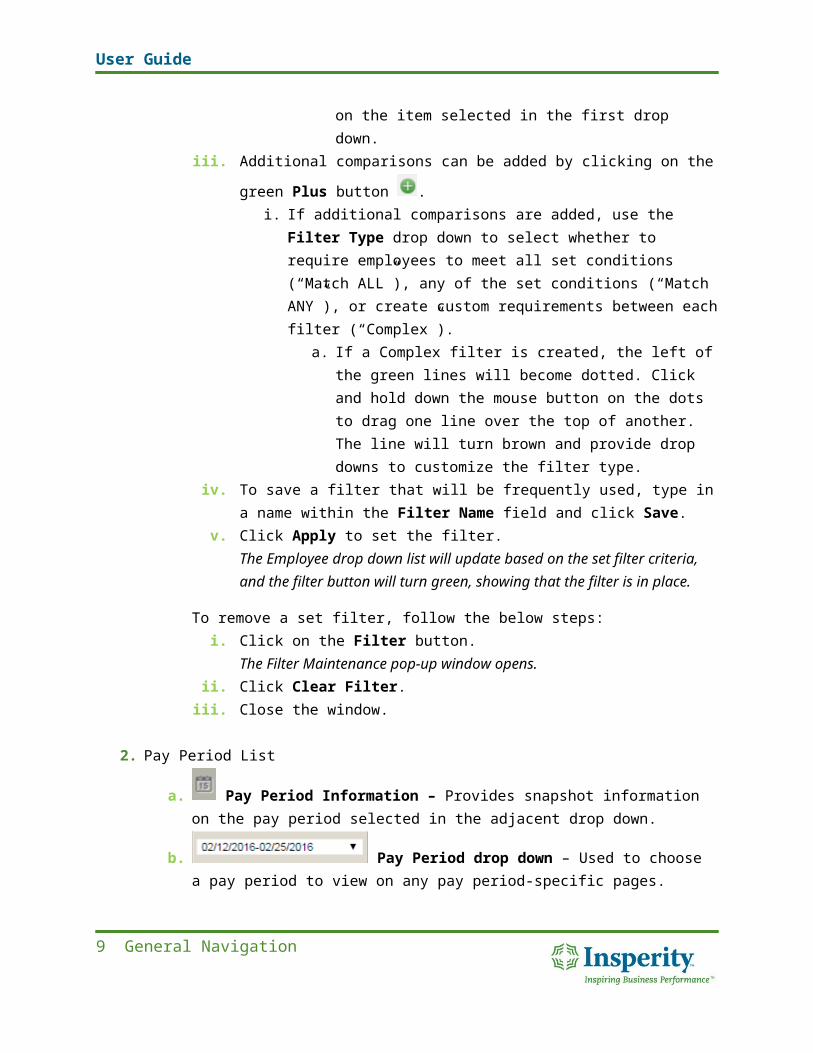
a. Pay Period Information – Provides snapshot information on the pay period selected in the adjacent drop down.
b. Pay Period drop down – Used to choose a pay period to view on any pay period-specific pages.
c. Previous and Next Pay Period – Selects the next or previous pay period in the Pay Period drop down.
d. Pay Period Indicator – Indicates whether the pay period selected in the Pay Period drop down is in the current, future, or past pay period. Indicators display as the following:
i. Current Pay Period – Indicates that the current pay period is selected in the Pay Period drop down.
ii. Future Pay Period – Indicates that a future pay period is selected in the Pay Period drop down. Can be clicked to be taken back to the current pay period.
iii. Past Pay Period – Indicates that a past pay period is selected in the Pay Period drop down. Can be clicked to be taken back to the current pay period.
8 General Navigation
User Guide
3. Miscellaneous
a. Company Information – Provides information on the selected company. If multiple independent companies exist, users can use the Company Name drop down located here to move between them.
b. Refresh – Refreshes the current page.
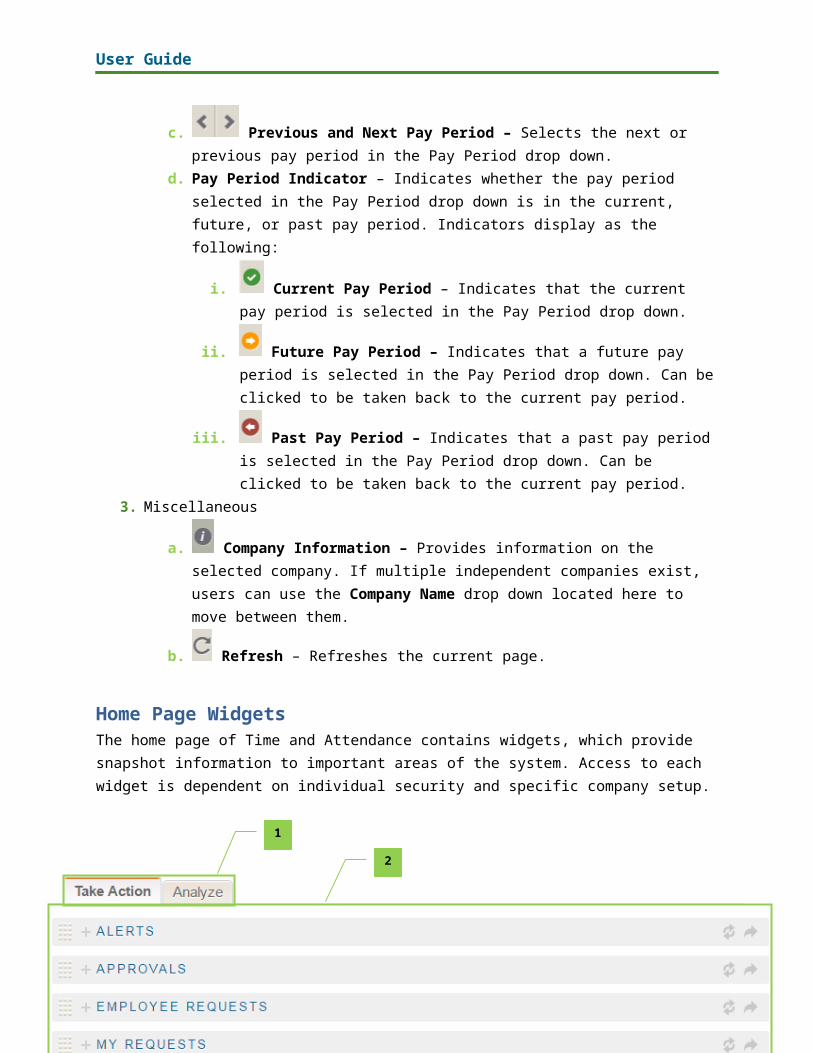
Home Page Widgets The home page of Time and Attendance contains widgets, which provide snapshot information to important areas of the system. Access to each widget is dependent on individual security and specific company setup.
1. Widget Selection Tabs a. Take Action – Widgets that are interactive, allowing users to take action on commonly
accessed areas of the system from the home page. b. Analyze – Widgets that are informational, allowing users to review information at-a-
glance from the home page. 2. Widget
a. Open Widget – Each widget can be opened, one at a time, by clicking on the plus button adjacent to the widget’s name. Widget options include the following:
i. Alerts – A list of alerts generated as a result of information entered in the system. Users can take action on the alerts using either of the following buttons:
1. View Alert Detail – Opens an Alert Detail pop-up window where the user may review and/or fix the cause of the alert.
2. Delete – Deletes the alert from the Alerts list.
9 General Navigation
2
1
User Guide
a. For more information on alerts, see the “Exceptions” User Guide.
ii. Approvals – A list of employees to approve. For more information on how to complete approvals, see the “Approvals” User Guide.
iii. Employee Requests – A list of received employee requests. For more information on how to respond to employee requests, see the “Requests” User Guide.
iv. My Requests – A list of the user’s sent requests, the ability to send a new request, and a view of the Accrual Balance(s) if applicable. For more information on sending requests, see the “Requests” User Guide.
v. Employees – Groups employees based on their current status of active, newly hired, or terminated.
vi. Hours & Wages – Breaks down hours and gross pay by Pay Type, Shift Type, and Org Level, and provides overall hours and gross pay totals for the current and previous pay period. Additionally, the Approvals tab displays employees who have and do not have their time approved.
vii. Schedules – Lists employees assigned to a schedule, providing indicators as to whether the employee is scheduled to work and/or working, as well as the time of their scheduled start and scheduled stop times, and their last recorded punch.
b. Move Widget – Widgets can be reorganized by clicking and holding down the mouse button on the cluster of dots to the left of the widget names, and dragging the line in to its desired position.
c. Refresh Widget – Refreshes the information within the widget.
d. Export Widget Information – Exports the information contained within the widget to Microsoft Excel.
10 General Navigation
User Guide
Header Navigation The top right of the Time and Attendance system houses general information about the system, a place to edit login information, and a log out button. Access to each button is dependent on individual security and specific company setup.
1. About – Opens the “About” page of Time and Attendance, providing information on the software, technical support, system profile, and installed options.
2. Account – Used to edit passwords and at times, usernames. Access to this area is highly dependent on specific company setup and individual security, and your workflow may dictate that password resets are completed in other locations either within or outside of Time and Attendance.
a. My Password tab – For the logged in user to change their password, and potentially, their username.
b. Supervisee Password tab – For a supervisor/manager/administrator to be able to change a password, and potentially, a username of a selected employee.
i. In the case of an employee password change by a supervisor, it is good to check off the Change Password checkbox to force the employee to change their password upon their next login.
3. Log Out – Logs the user out of the system.
11 General Navigation
321

User Guide
Frequently Asked Questions
Is there a shortcut to finding a name in a long employee list? To quickly find a name in the Employee drop down, open the employee drop down, and type the first few letters of the last name of the employee being searched in quick succession. The employee name will then move to the top of the employee list for selection.
Why does the employee that I’m looking for not show in the Employee drop down?There are several reasons why an employee may not show in the Employee drop down:
1. Employee status – The hire and termination dates will affect whether or not the employee shows in the Employee drop down.
a. If the employee has a hire date that is in a future pay period, the pay period must be advanced to the date of hire or further in to the future to see them listed in the Employee drop down.
b. If the employee has a termination date that is in a past pay period, the pay period must be moved backward to the pay period containing the date of termination or prior to see them listed in the Employee drop down.
2. Pay period mismatch – The pay period selected in the Pay Period drop down must be moved back or forward based on the employees’ status. See example number 1 for additional information.
3. Interface – When interfacing with a Human Resources system to automatically bring employees in to the Time and Attendance system, considerations must be made to ensure that all required employee fields are completed in the HR system, and verify that the interface is running correctly.
4. Filters – A set filter will reduce the number of employees in the Employee drop down. If the
filter button is turned green, a filter is set. To clear it, click on the Filter button . The Filter Maintenance pop-up window will open. Click the Clear Filter button, and close out of the Filter Maintenance pop-up window.
5. Security – Security settings in Time and Attendance will affect what can be viewed in the Employee drop down. These settings are typically maintained by the Time and Attendance team.
6. Company mismatch – If the company’s specific Time and Attendance system was set up with more than one company, it is important to ensure that the correct company is selected. Select
the Company Information button, followed by the Company Name drop down to move between companies.
7. Supervisor Assignments – To see employees in the Employee drop down as a supervisor, the employee must be assigned as one of the supervisor’s direct or indirect reports.
12 General Navigation