georeferencing specimen data in gis: diva-gis. spatial data models vectorraster points, lines &...
Post on 19-Dec-2015
234 views
TRANSCRIPT
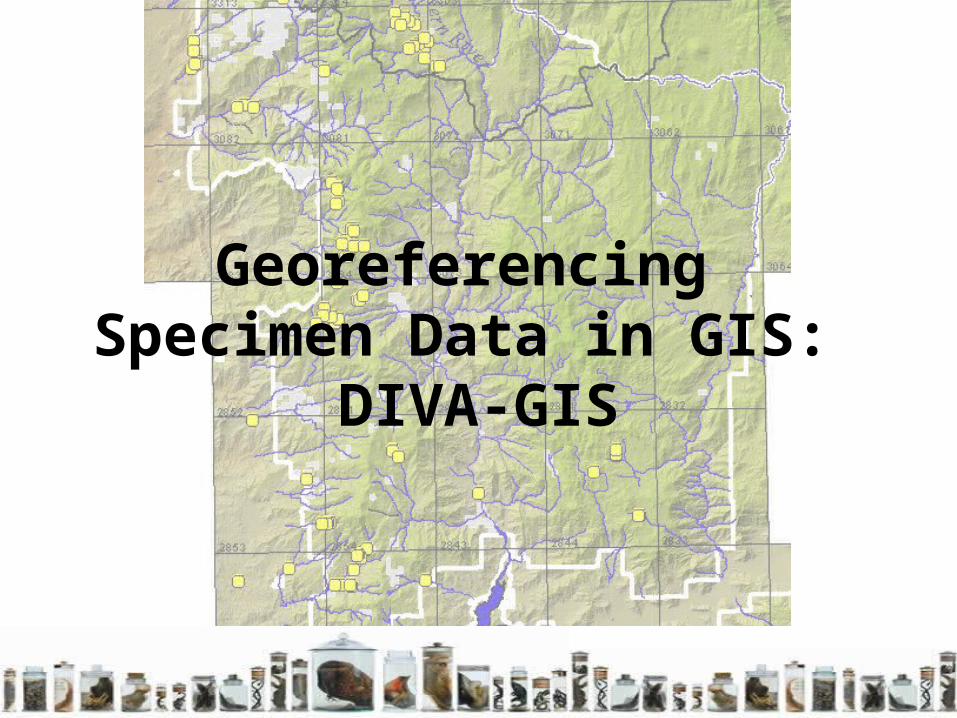
Georeferencing Specimen Data in GIS:
DIVA-GIS
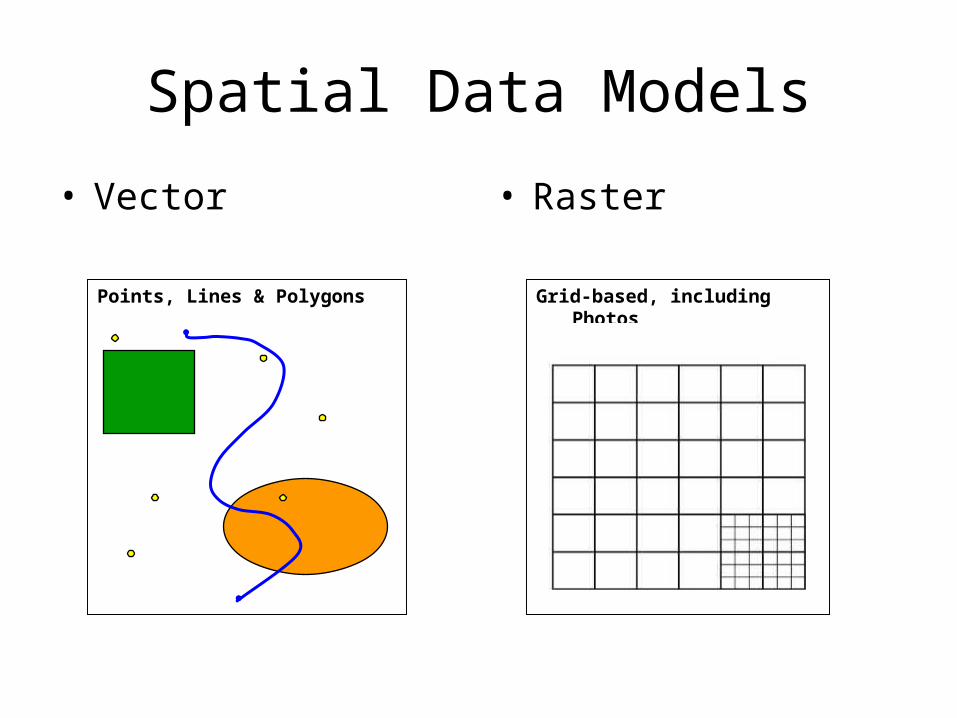
Spatial Data Models
• Vector • Raster
Points, Lines & Polygons Grid-based, including Photos
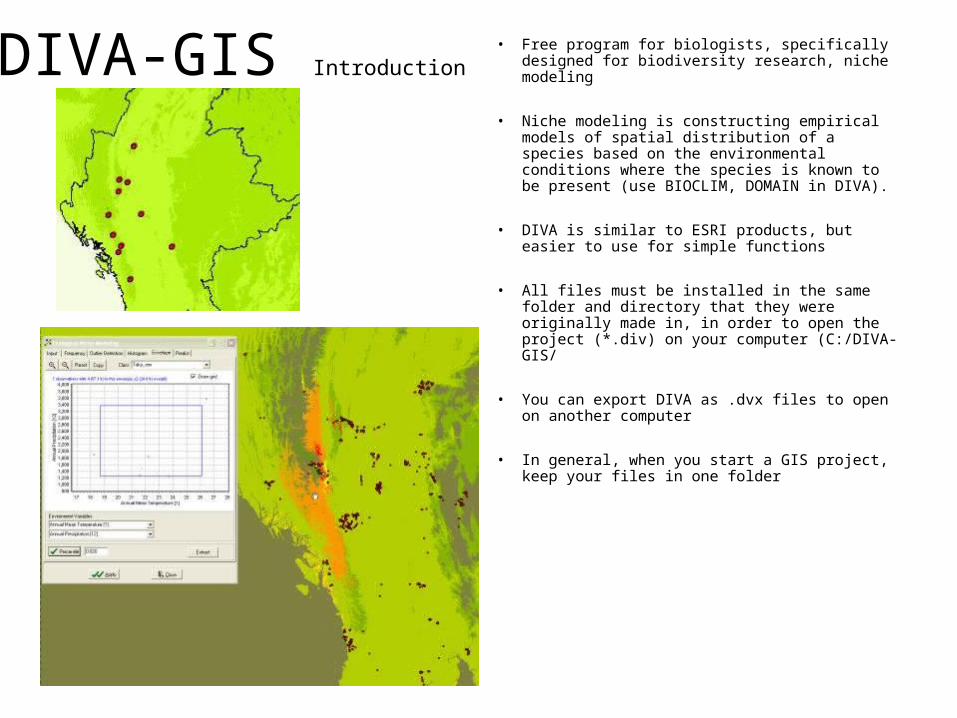
DIVA-GIS Introduction• Free program for biologists, specifically
designed for biodiversity research, niche modeling
• Niche modeling is constructing empirical models of spatial distribution of a species based on the environmental conditions where the species is known to be present (use BIOCLIM, DOMAIN in DIVA).
• DIVA is similar to ESRI products, but easier to use for simple functions
• All files must be installed in the same folder and directory that they were originally made in, in order to open the project (*.div) on your computer (C:/DIVA-GIS/
• You can export DIVA as .dvx files to open on another computer
• In general, when you start a GIS project, keep your files in one folder
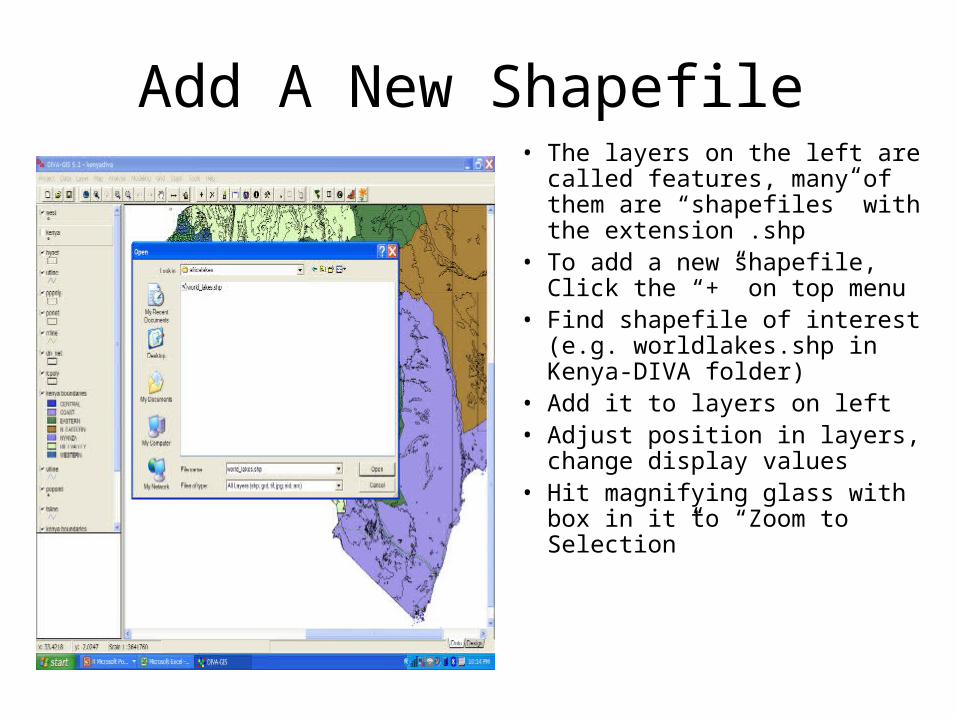
Add A New Shapefile• The layers on the left are
called features, many of them are “shapefiles” with the extension .shp
• To add a new shapefile, Click the “+” on top menu
• Find shapefile of interest (e.g. worldlakes.shp in Kenya-DIVA folder)
• Add it to layers on left• Adjust position in layers,
change display values• Hit magnifying glass with box
in it to “Zoom to Selection”
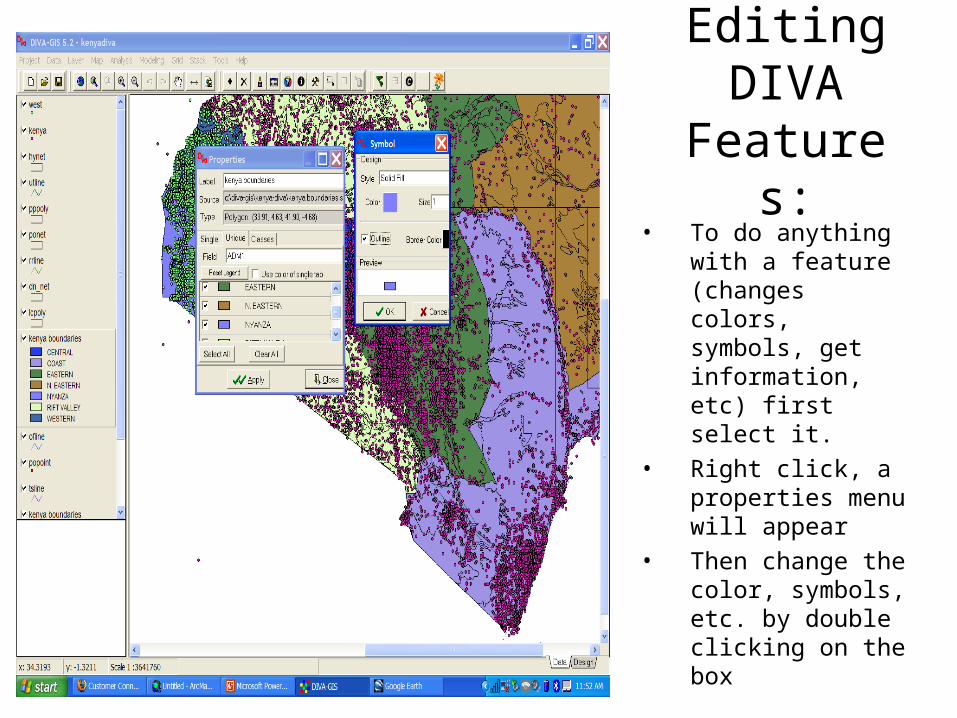
Editing DIVA
Features:• To do anything
with a feature (changes colors, symbols, get information, etc) first select it.
• Right click, a properties menu will appear
• Then change the color, symbols, etc. by double clicking on the box
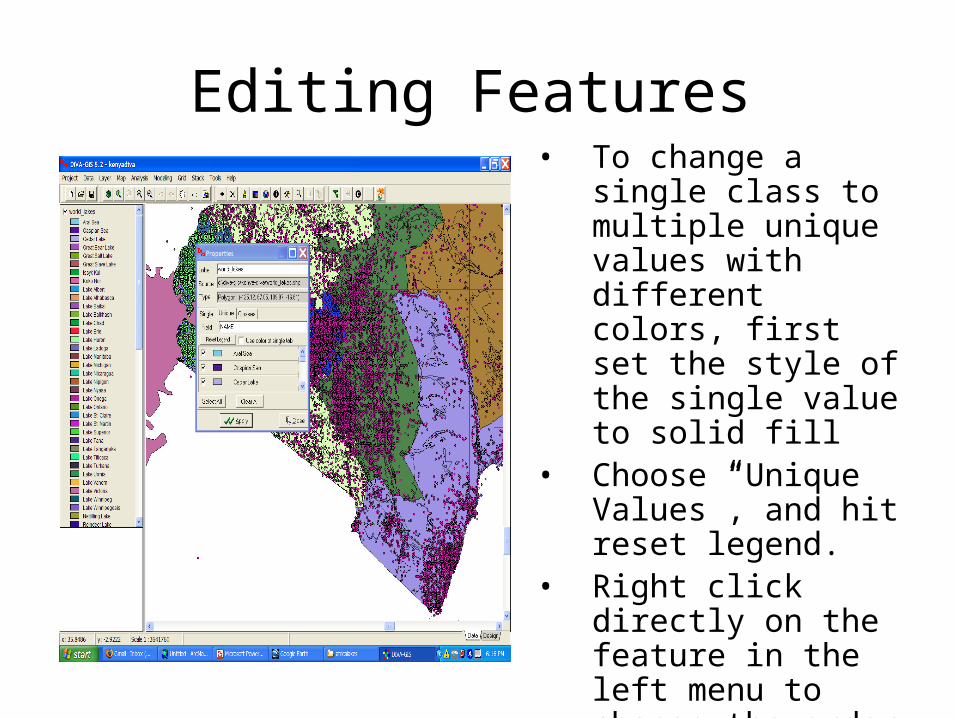
Editing Features• To change a single
class to multiple unique values with different colors, first set the style of the single value to solid fill
• Choose “Unique Values”, and hit reset legend.
• Right click directly on the feature in the left menu to change the order of the layers, etc.
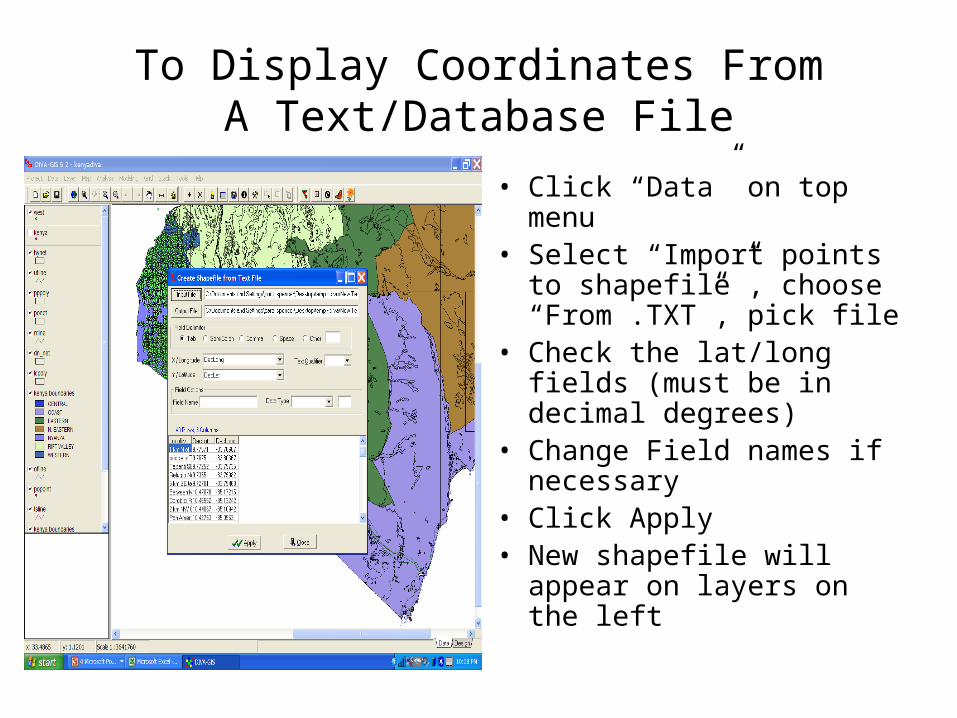
To Display Coordinates FromA Text/Database File
• Click “Data” on top menu• Select “Import points to
shapefile”, choose “From .TXT”, pick file
• Check the lat/long fields (must be in decimal degrees)
• Change Field names if necessary
• Click Apply• New shapefile will appear
on layers on the left
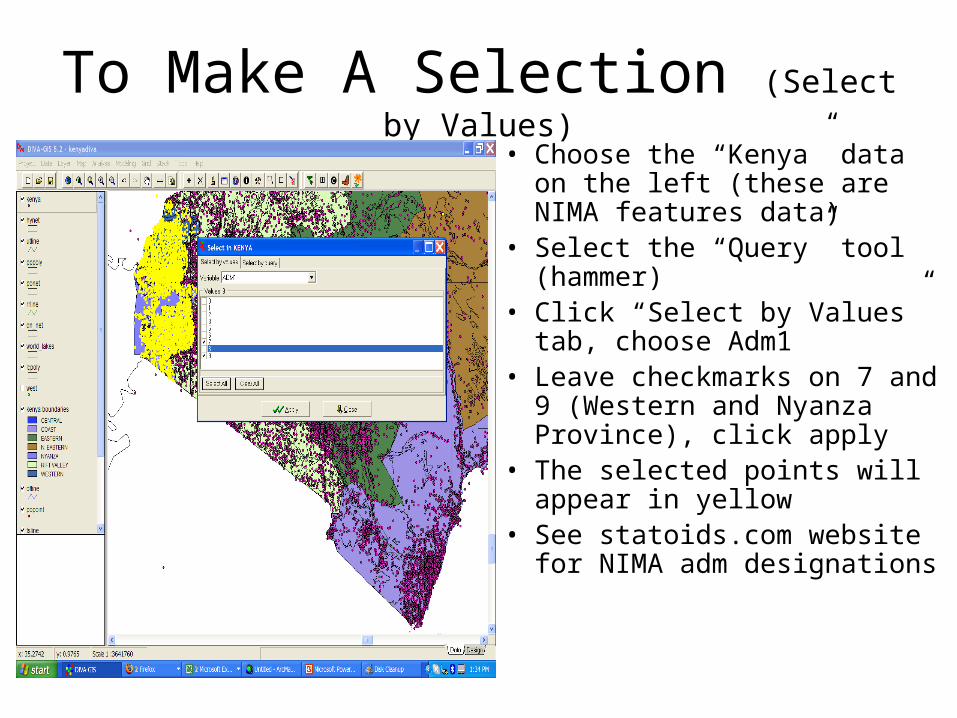
To Make A Selection (Select by Values)
• Choose the “Kenya” data on the left (these are NIMA features data)
• Select the “Query” tool (hammer)
• Click “Select by Values” tab, choose Adm1
• Leave checkmarks on 7 and 9 (Western and Nyanza Province), click apply
• The selected points will appear in yellow
• See statoids.com website for NIMA adm designations
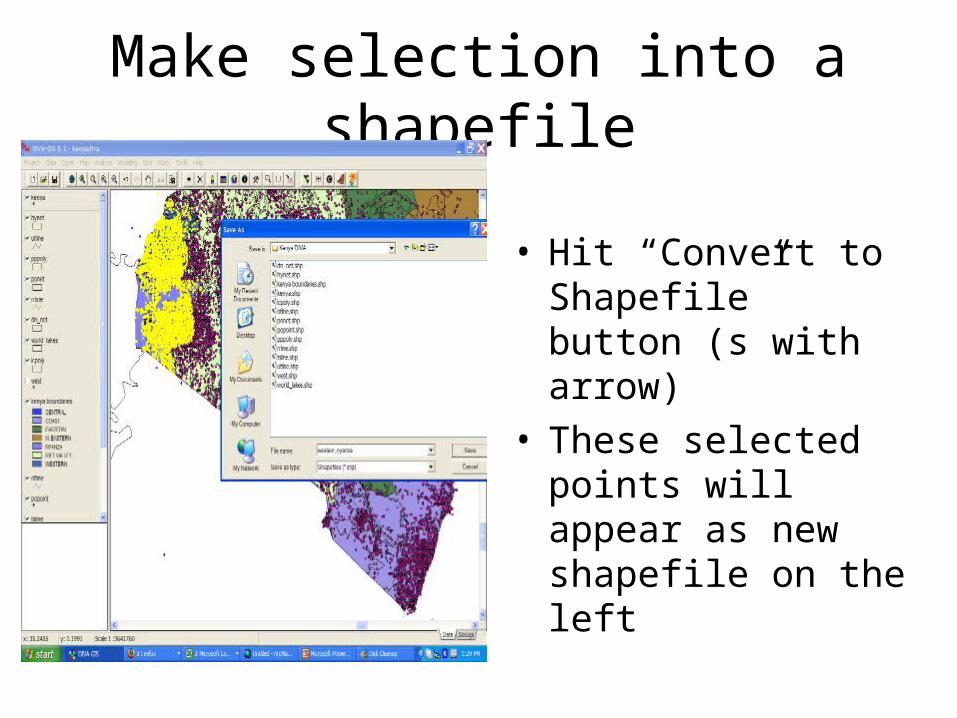
Make selection into a shapefile
• Hit “Convert to Shapefile” button (s with arrow)
• These selected points will appear as new shapefile on the left
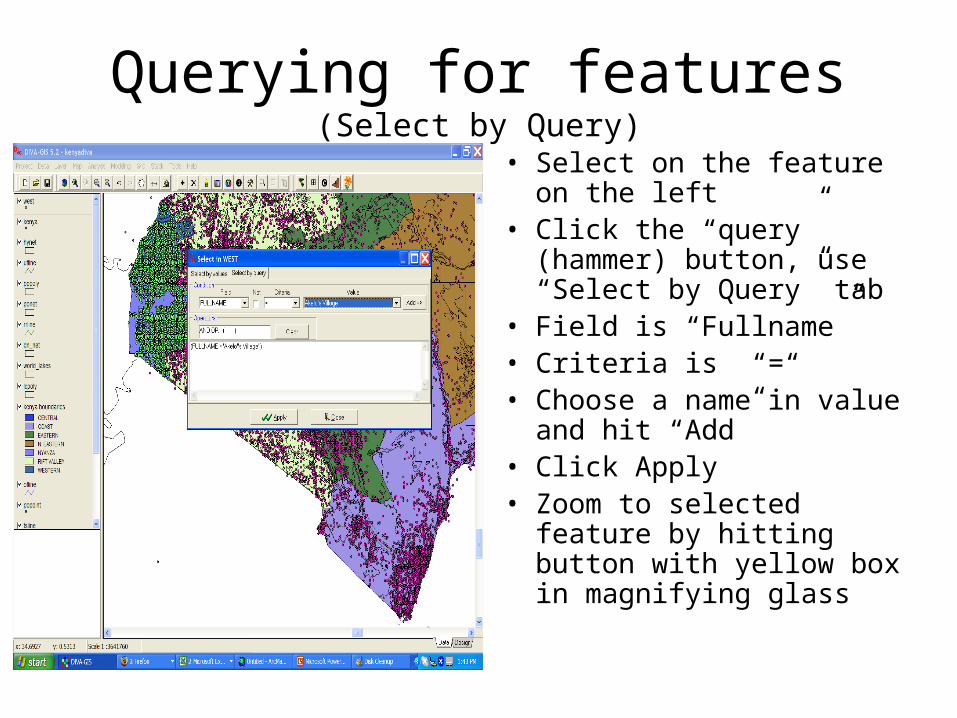
Querying for features (Select by Query)
• Select on the feature on the left
• Click the “query” (hammer) button, use “Select by Query” tab
• Field is “Fullname”• Criteria is “=“• Choose a name in value
and hit “Add”• Click Apply• Zoom to selected feature by
hitting button with yellow box in magnifying glass
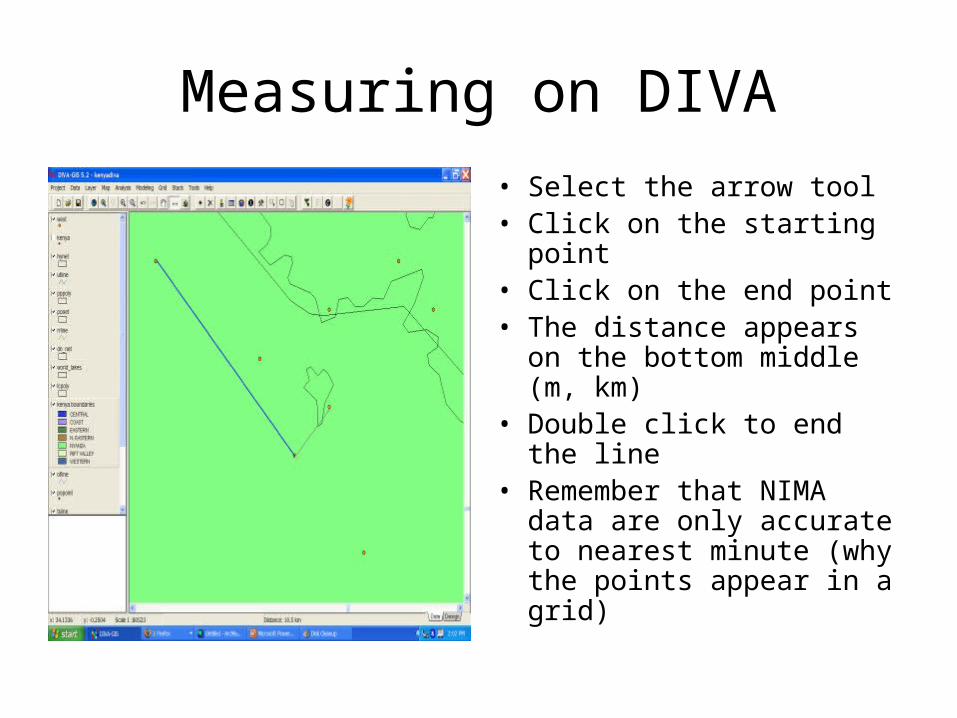
Measuring on DIVA
• Select the arrow tool• Click on the starting point• Click on the end point• The distance appears on
the bottom middle (m, km)
• Double click to end the line
• Remember that NIMA data are only accurate to nearest minute (why the points appear in a grid)