getting started with smart notebook - schedschd.ws/hosted_files/smmtlc17/c5/getting started with...1...
TRANSCRIPT
1
Getting Started with SMART Notebook Set the Page Background
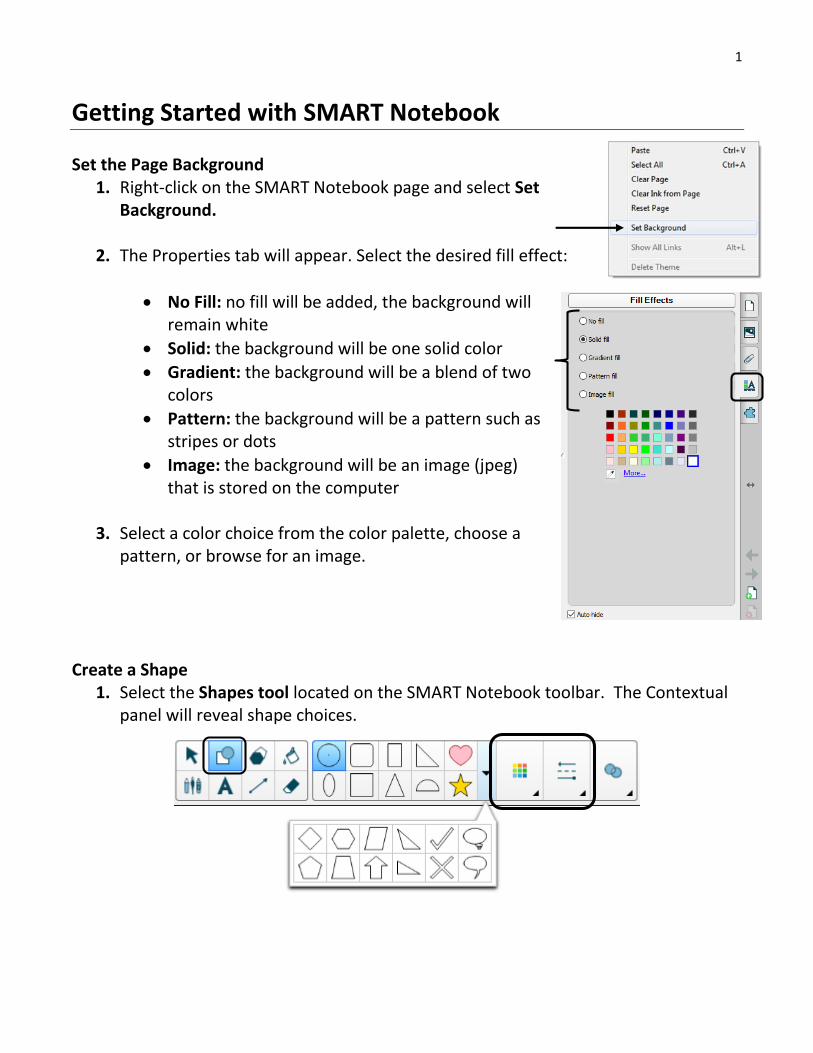
1. Right-click on the SMART Notebook page and select Set Background.
2. The Properties tab will appear. Select the desired fill effect:
No Fill: no fill will be added, the background will remain white
Solid: the background will be one solid color
Gradient: the background will be a blend of two colors
Pattern: the background will be a pattern such as stripes or dots
Image: the background will be an image (jpeg) that is stored on the computer
3. Select a color choice from the color palette, choose a
pattern, or browse for an image. Create a Shape
1. Select the Shapes tool located on the SMART Notebook toolbar. The Contextual panel will reveal shape choices.
2
2. Select the desired shape and continue to use the Contextual Panel to choose a Fill Color, Line Color, and Line Style.
3. Hover the mouse/cursor over the SMART Notebook workspace then click and
drag the cursor until the shape is the desired size.
4. Select the newly created shape to turn off the shape tool and return to being a cursor.
Add Text
1. Click an area of the workspace then begin typing on your keyboard. The text will appear where you clicked in the default font set within SMART Notebook software.
2. Click outside of the textbox when you are done typing.
3. Repeat these steps as necessary to create new text boxes.
4. Click and drag text to reposition it on the Notebook page.
5. Double-click text to reopen the text box and edit.
Modify Text
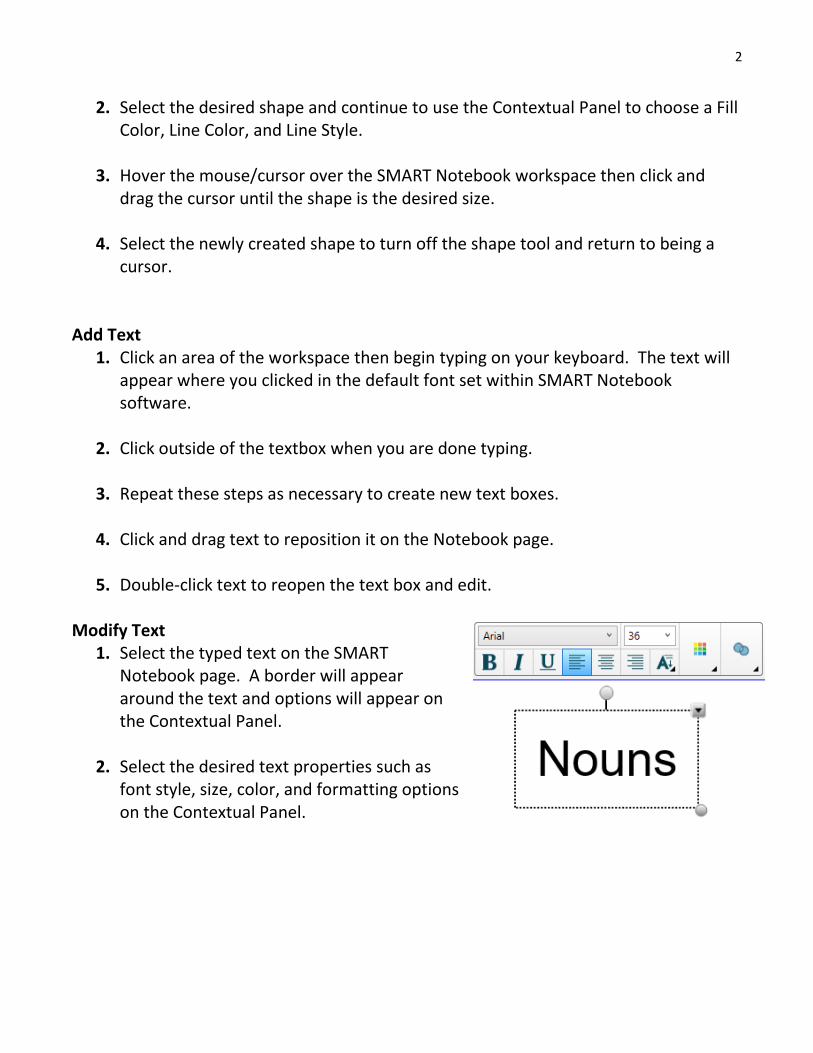
1. Select the typed text on the SMART Notebook page. A border will appear around the text and options will appear on the Contextual Panel.
2. Select the desired text properties such as
font style, size, color, and formatting options on the Contextual Panel.
3
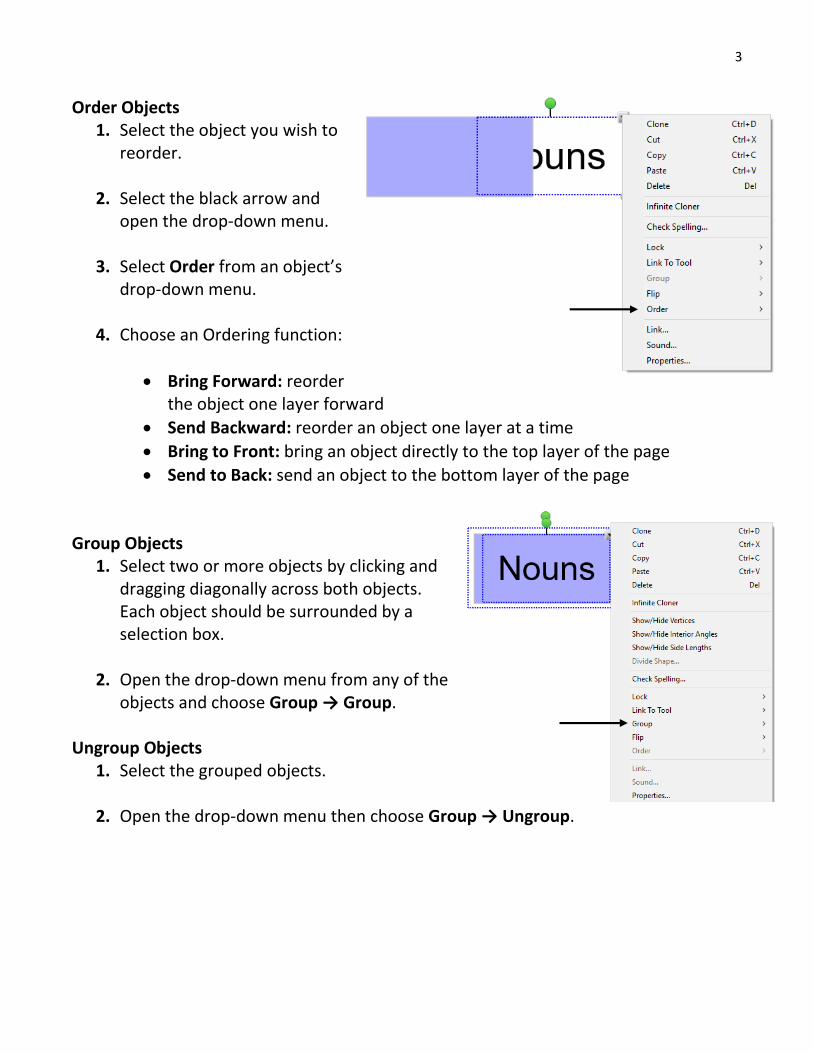
Order Objects 1. Select the object you wish to
reorder.
2. Select the black arrow and open the drop-down menu.
3. Select Order from an object’s
drop-down menu.
4. Choose an Ordering function:
Bring Forward: reorder the object one layer forward
Send Backward: reorder an object one layer at a time
Bring to Front: bring an object directly to the top layer of the page
Send to Back: send an object to the bottom layer of the page Group Objects
1. Select two or more objects by clicking and dragging diagonally across both objects. Each object should be surrounded by a selection box.
2. Open the drop-down menu from any of the
objects and choose Group → Group. Ungroup Objects
1. Select the grouped objects.
2. Open the drop-down menu then choose Group → Ungroup.
4
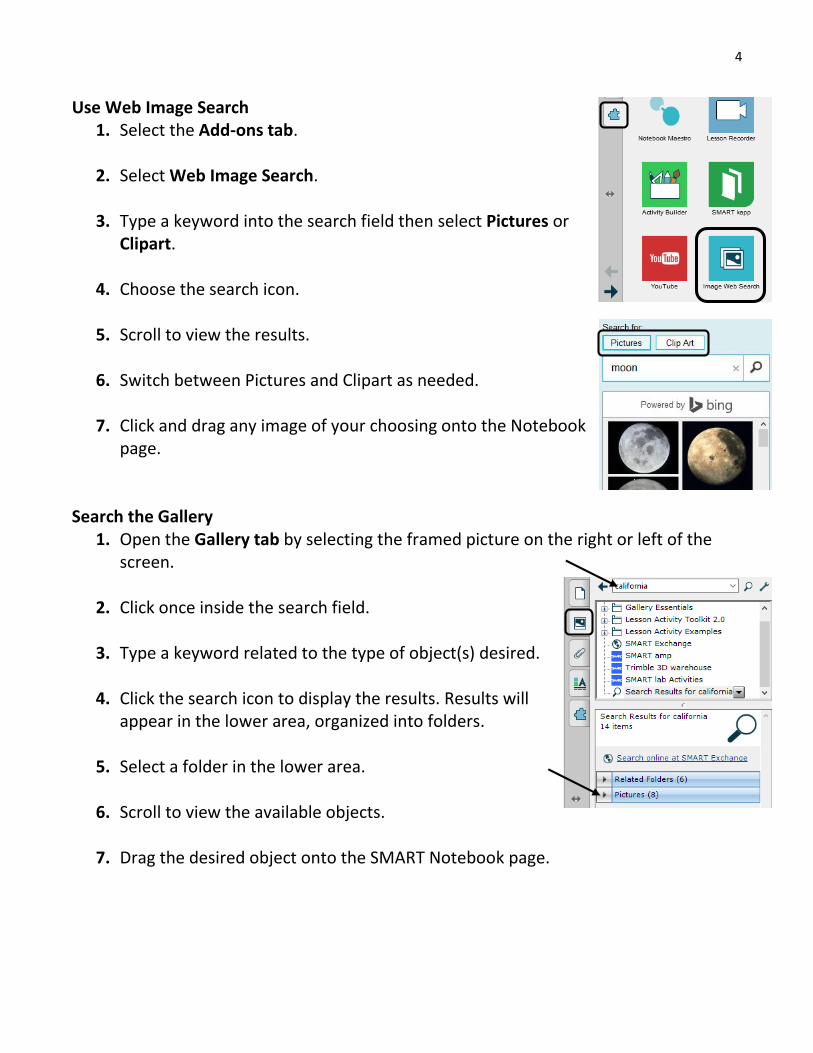
Use Web Image Search 1. Select the Add-ons tab.
2. Select Web Image Search.
3. Type a keyword into the search field then select Pictures or
Clipart.
4. Choose the search icon.
5. Scroll to view the results.
6. Switch between Pictures and Clipart as needed.
7. Click and drag any image of your choosing onto the Notebook page.
Search the Gallery
1. Open the Gallery tab by selecting the framed picture on the right or left of the screen.
2. Click once inside the search field.
3. Type a keyword related to the type of object(s) desired.
4. Click the search icon to display the results. Results will
appear in the lower area, organized into folders.
5. Select a folder in the lower area.
6. Scroll to view the available objects.
7. Drag the desired object onto the SMART Notebook page.

5
Adding Engagement Add a YouTube Video
1. Select the Add-ons tab.
2. Select YouTube.
3. Choose the Search button. A window will appear on the Notebook page.
4. Type in a keyword or words then select the Search icon.
5. Scroll to view video options.
6. Select the Play icon over the
video thumbnail to preview it.
7. Click the X to close the preview.
8. Select the Add Video button to add the video to the Notebook page. The search window will disappear.
9. Click and drag the title bar of
the video to move it around the page.
10. Select the double-ended arrow at the top left corner to expand or collapse the
video window.
11. Select the middle of the video window to pause and play the video. Note: You may also select the publisher of the video then the Add Video button to add the video without previewing it.
6
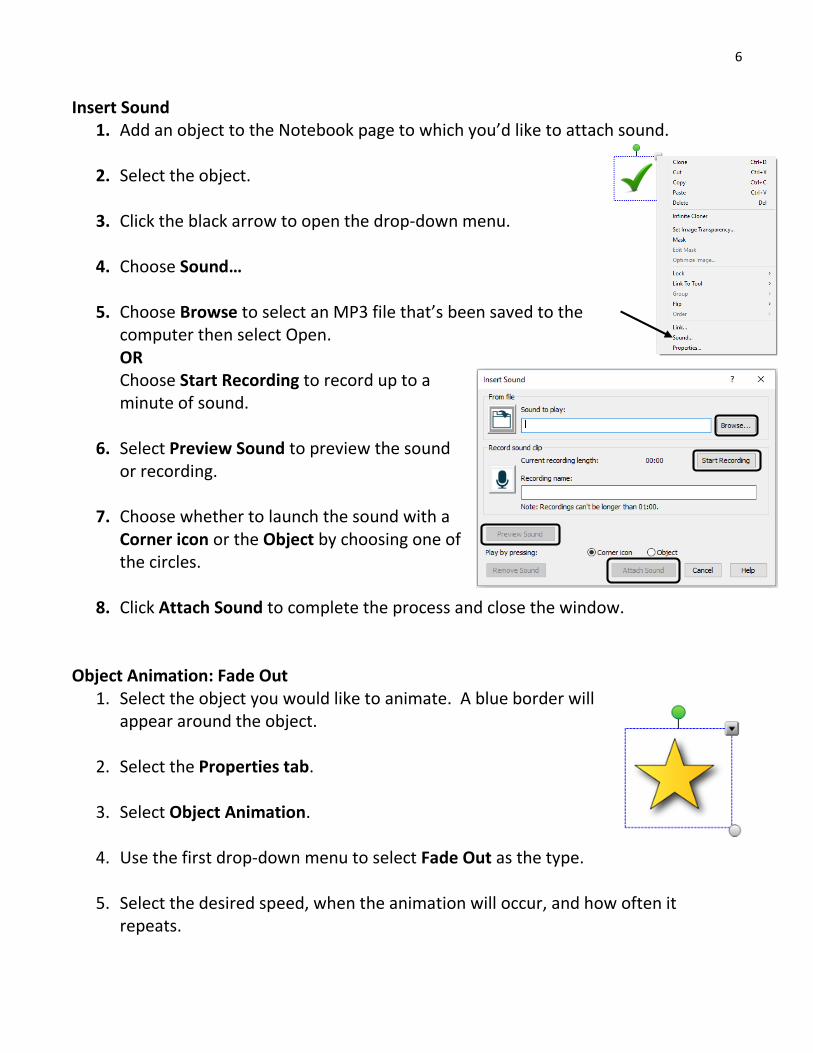
Insert Sound 1. Add an object to the Notebook page to which you’d like to attach sound.
2. Select the object.
3. Click the black arrow to open the drop-down menu.
4. Choose Sound…
5. Choose Browse to select an MP3 file that’s been saved to the
computer then select Open. OR Choose Start Recording to record up to a minute of sound.
6. Select Preview Sound to preview the sound
or recording.
7. Choose whether to launch the sound with a Corner icon or the Object by choosing one of the circles.
8. Click Attach Sound to complete the process and close the window.
Object Animation: Fade Out
1. Select the object you would like to animate. A blue border will appear around the object.
2. Select the Properties tab.
3. Select Object Animation.
4. Use the first drop-down menu to select Fade Out as the type.
5. Select the desired speed, when the animation will occur, and how often it
repeats.

7
6. To reveal content, select the shape and it will fade away!
Note: If the shape does not “hide” your content, change the order.
7. Select the shape and open the drop-down menu.
8. Select Order and then Bring to the front. Object Animation: Flip around the Axis
1. Select the object you would like to animate. A blue border will appear around the object.
2. Select the Properties tab.
3. Select Object Animation.
4. Using the first drop-down menu, select Flip around axis
as the type.
5. Select the desired direction, speed, when the animation will occur, and how often it repeats.
8
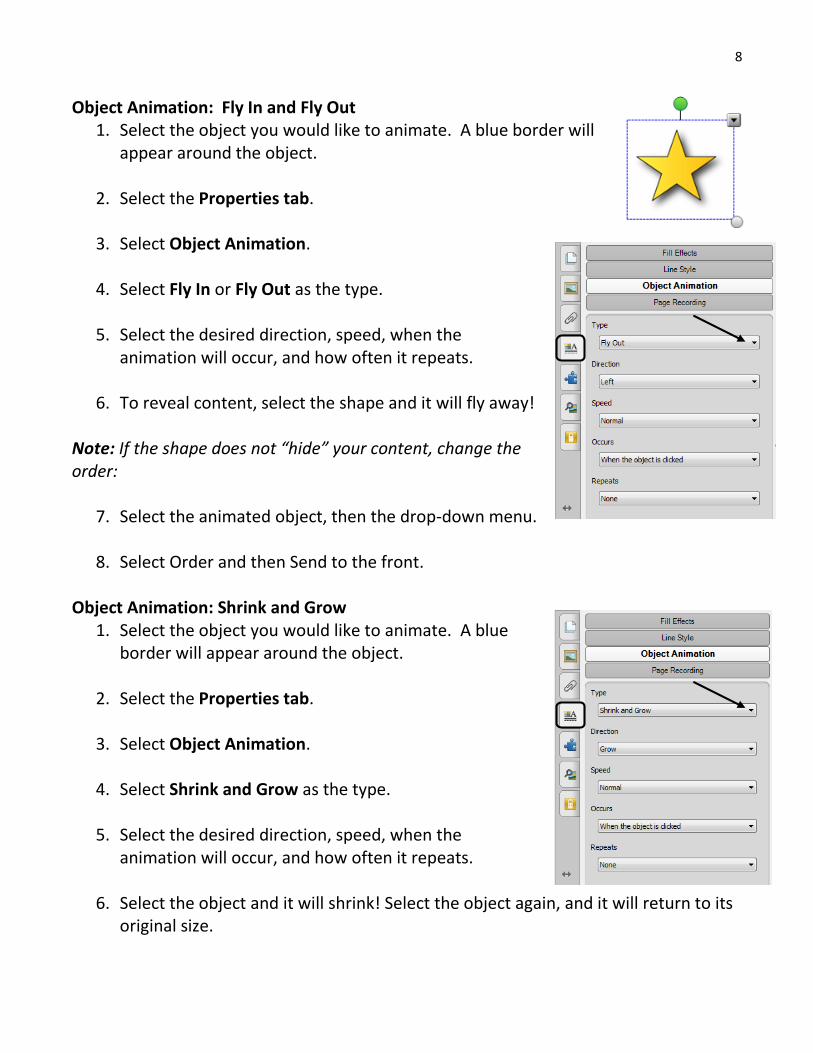
Object Animation: Fly In and Fly Out 1. Select the object you would like to animate. A blue border will
appear around the object.
2. Select the Properties tab.
3. Select Object Animation.
4. Select Fly In or Fly Out as the type.
5. Select the desired direction, speed, when the animation will occur, and how often it repeats.
6. To reveal content, select the shape and it will fly away!
Note: If the shape does not “hide” your content, change the order:
7. Select the animated object, then the drop-down menu.
8. Select Order and then Send to the front. Object Animation: Shrink and Grow
1. Select the object you would like to animate. A blue border will appear around the object.
2. Select the Properties tab.
3. Select Object Animation.
4. Select Shrink and Grow as the type.
5. Select the desired direction, speed, when the
animation will occur, and how often it repeats.
6. Select the object and it will shrink! Select the object again, and it will return to its original size.

9
Object Animation: Spin 1. Select the object you would like to animate. A blue border will
appear around the object.
2. Select the Properties tab.
3. Select Object Animation.
4. Select Spin as the type.
5. Select the desired direction, speed, when the animation will occur, and how often it repeats.
6. Select the object and it will spin!
10
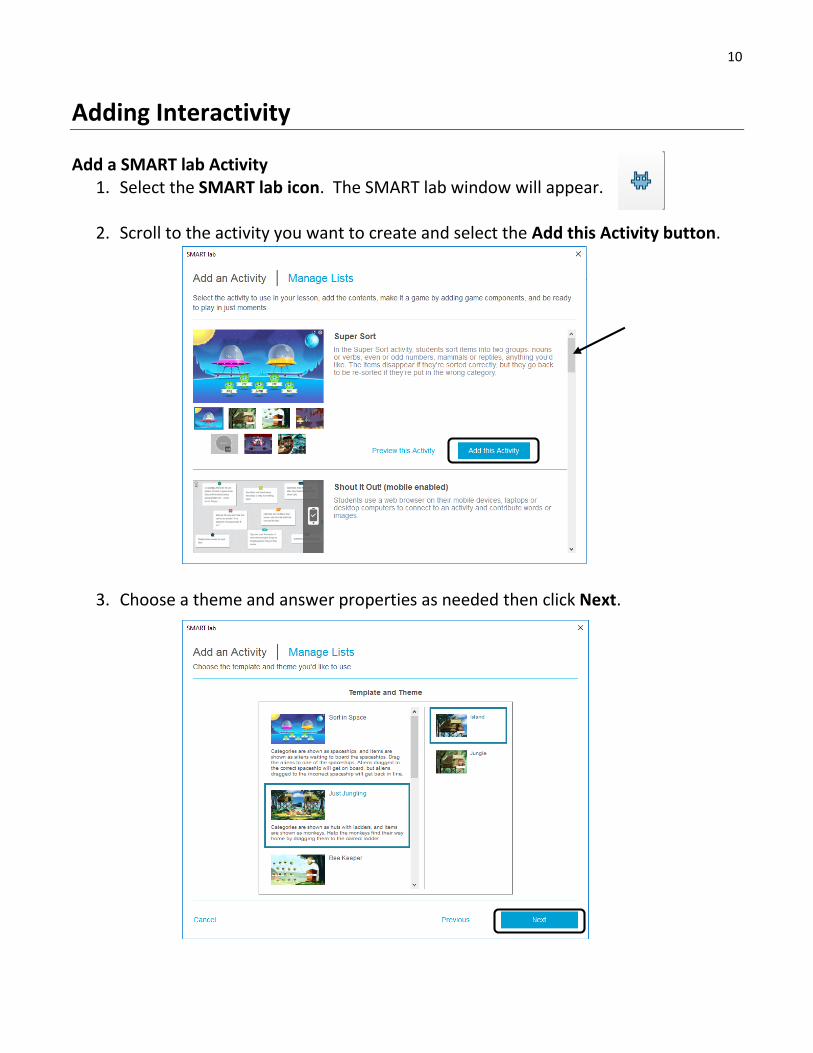
Adding Interactivity Add a SMART lab Activity
1. Select the SMART lab icon. The SMART lab window will appear.
2. Scroll to the activity you want to create and select the Add this Activity button.
3. Choose a theme and answer properties as needed then click Next.

11
4. Type in content or add in pictures as needed then select Next.
5. Add any game components you wish to use and customize them.
6. Click Finish. The activity will load on the Notebook page.
12
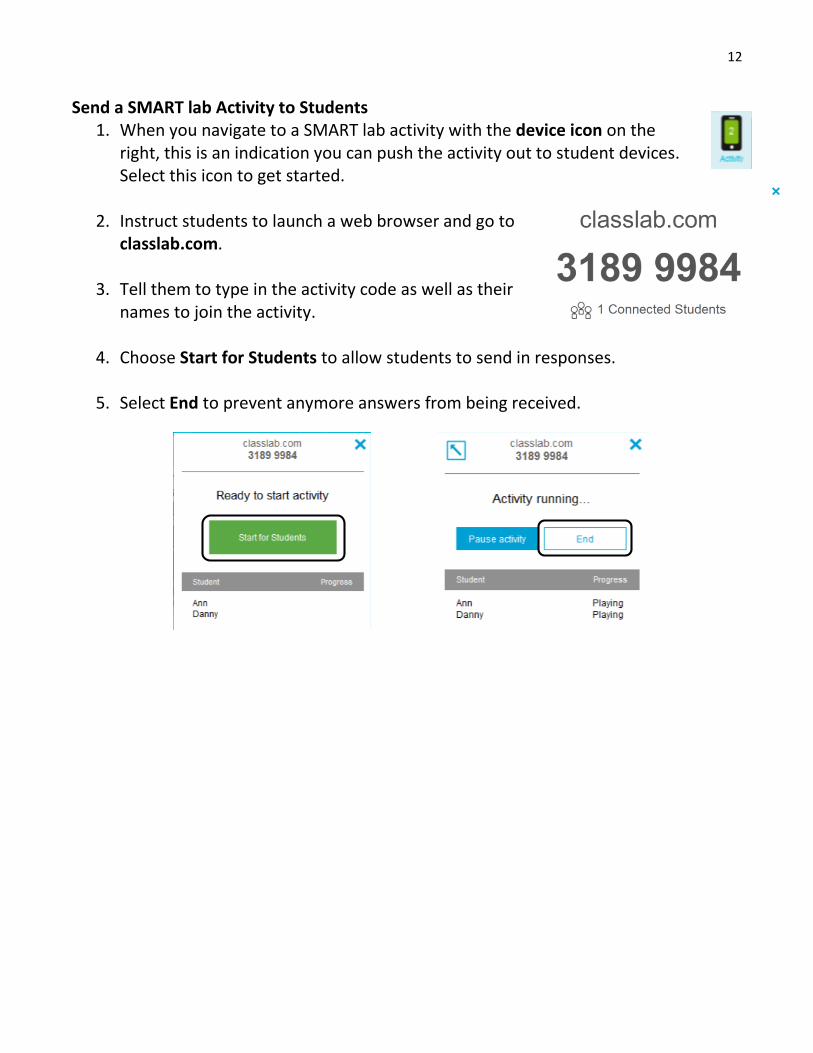
Send a SMART lab Activity to Students 1. When you navigate to a SMART lab activity with the device icon on the
right, this is an indication you can push the activity out to student devices. Select this icon to get started.
2. Instruct students to launch a web browser and go to classlab.com.
3. Tell them to type in the activity code as well as their
names to join the activity.
4. Choose Start for Students to allow students to send in responses.
5. Select End to prevent anymore answers from being received.
13
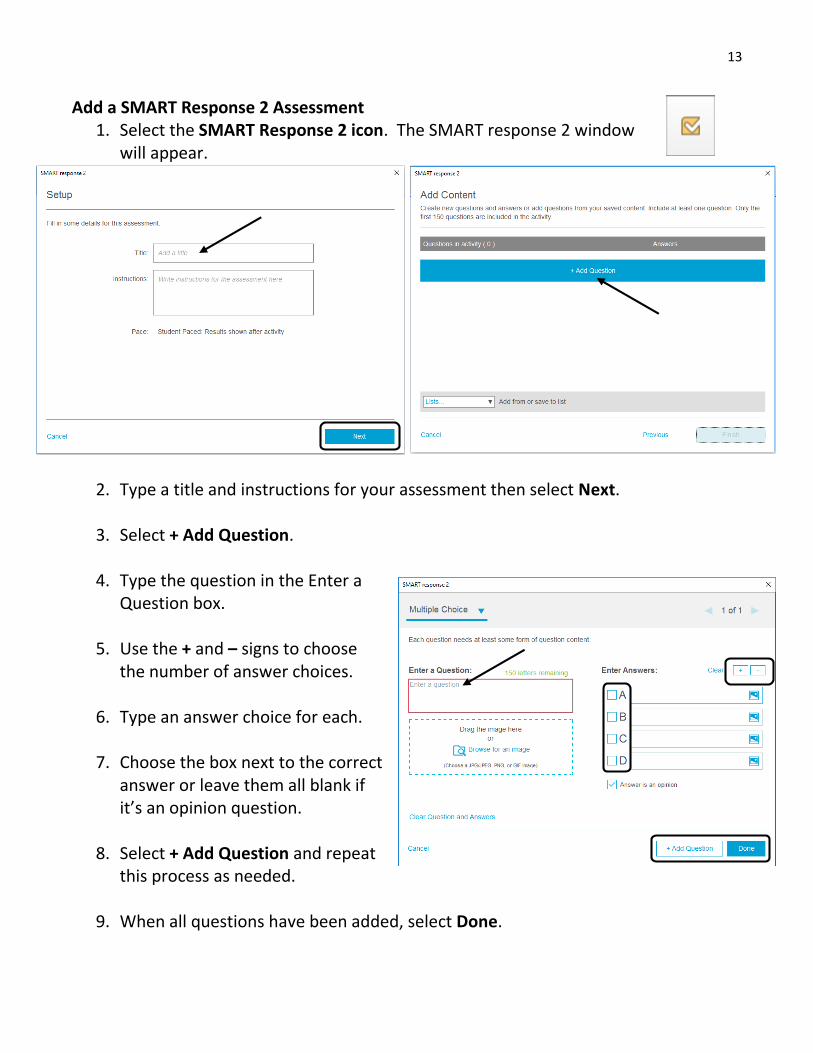
Add a SMART Response 2 Assessment 1. Select the SMART Response 2 icon. The SMART response 2 window
will appear.
2. Type a title and instructions for your assessment then select Next.
3. Select + Add Question.
4. Type the question in the Enter a
Question box.
5. Use the + and – signs to choose the number of answer choices.
6. Type an answer choice for each.
7. Choose the box next to the correct
answer or leave them all blank if it’s an opinion question.
8. Select + Add Question and repeat
this process as needed.
9. When all questions have been added, select Done.
14
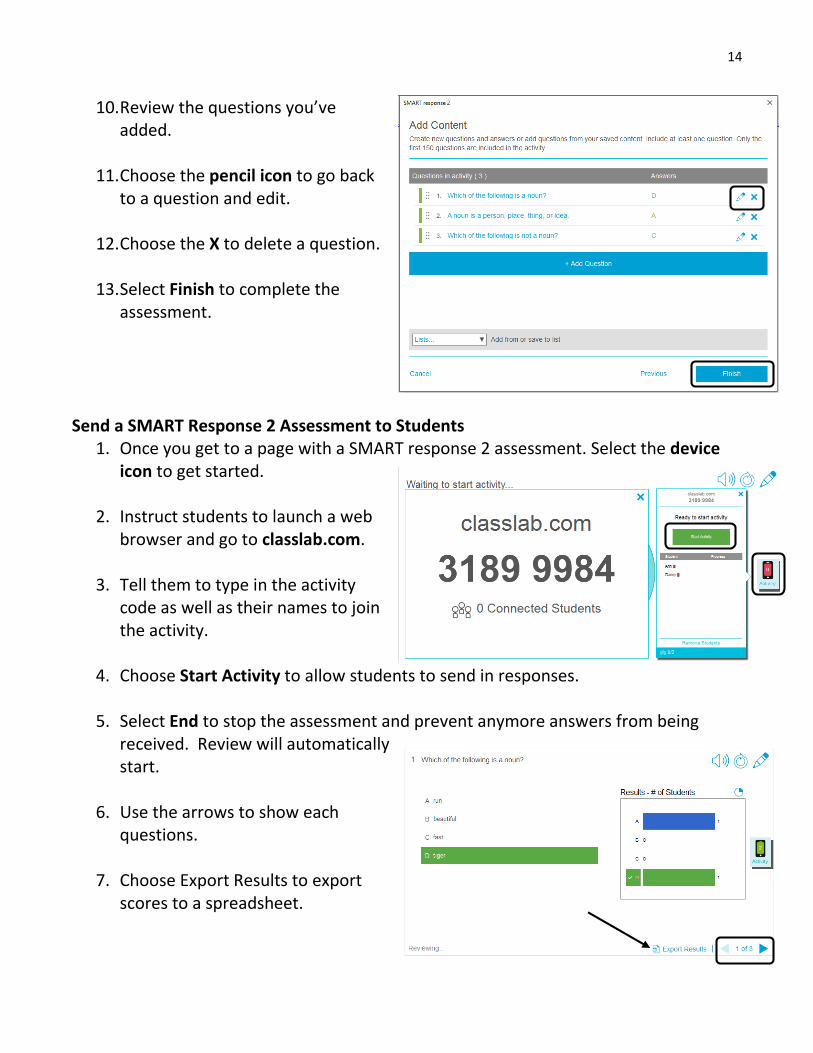
10. Review the questions you’ve added.
11. Choose the pencil icon to go back
to a question and edit.
12. Choose the X to delete a question.
13. Select Finish to complete the assessment.
Send a SMART Response 2 Assessment to Students
1. Once you get to a page with a SMART response 2 assessment. Select the device icon to get started.
2. Instruct students to launch a web
browser and go to classlab.com.
3. Tell them to type in the activity code as well as their names to join the activity.
4. Choose Start Activity to allow students to send in responses.
5. Select End to stop the assessment and prevent anymore answers from being
received. Review will automatically start.
6. Use the arrows to show each
questions.
7. Choose Export Results to export scores to a spreadsheet.
15
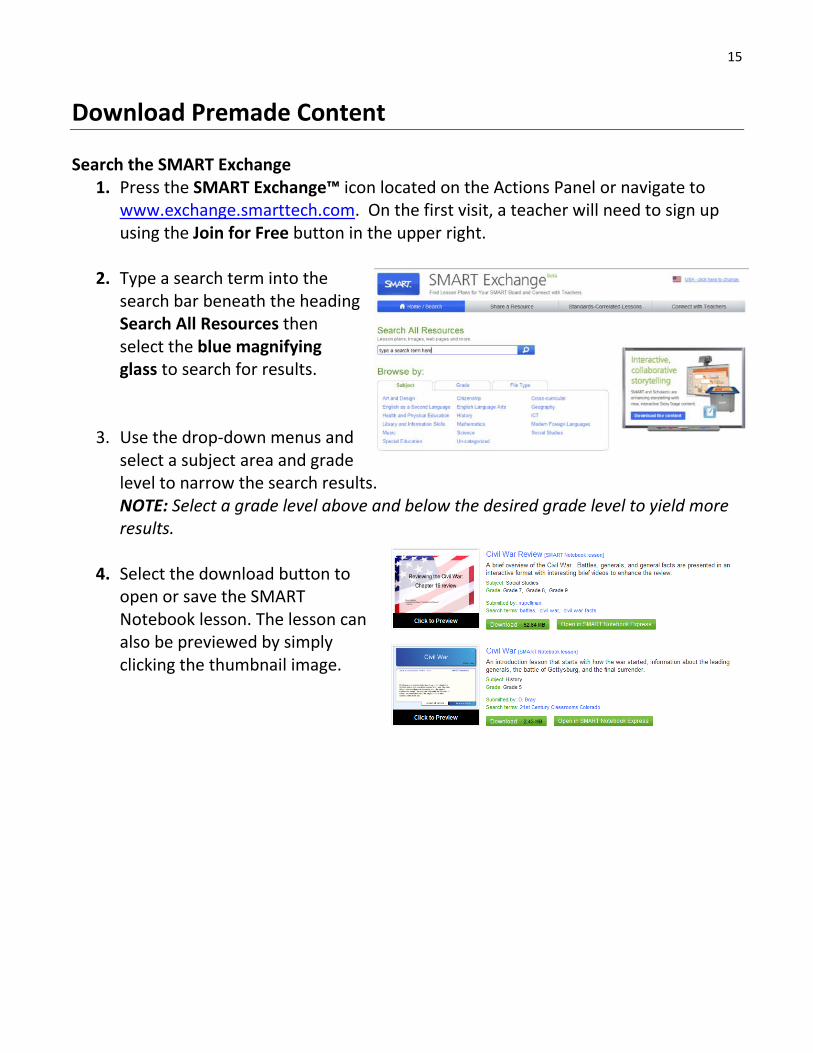
Download Premade Content Search the SMART Exchange
1. Press the SMART Exchange™ icon located on the Actions Panel or navigate to www.exchange.smarttech.com. On the first visit, a teacher will need to sign up using the Join for Free button in the upper right.
2. Type a search term into the
search bar beneath the heading Search All Resources then select the blue magnifying glass to search for results.
3. Use the drop-down menus and select a subject area and grade level to narrow the search results. NOTE: Select a grade level above and below the desired grade level to yield more results.
4. Select the download button to
open or save the SMART Notebook lesson. The lesson can also be previewed by simply clicking the thumbnail image.