gl225uk - black+deckerservice.blackanddecker.de/pdmsdocuments/eu/docs//docpdf/...use only the...
TRANSCRIPT

1
GL220GL225

2
Copyright Black & Decker

3
A
1
4
3
7
6
5
2
CB
3
9
8
4

4
D E
13
11 14
12 10
A
CB
1515
14
F
16
16

5
G
20°

6
STRIMMER GL220/GL225
E N G L I S H
CONGRATULATIONS!You have chosen a Black & Decker tool. Our aim isto provide quality tools at an affordable price.We hope that you will enjoy using this tool formany years.
EC DECLARATION OF CONFORMITY
GL220/GL225Black & Decker declares that theseproducts conform to: 98/37/EC,89/336/EEC, 73/23/EEC, EN 60335,EN 55014, EN 61000,2000/14/EC, Lawn trimmer, L ≤ 50 cm
Annex VIII, No. 0086B.S.I., HP2 4SQ, United Kingdom
Level of sound pressure, measured according to2000/14/EC:
LpA (sound pressure) dB(A) 81
LWA (acoustic power) dB(A) 94
LWA (guaranteed) dB(A) 96
Always wear ear protection if the soundpressure exceeds 85 dB(A).
Hand/arm weighted vibration value according to98/37/EC:
< 2.5 m/s2
Brian CookeDirector of Engineering
Spennymoor, County Durham DL16 6JG,United Kingdom
1-12-2001
INTENDED USEYour Black & Decker strimmer GL220/GL225 hasbeen designed for trimming lawn edges and to cutgrass in confined spaces. This tool is intended forconsumer use only.
SAFETY INSTRUCTIONS
Warning symbolsThe following symbols are used in this manual:
Denotes risk of personal injury, loss of lifeor damage to the tool in case of non-observance of the instructions in thismanual.
Denotes risk of electric shock.
Read the manual prior to operation.
Know your appliance
◆ Warning! When using mains-poweredappliances, basic safety precautions,including the following, should alwaysbe followed to reduce the risk of fire,electric shock and personal injury.
◆ Read all of this manual carefully beforeoperating the appliance.
◆ Before operating the appliance, makesure that you know how to switch it offin an emergency.
◆ The intended use is described in thismanual. The use of any accessory orattachment or performance of anyoperation with this appliance other thanthose recommended in this instructionmanual may present a risk of personalinjury.
◆ Retain this manual for future reference.
7
E N G L I S H
Work area◆ Do not expose the appliance to rain. Do not
use the appliance in damp or wet conditions.◆ Only use the appliance in daylight or good
artificial light.
Personal protection◆ Wear stout shoes or boots to protect your feet.
Do not operate the appliance wearing open-toed sandals or when barefoot.
◆ Wear long trousers to protect your legs.
Using your appliance◆ Be sure that the appliance is switched off when
plugging in.◆ Stay alert. Watch what you are doing.
Use common sense.◆ Do not operate the appliance when you are tired.◆ If the appliance begins to vibrate abnormally,
switch it off and remove the plug from thesocket. Allow rotating parts to stop and inspectthe appliance for damage and loose parts.
◆ Never pull the cord to disconnect the plugfrom the socket. Keep the cord away fromheat, oil and sharp edges.
◆ If the mains cable is damaged during use,switch the appliance off and disconnect theplug from the mains immediately. Do nottouch the mains cable before disconnectingfrom the mains.
Safety of others◆ Do not allow children or any person unfamiliar
with these instructions to operate the appliance.◆ Do not allow children, visitors or animals to
come near the work area or to touch theappliance or mains cable.
◆ Remember that the operator may be heldresponsible for accidents or hazards occurringto other people or their property.
After use◆ Switch off, remove the plug from the socket
and ensure that moving parts have stoppedrotating before leaving the applianceunattended and before changing, cleaning orinspecting any parts of the appliance.
◆ When not in use, the appliance should bestored in a dry place. Children should not haveaccess to stored appliances.
Inspection and repairs◆ Before use, check the appliance for damaged
or defective parts. Check for misalignment andseizure of moving parts, breakage of parts,damage to guards and switches and any otherconditions that may affect its operation.
◆ Do not use the appliance if any part is damagedor defective. Do not use the appliance if theswitch does not turn it on and off.
◆ Never use the appliance when any guard orenclosure is damaged or not in place.
◆ Ensure that the appliance will operate properlyand perform its intended function.
◆ Have any damaged or defective parts repairedor replaced by an authorised repair agent.
◆ Before use, check the mains cable for signs ofdamage, ageing and wear.
◆ Do not use the appliance if the mains cable isdamaged or defective.
◆ If the mains cable is damaged or defective itmust be repaired by an authorised repair agentto avoid a hazard.
◆ Never attempt to remove or replace any partsother than those specified in this manual.
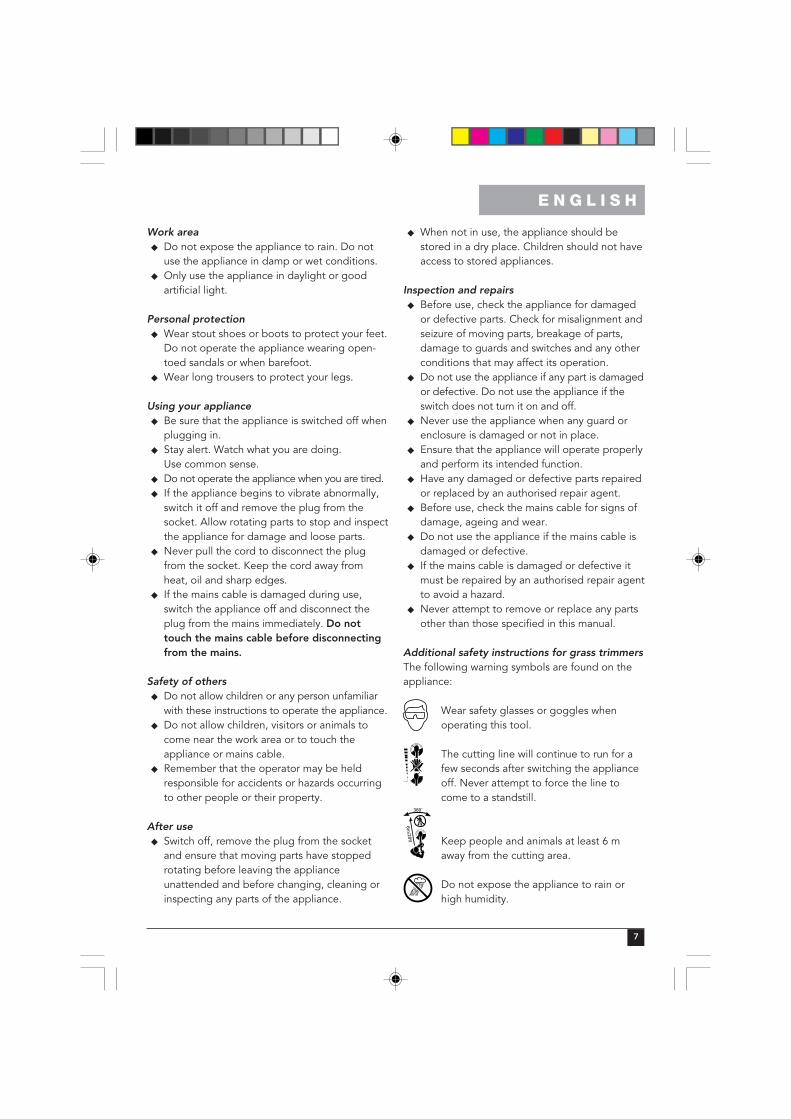
Additional safety instructions for grass trimmersThe following warning symbols are found on theappliance:
Wear safety glasses or goggles whenoperating this tool.
The cutting line will continue to run for afew seconds after switching the applianceoff. Never attempt to force the line tocome to a standstill.
360˚
6m/20ft Keep people and animals at least 6 m
away from the cutting area.
Do not expose the appliance to rain orhigh humidity.

8
E N G L I S H
Switch off, remove the plug from thesocket and ensure that moving parts havestopped rotating before leaving theappliance unattended and beforechanging, cleaning or inspecting any partsof the appliance.
◆ Before using the appliance, check that yourcutting path is free from sticks, stones,wire and any other objects.
◆ Only use the appliance in the correct position,with the cutting line near the ground, as shownin the illustrations. Never switch the applianceon in any other position.
◆ Switch on the appliance only when hands andfeet are away from the cutting line.
◆ Avoid body contact with the cutting line whilethe appliance is running.
◆ Do not work on steep slopes. Be sure of yourfooting. Be aware that freshly cut grass isdamp and slippery.
◆ Take care when trimming near borders andgravel paths or roads, as stones and soil maybe moved by the cutting line.
◆ Do not put the appliance down until thecutting line has come to a complete standstill.
◆ Use only the appropriate type of Black & Deckercutting line. Never use metal cutting line orfishing line.
◆ Take care to avoid injury from the linetrimming blade. Do not touch the blade.After extending new cutting line, always returnthe appliance to its normal operating positionbefore switching on.
◆ Take care to keep the mains cable away fromthe cutting line. Always be aware of the positionof the cable.
ELECTRICAL SAFETYThe appliance has been designed for one voltageonly. Always check that the power supplycorresponds to the voltage on the rating plate.
This appliance is designed for use onAC (mains) power supplies only. Do notattempt to use on any other supply.
This appliance is double insulated inaccordance with EN 60335; therefore noearth wire is required.
◆ Prevent body contact with earthed orgrounded surfaces (e.g. metal railings, lamp-posts etc.).
◆ Electric safety can be further improved byusing a high-sensitivity (30 mA/30 mS) residualcurrent device (RCD).
Mains plug replacement (U.K. & Ireland only)
◆ Should your mains plug need replacing and youare competent to do this, proceed as instructedbelow. If you are in doubt, contact an authorisedrepair agent or a qualified electrician.
◆ Disconnect the plug from the supply andremove the fuse from the plug.
◆ Cut off the plug and dispose of it safely; a plugwith bared copper conductors is dangerous ifengaged in a live socket outlet.
◆ Only fit 13 Amperes BS1363A approved plugsfitted with the correctly rated fuse (1).Use 5 Amperes fuses.
◆ The cable wire colours, or a letter, will bemarked at the connection points of most goodquality plugs. Attach the wires to theirrespective points in the plug (see above). Brownis for Live (L) (2), blue is for Neutral (N) (4).
◆ Before replacing the top cover of the mainsplug ensure that the cable restraint (3) isholding the outer sheath of the cable firmlyand that the leads are correctly fixed at theterminal screws.
◆ If the plug has a fuse cover, make sure that thefuse cover is fitted. Do not use the plug if thefuse cover is missing or damaged.

9
E N G L I S H
Never use a light socket.
Using an extension cableAlways use an approved extension cable suitablefor the power input of this appliance (see ratingplate). The extension cable must be suitable foroutdoor use.◆ Before use, inspect the cable for signs of
damage, wear and ageing. Replace theextension cable if damaged or defective.
◆ When using a cable reel, always unwind thecable completely.
◆ Take care to keep the cable away from thecutting line. Always be aware of the positionof the cable.
CARTON CONTENTSThe carton contains:1 Grass trimmer1 Guard with mounting screw1 Spool with cutting line1 Instruction manual
◆ Carefully unpack all parts.
OVERVIEW (fig. A)1. On/off switch2. Handle3. Power inlet (not for UK)3. Mains cable (UK)4. Guard5. Line trimming blade6. Spool housing7. Cutting line
ASSEMBLY
Before assembly, make sure that the toolis switched off and unplugged.
Fitting the guard (fig. B)◆ Unplug the tool.◆ Remove the screw (8) from the guard (4).◆ Place the guard (4) onto the tool as shown.◆ Firmly press the guard until it snaps into place.◆ Secure the guard with the screw (8).
Never use the tool unless the guard isproperly fitted.
Assembling and fitting the spool (fig. A & D)◆ Make sure that the tool is switched off and
unplugged.◆ Thread the cutting line through the hole (10)
in the inner cover (11).◆ Unclip the line from the groove (12).◆ Place the inner cover (11) on the spool (13).◆ Make sure that at least 5 cm of line protrudes
from the spool.◆ Take the spool in one hand, holding the spool
housing (14) with the other.◆ Fit the spool by pushing down (A) and turning
clockwise (B) until the spool clicks into place.
If the cutting line protrudes beyond thetrimming blade (5), cut it off so that it justreaches the blade.
Feeding out more cutting line (fig. A & E)A minimum of 5 cm of cutting line should protrudefrom the spool at all times. To feed out more line:
◆ Make sure that the tool is switched off andunplugged.
◆ While firmly holding the spool housing (14)with one hand, lift the line out of the slot (15)with the other.
◆ Extend the line by pulling it in the direction ofthe arrow until it reaches the line trimmingblade.
◆ When sufficient line protrudes from the spool,park the line in the next slot (15) in the spoolhousing.
If the cutting line protrudes beyond thetrimming blade (5), cut it off so that it justreaches the blade.
Connecting the tool to the mains (fig. A & C)Unless the tool is fitted with a mains cable, you willneed to connect an extension cable to the powerinlet (3).
◆ Connect the female socket of a suitableextension cable to the power inlet (3).
10
◆ Loop the cable through the cable restraint (9)as shown to prevent the extension cable frombecoming detached during use.
◆ Insert the mains plug into a mains outlet.
The extension cable must be suitable foroutdoor use.
USE
Let the tool work at its own pace.Do not overload.
Switching on and off (fig. A)◆ To switch the tool on, push the on/off switch (1).◆ To switch the tool off, release the the
on/off switch.
Never attempt to lock a switch in the onposition.
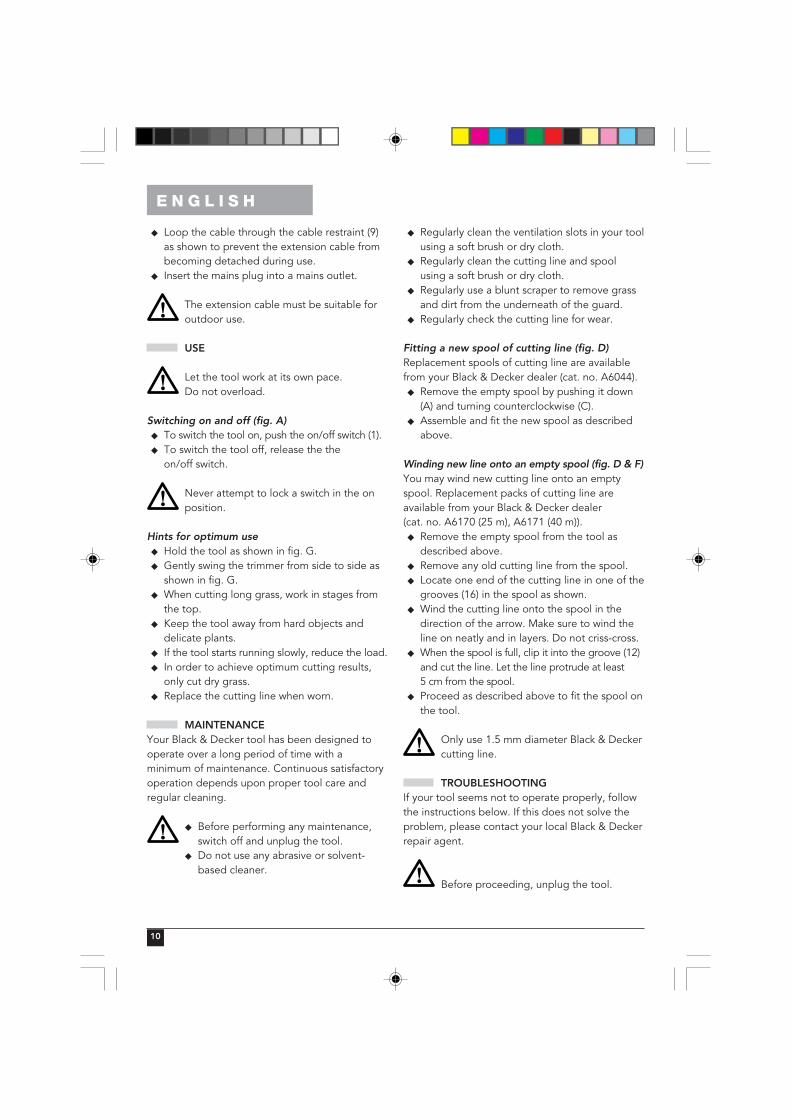
Hints for optimum use◆ Hold the tool as shown in fig. G.◆ Gently swing the trimmer from side to side as
shown in fig. G.◆ When cutting long grass, work in stages from
the top.◆ Keep the tool away from hard objects and
delicate plants.◆ If the tool starts running slowly, reduce the load.◆ In order to achieve optimum cutting results,
only cut dry grass.◆ Replace the cutting line when worn.
MAINTENANCEYour Black & Decker tool has been designed tooperate over a long period of time with aminimum of maintenance. Continuous satisfactoryoperation depends upon proper tool care andregular cleaning.
◆ Before performing any maintenance,switch off and unplug the tool.
◆ Do not use any abrasive or solvent-based cleaner.
◆ Regularly clean the ventilation slots in your toolusing a soft brush or dry cloth.
◆ Regularly clean the cutting line and spoolusing a soft brush or dry cloth.
◆ Regularly use a blunt scraper to remove grassand dirt from the underneath of the guard.
◆ Regularly check the cutting line for wear.
Fitting a new spool of cutting line (fig. D)Replacement spools of cutting line are availablefrom your Black & Decker dealer (cat. no. A6044).
◆ Remove the empty spool by pushing it down(A) and turning counterclockwise (C).
◆ Assemble and fit the new spool as describedabove.
Winding new line onto an empty spool (fig. D & F)You may wind new cutting line onto an emptyspool. Replacement packs of cutting line areavailable from your Black & Decker dealer(cat. no. A6170 (25 m), A6171 (40 m)).
◆ Remove the empty spool from the tool asdescribed above.
◆ Remove any old cutting line from the spool.◆ Locate one end of the cutting line in one of the
grooves (16) in the spool as shown.◆ Wind the cutting line onto the spool in the
direction of the arrow. Make sure to wind theline on neatly and in layers. Do not criss-cross.
◆ When the spool is full, clip it into the groove (12)and cut the line. Let the line protrude at least5 cm from the spool.
◆ Proceed as described above to fit the spool onthe tool.
Only use 1.5 mm diameter Black & Deckercutting line.
TROUBLESHOOTINGIf your tool seems not to operate properly, followthe instructions below. If this does not solve theproblem, please contact your local Black & Deckerrepair agent.
Before proceeding, unplug the tool.
E N G L I S H

11
Tool does not start◆ Check that the power cables are properly
connected.◆ Check the mains fuses.
Tool vibrates strongly◆ Carefully clean the spool housing.◆ Remove the spool and re-fit in a new position.◆ If this does not solve the problem, unwind the
line from the spool and rewind it more tightly.
PROTECTING THE ENVIRONMENT
Black & Decker provides a facility forrecycling Black & Decker products oncethey have reached the end of theirworking life. This service is provided freeof charge. To take advantage of thisservice please return your product to anyauthorised repair agent who will collectthem on our behalf.
You can check the location of your nearestauthorised repair agent by contacting your localBlack & Decker office at the address indicated inthis manual. Alternatively, a list of authorisedBlack & Decker repair agents and full details of ourafter-sales service and contacts are available onthe Internet at: www.2helpU.com.
GUARANTEEBlack & Decker is confident of the quality of itsproducts and offers an outstanding guarantee.This guarantee statement is in addition to and inno way prejudices your statutory rights.The guarantee is valid within the territories of theMember States of the European Union and theEuropean Free Trade Area.
If a Black & Decker product becomes defectivedue to faulty materials, workmanship or lack ofconformity, within 24 months from the date ofpurchase, Black & Decker guarantees to replacedefective parts, repair products subjected to fairwear and tear or replace such products to ensureminimum inconvenience to the customer unless:
◆ The product has been used for trade,professional or hire purposes;
◆ The product has been subjected to misuse orneglect;
◆ The product has sustained damage throughforeign objects, substances or accidents;
◆ Repairs have been attempted by other personsthan authorised repair agents or Black & Deckerservice staff.
To claim on the guarantee, you will need tosubmit proof of purchase to the seller or anauthorised repair agent. You can check thelocation of your nearest authorised repair agent bycontacting your local Black & Decker office at theaddress indicated in this manual. Alternatively, alist of authorised Black & Decker repair agents andfull details of our after-sales service and contactsare available on the Internet at:www.2helpU.com.
OTHER OUTDOOR TOOLSBlack & Decker has a full range of outdoor powertools that make life in the garden easy. If you wouldlike further information on the following products,please contact our Service and Information Centre(see the address page towards the end of thismanual) or your local Black & Decker retailer.
String trimmers ChainsawsCordless shear HedgetrimmersLawnmowers LawnrakersLeafbusters Shredders
Not all products are available in all countries.
E N G L I S H

12
E N G L I S H
TYP.
E13003 24 - 07 - 2000
1/2GL220/ GL225/ GL425
GL220/225 GL425/425S/425SC
2
3
4
5
6
7
8
9
10
11
12
1516
23
17
18
19
20
21
1 1
13
14
www.2helpU.com
6
13

13

14574792-14
Australia DEWALT Industrial Power Tool Company Tel. 03 9895 92007 Clarice Road Fax 03 9899 7465Box Hill, Victoria 3128
New Zealand Black & Decker Tel. 09 579 760081 Hugo Johnson Drive Fax 09 579 8200Penrose, Auckland, New Zealand
South Africa Black & Decker South Africa (Pty) Ltd Tel. (011) 653-1400Physical address: Fax (011) 653-1499146 Lechwe StreetCorporate parkRandjiesfontein, MidrandPostal address:Postnet Suite 107, Private Bag X65Halfway House 1685
United Kingdom Black & Decker Tel. 01753 511234210 Bath Road Fax 01753 551155Slough, Berkshire SL1 3YD Helpline 01753 574277

15
Dea
ler
add
ress
Dat
e o
f p
urch
ase
○
○
○
○
○
○
○
○
○
○
○
○
○
○
○
○
○
○
○
○
○
○
○
○
○
○
○
○
○
○
○
○
○
○
○
○
○
○
○
○
○
○
○
○
○
○
○
○
○
○
○
○
○
○
○
○
○
○
○
○
○
○
○
○
○
○
○
○
○
○
○
○
○
○
○
○
○
○
○
✁
Nam
e:...
......
......
......
......
......
......
......
......
......
......
......
......
......
......
......
......
...
Ad
dre
ss:.
......
......
......
......
......
......
......
......
......
......
......
......
......
......
......
......
..
Tow
n:...
......
......
......
......
......
......
......
......
......
......
......
......
......
......
......
......
....
Post
al c
ode:
......
......
......
......
......
......
......
......
......
......
......
......
......
......
......
...
Was
thi
s to
ol a
gift
?
Yes
No
Was
thi
s to
ol y
our
first
pur
chas
e?
Yes
No
Was
thi
s to
ol b
oug
ht a
s a
rep
lace
men
t?
Yes
No
Dea
ler
add
ress
:....
......
......
......
......
......
......
......
......
......
......
......
......
......
......
......
......
......
......
......
......
......
......
......
......
......
......
......
......
......
......
......
......
.....
......
......
......
......
......
......
......
......
......
......
......
......
......
......
......
......
......
......
.....
Dat
a p
rote
ctio
n ac
t:Ti
ck t
he b
ox if
you
pre
fer
not
to r
ecei
ve fu
rthe
r in
form
atio
n.

16
GU
AR
AN
TEE
CA
RD
Please co
mp
lete this section im
med
iately after the purchase o
f your to
ol and
send it to
Black &
Decker in yo
urco
untry. If you live in A
ustralia or N
ew Z
ealand, p
lease register b
y using the alternative g
uarantee cardsup
plied
.
○
○
○
○
○
○
○
○
○
○
○
○
○
○
○
○
○
○
○
○
○
○
○
○
○
○
○
○
○
○
○
○
○
○
○
○
○
○
○
○
○
○
○
○
○
○
○
○
○
○
○
○
○
○
○
○
○
○
○
○
○
○
○
○
○
○
○
○
○
○
○
○
○
○
○
○
○
○
○
✁
574792-14