glasses case just kisses - robert kaufman fabrics · just kisses designed by robert kaufman fabrics...
TRANSCRIPT

Just KissesDesigned by Robert Kaufman Fabricswww.robertkaufman.com
Featuring
GLASSES CASE
For questions about this pattern, please email [email protected].
Finished sizes: sleeve case = 4” x 6-1/2”, fold over case = 7” x 3-1/2

page 2
Fabric and Supplies Needed
Color Fabric Name/SKU Yardage
K001-476 GRELLOW
AIEL-16332-15 IVORY
Color Fabric Name/SKU Yardage
Fabric amounts based on yardage that is 42” wide.
A B1/4 yard 1/4 yard
Copyright 2016, Robert KaufmanFor individual use only - Not for resale
You will also need:1/4 yard of fusible fl eece for the fold over case
Optional: 2-3” long piece of 3/4” hook and loop tape for the fold over case
- Read through all of the instructions before beginning.- All of the seam allowances are 1/4” unless otherwise noted.- Press seam allowances open unless otherwise noted. - Width of fabric (WOF) is equal to at least 42” wide.- Right sides together has been abbreviated to RST.- Remember to measure twice and cut once!
Tip: for laminate fabrics such as the Slicker print used here for Fabric A, avoid pinning. Instead, use clips, such as Clover Wonder Clips to hold fabrics in place for sewing.
From Fabric A, cut:two 4-1/2” x 7”
From Fabric B, cut:two 4-1/2” x 7-1/2”
Notes Before You Begin
Sleeve Case Assembly
Sleeve Case Cutting Instructions
Step 1: Place the Fabric A pieces right sides together. Sew along both long sides and the bottom. Clip the bottom corners. Turn right side out and push the corners out.
page 3
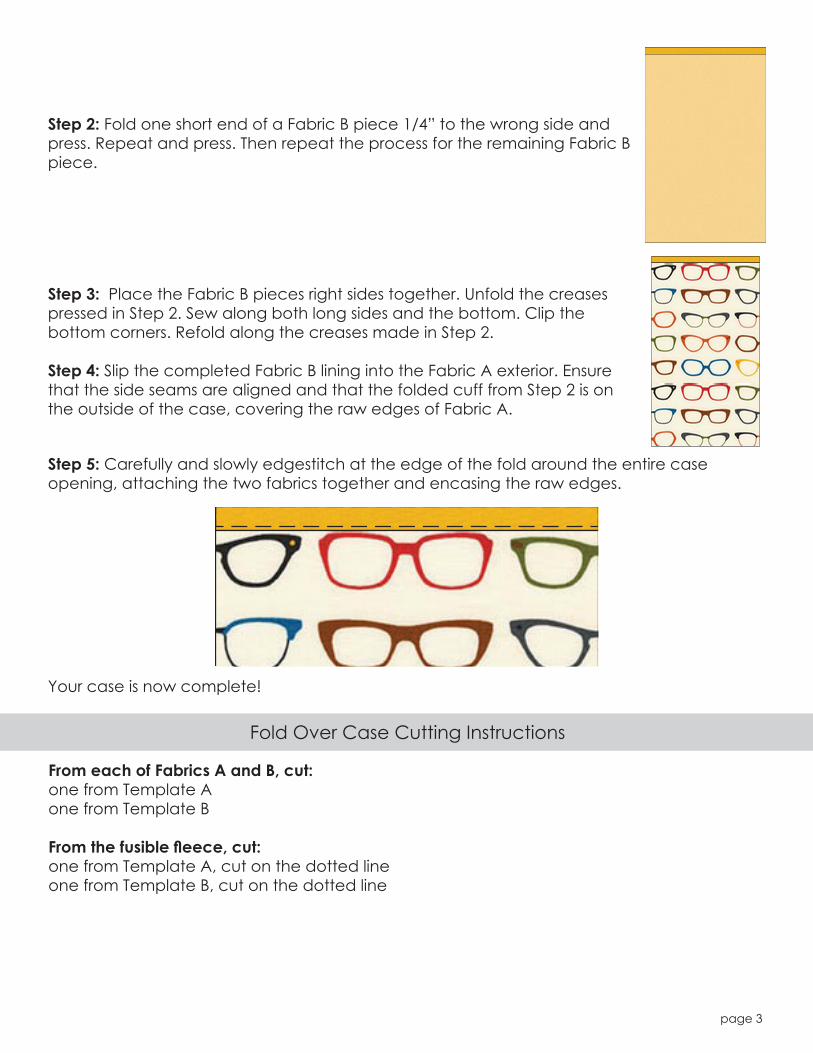
Step 2: Fold one short end of a Fabric B piece 1/4” to the wrong side and press. Repeat and press. Then repeat the process for the remaining Fabric B piece.
Step 3: Place the Fabric B pieces right sides together. Unfold the creases pressed in Step 2. Sew along both long sides and the bottom. Clip the bottom corners. Refold along the creases made in Step 2.
Step 4: Slip the completed Fabric B lining into the Fabric A exterior. Ensure that the side seams are aligned and that the folded cuff from Step 2 is on the outside of the case, covering the raw edges of Fabric A.
Step 5: Carefully and slowly edgestitch at the edge of the fold around the entire case opening, attaching the two fabrics together and encasing the raw edges.
Your case is now complete!
From each of Fabrics A and B, cut:one from Template Aone from Template B
From the fusible fl eece, cut:one from Template A, cut on the dotted lineone from Template B, cut on the dotted line
Fold Over Case Cutting Instructions

page 4
Tip: for laminate fabrics such as the Slicker print used here for Fabric A, avoid pinning. Instead, use clips, such as Clover Wonder Clips to hold fabrics in place for sewing.
Tip: to sew the curves, shorten the stitch length and sew slowly, pivoting with your needle down as needed.
Step 1: Center the fusible fl eece on the wrong side of the corresponding Fabric B (lining) pieces. Fuse.
Fold Over Case Assembly
Step 2: Place the Fabric A pieces right sides together, bottom edge and sides aligned. Sew along the sides and bottom, backstitching at the beginning and end of the seam. Clip the curved corners, taking care not to clip into the seam.
Fusible fl eece applied to wrong side of lining
Step 3: Place the Fabric B pieces right sides together, bottom edge and sides aligned. Sew along the sides and bottom, backstitching at the beginning and end of the seam. Leave a 3” opening along the bottom edge, backstitching at both sides of the opening.
Step 4: Turn the Fabric A unit (the exterior) right side out. Place inside the Fabric B unit, so that the fabrics are right sides together. Clip in place, aligning the side seams.
page 5
Step 5: Sew around the entire opening of the unit, along the fl ap and the front edge of the case. Clip the curves.
Step 6: Pull the project through the opening left in the lining, turning the unit right side out. Finger press the edges fl at and use a chopstick or turning tool to push the curved corners out. Stitch the opening in the lining closed.
Optional: Insert your glasses and mark a location to sew hook and loop tape for a more secure case. Remove glasses and place the hook portion on the front of the case and the loop portion on the fl ap. Sew in place, through the exterior and lining.
Your case is fi nished!
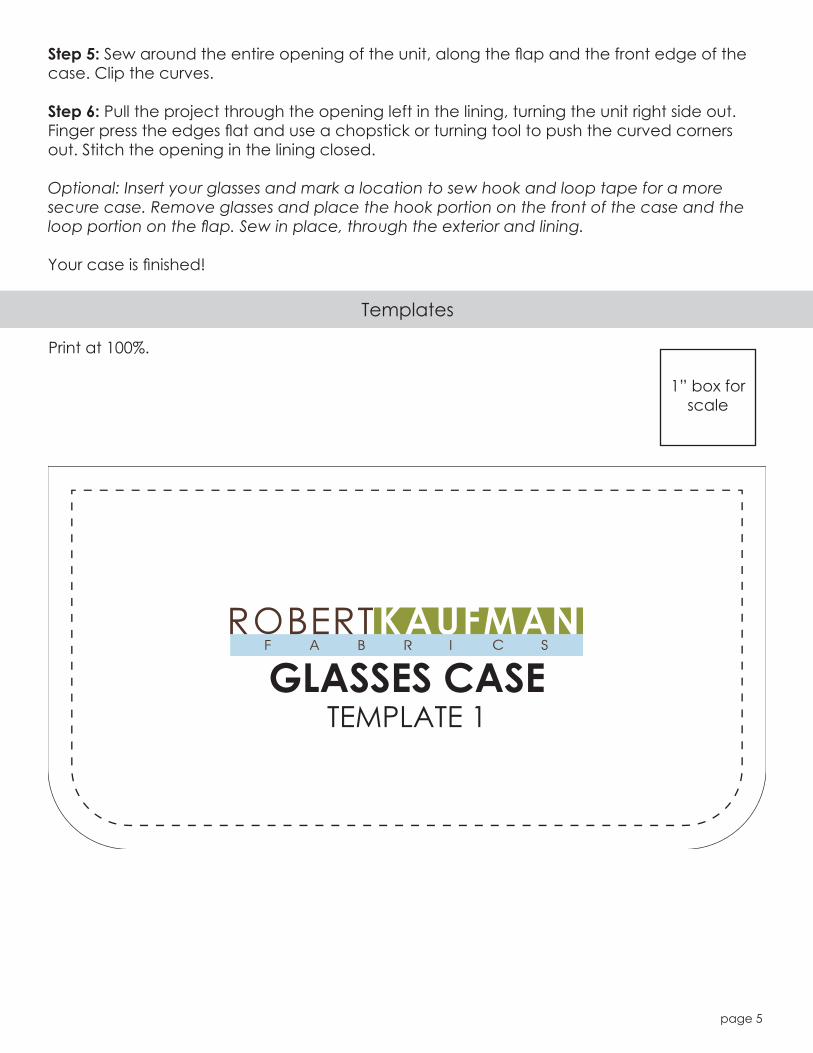
Print at 100%.
Templates
1” box for scale
GLASSES CASETEMPLATE 1
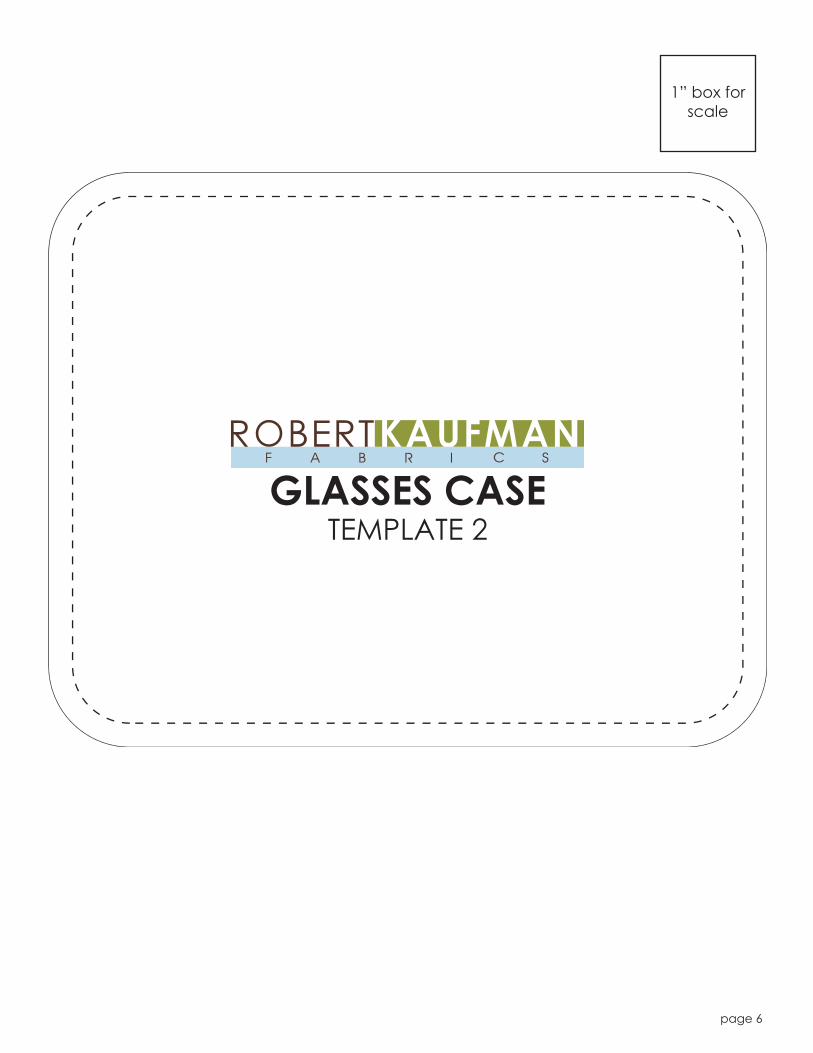
page 6
GLASSES CASETEMPLATE 2
1” box for scale