google sketchup tutorial part i - · pdf filegoogle sketchup tutorial part i – basic...
TRANSCRIPT
GOOGLE SKETCHUP TUTORIAL PART I – BASIC TOOLSET
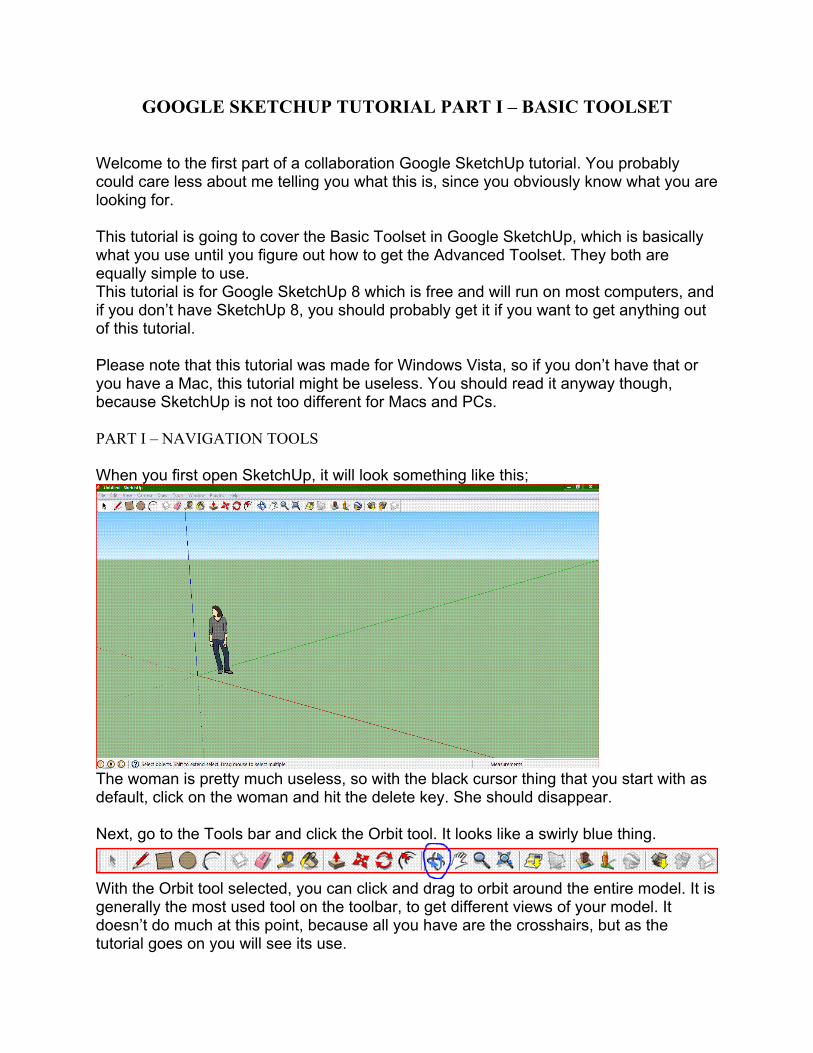
Welcome to the first part of a collaboration Google SketchUp tutorial. You probably could care less about me telling you what this is, since you obviously know what you are looking for. This tutorial is going to cover the Basic Toolset in Google SketchUp, which is basically what you use until you figure out how to get the Advanced Toolset. They both are equally simple to use. This tutorial is for Google SketchUp 8 which is free and will run on most computers, and if you don’t have SketchUp 8, you should probably get it if you want to get anything out of this tutorial. Please note that this tutorial was made for Windows Vista, so if you don’t have that or you have a Mac, this tutorial might be useless. You should read it anyway though, because SketchUp is not too different for Macs and PCs. PART I – NAVIGATION TOOLS When you first open SketchUp, it will look something like this;
The woman is pretty much useless, so with the black cursor thing that you start with as default, click on the woman and hit the delete key. She should disappear. Next, go to the Tools bar and click the Orbit tool. It looks like a swirly blue thing.
With the Orbit tool selected, you can click and drag to orbit around the entire model. It is generally the most used tool on the toolbar, to get different views of your model. It doesn’t do much at this point, because all you have are the crosshairs, but as the tutorial goes on you will see its use.
If you are using a mouse, you can press and hold the wheel, then drag it around to Orbit without having the orbit tool selected, and not have to keep clicking it every time you want to move around. Next go back to the toolbar and click on the tool that looks like an albino person’s hand.
That is the Pan tool. With that selected, you can click and drag to pan around the screen. I know these are not very accurate descriptions, but doing what I say you will kind of realize what they do. Next click on the tool that looks like a magnifying glass.
It is the Zoom tool, and allows you to zoom in or out on your model. Clicking and dragging your mouse upward will zoom in, and clicking and dragging downward will zoom out. It is good for getting into your design to fix interior stuff, if your model has it. Finally, click on the tool which is a magnifying glass with arrows coming out on all sides.
This is the Zoom Extents tool. Clicking on it will zoom to a point where the entire model is visible. There really is not much use for it unless you are navigating your model and have no idea where you are. At the moment, those tools are relatively useless, because you do not have anything modeled yet, which leads us to Part II of this tutorial. PART II – BASIC SHAPE TOOLS This is the nitty-gritty 3D architectural design stuff. Of course, the actual 3D stuff comes in Part III, but this is where we get into drawing stuff. Go to the toolbar and click the brownish rectangle. This, surprisingly enough, is the Rectangle tool.
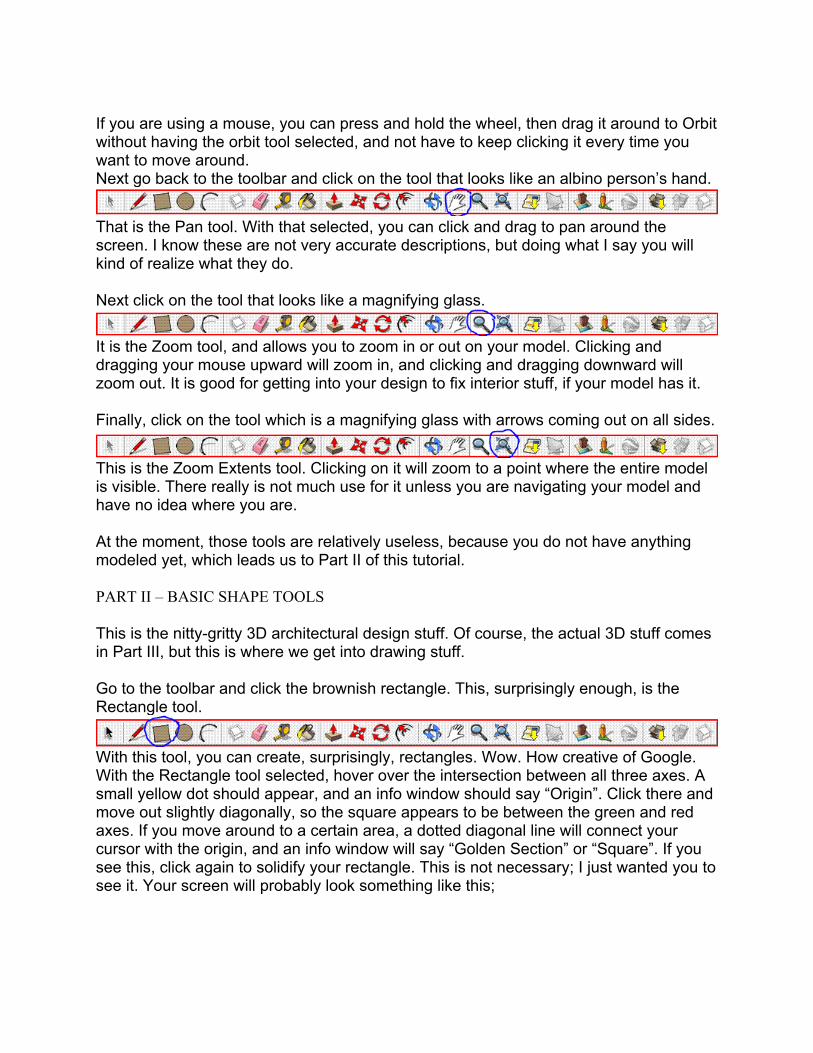
With this tool, you can create, surprisingly, rectangles. Wow. How creative of Google. With the Rectangle tool selected, hover over the intersection between all three axes. A small yellow dot should appear, and an info window should say “Origin”. Click there and move out slightly diagonally, so the square appears to be between the green and red axes. If you move around to a certain area, a dotted diagonal line will connect your cursor with the origin, and an info window will say “Golden Section” or “Square”. If you see this, click again to solidify your rectangle. This is not necessary; I just wanted you to see it. Your screen will probably look something like this;
Your square/golden section may be bigger or smaller than mine, it doesn’t make too huge a difference. This part is just demonstrating what the drawing tools do. Sections III and IV will cover what you can do with them in accordance with other tools. But keep reading because each section builds on the ones before. Now click on the Orbit around so you get a good idea of where your square is. Sometimes SketchUp does something weird and you end up putting something in a completely different area than where you thought it was. It doesn’t usually happen with rectangles, but you never know. Once you have confirmed that your rectangle is in the right place, reselect the Rectangle tool and go back to the origin. The small dot will probably be green and say “Endpoint” but if you started at the origin with your first square like I told you to, you will be fine. Now click and move along the green axis, which should also be one of the sides
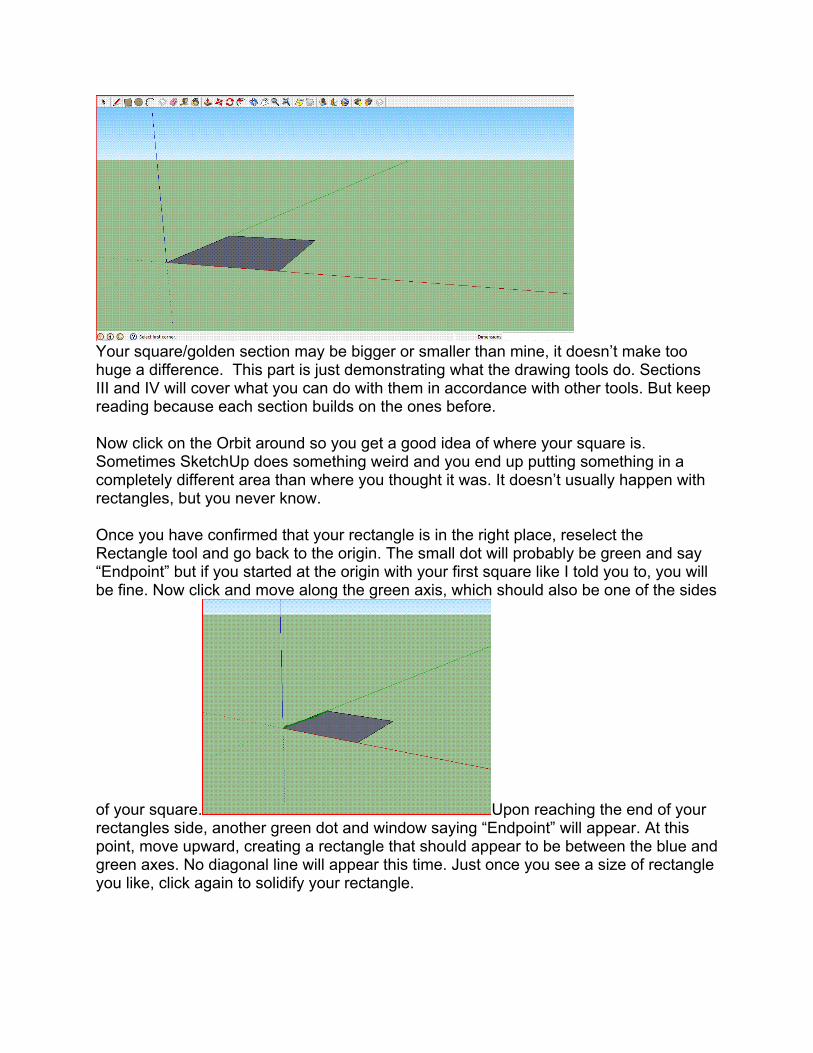
of your square. Upon reaching the end of your rectangles side, another green dot and window saying “Endpoint” will appear. At this point, move upward, creating a rectangle that should appear to be between the blue and green axes. No diagonal line will appear this time. Just once you see a size of rectangle you like, click again to solidify your rectangle.
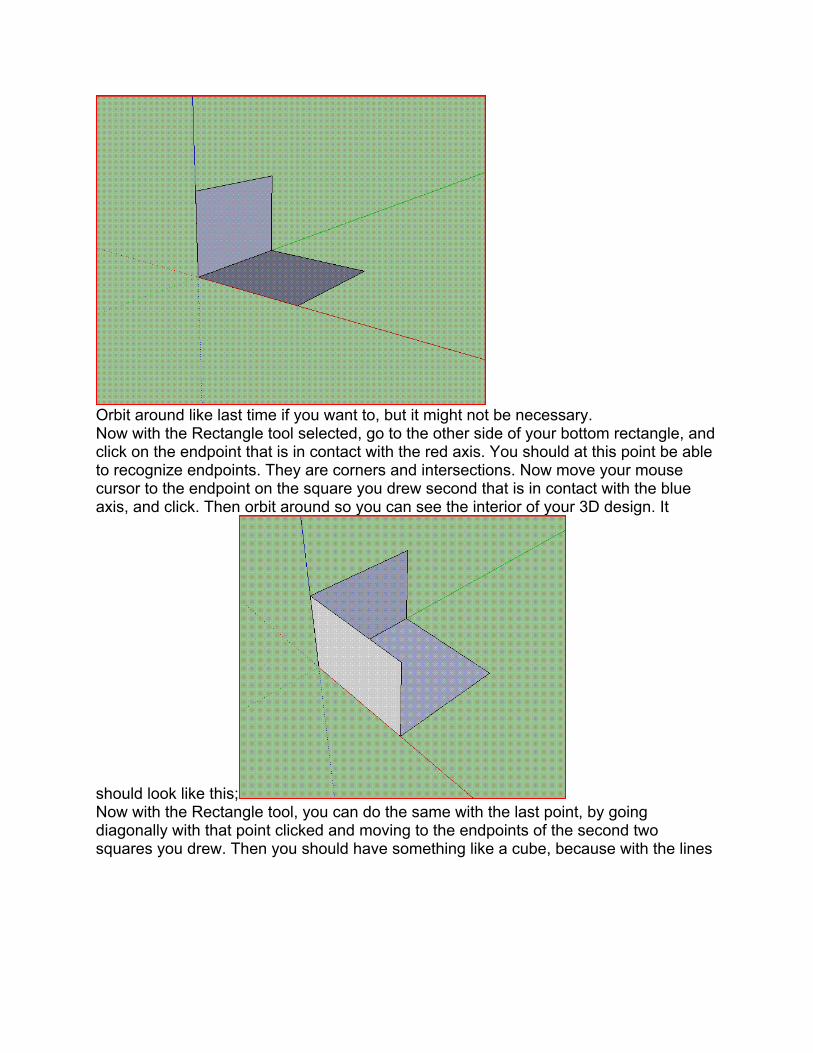
Orbit around like last time if you want to, but it might not be necessary. Now with the Rectangle tool selected, go to the other side of your bottom rectangle, and click on the endpoint that is in contact with the red axis. You should at this point be able to recognize endpoints. They are corners and intersections. Now move your mouse cursor to the endpoint on the square you drew second that is in contact with the blue axis, and click. Then orbit around so you can see the interior of your 3D design. It
should look like this; Now with the Rectangle tool, you can do the same with the last point, by going diagonally with that point clicked and moving to the endpoints of the second two squares you drew. Then you should have something like a cube, because with the lines
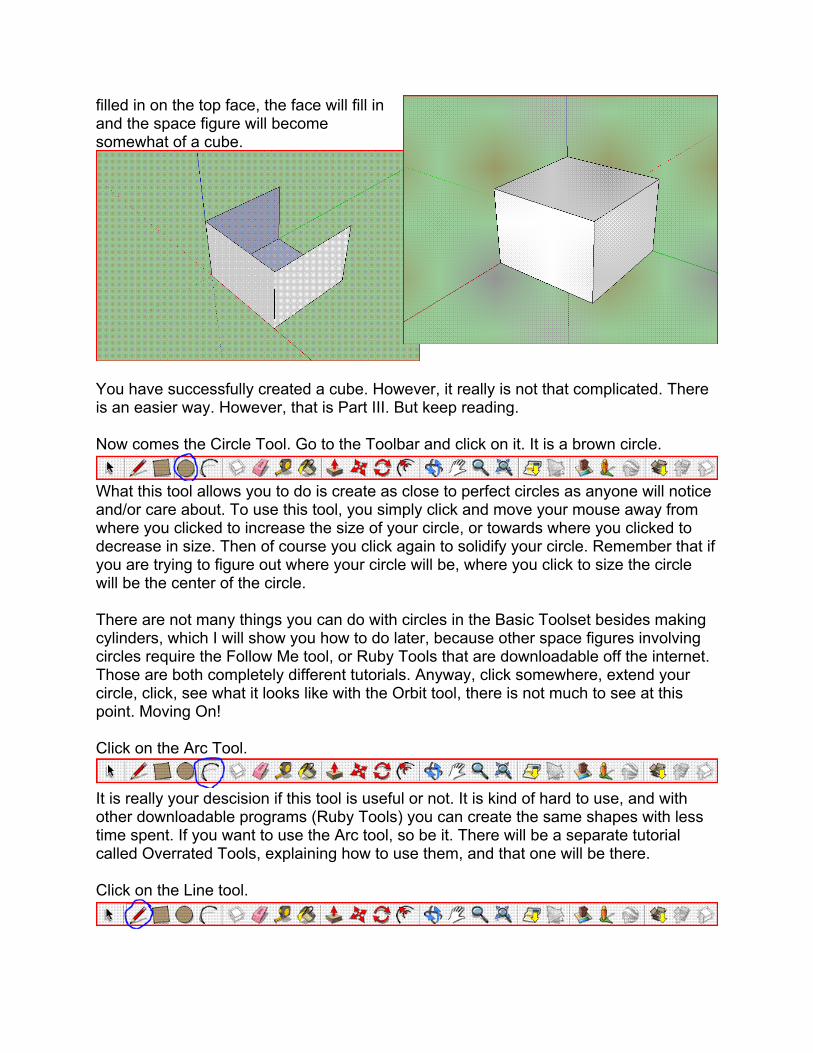
filled in on the top face, the face will fill in and the space figure will become somewhat of a cube.
You have successfully created a cube. However, it really is not that complicated. There is an easier way. However, that is Part III. But keep reading. Now comes the Circle Tool. Go to the Toolbar and click on it. It is a brown circle.
What this tool allows you to do is create as close to perfect circles as anyone will notice and/or care about. To use this tool, you simply click and move your mouse away from where you clicked to increase the size of your circle, or towards where you clicked to decrease in size. Then of course you click again to solidify your circle. Remember that if you are trying to figure out where your circle will be, where you click to size the circle will be the center of the circle. There are not many things you can do with circles in the Basic Toolset besides making cylinders, which I will show you how to do later, because other space figures involving circles require the Follow Me tool, or Ruby Tools that are downloadable off the internet. Those are both completely different tutorials. Anyway, click somewhere, extend your circle, click, see what it looks like with the Orbit tool, there is not much to see at this point. Moving On! Click on the Arc Tool.
It is really your descision if this tool is useful or not. It is kind of hard to use, and with other downloadable programs (Ruby Tools) you can create the same shapes with less time spent. If you want to use the Arc tool, so be it. There will be a separate tutorial called Overrated Tools, explaining how to use them, and that one will be there. Click on the Line tool.
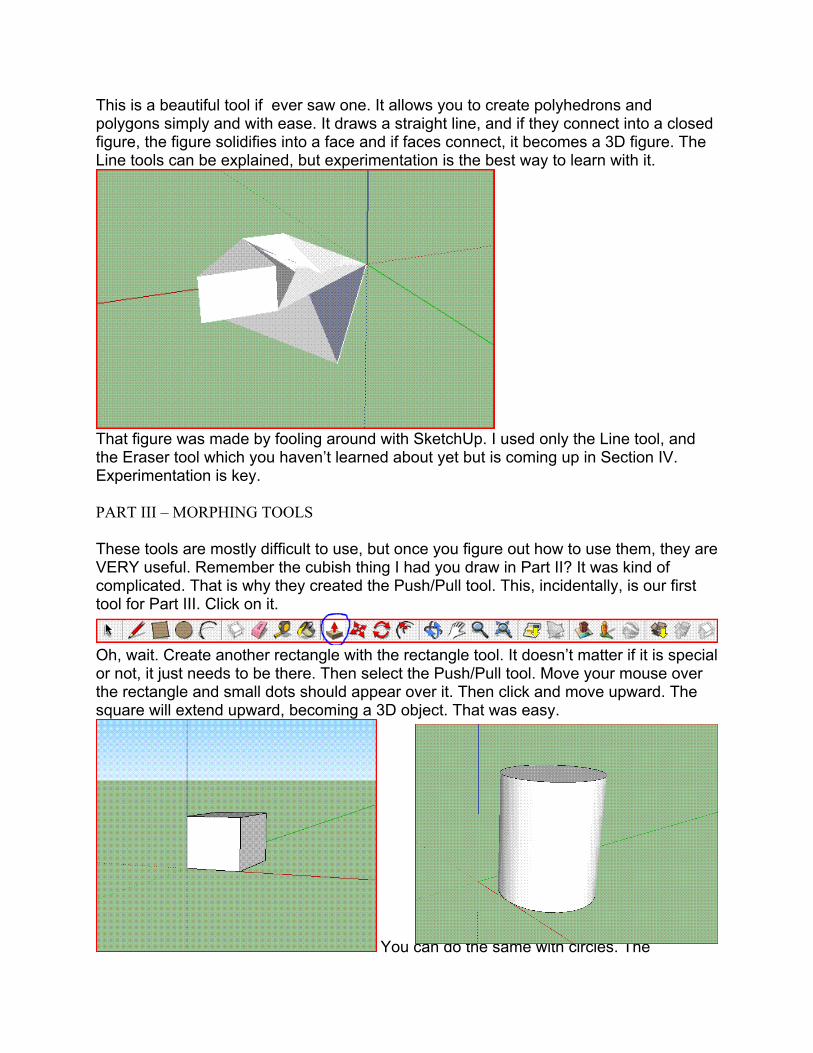
This is a beautiful tool if ever saw one. It allows you to create polyhedrons and polygons simply and with ease. It draws a straight line, and if they connect into a closed figure, the figure solidifies into a face and if faces connect, it becomes a 3D figure. The Line tools can be explained, but experimentation is the best way to learn with it.
That figure was made by fooling around with SketchUp. I used only the Line tool, and the Eraser tool which you haven’t learned about yet but is coming up in Section IV. Experimentation is key. PART III – MORPHING TOOLS These tools are mostly difficult to use, but once you figure out how to use them, they are VERY useful. Remember the cubish thing I had you draw in Part II? It was kind of complicated. That is why they created the Push/Pull tool. This, incidentally, is our first tool for Part III. Click on it.
Oh, wait. Create another rectangle with the rectangle tool. It doesn’t matter if it is special or not, it just needs to be there. Then select the Push/Pull tool. Move your mouse over the rectangle and small dots should appear over it. Then click and move upward. The square will extend upward, becoming a 3D object. That was easy.
You can do the same with circles. The
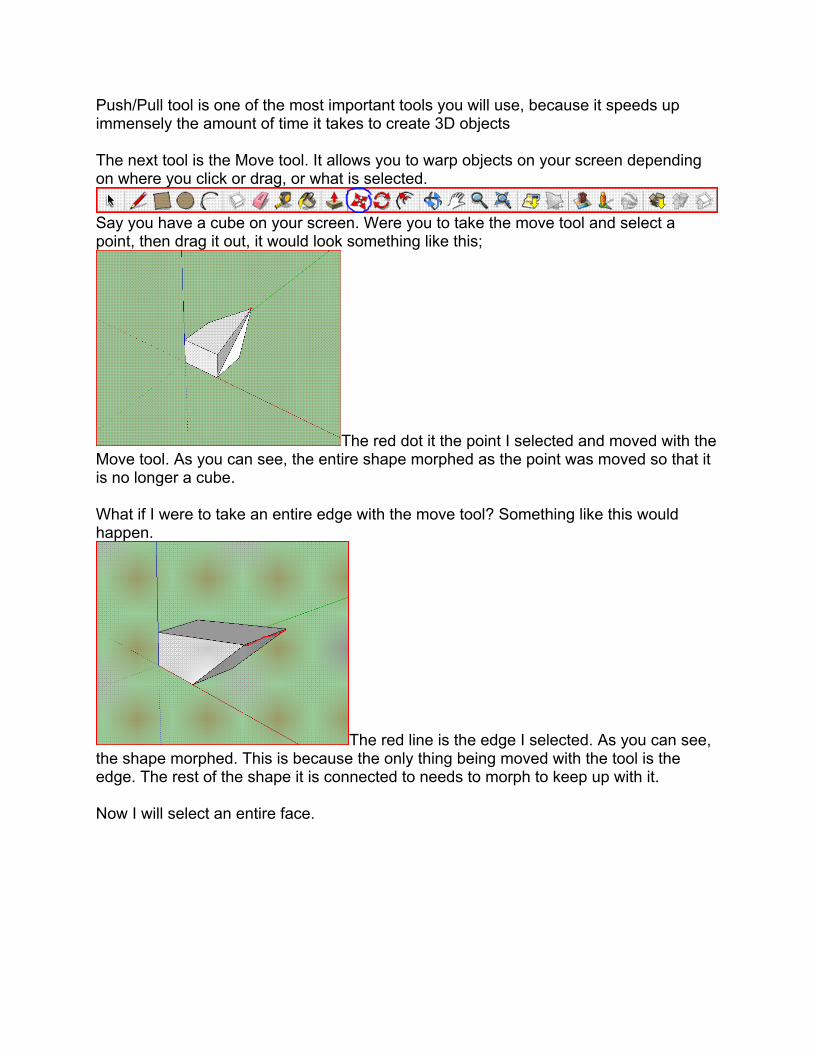
Push/Pull tool is one of the most important tools you will use, because it speeds up immensely the amount of time it takes to create 3D objects The next tool is the Move tool. It allows you to warp objects on your screen depending on where you click or drag, or what is selected.
Say you have a cube on your screen. Were you to take the move tool and select a point, then drag it out, it would look something like this;
The red dot it the point I selected and moved with the Move tool. As you can see, the entire shape morphed as the point was moved so that it is no longer a cube. What if I were to take an entire edge with the move tool? Something like this would happen.
The red line is the edge I selected. As you can see, the shape morphed. This is because the only thing being moved with the tool is the edge. The rest of the shape it is connected to needs to morph to keep up with it. Now I will select an entire face.
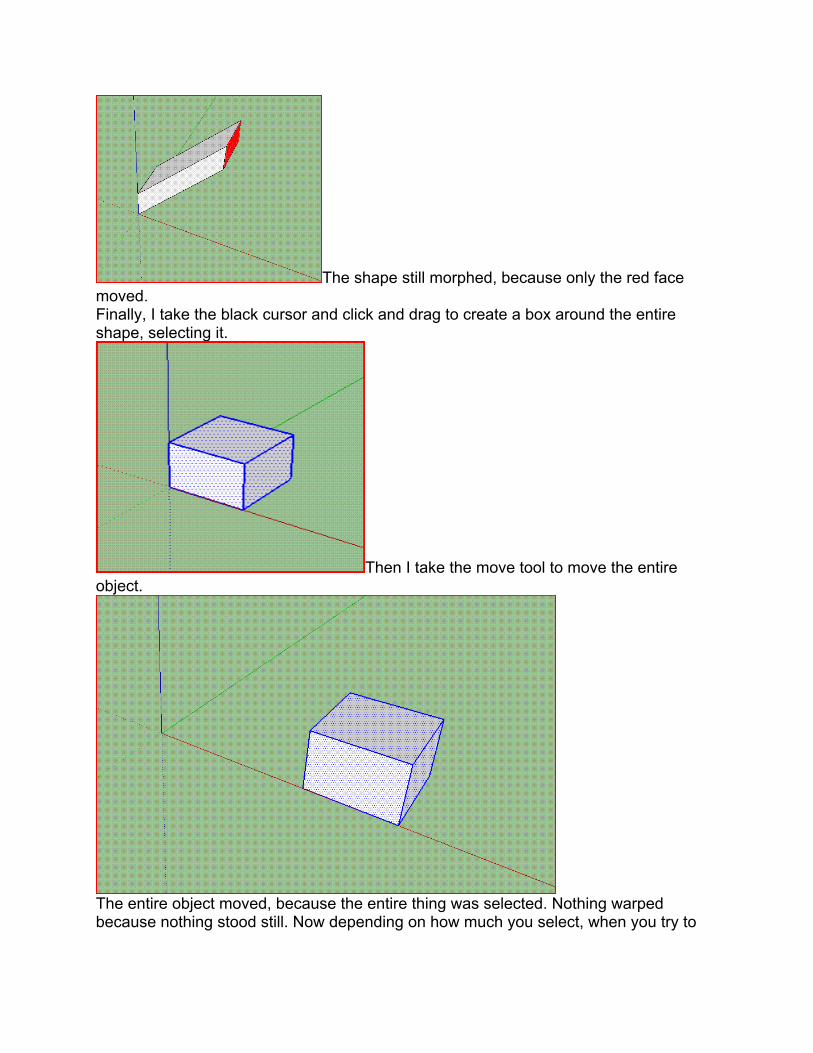
The shape still morphed, because only the red face moved. Finally, I take the black cursor and click and drag to create a box around the entire shape, selecting it.
Then I take the move tool to move the entire object.
The entire object moved, because the entire thing was selected. Nothing warped because nothing stood still. Now depending on how much you select, when you try to
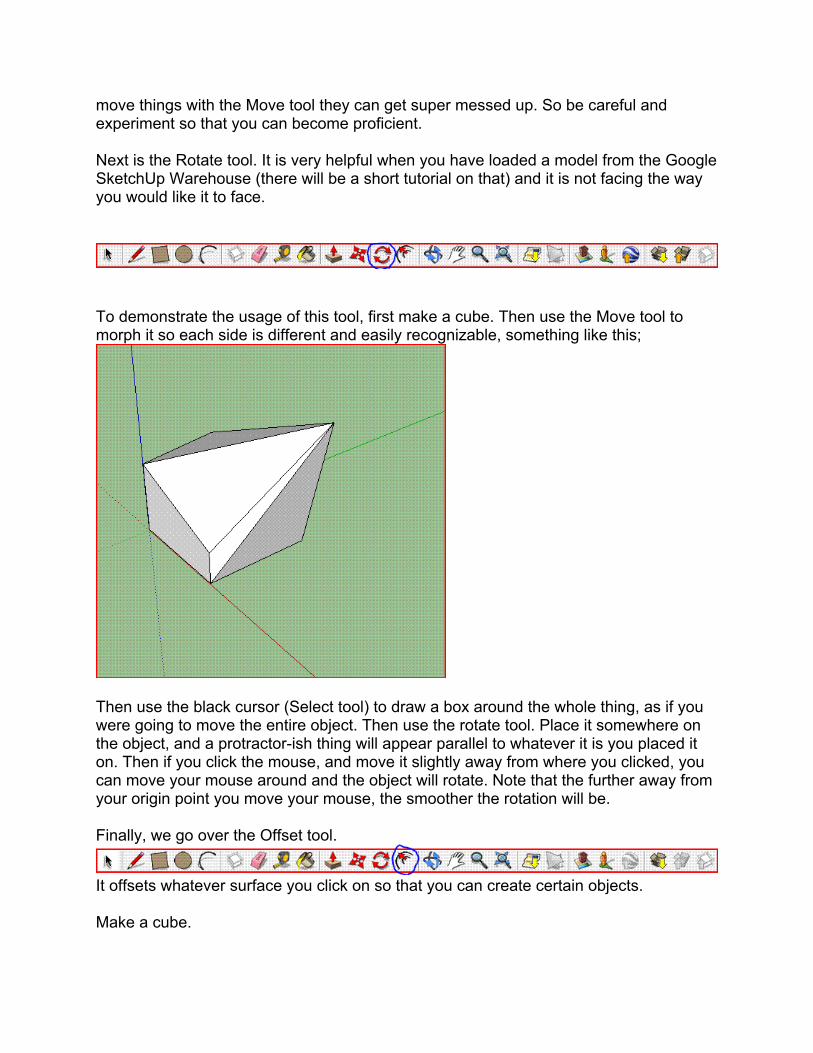
move things with the Move tool they can get super messed up. So be careful and experiment so that you can become proficient. Next is the Rotate tool. It is very helpful when you have loaded a model from the Google SketchUp Warehouse (there will be a short tutorial on that) and it is not facing the way you would like it to face.
To demonstrate the usage of this tool, first make a cube. Then use the Move tool to morph it so each side is different and easily recognizable, something like this;
Then use the black cursor (Select tool) to draw a box around the whole thing, as if you were going to move the entire object. Then use the rotate tool. Place it somewhere on the object, and a protractor-ish thing will appear parallel to whatever it is you placed it on. Then if you click the mouse, and move it slightly away from where you clicked, you can move your mouse around and the object will rotate. Note that the further away from your origin point you move your mouse, the smoother the rotation will be. Finally, we go over the Offset tool.
It offsets whatever surface you click on so that you can create certain objects. Make a cube.
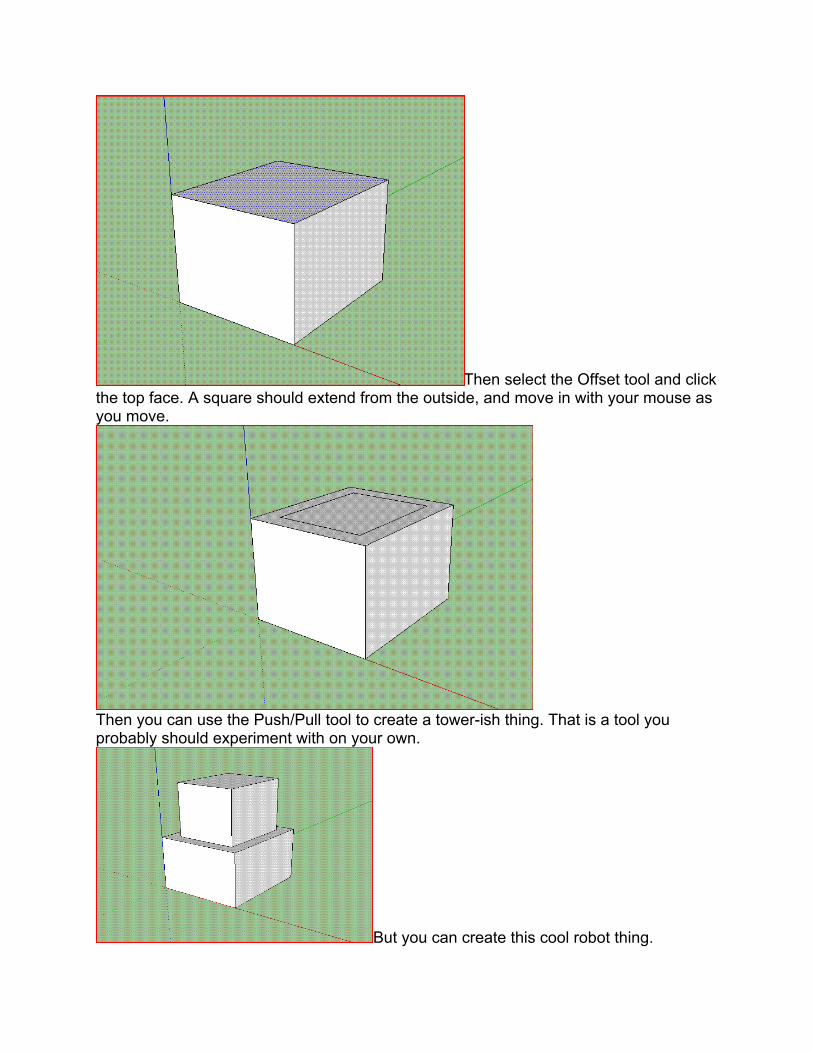
Then select the Offset tool and click the top face. A square should extend from the outside, and move in with your mouse as you move.
Then you can use the Push/Pull tool to create a tower-ish thing. That is a tool you probably should experiment with on your own.
But you can create this cool robot thing.
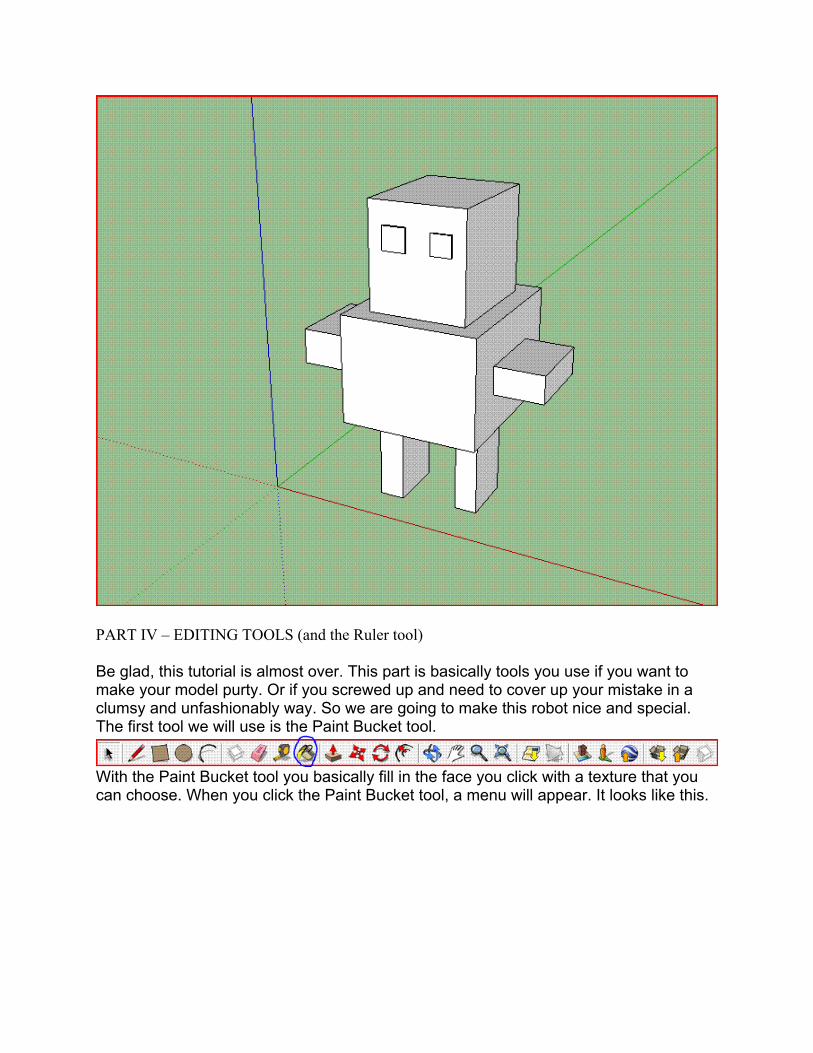
PART IV – EDITING TOOLS (and the Ruler tool) Be glad, this tutorial is almost over. This part is basically tools you use if you want to make your model purty. Or if you screwed up and need to cover up your mistake in a clumsy and unfashionably way. So we are going to make this robot nice and special. The first tool we will use is the Paint Bucket tool.
With the Paint Bucket tool you basically fill in the face you click with a texture that you can choose. When you click the Paint Bucket tool, a menu will appear. It looks like this.

What I want to do turn the robot’s skin metallic. So I will go to the
materials window, pull it down and select “Metal”. Then I will click on the really shiny looking one to select it, then click on the face on my robot that I want that color. I may have to edit the size but you can experiment with that as you wish.
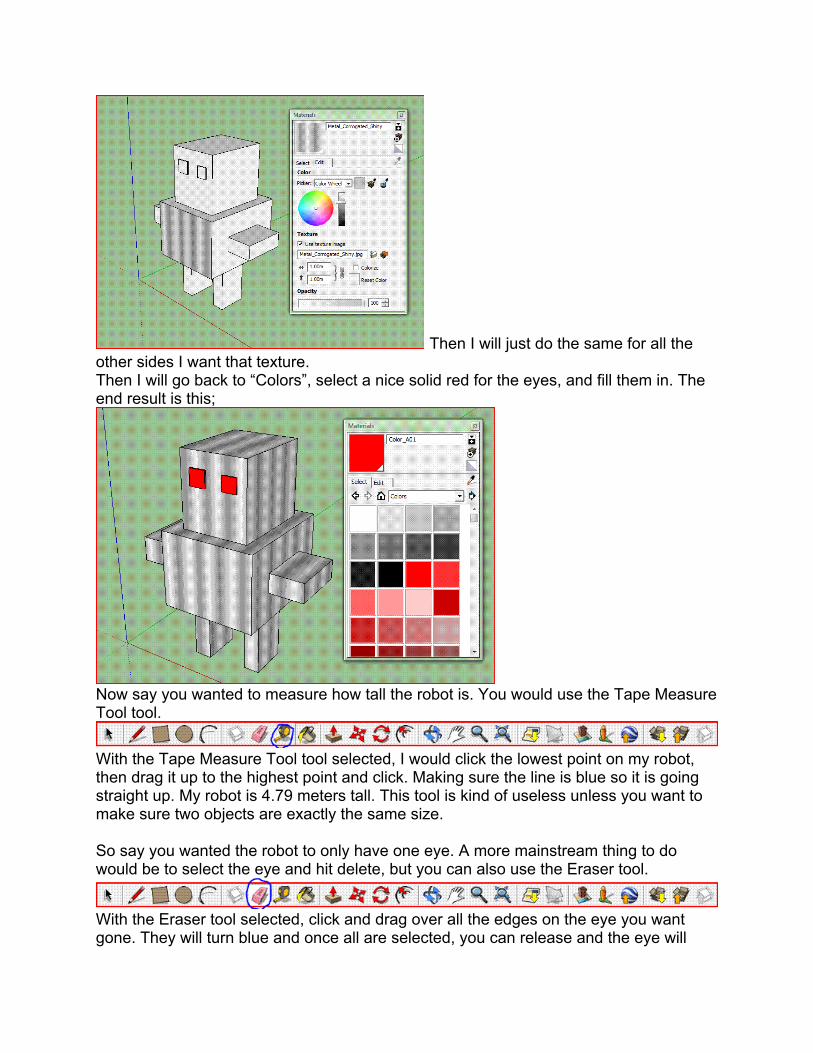
Then I will just do the same for all the other sides I want that texture. Then I will go back to “Colors”, select a nice solid red for the eyes, and fill them in. The end result is this;
Now say you wanted to measure how tall the robot is. You would use the Tape Measure Tool tool.
With the Tape Measure Tool tool selected, I would click the lowest point on my robot, then drag it up to the highest point and click. Making sure the line is blue so it is going straight up. My robot is 4.79 meters tall. This tool is kind of useless unless you want to make sure two objects are exactly the same size. So say you wanted the robot to only have one eye. A more mainstream thing to do would be to select the eye and hit delete, but you can also use the Eraser tool.
With the Eraser tool selected, click and drag over all the edges on the eye you want gone. They will turn blue and once all are selected, you can release and the eye will
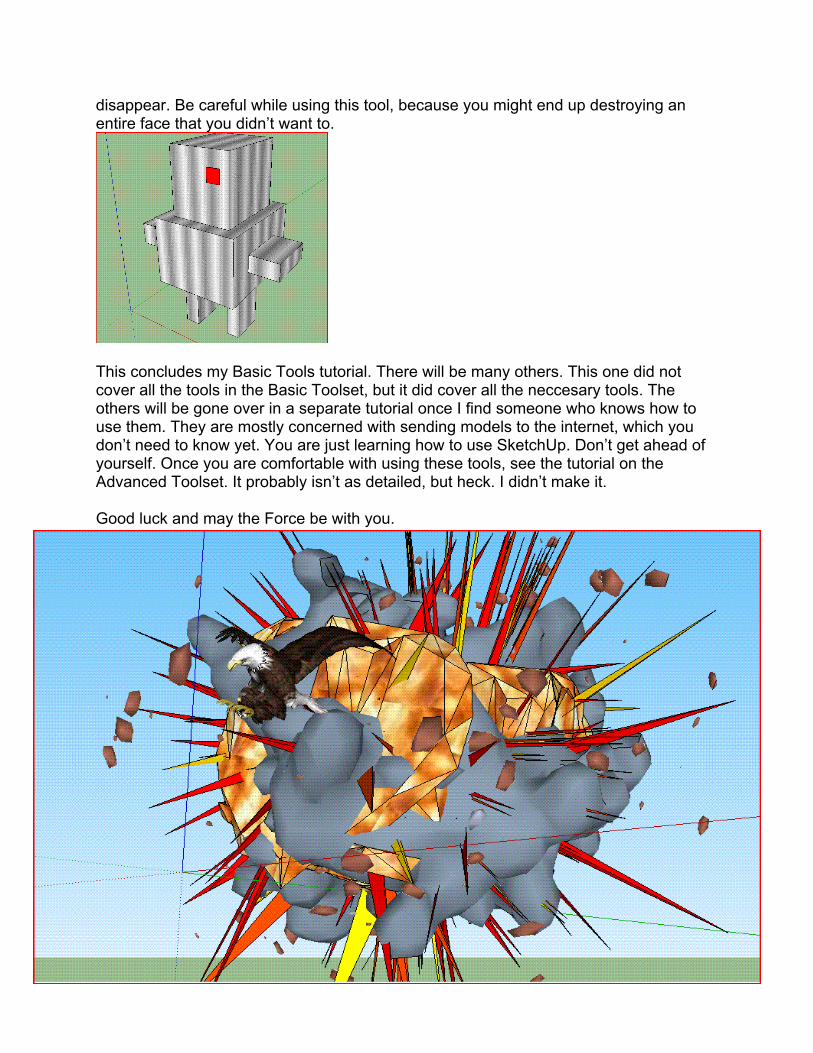
disappear. Be careful while using this tool, because you might end up destroying an entire face that you didn’t want to.
This concludes my Basic Tools tutorial. There will be many others. This one did not cover all the tools in the Basic Toolset, but it did cover all the neccesary tools. The others will be gone over in a separate tutorial once I find someone who knows how to use them. They are mostly concerned with sending models to the internet, which you don’t need to know yet. You are just learning how to use SketchUp. Don’t get ahead of yourself. Once you are comfortable with using these tools, see the tutorial on the Advanced Toolset. It probably isn’t as detailed, but heck. I didn’t make it. Good luck and may the Force be with you.