graphical user interfaces in java - colorado state...
TRANSCRIPT

Graphical User Interfaces in Java
CS314
Colorado State University

GUI Componentsmenu barbutton combo boxmenus
scroll bars

A Brief History
• Original AWT was suitable for Java applets but not for full-fledged application development.
• AWT 1.1 (JDK 1.1) had better event handling but did not have enough GUI components and was too dependent on (nonportable) native code.
• In 1997 Netscape and Sun developed a set of GUI classes written entirely in Java. The Java Foundation Classes (JFC), including the Swing component set, were released with JDK 2.0.
• A Swing program can have the same look and feel on a Mac, Windows, or Unix platform.

Some basic GUI components
Component Description JLabel An area where uneditable text or icons can be displayed.
JTextField An area in which the user inputs data from the keyboard. The area can also display information.
JButton An area that triggers an event when clicked with the mouse. JCheckBox A GUI component that is either selected or not selected. JComboBox A drop-down list of items from which the user can make a selection by
clicking an item in the list or possibly by typing into the box.
JList An area containing a list of items from which the user can make a selection by clicking on any element in the list. Multiple elements can be selected.
JPanel A container in which components can be placed and organized.
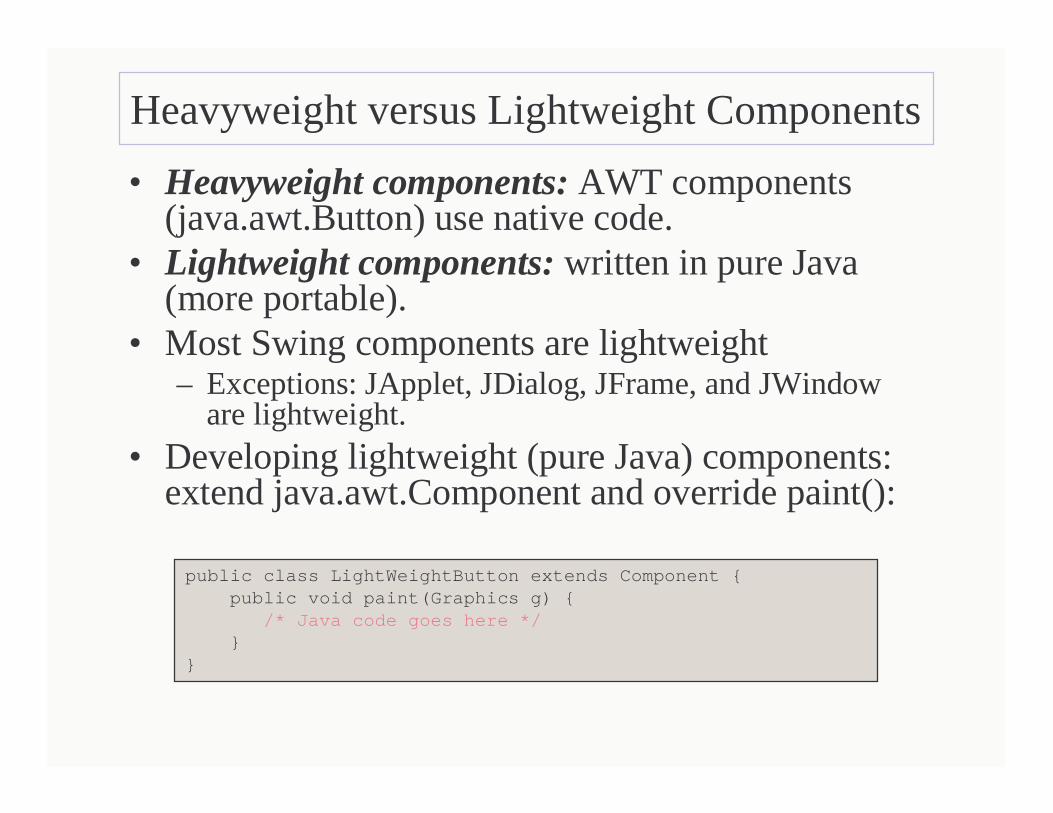
Heavyweight versus Lightweight Components
• Heavyweight components: AWT components (java.awt.Button) use native code.
• Lightweight components: written in pure Java (more portable).
• Most Swing components are lightweight– Exceptions: JApplet, JDialog, JFrame, and JWindow
are lightweight.• Developing lightweight (pure Java) components:
extend java.awt.Component and override paint():
public class LightWeightButton extends Component {public void paint(Graphics g) {
/* Java code goes here */}
}

Swing Hierarchy
Swing classes derived from JComponent will be lightweight, written
entirely in Java.
The top-level Swing windows are
heavyweight. They depend on the native
system.

Swing Hierarchy (Part II)
Swing components names start with ‘J’.
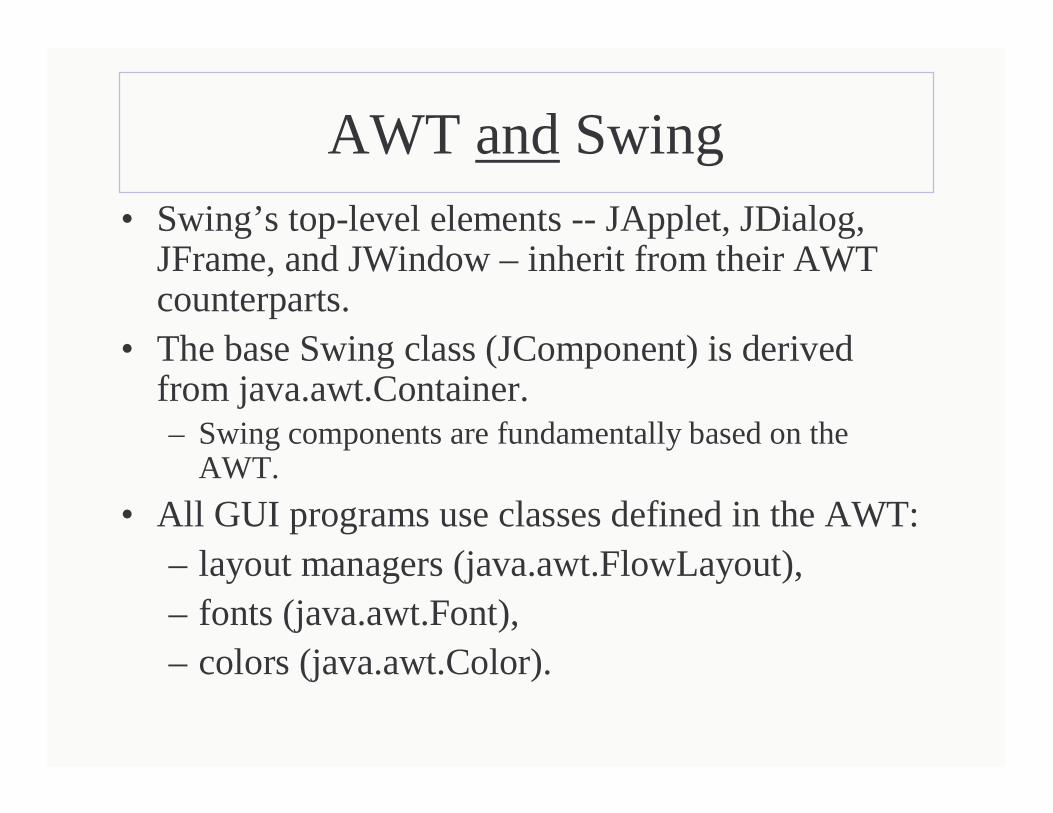
AWT andSwing• Swing’s top-level elements -- JApplet, JDialog,
JFrame, and JWindow – inherit from their AWT counterparts.
• The base Swing class (JComponent) is derived from java.awt.Container. – Swing components are fundamentally based on the
AWT.
• All GUI programs use classes defined in the AWT:– layout managers (java.awt.FlowLayout), – fonts (java.awt.Font),– colors (java.awt.Color).

The Swing Component Set
• Swing packages– javax.swing.event.*: contains Swing
events and listeners; similar to java.awt.event.*
– javax.swing.text.*: contains the classes for JTextField and JTextComponent, the Swing classes that replace the AWT'sTextField and TextArea classes.

JLabelJLabelJLabelJLabel
• Label– Provide text on GUI
– Defined with class JLabel
– Can display:• Single line of read-only text
• Image
• Text and image

3 import java.awt.*;
4 import java.awt.event.*;5 import javax.swing.*;6 7 public classLabelTestextendsJFrame {8 private JLabel label1, label2, label3;9 10 // set up GUI11 public LabelTest()
12 {13 super( "Testing JLabel" );14 15 // get content pane and set its layout17 setLayout( new FlowLayout() );18 19 // JLabel constructor with a string argument20 label1 = newJLabel( "Label with text" ); 21 label1.setToolTipText( "This is label1" );
22 add( label1 );23
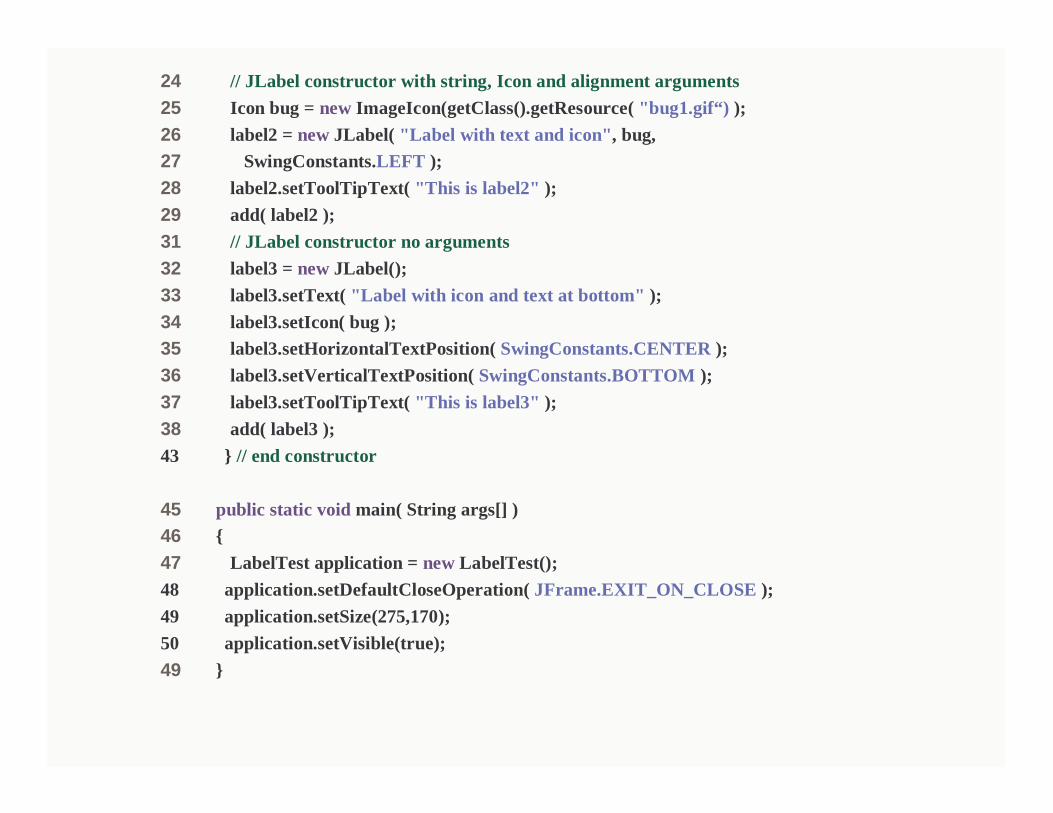
24 // JLabel constructor with string, Icon and alignment arguments
25 Icon bug = newImageIcon(getClass().getResource( "bug1.gif“) );
26 label2 = newJLabel( "Label with text and icon" , bug, 27 SwingConstants.LEFT );
28 label2.setToolTipText( "This is label2" );
29 add( label2 );
31 // JLabel constructor no arguments
32 label3 = newJLabel();
33 label3.setText( "Label with icon and text at bottom" );
34 label3.setIcon( bug ); 35 label3.setHorizontalTextPosition( SwingConstants.CENTER);
36 label3.setVerticalTextPosition( SwingConstants.BOTTOM );
37 label3.setToolTipText( "This is label3" );
38 add( label3 );
43 } // end constructor
45 public static void main( String args[] )46 {
47 LabelTest application = newLabelTest();
48 application.setDefaultCloseOperation( JFrame.EXIT_ON_CLOSE );
49 application.setSize(275,170);
50 application.setVisible(true);
49 }
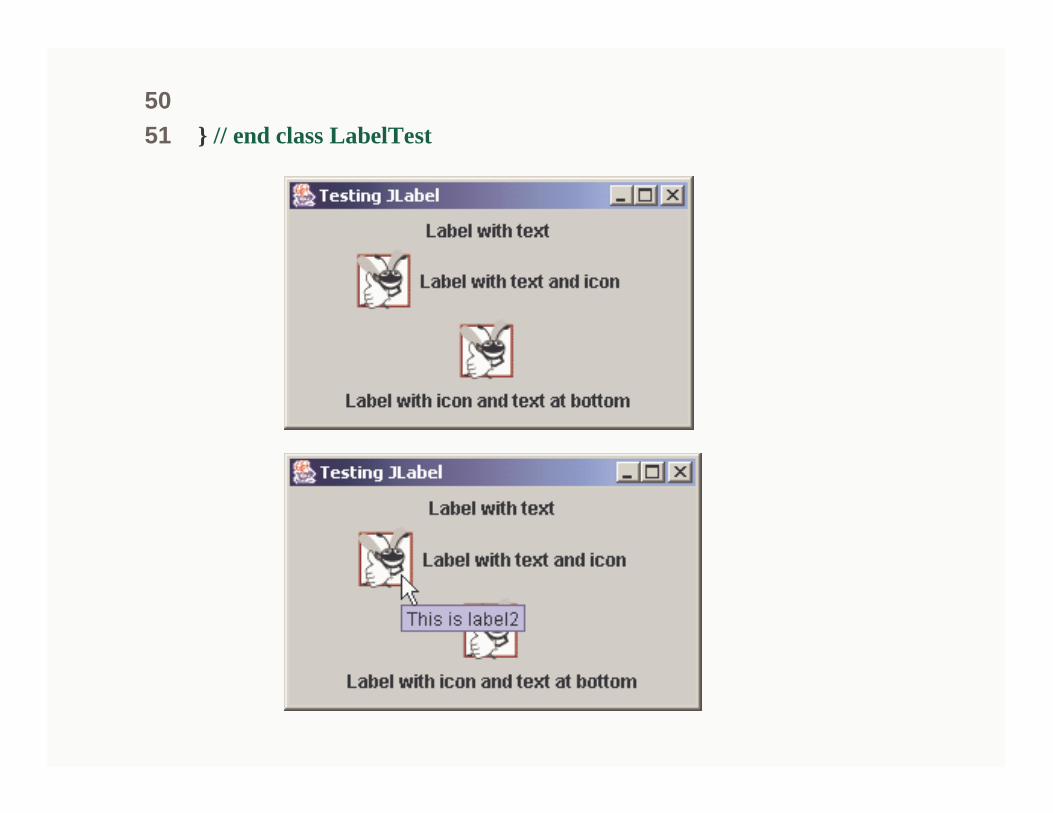
50 51 } // end class LabelTest
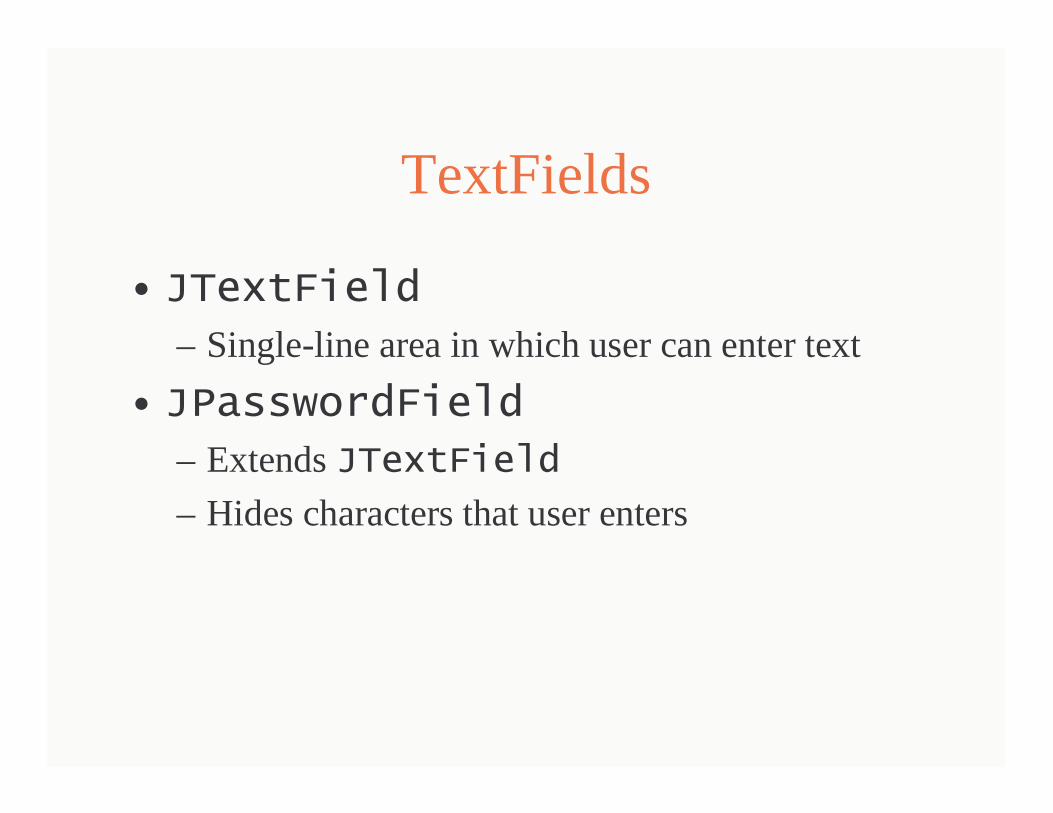
TextFields
• JTextField
– Single-line area in which user can enter text
• JPasswordField
– Extends JTextField
– Hides characters that user enters

// Demonstrating the JTextField class.import java.awt.*;import java.awt.event.*;import javax.swing.*;
public classTextFieldTestextendsJFrame {private JTextField textField1, textField2, textField3;private JPasswordField passwordField;
// set up GUIpublic TextFieldTest(){
super( "Testing JTextField and JPasswordField" );setLayout( newFlowLayout() );
// construct textfield with default sizingtextField1 = newJTextField( 10 ); add( textField1 );
// construct textfield with default text textField2 = newJTextField( "Enter text here" );add( textField2 );

// construct textfield with default text, // 20 visible elements and no event handler textField3 = new JTextField( "Uneditable text field" , 20 );textField3.setEditable( false); add( textField3 );
// construct passwordfield with default text passwordField = new JPasswordField( "Hidden text" );add( passwordField );
// register event handlersTextFieldHandler handler = new TextFieldHandler();textField1.addActionListener( handler );textField2.addActionListener( handler );textField3.addActionListener( handler );passwordField.addActionListener( handler );
setSize( 325, 100);setVisible( true );
} // end constructor TextFieldTest
public static void main( String args[] ){
TextFieldTest application = new TextFieldTest();application.setDefaultCloseOperation( JFrame.EXIT_ON_CLOSE );
}

// private inner class for event handling
private classTextFieldHandler implementsActionListener {
// process textfield events
public void actionPerformed( ActionEvent event )
{
String string = "" ;
// user pressed Enter in JTextField textField1
if ( event.getSource() == textField1 )string = "textField1: " + event.getActionCommand();
// user pressed Enter in JTextField textField2
else if ( event.getSource() == textField2 )
string = "textField2: " + event.getActionCommand();
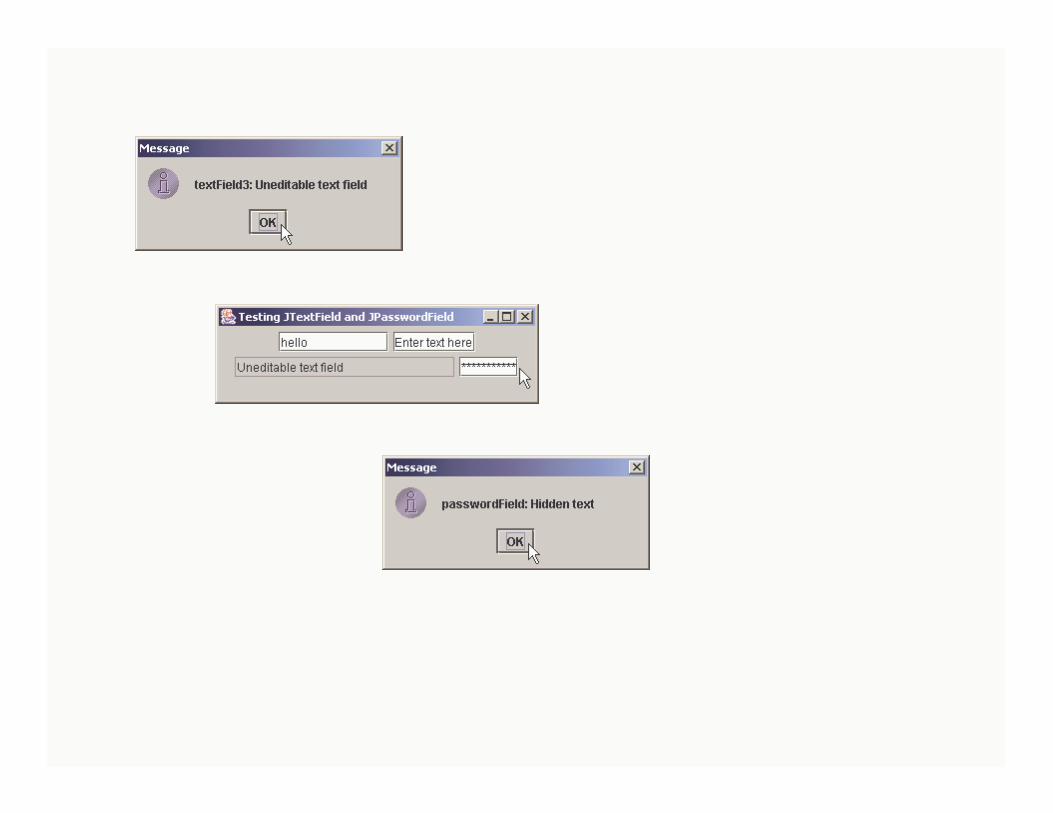
// user pressed Enter in JTextField textField3else if ( event.getSource() == textField3 )
string = "textField3: " + event.getActionCommand();
// user pressed Enter in JTextField passwordField
else if ( event.getSource() == passwordField ) {
string = "passwordField: " +
newString( passwordField.getPassword() );}
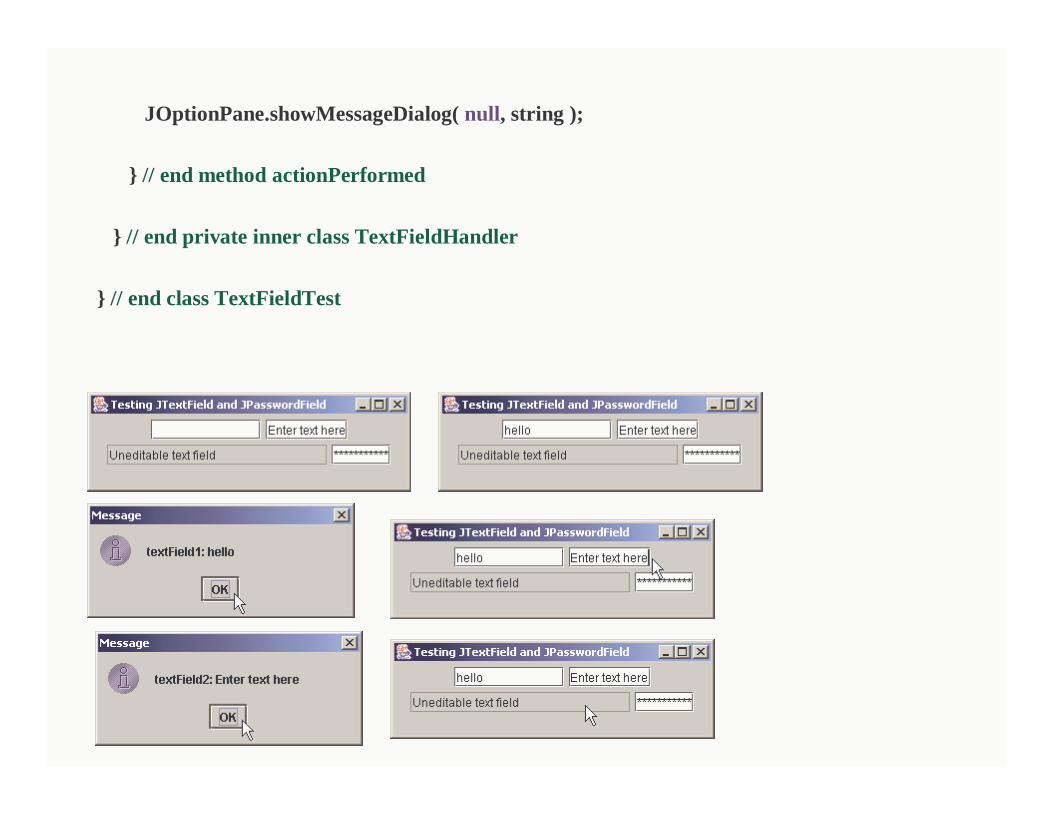
JOptionPane.showMessageDialog( null , string );
} // end method actionPerformed
} // end private inner class TextFieldHandler
} // end class TextFieldTest

How Event Handling Works
• Two open questions– How did event handler get registered?
• Answer:– Through component’s method addActionListener
– Lines 39-42 of TextFieldTest.java
– How does component know to call actionPerformed?
• Answer:– Event is dispatched only to listeners of appropriate type– Each event type has corresponding event-listener interface
» Event ID specifies event type that occurred

Event Handling
• Event-handling model– Three parts
• Event source– GUI component with which user interacts
• Event object– Encapsulates information about event that occurred
• Event listener– Receives event object when notified, then responds
– Programmer must perform two tasks• Register event listener for event source• Implement event-handling method (event handler)

The EventObject Class• The getSource() method is used to get the Object
that caused the event.

Event registration for JTextFieldJTextFieldJTextFieldJTextField textField1textField1textField1textField1textField1
listenerList
...
handler
This reference is created by the statementtextField1.addActionListener( handler );
public void actionPerformed(ActionEvent event )
{ // event handled here
}
JTextField object TextFieldHandler object

Creating an ActionListener
import javax.swing.*;import java.awt.*;import java.awt.event.*;import java.applet.*;
public class MyApplet extends JApplet implements ActionL istener {private JButton clickme = new JButton("ClickMe");
public void init() {getContentPane().add(clickme); // Add clickme to the appletclickme.addActionListener(this); // Register with a listener
} // init()
public void actionPerformed(ActionEvent e) {if (e.getSource() == clickme) {
showStatus("clickme was clicked");System.out.println( e.toString() );
}} // actionPerformed()
} // MyApplet
Button click events are handled by ActionListeners
The applet is the listener.
The actionPerformed() method contains code that handles the button click.

The Java Event Model• All events are handled by objects called listeners.

Handling an ActionEvent

Some event classes of package java.awt.eventjava.awt.eventjava.awt.eventjava.awt.event
Object
EventObject
AWTEvent
ActionEvent
AdjustmentEvent
ItemEvent
TextEvent
ContainerEvent
FocusEvent
PaintEvent
WindowEvent
InputEvent
MouseWheelEvent
ComponentEvent
KeyEvent MouseEvent
Object
EventObject
AWTEvent
ComponentEvent
TextEvent
ItemEvent
AdjustmentEvent
ActionEvent
WindowEvent
InputEvent
MouseEventKeyEvent
MouseWheelEvent
FocusEvent
PaintEvent
ContainerEvent
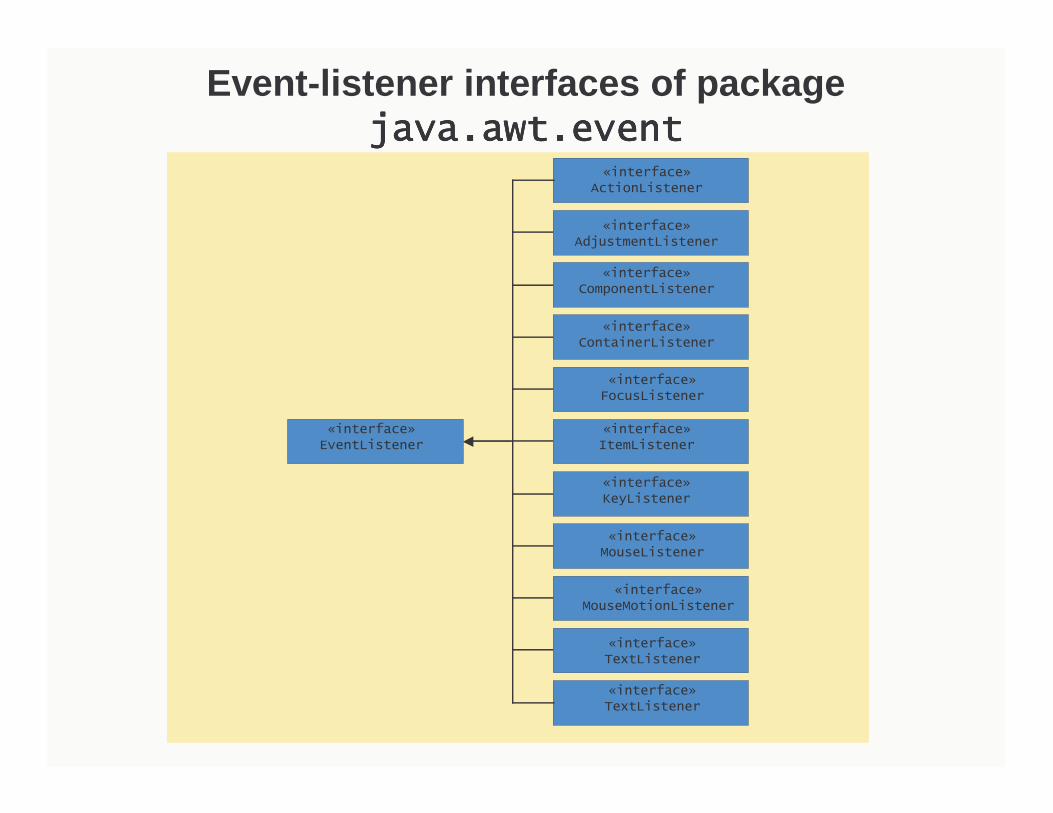
Event-listener interfaces of package java.awt.eventjava.awt.eventjava.awt.eventjava.awt.event
interface EventListener
interface ActionListener
interface AdjustmentListener
interface ComponentListener
interface ContainerListener
interface FocusListener
interface ItemListener
interface KeyListener
interface MouseListener
interface MouseMotionListener
interface TextListener
interface WindowListener
«interface»EventListener
«interface»ActionListener
«interface»AdjustmentListener
«interface»ComponentListener
«interface»ContainerListener
«interface»FocusListener
«interface»ItemListener
«interface»KeyListener
«interface»MouseListener
«interface»MouseMotionListener
«interface»TextListener
«interface»TextListener

Event Classes
Components Events DescriptionButton, JButton ActionEvent User clicked buttonCheckBox, JCheckBox ItemEvent User toggled a checkboxCheckboxMenuItem, JCheckboxMenuItem ItemEvent User toggled a checkboxChoice, JPopupMenu ItemEvent User selected a choiceComponent, JComponent ComponentEvent Component was moved or resized
FocusEvent Component acquired or lost focusKeyEvent User typed a keyMouseEvent User manipulated the mouse
Container, JContainer ContainerEvent Component added/removed from containerList, JList ActionEvent User double-clicked a list item
ItemEvent User clicked a list itemMenu, JMenu ActionEvent User selected menu itemScrollbar, JScrollbar AdjustmentEvent User moved scrollbarTextComponent, JTextComponent TextEvent User edited textTextField, JTextField ActionEvent User typed Enter keyWindow, JWindow WindowEvent User manipulated window
• AWT events for each type of component.

New Swing Event Classes
Component Events DescriptionJPopupMenu PopupMenuEvent User selected a choiceJComponent AncestorEvent An event occurred in an ancestorJList ListSelectionEvent User double-clicked a list item
ListDataEvent List's contents were changedJMenu MenuEvent User selected menu itemJTextComponent CaretEvent Mouse clicked in text
UndoableEditEvent An undoable edit has occurredJTable TableModelEvent Items added/removed from table
TableColumnModelEvent A table column was movedJTree TreeModelEvent Items added/removed from tree
TreeSelectionEvent User selected a tree nodeTreeExpansionEvent User changed tree node
JWindow WindowEvent User manipulated window
• Newly defined Swing events.

Case Study: Designing a Basic GUI
• Basic User Interface Tasks:– Provide help/guidance to the user.– Allow input of information.– Allow output of information.– Control interaction between the user and
device.

The MetricConverter Class• Problem Description: Design a GUI for a Java
application that converts miles to kilometers. The class that performs the conversions is defined as:
public class MetricConverter {
public static double milesToKm(double miles) {return miles / 0.62;
}}
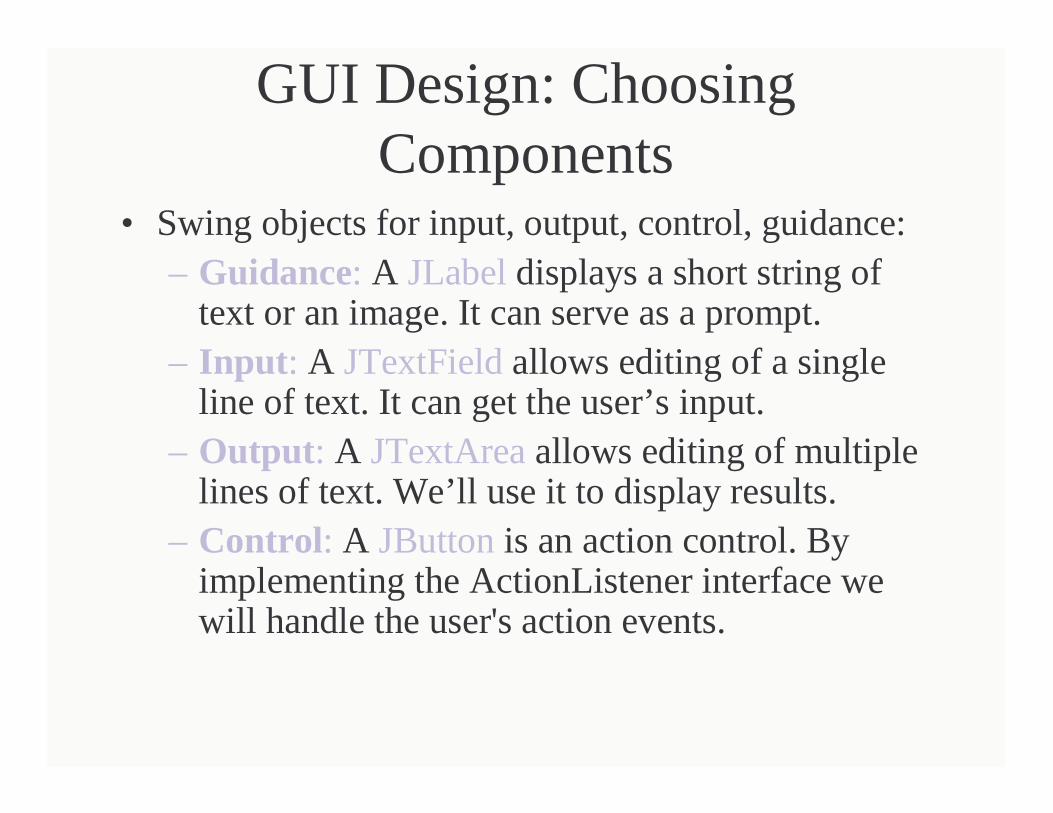
GUI Design: Choosing Components
• Swing objects for input, output, control, guidance:– Guidance: A JLabeldisplays a short string of
text or an image. It can serve as a prompt. – Input : A JTextFieldallows editing of a single
line of text. It can get the user’s input.– Output : A JTextAreaallows editing of multiple
lines of text. We’ll use it to display results.– Control : A JButtonis an action control. By
implementing the ActionListener interface we will handle the user's action events.

GUI Design: The Top-Level Window
• For applets, top-level window is JApplet.
• For applications, aJFrameis used.
• Both JApplet and JFrame are subclasses of Containerand are suitable for holding the interface components.
• Both JApplet and JFrame are heavyweight components.

GUI Design: Layout
• In a FlowLayout components are arranged left to right in rows within the container.

Class Design
Uses

import javax.swing.*; // Packages usedimport java.awt.*;import java.awt.event.*;
public class Converter extends JFrame implements Act ionListener{private JLabel prompt = new JLabel("Distance in miles : "); private JTextField input = new JTextField(6);private JTextArea display = new JTextArea(10,20);private JButton convert = new JButton("Convert!");
public Converter() {setLayout(new FlowLayout()); add(prompt);add(input);add(convert); add(display);display.setLineWrap(true);display.setEditable(false); convert.addActionListener(this);
} // Converter()
public void actionPerformed( ActionEvent e ) {double miles =
Double.valueOf(input.getText()).doubleValue();double km = MetricConverter.milesToKm(miles);display.append(miles + " miles equals " + km +
" kilometers\n");} // actionPerformed()
} // Converter
Implementing the Converter Class

Instantiating the Top-Level JFrame
public static void main(String args[]) {Converter f = new Converter();f.setSize(400, 300); f.setVisible(true);
// Quit the applicationf.addWindowListener(new WindowAdapter() {
public void windowClosing(WindowEvent e) {System.exit(0);
}});
} // main()

Extending the GUI: Button Array
• Make the JTextField a control so the user doesn’t have to use the mouse to perform conversions.
• Implement a 10-key pad so a conversion can be done with just the mouse control.
• Effective Design:Redundant controls.

The KeyPad JPanel
• The KeyPad JPanel handles its own actions.
Reference to the client.

The Callback Method Design

Implementation: The KeyPadClasspublic class KeyPad extends Jpanel implements ActionL istener {
private final static int NBUTTONS = 12;private KeyPadClient kpc; // Owner of the KeyPadprivate JButton buttons[]; // An array of buttonsprivate String labels[] = // And their labels
{ "1","2","3","4","5","6","7","8","9","C","0","." };
public KeyPad(KeyPadClient kpc) {this.kpc = kpc;buttons = new JButton[NBUTTONS]; // Create the arrayfor(int k = 0; k < keyPad.length; k++) { // For each button
buttons[k] = new JButton(labels[k]); // Create it w/labelbuttons[k].addActionListener(this); // and a listeneradd(buttons[k]); // and add to panel
} // for}public void actionPerformed(ActionEvent e) {
String keylabel = ((Jbutton)e.getSource()).getText( );kpc.keypressCallback(keylabel);
}} Callback.
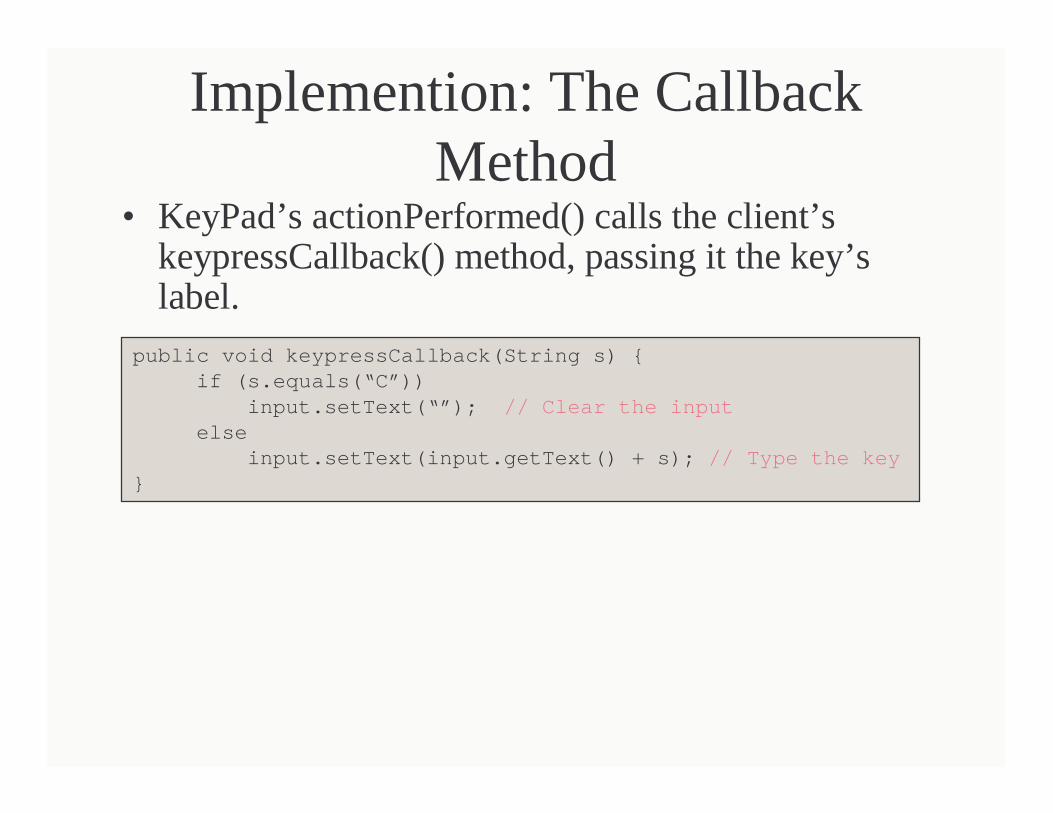
Implemention: The Callback Method
• KeyPad’s actionPerformed() calls the client’s keypressCallback() method, passing it the key’s label.
public void keypressCallback(String s) {if (s.equals(“C”))
input.setText(“”); // Clear the inputelse
input.setText(input.getText() + s); // Type the key}

GUI Design Critique
• Problem: The default layout for a JPanel is FlowLayout but we need GridLayout.
We got the keypad layout
wrong!

Containers
• A container is a component that contains other components -- e.g., JPanel, JFrame, JApplet.
• Container methods:

Layout Managers
• A layout manager is an object that manages the layout and organization of a container, including:– Size of container.– Size of each element in the container.– Position and spacing between elements.

Types of Layout Managers
Manager Descriptionjava.awt.BorderLayout Arranges elements along the north, south,
east, west, and in the center of the container.java.swing.BoxLayout Arranges elements in a single row or single
column.java.awt.CardLayout Arranges elements like a stack of cards, with
one visible at a time.java.awt.FlowLayout Arranges elements left to right across the
container.java.awt.GridBagLayout Arranges elements in a grid of variable sized
cells (complicated).java.awt.GridLayout Arranges elements into a two-dimensional grid
of equally sized cells.java.swing.OverlayLayout Arranges elements on top of each other.

Default Layout Managers
Container Layout ManagerJApplet BorderLayout (on its content pane)JBox BoxLayoutJDialog BorderLayout (on its content pane)JFrame BorderLayout (on its content pane)JPanel FlowLayoutJWindow BorderLayout (on its content pane)

The GridLayout Manager
keypadPanel.setLayout(new GridLayout(4,3,1,1));
• A GridLayoutarranges components in a two-dimensional grid.
4 rows and 3 columns
1 space between each row and
column
• Design Critique: We should useBorderLayoutfor top-level window.

The BorderLayout Manager
• Use add(Component, String)method to add components to a border layout :
• A BorderLayoutdivides the container into five areas: north, south, east, west, and center.
getContentPane().setLayout(new BorderLayout(2, 2));
getContentPane().add(keypadPanel, "East");
Horizontal and vertical gaps.

Converter: BorderLayout Design
Panels are used to group components
by function.
All the controls are grouped together.

Converter: BorderLayoutImplementation
public Converter() {setLayout(new BorderLayout());initKeyPad(); JPanel inputPanel = new JPanel(); // Input panelinputPanel.add(prompt); inputPanel.add(input); add(inputPanel,"North"); JPanel controlPanel = new JPanel(new BorderLayout(0, 0 )); // ControlscontrolPanel.add(keypadPanel, "Center");controlPanel.add(convert, "South");add(controlPanel, "East"); add(display,"Center"); // Output displaydisplay.setLineWrap(true);display.setEditable(false); convert.addActionListener(this); input.addActionListener(this);
} // Converter()
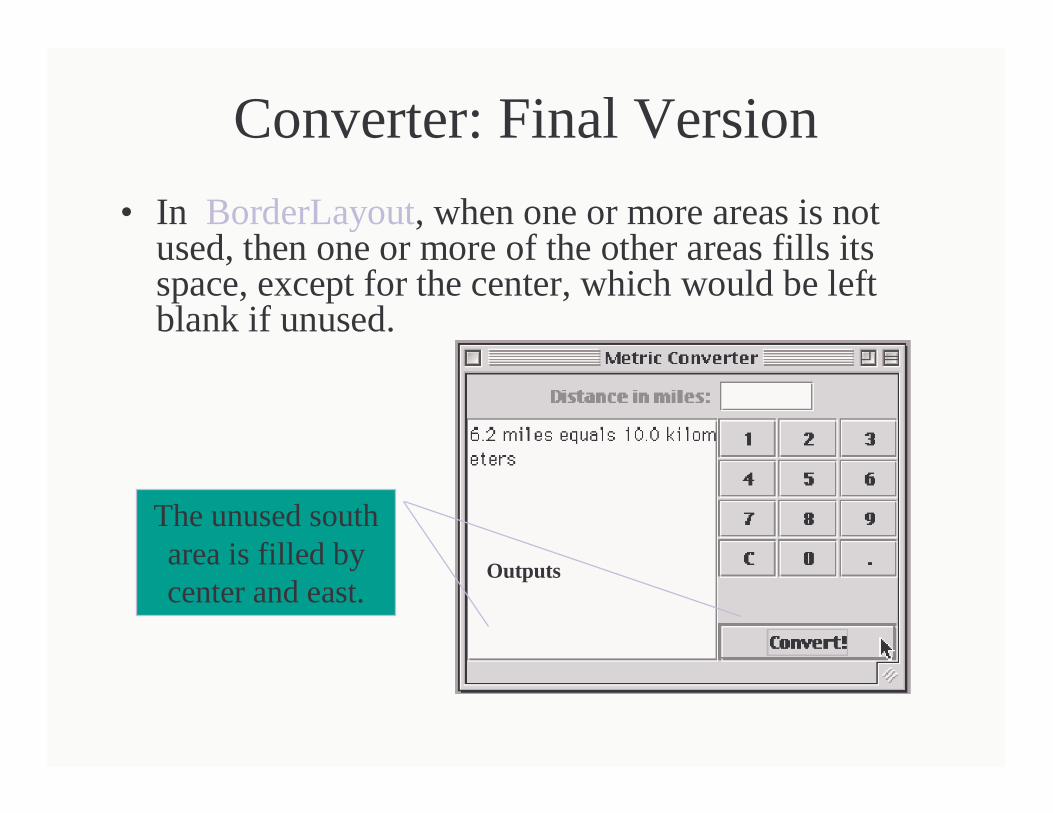
Converter: Final Version
Outputs
• In BorderLayout, when one or more areas is not used, then one or more of the other areas fills its space, except for the center, which would be left blank if unused.
The unused south area is filled by center and east.

Checkboxes
• A JCheckBoxis a button which always displays its current state (selected or not).
• Used to select one or more options from a set.
private JCheckBox titles[] = new JCheckBox[NTITLES];
private String titleLabels[] = {"Chess Master - $59.95", "Checkers Pro - $39.95",
"Crossword Maker - $19.95"};
for(int k = 0; k < titles.length; k++) {titles[k] = new JCheckBox(titleLabels[k]);titles[k].addItemListener(this);choicePanel.add(titles[k]);
}

Radio Buttons• A JRadioButtonis a button that belongs to a
ButtonGroupof mutually exclusive alternatives. Only one button from the group may be selected at a time.
private ButtonGroup optGroup = new ButtonGroup();private JRadioButton options[] = new JRadioButton[NOP TIONS];private String optionLabels[] = {"Credit Card", "Deb it Card",
"E-cash"};for(int k = 0; k < options.length; k++) {
options[k] = new JRadioButton(optionLabels[k]);options[k].addItemListener(this);optionPanel.add(options[k]);optGroup.add(options[k] );
}options[0].setSelected(true); // Set the first button on
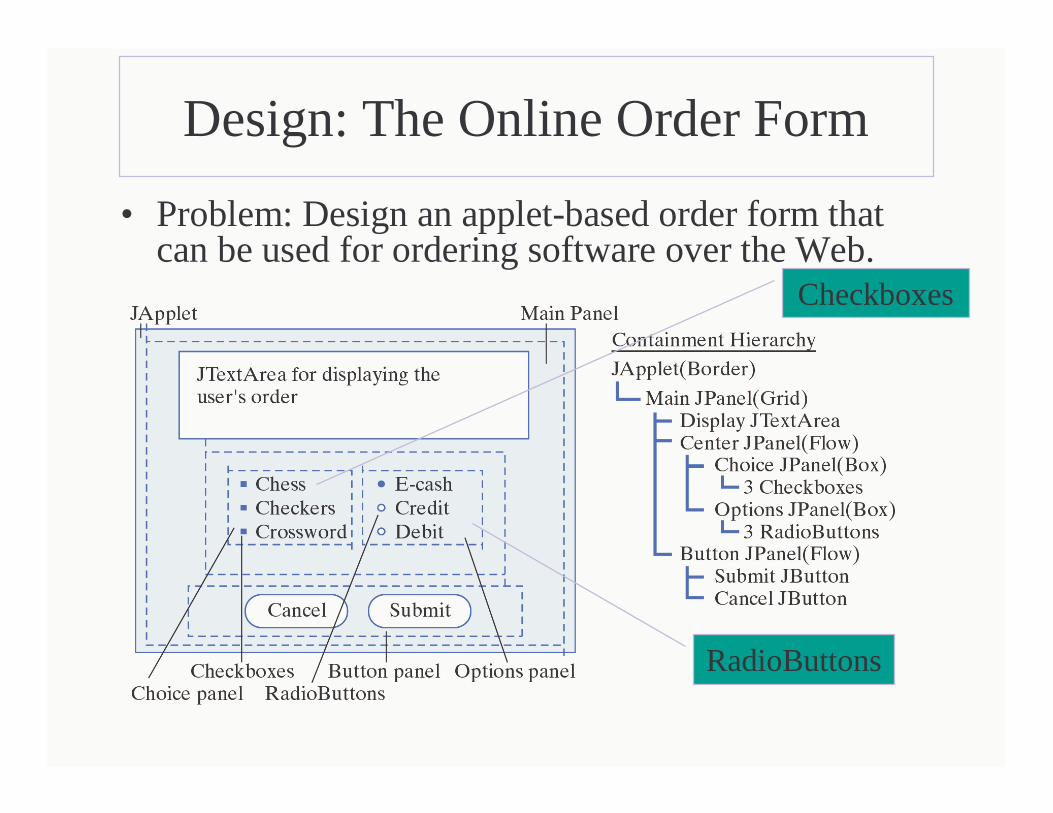
Design: The Online Order Form
• Problem: Design an applet-based order form that can be used for ordering software over the Web.
Checkboxes
RadioButtons

The Order Form
Applet
choicePanel.setBorder(BorderFactory.createTitledBorder("Titles"));
A Swing Titled Border

Class Design• The OrderApplet makes
extensive use of GUI components.

The ItemListener Interface
• ItemEventsare associated with items that make up menus, including JCheckBoxes and RadioButtons.
• They are handled by the ItemListenerinterface, which consists of theitemStateChanged()method.
• In the OrderApplet, each time the user selects a title or an option, the following method is executed.
public void itemStateChanged(ItemEvent e) {display.setText("Your order so far (Payment by: ");for (int k = 0; k < options.length; k++ )
if (options[k].isSelected())display.append(options[k].getText() + ")\n");
for (int k = 0; k < titles.length; k++ )if (titles[k].isSelected())
display.append("\t" + titles[k].getText() + "\n");} // itemStateChanged()

The OrderApplet Class: Initializationpublic class OrderApplet extends JApplet implements ItemListener, ActionListener {
private final int NTITLES = 3, NOPTIONS = 3; private JPanel mainPanel = new JPanel(),
centerPanel = new JPanel(),choicePanel = new JPanel(),optionPanel = new JPanel(),buttonPanel = new JPanel();
public void init() {mainPanel.setBorder(
BorderFactory.createTitledBorder("Acme Software Titles"));mainPanel.setLayout(new GridLayout(3, 1, 1, 1));cancel.addActionListener(this);submit.addActionListener(this);initChoices();initOptions();buttonPanel.setBorder(
BorderFactory.createTitledBorder("Order Today"));buttonPanel.add(cancel);buttonPanel.add(submit);centerPanel.add(choicePanel);centerPanel.add(optionPanel); mainPanel.add( display);mainPanel.add(centerPanel);mainPanel.add( buttonPanel);getContentPane().add(mainPanel);setSize(400,400);
} // init()
} // OrderApplet
import javax.swing.*;import javax.swing.border.*;import java.awt.*;import java.awt.event.*;
Panel hierarchy.
The init() method sets the layouts and adds
components to panels.

OrderApplet Class: Handling Actions
public void actionPerformed(ActionEvent e) {String label = submit.getText();if (e.getSource() == submit) {
if (label.equals("Submit Order")) {display.append(
"Thank you. Press 'Confirm' to submit for your orde r!\n");submit.setText("Confirm Order");
} else {display.append(
"Thank you. You will receive your order tomorrow!\n ");submit.setText("Submit Order");
} } else
display.setText("Thank you. Maybe we can serve you next time!\n");
} // actionPerformed()
The “Submit” button serves a dual purpose.

Menus
• Menus allow a program to grow without cluttering the interface.
• A JMenuBaris a horizontal list of menus.• A JMenuis a clickable area on the menu bar that
is associated with aJPopupMenu, a small window that diplays JMenuItems.
• JSeparatorsare used to group menu items.
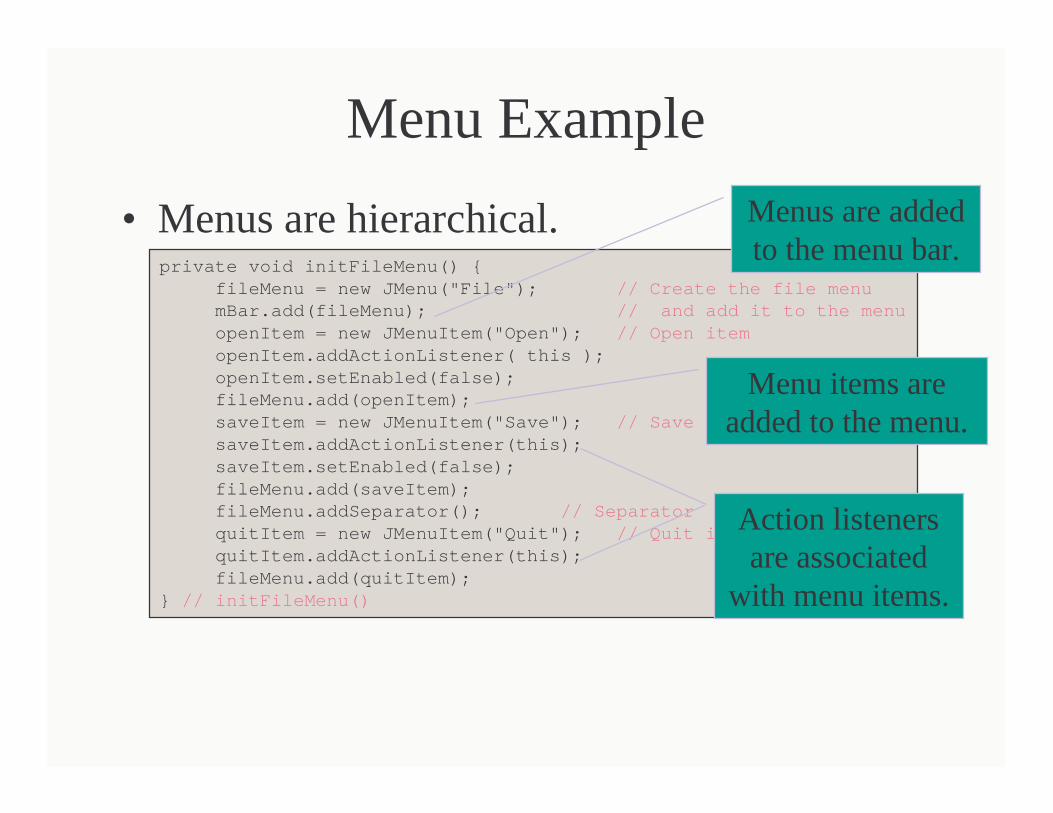
Menu Example
private void initFileMenu() {fileMenu = new JMenu("File"); // Create the file menumBar.add(fileMenu); // and add it to the menuopenItem = new JMenuItem("Open"); // Open itemopenItem.addActionListener( this );openItem.setEnabled(false);fileMenu.add(openItem);saveItem = new JMenuItem("Save"); // Save itemsaveItem.addActionListener(this);saveItem.setEnabled(false);fileMenu.add(saveItem);fileMenu.addSeparator(); // SeparatorquitItem = new JMenuItem("Quit"); // Quit itemquitItem.addActionListener(this);fileMenu.add(quitItem);
} // initFileMenu()
• Menus are hierarchical.
Action listeners are associated
with menu items.
Menus are added to the menu bar.
Menu items are added to the menu.
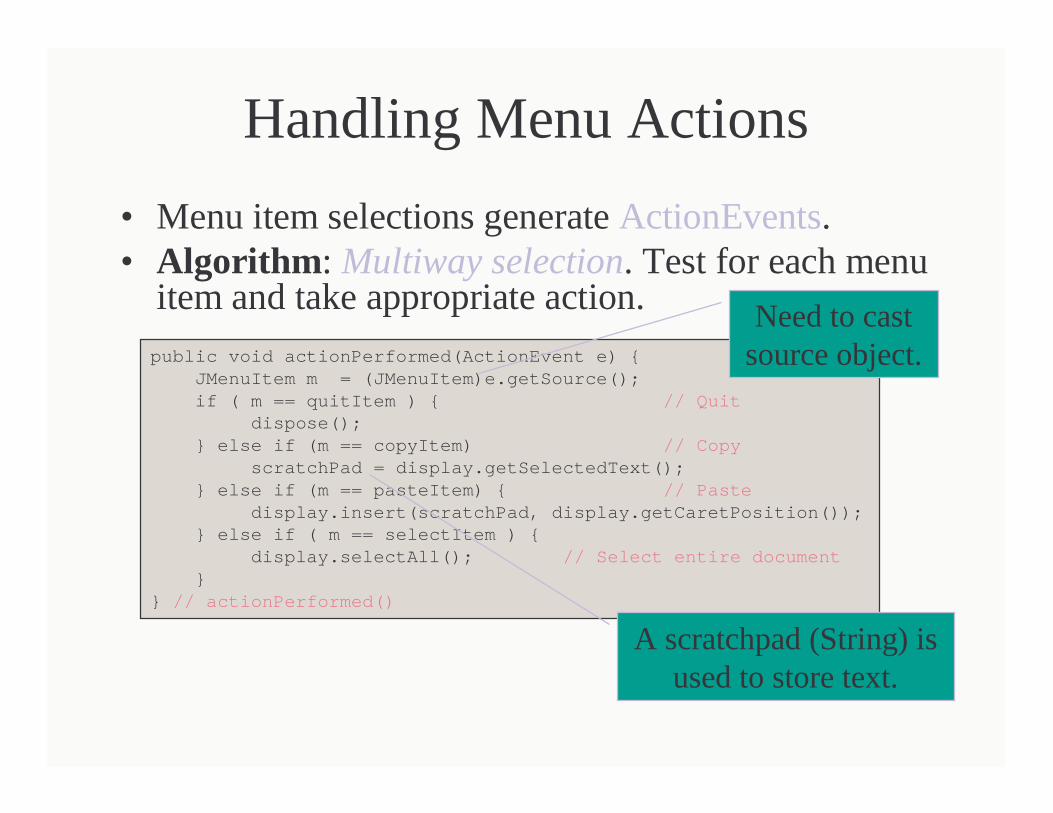
Handling Menu Actions
public void actionPerformed(ActionEvent e) {JMenuItem m = (JMenuItem)e.getSource(); if ( m == quitItem ) { // Quit
dispose();} else if (m == copyItem) // Copy
scratchPad = display.getSelectedText();} else if (m == pasteItem) { // Paste
display.insert(scratchPad, display.getCaretPosition ()); } else if ( m == selectItem ) {
display.selectAll(); // Select entire document}
} // actionPerformed()
• Menu item selections generate ActionEvents.• Algorithm : Multiway selection. Test for each menu
item and take appropriate action. Need to cast source object.
A scratchpad (String) is used to store text.