grc concrete wall panels
TRANSCRIPT

BESPOKE CONCRETE DESIGNS
GRC CONCRETE WALL PANELS INSTALLATION GUIDE
IMPORTANT INFORMATION
CONSIDERATIONS BEFORE INSTALLING GRC PANELS
§ Keep packaged until installation
§ Do not force the panels over uneven surfaces
§ Always store horizontally
§ Do not place loads on the panels
§ Level the sub-wall correctly before starting the installation (+/- 2 mm in 3 m)
§ GRC panels are not rectified, they can have variations of 0.6%.
INSTALLATION GUIDE - WALLS
• Base: solid flat surface
• There can be no rising or negative humidity
• Verify that the base wall is leveled (+/-2 mm in 3 meters)
• Allow for the perimeter joints and joints against objects from the base
STORAGE
• Panels should be kept in a horizontal way
• Do not leave the panels in a vertical or inclined position or leaning against any surface
• Keep in a dry, clean space in the original packaging
www.livingconcrete.co.uk [email protected] 12a Sutton Lane North, London W4 4LD Tel: 0203 092 3020
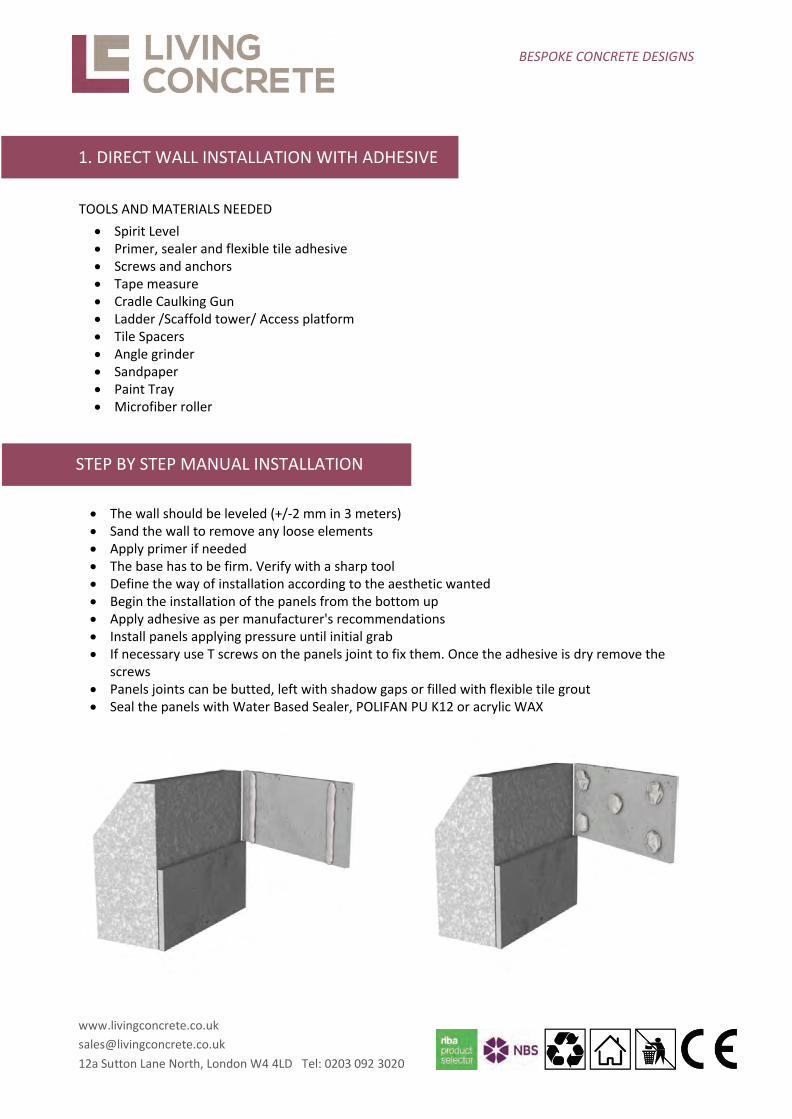
1. DIRECT WALL INSTALLATION WITH ADHESIVE
TOOLS AND MATERIALS NEEDED• Spirit Level• Primer, sealer and flexible tile adhesive• Screws and anchors• Tape measure• Cradle Caulking Gun• Ladder /Scaffold tower/ Access platform• Tile Spacers• Angle grinder• Sandpaper• Paint Tray• Microfiber roller
STEP BY STEP MANUAL INSTALLATION
• The wall should be leveled (+/-2 mm in 3 meters)• Sand the wall to remove any loose elements• Apply primer if needed• The base has to be firm. Verify with a sharp tool• Define the way of installation according to the aesthetic wanted• Begin the installation of the panels from the bottom up• Apply adhesive as per manufacturer's recommendations• Install panels applying pressure until initial grab• If necessary use T screws on the panels joint to fix them. Once the adhesive is dry remove the
screws• Panels joints can be butted, left with shadow gaps or filled with flexible tile grout• Seal the panels with Water Based Sealer, POLIFAN PU K12 or acrylic WAX
BESPOKE CONCRETE DESIGNS
www.livingconcrete.co.uk [email protected] 12a Sutton Lane North, London W4 4LD Tel: 0203 092 3020
BESPOKE CONCRETE DESIGNS
www.livingconcrete.co.uk [email protected] 12a Sutton Lane North, London W4 4LD Tel: 0203 092 3020
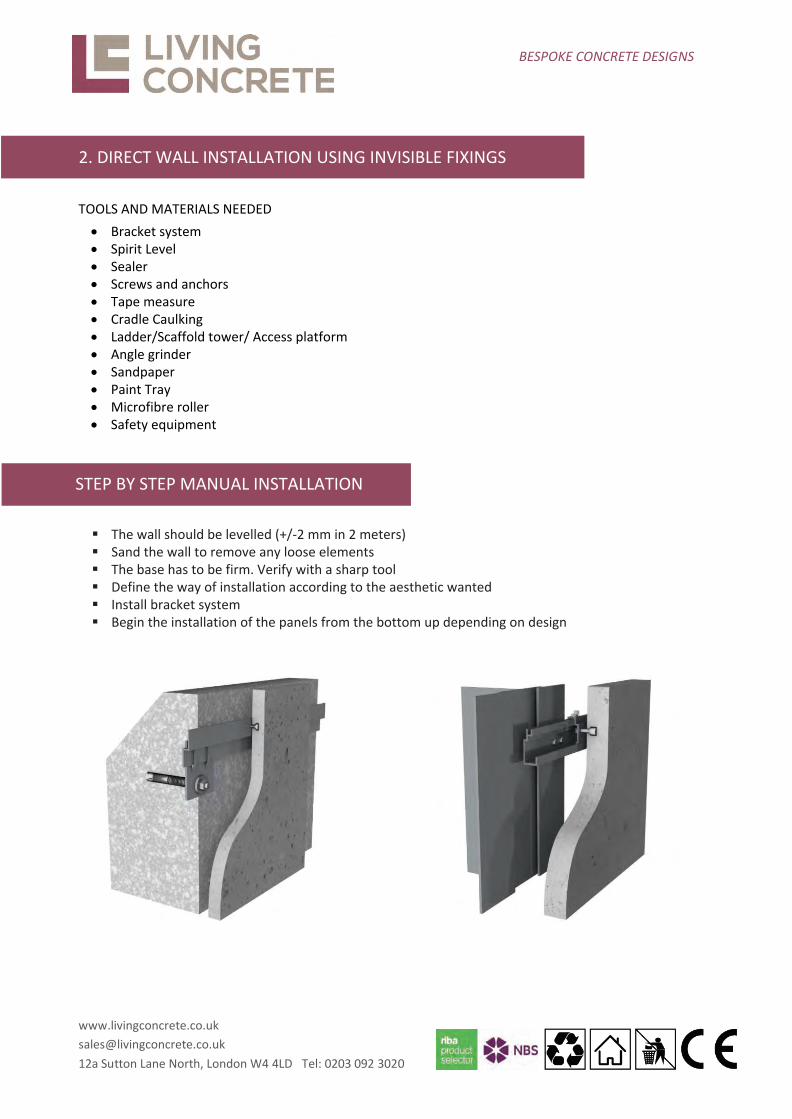
2. DIRECT WALL INSTALLATION USING INVISIBLE FIXINGS
TOOLS AND MATERIALS NEEDED• Bracket system• Spirit Level• Sealer• Screws and anchors• Tape measure• Cradle Caulking• Ladder/Scaffold tower/ Access platform• Angle grinder• Sandpaper• Paint Tray• Microfibre roller• Safety equipment
STEP BY STEP MANUAL INSTALLATION
§ The wall should be levelled (+/-2 mm in 2 meters)§ Sand the wall to remove any loose elements§ The base has to be firm. Verify with a sharp tool§ Define the way of installation according to the aesthetic wanted§ Install bracket system§ Begin the installation of the panels from the bottom up depending on design
BESPOKE CONCRETE DESIGNS
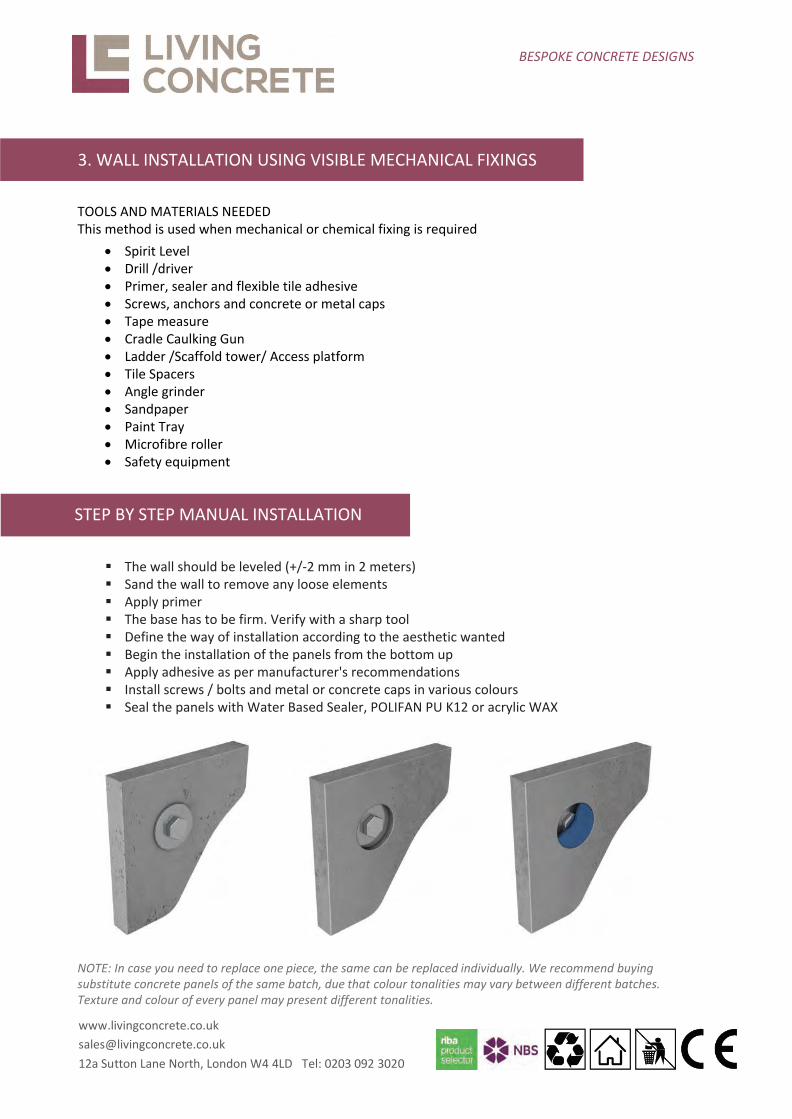
3. WALL INSTALLATION USING VISIBLE MECHANICAL FIXINGS
TOOLS AND MATERIALS NEEDEDThis method is used when mechanical or chemical fixing is required
• Spirit Level• Drill /driver• Primer, sealer and flexible tile adhesive• Screws, anchors and concrete or metal caps• Tape measure• Cradle Caulking Gun• Ladder /Scaffold tower/ Access platform• Tile Spacers• Angle grinder• Sandpaper• Paint Tray• Microfibre roller• Safety equipment
STEP BY STEP MANUAL INSTALLATION
§ The wall should be leveled (+/-2 mm in 2 meters)§ Sand the wall to remove any loose elements§ Apply primer§ The base has to be firm. Verify with a sharp tool§ Define the way of installation according to the aesthetic wanted§ Begin the installation of the panels from the bottom up§ Apply adhesive as per manufacturer's recommendations§ Install screws / bolts and metal or concrete caps in various colours§ Seal the panels with Water Based Sealer, POLIFAN PU K12 or acrylic WAX
NOTE: In case you need to replace one piece, the same can be replaced individually. We recommend buying substitute concrete panels of the same batch, due that colour tonalities may vary between different batches. Texture and colour of every panel may present different tonalities.
www.livingconcrete.co.uk [email protected] 12a Sutton Lane North, London W4 4LD Tel: 0203 092 3020