grt iii trigger installation - charliedatuna iii trigger.pdf · grt iii trigger installation use...
TRANSCRIPT
GRT III Trigger Installation
Use the Left and Right Arrow Keys to Move Forward and Back Through the Slides
Installation is Shown on a Crosman Quest but Installation is the Same for
Almost all Applications
The Final Clearance Check to be Performed on the Crosman Quest and the B-18/19’s is
Shown on the Final Page

Pre-Installation Front Side

Pre-Installation Reverse Side

Remove e-clip From Trigger Pivot Pin

Start to Push Pivot Pin Out
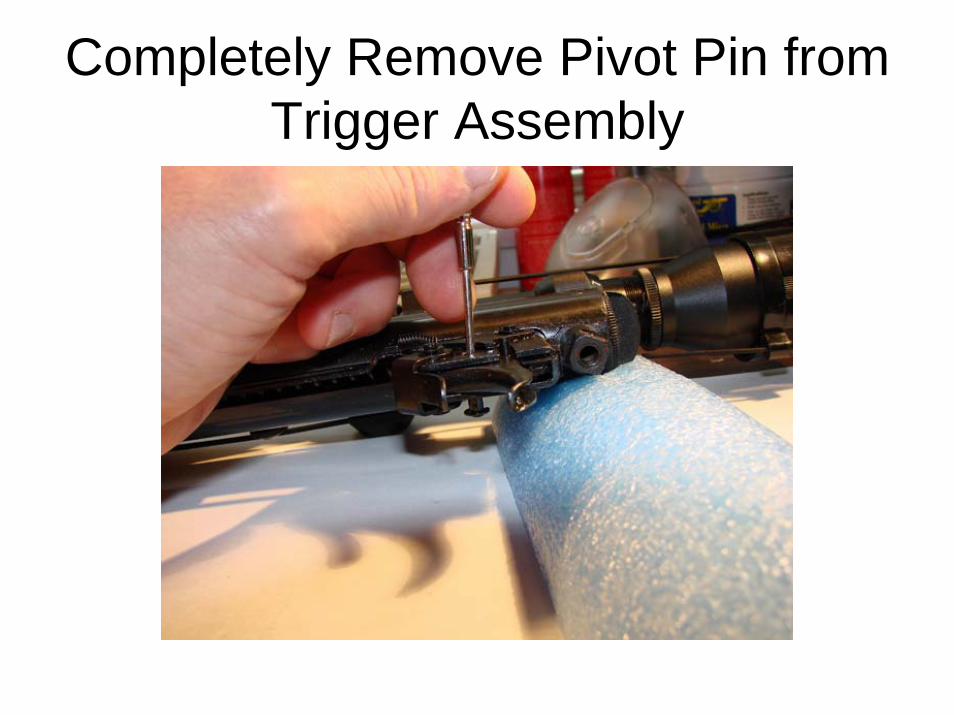
Completely Remove Pivot Pin from Trigger Assembly

Pivot Pin Removed From Old Trigger with remaining e-clip still attached
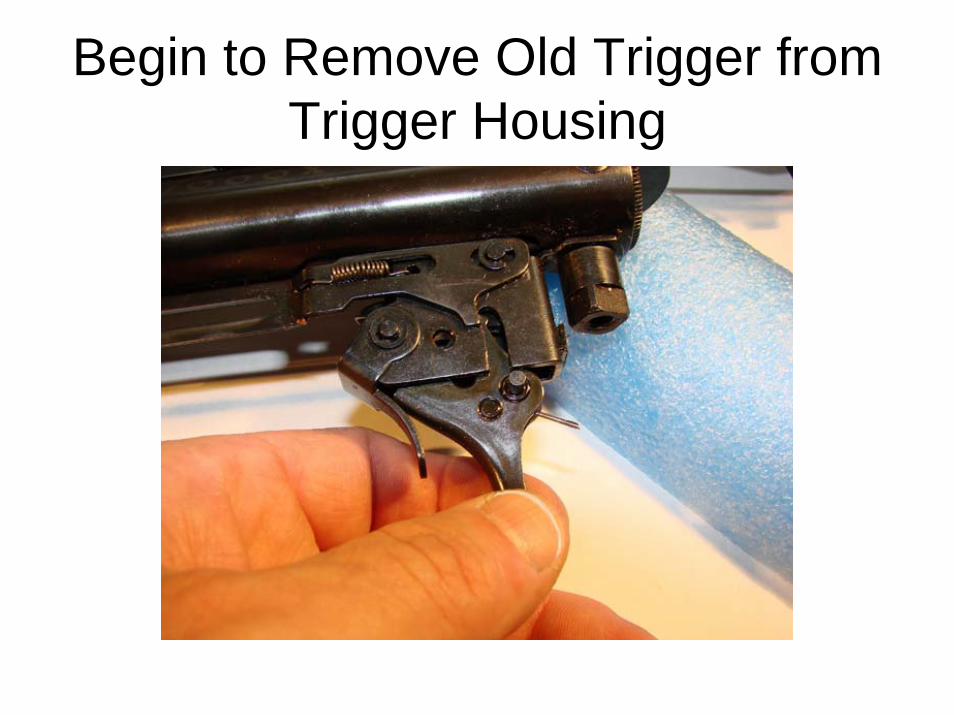
Begin to Remove Old Trigger from Trigger Housing

Old Trigger Out

Depress Spring in Trigger and Slide Out Fat Trigger Pin

Fat Trigger Pin Out

Remove Old Adjustment Screw
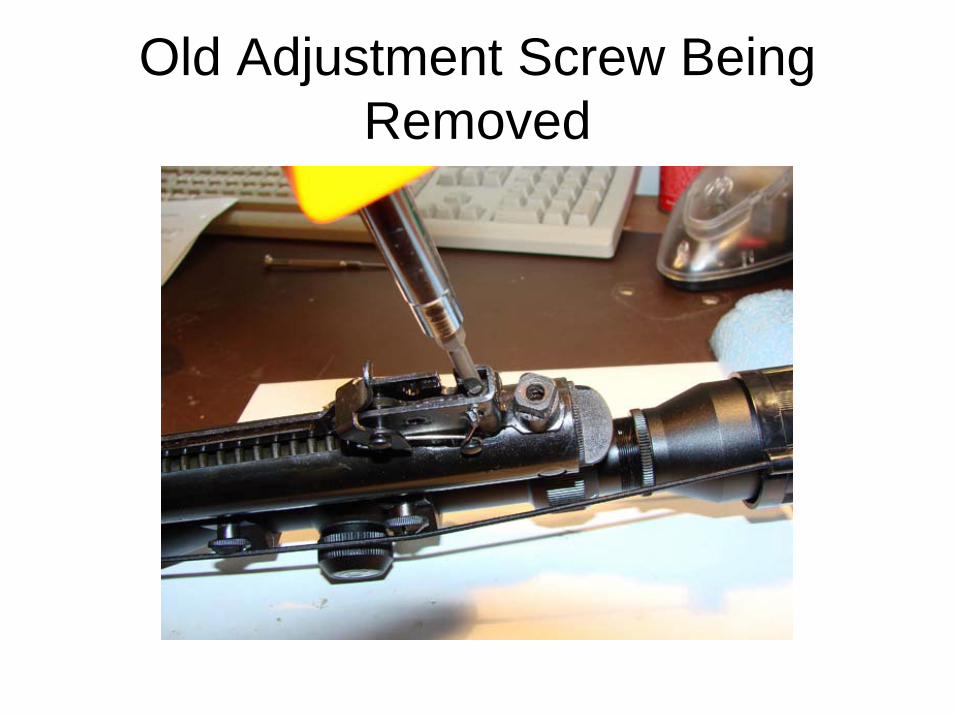
Old Adjustment Screw Being Removed
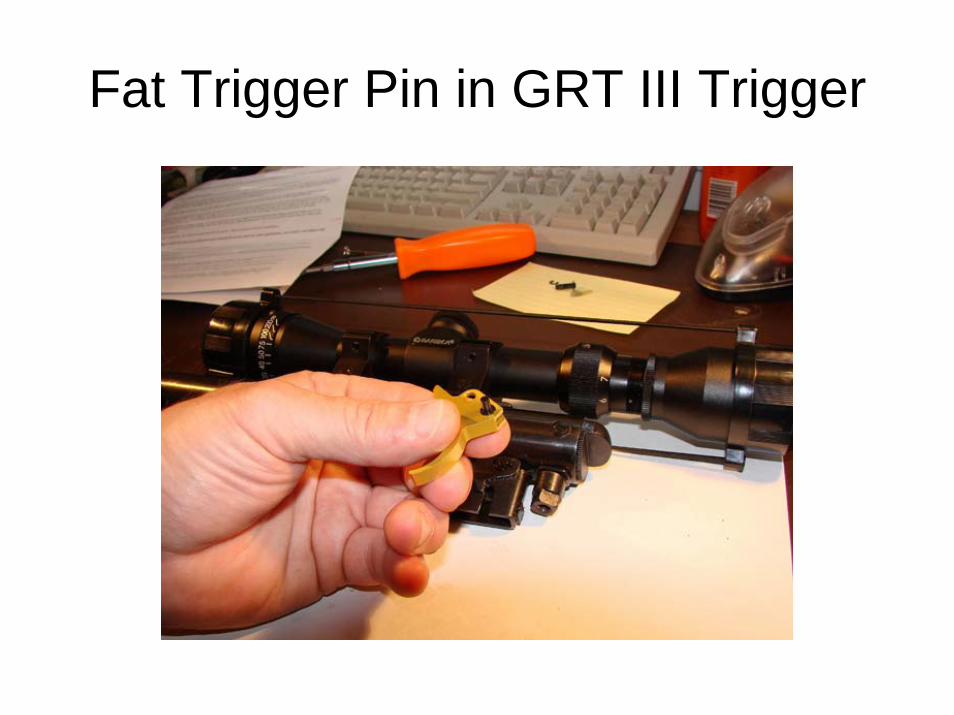
Fat Trigger Pin in GRT III Trigger
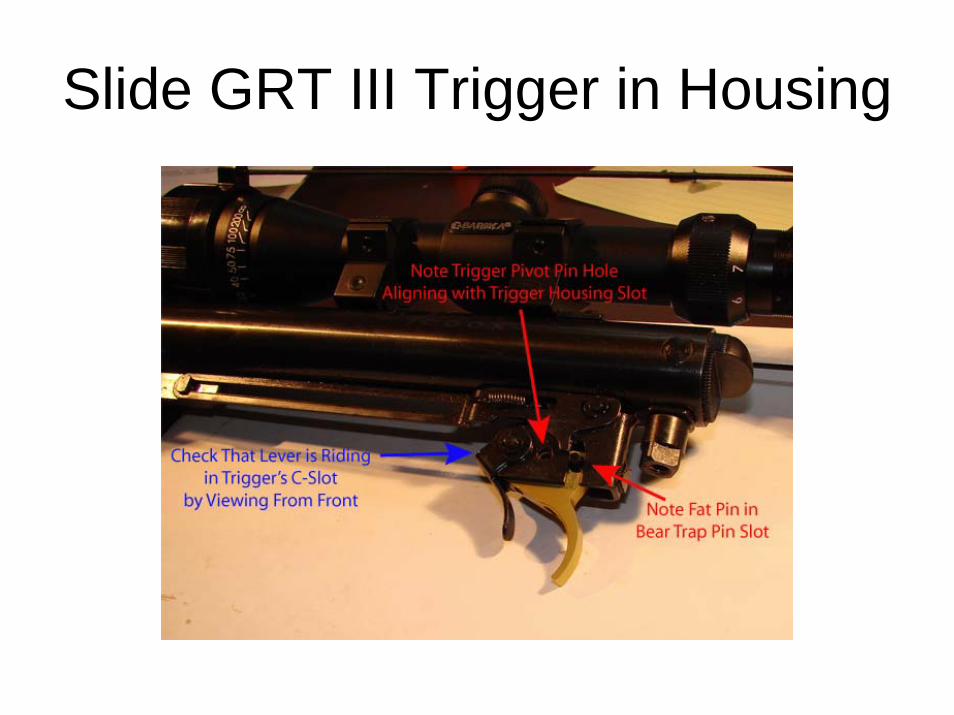
Slide GRT III Trigger in Housing

Pivot Pin Through Trigger Housing and Trigger

Replace e-clip on Trigger Pivot Pin

Installed

On Crosman Quest and B-18/19’s Perform This Check for Clearance