guide to starting your own soap
TRANSCRIPT

8/3/2019 Guide to Starting Your Own Soap
http://slidepdf.com/reader/full/guide-to-starting-your-own-soap 1/25
Guide to Starting Your own Soap & Beauty Care
Business
Have you ever dreamed of learning how to make fragrant soaps & beauty care
products? Well now you can. Women (and Men) just love beautiful great smelling bath & Body products as gifts! Make your own signature soaps and get started in thisgreat biz! Turn that love for making crafts into big bucks! If you already make soapsfor gifts or as a hobby, you can easily turn this into a home business. Develop amarketable line of soaps (consider scented varieties and purposeful soaps). Youcan make different sizes for different markets. For instance, you might sell travelsizedsoaps to bed & breakfasts, medium sized soaps to gift basketeers lookingfor filler items, and large soaps for selling in retail stores. You can also start your own Home Parties. The Small Business Administration estimates that there areover 10 million home based businesses in the US and 30% are owned by Women.Remember, everybody had to start somewhere, You can do it. Please read all of
this Guide very carefully before you begin making these recipes. We want towish you great success with your new business.
Scented Stones:
Great as room fresheners! You will need:
One ceramic or glass bowl,1/2 cup flour (do not use self-rising flour)1/4 cup salt,1/2 tablespoon alum (available in drug stores),
1 tablespoon essential or fragrance oil,2/3 cup boiling water andfood coloring (optional).
In ceramic or glass bowl, thoroughly mix dry ingredients.Add essential oil and boiling water.
NOTE: scent will be strong, but will fade slightly when pastilles dry.
For colored dough, blend in food coloring one drop at a time until desired shade isachieved.
Blend ingredients to form a ball.
Working with a small amount at a time, roll dough between palms of hands to form small balls. Note: cover unused dough to keep it from drying out.

8/3/2019 Guide to Starting Your Own Soap
http://slidepdf.com/reader/full/guide-to-starting-your-own-soap 2/25
Sugar, Salt and Nut Scrub:
1/2 cup ground almonds1/2 cup ground oatmeal1/2 cup sugar
1/2 cup salt1/4 cup almond oil45-60 drops fragrance or essential oil
Variation: Add 2 tablespoons of honey for an extra-moisturizing scrub.Mix almond oil and fragrance or essential oil together in a glass bowl. Add the sugar,finely ground almonds and salt together in a separate bowl and mix thoroughly together.Add this mixture to the almond oil. Mix well with your hands to incorporate and you'redone!
Solid Brown Sugar Scrub:
4 oz. melted melt and pour soap8 oz. grapeseed oil or Avocado Oil3-4 oz. brown sugar 1/2 oz. honeyFragrance oils or essential oils (20 drops)
Mix your grapeseed oil, honey and melted melt and pour soap together. Add the brownsugar and mix together with hands. You can add your fragrance or essential oils at any point during the mixing process. Divvy up into wide-mouthed jars. Wait 24 to 48 hoursfor the mixture to harden into a semi-solid mixture.
Restore the Beauty
2 tablespoons of coarse ground sea salt2 tablespoon of Epsom salt2 tablespoon of sweet almond oil2 teaspoon of calendula oil1 teaspoon of rosehip seed oil5-7 drops of palmrosa essential oil5-7 drops of patchouli eo5-7 drops of bergamot essential oil
Simplicity
2 tablespoons of coarse sea salt2tablespoons of Epsom salt1 tablespoon of sweet almond oil1tablespoons of rosehip seed oil2 teaspoons of calendula oil1 tablespoon of ground elderflowers
8/3/2019 Guide to Starting Your Own Soap
http://slidepdf.com/reader/full/guide-to-starting-your-own-soap 3/25
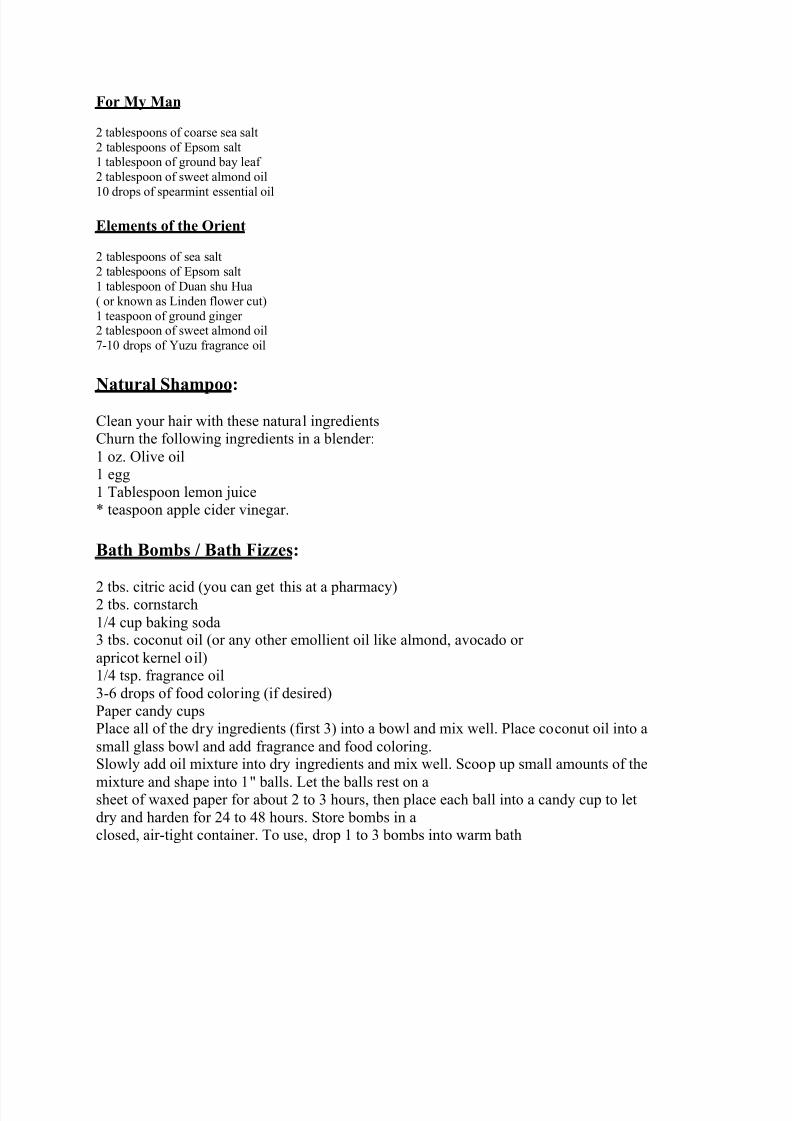
For My Man
2 tablespoons of coarse sea salt2 tablespoons of Epsom salt1 tablespoon of ground bay leaf 2 tablespoon of sweet almond oil
10 drops of spearmint essential oil
Elements of the Orient
2 tablespoons of sea salt2 tablespoons of Epsom salt1 tablespoon of Duan shu Hua( or known as Linden flower cut)1 teaspoon of ground ginger 2 tablespoon of sweet almond oil7-10 drops of Yuzu fragrance oil
Natural Shampoo:
Clean your hair with these natural ingredientsChurn the following ingredients in a blender:1 oz. Olive oil1 egg1 Tablespoon lemon juice* teaspoon apple cider vinegar.
Bath Bombs / Bath Fizzes:
2 tbs. citric acid (you can get this at a pharmacy)2 tbs. cornstarch1/4 cup baking soda3 tbs. coconut oil (or any other emollient oil like almond, avocado or apricot kernel oil)1/4 tsp. fragrance oil3-6 drops of food coloring (if desired)Paper candy cupsPlace all of the dry ingredients (first 3) into a bowl and mix well. Place coconut oil into asmall glass bowl and add fragrance and food coloring.Slowly add oil mixture into dry ingredients and mix well. Scoop up small amounts of the
mixture and shape into 1" balls. Let the balls rest on asheet of waxed paper for about 2 to 3 hours, then place each ball into a candy cup to letdry and harden for 24 to 48 hours. Store bombs in aclosed, air-tight container. To use, drop 1 to 3 bombs into warm bath

8/3/2019 Guide to Starting Your Own Soap
http://slidepdf.com/reader/full/guide-to-starting-your-own-soap 4/25
Bath Salts:
What You Need:
Large glass or metal mixing bowl
2 cups Epsom's salts1 cup Sea salt, rock salt or coarse saltFood coloring1/4 teaspoon GlycerinEssential oil for fragrance such as vanilla, citrus or peppermint, optionalClean, dry jars with cork stoppers or metal screw-on lid
How To Make It:
Try and do this on a day with low humidity, the salt will absorb moisture from the air.Combine salts in bowl and mix well. Add a couple drops of food coloring and mix
well.Add glycerin and essential oil (4 or 5 drops) and mix well. Spoon salts into the jarsand close them.Make a gift tag with the scent (if you used one) and suggesting using 1/3 to 1/2 cup inthe bath.Makes 3 cups of bath salts.
Milk Bath:
Pamper yourself with this luxurious bath!2 cups powdered milk (dry)1 Tbsp. dried orange peel2 tsp. dried lavender flowers2 tsp. dried rosemaryMix all the ingredients together and pour into a clear glass bottle. Use 1/2 cup of themixture per bath - soak for 20 minutes. Tie a ribbon and a sprig of dried flowers to the jar for a ready gift!
Secret Garden Bath Teas:
Makes one tea bag.
1 tsp lavender flowers (dried)1 tsp rose petals (dried)1/2 tsp lemon balm (dried)1/4 tsp rosemary (dried)1/8 tsp spearmint (dried) (just to give it a bit of a snap)4 drops lavender EO2 drops rose EO

8/3/2019 Guide to Starting Your Own Soap
http://slidepdf.com/reader/full/guide-to-starting-your-own-soap 5/25
1 drop patchouli (spelling?) EO
Mix well, put into heat sealable teabag(or mesh bag).
Herbal Bath Tea Blends:
Bath teas are a hot herbal item this year! Why? People have found that they work . We have formulated allkinds of herbal bath tea recipes to help you with your product development and for this seasons gift giving .
Secrets of the Orient
This was created for a famous day spa..( rather uplifting)( good for any skin especially oily like a man'sskin)
2 tbs epsom salt1 tbs lemongrass1 tbs ginger cut1 tbs lemon verbena
1 tbs comfrey leaf 1 tbs orange peel1 tbs chamomile1 tbs jasmine flowers1 tbs green tea
This should be enough for 2-3 bathes ( possible enhancement or fragrances to add ..lemon grass essentialoil, sweet orange china rain fragrance oil, seashore type )
Calm (relaxing )
2 parts lavender 2 parts epsom salt
2 parts rose petals1 part chamomile
No More Sore Muscles
2 parts Thyme( this herb is a great muscle relaxant. This is why you see it in so many recipes)2 parts rosemary2 parts lavender 1 part cramp bark ( the name gives it away, excellent herb often overlooked)1 part epsom salt
Troubled skin
2 parts rooibos tea2 parts oatmeal1 part sassafras1 part chamomile1 part comfrey leaf

8/3/2019 Guide to Starting Your Own Soap
http://slidepdf.com/reader/full/guide-to-starting-your-own-soap 6/25
Mix well, put into heat sealable teabag(or mesh bag).
Easy Clay Mask:
1 part bentonite clay1 part rhassoul clayoptional: skin loving essential oil, such as Lavender, Lemongrass or German Chamomile
Mix with water until the mask has a consistency that you like. Apply to body or face andwait for clay to dry fully. Take off with a warm water washcloth. If all over body, jumpin the shower to get off more quickly than a washcloth.
Sheer Lipstick Recipe:
2 oz. beeswax2 oz. Grapeseed Oil1/4 oz. Wheatgerm Oil2 tsp. Zinc Oxide (by volume - optional - may substitute titanium dioxide)4 tsp. lip safe mica (by volume)
The zinc Oxide will provide a opaque, matte effect to your lipstick. If you use just mica,you will have a more sheer lip balm.
Melt the beeswax in a double boiler. Once fully melted, add the Grapeseed andWheatgerm oil. Pour your colorant into the double boiler and stir well. Let this mixturesit until mixture begins to thicken slightly (thus suspending the colorant better) and pour into jars or tubes
Colored Lipstick Recipe:
This lipstick is a more waxy lipstick than the Sheer lipstick.
Phase 1
4 oz. Castor Oil4 oz. Jojoba oil
.5 oz. Beeswax1 oz. Candelilla wax1/4 oz. wheat germ oil
Colorant phase
8 full teaspoons of lip safe mica1 oz. Castor, Olive or Wheatgerm oil Hint: Castor provides more shine than Olive or

8/3/2019 Guide to Starting Your Own Soap
http://slidepdf.com/reader/full/guide-to-starting-your-own-soap 7/25
Wheatgerm
Melt the waxes in a double boiler. Once they are fully melted, add the Castor Oil andJojoba oil. In a separate bowl, add your mica to the liquid oil of your choice. Mix in welland make sure there are no clumps. Add the colorant mixture into your double boiler and
mix well. Remove this mixture from the double boiler and let sit until mixture begins tocool and thicken (thus suspending the colorant through out the lipstick). Once cooled toan appropriate thickness, pour into jars or tubes.
Easy Lip Balm Recipe - using Lanolin:
1oz. Olive Oil.3oz of Lanolin.4oz of Shea Butter .4oz of BeeswaxFlavor oil and Stevia for taste.
Melt beeswax gently over a double boiler (or in the microwave if no double boiler isavailable). In a separate container, heat the Lanolin Oil and Shea Butter up until it is fullyliquid. Add the olive oil to the melted Lanolin Oil and Shea Butter. Combine the beeswaxand all the oil, stir well. Add flavoring (if desired) and pour into containers.
Homemade Hand Salve:
4 ounces Olive Oil1 ½ ounces Beeswax1 ½ ounces Cocoa Butter
½ ounce of any fragrance oil of your choice
Melt cocoa butter over low heat and add beeswax until melted. Add olive oil and removefrom heat. Immediately transfer into container for your salve. I use 4 ounce tins that Iorder online. If mixture starts to harden, you can place it back on the heat to remelt.Once the salve has cooled and hardened in the tins, rub this salve on dry skin. It workswonders.
Night Foot and Hand Créme:
0.5 oz. Cetearyl Alcohol/Ceteareth 201.0 oz. Stearic Acid1.5 oz. Shea butter 0.8 oz. Cocoa butter 2.0 oz. Sweet almond oil0.5 oz. Fractionated coconut oil1.0 oz. Liquid glycerin1.0 oz. Jojoba

8/3/2019 Guide to Starting Your Own Soap
http://slidepdf.com/reader/full/guide-to-starting-your-own-soap 8/25
8.0 oz. Aloe Vera gel0.16 oz. Phenonip preservative or GermabenIIOptional: fragrance or essential oil, 0.10 to 0.25 oz.Makes 16 oz. of super creamy lotion.1. Add the Cetearyl Alcohol/Ceteareth 20, Stearic Acid, Shea Butter, Cocoa Butter,
Sweet Almond Oil, Coconut Oil and Jojoba to either a double boiler or microwave safecup.
2. Melt all the waxes and oils together. Attempt not to boil the product.
3. Add the liquid glycerin and Aloe Vera gel together.
4. Stir all ingredients well and combine the two bowls/mixing glasses.
5. Add the Phenonip.
6. Use a stick blender to emulsify and mix the oils, waxes and aloe Vera gel. Note: This product will not set up until it is fully cooled. Do not pour into containers (jarsare recommended) until you are certain that the lotion is fully blended and will notseparate.
Body Bronzing Lotion:
4.5 oz. Jojoba1.0 oz. Evening Primrose Oil0.3 oz. Emulsifying wax0.2 oz. Beeswax
8.0 oz. Distilled water 0.14 oz. Phenonip preservative or GermabenIIMicas: Cappuccino, Gold, Light Gold and Copper mica
Find it at: http://www.brambleberry.com/micas.html#sparkle
Makes 14 oz. of bronzing lotion.
1. Add the Emulsifying Wax, Beeswax, Jojoba and Evening Primrose Oil to either adouble boiler or microwave safe cup.
2. Melt all the waxes and oils together. Attempt not to boil the product.
3. Add the Distilled Water to the heated oils and waxes. Stir all ingredients well andcombine the two bowls/mixing glasses.
4. Stir all ingredients well and combine the two bowls/mixing glasses.
5. Add the Phenonip.

8/3/2019 Guide to Starting Your Own Soap
http://slidepdf.com/reader/full/guide-to-starting-your-own-soap 9/25
6. Use a stick blender to emulsify and mix the oils and waxes. Note: This product will not set up until it is fully cooled. Do not pour into containers(containers with a pump are recommended) until you are certain that the lotion is fully blended and will not separate.
7. Once you are certain the product is fully blended and will not separate, add the micas.Always add less than you think you will want to use - you can always add more but can'ttake the color out. I used 1 full tablespoon of Light Gold Mica, 1/2 tablespoonCappuccino Mica and 1 teaspoon of Copper Mica.
8. Hand blend this mixture with a spoon or small whisk. You can use the stick blender if the mixture hasn't set up too much.The ratio of micas that you use will depend on your skin tone. My best friend who madethe recipe with me used three times as much Cappuccino mica and almost no copper inher recipe since she is much darker than I am in skin tone. Remember, this is a make up
product (in addition to acting as a lotion) and will get on your clothes like any other bronzer will. It washes out fairly well. If you have very dark skin, get some Black Oxideas well and add it sparingly to the Cappuccino mica to darken the mixture up.
Skin Firming Gel - using CroThix:
Crothix has a secondary use as a skin firming agent. (Its primary use is as a thickeningagent in liquid soaps, and shampoos.) Here is an easy gel that you can make that is goodfor all skin types, using jojoba makes a non-comedogenic cream that won't clog your pores.
This makes (4) four ounce containers of gel-crème.
Water 13 oz.Glycerin .5 oz.Emulsifying Wax or Ceteryl Alcohol 1 oz.CroThix .7 oz.Jojoba Oil .6 oz.Germaben II or Phenonip .16 oz.Fragrance or Essential Oil .16 - .50 oz.
Find it at: http://www.brambleberry.com/lotions.html#crothix
Heat the Water and Glycerin to 170 degrees and set aside. Heat the Emulsifying Waxuntil melted and add to the CroThix and Jojoba. Stir. Add the water and glycerin to theEmulsifying Wax, CroThix and Jojoba. Mix until the creme is 105 degrees (or less). Addyour fragrance and preservative and package in jars or an easily squeezable package.Apply under make up for a more smooth application or as a night creme.

8/3/2019 Guide to Starting Your Own Soap
http://slidepdf.com/reader/full/guide-to-starting-your-own-soap 10/25
Homemade Moisturizing Lotion:
1 ½ cups water 2 ounces Sweet Almond Oil½ ounce vegetable glycerin
2 TBS E-Wax2 TBS Stearic Acid1 ½ tsp Germaben II½ tsp fragrance oilLiquid colorant of your choice
Mix everything together but the germaben and fragrance oil in a glass bowl. Melt in themicrowave in 30 second intervals. Stirring after each interval. When everything iscompletely melted, let it cool. While it is cooling, stir about every 5 minutes. It will startto thicken. When it starts to thicken, add the germaben and the fragrance oil. Stir completely. Using a funnel, add the lotion to the container of your choice.
I love this lotion. It leaves skin feeling so silky and smooth. You can add any fragranceoil or coloring to this receipt to create the perfect bottle of lotion. If you add coloring, besure to add very little at a time. It doesn¶t take much coloring for this lotion.
Easy Lotion Bars:
4 ounces mango or shea butter 4 ounces beesweax, yellow or white5 ounces liquid oil (jojoba or grapeseed are both excellent)2 teaspoons of essential oil or fragrance oil
This lotion bar does not use cocoa butter so you can use any fragrance or essential oil thatyour heart desires and not have a chocolate over-smell.
Melt the beeswax in a separate container and the butter/oil in another container. Addtogether, mix well, stir in FO/EO and pour into containers. Mixture will harden inapproximately 1-2 hours. The cooler the mixture is upon pouring it, the less 'divets' you'llget in the bar (that sunken spot at the top of the bar).
Scented Shower Gel Recipe:
Ingredients:
1/2 cup unscented shampoo1/4 cup water 3/4 teaspoon salt15 drops fragrance oilfood coloring ( optional)

8/3/2019 Guide to Starting Your Own Soap
http://slidepdf.com/reader/full/guide-to-starting-your-own-soap 11/25
Directions:
Pour shampoo into a bowl and add the water. Stir until its well mixed add the salt andfragrance.
Suggestions for scents:Kiwi extractRaspberry extractStrawberry extractCoconut extractVanilla extract
Mix and match or use one alone. I personally like the raspberry and vanilla mix...smellsso good!
Equipment you will need to make a batch of homemade soap:
A good quality scale that measures in ounces and pounds.
Wooden spoons, slotted if possible.
A sturdy wide-mouth glass jar or deep glass bowl (easy to pour from)
A large (one-gallon or larger) stainless-steel kettle or pot. (Never usealuminum! It will cause a reaction with your soap mixture)
A two-cup plastic or glass measuring cup.
Stainless-steel wire whisk
A laboratory thermometer that measures between 80 and 110 degrees
Rubber gloves
Something for your mold that has a cover or lidSoap is formed during a chemical process or reaction called saponification. This happenswhen you combine the fats/oils (acid) with an alkali (lye). All ingredients must be in
liquid form for this process to occur. The lye is mixed with water, the fats are melted,and the two liquids are combined to make soap.
Of all soap making supplies, it seems that lye is the most unfamiliar to new soap makersand they don't know where to buy it. New soap makers are also afraid they will buy the"wrong kind of lye."
I highly recommend the following company for lye, accurate scales and pH test strips.

8/3/2019 Guide to Starting Your Own Soap
http://slidepdf.com/reader/full/guide-to-starting-your-own-soap 12/25
ChemLab ships within the United States.
Ask for lye as "sodium hydroxide technical grade" granular or flake form.
Chem Lab Supplies
1060 Ortega Way, Unit CPlacentia CA 92670Telephone 714-630-7902Fax 714-630-3553
Basic Lye Soap Recipe:
32 ounces of COLD water 12 ounces lye4 ounces Beeswax29 ounces Palm Oil
24 ounces Coconut Oil4 ounces Cocoa Butter 24 ounces Olive Oil3 ounces Shea Butter
Put 32 ounces VERY COLD water in a large glass bowl that is easy to pour from.Measure 12 ounces of lye into the measuring cup. PLEASE make sure to wear your rubber gloves as the lye will cause burns to the skin if contact is made.
This next step should be done in a well ventilated area. I usually go outside to do this part. SLOWLY pour the lye into the cold water stirring constantly. It will heat up
quickly, and it will create nasty fumes. DO NOT breathe the fumes. Stir until the lye isdissolved. Once no more fumes are being created and the lye is dissolved, I take the lyemixture back into the house and sit it on the counter out of the way. Once the lyedissolves, it will look just like drinking water. Please make sure that someone doesn¶tmistake it for drinking water.
Next, measure your Beeswax, Palm Oil, Coconut Oil, Cocoa Butter, and Shea Butter. Putit all in a large stainless-steel pot. On LOW heat, slowly melt the oils. DO NOT LET ITGET TOO HOT! It will ruin your soap. Melt the oils just until all solid pieces are gone,stirring frequently. Once they have melted, remove from heat and add the olive oil. Stir until completely mixed up.
The next step can be frustrating but just be patient. The key to making a good batch of soap is to get the lye/water mixture and the oils the SAME temperature before mixingthem together. This is why I usually use two thermometers. I place one in the lye/water mixture and one in the oils. Stir both mixtures about every five minutes to distribute thetemperature.
Once the soap has finished saponification, let it cool for approximately 20 minutes,

8/3/2019 Guide to Starting Your Own Soap
http://slidepdf.com/reader/full/guide-to-starting-your-own-soap 13/25
stirring occasionally. Allowing the soap to cool helps prevent fragrance or essential oilsfrom "flashing off" - this happens when the soap is hotter than the evaporation point of the fragrance oil.
Before adding the fragrance, add approx. 1 oz. of sunflower oil and stir it in. This will
cool the soap down a bit more and make the soap a bit more pliable and wet. Don't worryabout calculating that 1 oz. of sunflower oil into your recipe - all this is doing iscushioning the soap in the soap mold, and it will make the soap easier to pop out. Theextra oil will eventually evaporate or meld with the soap within 24 hours of unmolding.Start spooning the soap into your plastic molds, a little at a time - put the first spoonful inand then tap the mold against the counter several times to disperse any air bubbles. Oncethe mold is full, place a piece of plastic wrap over it and gently use your fingers and the palm of your hand to move the soap where you want it - make sure it fills the entirecavity of each mold.
Put on your patience hat and wait 5-8 hours before unmolding your soap. Gently press on
the bottom of each individual cavity until you can see an air pocket begin to form between the soap and the plastic mold. Follow that air pocket around with your fingers,making it bigger and bigger. Voila! The soaps pop right out! If for some reason thisdoesn't work, pop the mold into the freezer for 1/2 hour, take out and leave sitting on thecounter for 5-10 minutes, and try again.
Additional Notes: I have found that other soap recipes will work well being molded IFand only IF a larger ratio of solid-at-room-temperature oils is used. Olive oil tends tomake soap sticky and impossible to move from a mold unless you let it sit there for 2-3weeks! Choose from Crisco, palm, palm kernel, coconut, white odorless cocoa butter (if you don't want the chocolately smell), lard, tallow, shea butter, mango butter, etc.,making those oils a good 80% of oils used. Add other liquid-at-room temperature oilssparingly - a bit of castor for bubbles, a dash of sesame, sunflower, olive, sweet almond,apricot kernel, etc. And don't forget to add that extra 1 oz. of sunflower oil AFTER thecook - I found this step might make or break this technique.
Shaving Soap:
Package this in a wide mouth jar and sell with a shaving brush!
2 pounds Bramble Berry Goats Milk liquid soap base2 tbs. Calendula, ground
8 oz. melt and pour base1 oz. of your favorite fragrance
Add melted melt and pour to the goatsmilk base; stir in fragrance oil and groundcalendula. Pour into wide mouth jars; wait 24 hours to harden. Soap will get slightly hard but not hard enough to pour into individual molds.

8/3/2019 Guide to Starting Your Own Soap
http://slidepdf.com/reader/full/guide-to-starting-your-own-soap 14/25
Oatmeal Melt and Pour Soap Recipe:
(1) Melt 8 oz. of white/opaque base
(2) Melt 8 oz. of clear base
(3) Optional: Grind up 1/2 oz. of Oatmeal in coffee grinder for a smoother,lighter exfoliation. Also, the smaller the particle, the easier to suspend in the soap.
(4) Combine the two bases
(5) Add your fragrance oil - approximately 1/2 oz. (Oatmeal, Milk and Honey is a goodone!) and stir in well
(6) Optional: Add colorant
(7) Add the oatmeal and stir. Wait 20 or 30 seconds - is the oatmeal sinking to the bottomof your bowl/Pyrex or is it staying suspended. If it is staying suspended, skip to step 8
(8) If the oatmeal is sinking, this simply means that your base is not thick enough tosupport the oatmeal. Either cover the bowl/Pyrex with saran wrap and wait for the base tocool, or stir the melted base until it is becomes thick enough to suspend the oatmeal.
(9) Pour your oatmeal soap into molds
(10) Spritz with alcohol to finish the soap and break up any bubbles on the top of the soap
(11) Wait 2 to 3 hours (or even better, overnight!) to pop the soap out of the molds. Wrapwith saran wrap and you're done!
Gentle Acne Soap:
Olive Oil 525gPalm Kernel Oil 525gRice Bran Oil 150gGrapeseed Oil 300gSodium Hydroxide 210gWater 225g
French Green Clay 3 TablespoonsLavandin Essential Oil 25g Niaouli Essential Oil 25g
1. Add lye to very cold water and whisk gently and constantly until solution is clear. Letcool to 90ºF.

8/3/2019 Guide to Starting Your Own Soap
http://slidepdf.com/reader/full/guide-to-starting-your-own-soap 15/25
2. Gently heat Palm Kernel Oil until melted, and pour over liquid oils. Heat of all oilscombined should be around 90ºF
3. Make a slurry of the clay and essential oils. Use about 1/2 oz of your olive oil to make
a smooth slurry.
4. Add the lye solution to the base oils with your stick-blender whirring away in the oils.Alternate between hand whisking and the stick blender until trace. At medium trace, addyour EO slurry. Mix very well.
5. Pour into your prepared mold. I try to keep the soap from gelling at this point bykeeping it cool. Seems to agree with the lavender scent better
6. Unmold and cut 12 hours after pouring. Soap should be smooth and fine-grained. If using more water, wait about 18 hours before unmolding and cutting. Enjoy!!
Small Batches of Cold Process Soaps:
Safety Reminder ³ALWAYS WEAR GLOVES´:If you are new to cold process soap making, Please remember when handling lye, pleaseuse gloves and goggles and do not breathe in the fumes, the lye will cause burns to theskin if contact is made. Remember, the lye water mixture is always added to the oil andnot vice versa.
1 pound Hemp Oil Batch
16 oz. Hemp6 oz. Distilled Water 2.1 oz. lyeFragrance/Essential Oil .7 oz.
1 pound Hemp/Olive Oil batch
8 oz. Olive8 oz. Hemp2.1 oz. Lye6 oz. Distilled Water
Fragrance/Essential Oil .7 oz.
1 pound Hemp/Coconut/Olive Oil Batch
5 oz. Coconut Oil5 oz. Hempseed Oil6 oz. Olive Oil2.3 oz. lye

8/3/2019 Guide to Starting Your Own Soap
http://slidepdf.com/reader/full/guide-to-starting-your-own-soap 16/25
6 oz. water Fragrance/Essential Oil .7 oz.
Now for the fun part!
Suit up in safety goggles, gloves and long sleeves. Add the lye to the water. Stir welltaking precautions to not breathe in the fumes. Set the mixture to the side and allow it tocool to approximately 110F. You can put the lye water mixture outside if you are not in awell ventilated area.
Add all the oils together and melt. Allow them to cool to approximately 110F, or within 5degrees of the lye water.
Add the lye water to the melted oils, carefully. Stir vigorously until trace occurs. Tracelooks like a thin pudding. A stick blender will help speed trace along. If you are stirring by hand, this recipe may take up to an hour to trace.
Pour your traced soap mixture into your molds. Pop out after 3 to 5 days and allow to sitfor a full 4 to 6 weeks to cure and finish the saponification process.
Adding scents and other additives:
You don¶t have to add much to make a wonderful bar of soap. Would you like to knowwhat my #1 best selling bar of soap is? It is Oatmeal Soap. The only thing I do I addabout 8 ounces of ground oatmeal to the basic soap recipe. This soap makes a wonderfulcomplexion soap.
I like to add coloring to my soap. I usually use a color that matches the fragrance I amusing. For example, if I use Lavendar fragrance, then I¶ll use a light colored purple.Instead of making the entire bar of soap a purple color. I¶ll swirl it. Before I pour thesoap into the mold, I measure out about 2 cups of the soap mixture. Pour the soap intothe mold, except for the 2 cups. Mix your purple coloring into the 2 cups of soap mixtureand stir well. Now, put large spoonfuls of the colored mixture into the mold with theother soap mixture. Using a knife, swirl the colored soap around. It¶s just like making amarble cake.
Another idea that makes a good bar of soap is to add a cup of cornmeal and lemonfragrance oil to your basic soap recipe. This bar of soap works well for very dirty or
greasy hands. My husband keeps a bar of this soap in his shop by his sink.
Cautions for using Essential Oils:
Research each essential oil before mixing your own blends. Not all essential oils work well together, and some essential oils are too harsh to use in products that will be used onyour skin.

8/3/2019 Guide to Starting Your Own Soap
http://slidepdf.com/reader/full/guide-to-starting-your-own-soap 17/25
Do not touch or use pure essential oils on your skin. They must be diluted before usingdirectly on the skin.
Use plastic gloves when mixing oils. Remove and clean gloves after every use, and washhands immediately after using oils.
Avoid rubbing your eyes or skin when using the oils. If the oils come in contact withyour skin or eyes, flush immediately with cool water.
Never take essential or fragrance oils internally and never add them to items that will beingested.
Consult a book on essential oils before using them in products for children. They havemore delicate skin than adults do. Keep all oils out of the reach of children.
Pregnant women should consult a doctor or health care specialist before using or
handling any products that contain essential oils.
Cautions for using Lye:
Keep lye tightly capped.
Upon opening a container of lye, the lye crystals absorb water from the air, which canweaken the strength of the lye and cause it to form a solid lump. When not in use, keeplye closely capped.
Lye reacts with some metals: aluminum, zinc, and tin. Safe containers include heatproof
stoneware, glass, enamel, stainless steel and plastic.
Lye can remove paint. If lye, lye/water or freshly-made soap splatters onto a paintedsurface, wipe it off immediately. Wash the area with water and detergent; wash it withclear water, then wipe it dry. Use old rags, because lye weakens cloth fiber.
Lye, lye/water and freshly-made soap can burn and irritate skin. You'll notice itching before burning. Lye/water on skin is first noticed by a slippery feeling. Rinse your handswith vinegar and immediately rinse them with running water.
Since lye can burn skin, you can imagine what it does to eyes! Always wear eye
protection! Wear sunglasses if you have to!
Lye can be fatal if swallowed. If you have small children, keep lye (and essential oils) ina locked cabinet. Lye/water sitting at the edge of a counter can easily be reached bychildren and even swallowed. Drinking lye/water is like drinking liquid fire. If someoneingests lye/water, do not induce vomiting or otherwise try to treat them. Take them to anemergency room immediately.

8/3/2019 Guide to Starting Your Own Soap
http://slidepdf.com/reader/full/guide-to-starting-your-own-soap 18/25
Fumes from lye/water. Some people are extremely sensitive to fumes that come from thelye/water. Fumes also come from the stirring container. Fumes from small batches (1 pound) usually isn't enough to cause a problem.
Be aware than larger amounts of lye (larger batches of soap) create more fumes. With
prolonged contact, fumes can burn the eyes and skin of sensitive people. If you makesoap in large amounts and afterward feel as if your face is "sun burned," chances are itwas caused by fumes.
Thousands of people make soap without mishap. In order to do so, you must be aware of all safety hazards. Children, pets and feeble-minded people should not be in the soapmaking area or have access to stored soap making ingredients, especially lye andessential oil.
10 Steps to Keep Organized:
#1) 12 x 12 Decorative Paper Solution: The decorative paper often comes in sheets toolarge to fit into normal filing systems. We've found that the 12 x 12 sized pieces of paper fit perfectly in those countertop dish draining racks! (so pre-cut lots)
#2) Ribbons: We make lots of gift packs up and to keep our ribbons organized, we've cut(alternately, you can break it) a plastic hanger and slipped all of our ribbons on thehanger. Then, we just tape the hanger back up, hang the ribbon-laden hanger back up andvoila! ribbons are easy to unspool, organized and out of the way!
#3) Random Crafting Items: We use file boxes with a 'V' or 'U' cut out of the front of them (to allow for easy access inside) to store random items (such as bagged lavender,
molds, beeswax etc...) Because the file boxes have flat lids, they allow for easy stacking.With the large holes cut out of the front for access, this proves to be an inexpensive,moveable and customizable storage system.
#4) Use Pegboard: Sure, pegboard doesn't look as nice as a smooth wall but it's a lot moreeffective at storing things! Paint your pegboard the color of the wall it's mounted on prior to hanging up. Once your pegboard is up, you can find a way to hang almost anything -from tools, to molds, to bags of supplies to extra fabric.
#5) Excess Fabric and Trim: You know those little pieces of trim, ribbon and fabric thatyou never want to throw away? We get them here too! Believe it or not, Ziploc Freezer
Bags are a great way to keep these organized by color or type. You can see through the bags for easy sorting and finding what you need and Ziploc baggies are inexpensive,reusable and easy to find anywhere!
#6) Fragrance Bottles: Being a fragrance company, we have thousands of little bottles.We organize all of our little bottles in an old card catalog from a library. You can purchase them for about $100 - $250 and they are easy to come by as librariescomputerize their systems. For larger bottles, we pick up the displays from convenience
8/3/2019 Guide to Starting Your Own Soap
http://slidepdf.com/reader/full/guide-to-starting-your-own-soap 19/25
stores that are used for storing their pop and drinks in the refrigerator section. They are perfect for holding round bottles because that's what they're designed for! You cannormally get these for free.
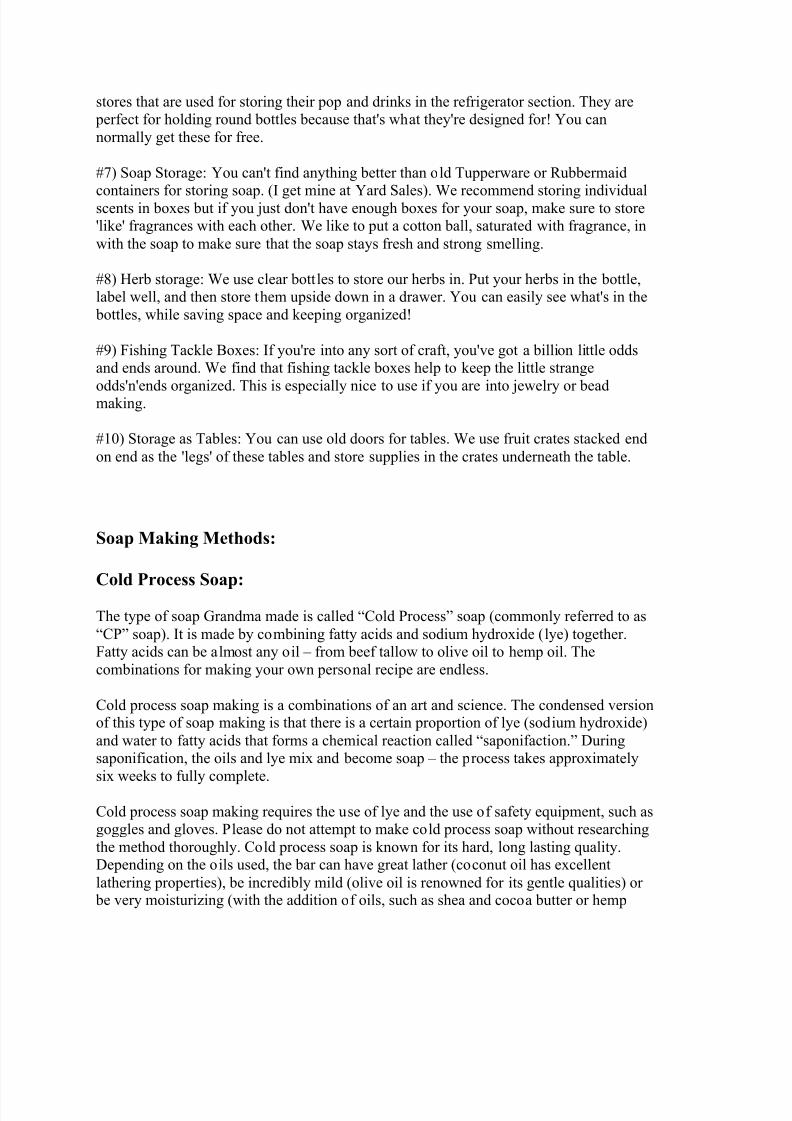
#7) Soap Storage: You can't find anything better than old Tupperware or Rubbermaid
containers for storing soap. (I get mine at Yard Sales). We recommend storing individualscents in boxes but if you just don't have enough boxes for your soap, make sure to store'like' fragrances with each other. We like to put a cotton ball, saturated with fragrance, inwith the soap to make sure that the soap stays fresh and strong smelling.
#8) Herb storage: We use clear bottles to store our herbs in. Put your herbs in the bottle,label well, and then store them upside down in a drawer. You can easily see what's in the bottles, while saving space and keeping organized!
#9) Fishing Tackle Boxes: If you're into any sort of craft, you've got a billion little oddsand ends around. We find that fishing tackle boxes help to keep the little strange
odds'n'ends organized. This is especially nice to use if you are into jewelry or beadmaking.
#10) Storage as Tables: You can use old doors for tables. We use fruit crates stacked endon end as the 'legs' of these tables and store supplies in the crates underneath the table.
Soap Making Methods:
Cold Process Soap:
The type of soap Grandma made is called ³Cold Process´ soap (commonly referred to as³CP´ soap). It is made by combining fatty acids and sodium hydroxide (lye) together.Fatty acids can be almost any oil ± from beef tallow to olive oil to hemp oil. Thecombinations for making your own personal recipe are endless.
Cold process soap making is a combinations of an art and science. The condensed versionof this type of soap making is that there is a certain proportion of lye (sodium hydroxide)and water to fatty acids that forms a chemical reaction called ³saponifaction.´ Duringsaponification, the oils and lye mix and become soap ± the process takes approximatelysix weeks to fully complete.
Cold process soap making requires the use of lye and the use of safety equipment, such asgoggles and gloves. Please do not attempt to make cold process soap without researchingthe method thoroughly. Cold process soap is known for its hard, long lasting quality.Depending on the oils used, the bar can have great lather (coconut oil has excellentlathering properties), be incredibly mild (olive oil is renowned for its gentle qualities) or be very moisturizing (with the addition of oils, such as shea and cocoa butter or hemp

8/3/2019 Guide to Starting Your Own Soap
http://slidepdf.com/reader/full/guide-to-starting-your-own-soap 20/25
oil).
Melt and Pour Soap:
Technically, all hand made soap is ³Glycerin Soap.´ In many commercial soaps, all the
extra glycerin (formed naturally by the cold process soap making method) is harvestedout. Thus, all handmade soap is glycerin rich (since hand made soap makers don¶t harvestout glycerin in their soap).
In today¶s market, the term ³Glycerin Soap´ is commonly used to refer to clear soap.Generally, the clear soap has extra glycerin added to it to produce a very nourishing,moisturizing bar. Glycerin is a ³humectant.´ It draws moisture to itself; the theory is thatif you wash with glycerin soap, a thin layer of glycerin will remain, drawing moisture toyour skin.
Clear soap can be purchased in large blocks to be melted down, colored and fragranced,
and placed into molds (or used to make loaves of soap to be sliced). This type of soap iscalled ³Melt and Pour´ and the artistry of melt and pour is called ³Soap Casting.´ Meltand Pour is gaining in popularity because of its ease of use. There are no significantsafety measures (other than basic common sense ± don¶t put your hand in the hot soap,don¶t cut your finger off with the knife etc«) needed for soap casting. Children can do it.It¶s a great outlet for creative types.You can also make clear soap from scratch. This method involves all the aspects of cold process soap making, but takes it a few steps further by adding alcohol for clarity and aglycerin and sugar mix to suspend and enhance the clarity. It is a dangerous process because of the alcohol vapors.
Hot Process Soap Making:
There are variations on the cold process method. Hot process soap is an interesting takeon the cold process method. The simple explanation is that you take all your ingredients,and add them to a pot (that is then placed over a heat source, such as a stove) and stir frequently until the soap goes through various stages. The excess water is evaporated off and the soap is ready to use once cooled.
Re-batching Soaps:
Re-batching is another form of cold process soap making. You make your cold processsoap from scratch, grate it up, place it over a heat source, in a kettle, with a little liquid(water works very well), and the mixture melts down into a mushy mess that you addcolorant and fragrance too. This method is often used to preserve the scent or the healing properties of some essential oils.

8/3/2019 Guide to Starting Your Own Soap
http://slidepdf.com/reader/full/guide-to-starting-your-own-soap 21/25
Where do I find Craft Shows?
First, how do you find a craft show? There are many ways to do this. The easiest is tofind a publication in your area, generally at a craft store, that lists all the shows in your state for the entire year. These publications come out in January or February and are
available all year. There are also various magazines that have shows listed but often,these magazines list larger shows where the fees may be daunting to a soap venders. Amethod that has served me well is simply to call the local Chamber of Commerce insurrounding cities and they will generally have a listing of upcoming shows, or better yet,they'll be sponsoring a few themselves. You can also attend some local craft shows andfind out from the crafters at the show where they'll be next, or which shows have donewell for them in the past.
Tips for selling outside of craft shows:
Leave samples at various gift shops around your town and towns close to you. Carry
samples of your products in your car. Use plastic wrap, soap is easy to handle once it iswrapped, you can still smell the fragrance. Make your own labels on your computer and place it where the plastic wrap meets. This makes the packaging look very nice withoutcosting a lot of money. Have a name tag made up for yourself and wear it every where(atStaples or Office Depot) also have matching business cards made up.
Narrowing your choices
Once you've figured out where the shows are, it's important to weed some of them out.The easiest way to do this is by the entry fee. There are three ways craft shows charge:
(1) Straight commission - the promoter will take anywhere from 10 to 35% of your totalsales. This is often advantageous for soap venders as we generally have lower sales thanartisans with large, more expensive items.
(2) Straight fee - the promoter charges a booth fee, ranging from $10 to $1,500. Thismethod is okay as long as your fee doesn't go over about $250. There are only so many bars of soap you can sell in two or three days, and there is a limit to how much inventoryyou can afford to make prior to the show. In my opinion, anything above $250 is prettyrisky.
(3) Combination of commission and fee - this is by far the scariest in my opinion; if thefee is expensive to begin with. If you have to pay $150 to get in and only sell what youwould normally sell at a show priced at $150 (about $700 or $800), and then you have to pay a 25% commission, your profit can get slim. I personally like straight commissionshows (no initial outlay of money to get into) but they are difficult to find.

8/3/2019 Guide to Starting Your Own Soap
http://slidepdf.com/reader/full/guide-to-starting-your-own-soap 22/25
Selecting the right Craft Show
Now that you've narrowed down the field, it's time to start asking questions. A few to ask are:
(1) How many people attended? In general, 1 to 3% of the total attending population will buy something at your booth. In all probability, only 1/3 to 1/2 of the total in attendancewill even venture by or into your booth. So, at a show that has 40,000 attending, that's400 (low end) to 1200 (high end) that will purchase your goods. Of course, pleaseremember that this is a best case scenario but this will give you a starting point to figureout if the fee is too high for the show.
(2) How many vendors are there? Bigger shows have upwards to 500 vendors, smaller ones are about 15 to 25. The more vendors, the bigger the fee. But, if there are morevendors, in general, more customers will show up also, so take that into consideration.
(3) How many soap venders will be there? Out of every 30 vendors, one soap venders is pretty standard. If you start to get 4 or 5 out of 100, the market gets tough. That's not tosay that you won't do well if there are more soap venders. Our Company, does pretty wellno matter how many soap venders there are because we do individually poured bars of melt and pour. So far, we've only been up against cold process soap makers or soapvenders that pour in loaves. We've got a niche but in general, the less competition, the better.
(4) Has the show grown substantially over the last year? If it has, don't do the show. Morethan 35% growth from the previous year is, as a rule of thumb, too fast a rate of growth. Normally, the amount of attendees doesn't vary substantially from one year to the next;
thus, the total amount of dollars spent is about the same year to year but now, with 35%more vendors, that amount will be spread more thinly, leaving less money for each of thevendors.
(5) How many vendors are returning? If there aren't any vendors returning, don't do theshow. There's a reason that the return rate is low. Normally, a great show can expect 65%return rate or so and a decent show will get about 50% returning. Try to go for the wellestablished, long term shows.There are other factors to consider: Will you stay in a motel? How far do you have todrive? Do you have to provide your own tent or tables? Will you have to eat out or arethere accommodations for you to cook in? Will you have to pay for your showers? All
these little expenses add up. The more money you spend getting to and staying at a show,the more money you'll need to make.
How much product do I bring to the show?
So, now the big question: how much product do I bring? If you follow the 1% to 3% rule(1% to 3% of the total attendance will buy a product at your booth), simply do the math,

8/3/2019 Guide to Starting Your Own Soap
http://slidepdf.com/reader/full/guide-to-starting-your-own-soap 23/25
and figure it out.
There is another way to figure out the amount you should expect to make. The ³7x´ rule:you can expect to make 7 to 10 times your entry fee. Multiply the entry fee times 7 for the low amount, and times 10 for the high number. So, if a show costs $100 to get in, I'll
bring $1000 worth of product, but hope to sell about $700. Don't be discouraged if your shows don't do the "7x" rule. I know my first shows didn't! I barely made my booth fee back! Over time, as you get your 'spiel' down, and become more comfortable selling,your sales will get higher.
Other Craft Show Necessities
There are a few basic necessities you need to bring to
your show:
Coffee beans (for clearing out noses)
Table
Table cloth, sheet
Change ($100 is good)
Soap pins (if you have signs to stick in them)
Ice cube soap/samples
Business cards
Coffee/ water/ pop to drink
Food! craft show food can get expensive
Thermos
Web site promo material ("Buy our stuff at www.sellsoap.com!")
Signs ("Bars of soap are 5 ounces")
Wounded and ugly soap (everyone loves a bargain!)
Soap dishes
Order forms

8/3/2019 Guide to Starting Your Own Soap
http://slidepdf.com/reader/full/guide-to-starting-your-own-soap 24/25
Plastic wrap(wrap soap), bags
Credit card processing (if applicable)
Promo material - "This is where we will be next - We do baskets, etc.")
Receipt book
Books, cards, stuff to do
Wet wipes
Kleenex
Scissors
Tape
Price tags
Soap for washrooms with note: "If you like this soap, buy it at Booth #???"
bath bomb samples (they make fun demonstrations)
Obviously, there are other things that you will want to bring but this is a good basicstarter list. So, now, take a deep breath and jump in to the craft show market with bothfeet! You¶ll love the extra dollars you bring home and all that profit in your pocket. Plus,the repeat customers throughout the year will make all the long hours worth your while.
Where to buy Supplies:
www.ebay.com
www.soapandcandleco.com
www.wellingtonfragrance.com
www.wholesalesuppliesplus.com
www.essentialwholesale.com
www.glorybeefoods.com
www.soapcrafters.com

8/3/2019 Guide to Starting Your Own Soap
http://slidepdf.com/reader/full/guide-to-starting-your-own-soap 25/25
www.esoapsupplies.com
www.brambleberry.com
www.columbusfoods.net
www.soapandsupplies.com
www.bestcontainers.com/bottles
Copyright © 2008 All rights reserved