habanero bmc configuration guide - tyan.com€¦ · habanero bmc configuration guide version 1.0...
TRANSCRIPT

1
Habanero BMC Configuration Guide
Version 1.0 Copyright Copyright © 2015 MiTAC International Corporation. All rights reserved. No part of this manual may be reproduced or translated without prior written consent from MiTAC International Corporation. Notice Information contained in this document is furnished by MiTAC International Corporation and has been reviewed for accuracy and reliability prior to printing. MiTAC assumes no liability whatsoever, and disclaims any express or implied warranty, relating to sale and/or use of TYAN® products including liability or warranties relating to fitness for a particular purpose or merchantability. MiTAC retains the right to make changes to product descriptions and/or specifications at any time, without notice. In no event will MiTAC be held liable for any direct or indirect, incidental or consequential damage, loss of use, loss of data or other malady resulting from errors or inaccuracies of information contained in this document. Document number: D2347-100

2
3
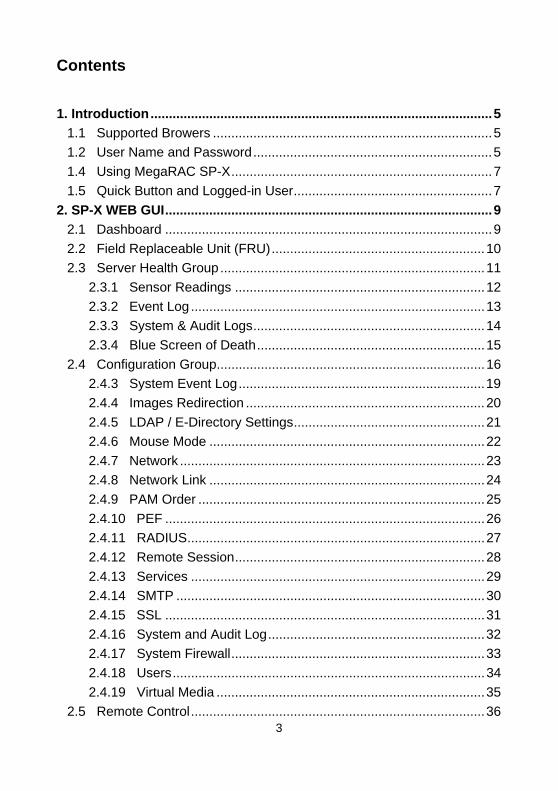
Contents
1. Introduction ............................................................................................. 5 1.1 Supported Browers ............................................................................ 5 1.2 User Name and Password ................................................................. 5 1.4 Using MegaRAC SP-X ....................................................................... 7 1.5 Quick Button and Logged-in User ...................................................... 7
2. SP-X WEB GUI ......................................................................................... 9 2.1 Dashboard ......................................................................................... 9 2.2 Field Replaceable Unit (FRU) .......................................................... 10 2.3 Server Health Group ........................................................................ 11
2.3.1 Sensor Readings .................................................................... 12 2.3.2 Event Log ................................................................................ 13 2.3.3 System & Audit Logs ............................................................... 14 2.3.4 Blue Screen of Death .............................................................. 15
2.4 Configuration Group ......................................................................... 16 2.4.3 System Event Log ................................................................... 19 2.4.4 Images Redirection ................................................................. 20 2.4.5 LDAP / E-Directory Settings .................................................... 21 2.4.6 Mouse Mode ........................................................................... 22 2.4.7 Network ................................................................................... 23 2.4.8 Network Link ........................................................................... 24 2.4.9 PAM Order .............................................................................. 25 2.4.10 PEF ....................................................................................... 26 2.4.11 RADIUS ................................................................................. 27 2.4.12 Remote Session .................................................................... 28 2.4.13 Services ................................................................................ 29 2.4.14 SMTP .................................................................................... 30 2.4.15 SSL ....................................................................................... 31 2.4.16 System and Audit Log ........................................................... 32 2.4.17 System Firewall ..................................................................... 33 2.4.18 Users ..................................................................................... 34 2.4.19 Virtual Media ......................................................................... 35
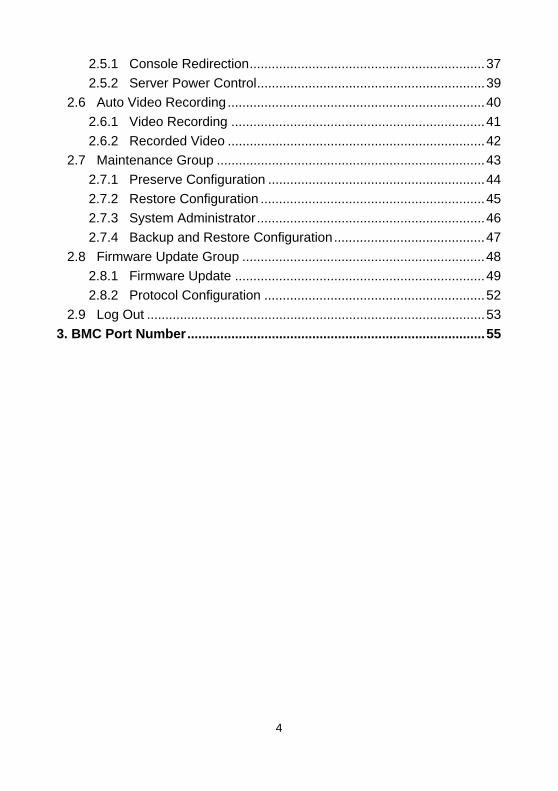
2.5 Remote Control ................................................................................ 36
4
2.5.1 Console Redirection ................................................................ 37 2.5.2 Server Power Control .............................................................. 39
2.6 Auto Video Recording ...................................................................... 40 2.6.1 Video Recording ..................................................................... 41 2.6.2 Recorded Video ...................................................................... 42
2.7 Maintenance Group ......................................................................... 43 2.7.1 Preserve Configuration ........................................................... 44 2.7.2 Restore Configuration ............................................................. 45 2.7.3 System Administrator .............................................................. 46 2.7.4 Backup and Restore Configuration ......................................... 47
2.8 Firmware Update Group .................................................................. 48 2.8.1 Firmware Update .................................................................... 49 2.8.2 Protocol Configuration ............................................................ 52
2.9 Log Out ............................................................................................ 53 3. BMC Port Number ................................................................................. 55
5
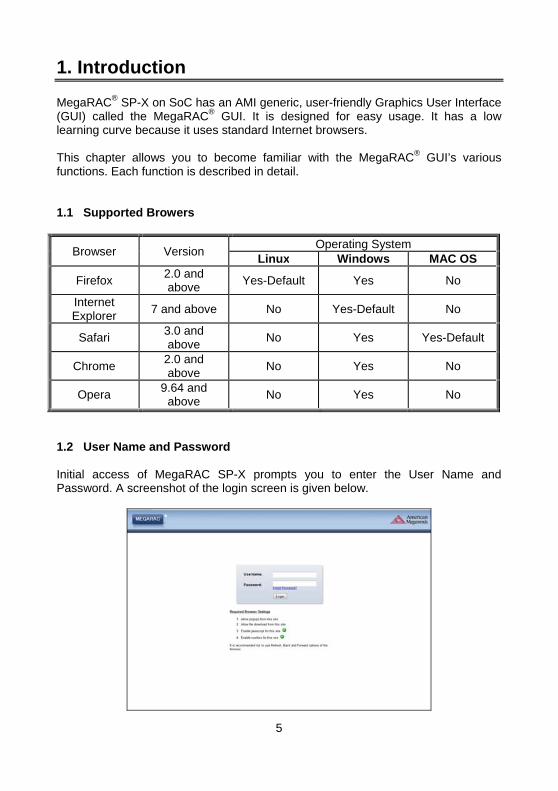
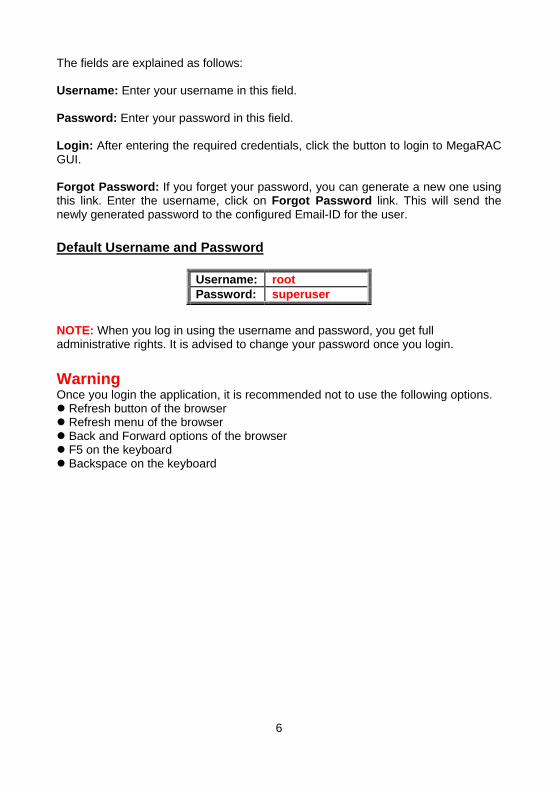
1. Introduction MegaRAC® SP-X on SoC has an AMI generic, user-friendly Graphics User Interface (GUI) called the MegaRAC® GUI. It is designed for easy usage. It has a low learning curve because it uses standard Internet browsers. This chapter allows you to become familiar with the MegaRAC® GUI’s various functions. Each function is described in detail. 1.1 Supported Browers
Browser Version Operating System
Linux Windows MAC OS
Firefox 2.0 and above
Yes-Default Yes No
Internet Explorer
7 and above No Yes-Default No
Safari 3.0 and above
No Yes Yes-Default
Chrome 2.0 and above
No Yes No
Opera 9.64 and
above No Yes No
1.2 User Name and Password Initial access of MegaRAC SP-X prompts you to enter the User Name and Password. A screenshot of the login screen is given below.
6
The fields are explained as follows: Username: Enter your username in this field. Password: Enter your password in this field. Login: After entering the required credentials, click the button to login to MegaRAC GUI. Forgot Password: If you forget your password, you can generate a new one using this link. Enter the username, click on Forgot Password link. This will send the newly generated password to the configured Email-ID for the user.
Default Username and Password
Username: rootPassword: superuser
NOTE: When you log in using the username and password, you get full administrative rights. It is advised to change your password once you login.
Warning Once you login the application, it is recommended not to use the following options. Refresh button of the browser Refresh menu of the browser Back and Forward options of the browser F5 on the keyboard Backspace on the keyboard
7
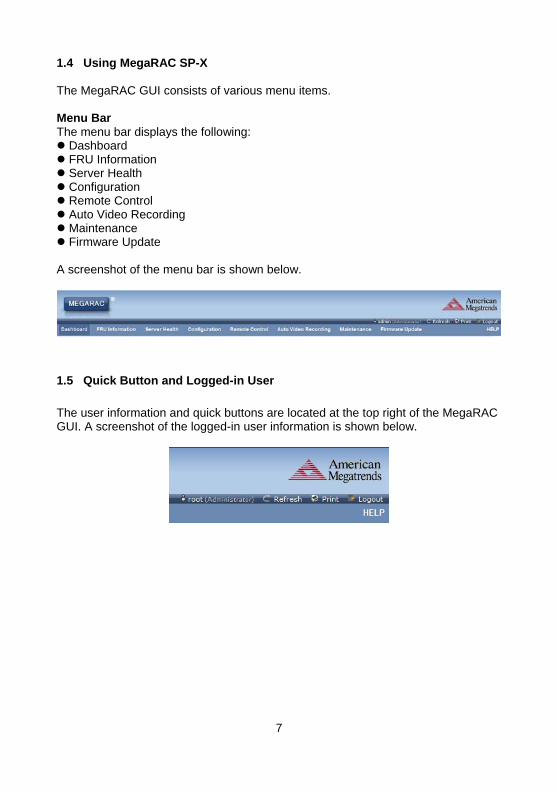
1.4 Using MegaRAC SP-X The MegaRAC GUI consists of various menu items. Menu Bar The menu bar displays the following: Dashboard FRU Information Server Health Configuration Remote Control Auto Video Recording Maintenance Firmware Update A screenshot of the menu bar is shown below.
1.5 Quick Button and Logged-in User
The user information and quick buttons are located at the top right of the MegaRAC GUI. A screenshot of the logged-in user information is shown below.

8
NOTE
9
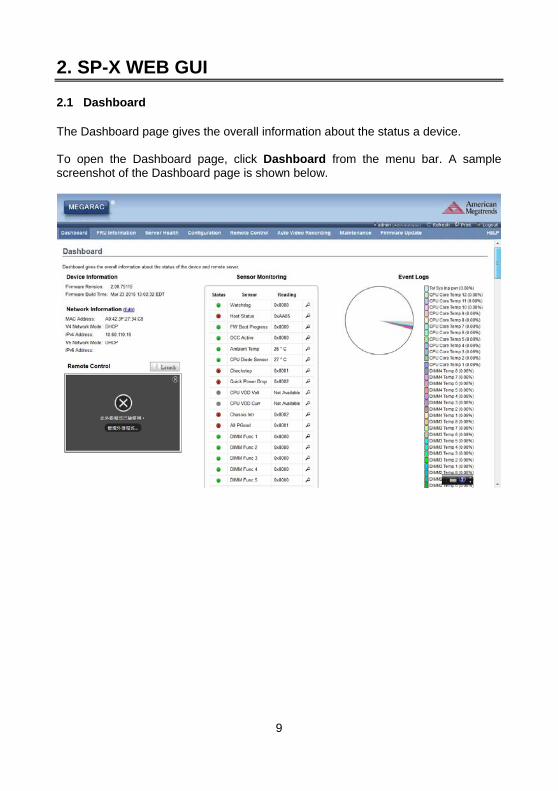
2. SP-X WEB GUI 2.1 Dashboard The Dashboard page gives the overall information about the status a device. To open the Dashboard page, click Dashboard from the menu bar. A sample screenshot of the Dashboard page is shown below.
10
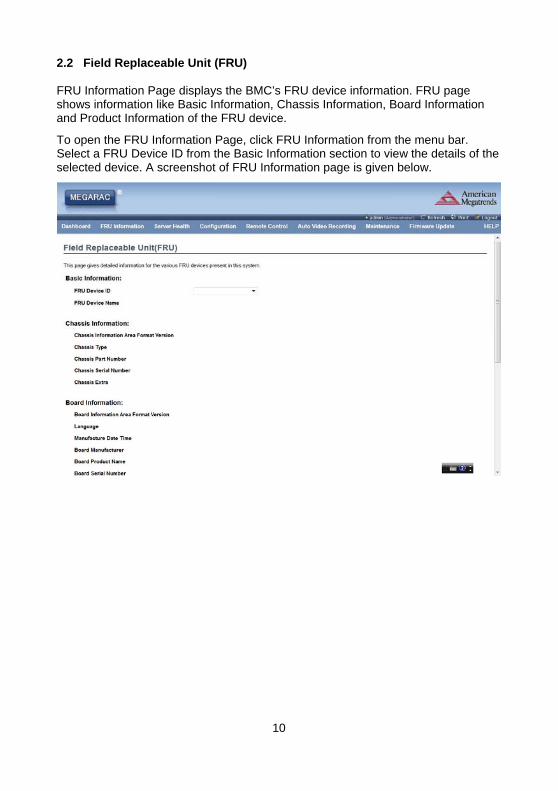
2.2 Field Replaceable Unit (FRU) FRU Information Page displays the BMC’s FRU device information. FRU page shows information like Basic Information, Chassis Information, Board Information and Product Information of the FRU device.
To open the FRU Information Page, click FRU Information from the menu bar. Select a FRU Device ID from the Basic Information section to view the details of the selected device. A screenshot of FRU Information page is given below.
11
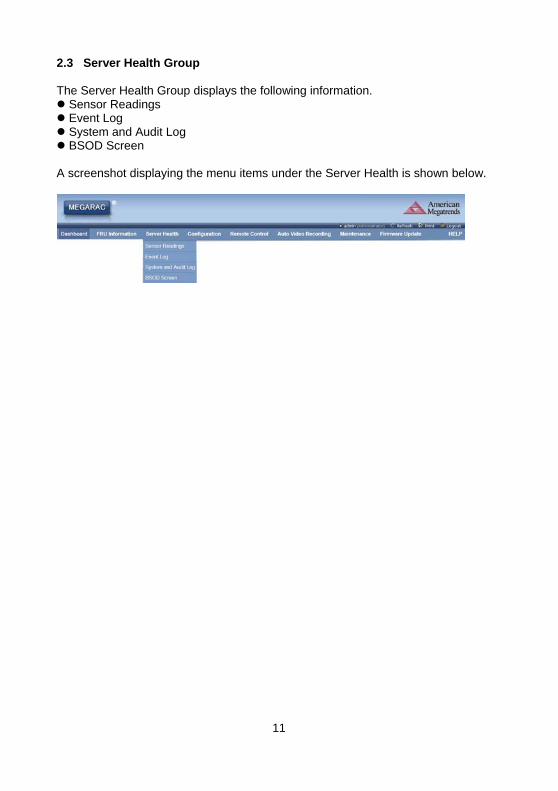
2.3 Server Health Group The Server Health Group displays the following information. Sensor Readings Event Log System and Audit Log BSOD Screen A screenshot displaying the menu items under the Server Health is shown below.
12
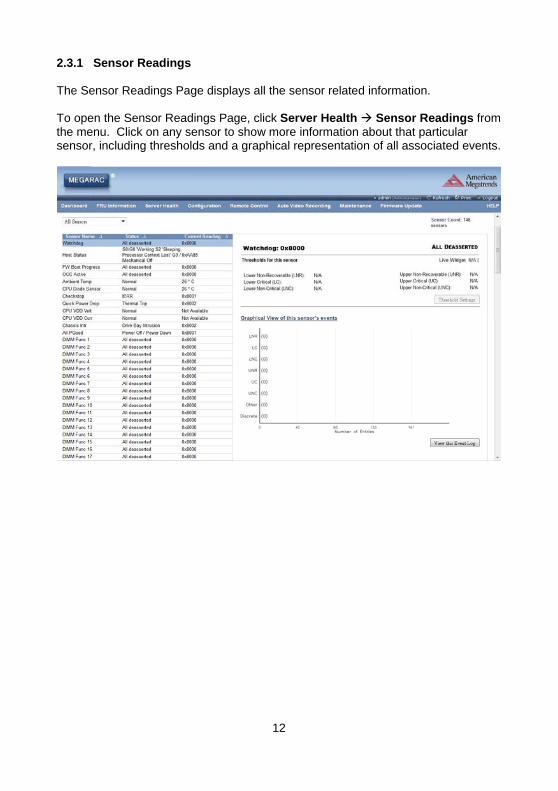
2.3.1 Sensor Readings The Sensor Readings Page displays all the sensor related information. To open the Sensor Readings Page, click Server Health Sensor Readings from the menu. Click on any sensor to show more information about that particular sensor, including thresholds and a graphical representation of all associated events.
13
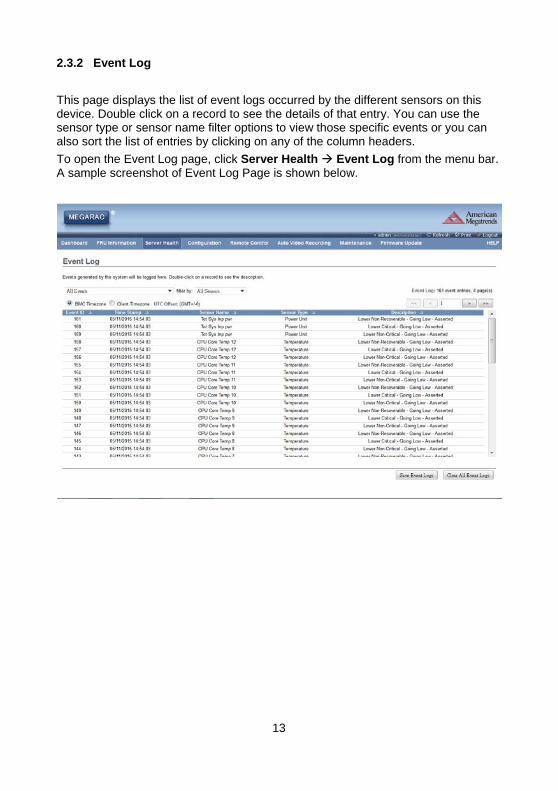
2.3.2 Event Log
This page displays the list of event logs occurred by the different sensors on this device. Double click on a record to see the details of that entry. You can use the sensor type or sensor name filter options to view those specific events or you can also sort the list of entries by clicking on any of the column headers.
To open the Event Log page, click Server Health Event Log from the menu bar. A sample screenshot of Event Log Page is shown below.
14
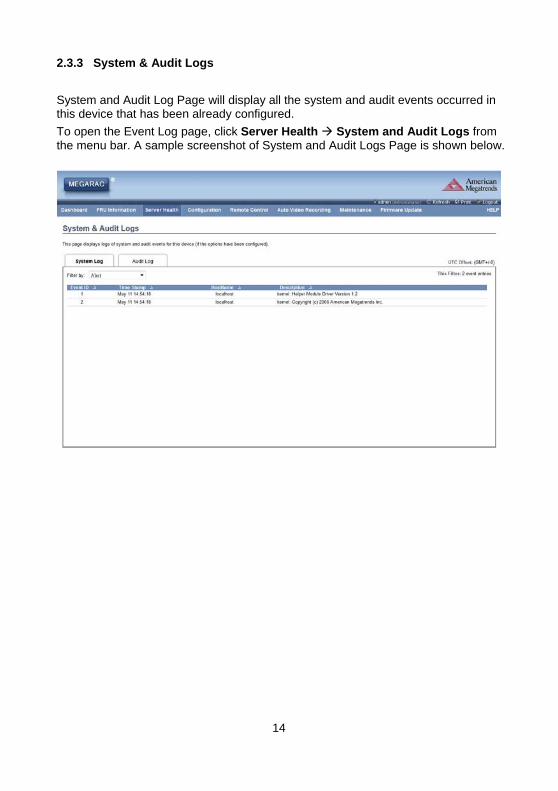
2.3.3 System & Audit Logs
System and Audit Log Page will display all the system and audit events occurred in this device that has been already configured.
To open the Event Log page, click Server Health System and Audit Logs from the menu bar. A sample screenshot of System and Audit Logs Page is shown below.

15
2.3.4 Blue Screen of Death
This page displays the blue screen captured during failure in host system.
To open the BSOD page, click Server Health BSOD from the menu bar. A sample screenshot of BSOD Page is shown below.
16
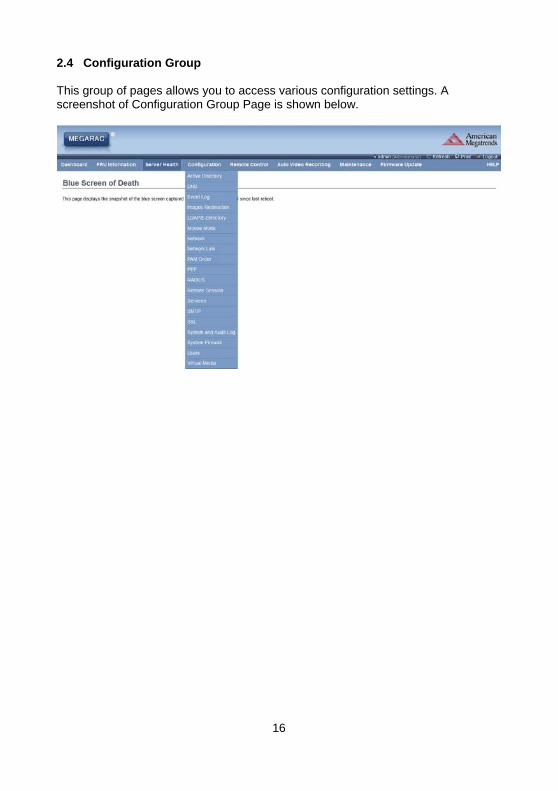
2.4 Configuration Group This group of pages allows you to access various configuration settings. A screenshot of Configuration Group Page is shown below.

17
2.4.1 Active Directory An active directory is a directory structure used on Microsoft Windows based computers and servers to store information and data about networks and domains. An active directory (sometimes referred to as an AD) does a variety of functions including the ability to provide information on objects. It also helps to organize these objects for easy retrieval and access, allows access by end users and administrators and allows the administrator to set security up for the directory. This page allows you to configure Active Directory Server Settings. To open the Active Directory Settings Page, click Configuration Active Directory from the menu bar. A sample screenshot of Active Directory Settings Page is shown in the screenshot below.
18
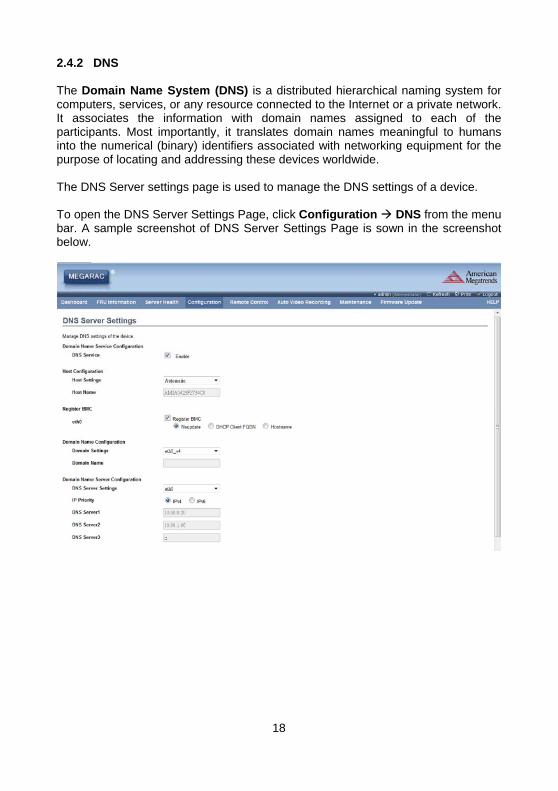
2.4.2 DNS The Domain Name System (DNS) is a distributed hierarchical naming system for computers, services, or any resource connected to the Internet or a private network. It associates the information with domain names assigned to each of the participants. Most importantly, it translates domain names meaningful to humans into the numerical (binary) identifiers associated with networking equipment for the purpose of locating and addressing these devices worldwide. The DNS Server settings page is used to manage the DNS settings of a device. To open the DNS Server Settings Page, click Configuration DNS from the menu bar. A sample screenshot of DNS Server Settings Page is sown in the screenshot below.
19
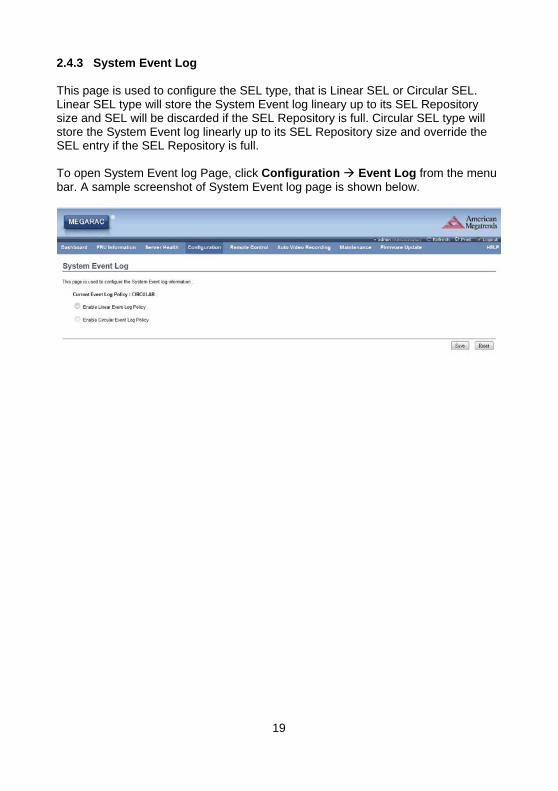
2.4.3 System Event Log This page is used to configure the SEL type, that is Linear SEL or Circular SEL. Linear SEL type will store the System Event log lineary up to its SEL Repository size and SEL will be discarded if the SEL Repository is full. Circular SEL type will store the System Event log linearly up to its SEL Repository size and override the SEL entry if the SEL Repository is full. To open System Event log Page, click Configuration Event Log from the menu bar. A sample screenshot of System Event log page is shown below.
20
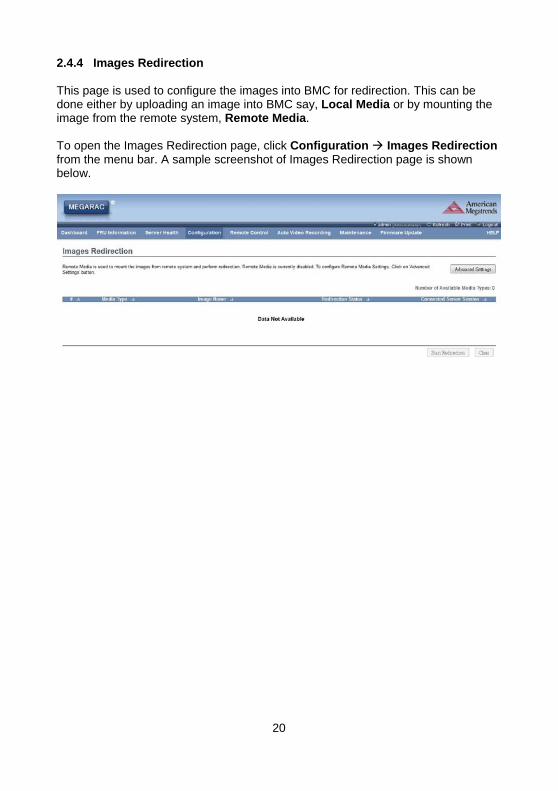
2.4.4 Images Redirection This page is used to configure the images into BMC for redirection. This can be done either by uploading an image into BMC say, Local Media or by mounting the image from the remote system, Remote Media. To open the Images Redirection page, click Configuration Images Redirection from the menu bar. A sample screenshot of Images Redirection page is shown below.
21
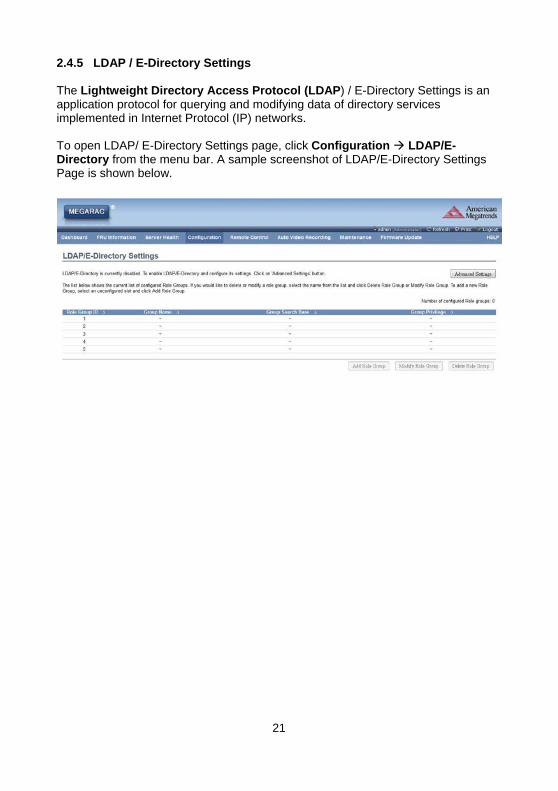
2.4.5 LDAP / E-Directory Settings The Lightweight Directory Access Protocol (LDAP) / E-Directory Settings is an application protocol for querying and modifying data of directory services implemented in Internet Protocol (IP) networks. To open LDAP/ E-Directory Settings page, click Configuration LDAP/E-Directory from the menu bar. A sample screenshot of LDAP/E-Directory Settings Page is shown below.
22
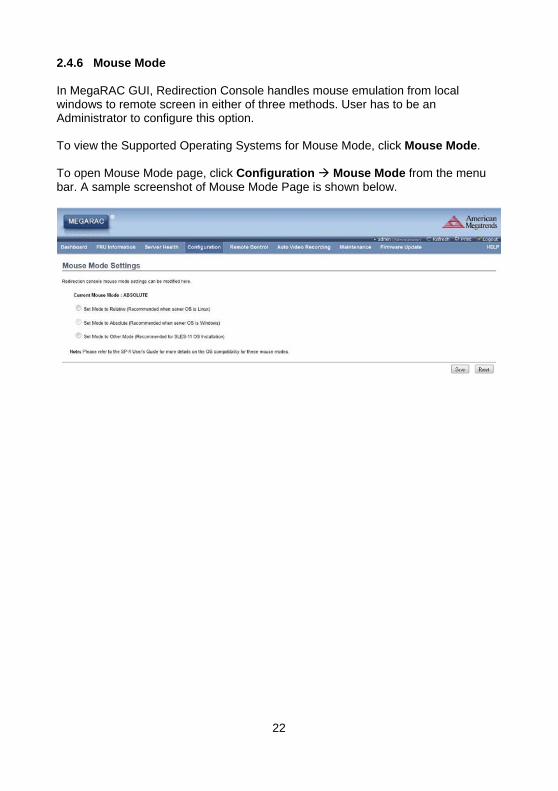
2.4.6 Mouse Mode In MegaRAC GUI, Redirection Console handles mouse emulation from local windows to remote screen in either of three methods. User has to be an Administrator to configure this option. To view the Supported Operating Systems for Mouse Mode, click Mouse Mode. To open Mouse Mode page, click Configuration Mouse Mode from the menu bar. A sample screenshot of Mouse Mode Page is shown below.
23
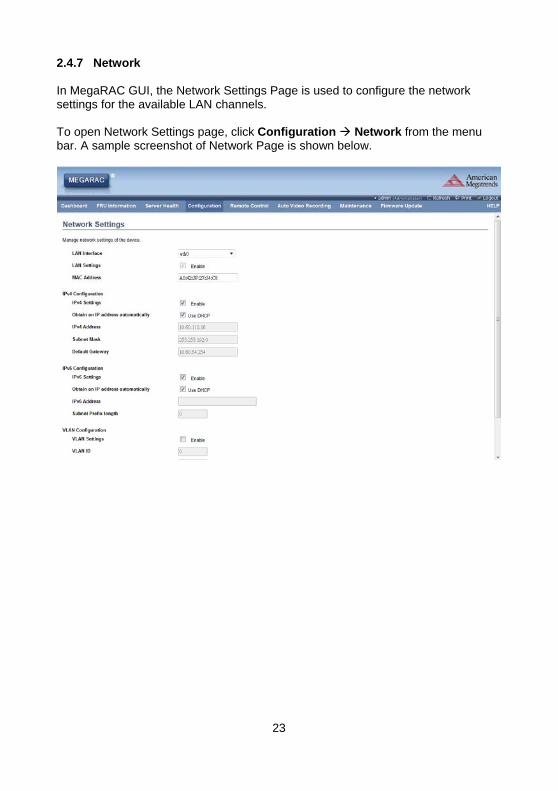
2.4.7 Network In MegaRAC GUI, the Network Settings Page is used to configure the network settings for the available LAN channels. To open Network Settings page, click Configuration Network from the menu bar. A sample screenshot of Network Page is shown below.
24
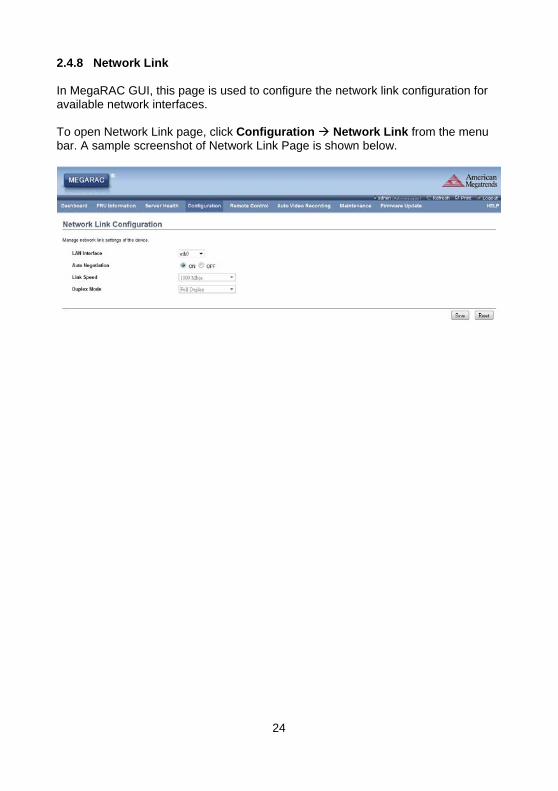
2.4.8 Network Link In MegaRAC GUI, this page is used to configure the network link configuration for available network interfaces. To open Network Link page, click Configuration Network Link from the menu bar. A sample screenshot of Network Link Page is shown below.
25
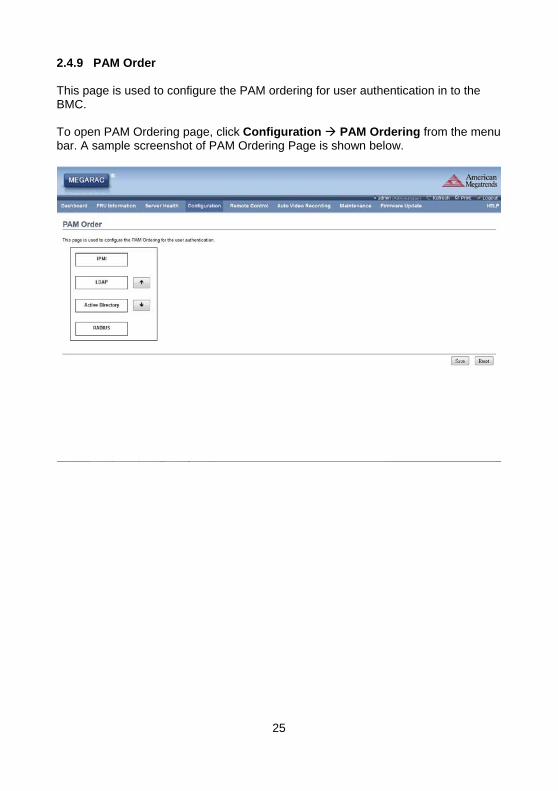
2.4.9 PAM Order This page is used to configure the PAM ordering for user authentication in to the BMC. To open PAM Ordering page, click Configuration PAM Ordering from the menu bar. A sample screenshot of PAM Ordering Page is shown below.
26
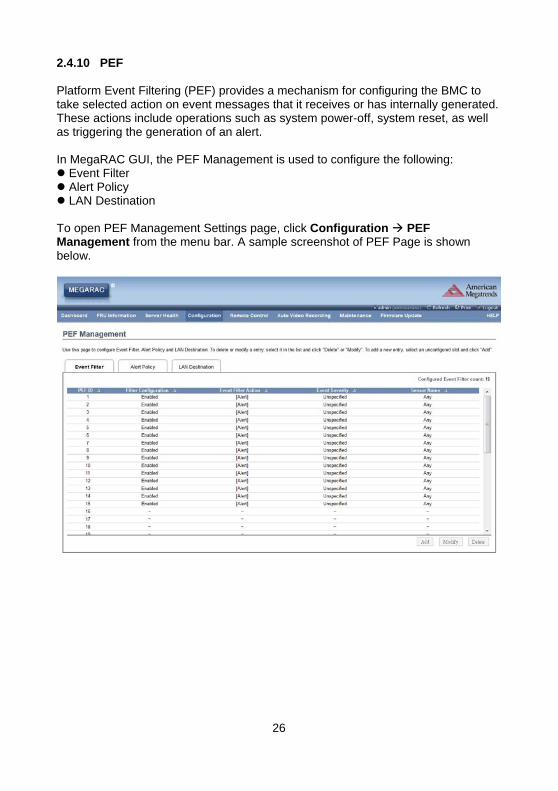
2.4.10 PEF Platform Event Filtering (PEF) provides a mechanism for configuring the BMC to take selected action on event messages that it receives or has internally generated. These actions include operations such as system power-off, system reset, as well as triggering the generation of an alert. In MegaRAC GUI, the PEF Management is used to configure the following: Event Filter Alert Policy LAN Destination To open PEF Management Settings page, click Configuration PEF Management from the menu bar. A sample screenshot of PEF Page is shown below.
27
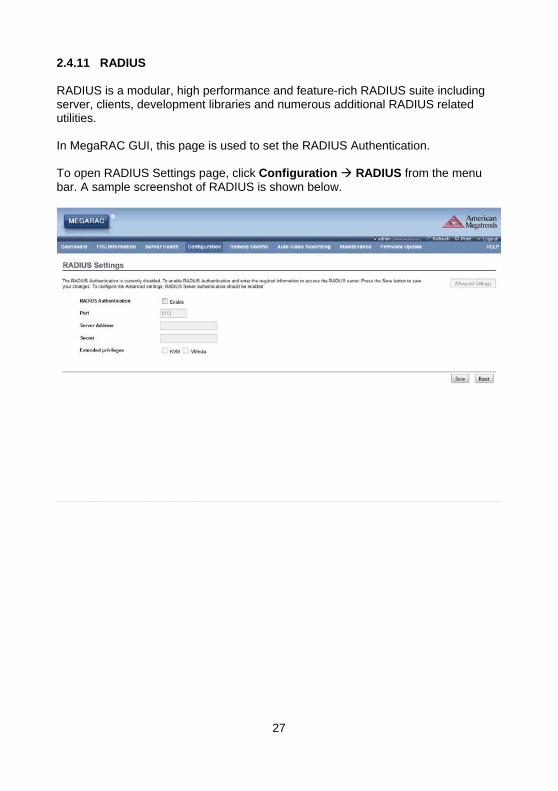
2.4.11 RADIUS RADIUS is a modular, high performance and feature-rich RADIUS suite including server, clients, development libraries and numerous additional RADIUS related utilities. In MegaRAC GUI, this page is used to set the RADIUS Authentication. To open RADIUS Settings page, click Configuration RADIUS from the menu bar. A sample screenshot of RADIUS is shown below.
28
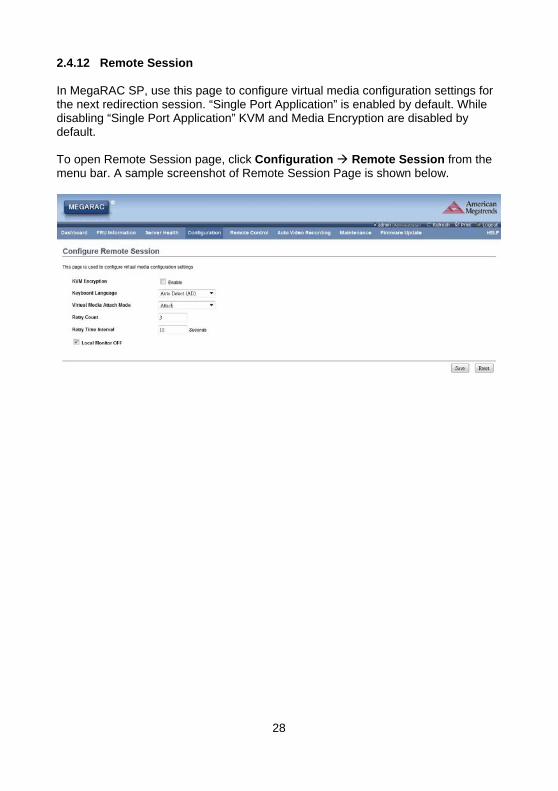
2.4.12 Remote Session In MegaRAC SP, use this page to configure virtual media configuration settings for the next redirection session. “Single Port Application” is enabled by default. While disabling “Single Port Application” KVM and Media Encryption are disabled by default. To open Remote Session page, click Configuration Remote Session from the menu bar. A sample screenshot of Remote Session Page is shown below.
29
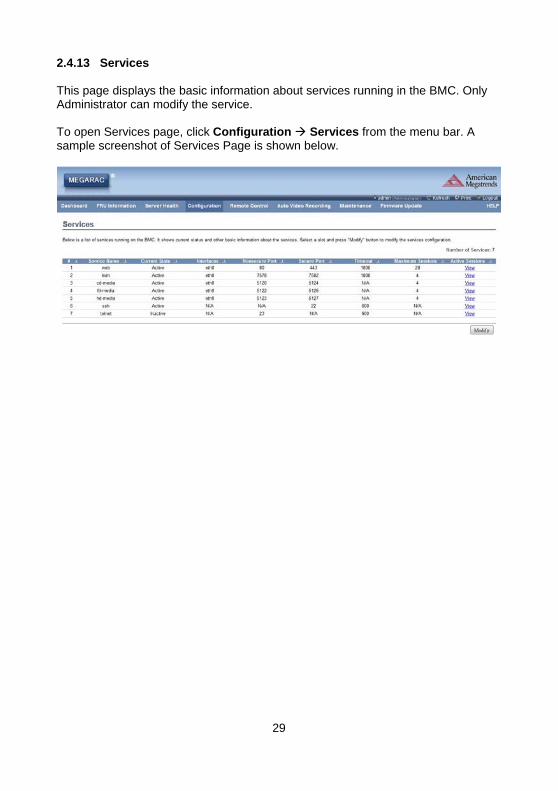
2.4.13 Services This page displays the basic information about services running in the BMC. Only Administrator can modify the service. To open Services page, click Configuration Services from the menu bar. A sample screenshot of Services Page is shown below.
30
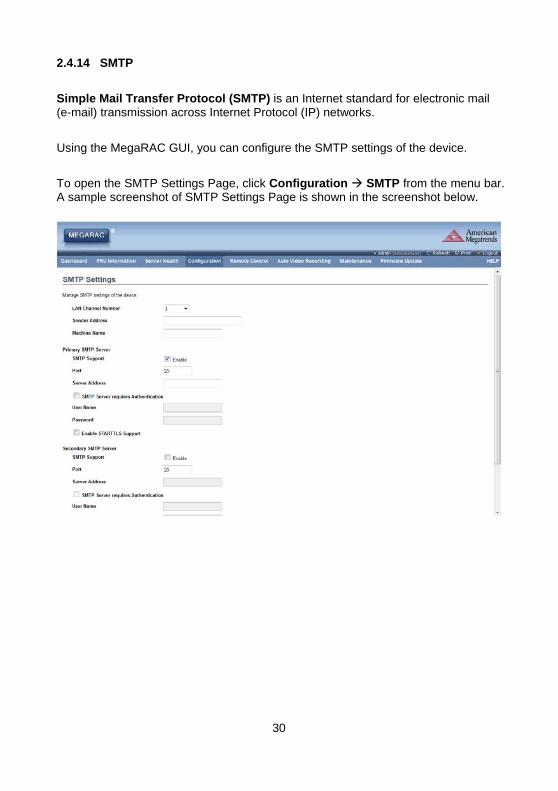
2.4.14 SMTP
Simple Mail Transfer Protocol (SMTP) is an Internet standard for electronic mail (e-mail) transmission across Internet Protocol (IP) networks.
Using the MegaRAC GUI, you can configure the SMTP settings of the device.
To open the SMTP Settings Page, click Configuration SMTP from the menu bar. A sample screenshot of SMTP Settings Page is shown in the screenshot below.
31
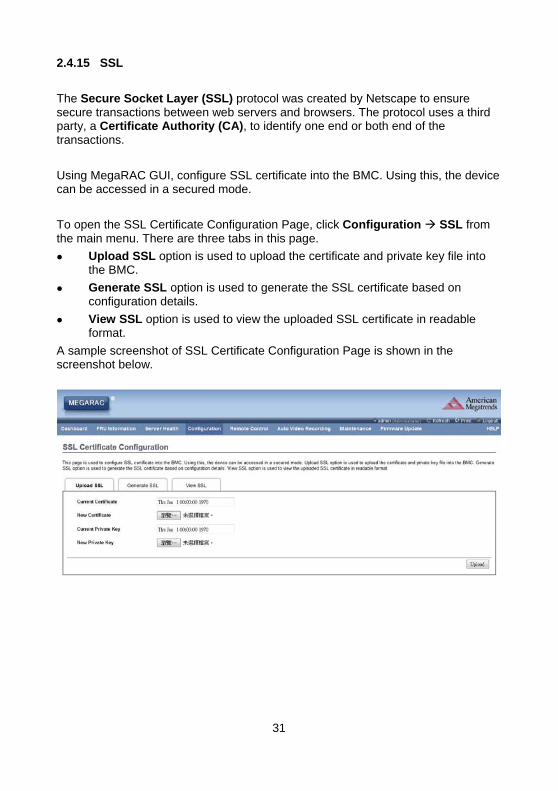
2.4.15 SSL
The Secure Socket Layer (SSL) protocol was created by Netscape to ensure secure transactions between web servers and browsers. The protocol uses a third party, a Certificate Authority (CA), to identify one end or both end of the transactions.
Using MegaRAC GUI, configure SSL certificate into the BMC. Using this, the device can be accessed in a secured mode.
To open the SSL Certificate Configuration Page, click Configuration SSL from the main menu. There are three tabs in this page.
Upload SSL option is used to upload the certificate and private key file into the BMC.
Generate SSL option is used to generate the SSL certificate based on configuration details.
View SSL option is used to view the uploaded SSL certificate in readable format.
A sample screenshot of SSL Certificate Configuration Page is shown in the screenshot below.
32
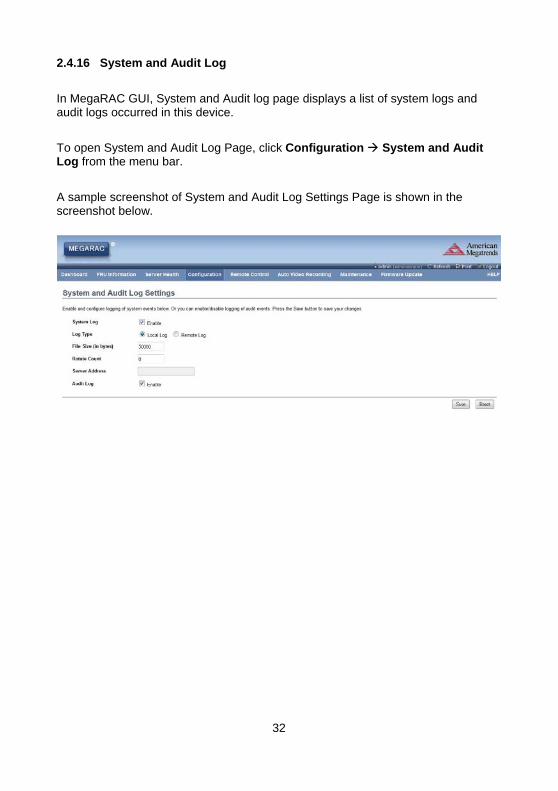
2.4.16 System and Audit Log
In MegaRAC GUI, System and Audit log page displays a list of system logs and audit logs occurred in this device.
To open System and Audit Log Page, click Configuration System and Audit Log from the menu bar.
A sample screenshot of System and Audit Log Settings Page is shown in the screenshot below.
33
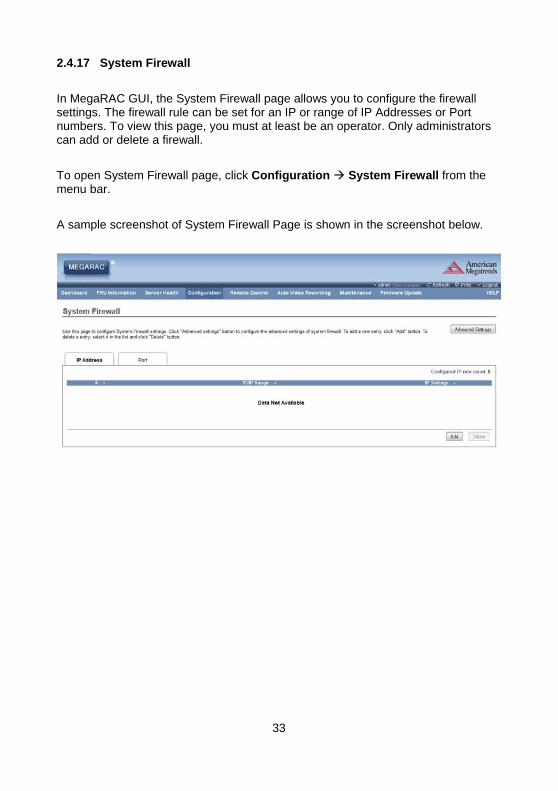
2.4.17 System Firewall
In MegaRAC GUI, the System Firewall page allows you to configure the firewall settings. The firewall rule can be set for an IP or range of IP Addresses or Port numbers. To view this page, you must at least be an operator. Only administrators can add or delete a firewall.
To open System Firewall page, click Configuration System Firewall from the menu bar.
A sample screenshot of System Firewall Page is shown in the screenshot below.
34
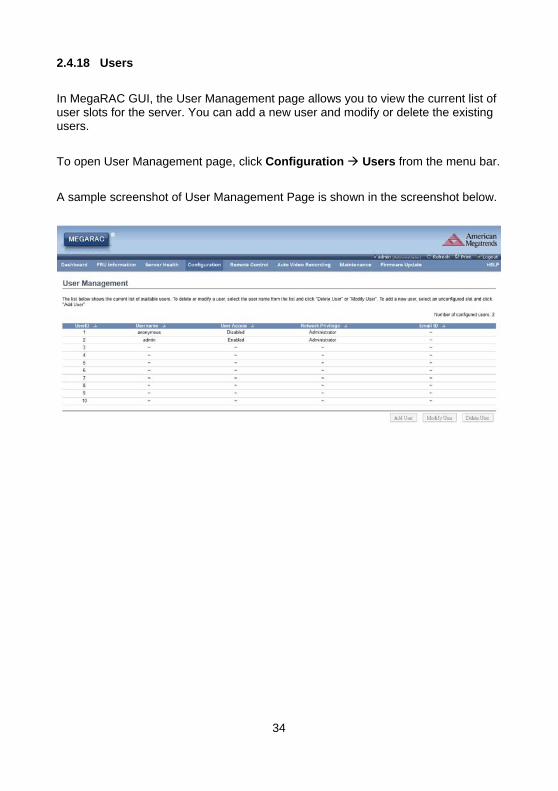
2.4.18 Users
In MegaRAC GUI, the User Management page allows you to view the current list of user slots for the server. You can add a new user and modify or delete the existing users.
To open User Management page, click Configuration Users from the menu bar.
A sample screenshot of User Management Page is shown in the screenshot below.
35
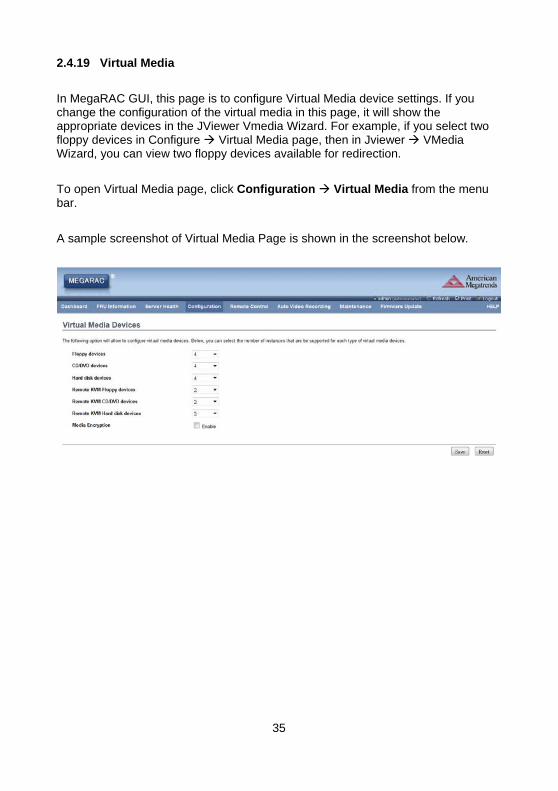
2.4.19 Virtual Media
In MegaRAC GUI, this page is to configure Virtual Media device settings. If you change the configuration of the virtual media in this page, it will show the appropriate devices in the JViewer Vmedia Wizard. For example, if you select two floppy devices in Configure Virtual Media page, then in Jviewer VMedia Wizard, you can view two floppy devices available for redirection.
To open Virtual Media page, click Configuration Virtual Media from the menu bar.
A sample screenshot of Virtual Media Page is shown in the screenshot below.

36
2.5 Remote Control The Remote Control consists of the following menu items. Console Redirection Server Power Control A sample screenshot of the Remote Control menu is given below.
37
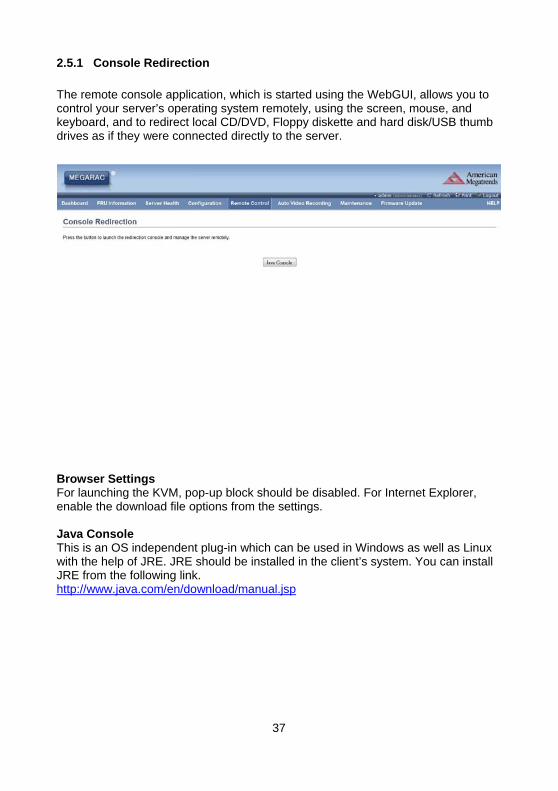
2.5.1 Console Redirection
The remote console application, which is started using the WebGUI, allows you to control your server’s operating system remotely, using the screen, mouse, and keyboard, and to redirect local CD/DVD, Floppy diskette and hard disk/USB thumb drives as if they were connected directly to the server.
Browser Settings For launching the KVM, pop-up block should be disabled. For Internet Explorer, enable the download file options from the settings. Java Console This is an OS independent plug-in which can be used in Windows as well as Linux with the help of JRE. JRE should be installed in the client’s system. You can install JRE from the following link. http://www.java.com/en/download/manual.jsp

38
The Console Redirection main menu consists of the following menu items. Video Keyboard Mouse Options Media Keyboard Layout Video Record Power Active Users Help
39
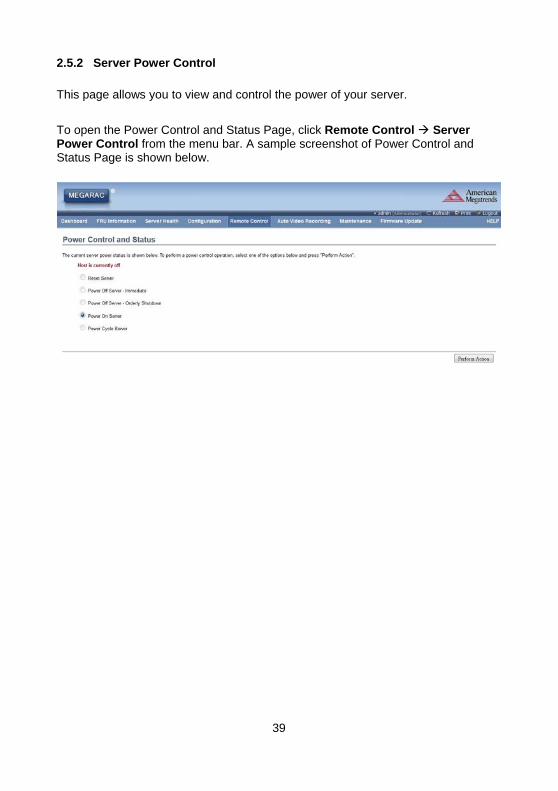
2.5.2 Server Power Control
This page allows you to view and control the power of your server.
To open the Power Control and Status Page, click Remote Control Server Power Control from the menu bar. A sample screenshot of Power Control and Status Page is shown below.

40
2.6 Auto Video Recording The Auto Video Recording consists of the following: Video Recordings Recorded Video A sample screenshot of the Auto Video Recording menu is given below.
41
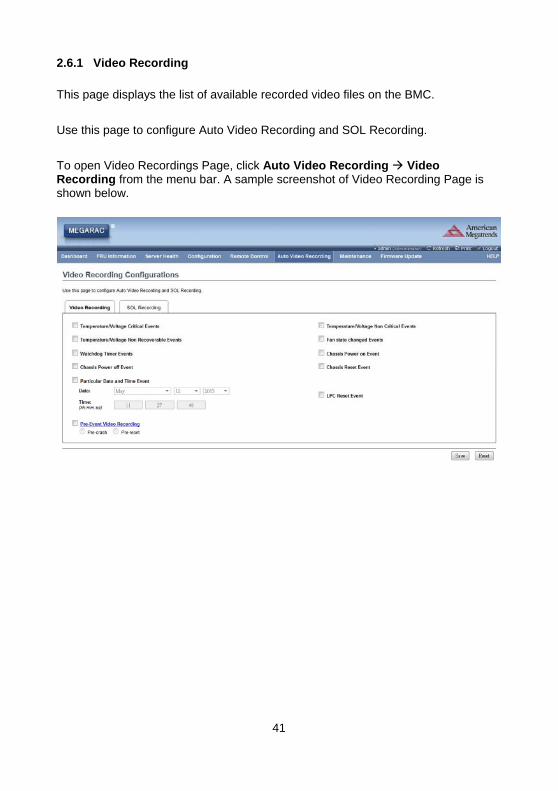
2.6.1 Video Recording
This page displays the list of available recorded video files on the BMC.
Use this page to configure Auto Video Recording and SOL Recording.
To open Video Recordings Page, click Auto Video Recording Video Recording from the menu bar. A sample screenshot of Video Recording Page is shown below.
42
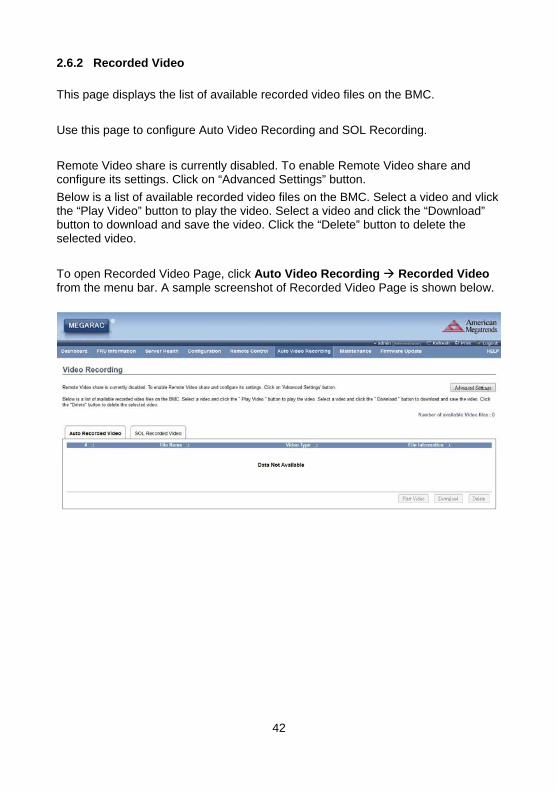
2.6.2 Recorded Video
This page displays the list of available recorded video files on the BMC.
Use this page to configure Auto Video Recording and SOL Recording.
Remote Video share is currently disabled. To enable Remote Video share and configure its settings. Click on “Advanced Settings” button.
Below is a list of available recorded video files on the BMC. Select a video and vlick the “Play Video” button to play the video. Select a video and click the “Download” button to download and save the video. Click the “Delete” button to delete the selected video.
To open Recorded Video Page, click Auto Video Recording Recorded Video from the menu bar. A sample screenshot of Recorded Video Page is shown below.
43
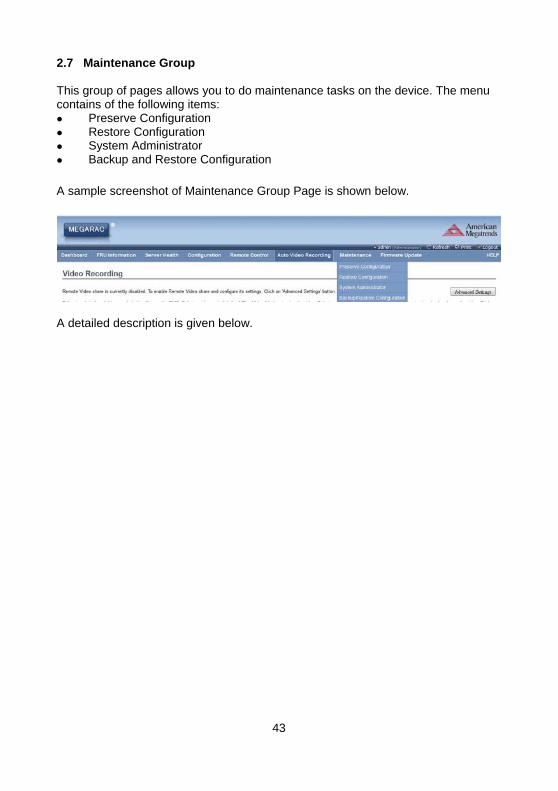
2.7 Maintenance Group This group of pages allows you to do maintenance tasks on the device. The menu contains of the following items: Preserve Configuration Restore Configuration System Administrator Backup and Restore Configuration
A sample screenshot of Maintenance Group Page is shown below.
A detailed description is given below.
44
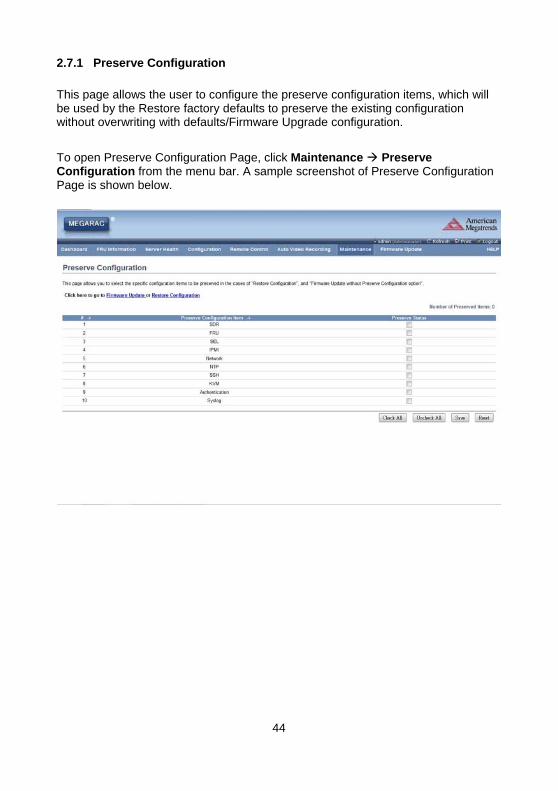
2.7.1 Preserve Configuration
This page allows the user to configure the preserve configuration items, which will be used by the Restore factory defaults to preserve the existing configuration without overwriting with defaults/Firmware Upgrade configuration.
To open Preserve Configuration Page, click Maintenance Preserve Configuration from the menu bar. A sample screenshot of Preserve Configuration Page is shown below.
45
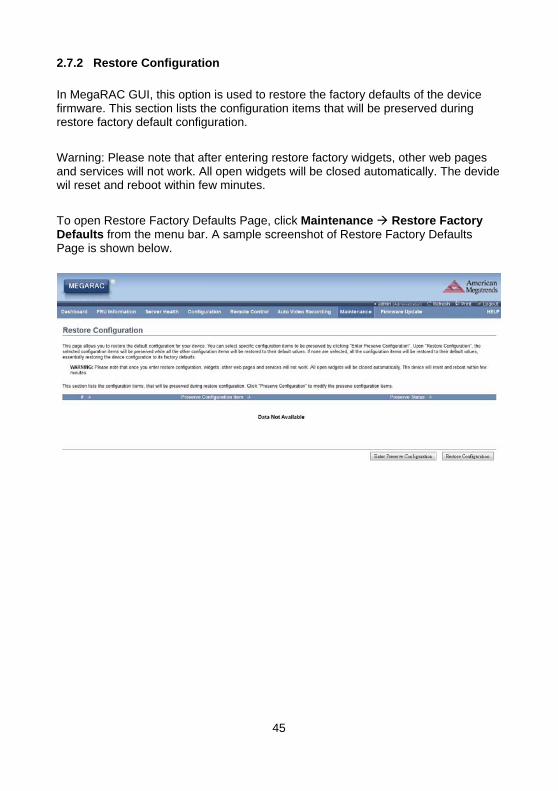
2.7.2 Restore Configuration
In MegaRAC GUI, this option is used to restore the factory defaults of the device firmware. This section lists the configuration items that will be preserved during restore factory default configuration.
Warning: Please note that after entering restore factory widgets, other web pages and services will not work. All open widgets will be closed automatically. The devide wil reset and reboot within few minutes.
To open Restore Factory Defaults Page, click Maintenance Restore Factory Defaults from the menu bar. A sample screenshot of Restore Factory Defaults Page is shown below.
46
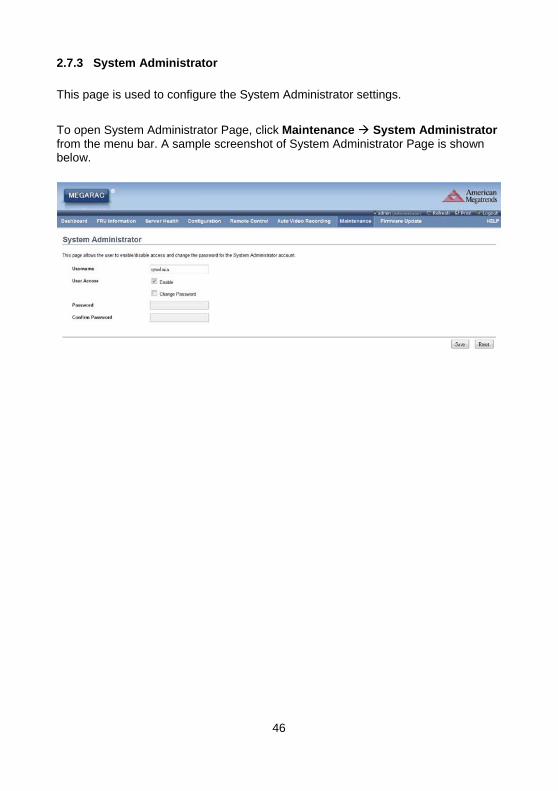
2.7.3 System Administrator
This page is used to configure the System Administrator settings.
To open System Administrator Page, click Maintenance System Administrator from the menu bar. A sample screenshot of System Administrator Page is shown below.
47
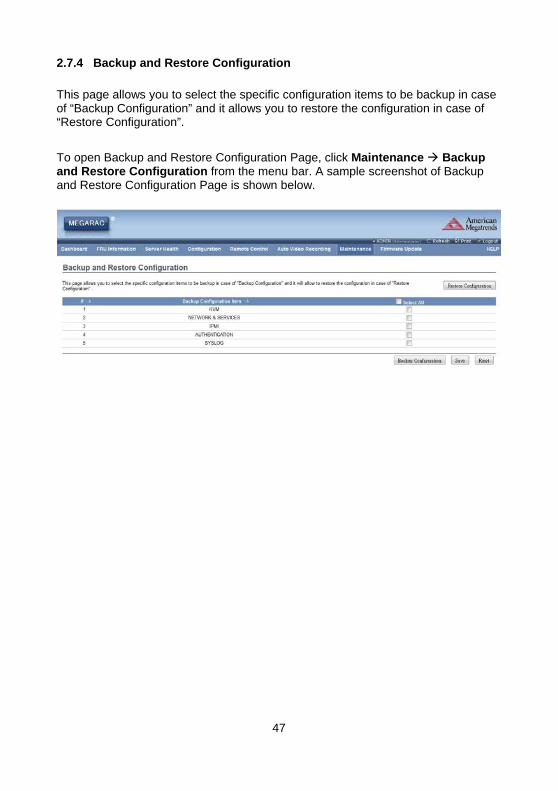
2.7.4 Backup and Restore Configuration
This page allows you to select the specific configuration items to be backup in case of “Backup Configuration” and it allows you to restore the configuration in case of “Restore Configuration”.
To open Backup and Restore Configuration Page, click Maintenance Backup and Restore Configuration from the menu bar. A sample screenshot of Backup and Restore Configuration Page is shown below.
48
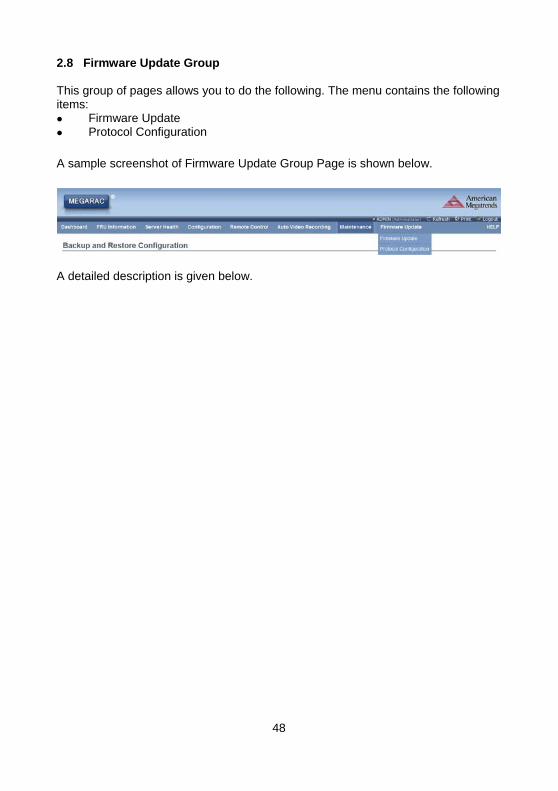
2.8 Firmware Update Group This group of pages allows you to do the following. The menu contains the following items: Firmware Update Protocol Configuration
A sample screenshot of Firmware Update Group Page is shown below.
A detailed description is given below.
49
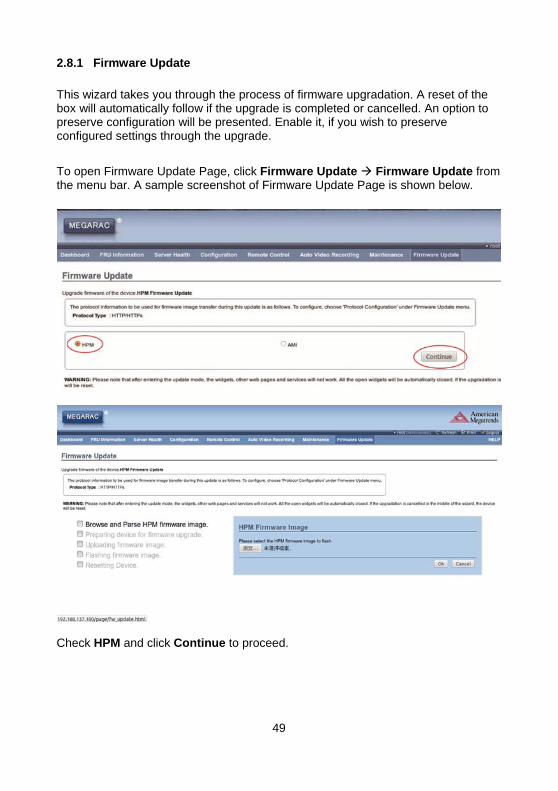
2.8.1 Firmware Update
This wizard takes you through the process of firmware upgradation. A reset of the box will automatically follow if the upgrade is completed or cancelled. An option to preserve configuration will be presented. Enable it, if you wish to preserve configured settings through the upgrade.
To open Firmware Update Page, click Firmware Update Firmware Update from the menu bar. A sample screenshot of Firmware Update Page is shown below.
Check HPM and click Continue to proceed.
50
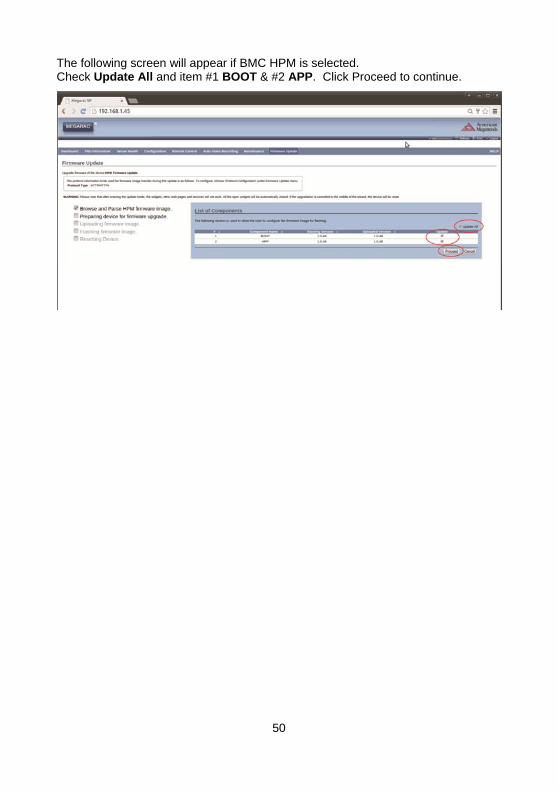
The following screen will appear if BMC HPM is selected. Check Update All and item #1 BOOT & #2 APP. Click Proceed to continue.

51
The following screen will appear if PRON HPM is selected. Check Update All and item #1 BIOS. Click Proceed to continue.
52
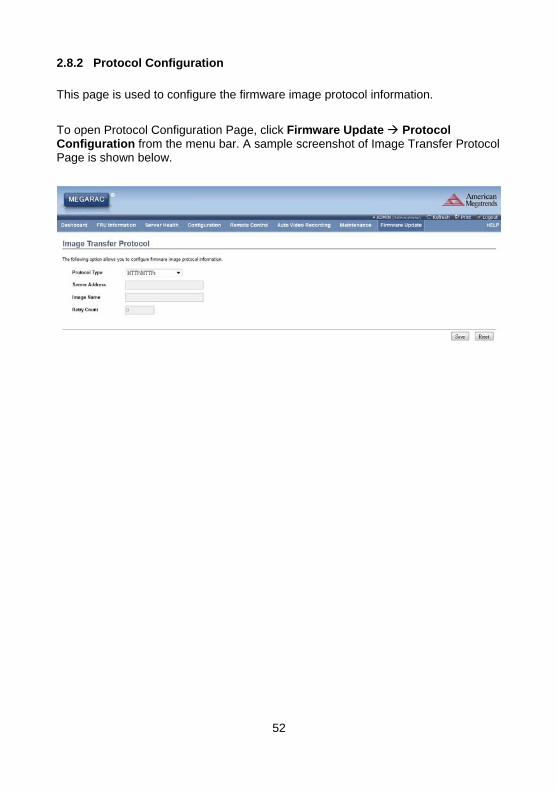
2.8.2 Protocol Configuration
This page is used to configure the firmware image protocol information.
To open Protocol Configuration Page, click Firmware Update Protocol Configuration from the menu bar. A sample screenshot of Image Transfer Protocol Page is shown below.
53
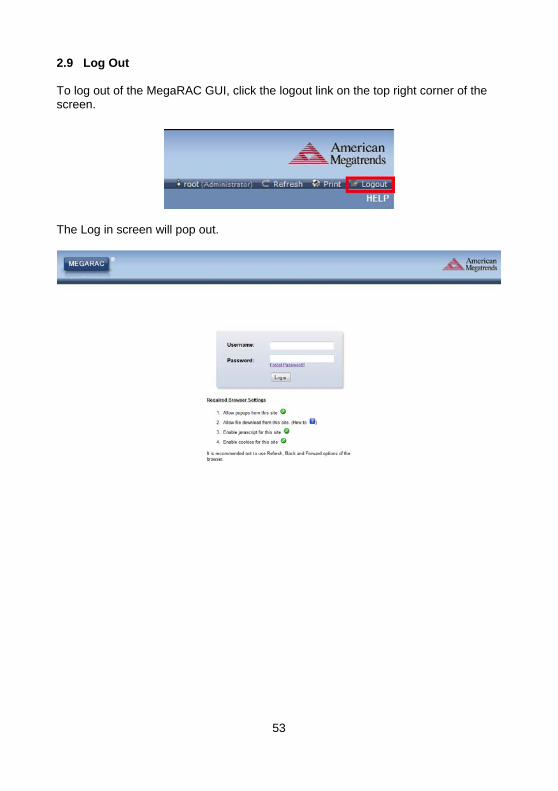
2.9 Log Out To log out of the MegaRAC GUI, click the logout link on the top right corner of the screen.
The Log in screen will pop out.

54
NOTE
55
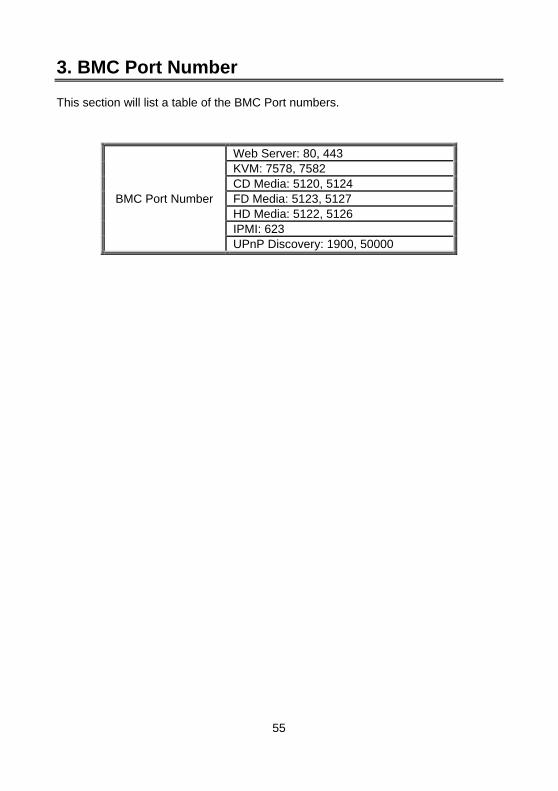
3. BMC Port Number This section will list a table of the BMC Port numbers.
BMC Port Number
Web Server: 80, 443 KVM: 7578, 7582 CD Media: 5120, 5124 FD Media: 5123, 5127 HD Media: 5122, 5126 IPMI: 623 UPnP Discovery: 1900, 50000