hardening cisco routers - entercapsentercaps.net/library/pdf/hardening_cisco_routers.pdf ·...
TRANSCRIPT


Hardening Cisco Routers
,TITLE.25382 Page i Friday, February 15, 2002 2:57 PM

,TITLE.25382 Page ii Friday, February 15, 2002 2:57 PM

Hardening Cisco Routers
Thomas Akin
Beijing • Cambridge • Farnham • Köln • Paris • Sebastopol • Taipei • Tokyo
,TITLE.25382 Page iii Friday, February 15, 2002 2:57 PM

Hardening Cisco Routersby Thomas Akin
Copyright © 2002 O’Reilly & Associates, Inc. All rights reserved.Printed in the United States of America.
Published by O’Reilly & Associates, Inc., 1005 Gravenstein Highway North,Sebastopol, CA 95472.
O’Reilly & Associates books may be purchased for educational, business, or sales promotionaluse. Online editions are also available for most titles (safari.oreilly.com). For more information,contact our corporate/institutional sales department: (800) 998-9938 or [email protected].
Editor: Jim Sumser
Production Editor: Ann Schirmer
Cover Designer: Emma Colby
Interior Designer: Melanie Wang
Printing History:
February 2002: First Edition.
Nutshell Handbook, the Nutshell Handbook logo, and the O’Reilly logo are registeredtrademarks of O’Reilly & Associates, Inc. Many of the designations used by manufacturers andsellers to distinguish their products are claimed as trademarks. Where those designations appearin this book, and O’Reilly & Associates, Inc. was aware of a trademark claim, the designationshave been printed in caps or initial caps. The association between the image of a North Africanwild ass and Cisco routers is a trademark of O’Reilly & Associates, Inc.
While every precaution has been taken in the preparation of this book, the publisher and authorassume no responsibility for errors or omissions, or for damages resulting from the use of theinformation contained herein.
ISBN: 0-596-00166-5
[M]
,COPYRIGHT.25258 Page iv Friday, February 15, 2002 2:57 PM

v
Table of Contents
Preface . . . . . . . . . . . . . . . . . . . . . . . . . . . . . . . . . . . . . . . . . . . . . . . . . . . . . . . . . . . . . . . . . ix
1. Router Security . . . . . . . . . . . . . . . . . . . . . . . . . . . . . . . . . . . . . . . . . . . . . . . . . . . . . 1Router Security? 1Routers: The Foundation of the Internet 2What Can Go Wrong 2What Routers Are at Risk? 4Moving Forward 5
2. IOS Version Security . . . . . . . . . . . . . . . . . . . . . . . . . . . . . . . . . . . . . . . . . . . . . . . . . 6The Need for a Current IOS 6Determining the IOS Version 6IOS Versions and Vulnerabilities 7IOS Security Checklist 10
3. Basic Access Control . . . . . . . . . . . . . . . . . . . . . . . . . . . . . . . . . . . . . . . . . . . . . . . . 11Authentication Versus Authorization 11Points of Access 11Basic Access Control 13Remote Administration 19Protection with IPSec 28Basic Access Control Security Checklist 30
4. Passwords and Privilege Levels . . . . . . . . . . . . . . . . . . . . . . . . . . . . . . . . . . . . . . 32Password Encryption 32Clear-Text Passwords 33service password-encryption 33Enable Security 34
,hciscoroutTOC.fm.24841 Page v Friday, February 15, 2002 2:55 PM

vi | Table of Contents
Strong Passwords 35Keeping Configuration Files Secure 36Privilege Levels 38Password Checklist 41
5. AAA Access Control . . . . . . . . . . . . . . . . . . . . . . . . . . . . . . . . . . . . . . . . . . . . . . . . . 43Enabling AAA 43Local Authentication 44TACACS+ Authentication 44RADIUS Authentication 47Kerberos Authentication 50Token-Based Access Control 51AAA Security Checklist 51
6. Warning Banners . . . . . . . . . . . . . . . . . . . . . . . . . . . . . . . . . . . . . . . . . . . . . . . . . . 52Legal Issues 52Example Banner 54Adding Login Banners 54Warning Banner Checklist 57
7. Unnecessary Protocols and Services . . . . . . . . . . . . . . . . . . . . . . . . . . . . . . . . . . 58ICMP 58Source Routing 63Small Services 64Finger 64HTTP 65CDP 65Proxy ARP 65Miscellaneous 66SNMP 67Unnecessary Protocols and Services Checklist 67
8. SNMP Security . . . . . . . . . . . . . . . . . . . . . . . . . . . . . . . . . . . . . . . . . . . . . . . . . . . . 68SNMP Versions 69Securing SNMP v1 and v2c 70Securing SNMP v3 76SNMP Management Servers 81SNMP Security Checklist 81
,hciscoroutTOC.fm.24841 Page vi Friday, February 15, 2002 2:55 PM

Table of Contents | vii
9. Secure Routing and Antispoofing . . . . . . . . . . . . . . . . . . . . . . . . . . . . . . . . . . . . 83Antispoofing 83Routing Protocol Security 88Routing Protocol and Antispoofing Checklist 94
10. NTP . . . . . . . . . . . . . . . . . . . . . . . . . . . . . . . . . . . . . . . . . . . . . . . . . . . . . . . . . . . . . . 96NTP Overview 96Configuring NTP 97NTP Checklist 106
11. Logging . . . . . . . . . . . . . . . . . . . . . . . . . . . . . . . . . . . . . . . . . . . . . . . . . . . . . . . . . 108Logging in General 108Router Logging 109ACL Violation Logging 116AAA Accounting 118Logging Checklist 121
A. Checklist Quick Reference . . . . . . . . . . . . . . . . . . . . . . . . . . . . . . . . . . . . . . . . . . 123
B. Physical Security . . . . . . . . . . . . . . . . . . . . . . . . . . . . . . . . . . . . . . . . . . . . . . . . . 133
C. Incident Response . . . . . . . . . . . . . . . . . . . . . . . . . . . . . . . . . . . . . . . . . . . . . . . . 143
D. Configuration Examples . . . . . . . . . . . . . . . . . . . . . . . . . . . . . . . . . . . . . . . . . . . 149
E. Resources . . . . . . . . . . . . . . . . . . . . . . . . . . . . . . . . . . . . . . . . . . . . . . . . . . . . . . . . 161
Index . . . . . . . . . . . . . . . . . . . . . . . . . . . . . . . . . . . . . . . . . . . . . . . . . . . . . . . . . . . . . . . . . 165
,hciscoroutTOC.fm.24841 Page vii Friday, February 15, 2002 2:55 PM

,hciscoroutTOC.fm.24841 Page viii Friday, February 15, 2002 2:55 PM
This is the Title of the Book, eMatter EditionCopyright © 2002 O’Reilly & Associates, Inc. All rights reserved.
ix
Preface
Master one single topic, and everything becomes clearer.
The field of network security is a huge subject. To be a network security expert, youmust be an expert on routers, switches, hubs, firewalls, intrusion detection systems(IDS), servers, desktops, email, HTTP, instant messages, sniffers, and a thousandother topics. There are many books on network security, and the good ones tend tobe tomes of 1000+ pages that are intimidating even to their authors. This book takesthe opposite approach. It takes a single, but vitally important, topic and expands onit. Routers are your first line of defense. If they are compromised, everything else iscompromised. This book describes how to secure your routers. Once you learn howto secure them, routers can protect the rest of your network.
To reemphasize, this is not a book on network security; there are hundreds of thosealready in print. You will not find long discussions on firewalls, Virtual Private Net-works (VPNs), network IDS systems, or even access lists (ACLs). This book is morefundamental than that. This book shows how to harden the foundation of your net-work—the router. Once you have mastered the information in this book, you willfind that your ability to build firewalls and configure IDS systems will increase. Youwill be building on a secure foundation.
OrganizationThis book consists of 11 chapters and 5 appendixes. At the end of most chapters is achecklist summarizing the hardening techniques described in that chapter.Appendix A provides a complete hardening checklist made up of the chapter check-lists. The book is designed to be read either straight through for those new to routersecurity, or a chapter at a time for those interested in specific topics. I recommend,however, that before reading the book, you review the checklist provided inAppendix A. This checklist will give you a good feel for the information covered in
,ch00.23088 Page ix Friday, February 15, 2002 2:52 PM

This is the Title of the Book, eMatter EditionCopyright © 2002 O’Reilly & Associates, Inc. All rights reserved.
x | Preface
each chapter and familiarize you with the scope of the book. Here is a brief descrip-tion of what each chapter and appendix covers.
Chapter 1, Router Security, addresses the importance of router security and whererouters fit into an overall information security plan. Additionally, this chapter dis-cusses which routers are the most important to secure and how secure routers arenecessary (and often overlooked) parts of both firewall design and the overall infor-mation security strategy of a company.
Chapter 2, IOS Version Security, discusses security issues involving the router IOSsoftware. It outlines current IOS revisions, shows how to determine current IOS ver-sions, and details the importance of running a current IOS.
Chapter 3, Basic Access Control, discusses the standard ways to access a Cisco router,the security implications of each of these methods, and how to secure basic Ciscorouter access. These methods include console, VTY, AUX, and HTTP access controls.
Chapter 4, Passwords and Privilege Levels, discusses the three ways that Cisco rout-ers store passwords and the security implications of each method. This chapter con-tinues to discuss the router’s default security levels and shows how to modify theselevels to increase the security and accountability on your routers.
Chapter 5, AAA Access Control, discusses how to use the advanced AAA authentica-tion and authorization configuration for Cisco routers. It also shows how to use anetwork access server running RADIUS or TACACS+ to control these services onthe router.
Chapter 6, Warning Banners, discusses the importance of having warning banners onrouters. This chapter not only talks about the need to have banners, but also pre-sents legal dos and don’ts for security banners. Finally, the chapter provides anexample recommended banner to use on Cisco routers.
Chapter 7, Unnecessary Protocols and Services, discusses the unnecessary servicesthat are commonly run on Cisco routers. Many of these services are enabled bydefault, and this chapter explains why services such as HTTP, finger, CDP, echo, andchargen are dangerous and details how to turn them off.
Chapter 8, SNMP Security, demonstrates how to disable SNMP or configure itsecurely. It presents the differences between SNMP Versions 1, 2, and 3; talks aboutread-only versus read-write access; and shows how to use access lists to limit SNMPaccess to only a few specific machines.
Chapter 9, Secure Routing and Antispoofing, discusses routing protocol security. Spe-cifically, it discusses how to add security to RIP, OSPF, EIGRP, and BGP. Theserouting protocols allow authentication to prevent fake routing updates. The chapteralso presents the importance of antispoofing filters and how to perform ingress andegress filtering using CLs on older routers and Cisco’s RPF and CEF antispoofingmechanisms on newer ones.
,ch00.23088 Page x Friday, February 15, 2002 2:52 PM

This is the Title of the Book, eMatter EditionCopyright © 2002 O’Reilly & Associates, Inc. All rights reserved.
Preface | xi
Chapter 10, NTP, discusses NTP and how to use it to make sure all routers have theexact same time. This chapter discusses the importance of having the time on allyour routers and logging servers synchronized and provides examples of how to con-figure a Cisco router to use NTP time services.
Chapter 11, Logging, discusses how Cisco routers perform logging and why logging isimportant. The chapter then demonstrates why and how to manipulate logging buff-ers, how to configure routers to use syslog, and when to do ACL violation logging.
Appendix A, Checklist Quick Reference, allows you to secure your Cisco routers andverify that important security issues have been addressed. The checklist is presentedin a manner that makes it easy to quickly refer back to the chapter addressing theitems outlined in the checklist reference. Finally, this appendix briefly talks aboutusing the checklist to harden and audit Cisco routers.
Appendix B, Physical Security, talks about the importance of physically securing yourrouters. It presents common physical vulnerabilities and discusses how to overcomethem.
Appendix C, Incident Response, gets you thinking about how to react when a break-in is discovered. The goal of this chapter is not to provide an exhaustive explanationof incident response, but to provide emergency guidelines that you can follow whenan incident occurs.
Appendix D, Configuration Examples, provides common Cisco router configurationexamples that combine the examples throughout the book.
Appendix E, Resources, provides a list of resources that you might find useful if youneed to brush up on ACLs, network access protocols such as TACACS or RADIUS,and services such as SNMP or syslog.
AudienceThis book assumes you are already familiar with configuring, administering, andtroubleshooting Cisco routers. A CCNA should be comfortable with the contents ofeach chapter. A CCNP or above will probably want to first turn to the checklist pro-vided in Appendix A. To get the most out of this book, you should be familiar with:
• Accessing your router through the console and VTYs
• Using TCP/IP and subnet masks
• Configuring your router from the command line
• Upgrading your IOS
• Configuring standard and extended ACLs
• Routing protocols such as RIP, IGRP, and OSPF
,ch00.23088 Page xi Friday, February 15, 2002 2:52 PM

This is the Title of the Book, eMatter EditionCopyright © 2002 O’Reilly & Associates, Inc. All rights reserved.
xii | Preface
Conventions Used in This BookThe following formatting conventions are used throughout this book:
• Italic is used for commands, passwords, error messages, filenames, emphasis,and the first use of technical terms.
• Constant width is used for IP addresses and router configuration examples.
• Constant width italic is used for replaceable text.
• Constant width bold is used for user input.
This icon indicates a note or tip.
This icon indicates a warning.
How to Contact UsPlease address comments and questions concerning this book to the publisher:
O’Reilly & Associates, Inc.1005 Gravenstein Highway NorthSebastopol, CA 95472(800) 998-9938 (in the United States or Canada)(707) 829-0515 (international/local)(707) 829-0104 (fax)
There is a web site for this book, which lists errata, examples, or any additionalinformation. You can access this page at:
http://www.oreilly.com/catalog/hardcisco
To comment or ask technical questions about this book, send email to:
For more information about books, conferences, resource centers, and the O’ReillyNetwork, see the O’Reilly web site at:
http://www.oreilly.com
,ch00.23088 Page xii Friday, February 15, 2002 2:52 PM

This is the Title of the Book, eMatter EditionCopyright © 2002 O’Reilly & Associates, Inc. All rights reserved.
Preface | xiii
AcknowledgmentsFirst, always, is my wife Abigail Akin. Neither of us knew how hard this would be,but it was her encouragement (and occasional kick in the pants) that gave me thecourage and discipline to write and finish this book. Honey, this first book is for you.
Second, for his near infinite patience, is Jim Sumser, my editor. It was Jim who tooka chance on an unknown author. He pushed me when I needed it and always had aword of praise to keep me on track just when I was about to throw my computer outthe window.
My technical reviewers gave invaluable input: Ian J. Brown, CCIE #3372, MarkJackson, CCIE #4736, and Elsa Lankford. Ian and Mark kept me towing the linetechnically, while Elsa kept me from getting bogged down in details, missing the for-est for the trees. Ian and Mark, the configuration examples in Appendix D are foryou, and, Elsa, the resources in Appendix E are yours.
Also, my friends in law enforcement: thanks to Steve Edwards from the GeorgiaBureau of Investigation and Cassandra Schansman, Georgia’s Assistant AttorneyGeneral, for both their support and review of Appendix C. Thanks to Patrick Grayfrom the FBI’s Atlanta Computer Crimes Squad for providing the warning banner inChapter 6.
Next, Jeff Crabtree, my former boss and long-time friend. He gave me my start ininformation technology and has supported me, many times at his own expense, foralmost a decade. I owe you and Lisa some serious margaritas.
Finally, the two people who have taught me that integrity and love are the mostimportant parts of being successful—my father Morgan Akin and my mother CathyCoulmas.
,ch00.23088 Page xiii Friday, February 15, 2002 2:52 PM

,ch00.23088 Page xiv Friday, February 15, 2002 2:52 PM

This is the Title of the Book, eMatter EditionCopyright © 2002 O’Reilly & Associates, Inc. All rights reserved.
1
Chapter 1 CHAPTER 1
Router Security
In Webster’s dictionary the definition of hard is particularly relevant to the field ofinformation security:
Not easily penetrated or separated into parts; not yielding to pressure.
By hardening a router, we make it difficult to penetrate and unyielding under thepressure of attacks. This chapter discusses why hardening network routers is one ofthe most important and overlooked aspects of Information Security. It will talk aboutwhat can go wrong when routers are left insecure and identify which routers are atthe most risk from attack.
Router Security?When asking about Information Security (InfoSec), most people immediately thinkabout stolen credit cards, defaced web sites, and teenage hackers with names likeB@D@pple. An InfoSec professional might extend the list to items like firewalls, Vir-tual Private Networks (VPN)s, penetration testing, and risk analysis. What is almostnever listed is router security—network security, yes, but never specifically routersecurity. The distinction is important.
Network security is most often thought of as something that protects machines on anetwork. To do this, companies put up firewalls, configure VPNs, and install intru-sion detection systems. Router security, however, involves protecting the networkitself by hardening or securing the routers. Specifically, it addresses preventingattackers from:
• Using routers to gain information about your network for use in an attack (infor-mation leakage)
• Disabling your routers (and therefore your network)
• Reconfiguring your routers
• Using your routers to launch further internal attacks
• Using your routers to launch further external attacks
,ch01.23218 Page 1 Friday, February 15, 2002 2:52 PM

This is the Title of the Book, eMatter EditionCopyright © 2002 O’Reilly & Associates, Inc. All rights reserved.
2 | Chapter 1: Router Security
Organizations spend hundreds of thousands of dollars on firewalls, VPNs, intrusiondetection, and other security measures, and yet they run routers with out-of-the-boxconfigurations. From personal experience, at least eight or nine out of every ten net-works has routers that are vulnerable to one of the five preceding problems.
Routers: The Foundation of the InternetA layperson who is asked what the foundation of the Internet is will probably say theWorld Wide Web, with the explanation that it is what everyone uses. Ask an MCSEand you may get a claim about how everyone runs Windows. Ask a network engi-neer and you will get routers and the statement “nothing works without them.”Without routers there is no Web, no email, no Internet.
The fundamental piece of information on the Internet is the IP packet. A router’s pri-mary function is to direct these packets. Therefore, routers truly work at the mostbasic and fundamental level of the Internet. Every network attached to the Internet isattached by a router. Some may be Linux boxes acting as routers, others may be fire-walls also performing routing, but most will be dedicated Cisco routers. Current esti-mates indicate that 80 percent of the Internet runs on Cisco equipment.
Routers are not only the foundation of the Internet; they are the foundation of howyour company communicates both externally and internally. Additionally, there is astrong trend toward converging voice, data, and even video into a single networkrunning IP. With this push, routers are becoming the foundation of data, voice, andvideo communication. With this convergence, almost all of a company’s informa-tion will pass through routers, causing them to become extremely attractive targets.
What Can Go WrongEfforts to improve awareness about the importance of router security are not helpedby the lack of media attention on incidents involving compromised routers. Why thelack of reported cases? There are two major reasons:
• Routers are often used to provide attackers with valuable information about yournetwork and servers rather than being the object of direct attack themselves.
• Router compromises are much less likely to be detected.
Before any attack, hackers will gather as much information about a company, its net-work, and its servers as possible. The more information an attacker can get, the eas-ier it is to compromise a site—knowledge is power. This type of informationgathering is called footprinting, and routers are routinely used when footprinting asite. With default configurations, an attacker can query routers and map out entirenetworks, including subnets, addressing schemes, and redundant paths. With thisinformation, an attacker can determine the most vulnerable locations on the
,ch01.23218 Page 2 Friday, February 15, 2002 2:52 PM

This is the Title of the Book, eMatter EditionCopyright © 2002 O’Reilly & Associates, Inc. All rights reserved.
What Can Go Wrong | 3
network. Footprinting a site, however, is a tedious and unglamorous process. Themedia reports that it took a hacker 15 minutes to break into NASA; they don’t pointout that the hacker spent 6 weeks gathering information before launching the attack.
Making matters worse, few organization have any controls or monitoring on theirrouters. When asked, “How would you know if someone reconfigured your router?”the answer invariably comes back, “When it stops working.” Prodding further with aquestion about how to detect changes that kept the network functional but allowedan attacker to bypass a firewall usually gets a comment about how the intrusiondetection system (IDS) would catch them. Pointing out that if a router were compro-mised, attackers could probably bypass the IDS finally induces concern. With the cur-rent lack of controls and auditing on routers, compromises will probably gounnoticed unless they disrupt service. Attacks that disrupt service are bad, but at leastcompanies know something is wrong—they know they have been hacked. Attacks inwhich a hacker does disable anything are the truly dangerous ones. Without ade-quate monitoring and auditing, no one knows the network has been compromised.An attacker can spend weeks or months monitoring all network traffic, gaining bankaccount numbers, client lists, or personnel records. This information could be sold tocompetitors, given to other hackers, or used to blackmail the company.
Consequences of Compromised RoutersIn modern warfare, a key strategy to attack an enemy’s ability to communicate. Theobvious attack disables an enemy’s ability to communicate. A subtler attack compro-mises, but does not disable, an enemy’s communications system. This type of com-promise allows easy access to enemy plans, troop movement, and points of attack.The compromise also allows false information to be transmitted to the enemy, con-fusing them and leading them into traps.
All networked organizations are in a battle to protect their resources and informa-tion. Secure communication is as important for an organization’s survival as it is inmilitary warfare. Routers are the communication medium for an organization andthe consequences of their compromise can be disastrous. By compromising an orga-nization’s routers, an attacker can:
Disable the entire networkThose who have experienced significant network outages can understand theloss of productivity and revenue this causes. Imagine how long it would take tofix the network if attackers disabled password recovery, changed the routers’passwords, and deleted the configurations.
Use the routers to attack internal systemsRouters can give attackers a foothold into your internal network. By taking con-trol of routers, attackers can often bypass intrusion detection systems, use therouters to gain access to trusted networks, and avoid or confuse any logging andmonitoring used on the network.
,ch01.23218 Page 3 Friday, February 15, 2002 2:52 PM

This is the Title of the Book, eMatter EditionCopyright © 2002 O’Reilly & Associates, Inc. All rights reserved.
4 | Chapter 1: Router Security
Use the routers to attack other sitesHackers like to hide their tracks. They do this by breaking into several net-worked systems and use those systems to launch other attacks. When attackspass through six or seven servers, they can be hard to trace. Since routers usu-ally have less protection and logging than servers, attacking through six or sevenrouters can be extremely difficult and costly to investigate. For organizationswith insecure routers and no monitoring, an attacker will leave little or no trace.
Reroute all traffic entering and leaving the networkCompromised routers allow an attacker to reroute network traffic. Attackers canthen monitor, record, and modify the redirected traffic. Imagine the effects ofseveral weeks worth of online orders being redirected to a competitor or, worse,online financial transactions being rerouted to a bank somewhere in Nigeria.
What Routers Are at Risk?A simple, but useful, risk analysis formula defines risk as:
Risk = vulnerability × threat × cost
where vulnerability is how likely an attack is to succeed, threat is the likelihood of anattack, and cost is the total cost of a threat succeeding.
The link between threat and vulnerability can be confusing but is important to under-stand. If a high-rise office building is designed and built without any protection againstearthquakes, then the office building has a vulnerability to earthquakes. The vulnera-bility alone, though, does not necessarily translate into risk for the people working inthe office building. If the building is located in California, there is a significant threatof earthquakes, so a vulnerable building provides a great amount of risk. The samebuilding located in Georgia, while being equally vulnerable to earthquakes, wouldhave a lower risk since the threat of earthquakes in Georgia is much lower.
When evaluating routers, the vulnerability usually averages around the same level.Even though different routers may run different IOS versions, routers inherently trustother routers. They trust one another in order to exchange routing information,allowing them to correctly transfer packets and route around problems. Once a sin-gle router is compromised, this trust can be exploited to manipulate other routers ona network. For this reason, it is advantageous to assume that all routerrs on the net-work share the same level of vulnerability. This level should be equal to the vulnera-bility of the most vulnerable router on the network.
With the vulnerability equal, the differentiating factors become threat and cost. Thethreat to external routers is generally greater due to their visibility. Other routers mayprovide access to secured or trusted networks, and their compromise would cost muchmore than a router connected to a public lab or test area.
,ch01.23218 Page 4 Friday, February 15, 2002 2:52 PM

This is the Title of the Book, eMatter EditionCopyright © 2002 O’Reilly & Associates, Inc. All rights reserved.
Moving Forward | 5
With these considerations in mind, some of the first routers that need to be securedand actively monitored are:
• Gateway routers that connect your network to the Internet
• Routers that are part of a firewall
• Routers that are connected to a trusted or secure network
• Routers that perform packet filtering
Moving ForwardThis chapter has explained what router security is and why it is vitally important.Routers provide one of the most fundamental functions on a network and are ofteninstalled and run with out-of-the-box security. When addressing router security,most administrators think about using access lists to turn off ping or Telnet. Diggingfurther and asking about the specific measures taken to protect the routers them-selves usually results in a blank stare or a statement such as, “Our routers don’t holdany critical data, and we have never had any security problems with them, so theymust be secure.” The “we have never had any problems with them” argumentsounds very powerful, especially to management and those who hold the pursestrings. This chapter provides insight into why this is such a dangerous view.
The rest of this book discusses what it takes to harden a Cisco router; Appendix Aprovides a checklist that summarizes the steps necessary to harden a router and pro-tect the network.
,ch01.23218 Page 5 Friday, February 15, 2002 2:52 PM

This is the Title of the Book, eMatter EditionCopyright © 2002 O’Reilly & Associates, Inc. All rights reserved.
6
Chapter 2CHAPTER 2
IOS Version Security
The first item to discuss when talking about router security is the router’s operatingsystem (OS). The OS on Cisco routers is called Internetworking Operating System,or IOS. Most routers will be running an IOS version between 11.x and 12.x. By thetime this book is published, Cisco may have released 13.x. Every OS has vulnerabili-ties, and IOS is no exception. These vulnerabilities generally allow an attacker to dis-able a router (a denial of service attack), collect information from a router(information leakage), or reconfigure a router (an actual compromise).
The Need for a Current IOSA key aspect of every good security plan involves operating system security. Everyoperating system connected to the Internet is subject to attack. Hackers look for OSvulnerabilities to exploit. Cisco IOS has come under increasing scrutiny over the pastfew years. Bugtraq, a full disclosure vulnerability forum, reports 14 Cisco vulnerabili-ties between 1992 and 1999, 23 in 2000, and 42 in 2001. Once posted on Bugtraq,these vulnerabilities are seen by thousands of hackers a day and are used in numer-ous attacks. With such an increase in vulnerabilities, secure routers must have a cur-rent and stable version of IOS. The next section on IOS versions providesinformation on how to identify secure IOS releases.
Determining the IOS VersionYou must know what IOS version your routers are currently running before deter-mining whether you should use the latest release. To determine the IOS version, loginto your router and type show version. The output will be similar to:
Cisco Internetwork Operating System Software IOS(tm)GS Software (RSP-P-MZ), Version 12.0(16), RELEASE SOFTWARE (fc1)Copyright (c) 1986-1999 by Cisco Systems, Inc.Compiled Wed 06-Jan-99 08:15 by preetha
,ch02.23353 Page 6 Friday, February 15, 2002 2:53 PM

This is the Title of the Book, eMatter EditionCopyright © 2002 O’Reilly & Associates, Inc. All rights reserved.
IOS Versions and Vulnerabilities | 7
The author has highlighted the important IOS information. The first is Version 12.0(16), showing the IOS release version. This is followed by text indicating the releasetype. For the sake of security and stability, this text should normally read RELEASESOFTWARE. If it reads anything else, such as EARLY DEPLOYMENT RELEASE SOFTWARE orMAINTENANCE INTERIM SOFTWARE, the router is not running one of the most stable andsecure releases.
IOS Versions and VulnerabilitiesOnce you know what IOS version your routers are running, you need to understandthe IOS release process. Without this understanding, identifying and choosing themost secure release can be very difficult.
IOS VersionsCisco has a very defined and often confusing procedure for releasing IOS versions.There are two major types of IOS releases:
Early DeploymentEarly Deployment (ED) releases are used to add features to Cisco’s IOS. Thesereleases contain feature and platform support that has not yet been tested exten-sively in production systems. It is relatively easy for Cisco to add additional fea-tures or platform support to ED releases, but these additions have had very littletesting in production environments.
Major ReleaseThe goal of Major Releases is stability and quality. Major Releases provideimages for all Cisco hardware and once a release become a Major Release, noadditional features or platforms added. The only changes to these releases are inthe form of bug fixes.
Both Early Deployment and Major Releases are broken down into subcategories.Early Deployment releases are broken down into four types:
Consolidated Technology Early Deployment (CTED)Cisco uses the CTED to add enhancements, new features, and new hardwareplatforms to the IOS. These releases are extremely feature rich, but at the cost ofstability and reliability.
Specific Technology Early Deployment (STED)STED releases are similar to CTED releases, but are targeted toward a specifictechnology and are always released on specific platforms.
Specific Market Early Deployment (SMED)These releases target specific market segments such as ISPs or financial institu-tions. Unlike STED releases, which are organized according to technology,
,ch02.23353 Page 7 Friday, February 15, 2002 2:53 PM

This is the Title of the Book, eMatter EditionCopyright © 2002 O’Reilly & Associates, Inc. All rights reserved.
8 | Chapter 2: IOS Version Security
SMED releases are organized around a specific market segment. These releasesare built only for the specific platforms needed by the target market.
X ReleasesX Releases are short-lived, one-time releases. These releases exist to allow Ciscoto add new features and platforms to a CTED release in an extremely shortperiod of time in order to get these enhancements to market quickly. After suc-cessful testing, X Releases are ported back into the CTED releases immediately.
Major Releases can be broken down into two subcategories:
Limited DeploymentLimited Deployment (LD) releases are the first official Major Releases of IOScode. They have passed through the Early Deployment phase and include manyof the new features and product support developed under the ED releases. Oncea release is in the LD phase, no additional features, platforms, or enhancementscan be made to the release—only bug fixes. Limited Deployment releases, how-ever, have not yet been extensively tested in actual production networks.
General DeploymentAfter 9 to 14 months of testing in Limited Deployment, IOS versions enter Gen-eral Deployment (GD). Once an IOS version reaches this phase, there are strictcontrols over any modifications to the code. The goal for GD releases is toremain as stable as possible. Not all releases reach General Deployment (forexample, 11.1 and 11.3).
One more type of release needs to be mentioned: a Deferred Release (DF). Thesereleases are designated by DF and occur when Cisco cancels and makes obsolete arelease somewhere in the cycle. Releases are usually deferred because of significantquality issues and should be avoided.
From a security standpoint, organizations should normally be running GD releases.These releases are the most stable and have the most testing behind them. Otherreleases should be run only if an organization requires the additional functionalityprovided by another release and if a risk analysis indicates that they can handle theinstability and insecurity often associated with the other releases.
Please note that, not knowing any better, many organizations run ED and LDreleases and often have no problems. Cisco’s release process is done very well, andeven these releases are generally stable and secure. However, the field of securityrequires one to be a little paranoid and, unless there are significant reasons to runother releases, the best practice is to stick with GD releases.
Finally, while running a General Deployment release should keep you safe from cur-rently known problems and vulnerabilities, don’t let the GD release lull you into afalse sense of confidence. Vulnerabilities are still discovered in GD releases, so it isextremely important to monitor the status of your releases to make sure new bugshave not been uncovered.
,ch02.23353 Page 8 Friday, February 15, 2002 2:53 PM
This is the Title of the Book, eMatter EditionCopyright © 2002 O’Reilly & Associates, Inc. All rights reserved.
IOS Versions and Vulnerabilities | 9
IOS Naming SchemeIn addition to the release system, choosing the right IOS release requires an under-standing of Cisco’s naming conventions. The first is the Major Release number.Examples of Major Release numbers are 12.1, 12.0, 11.3, 11.2, and 11.1. Bug fixes toMajor Releases are included in maintenance revisions released every eight weeks.The number inside the parentheses indicates maintenance revisions. For example,12.0(3) indicates Major Release 12.0 and maintenance revision 3.
Limited or General Deployment releases consist of only Major Release and mainte-nance revision numbers. While the first few maintenance releases are going to be LDreleases, there is no way to determine from the IOS number whether a release is inLimited or General Deployment. To find out, go to http://www.cisco.com and chooseProducts → Cisco IOS Software → Key Release Dates and Milestones, where the GDrelease dates are listed.
Identifying Early Deployment releases is easier. Letters or groups of letters are alwaysassigned to ED releases:
CTEDThe feature-rich Consolidated Technology releases can be identified by a Tappended after the release number—12.0T , 12.1(3)T, or 11.3(15)T.
STEDThe Specific Technology releases can be identified by two letters (excluding X)appended after the release number—11.1CA, 11.3(12)MA, or 12.0(3)NB. Thefirst letter is used to specify the technology (see Table 2-1) and the second isused for differentiation.
SMEDThe Specific Market releases can be identified by a single letter after the releasenumber (except for a T, which indicates a CTED release.) Examples of SMEDreleases are 12.1E or 12.0(14)S.
X ReleasesThese one-time releases can be identified by two letters—an X followed by a let-ter for differentiation.
The following letters help identify ED releases. These definitions apply when the let-ters are in the first position after the IOS release name.
Table 2-1. First letter of ED releases
Letter Meaning
A Access server/dial technology
D xDSL technology
E Enterprise feature set
H SDH/SONET technology
,ch02.23353 Page 9 Friday, February 15, 2002 2:53 PM

This is the Title of the Book, eMatter EditionCopyright © 2002 O’Reilly & Associates, Inc. All rights reserved.
10 | Chapter 2: IOS Version Security
An X or Y in the second position indicates a short-lived Early Deployment releasebased on a Specific Technology (STED) release. For example, 11.3NX is based on 11.3NA and 12.0(3)WX is based on 12.0(3)WA.
Finally, in the case of a major bug, Cisco may fix and rebuild an IOS release. To dif-ferentiate these rebuilds from the original release, Cisco appends a number or letterto the end of the release number. If the release ends in a letter, Cisco appends a num-ber. If the release ends in a number, Cisco appends a letter. If 12.0(3)T was rebuilt,the number would be 12.0(3)T1. A rebuild of 11.3(13) would yield 11.3(13a) and arebuild of 12.1(2)NA would result in 12.1(2)NA1.
VulnerabilitiesTo determine which versions of IOS have vulnerabilities, go to http://www.cisco.com/go/psirt to find the latest security information. Unfortunately, Cisco providesno summary of vulnerable IOS versions, and determining your vulnerability requiresgoing through most Security Advisories individually. With the numerous IOS ver-sions available, choosing a General Deployment makes checking for security vulner-abilities easier.
IOS Security ChecklistThis checklist summarizes the important security information presented in this chap-ter. A complete security checklist is provided in Appendix A.
• Make sure that all routers are running a current IOS.
• Make sure that the IOS version is in General Deployment (unless all risks withthe non-GD IOS version have been addressed).
• Check the IOS version against existing Cisco Security Advisories.
• Regularly check Cisco Security Advisories for IOS vulnerabilities.
N Voice, multimedia, conference
S Service provider
T Consolidated Technology (CTED)
W ATM/LAN switching/layer 3 switching
X One-time release based on a CTED release
Table 2-1. First letter of ED releases (continued)
Letter Meaning
,ch02.23353 Page 10 Friday, February 15, 2002 2:53 PM

This is the Title of the Book, eMatter EditionCopyright © 2002 O’Reilly & Associates, Inc. All rights reserved.
11
Chapter 3 CHAPTER 3
Basic Access Control
This chapter addresses what most people think about when they start to secure arouter—authenticating users and restricting access. There are many more ways toaccess Cisco routers than most network administrators realize. Each of these meth-ods can have different authentication methods and can be set to allow various levelsof privilege access. It is important that all methods of access are either secured or dis-abled. The chapter briefly discusses the differences between authentication andauthorization and then moves on to the fundamentals of how Cisco routers handlecontrolling and protecting access.
Authentication Versus AuthorizationAccess control involves both authentication and authorization. People often confusethe two. Authentication is the process of identifying a user; authorization restrictswhat a user is allowed to do. Cisco router authentication controls can be divided intotwo main categories—those that use the AAA (authentication, authorization,accounting) access methods and those that don’t. The non-AAA methods includeline authentication (console, auxiliary, and VTY ports), local username authentica-tion, and Terminal Access Controller Access Control System (TACACS) or extendedTACACS authentication. The AAA authentication methods add TACACS+,RADIUS, and Kerberos. AAA provides much greater control over authentication,authorization, and accounting than do non-AAA methods. While Cisco calls AAAthe primary and recommended method of access control, you must configure AAAon your router manually. This chapter describes non-AAA methods of access. AAAwill be discussed in Chapter 5.
Points of AccessThere are many ways to access a Cisco router. Each way can provide different levelsof authorization, from viewing router information to completely reconfiguring the
,ch03.23479 Page 11 Friday, February 15, 2002 2:53 PM

This is the Title of the Book, eMatter EditionCopyright © 2002 O’Reilly & Associates, Inc. All rights reserved.
12 | Chapter 3: Basic Access Control
router or some level in between. Each access method is either out-of-band, whichdoes not rely on the network, or in-band, which requires the network to be func-tional. The primary methods of access are through the console port, the auxiliaryport, or network access through virtual TTYs (VTYs), HTTP, TFTP, or SNMP. Thefirst three—console, auxiliary, and VTYs—are called lines. Each of the six methodshas different characteristics.
Console portThe console port is the main access point on Cisco routers. It is the only oneenabled by default and it requires physical access to the router. The console porthas special abilities not associated with the other methods of access (such as per-forming password recovery in the event that a router is misconfigured or pass-words are forgotten).
The console port is the only port that is automatically authorized to perform thespecial function of password recovery. If an organization loses all passwords to arouter or if a router is compromised and reconfigured, there must to be a way toaccess the router without a password. Password recovery allows an administra-tor to access the router and delete or change the current passwords. Regardingpassword recovery, the only method of authentication is physical access to therouter—anyone with physical access to the router can perform password recov-ery. This makes physical security of the router vitally important. See Appendix Bfor a checklist on how to secure physical access to the router.
Auxiliary portThe auxiliary or AUX port is used to provide out-of-band access to the router byallowing a modem or terminal server to be attached to the router. This portallows remote administration of the router even if the network itself is disabled.
Virtual TTYVirtual TTYs (VTYs) provide terminal access to the router through the networkitself. To gain access through a VTY, the network must be up and functioning.The most common protocol used to access a VTY is Telnet, but many other pro-tocols, such as rlogin and ssh, are supported. VTYs can even support non-IP pro-tocols, such as MOP or X.29. Cisco routers come with five VTY ports numbered0 through 4, configured by default.
HTTPRecent Cisco IOS revisions have added the ability to access and even reconfig-ure routers though the Web. When enabled, routers run a small web server thatauthenticates the user and provides access.
TFTPRouters use the Trivial File Transfer Protocol (TFTP) to upload IOS softwareand configuration files. TFTP access usually becomes a concern only when rout-ers are set to automatically load their configuration files from a TFTP server orare configured to act as TFTP servers themselves.
,ch03.23479 Page 12 Friday, February 15, 2002 2:53 PM

This is the Title of the Book, eMatter EditionCopyright © 2002 O’Reilly & Associates, Inc. All rights reserved.
Basic Access Control | 13
SNMPThe Simple Network Management Protocol (SNMP) provides read-only andread/write access to almost all network devices. This method of access is dis-cussed in detail in Chapter 8.
Basic Access ControlBy default, there are two levels of authorization on Cisco routers (level 1 and level15), and both require separate authentication. Level 1 is equivalent to read-onlyaccess, and level 15 give privileged or read/write access. Level 1 authorization allowsusers to view information about the router (but not make any changes) and is gener-ally referred to as user mode. Level 15 gives the user full rights to reconfigure therouter and is referred to as privileged mode.
Authentication and AuthorizationDefault router access first requires an administrator to gain user-level access beforeattempting privileged-level access. Thus, protecting and controlling user-level accessinto the routers is a primary concern. The default methods for access are the lines—console port, auxiliary port, and virtual TTYs. Additional methods include HTTP,TFTP, and SNMP access, and each method of access requires its own access controlconfiguration.
Console password
The console port is used for direct access to the router and must be configured forsecure access. By default, the console port’s authentication method is a password (nousername) and its authorization level is user or read-only. To configure the consoleport password from privileged mode, you must:
• Enter global configuration mode with the config terminal command
• Enter the line console with the line console 0 command
• Enable logins using the login command
• Establish a password with the password command
Here is an example:
Router#config terminalEnter configuration commands, one per line. End with CNTL/Z.Router(config)#line console 0Router(config-line)#loginRouter(config-line)#password console-passwordRouter(config-line)#^ZRouter#
,ch03.23479 Page 13 Friday, February 15, 2002 2:53 PM

This is the Title of the Book, eMatter EditionCopyright © 2002 O’Reilly & Associates, Inc. All rights reserved.
14 | Chapter 3: Basic Access Control
Never put a modem on a console port. With a little patience and a wardialer, attackers can use the console port to perform password recov-ery remotely over the modem.
AUX and VTY passwords
Setting passwords on AUX and VTY ports is similar to setting the console password.Setting the password on the AUX port looks like:
Router#config terminalEnter configuration commands, one per line. End with CNTL/Z.Router(config)#line aux 0Router(config-line)#loginRouter(config-line)#password aux-passwordRouter(config-line)#^ZRouter#
Setting the VTY password is slightly different since there are five VTY ports bydefault. Setting the password for the first VTY (VTY 0) would look like:
Router#config terminalEnter configuration commands, one per line. End with CNTL/Z.Router(config)#line vty 0Router(config-line)#loginRouter(config-line)#password vty0-passwordRouter(config-line)#^ZRouter#
Setting the VTY password for all five default VTYs at the same time would look like:
Router#config terminalEnter configuration commands, one per line. End with CNTL/Z.Router(config)#line vty 0 4Router(config-line)#loginRouter(config-line)#password vty-passwordRouter(config-line)#^ZRouter#
If you have configured additional VTYs on your router, you must make sure that apassword is configured on all of them.
After these commands, a show running-config shows:
line con 0 password console-password loginline aux 0 password aux-password loginline vty 0 4 password vty-password login
,ch03.23479 Page 14 Friday, February 15, 2002 2:53 PM

This is the Title of the Book, eMatter EditionCopyright © 2002 O’Reilly & Associates, Inc. All rights reserved.
Basic Access Control | 15
Don’t forget that any changes you make are not automatically saved.Changes appear in the running configuration only until they are savedwith the command copy running-config startup-config. If you don’t saveyour changes, they will disappear the next time the router is rebooted.
Privileged-level access control
Once a user is logged into a line with user-level access, he can use the enable com-mand to attempt to gain privilege access. Privilege access allows a user to both viewrouter information and reconfigure the router. If there is no privilege-level passwordset, then the enable command grants privileged-level access with prompting for apassword.
There are two ways to set the enable password—with the enable password commandand the enable secret command. The enable password command is provided for back-ward compatibility only, is much less secure than the enable secret command, andshould never be used. See Chapter 4 for more details on password encryption, butalways use the enable secret command to set the enable password:
Router#config terminalEnter configuration commands, one per line. End with CNTL/Z.Router(config)#enable secret enable-passwordRouter(config)#^ZRouter#
Cisco routers can also use tacacs (see the later section “TACACS access control”) forthe enable password (or they can use the more advanced AAA methods detailed inChapter 5).
The enable secret command takes precedence over the enable passwordcommand, so if both are set, the system will use only the passwordestablished by the enable secret command.
Local username access control
Default Cisco router authentication does not require a login name and has no con-cept of identity. This scales very poorly because when more than one administratorknows the router password, there is no accountability. Local authentication solvesthe accountability issue by letting users be defined on each router and each point ofaccess configured to use locally defined usernames and passwords.
To use local authentication, first configure user accounts on each router and thenconfigure each line to use these usernames for authentication. To create users, usethe username command:
Router#config terminalEnter configuration commands, one per line. End with CNTL/Z.Router(config)#username jdoe password jdoe-passwordRouter(config)#username rsmith password rsmith-password
,ch03.23479 Page 15 Friday, February 15, 2002 2:53 PM
This is the Title of the Book, eMatter EditionCopyright © 2002 O’Reilly & Associates, Inc. All rights reserved.
16 | Chapter 3: Basic Access Control
Router(config)#^ZRouter#
Next, tell each line to use local authentication by using the login local command:
Router#config terminalEnter configuration commands, one per line. End with CNTL/Z.Router(config)#line vty 0 4Router(config-line)#login localRouter(config-line)#^ZRouter#
This example configured only the VTY ports; you should also configure the AUXand console ports to use local authentication.
Local authentication can solve our accountability problems, but it doesn’t help withscalability. If a company has a dozen routers, every time an account needs to be cre-ated, deleted, or modified, the change must be made separately on all 12 routers.Local authentication also has the vulnerability of the passwords either being pre-sented in clear text or with a reversible encryption (as explained in Chapter 4).
TACACS access control
The only basic, non-AAA access control setting that can help solve the scalabilityproblems is TACACS. Cisco routers support three versions of TACACS—standardTACACS, Extended TACACS (X-TACACS), and TACACS Plus (TACACS+). Thesupported non-AAA versions are TACACS and X-TACACS.
TACACS can provide centralized access control on a network. Instead of each routerbeing statically configured with all usernames and passwords, it is configured to aska TACACS server for information about who is allowed to log in to the router. If youhave a dozen routers and all are configured to use a TACACS server for authentica-tion, the only list of usernames and passwords that need to be kept and updated ison the TACACS server.
TACACS and X-TACACS have been declared end-of-maintenance by Cisco, whichmeans they can drop support for them at any time. Therefore, this chapter providesonly a brief overview of a TACACS configuration. If you currently use one of thesetwo protocols, you are encouraged to migrate to TACACS+, RADIUS, or Kerberos. Allthree continue to be supported by Cisco routers. If you want to establish a networkaccess server to centralize your authentication, pretend that TACACS and XTACACSdon’t exist and read about TACACS+, RADIUS, and Kerberos in Chapter 5.
To be complete, however, look at the following examples of using a TACACS serverto authenticate user access to a router. The basic steps are:
1. Configure each line to use TACACS with the login tacacs command.
2. Set the password of last resort to the enable password with the tacacs-server last-resort password command. In case the router cannot contact the TACACS server
,ch03.23479 Page 16 Friday, February 15, 2002 2:53 PM

This is the Title of the Book, eMatter EditionCopyright © 2002 O’Reilly & Associates, Inc. All rights reserved.
Basic Access Control | 17
for authentication information, it will not lock you out, but will allow you to login using the privilege mode password.
3. Tell the router what TACACS server to use with the tacacs-server host command.
Here is an example of setting the AUX port to use the TACACS server 130.218.10.12for authentication:
Router#config terminalEnter configuration commands, one per line. End with CNTL/Z.Router(config)#line aux 0Router(config)#login tacacsRouter(config)#exitRouter(config-line)#tacacs-server last-resort passwordRouter(config)#tacacs-server host 130.218.10.12Router(config)#^ZRouter#
To set all line access to use TACACS, configure the other lines—console and VTYs 0through 4—with the login tacacs command as well.
You can also tell the router to use TACACS for the enable or privileged-level pass-word. To do so:
• Set the TACACS server with tacacs-server host if it is not already set.
• Configure TACACS enable authentication with tacacs-server authenticate enable.
• Configure the enable password to use TACACS with enable use-tacacs.
• Configure the enable password of last resort with enable last-resort so you canstill access enable mode if the TACACS server is unavailable.
For example:
Router#config terminalEnter configuration commands, one per line. End with CNTL/Z.Router(config)#tacacs-server host 130.218.10.5Router(config)#tacacs-server authenticate enableRouter(config)#enable use-tacacsRouter(config)#enable last-resort passwordRouter(config)#^ZRouter#
configures the router to use TACACS for privilege access and to default to a locallyconfigured enable password if the TACACS server is unavailable.
Using regular TACACS for enable access allows anyone with a validusername and password to access privileged mode. Regular TACACScan’t tell the different between a user-level authentication request anda privileged-level request. To solve this problem, use ExtendedTACACS or one of the AAA authentication methods such as RADIUSor TACACS+.
,ch03.23479 Page 17 Friday, February 15, 2002 2:53 PM

This is the Title of the Book, eMatter EditionCopyright © 2002 O’Reilly & Associates, Inc. All rights reserved.
18 | Chapter 3: Basic Access Control
Disabling console, auxiliary, and VTY logins
If you do not need or cannot secure AUX or VTY access to the router, the safest mea-sure is to disable logins on those ports completely. Disabling can be accomplishedfrom global config mode by entering the AUX or VTY lines and disabling loginsusing the login and no password commands. The NSA’s guide to router security alsorecommends that you use the transport input none, no exec, and exec-timeout com-mands for extra redundancy:
Router#config terminalEnter configuration commands, one per line. End with CNTL/Z.Router(config)#line aux 0Router(config-line)#login localRouter(config-line)#no passwordRouter(config-line)#transport input noneRouter(config-line)#no execRouter(config-line)#exec-timeout 0 1Router(config-line)#^ZRouter#
This step is counterintuitive, but very important. Intuitively, it seems that the com-mand no password would allow anyone to log in without a password. Likewise, intu-itively, it seems that the command no login would disable logins completely. Inreality, the opposite is true. Using the command no login on a line will allow anyoneto log in without a password! The no password command removes the password buttells the router not to allow anyone to log in.
Disabling logins can be tricky. Under a line, the no login command overrides every-thing else. Look at the following configuration:
line vty 0 4 password vty-password no login
A password is set, but the password is useless since the no login command allowsanyone to log in without a password:
% telnet RouterOneTrying RouterOne...Connected to RouterOne.Escape character is '^]'.
Router>
No password is required! In the following configuration, however:
line vty 0 4 login
the login command is used and no password is set, but everyone is denied access:
% telnet RouterOneTrying RouterOne...Connected to RouterOne.Escape character is '^]'.
,ch03.23479 Page 18 Friday, February 15, 2002 2:53 PM

This is the Title of the Book, eMatter EditionCopyright © 2002 O’Reilly & Associates, Inc. All rights reserved.
Remote Administration | 19
Password required, but none setConnection closed by foreign host.
TFTP AccessTFTP provides no methods of authentication; any TFTP client that knows the file-name can download the file. TFTP is normally used only when a router needsupgrading and represents a minimal security risk. However, routers are occasionallyset to automatically download their configuration from a TFTP server at everyreboot. This automatic download provides a security risk. If attackers are able tocompromise the TFTP server and modify the configuration files that reside on thatserver, they can then attempt to crash the router, causing it to load the compromisedconfiguration as it boots back up. If there are reasons why your routers must useTFTP servers for their configuration files, then the security of the router dependsdirectly on the security of the TFTP server.
Additionally, newer routers can be configured to serve as TFTP servers with otherTFTP clients downloading files from the router. If this feature is used, it should beturned on only for the duration of the transfer and then immediately turned off. Donot leave your routers configured as TFTP servers. Doing so invites an attacker tosimply download your IOS versions and your configuration files.
Remote AdministrationThe console port is useful only if you have physical access to the router. This physi-cal access is not always convenient. Many network administrators are responsible fornational and international networks. These administrators require a way to monitorand administer a router from anywhere in the world. Cisco routers provide threemain methods of remote administration. The first is an out-of-band method throughdial-up on the AUX port; the other two are in-band VTY and HTTP access. These in-band methods can be used only when the network is functional.
Danger of Remote AdministrationSome dangers are inherent to remote administration, and it is important to recog-nize what they are in order prevent them. Depending on how authentication andauthorization are configured, common dangers include:
SpoofingIf authentication depends on a trusted network or trusted IP address, attackerscan create packets with fake source addresses, making the router believe that apacket came from a trusted source.
,ch03.23479 Page 19 Friday, February 15, 2002 2:53 PM

This is the Title of the Book, eMatter EditionCopyright © 2002 O’Reilly & Associates, Inc. All rights reserved.
20 | Chapter 3: Basic Access Control
Trusted-host compromiseIf authorization depends on a trusted host, attackers can compromise that hostand make modifications to grant themselves access. A central access controlserver (ACS) such as TACACS or RADIUS would be a prime target for anattacker. If attackers could hack into the ACS, they could create an account togive themselves access to every router or system that relies on that ACS.
SniffingSniffing used to be a difficult attack that required significant knowledge to per-form, but current programs automatically capture and record logins and pass-words as they are sent across the network. This makes sniffing a significantthreat when logging into routers remotely.
Brute force attacksIf attackers can get a login prompt, then they can attempt to guess login namesand passwords. A moderately skilled attacker can easily write a program thatautomates the guessing process. By default, routers do not limit unsuccessfullogin attempts, nor do they log them. Logging can be configured through AAA,however.
Hijacked sessionsMany TCP sessions are susceptible to hijacking. When this occurs, an attackertakes over a connection, such as a Telnet session, after you have logged in andauthenticated yourself. If attackers can take over your connection, they thenhave the same access to the router as you do.
Table 3-1 lists common defenses to prevent these types of attacks when administer-ing a router remotely.
Remote administration is extremely useful, but its security should be given a lot ofthought.
Table 3-1. Preventing remote administration dangers
Danger Prevention
Spoofing Implement antispoofing filters (see Chapter 9), use encrypted sessions such as SSH, and useout-of-band management.
Trusted-host compromise Make sure all trusted hosts are well hardened and constantly monitored for security.
Sniffing Use encrypted protocols such as SSH, out-of-band management, or one-time passwords.
Brute force attacks Choose strong passwords (see Chapter 4) and use filters to limit access to only a few IPaddresses.
Hijacked sessions Use encrypted protocols such as SSH and use out-of-band management. (Note: SSHv1 makeshijacked sessions harder, but still possible.)
,ch03.23479 Page 20 Friday, February 15, 2002 2:53 PM

This is the Title of the Book, eMatter EditionCopyright © 2002 O’Reilly & Associates, Inc. All rights reserved.
Remote Administration | 21
Dial-up AccessThe AUX port’s primary purpose is to provide out-of-band remote administrationcapabilities through a modem. Once a modem is attached to the AUX port, itbecomes a point of attack that grants access into your router and your entire net-work. Before attaching a modem to the AUX port, give the AUX port its own pass-word. Do not rely only on the modem to provide secure access. This helps preventseveral security problems, such as the modem being misconfigured or someone gain-ing physical access to the router, removing the modem, and using the unprotectedAUX port to gain access. Besides AUX port password protection, several other stepscan be taken to secure dial-up access. These steps include password protecting themodem itself, using callback features that require administrators to call from specificpredefined numbers, and restricting the phone numbers that are allowed to call intoyour modems.
Password protecting the modem is specific to each modem, but callback security canbe configured on the router itself. There are two types of callback access. First,remote users dial in, authenticate themselves, and ask the modem to call them backat their current number. The primary purpose of this method is to allow remoteusers to avoid hotel and long-distance charges. The other method is to have remoteusers dial in, authenticate themselves, and have the modem callback to a predeter-mined phone number. This means that access is restricted to a single phone line, soyou lose some flexibility, but security is greatly enhanced.
If you want the security of single number callback with the flexibilityof using out-of-band administration from anywhere, set up and securean SSH server somewhere on another network, attach a modem to theserver, and configure the router to use that number as the single call-back number. Then you can SSH into the server from anywhere andfrom there dial into the router with callback security.
A word of warning, however: this works only if the SSH server isreachable, so it has to be located on another network that doesn’t relyon the router you are trying to administer.
Callback access is linked to a specific username, so you should create separateaccounts for each administrator who will need secure dial-up access. To establishcallback security on a router, perform the following steps:
1. Enable EXEC-mode callback with the service exec-callback command.
2. Establish user accounts that specify a number to call back with the usernamecommand.
3. Configure a chat script to perform the callback using the chat-script command.Chat scripts define how the router talks with the modem and what it does at cer-tain events such as disconnects or hang-ups.
,ch03.23479 Page 21 Friday, February 15, 2002 2:53 PM

This is the Title of the Book, eMatter EditionCopyright © 2002 O’Reilly & Associates, Inc. All rights reserved.
22 | Chapter 3: Basic Access Control
4. Configure the auxiliary port to perform callback authentication. To do this:
a. Configure it to use our chat scripts with the script command.
b. Tell it to use local usernames for authentication with login local.
c. Enable the modem for both inbound and outbound connections withmodem InOut.
d. Configure the modem to wait five seconds before dialing out using thecallback forced-wait command. Doing so ensures that the modem has timeto hang up the incoming connection before attempting to dial out.
e. Configure flow control with the flowcontrol command.
Here is an example of configuring callback authentication on the AUX port:
Router#config terminalEnter configuration commands, one per line. End with CNTL/Z.Router(config)#service exec-callbackRouter(config)#username callme callback-dialstring "5554321357" password passRouter(config)#chat-script offhook "" "ATH1" OKRouter(config)#chat-script rtp ABORT ERROR ABORT BUSY "" "AT" OK "ATDT \T" \ TIMEOUT 45 CONNECT \cRouter(config)#line aux 0Router(config-line)#script modem-off-hook offhookRouter(config-line)#script callback rtpRouter(config-line)#login localRouter(config-line)#modem InOutRouter(config-line)#callback forced-wait 5Router(config-line)#flowcontrol hardwareRouter(config-line)#^ZRouter#
If you are using callback authentication, remember to configure yourlocal modem to answer when the callback occurs. If you don’t, therouter will call back, but your modem won’t answer. Setting autoan-swer is usually done by sending a string similar to ats0=1 to themodem.
Another option to securing out-of-band modem-based access to your router is tohave your telephone company set up a closed user group. Provide the telephonecompany with a list of numbers that are allowed to call the phone lines used by themodems on your router and for a monthly charge, they will limit access to only thosenumbers.
Reverse Telnet
Finally, there is a little-known feature of router ports that supports reverse Telnet,allowing access to physical ports through the network itself. This might be done toallow an administrator to telnet to a router and dial out through a modem con-nected to the AUX port.
,ch03.23479 Page 22 Friday, February 15, 2002 2:53 PM

This is the Title of the Book, eMatter EditionCopyright © 2002 O’Reilly & Associates, Inc. All rights reserved.
Remote Administration | 23
Reverse Telnet access is granted if the transport input command is used under theline configuration. If enabled, the port will be accessible through the network onTCP port 20xx where xx is the TTY of the port on the router. To determine whatnetwork port is used, use the command show line. On a 2600, with a console port,an AUX port, and five VTYs, the output from this command looks like:
Router#show line Tty Typ Tx/Rx A Modem Roty AccO AccI Uses Noise Overruns Int* 0 CTY - - - - - 0 10 0/0 - 65 AUX 9600/9600 - inout - - - 6 0 0/0 - 66 VTY - - - - - 51 0 0/0 - 67 VTY - - - - - 0 0 0/0 - 68 VTY - - - - - 0 0 0/0 - 69 VTY - - - - - 0 0 0/0 - 70 VTY - - - - - 0 0 0/0 -
The AUX TTY is number 65; therefore, the AUX port will listen to TCP port 2065 ifreverse Telnet is enabled. For the sake of security, it is very important to disable net-work access to these ports. Disabling can be done with the transport input commandby explicitly specifying none. To make sure that network access to the AUX port isdisabled, you would specify:
Router#config terminalEnter configuration commands, one per line. End with CNTL/Z.Router(config)#line aux 0Router(config-line)#transport input noneRouter(config-line)#^ZRouter#
This step disables reverse Telnet and secures the AUX port against access throughthe network. Make sure that all physical ports on your router use the transport inputnone command to disable network access.
VTY AccessVTY access is probably the most commonly used remote administration method.VTYs provide access to the router through the network itself, so the network must befunctional before VTY access can be used. VTYs support multiple protocols, but themost commonly used one is Telnet. The problem with Telnet is that all informationis passed over the network in clear text. A much more secure choice is the SSH pro-tocol. With SSH, all information is encrypted, making sniffing much more difficultor useless. In addition to using SSH, VTY access should be limited by IP addresses.Only certain, predefined IP addresses should be allowed VTY access the router.
Disabling VTY access
In addition to disabling logins with the login and no password commands mentionedearlier, you can disable all access to the VTY ports by using the transport input nonecommand.
,ch03.23479 Page 23 Friday, February 15, 2002 2:53 PM

This is the Title of the Book, eMatter EditionCopyright © 2002 O’Reilly & Associates, Inc. All rights reserved.
24 | Chapter 3: Basic Access Control
You can also use the no exec and exec-timeout commands for redundant security:
Router#config terminalEnter configuration commands, one per line. End with CNTL/Z.Router(config)#line vty 0 4Router(config-line)#transport input noneRouter(config-line)#exec-timeout 0 1Router(config-line)#no execRouter(config-line)#^ZRouter#
Using these commands completely disables the ability to connect to all VTY portswith any protocol. With the login/no password method, the Telnet port remainsopen, but users receive the message Password required, but none set. Using transportinput none closes the port so that no one can even make a connection:
% telnet RouterOneTrying RouterOne...telnet: Unable to connect to remote host: Connection refused
SSH
With Telnet, it is just a matter of time until someone sniffs your passwords and com-promises your routers. Many Cisco routers currently support SSH, but only if theyare running IOS images that support IPSec. Currently, Cisco supports only SSH Ver-sion 1. SSHv1 is still susceptible to session hijacking, though less so than clear textprotocols such as Telnet. To enable SSH you need to:
• Configure a hostname for your router with the hostname command.
• Configure a domain for your router with the ip domain-name command.
• Generate RSA encryption keys by using the crypto key generate rsa command.This command will prompt you for a modulus size. Cisco recommends a mini-mum size of 1024. A size of 2048 will increase your security, but may decreaseyour performance.
• Enable SSH access with the ip ssh command (indicating the timeout value andnumber of retries).
• Configure each line to use SSH using the transport input command.
For example:
Router#config terminalEnter configuration commands, one per line. End with CNTL/Z.Router(config)#hostname RouterOneRouterOne(config)#ip domain-name mydomain.comRouterOne(config)#crypto key generate rsaThe name for the keys will be: RouterOneChoose the size of the key modulus in the range of 360 to 2048 for your General Purpose Keys. Choosing a key modulus greater than 512 may take a few minutes.
,ch03.23479 Page 24 Friday, February 15, 2002 2:53 PM

This is the Title of the Book, eMatter EditionCopyright © 2002 O’Reilly & Associates, Inc. All rights reserved.
Remote Administration | 25
How many bits in the modulus [512]: 1024Generating RSA keys ...[OK]RouterOne(config)#ip ssh time-out 60RouterOne(config)#ip ssh authentication-retries 2RouterOne(config)#line vty 0 4RouterOne(config-line)#transport input sshRouterOne(config-line)#^ZRouterOne#
enables SSH on RouterOne and sets all five VTYs to allow SSH access only.
If you have a router or IOS image that does not support SSH, don’t use Telnet!Instead, set up a secure SSH server on your internal network. The server should belocated in a secure location and be on a trusted network. Then, from anywhere onthe Internet, you can SSH to the server and telnet from it to the router. This way, theconnection into your network is encrypted, and only the last part of the connec-tion—between the SSH server and the router—is unencrypted. This method stillleaves you vulnerable to insider attackers (i.e., those who can monitor the connec-tion between the SSH server and the router), but it keeps the rest of the world fromsniffing your password or hijacking your connection.
SSH access cannot use line authentication; you have to either config-ure local usernames and passwords with the username command oruse AAA authentication.
Limiting VTY access by IP
By default, VTY ports allow any IP address to attempt authentication. This allows anattacker to try brute force password guessing against your routers from anywhere onthe Internet. If VTYs are not disabled, they need to be restricted so that only a fewselect IPs are allowed to even attempt to log in. This can be done using access con-trol lists (ACLs) and the access-class command under the VTY lines.
To limit VTY access, you:
1. Create an ACL.
2. Apply the ACL to all VTY lines with the access-class command.
For example, limiting VTY access to only the IPs 130.218.10.12 and 130.218.20.5would look like:
Router#config terminalEnter configuration commands, one per line. End with CNTL/Z.Router(config)#access-list 10 permit 130.218.10.12Router(config)#access-list 10 permit 130.218.20.5Router(config)#access-list 10 deny anyRouter(config)#line vty 0 4Router(config-line)#access-class 10 inRouter(config-line)#^ZRouter#
,ch03.23479 Page 25 Friday, February 15, 2002 2:53 PM

This is the Title of the Book, eMatter EditionCopyright © 2002 O’Reilly & Associates, Inc. All rights reserved.
26 | Chapter 3: Basic Access Control
With the preceding configuration, only the two specified IPs are allowed to connectto the VTY ports and attempt authentication.
Additional VTY settings
In addition to using SSH and limiting access to a few select IPs, a couple of addi-tional measures can help make VTY access more secure. The first measure is theexec-timeout command. This command tells the router how long to wait before dis-connecting an idle session. The default timeout for idle sessions is ten minutes. It isrecommended that you change this timeout to five minutes or less. The exec-timeoutcommand takes two arguments—first minutes and then seconds.
Additionally, you can use the service tcp-keepalives-in command to make sure thatyour VTYs don’t fill up with orphaned connections. If the remote client crashes or isdisconnected abnormally, the VTY will still believe that the remote client is attached.This can cause error messages similar to Connection refused by remote host. Usingservice tcp-keepalives-in, the router can watch all incoming connections, determinewhether the remote end disconnects abnormally, and reset the connection, freeingup the VTY port.
Setting tcp-keepalives is done globally, and setting the exec-timeout is done undereach line:
Router#config terminalEnter configuration commands, one per line. End with CNTL/Z.Router(config)#service tcp-keepalives-inRouter(config)#line vty 0 4Router(config-line)#exec-timeout 5 0Router(config-line)#^ZRouter#
HTTP/Web AccessCisco has added HTTP access to allow monitoring and management of the routerthrough a web browser. This feature, however, has several security problems. First,all passwords through HTTP are sent across the network in clear text with noencryption. Second, all content is sent across the Net in clear text. Finally, the HTTPprotocol provides no way to use token-based or one-time passwords. Therefore, Ihighly recommend that HTTP access to the router be completely disabled with theno ip http server command:
Router#config terminalEnter configuration commands, one per line. End with CNTL/Z.Router(config)#no ip http serverRouter(config)#^ZRouter#
,ch03.23479 Page 26 Friday, February 15, 2002 2:53 PM

This is the Title of the Book, eMatter EditionCopyright © 2002 O’Reilly & Associates, Inc. All rights reserved.
Remote Administration | 27
If HTTP access must be enabled, it must be set up as securely as possible. Setting it upsecurely involves restricting access with the ip http access-class command and choos-ing a secure authentication method with the ip http authentication command.
Limiting HTTP access by IP
Limiting HTTP access by IP is similar to limiting VTY access. You create an appro-priate ACL and apply it with the ip http access-class command.
Limiting HTTP access to the IP 130.218.40.15 would look like:
Router#config terminalEnter configuration commands, one per line. End with CNTL/Z.Router(config)#access-list 20 permit 130.218.40.15Router(config)#access-list 20 deny anyRouter(config)#ip http access-class 20Router(config)#^ZRouter#
If the IPs that need HTTP access are the same as those that need VTY access, thenyou can even use the same ACL that was created to limit VTY access.
HTTP authentication
By default, HTTP uses the enable password and defaults to privileged-level access.HTTP router access can also be set up to use local, TACACS, and AAA authentica-tion methods. It supports all 16 authorization levels. These levels are explained inChapter 4, but each level can be accessed with a URL similar to http://MyRouter/level/X, where X is the authorization level you want to access. Only users who areauthorized for a specific privilege level are allowed log in. You can access the twodefault levels—user and privilege—through both http://MyRouter or http://MyRouter/level/15 for privileged level and http://MyRouter/level/01 for user level.
To change the way HTTP authenticates on the router, once you have your local user-names, TACACS server, or AAA authentication method set up, you can use the com-mand ip http authentication:
Router#config terminalEnter configuration commands, one per line. End with CNTL/Z.Router(config)#ip http authentication typeRouter(config)#^ZRouter#
In this example, type is replaced with enable, local, tacacs, or aaa. Because of theinherent weakness in HTTP authentication, it is important to change the authentica-tion method from the default of using the enable password to a different method.
,ch03.23479 Page 27 Friday, February 15, 2002 2:53 PM

This is the Title of the Book, eMatter EditionCopyright © 2002 O’Reilly & Associates, Inc. All rights reserved.
28 | Chapter 3: Basic Access Control
Protection with IPSecWhile a router that allows only console or SSH access is ideal, you may sometimes berequired to set up configurations that you know have security vulnerabilities. Yourorganization might require SNMP Version 1 or need to allow certain administratorsTelnet access to the router. A way to help mitigate the risk associated with these pro-tocols and to add an additional layer of security to your existing methods is to useIPSec. IPSec is traditionally used to set up VPNs between networks or between aroaming user and her home network. If your routers and management stations allsupport IPSec, you can create a VPN between the router and management stations,encrypting all traffic sent between the two.
A full tutorial on IPSec and VPNs is out of the scope of this book, but a brief over-view on how to configure your router for an IPSec VPN to the management stationfollows. In this example, the router is named RouterOne, and the management sta-tion has an IP of 130.18.10.10. Also, this example uses preshared keys (a passwordmanually configured on both sides). Advanced VPN solutions can use key manage-ment systems instead of statically configured keys.
To configure the router end of your VPN, you must:
1. Set up ISAKMP with the preshared key. ISAKMP defines how the key exchangeis implemented.
2. Create an Extended ACL on the router. With IPSec, Extended ACLs are used toconfigure which packets are encrypted and which aren’t. This configuration letsan interface support both encrypted and regular traffic. In relation to IPSec,permit means encrypt and deny means do not encrypt.
3. Create IPSec transforms. Transforms are Cisco’s way of defining what type ofauthentication and encryption is used for each IPSec packet. This example usessome standard transforms, but may need to be changed depending on whichones the management station supports.
4. Create a crypto map. The crypto map ties our ISAKMP, ACL, and transformconfigurations together. The crypto map is also configured with the IP address ofthe management station with which we create a VPN.
5. Apply the crypto map to the router interface. After creating the crypto map, itmust be applied to the appropriate interface to take effect.
Setting up ISAKMPTo set up ISAKMP with a preshared key, you must:
1. Use the crypto isakmp policy command to create a policy. Policies are differenti-ated by numbers. This example will use number 10.
2. Use the authentication pre-share command to define the preshared password weare using for the VPN.
,ch03.23479 Page 28 Friday, February 15, 2002 2:53 PM

This is the Title of the Book, eMatter EditionCopyright © 2002 O’Reilly & Associates, Inc. All rights reserved.
Protection with IPSec | 29
Following is an example of configuring ISAKMP on the router:
RouterOne#config terminalEnter configuration commands, one per line. End with CNTL/Z.RouterOne(config)#crypto isakmp policy 10RouterOne(config-isakmp)#authentication pre-shareRouterOne(config-isakmp)#^Z
Creating the IPSec Extended ACLWhen applied to an IPSec crypto map, the ACL defines which packets are encryptedand which are normal traffic. In this example, the management station is 130.18.10.10, so the ACL will encrypt (permit) traffic to this IP and not encrypt (deny) traffic toall other IPs:
RouterOne#config terminalEnter configuration commands, one per line. End with CNTL/Z.RouterOne(config)#access-list 150 permit ip host 130.18.10.10 host RouterOneRouterOne(config)#access-list 150 deny ip any anyRouterOne(config)#^Z
If you have more than one management station with which you are creating IPSecconnections, you would also enter them in the preceding ACL.
Creating IPSec TransformsTransforms define what types of authentication and encryption are supported by thisVPN. The following transforms are fairly standard—HMAC-MD5 for authentica-tion and DES for encryption—but they may need to be modified depending on whatauthentication and encryption the management station supports. Transforms aredefined using the crypto ipsec transform-set command. In this example, the trans-form is named TransOne:
RouterOne#config terminalEnter configuration commands, one per line. End with CNTL/Z.RouterOne(config)#crypto ipsec transform-set TransOne ah-md5-hmac esp-desRouterOne(cfg-crypto-trans)#^Z
Creating the Crypto MapThe crypto map takes the three preceding configuration options and ties them into asingle entity that can be applied to the interface. Defining a crypto map requires thatyou:
1. Create the map with the crypto map command. This command requires theISAKMP policy that was defined in the first step. In this example, the policy wasidentified as number 10.
2. Define the IP of the management station with which we are creating an IPSecVPN. This is done with the set peer command.
,ch03.23479 Page 29 Friday, February 15, 2002 2:53 PM

This is the Title of the Book, eMatter EditionCopyright © 2002 O’Reilly & Associates, Inc. All rights reserved.
30 | Chapter 3: Basic Access Control
3. Define the transform set to use for this VPN. This is done with the set transform-set command.
4. Finally, identify the ACL defining which packets are encrypted and which pack-ets are normal with the match address command. The ACL in this example is150, so that the number is used with the command.
The following example defines the example crypto map and names it MyMapOne:
RouterOne#config terminalEnter configuration commands, one per line. End with CNTL/Z.RouterOne(config)#crypto map MyMapOne 10 ipsec-isakmpRouterOne(config-crypto-map)#set peer 130.18.10.10RouterOne(config-crypto-map)#set transform-set TransOneRouterOne(config-crypto-map)#match address 150RouterOne(config-crypto-map)#^Z
Applying the Crypto Map to an InterfaceFinally, you must apply the crypto map to the interface on which you want the VPNto be established. The following example uses interface Serial 0/1 as the interfacewith which the management station will VPN:
RouterOne#config terminalEnter configuration commands, one per line. End with CNTL/Z.RouterOne(config)#int Serial 0/1RouterOne(config-if)#crypto map MyMapOneRouterOne(config-if)#^Z
Now all you need to do is configure your management station to peer with the IPaddress of the interface, and all traffic between the management station and therouter will be encrypted.
Basic Access Control Security Checklist• Secure physical access to the router. (See Appendix B).
• Secure console access with the login and password commands.
• Disable or secure AUX access with the login and password commands.
• Disable or secure all VTY access with the login and password commands.
• Do not use the no login command under any line (con/aux/vty) configurations.
• Set the enable password using the enable secret command.
• In organizations in which multiple administrators access a router, enableaccountability by requiring administrators to have separate accounts to accessthe router. This can be accomplished through local usernames or more central-ized methods involving network access servers.
• Do not use TACACS and Extended TACACS in favor of TACACS+, RADIUS, orKerberos.
,ch03.23479 Page 30 Friday, February 15, 2002 2:53 PM

This is the Title of the Book, eMatter EditionCopyright © 2002 O’Reilly & Associates, Inc. All rights reserved.
Basic Access Control Security Checklist | 31
• If any version of TACACS is used for user-level authentications, set the methodof last resort to the privileged password (set with enable secret) and not todefault to open access with no authentication.
• Do not use standard TACACS for privileged-level access.
• If any version of TACACS is used for the enable password—privileged-levelaccess—then set the method of last resort to the enable secret password and notto automatically succeed.
• Make sure the router does not use TFTP to automatically load its configurationat every reboot. If it must, then harden and secure the TFTP server.
• Do not configure the router to serve as a TFTP server.
• With dial-up access to the router, make sure both the AUX port and the modemare password protected.
• With dial-up access to the router, configure callback security to a predefinednumber, or make sure the telephone company uses a closed user group torestrict which numbers are allowed to call your modems.
• Never connect a modem to the console port.
• Disable reverse Telnet to all physical ports.
• Disable Telnet in favor of SSH on all VTY lines.
• If insecure protocols such at Telnet or HTTP must be used, use IPSec to encryptall vulnerable traffic.
• Make sure all VTY access uses ACLs to restrict access to a few secured IPs.
• Set the exec-timeout on all VTYs to five minutes or less.
• Enable the global command service tcp-keepalives-in.
• Disable HTTP access to the router.
• If HTTP access must be used:
— Limit its use to secure networks.
— Only use it over IPSec.
— Restrict access with ACLs to a few secured IPs.
— Change the HTTP authentication method from the default enable password.
,ch03.23479 Page 31 Friday, February 15, 2002 2:53 PM

This is the Title of the Book, eMatter EditionCopyright © 2002 O’Reilly & Associates, Inc. All rights reserved.
32
Chapter 4CHAPTER 4
Passwords and Privilege Levels
Passwords are the core of Cisco routers’ access control methods. Chapter 3addressed basic access control and using passwords locally and from access controlservers. This chapter talks about how Cisco routers store passwords, how importantit is that the passwords chosen are strong passwords, and how to make sure thatyour routers use the most secure methods for storing and handling passwords. Itthen discusses privilege levels and how to implement them.
Password EncryptionCisco routers have three methods of representing passwords in the configuration file.From weakest to strongest, they include clear text, Vigenere encryption, and MD5hash algorithm. Clear-text passwords are represented in human-readable format.Both the Vigenere and MD5 encryption methods obscure passwords, but each has itsown strengths and weaknesses.
Vigenere Versus MD5The main difference between Vigenere and MD5 is that Vigenere is reversible, whileMD5 is not. Being reversible makes it easier for an attacker to break the encryptionand obtain the passwords. Being unreversible means that an attacker must use muchslower brute force guessing attacks in an attempt to obtain the passwords.
Ideally, all router passwords would use strong MD5 encryption, but the way certainprotocols, such as CHAP and PAP, work, routers must be able to decode the origi-nal password to perform authentication. This need to decode specific passwordsmeans that Cisco routers will continue to use reversible encryption for some pass-words—at least until such authentication protocols are rewritten or replaced.
,ch04.23611 Page 32 Friday, February 15, 2002 2:53 PM

This is the Title of the Book, eMatter EditionCopyright © 2002 O’Reilly & Associates, Inc. All rights reserved.
service password-encryption | 33
Clear-Text PasswordsChapter 3 sets passwords using line passwords, local username passwords, and theenable secret command. A show run provides the following:
enable secret 5 $1$Guks$Ct2/uAcSKHkcxNKyavE1i1enable password enable-password!username jdoe password 0 jdoe-passwordusername rsmith password 0 rsmith-password!line con 0 exec-timeout 5 0 password console-password login local transport input noneline aux 0 exec-timeout 5 0 password aux-password login tacacs transport input noneline vty 0 4 exec-timeout 5 0 password vty-password login transport input ssh
The highlighted parts of the configuration are the passwords. Notice that all pass-words, except the enable secret password, are in clear text. This clear text poses a sig-nificant security risk. Anyone who can view a copy of the configuration file—whether through shoulder surfing or off a backup server—can see the router pass-words. We need a way to make sure that all passwords in the router configurationfile are encrypted.
service password-encryptionThe first method of encryption that Cisco provides is through the command servicepassword-encryption. This command obscures all clear-text passwords in the configura-tion using a Vigenere cipher. You enable this feature from global configuration mode.
Router#config terminalEnter configuration commands, one per line. End with CNTL/Z.Router(config)#service password-encryptionRouter(config)#^Z
Now a show run command no longer displays the password in humanly readable for-mat.
enable secret 5 $1$Guks$Ct2/uAcSKHkcxNKyavE1i1enable password 7 02030A5A46160E325F59060B01
,ch04.23611 Page 33 Friday, February 15, 2002 2:53 PM

This is the Title of the Book, eMatter EditionCopyright © 2002 O’Reilly & Associates, Inc. All rights reserved.
34 | Chapter 4: Passwords and Privilege Levels
!username jdoe password 7 09464A061C480713181F13253920username rsmith password 7 095E5D0410111F5F1B0D17393C2B3A37!line con 0 exec-timeout 5 0 password 7 110A160B041D0709493A2A373B243A3017 login local transport input noneline aux 0 exec-timeout 5 0 password 7 0005061E494B0A151C36435C0D login tacacs transport input allline vty 0 4 exec-timeout 5 0 password 7 095A5A1054151601181B0B382F login transport input ssh
The only password not affected by the service password-encryption command is theenable secret password. It always uses the MD5 encryption scheme.
While the service password-encryption command is beneficial and should be enabledon all routers, remember that the command uses an easily reversible cipher. Somecommercial programs and freely available Perl scripts instantly decode any pass-words encrypted with this cipher. This means that the service password-encryptioncommand protects only against casual viewers—someone looking over your shoul-der—and not against someone who obtains a copy of the configuration file and runsa decoder against the encrypted passwords. Finally, service password-encryption doesnot protect all secret values such as SNMP community strings and RADIUS orTACACS keys.
Enable SecurityThe enable, or privileged, password has an additional level of encryption that shouldalways be used. The privileged-level password should always use the MD5 encryp-tion scheme.
In early IOS configurations, the privileged password was set with the enablepassword command and was represented in the configuration file in clear text:
enable password ena-password
For additional security, Cisco added the service password-encryption command toobscure all clear-text passwords:
service password-encryptionenable password 7 02030A5A46160E325F59060B01
,ch04.23611 Page 34 Friday, February 15, 2002 2:53 PM
This is the Title of the Book, eMatter EditionCopyright © 2002 O’Reilly & Associates, Inc. All rights reserved.
Strong Passwords | 35
However, as explained earlier, this uses the weak Vigenere cipher. Because of theimportance of the privileged-level password and the fact that it doesn’t need to bereversible, Cisco added the enable secret command that uses strong MD5 encryption:
Router#config terminalEnter configuration commands, one per line. End with CNTL/Z.Router(config)#enable secret my-secret-passwordRouter(config)#^Z
A show run now displays:
enable secret 5 $1$Guks$Ct2/uAcSKHkcxNKyavE1i1e
This type of encryption cannot be reversed. The only way to attack it is though bruteforce methods.
You should always use the enable secret command instead of enable password. Theenable password command is provided only for backward compatibility. If both areset, for example:
enable password 7 02030A5A46160E325F59060B01enable secret 5 $1$Guks$Ct2/uAcSKHkcxNKyavE1i1e
the enable secret password takes precedence and the enable password command isignored.
Many organizations begin using the insecure enable password com-mand, and then migrate to using the enable secret command. Often,however, they use the same passwords for both the enable passwordand enable secret commands. Using the same passwords defeats thepurpose of the stronger encryption provided by the enable secret com-mand. Attackers can simply decode the weak encryption from theenable password command to get the router’s password. To avoid thisweakness, be sure to use different passwords for each command—orbetter yet, don’t use the enable password command at all.
Strong PasswordsIn addition to using encryption to keep passwords from appearing in human-read-able form, secure password protection requires the use of strong passwords. Thereare two requirements for strong passwords. First, they are difficult to guess or crack.Second, they are easy to remember. If the password is based on a word found in adictionary—a name, a place, and so on—the password is weak. If the password is acomplete random string of letters and numbers, the password is strong, but usersend up writing the password down because they can’t remember it. To demonstratehow easy it is to crack weak passwords, the following passwords were encryptedwith the strong MD5 encryption:
• hello
• Enter0
,ch04.23611 Page 35 Friday, February 15, 2002 2:53 PM

This is the Title of the Book, eMatter EditionCopyright © 2002 O’Reilly & Associates, Inc. All rights reserved.
36 | Chapter 4: Passwords and Privilege Levels
• 9spot
• 8twelve8
• ilcic4l
A brute force password-cracking program was used to see how long it would take toguess each password.
On a Sun Ultra 5 with 512MB of RAM and a 333MHz processor, the first password,hello, took less than five seconds to crack. This is the same amount of time it wouldtake to guess most words in the English language (or a word in any other language, ifthe attacker included foreign language dictionaries). After four hours, the passwordcracker has guessed the next three passwords as well. Any password based on aword—English or foreign—is vulnerable to brute force attacks.
The last password looks random and was still not cracked when the password crackerstopped running three days later. The problem is remembering a password like thisone. See the upcoming sidebar, “Choosing and Remembering Strong Passwords” fortips on choosing an appropriate password.
Keeping Configuration Files SecureExcept for the enable secret password, all passwords stored on Cisco routers areweakly encrypted. If someone were to get a copy of a router configuration file, itwould take only a few seconds to run it through a program to decode all weaklyencrypted passwords. The first protection is to keep the configuration files secured.
You should always have a backup of each router’s configuration file. You should prob-ably have multiple backups. However, each of these backups must be kept in a securelocation. This means that they are not stored on a public server or on each networkadministrator’s desktop. Additionally, backups of all routers are usually kept on thesame system. If this system is insecure, and an attacker can gain access, he has hit thejackpot—the complete configuration of your entire network, all access list setups,weak passwords, SNMP community strings, and so on. To avoid this problem, wher-ever backup configuration files are kept, it is best to keep them encrypted. That way,even if an attacker gains access to the backup files, they are useless.
Encryption on an insecure system, however, provides a false sense of security. Ifattackers can break into the insecure system, they can set up a key logger and cap-ture everything that is typed on that system. This includes the passwords to decryptthe configuration files. In this case, an attacker just has to wait until the administra-tor types in the password, and your encryption is compromised.
Another option is to make sure your backup configuration files don’t contain anypasswords. This requires that you remove the password from your backup configura-tions manually or create scripts that strip out this information automatically.
,ch04.23611 Page 36 Friday, February 15, 2002 2:53 PM

This is the Title of the Book, eMatter EditionCopyright © 2002 O’Reilly & Associates, Inc. All rights reserved.
Keeping Configuration Files Secure | 37
Administrators should be very careful not to access routers from inse-cure or untrusted systems. Encryption or SSH does no good if anattacker has compromised the system you’re working on and can use akey logger to record everything you type.
Finally, avoid storing your configuration files on your TFTP server. TFTP providesno authentication, so you should move files out of the TFTP download directory asquickly as possible to limit your exposure.
Choosing and Remembering Strong PasswordsThe best way to create a password that is easy to remember but difficult to crack is touse pass phrases. Cisco routers support passwords of up to 25 characters. So create asentence and use that instead of just a password. When you can’t use a sentence,choose memorable, but strong, six- to eight-character passwords.
When testing the sample passwords hello, Enter0, 9spot, 8twelve8, and ilcic4l, the onlypassword that wasn’t cracked was ilcic4l. The problem is how to remember a passwordlike this. The secret is that this password looks random, but it is not. To create this pass-word, an easily remembered sentence was created. In this case, the sentence was, “I likechocolate ice cream for lunch.” Then the first letter of each word was used to create thebase of the password: ilcicfl. Next, the number 4 was put in place of the word for. Thisprovides ilcic4l—a password that is easy to remember, but difficult to crack.
This technique can be modified in any way you like. Take the second letter of eachword instead of the first. Change every e to a 3, every a to an @, or every t to a +. Addnumbers to the beginning or the end of the password—whatever you can think of.
Finally, another key to creating strong passwords is using a different password on eachsystem. That way, if someone guesses or steals one of your password, they can’t usethat password to access every system you have an account on. Now there is a problemof remembering a different password for every system you access. There is a solutionto this as well. You can modify the preceding technique to help you remember differentpasswords for every system. For example, take the password used previously, ilcic4l,and modify it for each system that you access. First come up with a formula. A simpleone would be to take the first letter of the system name you are connecting to andreplace the first letter of the password with that letter. Then do the same for the lastletter. If connecting to a system called Router1, the password for that system would beRlcic41. If connecting to Firewall-One, the password is Flcic4e. These simple examplesproduce numerous strong passwords that are easy to remember but difficult to crack.You can get as creative as you want in coming up with sentences and formulas. In fact,the more creative you get, the stronger your passwords will be.
,ch04.23611 Page 37 Friday, February 15, 2002 2:53 PM

This is the Title of the Book, eMatter EditionCopyright © 2002 O’Reilly & Associates, Inc. All rights reserved.
38 | Chapter 4: Passwords and Privilege Levels
Privilege LevelsBy default, Cisco routers have three levels of privilege—zero, user, and privileged.Zero-level access allows only five commands—logout, enable, disable, help, and exit.User level (level 1) provides very limited read-only access to the router, and privi-leged level (level 15) provides complete control over the router. This all-or-nothingsetting can work in small networks with one or two routers and one administrator,but larger networks require additional flexibility. To provide this flexibility, Ciscorouters can be configured to use 16 different privilege levels from 0 to 15.
Changing Privilege LevelsDisplaying your current privilege level is done with the show privilege command, andchanging privilege levels can be done using the enable and disable commands. With-out any arguments, enable will attempt to change to level 15 and disable will changeto level 1. Both commands take a single argument that specifies the level you want tochange to. The enable command is used to gain more access by moving up levels:
Router>show privilegeCurrent privilege level is 1Router>enable 5Password: level-5-passwordRouter#show privilegeCurrent privilege level is 5Router#
The disable command is used to give up access by moving down levels:
Router#show privilegeCurrent privilege level is 5Router#disable 2Router#show privilegeCurrent privilege level is 2Router#
Notice that a password is required to gain more access; no password is requiredwhen lowering your level of access. The router requires reauthentication every timeyou attempt to gain more privileges, but nothing is needed to give up privileges.
Default Privilege LevelsThe bottom and least privileged level is level 0. This is the only other level besides 1and 15 that is configured by default on Cisco routers. This level has only five com-mands that allow you to log out or attempt to enter a higher level:
Router#disable 0Router>?Exec commands: disable Turn off privileged commands enable Turn on privileged commands
,ch04.23611 Page 38 Friday, February 15, 2002 2:53 PM

This is the Title of the Book, eMatter EditionCopyright © 2002 O’Reilly & Associates, Inc. All rights reserved.
Privilege Levels | 39
exit Exit from the EXEC help Description of the interactive help system logout Exit from the EXECRouter>
Next is level 1, the default user level. This level provides the user with many morecommands that allow the user to display router information, telnet to other systems,and test network connectivity with ping and traceroute. Level 2, which is not enabledby default, adds a few additional show and clear commands, but provides no oppor-tunity for a user to reconfigure the router. Finally, level 15 allows full access to allrouter commands.
Privilege-Level PasswordsTo use the enable command to access a privilege level, a password must be set for thatlevel. If you try to enter a level with no password, you get the error message Nopassword set. Setting privilege-level passwords can be done with the enable secret levelcommand. The following example enables and sets a password for privilege level 5:
Router#config terminalEnter configuration commands, one per line. End with CNTL/Z.Router(config)#enable secret level 5 level5-passwordRouter(config)#^ZRouter#
Now we can enter level 5 with the enable 5 command.
Just as default passwords can be set with either the enable secret or theenable password command, passwords for other privilege levels can beset with the enable password level or enable secret level commands.However, the enable password level command is provided for back-ward compatibility and should not be used.
Line Privilege LevelsLines (CON, AUX, VTY) default to level 1 privileges. This can be changed using theprivilege level command under each line. To change the default privilege level of theAUX port, you would type the following:
Router#config terminalEnter configuration commands, one per line. End with CNTL/Z.Router(config)#line aux 0Router(config-line)#privilege level 4Router(config-line)#^ZRouter#
Or, to change the default privilege level of all VTY access to level 12:
Router#config terminalEnter configuration commands, one per line. End with CNTL/Z.Router(config)#line vty 0 4
,ch04.23611 Page 39 Friday, February 15, 2002 2:53 PM
This is the Title of the Book, eMatter EditionCopyright © 2002 O’Reilly & Associates, Inc. All rights reserved.
40 | Chapter 4: Passwords and Privilege Levels
Router(config-line)#privilege level 12Router(config-line)#^ZRouter#
Username Privilege LevelsFinally, a username can have a privilege level associated with it. This is useful whenyou want specific users to default to higher privileges. The username privilege com-mand is used to set the privilege level for a user:
Router#config terminalEnter configuration commands, one per line. End with CNTL/Z.Router(config)#username jdoe privilege 5Router(config)#username rsmith privilege 12Router(config)#^ZRouter#
Changing Command Privilege LevelsBy default, all router commands fall under levels 1 or 15. Creating additional privi-lege levels isn’t very useful unless the default privilege level of some router com-mands is also changed. Once the default privilege level of a command is changed,only those who have that level access or above are allowed to run that command.These changes are made with the privilege command. The following examplechanges the default level of the telnet command to level 2:
Router#config terminalEnter configuration commands, one per line. End with CNTL/Z.Router(config)#privilege exec level 2 telnetRouter(config)#^ZRouter#
Now no one with user-level (level 1) access can run the telnet command. Level 2access is required.
Privilege Mode ExampleHere is an example of how an organization might use privilege levels to access therouter without giving everyone the level 15 password.
Assume that the organization has a few highly paid network administrators, a fewjunior network administrators, and a computer operations center for troubleshoot-ing problems. This organization wants the highly paid network administrators to bethe only ones with complete (level 15) access to the routers, but also wants the jun-ior administrators have more limited access to the router that will allow them to helpwith debugging and troubleshooting. Finally, the computer operations center needsto be able to run the clear line command so they can reset the modem dial-up con-nection for the administrators if needed; however, they shouldn’t be able to telnetfrom the router to other systems.
,ch04.23611 Page 40 Friday, February 15, 2002 2:53 PM

This is the Title of the Book, eMatter EditionCopyright © 2002 O’Reilly & Associates, Inc. All rights reserved.
Password Checklist | 41
The highly paid administrators will have complete level 15 access. A level 10 will becreated for the junior administrators to give them access to the debug and telnet com-mands. Finally, a level 2 will be created for the operations center to give them accessto the clear line command, but not the telnet command:
Router#config terminalEnter configuration commands, one per line. End with CNTL/Z.Router(config)#username admin-joe privilege 15 password joes-passwordRouter(config)#username admin-carl privilege 15 password carls-passwordRouter(config)#username junior-jeff privilege 10 password jeffs-passwordRouter(config)#username junior-jay privilege 10 password jays-passwordRouter(config)#username ops-fred privilege 2 password freds-passwordRouter(config)#username ops-pat privilege 2 password pats-passwordRouter(config)#privilege exec level 10 telnetRouter(config)#privilege exec level 10 debugRouter(config)#privilege exec level 2 clear lineRouter(config)#^ZRouter#
Recommended Privilege-Level ChangesThe NSA guide to Cisco router security recommends that the following commands bemoved from their default privilege level 1 to privilege level 15—connect, telnet, rlogin,show ip access-lists, show access-lists, and show logging. Changing these levels limits theusefulness of the router to an attacker who compromises a user-level account.
To change the privilege level of these commands, you would:
RouterOne#config terminalEnter configuration commands, one per line. End with CNTL/Z.RouterOne(config)#privilege exec level 15 connectRouterOne(config)#privilege exec level 15 telnetRouterOne(config)#privilege exec level 15 rloginRouterOne(config)#privilege exec level 15 show ip access-listsRouterOne(config)#privilege exec level 15 show access-listsRouterOne(config)#privilege exec level 15 show loggingRouterOne(config)#privilege exec level 1 show ipRouterOne(config)#^Z
The final privilege exec level 1 show ip returns the show and show ip commands tolevel 1, enabling all other default level 1 commands to still function.
Password ChecklistThis checklist summarizes the important security information presented in this chap-ter. A complete security checklist is provided in Appendix A.
• Enable service password-encryption on all routers.
• Set the privileged-level (level 15) password with the enable secret command andnot with the enable password command.
,ch04.23611 Page 41 Friday, February 15, 2002 2:53 PM

This is the Title of the Book, eMatter EditionCopyright © 2002 O’Reilly & Associates, Inc. All rights reserved.
42 | Chapter 4: Passwords and Privilege Levels
• Make sure all passwords are strong passwords that are not based on English orforeign words.
• Make sure each router has different enable and user passwords.
• Keep backup configuration files encrypted on a secure server.
• Access routers only from secure or trusted systems.
• In large organizations with numerous personnel with router access, use addi-tional privilege levels to restrict access to unnecessary commands.
• Reconfigure the connect, telnet, rlogin, show ip access-lists, show access-lists, andshow logging commands to privilege level 15.
,ch04.23611 Page 42 Friday, February 15, 2002 2:53 PM

This is the Title of the Book, eMatter EditionCopyright © 2002 O’Reilly & Associates, Inc. All rights reserved.
43
Chapter 5 CHAPTER 5
AAA Access Control
AAA stands for authentication, authorization, accounting. This chapter will coverthe authentication and authorization aspects of AAA, leaving the accounting detailsfor Chapter 11. AAA access control provides much greater scalability and functional-ity than the basic access control methods discussed in Chapter 3. AAA can use localrouter configuration, TACACS+, RADIUS, and Kerberos for authentication and canutilize a TACACS+ or RADIUS for authorization.
TACACS+ and RADIUS can be used both for authentication and authorization,while Kerberos can be used only for authentication. Cisco-only networks usuallychoose TACACS+ because of its enhanced features. TACACS+, however, is propri-etary to Cisco. Networks using equipment from multiple vendors usually chooseRADIUS for its interoperability. Finally, organizations with existing Kerberos accessservers can configure their routers to use those servers to control access to Ciscorouters.
Enabling AAATo use any of these authentication and authorization methods, you must first enableAAA on the router. The general steps for enabling AAA are:
1. Turn on AAA with the aaa new-model command.
2. Configure security protocol information if using an access control server (ACS).
3. Define methods that specify the type and order of authentication with the aaaauthentication command.
4. Apply the authentication methods to each line and/or enable access.
5. Configure AAA authorization, if needed, with the aaa authorization command.
,ch05.23747 Page 43 Friday, February 15, 2002 2:53 PM
This is the Title of the Book, eMatter EditionCopyright © 2002 O’Reilly & Associates, Inc. All rights reserved.
44 | Chapter 5: AAA Access Control
Local AuthenticationAssume that the router configuration has the following users:
username jdoe password 7 09464A061C480713181F13253920username rsmith password 7 095E5D0410111F5F1B0D17393C2B3A37
To take advantage of the AAA accounting features, you can enable AAA but usethese locally defined usernames for access. To do so:
1. Enable AAA with aaa new-model.
2. Make the default AAA authentication method local using the aaa authenticationcommand.
3. Apply the default AAA authentication method to each line:Router#config terminalEnter configuration commands, one per line. End with CNTL/Z.Router(config)#aaa new-modelRouter(config)#aaa authentication login default localRouter(config)#line vty 0 4Router(config-line)#login authentication defaultRouter(config-line)#exitRouter(config)#line aux 0Router(config-line)#login authentication defaultRouter(config-line)#exitRouter(config)#line con 0Router(config-line)#login authentication defaultRouter(config-line)#^ZRouter#
While AAA and local authentication provide greater accountability than non-AAAmethods, local AAA authentication is not scalable, and all local passwords are storedin the configuration file using the weak Vigenere ciphers.
TACACS+ AuthenticationTACACS+ is Cisco’s proprietary and recommended access control protocol.TACACS+ has the benefits of running over TCP, encrypting the entire contents ofpackets between the ACS and the router, supporting multiple protocols, and provid-ing authentication and authorization support. TACACS+, however, is proprietary,and if your ACS server needs to serve non-Cisco equipment, you may have difficulty.If you are going to implement an ACS server for your Cisco routers only, TACACS+is definitely the choice to make. Configuring TACACS+ on a router is fairly straight-forward, but since the packets are encrypted, both the router and the server must bepreconfigured with an encryption key.
,ch05.23747 Page 44 Friday, February 15, 2002 2:53 PM

This is the Title of the Book, eMatter EditionCopyright © 2002 O’Reilly & Associates, Inc. All rights reserved.
TACACS+ Authentication | 45
To configure a router to use a TACACS+ server, assuming that the server is config-ured with the key MyTACACSkey, you must:
1. Enable AAA with the aaa new-model command.
2. Tell the router what TACACS+ server to use with the tacacs-server host command.
3. Tell the router what the TACACS+ server key is with the tacacs-server keycommand.
4. Define the default AAA authentication method to be TACACS+ with the locallyconfigured users as a backup in case the TACACS+ server isn’t available.
5. Configure each line to use the default AAA authentication method.
Here is example of setting the AUX and VTY ports to use the TACACS+ server 130.218.12.10:
Router#config terminalEnter configuration commands, one per line. End with CNTL/Z.Router(config)#aaa new-modelRouter(config)#tacacs-server host 130.218.12.10Router(config)#tacacs-server key MyTACACSkeyRouter(config)#aaa authentication login default group tacacs+ localRouter(config)#line aux 0Router(config-line)#login authentication defaultRouter(config-line)#exitRouter(config)#line vty 0 4Router(config-line)#login authentication defaultRouter(config-line)#^ZRouter#
IOS Versions 12.0.5(T) and later use the aaa authentication logindefault group tacacs+ enable command. Earlier versions leave out thekeyword group and use the aaa authentication login default tacacs+enable command.
The router is now set up to use the TACACS+ server 130.218.12.10 for authentica-tion. There is an important item to note when using the aaa authentication logincommand. The command tells the router to attempt to authenticate a user throughTACACS+ first, and to use the locally configured enable password only if it fails toreach the server. If the TACACS+ server is unreachable for some reason, the routeruse the local enable password. If the TACACS+ server is reachable, but rejects usersbecause they didn’t authenticate themselves correctly, the router does not default tothe enable password, but denies the users access.
TACACS+ Enable PasswordYou can also use TACACS+ for the enable password. If TACACS+ is already config-ured on your router, this can be done with the command:
aaa authentication enable default group tacacs+ enable
,ch05.23747 Page 45 Friday, February 15, 2002 2:53 PM

This is the Title of the Book, eMatter EditionCopyright © 2002 O’Reilly & Associates, Inc. All rights reserved.
46 | Chapter 5: AAA Access Control
Otherwise, you need to:
1. Enable AAA, if not already enabled, with the aaa new-model command.
2. Tell the router what TACACS+ server to use with the tacacs-server hostcommand.
3. Tell the router what the TACACS+ server key is.
4. Configure the enable password to use the TACACS+ server first and then thelocally configured enable password in case the TACACS+ server is unavailable:
Router#config terminalEnter configuration commands, one per line. End with CNTL/Z.Router(config)#aaa new-modelRouter(config)#tacacs-server host 130.218.12.10Router(config)#tacacs-server key MyTACACSkeyRouter(config)#aaa authentication enable default group tacacs+ enableRouter(config-line)#^ZRouter#
Cisco provides a free Unix-based TACACS+ server that you candownload from ftp://ftp-eng.cisco.com/pub/tacacs. This free serverhasn’t been updated since 1998, and if you are not comfortable usinga free solution, you may want to look at Cisco’s commercial accesscontrol servers.
HTTP Authentication with TACACS+If you are running the HTTP service on your router (not recommended), you can useTACACS+ for HTTP authentication. Assuming that TACACS+ is already set up onyour router, you can enable HTTP authentication through TACACS+ by:
Router#config terminalEnter configuration commands, one per line. End with CNTL/Z.Router(config)#ip http authentication aaaRouter(config)#^Z
TACACS+ AuthorizationIn addition to authentication, TACACS+ provides very granular control over userauthorization. Most configuration is done on the TACACS+ server. UsingTACACS+, you can specify what a user can and cannot do. Once this information isconfigured on the server, you then tell the router to use the TACACS+ server toauthorize every command at a specific level.
EXEC authorization
EXEC is what Cisco calls the command-line shell on its routers. You can useTACACS+ to configure which users are authorized to use the EXEC prompt to exe-cute commands. Without access to an EXEC prompt, even users who are successfully
,ch05.23747 Page 46 Friday, February 15, 2002 2:53 PM

This is the Title of the Book, eMatter EditionCopyright © 2002 O’Reilly & Associates, Inc. All rights reserved.
RADIUS Authentication | 47
authenticated will be unable to start a shell and will be disconnected. Most TACACS+daemons have a default deny stance, so before you enable EXEC authorization, makesure your TACACS+ server is set up to allow at least one user EXEC access.
To use TACACS+ for EXEC authorization, enter the command:
Router(config)#aaa authorization exec default group tacacs+ if-authenticated
The final if-authenticated is a fail-safe that allows successfully authenticated users tostart an EXEC a shell if the TACACS+ server is unavailable. This keeps you frombeing locked out of the router if the network or TACACS+ server is down.
Command authorization
In addition to using TACACS+ to authorize EXEC (shell) access, you can use it tospecify what commands a user can and cannot run. This is done on a per-privilege-level basis, and again, most TACACS+ servers default to no authorization. There-fore, before you turn it on, make sure that the TACACS+ server is set up to allow atleast one user authorization to necessary commands such as enable and configure.Command authorization is set using aaa authorization commands:
Router(conf)#aaa authorization commands 1 default group tacacs+ if-authenticated
This line configures the router to use the TACACS+ server to authorize all com-mands that are run at level 1. To configure the router to use the TACACS+ server,authorize all level 15 commands you would use:
Router(conf)#aaa authorization commands 15 default group tacacs+ if-authenticated
The final if-authenticated is a fail-safe that tells the router, if the TACACS+ server isunavailable, to allow authenticated users to successfully run any command at theircurrent run level. This prevents you from being locked out of the router if theTACACS+ server is unreachable.
RADIUS AuthenticationRADIUS is an access control server protocol developed by Livingston Enterprisesand is documented in RFC 2865. While there are proprietary extensions to RADIUS,it is much more interoperable between different vendors than Cisco’s TACACS+.However, Cisco still recommends the use of TACACS+ instead of RADIUS for thefollowing reasons:
• RADIUS uses UDP, while TACACS+ uses TCP.
• RADUIS encrypts only the password inside access request packets, whileTACACS+ encrypts the entire payload.
• RADUIS combines the authentication and authorization features, whileTACACS+ provides methods to separate these two functions.
• TACACS+ has multiprotocol support built in.
,ch05.23747 Page 47 Friday, February 15, 2002 2:53 PM

This is the Title of the Book, eMatter EditionCopyright © 2002 O’Reilly & Associates, Inc. All rights reserved.
48 | Chapter 5: AAA Access Control
However, the multivendor interoperability issue can be very compelling, and manyorganizations already run RADIUS authentication servers. This section details howto configure a Cisco router to authenticate to an external RADIUS server if yourorganization already has or chooses to use RADIUS.
To configure a router to use RADIUS authentication, perform the following steps:
1. Enable AAA with the command aaa new-model.
2. Tell the router what RADIUS server to use with the radius-server host command.
3. Tell the router what the RADIUS server key is with the radius-server keycommand.
4. Define the default AAA authentication method to be RADIUS (using the locallyconfigured users as a backup in case the RADIUS server isn’t available).
5. Configure each line to use the default AAA authentication method.
Here is an example of setting the console and VTY ports to use the RADIUS server130.218.50.5 for authentication:
Router#config terminalEnter configuration commands, one per line. End with CNTL/Z.Router(config)#aaa new-modelRouter(config)#radius-server host 130.218.50.5Router(config)#radius-server key MyRADIUSkeyRouter(config)#aaa authentication login default group radius localRouter(config)#line con 0Router(config-line)#login authentication defaultRouter(config-line)#exitRouter(config)#line vty 0 4Router(config-line)#login authentication defaultRouter(config-line)#^ZRouter#
IOS Versions 12.0.5(T) and later use the aaa authentication logindefault group radius enable command. Earlier versions leave out thegroup keyword and use the aaa authentication login default radiusenable command.
RADIUS Enable PasswordWith the preceding RADIUS configuration, to set the enable password to useRADIUS for authentication, use the command:
aaa authentication enable default group radius enable
A complete configuration for only the enable password would include the followingsteps:
1. Enable AAA with the aaa new-model command.
2. Tell the router which RADIUS server to use with the radius-server host command.
,ch05.23747 Page 48 Friday, February 15, 2002 2:53 PM

This is the Title of the Book, eMatter EditionCopyright © 2002 O’Reilly & Associates, Inc. All rights reserved.
RADIUS Authentication | 49
3. Tell the router what the RADIUS server key is with radius-server key.
4. Configure the enable password to use the RADIUS server first and then thelocally configured enable password in case the server is unavailable:
Router#config terminalEnter configuration commands, one per line. End with CNTL/Z.Router(config)#aaa new-modelRouter(config)#radius-server host 130.218.50.5Router(config)#radius-server key MyRADIUSkeyRouter(config)#aaa authentication enable default group radius enableRouter(config)#^ZRouter#
RADIUS server software is very prevalent on the Internet. See the fol-lowing sites for open source RADIUS software:
• ftp://ftp.livingston.com/pub/le/radius
• http://www.freeradius.org
• http://www.radius.cistron.nl
• http://www.gnu.org/software/radius/radius.html
Numerous vendors, including Cisco, also offer commercial RADIUSservers.
HTTP Authentication with RADIUSIf running the HTTP services on your router, you can use RADIUS to provide HTTPauthentication. Assuming that RADIUS is already set up on your router to performline or other authentication, the following commands will set up HTTP to useRADIUS authentication:
Router#config terminalEnter configuration commands, one per line. End with CNTL/Z.Router(config)#ip http authentication aaaRouter(config)#^ZRouter#
RADIUS AuthorizationConfiguring RADIUS for EXEC or command authorization is very similar to theTACACS+ configuration. The only change is the RADIUS keyword instead ofTACACS+. The following commands set RADIUS authorization for the EXEC com-mands, level 1 commands, and level 15 commands, respectively:
aaa authorization exec default group radius if-authenticatedaaa authorization commands 1 default group radius if-authenticatedaaa authorization commands 15 default group radius if-authenticated
,ch05.23747 Page 49 Friday, February 15, 2002 2:53 PM

This is the Title of the Book, eMatter EditionCopyright © 2002 O’Reilly & Associates, Inc. All rights reserved.
50 | Chapter 5: AAA Access Control
Kerberos AuthenticationKerberos is a network authentication protocol developed by MIT. Kerberos can pro-vide authentication only. It doesn’t have the capability to perform authorization. Somesites with existing Kerberos servers use Kerberos for authentication, while usingTACACS+ or RADIUS for authorization. A tutorial on Kerberos is out of the scope ofthis book, but see web.mit.edu/kerberos/www for the latest Kerberos information.
If your network uses Kerberos for authentication, the following example shows howto configure your router to use the Kerberos server for authentication. This exampleassumes that you are already familiar with Kerberos and have a functional Kerberosauthentication server set up.
To use a Kerberos server for authentication, you must:
1. Enable AAA authentication with the aaa new-model command.
2. Configure Kerberos protocol support:
a. Define the default Kerberos realm with the kerberos local-realm command.
b. Specify which Kerberos server to use with the kerberos server command.
c. Copy the SRVTAB from the server with the kerberos srvtab remotecommand.
d. Enable credential forwarding with the kerberos credential forwardcommand.
3. Configure the router to use Kerberos for default login authentication with locallyconfigured usernames as a backup in case the Kerberos server isn’t available.
4. Configure each line to use the default login authentication.
This example uses the Realm CISCO.COM and the Kerberos server 138.218.56.5 toconfigure the VTY and AUX ports to use Kerberos authentication:
Router#config terminalEnter configuration commands, one per line. End with CNTL/Z.Router(config)#aaa new-modelRouter(config)#kerberos local-realm CISCO.COMRouter(config)#kerberos server CISCO.COM 130.218.56.5Router(config)#kerberos srvtab remote 130.218.56.5 srvtab-filenameRouter(config)#kerberos credentials forwardRouter(config)#aaa authentication login default krb5 localRouter(config)#line aux 0Router(config-line)#login authentication defaultRouter(config-line)#exitRouter(config)#line vty 0 4Router(config-line)#login authentication defaultRouter(config-line)#^ZRouter#
,ch05.23747 Page 50 Friday, February 15, 2002 2:53 PM

This is the Title of the Book, eMatter EditionCopyright © 2002 O’Reilly & Associates, Inc. All rights reserved.
AAA Security Checklist | 51
Token-Based Access ControlAn authentication method that offers additional security is token-based access con-trol. With this method, each user has a smart card or token that either displays aconstantly changing password or buttons that calculate a new password based on achallenge phrase. Without this card, it is impossible to authenticate yourself to thesystem. This two-factor authentication provides additional security by requiring anattacker to both guess the user’s password and steal the smart card or token that isused to access the system.
Cisco routers don’t support token-based access control directly, but there is still away to use this authentication method. The router must be configured to use aTACACS+ or RADIUS ACS for authentication. The ACS is then configured to usesmart cards or token-based access control. A word of warning, however: due to theway that HTTP performs authentication, token-based access control cannot be used.
AAA Security ChecklistThis checklist summarizes the important security information presented in this chap-ter. A complete security checklist is provided in Appendix A. If your organizationchooses to use AAA, the following checklist will help you do so securely:
• If AAA is used, when possible, use TACACS+ instead of other methods.
• If TACACS+ or RADIUS is used, then keep the configuration files secure, sinceTACACS+ and RADIUS keys are not obscured by the service password-encryption command.
• If AAA authentication is used, always set the backup method for authenticationto locally configured usernames or the default privileged password and never tonone.
• If AAA authorization is used and your security needs are low to medium, makesure the backup method for authorization is if-authenticated (to avoid beinglocked out of the router).
• If AAA authorization is used and you need a higher level of security, make surethere is no backup method for authorization.
• Disable HTTP access. If it must be used, make sure it uses TACACS+ orRADIUS, and not the default privileged-mode password, for authentication.
• In larger organizations that need dual-factor access control, configure therouter’s TACACS+ or RADIUS servers to use token-based access control.
,ch05.23747 Page 51 Friday, February 15, 2002 2:53 PM
This is the Title of the Book, eMatter EditionCopyright © 2002 O’Reilly & Associates, Inc. All rights reserved.
52
Chapter 6CHAPTER 6
Warning Banners
This chapter is short, but very important. Every router should have an appropriatewarning banner for all login access. These banners, however, are often thought of aspure fluff by those technically inclined. How could a warning banner serve as anyprotection against a hacker? What hacker is going to go away because a warningbanner tells him to? It is important to remember that warning banners are not imple-mented to provide technical protection. They provide legal protection.
Legal IssuesBecause many technicians see warning banners as worthless in the prevention ofhack attacks, most systems have no banners. Even if management requires that ban-ners be put in place, most administrators don’t understand what a banner should sayto provide legal protection, so even systems that have banners often include ineffec-tual ones.
A good warning banner has four main goals. It needs to:
• Be legally sufficient for prosecution of intruders
• Shield administrators from liability
• Warn users about monitoring or recording of system use
• Not leak information that could be useful to an attacker
Each banner should address the following issues:
Authorized users onlyThe banner should specify that this system is for authorized users only. Thisspecification keeps a hacker from claiming ignorance. While not the most effec-tive legal strategy, with the novelty of computers and lack of case law, prosecu-tors are concerned enough about it that it should be included in every banner.
,ch06.23871 Page 52 Friday, February 15, 2002 2:54 PM

This is the Title of the Book, eMatter EditionCopyright © 2002 O’Reilly & Associates, Inc. All rights reserved.
Legal Issues | 53
Official workIn addition to restricting the system to authorized users, the banner should statethat the system is to be used for official work only. This statment closes theloophole of an authorized user attempting unauthorized activities.
No expectation of privacyEvery banner should explicitly state that there is no expectation of privacy whenusing the system. This statement is extremely important. The Electronic Com-munications Privacy Act makes it illegal to intercept or disclose the contents ofelectronic communications unless there is explicit notice that users have noexpectation of privacy (or the courts grant a wiretap). Without such a warning,an administrator performing routine maintenance might be performing an ille-gal wiretap and violating the law.
All access and use may be monitored and/or recordedElaborating on the previous statement, this explicitly states that all access anduse may be monitored and/or recorded. It is important to say may be monitoredrather than will be monitored. Computer logs can sometimes be considered hear-say and rendered inadmissible in a court of law. If your banner says that allaccess will be monitored and you don’t monitor all access, a defending attorneymight be able to relegate your entire warning banner to the state of an unen-forced policy and therefore render it useless in court. May be monitored gives youthe option of choosing when to perform monitoring.
Results may be provided to appropriate officialsIt is important to inform the user that any monitoring or recording that indi-cates abuse or criminal activity may be turned over to law enforcement or otherappropriate officials.
Use implies consentFinally, the banner should explicitly state that use of the system implies consentto all conditions laid out in the warning banner. This statement eliminates thepossibility of someone claiming that they never agreed to the conditions of thebanner and therefore weren’t bound by them.
Without banners that display the previous information, you may cripple both your andlaw enforcement’s ability to investigate any incidents. Additionally, if you do find theattacker, your evidence may not be admissible in court and may destroy your case.Also, many organizations like to put items in banners such as:
• Router hardware and software types
• Contact information
• Location of the router
• Name of the administrator
All of this information can be invaluable to attackers as they perform reconnaissanceon your network. Anything more than the name of your organization should neverbe put into warning banners.
,ch06.23871 Page 53 Friday, February 15, 2002 2:54 PM

This is the Title of the Book, eMatter EditionCopyright © 2002 O’Reilly & Associates, Inc. All rights reserved.
54 | Chapter 6: Warning Banners
Finally, it is important to check your local legal requirements. For example, bannersin Canada must include both English and French translations.
Example BannerThis example banner was provided by FBI agent Patrick Gray who works for the FBI’scomputer crimes division in Atlanta. It covers all of the issues mentioned earlier.
WARNING!!!This system is solely for the use of authorized users for official purposes.You have no expectation of privacy in its use and to ensure that the systemis functioning properly, individuals using this computer system are subjectto having all of their activities monitored and recorded by systempersonnel. Use of this system evidences an express consent to suchmonitoring and agreement that if such monitoring reveals evidence ofpossible abuse or criminal activity, system personnel may provide theresults of such monitoring to appropriate officials.
This is a good example of a generic banner that covers the basic needs of a banner.You may want to check with your state’s attorney general to see if there are any morespecifics to add that relate to your state’s cybercrime laws.
There is a cyberlegend about a case that was dismissed and a hackerlet go because the system banner said Welcome to system XYZ…. Thestory says that the defending attorney argued that because the systembanner said Welcome, the hacker had been invited into the system andthere was no unauthorized access. The story is fictitious, but becauseof the lack of cybercrime case law, it’s not good to tempt fate. No mat-ter how nice you are, don’t let your system banners say Welcome.
Adding Login BannersYou can set four banners on Cisco routers. These banners include:
• MOTD banner
• Login banner
• AAA authentication banner
• EXEC banner
MOTD BannerThe MOTD banner sends users messages of the day and is set with the banner motdcommand. While it can be used to display the warning banner, it is generally used formore general announcements such as planned outages or system maintenance.
,ch06.23871 Page 54 Friday, February 15, 2002 2:54 PM

This is the Title of the Book, eMatter EditionCopyright © 2002 O’Reilly & Associates, Inc. All rights reserved.
Adding Login Banners | 55
Login BannerThe login banner is presented each time a user attempts to log in. You definitelywant to set this banner to the previous warning banner. This banner is set with thebanner login command:
Router#config terminalEnter configuration commands, one per line. End with CNTL/Z.Router(config)#banner login $Enter TEXT message. End with the character '!'.WARNING!!!This system is solely for the use of authorized users for official purposes.You have no expectation of privacy in its use and to ensure that the systemis functioning properly, individuals using this computer system are subjectto having all of their activities monitored and recorded by systempersonnel. Use of this system evidences an express consent to suchmonitoring and agreement that if such monitoring reveals evidence ofpossible abuse or criminal activity, system personnel may provide theresults of such monitoring to appropriate officials.$Router(config)#^ZRouter#
Now when users attempt to log into the router, they see the following:
% telnet RouterOneTrying RouterOne...Connected to RouterOne.Escape character is '^]'.
WARNING!!!This system is solely for the use of authorized users for official purposes.You have no expectation of privacy in its use and to ensure that the systemis functioning properly, individuals using this computer system are subjectto having all of their activities monitored and recorded by systempersonnel. Use of this system evidences an express consent to suchmonitoring and agreement that if such monitoring reveals evidence ofpossible abuse or criminal activity, system personnel may provide theresults of such monitoring to appropriate officials.
Username:
AAA Authentication BannerIf you are using AAA authentication, you can set the AAA authentication bannerinstead of the login banner. If both are set, both will be displayed. The AAA authen-tication banner is set with the aaa authentication banner command:
Router#config terminalEnter configuration commands, one per line. End with CNTL/Z.Router(config)#aaa authentication banner $Enter TEXT message. End with the character '$'.
,ch06.23871 Page 55 Friday, February 15, 2002 2:54 PM

This is the Title of the Book, eMatter EditionCopyright © 2002 O’Reilly & Associates, Inc. All rights reserved.
56 | Chapter 6: Warning Banners
WARNING!!!This system is solely for the use of authorized users for official purposes.You have no expectation of privacy in its use and to ensure that the systemis functioning properly, individuals using this computer system are subjectto having all of their activities monitored and recorded by systempersonnel. Use of this system evidences an express consent to suchmonitoring and agreement that if such monitoring reveals evidence ofpossible abuse or criminal activity, system personnel may provide theresults of such monitoring to appropriate officials.$Router(config)#^ZRouter#
EXEC BannerThe EXEC banner is displayed after a user has successfully logged in and started anEXEC or shell prompt. It is a good place to provide additional notification to usersand to make it even harder for them to claim that they didn’t see the banner. You setthe EXEC banner with the banner exec command:
Router#config terminalRouter(config)#banner exec $Enter TEXT message. End with the character '$'.REMEMBER!!!This system is solely for the use of authorized users for official purposes.You have no expectation of privacy in its use and to ensure that the systemis functioning properly, individuals using this computer system are subjectto having all of their activities monitored and recorded by systempersonnel. Use of this system evidences an express consent to suchmonitoring and agreement that if such monitoring reveals evidence ofpossible abuse or criminal activity, system personnel may provide theresults of such monitoring to appropriate officials.$Router(config)#^ZRouter#
Now users see the banner before and after they log into the system:
% telnet RouterOneTrying RouterOne...Connected to RouterOne.Escape character is '^]'.
WARNING!!!This system is solely for the use of authorized users for official purposes.You have no expectation of privacy in its use and to ensure that the systemis functioning properly, individuals using this computer system are subjectto having all of their activities monitored and recorded by systempersonnel. Use of this system evidences an express consent to suchmonitoring and agreement that if such monitoring reveals evidence ofpossible abuse or criminal activity, system personnel may provide theresults of such monitoring to appropriate officials.
,ch06.23871 Page 56 Friday, February 15, 2002 2:54 PM
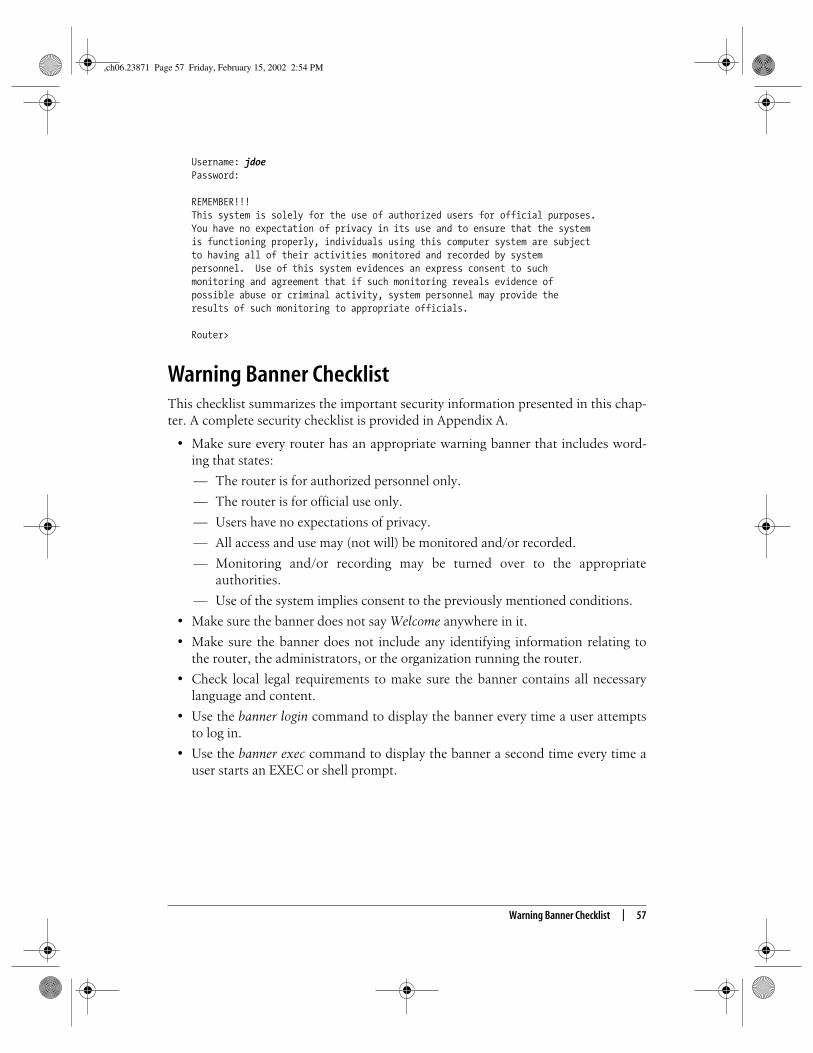
This is the Title of the Book, eMatter EditionCopyright © 2002 O’Reilly & Associates, Inc. All rights reserved.
Warning Banner Checklist | 57
Username: jdoePassword:
REMEMBER!!!This system is solely for the use of authorized users for official purposes.You have no expectation of privacy in its use and to ensure that the systemis functioning properly, individuals using this computer system are subjectto having all of their activities monitored and recorded by systempersonnel. Use of this system evidences an express consent to suchmonitoring and agreement that if such monitoring reveals evidence ofpossible abuse or criminal activity, system personnel may provide theresults of such monitoring to appropriate officials.
Router>
Warning Banner ChecklistThis checklist summarizes the important security information presented in this chap-ter. A complete security checklist is provided in Appendix A.
• Make sure every router has an appropriate warning banner that includes word-ing that states:
— The router is for authorized personnel only.
— The router is for official use only.
— Users have no expectations of privacy.
— All access and use may (not will) be monitored and/or recorded.
— Monitoring and/or recording may be turned over to the appropriateauthorities.
— Use of the system implies consent to the previously mentioned conditions.
• Make sure the banner does not say Welcome anywhere in it.
• Make sure the banner does not include any identifying information relating tothe router, the administrators, or the organization running the router.
• Check local legal requirements to make sure the banner contains all necessarylanguage and content.
• Use the banner login command to display the banner every time a user attemptsto log in.
• Use the banner exec command to display the banner a second time every time auser starts an EXEC or shell prompt.
,ch06.23871 Page 57 Friday, February 15, 2002 2:54 PM

This is the Title of the Book, eMatter EditionCopyright © 2002 O’Reilly & Associates, Inc. All rights reserved.
58
Chapter 7CHAPTER 7
Unnecessary Protocols and Services
Nearly all networked systems and routers have many services automatically acti-vated for the convenience of the administrator. These features, enabled by default,often provide attackers points of entry to gather information or gain access into therouter. Since each service provides a possible access point, it is important to turn offall services that are not needed or that are security risks.
ICMPThe Internet Control Message Protocol (ICMP) enhances network functionality andis invaluable for testing network connectivity and determining network paths. Noone troubleshooting a network problem would want to be without the ability to pingand traceroute. ICMP also provides incredible functionality that an attacker canmanipulate to collect vast amounts of information about your routers, your networktopology, and the systems on your network.
It is extremely difficult to keep a determined attacker from discovering informationabout any system attached to the Internet. However, the recommendations that fol-low will make that job harder and keep casual attackers from finding your networkattractive.
ICMP MTU DiscoveryMany sites choose to deny all ICMP packets into and out of their networks. Thissolution almost works. The only ICMP message type that causes problems when dis-abled is maximum transfer unit (MTU) discovery. MTU discovery optimizes the sizeof packets between two systems. Disabling MTU can cause severe performance prob-lems. It can also cause sporadic problems in which small packets are allowedthrough, but larger ones aren’t. This can cause enormous troubleshooting headachesunless the administrator understands how MTU discovery is done. To avoid theseproblems, you need to allow the ICMP packets responsible for MTU discovery both
,ch07.23996 Page 58 Friday, February 15, 2002 2:54 PM

This is the Title of the Book, eMatter EditionCopyright © 2002 O’Reilly & Associates, Inc. All rights reserved.
ICMP | 59
in and out of your network. These packets are ICMP Type 3 Code 4. On Cisco rout-ers, you can specify the type and code directly in your ACL or use the Cisco ACLkeyword packet-too-big.
If you want to disable all ICMP coming into your network except MTU discovery,you can add the following access list to all interfaces between your network and anexternal network. Here is the ACL applied to interface Serial 0/1:
Router#config terminalEnter configuration commands, one per line. End with CNTL/Z.Router(config)#access-list 103 permit icmp any any 3 4Router(config)#access-list 103 deny icmp any anyRouter(config)#access-list 103 permit ip any anyRouter(config)#interface Serial 0/1Router(config-if)#ip access-group 103 inRouter(config-if)#^ZRouter#
This ACL blocks all ICMP except the Type 3 Code 4 packets needed by MTUdiscovery.
Many sites also choose to allow ping and traceroute ICMP packetsinto their network for troubleshooting purposes. If you have one ofthese sites, it is important to know that ping uses ICMP Type 0 pack-ets and traceroute uses ICMP Type 11. You will need to permit thesepackets through your ACL if you want to allow ping and traceroutefunctionality.
ICMP RedirectsICMP redirects allow systems to change the way packets are passed through a net-work. By sending ICMP redirects, attackers can redirect all or part of your networktraffic through a router of their choice, allowing them to monitor and record the traf-fic or even hijack sessions. On a functional network using a routing protocol, dis-abling ICMP redirects should have no negative impact on your networks and shouldhelp secure your routers from being manipulated by hackers.
ICMP redirects—sending
To stop your router from sending ICMP redirects, you need to enter the commandno ip redirects under each interface. The following code stops the interface FastEthernet 0/0 from sending redirects:
Router#config terminalEnter configuration commands, one per line. End with CNTL/Z.Router(config)#interface FastEthernet 0/0Router(config-if)#no ip redirectsRouter(config-if)#^ZRouter#
The no ip redirects command should be entered under each interface on every router.
,ch07.23996 Page 59 Friday, February 15, 2002 2:54 PM

This is the Title of the Book, eMatter EditionCopyright © 2002 O’Reilly & Associates, Inc. All rights reserved.
60 | Chapter 7: Unnecessary Protocols and Services
ICMP redirects—receiving
To keep the router from receiving ICMP redirects, you must use access lists. The saf-est way is to block each interface from receiving ICMP redirects. However, on largernetworks with hundreds of interfaces, this can be a daunting task. In these cases, at aminimum you need to block ICMP redirects on all router interfaces between autono-mous domains (i.e., your network and one controlled by someone else). To block aninterface from receiving ICMP redirects:
1. Create an ACL that blocks ICMP redirects:
a. First it denies all ICMP redirects.
b. Then it permits all other traffic.
2. Apply that ACL inbound on the interface:Router#config terminalEnter configuration commands, one per line. End with CNTL/Z.Router(config)#access-list 101 deny icmp any any redirectRouter(config)#access-list 101 permit ip any anyRouter(config)#interface FastEthernet 0/0Router(config-if)#ip access-group 101 inRouter(config-if)#^ZRouter#
Cisco ACLs have a default deny stance; an empty access list will denyeverything. Likewise, an access list that has only an entry such as:
access-list 101 deny icmp any any redirect
will not deny just ICMP redirects (as you may suspect) but will denyeverything. The moral is that you must have a permit statement some-where in your ACL; applying an empty ACL to an interface will meanthat you effectively disable that interface since it will block everything.
The ACL blocking ICMP redirects should be applied to all interfaces, if practical,and to all external interfaces, at a minimum.
The danger of blocking only ICMP redirects on interfaces betweenyour network and external networks is that if an internal host is com-promised, it can be used to send ICMP redirects and reconfigure thenetwork paths that your systems use. If at all possible, employ ICMPredirect filtering on every router interface to eliminate this danger.
ICMP-Directed BroadcastsAnother ICMP danger is directed broadcasts. ICMP echo (pings) not only can be sentto a specific host, but can also be addresses to an entire network or subnet. When asingle ICMP ping is sent to a network, then most machines on that network respond
,ch07.23996 Page 60 Friday, February 15, 2002 2:54 PM

This is the Title of the Book, eMatter EditionCopyright © 2002 O’Reilly & Associates, Inc. All rights reserved.
ICMP | 61
to the ping request. This is the well-known smurf attack. An attacker sends an ICMPecho (ping) request to a network, but spoofs the source address to look as if it comesfrom a victim IP. Then tens or hundreds of machines all send back ping responses tothe victim IP, overwhelming it. It is difficult to avoid being a victim to this type ofattack, but with proper router configuration, you can prevent being a network usedby an attacker. This is important for two reasons. First, hundreds of machines onyour network responding to ping requests simultaneously can easily overwhelm yournetwork and consume all of your bandwidth. Second, to the victim it looks as if yournetwork is doing the attacking. You can prevent both of these problems by using theno ip directed-broadcast command on each router interface.
This command causes your router to block all ICMP packets sent to network or sub-net addresses. To prevent your network from being a host to smurf attacks, the fol-lowing example should be applied to all of your router interfaces:
Router#config terminalEnter configuration commands, one per line. End with CNTL/Z.Router(config)#interface Serial 0/1Router(config-if)#no ip directed broadcastRouter(config-if)#^ZRouter#
ICMP Mask ReplyMany ICMP functionalities have been superseded by protocols such as BOOTP andDHCP. ICMP mask reply is one of them. This ICMP type allows the router to informhosts what the subnet mask for a network segment is. With modern protocols likeDHCP, hosts should already have this information and ICMP mask replies are nolonger needed. An attacker, however, may be able to use this feature to help map outthe configuration of your network and routers. Therefore, unless you know that youneed this feature, it is wise to disable ICMP mask replies on all routers.
Most Cisco routers default to not sending ICMP mask replies, but explicitly usingthis setting in the configuration file leaves no room for doubt and makes auditing therouter easier. To disable ICMP mask replies, enter the no ip mask-reply commandunder each interface. The following example disables this feature for interfacesEthernet 0/0 and Serial 0/1:
Router#config terminalEnter configuration commands, one per line. End with CNTL/Z.Router(config)#interface Ethernet 0/0Router(config-if)#no ip mask-replyRouter(config-if)#exitRouter(config)#interface Serial 0/1Router(config-if)#no ip mask-replyRouter(config-if)#^ZRouter#
,ch07.23996 Page 61 Friday, February 15, 2002 2:54 PM
This is the Title of the Book, eMatter EditionCopyright © 2002 O’Reilly & Associates, Inc. All rights reserved.
62 | Chapter 7: Unnecessary Protocols and Services
ICMP UnreachablesICMP unreachables are sent whenever a host attempts to send a packet to a net-work, host, or protocol that doesn’t exist or isn’t supported. This is a very nice thingfor remote systems to do since it immediately lets the connecting system know thatits request cannot be filled. The connecting system can then error out and performother work. When a system attempts an invalid connection but doesn’t receive anICMP unreachable message, the system then continues waiting for the remote sys-tem to respond. This waiting can last from several seconds to several minutes untilthe connecting system times out.
The security implications of allowing or disabling ICMP unreachables are related to anattacker scanning your router to determine what services you are running and whatservices might be vulnerable to attack. Many scanning methods rely on ICMPunreachable messages to concretely determine when a service is disabled. When scan-ning a system, ICMP unreachable messages are sent back to the attackers wheneverthey scan a port that is closed. The router, in effect, tells the attackers, “Sorry, thisdoor is closed.” This allows attackers to scan a system very quickly and know exactlywhich ports are open and which are closed. By disabling ICMP unreachables, anattacker receives no notice that the port is closed, and these types of scans take muchlonger to perform. While disabling ICMP unreachables works only for certain scan-ning methods, it does make an attacker’s job a little bit harder, which is always good.
Disabling ICMP unreachables must be done on every interface with the no ipunreachables command. The following disables ICMP unreachables on the FastEthernet 0/1 and the Serial 0/0 interfaces:
Router#config terminalEnter configuration commands, one per line. End with CNTL/Z.Router(config)#interface FastEthernet 0/1Router(config-if)#no ip unreachablesRouter(config-if)#exitRouter(config)#interface Serial 0/0Router(config-if)#no ip unreachablesRouter(config-if)#^ZRouter#
The no ip unreachables command stops each interface from sending alltypes of ICMP unreachable packets. While using this command helpsprevent or slow down an attacker’s attempt to gather informationabout your network and routers, it can also cause end users to experi-ence delays when attempting to connect to an invalid network, host,or port. With ICMP unreachables enabled, users are instantlyinformed that they tried an invalid connection. Without ICMPunreachables, users must wait until the connection attempt times outbefore getting an error message. This can occasionally cause frustra-tion among users who often attempt invalid connections.
,ch07.23996 Page 62 Friday, February 15, 2002 2:54 PM

This is the Title of the Book, eMatter EditionCopyright © 2002 O’Reilly & Associates, Inc. All rights reserved.
Source Routing | 63
ICMP Timestamp and Information RequestsTwo other ICMP services that are usually more useful to an attacker than an admin-istrator are the timestamp and information request packets. These ICMP types arerarely used on modern networks, but can be used by an attacker for mapping yournetwork and possibly determining the type of routers and hosts you are running. Thetimestamp command can also provide an attacker information on the time and dateset on your router. This information might help them defeat existing time-depen-dent security defenses.
There is no single command to disable sending responses to ICMP timestamp andinformation requests. You must use an ACL to keep the router from receiving thesemessages. To do this:
1. Create an ACL that:
a. Denies all ICMP timestamp requests
b. Denies all ICMP information requests
c. Allows everything else
2. Apply the ACL to each interface or, at a minimum, interfaces between your net-work and one controlled by another:
Router#config terminalEnter configuration commands, one per line. End with CNTL/Z.Router(config)#access-list 102 deny icmp any any timestamp-requestRouter(config)#access-list 102 deny icmp any any information-requestRouter(config)#access-list 102 permit ip any anyRouter(config)#interface serial 0/0Router(config-if)#ip access-group 102 inRouter(config-if)#^ZRouter#
Source RoutingSource routing allows a packet to specify how it should be routed through a networkinstead of following the routers designated by the internal network’s routing proto-cols. This can allow an attacker to bypass firewalls and intrusion detection systems.Unless you have very special circumstances that require you to enable source rout-ing, it should be disabled on all of your routers.
The command no ip source-route causes the router to never honor a packet that car-ries source routing information:
Router#config terminalEnter configuration commands, one per line. End with CNTL/Z.Router(config)#no ip source-routeRouter(config)#^ZRouter#
,ch07.23996 Page 63 Friday, February 15, 2002 2:54 PM

This is the Title of the Book, eMatter EditionCopyright © 2002 O’Reilly & Associates, Inc. All rights reserved.
64 | Chapter 7: Unnecessary Protocols and Services
Small ServicesDepending on the IOS version you are running (Version 11.3 or prior), TCP andUDP small services may be enabled by default. These services include the echo, dis-card, daytime, and chargen services. These services rarely serve any purpose on amodern network and should be disabled on all routers. As a note of historical inter-est, one of the original denial-of-service attacks used spoofed packets to redirect onesystem’s chargen port to another’s echo port. This would consume all bandwidthbetween the systems as one system generated infinite characters and the other ech-oed these back.
Disabling these services can be done with the following commands:
Router#config terminalEnter configuration commands, one per line. End with CNTL/Z.Router(config)#no service tcp-small-serversRouter(config)#no service udp-small-serversRouter(config)#^ZRouter#
FingerThe finger service can allow remote users to find out who is logged into the router. Itcan provide sensitive information that includes valid login names for the router. Tra-ditionally, finger services have served hackers much more than administrators.Therefore, finger should be disabled on all routers to prevent information leakage.
Finger can be easily disabled with the no service finger command. This command dis-ables the router only from replying to finger requests; it doesn’t block all fingerrequests into your network. To do that, you would need to use an ACL that blocksTCP port 79 inbound on all external interfaces. To keep the router itself fromresponding to finger requests, use these commands:
Router#config terminalEnter configuration commands, one per line. End with CNTL/Z.Router(config)#no service fingerRouter(config)#^Z
Newer versions of IOS use the no ip finger command to disable finger. If the noservice finger command doesn’t work for you, try:
Router#config terminalEnter configuration commands, one per line. End with CNTL/Z.Router(config)#no ip fingerRouter(config)#^Z
,ch07.23996 Page 64 Friday, February 15, 2002 2:54 PM

This is the Title of the Book, eMatter EditionCopyright © 2002 O’Reilly & Associates, Inc. All rights reserved.
Proxy ARP | 65
HTTPWe have already addressed the security vulnerabilities of HTTP—namely, that allinformation, including login and password, is passed in clear text and that HTTPauthentication cannot use one-time password or token-based authentication. Forthese reasons, HTTP should be disabled or severely limited. See Chapter 3 for infor-mation on disabling or restricting HTTP access.
CDPCDP is the Cisco Discovery Protocol that provides information on remote interfacesconnected to each Cisco router. It provides useful information on determining thetype and configuration of a remote interface; however, it provides no informationthat a properly documented network will not already have recorded. CDP does,however, provide an excellent opportunity for attackers to walk from router to routerand map out an entire enterprise-wide network. For this reason, accurate documen-tation should be kept and CDP should be disabled on all routers.
CDP can be disabled globally on a router with the no cdp run command:
Router#config terminalEnter configuration commands, one per line. End with CNTL/Z.Router(config)#no cdp runRouter(config)#^Z
CDP can be disabled on only specific interfaces with the no cdp enable command:
Router#config terminalEnter configuration commands, one per line. End with CNTL/Z.Router(config)#interface Serial 0/0Router(config-if)#no cdp enableRouter(config-if)#^ZRouter#
Proxy ARPProxy Address Resolution Protocol (ARP) can help hosts that have no default routeror gateway configured. In this case, the host simply sends an ARP on the local net-work and the router responds to the ARP, supplying its own MAC address as the oneto use when sending to the remote system. On modern, properly configured net-works where protocols such as DHCP are used, there is no reason to enable or useProxy ARP. Attackers may be able to spoof packets to take advantage of systems per-forming Proxy ARP and may also be able to use a router’s willingness to respond toProxy ARP messages to gather information about your router and network.
,ch07.23996 Page 65 Friday, February 15, 2002 2:54 PM
This is the Title of the Book, eMatter EditionCopyright © 2002 O’Reilly & Associates, Inc. All rights reserved.
66 | Chapter 7: Unnecessary Protocols and Services
Proxy ARP is disabled on each interface using the no ip proxy-arp command. The fol-lowing example disables Proxy ARP on the Ethernet 0/0 and Serial 0/0 interfaces:
Router#config terminalEnter configuration commands, one per line. End with CNTL/Z.Router(config)#interface Ethernet 0/0Router(config-if)#no ip proxy-arpRouter(config-if)#exitRouter(config)#interface Serial 0/0Router(config-if)#no ip proxy-arpRouter(config-if)#^ZRouter#
MiscellaneousMany services may also be enabled by default, but are not needed. Good securitymeans shutting off everything that is not required, so unless you know you requirethese services, they should be disabled. These services include:
• BootP
• DNS
• Network autoloading of configuration files
• PAD—packet assembly/disassembly
• IP classless
The following commands disable these services:
Router#config terminalEnter configuration commands, one per line. End with CNTL/Z.Router(config)#no ip bootp serverRouter(config)#no ip name-serverRouter(config)#no service configRouter(config)#no boot networkRouter(config)#no service padRouter(config)#no ip classlessRouter(config)#^Z
By default, Cisco routers come with DNS enabled, but no nameserverconfigured. This causes Cisco routers to use broadcasts for DNS que-ries. In the best case, this causes annoying delays at the EXEC prompt.In the worst case, an attacker can respond to these broadcast DNSqueries with false information that could fool your router into usingthe wrong hosts. If you don’t want to use DNS, use the ip name-servercommand to statically configure DNS servers on your routers (to avoidusing broadcast DNS queries).
,ch07.23996 Page 66 Friday, February 15, 2002 2:54 PM

This is the Title of the Book, eMatter EditionCopyright © 2002 O’Reilly & Associates, Inc. All rights reserved.
Unnecessary Protocols and Services Checklist | 67
SNMPSNMP can often be a gold mine to an attacker. SNMP is usually enabled by defaultand uses the default access strings public and private. Many administrators do not dis-able SNMP and also do not change from the defaults. This lets attackers use SNMP togather almost any information about your router that they want and often lets themuse SNMP to reconfigure your router. Disable SNMP if it is not needed, and severelyrestrict its access if it is enabled. See Chapter 8 for details on SNMP security.
Unnecessary Protocols andServices ChecklistThis checklist summarizes the important security information presented in this chap-ter. A complete security checklist is provided in Appendix A.
• Disable the following services on every interface on every router:
— Disable sending ICMP redirects with the no ip redirects command.
— Disable ICMP broadcasts with the no ip directed-broadcast command.
— Disable ICMP mask replies with the no ip mask-reply command.
— Disable ICMP unreachables with the no ip unreachables command.
— Disable Proxy ARP with the no ip proxy-arp command.
• Disable CDP globally with the no cdp run command or disable it on each inter-face with the no cdp enable command.
• Disable source routing with the no ip source-route command.
• Disable small services with the no service tcp-small-servers and the no udp-small-servers commands.
• Disable Finger with the no service finger command.
• Severly restrict incoming ICMP packets using an appropriate ACL. (Ideally, onlyMTU discovery is allowed between your internal network and external networks.)
• Disable miscellaneous services such as BOOTP, PAD, configuration autoload-ing, and DNS.
• Disable or secure HTTP access (see Chapter 3).
• Disable or secure SNMP access (see Chapter 8).
,ch07.23996 Page 67 Friday, February 15, 2002 2:54 PM

This is the Title of the Book, eMatter EditionCopyright © 2002 O’Reilly & Associates, Inc. All rights reserved.
68
Chapter 8CHAPTER 8
SNMP Security
The Simple Network Management Protocol (SNMP) is an extremely useful protocolfor monitoring and managing TCP/IP networks. Most networked systems come withat least a basic SNMP service enabled by default, allowing you to collect informationabout your network remotely. If write access is enabled, SNMP can also be used toconfigure devices on your network remotely.
Since read-only SNMP is enabled by default on many systems, it is an attacker’sdream. An attacker can use SNMP to map out your entire network, find out MAC andIP address binding, and even find out exactly what hardware you are using and whatsoftware versions you are running. At attacker can then use that information to searchvulnerability databases and analyze your network for vulnerable trust relationships.
The following example shows just how much information an attacker can gain aboutyour router and network through unsecured SNMP. Using the Net-SNMP snmpwalkprogram to get the routers system information through SNMP, you see:
% snmpwalk –v1 RouterOne public systemsystem.sysDescr.0 = Cisco Internetwork Operating System SoftwareIOS (tm) C2600 Software (C2600-DO3S-M), Version 12.0(5)T1, RELEASE SOFTWARE (fc1)Copyright (c) 1986-1999 by cisco Systems, Inc.Compiled Tue 17-Aug-99 13:18 by cmongsystem.sysContact.0 = Jane Doe <[email protected]> - Office BB 983 – x3334system.sysName.0 = RouterOnesystem.sysLocation.0 = Building A Basement – Closet 936
You now have the exact hardware and software versions of this router, contact infor-mation, the router’s name, and its physical location.
This is only the tip of the iceberg; from a full snmpwalk you get a list of each inter-face on this router, what types of interfaces they are, and their physical and networkaddresses. Additionally, you can get a complete list of this router’s routing tables,ARP tables, and even how long the router has been up since the last boot. All of thisinformation is a gold mine for someone trying to break into your network. With thisinformation, an attacker often understands your network better than you do.
,ch08.24155 Page 68 Friday, February 15, 2002 2:54 PM

This is the Title of the Book, eMatter EditionCopyright © 2002 O’Reilly & Associates, Inc. All rights reserved.
SNMP Versions | 69
Net-SNMP is a suite of tools that includes an open source SNMPserver and can be found at http://net-snmp.sourceforge.net. For moreinformation on SNMP in general, see http://www.simpleweb.org.
SNMP VersionsThree main versions of SNMP are in use today. The oldest and most widely used isSNMP Version 1. The second, SNMP v2c, has a few improvements over SNMP v1,but uses the same methods for security. SNMP v3 has enhanced security measuresthat allow the use of SNMP in environments requiring additional security.
SNMP Version 1SNMP v1 gained popularity in the early 1990s and quickly became the standard wayto monitor network devices remotely. It was quickly discovered that SNMP v1 hadsome inherent security flaws, but at the time, because it was so useful and e-com-merce was in its infancy, few worried about these flaws. As the Internet progressedand more servers containing sensitive information were attached, the security flaw ofSNMP v1 became more problematic.
A key security flaw in SNMP v1 is that the only authentication available is through acommunity string. Think of a community string as a group password—anyone whoknows the community string is allowed access. Adding to this problem is the factthat all SNMP v1 packets are passed unencrypted across the network. Therefore,anyone who can sniff a single SNMP packet now has the community string needed toget access.
SNMP Version 2cSNMP v2 was the first attempt to fix these security flaws. However, the members ofthe Internet Engineering Task Force (IETF) subcommittee responsible for the v2standard had trouble agreeing on the security and administrative aspects of the pro-tocol. Therefore, SNMP v2 never really took off. The only prevalent version of SNMPv2 today is SNMP v2c, which contains SNMP v2 protocol enhancements, but leavesout the security features that no one could agree on. The c designates v2c as being“community based,” which means that it uses the same authentication mechanism asv1—community strings.
SNMP Version 3SNMP v3 was the next attempt to fix the security vulnerabilities inherent to SNMPv1 and v2c. SNMP v3 provides many security enhancement, but is currently still a
,ch08.24155 Page 69 Friday, February 15, 2002 2:54 PM

This is the Title of the Book, eMatter EditionCopyright © 2002 O’Reilly & Associates, Inc. All rights reserved.
70 | Chapter 8: SNMP Security
draft-standard and not yet a full standard. This has kept many vendors from imple-menting SNMP v3 or caused them to develop proprietary versions of SNMP v3. Thekey security additions to SNMP v3 are that it:
• Can use MD5 or SHA hashes for authentication
• Can encrypt the entire packet
• Can guarantee message integrity
SNMP v3 allows you to choose to use no authentication and no encryption(NoAuthNoPriv), authentication but no encryption (AuthNoPriv), or authenticationand encryption (AuthPriv). See Table 8-1 for a comparison of SNMP version features.
If you are new to SNMP, start with SNMP v1 to learn how SNMP works. On smaller,low-risk networks, SNMP v1 or v2c can be used regularly if community strings arechanged and access is restricted to specific IP addresses. On larger, more sensitivenetworks, however, It is recommended that you use either SNMP v3 with encryp-tion and authentication or IPSec to encrypt the SNMP v1 traffic between your rout-ers and management stations.
Despite the benefits of SNMP v3, you will face some significant hurdles in its imple-mentation. First, very few vendors who sell software for SNMP management sta-tions currently support SNMP v3. Second, SNMP v3 uses Data Encryption Standard(DES) encryption, which many security professionals consider to be too weak to beeffective for high-security networks.
Securing SNMP v1 and v2cSince SNMP v1 and v2c use the same community-based authentication methods,they are grouped together on Cisco routers. You either enable both or neither.
Table 8-1. Cisco router SNMP version comparison
Version Authentication Encryption Function
v1 Community strings None Uses community string for authentication. Packet ispassed in clear text.
v2 Community strings None Uses community string for authentication. Packet ispassed in clear text.
v3 (NoAuthNoPriv) Username None Uses username for authentication. Packet is passed inclear text.
v3 (AuthNoPriv) MD5 or SHA None Uses HMAC-MD5 or HMAC-SHA for authentication.Remaining packet is passed in clear text.
v3 (AuthPriv) MD5 or SHA DES Uses HMAC-MD5 or HMAC-SHA for authentication. Entirepacket is encrypted.
,ch08.24155 Page 70 Friday, February 15, 2002 2:54 PM

This is the Title of the Book, eMatter EditionCopyright © 2002 O’Reilly & Associates, Inc. All rights reserved.
Securing SNMP v1 and v2c | 71
Enabling SNMP v1 and v2cFirst, for security reasons, it is strongly recommended that you disable SNMP v1 andv2c on all your routers. SNMP v3 is much better suited for secure enterprise-wideuse. However, if SNMP v1 or v2 must be used, then the following security precau-tions must be taken:
• Do not enable read/write access unless absolutely necessary.
• Choose secure (difficult to guess) community strings. Ideally, you would use dif-ferent community strings on each router, but this usually isn’t practical due tothe way most SNMP network management servers function.
• Limit all SNMP access to specific IP addresses using ACLs.
• Limit SNMP output with views.
The rest of this section discusses how to accomplish these tasks and make SNMP v1and v2c as secure as possible.
Community strings
When enabling SNMP v1 and v2c, two levels of privilege can be configured. The firstis read-only; the second, read/write. Read-only allows remote users to use SNMP toget statistics and information from the router, but allows no changes to made to therouter itself. Read/write access allows remote users to read information from therouter and reconfigure the router.
Community strings are the basis for SNMP v1 and v2c authentication. Unless addi-tional IP-based restrictions are configured, anyone who knows the communitystring can access the router. There are two serious repercussions to this. First, mostnetwork devices ship with a default read-only community string, public. Thisdefault community string is well known and should never be used. The default com-munity string for read/write access is private. Again, this string is well known, and ifread/write access is enabled, it should be changed. The same rules for choosing agood password apply to choosing a good community string. See the “Strong Pass-words” section of Chapter 4 for information on choosing strong community strings.Next, with SNMP v1 and v2c, the community string is passed in clear text acrossthe network. This makes their secure use extremely limited since anyone with asniffer can obtain your community strings and therefore access your routers. If youdecide to use SNMP v1 or v2c, make sure your organization can live with theserisks. Many organizations choose to use read-only SNMP v1 or v2c, restricted by IPaddress to specific internal machines, and totally block SNMP access on all externalrouter interfaces.
,ch08.24155 Page 71 Friday, February 15, 2002 2:54 PM
This is the Title of the Book, eMatter EditionCopyright © 2002 O’Reilly & Associates, Inc. All rights reserved.
72 | Chapter 8: SNMP Security
Read-only access
To configure read-only SNMP v1 and v2c access, use the snmp-server communitycommand followed by a community string and the RO keyword:
Router#config terminalEnter configuration commands, one per line. End with CNTL/Z.Router(config)#snmp-server community UnGuessableStringReadOnly RORouter(config)#^Z
Read/write access
To configure read/write SNMP v1 and v2c access, use the snmp-server command fol-lowed by a different community string and the RW keyword:
Router#config terminalEnter configuration commands, one per line. End with CNTL/Z.Router(config)#snmp-server community UnGuessableStringWriteable RWRouter(config)#^Z
Disabling SNMP v1 and v2cDisabling SNMP can be done entirely with the command no snmp-server. Use thefollowing example to specifically disable read/write or read-only access.
Using the no snmp-server command disables all SNMP versions onyour router. However, until the system is rebooted, it holds the previ-ous SNMP configuration in memory. The configuration is inactive, butif you reenable SNMP, this previous configuration information cansometimes be reloaded into the running configuration. This can beespecially tricky in cases when you have SNMP v1 and v2c enabled;use the no snmp-server command to disable SNMP and then configureSNMP v3. Make sure that your previous SNMP v1 and v2c configura-tions have not been restored without your knowledge.
Disabling read-only access
To disable read-only SNMP v1 and v2c access, explicitly use the no snmp-servercommunity command followed by the read-only community string and the RO key-word. If your read-only community string is UnGuessableStringReadOnly, you wouldinput:
Router#config terminalEnter configuration commands, one per line. End with CNTL/Z.Router(config)#no snmp-server community UnGuessableStringReadOnly RORouter(config)#^Z
,ch08.24155 Page 72 Friday, February 15, 2002 2:54 PM

This is the Title of the Book, eMatter EditionCopyright © 2002 O’Reilly & Associates, Inc. All rights reserved.
Securing SNMP v1 and v2c | 73
Disabling read/write access
To disable read/write SNMP v1 and v2c access, explicitly use the no snmp-server com-munity command followed by the read/write community string and the RW keyword.If your read/write community string is UnGuessableStringWritable, you would type:
Router#config terminalEnter configuration commands, one per line. End with CNTL/Z.Router(config)#no snmp-server community UnGuessableStringWriteable RWRouter(config)#^Z
Limiting SNMP v1 and v2c Access by IPYou should always limit SNMP access to only a few specific IP addresses; this isespecially true when using SNMP v1 and v2c. To do this:
1. Create an appropriate ACL.
2. Configure read-only or read/write access to use that ACL.
Read-only access
Restricting read-only access by IP address uses the same command as enabling read-only SNMP, with one addition: you append the number of ACL. To restrict read-onlySNMP access to the IP addresses 130.218.10.8 and 130.218.14.7, you would type:
Router#config terminalEnter configuration commands, one per line. End with CNTL/Z.Router(config)#access-list 6 permit 130.218.10.8Router(config)#access-list 6 permit 130.218.14.7Router(config)#access-list 6 deny anyRouter(config)#snmp-server community UnGuessableStringReadOnly RO 6Router(config)#^Z
Read/write access
Restricting read/write access is almost the same as the previous example with theexception of the RW keyword in place or RO. Restricting read/write access to thesame IPs as before—130.218.10.8 and 130.218.14.7—would require:
Router#config terminalEnter configuration commands, one per line. End with CNTL/Z.Router(config)#access-list 8 permit 130.218.10.8Router(config)#access-list 8 permit 130.218.14.7Router(config)#access-list 8 deny anyRouter(config)#snmp-server community UnGuessableStringWriteable RW 8Router(config)#^Z
Since the IPs in both examples are the same, you don’t have to create a separate ACLand can use the same ACL, number 6, to restrict both read-only and read/writeaccess.
,ch08.24155 Page 73 Friday, February 15, 2002 2:54 PM

This is the Title of the Book, eMatter EditionCopyright © 2002 O’Reilly & Associates, Inc. All rights reserved.
74 | Chapter 8: SNMP Security
Read-only SNMP access allows an attacker to see how your router andnetwork are configured. While this is extremely valuable information,it doesn’t come close to what an attacker can do with read/writeaccess. Read/write access gives an attacker complete control over yourrouter. Using SNMPset, an attacker can completely reconfigure yourrouter, including resetting your passwords, disabling ACLs, and redi-recting traffic.
SNMP Read/Write and TFTPThere is a major security risk associated with SNMP read/write access that involvesTFTP. When SNMP read/write access is enabled, attackers can use SNMP to causethe router to either TFTP its configuration file to them, or even have the router loada new configuration from an arbitrary TFTP server. To avoid this problem, it isimportant to use the snmp-server tftp-server-list command to limit what IP addressesare allowed to use TFTP servers via SNMP.
The following example shows how to use an ACL to restrict SNMP-controlled TFTPaccess to the IP 130.8.4.9:
RouterOne#config terminalEnter configuration commands, one per line. End with CNTL/Z.RouterOne(config)#access-list 98 permit host 130.8.4.9RouterOne(config)#access-list 98 deny anyRouterOne(config)#snmp-server tftp-server-list 98RouterOne(config)#^Z
If you don’t use TFTP, then create an empty ACL and apply it. Since ACLs aredefault deny, this will keep anyone from using SNMP and TFTP to manipulate yourrouter.
Cisco routers have a command that enables them to be rebootedthrough SNMP remotely—snmp-server system-shutdown. This com-mand is disabled by default and should not be turned on. The poten-tial for abuse greatly outweighs the utility of this feature.
Limiting SNMP v1 and v2c Access with ViewsAnother way to help secure SNMP v1 and v2c is to limit what information remotesystems can see. This is extremely useful when only specific information is neededthrough SNMP. To use views:
1. Create a view specifying what information is allowed to be seen using the snmp-server view command.
2. Create a new community string with the snmp-server community command thatspecifies the view we created previously.
,ch08.24155 Page 74 Friday, February 15, 2002 2:54 PM

This is the Title of the Book, eMatter EditionCopyright © 2002 O’Reilly & Associates, Inc. All rights reserved.
Securing SNMP v1 and v2c | 75
The SNMP MIB defines what information you can retrieve or setthrough SNMP. Standard MIBs, such as MIB-II, are supported byevery network device, and proprietary MIBs are only for specific prod-ucts. MIBs consist of a treelike structure and are organized withObject Identifiers (OID). Knowing the OID lets you access the spe-cific information you are looking for. For more information on MIBsand OIDs, see http://www.simpleweb.org.
The snmp-server view command takes three arguments. The first is the name youwant to call the view, then the table name or MIB Object Identifier (OID), and finallythe keyword include or exclude. If you know SNMP well, you can create advancedlists by using the OID numbers. If you’re not an SNMP expert, you can use tablenames such as IP, ICMP, TCP, SYSTEM, INTERFACES, and so on. Like access lists,the default policy of a view is to deny access and not return any data. The followingexample creates a view called tcp-only that allows access to the MIB objects onlyunder the TCP table:
Router#config terminalEnter configuration commands, one per line. End with CNTL/Z.Router(config)#snmp-server view tcp-only tcp includeRouter(config)#snmp-server community TcpOnlyCommunityString view tcp-onlyRouter(config)#^Z
Now, when you attempt to get SNMP information from the router using the TcpOn-lyCommunityString command, you see only the information in the TCP table:
% snmpwalk -v1 RouterOne TcpOnlyCommunityStringtcp.tcpRtoAlgorithm.0 = vanj(4)tcp.tcpRtoMin.0 = 300 millisecondstcp.tcpRtoMax.0 = 60000 millisecondstcp.tcpMaxConn.0 = -1tcp.tcpActiveOpens.0 = 0tcp.tcpPassiveOpens.0 = 2tcp.tcpAttemptFails.0 = 0tcp.tcpEstabResets.0 = 0tcp.tcpCurrEstab.0 = Gauge: 1tcp.tcpInSegs.0 = 3698tcp.tcpOutSegs.0 = 2549tcp.tcpRetransSegs.0 = 1tcp.tcpConnTable.tcpConnEntry.tcpConnState.130.218.9.50.23.130.218.59.1.64880 =established(5)tcp.tcpConnTable.tcpConnEntry.tcpConnLocalAddress.130.218.9.50.23.130.218.9.41.64880= IpAddress: 130.218.59.250tcp.tcpConnTable.tcpConnEntry.tcpConnLocalPort.130.218.9.50.23.130.218.9.41.64880 =23tcp.tcpConnTable.tcpConnEntry.tcpConnRemAddress.130.218.9.50.23.130.218.9.41.64880 =IpAddress: 130.218.59.41tcp.tcpConnTable.tcpConnEntry.tcpConnRemPort.130.218.9.50.23.130.218.9.41.64880 =64880tcp.tcpInErrs.0 = 0tcp.tcpOutRsts.0 = 0End of MIB
,ch08.24155 Page 75 Friday, February 15, 2002 2:54 PM

This is the Title of the Book, eMatter EditionCopyright © 2002 O’Reilly & Associates, Inc. All rights reserved.
76 | Chapter 8: SNMP Security
Table 8-2 contains some useful keywords for creating views.
Finally, one of the most useful features of SNMP views is its ability to limit SNMPwrite access in addition to limiting read-only access.
SNMP v3 is not yet a full standard. Many vendors have not imple-mented it or have implemented incompatible versions of SNMP v3.One way to get the advantages of SNMP v3 authentication andencryption while still using SNMP v1 or SNMP v2 is to use IPSecbetween the router and the SNMP management station. See Chapter 3for more information on configuring IPSec.
Securing SNMP v3In relation to security, the major change in SNMP v3 is the ability to authenticateand encrypt SNMP packets. This ability allows you to use SNMP securely acrossuntrustworthy networks. The current disadvantage of SNMP v3, however, is that it isnot supported on all network devices or all network management stations. Ciscorouters running IOS 12.0(3)T and above include SNMP v3 support.
The three levels of SNMP v3 security are no authentication and no encryption,authentication and no encryption, and authentication and encryption. SNMP v3specifies these levels as NoAuthNoPriv, AuthNoPriv, and AuthPriv, respectively.Table 8-3 shows the Cisco keywords that map to these security levels.
Table 8-2. SNMP keywords
SNMP MIB keyword Reported information
System Information about the system, including hardware, software, contact, and location
Interfaces Information about every interface on the system, including packets in, packets out, errors, etc.
at The ARP table mappings
Ip IP statistics and tables including the routing tables
Icmp ICMP statistics
tcp TCP statistics, including the connection tables with port numbers
udp UDP statistics, including the connection tables with port numbers
snmp SNMP statistics
Table 8-3. SNMP security and Cisco keywords
SNMP security keyword Cisco keyword
NoAuthNoPriv Noauth
AuthNoPriv Auth
AuthPriv Priv
,ch08.24155 Page 76 Friday, February 15, 2002 2:54 PM

This is the Title of the Book, eMatter EditionCopyright © 2002 O’Reilly & Associates, Inc. All rights reserved.
Securing SNMP v3 | 77
Whenever you see a router command that specifies priv as the SNMP v3 securitylevel, it really indicates both authentication and encryption.
No Authentication/No EncryptionThe least-secure method of SNMP v3 uses no authentication and no encryption. Thisis referred to as NoAuthNoPriv. With this type of SNMP v3 packet, the only type ofaccess control is through a username. To configure SNMP v3 NoAuthNoPriv accesson a router, you must:
1. Configure an SNMP v3 group that specifies no authentication with the snmp-server group command and the noauth keyword.
2. Create an SNMP v3 user in that group with the snmp-server user command.
The snmp-server group command can take many different arguments, depending onhow you want the group set up. The first two arguments indicate the name of thegroup and the SNMP version of the group. Additional arguments can specify accesslists, restricted views, or authentication and encryption methods. In the followingexample, the v3 indicates SNMP v3 and noauth indicates that no authentication orencryption is to be used.
The snmp-server user command also takes various arguments. The first three are thename of the user, the name of the group that user belongs to, and the SNMP ver-sion that user runs. Additional arguments specify authentication and encryptioninformation:
Router#config terminalEnter configuration commands, one per line. End with CNTL/Z.Router(config)#snmp-server group NoAuthGroup v3 noauthRouter(config)#snmp-server user MyUser1 NoAuthGroup v3Router(config)#^Z
Now you can use unauthenticated and unencrypted SNMP to access informationabout the router by specifying user MyUser1:
% snmpwalk -v 3 –l NoAuthNoPriv -u MyUser1 RouterOnesystem.sysDescr.0 = Cisco Internetwork Operating System SoftwareIOS (tm) C2600 Software (C2600-IS56I-M), Version 12.1(1), RELEASE SOFTWARE (fc1)Copyright (c) 1986-2000 by cisco Systems, Inc.Compiled Wed 15-Mar-00 03:45 by cmongsystem.sysObjectID.0 = OID: enterprises.9.1.208system.sysUpTime.0 = Timeticks: (888383) 2:28:03.83system.sysContact.0 =system.sysName.0 = RouterOne.kennesaw.edu[ cut ]
Using no authentication and no encryption (NoAuthNoPriv) means that you are stillvulnerable to someone sniffing your username and gaining SNMP access. If you aregoing to use SNMP v3, it is recommended that you use both authentication andencryption (AuthPriv).
,ch08.24155 Page 77 Friday, February 15, 2002 2:54 PM

This is the Title of the Book, eMatter EditionCopyright © 2002 O’Reilly & Associates, Inc. All rights reserved.
78 | Chapter 8: SNMP Security
Authentication/No EncryptionThe level of protection above a simple username is authentication. This is theAuthNoPriv level in which users are securely authenticated, but packets are stillpassed unencrypted. This level allows you to specify a different username and pass-word for every user who requires SNMP access, giving you the accountability thatyou lack when using just a community string.
To configure SNMP v3 authentication, you must:
1. Create an SNMP v3 group that is configured to use authentication with thesnmp-server group command and the auth keyword.
2. Create an SNMP v3 user in that group and give that user an authenticationmethod and password. The auth keyword, followed by an authenticationmethod, here md5, is followed by the SNMP v3 user password:
Router#config terminalEnter configuration commands, one per line. End with CNTL/Z.Router(config)#snmp-server group AuthGroup v3 authRouter(config)#snmp-server user MyUser2 AuthGroup v3 auth md5 MyAuthPasswordRouter(config)#^Z
Now you can access the SNMP v3 information only by successfully authenticatingyourself with the username MyUser2 and the password MyAuthPassword. Eventhough you are authenticating, you are still not using encryption and are at theAuthNoPriv level:
% snmpwalk -v 3 -u MyUser2 -l AuthNoPriv -A MyAuthPassword RouterOnesystem.sysDescr.0 = Cisco Internetwork Operating System SoftwareIOS (tm) C2600 Software (C2600-IS56I-M), Version 12.1(1), RELEASE SOFTWARE (fc1)Copyright (c) 1986-2000 by cisco Systems, Inc.Compiled Wed 15-Mar-00 03:45 by cmongsystem.sysObjectID.0 = OID: enterprises.9.1.208system.sysUpTime.0 = Timeticks: (1008588) 2:48:05.88system.sysContact.0 =system.sysName.0 = RouterOne.kennesaw.edu[ cut ]
Authentication/EncryptionFinally, there is the AuthPriv level, which uses both strong authentication andencryption. This level is the most appropriate level to use on secure networks. SNMPv3 requires separate passwords for authentication and encryption for each user-name. To configure a user to use authentication and encryption:
1. Create a group that is configured to use both authentication and encryptionusing the snmp-server group command and the priv keyword.
2. Create a user in that group to whom you assign separate authentication andencryption passwords using the snmp-server user command and the priv
,ch08.24155 Page 78 Friday, February 15, 2002 2:54 PM

This is the Title of the Book, eMatter EditionCopyright © 2002 O’Reilly & Associates, Inc. All rights reserved.
Securing SNMP v3 | 79
keyword. The auth keyword is followed by the authentication method, md5, andthe priv keyword is followed by the encryption type, des56:
Router#config terminalEnter configuration commands, one per line. End with CNTL/Z.Router(config)#snmp-server group AuthPrivGroup v3 privRouter(config)#snmp-server user MyUser3 AuthPrivGroup v3 auth md5 AuthPass \priv des56 PrivPassRouter(config)#^Z
When you request SNMP v3 information from the router, you must use the correctusername, authentication password, and encryption password. When you do, allcommunication is encrypted:
% snmpwalk -v 3 -u MyUser3 -l authpriv -A AuthPass -X PrivPass RouterOnesystem.sysDescr.0 = Cisco Internetwork Operating System SoftwareIOS (tm) C2600 Software (C2600-IS56I-M), Version 12.1(1), RELEASE SOFTWARE (fc1)Copyright (c) 1986-2000 by cisco Systems, Inc.Compiled Wed 15-Mar-00 03:45 by cmongsystem.sysObjectID.0 = OID: enterprises.9.1.208system.sysUpTime.0 = Timeticks: (1008588) 2:48:05.88system.sysContact.0 =system.sysName.0 = RouterOne.kennesaw.edu[ cut ]
SNMP v3 uses an identification number called the engineID. This num-ber is set on your router automatically. Both authentication and encryp-tion functions rely on this number not changing. If you purposefully oraccidentally change your engineID number, you will disable your cur-rent users and groups and will need to delete and re-create them.
Limiting SNMP v3 Access by IPYou can also use ACLs with SNMP v3 to further enhance your security. You canspecify an access list at the group or user level. In either case, add the keyword accessfollowed by the restricting ACL to any of the preceding snmp-server group or usercommands.
The following example:
• Creates an ACL that restricts access to the systems 130.218.9.12 and 130.218.9.14 with the access-list command
• Creates an SNMP v3 group called Trusted that uses the ACL to restrict access forall members of that group with the snmp-server group command and the accesskeyword
• Creates the users Jeff and Sara inside the Trusted group with the snmp-serveruser command
Router#config terminalEnter configuration commands, one per line. End with CNTL/Z.Router(config)#access-list 5 permit 130.218.9.12
,ch08.24155 Page 79 Friday, February 15, 2002 2:54 PM

This is the Title of the Book, eMatter EditionCopyright © 2002 O’Reilly & Associates, Inc. All rights reserved.
80 | Chapter 8: SNMP Security
Router(config)#access-list 5 permit 130.218.9.14Router(config)#access-list 5 deny anyRouter(config)#snmp-server group Trusted v3 auth access 5Router(config)#snmp-server user jeff Trusted v3 auth md5 JeffsPassRouter(config)#snmp-server user sara Trusted v3 auth md5 SarasPassRouter(config)#^Z
Limiting IP addresses on a per-user basis is similar:
1. Create an ACL that limits access based on IP with the access-list command. Thisexample uses 130.218.12.5 and 130.218.6.3.
2. Create a group that specifies authentication and encryption information with thesnmp-server group command.
3. Create users in this group and specify the ACL for each user with the snmp-server user command and the access keyword. The following example restrictsThomas to the IP 130.218.12.5 and Abigail to the IP 130.218.6.3:
Router#config terminalEnter configuration commands, one per line. End with CNTL/Z.Router(config)#access-list 6 permit 130.218.12.5Router(config)#access-list 6 deny anyRouter(config)#access-list 7 permit 130.218.6.3Router(config)#access-list 7 deny anyRouter(config)#snmp-server group AdminGroup v3 authRouter(config)#snmp-server user thomas AdminGroup v3 auth md5 TsPass access 6Router(config)#snmp-server user abigail AdminGroup v3 auth md5 AsPass access 7Router(config)#^Z
Limiting SNMP v3 Output with ViewsViews can be applied to SNMP v3 groups, but not directly to users. The process issimilar to creating views for SNMP v1 and v2c. When creating a group that restrictsinformation with views, use the read or write keywords to indicate whether the viewapplies to read-only access or read/write access.
1. Create a view restricting access to SNMP information with the snmp-server viewcommand.
2. Create a group to which you apply that view with the snmp-server group com-mand. You can apply the view to read or write access. This example uses theread keyword so the view is applied to read-only access for this group.
3. Create users inside the group with the snmp-server user command and they willbe restricted by that group’s view.
The following example restricts all the members of group IpOnly to viewing the IPinformation (but nothing else):
Router#config terminalEnter configuration commands, one per line. End with CNTL/Z.Router(config)#snmp-server view IpOnlyView ip includeRouter(config)#snmp-server group IpOnly v3 noauth read IpOnlyView
,ch08.24155 Page 80 Friday, February 15, 2002 2:54 PM

This is the Title of the Book, eMatter EditionCopyright © 2002 O’Reilly & Associates, Inc. All rights reserved.
SNMP Security Checklist | 81
Router(config)#snmp-server user heather IpOnly v3Router(config)#^Z
Now when Heather uses SNMP v3 to access the router, she will only get informationabout the IP protocol.
Finally, you can combine views and access lists. This example creates a group thatrestricts access to the single IP 130.218.250.5 and allows read-only access to theinterface information and nothing more:
Router#config terminalEnter configuration commands, one per line. End with CNTL/Z.Router(config)#access-list 10 permit 130.218.250.5Router(config)#access-list 10 deny anyRouter(config)#snmp-server view IntView interface includeRouter(config)#snmp-server group IntGroup v3 auth read IntView access 10Router(config)#snmp-server user bob IntGroup v3 auth md5 BobsPassRouter(config)#^Z
SNMP Management ServersFinally, with all this effort to secure the SNMP access on the routers, you can’t for-get the SNMP management station. Just as storing your router configurations on aninsecure box can lead to a compromise, leaving your SNMP management serverunsecured is an invitation for attack.
By its very nature, the SNMP management server must have the SNMP informationfor every system that it monitors. This information includes IP addresses, SNMPcommunity strings, SNMP v3 usernames, and authentication and encryption pass-words. Additionally, SNMP management servers must also have access to query eachsystem, meaning that you must allow the server through your ACLs. Therefore, if anSNMP management server is compromised, an attacker has just gained access infor-mation for every system monitored on your network and also a platform from whichto perform additional monitoring and attacks (since the SNMP management serverwill necessarily have SNMP access to the routers).
Therefore, in addition to hardening your routers, you must make sure that the SNMPmanagement station is also secured.
SNMP Security ChecklistThis checklist summarizes the important security information presented in this chap-ter. A complete security checklist is provided in Appendix A.
• Disable SNMP, if it is not needed.
• Use different community or authentication strings for each router, if possible.(This often become unmanageable.)
,ch08.24155 Page 81 Friday, February 15, 2002 2:54 PM

This is the Title of the Book, eMatter EditionCopyright © 2002 O’Reilly & Associates, Inc. All rights reserved.
82 | Chapter 8: SNMP Security
• Make sure community strings and passwords are well chosen and not easilyguessed.
• Restrict all SNMP access to specific hosts through ACLs.
• Restrict all SNMP output through the use of views.
• Disable read/write SNMP access unless absolutely necessary.
• If SNMP read/write access is configured, use the snmp-server tftp-server-list com-mand to restrict SNMP-controlled TFTP transfers.
• Disable SNMP v1 and v2c in favor of SNMP v3.
• Under SNMP v3:
— Make sure that SNMP v1 and v2c are disabled.
— Use both authentication and encryption (AuthPriv) on your routers.
— Use views to limit SNMP access to information.
• Secure all SNMP Management Servers.
,ch08.24155 Page 82 Friday, February 15, 2002 2:54 PM

This is the Title of the Book, eMatter EditionCopyright © 2002 O’Reilly & Associates, Inc. All rights reserved.
83
Chapter 9 CHAPTER 9
Secure Routing and Antispoofing
This chapter covers both antispoofing and securing the routing protocol your rout-ers use to exchange information. Antispoofing filters prevent external users fromsending forged packets that act as if they come from your internal network. Manysecurity controls use a packet’s source IP address to allow or deny access. By send-ing spoofed packets that look as if they originated on your internal network, attack-ers can manipulate or bypass these security controls.
Your routers use routing protocols to exchange information. This information isused to determine what direction a router will send a packet once it is received. Afunctional network requires correct routing information, so, minimally, an attackercan cause a denial-of-service (DoS) attack by inserting false routing information intoyour routers. A far more damaging attack can involve having all of your network traf-fic relayed through another system, possibly one controlled by the attacker or onethat allows him to bypass your firewall and intrusion detection systems. Protectinghow routers exchange routing information is necessary to prevent such dangers.
AntispoofingAntispoofing filters are usually implemented to protect the networks behind routers,but they are equally important in protecting the routers themselves. These filterskeep people from attempting to spoof connections to your routers. They also pre-vent numerous attacks that, while not directed at the router, must pass through therouter and can overwhelm it with excessive traffic.
This chapter will cover both inbound and outbound filters using traditional ACLsand Cisco’s newer unicast reverse packet forwarding feature. Finally, since filteringcan cause some performance degradation, the checklist ends with brief descriptionsof methods used to reduce the performance impact of antispoofing filters.
,ch09.24296 Page 83 Friday, February 15, 2002 2:54 PM
This is the Title of the Book, eMatter EditionCopyright © 2002 O’Reilly & Associates, Inc. All rights reserved.
84 | Chapter 9: Secure Routing and Antispoofing
Ingress and Egress FilteringIngress and egress refer to filters applied to packets traveling into and out of a net-work, respectively. Ingress refers to packets coming from an external network—likethe Internet—into your network, and egress refers to packets leaving your networkand going to an external network. Your site needs to implement both types of filters.
Since ingress and egress filters relate to packets entering or leaving your network,they should be applied at the edges of your network—anywhere you connect to anetwork controlled by another.
Ingress
Ingress filters make sure that packets entering your network do not claim to be fromyour network. Assume that your network is 130.218.0.0/16. All IPs leaving your net-work should have a source address of 130.218.x.x. Additionally, no packets cominginto your network should have a source address of 130.218.x.x. A packet from anexternal network with a source address of 130.18.x.x stems from either a misconfig-uration or an attacker attempting to send spoofed packets into your network. Eitherway, packets from external networks claiming to have a source address of your inter-nal network—138.18.x.x, in this example—are dangerous and should be dropped.
To drop these packets:
1. Create an ACL that:
a. Denies all packets coming from the Internet claiming to have originatedfrom the internal network
b. Permits all other packets
2. Apply that ACL, in the inbound direction, to the router interface that connectsto the external network.
Using the interface Serial 0 and the internal network 130.18.00/16, the code wouldlook like:
Router#config terminalEnter configuration commands, one per line. End with CNTL/Z.Router(config)#access-list 15 deny 130.18.0.0 0.0.255.255Router(config)#access-list 15 permit anyRouter(config)#interface Serial 0/0Router(config-if)#ip access-group 15 inRouter(config-if)#^Z
If you have more than one network numbering scheme inside your internal network,you would extend the deny statements to include all of your internal networks. Forexample, if your internal network consisted of the following networks:
203.2.4.0/24199.10.4.0/27215.6.45.0/24
,ch09.24296 Page 84 Friday, February 15, 2002 2:54 PM

This is the Title of the Book, eMatter EditionCopyright © 2002 O’Reilly & Associates, Inc. All rights reserved.
Antispoofing | 85
your ingress ACL would look like:
access-list 15 deny 203.2.4.0 0.0.0.255access-list 15 deny 199.10.4.0 0.0.0.31access-list 15 deny 215.6.45.0 0.0.0.255access-list 15 permit any
Finally, to fully protect your router and network, you should apply the ingress filterto all interfaces that attach to an external network.
Reserved and private networks
Antispoofing filters also need to include rules that filter out any packets that claim tocome from reserved and private networks. The standard list includes the loopbackaddress, the broadcast address, multicast networks, and networks defined in RFC1918 as reserved:
• 127.0.0.0/8
• 10.0.0.0/8
• 172.16.0.0/12
• 192.168.0.0/16
• 224.0.0.0/4
• 240.0.0.0/5
• 255.255.255.255/32
Adding these filters to our previous example (in which the internal networks wereassumed to be 203.2.4.0/24, 199.10.4.0/27, and 215.6.45.0/24), you get the follow-ing ACL:
access-list 15 deny 203.2.4.0 0.0.0.255access-list 15 deny 199.10.4.0 0.0.0.31access-list 15 deny 215.6.45.0 0.0.0.255access-list 15 deny 127.0.0.0 0.255.255.255access-list 15 deny 10.0.0.0 0.255.255.255access-list 15 deny 172.16.0.0 0.15.255.255access-list 15 deny 192.168.0.0 0.0.255.255access-list 15 deny 224.0.0.0 15.255.255.255access-list 15 deny 240.0.0.0 7.255.255.255access-list 15 permit any
Some administrators like to go all out with their spoofing filters. Thesite http://www.liquifried.com/docs/security/reservednets.html has alarge list of IANA-reserved addresses that you can configure into yourantispoofing filters.
Egress
Egress filtering prevents your network from sending spoofed packets out to the Inter-net. This type of filtering is desirable because it prevents your network and routers
,ch09.24296 Page 85 Friday, February 15, 2002 2:54 PM

This is the Title of the Book, eMatter EditionCopyright © 2002 O’Reilly & Associates, Inc. All rights reserved.
86 | Chapter 9: Secure Routing and Antispoofing
from being launching points for attacks involving spoofed packets. Not allowingspoofed packets out of your network makes your network and routers less attractiveto attackers since they can no longer use spoofing attacks.
Using the same 130.18.0.0/16 network as before, to perform egress filtering, youmust:
1. Create an ACL that:
a. Allows packets with a 130.18.x.x source address out
b. Denies all other packets
2. Apply the ACL, in the outbound direction, to the interface that connects to anexternal network.
For example:
Router#config terminalEnter configuration commands, one per line. End with CNTL/Z.Router(config)#access-list 16 permit 130.18.0.0 0.0.255.255Router(config)#access-list 16 deny anyRouter(config)#interface Serial 0/0Router(config-if)#ip access-group 16 outRouter(config-if)#^Z
With multiple internal networks, add permit statements for each network before thedeny any statement. An example ACL would look like:
access-list 16 permit 203.2.4.0 0.0.0.255access-list 16 permit 199.10.4.0 0.0.0.31access-list 16 permit 215.6.45.0 0.0.0.255access-list 16 deny any
Chapter 11 is entirely about logging, but remember that you shoulduse the log keyword at the end of each deny statement in your ACLs.For example, access-list 16 deny any becomes access-list 16 deny anylog. The log keyword causes the ACL to log all violations, giving you alist of all instances when either a misconfiguration or an attackerattempted to send invalid packets through your router. See Chapter 11for more details.
Unicast Reverse Packet ForwardingUnicast Reverse Packet Forwarding (uRPF) is a feature designed by Cisco to makeadministering antispoofing on routers easier. This feature takes advantage of CiscoExpress Forwarding (CEF) to make sure packets entering an interface pass a sanitycheck. uRPF checks the source address of each incoming packet and, based on rout-ing information, determines if the packet should have come in on that interface. Ifnot, the packet is discarded.
,ch09.24296 Page 86 Friday, February 15, 2002 2:54 PM

This is the Title of the Book, eMatter EditionCopyright © 2002 O’Reilly & Associates, Inc. All rights reserved.
Antispoofing | 87
The beauty of uRPF is that it adjusts to routing and topology changes automatically.You simply enable it on an interface, and it is automatic. This means no more man-ual configuration and maintenance of ACLs.
uRPF does have a downside. It can have problems with asymmetrical routing.Depending on the configuration, asymmetrical routing presents the possibility of theCEF table not having enough information and discarding packets incorrectly.Because of this possibility, it is recommended that you do not enable uRPF on inter-nal routers, but only on the edge of your network on interfaces connecting to anexternal network. Additionally, uRPF doesn’t allow you the logging capability per-mitted by ACLs. uRPF logs only the number of violations, while ACLs allow you tolog details about the spoofed packet.
To enable uRPF, you must first globally enable CEF with the ip cef command andthen uRPF on each needed interface with the ip verify unicast reverse-path command:
Router#config terminalEnter configuration commands, one per line. End with CNTL/Z.Router(config)#ip cefRouter(config)#interface Serial 0/1Router(config-if)#ip verify unicast reverse-pathRouter(config-if)#^Z
uRPF requires that CEF be enabled. If you disable CEF while uRPF isturned on, things will stop working.
If you cannot use uRPF on your router, then you must use ACLs to eliminate spoof-ing. Since ACLs have a greater impact on performance than does uRPF, the follow-ing techniques may help increase performance:
1. Create smaller ACLs. Large ACLs have a much greater impact on router perfor-mance than do small ones, so make your ACLs as small as possible.
2. Apply ACLs inbound. On Cisco routers, inbound filters are more efficient thanoutbound filters, so modify your ACL so you can apply it inbound.
3. Use the pass established keyword by putting a line similar to access-list 150permit tcp any any established at the top of your ACL; TCP packets with theACK bit will be let through immediately. In return for increased performance,this may open you up to spoofed DoS attacks, but it still prevents antispoofingfor all TCP connection attempts.
4. Cisco’s NetFlow can also be used to increase performance. On many routers,numbered and named ACLs have been modified to work with NetFlow.
5. Some newer combinations of router software and hardware support TurboACLs. ACLs longer than three entries benefit from significant speed enhance-ments when they are compiled as a Turbo ACL.
,ch09.24296 Page 87 Friday, February 15, 2002 2:54 PM

This is the Title of the Book, eMatter EditionCopyright © 2002 O’Reilly & Associates, Inc. All rights reserved.
88 | Chapter 9: Secure Routing and Antispoofing
Routing Protocol SecurityThe antispoofing filters discussed previously help prevent numerous attacks on yournetwork and also keep attackers from using spoofed packets to manipulate your net-work’s routing. Additional measures are required to finish securing your network’srouting.
Static RoutingThe most secure routing configuration is static routing. With static routing, anadministrator manually configures each router with all appropriate routes. Staticrouting gives an administrator much control over how packets are passed through anetwork, and since routers are configured manually, there are no routing protocolsfor an attacker to manipulate. However, static routing has one significant draw-back—it scales horribly. When moving beyond two or three routers, manually con-figuring static routes on each router becomes a nightmare. Furthermore, adding anew router, or even a new network to an existing router, requires you to go back andchange the configuration of every single router manually. So, despite their securityadvantages, static routes lose their practicality when a network has frequent routechanges or grows larger than three routers.
AuthenticationThe largest improvement to securing your routing protocol is to use authentication.Certain routing protocols such as RIP v2, OSPF, EIGRP, and BGP support authenti-cation. When configuring authentication, you configure a routing password on eachrouter in your network, and routing information will only be exchanged betweenrouters that know the password. Since standard routing protocols don’t use authen-tication by default, they are vulnerable to an attacker manipulating them. Withauthentication, any routing information an attacker tries to inject into your routerswill be ignored (unless the attacker has the authentication password, so make sureyou keep it secure.)
Next, you will find examples for configuring authentication for the interior routingprotocols RIP v2, OSPF, EIGRP, and the exterior routing protocol BGP.
RIP v2
One of the problems with RIP Version 1 was its lack of support for authentication.RIP Version 2 was designed to overcome this problem. The RIP v2 protocol stan-dard supports plain-text authentication. Cisco’s implementation of RIP v2 authenti-cation is proprietary and uses the more secure MD5 authentication to keep keysfrom being sent across the network in the clear.
,ch09.24296 Page 88 Friday, February 15, 2002 2:54 PM

This is the Title of the Book, eMatter EditionCopyright © 2002 O’Reilly & Associates, Inc. All rights reserved.
Routing Protocol Security | 89
To use RIP v2 authentication:
1. Enable RIP v2 authentication on each interface using the ip rip authenticationkey-chain command.
2. On each interface using RIP v2, configure it to use MD5 authentication insteadof plain-text with the ip rip authentication mode md5 command.
3. Configure your authentication keys on each router:
a. Define a key chain with the key chain command in global configurationmode.
b. Identify the number of your key in this chain with the key command.
c. Use the key-string command to define the authentication key.
In the following example, RIP v2 authentication is configured on RouterOne usingthe key UnguessableKey. If RouterOne has three interfaces that are using RIP v2—Fast Ethernet 0/0, Serial 0/0, and Serial 0/1—authentication must be enabled oneach interface.
This example uses key chain number 10:
RouterOne#config terminalEnter configuration commands, one per line. End with CNTL/Z.RouterOne(config)#interface FastEthernet 0/0RouterOne(config-if)#ip rip authentication key-chain 10RouterOne(config-if)#ip rip authentication mode md5RouterOne(config-if)#exitRouterOne(config)#interface Serial 0/0RouterOne(config-if)#ip rip authentication key-chain 10RouterOne(config-if)#ip rip authentication mode md5RouterOne(config-if)#exitRouterOne(config)#interface Serial 0/1RouterOne(config-if)#ip rip authentication key-chain 10RouterOne(config-if)#ip rip authentication mode md5RouterOne(config-if)#exitRouterOne(config)#^Z
Next, the key chain 10 is defined. Inside key chain 10, key number 1 is created withthe key-string UnguessableKey:
RouterOne#config terminalEnter configuration commands, one per line. End with CNTL/Z.RouterOne(config)#key chain 10RouterOne(config-keychain)#key 1RouterOne(config-keychain-ke)#key-string UnguessableKeyRouterOne(config-keychain-ke)#^Z
Next, perform the same configuration on all of your routers. The most common mis-configurations when using authentication are:
• Not configuring RIP v2 authentication on every interface
• Not using the same key string on each router
Check these two items first if you are having trouble with RIP v2 authentication.
,ch09.24296 Page 89 Friday, February 15, 2002 2:54 PM

This is the Title of the Book, eMatter EditionCopyright © 2002 O’Reilly & Associates, Inc. All rights reserved.
90 | Chapter 9: Secure Routing and Antispoofing
EIGRP
Configuring Cisco’s routing protocol EIGRP to use authentication follows similarsteps as configuring RIP v2 authentication:
1. Enable EIGRP authentication on each interface with the ip authentication modeeigrp command.
2. Define the key chain to use under each interface with the ip authentication key-chain eigrp command.
3. Create the key chain specified in the previous step:
a. Define a key chain with the key chain command.
b. Identify the number of this authentication key with the key command.
c. Configure the actual authentication key with the key-string command.
Assuming your autonomous system number is 10, you would enable EIGRP authen-tication on the interfaced FastEthernet 0/0, Serial 0/0, and Serial 0/1 with:
RouterOne#config terminalEnter configuration commands, one per line. End with CNTL/Z.RouterOne(config)#interface FastEthernet 0/0RouterOne(config-if)#ip authentication mode eigrp 10 md5RouterOne(config-if)#ip authentication key-chain eigrp 10 Chain1RouterOne(config-if)#exitRouterOne(config)#interface Serial 0/0RouterOne(config-if)#ip authentication mode eigrp 10 md5RouterOne(config-if)#ip authentication key-chain eigrp 10 Chain1RouterOne(config-if)#exitRouterOne(config)#interface Serial 0/1RouterOne(config-if)#ip authentication mode eigrp 10 md5RouterOne(config-if)#ip authentication key-chain eigrp 10 Chain1RouterOne(config-if)#exitRouterOne(config)#^Z
After your interfaces are configured to use EIGRP authentication, you then define thekey chain and the authentication key. The previous commands specify Chain1 as thekey chain to use for authentication, so the key chain command needs to be used tocreate Chain1. In the following example, the authentication key 1 is defined asUnguessableKey:
RouterOne#config terminalEnter configuration commands, one per line. End with CNTL/Z.RouterOne(config)#key chain Chain1RouterOne(config-keychain)#key 1RouterOne(config-keychain-ke)#key-string UnguessageKeyRouterOne(config-keychain-ke)#^Z
Perform this same configuration on all other routers and interfaces that requireEIGRP authentication to complete the setup.
,ch09.24296 Page 90 Friday, February 15, 2002 2:54 PM

This is the Title of the Book, eMatter EditionCopyright © 2002 O’Reilly & Associates, Inc. All rights reserved.
Routing Protocol Security | 91
OSPF
Configuring OSPF authentication is a little simpler than with RIP v2. Like RIP, OSPFcan use both plain-text and MD5 authentication. These examples only cover usingsecure MD5 authentication. If you are using OSPF as your interior routing protocolto configure authentication:
1. Use the ip ospf message-digest-key command on each interface to define a key.This includes defining both the key number and the actual authentication keyitself.
2. Use the area ? authentication message-digest command to configure OSPF to useauthentication.
Using the interfaces as in the RIP v2 example, configure OSPF authentication oninterfaced FastEthernet 0/0, Serial 0/0, and Serial 0/1:
RouterOne#config terminalEnter configuration commands, one per line. End with CNTL/Z.RouterOne(config)#interface FastEthernet 0/0RouterOne(config-if)#ip ospf message-digest-key 1 md5 UnguessableKeyRouterOne(config-if)#exitRouterOne(config)#interface Serial 0/0RouterOne(config-if)#ip ospf message-digest-key 1 md5 UnguessableKeyRouterOne(config-if)#exitRouterOne(config)#interface Serial 0/1RouterOne(config-if)#ip ospf message-digest-key 1 md5 UnguessableKeyRouterOne(config-if)#exitRouterOne(config)#^Z
Next, configure authentication under the OSPF areas where you want to use authen-tication. This example assumes that your OSPF autonomous number is 10 and thatyou are setting up area 0 to use authentication:
RouterOne#config terminalEnter configuration commands, one per line. End with CNTL/Z.RouterOne(config)#router ospf 10RouterOne(config-router)#area 0 authentication message-digestRouterOne(config-router)#^Z
Repeat these steps on your other routers and their interfaces using OSPF authentica-tion to complete the setup.
It is important to note that if authentication is enabled on one OSPFlink, then it must be enabled on all other links within that area, orOSPF adjacency can be lost.
BGP
BGP authentication is one of the simplest to configure. BGP doesn’t support plain-text authentication, only MD5, so there is no need to explicitly specify MD5 authen-tication. Enable BGP authentication by adding the password keyword to the
,ch09.24296 Page 91 Friday, February 15, 2002 2:54 PM

This is the Title of the Book, eMatter EditionCopyright © 2002 O’Reilly & Associates, Inc. All rights reserved.
92 | Chapter 9: Secure Routing and Antispoofing
neighbor command. For example, your router’s BGP autonomous number is 109,and 130.18.6.7 is configured as a BGP neighbor; you can enable authenticationbetween RouterOne and 130.18.6.7 with:
RouterOne#config terminalEnter configuration commands, one per line. End with CNTL/Z.RouterOne(config)#router bgp 109RouterOne(config-router)#neighbor 130.18.6.7 password MyBGPpasswordRouterOne(config-router)#^Z
Next, use the same commands to configure 130.18.6.7 to authenticate with Router-One. The only difference is that you use RouterOne’s IP address instead of 130.18.6.7.Assuming RouterOne has the IP 19.6.7.8, this would look like:
RouterTwo#config terminalEnter configuration commands, one per line. End with CNTL/Z.RouterTwo(config)#router bgp 109RouterTwo(config-router)#neighbor 19.6.7.8 password MyBGPpasswordRouterTwo(config-router)#^Z
Repeat this configuration with each neighbor you want to use BGP authentication.
Passive InterfacesSometimes you want to control the routing information that is sent out or acceptedinto an interface. This can be done with passive interfaces and route filtering. Usingpassive interfaces is the easiest way to keep an interface from participating inexchanging routing protocols, but passive interfaces are an all-or-nothing approach.Route filtering can be used when you need an interface to send and receive only spe-cific routing information.
Passive interfaces
When an interface is configured as a passive interface, it stops sending out routingupdates. Passive interfaces with most routing protocols—OSPF and EIGRP being thenotable exceptions—will still receive routing updates. Passive interfaces are oftenused on network segments that require the security of static routes or when routingupdates should not be sent out for both bandwidth and security reasons.
To configure an interface as a passive interface, from global configuration mode,enter your routing protocol mode with commands such as router rip or router ospf109. Next, use the passive-interface command followed by the interface you want tostop sending out updates. For example, using RIP, if you wanted to make interfaceFastEthernet 0/2 a passive interface:
RouterOne#config terminalEnter configuration commands, one per line. End with CNTL/Z.RouterOne(config)#router ripRouterOne(config-router)#passive-interface FastEthernet 0/2RouterOne(config-router)#^Z
,ch09.24296 Page 92 Friday, February 15, 2002 2:54 PM

This is the Title of the Book, eMatter EditionCopyright © 2002 O’Reilly & Associates, Inc. All rights reserved.
Routing Protocol Security | 93
The passive-interface command would be repeated for every interface you wanted toconfigure as passive.
OSPF and EIGRP passive interfaces
Unlike passive interfaces in most other protocols, passive interfaces in EIGRP andOSPF not only stop sending routing updates, but also stop receiving them. To havean interface under these protocols stop sending, but still receive routing updates, youmust enable EIGRP or OSPF on the interface and then use an outbound routing fil-ter to prevent the sending out of routing updates.
Route FilteringRoute filtering gives you more control over what routing information is sent orreceived on an interface. Use the distribute-list <ACL> out command to control out-bound routing information and distribute-list <ACL> in to control inbound informa-tion. These filters are configured under the router’s routing protocol configurationmode and can be configured to apply globally to the entire router or to an individualinterface.
Global filtering
To configure route filtering globally:
1. Create an ACL that defines what network information is allowed in/out.
2. Configure a distribute-list in the appropriate direction under the router’s routingprotocol configuration.
For example, if RouterOne uses EIGRP (AS number 110) and you do not want it tosend out routing information about network 130.18.0.0/16, configure an outboundfilter with the distribute-list <ACL> out command:
RouterOne#config terminalEnter configuration commands, one per line. End with CNTL/Z.RouterOne(config)#access-list 14 deny 130.18.0.0 0.0.255.255RouterOne(config)#access-list 14 permit anyRouterOne(config)#router eigrp 110RouterOne(config-router)#distribute-list 14 outRouterOne(config-router)#^Z
Using the same example, but configuring RouterOne to ignore any routing informa-tion it receives about network 130.18.0.0/16, use the distribute-list <ACL> incommand:
RouterOne#config terminalEnter configuration commands, one per line. End with CNTL/Z.RouterOne(config)#access-list 14 deny 130.18.0.0 0.0.255.255RouterOne(config)#access-list 14 permit anyRouterOne(config)#router eigrp 110RouterOne(config-router)#distribute-list 14 inRouterOne(config-router)#^Z
,ch09.24296 Page 93 Friday, February 15, 2002 2:54 PM

This is the Title of the Book, eMatter EditionCopyright © 2002 O’Reilly & Associates, Inc. All rights reserved.
94 | Chapter 9: Secure Routing and Antispoofing
Per-interface filtering
To apply filtering to a specific interface, add the name of the interface after thedistribute-list command. For example, to keep only interface Serial 0/0 from sendingout routing information about network 130.18.0.0/16, refer to this example:
RouterOne#config terminalEnter configuration commands, one per line. End with CNTL/Z.RouterOne(config)#access-list 14 deny 130.18.0.0 0.0.255.255RouterOne(config)#access-list 14 permit anyRouterOne(config)#router eigrp 110RouterOne(config-router)#distribute-list 14 out Serial 0/0RouterOne(config-router)#^Z
Notice that the only line that has changed from our previous example was the linedistribute-list 14 out Serial 0/0, in which Serial 0/0 was appended to indicate that thisfilter applies only to routing updates sent out of Serial 0/0.
In addition to distribute lists, BGP allows you to filter routes by neighbor and useprefix lists that have advantages over ACLs. See Cisco’s documentation on BGP formore details on how to use these methods of route filtering.
Filtering at network borders
Route filtering is generally used between external and internal networks. Route filter-ing at the borders of your network helps minimize the chance that incorrect routinginformation will be injected into your network without requiring the administrativehassle of creating and maintaining filters on every interface on your network. Forexample, if network 14.6.0.0/16 is controlled by one of your customers, and youreceive routing information for this network from routers controlled by that cus-tomer, good security dictates that you configure your border routers to accept onlyrouting updates about the 14.6.0.0/16 network from the customer. This preventsmisconfigurations or attackers on the customer’s network from sending false routinginformation to your routers.
Routing Protocol and Antispoofing ChecklistThis checklist summarizes the important security information presented in this chap-ter. A complete security checklist is provided in Appendix A.
• Take antispoofing measures at each router bordering an external network:
— Enable ip verify unicast reverse-path on all interfaces that connect with exter-nal networks and are not involved in asymmetrical routing.
— If uRPF cannot be used (or additional logging is required), apply antispoofingingress and egress ACLs to all interfaces that connect to an external network.
— If your network is very small and you need additional security, considerusing static routes.
,ch09.24296 Page 94 Friday, February 15, 2002 2:54 PM

This is the Title of the Book, eMatter EditionCopyright © 2002 O’Reilly & Associates, Inc. All rights reserved.
Routing Protocol and Antispoofing Checklist | 95
• When using a routing protocol, choose one that supports authentication andenable authentication on all routers on the network:
— Choose the authentication password well and make sure controls are inplace to keep the authentication passwords secret.
— Use secure hash protocols such as MD5, not plain-text protocols, forauthentication.
• Use route filters at the border between your network and the networks con-trolled by others to prevent false routing information from being injected intoyour network.
,ch09.24296 Page 95 Friday, February 15, 2002 2:54 PM

This is the Title of the Book, eMatter EditionCopyright © 2002 O’Reilly & Associates, Inc. All rights reserved.
96
Chapter 10CHAPTER 10
NTP
Time is inherently important to the function of routers and networks. It provides theonly frame of reference between all devices on the network. This makes synchro-nized time extremely important. Without synchronized time, accurately correlatinginformation between devices becomes difficult, if not impossible. When it comes tosecurity, if you cannot successfully compare logs between each of your routers andall your network servers, you will find it very hard to develop a reliable picture of anincident. Finally, even if you are able to put the pieces together, unsynchronizedtimes, especially between log files, may give an attacker with a good attorney enoughwiggle room to escape prosecution.
NTP OverviewThe Network Time Protocol (NTP) was first described in RFC 958 and has developedinto the standard Internet time synchronization protocol. It is extremely efficient andneeds no more than about one packet a minute to synchronize systems on a LAN towithin 1 millisecond, and systems across WANs to within about 10 milliseconds.
Without proper time synchronization between your routers, you may not only havetrouble with correlating log files, but inaccurate time may also affect your ability toperform accounting, fault analysis, network management, and even time-based AAAauthentication and authorization. So good time management is a necessary part ofkeeping your network healthy and secure.
While NTP Version 4 is the latest and preferred version of NTP, Ciscorouters currently only support through Version 3.
NTP can operate in four different modes—client, server, peer, and broadcast. Thesemodes provide NTP with a great amount of flexibility in how you configure synchro-nization on your network.
,ch10.24424 Page 96 Friday, February 15, 2002 2:54 PM
This is the Title of the Book, eMatter EditionCopyright © 2002 O’Reilly & Associates, Inc. All rights reserved.
Configuring NTP | 97
NTP modes differ based on how NTP allows communication between systems. NTPcommunication consists of time requests and control queries. Time requests providethe standard client/server relationship in which a client requests time synchroniza-tion from an NTP server. Control queries provide ways for remote systems to getconfiguration information and reconfigure NTP servers. Here is a short explanationof the NTP modes:
ClientAn NTP client is configured to let its clock be set and synchronized by an exter-nal NTP timeserver. NTP clients can be configured to use multiple servers to settheir local time and are able to give preference to the most accurate time sources.They will not, however, provide synchronization services to any other devices.
ServerAn NTP server is configured to synchronize NTP clients. Servers can be config-ured to synchronize any client or only specific clients. NTP servers, however,will accept no synchronization information from their clients and therefore willnot let clients update or affect the server’s time settings.
PeerWith NTP peers, one NTP-enabled device does not have authority over theother. With the peering model, each device shares its time information with theother, and each device can also provide time synchronization to the other.
Broadcast/multicastBroadcast/multicast mode is a special server mode with which the NTP serverbroadcasts its synchronization information to all clients. Broadcast moderequires that clients be on the same subnet as the server, and multicast moderequires that clients and servers have multicast access available and configured.
Configuring NTPThe three most common configurations for NTP are the use of a central server, ahierarchical model, or a flat configuration. Each of these configurations has advan-tages and disadvantages, discussed next.
Central ServerThe central server configuration is probably the easiest for small- to medium-sizednetworks. With this configuration, you set up one or two centralized NTP serversthat use the Internet (or other authoritative source) to synchronize their time. All cli-ents on the network are then configured to synchronize their time to those servers.This type of configuration is easy to administer and simplifies authorization andaccess control. However, because it relies on a few central servers, it doesn’t scale aswell as the hierarchical model on larger networks.
,ch10.24424 Page 97 Friday, February 15, 2002 2:54 PM
This is the Title of the Book, eMatter EditionCopyright © 2002 O’Reilly & Associates, Inc. All rights reserved.
98 | Chapter 10: NTP
There are several publicly accessible NTP timeservers on the Internet.Do a search on the Internet for public NTP servers or see http://www.eecis.udel.edu/~mills/ntp/servers.htm.
Existing timeserver
If you already have an existing NTP server set up on your network, it is relativelyeasy to configure your routers to use that server for time synchronization. The com-mand ntp server, followed by the IP address or hostname of the NTP server, is usedto configure your router to use an existing NTP server:
Router#config terminalEnter configuration commands, one per line. End with CNTL/Z.Router(config)#ntp server 129.237.32.2Router(config)#^Z
To specify additional timeservers for redundancy, simply repeat the ntp server com-mand with the IP address of each additional server.
If your router has an internal clock chip, once you have NTP config-ured, you can use it to synchronize the time of the internal clock withthe ntp update-calendar command.
NTP Accuracy and ReliabilityFor maximum time reliability, you can set up what is called a stratum one server, anNTP server directly connected to radio receivers or atomic clocks that are extremelyaccurate. An NTP stratum two server is one that gets its time information from a stra-tum one server, and so on. You can synchronize your systems on the Internet to severalstratum two and three servers. Some of these servers are free, and others offer slightlygreater accuracy and reliability at a cost.
NTP experts recommend that for the greatest reliability and accuracy, you need a min-imum of three internal NTP servers with each server synchronized with three differentexternal NTP servers. These internal servers are then set up to peer one another in caseone of the servers loses contact with its external NTP servers. Internal NTP clients arethen configured to synchronize with all three of the internal NTP servers. The recom-mendations extend further to putting each NTP server in different buildings and pro-viding different paths to the Internet for each server.
For many smaller networks, the cost of such reliability is difficult to justify, and in theabsence of other mitigating factors, many smaller networks run NTP successfully withone or two NTP servers synchronized through a single Internet connection.
,ch10.24424 Page 98 Friday, February 15, 2002 2:54 PM

This is the Title of the Book, eMatter EditionCopyright © 2002 O’Reilly & Associates, Inc. All rights reserved.
Configuring NTP | 99
Synchronized router as a timeserver
Once a router is synchronized with another time source, either as a client or a peer,that router will automatically provide time synchronization for other systems. Thisallows you to use one or more routers as the primary time synchronization sourcesfor your LAN. To do this:
1. Pick one, two, or three routers and have them synchronize to separate externaltime sources.
2. Configure your internal servers and systems to use these routers for their timesynchronization.
Some low-end routers, such as the 1600 and 1700 series, don’t sup-port the full NTP protocol. They support only a stripped-down ver-sion called SNTP. SNTP is a client-only version of NTP and can beconfigured with the sntp server command.
Unsynchronized router as a timeserver
If you do not have an existing timeserver, you should synchronize your routers topublic NTP servers on the Internet and use them as timeservers for your internal net-work. In situations in which this is not possible, such as isolated networks, you canconfigure an unsynchronized router to act as an authoritative NTP source using thentp master command. Cisco and NTP experts discourage the use of this command ifany other NTP time sources are available because it violates NTP’s hierarchical trustmodel. When using this command, you should choose a high stratum number, suchas 10, so time associations through the fake master clock are ignored if more trust-worthy NTP information is made available.
To enable an unsynchronized Cisco router to act as an authoritative NTP clock atstratum 10, type:
Router#config terminalEnter configuration commands, one per line. End with CNTL/Z.Router(config)#ntp master 10Router(config)#^Z
Again, once a router’s clock is synchronized to an NTP source or configured to serveas a master, it will, in turn, act as an NTP server to any system that requests synchro-nization. It is important to use authentication and access lists to avoid providing timesynchronization service to the entire Internet.
FlatThe flat structure configures all routers to peer with one another; each router acts asboth a client and a server with every other router. Then two or three routers that aregeographically separated are configured to point to external timeservers.
,ch10.24424 Page 99 Friday, February 15, 2002 2:54 PM

This is the Title of the Book, eMatter EditionCopyright © 2002 O’Reilly & Associates, Inc. All rights reserved.
100 | Chapter 10: NTP
The primary advantage of this model is that it is very stable; each router has the abil-ity to provide synchronizing information to every other router. The disadvantages arelack of scalability, difficulty of administration, and a slow time to convergence.When you configure a full mesh in which every router peers with every other router,all routers have a say in the final time synchronization. Therefore, it takes longer toget all the routers to agree on the exact time. On larger networks, the most seriousdisadvantages are the lack of scalability and difficulty of administration. Wheneveryou add a router to the mesh, you must reconfigure every router on that mesh topeer with the new router.
If you have a smaller network and choose to use the flat model, use the ntp peer com-mand to configure each router to peer with all other routers. If your network con-sists of five routers—RouterOne through RouterFive—to configure an NTP mesh, thecommands on RouterOne would be:
Router#config terminalEnter configuration commands, one per line. End with CNTL/Z.Router(config)#ntp peer RouterTwoRouter(config)#ntp peer RouterThreeRouter(config)#ntp peer RouterFourRouter(config)#ntp peer RouterFiveRouter(config)#^Z
To complete the flat NTP mesh, each router must be configured with similar com-mands, peering it with all other routers on the network. Finally, to synchronize themesh with external NTP servers, you would pick two or three geographically sepa-rated routers and use the ntp server command to synchronize them to the externaltimeservers.
HierarchicalFor larger networks, the hierarchical model is probably the most scalable and easiestto administer. This model is typically used by ISPs that have multiple stratum oneservers that synchronize all internal ISP systems and routers. These routers, in turn,provide time synchronization for customer routers. The customer routers then pro-vide time synchronization to the customer’s internal systems. With this tree-likemodel, both administration and time to convergence is minimized.
If the top of your NTP network consisted of RouterOne, RouterTwo, andRouterThree, you would synchronize these routers to external servers. For example,using external timeservers 129.237.32.2, 128.249.2.2, and 128.118.25.3 would eachbe configured with:
Router#config terminalEnter configuration commands, one per line. End with CNTL/Z.Router(config)#ntp server 129.237.32.2Router(config)#ntp server 128.249.2.2Router(config)#ntp server 128.118.25.3Router(config)#^Z
,ch10.24424 Page 100 Friday, February 15, 2002 2:54 PM
This is the Title of the Book, eMatter EditionCopyright © 2002 O’Reilly & Associates, Inc. All rights reserved.
Configuring NTP | 101
Next, each of these three routers would be configured to peer with the others. Thiswould provide consistent and accurate time, even if a router lost connectivity to theInternet. RouterOne would be configured to peer with RouterTwo and RouterThreewith the following commands:
Router#config terminalEnter configuration commands, one per line. End with CNTL/Z.Router(config)#ntp peer RouterTwoRouter(config)#ntp peer RouterThreeRouter(config)#^Z
Next, each customer’s gateway router would be configured to use the internal ISProuters for NTP synchronization:
Router#config terminalEnter configuration commands, one per line. End with CNTL/Z.Router(config)#ntp server RouterOneRouter(config)#ntp server RouterTwoRouter(config)#ntp server RouterThreeRouter(config)#^Z
Finally, the customer’s internal systems and routers would be configured to use thecustomer’s gateway router for time synchronization.
NTP OptionsNTP on Cisco routers support additional options that may be useful for synchroniza-tion, keeping the router from being overwhelmed by NTP requests, and disablingNTP on only specific interfaces.
Preferred server
A router can be configured to prefer an NTP source over another. A preferredserver’s responses are discarded only if they vary dramatically from the other timesources. Otherwise, the preferred server is used for synchronization without consid-eration of the other time sources. Preferred servers are usually specified when theyare known to be extremely accurate. To specify a preferred server, use the prefer key-word appended to the ntp server command. The following example tells the router toprefer TimeServerOne over TimeServerTwo:
Router#config terminalEnter configuration commands, one per line. End with CNTL/Z.Router(config)#ntp server TimeServerOne preferRouter(config)#ntp server TimeServerTwoRouter(config)#^Z
ntp max-associations
NTP also allows you to define the maximum number of peer and client associationsthat your router will serve. This helps ensure that your router isn’t overwhelmed by
,ch10.24424 Page 101 Friday, February 15, 2002 2:54 PM

This is the Title of the Book, eMatter EditionCopyright © 2002 O’Reilly & Associates, Inc. All rights reserved.
102 | Chapter 10: NTP
huge numbers of NTP synchronization requests. The ntp max-associations com-mand is used to set this limit. For example:
RouterOne#config terminalEnter configuration commands, one per line. End with CNTL/Z.RouterOne(config)#ntp max-associations 20RouterOne(config)#^Z
ntp disable
The ntp disable command can be used on a per-interface basis. When applied to aninterface, the command keeps the interface from acting as an NTP server, but stillallows it to serve as an NTP client. This is the recommended configuration for exter-nal interfaces. If Serial 0/0 is the external interface, you can keep it from acting as anNTP server with:
RouterOne#config terminalEnter configuration commands, one per line. End with CNTL/Z.RouterOne(config)#interface serial 0/0RouterOne(config-if)#ntp disableRouterOne(config-if)#^Z
Time ZonesNTP uses Coordinated Universal Time for all time synchronizations so it is notaffected by different time zones. To have your router report the time in your localtime zone, you need to use the clock timezone and clock summer-time commands.The clock timezone command needs to be followed by the time zone abbreviationand the time zone offset. For example, to set your routers’ local time zone to easternstandard time, enter:
Router#config terminalEnter configuration commands, one per line. End with CNTL/Z.Router(config)#clock timezone EST -05Router(config)#^Z
To enable daylight saving time, the clock summer-time command requires the day-light savings time abbreviation of your time zone followed by the keyword recurring.Configuring eastern daylight time would require:
Router#config terminalEnter configuration commands, one per line. End with CNTL/Z.Router(config)#clock summer-time EDT recurringRouter(config)#^Z
Cisco routers are configured to U.S. time zone standards. If you are ina location with different time standards, you can still use the clocktimezone and the clock summer-time commands to customize the timezone and daylight saving time settings. Refer to Cisco documentationfor more details.
,ch10.24424 Page 102 Friday, February 15, 2002 2:54 PM

This is the Title of the Book, eMatter EditionCopyright © 2002 O’Reilly & Associates, Inc. All rights reserved.
Configuring NTP | 103
Viewing StatusTo verify that your router is synchronizing correctly, use the show ntp command.First, the show ntp status command tells you that you are synchronized, the stratumlevel of your router, and the IP of the server to which you are synchronized. Forexample, a show ntp status on a system synchronized to 128.249.2.2 shows:
Router#show ntp statusClock is synchronized, stratum 3, reference is 128.249.2.2nominal freq is 250.0000 Hz, actual freq is 249.9961 Hz, precision is 2**16reference time is BF454660.7CCA9683 (22:37:36.487 EDT Sat Sep 8 2001)clock offset is 4.3323 msec, root delay is 136.28 msecroot dispersion is 37.69 msec, peer dispersion is 1.14 msec
The first line shows the system to which the router is synchronized and that it is act-ing as a stratum 3 NTP server.
Next, the show ntp associations command lists all the NTP servers to which therouter is configured to synchronize. An example show ntp associations would display:
Router#show ntp associations
address ref clock st when poll reach delay offset disp *~128.249.2.2 192.5.41.40 2 4 64 377 76.9 5.49 0.4 -~130.218.100.5 198.72.72.10 3 33 128 377 7.1 13.13 0.6 +~129.237.32.2 192.43.244.18 2 16 64 377 44.8 3.05 0.9 +~128.118.25.3 128.118.25.12 2 48 64 377 39.7 5.50 1.4 * master (synced), # master (unsynced), + selected, - candidate, ~ configured
The asterisk (*) next to the 128.249.2.2 address indicates that the router is synchro-nized to this server. It is very important that at least one address have an asterisk byit. NTP dictates that a server cannot synchronize another system unless the serveritself is synchronized.
After configuring a router to act as an NTP server, it may take five toten minutes before that router becomes synchronized with other timesources. Until the router is synchronized, it does not provide time syn-chronization for other systems. This is important to remember so youcan avoid troubleshooting problems that don’t exist. After you config-ure a router as an NTP server, you may need to wait a few minutesbefore it successfully provides synchronization for other systems.
Access ListsOnce a router is synchronized to an NTP time source, it automatically acts as anNTP for any client that requests synchronization or informational control queries.Many network administrators leave their routers open to NTP requests from theInternet. The problem with this is that Murphy (of Murphy’s law) guarantees thatthe day you say “There is no harm in letting people get time information off the rout-ers, so I won’t bother restricting access” is the same day a new security vulnerability
,ch10.24424 Page 103 Friday, February 15, 2002 2:54 PM

This is the Title of the Book, eMatter EditionCopyright © 2002 O’Reilly & Associates, Inc. All rights reserved.
104 | Chapter 10: NTP
in NTP will be discovered. Also, if your routers get listed as public timeservers on theWeb, you can get overwhelmed with public time synchronization requests. Finally,with a sophisticated attack, an attacker could use NTP informational queries to dis-cover the timeservers to which your router is synchronized, and then through anattack such as DNS cache poisoning, redirect your router to a system under his con-trol. Manipulating the time on your routers this way could make it difficult to iden-tify when incidents truly happened and could also be used to confuse any time-basedsecurity measures you have in place.
NTP allows you to configure ACLs to restrict access to the NTP services on therouter. These ACLs can be configured to restrict access based on IP and the follow-ing four restrictions:
peerAllows time synchronization requests and control queries and allows the routerto synchronize itself to remote systems that pass the ACL
serveAllows time synchronization requests and control queries, but does not allowthe router to synchronize itself to remote systems that pass the ACL
serve-onlyAllows only time synchronization requests from systems that pass the ACL
query-onlyAllows only NTP control queries from systems that pass the ACL
The two ACLs generally used to restrict access for security reasons are the peer andserve-only options—for example, if you are using the hierarchical model with thecore routers RouterOne and RouterTwo providing NTP services for the rest of therouters in your network.
First, configure RouterOne:
1. To use three external NTP servers with the ntp server command.
2. To peer with RouterTwo with the ntp peer command.
3. To peer only with RouterTwo. Assuming RouterTwo’s IP is 135.26.2.1, you:
a. Configure an ACL to restrict access only to RouterTwo.
b. Configure NTP to use the ACL with the ntp access-group peer command.
4. To provide time services only to internal systems. For this example, assume yourinternal network is 135.26.x.x.
a. Configure an ACL to restrict access to internal systems:
b. Configure NTP to use the ACL with the ntp access-group serve-onlycommand:
RouterOne#config terminalEnter configuration commands, one per line. End with CNTL/Z.RouterOne(config)#ntp server 128.250.36.2RouterOne(config)#ntp server 140.79.17.101
,ch10.24424 Page 104 Friday, February 15, 2002 2:54 PM

This is the Title of the Book, eMatter EditionCopyright © 2002 O’Reilly & Associates, Inc. All rights reserved.
Configuring NTP | 105
RouterOne(config)#ntp server 138.194.21.154RouterOne(config)#ntp peer RouterTwoRouterOne(config)#access-list 20 permit 135.26.2.1 0.0.0.0RouterOne(config)#access-list 20 deny anyRouterOne(config)#ntp access-group peer 20RouterOne(config)#access-list 21 permit 135.26.0.0 0.0.255.255RouterOne(config)#access-list 21 deny anyRouterOne(config)#ntp access-group serve-only 21RouterOne(config)#^Z
RouterTwo would be configured the same way with references to RouterTworeplaced by RouterOne. For optimal redundancy, you should have RouterTwo con-figured to use different public NTP servers than RouterOne.
NTP Source AddressOn a router with multiple interfaces, the source address of the NTP packet is thesame as the interface the packet it sent out on. This arrangement can complicatethings when you are trying to create simple ACLs and use authentication. To makeadministration easier, use the ntp source command.
For example, if your Fast Ethernet 0/0 interface has the IP address 135.26.100.1 andyou want all NTP packets from this router to use this as their source address, type:
RouterOne#config terminalEnter configuration commands, one per line. End with CNTL/Z.RouterOne(config)#ntp source FastEthernet0/0RouterOne(config)#^Z
Now you can configure all of your ACLs to allow or deny access based on the 135.26.100.1 IP address.
Many administrators choose to use the loopback interface as thesource. The loopback never fails and therefore isn’t affected if anotherinterface goes down.
AuthenticationFor additional security, you can configure your NTP servers and clients to useauthentication. Cisco routers support only MD5 authentication for NTP. To enable arouter to do NTP authentication:
1. Enable NTP authentication with the ntp authenticate command.
2. Define an NTP authentication key with the ntp authentication-key command. Aunique number identifies each NTP key. This number is the first argument to thentp authentication-key command.
3. Use the ntp trusted-key command to tell the router which keys are valid forauthentication. The ntp trusted-key command’s only argument is the number ofthe key defined in the previous step.
,ch10.24424 Page 105 Friday, February 15, 2002 2:54 PM

This is the Title of the Book, eMatter EditionCopyright © 2002 O’Reilly & Associates, Inc. All rights reserved.
106 | Chapter 10: NTP
To enable authentication on RouterOne and define key number 10 as MySecretKey,type:
RouterOne#config terminalEnter configuration commands, one per line. End with CNTL/Z.RouterOne(config)#ntp authenticateRouterOne(config)#ntp authentication-key 10 md5 MySecretKeyRouterOne(config)#ntp trusted-key 10RouterOne(config)#^Z
Configuring NTP authentication does not require all clients to useNTP authentication; it enables clients to use authentication. Yourrouter will still respond to unauthenticated requests, so be sure to useACLs to limit NTP access.
If your external NTP servers require authentication, you need to configure yourrouter to use authentication when contacting those servers. To do this, perform thesame steps listed previously to add an NTP authentication key; then use the ntpserver command with the key argument to tell the router what key to use whenauthenticating with the NTP server:
RouterOne#config terminalEnter configuration commands, one per line. End with CNTL/Z.RouterOne(config)#ntp authenticateRouterOne(config)#ntp authentication-key 11 md5 MyOtherKeyRouterOne(config)#ntp trusted-key 11RouterOne(config)#ntp server 130.218.59.4 key 11RouterOne(config)#^Z
Finally, to authenticate NTP peers, configure the same key on both systems and usethe ntp peer command with the key argument to configure authentication:
RouterOne#config terminalEnter configuration commands, one per line. End with CNTL/Z.RouterOne(config)#ntp authenticateRouterOne(config)#ntp authentication-key 12 md5 MyPeeringKeyRouterOne(config)#ntp trusted-key 12RouterOne(config)#ntp peer 135.26.100.2 key 12RouterOne(config)#^Z
NTP ChecklistThis checklist summarizes the important security information presented in this chap-ter. A complete security checklist is provided in Appendix A.
• Make sure all routers use NTP to synchronize their time.
• On larger networks requiring more accurate time, use redundant timeservers andsynchronize routers to multiple servers to prevent a single point of failure.
,ch10.24424 Page 106 Friday, February 15, 2002 2:54 PM

This is the Title of the Book, eMatter EditionCopyright © 2002 O’Reilly & Associates, Inc. All rights reserved.
NTP Checklist | 107
• Use the ntp master command only when external time synchronization is notpossible—i.e., in networks not connected to the Internet.
• Make sure all routers have ACLs preventing them from becoming public timesynchronization servers. These ACLs should restrict what servers the router syn-chronizes to and systems the router will synchronize.
• Use NTP authentication between clients, servers, and peers to ensure that time issynchronized to approved servers only.
,ch10.24424 Page 107 Friday, February 15, 2002 2:54 PM

This is the Title of the Book, eMatter EditionCopyright © 2002 O’Reilly & Associates, Inc. All rights reserved.
108
Chapter 11CHAPTER 11
Logging
Good logging is important for real-time incident detection and after-the-fact auditing.By religiously watching your log file, you will often get warnings that an outage isabout to occur or that an attacker is analyzing your network for vulnerabilities. Thisallows you to take action to correct or prevent the problem. Log files also provide anaudit trail for determining what went wrong or what an attacker accomplished.
Logging in GeneralLogging is a balance between collecting as much useful information as possible andnot collecting so much information that it overwhelms you. An administrator over-whelmed by log files will ignore them until after an incident occurs. This negates thefirst benefit of log files—early warning. Many network administrators keep thedefault logging setting on routers and never take advantage of all of the additionalinformation that can be logged. The rest of this chapter covers the logging capabili-ties of Cisco routers and discusses how to avoid being overwhelmed by your log files.
To achieve maximum benefit from log files, you must monitor them regularly. Onsystems of medium importance, log review can be done daily with the resultsemailed to the administrator. On highly secure systems, log analysis is often done inreal time with the results sent to a pager.
Numerous commercial and public domain software packages can help you analyzeyour log files. Use them. These packages automate the process of analyzing log filesby filtering out uninteresting messages and highlighting the dangerous ones. Suchprograms are the only way an administrator can keep up with log files to use themfor incident detection.
One of the most useful ways to set up your log-watching programs is to have them:
1. Highlight everything you know is dangerous.
2. Ignore everything you know is safe.
3. Print out everything else.
,ch11.24575 Page 108 Friday, February 15, 2002 2:55 PM

This is the Title of the Book, eMatter EditionCopyright © 2002 O’Reilly & Associates, Inc. All rights reserved.
Router Logging | 109
Before you run the log checker the first time, go through your current logs and con-figure the software to highlight or ignore each different entry. Each day, run the log-check software, taking note of any highlighted (dangerous) messages. Next, for eachmessage the software didn’t highlight or ignore, configure the software to do one orthe other. After about two weeks of doing this daily, you will have a custom configu-ration that will automatically inform you of dangerous log messages while strippingout all extraneous ones. If all your routers log to a central syslog server, monitoringyour logs becomes even easier, since everything can be monitored from one locationand you need only a single log-checking configuration.
Router LoggingCisco routers can log information in six ways:
Console loggingConsole log messages are configured to be displayed on the console port only.You must be connected to the console port to see these messages.
Buffered loggingBuffered logging keeps the log messages in RAM on the router. A logging buffermust be configured on the router, and this buffer is circular, meaning that whenit fills up, the oldest log message is deleted to make room for the new message.
Terminal loggingUsing the terminal monitor command, routers can be configured to send logmessages to the VTY terminals.
syslogCisco routers can be configured to send their log messages to one or more exter-nal syslog servers.
SNMP trapsIf enabled, SNMP can be configured to send traps to an external SNMP server tolog specific conditions.
AAA accountingIf you are using AAA, you can configure the router to log network connectionsand even command execution to the Network Access Server (NAS).
Log messages are given a priority from 0 to 7. The lower the number, the more criti-cal the message. These levels are defined as shown in Table 11-1.
Table 11-1. Log severity levels
Level Title Description
0 Emergencies System is unusable.
1 Alerts Immediate action is needed.
2 Critical A critical condition has occurred.
,ch11.24575 Page 109 Friday, February 15, 2002 2:55 PM

This is the Title of the Book, eMatter EditionCopyright © 2002 O’Reilly & Associates, Inc. All rights reserved.
110 | Chapter 11: Logging
These levels are a hierarchy in which messages of your chosen level and above arelogged and printed. Choosing level 7 (debugging) will print out all messages from level7 to 0, while choosing level 2 (critical) will only print out messages of levels 2 to 0.
TimestampsThe importance of accurate time was addressed in Chapter 10. It is also importantto make sure that all log messages include detailed time information. Without thisinformation, it becomes impossible to precisely correlate various log files to deter-mine when an incident happened. To configure Cisco routers to include detailedtime information in all log messages, use the service timestamps log datetime com-mand. Use the following options to make sure as much information as possible iscaptured:
msecThis option includes milliseconds in each log timestamp. Without this option,log messages are timestamped only to the nearest second.
localtimeThis option configures the routers to use the local time to timestamp each logmessage. Doing so is generally advisable to make the logs easier for a human tointerpret, but may be left out when routers across different time zones are log-ging to a central syslog server.
show-timezoneThis option configures the router to indicate the time zone when timestampingeach message. This step makes comparing log messages from various sourcesmuch easier.
To enable this detailed timestamping:
RouterOne#config terminalEnter configuration commands, one per line. End with CNTL/Z.RouterOne(config)#service timestamps log datetime msec localtime show-timezoneRouterOne(config)#^Z
3 Errors An error condition has occurred.
4 Warning A warning message.
5 Notifications Normal but significant events.
6 Informational Information messages.
7 Debugging Debugging messages.
Table 11-1. Log severity levels (continued)
Level Title Description
,ch11.24575 Page 110 Friday, February 15, 2002 2:55 PM

This is the Title of the Book, eMatter EditionCopyright © 2002 O’Reilly & Associates, Inc. All rights reserved.
Router Logging | 111
Console LoggingTo see console messages, you must be logged into the console. The console is config-ured by default to level 5 (notifications), meaning that it only displays messages ofnotification level or above.
Changing the console logging level
To change the logging level of the console, use the logging console command, fol-lowed by the number or name of the new severity level. To see all logging messages,set the console to level 7 (debug) by:
RouterOne#config terminalEnter configuration commands, one per line. End with CNTL/Z.RouterOne(config)#logging console 7RouterOne(config)#^Z
or
RouterOne#config terminalEnter configuration commands, one per line. End with CNTL/Z.RouterOne(config)#logging console debuggingRouterOne(config)#^Z
Disabling console logging
As you begin logging more information, you may have trouble using the console asthe display is covered up by numerous log messages. You can eliminate some ofthese messages by changing to a higher severity level using the commands describedor you can disable logging to the console altogether. Since each console log messagerequires a CPU interrupt to be delivered, disabling logging in the console port canincrease a router’s performance. Disabling console logging is done by:
RouterOne#config terminalEnter configuration commands, one per line. End with CNTL/Z.RouterOne(config)#no logging consoleRouterOne(config)#^Z
Buffered LoggingBuffered logging keeps copies of log messages in the router’s RAM. This makes itvery easy for an administrator logged into the router to display current log messages.The RAM buffer is circular. The buffer is a fixed size, and as new messages are addedto the buffer, the older messages are deleted. This keeps the most recent messages inthe buffer without filling up the router’s memory.
The size of each router’s logging buffer should be configured with regard to theamount of RAM on the router. These buffers should be large enough to keep usefullog entries, but small enough not to use up the router’s RAM and interfere with
,ch11.24575 Page 111 Friday, February 15, 2002 2:55 PM

This is the Title of the Book, eMatter EditionCopyright © 2002 O’Reilly & Associates, Inc. All rights reserved.
112 | Chapter 11: Logging
performance. A size of 16,000 or 32,000 bytes is usually sufficient and doesnt over-whelm the router. Play with the values if you find that you need log messages keptlonger.
To enable buffered logging:
1. Make sure logging is turned on with the logging on command.
2. Configure the buffer with the logging buffered command.
3. Configure the logging buffer severity level with the logging buffered command.
The following example configures the router to use a 32,000-byte logging buffer andto log messages of level 6 (informational) and above:
RouterOne#config terminalEnter configuration commands, one per line. End with CNTL/Z.RouterOne(config)#logging onRouterOne(config)#logging buffered 32000RouterOne(config)#logging buffered informationalRouterOne(config)#^Z
Terminal MonitorWhile logging is enabled to the console by default, log messages are not normallysent to the VTYs. If you are logged in through the network on a VTY and want to seelog messages on your terminal, use the terminal monitor command:
1. Use the logging monitor command to configure the severity of messages sent tothe VTY terminal.
2. At the enable prompt of the terminal, type terminal monitor.
The following example configures the terminal to receive level 3 (error) messages andabove:
RouterOne#config terminalEnter configuration commands, one per line. End with CNTL/Z.RouterOne(config)#logging monitor errorRouterOne(config)#^ZRouterOne#terminal monitor
Note that the terminal monitor command was run not from configuration mode, butrather from privileged or enable mode.
Turning on terminal monitor, especially at the debug level, can over-whelm your connection, so be careful. If you find your terminal ses-sion scrolling with so many log messages that you are overwhelmed,use the terminal no monitor command to stop the terminal fromreceiving the log messages. Even if you can’t see what you are typing,try typing terminal no monitor and pressing Enter; the router will stilltake the command and stop the log messages to your terminal.
,ch11.24575 Page 112 Friday, February 15, 2002 2:55 PM

This is the Title of the Book, eMatter EditionCopyright © 2002 O’Reilly & Associates, Inc. All rights reserved.
Router Logging | 113
syslogsyslog logging is the most important non-AAA method of logging. All previous log-ging methods print the log message to a terminal or keep the log in memory. Neitherof these records the log messages long term. Long-term storage is critical for keepingaudit trails and is required for analyzing logs after messages have left the terminalscreen or have buffered out of memory.
Almost all Unix servers come with syslog servers configured by default. Almost allsecurity-conscious organization have one or two central syslog servers in which alllogging information is sent and recorded. These messages are sent across the net-work to the syslog server where the server records the message to the hard drive.Centralizing your log files in this method makes correlating log information from dif-ferent routers and systems much easier.
Remember to configure your router to send all log messages to a syslog server so thatmessages are permanently recorded and not lost when the router runs out of mem-ory or messages scroll off the terminal screen.
syslog facilities
syslog servers rely on the severity levels defined earlier and on another variable calledthe facility. syslog facilities separate different services so that log messages can be sep-arated into different log files. This separation makes reviewing and auditing log filesmuch easier. Table 11-2 lists some standard syslog facilities.
Table 11-2. syslog facilities
syslog facility Description
User Log messages generated by user processes
Kern Log messages generated by the kernel
Mail Log messages regarding the mail system
Daemon Log messages generated by system daemons
Auth Log messages regarding the authorization system
LPR Log messages regarding the printing system
News Log messages regarding Usenet news processes
UUCP Reserved for the UUCP system
Cron Log messages regarding the cron system
Local0 Reserved for your use
Local1 Reserved for your use
Local2 Reserved for your use
Local3 Reserved for your use
Local4 Reserved for your use
Local5 Reserved for your use
,ch11.24575 Page 113 Friday, February 15, 2002 2:55 PM

This is the Title of the Book, eMatter EditionCopyright © 2002 O’Reilly & Associates, Inc. All rights reserved.
114 | Chapter 11: Logging
Cisco routers are usually configured to use one of the reserved facilities local0through local7.
The syslog server must be configured to receive and record the logmessages to a file. On almost all Unix systems, the syslog configura-tion file is /etc/syslog.conf. The standard format for syslog.conf files is(with tabs, not spaces):
Facility.Severity logfile
If you are unfamiliar with syslog, the easiest way to get a router log-ging to the syslog server is to use a facility that is already configured.However, this facility mixes your Cisco log messages with server logmessages. The recommended way to get the router logged into theserver is to configure a unique facility, such as local6 or local7, to sendmessages to a different file. For example, to configure the syslog serverto send all log messages it receives that have a facility of local6 and aseverity of informational to the file /var/log/cisco, your /etc/syslog.conffile might contain:
local6.info /var/log/cisco
You would then configure each router to use facility local6 when send-ing messages to the syslog server.
Configuring syslog logging
To configure syslog logging on your router:
1. Configure the syslog facility using the logging facility command.
2. Configure the syslog severity level with the logging trap command.
3. Configure the syslog server to which log messages will be sent with the loggingcommand.
To configure your router to send log messages to the server 13.18.10.4 using facilitylocal6 and severity informational:
RouterOne#config terminalEnter configuration commands, one per line. End with CNTL/Z.RouterOne(config)#logging facility local6RouterOne(config)#logging trap informationalRouterOne(config)#logging 13.18.10.4RouterOne(config)#^Z
You can specify additional syslog servers with additional logging <ip-address> com-mands and specify that log messages will be sent to each server for redundancy.
Local6 Reserved for your use
Local7 Reserved for your use (default Cisco log level)
Table 11-2. syslog facilities (continued)
syslog facility Description
,ch11.24575 Page 114 Friday, February 15, 2002 2:55 PM

This is the Title of the Book, eMatter EditionCopyright © 2002 O’Reilly & Associates, Inc. All rights reserved.
Router Logging | 115
By default, many syslog servers accept messages from any IP address.While this won’t let an attacker modify log messages already recorded,it does allow an attacker to send bogus log messages that get mixed inwith your good messages. It can also allow an attacker to use up all ofthe disk space on your syslog server so that valid log messages can’t berecorded because of lack of space.
It is important to make sure your syslog server does not accept syslogmessages from systems external to your network. This can be accom-plished by using ACLs at your network boundaries to deny all incom-ing syslog packets (UDP port 514) and/or by configuring the syslogserver to accept log messages only from your internal network.
syslog sequence numbers
Cisco has recently added a feature that stamp each syslog message with a sequencenumber. These numbers increase by one for each syslog message sent. Thesesequence number can provide a way for an administrator to determine whether thelog files have been tampered with. A log file that is missing a set of sequence num-bers indicates that the log files are either incomplete or have been tampered with.This example enables syslog sequence numbers:
RouterOne#config terminalEnter configuration commands, one per line. End with CNTL/Z.RouterOne(config)#service sequence-numbersRouterOne(config)#^Z
Sequence numbers do little if intruders accesses the syslog server—they can simplyresequence the messages in the log file. However, sequence numbers can be useful indetermining whether bogus messages are being forwarded to a syslog server. A logfile that contains log messages without sequence numbers or with duplicate sequencenumbers indicates that someone is sending bogus message to your syslog server.
Throttling syslog messages
IOS Version 12.1(3)T introduced the ability to limit the number of syslog messagessent to and from the router in a specific time frame. Some logging, such as ACL vio-lation logging, if not implemented correctly, can cause the router to overwhelm thesyslog server with thousands of messages a second. You can limit the number of mes-sages sent with the logging rate-limit command. This example limits message outputto 10 messages a second:
RouterOne#config terminalEnter configuration commands, one per line. End with CNTL/Z.RouterOne(config)#logging rate-limit all 10RouterOne(config)#^Z
You can append the except keyword followed by a severity level to rate-limit onlylow-priority messages.
,ch11.24575 Page 115 Friday, February 15, 2002 2:55 PM

This is the Title of the Book, eMatter EditionCopyright © 2002 O’Reilly & Associates, Inc. All rights reserved.
116 | Chapter 11: Logging
For example, to avoid rate-limiting messages of severity error or higher, enter:
RouterOne#config terminalEnter configuration commands, one per line. End with CNTL/Z.RouterOne(config)#logging rate-limit all 10 except errorRouterOne(config)#^Z
SNMP TrapsIf you run SNMP (see Chapter 8), you can use SNMP traps to log additional informa-tion. Traps are packets sent to an SNMP server when specific events occur. Suchevents include high temperatures, configuration changes, and down interfaces. If youare familiar with SNMP and want to enable SNMP traps on your router, you must:
1. Use the snmp-server host command to configure which SNMP server will receivethe traps.
2. Use the snmp-server enable traps command to enable SNMP traps.
The following example configures the router to send traps to the SNMP server 13.145.6.5:
RouterOne#config terminalEnter configuration commands, one per line. End with CNTL/Z.RouterOne(config)#snmp-server host 13.145.6.5 publicRouterOne(config)#snmp-server enable trapsRouterOne(config)#^Z
This example configures the router to send all possible traps to the SNMP server.You can supply additional arguments to the snmp-server enable traps command tolimit the traps sent. See Cisco’s documents on SNMP traps for more information.
ACL Violation LoggingAside from system logging, ACL violation logging is an important area to configure.By logging ACL violations, you can record any time your ACLs block access. This isextremely useful for determining when attackers are trying to spoof, log in, or accessyour router from external or untrusted systems.
ACL violation logging can be enabled by simply adding the keyword log or log-inputto the end of your ACL statements. Be selective about what you choose to log. Add-ing the log keyword to the wrong filters can end up logging every packet in and outof your networks.
The log keyword provides information on the type, date, and time of the ACL viola-tion and is the only option for standard ACLs. The log-input keyword is available onextended ACLs and logs additional information about the input interface and sourceMAC address.
,ch11.24575 Page 116 Friday, February 15, 2002 2:55 PM

This is the Title of the Book, eMatter EditionCopyright © 2002 O’Reilly & Associates, Inc. All rights reserved.
ACL Violation Logging | 117
The log keyword works only for standard access lists. Both the log andlog-input keywords can be used for extended and named ACLs.
Antispoofing ViolationsThe following examples configure your ACL antispoofing filters to log both inboundand outbound spoofing attempts. Assuming our internal network was 130.18.0.0/16,an ingress filter that logs all spoofed packets looks like:
RouterOne#config terminalEnter configuration commands, one per line. End with CNTL/Z.RouterOne(config)#access-list 115 deny ip 130.18.0.0 0.0.255.255 any log-inputRouterOne(config)#access-list 115 permit ip any anyRouterOne(config)#^Z
This filter would be placed inbound on each interface that borders an external net-work. Assuming this was Serial 0/0 on RouterOne, enter:
RouterOne#config terminalEnter configuration commands, one per line. End with CNTL/Z.RouterOne(config)#int Serial 0/0RouterOne(config-if)#ip access-group 115 inRouterOne(config-if)#^Z
An egress filter that logs all attempts at sending spoofed packets out of the networkwould look like:
RouterOne#config terminalEnter configuration commands, one per line. End with CNTL/Z.RouterOne(config)#access-list 116 permit ip 130.18.0.0 0.0.255.255 anyRouterOne(config)#access-list 116 deny ip any any log-inputRouterOne(config)#^Z
And would be applied to all outgoing interfaces:
RouterOne#config terminalEnter configuration commands, one per line. End with CNTL/Z.RouterOne(config)#int Serial 0/0RouterOne(config-if)#ip access-group 116 outRouterOne(config-if)#^Z
VTY Access LoggingLogging router login attempts through VTYs is very important. It can give you anearly indication that someone is trying to access your router without authorization.Assuming you want only the IP 130.18.5.6 to be able to access the router throughVTYs, your ACL would look like:
RouterOne#config terminalEnter configuration commands, one per line. End with CNTL/Z.RouterOne(config)#access-list 117 permit ip host 130.18.5.6 anyRouterOne(config)#access-list 117 deny ip any any log-inputRouterOne(config)#^Z
,ch11.24575 Page 117 Friday, February 15, 2002 2:55 PM

This is the Title of the Book, eMatter EditionCopyright © 2002 O’Reilly & Associates, Inc. All rights reserved.
118 | Chapter 11: Logging
You would apply it the VTY lines 0 through 4 with:
RouterOne#config terminalEnter configuration commands, one per line. End with CNTL/Z.RouterOne(config)#line vty 0 4RouterOne(config-line)#access-class 117 inRouterOne(config-line)#^Z
Now someone from an unauthorized IP trying to access a router VTY will generate alog message. The following message is an sample log entry of an unauthorized per-son trying to telnet to the router:
Oct 13 21:10:44.185 EDT: %SEC-6-IPACCESSLOGP: list 120 denied tcp 19.8.59.41(63104) -> 0.0.0.0(23), 1 packet
Many sites also choose to log all permitted VTY access attempts in addition toblocked access ones. Since all VTY access is through TCP, you can use the ACL key-word established to log successful access attempts without overwhelming your routeror syslog server. This can be done effectively if you:
• Pass, without logging, all established TCP connections from permitted IPs.
• Pass and log the first packet for all TCP sessions from permitted IPs.
• Deny and log all other packets.
This example logs both access attempts from approved IPs and access attempts fromunapproved IP addresses:
RouterOne#config terminalEnter configuration commands, one per line. End with CNTL/Z.RouterOne(config)#access-list 117 permit tcp host 130.218.5.6 any establishedRouterOne(config)#access-list 117 permit tcp host 130.218.5.6 any log-inputRouterOne(config)#access-list 117 deny ip any any log-inputRouterOne(config)#^Z
Other ServicesOther protocols and services such as HTTP, SNMP, ICMP, and route filtering can belogged in the same way. Just add the keyword log or log-input to the deny state-ments of the ACLs for each service you want to log.
AAA AccountingAAA accounting allows you to log additional information that cannot be obtainedfrom the previous logging methods. Using Cisco’s TACACS+, AAA accounting canlog every command executed on the router to the Network Access Server (NAS).
,ch11.24575 Page 118 Friday, February 15, 2002 2:55 PM

This is the Title of the Book, eMatter EditionCopyright © 2002 O’Reilly & Associates, Inc. All rights reserved.
AAA Accounting | 119
AAA Accounting MethodsThere are five methods of AAA accounting—EXEC, System, Command, Connec-tion, and Network. Here is a short description of each method:
EXEC accountingEXEC accounting records information about each EXEC, or shell, session on therouter. It records information such as username, date, time, and IP of the systemconnecting to the router.
System accountingSystem accounting logs information about system-level events, such as rebootsor when accounting is turned on or off.
Command accountingCommand accounting logs information about the commands typed at the EXECshell prompt. It records information (including what command was executed,who executed the command, the privilege level, and the date and time). Pleasenote that older versions of Cisco’s implementation of RADIUS do not supportCommand accounting, so you will need to use TACACS+ or upgrade.
Connection accountingConnection accounting logs information about outgoing connections made fromthe router. These connections include telnet, rlogin, tn3270, and LAT.
Network accountingNetwork accounting logs information about PPP, SLIP, and ARAP sessions.
AAA Accounting TypesTo log the largest amount of useful information, you should turn on accounting forall five methods. Each method supports three types of logging:
start-stopThe start-stop keyword configures the router to generate a log message when aservice starts and stops. For example, using the start-stop keyword for EXEC,accounting generates a log message when a user first accesses the router andanother log messages when the user disconnects from the router.
stop-onlyThe stop-only keyword configures the router to generate log messages only whena service ends. With EXEC accounting, this keyword generates log messagesonly when a user disconnects from the router.
wait-startThe wait-start keyword delays the start of the requested service until confirma-tion is received from the NAS server that a log message has been received. This istypically reserved for higher-security installations that want to guarantee thateach connection and command that run on a system is recorded. If the NAS
,ch11.24575 Page 119 Friday, February 15, 2002 2:55 PM

This is the Title of the Book, eMatter EditionCopyright © 2002 O’Reilly & Associates, Inc. All rights reserved.
120 | Chapter 11: Logging
server doesn’t indicate that it successfully received the log message, the routerwill not start the requested service or command.
AAA Accounting ConfigurationsRecommended initial settings for each method are shown in Table 11-3.
The rest of this section provides examples on configuring each logging method.
Accounting with TACACS+
If you have AAA configured to use TACACS+, you can enable EXEC, System, Con-nection, and Network accounting to your NAS server with:
RouterOne#config terminalEnter configuration commands, one per line. End with CNTL/Z.RouterOne(config)#aaa accounting exec default start-stop group tacacs+RouterOne(config)#aaa accounting system default stop-only group tacacs+RouterOne(config)#aaa accounting connection default start-stop group tacacs+RouterOne(config)#aaa accounting network default start-stop group tacacs+RouterOne(config)#^Z
To configure Command accounting, you also need to supply the privilege level youwant logged. Unless you have changed the default privilege levels, privilege levels 1and 15 should capture everything. If you have custom privilege-level configurations,make sure you add commands to log all levels you are interested in:
RouterOne#config terminalEnter configuration commands, one per line. End with CNTL/Z.RouterOne(config)#aaa accounting commands 1 default stop-only group tacacs+RouterOne(config)#aaa accounting commands 15 default stop-only group tacacs+RouterOne(config)#^Z
Table 11-3. Recommended AAA method types
MethodRecommendedstarting type Explanation
EXEC start-stop This method makes determining exactly when someone accessed the router andexactly when they disconnected much easier.
System stop-only System messages are usually atomic events that don’t need the start and stop timesrecorded. The stop-only keyword is usually sufficient for System accounting.
Command stop-only Commands are usually run in such short time periods that start and stop times are oflimited use and can double the amount of log messages you have to analyze.
Connection start-stop Logging the start and stop times of outgoing connections from the router makes ana-lyzing log files easier.
Network start-stop Again, logging start and stop times of these network connections makes log file analy-sis less of a chore and more intuitive.
,ch11.24575 Page 120 Friday, February 15, 2002 2:55 PM

This is the Title of the Book, eMatter EditionCopyright © 2002 O’Reilly & Associates, Inc. All rights reserved.
Logging Checklist | 121
Accounting with RADIUS
If you have AAA configured to use RADIUS, you can enable EXEC, System, Connec-tion, and Network accounting to your NAS server with:
RouterOne#config terminalEnter configuration commands, one per line. End with CNTL/Z.RouterOne(config)#aaa accounting exec default start-stop group radiusRouterOne(config)#aaa accounting system default stop-only group radiusRouterOne(config)#aaa accounting connection default start-stop group radiusRouterOne(config)#aaa accounting network default start-stop group radiusRouterOne(config)#^Z
You also need to enable Command accounting for all privilege levels you are inter-ested in. Older versions of Cisco’s IOS don’t support Command accounting throughRADIUS. If you determine that your router doesn’t support RADIUS command log-ging, then either migrate to TACACS+ or upgrade your IOS:
RouterOne#config terminalEnter configuration commands, one per line. End with CNTL/Z.RouterOne(config)#aaa accounting commands 1 default stop-only group radiusRouterOne(config)#aaa accounting commands 15 default stop-only group radiusRouterOne(config)#^Z
AAA authentication failure logging
AAA also needs to be configured to log authentication failures. The following exam-ple will generate an AAA log message each time someone attempts to access therouter but fails:
RouterOne#config terminalEnter configuration commands, one per line. End with CNTL/Z.RouterOne(config)#aaa accounting send stop-record authentication failureRouterOne(config)#^Z
Logging ChecklistThis checklist summarizes the important security information presented in this chap-ter. A complete security checklist is provided in Appendix A.
• Actively monitor all logs for indications of attacks, misconfigurations, and failures.
• Configure logging timestamps to include milliseconds using the servicetimestamp log datetime msec localtime command.
• Enable RAM buffer logging with the logging buffered command. The default andrecommended level is 6 (informational).
• Enable logging sequence numbers with the service sequence-numbers command.
• Configure routers to send log messages to a syslog server to preserve the messages:
— Make sure that sites requiring higher levels of security and auditability sendrouter log messages to multiple syslog servers for redundancy.
,ch11.24575 Page 121 Friday, February 15, 2002 2:55 PM

This is the Title of the Book, eMatter EditionCopyright © 2002 O’Reilly & Associates, Inc. All rights reserved.
122 | Chapter 11: Logging
— Filter out syslog messages from external systems through ACLs at your net-work’s border or with the syslog server itself.
• Configure key ACLs to record access violations. Recommended ACL loggingincludes:
— Antispoofing violations
— VTY access attempts
— HTTP access attempts
— SNMP access attempts
— Route filter violations
— ICMP violations
— Any other important filters
• In environments requiring additional security, use AAA and enable AAAaccounting:
— Configure EXEC, System, Connection, and Network accounting to recordinformation on system events and user sessions.
— Configure AAA accounting to record authentication failures.
— If a record of each command executed on the router is required, configurecommand accounting.
,ch11.24575 Page 122 Friday, February 15, 2002 2:55 PM

This is the Title of the Book, eMatter EditionCopyright © 2002 O’Reilly & Associates, Inc. All rights reserved.
123
Appendix A APPENDIX A
Checklist Quick Reference
You can use this checklist in two ways. First, you can use it as a checklist whensecuring your routers. You can also use the checklist as the basis for auditing thesecurity of your routers.
Hardening Your RoutersIf you are using this checklist to harden your routers, a good approach is to use thefollowing three-step process:
1. Use the checklist to determine your routers’ current security level. Check offeach item that has already been taken care of.
2. Review all items in the checklist that have not been checked off. For each item,determine how you are going to address that issue—secure it, leave it alone andaccept the risk, or assign the risk to someone else (e.g., insurance).
3. Secure each item that you determined needs securing. For all other items, docu-ment why you are leaving this item unsecured. It is important to list the risksassociated with the item and determine why the risk can be ignored or how it isbeing assigned to someone else.
For example, if your network has two routers and one administrator, the cost associ-ated with setting up an AAA server is probably not justifiable. Local usernames andpasswords would be much more reasonable. Documenting these decisions and get-ting management to sign off on them helps to cover your tail when an incident occurs.
Auditing Your RoutersAuditing is a topic for a book unto itself and generally requires a higher skill levelthan hardening. When hardening a router, a sysadmin can usually turn off servicesthat aren’t understood. An auditor, however, must understand not only how eachservice works, but also the risks associated with that service. For those who are not
,appa.22314 Page 123 Friday, February 15, 2002 2:51 PM

This is the Title of the Book, eMatter EditionCopyright © 2002 O’Reilly & Associates, Inc. All rights reserved.
124 | Appendix A: Checklist Quick Reference
just hardening their routers, but auditing them, this checklist can serve as the foun-dation for an audit of Cisco router security. For those new to auditing, here is anoverview of the typical auditing process:
Securing approval to perform the auditWhen performing an audit, make sure you have not only the approval, but alsothe authority, to perform the audit. Without approval and authority the best-case scenario is an incomplete and useless audit. Since many security audits canlook like attacks, the worst-case scenario is your termination or incarceration.
Planning the auditMake sure that the scope and focus of the audit are defined and agreed upon.This is the time to define what resources will be needed for the audit, how theaudit will be performed, and what the deliverables will be.
Performing the auditPerforming the audit usually takes two very different steps. First, interviews aredone with everyone involved with items being audited. For a router, this mightinclude managers responsible for overseeing the router administrators, the infor-mation security officer of the organization, the senior network administrator, thejunior sysadmins responsible for day-to-day maintenance, and, depending onwhere the router is located, janitors or computer operations personnel who haveaccess to the room the router is in. Second, the router must be audited techni-cally. The technical audit is when you analyze router configurations and possi-bly perform penetration testing against the organization’s routers.
Reporting the auditThe report details the findings of the audit and highlights the strengths andweaknesses discovered in the audit. Circulation of security audit reports shouldbe restricted since they probably contain vulnerability information.
Following up the auditFinally, the organization that receives the audit report should review the reportand, for each weakness uncovered, take action to correct the weakness, decidethat the weakness is considered an acceptable risk and live with it, or assign therisk to a third party with outsourcing or insurance.
Here are some standard points that are key to performing an effective audit:
IndependenceThe ideal auditor is usually a third party with no vested interest in the outcomeof the audit. When network administrators audit their own networks, it becomestoo easy to selectively ignore certain weaknesses. Also, many managers seem tosee a direct correlation between how much they pay for information and howmuch they believe it. Independent audits can often open management’s eyes tothe problems that insiders can’t push politically. This can often help administra-tors get the resources they really need.
,appa.22314 Page 124 Friday, February 15, 2002 2:51 PM

This is the Title of the Book, eMatter EditionCopyright © 2002 O’Reilly & Associates, Inc. All rights reserved.
Cisco Router Security Checklist | 125
CompetenceAn auditor must be competent to perform the audit. Auditors need the skills andknowledge to understand how administrators interact with their routers and tounravel all the nuances of Cisco router configuration files.
EthicsIn security, ethics is always very high on the list of requirements. Since the pur-pose of auditing is to uncover weakness and vulnerabilities, an auditor musthave impeccable ethics, both personally and professionally.
Due diligenceAuditors must not only have the knowledge to perform the audit, but also mustbe able to demonstrate and document that they performed their work to a profes-sionally acceptable level. The auditor must be competent and must also under-stand professional auditing standards to the point at which an audit by a differentprofessional would not uncover significant omissions in the original audit. Aknowledgeable but lazy auditor can do more harm than good.
Finally, many audits are performed to test compliance with existing security policies.The following checklist can be very useful in establishing or updating these policies.
Cisco Router Security ChecklistThis section provides a complete list of the checklists shown at the end of most chap-ters. It is only a guideline; you don’t have to agree with or implement each of the rec-ommendations. If the checklist gets you to think about and address each issue, it hasserved its purpose. As an administrator, you are responsible for working with man-agement, determining how much risk your organization can handle, and knowinghow secure your routers need to be.
IOS Security (Chapter 2)• Make sure that all routers are running a current IOS.
• Make sure that the IOS version is in General Deployment (unless all risks withthe non-GD IOS version have been addressed).
• Check the IOS version against existing Cisco Security Advisories.
• Regularly check Cisco Security Advisories for IOS vulnerabilities.
Basic Access Control (Chapter 3)• Secure physical access to the router. (See Appendix B).
• Secure console access with the login and password commands.
• Disable or secure AUX access with the login and password commands.
• Disable or secure all VTY access with the login and password commands.
,appa.22314 Page 125 Friday, February 15, 2002 2:51 PM

This is the Title of the Book, eMatter EditionCopyright © 2002 O’Reilly & Associates, Inc. All rights reserved.
126 | Appendix A: Checklist Quick Reference
• Do not use the no login command under any line (con/aux/vty) configurations.
• Set the enable password using the enable secret command.
• In organizations in which multiple administrators access a router, enableaccountability by requiring administrators to have separate accounts to accessthe router. This can be accomplished through local usernames or more central-ized methods involving network access servers.
• Do not use TACACS and Extended TACACS in favor of TACACS+, RADIUS, orKerberos.
• If any version of TACACS is used for user-level authentications, set the methodof last resort to the privileged password (set with enable secret) and not todefault to open access with no authentication.
• Do not use standard TACACS for privileged-level access.
• If any version of TACACS is used for the enable password—privileged-levelaccess—then set the method of last resort to the enable secret password and notto automatically succeed.
• Make sure the router does not use TFTP to automatically load its configurationat every reboot. If it must, then harden and secure the TFTP server.
• Do not configure the router to serve as a TFTP server.
• With dial-up access to the router, make sure both the AUX port and the modemare password protected.
• With dial-up access to the router, configure callback security to a predefinednumber, or make sure the telephone company uses a closed user group torestrict which numbers are allowed to call your modems.
• Never connect a modem to the console port.
• Disable reverse Telnet to all physical ports.
• Disable Telnet in favor of SSH on all VTY lines.
• If insecure protocols such at Telnet or HTTP must be used, use IPSec to encryptall vulnerable traffic.
• Make sure all VTY access uses ACLs to restrict access to a few secured IPs.
• Set the exec-timeout on all VTYs to five minutes or less.
• Enable the global command service tcp-keepalives-in.
• Disable HTTP access to the router.
• If HTTP access must be used:
— Limit its use to secure networks.
— Only use it over IPSec.
— Restrict access with ACLs to a few secured IPs.
— Change the HTTP authentication method from the default enable password.
,appa.22314 Page 126 Friday, February 15, 2002 2:51 PM

This is the Title of the Book, eMatter EditionCopyright © 2002 O’Reilly & Associates, Inc. All rights reserved.
Cisco Router Security Checklist | 127
Password Security (Chapter 4)• Enable service password-encryption on all routers.
• Set the privileged-level (level 15) password with the enable secret command andnot with the enable password command.
• Make sure all passwords are strong passwords that are not based on English orforeign words.
• Make sure each router has different enable and user passwords.
• Keep backup configuration files encrypted on a secure server.
• Access routers only from secure or trusted systems.
• In large organizations with numerous personnel with router access, use addi-tional privilege levels to restrict access to unnecessary commands.
• Reconfigure the connect, telnet, rlogin, show ip access-lists, show access-lists, andshow logging commands to privilege level 15.
AAA Security (Chapter 5)• If AAA is used, when possible, use TACACS+ instead of other methods.
• If TACACS+ or RADIUS is used, then keep the configuration files secure, sinceTACACS+ and RADIUS keys are not obscured by the service password-encryption command.
• If AAA authentication is used, always set the backup method for authentication tolocally configured usernames or the default privileged password and never to none.
• If AAA authorization is used and your security needs are low to medium, makesure the backup method for authorization is if-authenticated (to avoid beinglocked out of the router).
• If AAA authorization is used and you need a higher level of security, make surethere is no backup method for authorization.
• Disable HTTP access. If it must be used, make sure it uses TACACS+ orRADIUS, and not the default privileged-mode password, for authentication.
• In larger organizations that need dual-factor access control, configure therouter’s TACACS+ or RADIUS servers to use token-based access control.
Warning Banners (Chapter 6)• Make sure every router has an appropriate warning banner that includes word-
ing that states:
— The router is for authorized personnel only.
— The router is for official use only.
,appa.22314 Page 127 Friday, February 15, 2002 2:51 PM

This is the Title of the Book, eMatter EditionCopyright © 2002 O’Reilly & Associates, Inc. All rights reserved.
128 | Appendix A: Checklist Quick Reference
— Users have no expectations of privacy.
— All access and use may (not will) be monitored and/or recorded.
— Monitoring and/or recording may be turned over to the appropriate author-ities.
— Use of the system implies consent to the previously mentioned conditions.
• Make sure the banner does not say Welcome anywhere in it.
• Make sure the banner does not include any identifying information relating tothe router, the administrators, or the organization running the router.
• Check local legal requirements to make sure the banner contains all necessarylanguage and content.
• Use the banner login command to display the banner every time a user attemptsto log in.
• Use the banner exec command to display the banner a second time every time auser starts an EXEC or shell prompt.
Unnecessary Protocols and Services (Chapter 7)• Disable the following services on every interface on every router:
— Disable sending ICMP redirects with the no ip redirects command.
— Disable ICMP broadcasts with the no ip directed-broadcast command.
— Disable ICMP mask replies with the no ip mask-reply command.
— Disable ICMP unreachables with the no ip unreachables command.
— Disable Proxy ARP with the no ip proxy-arp command.
• Disable CDP globally with the no cdp run command or disable it on each inter-face with the no cdp enable command.
• Disable source routing with the no ip source-route command.
• Disable small services with the no service tcp-small-servers and the no udp-small-servers commands.
• Disable Finger with the no service finger command.
• Severly restrict incoming ICMP packets using an appropriate ACL. (Ideally,only MTU discovery is allowed between your internal network and externalnetworks.)
• Disable miscellaneous services such as BOOTP, PAD, configuration autoload-ing, and DNS.
• Disable or secure HTTP access (see Chapter 3).
• Disable or secure SNMP access (see Chapter 8).
,appa.22314 Page 128 Friday, February 15, 2002 2:51 PM
This is the Title of the Book, eMatter EditionCopyright © 2002 O’Reilly & Associates, Inc. All rights reserved.
Cisco Router Security Checklist | 129
SNMP Security (Chapter 8)• Disable SNMP, if it is not needed.
• Use different community or authentication strings for each router, if possible.(This often become unmanageable.)
• Make sure community strings and passwords are well chosen and not easilyguessed.
• Restrict all SNMP access to specific hosts through ACLs.
• Restrict all SNMP output through the use of views.
• Disable read/write SNMP access unless absolutely necessary.
• If SNMP read/write access is configured, use the snmp-server tftp-server-list com-mand to restrict SNMP-controlled TFTP transfers.
• Disable SNMP v1 and v2c in favor of SNMP v3.
• Under SNMP v3:
— Make sure that SNMP v1 and v2c are disabled.
— Use both authentication and encryption (AuthPriv) on your routers.
— Use views to limit SNMP access to information.
• Secure all SNMP Management Servers.
Routing Protocol and Antispoofing (Chapter 9)• Take antispoofing measures at each router bordering an external network:
— Enable ip verify unicast reverse-path on all interfaces that connect with exter-nal networks and are not involved in asymmetrical routing.
— If uRPF cannot be used (or additional logging is required), apply antispoofingingress and egress ACLs to all interfaces that connect to an external network.
— If your network is very small and you need additional security, considerusing static routes.
• When using a routing protocol, choose one that supports authentication andenable authentication on all routers on the network:
— Choose the authentication password well and make sure controls are inplace to keep the authentication passwords secret.
— Use secure hash protocols such as MD5, not plain-text protocols, forauthentication.
• Use route filters at the border between your network and the networks con-trolled by others to prevent false routing information from being injected intoyour network.
,appa.22314 Page 129 Friday, February 15, 2002 2:51 PM

This is the Title of the Book, eMatter EditionCopyright © 2002 O’Reilly & Associates, Inc. All rights reserved.
130 | Appendix A: Checklist Quick Reference
NTP Security (Chapter 10)• Make sure all routers use NTP to synchronize their time.
• On larger networks requiring more accurate time, use redundant timeservers andsynchronize routers to multiple servers to prevent a single point of failure.
• Use the ntp master command only when external time synchronization is notpossible—i.e., in networks not connected to the Internet.
• Make sure all routers have ACLs preventing them from becoming public timesynchronization servers. These ACLs should restrict what servers the router syn-chronizes to and systems the router will synchronize.
• Use NTP authentication between clients, servers, and peers to ensure that time issynchronized to approved servers only.
Logging (Chapter 11)• Actively monitor all logs for indications of attacks, misconfigurations, and failures.
• Configure logging timestamps to include milliseconds using the servicetimestamp log datetime msec localtime command.
• Enable RAM buffer logging with the logging buffered command. The default andrecommended level is 6 (informational).
• Enable logging sequence numbers with the service sequence-numbers command.
• Configure routers to send log messages to a syslog server to preserve the messages:
— Make sure that sites requiring higher levels of security and auditability sendrouter log messages to multiple syslog servers for redundancy.
— Filter out syslog messages from external systems through ACLs at your net-work’s border or with the syslog server itself.
• Configure key ACLs to record access violations. Recommended ACL loggingincludes:
— Antispoofing violations
— VTY access attempts
— HTTP access attempts
— SNMP access attempts
— Route filter violations
— ICMP violations
— Any other important filters
• In environments requiring additional security, use AAA and enable AAAaccounting:
— Configure EXEC, System, Connection, and Network accounting to recordinformation on system events and user sessions.
,appa.22314 Page 130 Friday, February 15, 2002 2:51 PM

This is the Title of the Book, eMatter EditionCopyright © 2002 O’Reilly & Associates, Inc. All rights reserved.
Cisco Router Security Checklist | 131
— Configure AAA accounting to record authentication failures.
— If a record of each command executed on the router is required, configurecommand accounting.
Physical Security (Appendix B)• Make sure all routers are in a secured area:
— Make sure walls continue below raised flooring.
— Make sure walls continue above dropped/false ceilings.
— Make sure air ducts are too small to be used for access.
• Make sure the only access into the area is through locked doors:
— Make sure there are a minimum number of doors into the secured area.
— Make sure all doors and door frames are metal.
— Make sure all doors are self-closing with no feature to hold them open.
— Make sure all doors remained locked at all times.
• Make sure all doors have adequate locks.
• Choose appropriate locks—keyed, mechanical, electronic, carded, biometric, ordual-factor.
• Allow only required and authorized personnel to access the secure location.
• Keep router configuration backups in a separate and secure area.
• Make sure the area has adequate fire prevention controls:
— Make sure multiple smoke alarms are in the secured area.
— Make sure automatic fire suppression controls are adequate.
— Provide easily accessable manual fire extinguishers in and near the room.
— Do not store or keep flammable material in the room.
• Adequately protect the area against water damage:
— Make sure no water or steam pipes run through the room.
— If a sprinkler system is present, make sure the room is equipped with a drain.
— If a sprinkler system is present, tie its activation into the circuit breaker toshut off all equipment if the sprinkler system activates.
• Adequately protect the area against excessive heat:
— Make sure there is adequate air-conditioning to keep the room around 69 to75 degrees Fahrenheit.
— Make sure all equipment fans and ventilation areas are free from obstruction.
• Make sure he secured area has adequate humidity control to keep the roomaround 40 to 60 percent humidity.
,appa.22314 Page 131 Friday, February 15, 2002 2:51 PM

This is the Title of the Book, eMatter EditionCopyright © 2002 O’Reilly & Associates, Inc. All rights reserved.
132 | Appendix A: Checklist Quick Reference
• Adequately protect the area against electrical damage:
— Make sure all equipment is on an uninterruptible power supply.
— Make sure the flooring is anti-static electricity flooring.
• Free the area from excessive airborne dust and dirt.
• Clear and unclog equipment fans, filters, and vents.
Incident Reponse (Appendix C)• Follow your established incident response plan, if you have one.
• Determine if the problem was due to an accident or malicious attack.
• While determining the cause of the problem:
— Change nothing.
— Record everything.
• If you don’t have an incident response policy and you determine you have beenhacked, touch nothing and call law enforcement.
• If you cannot call or wait for law enforcement, understand the risks you take bymodifying or rebooting the router.
• If you must modify or reboot the router, first record all volatile evidence fromthe router in a well-documented manner.
• Recover from the incident by getting the router functional again.
• Perform a postmortem and implement changes to prevent future compromises.
• If you don’t have a documented and tested incident response plan, develop onenow.
,appa.22314 Page 132 Friday, February 15, 2002 2:51 PM

This is the Title of the Book, eMatter EditionCopyright © 2002 O’Reilly & Associates, Inc. All rights reserved.
133
Appendix B APPENDIX B
Physical Security
Physical security has been around since the first caveman guarded his mammothskins and clubbed his neighbor over the head for trying to steal them. Because of itslong history, physical security is a very mature field. However, as many InfoSec pro-fessionals start out as technicians, this aspect of security is often overlooked. In mostcircumstances, security is completely compromised once physical access is achieved.With physical access, attackers can disable, reconfigure, replace, and/or steal sys-tems. Security is only as strong as the weakest link, and no amount of firewall protec-tion, intrusion detection, or network security does any good if an attacker can simplywalk off with the system. This appendix discusses how to physically protect routersfrom attackers, Murphy’s Law, and Mother Nature.
Protection Against PeopleThe first denial-of-service attack against a network probably consisted of cola beingpoured into a router. Using a baseball bat would be equally effective. Without physi-cal security, a janitor tripping over a power cord can bring down an entire network.Physical security not only protects against maliciousness, but also stupidity. Physicalaccess is used not just for destruction. With physical access, attackers can take con-trol of your systems. With physical access, it takes only a few minutes for an attackerto perform a password recovery on a Cisco router. Sophisticated attackers wouldn’teven bother with password recovery. To avoid minutes of downtime and possibledetection, they would replace the router with one that had been preconfigured tofunction normally, but to also let them record traffic and access trusted networks.
LocationThe first aspect to discuss when talking about physical security is location. Whereare the routers physically located? Do they sit in a secured room, in a closet down thehall, or somewhere up in the suspended ceiling? Because of their importance, routersshould always be kept in a secure location. How secure depends on the size of the
,appb.22491 Page 133 Friday, February 15, 2002 2:51 PM
This is the Title of the Book, eMatter EditionCopyright © 2002 O’Reilly & Associates, Inc. All rights reserved.
134 | Appendix B: Physical Security
organization and the value of the traffic passing over the network. Routers shouldalways sit in a locked room. Ideally, this room is occupied by computer equipmentonly, and not by people. Keeping the equipment separate allows the room to be opti-mized for the equipment rather than the comfort of people, makes it easier to limitthe number of people who have access to the room, and makes installation of a firesuppression system easier and cheaper.
A secure location provides good access control. The only way in or out of the roomshould be through the doors. This may sound obvious, but often a room that can beaccessed under raised floors, over dropped ceilings, or through air ducts is chosen.Make sure that if the room has a raised floor, all the walls continue down below theraised floor; if it has dropped or false ceilings, all the walls continue up above thedropped ceiling; and that any air ducts into the room are too small to be used foraccess.
DoorsA minimum number of doors should open into the secure area. The fewer the num-ber of access points, the easier access can be controlled. All doors, however, shouldgenerally be of the same type and use the same type of access control mechanism.Different methods of access into the same room can become an administration night-mare and, by making things more complex, increase the risk of compromise.
Many doors are hollow wood doors with wooden door frames. One swift kick is usu-ally all that is needed to bypass one of these doors. Both the door and door frame tothe secured area should be made of metal.
All doors should be self-closing and remain locked at all times. Additionally, thedoors should not have mechanisms that prop them open. Even in the most securearea, there seems to be a great temptation to prop open doors. This happens mostoften when someone needs to make frequent trips to and from the room or when avendor needs access and the door is propped open to provide this access. Anytimethe door to a secure area is unlocked or propped open, the equipment in the room isvulnerable. Making matters worse, people often forget that they unlocked a door orpropped it open, which can lead to days or weeks of vulnerability.
LocksYou can choose from hundreds of locks to secure a room. These range from the basickeyed entry to dual card-swipe/keycode-access locks. Each lock has its own strengthsand weaknesses, so choosing a lock for a secured area depends on the needs of theorganization. The “key” (pun intended) is to use the lock that best fits the needs andculture of an organization. The foundations for access control rest on three criteria—something a person has, something a person knows, or something a person is. Aregular house key would be an example of something a person has. Anyone whophysically has the house key can use it to enter the house. A keycode is an example
,appb.22491 Page 134 Friday, February 15, 2002 2:51 PM

This is the Title of the Book, eMatter EditionCopyright © 2002 O’Reilly & Associates, Inc. All rights reserved.
Protection Against People | 135
of something a person knows. Anyone who knows the code can use it to open thedoor. A fingerprint or iris scan is an example of something a person is. Access isgranted only to individuals with a specific fingerprint or iris pattern. The most effec-tive, and most expensive, access controls combine at least two of these criteria.
Keyed locks
Keyed locks are the most common types of locks and range from the small locks onsuitcases to the dual keys required to open safe deposit boxes. These locks are exam-ples of access control based on something a person has and they require a physicalkey with specific ridges and valleys in order to open. The advantages to keyed locksare that they do not require electricity to work, are easy to use, and do not requireuser training—everyone knows how to use a key to open a door. A disadvantage ofkeyed locks is that if a single key is compromised, the lock and all other keys must bephysically replaced. Additionally, there is no logging inherent to the use of keys. Iften people have keys to the server room, after an incident there is no way to knowwhich of the ten accessed the room.
Mechanical locks
Mechanical locks are locks that use mechanical push-button codes to allow entry.These locks are based on something a person knows rather than something one has(like an actual key). The advantages are that they do not require electricity to run,can be reprogrammed without the need to replace hardware, and are very easy touse. The disadvantages are that these locks rely on one code to provide access andprovide no logging to show who accessed the room. If a code is compromised, thelock can easily be reset to use another code; however, the reliance on a single codefor all personnel means that, similarly to a keyed entry, there is no way of knowingwho entered the room at a specific day and time.
Electronic locks
Electronic locks are similar to mechanical locks because they also require a specifickeycode in order to get access. Likewise, they are based on something a personknows. Electronic locks, however, allow the use of different key codes for each indi-vidual. Therefore, they provide the ability to log individual access based on keycodes. Additionally, these locks are usually very easy to change in the event of a com-promise. Unlike mechanical locks, if a single code is compromised, then only thatcode has to be reset and changed, avoiding the need to reset and redistribute every-one’s code (as with mechanical locks). These locks however, rely on electricity tofunction. Some state or cities may require by law that electronic locks open automat-ically if electricity is removed. This is a significant security problem and should beresearched before you decide to implement electronic locks. On the positive side,electronic locks require very little electricity to function, and most come with batter-ies to allow them to function even in the event of a power failure.
,appb.22491 Page 135 Friday, February 15, 2002 2:51 PM

This is the Title of the Book, eMatter EditionCopyright © 2002 O’Reilly & Associates, Inc. All rights reserved.
136 | Appendix B: Physical Security
Card-access locks
Similar to keyed locks, card-access locks are based on something a person has. Theselocks require users to have a card preprogrammed with their access information. Thelocks have embedded card readers that read the key cards. The advantages of card-access locks are numerous. Individual locks can be programmed to allow access toindividual users as needed, and reprogramming these locks does not require thereplacement of any physical items. These locks can also keep access logs that includethe identity of the person and the date and time he or she accessed the room. A dis-advantage of these locks is the reliance on only a key card. An attacker needs to stealor compromise only one key card in order to gain access. Another disadvantage ofthese locks is that they rely on electricity and are subject to the same restrictions asmentioned earlier for electronic locks.
Biometric locks
Biometric locks are different from our previous locks because they grant access basedon something a person is rather then something they have or know. Generally, it ismuch more difficult to fake this type of credential than it is to fake the previous two.James Bond aside, fingerprint and iris pattern scanning can provide a high level ofidentity verification. There are many types of biometric locks. In addition to finger-prints and iris patterns, biometric locks can use voice recognition, finger length andhand geometry, retina scanning, handwriting recognition, and even typing patternrecognition. Each of these technologies has it own strengths and weaknesses. Theideal biometric system is difficult to fool—voice recordings and photographs won’tfool it, it’s noninvasive—it doesn’t shoot a laser into the eye to scan the retina, andit’s relatively inexpensive. Currently, fingerprint and iris pattern recognition gener-ally meet these requirements the best.
Dual-factor locks
Dual-factor locks are locks that combine two of the previous locks into one. Withsingle-factor locks, if any access method is compromised, access is compromised. Forexample, if someone steals the code to a mechanical or electronic lock, he can usethat code to gain entry. Worse, he can publish that code on the Internet, and anyonewho downloads the code can gain entry. Dual-factor locks help prevent this singlepoint of failure; they require two of the three access criteria before granting access. Alock that requires a key card and a code is an example of a dual-factor lock. Such alock would require use of a key card—something he has—and then a code—some-thing he knows—before granting access. A card or code by itself is useless, and if oneis compromised, access is still secure. Another example of a dual-factor lock wouldbe one that requires a retina scan—something a person is—and a key card—some-thing a person has—before granting access. Dual-factor locks are more expensive topurchase and maintain, but make it exponentially harder for an attacker to gainaccess to a secured area.
,appb.22491 Page 136 Friday, February 15, 2002 2:51 PM

This is the Title of the Book, eMatter EditionCopyright © 2002 O’Reilly & Associates, Inc. All rights reserved.
Protection Against People | 137
PersonnelBillions of dollars are spent annually to protect organizations from hackers on theInternet, yet an estimated 70 percent of attacks come from insiders. The personnelresponsible for an organization’s routers necessarily have physical access to them.Recognizing this problem, many organizations are performing background checks onall personnel responsible for the administration and maintenance of critical systems.The problem is that many organizations do not realize that other forgotten person-nel may have access to rooms that hold server and network equipment.
Often, network equipment is located in the same rooms as telephone equipment. Inmany organizations, telephone company personnel are granted complete and instantaccess to any room housing telephone equipment. Are all personnel claiming to betelephone company personnel really from the telephone company? Most janitorialstaff have master keys allowing them to clean every room in a building. Do they alsohave access to the company’s network closets? Finally, building maintenance person-nel also often have master keys allowing them access to all rooms in a building. Dothe maintenance personnel ever prop open doors for convenience?
When determining who has access to secured areas, it is important to consider notonly the personnel under an administrator’s control, but also the invisible supportstaff such as telephone technicians, janitors, and maintenance people. All it takes isone of these people to be overly trusting or susceptible to bribes, and all physicalaccess can be compromised.
BackupsBackups are considered necessary protection against hardware failure (Murphy).Backups are not often considered a part of information security, which can causesevere compromises. Organizations spend hundreds of thousands of dollars protect-ing themselves from the Internet, while an attacker can walk off with a copy of theirbackup tapes.
Make sure you keep backup copies of router configurations. Occasionally, even thebest-intentioned router technician blows away a router configuration; more often, ahardware failure results in a lost configuration. With backups, restoring a router cantake minutes. Without backups, restoring a router can take hours or days, depend-ing on the level of network documentation. Inevitably, most networks without routerconfiguration backups are the same ones with poor documentation.
In addition to the need to keep backups of router configurations, good securityrequires that these configurations be kept in a secure location. This means a securephysical location. Many people new to information security question this point andask, “Wouldn’t encryption be good enough?” In response, encryption would help, butit is still no replacement for physical security. The next question is inevitably “Why?”
,appb.22491 Page 137 Friday, February 15, 2002 2:51 PM

This is the Title of the Book, eMatter EditionCopyright © 2002 O’Reilly & Associates, Inc. All rights reserved.
138 | Appendix B: Physical Security
Assume that critical information, such as router configurations, is kept encrypted ona network administrator’s PC located inside a cubicle. Sound secure? With physicalaccess to that PC, it is trivial to use a keystroke recorder to intercept the encryptionkey. Once the key is compromised, with physical access, an attacker can either stealor copy the backup configurations and decrypt them. Physical security for backupsshould be given as much thought as the physical security of the routers themselves.
Protection Against Murphyand Mother NatureAvailability is inherent to information security’s CIA triad. In order to ensure net-work availability, good security protects not only against physical compromise bypeople, but also disasters. These disasters can range from earthquakes to flooding tofire. Additionally, these disasters do not have to be natural. An old and effectivedenial-of-service attack is to simply use arson and burn down a building.
FireFire is usually considered one of the most probable disasters. Fire damage has beenaround for thousands of years and is of serious concern whether started accidentallyor purposefully. Fire is such a concern that everywhere in the United States, properfire detection and prevention controls are required before an organization can getproperty insurance.
Each area with critical routers should have both fire detection and prevention meth-ods. Multiple smoke alarms will ensure a warning in case one alarm fails. Fire extin-guishers rated for electrical fires should be obvious and easily accessible near thesecured area. Flammable materials should be kept to a minimum. This often meansstoring manuals in another location or a closed metal cabinet. Finally, adequateautomatic fire suppression methods should be employed. Both water and gas haveunique advantages and disadvantages, though water suppression methods are usu-ally cheaper and can be safe and effective when linked with a breaker that cuts powerto the room before the sprinkler system is activated.
WaterWater can be severely damaging to electronic equipment such as routers. Therefore,rooms containing network equipment should not have water or steam pipes runningthrough them. If either of these pipes leaks or breaks, it can cause irreparable dam-age to electrical equipment.
Most network equipment rooms are equipped with sprinkler systems rather than gassuppression. Sprinkler systems can be safe and effective, provided adequate caution is
,appb.22491 Page 138 Friday, February 15, 2002 2:51 PM

This is the Title of the Book, eMatter EditionCopyright © 2002 O’Reilly & Associates, Inc. All rights reserved.
Protection Against Murphy and Mother Nature | 139
taken. Sprinkler systems can be broken down into three main types—wet pipe, drypipe, and hybrid. Which one of these you choose depends on your budget and needs.
In wet pipe systems, water is already inside all fire suppression pipes runningthrough the room. Each pipe has multiple sprinkler heads, and each head is trig-gered individually by excessive heat—normally around 150 degrees Fahrenheit. Theadvantage to this system is its immediate response; the water is already in the pipe,and the sprinkler heads are triggered only in areas in which fire is detected. The dis-advantage is having water in overhead pipes. If any of these pipes leak or break, itwill damage the electronic equipment in the room.
In dry pipe systems, the fire suppression pipes are normally dry and free of water.The water is stopped at a main release valve before it enters the room. This releasevalve is connected to the fire detection alarms, and if an fire is detected, the valvereleases water into the pipes, providing fire suppression for the entire room. Theadvantage of this system is that the overhead pipes do not continuously containwater, eliminating the risk of leaks and breaks. However, there is a delay in suppres-sion after a fire is detected since time is needed to flood the pipes with water.Another disadvantage is that dry pipe systems provide fire suppression for the entireroom, rather than just the area where a fire has been detected. This can increase theamount of damaged equipment, since everything is doused with water.
Hybrid systems attempt to combine the advantages of the wet pipe and dry pipe sys-tems. Hybrid systems use a main release valve to keep pipes dry. However, these sys-tems also employ individually activated sprinkler heads as in the wet pipe systems.Once a fire is detected, the pipes are flooded, but water is released only onto areas inwhich the sprinkler heads are triggered by excessive heat. These systems, while moreexpensive, provide a good compromise between area protection and not havingwater constantly in the pipes overhead.
Finally, to minimize damage, rooms using water for fire suppression should beequipped with drains, and the activation of the sprinkler system should be directlyconnected to a circuit breaker for the room. This connection should automatically flipthe breaker and shut off electrical power to the room whenever the sprinkler system isactivated. Once the routers are dry and clean, they can then be powered on again.
HeatHeat is another enemy of computer equipment. Excessive heat, excepting a fire, doesnot cause immediate equipment failure, but drastically shortens the life of electronicequipment. Heat can be a hidden problem since the temperature inside routers canoften be 20 degrees Fahrenheit hotter than the room. With such a difference, heat-induced failures can still occur in a cool room. To help keep the internal tempera-ture of routers at a safe level, the ambient room temperature should be between 69and 75 degrees Fahrenheit. Additionally, all equipment should have unobstructed
,appb.22491 Page 139 Friday, February 15, 2002 2:51 PM

This is the Title of the Book, eMatter EditionCopyright © 2002 O’Reilly & Associates, Inc. All rights reserved.
140 | Appendix B: Physical Security
ventilation for all fans, filters, and heat syncs. These precautions can significantlylengthen the life of routers and network equipment.
HumidityUncontrolled humidity can also shorten the life of computer equipment. In low-humidity conditions, static electricity can become a serious problem. In dry air con-ditions, static shocks can reach several thousand volts—enough to damage mostcomputer circuits. Excessive humidity can also cause problems. In high-humidityconditions, metal connectors start a process similar to electroplating that causesthem to loose conductivity and cement connectors into their sockets.
Humidity levels should be kept between 40 and 60 percent. A note of caution, how-ever: humidity control systems require drains to get rid of excessive humidity and awater line to add humidity when it is too low. Care should be taken to make surethat there is minimal chance that water from the humidity control system will makecontact with network equipment. Finally, in no case should the system cause con-densation to occur on the electronic equipment.
ElectricityBy definition, lectronic equipment runs on electricity. The general reliability of mod-ern electrical power makes it easy to forget the need for protection against spikes,surges, sags, and outages. Electrical protection falls into three major categories: lineconditioners, uninterruptible power supplies, and backup power sources.
Power line conditioners are used to smooth out voltage irregularities such as spikes,surges, and sags. Surge protection power strips act as partial line conditioners byprotecting against voltage spikes and surges; however, they generally do not protectagainst power sags.
Uninterruptible power supplies (UPSs) include batteries to replace failed AC power,and UPSs provide excellent protection against short-term power outages. While nor-mal power is functioning, UPSs charge their internal batteries, and if the power sagsor goes out completely, they power equipment from their batteries. Most modernUPSs also include spike and surge protection and act as line conditioners in additionto providing backup electricity.
Backup power sources are required when primary power is unavailable for extendedperiods of time and are usually run by either gasoline or diesel fuel. Backup powersystems can power equipment directly or can maintain the charge in UPS batteries.
Basic electrical protection involves the use of power strips and UPSs to provide short-term protection against short-term power problems. In critical areas, a backup powergenerator should be employed to protect against longer power outages.
,appb.22491 Page 140 Friday, February 15, 2002 2:51 PM
This is the Title of the Book, eMatter EditionCopyright © 2002 O’Reilly & Associates, Inc. All rights reserved.
Physical Security Checklist | 141
Dirt and DustIn the past, dust and contaminants in the air were a serious problem, and computerroom air needed to be purified. Most modern systems, however, have hermeticallysealed disk drives, and modern media are much less vulnerable to damage and contam-ination from dust particles. The main danger from airborne dirt and dust today comesfrom clogged ventilation. When a system’s fans, filters, vents, or heat syncs becomeclogged with dust, they lose the ability to circulate cooling air through the system. Thiscauses internal temperatures to remain high, significantly shortening the life of theequipment. Because many network rooms are unfinished, dust can be particularlyheavy; it is extremely important to regularly clean the ventilation of these systems.
Physical Security Checklist• Make sure all routers are in a secured area:
— Make sure walls continue below raised flooring.
— Make sure walls continue above dropped/false ceilings.
— Make sure air ducts are too small to be used for access.
• Make sure the only access into the area is through locked doors:
— Make sure there are a minimum number of doors into the secured area.
— Make sure all doors and door frames are metal.
— Make sure all doors are self-closing with no feature to hold them open.
— Make sure all doors remained locked at all times.
• Make sure all doors have adequate locks.
• Choose appropriate locks—keyed, mechanical, electronic, carded, biometric, ordual-factor.
• Allow only required and authorized personnel to access the secure location.
• Keep router configuration backups in a separate and secure area.
• Make sure the area has adequate fire prevention controls:
— Make sure multiple smoke alarms are in the secured area.
— Make sure automatic fire suppression controls are adequate.
— Provide easily accessable manual fire extinguishers in and near the room.
— Do not store or keep flammable material in the room.
• Adequately protect the area against water damage:
— Make sure no water or steam pipes run through the room.
— If a sprinkler system is present, make sure the room is equipped with a drain.
— If a sprinkler system is present, tie its activation into the circuit breaker toshut off all equipment if the sprinkler system activates.
,appb.22491 Page 141 Friday, February 15, 2002 2:51 PM

This is the Title of the Book, eMatter EditionCopyright © 2002 O’Reilly & Associates, Inc. All rights reserved.
142 | Appendix B: Physical Security
• Adequately protect the area against excessive heat:
— Make sure there is adequate air-conditioning to keep the room around 69 to75 degrees Fahrenheit.
— Make sure all equipment fans and ventilation areas are free from obstruction.
• Make sure he secured area has adequate humidity control to keep the roomaround 40 to 60 percent humidity.
• Adequately protect the area against electrical damage:
— Make sure all equipment is on an uninterruptible power supply.
— Make sure the flooring is anti-static electricity flooring.
• Free the area from excessive airborne dust and dirt.
• Clear and unclog equipment fans, filters, and vents.
,appb.22491 Page 142 Friday, February 15, 2002 2:51 PM

This is the Title of the Book, eMatter EditionCopyright © 2002 O’Reilly & Associates, Inc. All rights reserved.
143
Appendix Cradius APPENDIX C
Incident Response
Your router has been hacked. Now what? This chapter covers the basics of emer-gency response when dealing with a router compromise. Ideally, you should have anincident response plan that is tailored to your organization. If you are reading thischapter because you have just been hacked and don’t know what to do, first prom-ise that as soon as this incident is over, you will develop a complete incidentresponse plan. Then keep reading for help on responding to incidents involvingrouter compromises.
The goals of incident response are to:
• Determine if the incident is an attack or an accident
• Discover what happened and the scope of the incident
• Preserve all the evidence
• Recover from the incident
• Take the steps necessary to prevent this incident from happening again
Warning!If you do not have a detailed incident response plan in place and you have beenhacked, it is best to do nothing yourself and to call law enforcement. They aretrained to preserve the evidence and investigate the incident and can track downattackers through means you don’t have access to. Therefore, the first recommenda-tion is to do nothing and call law enforcement.
However, many attacks may look like accidental outages (and vice versa). The fol-lowing information is provided for those who are still trying to determine if an inci-dent is due to a hacker or an accident or for those who must get the compromisedrouter operational as soon as possible. So please read this entire chapter—especiallythe section on preserving evidence—to collect enough evidence to provide lawenforcement with leads if necessary. When you reconfigure or reboot the router, you
,appc.22691 Page 143 Friday, February 15, 2002 2:52 PM

This is the Title of the Book, eMatter EditionCopyright © 2002 O’Reilly & Associates, Inc. All rights reserved.
144 | Appendix C: Incident Response
destroy the original evidence, so how you make copies of this evidence is extremelyimportant to having any chance of holding up in a court of law.
Keys to InvestigatingYour mission while investigating an incident is to:
1. Change nothing.
2. Record everything.
Even if you suspect the incident was accidental, it is best to follow these two rulesuntil you are sure. Once you start modifying your router, you destroy your ability touse any information on it in the future.
Change NothingMany administrators’ first step when a router goes down is to reboot the system. It isamazing how many times this seems to fix a problem, but if the router malfunc-tioned because of an attack by a hacker, rebooting the system can cause the loss ofvaluable evidence, sometimes all evidence of the attack. Additionally, while investi-gating the incident, until you have determined that it was indeed an accident, do notmake any changes to the router. These changes can cause significant problems if theevidence is ever needed in court.
Record EverythingThe most unobtrusive way to log into a router is through the console port. Thus, forinvestigation purposes, use terminal emulation software—like HyperTerminal—toconnect to the router’s console port. Before you even log in, configure your terminalemulation software to capture your current session. This will record everything youdo and can be helpful in proving that you did not make any changes to the routerduring your investigation. HyperTerminal can be configured to capture your sessionthough the menu option Transfer ➝ Capture Text. This option will bring up a dialogbox that lets you choose the name and location of the capture file. Once you havechosen it, click the Start button to begin recording. You can now log into the routerand use read-only commands—show commands—to investigate the incident.
Make sure you record the date and time inside your terminal sessionsomehow. To do this, right after you connect to the router, run theshow clock command. Run this command about every five minutes orso to establish a time record, and then run it one more time just beforeyou log out of the router.
,appc.22691 Page 144 Friday, February 15, 2002 2:52 PM
This is the Title of the Book, eMatter EditionCopyright © 2002 O’Reilly & Associates, Inc. All rights reserved.
Discover What Happened and the Scope of the Incident | 145
Attack Versus AccidentWhen many administrators start getting involved in information security, they tend toget very worried and excited about the state of their networks. First, they get worriedbecause they realize how vulnerable their systems are; second, they get excited by thechallenge of protecting those systems. The Holy Grail for many system and networkadministrators who move into InfoSec is catching the bad guy. This provides the abil-ity to impress friends with tales of how your cunning outsmarted the wily hacker.
This excitement can make these administrators jump to conclusions and see acciden-tal incidents as attacks. In their excitement, they inform management that the systemshave been hacked, and they are quickly tracking down the attacker. This can becomeembarrassing when it turns out that the janitor accidentally tripped over a power cord.
So, before you run to management claiming that you have been hacked, take the timeto rule out accidental causes. They are more often responsible for router problemsthan are intentional compromises, and caution can save you much embarrassment.
Discover What Happened and the Scopeof the IncidentPeople request a nice checklist when they reach the step of determining what hap-pened and how big the problem is. Networks are so complex and types of attacks arechanging so fast that such a checklist will never exist. This type of work is what sepa-rates those who truly understand routers and networking from those who don’t. Todetermine what happened, you need to go through your router logs, configurations,access points, and so on. Once you decide that your router was actually compro-mised by an attacker, you need to determine details such as:
• What parts of your organization are impacted, and how much damage is theimpact causing?
• How did the attacker do it?
• Who is the attacker?
• Is the incident ongoing, or has it stopped?
• What other systems or routers have been accessed from the compromised router?
• What version of IOS are you running, and are there any known vulnerabilities tothis version?
• What IP addresses have recently accessed the router?
• Have the running-config or startup-config been changed?
This list is far from complete, but will hopefully get you thinking in the right direc-tion. More often than not, answering every question on this list necessarily involves
,appc.22691 Page 145 Friday, February 15, 2002 2:52 PM

This is the Title of the Book, eMatter EditionCopyright © 2002 O’Reilly & Associates, Inc. All rights reserved.
146 | Appendix C: Incident Response
law enforcement. If you are not sure how to start looking for answers to the preced-ing questions, you are probably over your head and it is time to call in a professional.
Evidence PreservationIf you must get your router functional as quickly as possible, it is vitally importantthat you record any volatile information that may be lost upon reconfiguration orreboot of the router. Before you make any changes to, shut down, or reboot therouter, follow these steps to gather as much of this volatile evidence as possible:
1. Connect to the router’s console port. This is the least-intrusive way to access therouter. It doesn’t require network access and will not tip off your attackers ifthey are sniffing your network.
2. Configure your terminal emulation software to record your session.
3. Log in to the router.
4. Enter enable mode (enable).
5. Show the current date and time (show clock detail).
6. Write down the time from a trusted time source—atomic clock, NTP server, etc.
7. Show the IOS, uptime, and hardware information (show version).
8. Show the current running configuration (show running-config).
9. Show the current startup configuration (show startup-config).
10. Show scheduled reload time (system may auto reboot, if set) (show reload).
11. Show the routing tables (show ip route).
12. Show the ARP tables (show ip arp).
13. Show who is logged in (show users).
14. Show current logs (show logging).
15. Show current interface configuration (show ip interface).
16. Show TCP connections (show tcp brief).
17. Show open sockets (show ip sockets).
18. Show NAT translations (show ip net translations verbose).
19. Show NetFlows (show ip cache flow).
20. Show CEF forwarding table (show ip cef).
21. Show SNMP v3 users (show snmp user).
22. Show SNMP v3 groups (show snmp group).
23. Show date and time again (show clock detail).
24. Write down the time from a trusted time source again.
25. Disconnect from the router.
,appc.22691 Page 146 Friday, February 15, 2002 2:52 PM

This is the Title of the Book, eMatter EditionCopyright © 2002 O’Reilly & Associates, Inc. All rights reserved.
Recovering from the Incident | 147
26. End your terminal recording session.
27. Print out your recording session.
28. Write the two times you recorded from the trusted time source on the printout.
29. Sign and date the printout.
30. Get a witness to sign and date the printout.
31. Keep both the electronic copy and the hardcopy in a secure location until youcan turn them over to law enforcement.
Next, you need to gather information from the router externally:
1. Port scan the router from an external system.
2. Record the time of the port scan from a trusted time source.
3. Print out the port scan and write the time on the printout.
4. If the router is running SNMP, get a copy of the current SNMP tree. This can bedone with a command such as snmpwalk (from NetSNMP http://net-snmp.sourceforge.net).
5. Record the time of the SNMP walk from a trusted time source.
6. Print out the SNMP tree info and write the time on the printout.
7. Sign and date both printouts.
8. Get a witness to sign and date both printouts.
9. Keep all copies in a secure location until you can turn them over to law enforce-ment.
A good source of accurate time is a portable clock that has a built-inradio receiver and synchronizes itself with US atomic clocks. They canusually be purchased for less than $50.
The worst-case scenario is when the router’s enable password has been changed byeither an accident or an attacker. In these situations your ability to collect forensicinformation is severely limited. Password recovery procedures require rebooting therouter, which destroys much of the evidence you are interested in. If this happens,attempt to log in with a lower privileged account and run as many of the precedingcommands as possible. When you cannot log into the router at all, the informationgathered externally becomes much more important because it is all you have. There-fore, be sure to try to use SNMP and port scans to gather as much information aboutthe router as possible.
Recovering from the IncidentOnce law enforcement officials have completed their initial analysis of the router,they may return it to you or keep it for more detailed forensic investigation. Whether
,appc.22691 Page 147 Friday, February 15, 2002 2:52 PM

This is the Title of the Book, eMatter EditionCopyright © 2002 O’Reilly & Associates, Inc. All rights reserved.
148 | Appendix C: Incident Response
you are using the original router or a replacement router, the next step is to recoverfrom the incident. This is why it is so important to have current documentation onyour network and backup copies of all your router configuration files. With backupcopies, recovery may be as simple as reloading the backup configuration onto therouter. However, this configuration has already been compromised once; it is imper-ative that you move on to the next step—preventing future incidents.
Preventing Future IncidentsHaving finally recovered, your job isn’t over. In the course of your response andinvestigation, you should have determined how the attacker compromised yourrouter. Chances are it will have been compromised due to a known vulnerability thathadn’t been patched, an attacker sniffing the wire for passwords, or poorly chosenrouter passwords that the attacker simply guessed.
Whatever the cause, now is the time to do a postmortem and come up with a plan toclose the security hole and prevent such holes from appearing in the future. Finally, ifyou responded to this incident by the seat of your pants, consider this your wake-upcall and develop a documented and tested incident response policy.
Incident Response ChecklistHere is a quick overview of responding to an incident:
• Follow your established incident response plan, if you have one.
• Determine if the problem was due to an accident or malicious attack.
• While determining the cause of the problem:
— Change nothing.
— Record everything.
• If you don’t have an incident response policy and you determine you have beenhacked, touch nothing and call law enforcement.
• If you cannot call or wait for law enforcement, understand the risks you take bymodifying or rebooting the router.
• If you must modify or reboot the router, first record all volatile evidence fromthe router in a well-documented manner.
• Recover from the incident by getting the router functional again.
• Perform a postmortem and implement changes to prevent future compromises.
• If you don’t have a documented and tested incident response plan, develop onenow.
,appc.22691 Page 148 Friday, February 15, 2002 2:52 PM

This is the Title of the Book, eMatter EditionCopyright © 2002 O’Reilly & Associates, Inc. All rights reserved.
149
Appendix D APPENDIX D
Configuration Examples
This appendix consolidates many of the concepts presented in this book into exam-ple router configurations that can be used as templates for your Cisco routers. Whilethese examples don’t include all possible configurations, they do include the mostcommon security configurations for both small and large organizations. The exam-ples are created so you can type all commands directly into your router. They will beslightly different than a show running-config because of IOS version differences andcommand line differences.
Basic Example ConfigurationThis is a basic secure configuration that you might find at an organization with asmall network with few routers and few administrators. In addition to standard secu-rity settings, this configuration will:
• Disable all unneeded services. This configuration doesn’t use HTTP, SNMP,TFTP, CDP, etc.
• Configure the router to use an external NTP server to set its time, while peeringwith two other routers—10.10.2.1 and 10.10.4.1. NTP is configured to useauthentication and to serve only clients on the internal network.
• Configure logging to log to the syslog server 10.10.4.6.
• Enable an external interface—Serial 0/0—that has antispoofing ACL applied toit. This interface uses BGP, with authentication, as its routing protocol.
• Enable an internal interface—Fast Ethernet 0/0—that has been configured touse RIP v2, with authentication, as its routing protocol.
• Configure console access to use a line password for authentication.
• Disable AUX access.
• Restrict VTY access to the IP 10.10.4.10 and configure it to use only SSH:!! Enable password encryption
,appd.22818 Page 149 Friday, February 15, 2002 2:52 PM

This is the Title of the Book, eMatter EditionCopyright © 2002 O’Reilly & Associates, Inc. All rights reserved.
150 | Appendix D: Configuration Examples
service password-encryption!! Set the privileged level passwordenable secret SecretEnablePassword!! Disable Global services & protocolsno service udp-small-serversno service tcp-small-serversno service fingerno service padno service configno boot networkno cdp runno snmp-serverno ip bootp serverno ip source-routeno ip fingerno ip name-serverno ip classlessno ip http server!! Enable needed servicesip cefservice tcp-keepalives-in!! Configure the Loopback Addressint loopback 0 ip address 10.10.10.1 255.255.255.252!! Configure NTP ! Use External Server 192.5.5.250 ntp server 192.5.5.250 prefer ! Set our NTP source address to be our loopback interface ntp source loopback 0 ! Enable NTP Authentication ntp authenticate ! Create & Trust our NTP authentication Key ntp authentication-key 10 md5 SecretNtpKey ntp trusted-key 10 ! Now Peer with our other main routers (10.10.2.1 & 10.10.4.1) ! But use the authentication key we just created ntp peer 10.10.2.1 key 10 ntp peer 10.10.4.1 key 10 ! Configure NTP to only peer with our main routers (10.10.2.1 & 10.10.4.1) ! Create ACL & Log violations access-list 20 permit host 10.10.2.1 access-list 20 permit host 10.10.4.1 access-list 20 deny any log ! Apply the ACL as our peer ACL ntp access-group peer 20 ! Configure NTP to only serve our internal networks 10.10.0.0/16 ! Create and ACL & Log violations access-list 21 permit 10.10.0.0 0.0.255.255 access-list 21 deny any log ! Apply the ACL as our server-only ACL
,appd.22818 Page 150 Friday, February 15, 2002 2:52 PM

This is the Title of the Book, eMatter EditionCopyright © 2002 O’Reilly & Associates, Inc. All rights reserved.
Basic Example Configuration | 151
ntp access-group serve-only 21 ! Only server 20 NTP clients maximum ntp max-associations 20 ! Set to Eastern Daylight Savings Time clock summer-time EDT recurring!! Set up logging ! Turn logging on logging on ! Configure logging to use millisecond time stamps and the timezone service timestamps log datetime msec localtime show-timezone ! Enable sequence numbers and throttle messages below error level service sequence-numbers logging rate-limit all 10 except error ! Create our logging buffer logging buffer 32000 ! Set out logging buffer to see notification level messages & above logging buffer notification ! Disable Console logging no logging console ! Configure logging to go to our syslog server 10.10.4.6 logging 10.10.4.6 ! Set our syslog facility to local6 and our level to informational & above logging facility local6 logging trap informational!! NSA recommended command privilege changesprivilege exec level 15 connectprivilege exec level 15 telnetprivilege exec level 15 rloginprivilege exec level 15 show ip access-listsprivilege exec level 15 show access-listsprivilege exec level 15 show loggingprivilege exec level 1 show ip!! Configure the Login Bannerbanner login ^CWARNING!!!This system is solely for the use of authorized users for official purposes.You have no expectation of privacy in its use and to ensure that the systemis functioning properly, individuals using this computer system are subjectto having all of their activities monitored and recorded by systempersonnel. Use of this system evidences an express consent to suchmonitoring and agreement that if such monitoring reveals evidence ofpossible abuse or criminal activity, system personnel may provide theresults of such monitoring to appropriate officials.^C!! Configure the EXEC Bannerbanner exec ^CNOTICE!!!This system is solely for the use of authorized users for official purposes.You have no expectation of privacy in its use and to ensure that the systemis functioning properly, individuals using this computer system are subject
,appd.22818 Page 151 Friday, February 15, 2002 2:52 PM

This is the Title of the Book, eMatter EditionCopyright © 2002 O’Reilly & Associates, Inc. All rights reserved.
152 | Appendix D: Configuration Examples
to having all of their activities monitored and recorded by systempersonnel. Use of this system evidences an express consent to suchmonitoring and agreement that if such monitoring reveals evidence ofpossible abuse or criminal activity, system personnel may provide theresults of such monitoring to appropriate officials.^C!! Configure BGP for our ISP link using authenticationrouter bgp 100 network 10.10.2.0 network 10.10.4.0 network 130.18.6.0 neighbor 130.18.6.2 remote-as 115 neighbor 130.18.6.2 password SecretBGPpassword!! Create an Ingress (incoming) ACL for our External Interface (Serial 0/0) ! Anti-spoofing (Internet Network is 10.10.0.0/16) access-list 101 deny ip 10.10.0.0 0.0.255.255 any log-input access-list 101 deny ip 127.0.0.0 0.255.255.255 any log-input access-list 101 deny ip 10.0.0.0 0.255.255.255 any log-input access-list 101 deny ip 172.16.0.0 0.15.255.255 any log-input access-list 101 deny ip 192.168.0.0 0.0.255.255 any log-input access-list 101 deny ip 224.0.0.0 15.255.255.255 any log-input access-list 101 deny ip 240.0.0.0 7.255.255.255 any log-input ! Block all incoming Syslog packets (port 514) access-list 101 deny udp any any eq 514 log-input ! Block incoming all incoming ICMP packets except MTU discovery ! This won't allow us to ping or traceroute outside our networkaccess-list 101 permit icmp any any 3 4
access-list 101 deny icmp any any log-input ! Allow everything else access-list 101 permit ip any any!! Create our Egress filter to no allow our network to send out spoofed packetsaccess-list 102 permit ip 10.10.0.0 0.0.255.255 anyaccess-list 102 deny ip any any log-input!! External Interface (Directly connected to Internet)interface Serial 0/0 ip address 130.18.6.1 255.255.255.252 ! Disable unneeded protocols & services no ip redirects no ip directed-broadcast no ip mask-reply no ip unreachables no ip proxy-arp no cdp enable ! Enable uRPF anti-spoofing features ip verify unicast reverse-path ! Make sure we don't serve as a NTP server ntp disable ! Apply our ingress (incoming) ACL ip access-group 101 in ! Apply our egress (outgoing) ACL ip access-group 102 out
,appd.22818 Page 152 Friday, February 15, 2002 2:52 PM

This is the Title of the Book, eMatter EditionCopyright © 2002 O’Reilly & Associates, Inc. All rights reserved.
Basic Example Configuration | 153
!! Configure RIPv2 for our internal networkingrouter rip version 2 network 10.0.0.0!! Define a Key Chain for our RIPv2 authenticationkey chain 10 key 1 key-string SecretRipKey!! Internal Interface FastEthernet 0/0 (connected our Internal network)interface FastEthernet 0/0 ip address 10.10.2.2 255.255.255.0 ! Disable unneeded protocols & services no ip redirects no ip directed-broadcast no ip mask-reply no ip unreachables no ip proxy-arp no cdp enable ! Enable uRPF anti-spoofing features ip verify unicast reverse-path ! Enable & Configure RIP v2 authentication ip rip authentication key-chain 10 ip rip authentication mode md5!! Securely Configure the Consoleline con 0 ! Enable logins login ! Set the Console Login password password SecretConsolePassword ! Disable all network access transport input none!! Disable the AUX portline aux 0 ! Use the login and no password commands to disable access login no password ! Disable all network access transport input none ! NSA's other recommended commands for disabling access no exec exec-timeout 0 1!! Enable SSH on the router ! Give the router a hostname hostname RouterOne ! Configure our domain ip domain-name Company.Com ! Configure our RSA keys !crypto key generate rsa
,appd.22818 Page 153 Friday, February 15, 2002 2:52 PM

This is the Title of the Book, eMatter EditionCopyright © 2002 O’Reilly & Associates, Inc. All rights reserved.
154 | Appendix D: Configuration Examples
! Configure a local username for vty SSH access username JohnDoe password PasswordForJohnDoe ! Configure SSH retries & Timeout ip ssh time-out 60 ip ssh authenication-retries 2!! Create ACL to restrict VTY access managers IP only (10.10.4.10)access-list 15 permit 10.10.4.10access-list 15 deny any log! Configure & Secure VTY accessline vty 0 4 ! Enable login using the locally define username and password login local ! Make sure we only use SSH to access the router transport input ssh ! Set the timeout to 5 minutes exec-timeout 5 0 ! Apply ACL to restrict VTY access access-class 15 in
AAA Example ConfigurationThis configuration is the same as the preceding one, except that instead of local andline authentication, it uses AAA authentication and a TACACS+ access controlserver. The TACACS+ server used in this example has the IP address 10.10.2.20.
!! Enable password encryptionservice password-encryption!! Set the privileged level passwordenable secret UnGuessablePassword!! Disable Global services & protocolsno service udp-small-serversno service tcp-small-serversno service fingerno service padno service configno boot networkno cdp runno snmp-serverno ip bootp serverno ip source-routeno ip fingerno ip name-serverno ip classlessno ip http server!! Enable needed servicesip cefservice tcp-keepalives-in
,appd.22818 Page 154 Friday, February 15, 2002 2:52 PM

This is the Title of the Book, eMatter EditionCopyright © 2002 O’Reilly & Associates, Inc. All rights reserved.
AAA Example Configuration | 155
!! Configure the Loopback Addressint loopback 0 ip address 10.10.10.1 255.255.255.252!! Configure NTP ! Use External Server 192.5.5.250 ntp server 192.5.5.250 prefer ! Set our NTP source address to be our loopback interface ntp source loopback 0 ! Enable NTP Authentication ntp authenticate ! Create & Trust our NTP authentication Key ntp authentication-key 10 md5 SecretNtpKey ntp trusted-key 10 ! Now Peer with our other main routers (10.10.2.1 & 10.10.4.1) ! But use the authentication key we just created ntp peer 10.10.2.1 key 10 ntp peer 10.10.4.1 key 10 ! Configure NTP to only peer with our main routers (10.10.2.1 & 10.10.4.1) ! Create ACL & Log violations access-list 20 permit host 10.10.2.1 access-list 20 permit host 10.10.4.1 access-list 20 deny any log ! Apply the ACL as our peer ACL ntp access-group peer 20 ! Configure NTP to only serve our internal networks 10.10.0.0/16 ! Create and ACL & Log violations access-list 21 permit 10.10.0.0 0.0.255.255 access-list 21 deny any log ! Apply the ACL as our server-only ACL ntp access-group serve-only 21 ! Only server 20 NTP clients maximum ntp max-associations 20 ! Set to Eastern Daylight Savings Time clock summer-time EDT recurring!! Set up logging ! Turn logging on logging on ! Configure logging to use millisecond time stamps and the timezone service timestamps log datetime msec localtime show-timezone ! Enable sequence numbers and throttle messages below error level service sequence-numbers logging rate-limit all 10 except error ! Create our logging buffer logging buffer 32000 ! Set out logging buffer to see notification level messages & above logging buffer notification ! Disable Console logging no logging console ! Configure logging to go to our syslog server 10.10.4.6 logging 10.10.4.6 ! Set our syslog facility to local6 and our level to informational & above logging facility local6
,appd.22818 Page 155 Friday, February 15, 2002 2:52 PM

This is the Title of the Book, eMatter EditionCopyright © 2002 O’Reilly & Associates, Inc. All rights reserved.
156 | Appendix D: Configuration Examples
logging trap informational!! NSA recommended command privilege changesprivilege exec level 15 connectprivilege exec level 15 telnetprivilege exec level 15 rloginprivilege exec level 15 show ip access-listsprivilege exec level 15 show access-listsprivilege exec level 15 show loggingprivilege exec level 1 show ip!! Configure the Login Bannerbanner login ^CWARNING!!!This system is solely for the use of authorized users for official purposes.You have no expectation of privacy in its use and to ensure that the systemis functioning properly, individuals using this computer system are subjectto having all of their activities monitored and recorded by systempersonnel. Use of this system evidences an express consent to suchmonitoring and agreement that if such monitoring reveals evidence ofpossible abuse or criminal activity, system personnel may provide theresults of such monitoring to appropriate officials.^C!! Configure the EXEC Bannerbanner exec ^CNOTICE!!!This system is solely for the use of authorized users for official purposes.You have no expectation of privacy in its use and to ensure that the systemis functioning properly, individuals using this computer system are subjectto having all of their activities monitored and recorded by systempersonnel. Use of this system evidences an express consent to suchmonitoring and agreement that if such monitoring reveals evidence ofpossible abuse or criminal activity, system personnel may provide theresults of such monitoring to appropriate officials.^C!! Configure BGP for our ISP link using authenticationrouter bgp 100 network 10.10.2.0 network 10.10.4.0 network 130.18.6.0 neighbor 130.18.6.2 remote-as 115 neighbor 130.18.6.2 password SecretBGPpassword!! Create an Ingress (incoming) ACL for our External Interface (Serial 0/0) ! Anti-spoofing (Internet Network is 10.10.0.0/16) access-list 101 deny ip 10.10.0.0 0.0.255.255 any log-input access-list 101 deny ip 127.0.0.0 0.255.255.255 any log-input access-list 101 deny ip 10.0.0.0 0.255.255.255 any log-input access-list 101 deny ip 172.16.0.0 0.15.255.255 any log-input access-list 101 deny ip 192.168.0.0 0.0.255.255 any log-input access-list 101 deny ip 224.0.0.0 15.255.255.255 any log-input access-list 101 deny ip 240.0.0.0 7.255.255.255 any log-input
,appd.22818 Page 156 Friday, February 15, 2002 2:52 PM

This is the Title of the Book, eMatter EditionCopyright © 2002 O’Reilly & Associates, Inc. All rights reserved.
AAA Example Configuration | 157
! Block all incoming Syslog packets (port 514) access-list 101 deny udp any any eq 514 log-input ! Block incoming all incoming ICMP packets except MTU discovery ! This won't allow us to ping or traceroute outside our networkaccess-list 101 permit icmp any any 3 4
access-list 101 deny icmp any any log-input ! Allow everything else access-list 101 permit ip any any!! Create our Egress filter to no allow our network to send out spoofed packetsaccess-list 102 permit ip 10.10.0.0 0.0.255.255 anyaccess-list 102 deny ip any any log-input!! External Interface (Directly connected to Internet)interface Serial 0/0 ip address 130.18.6.1 255.255.255.252 ! Disable unneeded protocols & services no ip redirects no ip directed-broadcast no ip mask-reply no ip unreachables no ip proxy-arp no cdp enable ! Enable uRPF anti-spoofing features ip verify unicast reverse-path ! Make sure we don't serve as a NTP server ntp disable ! Apply our ingress (incoming) ACL ip access-group 101 in ! Apply our egress (outgoing) ACL ip access-group 102 out!! Configure RIPv2 for our internal networkingrouter rip version 2 network 10.0.0.0!! Define a Key Chain for our RIPv2 authenticationkey chain 10 key 1 key-string SecretRipKey!! Internal Interface FastEthernet 0/0 (connected our Internal network)interface FastEthernet 0/0 ip address 10.10.2.2 255.255.255.0 ! Disable unneeded protocols & services no ip redirects no ip directed-broadcast no ip mask-reply no ip unreachables no ip proxy-arp no cdp enable ! Enable uRPF anti-spoofing features ip verify unicast reverse-path
,appd.22818 Page 157 Friday, February 15, 2002 2:52 PM

This is the Title of the Book, eMatter EditionCopyright © 2002 O’Reilly & Associates, Inc. All rights reserved.
158 | Appendix D: Configuration Examples
! Enable & Configure RIP v2 authentication ip rip authentication key-chain 10 ip rip authentication mode md5!! THIS IS WHERE DIFFERENCES FROM PREVIOUS CONFIG START! THIS CONFIG USES AAA INSTEAD OF LOCAL & LINE AUTHENTICATION! IT ALSO USES AAA TO USE A TACACS+ SERVER FOR AUTHORIZATION.!! Enable AAA ! Define a new AAA model aaa new-model ! Define where to find our TACACS+ server (10.10.2.20) tacacs-server host 10.10.2.20 ! Configure our TACACS+ server key tacacs-server key TACACSserverKEY! Define default AAA authentication methods for logins:
! First TACACS+ server, then local usernames if server is unreachable aaa authentication login default group tacacs+ local ! Define default AAA authentication methods for enable password: ! First TACACS+ server, then local enable password if server is unreachable aaa authentication enable default group tacacs+ enable ! ! Configure router to use AAA for authorization (Leave this part out if you ! only want to use AAA for authentication and keep standard authorization. ! ! Configure AAA to use TACACS+ for EXEC (shell) authorization aaa authorization exec default group tacacs+ if-authenticated ! Configure AAA to use TACACS+ for level 1 and level 15 command authorization aaa authorization commands 1 default group tacacs+ if-authenticated aaa authorization commands 15 default group tacacs+ if-authenticated!
! Configure the router to use AAA to log to the TACACS+ server. ! ! Configure the router to perform EXEC, System, Network & Connection logging ! to the TACACS+ server aaa accounting exec default start-stop group tacacs+ aaa accounting system default stop-only group tacacs+ aaa accounting connection default start-stop group tacacs+ aaa accounting network default start-stop group tacacs+! Now configure the router to log all level 1 (user) and level 15 (privilege)
! command the the TACACS+ server aaa accounting commands 1 default stop-only group tacacs+ aaa accounting commands 15 default stop-only group tacacs+!! Securely Configure the Consoleline con 0 ! Configure the console to use the AAA method 'default' for authentication login authentication default ! Disable all network access transport input none!! Disable the AUX portline aux 0
,appd.22818 Page 158 Friday, February 15, 2002 2:52 PM

This is the Title of the Book, eMatter EditionCopyright © 2002 O’Reilly & Associates, Inc. All rights reserved.
SNMP Example Configuration | 159
! Use the login and no password commands to disable access login no password ! Disable all network access transport input none ! NSA's other recommended commands for disabling access no exec exec-timeout 0 1!! Enable SSH on the router ! Give the router a hostname hostname RouterOne ! Configure our domain ip domain-name Company.Com ! Configure our RSA keys!crypto key generate rsa
! Configure a local username for vty SSH access username JohnDoe password PasswordForJohnDoe ! Configure SSH retries & Timeout ip ssh time-out 60 ip ssh authenication-retries 2!! Create ACL to restrict VTY access managers IP only (10.10.4.10)access-list 15 permit 10.10.4.10access-list 15 deny any log! Configure & Secure VTY accessline vty 0 4 ! Configure logins to use the AAA methods 'default' for authentication. login authentication default ! Make sure we only use SSH to access the router transport input ssh ! Set the timeout to 5 minutes exec-timeout 5 0 ! Apply ACL to restrict VTY access access-sclass 15 in
SNMP Example ConfigurationThe previous examples have SNMP turned off. If your organization requires SNMP,add the following configuration examples to the preceding ones. To enable thisSNMP read-only access to the router, replace the no snmp-server command in theprevious examples with the following configurations.
SNMP Version 2cThe following example configuration configures the router to provide SNMP v2cread-only access to the SNMP management system 10.10.4.10:
!! Create an ACL that only allows 10.10.4.10 to use SNMP accessaccess-list 30 permit 10.10.4.10
,appd.22818 Page 159 Friday, February 15, 2002 2:52 PM

This is the Title of the Book, eMatter EditionCopyright © 2002 O’Reilly & Associates, Inc. All rights reserved.
160 | Appendix D: Configuration Examples
access-list 30 deny any log!! Enable the SNMP read only serversnmp-server community SNMPreadOnlyCommunityString RO 30
SNMP Version 3This example uses SNMP v3 authentication and encryption to protect SNMP trafficbetween the management server and the router and allows only SNMP managementsystem 10.10.4.10 to access the router through SNMP:
!! Create ACL that only allows 10.10.4.10 to use SNMP accessaccess-list 40 permit 10.10.4.10access-list 40 deny any log! Create an SNMP v3 group to use Authentication & Encryptionsnmp-server group AuthPrivGroup v3 priv access 40! Define and SNMPv3 user, authentication password, and encryption password.snmp-server user MyUser3 AuthPrivGroup v3 auth md5 AuthPass priv des56 PrivPass
HTTP ConfigurationIf you decide that HTTP’s usefulness outweighs its security problems, replace the noip http server command in the preceding examples with the following. This exampleconfigures HTTP access for the IP 10.10.4.10 only:
!! Create an ACL to limit HTTP access to 10.10.4.10access-list 45 permit 10.10.4.10access-list 45 deny any log! Configure HTTP access to use the ACLip http access-class 45! Configure HTTP access to use local authenticationip http authentication local!
,appd.22818 Page 160 Friday, February 15, 2002 2:52 PM
This is the Title of the Book, eMatter EditionCopyright © 2002 O’Reilly & Associates, Inc. All rights reserved.
161
Appendix E APPENDIX E
Resources
This appendix lists resources that you may find useful when securing your routers,systems, and networks. It also provides links to sites where you can find moredetailed information on topics that are out of the scope of this book—includingIPSec, RADIUS/TACACS+, and intrusion detection.
Web Siteshttp://www.cisco.com
This site provides the most current information on Cisco routers and products.Cisco’s online technical documentation is excellent and should usually be thefirst stop for questions involving Cisco routers.
http://www.cisco.com/go/psirtA direct link to Cisco’s Product Security Incident Response Team (PSIRT) and alist of all Cisco IOS vulnerabilities.
http://www.cisco.com/cgi-bin/Support/FeatureNav/FN.plCisco’s feature navigator. It helps determine what IOS versions and hardwaresupport features such as IPSec and SSH.
http://nsa1.www.conxion.com/ciscoNSA-recommended guides for securing Cisco routers.
http://nsa1.www.conxion.comAdditional NSA-recommended security guides.
http://www.securityfocus.comA security site with excellent news, articles, tools, and vulnerability listings.SecurityFocus is also home to the Bugtraq vulnerability forum.
http://www.cert.orgThe original Computer Emergency Response Team (CERT) based out of Carn-egie Mellon. CERT is an excellent resource on vulnerabilities, fixes, and incidentresponse.
,appe.22945 Page 161 Friday, February 15, 2002 2:52 PM

This is the Title of the Book, eMatter EditionCopyright © 2002 O’Reilly & Associates, Inc. All rights reserved.
162 | Appendix E: Resources
http://www.sans.orgThe System Administrator and Network Security web site. It is an excellentsource for research and education in the area of information security.
http://www.gocsi.comThe Computer Security Institute web site. he source of the annual FBI/CSI com-puter crime and security survey.
http://web.mit.edu/kerberos/wwwThe MIT Kerberos web site.
http://www.de.easynet.net/tacacs-faqThe TACACS frequently asked questions web site (with a focus on Cisco).
http://www.ietf.org/html.charters/OLD/radius-charter.htmlThe IETF RADIUS workgroup with links to RFCs and RADIUS information.
http://www.ietf.org/html.charters/ipsec-charter.htmlThe IETF IPSec working group page with links to IPSec drafts and RFCs.
http://www.rfc-editor.orgA site where you can search RFCs by number, topic, and keyword.
http://www.simpleweb.orgA site with links to more information about SNMP.
http://net-snmp.sourceforge.netA web site for the Net-SNMP open source SNMP server and client software.
http://www.liquifried.com/docs/security/reservednets.htmlA large listing of IANA-reserved networks that can be included in antispoofingfilters.
http://www.ietf.org/html.charters/syslog-charter.htmlThe IETF syslog working group with links to drafts and RFCs.
http://www.isaca.orgThe Information Systems Audit and Control Association web site. This organiza-tion sponsors the Certified Information Systems Auditor (CISA) certification.
BooksBoney, James. Cisco IOS in a Nutshell. O’Reilly & Associates, 2001.
This book consolidates the most important commands and features of IOS into asingle volume.
Garfinkel, Simson and Gene Spafford. Practical Unix and Internet Security, SecondEdition. O’Reilly & Associates, 1996.
This classic reference is the definitive source of information on securing bothstandalone Unix systems and those connected to the Internet.
,appe.22945 Page 162 Friday, February 15, 2002 2:52 PM

This is the Title of the Book, eMatter EditionCopyright © 2002 O’Reilly & Associates, Inc. All rights reserved.
Books | 163
Kaeo, Merike. Designing Network Security. Cisco Press, 1999.
Cisco’s book on the fundamentals of Cisco network security.
Norberg, Stefan. Securing Windows NT/2000 Servers for the Internet. O’Reilly &Associates, 2000.
This concise guide simplifies the job of securing a Windows server by paringdown installation and configuration instructions into a series of checklists.
Schneier, Bruce. Applied Cryptography. John Wiley & Sons, 1995.
An excellent reference and introduction to cryptography and standard encryp-tion techniques and formulas.
Sedayao, Jeff. Cisco IOS Access Lists. O’Reilly & Associates, 2001.
This book focuses on a critical aspect of the Cisco IOS—access lists, which arecentral to securing routers and networks.
van Wyk, Kenneth and Richard Forno. Incident Response. O’Reilly & Associates,2001.
This book combines technical information with guidelines for administrativeplanning so that organizations can map out their responses to computer incidents.
Wenstrom, Michael. Managing Cisco Network Security. Cisco Press, 2001.
Cisco’s overview of network security using Cisco products by Cisco Systems
Zwicky, Elizabeth, Simon Cooper, and Brent Chapman. Building Internet Firewalls,Second Edition. O’Reilly & Associates, 2000.
An excellent book on the complexities of designing and building firewalls.
,appe.22945 Page 163 Friday, February 15, 2002 2:52 PM

,appe.22945 Page 164 Friday, February 15, 2002 2:52 PM

This is the Title of the Book, eMatter EditionCopyright © 2002 O’Reilly & Associates, Inc. All rights reserved.
165
We’d like to hear your suggestions for improving our indexes. Send email to [email protected].
Index
AAAA access control, 43
enabling, 43local authentication, 44
AAA accounting, 118, 119accounting types, 119configurations, 120logging, 109
AAA authentication, 11checklist, 51configuration example, 154–159
AAA authentication banner, 55aaa authentication login command, 45AAA security checklist, 127access control
AAA, 11authentication and, 11authorization and, 11AUX password, 14auxiliary port, 12callback access, 21console password, 13console port, 12dial-up access, 21HTTP, 12, 26IPSec, 28Kerberos authentication, 50line authentication, 11local username, 15local username authentication, 11points of access, 11privileged mode, 13, 15RADIUS authentication, 47
remote administration dangers, 19reverse Telnet, 22security checklist, 30SNMP, 13TACACS, 11, 16TACACS+ authentication, 44TACACS+ authorization, 46TFTP, 12, 19token-based, 51user mode, 13virtual TTYs, 12VTY access, disabling, 23VTY password, 14Web access, 26(see also AAA access control)
access points, physical security and, 134accidents versus attacks, 145ACL violation logging, 116
antispoofing violations, 117other protocols, 118VTY access logging, 117
ACLs (access lists)instead of uRPF, spoofing and, 87NTP configuration, 103
addresses, source address, NTPconfiguration, 105
antispoofingfilters, 83–87security checklist, 129uRPF and, 86violation logging, 117
approval for audits, 124ARP tables, snmpwalk program, 68
,hciscoroutIX.fm.24713 Page 165 Friday, February 15, 2002 2:55 PM

This is the Title of the Book, eMatter EditionCopyright © 2002 O’Reilly & Associates, Inc. All rights reserved.
166 | Index
asymmetrical routing, uRPF and, 87attacks
DoS, 83risk of, 4versus accidents, 145(see also hacks)
auditing routers, 123–125authentication, 11
AAA access control, local, 44AAA authentication banner, 55AAA method, 11BGP, 91console password, 13EIGRP, 90failure logging, AAA accounting and, 121HTTP, 27HTTP, TACACS+ and, 46Kerberos, 50line authentication, 11local username, 11, 15NTP configuration, 105OSPF, 91packets, SNMP v3, 76RADIUS, 47RIP v2, 88routing protocols, 88–92SNMP v1, 69SNMP v3, 70spoofing and, 19TACACS, 16TACACS+, 44
AuthNoPriv access, SNMP v3, 78authorization, 11
diabling logins, 18privileged mode, 15RADIUS, 49TACACS+
command authorization, 47EXEC, 46
authorized users, warning banners, 52AuthPriv access, SNMP v3, 78AUX password, 14AUX port
dial-up access and, 21reverse Telnet, 22TACACS+ server, 45
auxiliary login, disabling, 18auxiliary port, access control and, 12
Bbackups
configuration files, 36
physical security and, 137routers, 36
banner login command, 55banners
AAA authentication, 55EXEC banner, 56login banners, 54, 55MOTD (message of the day), 54(see also warning banners)
basic access control(see also access control)
basic access control (see access control)BGP authentication, 91biometric locks, physical security, 136books for further reading, 163broadcast/multicast mode, NTP, 97brute force attacks, remote administration
and, 20buffered logging, 109, 111Bugtraq, IOS version and, 6
Ccallback access, 21callback forced-wait command, 22card-access locks, physical security, 136CDP (Cisco Discovery Protocol), 65CEF (Cisco Express Forwarding), 86
enabling, 87central server configuration, NTP, 97–99clear line command, 40, 41client mode, NTP, 97clock summer-time command, 102clock timezone command, 102Command accounting, AAA accounting
method, 119command authorization, TACACS+, 47commands
aaa authentication login, 45banner login, 55callback forced-wait, 22clear line, 40, 41clock summer-time, 102clock timezone, 102debug, 41enable password, 15enable secret, 15, 34, 35exec-timeout, 26flowcontrol, 22ip cef, 87no snmp-server, 72ntp authenticate, 105ntp disable, 102
,hciscoroutIX.fm.24713 Page 166 Friday, February 15, 2002 2:55 PM

This is the Title of the Book, eMatter EditionCopyright © 2002 O’Reilly & Associates, Inc. All rights reserved.
Index | 167
ntp peer, 100ntp server, 98ntp source, 105passive-interface, 93privilege level, 39privilege levels, changing, 40service exec-callback, 21service password-encryption, 33service tcp-keepalives-in, 26service timestamps log datetime, 110show clock, 144show ntp, 103show ntp status, 103show privilege, 38show run, 35snmp-server, 72, 73snmp-server tftp-server-list, 74snmp-server view, 75, 80telnet, 41terminal monitor, 112transport input, 23username privilege, 40
community stringsSNMP v1, 69SNMP v1 and v2c, 71
competence, auditing and, 125compromised routers, 2
consequences, 3configuration
AAA accounting, 120examples
AAA, 154–159basic, 149–154HTTP, 160SNMP, 159
NTPACLs, 103authentication, 105central server, 97–99flat structure, 99–100hierarchical model, 100options, 101source address, 105time zones, 102viewing status, 103
syslog logging, 114configuration files
backups, 36encryption, 36security, 36TFTP server, 37
Connection accounting, AAA accountingmethod, 119
console logging, 109, 111console login, disabling, 18console password, 13console port, access control and, 12Consolidated Technology Early Deployment
(CTED), 7crypto maps, 29
interfaces, 30CTED (Consolidated Technology Early
Deployment) IOS early deploymentrelease, 7
naming scheme, 9
Ddebug command, 41DES (Data Encryption Standard), SNMP
v3, 70DF (Deferred Release) IOS version, 8dial-up access, AUX port and, 21directed broadcasts, ICMP, 60dirt, physical security and, 141disable command, privilege levels and, 38doors, physical security, 134DoS (denial-of-service) attacks, 83dry pipe sprinkler systems, physical
security, 139dual-factor locks, physical security, 136due diligence, auditing and, 125dust, physical security and, 141
EEARLY DEPLOYMENT RELEASE
SOFTWARE, software system, 7ED (Early Deployment) IOS version, 7egress filters, antispoofing, 85EIGRP
authentication and, 90passive interfaces, 93
electricity, physical security and, 140Electronic Communications Privacy Act, 53electronic locks, physical security, 135enable command, privilege levels and, 38enable password, 34
RADIUS, 48TACACS+ enable password, 45
enable password command, 15enable secret command, 15, 34, 35enable secret password, 34
,hciscoroutIX.fm.24713 Page 167 Friday, February 15, 2002 2:55 PM

This is the Title of the Book, eMatter EditionCopyright © 2002 O’Reilly & Associates, Inc. All rights reserved.
168 | Index
encryptionconfiguration files, 36MD5 hash algorithm, 32packets, SNMP v3, 76passwords, 32service password-encryption
command, 33SNMP v3, 70strong encryption, MD5, 35Vigenere, 32
ethics, auditing and, 125evidence preservation, incident
response, 146example configurations
AAA, 154–159basic, 149–154HTTP, 160SNMP, 159
Exec accounting, AAA accountingmethod, 119
EXEC authorization, TACACS+, 46EXEC banner, 56exec-mode callback, 21exec-timeout command, 26
FFBI warning banner example, 54filters
antispoofing, 83–87route filtering, 92, 93
global, 93network borders, 94per-interface filtering, 94
finger service, 64fire, physical security and, 138firewalls, source routing and, 63flat structure configuration, NTP, 99–100flowcontrol command, 22footprinting, 2
GGD (General Deployment) release, operating
system, 6, 7naming scheme, 9
General Deployment, IOS Major Releases, 8general logging practices, 108global route filtering, 93groups, Trusted groups, 79
Hhacks
attacking other sites, 4disabled network, 3internal system attack, 3rerouting traffic, 4risk of attack, 4(see also attacks)
hardening routerschecklist for process, 123defined, 1
heat, physical security, 139hierarchical model configuration, NTP, 100hijacking, remote administration and, 20HTTP (Hypertext Transfer Protocol), 26
access control, 12authentication, 27configuration example, 160limiting access, 27RADIUS authentication, 49security and, 65TACACS+ authentication and, 46
humidity, physical security and, 140hybrid sprinkler systems, physical
security, 139HyperTerminal, 144
IICMP (Internet Central Message Protocol)
directed broadcasts, 60information requests, 63mask reply, 61MTU discovery, 58redirects, 59timestamps, 63
ICMP unreachables, 62IDS (intrustion detection system), 3incident response
attacks versus accidents, 145change nothing rule, 144checklist, 148evidence preservation, 146investigation checklist, 145law enforcement and, 143prevention, 148record everything rule, 144recovery, 147terminal emulation software and, 144
independence, auditing and, 124information requests, ICMP, 63
,hciscoroutIX.fm.24713 Page 168 Friday, February 15, 2002 2:55 PM

This is the Title of the Book, eMatter EditionCopyright © 2002 O’Reilly & Associates, Inc. All rights reserved.
Index | 169
InfoSec (Information Security), 1incident response and, 145
ingress filters, antispoofing, 84interfaces, passive, 92internal routers, uRPF and, 87internal system attack, 3interviews, audit process, 124investigating incidents, 144investigation checklist, incident
response, 145IOS (Internetworking Operating System)
DF (Deferred Release), 8GD (General Deployment) release, 6, 7naming scheme, 9security, 6
checklist, 10, 125versions, 6, 7
determining, 6vulnerabilities, 10
IP addressesHTTP limiting, 27SNMP access, limiting, 73, 79SNMP and, 68VTY access, 25
ip cef command, 87IPSec, 28IPSec Extended ACL, 29IPSec transforms, 29ISAKAMP setup, 28
KKerberos authentication, 50keyed locks, physical security, 135
Llaw enforcement, incident response and, 143LD (Limited Deployment) IOS Major
Releases, 8naming scheme, 9
line authentication, 11line privilege levels, 39local authentication, AAA access control, 44local username authentication, 11, 15location, physical security and, 133locks, physical security, 134–136
biometric locks, 136card-access locks, 136dual-factor locks, 136electronic locks, 135keyed locks, 135mechanical locks, 135
loggingAAA accounting, 118ACL violation logging, 116checklist, 130general, 108message priority, 109router logging, 109timestamps, 110uRPF and, 87
login banners, 54, 55
MMAC addresses, SNMP and, 68MAINTENANCE INTERIM SOFTWARE,
operating system, 7Major Releases IOS version, 7
naming scheme, 9mask reply, ICMP, 61maximum associations, NTP
configuration, 101MD5 encryption, strong encryption, 35MD5 hash algorithm, 32
SNMP v3 and, 70mechanical locks, physical security, 135messages
logging messages, 109syslog logging, 115
methods, 119modem passwords, 21monitoring access, warning banners, 53MOTD (message of the day) banners, 54MTU discovery, 58Murphy’s Law, physical security, 138–141
Nnaming conventions, IOS, 9natural disaster, physical security, 138–141Net-SNMP snmpwalk program, 68no snmp-server command, 72no snmp-server community command, 72noauth keyword, 77NoAuthNoPriv access, SNMP v3, 77notification of activity, warning banners, 53ntp authenticate command, 105ntp disable command, 102NTP (Network Time Protocol)
broadcast mode, 97client mode, 97configuration
ACLs, 103authentication, 105
,hciscoroutIX.fm.24713 Page 169 Friday, February 15, 2002 2:55 PM

This is the Title of the Book, eMatter EditionCopyright © 2002 O’Reilly & Associates, Inc. All rights reserved.
170 | Index
NTP (Network Time Protocol)(continued)central server, 97–99flat structure, 99–100hierarchical model, 100maximum associations, 101options, 101preferred server, 101source address, 105time zones, 102viewing status, 103
existing time server, 98overview, 96peer mode, 97security checklist, 130server mode, 97stratum one server, 98synchronized router as timeserver, 99unsynchronized router as timeserver, 99
ntp peer command, 100ntp server command, 98ntp source command, 105
Oofficial work, warning banners, 53OSPF authentication, 91OSPF passive interfaces, 93
Ppackets, routers and, 2packet-too-big keyword, 58pass established keyword, 87passive interfaces, 92passive-interface command, 93passwords
AUX, 14checklist, 41choosing, 37configuration files, 36console password, 13enable, 34
RADIUS, 48enable secret, 34encryption, 32modems, 21privilege-level, 39security checklist, 127strong passwords, 35, 37TACACS+ enable password, 45VTY, 14
peer ACL, NTP configuration, 104peer mode, NTP, 97
per-interface filtering, 94personnel, physical security, 137physical security, 133
backups, 137checklist, 131doors, 134locks, 134–136Murphy’s Law, 138–141natural disaster, 138–141personnel, 137protection against people, 133router location, 133
pinging, 58ICMP, 60
planning, audit process, 124points of access, 11prevention, 148privacy expectations, warning banners, 53private community string, 71private networks, antispoofing filters, 85privilege level command, 39privilege levels
changing, 38commands, changing, 40defaults, 38line privilege, 39privilege mode, 40recommended changes, 41username privilege levels, 40
privilege mode, 40access control, 15
privileged mode, access control, 13privilege-level passwords, 39protocols
routing, security, 88–94security checklist, 128unneeded, 58–67
Proxy ARP (Proxy Address ResolutionProtocol), 65
public community string, 71
Qquery-only ACL, NTP configuration, 104
RRADIUS
AAA accounting and, 121authentication, 47authorization, 49HTTP authentication, 49
RADIUS enable password, 48
,hciscoroutIX.fm.24713 Page 170 Friday, February 15, 2002 2:55 PM

This is the Title of the Book, eMatter EditionCopyright © 2002 O’Reilly & Associates, Inc. All rights reserved.
Index | 171
read-only access, SNMP v1 and v2c, 72disabling, 72
read/write accessSNMP, TFTP and, 74SNMP v1 and v2c, 72
disabling, 73recording access, warning banners, 53recovery, 147redirects, ICMP, 59references
books, 163Web sites, 161–162
RELEASE SOFTWARE, operating system, 7remote administration, 19
brute force attacks, 20hijacking and, 20sniffing, 20spoofing, 19
remote authentication, trusted-hostcompromise, 20
remote connections, CDP, 65reporting, audit process, 124rerouting traffic hack, 4reserved networks, antispoofing filters, 85resources, books, 163resources, Web sites, 161–162reverse Telnet, 22RIP v2, authentication and, 88risk of attack, 4route filtering, 92, 93
global, 93network borders, 94per-interface filtering, 94
router logging, 109AAA accounting, 109buffered logging, 109, 111console logging, 109, 111message priority, 109SNMP traps logging, 109, 116syslog logging, 109, 113–115terminal logging, 109terminal monitor logging, 112
routersauditing, 123–125backups, 36compromised, 2
consequences, 3hardening, defined, 1overview, 2packets and, 2security checklists, 125–131
routingprotocols
authentication, 88–92static routing, 88
source routing, 63tables, snmpwalk program, 68
Ssecurity
AAA, checklist, 127access control security, 30antispoofing, checklist, 129authentication, 88–92configuration files, 36
backups, 36enabling, 34HTTP, 65IOS, 6
checklist, 10, 125IPSec, 28logs checklist, 130NTP checklist, 130passwords checklist, 127physical checklist, 131protocols checklist, 128, 129routers
checklists, 125–131routing protocols, 88–94services, checklist, 128SNMP
checklist, 129SNMP read/write access
TFTP and, 74static routing, 88warning banners checklist, 127(see also physical security, privilege levels)
sequence numbers, syslog logging, 115serve ACL, NTP configuration, 104serve-only ACL, NTP configuration, 104server mode, NTP, 97servers
preferred, NTP configuration, 101SNMP management, 81
service exec-callback command, 21service password-encryption command, 33service tcp-keepalives-in command, 26service timestamps log datetime
command, 110services
security checklist, 128unneeded, 58–67
,hciscoroutIX.fm.24713 Page 171 Friday, February 15, 2002 2:55 PM

This is the Title of the Book, eMatter EditionCopyright © 2002 O’Reilly & Associates, Inc. All rights reserved.
172 | Index
SHA hashes, SNMP v3 and, 70show clock command, 144show ntp command, 103show ntp status command, 103show privilege command, 38show run command, 35show version command, 6small services, 64SMED (Specific Market Early Deployment)
IOS early deployment release, 7naming scheme, 9
sniffing, remote administration and, 20SNMP (Simple Network Management
Protocol), 67, 68access control, 13configuration example, 159IP addresses and, 68MAC addresses and, 68management servers, 81read/write access, 74security checklist, 129snmpwalk program and, 68
SNMP traps logging, 109, 116SNMP v1, 69
community strings, 71disabling, 72enabling, 71limiting access
IP addresses, 73views and, 74–76
read-only access, 72disabling, 72
read/write access, 72securing, 70–76
SNMP v2, 69enabling, 71securing, 70–76
SNMP v2ccommunity strings, 71disabling, 72limiting access
IP addresses, 73views and, 74–76
read-only access, 72disabling, 72
read/write access, 72SNMP v3, 69
AuthNoPriv access, 78AuthPriv access, 78limiting access, IP addresses, 79limiting output, views, 80
NoAuthNoPriv access, 77securing, 76–81
snmp-server command, 72snmp-server community command, 72, 73snmp-server tftp-server-list command, 74snmp-server view command, 75, 80snmpwalk program, system information with
SNMP, 68source address configuration, NTP, 105source routing, 63Specific Market Early Deployment
(SMED), 7Specific Technology Early Deployment
(STED), 7spoofing, 19
antispoofing, 83–87sprinkler systems, physical security, 138SSH, VTY and, 24start-stop AAA accounting type, 119static routing, 88STED (Specific Technology Early
Deployment) IOS early deploymentrelease, 7
naming scheme, 9stop-only AAA accounting type, 119stratum one server, 98strong passwords, 35, 37synchronized router as timeserver, 99syslog logging, 109, 113–115System accounting, AAA accounting
method, 119
TTACACS+
AAA accounting and, 120authentication, 44authorization
command authorization, 47EXEC, 46
HTTP authentication, 46TACACS+ enable password, 45TACACS (Terminal Access Controller Access
Control System), 16authentication, 11
TCP small services, 64TCP (Transfer Control Protocol), RADIUS
and, 47telnet command, 41terminal emulation software, 144terminal logging, 109terminal monitor command, 112
,hciscoroutIX.fm.24713 Page 172 Friday, February 15, 2002 2:55 PM

This is the Title of the Book, eMatter EditionCopyright © 2002 O’Reilly & Associates, Inc. All rights reserved.
Index | 173
terminal monitor logging, 112TFTP (Trivial File Transfer Protocol), 19
access control, 12server, configuration files, 37SNMP read/write access, 74
throttling syslog messages, 115time zone configuration, NTP, 102timestamps
ICMP, 63logging, 110
token-based access control, 51traceroute, 58transport input command, 23Trusted group, 79trusted-host compromise, remote
authentication and, 20
UUDP small services, 64UDP (User Defined Protocol), RADIUS
and, 47unneeded protocols and services, 58–67unreachables, ICMP, 62unsynchronized router as timeserver, 99UPSs (uninterruptible power supplies), 140uRPF (Unicast Reverse Packet
Forwarding), 86use implies consent, warning banners, 53user mode, access control, 13username privilege command, 40username privilege levels, 40users, warning banners, 52
Vview configuration, NTP, 103views
SNMP access, limiting, 74–76SNMP output, limiting, 80
Vigenere encryption, 32virtual TTYs, access control and, 12VPN, 28
Crypto Maps, 29IPSec, 28
IPSec ACL, 29IPSec Transforms, 29ISAKMP, 28
VTYaccess, disabling, 23access limit, 25additional settings, 26login, disabling, 18SSH, 24
VTY access logging, 117VTY password, 14VTY ports, TACACS+ server, 45vulnerabilities of IOS versions, 10
Wwait-stop AAA accounting type, 119warning banners, 52
characteristics of, 52checklist, 57example, FBI, 54legal issues, 52monitoring access, 53notification of activity, 53official work, 53privacy expectations, 53recording access, 53security checklist, 127use implies consent, 53(see also banners)
water, physical security, 138Web access, 26Web site resources, 161–162wet pipe sprinkler systems, physical
security, 139
XX Releases, IOS early deployment release, 8
naming scheme, 9
,hciscoroutIX.fm.24713 Page 173 Friday, February 15, 2002 2:55 PM

,hciscoroutIX.fm.24713 Page 174 Friday, February 15, 2002 2:55 PM

About the AuthorThomas Akin is a Certified Information Systems Security Professional (CISSP) with adecade of experience in information security. He is the founding director of theSoutheast Cybercrime Institute at Kennesaw State University, where he also serves aschairman of the Institute’s Board of Advisors. He is an active member of theAttorney General’s Georgia Cybercrime Task Force and heads its educationcommittee. Heavily involved in Atlanta’s InfoSec community, Thomas spends muchof his time teaching, writing, and trying to keep his security, network, and Unixcertifications up to date. Finally, he is the owner of and principal consultant forCrossRealm Consulting. More information about Thomas can be found athttp://www.crossrealm.com.
ColophonOur look is the result of reader comments, our own experimentation, and feedbackfrom distribution channels. Distinctive covers complement our distinctive approachto technical topics, breathing personality and life into potentially dry subjects.
The animal on the cover of Hardening Cisco Routers is a North African wild ass. Thismammal, an ancester of the domestic donkey, once lived in the Moroccan AtlasMountain range and possibly throughout North Africa. The small population of wildasses is now confined to Sudan, Somalia, and Ethiopia.
Adapted to arid grasslands, the North African wild ass eats thorny, dry plants andgrass. It retreats to rocky areas for shade during the hot, sunny hours of the day andis active in the early morning, at dusk, and at night. The wild ass needs water everytwo to three days and lives alone or temporarily in small groups of offspring toconserve food and water. Males generally live alone, especially when defending terri-tory that contains sources of water.
The North African wild ass is in grave danger of extinction. Domestication, breedingwith domestic animals, hunting, and competition with other animals (includinghumans) for water has diminished the population to a few hundred. Well-meaningtourists who chase the animals for photographs often exhaust the wild asses to thepoint of death. The animal is now one of the rarest mammals in the world, despiteconservation efforts.
Ann Schirmer was the production editor and proofreader, and Norma Emory was thecopyeditor, for Hardening Cisco Routers. Claire Cloutier, Tatiana Apandi Diaz, andRachel Wheeler provided quality control. Johnna VanHoose Dinse wrote the index.
Emma Colby designed the cover of this book, based on a series design by EdieFreedman. The cover image is a 19th-century engraving from the Dover PictorialArchive. Emma Colby produced the cover layout with QuarkXPress 4.1 usingAdobe’s ITC Garamond font.
,AUTH.COLO.25109 Page 1 Friday, February 15, 2002 2:57 PM

Melanie Wang designed the interior layout, based on a series design by DavidFutato. Mihaela Maier converted the files from Microsoft Word to FrameMaker5.5.6 using tools created by Mike Sierra. The text font is Linotype Birka; the headingfont is Adobe Myriad Condensed; and the code font is LucasFont’s TheSans MonoCondensed. The illustrations that appear in the book were produced by RobertRomano and Jessamyn Read using Macromedia FreeHand 9 and Adobe Photoshop6. The tip and warning icons were drawn by Christopher Bing. This colophon waswritten by Ann Schirmer.
,AUTH.COLO.25109 Page 2 Friday, February 15, 2002 2:57 PM