hardening guide - suse linux enterprise server 12 …...a.4 october 2014 (initial release of suse...
TRANSCRIPT
Hardening Guide
SUSE Linux Enterprise Server 12 SP4
Hardening GuideSUSE Linux Enterprise Server 12 SP4
Deals with the particulars of installing and setting up a secure SUSE Linux Enter-prise Server, and additional post-installation processes required to further secureand harden that installation. Supports the administrator with security-related choic-es and decisions.
Publication Date: April 09, 2020
SUSE LLC10 Canal Park DriveSuite 200Cambridge MA 02141USA
https://www.suse.com/documentation
Copyright © 2006– 2020 SUSE LLC and contributors. All rights reserved.
Permission is granted to copy, distribute and/or modify this document under the terms of the GNU Free Docu-
mentation License, Version 1.2 or (at your option) version 1.3; with the Invariant Section being this copyright
notice and license. A copy of the license version 1.2 is included in the section entitled “GNU Free Documentation
License”.
For SUSE trademarks, see http://www.suse.com/company/legal/ . All other third-party trademarks are the prop-
erty of their respective owners. Trademark symbols (®, ™ etc.) denote trademarks of SUSE and its affiliates.
Asterisks (*) denote third-party trademarks.
All information found in this book has been compiled with utmost attention to detail. However, this does not
guarantee complete accuracy. Neither SUSE LLC, its affiliates, the authors nor the translators shall be held liable
for possible errors or the consequences thereof.
Contents
About This Guide vi
1 Common Criteria 11.1 Introduction 1
1.2 Evaluation Assurance Level (EAL) 1
1.3 Generic Guiding Principles 2
1.4 For More Information 4
2 Linux Security and Service Protection Methods 6
2.1 Physical Security 7
System Locks 7
2.2 Locking Down the BIOS 8
2.3 Security via the Boot Loaders 9
2.4 Verifying Security Action with seccheck 9
Seccheck Configuration 10 • Automatic Logout 11
2.5 Retiring Linux Servers with Sensitive Data 12
scrub: Disk Overwrite Utility 12
2.6 Backups 14
2.7 Disk Partitions 14
2.8 Firewall (iptables) 15
2.9 Security Features in the Kernel 15Enable TCP SYN Cookie Protection (default in SUSE Linux Enterprise Server 12
SP4) 16 • Disable IP Source Routing (default in SUSE Linux Enterprise Server
12 SP4) 16 • Disable ICMP Redirect Acceptance 17 • Enable IP Spoofing
Protection (default in SUSE Linux Enterprise Server 12 SP4) 17 • Enable
Ignoring to ICMP Requests 17 • Enable Ignoring Broadcasts Request
iii Hardening Guide
(default in SUSE Linux Enterprise Server 12 SP4) 17 • Enable Bad
Error Message Protection (default in SUSE Linux Enterprise Server 12
SP4) 18 • Enable Logging of Spoofed Packets, Source Routed Packets,
Redirect Packets 18 • Buffer Overflow Attack Mitigation 18 • File system
hardening 19 • Increased dmesg Restrictions 20 • Filter access to /
dev/mem (default in SUSE Linux Enterprise Server 12) 20
2.10 AppArmor 20
2.11 SELinux 21
2.12 FTP, telnet, and rlogin (rsh) 22
2.13 Removing Unnecessary Software Packages (RPMs) 22
2.14 Patching Linux Systems 24
YaST Online Update 24 • Automatic Online Update 25 • Subscription
Management Tool—SMT 25 • SUSE Manager 26
2.15 Securing the Network—Open Network Ports Detection 27
2.16 xinetd Services - Disabling 28
Inventory xinetd services 30
2.17 Securing Postfix 32
2.18 File Systems: Securing NFS 32
Enabling and Starting NFS Server 33 • Exporting NFS 34 • Using NFS
over TCP 35
2.19 Copying Files Using SSH Without Providing Login Prompts 35
2.20 Checking File Permissions and Ownership 36
2.21 Default umask 37
2.22 SUID/SGID Files 37
2.23 World-Writable Files 38
2.24 Orphaned or Unowned Files 39
2.25 Restricting Access to Removable Media 39
iv Hardening Guide
2.26 Various Account Checks 40
Unlocked Accounts 40 • Unused Accounts 41
2.27 Enabling Password Aging 41
2.28 Stronger Password Enforcement 43
2.29 Leveraging an Effective PAM stack 44
Password Strength 44 • Restricting Use of Previous
Passwords 45 • Locking User Accounts After Too Many Login Failures 46
2.30 Preventing Accidental Denial of Service 48
Example for Restricting System Resources 48
2.31 Displaying Login Banners 51
2.32 Miscellaneous 52
Host-Based Linux Monitoring and Intrusion Detection 52 • Connect
Accounting Utilities 52 • Other 53
A Documentation Updates 54
A.1 November 2016 (Initial Release of SUSE Linux Enterprise Server 12SP2) 54
A.2 December 2015 (Initial Release of SUSE Linux Enterprise Server 12SP1) 55
A.3 February 2015 (Documentation Maintenance Update) 56
A.4 October 2014 (Initial Release of SUSE Linux Enterprise Server 12) 56
v Hardening Guide
About This Guide
The SUSE Linux Enterprise Server Security and Hardening Guide deals with the particulars of in-stallation and set up of a secure SUSE Linux Enterprise Server and additional post-install process-es required to further secure and harden that installation. Security and hardening elements andprocedures are best applied to a server both during installation and post-installation and aim toimprove the fitness of the system for the purposes demanded by its administrator.
This guide supports administrator in making security related choices and decisions. The indi-vidual steps and procedures should be seen as proposals, not as strict rules. You will often needto evaluate the usefulness of measures for your organization yourself.
The objective is to improve the security value of the system. Definitions about the meaning ofthe term security vary, but we want to settle on one that is both simple and abstract:
A good system does what it is expected to do, and it does it well.
A secure system is a good system that does nothing else.
The focus of this guide lies on doing “nothing else”. The Linux system is constructed in suchway that security policies are enforced. These policies consist of the following concepts (fairlygeneric and incomplete list):
DAC (Discretionary Access Control): File and directory permissions, as set by chmod andchown .
Privileged ports: TCP and UDP ports 0-1023 and raw sockets can only be used by root .
Other privileged operations: Loading kernel modules, configuring network interfaces, allsecurity relevant settings of the Linux kernel. These are operations that can only be doneby the root user, that is the user with the user ID 0, or any other process with the necessarycapabilities.
Attacking a system means to attempt to overcome privilege boundaries, for example by circum-venting or breaking them. That means the administrator or programmer of the system has notanticipated this scenario.
A hardened system raises the bar by reducing the area that the system exposes to the attacker(often called attack surface). A hardened system can also provide measures to reduce the impactof vulnerabilities in the parts of the systems that must be exposed to a potential attacker.
Security is about decisions, and whenever security is in (apparent) opposition to function, thesedecisions become trade-os. While it can be argued that all systems should be set up to beas securely as possible, some levels of security and hardening may very well be overkill in
vi SLES 12 SP4
some cases. Each system's operational environment has its own security requirements derivedfrom business drivers or regulatory compliance mandates. SUSE Linux Enterprise Server can,for example, be configured to comply with security standards, such as SOX, HIPAA and PCIDSS.It can also be set up to fulfill the requirements from the German Federal Office of InformationSecurity (Bundesamt für Sicherheit in der Informationstechnik) as described in BSI TR-02102-1.An effective business requirements analysis should be performed to determine the right level ofsecurity and hardening to be applied to a server or defined as part of a baseline server build.
As a final note before we begin: You may encounter individual requirements in regulatory com-pliance frameworks that may not make sense from a technical perspective, or they do not servethe purpose of improving security. It may be a productive attitude to simply implement whatis required, but whenever there is a contradiction to security, an informed discussion in thedocumentation serves the overall purpose of your regulative compliance framework much morethan blindly obeying the specifications. Feel encouraged to dispute list items that you think arecounterproductive.
1 Assumptions and ScopeReferences in this document will usually be made to a single server target or host, however thescope can generally be applied to more than one machine. We generally assume that the securitytarget can cover one or more systems running SUSE Linux Enterprise Server.
We explicitly do not make any assumptions about the hostility of the network that the systemsare connected to, or the cooperative nature of the users that leverage the services provided bythe systems.
In turn, this means that you partially define your context on your own when reading throughthis document. You will need to broaden the meaning of individual portions to adapt it to yourenvironment. In some cases, such as the use case of a server that is exposed to the Internet,this document may even be insufficient or incomplete; however, it may still serve as a goodstarting point on your journey toward an increased level of confidence that your system willbehave like you want it to.
About trust: Trust relationships exist among all systems that participate in networked transac-tions. In this way, the trust relationship between the people that use the systems is transportedacross these systems. The chain that is formed by your trust relationships is only as strong as theweakest link. It is good practice to graphically visualize the trust relationships with the servicesin a schematic overview or map of your network. Generally, it is up to the owner of a resourceto enforce the policies imposed on that resource; this would usually be the server that provides
vii Assumptions and Scope SLES 12 SP4
the resource. The client that opens a connection to request the resource can only be made re-sponsible for the actions that it performs. This refers to the action of opening the connection tostart with, but to nothing else as such.
The case of hostile users is special and unique: The Human Resources department may be ableto solve some security problems in your computing environment; in addition, some technicalmeasures can be taken. Make sure that the necessary regulations in your environment t yourneeds, and that they back your intentions instead of obstructing them if you need to work arounda missing support from your HR department (and your management).
Persons that have administrative privileges on a system are automatically considered trusted.
A Linux system—without any additional security frameworks such as SELinux—is a single levelsecurity system: From a security policy perspective there is only the superuser (root) and non-privileged users. System users are non-root user IDs that have access to les specific to theirpurpose. The separation of administrative duties is complicated by this simplicity. Some toolshelp: Use sudo(8) for administrative tasks, but be aware that after the privilege boundary iscrossed, a program running with root privileges does not enforce any le access policies for non-privileged users anymore. vi(1) that runs as root can read and write to any le in the system.
Another tool to mitigate the risk of abuse or accidental misuse of administrative privileges isNetIQ's Privileged User Manager product. More information is available here:
https://www.netiq.com/products/privileged-user-manager/
Physical security of the server is another assumption made here, where the server is protect-ed from theft and manipulation by unauthorized persons. A common sobering thought amongsecurity professionals is the “ten-second Denial of Service”: Unplug the wires and reboot theserver. Physical security must be ensured and physical access must be controlled. Otherwise, allassumptions about at least the availability of these systems are void.
Note: CryptographyThe use of cryptography to protect the confidentiality of transactions with the servicesthat your system provides is generally encouraged. The need to implement cryptographicenhancements is strongly dependent on the operational environments of all participatingsystems. Keep in mind that you need to verify all of the possible security benefits that
viii Assumptions and Scope SLES 12 SP4
cryptography can provide, for all of your services, and that these benefits are not deliveredautomatically by turning on the “encrypt” option of your service (if you can enjoy theidyllic situation where encryption is available as a button to check):
Confidentiality
Protection against reading the content of a transaction
Privacy
Protection against knowing that a transaction exists, and some properties that itmay have, such as size, identities of involved parties, their presence, etc.
Integrity
Protection against alteration of content. Be aware that cryptography does not auto-matically provide this kind of protection.
Authenticity
Protection against identity fraud. Cryptography that does not know about identitiesof participating entities cannot deliver this value.
Keep in mind that encryption of data for confidentiality purposes can merely reduce thesize of the data to protect from the actual size to the size of the key that is used to encryptthe data. This results in a key exchange problem for encrypted transactions, and in akey management problem for encrypted data storage. Since data is (typically, there areexceptions!) processed in clear, you need your vault unlocked while data within is beingworked with. The encryption of such data on the le system or block device layer helpsagainst the theft of the system, but it does not help the confidentiality of the data whilethe system is running.
If you want to implement a consistent security policy covering multiple hosts on a network thenorganizational procedures must ensure that all those hosts can be trusted and are configured withcompatible security configurations enforcing an organization wide security policy. Isolation ofgroups of systems that maintain data of the same trust domain can provide an adequate meansof control; ultimately, the access controls to these systems, both for end users and for othersystems, need to be carefully designed, configured, inspected and monitored.
ix Assumptions and Scope SLES 12 SP4
Important: Trusting DataData can only be trusted to the degree that is associated with the domain it comes from. Ifdata leaves the domain in which security policies can be enforced, it should consequentlybe associated with the trust of the target domain.
For a review of industry best practices on security, the development of sound security processes,controls, development, reviews, audit practices and incident management, you can review apublic RFC (request for comments). RFC 2196 is the ongoing work of the world-wide communityand individual security and process experts. You can review it online here: http://www.faqs.org/
rfcs/rfc2196.html . An RFC is an open and living document that invites comments and review.Enhancements and improvements are welcome; you will nd instructions on where to send thosesuggestions within the document itself.
This guide provides initial guidance on how to set up and secure a SUSE Linux Enterprise Serverinstallation but it is not intended to be the only information required for a system administratorto learn how to operate Linux securely. Assumptions are made within this guide that the readerhas knowledge and understanding of operating security principles in general, and of Linux ad-ministrative commands and configuration options in particular.
2 Contents of this BookChapter 1, Common Criteria contains a reference to Common Criteria and SUSE Linux EnterpriseServer. Chapter 2, Linux Security and Service Protection Methods contains more general system secu-rity and service protection schemes.
3 Available Documentation
Note: Online Documentation and Latest UpdatesDocumentation for our products is available at http://www.suse.com/documentation/ ,where you can also nd the latest updates, and browse or download the documentationin various formats. The latest documentation updates are usually available in the Englishversion of the documentation.
x Contents of this Book SLES 12 SP4
The following documentation is available for this product:
Article “Installation Quick Start”
Lists the system requirements and guides you step-by-step through the installation of SUSELinux Enterprise Server from DVD, or from an ISO image.
Book “Deployment Guide”
Shows how to install single or multiple systems and how to exploit the product-inher-ent capabilities for a deployment infrastructure. Choose from various approaches, rangingfrom a local installation or a network installation server to a mass deployment using aremote-controlled, highly-customized, and automated installation technique.
Book “Administration Guide”
Covers system administration tasks like maintaining, monitoring and customizing an ini-tially installed system.
Book “Virtualization Guide”
Describes virtualization technology in general, and introduces libvirt—the unified inter-face to virtualization—and detailed information on specific hypervisors.
Book “Storage Administration Guide”
Provides information about how to manage storage devices on a SUSE Linux EnterpriseServer.
Book “AutoYaST”
AutoYaST is a system for unattended mass deployment of SUSE Linux Enterprise Serversystems using an AutoYaST profile containing installation and configuration data. Themanual guides you through the basic steps of auto-installation: preparation, installation,and configuration.
Book “Security Guide”
Introduces basic concepts of system security, covering both local and network securityaspects. Shows how to use the product inherent security software like AppArmor or theauditing system that reliably collects information about any security-relevant events.
Hardening Guide
Deals with the particulars of installing and setting up a secure SUSE Linux Enterprise Serv-er, and additional post-installation processes required to further secure and harden thatinstallation. Supports the administrator with security-related choices and decisions.
xi Available Documentation SLES 12 SP4
Book “System Analysis and Tuning Guide”
An administrator's guide for problem detection, resolution and optimization. Find how toinspect and optimize your system by means of monitoring tools and how to efficientlymanage resources. Also contains an overview of common problems and solutions and ofadditional help and documentation resources.
Book “Subscription Management Tool for SLES 12 SP4”
An administrator's guide to Subscription Management Tool—a proxy system for SUSE Cus-tomer Center with repository and registration targets. Learn how to install and configure alocal SMT server, mirror and manage repositories, manage client machines, and configureclients to use SMT.
Book “GNOME User Guide”
Introduces the GNOME desktop of SUSE Linux Enterprise Server. It guides you throughusing and configuring the desktop and helps you perform key tasks. It is intended mainlyfor end users who want to make efficient use of GNOME as their default desktop.
The release notes for this product are available at https://www.suse.com/releasenotes/ .
4 Giving Feedback
Your feedback and contribution to this documentation is welcome! Several channels are avail-able:
Service Requests and Support
For services and support options available for your product, refer to http://www.suse.com/
support/ .To open a service request, you need a subscription at SUSE Customer Center. Go to https://
scc.suse.com/support/requests , log in, and click Create New.
Bug Reports
Report issues with the documentation at https://bugzilla.suse.com/ . To simplify thisprocess, you can use the Report Documentation Bug links next to headlines in the HTML ver-sion of this document. These preselect the right product and category in Bugzilla and adda link to the current section. You can start typing your bug report right away. A Bugzillaaccount is required.
xii Giving Feedback SLES 12 SP4
Contributions
To contribute to this documentation, use the Edit Source links next to headlines in theHTML version of this document. They take you to the source code on GitHub, where youcan open a pull request. A GitHub account is required.For more information about the documentation environment used for this doc-umentation, see the repository's README (https://github.com/SUSE/doc-sle/blob/mas-
ter/README.adoc) .
Alternatively, you can report errors and send feedback concerning the documentation [email protected] . Make sure to include the document title, the product version andthe publication date of the documentation. Refer to the relevant section number and title(or include the URL) and provide a concise description of the problem.
5 Documentation ConventionsThe following notices and typographical conventions are used in this documentation:
/etc/passwd : directory names and le names
PLACEHOLDER : replace PLACEHOLDER with the actual value
PATH : the environment variable PATH
ls , --help : commands, options, and parameters
user : users or groups
package name : name of a package
Alt , Alt – F1 : a key to press or a key combination; keys are shown in uppercase as ona keyboard
File, File Save As: menu items, buttons
x86_64 This paragraph is only relevant for the AMD64/Intel 64 architecture. The arrowsmark the beginning and the end of the text block. System z, POWER This paragraph is only relevant for the architectures z Systems andPOWER . The arrows mark the beginning and the end of the text block.
xiii Documentation Conventions SLES 12 SP4
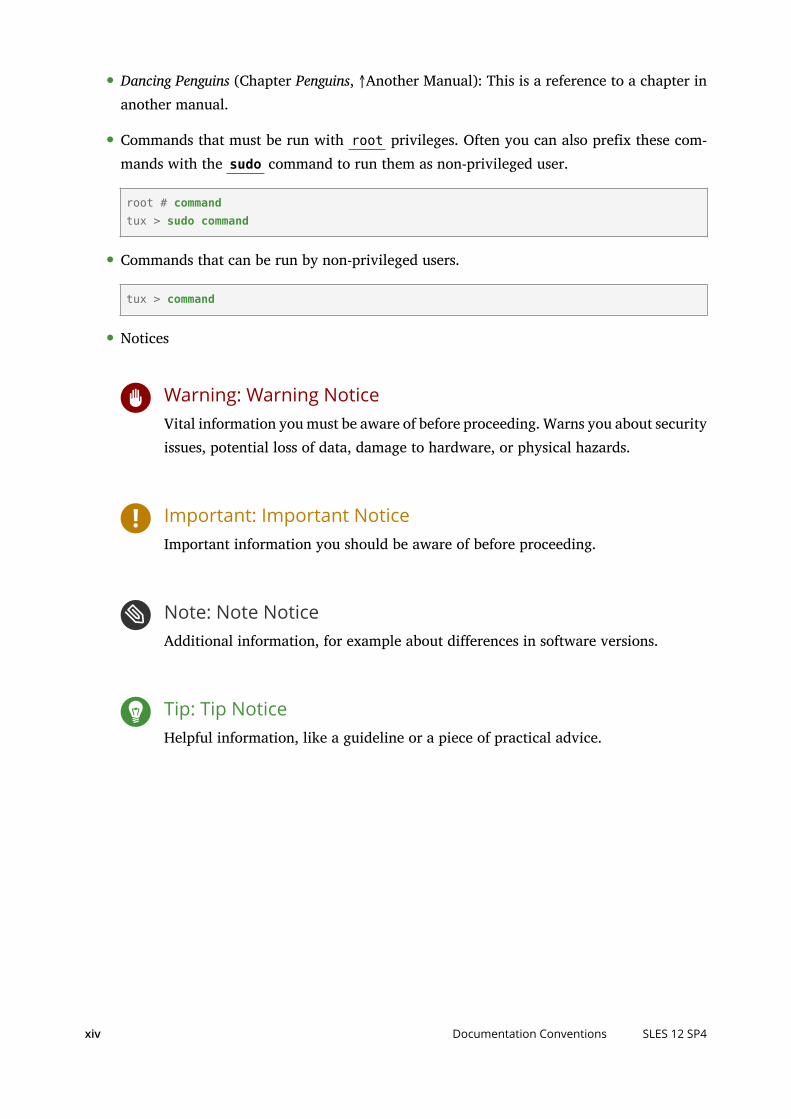
Dancing Penguins (Chapter Penguins, ↑Another Manual): This is a reference to a chapter inanother manual.
Commands that must be run with root privileges. Often you can also prefix these com-mands with the sudo command to run them as non-privileged user.
root # commandtux > sudo command
Commands that can be run by non-privileged users.
tux > command
Notices
Warning: Warning NoticeVital information you must be aware of before proceeding. Warns you about securityissues, potential loss of data, damage to hardware, or physical hazards.
Important: Important NoticeImportant information you should be aware of before proceeding.
Note: Note NoticeAdditional information, for example about differences in software versions.
Tip: Tip NoticeHelpful information, like a guideline or a piece of practical advice.
xiv Documentation Conventions SLES 12 SP4
1 Common Criteria
Common Criteria is the best known and most widely used methodology to evalu-ate and measure the security value of an IT product. The methodology aims to beindependent, as an independent laboratory conducts the evaluation, which a cer-tification body will certify afterward. Security Functional Requirements (SFR) aresummarized in so-called Protection Profiles (PP). If the definition of a Security Tar-get (ST) and the Evaluation Assurance Levels (EAL) are comparable, this allows thecomparison of security functions of different products. (The definition of a Securi-ty Target typically references the PP—if one exists that ts the purpose of the prod-uct).
1.1 IntroductionA clear definition of security in IT products is challenging. Security should be considered aprocess that never ends, not a static condition that can be met or not. A Common Criteria cer-tificate (below EAL7) does not make a clear statement about error-proneness of the system,but it adds an important value to the product that cannot be described with the presence oftechnology alone: That someone has independently inspected the design of the system in suchway that it corresponds to the claims that are made, and that explicit care has been taken inproducing and maintaining the product.
The certificate states a degree of maturity of both the product with its security functions andthe processes of the company that has designed, built and engineered the product, and that willmaintain the product across its lifecycle. As such, Common Criteria aims to be fairly holistic withits approach to take everything into account that is relevant for the security of an IT product.
1.2 Evaluation Assurance Level (EAL)The Evaluation Assurance Level denotes the degree of confidence that the product fulfills thedescribed claims. The levels are from 1 through 7:
EAL1: Functionally tested
EAL2: Structurally tested
1 Introduction SLES 12 SP4
EAL3: Methodically tested and checked
EAL4: Methodically designed, tested and reviewed
EAL5: Semi-formally designed and tested
EAL6: Semi-formally verified design and tested
EAL7: Formally verified design and tested
While EAL1 only provides basic assurance for products to meet security requirements, EAL2 to 4are medium assurance levels. EAL5-EAL7 describe medium-to-high and high assurance. EAL4 isexpected to be the highest level of assurance that a product can have if it has not been designedfrom the start to achieve a higher level of assurance.
1.3 Generic Guiding PrinciplesMuch of the advice in this guide is based on the following guidelines. Consider them whendefining your own security processes or deciding about configurations that are not explicitlycovered here.
Use Data Encryption Whenever Possible
Refer to the About This Guide section of this guide. In Section 1, “Assumptions and Scope”, thelimitations of cryptography are briey outlined.Be aware that cryptography is certainly useful, but only for the specific purposes that itis good for. Using cryptography is not a generic recipe for better security in a system, itsuse may even impose additional risk on the system. Make informed decisions about theuse of cryptography, and feel obliged to have a reason for your decisions. A false sense ofsecurity can be more harmful than the weakness itself.SUSE Linux Enterprise Server supports encryption for:
Network connections (the openssl command, stunnel ), for remote login( openssh , man ssh(1) )
Files ( gpg )
Entire le systems at block layer ( dm-crypt , cryptsetup )
VPN ( ipsec , openvpn )
2 Generic Guiding Principles SLES 12 SP4
Minimal Package Installation
It is useful to restrict the installed packages in your system to a minimum. Binaries notinstalled cannot be executed.During installation of the system, you can limit the set of packages that is installed. Forexample, you can deselect all packages and select only those that you want to use. Forexample, the selection of the apache2-mod_perl package in YaST would automaticallycause all packages to be selected for installation that are needed for the Apache packageto operate. Dependencies have often been artificially cut down to handle the system's de-pendency tree more flexibly. You can chose the minimal system, and build the dependencytree from there with your (leaf) package selection.
Service Isolation—Run Different Services on Separate Systems
Whenever possible, a server should be dedicated to serving exactly one service or appli-cation. This limits the number of other services that could be compromised if an attackercan successfully exploit a software aw in one service (assuming that aw allows accessto others).The use of AppArmor for services that are provided on a system is an effective means ofcontainment. For more information, see Book “Security Guide” and the man page of ap-parmor .The use of virtualization technology is supported with SUSE Linux Enterprise Server. Whilevirtualization is generally designed for server consolidation purposes, it is also usefulnessfor service isolation. However, virtualization technology cannot match or substitute theseparation strength that is given by running services on different physical machines! Beaware that the capability of the hypervisor to separate virtual machines is not higher orstronger than the Linux kernel's capability to separate processes and their address spaces.
System Fingerprinting and Backups
Doing regular backups and having a fingerprint of your system is vital, especially in thecase of a successful attack against your system. Make it an integral part of your securityroutine to verify that your backups work.A fast and directly accessible backup adds confidence about the integrity of your system.However, it is important that the backup mechanism/solution has adequate versioningsupport so that you can trace changes in the system. As an example: The installation timesof packages ( rpm -q --queryformat='%{INSTALLTIME} %{NAME}\n' PACKAGE NAME )must correspond to the changed les in the backup log les.
3 Generic Guiding Principles SLES 12 SP4
Several tools exist on SUSE Linux Enterprise Server 12 SP4 which can be used for thedetection of unknown, yet successful attacks. It does not take much effort to configurethem.In particular, we recommend using the le and directory integrity checker AIDE (Ad-vanced Intrusion Detection Environment). When run for initialization, it creates a hashdatabase of all les in the system that are listed in its configuration le. This allows veri-fying the integrity of all cataloged les at a later time.
Warning: BackdoorsIf you use AIDE, copy the hash database to a place that is inaccessible for potentialattackers. Otherwise, the attacker may modify the integrity database after plantinga backdoor, thereby defeating the purpose of the integrity measurement.
An attacker may also have planted a backdoor in the kernel. Apart from being veryhard to detect, the kernel-based backdoor can effectively remove all traces of thesystem compromise so system alterations become almost invisible. Consequently,an integrity check needs to be done from a rescue system (or any other independentsystem with the target system's le systems mounted manually).
Be aware that the application of security updates invalidates the integrity database. rpm-qlv packagename lists the les that are contained in a package. The RPM subsystem isvery powerful with the data that it maintains. It is accessible with the --queryformatcommand line option. A differential update of integrity database with the changed lesbecomes more manageable with some ne-grained usage of RPM.
1.4 For More InformationThe Common Criteria evaluations inspect a specific configuration of the product in an evaluatedsetup. How to install and configure the reference system that was used as baseline in the CommonCriteria evaluation is documented in the “Administrator's Guide” part of the Common Criteriaevaluation documentation.
However, it would be incorrect to understand the evaluated configuration as a hardened con-figuration. The removal of setuid bits and the prescription of administrative procedures afterinstallation help to reach a specific configuration that is sane. But this is not sufficient for ahardening claim.
4 For More Information SLES 12 SP4
For more information about SUSE Linux Enterprise Server security certifications and fea-tures, see https://www.suse.com/support/security/certifications/ .
Find a list of SUSE security resources at https://www.suse.com/support/security/ .
Apart from the documentation that comes with the Common Criteria effort, see also thefollowing manual pages:
pam(8), pam(5)apparmor(7) and referred man pagesrsyslogd(8), syslog(8), syslogd(8)fstab(5), mount(8), losetup(8), cryptsetup(8)haveged(8), random(4)ssh(1), sshd(8), ssh_config(5), sshd_config(5), ssh-agent(1), ssh-add(1), ssh-keygen(1)cron(1), crontab(5), at(1), atd(8)systemctl(1), daemon(7), systemd.unit(5), systemd.special(5), kernel-command-line(7),bootup(7), systemd.directives
5 For More Information SLES 12 SP4
2 Linux Security and Service Protection Methods
In Chapter 1, Common Criteria we mentioned the Common Criteria EAL 4+ certi-fied installation and setup that was sponsored by IBM for a select subset of hard-ware. This certified build is a great rst step for customers wanting to build a se-cure and hardened base system, yet might not address all of the services and soft-ware specics that many customers would be interested in.
This next part will present a more general view and give recommendations andguidance for SUSE Linux Enterprise Server system security. Some topics may seemrepeated here (from the previous part) yet the context is very different. More detailwill be provided in some sections and certainly some more general examples for agreater number of services.
This portion of the guide will only give basic recommendations instead of strict rules. The pro-cedures and examples here should give you the ability to apply security enhancement techniquesto a wider variety of server-based services and programs.
Some subjects of this chapter have been discussed before. However, you will nd more detailsand explanations in this chapter. Selected general topics are:
Physical Security – Protection of the server from environmental threats (people, places,things).
Security Policies and Procedures – Server life cycle management, disk/media reclamation,backup and archive security.
Systems Monitoring – Procedures around event notification/management.
Systems Automation – Mechanisms and/or procedures for automatic security measures.Heuristics, account control, security reporting and remediation, automated shutdown, etc.
Systems Management – Methods to obtaining packages, verification and signing keys,patching procedures and recommendations.
Securing Network – Addition programs, ports and service wrappers – iptables, tcpwrappers,services.
Remote Access – extra SSH information and key federation. CA integration.
Common Services – mail, NFS and automount.
6 SLES 12 SP4
Securing the kernel and Init Process – parameters, systemd targets, and boot scripts.
Access Control – user/groups/permissions.
Password Security and Warnings – Proper setup of passwords, banners and xinetd .
Miscellaneous Security – Assorted security settings and miscellany.
Resources – Web links, documentation and example references, howtos and general infor-mation, product links.
The sections will again be organized by a topical hierarchy for continuity-sake. Refer to themain table of contents for easy reference.
2.1 Physical SecurityPhysical security should be one of the utmost concerns. Linux production servers should be inlocked data centers where only people have access that have passed security checks. Dependingon the environment and circumstances, you can also consider boot loader passwords.
Additionally, consider questions like:
Who has direct physical access to the host?
Of those that do, should they?
Can the host be protected from tampering and should it be?
The amount of physical security needed on a particular system depends on the situation, andcan also vary widely by available funds.
2.1.1 System Locks
Most server racks in data centers include a locking feature. Usually this will be a hasp/cylinderlock on the front of the rack that allows you to turn an included key to a locked or unlockedposition – granting or denying entry. Cage locks can help prevent someone from tampering orstealing devices/media from the servers, or opening the cases and directly manipulating/sabo-taging the hardware. Preventing system reboots or the booting from alternate devices is alsoimportant (for example CD/DVDs/USB drives/etc.).
7 Physical Security SLES 12 SP4
Some servers also have case locks. These locks can do different things according to the designsof the system vendor and construction. Many systems are designed to self-disable if attempts aremade to open the system without unlocking. Others have device covers that will not let you plugin or unplug keyboards or mice. While locks are sometimes a useful feature, they are usuallylower quality and easily defeated by attackers with ill intent.
2.2 Locking Down the BIOS
Tip: Secure BootThis section describes only basic methods to secure the boot process. To nd out moreabout UEFI and the secure boot feature, see Book “Administration Guide”, Chapter 11 “UEFI
(Unified Extensible Firmware Interface)”, Section 11.1 “Secure Boot”.
The BIOS (Basic Input/Output System) or its successor UEFI (Unified Extensible Firmware In-terface) is the lowest level of software/rmware that dictates system configuration and low-level hardware. When this document references the BIOS, it usually means BIOS and/or UEFI.GRUB 2 and other Linux boot loaders access the BIOS to determine how to boot the host. Oth-er hardware types (POWER/z Systems) that run Linux also have low-level software/rmware.Typically the BIOS can be configured to help prevent attackers from being able to reboot thehost and manipulate the system.
Most BIOS varieties allow the setting of a boot password. While this does not provide a highlevel of security (a BIOS can be reset, removed or modified – assuming case access), it can beanother deterrent.
Many BIOS capabilities have other various security settings – checking with the system vendor,the system documentation or examine the BIOS during a system boot.
Important: Booting when a BIOS Password is SetIf a system host has been set up with a boot password, the host will not boot up unattended(for example a system reboot, power failure, etc.). This is a trade-o.
8 Locking Down the BIOS SLES 12 SP4
2.3 Security via the Boot LoadersThe Linux boot loader GRUB 2, which is used by default in SUSE Linux Enterprise Server, canhave a boot passwords set. It also provides a password feature, so that only administrators canstart the interactive operations (for example editing menu entries and entering the commandline interface). If a password is specified, GRUB 2 will disallow any interactive control until youpress the key C and E and enter a correct password.
You can refer to the GRUB 2 man page for examples.
It is very important to keep in mind that when setting these passwords they will need to beremembered! Also, enabling these passwords might merely slow an intrusion, not necessarilyprevent it. Again, someone could boot from a removable device, and mount your root partition.If you are using BIOS-level security and a boot loader, it is a good practice to disable the abilityto boot from removable devices in your computer's BIOS, and then also password-protectingthe BIOS itself.
Also keep in mind that the boot loader configuration les will need to be protected by changingtheir mode to 600 (read/write for root only), or others will be able to read your passwordsor hashes!
2.4 Verifying Security Action with seccheckIt is highly recommended to have scripts in place which can verify that security actions or pro-cedures have been run. Even the best systems administrators can make errors or forget some-thing. If you have a small or large Linux installation or environment, you should consider theuse of the seccheck scripts.
seccheck is the SUSE Security Checker. It is a set of several shell scripts designed to checkthe local security of the system on a regular basis. There are three main scripts that are exe-cuted at different time intervals. They are security-daily, security-weekly and securi-ty-monthly . If seccheck is not installed on your system, install it with sudo zypper in sec-check . These scripts all have schedule entries that get placed in cron that determine when theyrun. Although cron scheduling is the default behavior, this can be controlled via configurationsettings (see next section). The daily script runs at midnight, and if changes are detected sincethe last run (the night before), an e-mail noting the differences will be sent. The weekly scriptruns every Monday at 1:00 am, and only if changes to the last run (the week before) are found,a mail with the differences will be sent. The monthly script runs every on every 1st of the monthand sends the full last daily and weekly report via e-mail.
9 Security via the Boot Loaders SLES 12 SP4
2.4.1 Seccheck Configuration
Note that you can change the receiver of the seccheck mails from root to anyone else if you addan entry like this one to /etc/sysconfig/seccheck :
SECCHK_USER="firewall" # exchange firewall is an admin user's account name
Also note that the START_SECCHK variable from /etc/sysconfig/seccheck controls whetherthe security check will be run from cron. (It is ignored if you call security-control manually.)
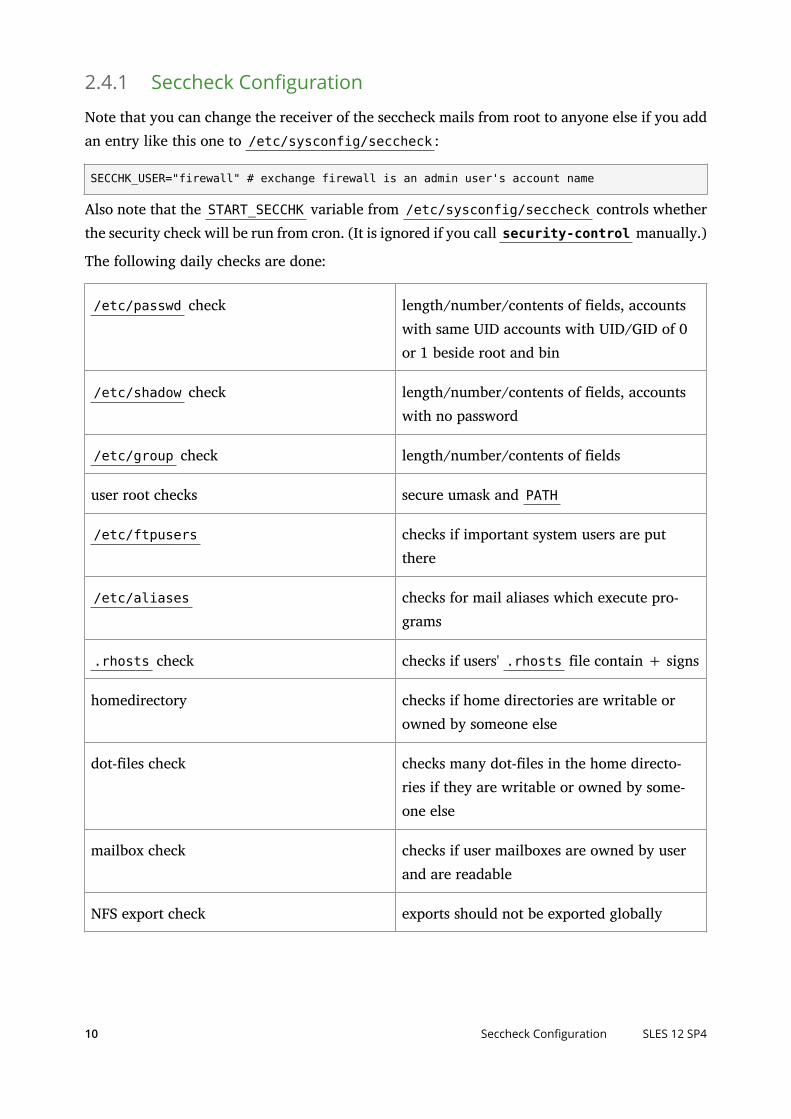
The following daily checks are done:
/etc/passwd check length/number/contents of elds, accountswith same UID accounts with UID/GID of 0or 1 beside root and bin
/etc/shadow check length/number/contents of elds, accountswith no password
/etc/group check length/number/contents of elds
user root checks secure umask and PATH
/etc/ftpusers checks if important system users are putthere
/etc/aliases checks for mail aliases which execute pro-grams
.rhosts check checks if users' .rhosts le contain + signs
homedirectory checks if home directories are writable orowned by someone else
dot-les check checks many dot-les in the home directo-ries if they are writable or owned by some-one else
mailbox check checks if user mailboxes are owned by userand are readable
NFS export check exports should not be exported globally
10 Seccheck Configuration SLES 12 SP4
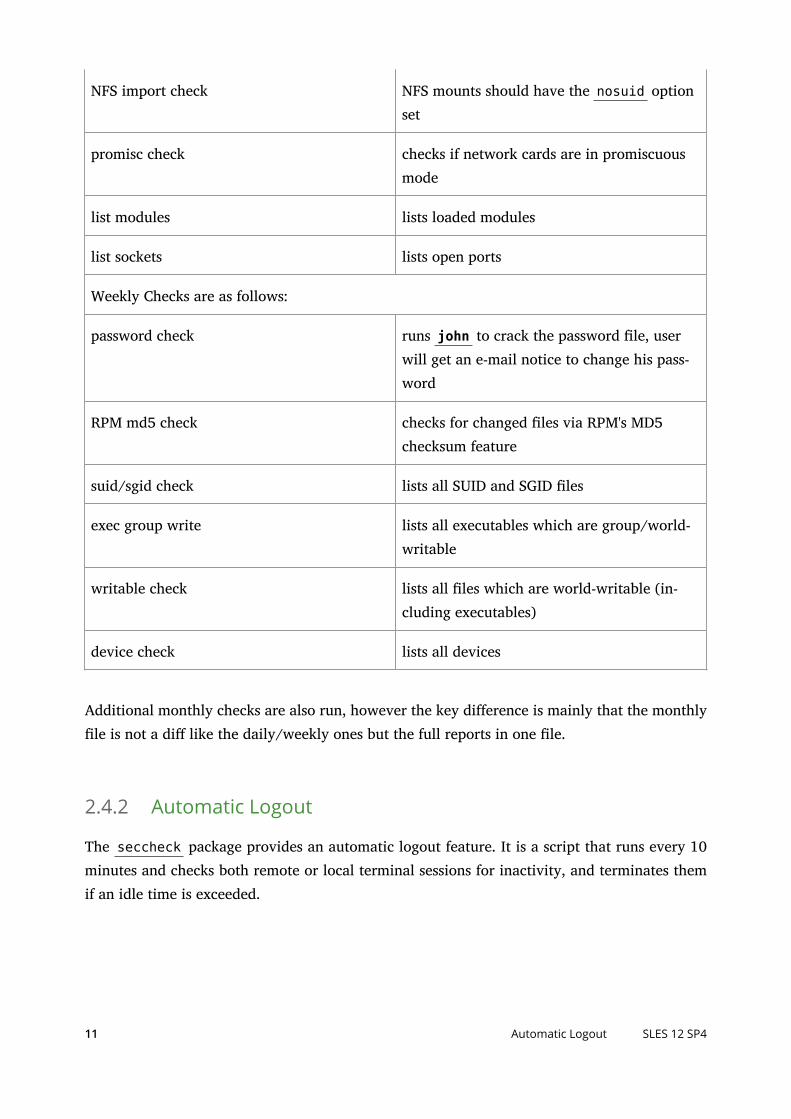
NFS import check NFS mounts should have the nosuid optionset
promisc check checks if network cards are in promiscuousmode
list modules lists loaded modules
list sockets lists open ports
Weekly Checks are as follows:
password check runs john to crack the password le, userwill get an e-mail notice to change his pass-word
RPM md5 check checks for changed les via RPM's MD5checksum feature
suid/sgid check lists all SUID and SGID les
exec group write lists all executables which are group/world-writable
writable check lists all les which are world-writable (in-cluding executables)
device check lists all devices
Additional monthly checks are also run, however the key difference is mainly that the monthlyle is not a di like the daily/weekly ones but the full reports in one le.
2.4.2 Automatic Logout
The seccheck package provides an automatic logout feature. It is a script that runs every 10minutes and checks both remote or local terminal sessions for inactivity, and terminates themif an idle time is exceeded.
11 Automatic Logout SLES 12 SP4
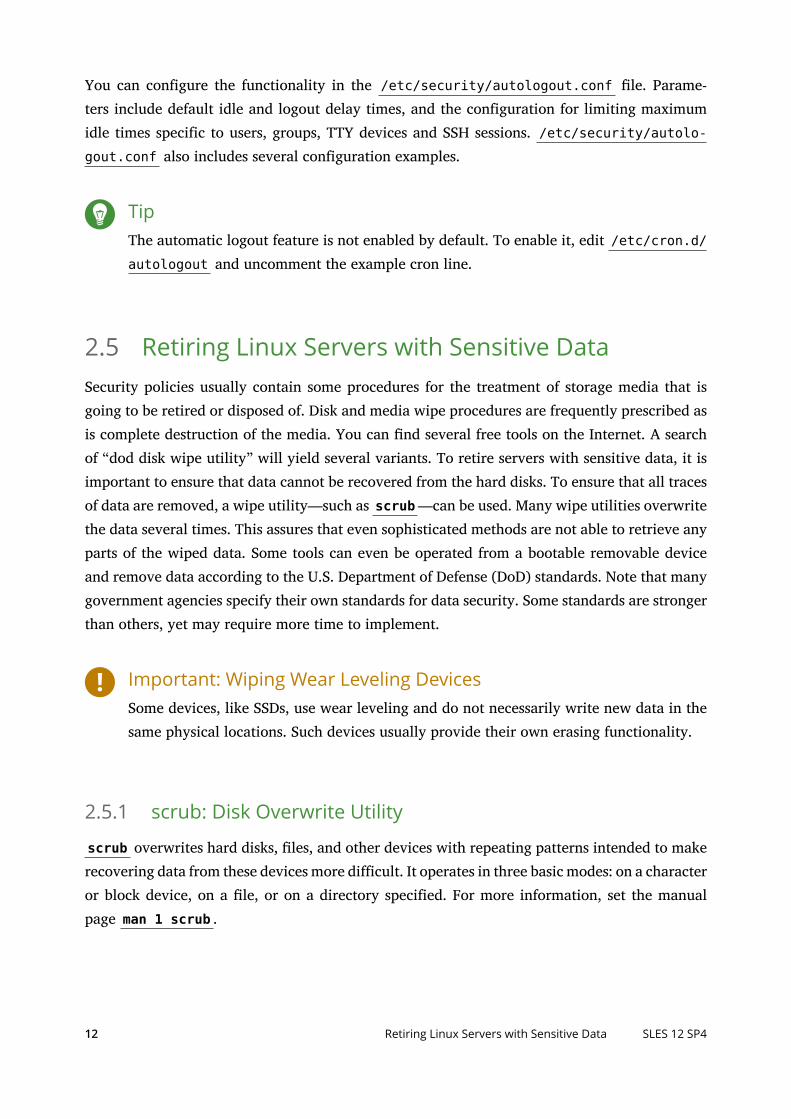
You can configure the functionality in the /etc/security/autologout.conf le. Parame-ters include default idle and logout delay times, and the configuration for limiting maximumidle times specific to users, groups, TTY devices and SSH sessions. /etc/security/autolo-gout.conf also includes several configuration examples.
TipThe automatic logout feature is not enabled by default. To enable it, edit /etc/cron.d/autologout and uncomment the example cron line.
2.5 Retiring Linux Servers with Sensitive DataSecurity policies usually contain some procedures for the treatment of storage media that isgoing to be retired or disposed of. Disk and media wipe procedures are frequently prescribed asis complete destruction of the media. You can nd several free tools on the Internet. A searchof “dod disk wipe utility” will yield several variants. To retire servers with sensitive data, it isimportant to ensure that data cannot be recovered from the hard disks. To ensure that all tracesof data are removed, a wipe utility—such as scrub—can be used. Many wipe utilities overwritethe data several times. This assures that even sophisticated methods are not able to retrieve anyparts of the wiped data. Some tools can even be operated from a bootable removable deviceand remove data according to the U.S. Department of Defense (DoD) standards. Note that manygovernment agencies specify their own standards for data security. Some standards are strongerthan others, yet may require more time to implement.
Important: Wiping Wear Leveling DevicesSome devices, like SSDs, use wear leveling and do not necessarily write new data in thesame physical locations. Such devices usually provide their own erasing functionality.
2.5.1 scrub: Disk Overwrite Utility
scrub overwrites hard disks, les, and other devices with repeating patterns intended to makerecovering data from these devices more difficult. It operates in three basic modes: on a characteror block device, on a le, or on a directory specified. For more information, set the manualpage man 1 scrub .
12 Retiring Linux Servers with Sensitive Data SLES 12 SP4
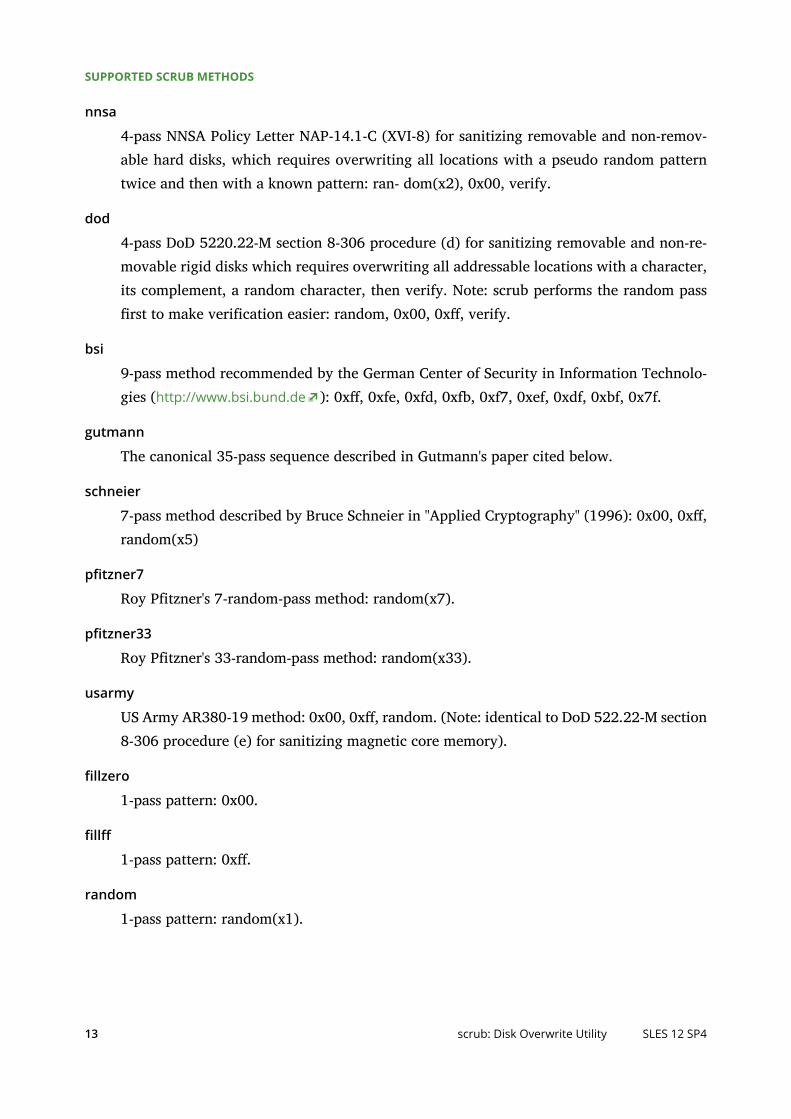
SUPPORTED SCRUB METHODS
nnsa
4-pass NNSA Policy Letter NAP-14.1-C (XVI-8) for sanitizing removable and non-remov-able hard disks, which requires overwriting all locations with a pseudo random patterntwice and then with a known pattern: ran- dom(x2), 0x00, verify.
dod
4-pass DoD 5220.22-M section 8-306 procedure (d) for sanitizing removable and non-re-movable rigid disks which requires overwriting all addressable locations with a character,its complement, a random character, then verify. Note: scrub performs the random passrst to make verification easier: random, 0x00, 0x, verify.
bsi
9-pass method recommended by the German Center of Security in Information Technolo-gies (http://www.bsi.bund.de ): 0x, 0xfe, 0xfd, 0xfb, 0xf7, 0xef, 0xdf, 0xbf, 0x7f.
gutmann
The canonical 35-pass sequence described in Gutmann's paper cited below.
schneier
7-pass method described by Bruce Schneier in "Applied Cryptography" (1996): 0x00, 0x,random(x5)
pfitzner7
Roy Pfitzner's 7-random-pass method: random(x7).
pfitzner33
Roy Pfitzner's 33-random-pass method: random(x33).
usarmy
US Army AR380-19 method: 0x00, 0x, random. (Note: identical to DoD 522.22-M section8-306 procedure (e) for sanitizing magnetic core memory).
fillzero
1-pass pattern: 0x00.
fillff
1-pass pattern: 0x.
random
1-pass pattern: random(x1).
13 scrub: Disk Overwrite Utility SLES 12 SP4
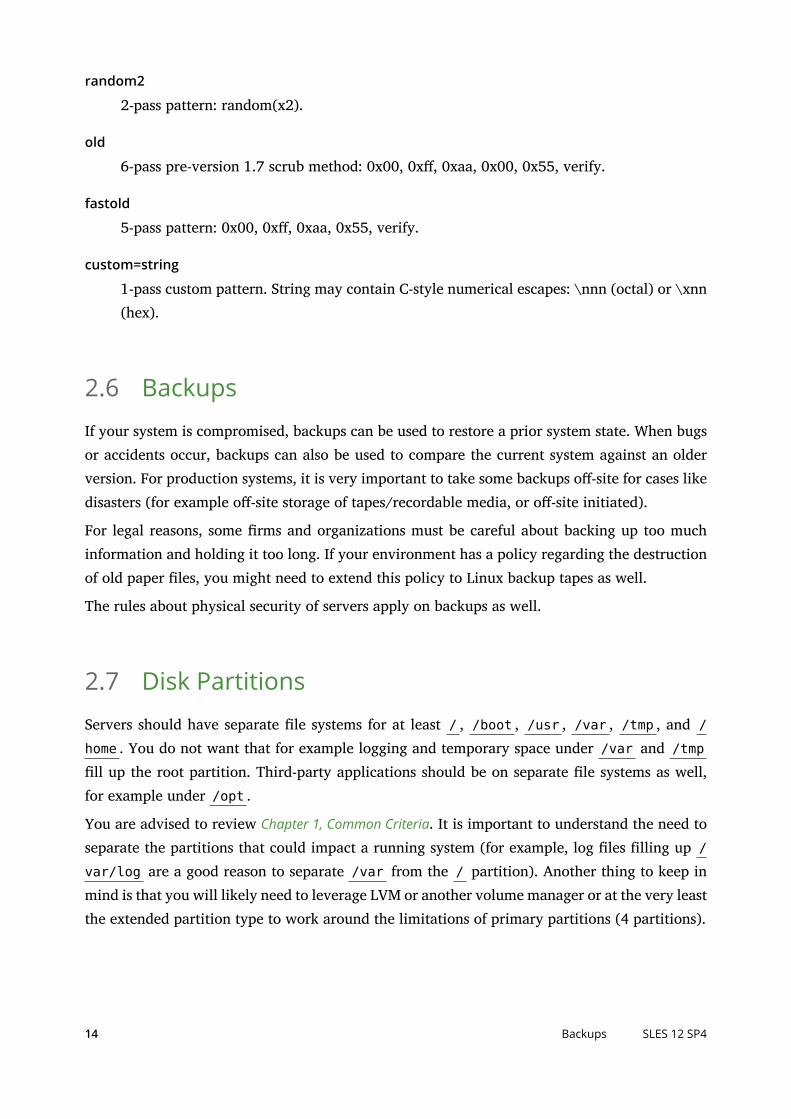
random2
2-pass pattern: random(x2).
old
6-pass pre-version 1.7 scrub method: 0x00, 0x, 0xaa, 0x00, 0x55, verify.
fastold
5-pass pattern: 0x00, 0x, 0xaa, 0x55, verify.
custom=string
1-pass custom pattern. String may contain C-style numerical escapes: \nnn (octal) or \xnn(hex).
2.6 BackupsIf your system is compromised, backups can be used to restore a prior system state. When bugsor accidents occur, backups can also be used to compare the current system against an olderversion. For production systems, it is very important to take some backups o-site for cases likedisasters (for example o-site storage of tapes/recordable media, or o-site initiated).
For legal reasons, some rms and organizations must be careful about backing up too muchinformation and holding it too long. If your environment has a policy regarding the destructionof old paper les, you might need to extend this policy to Linux backup tapes as well.
The rules about physical security of servers apply on backups as well.
2.7 Disk PartitionsServers should have separate le systems for at least / , /boot , /usr , /var , /tmp , and /home . You do not want that for example logging and temporary space under /var and /tmpll up the root partition. Third-party applications should be on separate le systems as well,for example under /opt .
You are advised to review Chapter 1, Common Criteria. It is important to understand the need toseparate the partitions that could impact a running system (for example, log les filling up /var/log are a good reason to separate /var from the / partition). Another thing to keep inmind is that you will likely need to leverage LVM or another volume manager or at the very leastthe extended partition type to work around the limitations of primary partitions (4 partitions).
14 Backups SLES 12 SP4
Another capability in SUSE Linux Enterprise Server is encrypting a partition or even a singledirectory or le as a container. Refer to Book “Security Guide”, Chapter 11 “Encrypting Partitions
and Files” for details.
2.8 Firewall (iptables)iptables will not be covered in detail in this guide. Most companies use dedicated firewallsor appliances to protect their servers in a production network. This is strongly recommendedfor secure environments. SUSE Linux Enterprise Server also includes SuSEFirewall2 which is awrapper for iptables and is enabled by default as a simple and layered protection.
If you are also interested in Linux stateful firewalls using iptables, there are many guides on theInternet. See the Appendix for resources. For lots of iptables tutorials and examples, see http://
www.linuxguruz.com/iptables/ .
2.9 Security Features in the KernelThe following list shows tunable kernel parameters you can use to secure your Linux serveragainst attacks. Some are defaults already within the SLE distributions. To check the currentstatus of any of these settings, you can query the kernel ( /proc/sys/... contents). For ex-ample, the Source Routing setting is located in the /proc/sys/net/ipv4/conf/all/accep-t_source_route le. Simply display the contents of a le to see how the current running kernelis set up.
For each tunable kernel parameter shown, the change to the entry that needs to be affectedcan be modified or added to the /etc/sysctl.conf configuration le to make the changepersistent after a reboots.
You can get a list of current kernel settings by using the command:
root # sysctl -a
It is even a very good idea to store the output of the kernel settings (for comparison or reference)by redirecting the output of the sysctl command to a le, for example
root # sysctl -A > /root/sysctl.settings.store
Because SUSE Linux Enterprise Server includes, by default, security-focused kernel tuning pa-rameters, you will nd the existing /etc/sysctl.conf le to be sparsely populated. You maychoose to use the above mentioned “catalog” method of storing the complete gamut of kernel
15 Firewall (iptables) SLES 12 SP4
settings and then choose those parameters you want to be reset at reboot. You can place these inthe /etc/sysctl.conf le where they will be picked up upon a reboot or they can be insertedimmediately (into the running kernel) by running the command sysctl -p .
Many third-party applications like Oracle, SAP, DB2, Websphere, etc. recommend changingkernel parameters to ensure high performance for I/O or CPU processing. Having a full list ofcurrent settings can be helpful for reference.
2.9.1 Enable TCP SYN Cookie Protection (default in SUSE LinuxEnterprise Server 12 SP4)
A SYN attack is a denial of service attack that consumes all the resources on a machine. Anyserver that is connected to a network is potentially subject to this attack. To enable TCP SYNCookie Protection, edit the /etc/sysctl.conf le and ensure the following line and valueexists:
net.ipv4.tcp_syncookies = 1
NoteDespite the name of the configuration option, it applies to IP version 6 as well.
2.9.2 Disable IP Source Routing (default in SUSE Linux EnterpriseServer 12 SP4)
Source Routing is used to specify a path or route through the network from source to destination.This feature can be used by network people for diagnosing problems. However, if an intruderwas able to send a source routed packet into the network, then he could intercept the repliesand your server might not know that it is not communicating with a trusted server.
net.ipv4.conf.all.accept_source_route = 0
or
net.ipv6.conf.all.accept_source_route = 0
16
Enable TCP SYN Cookie Protection (default in SUSE Linux Enterprise Server 12 SP4) SLES
12 SP4
2.9.3 Disable ICMP Redirect Acceptance
ICMP redirects are used by routers to tell the server that there is a better path to other networksthan the one chosen by the server. However, an intruder could potentially use ICMP redirectpackets to alter the host's routing table by causing traffic to use a path you did not intend. Todisable ICMP Redirect Acceptance, edit the /etc/sysctl.conf le and add the following line:
net.ipv4.conf.all.accept_redirects = 0
or
net.ipv6.conf.all.accept_redirects = 0
2.9.4 Enable IP Spoofing Protection (default in SUSE LinuxEnterprise Server 12 SP4)
IP spoofing is a technique where an intruder sends out packets which claim to be from anotherhost by manipulating the source address. IP spoofing is very often used for denial of serviceattacks. For more information on IP Spoofing, see http://en.wikipedia.org/wiki/IP_address_spoof-
ing
net.ipv4.conf.all.rp_filter = 1
2.9.5 Enable Ignoring to ICMP Requests
If you want or need Linux to ignore ping requests, edit the /etc/sysctl.conf le and addthe following line:
net.ipv4.icmp_echo_ignore_all = 1
This cannot be done in many environments, as some monitoring systems use a rudimentary ICMP(ping) to determine the health of the device on the network (or at least its ability to respond).
2.9.6 Enable Ignoring Broadcasts Request (default in SUSE LinuxEnterprise Server 12 SP4)
If you want or need Linux to ignore broadcast requests.
17 Disable ICMP Redirect Acceptance SLES 12 SP4
net.ipv4.icmp_echo_ignore_broadcasts = 1
2.9.7 Enable Bad Error Message Protection (default in SUSE LinuxEnterprise Server 12 SP4)
To alert you about bad error messages in the network.
net.ipv4.icmp_ignore_bogus_error_responses = 1
2.9.8 Enable Logging of Spoofed Packets, Source Routed Packets,Redirect Packets
To turn on logging for Spoofed Packets, Source Routed Packets, and Redirect Packets, edit the/etc/sysctl.conf le and add the following line:
net.ipv4.conf.all.log_martians = 1
NoteBecause of the way SUSE Linux Enterprise Server is set up (with rsyslog) for networkevent tracking, keep in mind that this can cause a large amount of messages to be logged.
2.9.9 Buffer Overflow Attack Mitigation
Starting with the 2.6.x kernel releases, Linux offers Address Space Layout Randomization (ASLR)and the No-eXecute (NX bit) for mitigation of buer overflow attacks. For more information, see:
http://searchenterpriselinux.techtarget.com/tip/Linux-virtual-address-randomization-and-
impacting-buffer-overflows
https://en.wikipedia.org/wiki/Address_space_layout_randomization
https://en.wikipedia.org/wiki/NX_bit
Since version 12, SUSE Linux Enterprise Server already comes with some buer overflow attackmitigation techniques being enabled by default.
18
Enable Bad Error Message Protection (default in SUSE Linux Enterprise Server 12
SP4) SLES 12 SP4
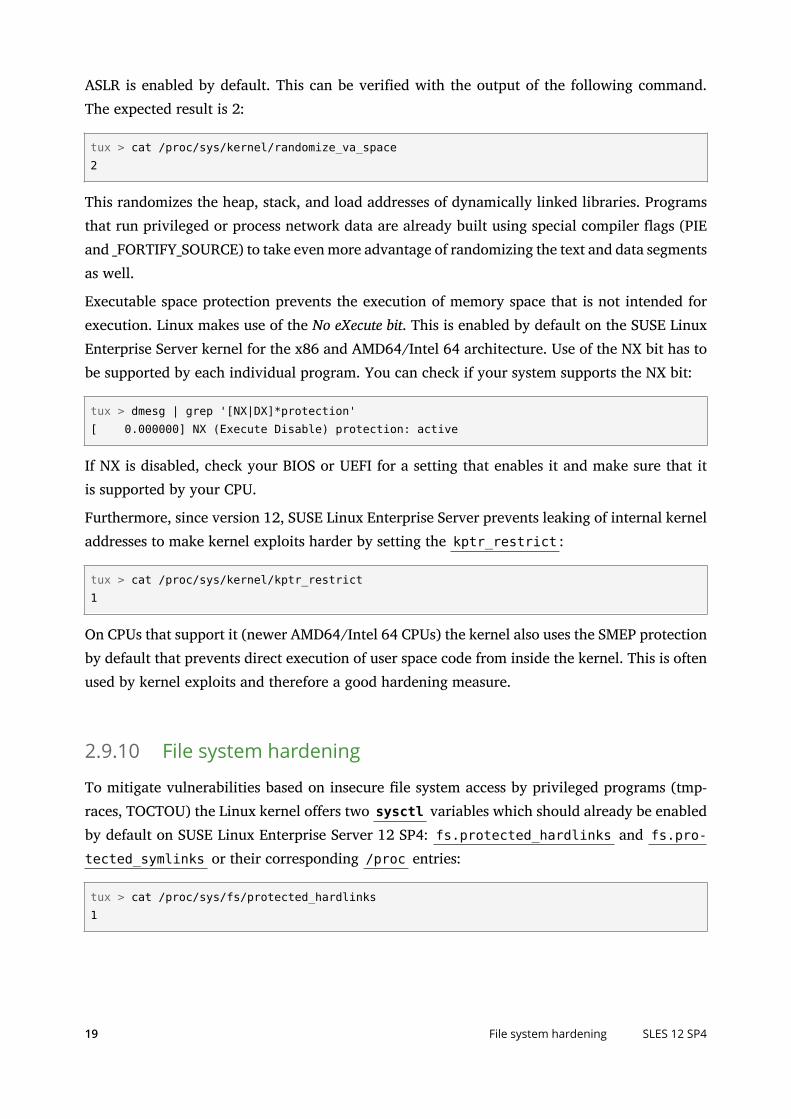
ASLR is enabled by default. This can be verified with the output of the following command.The expected result is 2:
tux > cat /proc/sys/kernel/randomize_va_space2
This randomizes the heap, stack, and load addresses of dynamically linked libraries. Programsthat run privileged or process network data are already built using special compiler ags (PIEand _FORTIFY_SOURCE) to take even more advantage of randomizing the text and data segmentsas well.
Executable space protection prevents the execution of memory space that is not intended forexecution. Linux makes use of the No eXecute bit. This is enabled by default on the SUSE LinuxEnterprise Server kernel for the x86 and AMD64/Intel 64 architecture. Use of the NX bit has tobe supported by each individual program. You can check if your system supports the NX bit:
tux > dmesg | grep '[NX|DX]*protection'[ 0.000000] NX (Execute Disable) protection: active
If NX is disabled, check your BIOS or UEFI for a setting that enables it and make sure that itis supported by your CPU.
Furthermore, since version 12, SUSE Linux Enterprise Server prevents leaking of internal kerneladdresses to make kernel exploits harder by setting the kptr_restrict :
tux > cat /proc/sys/kernel/kptr_restrict1
On CPUs that support it (newer AMD64/Intel 64 CPUs) the kernel also uses the SMEP protectionby default that prevents direct execution of user space code from inside the kernel. This is oftenused by kernel exploits and therefore a good hardening measure.
2.9.10 File system hardening
To mitigate vulnerabilities based on insecure le system access by privileged programs (tmp-races, TOCTOU) the Linux kernel offers two sysctl variables which should already be enabledby default on SUSE Linux Enterprise Server 12 SP4: fs.protected_hardlinks and fs.pro-tected_symlinks or their corresponding /proc entries:
tux > cat /proc/sys/fs/protected_hardlinks1
19 File system hardening SLES 12 SP4
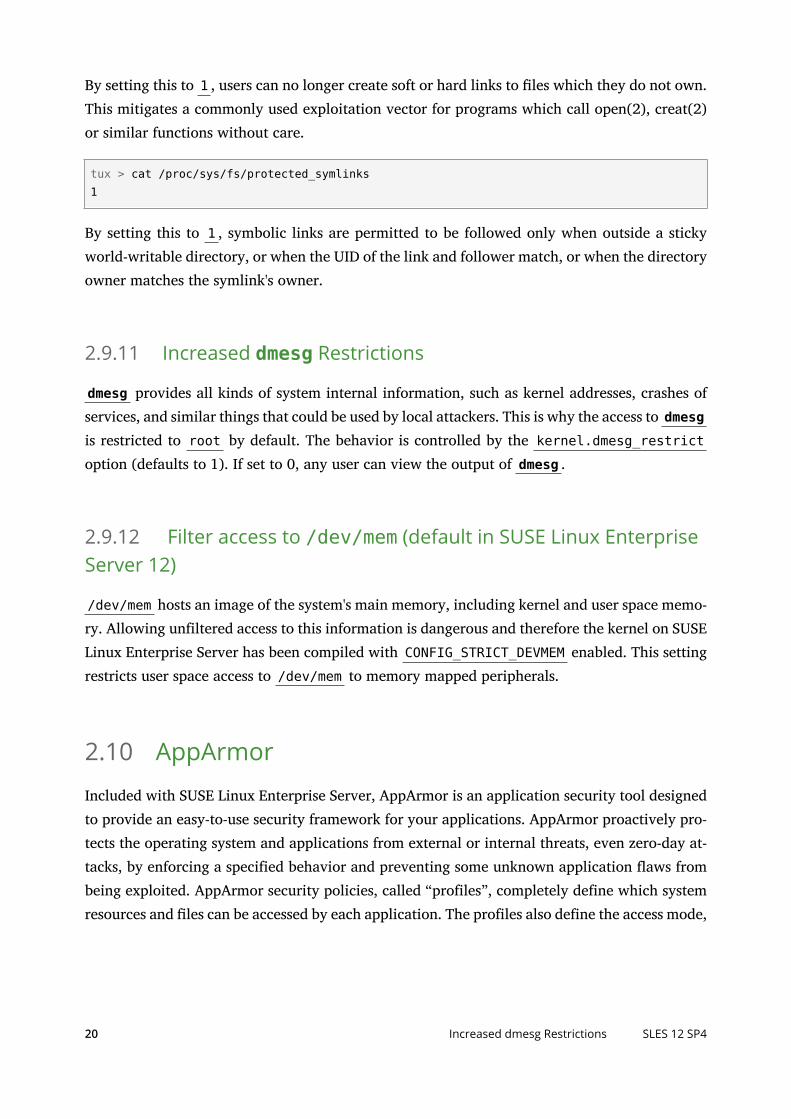
By setting this to 1 , users can no longer create soft or hard links to les which they do not own.This mitigates a commonly used exploitation vector for programs which call open(2), creat(2)or similar functions without care.
tux > cat /proc/sys/fs/protected_symlinks1
By setting this to 1 , symbolic links are permitted to be followed only when outside a stickyworld-writable directory, or when the UID of the link and follower match, or when the directoryowner matches the symlink's owner.
2.9.11 Increased dmesg Restrictions
dmesg provides all kinds of system internal information, such as kernel addresses, crashes ofservices, and similar things that could be used by local attackers. This is why the access to dmesgis restricted to root by default. The behavior is controlled by the kernel.dmesg_restrictoption (defaults to 1). If set to 0, any user can view the output of dmesg .
2.9.12 Filter access to /dev/mem (default in SUSE Linux EnterpriseServer 12)
/dev/mem hosts an image of the system's main memory, including kernel and user space memo-ry. Allowing unfiltered access to this information is dangerous and therefore the kernel on SUSELinux Enterprise Server has been compiled with CONFIG_STRICT_DEVMEM enabled. This settingrestricts user space access to /dev/mem to memory mapped peripherals.
2.10 AppArmor
Included with SUSE Linux Enterprise Server, AppArmor is an application security tool designedto provide an easy-to-use security framework for your applications. AppArmor proactively pro-tects the operating system and applications from external or internal threats, even zero-day at-tacks, by enforcing a specified behavior and preventing some unknown application aws frombeing exploited. AppArmor security policies, called “profiles”, completely define which systemresources and les can be accessed by each application. The profiles also define the access mode,
20 Increased dmesg Restrictions SLES 12 SP4
for example read or write. Several default profiles are included with AppArmor, and using acombination of advanced static analysis and learning-based tools, AppArmor profiles for evenvery complex applications can be deployed successfully in a matter of hours.
AppArmor consists of:
A kernel extension which enforces the security profiles.
A collection of RPMs, also shipped with SUSE Linux Enterprise Server that provides:
A set of AppArmor profiles for numerous programs that ship with SUSE Linux Enter-prise Server.
Tools to create and manage new and existing AppArmor profiles.
A YaST user interface to manage reports and notification of security events.
Documentation about the AppArmor tools.
It is best to reboot a system after completing installation, so that AppArmor can confine allsystem daemons.
For additional details and step-by-step instructions on the usage and configuration of AppArmoryou can also refer to Book “Security Guide”.
2.11 SELinux
SELinux is an advanced technology for securing Linux systems. It is included with “basic enable-ment” in SUSE Linux Enterprise Server 12 SP4, and is included with some other distributions bydefault. Hardening Linux using SELinux technology, on its own, warrants its own security HOW-TO and is out of scope for this guide. The book SELinux: NSA's Open Source Security Enhanced
Linux (http://shop.oreilly.com/product/9780596007164.do) contains a very good description ofits setup and usage. As part of the “basic enablement”, SELinux will not be officially supported,but packages have now been added to SUSE Linux Enterprise Server 12 SP4 to enable its usagewith minimal effort. While AppArmor is much easier to use and has a similar feature set, know-ing both will most certainly be beneficial.
21 SELinux SLES 12 SP4
2.12 FTP, telnet, and rlogin (rsh)
The programs/protocols of FTP, telnet , and rlogin ( rsh ) are vulnerable to eavesdropping,which is one of the main reasons secure alternatives such as ssh , scp or sftp should be usedinstead. It is highly recommended not to run the insecure services. Because of the high risk, thisguide does not cover these services (other than vsftp). It would also be a good idea (and part ofour guidance, see next section) not to have FTP and Telnet server RPMs installed on the system.Note that the EAL 4+ evaluation had vsftp installed. The “vs” stands for “very secure”—whichis a differentiator here when compared to normal FTP.
2.13 Removing Unnecessary Software Packages(RPMs)
A very important step in securing a Linux system is to determine the primary function(s) orrole(s) of the Linux server. Otherwise, it can be difficult to understand what needs to be securedand securing these Linux systems can prove ineffective. Therefore, it is critical to look at thedefault list of software packages and remove any unnecessary packages or packages that do notcomply with your defined security policies.
Generally, an RPM software package consists of the following:
The package's meta data that is written to the RPM database upon installation.
The package's les and directories.
Scripts that are being executed before and after installation and removal.
Packages generally do not impose any security risk to the system unless they contain:
1. setuid or setgid bits on any of the installed les
2. group- or world-writable les or directories
3. a service that is activated upon installation/activated by default.
Assuming that neither of the three conditions above apply, a package is merely a collection ofles. Neither installation nor deinstallation of such packages has influence on the security valueof the system.
22 FTP, telnet, and rlogin (rsh) SLES 12 SP4
Nevertheless, it is useful to restrict the installed packages in your system to a minimum. Doingthis will result in fewer packages that require updates and will simplify maintenance effortswhen security alerts and patches are released. It is a best practice not to install, among others,development packages or desktop software packages (for example, an X Server) on productionservers. If you do not need them, you should also not install, for example, the Apache Webserver or Samba le sharing server.
Important: Requirements of Third-party InstallersMany third-party vendors like Oracle and IBM require a desktop environment and devel-opment libraries to run installers. To avoid this from having an impact on the securityof their production servers, many organizations work around this by creating a silentinstallation (response le) in a development lab.
Also, other packages like FTP and Telnet daemons should not be installed as well unless thereis a justified business reason for it (again, ssh , scp or sftp should be used as replacements).
One of the rst action items should be to create a Linux image that only contains RPMs needed bythe system and applications, and those needed for maintenance and troubleshooting purposes.A good approach is to start with a minimum list of RPMs and then add packages as needed. Thisprocess is time-consuming but usually worth the effort.
Tip: Just Enough Operating System (JeOS)The SUSE Appliance Program includes a component called JeOS (Just Enough OperatingSystem). JeOS has a very small footprint and can be customized to t the specific needsof a system developer. Main uses of JeOS are for hardware/software appliance or virtualmachine development. Key benefits of JeOS are efficiency, higher performance, increasedsecurity and simplified management.
If JeOS is not an option for you, a good choice is the minimal installation pattern.
To generate a list of all installed RPMs, use the following command:
root # rpm -qa
To retrieve details about a particular RPM (from the RPM itself), run:
root # rpm -qi PACKAGE_NAME
23 Removing Unnecessary Software Packages (RPMs) SLES 12 SP4
To check for and report potential conflicts and dependencies when deleting an RPM, run:
root # rpm -e --test PACKAGE_NAME
This can be very useful, as running the removal command without a test can often yield a massof complaints and require manual recursive dependency hunting.
2.14 Patching Linux SystemsBuilding an infrastructure for patch management is another very important part of a proactiveand secure production Linux environment.
It is recommended to have a written security policy and procedure to handle Linux securityupdates and issues. For example, a security policy should detail the time frame for assessment,testing, and roll out of patches. Network related security vulnerabilities should get the highestpriority and should be addressed immediately within a short time frame. The assessment phaseshould occur within a testing lab, and initial roll out should occur on development systems rst
A separate security log le should contain details on which Linux security announcements havebeen received, which patches have been researched and assessed, when patches have been ap-plied, etc.
SUSE releases their patches in three categories, security, recommended and optional. There area few options that can be used to keep systems patched, up to date and secure. Each systemcan register and then retrieve updates via the SUSE Update Web site using the included YaSTtool—YaST Online Update. SUSE has also created the Subscription Management Tool (SMT),an efficient way to maintain a local repository of available/released patches/updates/fixes thatsystems can then pull from (reducing Internet traffic). SUSE also offers SUSE Manager for themaintenance, patching, reporting and centralized management of Linux systems, not only SUSE,but other distributions as well.
2.14.1 YaST Online Update
On a per-server basis, installation of important updates and improvements is possible using theYaST Online Update tool. Current updates for the SUSE Linux Enterprise family are availablefrom the product specific update catalogs containing patches. Installation of updates and im-provements is accomplished using YaST and selecting Online Update in the Software Group. Allnew patches (except the optional ones) that are currently available for your system will alreadybe marked for installation. Clicking Accept will then automatically install these patches.
24 Patching Linux Systems SLES 12 SP4
2.14.2 Automatic Online Update
YaST also offers the possibility to set up an automatic update. Select Software Automatic OnlineUpdate. Configure a Daily or a Weekly update. Some patches, such as kernel updates, require userinteraction, which would cause the automatic update procedure to stop. Check Skip InteractivePatches for the update procedure to proceed automatically.
In this case, run a manual Online Update from time to install patches that require interaction.
When Only Download Patches is checked, the patches are downloaded at the specified time butnot installed. They must be installed manually using rpm or zypper .
2.14.3 Subscription Management Tool—SMT
The Subscription Management Tool for SUSE Linux Enterprise goes one step further than theOnline Update process by establishing a proxy system with repository and registration targets.This helps customers centrally manage software updates within the firewall on a per-systembasis, while maintaining their corporate security policies and regulatory compliance.
The downloadable SMT (http://download.suse.com/ ) is integrated with SUSE Customer Center(https://scc.suse.com/ ) and provides a repository and registration target that is synchronizedwith it. This can be very helpful in tracking entitlements in large deployments. The SMT main-tains all the capabilities of SUSE Customer Center, while allowing a more secure centralizeddeployment. It is included with every SUSE Linux Enterprise subscription and is therefore fullysupported.
The SMT provides an alternative to the default configuration, which requires opening the fire-wall to outbound connections for each device to receive updates. That requirement often vio-lates corporate security policies and can be seen as a threat to regulatory compliance by someorganizations. Through its integration with SUSE Customer Center, the SMT ensures that eachdevice can receive its appropriate updates without the need to open the firewall, and withoutany redundant bandwidth requirements.
The SMT also enables customers to locally track their SUSE Linux Enterprise devices (that isservers, desktops, or Point of Service terminals) throughout their enterprise. Now they can easilydetermine how many entitlements are in need of renewal at the end of a billing cycle withouthaving to physically walk through the data center to manually update spreadsheets.
The SMT informs the SUSE Linux Enterprise devices of any available software updates. Eachdevice then obtains the required software updates from the SMT. The introduction of the SMTimproves the interaction among SUSE Linux Enterprise devices within the network and simplifies
25 Automatic Online Update SLES 12 SP4
how they receive their system updates. The SMT enables an infrastructure for several hundredSUSE Linux Enterprise devices per instance of each installation (depending on the specific usageprofile). This offers more accurate and efficient server tracking.
In a nutshell, the Subscription Management Tool for SUSE Linux Enterprise provides customerswith:
Assurance of firewall and regulatory compliance
Reduced bandwidth usage during software updates
Full support under active subscription from SUSE
Maintenance of existing customer interface with SUSE Customer Center
Accurate server entitlement tracking and effective measurement of subscription usage
Automated process to easily tally entitlement totals (no more spreadsheets!)
Simple installation process that automatically synchronizes server entitlement with SUSECustomer Center
2.14.4 SUSE Manager
SUSE Manager automates Linux server management, allowing you to provision and maintainyour servers faster and more accurately. It monitors the health of each Linux server from asingle console so you can identify server performance issues before they impact your business.And it lets you comprehensively manage your Linux servers across physical, virtual and cloudenvironments while improving data center efficiency. SUSE Manager delivers complete life cyclemanagement for Linux:
Asset management
Provisioning
Package management
Patch management
Configuration management
Redeployment
For more information on SUSE Manager refer to https://www.suse.com/products/suse-manag-
er/ .
26 SUSE Manager SLES 12 SP4
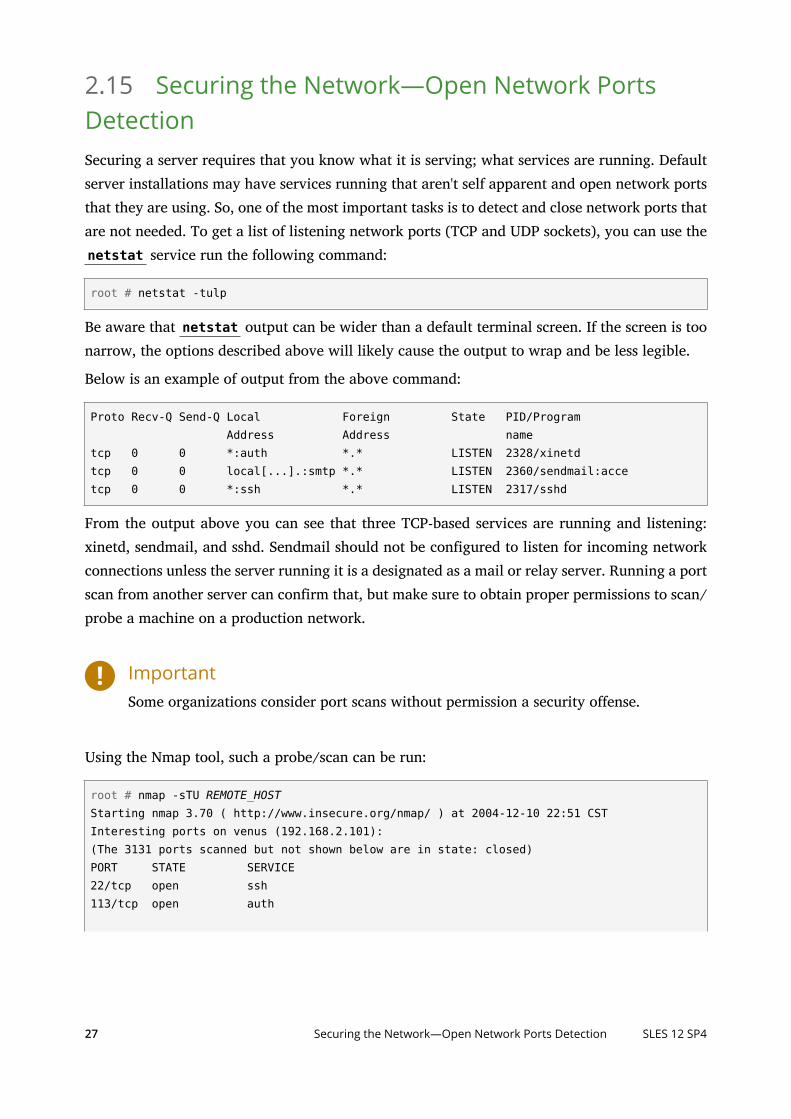
2.15 Securing the Network—Open Network PortsDetectionSecuring a server requires that you know what it is serving; what services are running. Defaultserver installations may have services running that aren't self apparent and open network portsthat they are using. So, one of the most important tasks is to detect and close network ports thatare not needed. To get a list of listening network ports (TCP and UDP sockets), you can use thenetstat service run the following command:
root # netstat -tulp
Be aware that netstat output can be wider than a default terminal screen. If the screen is toonarrow, the options described above will likely cause the output to wrap and be less legible.
Below is an example of output from the above command:
Proto Recv-Q Send-Q Local Foreign State PID/Program Address Address nametcp 0 0 *:auth *.* LISTEN 2328/xinetdtcp 0 0 local[...].:smtp *.* LISTEN 2360/sendmail:accetcp 0 0 *:ssh *.* LISTEN 2317/sshd
From the output above you can see that three TCP-based services are running and listening:xinetd, sendmail, and sshd. Sendmail should not be configured to listen for incoming networkconnections unless the server running it is a designated as a mail or relay server. Running a portscan from another server can confirm that, but make sure to obtain proper permissions to scan/probe a machine on a production network.
ImportantSome organizations consider port scans without permission a security offense.
Using the Nmap tool, such a probe/scan can be run:
root # nmap -sTU REMOTE_HOSTStarting nmap 3.70 ( http://www.insecure.org/nmap/ ) at 2004-12-10 22:51 CSTInteresting ports on venus (192.168.2.101):(The 3131 ports scanned but not shown below are in state: closed)PORT STATE SERVICE22/tcp open ssh113/tcp open auth
27 Securing the Network—Open Network Ports Detection SLES 12 SP4

Nmap run completed -- 1 IP address (1 host up) scanned in 221.669 seconds
Note that running the nmap command can take quite a while (in this example almost 4 minutes)depending on the options used. If you remove the UDP port scan (leave out the -U option),then nmap will finish the port scan nearly immediately. The results of nmap can vary widelyand might not show all listening network sockets depending on the status of the SuSEFirewall2(or other) and if it has been set up to block any ports.
From the sample run above, you see that the xinetd daemon is listening on port auth (port 113)for IDENT (for more information on this service, see Section 2.16, “xinetd Services - Disabling”).You can also see that sendmail is not listening for remote incoming network connections.
Another method to list all of the TCP and UDP sockets to which programs are listening (on ahost) is to use the lsof command – which lists open les:
root # lsof -i -n | egrep 'COMMAND|LISTEN|UDP'COMMAND PID USER FD TYPE DEVICE SIZE/OFF NODE NAMEsshd 2317 root 3u IPv6 6579 0t0 TCP *:ssh (LISTEN)xinetd 2328 root 5u IPv4 6698 0t0 TCP *:auth (LISTEN)sendmail 2360 root 3u IPv4 6729 0t0 TCP 127.0.0.1:smtp (LISTEN)
2.16 xinetd Services - DisablingThe xinetd daemon is a replacement for inetd, the Internet services daemon. It monitors theports for all network services configured in /etc/xinetd.d , and starts the services in responseto incoming connections. To check if xinetd is enabled and running, execute:
root # systemctl status xinetd
To check the current status of the xinetd service, execute:
root # systemctl status xinetd
If xinetd is active, it is very important to see which services are active and being controlledby xinetd . The following command will list all services configured in /etc/xinetd.d andwhether xinetd monitors the ports for these services:
root # chkconfig -list | awk '/xinetd based services/,/""/'xinetd based services:
chargen: off chargen-udp: off cups-lpd: off
28 xinetd Services - Disabling SLES 12 SP4
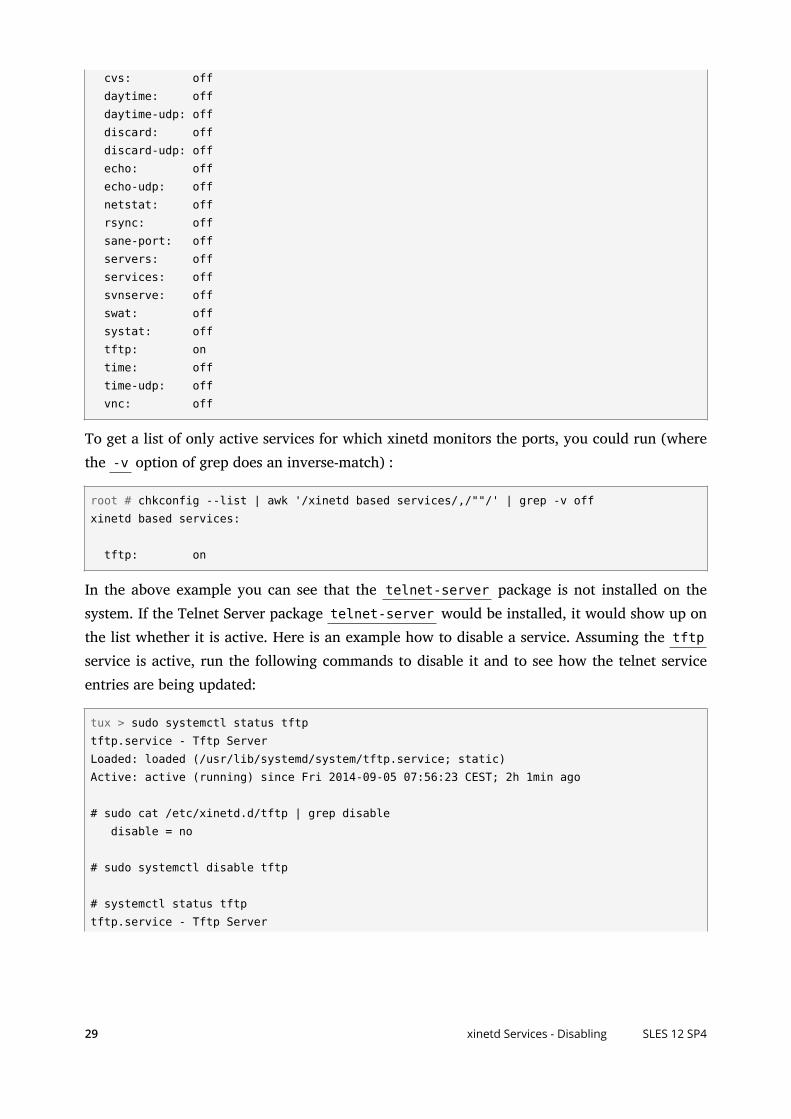
cvs: off daytime: off daytime-udp: off discard: off discard-udp: off echo: off echo-udp: off netstat: off rsync: off sane-port: off servers: off services: off svnserve: off swat: off systat: off tftp: on time: off time-udp: off vnc: off
To get a list of only active services for which xinetd monitors the ports, you could run (wherethe -v option of grep does an inverse-match) :
root # chkconfig --list | awk '/xinetd based services/,/""/' | grep -v offxinetd based services:
tftp: on
In the above example you can see that the telnet-server package is not installed on thesystem. If the Telnet Server package telnet-server would be installed, it would show up onthe list whether it is active. Here is an example how to disable a service. Assuming the tftpservice is active, run the following commands to disable it and to see how the telnet serviceentries are being updated:
tux > sudo systemctl status tftptftp.service - Tftp ServerLoaded: loaded (/usr/lib/systemd/system/tftp.service; static)Active: active (running) since Fri 2014-09-05 07:56:23 CEST; 2h 1min ago
# sudo cat /etc/xinetd.d/tftp | grep disable disable = no
# sudo systemctl disable tftp
# systemctl status tftptftp.service - Tftp Server
29 xinetd Services - Disabling SLES 12 SP4
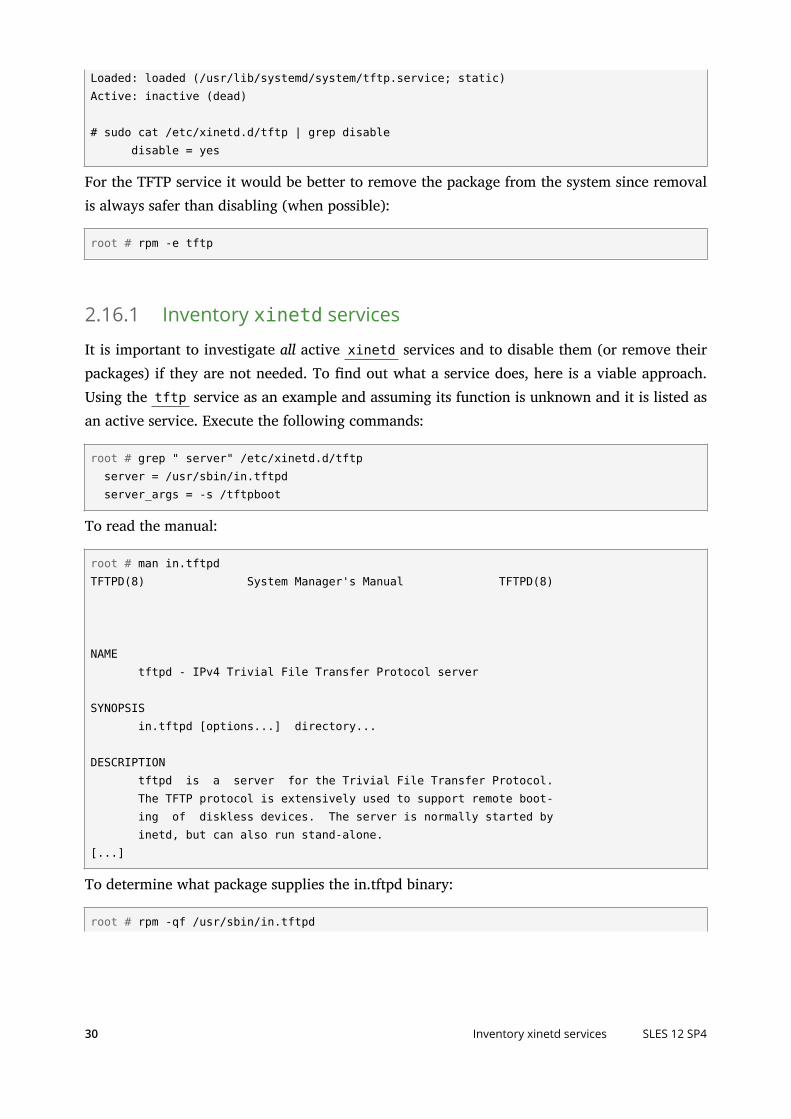
Loaded: loaded (/usr/lib/systemd/system/tftp.service; static)Active: inactive (dead)
# sudo cat /etc/xinetd.d/tftp | grep disable disable = yes
For the TFTP service it would be better to remove the package from the system since removalis always safer than disabling (when possible):
root # rpm -e tftp
2.16.1 Inventory xinetd services
It is important to investigate all active xinetd services and to disable them (or remove theirpackages) if they are not needed. To nd out what a service does, here is a viable approach.Using the tftp service as an example and assuming its function is unknown and it is listed asan active service. Execute the following commands:
root # grep " server" /etc/xinetd.d/tftp server = /usr/sbin/in.tftpd server_args = -s /tftpboot
To read the manual:
root # man in.tftpdTFTPD(8) System Manager's Manual TFTPD(8)
NAME tftpd - IPv4 Trivial File Transfer Protocol server
SYNOPSIS in.tftpd [options...] directory...
DESCRIPTION tftpd is a server for the Trivial File Transfer Protocol. The TFTP protocol is extensively used to support remote boot- ing of diskless devices. The server is normally started by inetd, but can also run stand-alone.[...]
To determine what package supplies the in.tftpd binary:
root # rpm -qf /usr/sbin/in.tftpd
30 Inventory xinetd services SLES 12 SP4
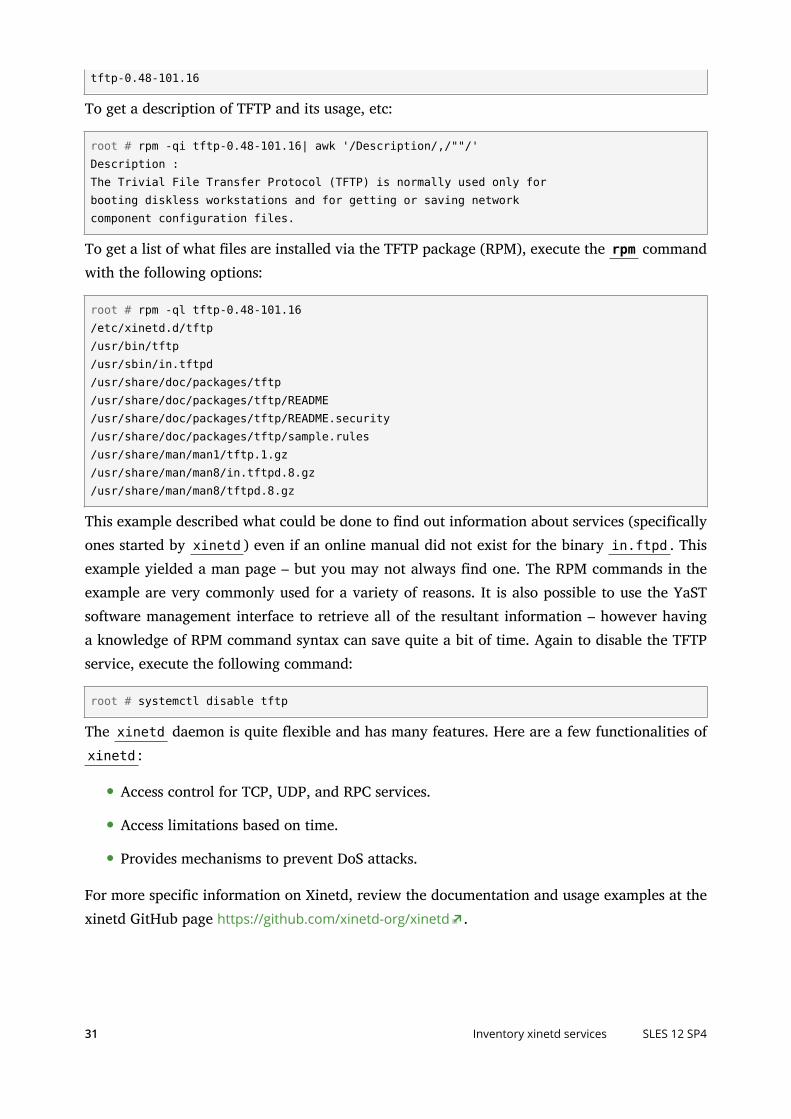
tftp-0.48-101.16
To get a description of TFTP and its usage, etc:
root # rpm -qi tftp-0.48-101.16| awk '/Description/,/""/'Description :The Trivial File Transfer Protocol (TFTP) is normally used only forbooting diskless workstations and for getting or saving networkcomponent configuration files.
To get a list of what les are installed via the TFTP package (RPM), execute the rpm commandwith the following options:
root # rpm -ql tftp-0.48-101.16/etc/xinetd.d/tftp/usr/bin/tftp/usr/sbin/in.tftpd/usr/share/doc/packages/tftp/usr/share/doc/packages/tftp/README/usr/share/doc/packages/tftp/README.security/usr/share/doc/packages/tftp/sample.rules/usr/share/man/man1/tftp.1.gz/usr/share/man/man8/in.tftpd.8.gz/usr/share/man/man8/tftpd.8.gz
This example described what could be done to nd out information about services (specificallyones started by xinetd ) even if an online manual did not exist for the binary in.ftpd . Thisexample yielded a man page – but you may not always nd one. The RPM commands in theexample are very commonly used for a variety of reasons. It is also possible to use the YaSTsoftware management interface to retrieve all of the resultant information – however havinga knowledge of RPM command syntax can save quite a bit of time. Again to disable the TFTPservice, execute the following command:
root # systemctl disable tftp
The xinetd daemon is quite flexible and has many features. Here are a few functionalities ofxinetd :
Access control for TCP, UDP, and RPC services.
Access limitations based on time.
Provides mechanisms to prevent DoS attacks.
For more specific information on Xinetd, review the documentation and usage examples at thexinetd GitHub page https://github.com/xinetd-org/xinetd .
31 Inventory xinetd services SLES 12 SP4
2.17 Securing PostfixPostfix is a replacement for Sendmail and has several security advantages over Sendmail. Postfixis the default mail system in SUSE Linux Enterprise Server and consists of several small programsthat each perform their own small task—most of these programs run in a chroot jail. This is oneof the reasons Postfix is recommended over Sendmail.
Linux servers that are not dedicated mail or relay servers should not accept external e-mails.However, it is important for production servers to send local e-mails to a relay server—somesecurity setups (for example the seccheck scripts) can be configured to send e-mails to someoneother than root , even o the local system.
Verify the following parameters in /etc/postfix/main.cf are set to ensure that Postfix acceptsonly local e-mails for delivery (look toward the bottom of the le as the top portion is mostlycommented-out example entries and explanations):
mydestination = $myhostname, localhost.$mydomain, localhostinet_interfaces = localhost
The mydestination parameter lists all domains to receive e-mails for. The inet_interfacesparameter specifies the network to listen on. After reconfiguring Postfix, a restart of the mailsystem is necessary:
root # systemctl restart postfix
Verify that Postfix is not listening for network requests (incoming) by running one of thesecommands from another host:
nmap -sT -p 25 REMOTE_HOSTtelnet <remote_host> 25
NoteRunning these commands on the local host will provide inaccurate results because Postfixis supposed to accept connections from the local node. Use an external host for correctresults.
2.18 File Systems: Securing NFSNFS (Network File System) allows servers to share les over a network. But like all networkservices using NFS involves risks.
32 Securing Postfix SLES 12 SP4

Here are some basic rules:
NFS should not be enabled if not needed.
If NFS is truly needed, use a TCP wrapper to restrict remote access.
Ensure to export only to those hosts that really need access.
Use a fully qualified domain name to diminish any spoofing attempts.
Export only as read-only whenever possible.
Use NFS only over TCP.
If you do not have shared directories to export, then ensure that the NFS service is not enablednor running on the system:
Check the NFS service status:
root # systemctl status nfsserver
Check the current targets:
root # ls /etc/systemd/system/*.wants/nfsserver.service
2.18.1 Enabling and Starting NFS Server
If NFS must be used, it can be activated using the following commands on SUSE Linux EnterpriseServer or more simply and securely with the YaST plug-in (ncurses). Access it directly fromcommand line with yast nfs_server or yast nfs_client – or manually:
root # systemctl enable nfssystemctl start nfs
Portmapper information:
root # rpcinfo -p SERVERNAME program vers proto port 100000 2 tcp 111 portmapper 100000 2 udp 111 portmapper 100003 2 udp 2049 nfs 100003 3 udp 2049 nfs 100003 2 tcp 2049 nfs 100003 3 tcp 2049 nfs 100005 1 udp 623 mountd 100005 1 tcp 626 mountd
33 Enabling and Starting NFS Server SLES 12 SP4
100005 2 udp 623 mountd 100005 2 tcp 626 mountd 100005 3 udp 623 mountd 100005 3 tcp 626 mountd
If you run it from an "untrusted" server or network, you should get the following output:
root # rpcinfo -p SERVERNAMENo remote programs registered.
2.18.2 Exporting NFS
To allow a client access to a le system or directory, the /etc/exports le serves as the accesscontrol list. To give the network "network.example.com" read-only access to /pub , the entriesin /etc/exports would look like as follows:
/pub *.network.example.com(ro,sync)
It is very important not to give write access to NFS clients if not absolutely needed! Entriesin /etc/exports are exported read-only ( ro option) by default. To allow servers sles-ha1 ,sles-ha2 and sles-ha3 read-write access to the /data/MYSQL directory, the entries in /etc/exports would look like as follows:
/data/MYSQL sles-ha1.example.com(rw,sync) sles-ha2.example.com(rw,sync) sles-ha3.example.com(rw,sync)
Note that the options must not be separated from the host names or networks with whitespace(s).Also, fully qualified domain names should always be used to diminish spoofing attempts. Allentries in /etc/exports are exported with the root_squash option (“root squashing”) bydefault. This means that a root user on a client machine does not have root privileges (rootaccess) to les on exported NFS. It is not recommended to turn “root squashing” o using theno_root_squash option! After you have made all your entries in /etc/exports , you canexport all le systems/directories using the following command:
root # exportfs -a
To unexport all shared le systems/directories, run:
root # exportfs -ua
To see all shared le systems/directories, run:
root # showmount -e localhost
34 Exporting NFS SLES 12 SP4
Export list for localhost:
/pub *.network.example.com/data/MYSQLsles-ha1.example.com,sles-ha2.example.com,sles-ha3.example.com
2.18.3 Using NFS over TCP
If you need NFS, it is recommended to use NFS only over TCP since NFS over UDP is not secure.All 2.4 and later kernels support NFS over TCP on the client side. Server support for TCP ap-peared in later 2.4 kernels and beyond. To mount a shared directory using NFS over TCP, it isnecessary to use the proto=tcp mount option:
root # mount -o proto=tcp SERVERNAME:/pub /usr/local/pub
Verify that the target directory, in this case /usr/local/pub , exists on the client:
root # mount [...] SERVERNAME:/pub on/usr/local/pub type nfs (rw,proto=tcp,addr=192.168.1.110)
To have the shared directory mounted on the client at boot time, use the /etc/fstab le. Forthe above example, the /etc/fstab entry could look like this:
SERVERNAME:/pub /usr/local/pub nfs rsize=8192,wsize=8192,timeo=14,intr,tcp 0 0
2.19 Copying Files Using SSH Without Providing LoginPromptsThis example is needed in some cases to enable les to be copied over the network using SSHwithout providing an interactive login prompt. This allows trusted hosts to be set up—an ex-ample of federation.
SSH can allow a forced command using the “command” option. Using this option it is possibleto disable scp (secure copy) and enforce every passed ssh command to be ignored. On theserver side where you want to retrieve the le from, add the following entry to the beginningof the SSH key in the ~/.ssh/authorized_keys le (the ~ represents a particular users homedirectory – root 's home directory is /root – other users typically reside in /home/USERNAME ):
command="/bin/cat ~/<file_name>" ssh-rsa AAAAB3N...{etc}
35 Using NFS over TCP SLES 12 SP4
To copy now the le from the remote server, run the following command:
ssh USER@ SERVERNAME LOCAL_FILE
Since /bin/cat is run on the server side, its output needs to be redirected to the local le.
Another approach is to replace the /bin/cat (referenced above) with your own script thatchecks the passed SSH commands by reading the environment variable $SSH_ORIGINAL_COM-MAND . For example:
#!/bin/ksh if [[ $SSH_ORIGINAL_COMMAND = "File1" || $SSH_ORIGINAL_COMMAND = "File2" ]] then /bin/cat $SSH_ORIGINAL_COMMAND else echo "Invalid file name!" exit 1 fi
So you replace the /bin/cat portion with the script name in ~/.ssh/authorized_keys , andrun the following command to copy Foo1 :
tux > ssh USER@SERVERNAME Foo1 > LOCAL_FILE
To copy Foo 2 , run:
tux > ssh USER@SERVERNAME Foo2 > LOCAL_FILE
With the modifications above, every other variety of passed parameters will return errors.
2.20 Checking File Permissions and OwnershipThe following sections deal with some ways the default permissions and le settings can bemodified to enhance the security of a host. It is important to note that the use of the defaultSUSE Linux Enterprise Server utilities like seccheck - can be run to lock down and improvethe general le security and user environment. However, it is beneficial to understand how tomodify these things.
SUSE Linux Enterprise Server hosts include 3 defaults settings for le permissions: permission-s.easy , permissions.secure , and permissions.paranoid , all located in the /etc directo-ry. The purpose of these les is to define special permissions, such as world-writable directoriesor, for les, the setuser ID bit (programs with the setuser ID bit set do not run with the permis-sions of the user that has launched it, but with the permissions of the le owner, usually root ).
36 Checking File Permissions and Ownership SLES 12 SP4
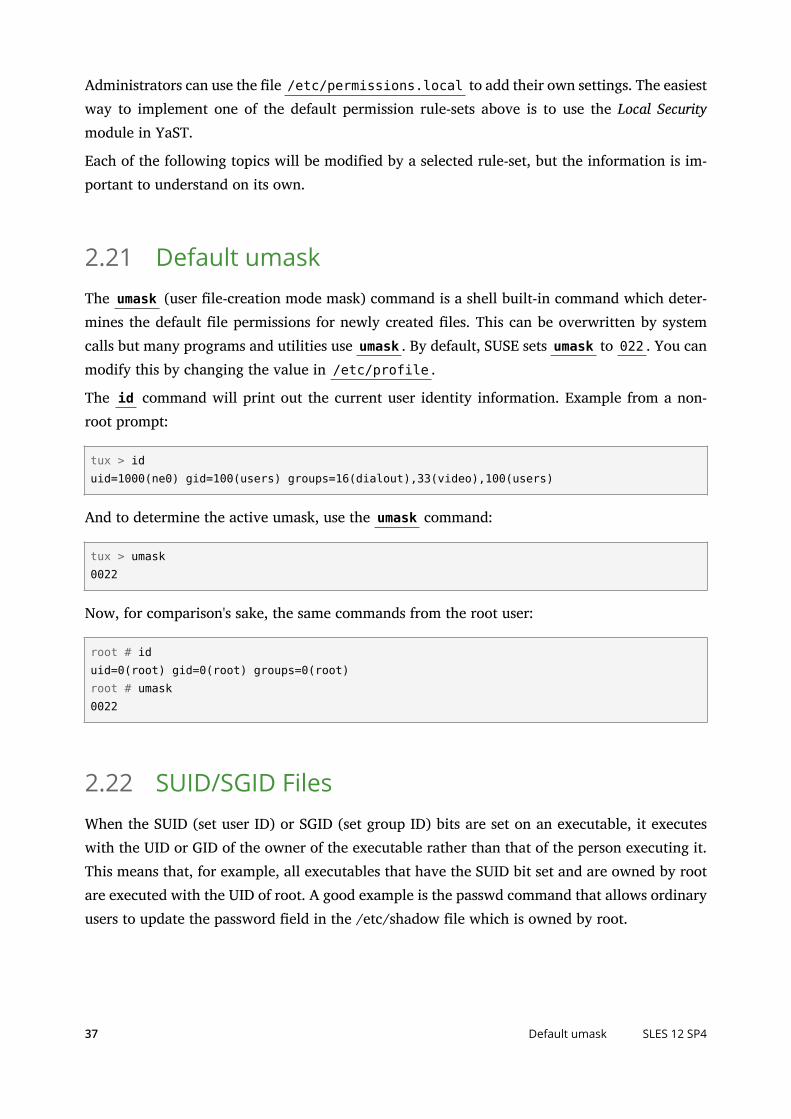
Administrators can use the le /etc/permissions.local to add their own settings. The easiestway to implement one of the default permission rule-sets above is to use the Local Securitymodule in YaST.
Each of the following topics will be modified by a selected rule-set, but the information is im-portant to understand on its own.
2.21 Default umaskThe umask (user le-creation mode mask) command is a shell built-in command which deter-mines the default le permissions for newly created les. This can be overwritten by systemcalls but many programs and utilities use umask . By default, SUSE sets umask to 022 . You canmodify this by changing the value in /etc/profile .
The id command will print out the current user identity information. Example from a non-root prompt:
tux > iduid=1000(ne0) gid=100(users) groups=16(dialout),33(video),100(users)
And to determine the active umask, use the umask command:
tux > umask0022
Now, for comparison's sake, the same commands from the root user:
root # iduid=0(root) gid=0(root) groups=0(root)root # umask0022
2.22 SUID/SGID FilesWhen the SUID (set user ID) or SGID (set group ID) bits are set on an executable, it executeswith the UID or GID of the owner of the executable rather than that of the person executing it.This means that, for example, all executables that have the SUID bit set and are owned by rootare executed with the UID of root. A good example is the passwd command that allows ordinaryusers to update the password eld in the /etc/shadow le which is owned by root.
37 Default umask SLES 12 SP4
But SUID/SGID bits can be misused when the SUID/SGID executable has a security hole. There-fore, you should search the entire system for SUID/SGID executables and document it. For ex-ample, ensure that code developers do not set SUID/SGID bits on their programs if it is not anabsolute requirement. Very often you can use workarounds like removing the executable bit forworld/others. However, a better approach is to change the design of the software if possible.
To search the entire system for SUID or SGID les, you can run the following command:
root # find / -path /proc -prune -o -type f -perm '/6000' -ls
The -prune option in this example is used to skip the /proc le system.
2.23 World-Writable FilesWorld-writable les are a security risk since it allows anyone to modify them. Additionally,world-writable directories allow anyone to add or delete les. To locate world-writable les anddirectories, you can use the following command:
root # find / -path /proc -prune -o -perm -2 ! -type l -ls
The ! -type l parameter skips all symbolic links since symbolic links are always world-writable. However, this is not a problem as long as the target of the link is not world-writable,which is checked by the above nd command.
World-writable directories with sticky bit—directory or le ownership where only the item'sowner, the directory's owner, or root can rename or delete les—such as the /tmp directorydo not allow anyone except the owner of a le to delete or modify it in this directory. Thesticky bit makes les stick to the user who created it and it prevents other users from deletingand renaming the les. Therefore, depending on the purpose of the directory world-writabledirectories with sticky are usually not an issue. An example is the /tmp directory:
tux > ls -ld /tmpdrwxrwxrwt 18 root root 16384 Dec 23 22:20 /tmp
The t mode, which denotes the sticky bit, allows les to be deleted and renamed only if theuser is the owner of this le or the owner of the directory.
SUSE Linux Enterprise Server supports le capabilities to allow more ne grained privileges tobe given to programs rather than the full power of root:
root # getcap -v /usr/bin/ping
38 World-Writable Files SLES 12 SP4
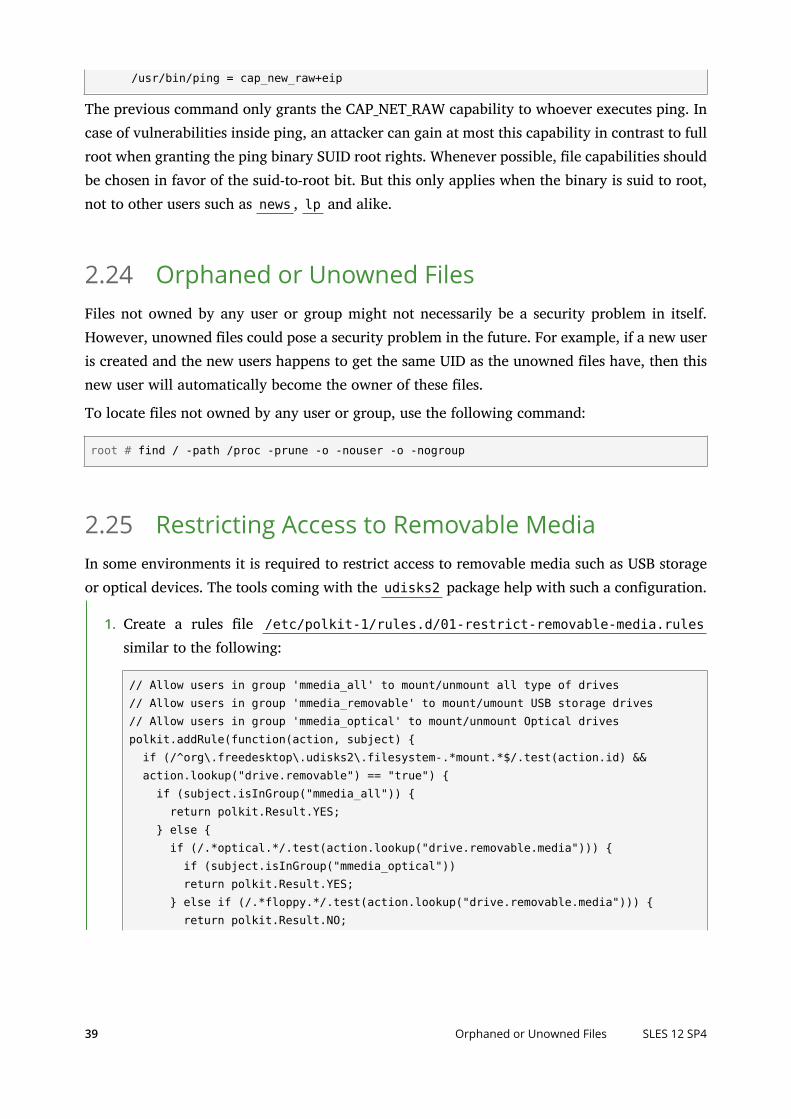
/usr/bin/ping = cap_new_raw+eip
The previous command only grants the CAP_NET_RAW capability to whoever executes ping. Incase of vulnerabilities inside ping, an attacker can gain at most this capability in contrast to fullroot when granting the ping binary SUID root rights. Whenever possible, le capabilities shouldbe chosen in favor of the suid-to-root bit. But this only applies when the binary is suid to root,not to other users such as news , lp and alike.
2.24 Orphaned or Unowned FilesFiles not owned by any user or group might not necessarily be a security problem in itself.However, unowned les could pose a security problem in the future. For example, if a new useris created and the new users happens to get the same UID as the unowned les have, then thisnew user will automatically become the owner of these les.
To locate les not owned by any user or group, use the following command:
root # find / -path /proc -prune -o -nouser -o -nogroup
2.25 Restricting Access to Removable MediaIn some environments it is required to restrict access to removable media such as USB storageor optical devices. The tools coming with the udisks2 package help with such a configuration.
1. Create a rules le /etc/polkit-1/rules.d/01-restrict-removable-media.rules
similar to the following:
// Allow users in group 'mmedia_all' to mount/unmount all type of drives// Allow users in group 'mmedia_removable' to mount/umount USB storage drives// Allow users in group 'mmedia_optical' to mount/unmount Optical drivespolkit.addRule(function(action, subject) { if (/^org\.freedesktop\.udisks2\.filesystem-.*mount.*$/.test(action.id) && action.lookup("drive.removable") == "true") { if (subject.isInGroup("mmedia_all")) { return polkit.Result.YES; } else { if (/.*optical.*/.test(action.lookup("drive.removable.media"))) { if (subject.isInGroup("mmedia_optical")) return polkit.Result.YES; } else if (/.*floppy.*/.test(action.lookup("drive.removable.media"))) { return polkit.Result.NO;
39 Orphaned or Unowned Files SLES 12 SP4
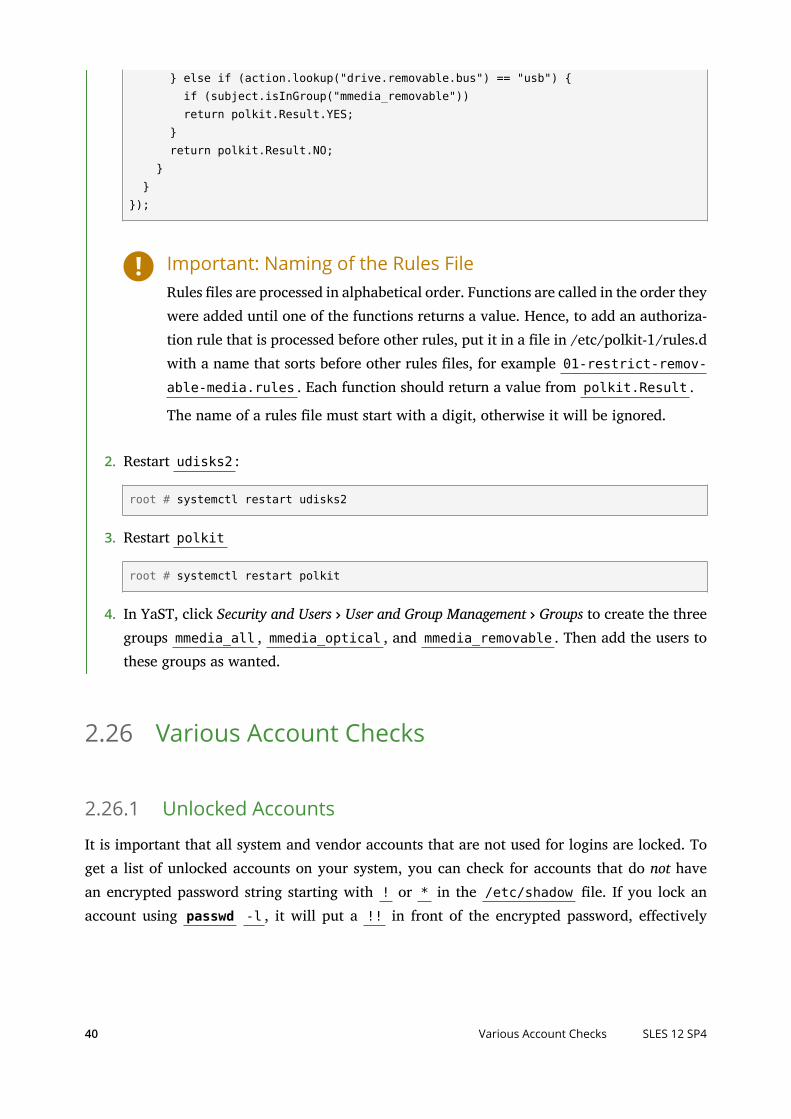
} else if (action.lookup("drive.removable.bus") == "usb") { if (subject.isInGroup("mmedia_removable")) return polkit.Result.YES; } return polkit.Result.NO; } }});
Important: Naming of the Rules FileRules les are processed in alphabetical order. Functions are called in the order theywere added until one of the functions returns a value. Hence, to add an authoriza-tion rule that is processed before other rules, put it in a le in /etc/polkit-1/rules.dwith a name that sorts before other rules les, for example 01-restrict-remov-able-media.rules . Each function should return a value from polkit.Result .
The name of a rules le must start with a digit, otherwise it will be ignored.
2. Restart udisks2 :
root # systemctl restart udisks2
3. Restart polkit
root # systemctl restart polkit
4. In YaST, click Security and Users User and Group Management Groups to create the threegroups mmedia_all , mmedia_optical , and mmedia_removable . Then add the users tothese groups as wanted.
2.26 Various Account Checks
2.26.1 Unlocked Accounts
It is important that all system and vendor accounts that are not used for logins are locked. Toget a list of unlocked accounts on your system, you can check for accounts that do not havean encrypted password string starting with ! or * in the /etc/shadow le. If you lock anaccount using passwd -l , it will put a !! in front of the encrypted password, effectively
40 Various Account Checks SLES 12 SP4
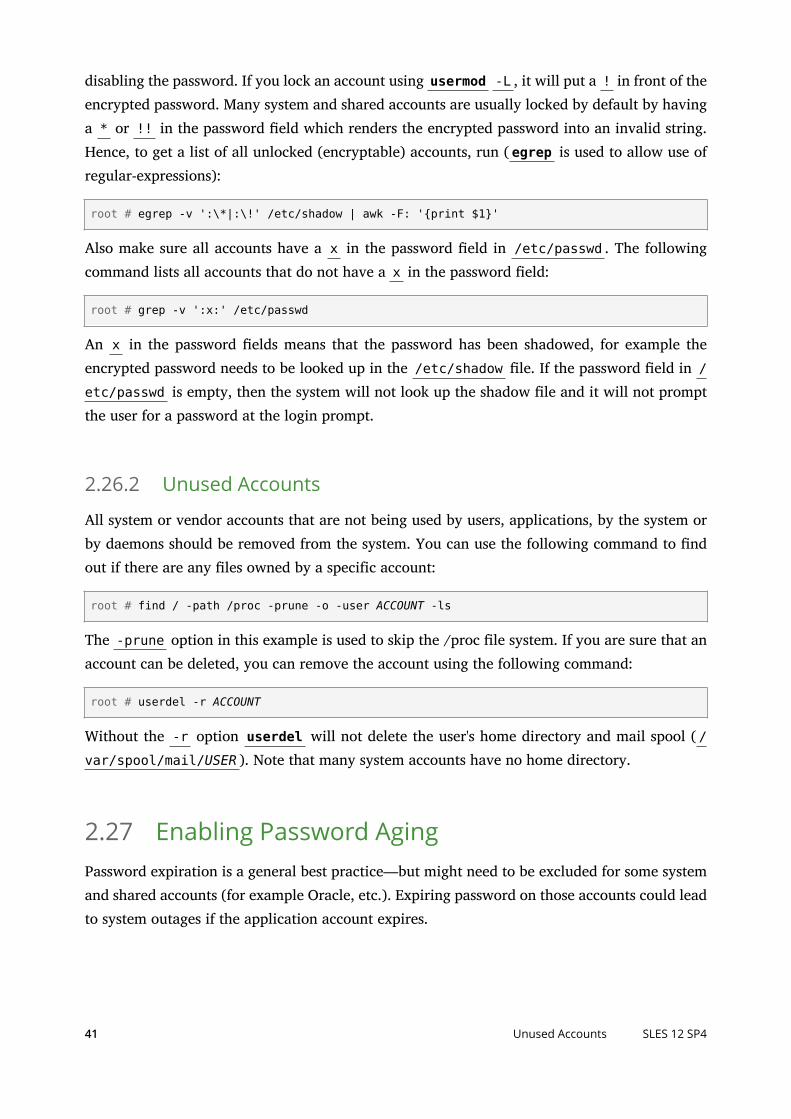
disabling the password. If you lock an account using usermod -L , it will put a ! in front of theencrypted password. Many system and shared accounts are usually locked by default by havinga * or !! in the password eld which renders the encrypted password into an invalid string.Hence, to get a list of all unlocked (encryptable) accounts, run ( egrep is used to allow use ofregular-expressions):
root # egrep -v ':\*|:\!' /etc/shadow | awk -F: '{print $1}'
Also make sure all accounts have a x in the password eld in /etc/passwd . The followingcommand lists all accounts that do not have a x in the password eld:
root # grep -v ':x:' /etc/passwd
An x in the password elds means that the password has been shadowed, for example theencrypted password needs to be looked up in the /etc/shadow le. If the password eld in /etc/passwd is empty, then the system will not look up the shadow le and it will not promptthe user for a password at the login prompt.
2.26.2 Unused Accounts
All system or vendor accounts that are not being used by users, applications, by the system orby daemons should be removed from the system. You can use the following command to ndout if there are any les owned by a specific account:
root # find / -path /proc -prune -o -user ACCOUNT -ls
The -prune option in this example is used to skip the /proc le system. If you are sure that anaccount can be deleted, you can remove the account using the following command:
root # userdel -r ACCOUNT
Without the -r option userdel will not delete the user's home directory and mail spool ( /var/spool/mail/USER ). Note that many system accounts have no home directory.
2.27 Enabling Password AgingPassword expiration is a general best practice—but might need to be excluded for some systemand shared accounts (for example Oracle, etc.). Expiring password on those accounts could leadto system outages if the application account expires.
41 Unused Accounts SLES 12 SP4
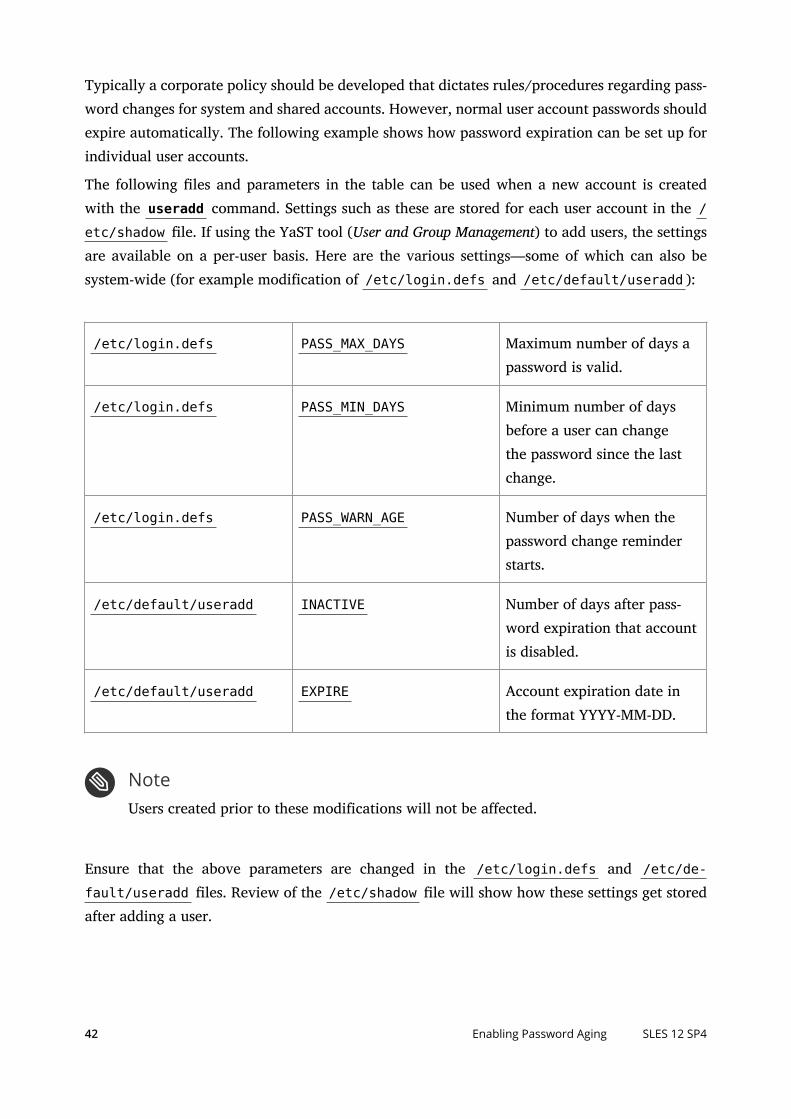
Typically a corporate policy should be developed that dictates rules/procedures regarding pass-word changes for system and shared accounts. However, normal user account passwords shouldexpire automatically. The following example shows how password expiration can be set up forindividual user accounts.
The following les and parameters in the table can be used when a new account is createdwith the useradd command. Settings such as these are stored for each user account in the /etc/shadow le. If using the YaST tool (User and Group Management) to add users, the settingsare available on a per-user basis. Here are the various settings—some of which can also besystem-wide (for example modification of /etc/login.defs and /etc/default/useradd ):
/etc/login.defs PASS_MAX_DAYS Maximum number of days apassword is valid.
/etc/login.defs PASS_MIN_DAYS Minimum number of daysbefore a user can changethe password since the lastchange.
/etc/login.defs PASS_WARN_AGE Number of days when thepassword change reminderstarts.
/etc/default/useradd INACTIVE Number of days after pass-word expiration that accountis disabled.
/etc/default/useradd EXPIRE Account expiration date inthe format YYYY-MM-DD.
NoteUsers created prior to these modifications will not be affected.
Ensure that the above parameters are changed in the /etc/login.defs and /etc/de-
fault/useradd les. Review of the /etc/shadow le will show how these settings get storedafter adding a user.
42 Enabling Password Aging SLES 12 SP4
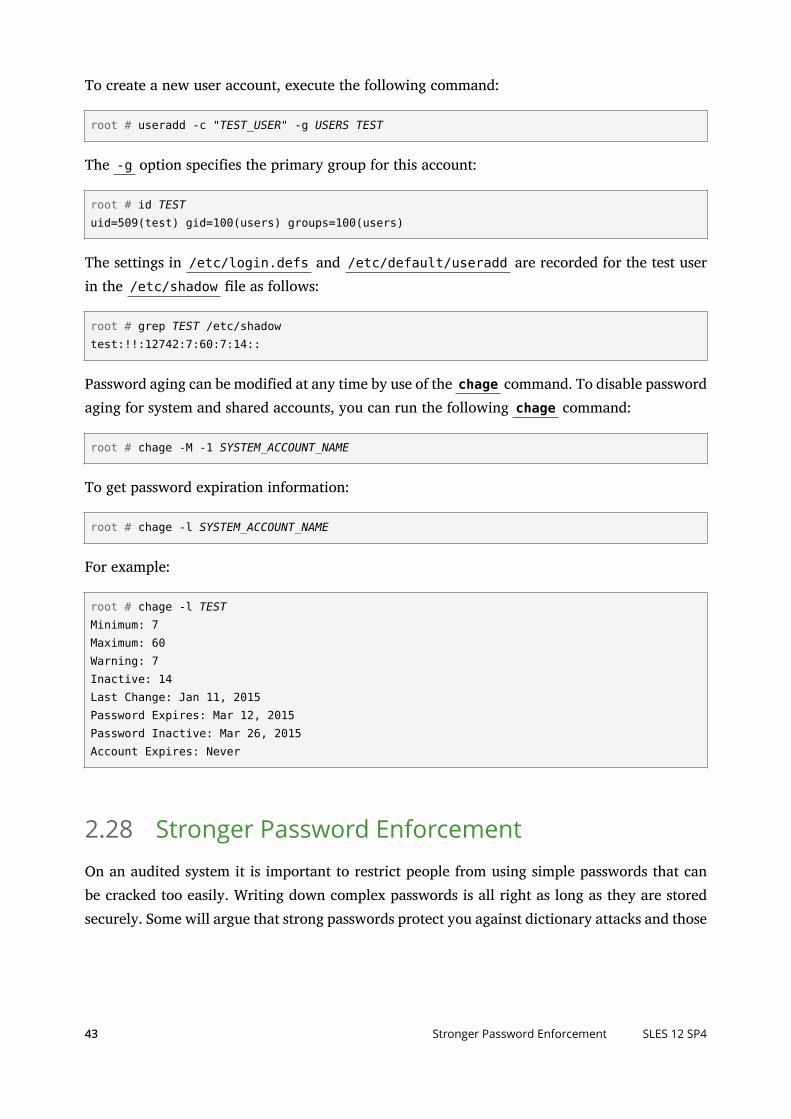
To create a new user account, execute the following command:
root # useradd -c "TEST_USER" -g USERS TEST
The -g option specifies the primary group for this account:
root # id TESTuid=509(test) gid=100(users) groups=100(users)
The settings in /etc/login.defs and /etc/default/useradd are recorded for the test userin the /etc/shadow le as follows:
root # grep TEST /etc/shadowtest:!!:12742:7:60:7:14::
Password aging can be modified at any time by use of the chage command. To disable passwordaging for system and shared accounts, you can run the following chage command:
root # chage -M -1 SYSTEM_ACCOUNT_NAME
To get password expiration information:
root # chage -l SYSTEM_ACCOUNT_NAME
For example:
root # chage -l TESTMinimum: 7Maximum: 60Warning: 7Inactive: 14Last Change: Jan 11, 2015Password Expires: Mar 12, 2015Password Inactive: Mar 26, 2015Account Expires: Never
2.28 Stronger Password EnforcementOn an audited system it is important to restrict people from using simple passwords that canbe cracked too easily. Writing down complex passwords is all right as long as they are storedsecurely. Some will argue that strong passwords protect you against dictionary attacks and those
43 Stronger Password Enforcement SLES 12 SP4
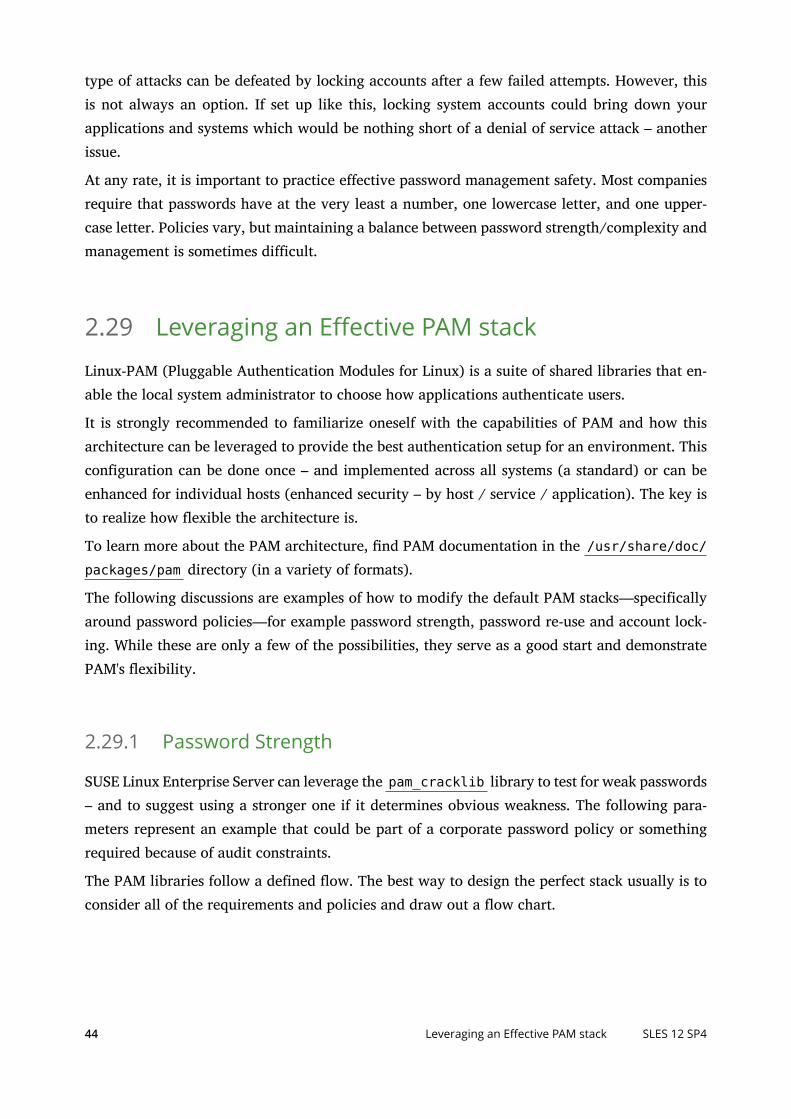
type of attacks can be defeated by locking accounts after a few failed attempts. However, thisis not always an option. If set up like this, locking system accounts could bring down yourapplications and systems which would be nothing short of a denial of service attack – anotherissue.
At any rate, it is important to practice effective password management safety. Most companiesrequire that passwords have at the very least a number, one lowercase letter, and one upper-case letter. Policies vary, but maintaining a balance between password strength/complexity andmanagement is sometimes difficult.
2.29 Leveraging an Effective PAM stack
Linux-PAM (Pluggable Authentication Modules for Linux) is a suite of shared libraries that en-able the local system administrator to choose how applications authenticate users.
It is strongly recommended to familiarize oneself with the capabilities of PAM and how thisarchitecture can be leveraged to provide the best authentication setup for an environment. Thisconfiguration can be done once – and implemented across all systems (a standard) or can beenhanced for individual hosts (enhanced security – by host / service / application). The key isto realize how flexible the architecture is.
To learn more about the PAM architecture, nd PAM documentation in the /usr/share/doc/packages/pam directory (in a variety of formats).
The following discussions are examples of how to modify the default PAM stacks—specificallyaround password policies—for example password strength, password re-use and account lock-ing. While these are only a few of the possibilities, they serve as a good start and demonstratePAM's flexibility.
2.29.1 Password Strength
SUSE Linux Enterprise Server can leverage the pam_cracklib library to test for weak passwords– and to suggest using a stronger one if it determines obvious weakness. The following para-meters represent an example that could be part of a corporate password policy or somethingrequired because of audit constraints.
The PAM libraries follow a defined ow. The best way to design the perfect stack usually is toconsider all of the requirements and policies and draw out a ow chart.
44 Leveraging an Effective PAM stack SLES 12 SP4
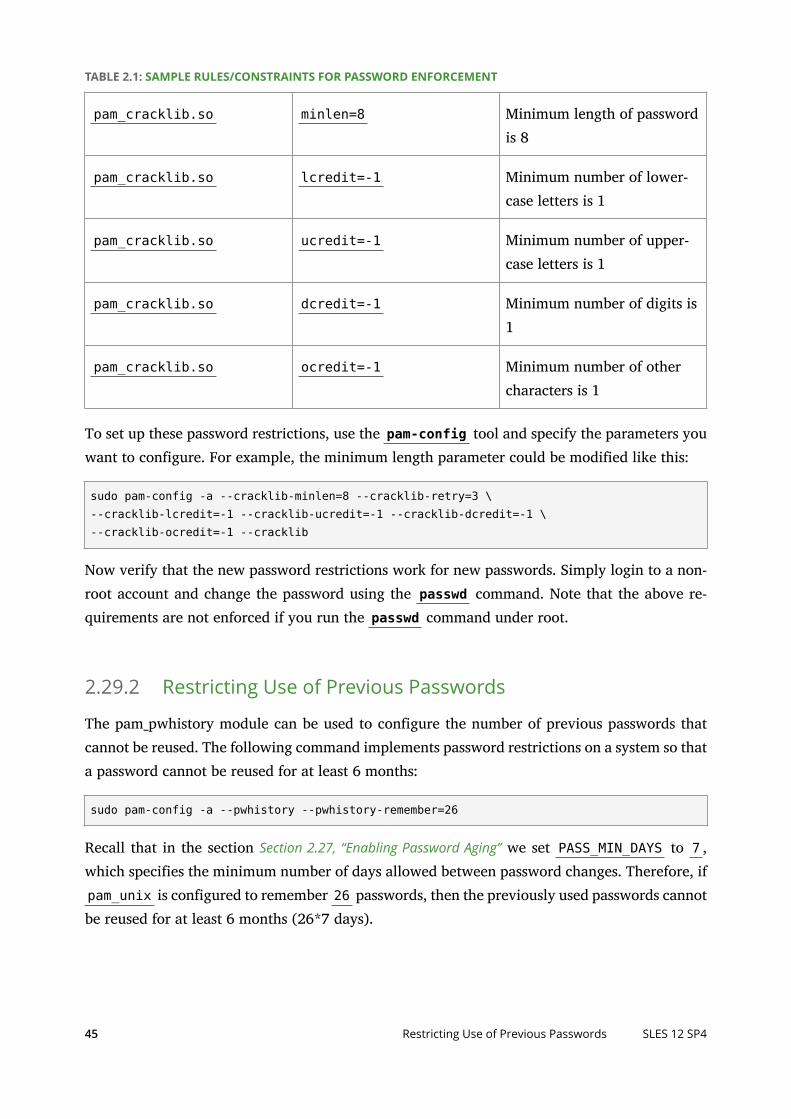
TABLE 2.1: SAMPLE RULES/CONSTRAINTS FOR PASSWORD ENFORCEMENT
pam_cracklib.so minlen=8 Minimum length of passwordis 8
pam_cracklib.so lcredit=-1 Minimum number of lower-case letters is 1
pam_cracklib.so ucredit=-1 Minimum number of upper-case letters is 1
pam_cracklib.so dcredit=-1 Minimum number of digits is1
pam_cracklib.so ocredit=-1 Minimum number of othercharacters is 1
To set up these password restrictions, use the pam-config tool and specify the parameters youwant to configure. For example, the minimum length parameter could be modified like this:
sudo pam-config -a --cracklib-minlen=8 --cracklib-retry=3 \--cracklib-lcredit=-1 --cracklib-ucredit=-1 --cracklib-dcredit=-1 \--cracklib-ocredit=-1 --cracklib
Now verify that the new password restrictions work for new passwords. Simply login to a non-root account and change the password using the passwd command. Note that the above re-quirements are not enforced if you run the passwd command under root.
2.29.2 Restricting Use of Previous Passwords
The pam_pwhistory module can be used to configure the number of previous passwords thatcannot be reused. The following command implements password restrictions on a system so thata password cannot be reused for at least 6 months:
sudo pam-config -a --pwhistory --pwhistory-remember=26
Recall that in the section Section 2.27, “Enabling Password Aging” we set PASS_MIN_DAYS to 7 ,which specifies the minimum number of days allowed between password changes. Therefore, ifpam_unix is configured to remember 26 passwords, then the previously used passwords cannotbe reused for at least 6 months (26*7 days).
45 Restricting Use of Previous Passwords SLES 12 SP4
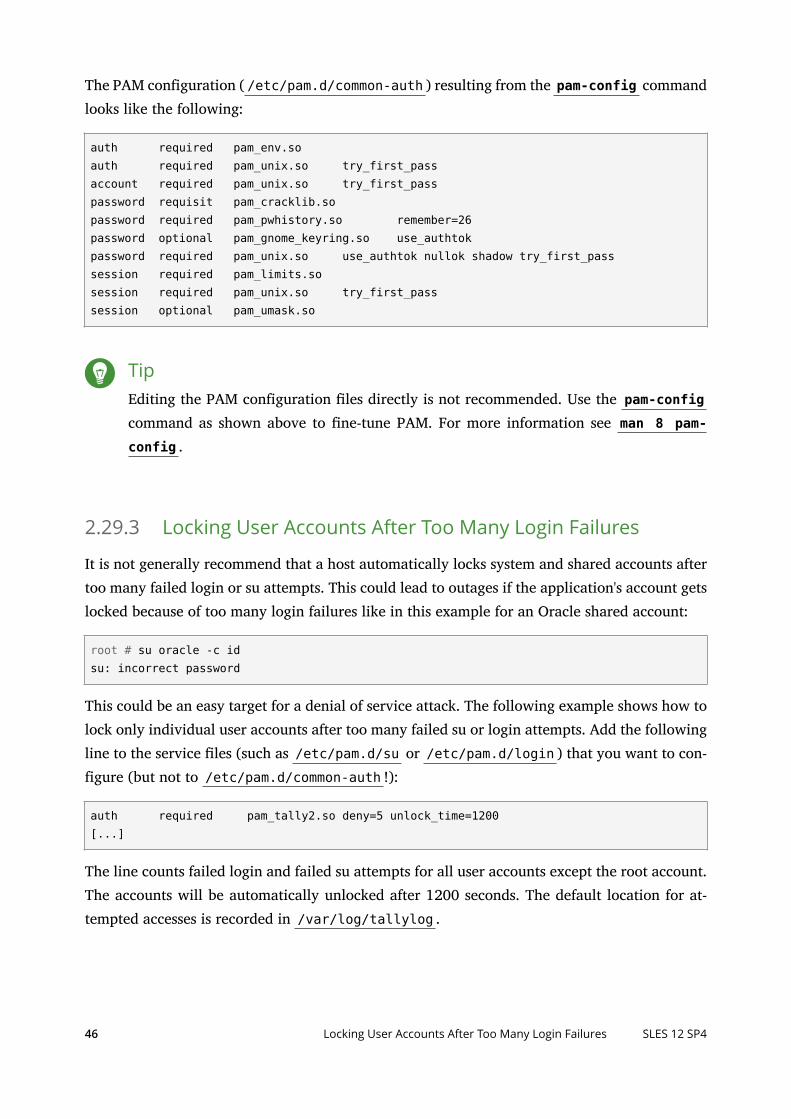
The PAM configuration ( /etc/pam.d/common-auth ) resulting from the pam-config commandlooks like the following:
auth required pam_env.soauth required pam_unix.so try_first_passaccount required pam_unix.so try_first_passpassword requisit pam_cracklib.sopassword required pam_pwhistory.so remember=26password optional pam_gnome_keyring.so use_authtokpassword required pam_unix.so use_authtok nullok shadow try_first_passsession required pam_limits.sosession required pam_unix.so try_first_passsession optional pam_umask.so
TipEditing the PAM configuration les directly is not recommended. Use the pam-configcommand as shown above to ne-tune PAM. For more information see man 8 pam-config .
2.29.3 Locking User Accounts After Too Many Login Failures
It is not generally recommend that a host automatically locks system and shared accounts aftertoo many failed login or su attempts. This could lead to outages if the application's account getslocked because of too many login failures like in this example for an Oracle shared account:
root # su oracle -c idsu: incorrect password
This could be an easy target for a denial of service attack. The following example shows how tolock only individual user accounts after too many failed su or login attempts. Add the followingline to the service les (such as /etc/pam.d/su or /etc/pam.d/login ) that you want to con-figure (but not to /etc/pam.d/common-auth !):
auth required pam_tally2.so deny=5 unlock_time=1200[...]
The line counts failed login and failed su attempts for all user accounts except the root account.The accounts will be automatically unlocked after 1200 seconds. The default location for at-tempted accesses is recorded in /var/log/tallylog .
46 Locking User Accounts After Too Many Login Failures SLES 12 SP4
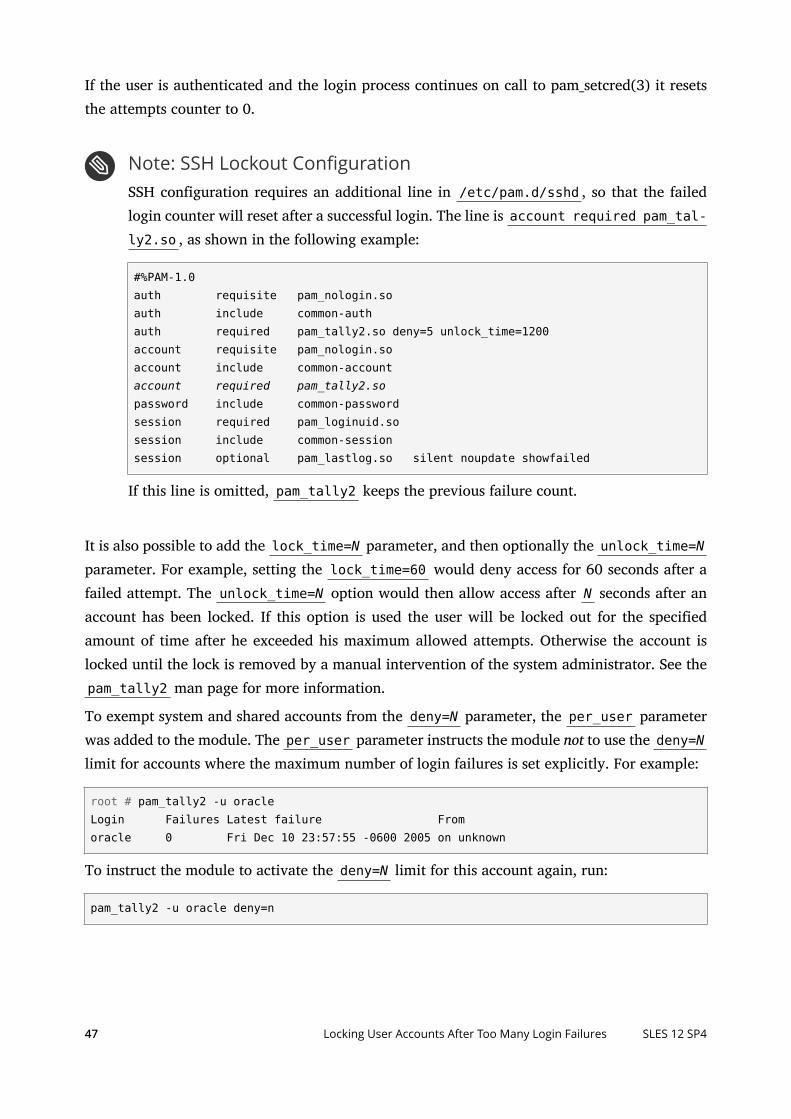
If the user is authenticated and the login process continues on call to pam_setcred(3) it resetsthe attempts counter to 0.
Note: SSH Lockout ConfigurationSSH configuration requires an additional line in /etc/pam.d/sshd , so that the failedlogin counter will reset after a successful login. The line is account required pam_tal-ly2.so , as shown in the following example:
#%PAM-1.0auth requisite pam_nologin.soauth include common-authauth required pam_tally2.so deny=5 unlock_time=1200account requisite pam_nologin.soaccount include common-accountaccount required pam_tally2.sopassword include common-passwordsession required pam_loginuid.sosession include common-sessionsession optional pam_lastlog.so silent noupdate showfailed
If this line is omitted, pam_tally2 keeps the previous failure count.
It is also possible to add the lock_time=N parameter, and then optionally the unlock_time=Nparameter. For example, setting the lock_time=60 would deny access for 60 seconds after afailed attempt. The unlock_time=N option would then allow access after N seconds after anaccount has been locked. If this option is used the user will be locked out for the specifiedamount of time after he exceeded his maximum allowed attempts. Otherwise the account islocked until the lock is removed by a manual intervention of the system administrator. See thepam_tally2 man page for more information.
To exempt system and shared accounts from the deny=N parameter, the per_user parameterwas added to the module. The per_user parameter instructs the module not to use the deny=Nlimit for accounts where the maximum number of login failures is set explicitly. For example:
root # pam_tally2 -u oracleLogin Failures Latest failure Fromoracle 0 Fri Dec 10 23:57:55 -0600 2005 on unknown
To instruct the module to activate the deny=N limit for this account again, run:
pam_tally2 -u oracle deny=n
47 Locking User Accounts After Too Many Login Failures SLES 12 SP4
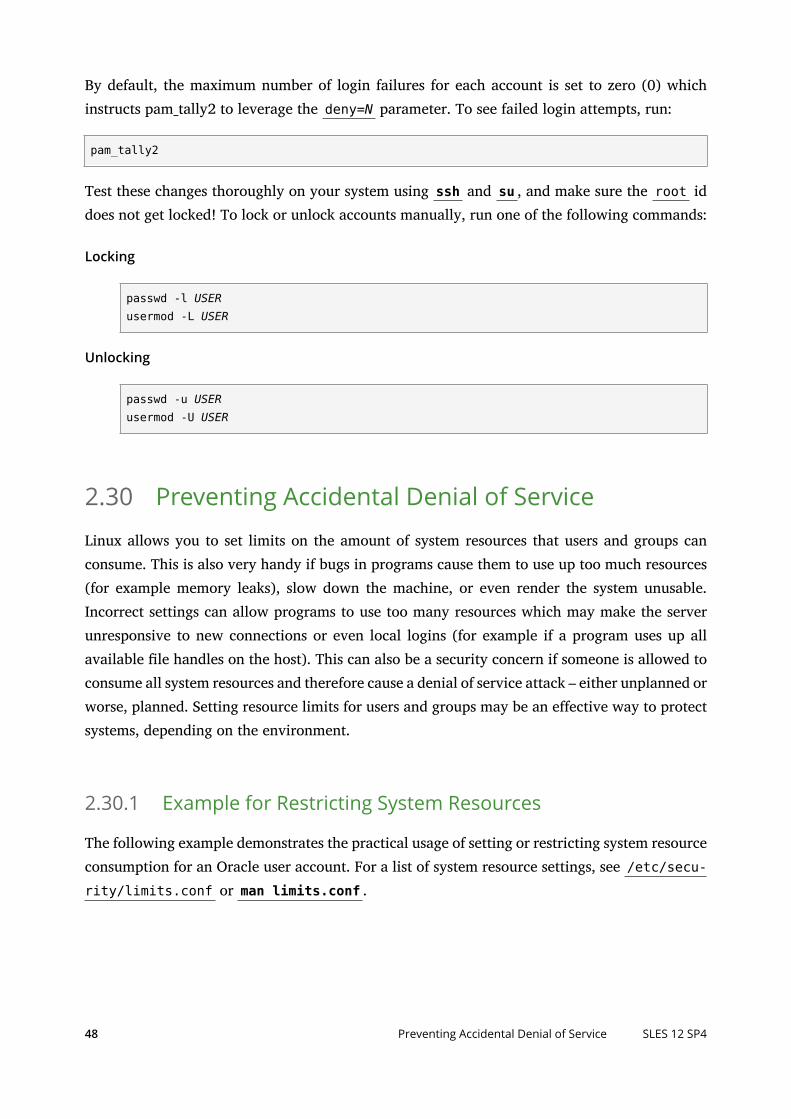
By default, the maximum number of login failures for each account is set to zero (0) whichinstructs pam_tally2 to leverage the deny=N parameter. To see failed login attempts, run:
pam_tally2
Test these changes thoroughly on your system using ssh and su , and make sure the root iddoes not get locked! To lock or unlock accounts manually, run one of the following commands:
Locking
passwd -l USERusermod -L USER
Unlocking
passwd -u USERusermod -U USER
2.30 Preventing Accidental Denial of Service
Linux allows you to set limits on the amount of system resources that users and groups canconsume. This is also very handy if bugs in programs cause them to use up too much resources(for example memory leaks), slow down the machine, or even render the system unusable.Incorrect settings can allow programs to use too many resources which may make the serverunresponsive to new connections or even local logins (for example if a program uses up allavailable le handles on the host). This can also be a security concern if someone is allowed toconsume all system resources and therefore cause a denial of service attack – either unplanned orworse, planned. Setting resource limits for users and groups may be an effective way to protectsystems, depending on the environment.
2.30.1 Example for Restricting System Resources
The following example demonstrates the practical usage of setting or restricting system resourceconsumption for an Oracle user account. For a list of system resource settings, see /etc/secu-rity/limits.conf or man limits.conf .
48 Preventing Accidental Denial of Service SLES 12 SP4
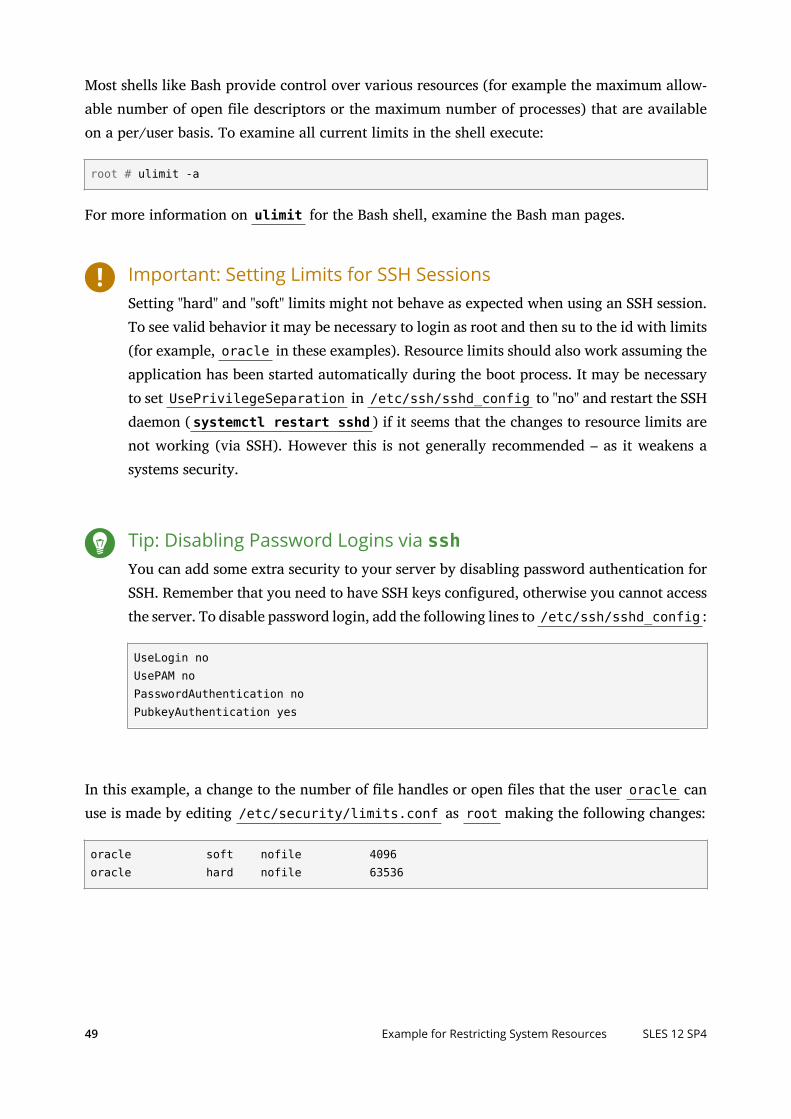
Most shells like Bash provide control over various resources (for example the maximum allow-able number of open le descriptors or the maximum number of processes) that are availableon a per/user basis. To examine all current limits in the shell execute:
root # ulimit -a
For more information on ulimit for the Bash shell, examine the Bash man pages.
Important: Setting Limits for SSH SessionsSetting "hard" and "soft" limits might not behave as expected when using an SSH session.To see valid behavior it may be necessary to login as root and then su to the id with limits(for example, oracle in these examples). Resource limits should also work assuming theapplication has been started automatically during the boot process. It may be necessaryto set UsePrivilegeSeparation in /etc/ssh/sshd_config to "no" and restart the SSHdaemon ( systemctl restart sshd ) if it seems that the changes to resource limits arenot working (via SSH). However this is not generally recommended – as it weakens asystems security.
Tip: Disabling Password Logins via sshYou can add some extra security to your server by disabling password authentication forSSH. Remember that you need to have SSH keys configured, otherwise you cannot accessthe server. To disable password login, add the following lines to /etc/ssh/sshd_config :
UseLogin noUsePAM noPasswordAuthentication noPubkeyAuthentication yes
In this example, a change to the number of le handles or open les that the user oracle canuse is made by editing /etc/security/limits.conf as root making the following changes:
oracle soft nofile 4096oracle hard nofile 63536
49 Example for Restricting System Resources SLES 12 SP4
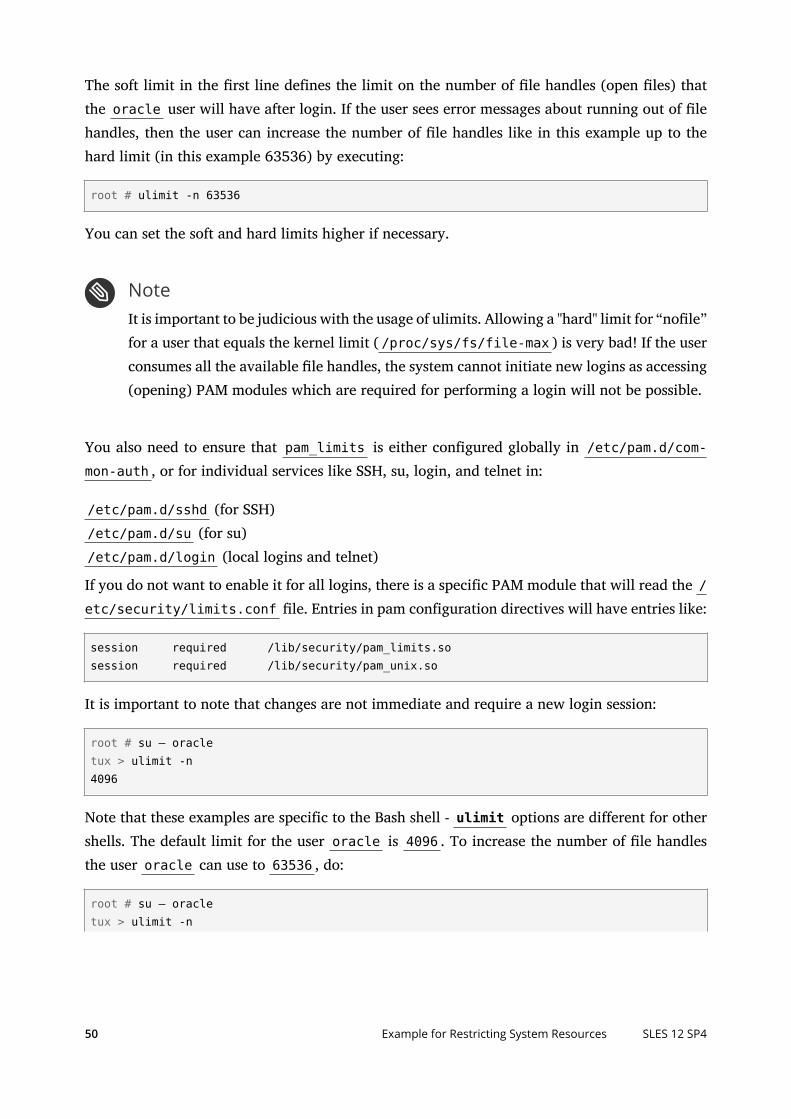
The soft limit in the rst line defines the limit on the number of le handles (open les) thatthe oracle user will have after login. If the user sees error messages about running out of lehandles, then the user can increase the number of le handles like in this example up to thehard limit (in this example 63536) by executing:
root # ulimit -n 63536
You can set the soft and hard limits higher if necessary.
NoteIt is important to be judicious with the usage of ulimits. Allowing a "hard" limit for “nole”for a user that equals the kernel limit ( /proc/sys/fs/file-max ) is very bad! If the userconsumes all the available le handles, the system cannot initiate new logins as accessing(opening) PAM modules which are required for performing a login will not be possible.
You also need to ensure that pam_limits is either configured globally in /etc/pam.d/com-mon-auth , or for individual services like SSH, su, login, and telnet in:
/etc/pam.d/sshd (for SSH)/etc/pam.d/su (for su)/etc/pam.d/login (local logins and telnet)
If you do not want to enable it for all logins, there is a specific PAM module that will read the /etc/security/limits.conf le. Entries in pam configuration directives will have entries like:
session required /lib/security/pam_limits.sosession required /lib/security/pam_unix.so
It is important to note that changes are not immediate and require a new login session:
root # su – oracletux > ulimit -n4096
Note that these examples are specific to the Bash shell - ulimit options are different for othershells. The default limit for the user oracle is 4096 . To increase the number of le handlesthe user oracle can use to 63536 , do:
root # su – oracletux > ulimit -n
50 Example for Restricting System Resources SLES 12 SP4
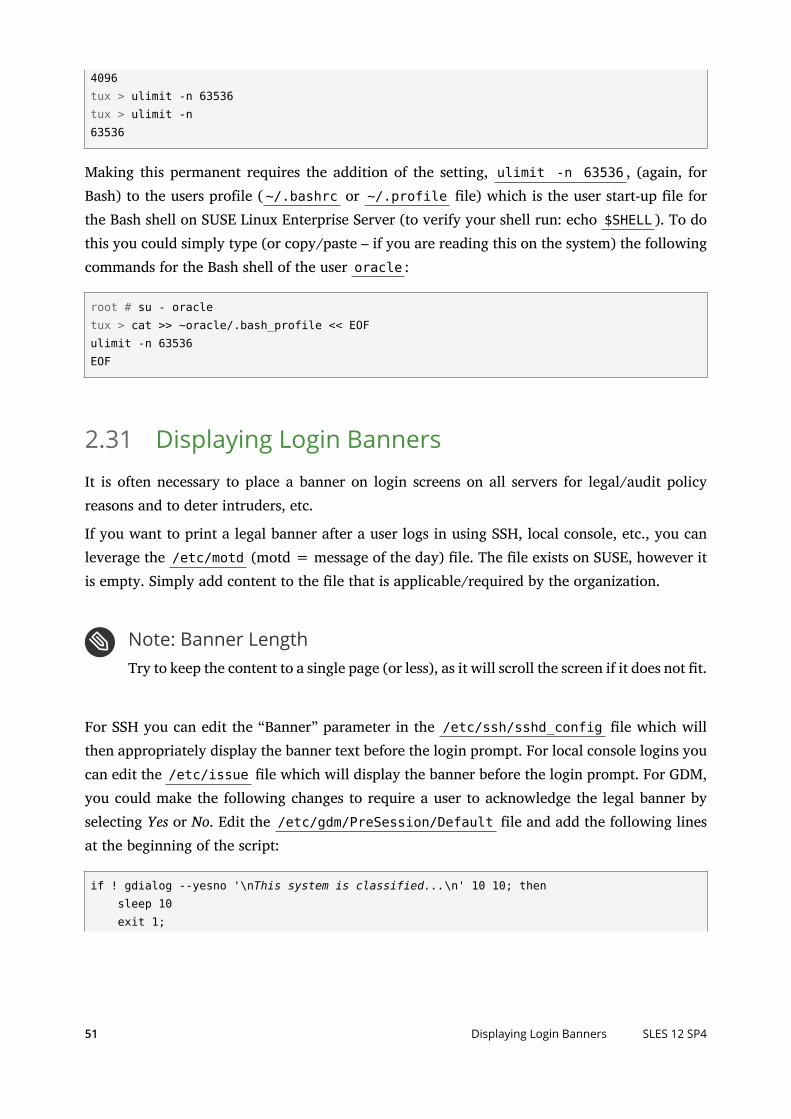
4096tux > ulimit -n 63536tux > ulimit -n63536
Making this permanent requires the addition of the setting, ulimit -n 63536 , (again, forBash) to the users profile ( ~/.bashrc or ~/.profile le) which is the user start-up le forthe Bash shell on SUSE Linux Enterprise Server (to verify your shell run: echo $SHELL ). To dothis you could simply type (or copy/paste – if you are reading this on the system) the followingcommands for the Bash shell of the user oracle :
root # su - oracletux > cat >> ~oracle/.bash_profile << EOFulimit -n 63536EOF
2.31 Displaying Login BannersIt is often necessary to place a banner on login screens on all servers for legal/audit policyreasons and to deter intruders, etc.
If you want to print a legal banner after a user logs in using SSH, local console, etc., you canleverage the /etc/motd (motd = message of the day) le. The le exists on SUSE, however itis empty. Simply add content to the le that is applicable/required by the organization.
Note: Banner LengthTry to keep the content to a single page (or less), as it will scroll the screen if it does not t.
For SSH you can edit the “Banner” parameter in the /etc/ssh/sshd_config le which willthen appropriately display the banner text before the login prompt. For local console logins youcan edit the /etc/issue le which will display the banner before the login prompt. For GDM,you could make the following changes to require a user to acknowledge the legal banner byselecting Yes or No. Edit the /etc/gdm/PreSession/Default le and add the following linesat the beginning of the script:
if ! gdialog --yesno '\nThis system is classified...\n' 10 10; then sleep 10 exit 1;
51 Displaying Login Banners SLES 12 SP4
fi
The This system is classified... test should be replaced with the valid text. It is importantto note that this dialog will not prevent a login from progressing.
2.32 Miscellaneous
2.32.1 Host-Based Linux Monitoring and Intrusion Detection
Before you place a host into production or even on a network, consider the use of a system in-tegrity checker, like seccheck (already discussed in Section 2.4, “Verifying Security Action with sec-check”), so in case of unauthorized changes, notifications will be issued. Also consider the use ofan intrusion detection environment, like AIDE, the Advanced Intrusion Detection Environment.
AIDE is a GPL licensed and open source intrusion detection system. It could be considered asystem fingerprinting mechanism. AIDE works by creating a database containing informationabout the les on your system. The database is created from rules laid out in the configurationle aide.conf. When AIDE is run, this database is referenced to check for changes (or createdfor the rst time). Assuming a comparison check is being run, any changes not permitted bythe configuration le are reported.
By leveraging AIDE—storing a copy of the host's database in a secure location—and comparingit (on a scheduled basis or as part of a forensic effort), system integrity/insurance can be a matterof heuristics and procedure. If an intruder compromises your system, the comparison effort willenable an administrator or security officer to know what has changed on the host. The initialdatabase should be created as a final step—before a system gets deployed into production.
It is outside the scope of this article to cover Linux Monitoring and detailed Intrusion Detectionsystems (IDS) or solutions, however there is a plethora of information about configuring AIDEor other solutions and many informative articles on the Web.
2.32.2 Connect Accounting Utilities
Here is a list of commands you can use to get data about user logins:
who . Lists currently logged in users.
w . Shows who is logged in and what they are doing.
52 Miscellaneous SLES 12 SP4
last . Shows a list of last logged in users, including login time, logout time, login IP address, etc.
lastb . Same as last , except that by default it shows /var/log/btmp , which contains all thebad login attempts.
lastlog . This command reports data maintained in /var/log/lastlog , which is a record ofthe last time a user logged in.
ac . Available after installing the acct package. Prints the connect time in hours on a per-userbasis or daily basis, etc. This command reads /var/log/wtmp .
dump-utmp . Converts raw data from /var/run/utmp or /var/log/wtmp into ASCII-parsableformat.
Also check the /var/log/messages le, or the output of journalctl if no logging facility isrunning. See Book “Administration Guide”, Chapter 15 “journalctl: Query the systemd Journal” formore information on the systemd journal.
2.32.3 Other
Finally, the following items are relevant to the system security as well, and misconfigurationcan cause many problems – and should be reviewed:
Resolver ( /etc/hosts , /etc/resolv.conf , /etc/nsswitch.conf ).
NTP configuration ( /etc/ntp.conf ).
53 Other SLES 12 SP4
A Documentation Updates
This chapter lists content changes for this document since the release of SUSE® Linux EnterpriseServer 11 SP3.
This manual was updated on the following dates:
Section A.1, “November 2016 (Initial Release of SUSE Linux Enterprise Server 12 SP2)”
Section A.2, “December 2015 (Initial Release of SUSE Linux Enterprise Server 12 SP1)”
Section A.3, “February 2015 (Documentation Maintenance Update)”
Section A.4, “October 2014 (Initial Release of SUSE Linux Enterprise Server 12)”
A.1 November 2016 (Initial Release of SUSE LinuxEnterprise Server 12 SP2)
All sections
Unified input line style.
Section 2.19, “Copying Files Using SSH Without Providing Login Prompts”
Replaced depricated ~/.ssh/authorized_keys2 and rsa-dss
Section 2.2, “Locking Down the BIOS”
Referenced UEFI
Section 2.29.2, “Restricting Use of Previous Passwords”
Fix configuration description (https://bugzilla.suse.com/show_bug.cgi?id=977984 ).
Section 2.25, “Restricting Access to Removable Media”
Name of rules les must start with a digit (Doc comment #29432).
Section 2.5, “Retiring Linux Servers with Sensitive Data”
More information about wiping les, wear leveling devices
Section 2.9.9, “Buffer Overflow Attack Mitigation”
Address Space Layout Randomization and No Execute bit do not prevent buer overflowsbut buer overflow attacks.
54 November 2016 (Initial Release of SUSE Linux Enterprise Server 12 SP2) SLES 12 SP4

Bugfixes
PAM related fixes (https://bugzilla.suse.com/show_bug.cgi?id=978001 ,https://bugzilla.suse.com/show_bug.cgi?id=977984 , https://bugzilla.suse.com/show_bug.c-
gi?id=977988 ).
A.2 December 2015 (Initial Release of SUSE LinuxEnterprise Server 12 SP1)
General
Book “Subscription Management Tool for SLES 12 SP4” is now part of the documentationfor SUSE Linux Enterprise Server.
Add-ons provided by SUSE have been renamed as modules and extensions. The man-uals have been updated to reflect this change.
Numerous small fixes and additions to the documentation, based on technical feed-back.
The registration service has been changed from Novell Customer Center to SUSECustomer Center.
In YaST, you will now reach Network Settings via the System group. Network Devicesis gone (https://bugzilla.suse.com/show_bug.cgi?id=867809 ).
Added Section 2.14.4, “SUSE Manager” (Doc comment #26206).
Added Section 2.9.12, “ Filter access to /dev/mem (default in SUSE Linux Enterprise Server
12) ” (Fate #315172).
55 December 2015 (Initial Release of SUSE Linux Enterprise Server 12 SP1) SLES 12 SP4
Bugfixes
Access to Removable Media Cannot be Restricted as Described (https://bugzil-
la.suse.com/show_bug.cgi?id=929918 ).
A.3 February 2015 (Documentation MaintenanceUpdate)
Bugfixes
SLES hardening documentation wrong/incomplete—password strength (https://
bugzilla.suse.com/show_bug.cgi?id=907754 ).
A.4 October 2014 (Initial Release of SUSE LinuxEnterprise Server 12)
General
Removed all KDE documentation and references because KDE is no longer shipped.
Removed all references to SuSEconfig, which is no longer supported (Fate #100011).
Move from System V init to systemd (Fate #310421). Updated affected parts of thedocumentation.
YaST Runlevel Editor has changed to Services Manager (Fate #312568). Updatedaffected parts of the documentation.
Removed all references to ISDN support, as ISDN support has been removed (Fate#314594).
Removed all references to the YaST DSL module as it is no longer shipped (Fate#316264).
Removed all references to the YaST Modem module as it is no longer shipped (Fate#316264).
56 February 2015 (Documentation Maintenance Update) SLES 12 SP4
Btrfs has become the default le system for the root partition (Fate #315901). Up-dated affected parts of the documentation.
The dmesg now provides human-readable time stamps in ctime() -like format (Fate#316056). Updated affected parts of the documentation.
syslog and syslog-ng have been replaced by rsyslog (Fate #316175). Updated affectedparts of the documentation.
MariaDB is now shipped as the relational database instead of MySQL (Fate #313595).Updated affected parts of the documentation.
SUSE-related products are no longer available from http://download.novell.com butfrom http://download.suse.com . Adjusted links accordingly.
Novell Customer Center has been replaced with SUSE Customer Center. Updatedaffected parts of the documentation.
/var/run is mounted as tmpfs (Fate #303793). Updated affected parts of the doc-umentation.
The following architectures are no longer supported: IA64 and x86. Updated affectedparts of the documentation.
The traditional method for setting up the network with ifconfig has been replacedby wicked . Updated affected parts of the documentation.
A lot of networking commands are deprecated and have been replaced by newercommands (usually ip ). Updated affected parts of the documentation.
arp : ip neighborifconfig : ip addr , ip linkiptunnel : ip tunneliwconfig : iwnameif : ip link , ifrenamenetstat : ss , ip route , ip -s link , ip maddrroute : ip route
Numerous small fixes and additions to the documentation, based on technical feed-back.
57 October 2014 (Initial Release of SUSE Linux Enterprise Server 12) SLES 12 SP4
Section 2.5, “Retiring Linux Servers with Sensitive Data”
Added Section 2.5.1, “scrub: Disk Overwrite Utility” (Fate #315530).
Section 2.9.9, “Buffer Overflow Attack Mitigation”
Added Section 2.9.11, “Increased dmesg Restrictions” (Fate #315175).
Section 2.4, “Verifying Security Action with seccheck”
Added Section 2.4.1, “Seccheck Configuration” (Fate #312303).
Obsolete Content
Bugfixes
Removed all content about or references to ZENworks Linux Management.
58 October 2014 (Initial Release of SUSE Linux Enterprise Server 12) SLES 12 SP4