hero - excela healthdrweb.excelahealth.org/_uploadshero/_documents/hero instructor...functions can...
TRANSCRIPT

HERO Health Electronic Record Online
Excela Health
Provider EMR Training
Session 1

2
Introduction/Welcome/Opening Message Welcome to Session I of the Provider EMR Training.
Excela Health has made the commitment to proceed with the EMR because of the American Recovery and Reinvestment HITECH Act to improve the continuity of care and safety of our patients, and yes, ultimately to continue receiving the maximum reimbursement from Medicare/Medicaid services.
Excela Health’s Electronic Medical Record will be referred to as HERO – Health Electronic Record Online.
What does that mean for you as providers?
It means that your world is going to be transformed and basically turned upside down.
Providers will be entering their patient’s diagnosis, their own orders and their daily progress notes and if a surgeon the immediate post-procedure note, etc.
Is it going to be hard – YES.
Is it going to take me more time – YES.
Is the Nurse or Unit Clerk going to be able to help me – NO
Will it be painful during go-live and days after – YES
BUT we WILL get through it. You are not alone.
BUT will you after a few weeks become more efficient and get better at it – YES. Training:
Providers are having 2 – 4 hour sessions.
You will have a BREAK.
We have A LOT of information to cover in these sessions. There may be multiple ways that certain functions can be done in HERO but we are going to focus on 1 way. If you find the other ways later on your own – that’s ok.
Open Labs are available.
In training we are asking that you be patient with us.
There are things we cannot show you in train because they are not available in train.
We will probably also discover some things during the training sessions that we do not know or have answers for but we will find out.
We are going to approach the first part of Session I as the “day in the life” of a provider. So let’s get started…..
Explain that training sessions have been structured up to represent “A Day in the Life of a Provider”
3
1. Sign in-Access Message Center: from Home, Office, Hospital, etc. ANYWHERE you have access
to the internet.
LOGGING IN In Train
1) You must log in to Citrix first
o User ID (EH email or ePortal log in) pctraining1, pctraining2, etc. (silver sticker)
o Password – (EH email or ePortal password) password
2) Log into HERO
o User ID tent info
o Password – CERNER
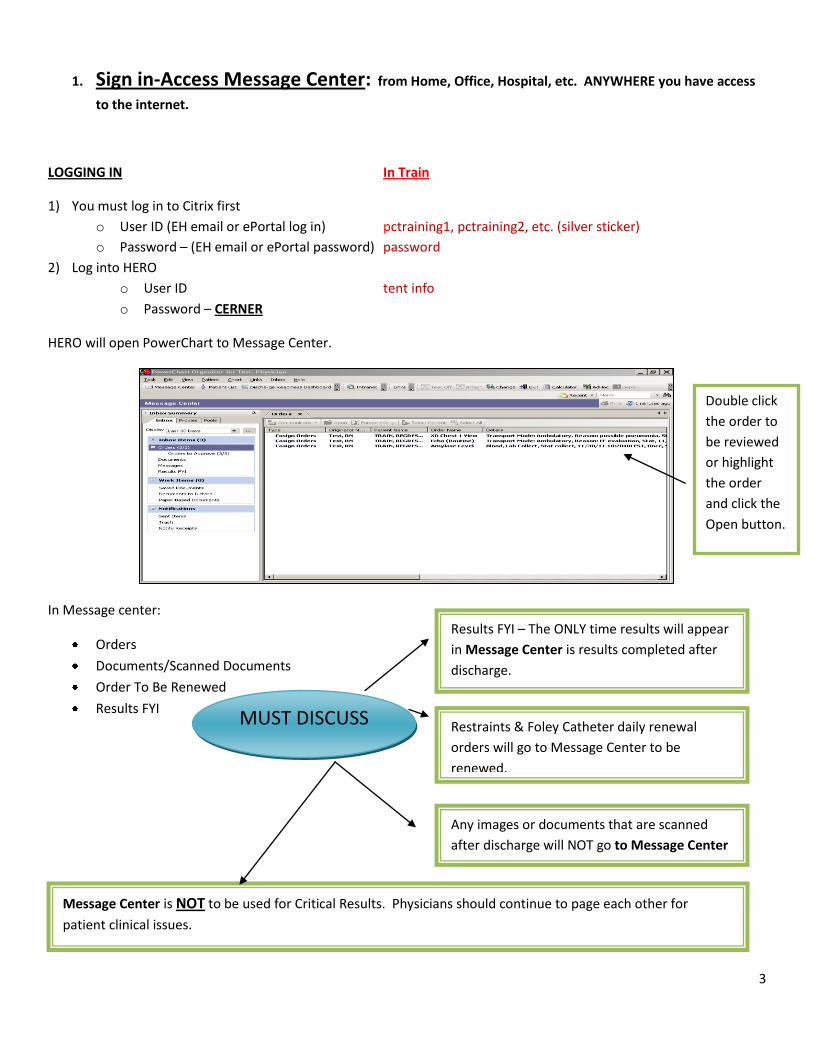
HERO will open PowerChart to Message Center.
In Message center:
Orders
Documents/Scanned Documents
Order To Be Renewed
Results FYI
Double click
the order to
be reviewed
or highlight
the order
and click the
Open button.
Results FYI – The ONLY time results will appear
in Message Center is results completed after
discharge.
Any images or documents that are scanned
after discharge will NOT go to Message Center
Message Center is NOT to be used for Critical Results. Physicians should continue to page each other for
patient clinical issues.
MUST DISCUSS Restraints & Foley Catheter daily renewal
orders will go to Message Center to be
renewed.

4
Message Center – ORDERS FOR REVIEW
You will have three orders for review to work with.
Orders for review can be “skipped” (next), “approved”, or “refused”.
Show examples of all three options
Approve or refuse
OK /NEXT will approve the order
and proceed to next order for
review, through the documents.
NEXT will skip current order and
proceed to next order for review
OK will approve the order and
you will return to main menu
REFUSED ORDERS: Refused orders will automatically go to the Nurse Manager/Supervisor Mailbox. If the
ordering physician is known they will forward it to the correct physician. If the ordering physician is unknown,
the order will be forwarded to the attending physician who must approve the order to get it out of the system
(message center) with a comment regarding the situation.
1. Bring up first order by double clicking on it.
2. Approve it.
3. Use Ok & next button to proceed to next order.
4. Bring up the second order.
5. Refuse it and EXPLAIN REFUSAL PROCESS.
What orders will appear in Message Center For Review? Orders given to and entered by a nurse as a phone
order OR orders entered by a Resident, Nurse Practitioner or Physician Assistant will appear in message
center for review and co-signature.
5
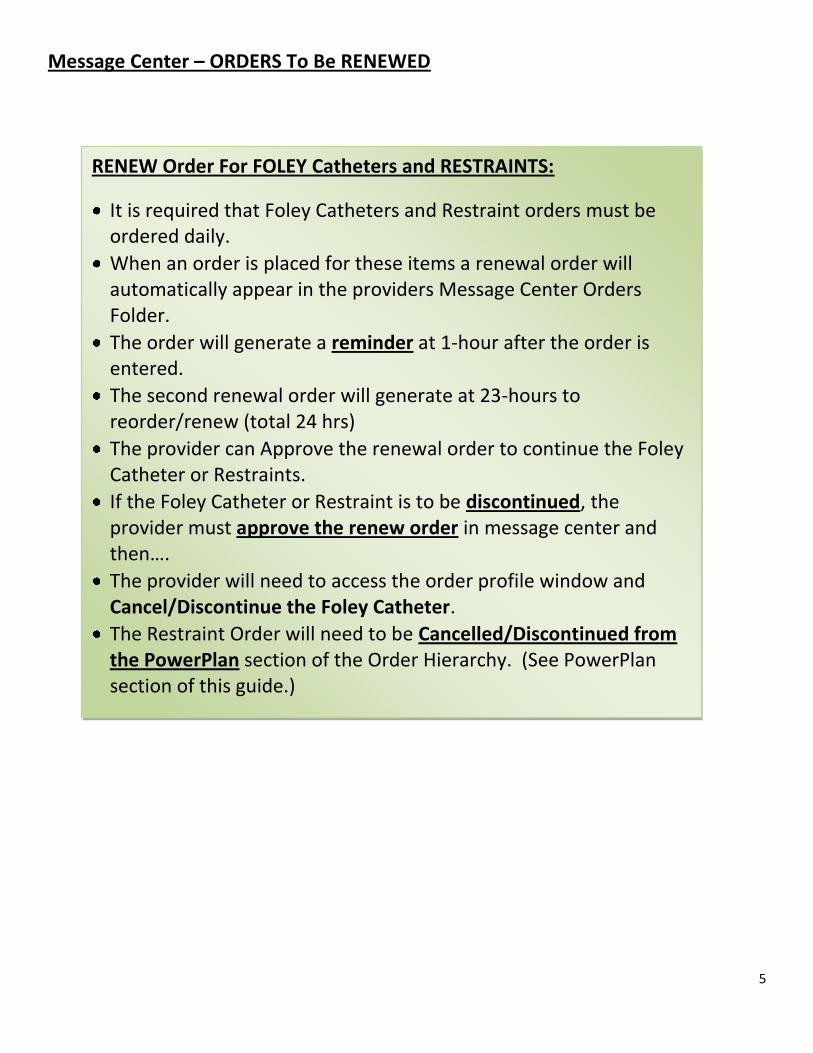
RENEW Order For FOLEY Catheters and RESTRAINTS:
It is required that Foley Catheters and Restraint orders must be ordered daily.
When an order is placed for these items a renewal order will automatically appear in the providers Message Center Orders Folder.
The order will generate a reminder at 1-hour after the order is entered.
The second renewal order will generate at 23-hours to reorder/renew (total 24 hrs)
The provider can Approve the renewal order to continue the Foley Catheter or Restraints.
If the Foley Catheter or Restraint is to be discontinued, the provider must approve the renew order in message center and then….
The provider will need to access the order profile window and Cancel/Discontinue the Foley Catheter.
The Restraint Order will need to be Cancelled/Discontinued from the PowerPlan section of the Order Hierarchy. (See PowerPlan section of this guide.)
(Time frame for renewal is based on calendar day.)
Message Center – ORDERS To Be RENEWED

6
Message Center – DOCUMENTS FOR REVIEW
Documents for review can be “skipped”, “signed”, or “refused”. Show examples of “sign” and “refuse” options.
Refuse
NOTE: REFUSED DOCUMENTS: Refused documents need to be sent to the appropriate HIM mailbox. From
the search window, key in the appropriate… Frick, HIM Refused – Latrobe, HIM Refused – Westmoreland, HIM
Refused.
NOTE: Dictated/Transcribed Reports: All documents except the Daily Progress Note and Immediate Post
Procedure Note will continue to be dictated and transcribed by Medical Records. These dictated reports will be
sent to Message Center for electronic signature.
These documents will be able to be modified by the provider right from message center as well as refused.
Refused documents will be sent to the appropriate HIM mailbox.
Sign
1. Bring up 1st document and Sign it. 2. Bring up the 2nd document and Refuse it and explain refusal process. 3. Click on Refuse 4. Select a refuse reason 5. Select Review 6. Click the search button (binoculars) 7. Key in Frick, Latrobe or Westmoreland for appropriate facility HIM mailbox. 8. Select the appropriate HIM mailbox (not orders) 9. Click OK. 10. Bring up 3rd document and show how the report can be modified by the user in message center.

7
EXPLAIN-If the physician "agrees" to the question asked, a reply must be sent. In addition, the provider will need to
document the answer in their daily progress note and discharge summary.
Double –click the message or highlight the message and click open.
CDMP Message (Compliant Documentation Management Program)
Currently known as the PINK Deficiency SLIPS
The message will display in the Message section of the Message Center Inbox.
Reply To Message:
Sign Note:
When Message Center review is complete, show physicians the PATIENT LIST tab. (Since we are having the providers log in as themselves at the end of session 1 instead of session 2 we will actually go in
as them and build their patient lists and show them how to print then.)
To reply to the message, click reply
and key in appropriate message and
click send button.
The final document regarding the
deficiency will display in the
providers Document section for
signature. The provider will sign the
document just like any other
documents.

8
Searching for a patient by name
Patient Banner Bar
Height and Weight – Both in metric
Search by
clicking
“Recent”
Enter last name, first
name (e.g. Smith, John)
VERY IMPORTANT: Providers must make sure that when searching for a patient, to select the correct account number or encounter
REVIEW POWERCHART WINDOW:
Task Bar - For the most part will not use.
Toolbar – Go over buttons of the toolbar
Message Center
Patient List
Discharge Readiness Dashboard (will talk about when we discuss Discharge)
PAL (will not use)
Core Measure Dashboard (will discuss later)
Links (Intranet, Micromedex, UpToDate and Dynamed)
Tear-off button – will not use.
REVIEW Details OF Banner Bar
EXPLAIN: The banner bar weight reflects the most current measured weight. However, the dosing Weight is the
Actual Measured Weight on Admission and is ONLY changed if a physician order is placed. The order the physician
would enter is the Update Dosing Weight/Dosing Weight Change order.

9
MENU BAR OR TABLE OF CONTENTS
The Menu Bar or Table of Contents is the “organizer” of PowerChart where all of the patient’s
documentation is filed and organized.
Do NOT click through each tab – Explain that you will be going through the
Menu Bar or TOC as we go through the training session. The areas highlighted
in gray below will be explained as we go through them in class. Others will be
discussed when we log into the system as themselves.
Explain REFRESH button
NOTE: Only one patient chart can be open at a time. However, multiple users can be in the same
chart at the same time placing orders, reviewing results, documenting, etc. with the exception of
medications. Only one user can order and document medications at the same time
10
Communication To Physician – Displays certain components of nursing and ancillary documentation for the last 72
hours. Some items included are PT/OT/Speech Progress Note, Communication To Physician, Diet Information, etc. WILL
REVIEW IN LIVE
Documentation – Providers will complete their daily progress note from the documentation
tab. Surgeons will also complete their immediate post-procedure note from the
documentation tab.
Inpatient Summary – is a snapshot of the patient’s chart. Providers can review I & O, Vitals,
Diagnoses, Results, etc. It is specific to this encounter or visit. How far back it goes depends
on what you’re looking at. WILL REVIEW IN LIVE TOO.
Orders – All orders will be placed from the orders tab including PowerPlans/order sets.
Results Review – Displays vitals, lab, radiology and images. WILL REVIEW IN LIVE TOO
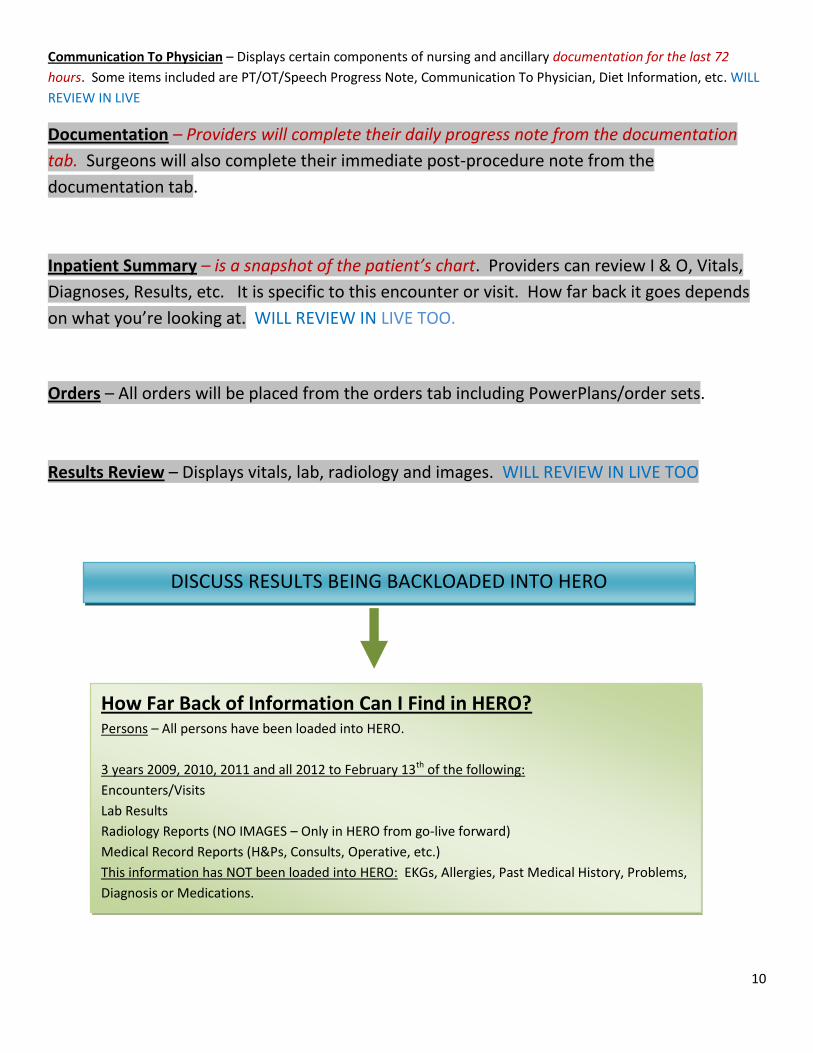
DISCUSS RESULTS BEING BACKLOADED INTO HERO
How Far Back of Information Can I Find in HERO? Persons – All persons have been loaded into HERO.
3 years 2009, 2010, 2011 and all 2012 to February 13th of the following:
Encounters/Visits
Lab Results
Radiology Reports (NO IMAGES – Only in HERO from go-live forward)
Medical Record Reports (H&Ps, Consults, Operative, etc.)
This information has NOT been loaded into HERO: EKGs, Allergies, Past Medical History, Problems,
Diagnosis or Medications.

11
Discharge Summary – Providers will access the discharge summary page that includes all aspects that need to
be completed by the physician for discharge. DISCHARGE WILL BE COVERED IN SESSION II
Allergies – Displays a list of the patient’s allergies. Allergies will become part of the patient’s
permanent medical record and will carry over from encounter to encounter. Allergies will be
assessed and updated by nursing with each admission.
Patient Information – Displays the patient’s address, birth date, visit list, patient provider relationships, etc. Providers can view
the patient provider relationship to see which nurse is caring for that patient. WILL REVIEW IN LIVE
Diagnosis & Problems – Physicians are responsible for the patient diagnosis on admission,
included in daily progress note during the patient stay and at discharge. Nursing is responsible
for problems. Physicians can diagnose – nursing cannot. Diagnosis will drop off after each
discharge. Problems will remain part of patient’s permanent medical record and will carry
over from admission to admission. Nursing will access and update problems at each
admission.
ENTER an allergy:
1. Click the Add button.
2. In the search box Type peanuts
3. Click search (relevant matches will populate below)
4. Double click peanuts
5. Change category to food (category will always default to drug as a safety precaution)( Other fields are optional and
are not required.)
6. Click APPLY. It is VERY important that apply is clicked prior to clicking ok.
7. Click OK
Allergies must be entered into the system and are required prior to placing medication orders. Once
allergies are entered the provider will receive automatic allergy alerts while in the system.
Initially, providers may be required to enter allergies into the system.
On the first day of go-live, the providers will need to enter the Diagnoses into the system. (This is
not being entered ahead of time.)
12
Form Browser – Probably will not use.
Growth Chart – Probably will not use.
Histories – Documented by nursing. Displays past medical history, procedures, social and family history. WILL REVIEW IN
LIVE
Interactive View/I&O – Displays nursing/ancillary documentation in a flowsheet manner – default for the last 3 days. WILL
REVIEW IN LIVE
Immunization Schedule – Immunizations given while in the hospital and documented via the eMAR or entered on
admission will display in this section of the chart. (If a patient had a tetanus shot 3 years ago and the nurse
documented it, it will appear here.)
MAR Summary – View only access of the Medication Administration Record. NOTE: Anesthesiology does have
access to the eMAR to document antibiotics for surgical patients. WILL REVIEW IN LIVE
Medication List – Listing of medication orders. Medications can be added from here as well.
Notes – Displays medical record reports (dictated/transcribed reports, nursing documentation,
ancillary documentation, etc.) WILL REVIEW IN LIVE
Reference – displays reference information for medications, education leaflets and reference
information.
Pregnancy – for Westmoreland use.
Core Measure Data – includes core measure information that nursing has documented during the patient’s stay. The Core
Measure requirements have been built into the PowerPlans and Discharge processes. WILL BE COVERED IN SESSION II
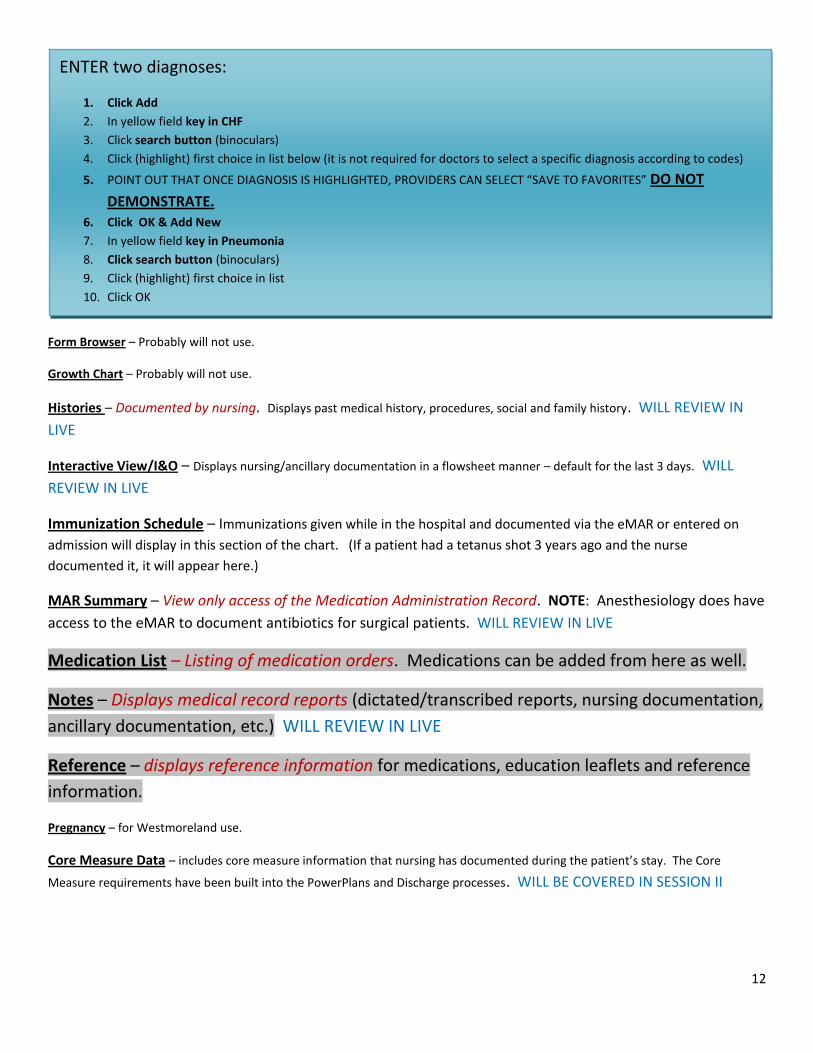
ENTER two diagnoses:
1. Click Add
2. In yellow field key in CHF
3. Click search button (binoculars)
4. Click (highlight) first choice in list below (it is not required for doctors to select a specific diagnosis according to codes)
5. POINT OUT THAT ONCE DIAGNOSIS IS HIGHLIGHTED, PROVIDERS CAN SELECT “SAVE TO FAVORITES” DO NOT
DEMONSTRATE. 6. Click OK & Add New
7. In yellow field key in Pneumonia
8. Click search button (binoculars)
9. Click (highlight) first choice in list
10. Click OK
13
“The Day in the Life of a Provider Using HERO”
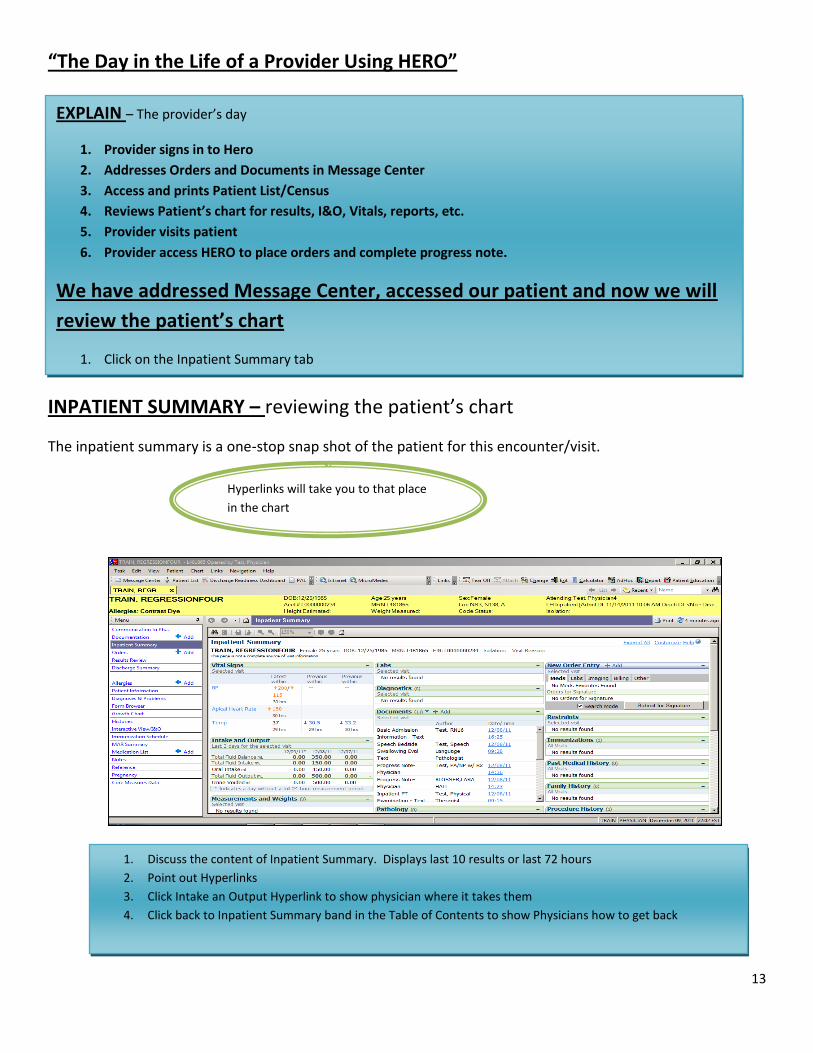
INPATIENT SUMMARY – reviewing the patient’s chart
The inpatient summary is a one-stop snap shot of the patient for this encounter/visit.
Hyperlinks will take you to that place
in the chart
EXPLAIN – The provider’s day
1. Provider signs in to Hero
2. Addresses Orders and Documents in Message Center
3. Access and prints Patient List/Census
4. Reviews Patient’s chart for results, I&O, Vitals, reports, etc.
5. Provider visits patient
6. Provider access HERO to place orders and complete progress note.
We have addressed Message Center, accessed our patient and now we will
review the patient’s chart
1. Click on the Inpatient Summary tab
1. Discuss the content of Inpatient Summary. Displays last 10 results or last 72 hours
2. Point out Hyperlinks
3. Click Intake an Output Hyperlink to show physician where it takes them
4. Click back to Inpatient Summary band in the Table of Contents to show Physicians how to get back

14
1. Click on the Results Review Tab.
2. Discuss Tabs within Results Review
3. Click Radiology tab
4. Double click CT Thorax
5. Report opens, point out that in Live you will be able to click the image bottom at bottom right of report
RESULTS REVIEW Results review displays Recent Results, Vital Signs, Lab, Radiology and Assessments in a flow sheet manner.
Notes:
15
(Workflow) GO SEE THE PATIENT. Come back to do orders and progress note.
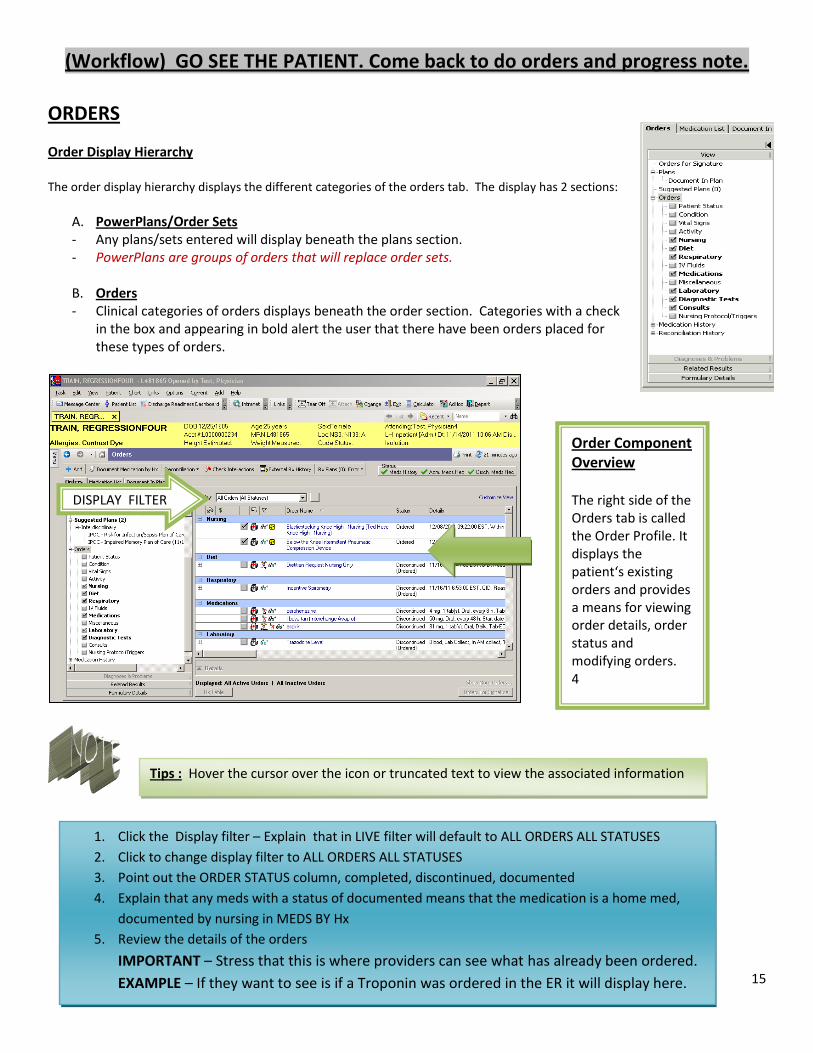
ORDERS
Order Display Hierarchy The order display hierarchy displays the different categories of the orders tab. The display has 2 sections:
A. PowerPlans/Order Sets - Any plans/sets entered will display beneath the plans section. - PowerPlans are groups of orders that will replace order sets.
B. Orders - Clinical categories of orders displays beneath the order section. Categories with a check
in the box and appearing in bold alert the user that there have been orders placed for these types of orders.
Order Component Overview
The right side of the Orders tab is called the Order Profile. It displays the patient‘s existing orders and provides a means for viewing order details, order status and modifying orders. 4
Tips : Hover the cursor over the icon or truncated text to view the associated information
DISPLAY FILTER
1. Click the Display filter – Explain that in LIVE filter will default to ALL ORDERS ALL STATUSES
2. Click to change display filter to ALL ORDERS ALL STATUSES
3. Point out the ORDER STATUS column, completed, discontinued, documented
4. Explain that any meds with a status of documented means that the medication is a home med,
documented by nursing in MEDS BY Hx
5. Review the details of the orders
IMPORTANT – Stress that this is where providers can see what has already been ordered.
EXAMPLE – If they want to see is if a Troponin was ordered in the ER it will display here.

16
CPOE (Computerized Provider Order Entry)
Entering Orders: To place an order, complete the following steps:
.
Frequency: Every versus Q
Q = Interval – order for every 8 hours starting at 1000. Orders will generate from
the start time of 1000. Orders will be generated at 1000, 1800 and 0200.
Every = The Frequency is defined as every 8 hours at 0800, 1600 and 2400. An
order will generate at the predefined times only.
1. Click the Add button
2. Key in Troponin. Order names with relevant matches will automatically display in the Add
Order window
3. Click on Troponin-T. One time. It will highlight bold and blue
4. The order sentence box will display. SELECT q6h for 3 timesClick Done
5. Review the Orders Detail Window.
6. Change in detail window to 2 times
7. Change Order start time to 12:00 pm
8. Show how the Order’s Detail Window can be hidden, moved up and down, etc
9. DISCUSS THE FREQUENCY FIELD Q vs. EVERY (note below)
10. Click ORDERS FOR SIGNATURE
11. CLICK SIGN

17
To save time, the provider will want to enter multiple orders at one time….
1. Click the Add button.
2. Key in BUN
3. Click the BUN CREATANINE one time
4. Select in the AM
5. Key in and select the EKG
6. Select STAT
7. Key in and select the T4
8. Key in Chest PA (Demonstrate that you may need to change “starts with” to “contains”)
9. Select XR CHEST PA/LATERAL (will turn bold and blue – no order sentence)
10. Select order sentence Today; once
11. Key in Diet and select the Calorie Controlled Diet
12. Key in TSH and select TSH
13. Select order sentence, In AM = Tomorrow at 0600
14. Click Done
15. Address missing details
16. Highlight Calorie Controlled Diet
17. In Order Details (below) select NO diabetic restrictions
18. Select NO beverage modifiers
19. Highlight T4
20. In Order Details (below) select frequency Daily
21. Select collection priority Timed
22. Highlight TSH
23. POINT OUT the in AM collection is already displayed in details window from order sentence
24. IMPORTANT show that the date and time have already updated to tomorrow’s date at 0600
NOTE: If an order is being placed at 0100 and the provider wants the test to be done in the a.m. (that morning), the
order should be placed with a TIMED priority, ONCE frequency and the date/time for in the a.m. must be entered
25. Highlight Chest X-ray
26. Select transport mode (in live this will auto populate when nursing does assessment)
27. In the Reason For Exam field key in Chest Pain
28. Right-click on an order to show the provider how an order can be removed before it is signed.
29. Click Sign– (this will populate a duplicate order alert).
IMPORTANT – STRESS the importance of addressing the duplicate order window. Not addressing the
duplicate orders will result in multiple orders for nurse review which will have to be discontinued,
cancelled, etc.
REVIEW – Duplicate Order Window options – Order Anyway, Remove, Cancel/Discontinue, etc.
30. Highlight Cardiac Diet and Click Cancel/Discontinue
31. Click Sign
32. Click Refresh
33. Show Providers where orders have filed themselves into each of their clinical categories

18
Once the order/orders window has been refreshed, symbols display next to the order. Pharmacy = Mortar and Pestle symbol Physician = Caduceus symbol Eyeglasses = Nurse Symbol If the provider hovers over these symbols a pop-up window will display indicating if the order has yet to be verified by a pharmacist, cosigned by the ordering physician or reviewed by the nurse.
STAT Orders: If a provider enters STAT orders they should alert/notify the nurse or unit
clerk that STAT orders have been entered.
REFRESH- REFRESH- REFRESH
Notes:

19
Modifying/Interacting Orders Options:
If an order has already been signed and it needs to be changed, right-click to select any of the following order actions: All functions may not be available for all orders.
Modify - Allows modification an existing signed order. Suspend – (Only for Medications) Allows user to suspend, or pause, an existing signed order. Resume - (Only for Medications) Allows user to resume a suspended order. Cancel and Reorder - Allows user to cancel an existing order and place another order for the same orderable item. Renew - Allows user to renew a continuing order. Cancel/Discontinue - Allows user to cancel a onetime existing signed order or discontinue a continuing order. Void - Allows user to void, or delete, an existing signed order. Void is typically utilized for orders placed on an incorrect patient or ordered incorrectly. I made a MISTAKE!
1. Right Click Nebulizer-Treatment QID
2. Discuss the options that populate before proceeding
3. Click Cancel/DC
4. Hide Orders Details Window
5. Right Click T4 (our scenario is that we ordered the T4 in error)
6. Click Void
7. Click Orders For Signature
8. Click Sign
REFRESH-
REFRESH
Orders That CANNOT Be Modified:
Lab, Radiology and Medication Orders
These orders will need to be Cancelled/Discontinued and reordered.
EXCEPTION – Bolus and IV Rate Changes
CAN BE MODIFIED
Note: If modify is not an available menu item, then the selected order does not allow this option.
Suspend: Surgeons will suspend medication orders ONLY when an Inpatient is going to surgery. Surgeons
must review these suspended orders post-op and complete transfer med rec to indicate what medications need to be discontinued, continued or if new orders are to be entered.
20
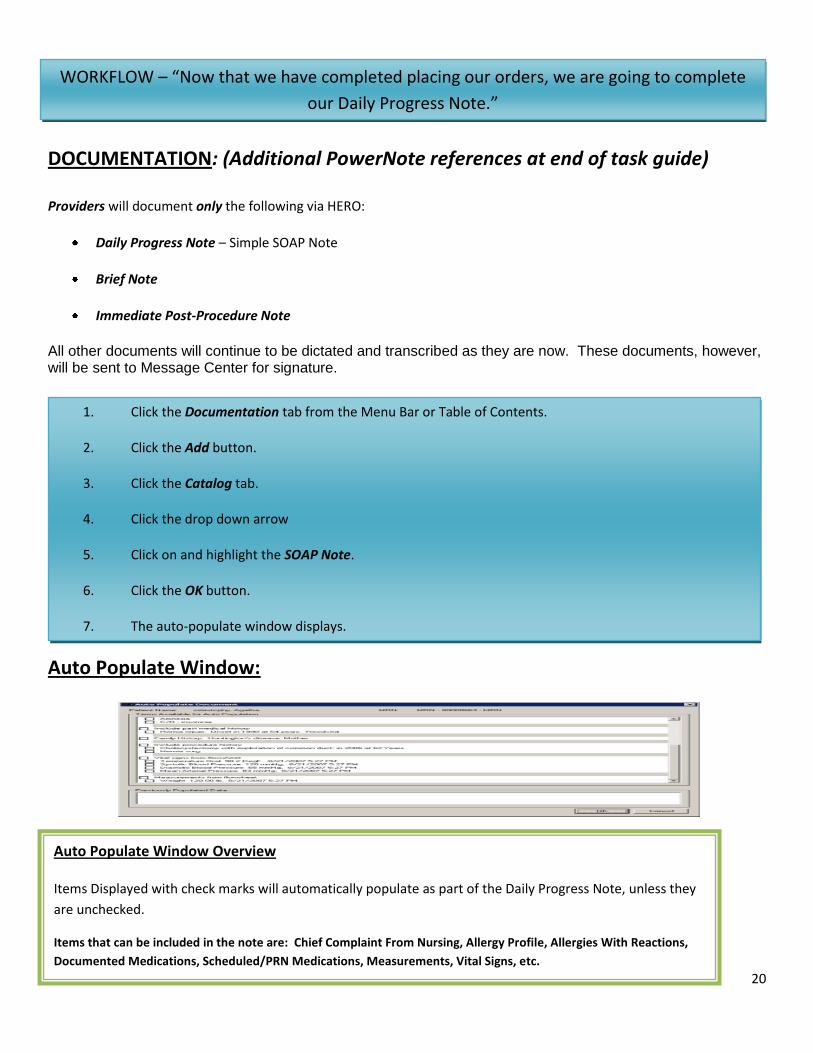
DOCUMENTATION: (Additional PowerNote references at end of task guide) Providers will document only the following via HERO:
Daily Progress Note – Simple SOAP Note
Brief Note
Immediate Post-Procedure Note
All other documents will continue to be dictated and transcribed as they are now. These documents, however, will be sent to Message Center for signature.
Auto Populate Window:
WORKFLOW – “Now that we have completed placing our orders, we are going to complete
our Daily Progress Note.”
1. Click the Documentation tab from the Menu Bar or Table of Contents.
2. Click the Add button.
3. Click the Catalog tab.
4. Click the drop down arrow
5. Click on and highlight the SOAP Note.
6. Click the OK button.
7. The auto-populate window displays.
Auto Populate Window Overview
Items Displayed with check marks will automatically populate as part of the Daily Progress Note, unless they
are unchecked.
Items that can be included in the note are: Chief Complaint From Nursing, Allergy Profile, Allergies With Reactions,
Documented Medications, Scheduled/PRN Medications, Measurements, Vital Signs, etc.

21
.
8. For training purposes, keep all selections checked. 9. Click OK. The progress note displays 10. Show providers that items checked become circled, which means they will be included in the final
note. Documentation that was checked in the auto populate box will automatically be circled in the progress note.
11. Show Providers that each Subject heading has the option to SHOW STRUCTURE (if collapsed) and HIDE STRUCTURE.
12. Show Providers that each Subject heading has a FREE TEXT option 13. Click on Free Text next to the Subjective Heading 14. Type in free text will appear here 15. Show providers the icons and symbols within PowerNote: 16. Click Show Structure, next to the Objective heading 17. Click and Explain the blue Chevrons next to EYE 18. next to visual acuity, Click Right 19. Click the === signs next to 20/=== 20. Above the 20/40 info, click the + next to Iris, (it will display addition al choices, specific to the iris) 21. Allow Providers to Click on and circle selections 22. Scroll down to Results Review 23. Click Today’s Results 24. Click Select All 25. Click Include Selected 26. Scroll down to Impression and Plan 27. Click Other Diagnosis (the diagnosis box will populate) 28. Highlight the diagnosis CHF 29. Click Include 30. Click Progressing as Expected 31. Click PowerOrders (this will open the add order box)(EXPLAIN that orders can be entered directly from
PowerNote while doing Daily Progress Note) 32. Type Albuterol 33. Click Albuterol Nebulizer 34. Click 2.6 mg, NEB, QID 35. Click Sign 36. Click Order Profile 37. Click EKG 38. Holding down the Ctrl Key, Click XR Chest (both should now be highlighted) 39. Click Include Selected 40. Click Sign/Submit (Save not recommended.)
41. Click SignClick Refresh 42. Right Click in body of PowerNote 43. Click Modify 44. Scroll to bottom and Click under Insert Addendum Here 45. Type free text appears here 46. Click Sign 47. Right Click in body of PowerNote 48. Click In Error (you can also point out that there is an !In Error button at top of page) 49. Click OK in the Error Comment box 50. Click OK in the alert box

22
SYMBOLS
Blue Chevrons are used to indicate that a sentence can be expanded to show additional terms or collapsed to expose only the common terms.
Within the body of the template, indicates a term and its associated terms are set to repeat when selected.
+ Indicates there are additional terms that can be selected to further describe a term.
... Indicates there are additional terms to further describe a term that is not exposed until >> or + signs expose the parent term.
= = = Indicates a term where a number will need to be entered.
Insert Image icon found in PowerChart. Used to insert images into PowerNotes.
Insert Image icon found in PowerChart Office. Used to insert images into PowerNotes.
Displays the structure of a paragraph including the sentences and terms.
Hides the structure of a paragraph including the sentences and terms. The text rendition of the paragraph will display if terms have been documented.
Launches a date control that allows for a date and/or date range to be entered into the note.
Launches a box that allows for freetext to be entered into the note.

23
Icons and Symbol Definitions
Chevrons >>
Blue Chevrons indicate that a sentence can be expanded to show additional terms or collapsed to expose only the common terms. A sentence not fully expanded appear as >>. The example below shows the sentences collapsed.
Clicking on the chevrons to expand the sentence will display all terms associated with the sentence. A sentence fully expanded appear as <<. All terms associated with that sentence are exposed. The example below shows the expanded out sentences.
+ Symbol
The + sign is used to indicate when there are additional terms. These additional terms will display when a term containing the + sign is selected. Below the + sign is used to indicate there are additional terms associated to the term "Finger".
When the + is selected, the additional terms associated to that term will display for selection.
= = = Symbol
The = = = is used to indicate a term where a numeric value needs to be entered. In the example below = = = is used to indicate a value is needed for the "minutes" term.
Once a term with the === symbols is selected, a numeric control will launch that allows for a value to be inserted. Below is an example of the control being launched when the "=== minutes" term is selected. After entering the value and
selecting "Ok" the numeric value entered will display.

24
Other Term
The "OTHER" term is one option for inserting freetext into a note. The "OTHER" term is intended for use when the terms available for documentation are not applicable or need to be further expanded upon.
Free-Texting
Freetext allows for text to be entered directly into a note without selecting any terms or sentences from the template provided. The OTHER term, previously described, allows for freetext to be entered at the sentence level through the use of a freetext box.
Modify or Correct a Signed Note
1. In the List tab of PowerNote, select the document you want to modify and click the Modify button
from the toolbar or right-click in the text area and select Modify
2. Scroll to the bottom of the document to where it states “Insert Addendum Here.”
3. Key in data and click Sign.
4.
Modify allows a free-text addendum to be added to the previously signed note.

25
Note Entered On Wrong Patient or Entered In Error
STOP – BREAK This is where we hope to be at break time!!!
10 minute break – hoping that everyone will be back in 15 and ready to
start!!
1. From the documentation tab, select the document that entered incorrectly.
2. Click the In Error button from the toolbar.
3. The In Error Comment window will display.
4. Key in the reason the report was done in error.
Click OK.
The Note will display with the “In Error Report” title

26
POWERPLANS (Order Sets):
Physician Order Sets : Primarily entered by the physicians, these order sets replace current pre-printed
physicians order sets and includes nursing, medication, diet, and consult orders in a single order.
PowerPlans allow for standardized orders based on specialty.
PowerPlans include provider reminders and appear as yellow post-it notes in the PowerPlan. These reminders
are comparable to the directives on our existing paper order sets.
PowerPlan orders can be discontinued individually or as a whole, adding efficiency of order entry.
Some PowerPlans can be placed into a Planned status for later activation when the patient status or location
changes.
PowerPlan Icons
The following are the most common icons/symbols you will encounter when working with PowerPlans.
Symbol Description
Merge View - Allows proactive duplicate checking
Initiate - Activates plan orders, outcomes, and interventions
Discontinue - Discontinuation of Plan or Phase
Review Excluded Components - Review those items excluded
IMPORTANT:
Orders that are part of a PowerPlan/Order Set become active orders once the PowerPlan/Order
Set is INITIATED.
PowerPlans/Order Sets can be INITIATED or entered into a
PLANNED STATE and INITIATED at a later time.

27
PLANNED STATE PowerPlans/Orders Sets:
The patient is in the ER but the provider would like to start the admission orders.
The patient is in the PACU and has not gone to the inpatient unit and the surgeon would like to enter their
postop orders.
The patient is a DIRECT Admit from the office and the provider would like to place the admission orders prior to
the patient’s arrival to the hospital.
PLACING ORDERS IN A PLANNED STATE:
The provider will need to click the Orders For Signature Button and then the Sign Button ONLY.
DO NOT “IN”-ITIATE unless the patient is in an “IN”-PATIENT/Observation status on an “IN”-PATIENT nursing unit or an
“IN”-PATIENT room/bed.
Once the patient arrives on the floor, nursing will INITIATE the orders and select “No Signature Required Per Protocol”
and the orders will become active.
The “No Signature Required Per Protocol” will prohibit the orders from going to the providers message center because
the provider has already signed the orders.
WHEN A POWERPLAN IS IN A PLANNED STATUS, THE POWERPLAN MUST BE INITIATED
BEFORE THE ORDERS CAN BE ACTED UPON.
Entering PowerPlans/Orders Sets in a PLANNED State:
PowerPlans can be placed into a Planned state and later initiated.
Discuss -Why put in a PLANNED STATE
SCENARIO:
The patient is in the office and needs to be admitted as a DIRECT Admit.
The provider or the provider’s office staff will need to call the admissions department to get a “quick direct”
account number.
Once the account number is received, the provider will access the patient via HERO using the account number and
complete the following.
OR SCENARIO:
The patient is in the ED and is going to be admitted.
The provider will access HERO, bring up the patient and complete the following.

28
Click + Add to add an order.
Type General in the Find field. All matching orders display
Click the General Admission PowerPlan. Click Done.
Check the appropriate orders. Some items are prechecked. Initial Inpatient/Observation Order Resuscitation Status Routine Vital Signs
Any items checked that require more details will appear with a symbol. This indicates that required details are needed for the order to be processed.
Click and highlight the order requiring details. Right Click and select Modify Planned Order. Address order appropriate order details.
Click Orders For Signature. DO NOT INITIATE!!!!! NOTE: If any order details are missing or are not complete a warning pop-up window will display. To complete the order details click Yes to return the PowerPlan.
Click Sign. DO NOT INITIATE!!!!!
PowerPlan will display in Order Hierarchy in a PLANNED STATE.
Select or check the following as well: Activity as tolerated General Diet Acetaminophen (Tylenol) Ondansetron CBC /w Automated Diff
Add To Phase: Abdomen Ultrasound
Any items checked that require more details will appear with a symbol. This indicates that required details are needed for the order to be processed.
Click and highlight the order requiring details. Right Click and select Modify Planned Order. Address order appropriate order details.
Click Orders For Signature. DO NOT INITIATE!!!!! NOTE: If any order details are missing or are not complete a warning pop-up window will display. To complete the order details click Yes to return the PowerPlan.
Click Sign. DO NOT INITIATE!!!!!
PowerPlan will display in Order Hierarchy in a PLANNED STATE.

29
Working with PowerPlan/Order Set Sub-Phases A sub-phase is a single-phase plan that is added as a component to another plan.
A PowerPlan within a PowerPlan.
Notice that it is nested beneath the plan it is associated with and it follows the actions of the plan. An example of a Plan
with a Sub-Phases is the Hospitalization Order set and Alcohol withdrawal.
1. From the Orders section, place a PowerPlan order.
2. Select the Sub-Phase option. A Sub-Phases are indicated by an icon.
1. The Sub-Phase order window displays.
2. Select the components to add to the Sub-Phase.
3. The status of the sub-phase is Initiated Pending.
Complete and sign the PowerPlan.
The Sub-Phase is listed under the main PowerPlan
Click Orders For Signature. NOTE: If any order details are missing or are not complete a warning pop-up window will display. To complete the order details click Yes to return the PowerPlan.
Click Sign
Orders will appear as processing.
Click Refresh, Refresh, Refresh

30
INITIATE PowerPlans/Orders Sets:
The patient is and inpatient/observation patient in a room/bed.
The patient is located on an inpatient nursing unit.
The patient is an inpatient and the orders need to be activated immediately.
Examples: Blood Product PowerPlan/Order Set, Medication PowerPlans/Order Sets, etc.
PLACING ORDERS and INITIATING the PowerPlan/Order Set:
The provider will need to click the INITIATE button, followed by the Orders For Signature Button and then the Sign
Button.
These orders will become active and be received in the lab, pharmacy, display on the nursing task list, go to
the appropriate ancillary department, etc.
Adding and Initiating a PowerPlan/Order Set:
.
Discuss - When should Powerplans/Order Sets be INITIATED
instead of planned?
Click + Add to add an order.
Type Blood in the Find field. All matching orders display
Click the Blood Product Transfusion PowerPlan/Order Set. Click Done.
Check the Type And Crossmatch (Type and Crossmatch RBC’s) order.
The missing details symbol will display. This indicates that required details are needed for the order to be processed.
Click and highlight the order requiring details. Right Click and select Modify Planned Order.
Enter the number of units – 2
Click Initiate.
NOTE: If any order details are missing or are not complete a warning pop-up window will display. To complete the order details click Yes to return the PowerPlan.
Click Sign
Orders will appear as processing.
Click Refresh, Refresh, Refresh!!!!
Scenario:
The patient is assigned to room 413B. The patient needs to be type and cross matched for 2 units of PRBCs

31
Add an Additional Order to a PowerPlan/Order Set
Modify a Planned Order
SHOW:
PowerPlan/Order Set Display:
Once the PowerPlan/Order Set is entered, either
planned or initiated, it will display in the Order
Hierarchy below the “Plans” section.
1. Highlight the Blood Product Transfusion
PowerPlan order.
2. Click Add to Phase, select Add Order…
3. Type in PT
4. Select PT.
5. Select order sentence, Blood, Lab, Collect, in
AM, Once.
6. Click Orders for Signature
7. Click Sign
8. Click Refresh
1. From the Order Hierarchy, select the Blood Product Transfusion PowerPlan.
2. Right-click Transfuse Blood Product.
3. Select Modify (The order details window displays and is available for modification. Complete the
modification as you would with any other order.)
4. Change priority to STAT (in orders detail window)
5. Click Orders for Signature
6. Click Sign
7. Click Refresh
32
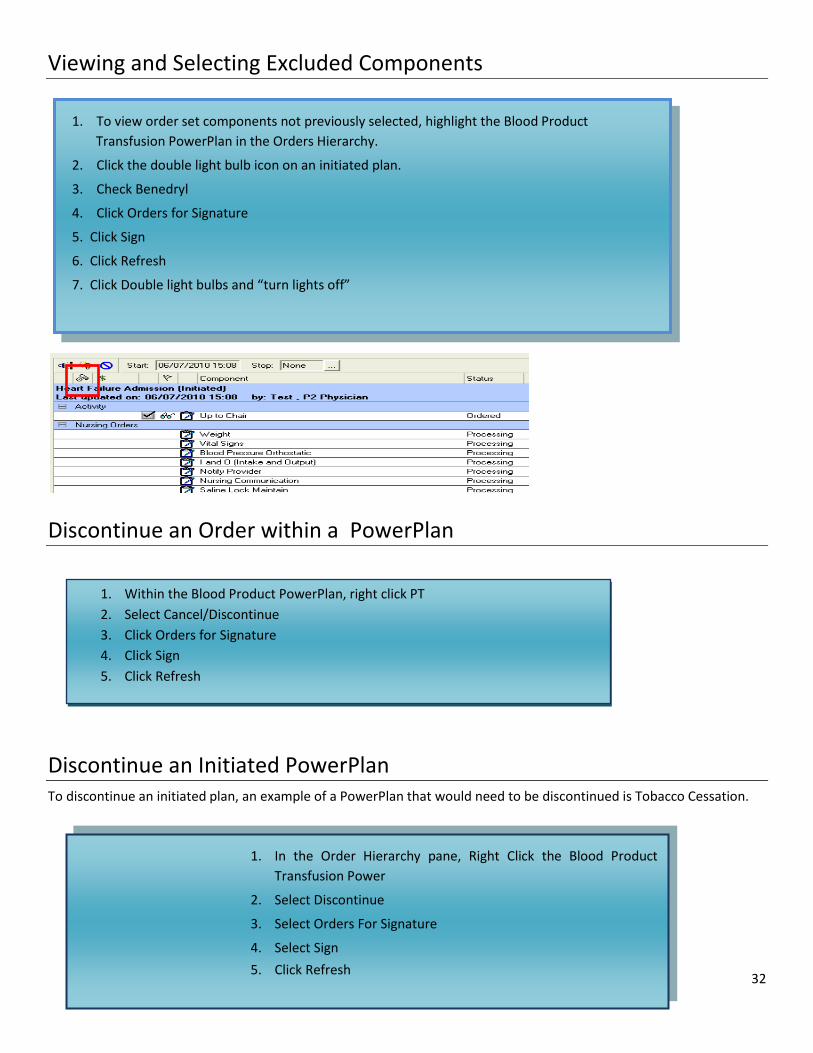
Viewing and Selecting Excluded Components
Discontinue an Order within a PowerPlan
Discontinue an Initiated PowerPlan To discontinue an initiated plan, an example of a PowerPlan that would need to be discontinued is Tobacco Cessation.
1. To view order set components not previously selected, highlight the Blood Product
Transfusion PowerPlan in the Orders Hierarchy.
2. Click the double light bulb icon on an initiated plan.
3. Check Benedryl
4. Click Orders for Signature
5. Click Sign
6. Click Refresh
7. Click Double light bulbs and “turn lights off”
1. Within the Blood Product PowerPlan, right click PT
2. Select Cancel/Discontinue
3. Click Orders for Signature
4. Click Sign
5. Click Refresh
1. In the Order Hierarchy pane, Right Click the Blood Product
Transfusion Power
2. Select Discontinue
3. Select Orders For Signature
4. Select Sign
5. Click Refresh

33
The following pages contain information for instructors/proctors:
1. AD/Citrix login 2. Creating Patient Lists/Census 3. Printing Patient List/Census 4. Saving Favorites 5. Deleting Favorites 6. Adding PowerPlans as Favorites 7. Precompleted Notes 8. Using Precompleted Notes 9. Printing Fact sheets from PowerChart
Notes:

34
If time permits at the end of Session 1, have providers log into HERO LIVE to set up their passwords for HERO as well as their inpatient census list.
A Note to the Trainers and Proctors – Session 1 will definitely take the entire 4 hours. .
AD/CITRIX and HERO LOGIN INFORMATION: Providers (Physicians, Residents, PAs, NPs)
The providers will be given their HERO “LIVE” passwords at the end of Session 1.
This will allow them to set up order and powerplan/order set favorites as well as precompleted notes.
When the provider accesses CITRIX, the provider will use their current AD username/password.
When the providers access HERO for the first time, they will be challenged to change their CERNER login on the first attempt.
The AD/CITRIX and HERO logins will require a minimum of 6 characters. NO NUMBERS, SPECIAL CHARACTERS or CAPITAL LETTERS are required. RECOMMENDATION: It is recommended that the provider keep their AD/CITRIX, HERO and ePortal passwords the same. IMPORTANT: For providers who have EH Email, changing the AD/CITRIX password will also change their email password.
If the provider would need their AD/CITRIX or ePortal password updated to keep them in sync, the I.T. Analysts with access to Active Directory will update the providers AD/CITRIX password to the providers HERO password.
Creating Census/Provider Group Lists
1. Log into HERO.
2. Click the Patient List button from the Toolbar.
3. Click the List Maintenance button – “ wrench” symbol, from the patient list
toolbar.
4. The Modify Patient Lists window displays.
Click the New button to create a provider group list.

35
5. The Patient List Type window displays.
Click on the patient list
type of Provider Group
and click the Next button.
6. The Provider Group Patient List window displays.
Search in the right pane for the appropriate group and click the check box next to it.
7. Click the Encounter Types box from the left pane.
8. A list of encounter types will display.
9. Select the following types from the list (you may have to scroll to find these).
Latrobe Hospital: Frick Hospital:
Inpatient Rehab FH Inpatient
LH Inpatient FH Inpatient Hospice
36
LH Inpatient Hospice FH Observation Bed
LH Long Term Care LH Outpatient Observation
LH Optional: Frick Optional:
LH MH Inpatient (Adol. MH) FH Quick Direct
LH Quick Direct FH Quick Surgery
LH Quick Surgery
LH Outpatient Surgery
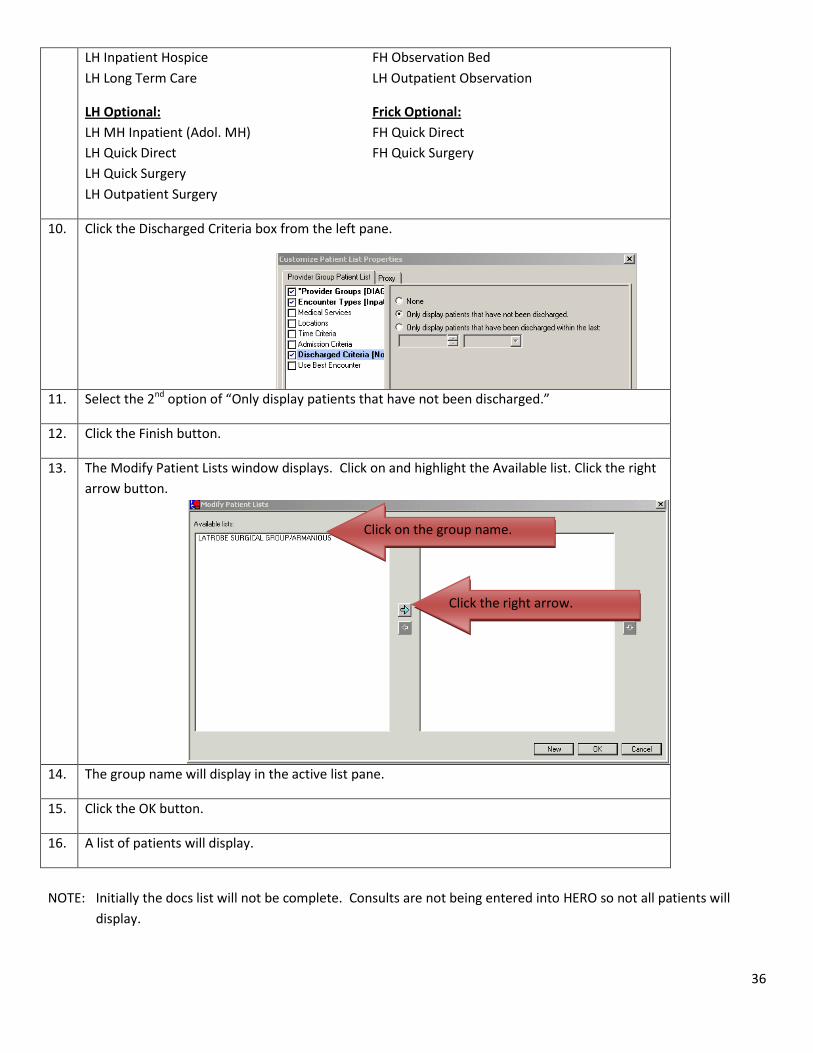
10. Click the Discharged Criteria box from the left pane.
11. Select the 2nd option of “Only display patients that have not been discharged.”
12. Click the Finish button.
13. The Modify Patient Lists window displays. Click on and highlight the Available list. Click the right
arrow button.
14. The group name will display in the active list pane.
15. Click the OK button.
16. A list of patients will display.
NOTE: Initially the docs list will not be complete. Consults are not being entered into HERO so not all patients will
display.
Click on the group name.
Click the right arrow.

37
FAVORITES:
Adding Orders As Favorites
Order favorites are unique to a user that are maintained by the user and can be convenient to help speed up the
ordering process for users. Favorites are not seen by other users. Users can create, move, delete, and organize their
own Favorites.
1. From the Add Order window search for the order you wish to add as your favorite.
2. Click Done from the Add Order window.
3. Complete the order details as appropriate.
4. From the Review Order Section of the window, right-click the item and select Add to Favorites.
5. The Add Favorite window displays. Choose the existing folder and click OK.
SAVING FAVORITES

38
To verify that your favorite order has been saved, go back to the add order window and verify your order displays.
Deleting Favorite Orders
1. From the Add Order window right-click on the order name you wish to delete.
2. Select Remove from Favorites.
Adding PowerPlans As Favorites
PowerPlans can be added as favorites as well. The PowerPlan favorites are also unique to a user, maintained by the user
and can be convenient to help speed up the ordering process for users. Users can create, move, delete, and organize
their own Favorites.
1. From the Add Order window search for the PowerPlan you wish to add as your favorite.
2. Click Done from the Add Order window.
3. Select appropriate orders from the PowerPlan.
4. Complete all selected order details as appropriate.
5. Click the Save as My Favorite Button.
6. The Save as My Favorite pop-up window will display.
7. Rename the PowerPlan.
8. Click OK.
9. From the Add Order window click the My Favorite Plans folder.
10. You Favorite PowerPlans will display.
Favorites

39
Precompleted Notes (Progress Note)
Creating a Precompleted Progress Note:
To accomplish a pre-completed note template, complete the following steps:
NOTE: These steps have to be accomplished before the note is signed.
1. Select the Progress Note.
2. Complete the note with all desired information that you wish to apply to your precompleted note.
3. Click on the Documentation from the Menu bar at top of the PowerChart window and select ‘Save as Precompleted Note’.
4. The ‘Save as Precompleted Note’ dialog box opens.
5. Rename the Note Title to a title of your choice.
6. Click the Save as New button. The progress note has now been saved as a precompleted note.
Using a Precompleted PowerNote
1. Open the documentation tab from the Table of Contents.
2. The Documentation window appears.
3. Click the ‘+Add’ button.

40
4. Select the Precompleted tab.
5. Select the precompleted note.
6. Click OK.
The precompleted note will open with the contents already complete with what was save as part of your note. Edits and additions can be added as desired and sign.

41
PRINTING FACESHEETS FROM POWERCHART
The physicians will be able to print the face sheet from Power Chart using the print icon from the image control tool bar.
Once it is double-clicked, the Print box appears and the default printer of the device being used is available for printing.