hero narrative writing unit: teacher’s guide · hero narrative writing unit: teacher’s guide by...
TRANSCRIPT

© 2009 Art & Remembrance and Sasha Domnitz, Revised 2013
Hero Narrat ive Writ ing Unit : Teacher’s Guide By Sasha Domnitz, 5th grade teacher Hunter College Elementary School
New York, New York. Background: The Hero Project was a two-part fine art and language arts project undertaken in 2009 by 5th Grade students at Hunter College Elementary School in conjunction with Art and Remembrance. The students wrote and illustrated a story about a family member who had displayed hero qualities after listening to Bernice Steinhardt, watching an interview with Esther Nisenthal Krinitz, reading the book “Memories of Survival” and discussing events in Esther’s life that defined who she was, who she became, and how her courage and determination shaped her life. The Hero Project Gallery at www.artandremembrance.org presents the student’s art and written stories.
Credit where credit is due: Although I devised this writing unit, the structure of the lessons is based on the Lucy Calkins Writer’s Workshop. Several strategies are based closely or loosely on her work. The lessons are written in the language they were delivered. Much of this language is based on Ms. Calkin’s work. Additionally, ideas were drawn from the work of Ralph Fletcher. I . Pre-writ ing
Lesson One: Hero Qual i t ies
Lesson Aim: Students will create a “hero checklist” that includes 5 – 10 qualities that heroes possess.
Connection: We’re starting a new writing piece today called “The Hero Narrative.” you will be writing the story of hero from your own family. During this process, you’ll need to use all the writing techniques you’ve learned so far. You’ll also need to do some more advanced character development and some research in order to bring your story to life. Let’s read the overview of the assignment and then get started. Hand out and read through the Hero narrat ive ass ignment worksheet you have created. Hold of f on taking too many quest ions, as many of them wi l l be answered along the way. You wi l l want to make it c lear that students can select a member of their fami ly that is l iv ing or deceased, someone they personal ly know/knew or someone that they’ve heard stor ies about growing up. They do not, nor should they, decide on the spot who they wi l l wr ite about at th is point.
Teach: To begin this process, each of you will need to create an important definition. That is, you need to define for yourself what is a hero. Let’s begin that process together. I want each of you to begin by silently coming up with a list of 3 – 5 people you would consider a hero. Give students t ime to think. Then have them share out with the c lass. Write out a l i st of their suggest ions. Include anywhere from 15 – 25 names. Okay, now you need to look at this list of heroes (or at least focus on the names that you consider to be heroes) and ask yourselves, “What qualities make those people heroes?” For instance, I see on that list the following people (ex. Martin Luther King, Jr., Harriet Tubman, Gandhi, Abraham Lincoln). I wonder, do these people have certain characteristics in common that define them as heroes. Well, one thing that comes to mind for me is

their bravery. Each of them bravely stood up against great forces in society to bring about a change. So, I’m going to list bravery as a heroic characteristic.
Active Involvement: I want you to choose some names off the list and try to list 3 – 5 characteristics that define these people as heroes. Give students t ime to think s i lent ly. Then let them share with a partner. Then have them share out with the c lass. L ist these character ist ics of a hero as wel l . Come up with a l i st of 10 – 20 character ist ics. You’ l l probably want to have this l i st hanging in the c lassroom throughout the course of the unit . Link: Now you’re going to do some writing in your writer’s notebook. I want you to look over this list we just created. Choose your top 3 – 5 characteristics for a hero and list them in your notebook. Then write about why those characteristics are essential for a person to be considered a hero. You may find while doing this that one characteristic emerges as the most important one for a hero. That’s good. Write about why that one characteristic is so important for a hero to possess. I I . Gather ing Seeds
Lesson Two: Finding fami ly heroes
Lesson Aim: Students will identify heroes in their own families and write about why these people are heroes.
Connection: Last writer’s workshop we did the important job of defining what is a hero. Some of the characteristics we decided heroes usually possess are (read off the list created last lesson). Today, we’re going to start looking into our families and finding heroes from our own lives.
Teach: To begin with, you’re going to brainstorm a list of family members that could be considered heroes. While you’re doing this, remember that there are really two types of heroes – everyday heroes and historical heroes. An everyday hero is someone who changes the lives of people in his/her immediate surroundings. Everyday heroes usually do not become famous, nor do they receive the kind of credit, fame or recognition they probably deserve. An historical hero is a person who changes society in a way that reaches far beyond his/her immediate surroundings or experience. This type of hero usually does become famous and receive recognition; although sometimes the recognition doesn’t come until after the person has died. Some of you may have historical heroes in your family history; some of you may not.
So, you’ll begin by creating a list of 3 – 10 people in your family (living or dead) that you consider to be heroes. Then you’ll circle one name and briefly start writing that person’s story. At this stage, the writing doesn’t have to be detailed or even focused. However, if you’re inspired to tell the story in detail or to focus on a small moment in that person’s life rather than writing a general biography, then do that.
Watch and listen to me as I briefly go through the process I just described. Model the process for the students.

Active Involvement: Let’s get started together. Everyone silently come up with 1 – 2 names of people in your family that are heroes. Classify that person as an everyday hero or a historical hero. Then silently describe that person in your mind. Think about what that person did or how they behaved that made them a hero. Give students a few moments to do this. Then let them turn and share with a partner.
Link: Okay, now you’re going to do some writing. Follow the process that I showed you and that you just practiced with your partner.
For homework: Students should write about at least 1 – 2 more fami ly heroes in their writer’s notebooks. Each entry should be about 1 page. Students may need to ta lk to relat ives in order to get some ideas and gather some stor ies. I I I . Draft ing
Lesson Three: Select ing your hero.
Lesson Aim: Students will select the person they will write about for the hero narrative, the heroic characteristic that person most clearly embodies and the action/s that person performed that illustrate that heroic characteristic.
Connection: Last writer’s workshop, you starting gathering seeds of possible family heroes that you could write about for your narrative. You should have written 1 – 2 more entries for homework. Today, our goal is to create a focus for your hero narrative by choosing who your hero is, what heroic characteristic he/she embodies most and, finally, what actions or accomplishments your hero performed during his/her life that illustrates why he or she is a hero.
Teach: You are going to look over your writer’s journal entries. Hopefully, there’s one that stands out the most to you. It might be the person that most impresses you, it might be the story that you already know the most details about, it might be a person that you have/had a great relationship with or it might be someone you just learned about in your family history that you want to find out more about. Whatever the reason, the first thing you’re going to do is select the family hero you will write about from this point forward.
Next, you will ask yourself, “Why is this person a hero?” In order to answer this question you will refer back to the list of heroic characteristics you created. Choose the one characteristic that best describes your hero.
Then, you will ask yourself, “What did this person do in his/her life that illustrates that characteristic best?” You will either list many actions or accomplishments that illustrate that trait or you will focus on one action that illustrates this trait.
Watch me while I go through this process. Model the 3 steps for students. As you do the 3rd step, try to choose speci f ic, “smal l moment” act ions or accompl ishments that i l lustrate the person’s heroism rather than l i fe- long events. Example (these are ‘everyday hero’

types of examples. Students may have more impress ive ‘h istor ical hero’ examples f rom their own fami l ies):
People Why is th is person a hero?
Act ions or Accompl ishments
My dad Made tough choices to make him and his fami ly happier
Chose to leave his law pract ice to buy a bookstore (even when other people to ld him it was a bad idea)
My grandmother Persevered through di f f icult c i rcumstances
She took care of hersel f and my dad for 2 years whi le my grandfather was away WWII. Speci f ical ly, she agreed to l ive with her in- laws, which she wasn’t thr i l led about doing.
Active Involvement: Okay, now it’s your turn. Select a person from your writer’s journal. Then, silently to yourself, answer the question, “Why is this person a hero?” Finally, list 1 or 2 actions or accomplishments this person achieved that illustrate his or her heroism. Now, turn and talk to your partner about who you’ve selected as your hero, why that person is a hero to you and what they person did or accomplished during his or her lifetime that illustrated his/her heroism. Give students a few minutes for each partner to share their ideas. Walk around and l isten to make sure they’ve understood the instruct ions and to make notes about students who may be in the most immediate need of a conference to jumpstart the process and make decis ions about the subject of their narrat ives.
Link: During today’s independent writing time, the first thing I want you to do is record in your writer’s notebook the three items you just described to your partner – your hero, why that person is a hero, what that person accomplished or did that illustrates his/her heroism. Once you’ve done that, you can start writing that person’s story – specifically, the story of that action or accomplishment that best illustrates his/her heroism. If, after you’ve discussed one person with your partner, you feel that that person is not the best choice for the subject of your narrative, choose someone else from your list and go through the same process.
A note about conferences at th is stage : The most important thing right now is that all students make a decision about the person, the heroic characteristic and the action/accomplishment that they will write about. Some students may need your help articulating these three things. Meet with those students who are struggling with making these decisions.

Lesson Four: Remember, you’re writ ing a story!
Lesson Aim: Students will apply their knowledge of story structure to aid them in drafting their hero narratives.
Connection: Remember, when we were at the beginning of the drafting process for our last writing pieces, we used a tool called “The Story Mountain.” “The Story Mountain” helped us map out the basic structure for our narrative. Today, we’re going to review that structure and use it to help us in the drafting of our hero narrative.
Teach: The Story Mountain can be divided into 4 parts. Let’s review those 4 parts:
Introduct ion – At the beginning of the story, the reader meets the main character, learns about the setting, and learns about the main conflict that the main character faces.
Bui ld – During the build, the reader faces obstacles that cause the conflict to get worse. There may be moments where the main character thinks he/she will never overcome or solve this conflict. He or she may get discouraged, or he/she may keep trying different tactics to arrive at a solution.
Cl imax – The “ah-hah!” moment. The main character faces the conflict or main obstacle head on and does something to solve it. This should be the most important moment, the most exciting moment and the most emotionally moving moment of the story.
Resolut ion – This is when we see how the main character’s life has changed as a result of solving the main conflict.
I’m going to read you an example of a hero narrative that one of the 5th grade students wrote last year. As you listen, I’d like you to try to identify the 4 parts of this person’s story. Read the example.
Active Involvement: I’m going to split the class into 4 groups. Each group will discuss with your partners one part of the narrative you just heard. Then you will share what you discussed. Assign one group the introduct ion, one the bui ld, one the c l imax, one the resolut ion. Give them a few moments to discuss what they heard in each part of the story. Then have them share what they discussed. Record their responses on a chart or on the Smart board.
Link: During your independent writing time, you will continue to draft your hero narrative. Some of you may find it helpful to sketch out the four parts of your story in much the same way that we recorded the 4 parts of the example story that we just discussed. This may act as a road map for your as you continue your writing process. Homework: Students should cont inue work ing on their f i rst drafts. You may want to set a date the f i rst draft should be completed. Give them approximately a week from this lesson.
Lesson Five: What do you know? What do you need to know?
Lesson Aim: Students will write a set of research questions to guide their research in discovering details about the time, place and life of their hero.
Connection: In the last two pieces you’ve written, your Nature’s Classroom piece and your personal narrative, you were the main character. You knew the story inside and out because you experienced it first hand. All you had to do was reach into your memory to picture the setting, the other characters and the action of the story. Now you’re writing a narrative in which someone else is the main character. This presents a challenge. You must tell the story in such a way that the reader can feel as though he/she is experiencing the setting, the characters and the action first hand. That means you may have to do some research to find out more about the details of your story. Today we’re going to talk about how to do that research.
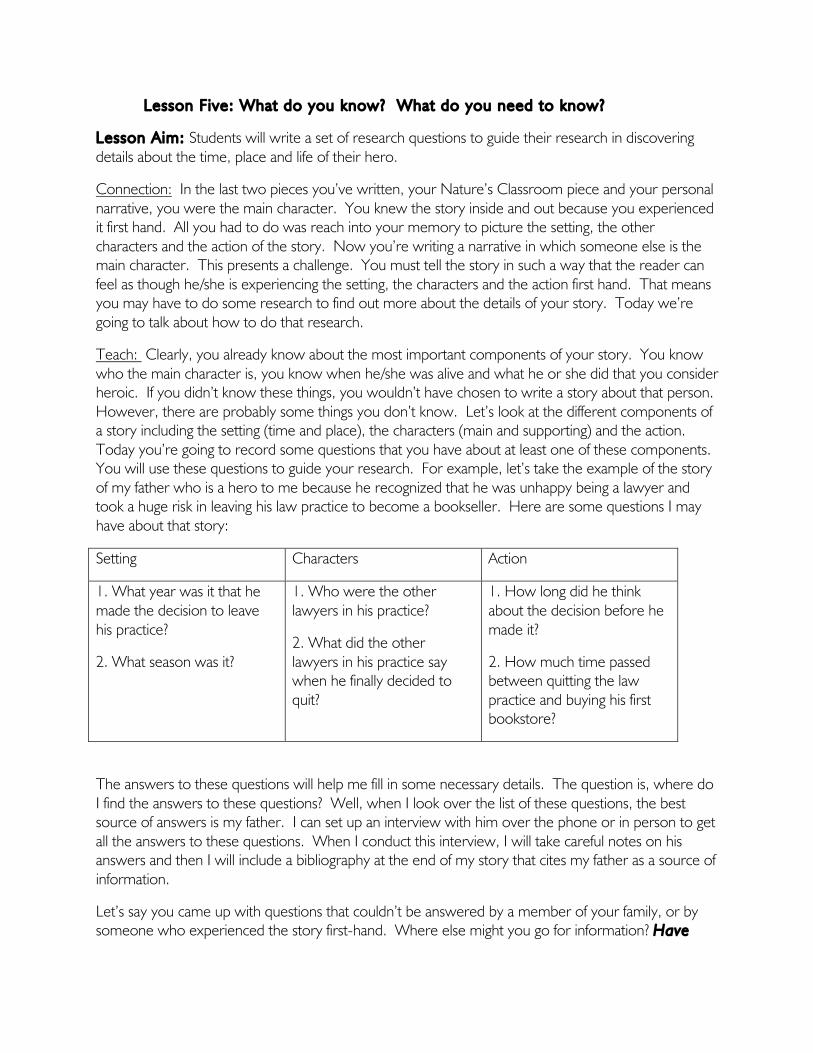
Teach: Clearly, you already know about the most important components of your story. You know who the main character is, you know when he/she was alive and what he or she did that you consider heroic. If you didn’t know these things, you wouldn’t have chosen to write a story about that person. However, there are probably some things you don’t know. Let’s look at the different components of a story including the setting (time and place), the characters (main and supporting) and the action. Today you’re going to record some questions that you have about at least one of these components. You will use these questions to guide your research. For example, let’s take the example of the story of my father who is a hero to me because he recognized that he was unhappy being a lawyer and took a huge risk in leaving his law practice to become a bookseller. Here are some questions I may have about that story:
Setting Characters Action
1. What year was it that he made the decision to leave his practice?
2. What season was it?
1. Who were the other lawyers in his practice?
2. What did the other lawyers in his practice say when he finally decided to quit?
1. How long did he think about the decision before he made it?
2. How much time passed between quitting the law practice and buying his first bookstore?
The answers to these questions will help me fill in some necessary details. The question is, where do I find the answers to these questions? Well, when I look over the list of these questions, the best source of answers is my father. I can set up an interview with him over the phone or in person to get all the answers to these questions. When I conduct this interview, I will take careful notes on his answers and then I will include a bibliography at the end of my story that cites my father as a source of information.
Let’s say you came up with questions that couldn’t be answered by a member of your family, or by someone who experienced the story first-hand. Where else might you go for information? Have

students share sources – the internet, photo albums, books, encyclopedias, photography books that show the dress or environment dur ing a part icular t ime per iod or a part icular p lace, etc.
Active Involvement: I’d like each of you to think about the hero narrative you are writing. What sort of information do you need to make the story come to life, to make it accurate, clear and believable to the reader? Try to come up with at least 1 or 2 questions right now that you’d like answered. Then think about where you can find the answers to those questions. Give students a few moments to formulate quest ions and sources. Then let them share their ideas with a partner. Walk around and l isten. When you get the c lass ’ attent ion, share a few good examples of quest ions and sources that you overheard in their d iscuss ions.
Link: Today during your independent writing time, you can either create your set of 3 – 6 research questions and possible sources or you may continue drafting your story. Everyone will need to have research questions, sources and answers to the questions eventually. Then, of course, you’ll need to incorporate the answers to these questions into your story in the form of details.
Homework: Questions, Sources, Answers…and continue working on your first draft. Remind students when the first draft is due.
IV. Revis ing:
Lesson Six: F leshing out characters
By now students should have a first draft completed. In other words, they have the story with a beginning, middle and end out on paper. The conflict and resolution should be clear; and, of course, it should be clear why the main character could be considered a hero.
Lesson Aim: Students will create a character profile and learn the “show don’t tell” strategy in order to bring their main characters to life.
Connection: By now you’ve completed your first draft. You should have the basic action of your story (beginning, middle and end) on paper. The conflict or major obstacle that your main character faces should be clear, as should the resolution. Hopefully you’ve also done some research to help you fill in some details about the setting (time and place), characters and action of the story. Today, we’re going to focus on your characters. We’re going to create a profile of your character to help you flesh the character out and bring him or her to life a bit more.
Teach: We have discussed in reading how we can analyze a character based on the way he or she looks, acts, thinks and feels. We can use the same guidelines to create a profile of a character when we are writing, too. I start by writing the words looks, acts, thinks, and feels down on paper. Beneath each word, I list details about my main character. I have to keep in mind that my character changes throughout the course of my story. That should be reflected in the list of words I use to describe my character. Example

Character: My dad, Avin Domnitz
Looks Feels Thinks Acts
6 ft.
Big
Brown hair (short)
Brown eyes
Flat feet
Anxious
Sad
Unfulfilled
Nervous
Brave
Satisfied
Excited/Inspired
Racing thoughts about trials
Concerns about his family
Conscious about other people’s opinions
Paces at night
Sits quietly with family
Decisively quits his law practice
Meets with Mr. Greene about buying a bookstore
Then it becomes our job as writers to communicate all the details about a character to our readers. Some details are easier to communicate than others. For instance, how does your character look? Well, you simply have to describe that character as specifically as possible. Describe his/her hair, eyes, skin, body type, clothing, and remarkable physical characteristics. You can do this all at once, or you can work these descriptions into the action of the story. It’s generally much more interesting for the reader to Example:
At 40 years old, Avin stood about 6 feet tall. He was a big man with a full head of brown thick hair, kind brown eyes and a teddy bear like body. Holding his hand or hugging him felt comforting, like snuggling into a big pillow. He was feeling anxious and unhappy in his law practice. In fact, he was losing sleep thinking about his upcoming trials. When his young family sat down for dinner, he hardly spoke because he was so preoccupied with his thoughts.
OR
Avin paced back and forth every night. His family could hear his big frame creak against the floors as his 6 foot frame traveled around the downstairs of their home as he searched for an answer. As each day went by, his kind brown eyes looked more and more sad and tired. They seemed to say, “This isn’t living.” Although his embrace still held the same warmth and comfort, there was energy missing.
What’s the difference between these two examples? In the first one, I just tell the reader what Avin looks like and feels like. In the second one, I show the reader only how he looks and feels through his actions and others’ observations of him. The second is a much more engaging way to communicate details about this character. This strategy, again, is called the “show don’t tell” strategy.
Active Involvement: Okay, now I want you to try using this strategy. I’m going to give you about a minute and a half to write down the start of a character profile for your main character. You’ll record the way that person looks, feels, acts and thinks. Give students time to do this. Now, choose 1 – 3 things off the profile you just created. Include at least one feeling. Think of a way you could show the

reader your characters is feeling that way through his or her actions, rather than just te l l ing the reader the character is feeling that way. Do this silently, and then I will give you a chance to share with your partner. When students are shar ing with their partners, again, walk around and l isten for good examples of the show don’t te l l strategy. Have students share examples that i l lustrate use of the strategy.
Link: During your independent writing time, you should complete your character profile. Then, go into your draft and find ways to insert all of these details about your main character into the story. You really want to bring that character to life in a 3 dimensional way. Try using the “show don’t tell” strategy to communicate the character’s feelings, rather than just telling the reader how the character is feeling outright.
A note about conferencing and/or post- independent wr it ing share: Remind students that it’s possible that when they were creating their character profiles, they may have discovered that they actually don’t know enough about the way the character looked, acted, thought or felt. That might mean that they have more research to do on that character to find out this information. At the same time, it’s okay for writers to use “artistic license” sometimes to fill in details that are reasonable. For instance, if a character is in a dangerous situation, it’s safe to assume that he/she was nervous or scared. It’s safe to assume that due to this nervousness or fear that his/her heart was beating fast. Even though the author may not know this as a fact, it’s okay to put details like this into the story to make it more interesting and believable. Students should just be careful not to add in anomalous details (objects, words or details that are out of place and time) or details that reach too far outside of what they know to be true about the character.
Lesson Seven: Reviewing Writ ing Strategies
Lesson Aim: To create a list of all the writing strategies we’ve covered thus far in the school year.
Connection: By this point you are in the middle of revising your first draft to make it more focused, more detailed and more engaging. We’ve learned quite a few strategies this year to help you with that process. Today we’re going to list those strategies and remind ourselves how to use them during the revision process.
Teach: What strategies have we learned this year? (Create a list to hang in the classroom as students offer up ideas. Have students describe the strategy, not just name it). You should have the following strategies on the list:
• Good beginnings – Start your story with a piece of dialogue, jumping right into the action or placing the reader in the setting with a detailed description.
• Cut and Paste – Literally cut your story apart to either rearrange the order of events or to insert more detail in a section of your story. This is especially helpful when you’re stretching out the heart of your story.
• Non-narrative elements – insert non-narrative elements such as maps, e-mails, journal entries, newspaper articles or pictures to lend a feeling of authenticity to your story.

• Flash backs and flash forwards – Jump ahead or back in time to insert memories or future events that enhance the theme of your story, offer important insight into your characters or offer important information about the plot of your story.
• Internal/External story – Switch back and forth in your story between describing the action and setting (external) and the characters’ thoughts and feelings about what is happening (internal)
• Show Don’t tell – Rather than just stating how the character is feeling, SHOW how the character is feeling through his/her actions, reactions or physical manifestations.
Active Involvement: Look at your draft right now. Put your finger on a place that needs work. Identify one strategy from this list that you could use to bring that particular part of your story to life. (Allow students to share their ideas with a partner)
Link: Now that you have all of these strategies fresh in your mind, I want you to utilize them during independent writing today.
A note about conferencing: In your conferences, be sure students are conscious of the “heart” of their stories (i.e. the climax or most important moment). Encourage them to stretch that moment out with the greatest detail. They can use several of the strategies listed above to do that.
Lesson Eight: Strong Endings
A note about this lesson – You will be introducing mentor texts to the students, so this lesson will take longer than other lessons. The students will be reading the texts as a part of the lesson. Allow for about 60 minutes.
Lesson Aim: To learn to use mentor texts as models for writing strong endings for narrative stories.
Connection: You might remember that during our last writing process, we turned to our realistic fiction books as “mentors.” In other words, we looked to those authors and texts to see how they manipulated the narrative structure to enhance the themes of their books. Today we’re going to look at some hero text mentors and use them to identify different ways to write strong endings for our hero narratives.
Teach: In a moment you are going to break up into 4 groups. I will assign one text to each group. You will either decide to elect one person to read the entire text aloud to the group OR you can take turns reading the text every few pages. These are biography picture books that resemble your hero narratives in length and scope.
Suggested texts:
Stickeen: John Muir and the Brave Little Dog by Donnell Rubay
The First Starry Night by Joan Shaddox Jsom
Alvin Ailey by Adrea Davis Pinkney

Satchel Paige: Don’t Look Back by David A. Adler
(You can either introduce the books and then have students select a book they’d like to work with, or you can just assign the groups.)
When you get into your group, first read the book. Then discuss and record the following three things:
1) Who is the hero in this book?
2) What heroic characteristic most stands out about that person?
3) What particular episode in that person’s life best illustrates that characteristic?
Next, I want you to re-read the last few sentences of the book. As a group, I’d like you to identify how the author is ending the book. Does the author end with a quote? A lasting statement? An image? Or something else? Then discuss with your group if you think the author wrote a strong ending to the book.
Active Involvement: After students have done the aforementioned activities, have each group read the last few sentences of their books aloud to the class and identify the strategy the author employed for the ending.
Link: Now we’ve collected at least 4 different ways you could end your narrative. Try each one and see which works best for your story.
A note about conferencing: Encourage students to use the mentor texts to help guide them through other trouble spots in their writing. For instance, the author might use an introduction or postscript in the book to provide additional information necessary to understand the context of the focused story. Or perhaps the author uses description of the setting to set a mood in the text. Have the mentor texts out and available for students to use.
Lesson Nine: Attent ion Grabbing Tit les
Lesson Aim: Students will learn 3 different strategies for creating attention-grabbing titles.
Connection: By now the content of your narrative should be nearing its final stages. It should be clear to the reader who your hero is, what heroic characteristic this person possesses and what one episode in this person’s life illustrates that heroic characteristic. Your story should have an engaging beginning and end, and it should be clear to the reader which moment in your story is the climax or “heart” because that one part is filled with the most detail. You should have utilized our strategies to play around with the narrative structure to enhance the theme of your piece. Now it’s time for us to talk about creating a really good title that will grab the reader’s attention and make him/her want to pick up your story and read it.
Teach: Good titles usually do one of the following things –

• State something important about the main character
• State something important about the main event of the story (i.e. the climax)
• State the theme
Often times, authors use word play in their titles as well. They will take an idiom or a well-known title of a poem, book or movie and change it slightly so that it relates to his/her own story. The familiarity of the words will catch the reader’s attention, but the slight change will reveal something about the author’s story. Let’s look at a few examples from our mentor texts. Let’s classify the titles based on what each title states in regards to the rest of the book.
Active Involvement: Now I’d like each one of you to open up your writer’s notebook. Jot down 3 possible titles for your hero narrative using the three strategies we just reviewed. Try using word play in at least one of the titles. Give students about 5 minutes to brainstorm some t it les. Walk around. Choose a few t i t les that i l lustrate the strategies wel l . Have those students share with the rest of the c lass.
Link: So, today during your independent writing time, you should try to decide on a title for your hero narrative. You can also use this time to continue to use other revision strategies to complete your narrative.
EDITING: Teachers should plan 2 - 4 edit ing lessons based on the needs of their students.
PUBLISHING: Once the Hero Narratives are edited, it is nice to “publish” the narratives and celebrate their completion. Since the narratives are based on the children’s family members, it is nice to invite family members to a publishing party to read the finished products.