high efficiency home build
TRANSCRIPT

Sutton Yanosky
Construction Engineering Technology
ET 493 Spring 2014
Dr. Cris Koutsougeras
Advisor : Ed Rode
5/5/2014
High Efficiency
Home Build

ABSTRACT:
My project was the development of a high-efficiency home from top to bottom. My
responsibilities for this project were to act in a project managerial role, to oversee smooth
phase transitions in addition to actually performing various labor tasks for the build. I was
responsible to formulate a construction schedule for the project, track project progress in
relation to schedule, form estimated project costs, phase by phase material take-offs as well
as actual cost phase by phase throughout this project. The owner has a location and has
already met with a team of engineers, architect and the parish executives, confirming all
building permits that will be necessary throughout the project duration. An overall
construction blueprint has been established and agreed upon by all participating parties.
All funding and investments are accounted for through the owner. Construction design
uses unusual materials and methods throughout build that will be further explained
throughout this report.
High Efficiency Home Build: Introduction
A high-efficiency home is a new build for me and the company I am working under. It is a
very non-traditional approach to building a home and is much more labor extensive and difficult
than standard builds. This home is fairly large, coming in around 6,000 square feet utilizing very
untraditional building strategies to conquer the needs and specifications of the owners. This is a
complete build starting from absolutely nothing. The land is there with no trails or lot prepared.
My team and I started from the bottom and are currently in the process of completing this build
with regards to predetermined budget and schedule.
This home is built using a solid concrete exterior, all floors and all exterior walls will be
formed from 6 inch thick concrete slabs. Roof truss system will be made of 18 and 16 gauge A36
formed steel and bolted and welded onto a steel top plate implanted 6 inches into the concrete
walls. All interior walls will be framed with 16 and 18 gauge A36 steel material and fastened
with 5/16” hex bolts. This project will have an upstairs loft, supported by four walls and two
large structural steel W-Beams fastened by 3/4 inch bolts to four inch structural steel columns
anchored into the concrete slab below.
The building interior and roof system is framed out of A36 steel studs and connections.
Interior sheathing is standard half inch gypsum board, finished, textured and painted to color
choice of the owner. All trim and woodwork will be installed by my construction team and I.
This build has a large amount of triple crown-molding throughout, as well as a boxed trim
wainscot system and eight inch base-molding. The main living room area has a coffer ceiling
system installed with triple-crown molding and various one-by trim completing each of the nice
equally sized bays. This room is a true eye-opener and a testament to the skill and creativity of
our carpentry team.

All of the light fixtures, windows, doors, toilets, sinks, HVAC units, flooring, exterior
finishes and appliances were of owner’s choice. All of these with exception to the windows and
doors were installed by their respective trades. Subcontractor bids were priced in as material and
labor costs combined. For most other phases I was able to estimate material costs and labor costs
separately as will be illustrated later in this report.
Our goal for this project was to complete as many phases as possible without employing
sub-contractors. This mission would help to minimize costs and time, as well as allow us to
dictate much of the framing design. We did have to hire sub-contractors to handle some of the
specialty and certification mandated phases. Thus far we have all been very pleased with the
project as far as timing and budget constraints.
Savings by performing phases independent of sub-contractors
- Independent lot clearing
- Foundation prep/ forming
- Exterior drainage and area grade
- Trenching for all underground electrical and plumbing
- Concrete wall forming
- All steel framing (roof and interior)
- All sheetrock and boarding material (sheet rock, plywood, soffit, fascia)
- Electrical wiring (run wires, install outlets and can lights)
- Install all trim and moldings
- Install all windows and interior and exterior doors
- Install all hardware throughout house
- Soffit/Fascia framing and boarding
- Shutter build/paint and install
- Exterior vapor barrier
- Front porch column Install
- Form and prep driveway and landing pads
- Digging and filling pond (future potential add)
LOT DEVELOPMENT PHASE
The location of this build is in the deep woods of an area in Bush, Louisiana. The owner
has a property totaling sixty-two acres, 50 of which were completely wooded and overgrown and
this is where the home’s desired location would be.
The first obstacle we came across in this project was to find a viable location for the
home. After about a week with chainsaws and machetes we were able to find a location about
six-hundred feet deep into the woods that we all felt comfortable with. At this time we

immediately brought in a bulldozer and got to work. The owner was able to provide a Caterpillar
550H bulldozer. Rent for this type of machinery is usually about $1000.00 a week so this really
helped our company to keep costs at a minimum, knocking down a three to four thousand dollar
expense.
After a couple weeks of clearing and grubbing the site, we were able to clear out about
three acres of land in the middle of the heavy woods. With a
newly serviceable lot, construction was ready to begin.
PROJECT SCHEDULE
Project Pha
Project Phase Estimated start Estimated finish
Estimated
work
(hours)
Duration (days)
Project Plan/Design December 9, 2013 December 13, 2013 80 10
Attain Blueprints and
Permits December 13, 2013 December 27, 2013 80 10
Clear/Grub Project
Location December 23, 2013 January 11, 2014 144 18
Slab/Driveway Prep January 14, 2014 January 24, 2014 80 10
Slab/Driveway Form January 24, 2014 February 4, 2014 80 10
Plumbing Slab Rough In January 27, 2014 January 31, 2014 32 4
Slab/Driveway
Pour/Cure February 5, 2014 February 10, 2014 40 5

Ext. Concrete Wall
Frame/Pour/Cure February 10, 2014 March,1,2014 128 16
Interior Walls Framing March 3,2014 March 21, 2014 120 15
Staircase March 10, 2014 March 13, 2014 24 3
Roof Frame - Project
Dry-In March 24, 2014 April 11, 2014 120 15
Plumbing Top Out April 7, 2014 April 18, 2014 80 10
Electrical Rough in April 7, 2014 April 25, 2014 120 15
HVAC Rough in April 14, 2014 April 25, 2014 80 10
Home Insulation April 14, 2014 April 18, 2014 40 5
Ext. Door/Window
Install March 26, 2014 March 29, 2014 24 3
Hang Sheetrock April 14, 2014 April 22, 2014 56 7
Texture and Finish
Sheetrock April 21, 2014 April 25, 2014 40 5
Trim and Woodwork April 14, 2014 May 6, 2014 160 20
Exterior Vapor Barrier March 26, 2014 March 30, 2014 32 4
Soffit and Fascia
Framing/Boarding March 26, 2014 April 1, 2014 40 5
Brick Veneer April 14, 2014 May 16, 2014 200 25
Porch Column Install April 28, 2014 April 30, 2014 16 2
Paint Base Coat April 28, 2014 April 30, 2014 16 2
Paint Prepwork (puddy,
sand, caulk, etc) April 28, 2014 May 23, 2014 160 20
Finish Paint May 19, 2014 June 13, 2014 160 20
Flooring May 12, 2014 May 30, 2014 120 15
Finish Soffit ( stucco) May 19, 2014 May 23, 2014 40 5
Finish Fascia (aluminum
face) May 19, 2014 May 21, 2014 24 3
Gutters May 21,2014 May 23, 2014 24 3
Cabinet Install June 2, 2014 June 6, 2014 40 5
Shelving Install June 2, 2014 June 6, 2014 40 5
Countertops Install June 23, 2014 June 25, 2014 24 3
Shutter
Built/Paint/Install June 9, 2014 June 13, 2014 40 5
Interior Doors and
Hardware Install June 2, 2014 June 6, 2014 40 5
Plumbing Final Trim June 30, 2014 July 2, 2014 24 3
Electrical Final Trim June 30, 2014 July 4, 2014 40 5
HVAC Final Trim June 30, 2014 July 1, 2014 16 2
Landscape May 26, 2014 July 6, 2014 80 10
Pond May 26, 2014 July 6, 2014 80 10
Pool
Finish Landscape July 9, 2014 July 20, 2016 80 10

Punch list July 16, 2014 August 4, 2014 80 10
Final Job Cleaning July 23, 2014 July 27, 2014 40 5
Move In August 7, 2014 August 11, 2014 40 5
TOTAL HOURS 3,024 378
hours days
FOUNDATION PHASE
Once we attained a workable area that was cleared and grubbed, the foundation phase
started. This phase consisted of building up the home slab location and prepping the soil to
support the concrete slab foundation. Numerous days of compacting and adding soil later, the
slab area was ready for the slab and driveway forming to begin. This was a very labor extensive
phase, as the slab for this build is gargantuan in size and calls for enormous structural beams and
footings running from end-to-end throughout the slab.
Our concrete subcontractor used multiple crews to accomplish this feat. Some worked
digging foundation footings and beam trenches, while others busied themselves forming the slab
and fabricating the massive steel reinforcement beams and footings necessary to complete this
slab. After about a month of hard labor, over ten-thousand dollars of steel rebar and an additional
twenty-two plus thousand dollars in concrete and other materials, the house slab was finally
finished and ready for the home to come to life.
FRAMING PHASE (EXTERIOR WALLS)
High efficiency homes are built using very different materials and techniques than
traditional homes. This house is no exception and was built for superior strength, and economic
efficiency, much like many commercial buildings today.

To begin with, a traditional exterior wall in a home is usually wood framed with a
plywood external boarding with some type of vapor barrier and an external finish. Commercial
builds typically follow the same pattern but typically use a steel framing system over wood. The
design of this home uses a six inch thick, ten foot tall exterior wall formed of 3,000 PSI concrete,
tied in vertically to the foundation with rebar every sixteen inches as well as rebar tied
horizontally every sixteen inches, forming one solid concrete unit. This design is extremely
efficient in terms of strength, durability and in decreasing utilities. The concrete walls were
especially interesting to me because I was able to take part in the assembly and constructing of
these walls systems.
These walls are framed together using concrete forms of various sizes, tied together using
steel “loop-ties” every one foot vertically and horizontally. Steel wedges are then used to fasten
the two frames together. The two frames face their smooth wood finished side inward where the
concrete wall will be poured. The steel wedges fasten the frames tightly together, in addition to
plentiful bracing, to withstand any potential blowout during the pour. Bracing for this type of
wall system consists of; 2”X4” strong-back bracing running along the entirety of the inside wall
perimeter of the home, vertical 2”X4” bracing placed every four feet tied into the horizontal
runners, and finally diagonal turnbuckle bracing every four feet in between vertical bracing.
Turnbuckles are anchored into the concrete foundation and then tightened until the wall section
is level. (picture below)
This process is extremely labor extensive and took nearly one month for
completion. Once all forms are put together, rebar is installed, opening forms are installed and
forms are braced and leveled, the walls are ready to be poured. This final step was by far the
most simple and took only one day to complete. During the pour, once the very top was being
finished, a half inch thick steel anchor plate was placed into the wet concrete. This plate came in
twenty foot lengths and had small stud protrusions about six inches in length that were embedded
into the concrete. This allowed the entire exterior wall perimeter to have a steel plate at the top to

fasten and weld roof rafter and ceiling joists to during later phases. Once all the bracing and
forms are removed and hauled away, your exterior walls are complete.
As an added precaution, we sealed the concrete exterior of this home using a high
grade industrial sealant. This product had the consistency of maple syrup and was extremely
expensive at five hundred dollars per five-gallon bucket. Despite cost, this is a lifetime sealant
and therefore moisture will never be a problem getting into the home and the brick veneer will
not have to be periodically sealed.
Sealed Exterior Walls
WHY USE CONCRETE WALLS?
1) Strength – Concrete is able to withstand 250 miles per hour or greater wind speeds as
well as impacts from objects traveling the same speed. This is especially beneficial in
areas subject to hurricanes, tornadoes and high winds.
2) Energy Efficiency – Thermal mass of walls and tight seals allow concrete homes to
excel at keeping conditioned air in and extreme temperatures out. Concrete walls
have a high thermal mass, which reduces home energy costs by decreasing
energy transfer between the outside and inside of the walls. These walls create more
comfortable homes by minimizing interior temperature fluctuations and drafts.
3) Temperature Control – Concrete homes tend to have little to no hot or cold zones.
4) Durability – Concrete does not harbor insects and rot that can cause framed houses to
deteriorate. Building life expectancy in concrete homes can be for centuries.
5) Fire Resistance – Concrete does not burn or spread fire.
6) Acoustics – Noise is insulated much more efficiently in concrete homes than framed
houses.
7) Flooding – Flood damage does not affect concrete walls.
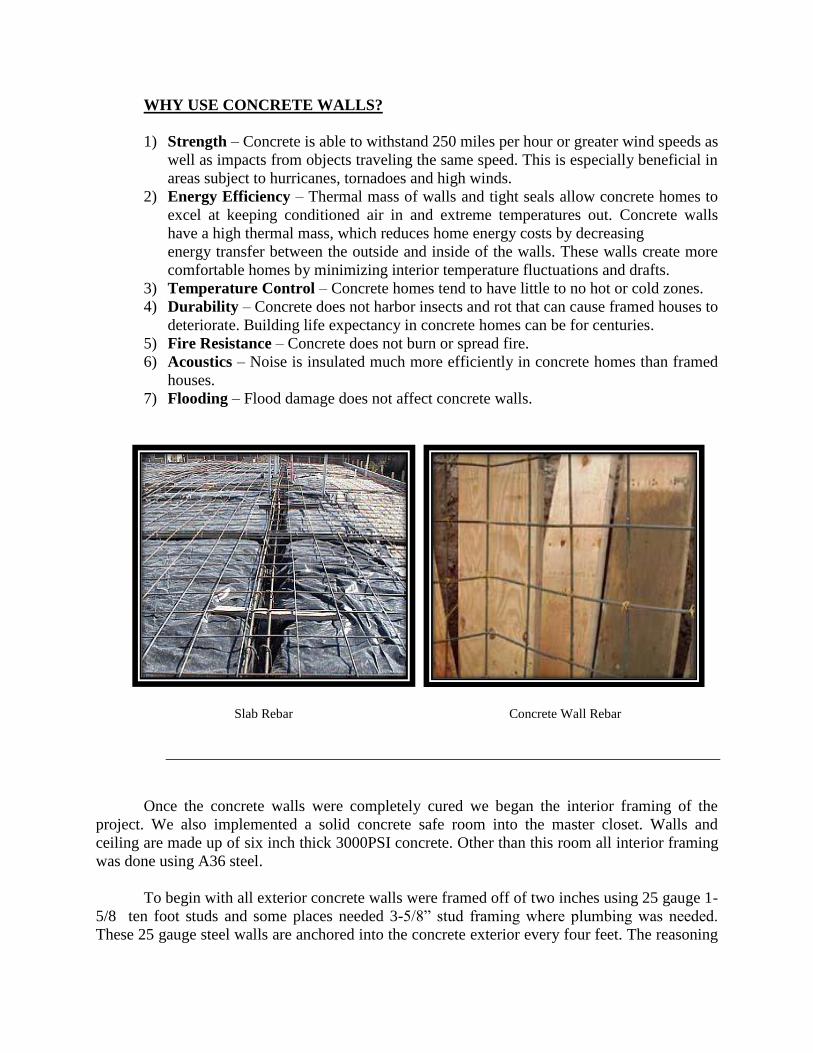
Slab Rebar Concrete Wall Rebar
Once the concrete walls were completely cured we began the interior framing of the
project. We also implemented a solid concrete safe room into the master closet. Walls and
ceiling are made up of six inch thick 3000PSI concrete. Other than this room all interior framing
was done using A36 steel.
To begin with all exterior concrete walls were framed off of two inches using 25 gauge 1-
5/8 ten foot studs and some places needed 3-5/8” stud framing where plumbing was needed.
These 25 gauge steel walls are anchored into the concrete exterior every four feet. The reasoning

for framing these small steel walls was to allow the sheetrock, electrical, plumbing and HVAC to
move along much more smoothly as well as to leave room for the blown in insulation.
Everything can be simply mounted or screwed directly into the light gauge steel studs instead of
needing to drill and cut out concrete for electrical boxes or having to anchor and glue sheetrock
throughout the house.
Light-gauge steel framing Light-gauge steel framing
All other interior walls are framed out of A36 16 and 18 gauge steel studs, track and
clips. Walls members are fastened together using 5/16” X ¾” hex bolts or welding. All walls
with plumbing are built out of 18 gauge six inch studs as well as the two walls supporting the
second floor loft area. All other walls on the interior of this build use 18 gauge 3-5/8” studs and
track plates.
The interior openings for this home are framed using a 16 gauge structural header. These
headers consist of two 16 gauge 12” studs fastened with hex bolts to the top track plate as well as
three bolts in the king stud on each side of the opening. These structural openings are supported
by a jack stud on each side of the opening which supports the compressive loads transferred from
overhead. All structural headers are capped with an 18 gauge track plate on top and bottom, with
a non-structural 25 gauge steel header framed in to specified opening height. Openings are then
wrapped in a 2”X4” pine board to hold door frames and casing into place.
Once the vertical wall framing is complete, the joist framing phase begins. Joists are the
framing members running perpendicular to the walls. Joists can make up either the ceiling or

floor of a structure. For this project we used 18 gauge steel 6” joist material for our ceilings.
Electrical fixtures, AC ducts and lastly sheetrock are screwed into these ceiling joists. It is
important to know what the maximum span length of your joisting material is. If you overload
your joist, your framing system could fail. A span is the distance a member can cover without
needing support from another structural member, typically a structural beam or vertical wall. For
this project our choice in 6” joists worked almost throughout our spans, but we had to fabricate 4
beams in order to cope with the large spans in some areas.
A total of four beams needed to be fabricated and installed in order to carry out the joist
framing phase of this job. All beams were made of two 16 gauge 12” studs cut to necessary
length, capped with an 18 gauge track plate on top and bottom and fastened together and into
place using hex bolts. Once beams are in place and fastened, we were able to carry out our
joisting phase. Joist connections on this job used 18 gauge 6” steel track and were all fastened
using 5/16” hex bolts.
Structural Header Beam/Joist Connection
ROOF FRAMING/DRY-IN
For the roof system of for this build we decided to use an all steel framed hip style roof,
with truss connections using 18 gauge steel L-clips and welds in some areas. The original plan
for this roof system was to special order an engineering pre-manufactured steel roof truss system.
These truss systems are usually very efficient in terms of erection speed and are very easy to use.
Unfortunately a custom built steel truss system for this home design would have been extremely

expensive, all quotes were upwards of fifty thousand dollars. In order to save on cost, we decided
to manufacture our own roof truss system using 18 gauge six steel inch studs for roof rafters and
a welded connection combining 18 gauge eight inch steel studs and track plates for all ridge
beams. Rafters are spaced sixteen inches apart and are connected to the ridge beams using 18
gauge steel angle clips fastened with 5/16” hex bolts and then connected to the concrete exterior
walls or porch beams using welding or steel angle clips. When designing the rafter system, we
made sure to account for a two foot rafter overhang over the entire perimeter of the home, where
we later framed in our soffit and fascia. After all the rafters were finished, we stiffened them up
by using twenty foot black iron sticks in addition to a 1-1/2 inch steel “hat”-channel to lock the
rafters into place and prevent twisting and bowing. This bracing greatly increases the strength of
the roof system. We also installed multiple structural support columns and walls throughout the
roof system located under the ridge beams and in support of the large spanning rafters. These
columns and walls work to support compressive loads from the roof and combine with horizontal
bracing members to maintain a very high strength roof system. We used half inch OSB plywood
boards for decking the roof which was dried in using a water resistant building paper and then
topped off with 30 year 3-tab asphalt shingles. This roof used close to one-hundred squares
(square = 100 square feet) or bundles of asphalt shingles, costing nearly ten thousand dollars in
material alone.
Roof Decked and Wrapped Soffit/Fascia Frame

The largest rafter material available to order was twenty four foot length for six and eight
inch steel. For a large portion of this roof, the rafter length with the two foot soffit overhang
exceeded fourty six feet. Therefore we were forced to join two twenty four foot steel studs
together with a five foot 18 gauge six inch track plate, secured with 5/16” hex bolts every one
foot on all three sides of the connection. This phase of the project was definitely my personal
favorite. Being able to work both sides of the job for the first time was very enjoyable for me and
I feel that I learned a lot of useful information that will be beneficial for me in my path into the
proffesional ranks of the field of construction.
WHY STEEL FRAMING? ( www.steel.org/steel)
- Steel is 100 percent recyclable . Any and all waste can be recylced and even
scrapped for quick cash at a local scrap yard.
- Steel is lightweight and also has the highest strength to weight ratio of any
construction material.
- Steel does not warp, split or rot. Therefore steel framing and roofing material
always have a very consistent product output.
- Steel framing members consist of at least 25% recylcled steel. In fact more steel
is recycled per year than paper.
- Our contractor and labor team are experienced steel framers. Using wood for this
roof system would have taken our team much longer to complete due to
uncomfortability when using wood.
Once the project was completely dried in and the roof complete, the project really
began to take form. Within about one month of the building dry in phase, electrical,
HVAC , plumbing, insulation, sheetrock and trim were all able to be completed. In
addition, the soffit and fascia phases were completed and the exterior brick veneer is
working towards completion as well. Within about one month this project truly began to
look like a home. An up-to-date project progress report is placed below.
Project Phase Actual start Actual finish Actual work
(hours) Actual duration (days)
Project Plan/Design 40 5
Attain Blueprints and Permits 80 10
Clear/Grub Project Location 3-Jan-2014 14-Jan-2014 80 10
Slab/Driveway Prep 13-Jan-2014 18-Jan-2014 48 6
Slab/Driveway Form 20-Jan-2014 1-Feb-2014 88 11
Slab/Driveway Pour/Cure 3-Feb-2014 8-Feb-2014 48 6
Ext. Concrete Wall
Frame/Pour/Cure 10-Feb-2014 5-Mar-2014 160 20
Interior Walls Framing 6-Mar-2014 14-Mar-2014 56 7
Staircase 10-Mar-2014 10-Mar-2014 8 1

Roof Frame - Project Dry-In 14-Mar-2014 28-Mar-2014 96 12
Plumbing Rough in 31-Mar-2014 11-Apr-2014 80 10
Electrical Rough in 31-Mar-2014 16-Apr-2014 104 13
HVAC Rough in 7-Apr-2014 11-Apr-2014 40 5
Home Insulation 8-Apr-2014 16-Apr-2014 56 7
Ext. Door/Window Install 31-Mar-2014 1-Apr-2014 16 2
Hang Sheetrock 14-Apr-2014 19-Apr-2014 48 6
Texture and Finish Sheetrock 16-Apr-2014 20-Apr-2014 32 4
Trim and Woodwork 18-Apr-2014 2-May-2014 104 13
Exterior Vapor Barrier 10-Mar-2014 12-Mar-2014 24 3
Soffit and Fascia
Framing/Boarding 6-Mar-2014 31-Mar-2014 40 5
Brick Veneer 21-Apr-2014 IN PROGRESS
Porch Column Install 1-May-2014 2-May-2014 12 1.5
Paint Base Coat April 14, 2014 April 14, 2014 8 1
Paint Prepwork (puddy, sand,
caulk, etc) April 21, 2014 IN PROGRESS
Finish Paint
Flooring May 2, 2014 IN PROGRESS
Finish Soffit ( stucco) April 14, 2014 April 17, 2014 32 4
Finish Fascia (aluminum face) April 19, 2014 April 19, 2014 8 1
Gutter Install
starts next
week
Cabinet Install
Shelving Install
Countertops Install
Shutter build/paint/Install
built, waiting
on brick
Interior Doors and Hardware
Install
Plumbing Final Trim
Electrical Final Trim
HVAC Final Trim
Landscape
Pond
Pool
Finish Landscaping
Punch list
Final Job Cleaning
Move In
TOTAL HOURS 1,308 163.5
hours days

The overall project thus far is behind about one to two weeks. Brick phase was estimated
to start a little earlier but there additions have been made to the project. A brick paver back patio
and two front gate columns have been added to the brick phase thus far. These additions have
added around one week to the brick veneer phase and a few extra thousand dollars in labor and
material to the overall project cost, which will be shown later in this report.
BRICK VENEER AND EXTERIOR FINISH PHASE
This build is currently in the process of having the brick veneer installed. Owner chose a
standard 2-1/2 inch by 7-5/8 inch brick with a half inch mortar joint. The choice in brick was
very interesting. The owner chose to use a recycled historic brick, taken from buildings that were
demolished around the Mobile, Alabama area. A large amount of these bricks came from a one
hundred year old tobacco factory .
Each individual brick has its’ own character and history. Overall they are in pretty
good shape, some with beat up corners, pits and small cracks but this is exactly the style and look
the owner was looking for. This brick pattern blends a mixture of various shades of orange, red,
white and a unique blend of previous building paint colors like grey, green, black, beige, silver,
blue and more. The use of historic brick really expresses the owner’s taste for an antique ,
weathered look, very popular in southern style design. The total brick estimate I came up with
was 24,000 total bricks. This number covers the entire house, brick front staircase, step-down
pads and all new additions to this phase.
This build portrays a two foot rafter overhang highlighted by an aluminum faced fascia
and a stucco finished soffit on all exterior lids including porches and a carport. The soffit and
fascia was framed using 25 gauge 1-5/8 inch steel studs fastened to the concrete exterior walls
using 1-5/8 inch steel track and lead anchors. Lead anchors were placed every two feet down the
perimeter of the home. The studs were spaced every sixteen inches and then connected to the
track and roof rafters using ¾ inch framing screws known as “button heads”. The soffit was then
boarded with a 5/8 inch moisture resistant Densglass sheathing, fastened with 1-1/4 inch self-
tapping screws. Denseglass sheathing is commonly used in commercial applications on building
exteriors where a stucco finish will be applied later. We chose this material for that same reason.
The finished soffit for this build displays a beige colored stucco throughout the home’s exterior
lids.
Densglass Soffit Stucco Finished Soffit

Trim and Woodwork Phase
This build features a ton of trim and woodwork. Over twenty-five thousand dollars worth in
material and labor. This build displays a three piece crown molding system in nearly all rooms of
this house. This crown mold system includes a top and bottom 3-1/4 inch enhancer strip, topped
off with a 4-1/2 inch crown molding. This gives each room displaying this style of molding a
very luxurious look. All material for the crown molding for this job were ordered in sixteen
lengths and we chose to use MDF board molding to cut down on cost. In addition to MDF crown
molding, we used MDF 7-1/2” basemold as well. All trim material used was pre-primed and
bought in sixteen foot lengths.
3 piece Crown Molding Wainscot Paneling
This house also displaysa large amount of custom waiscott wall trim. We used all primed
pine material for this application. We used a 1-1/2 inch chair rail atop a custom framed two foot
by three foot box layout using primed 1X4 inch pine lined on the inside with a 1-1/4 inch pimed
pine basecap to really dress up this wall paneling. In addition, we installed a coffer style ceiling
into the main living area of this home and formed four wood columns. This coffer ceiling system
was decided on to cover up the structural W16X35 beams and columns supporting the second
floor. We were able to over achieve with the final outcome of this room. A true testiment to the
skill and creativity or our carpentry team.

Insulation
For the insulation in this home we chose to use a combination of open and closed cell
spray foam insulation. Spray foam insulation is a growing material being used in homes and
buildings all over. Since we designed this house with concrete walls we only needed to insulate
exterior walls and the ceiling covering all the conditioned areas. As explained previously in this
report, the house features 1-5/8 inch steel walls framed two inches off of the concrete exterior
walls. This is where we used close-cell spray foam insulation as well as in between roof rafters.
Open cell insulation was only used in the interior walls of the master bedroom for noise control
purposes.
What is Spray Foam Insulation?
Spray polyurethane foam (SPF) is a spray-applied plastic that can form a continuous
insulation and air sealing barrier on walls, roofs, around corners, and on all contoured surfaces. It
is made by mixing and reacting unique liquid components at the job site to create foam. The
liquids react very quickly when mixed, expanding on contact to create foam that insulates, seals
gaps, and can form moisture and vapor barriers. SPF insulation is known to resist heat transfer
extremely well, and it offers a highly effective solution in reducing unwanted air infiltration
through cracks, seams, and joints (http://www.whysprayfoam.org/).
There are three primary types of SPF that can be used for insulation and other specific purposes:
High Density: often used for exterior and roofing applications
Medium Density: often used for continuous insulation, interior cavity fill, and unvented attic
applications
Low Density: often used for interior cavity fill and unvented attic applications
As much as 40% of a building’s energy is lost due to air infiltration. Gaps, holes and air
leaks—which can all be prevented—can make energy bills unnecessarily high and let valuable
resources go to waste (http://www.whysprayfoam.org/).
Spray foam offers a solution: it performs as both insulation and an air sealant, or air barrier,
closing those nooks and crannies that let air escape and add dollars to monthly energy bills. The
U.S. Environmental Protection Agency’s (EPA) Energy Star program estimates that by adding
insulation and sealing air leaks, you could save up to 20% on your monthly energy bills.
The U.S. Department of Energy estimates that 56% of the energy used in a home goes to
heating and cooling. Your home’s heating, ventilating, and air conditioning (HVAC) system has
a big effect on your utility bills and your energy consumption. Maintaining an optimal HVAC
system can make your home more energy efficient. Spray foam insulation can help reduce the
workload on your HVAC system thanks to its high R-value and effectiveness. In fact, with spray

foam, HVAC sizing can be reduced as much as 35% without the loss of efficiency and comfort
( http://www.whysprayfoam.org/energy-efficiency/).
Spray polyurethane foam (SPF) is a way to invest in your home or building. SPF could save you
money in the following ways:
Improved efficiency and reduced air loss could lower energy bills.
Builders can use smaller HVAC systems, using fewer framing and roofing materials and
employing one product that could provide three functions: insulator, air barrier and moisture
barrier, which could lower construction costs.
Spray foam offers home and building owners opportunities to lower maintenance costs on
roofing systems.
Homeowners, builders and architects may be able to qualify for tax incentives, rebates, grants
or certifications (whysprayfoam.com)
Closed Cell Spray Foam Insulation Install

HVAC SYSTEM
This home was designed for superior efficiency in strength, durability and mostly energy
efficiency. With these characteristics highlighting our design phase, we were able to choose our
HVAC system based on efficiency.
With the concrete walls being a very capable thermal insulator combined with the
extreme efficiency and high R-value of close cell spray foam insulation, the HVAC system for
this build is vastly undersized but maintains optimum performance and efficiency. This home
features a variable speed HVAC system. This type of system is somewhat knew in the heating
and air conditioning industry. When compared with a traditional single speed unit, the energy
efficiency of a variable speed system is unmatched.
Single speed units are either on full blast or completely off, regardless of how much
conditioned air is actually necessary. The constant on and off of these systems, especially in hot,
humid climates can make utilities extremely expensive. In a variable speed system, the unit runs
for a much longer time period, using an advanced circuit board that monitors necessary output
power for the system to attain the homes desired interior environment. The brain of this system
updates the output and intensity of the work done by the unit on a daily basis, in regards to the
external conditions. Therefore, the homeowner gets just what they need and very rarely will the
unit need its’ full capacity to satisfy a desired internal temperature. This saves the owner greatly
on utility bills allowing for about a 35-50 percent difference in HVAC system design size. For a
Louisiana climate, most HVAC specialists I have talked with are usually comfortable using
about 500-800 square feet of conditioned space per ton air condition unit. This particular home
design utilizes dual 2-ton variable speed units to power this entire home measuring about 6,000
square feet. This design is 2-3 times undersized for a traditionally designed home but due to the
efficient materials and design used in this build, this size unit will be plenty sufficient.

For this project I was responsible for forming a construction schedule, forming material
estimates for all phases of construction as well as forming a job cost estimate. I formed a
material and labor cost estimate for most phases and have formed an actual cost for the
project up to date. I was able to get pricing for future phases of this job and have included
them into my actual job cost sheet.
Project Phase ESTIMATED
TIME
ESTIMATED
LABOR
COST
ESTIMATED
MATERIAL
COST
TOTAL
ESTIMATED
COST
Project Plan/Design 10
Attain Blueprints and Permits 10 1500 500 2000
Clear/Grub Project Location 12 9600 400 10000
Slab/Driveway Prep 10 2000 1000 3000
Slab/Driveway Form 10 5000 8000 13000
Slab/Driveway Pour/Cure 5 4000 50000 54000
Ext. Concrete Wall
Frame/Pour/Cure 15 15000 32000 47000
Interior Walls Framing 10 8000 20000 28000
Staircase 2 400 250 650
Roof Frame - Project Dry-In 15 16000 32000 48000
Plumbing Rough in/Top Out 10 10000 5000 15000
Electrical Rough in 15 4000 6000 10000
HVAC Rough in/Final 10 15000 15000
Home Insulation(BLOWN IN) 5 8000 8000 16000
Ext. Door/Window Install 3 1000 15000 16000
Hang Sheetrock 7 4500 6000 10500
Texture and Finish Sheetrock 5 4500 1500 6000
Trim and Woodwork 20 16000 8000 24000
Exterior Vapor Barrier 4 2000 2000 4000
Soffit and Fascia Framing/Boarding 5 4200 2000 6200
Brick Veneer 25 20000 20000 40000
Porch Column Install 2 1000 2500 3500
Paint Base Coat 2 500 1000 1500
Paint Prepwork (puddy, sand,
caulk, etc) 20
6,000
1,000 7000
Finish Paint 10 6000 6000 12000
Flooring 12 26000 20000 46000
Finish Soffit ( stucco) 5 4000 7000 11000
Finish Fascia (aluminum face) 3 1500 1000 2500
Aluminum Leaf-Guard Gutter
Instal 3 1800 4000 5800
Cabinet Install 5 24000 24000

Shelving Install 3 3000 3000
Countertops Install 2 9000 9000
Shutter build/paint/install 3 1600 1800 3400
Interior Doors and Hardware Install 5 1500 6000 7500
Plumbing Final Trim 3 2000 2000
Electrical Final Trim 4 2000 2000
HVAC Final Trim 2 500 500
Landscape 10 2000 3000 5000
Pond 10 3500 250 3750
Pool 20 15000 20000 35000
Finish Landscape 5 2500 2500
Punch list 10 2000 2000
Final Job Cleaning 5 1000 1000
Appliances 25000 25000
Fireplaces and Logsets 3000 3000
Electrical Fans/Fixtures 6000 6000
Move In 5 1500 1500
TOTALS 357 $217,600 $376,200 $593,800
Above is my predetermined total project cost estimate for each phase and all phases
combined. Total job estimated cost comes in at $593,800 dollars. This might seem very pricey
for a home but this is not a typical home. The construction methods and materials used for this
build are very untraditional and this home is built to last and require minimal maintenance and
utility costs. Below will be a project actual costs analysis sheet that has been updated as of May
4th
, 2014.
Project Phase ACTUAL LABOR
COST
ACTUAL
MATERIAL
COST
TOTAL
COST
Project Plan/Design
Attain Blueprints and Permits 1500 1500
Clear/Grub Project Location 6000 500 6500
Slab/Driveway Prep 1200 1200 2400
Slab/Driveway Form/Pour/Cure 15464 36876.7 52340.7
Ext. Concrete Wall Frame/Pour/Cure 10600 32403.72 43003.72
Interior Walls Framing 6500 22144.19 28644.19
Staircase 400 200 600
Roof Frame - Project Dry-In 16488 29961.25 46449.25
Plumbing Rough in/Top Out 15205 15205
Electrical Rough in 4800 6000 10800
HVAC Rough in/Final 15000 15000
Home Insulation(BLOWN IN) 15463 15463
Ext. Door/Window Install 800 14522.13 15322.13

Hang Sheetrock 4600 5266 9866
Texture and Finish Sheetrock 2500 2500 5000
Trim and Woodwork 14400 8000 22400
Exterior Vapor Barrier 1200 2000 3200
Soffit and Fascia Framing/Boarding 3000 2211.65 5211.65
Brick Veneer 22240 17264.11 39504.11
Porch Column Install 800 2557.8 3357.8
Finish Paint 6100 13500 19600
Flooring 13043.62 20291.44 33335.06
Finish Soffit ( stucco) 9944 9944
Finish Fascia (aluminum face) 1980 1980
Aluminum Leaf-Guard Gutter Instal 5411 5411
Cabinet Install 30000 30000
Shelving Install 3350 3350
Countertops Install 10108 10108
Shutter build/paint/install 3600 3386.97 6986.97
Interior Doors and Hardware Install 1200 5078.97 6278.97
Plumbing Final Trim 2000 2000
Electrical Final Trim 2000 2000
HVAC Final Trim 500 500
Landscape 1600 3000 4600
Pond
Pool
Finish Landscape
Punch list 1000 1000
Final Job Cleaning 1000 1000
Appliances 16031 16031
Fireplaces and logsets 3103.36 3103.36
Electrical Fans/Fixtures 10485.38 10485.38
Fireplace Mantels
Move In
LABOR TOTALS
MATERIAL
TOTALS
COST
TOTAL
TOTALS $143,035.62 $335,134.2 $509,481.29
An up to date project total thus far comes in at $509,481.29. The job is currently and
looks to stay on a path under initial estimated budget. The initial budget does include costs for a
pond and a pool totaling nearly $45,000 dollars. These two items are still being discussed as far
as design, location by the owner. These two phases can easily be added at any time during or
after the home construction therefore they are not crucial towards overall project deadlines.

This project has been a lot of fun for me this semester. I have worked in construction for
a very long time but have never truly been able to be a part of the business side of the industry.
Using skills and techniques learned in my engineering technology curriculum in combination
with my previous field experience I was able to develop a working schedule and accurate project
estimates in terms of material and costs. I feel much more comfortable reading architectural
drawing and have become much more efficient in submitting prices and material estimates. I feel
this was a great introductory project for a person pursuing a career in the construction industry as
a project manager or eventual commercial contractor. This experience was truly great for me
because I was able to work on both sides of this project. I was able to get with the contractor and
owner, developing timelines, building goals and designs as well as estimating materials. I was
able to carry out these goals and design techniques on the physical end too by taking part in
many phases like framing, sheetrock, carpentry, foundation forming, clearing and more. I look
forward to working more into this project or similar projects in the upcoming semester in ET
494.

SOURCES
( http://www.whysprayfoam.org/energy-efficiency/).
Portland Cement Association (PCA) – Removable Forms (Cast-in-Place) Concrete Building
Systems
http://www.cement.org/homes/ch_bs_removable.asp