home winemaking guide
TRANSCRIPT

HOM
E WINEMAKER DEPOT
ynapmoC tnempiuqE orepsor
P a
Est. 1972
Home Winemaking Guide

Table of Contents
Dear Home Winemaker, Welcome! We have put together this comprehensive guide for both the beginner and experienced home winemaker. It is packed with useful information and illustrations to help you achieve the best results possible.
With detailed notes and insights from our very own winemaker, this guide covers everything you need to know—from descriptions of red and white grape varieties, to recipes that reflect “Old World” Tradition and “New World” Trends, to the precise calculations you will need to master a perfectly balanced wine—it’s all here! We at Prospero Equipment Corp. are proud to present you with our HOME WINEMAKER DEPOT guide and wish you a fun-filled journey, as we raise a glass of wine to your success! Cheers! The Staff at Prospero
HOM
E WINEMAKER DEPOT
ynapmoC tnempiuqE orepsor
P a
Est. 1972
© 2015 Prospero Equipment Company. All Rights Reserved.
Written by Joe Vicari Layout and Illustrations by Paul Rubino

Table of ContentsGrape VarietiesWine Blends And RecipesTwo-Step CleaningWinemaking Equipment, Chemicals And Materials3 Important Chemicals TanninChris Hansen’s Malolactic Cultures Acidity: Red vs. WhiteStep-by-Step WinemakingWine from Grapes Yeast StarterWine from Juice Yeast StarterYeast NutrientsProcedure for Increasing Alcohol In A Low Sugar MustUses Of Potassium MetabisulfiteMalolactic FermentationMicroessentials Advanced White Winemaking ProfileAdvanced Red Winemaking Profile How to Prepare A New Oak BarrelPreparing Used BarrelsStoring A Used BarrelOak-MorWeights And MeasuresAcidity in WineHow to Test Using an Acid Test KitAdjusting Total AcidityBentoniteOne Word Wine DescriptionsMeasures And Conversions
468
1012131415161718202123242526283032333435363738383940

4 2015 HOME WINEMAKING GUIDE HOM
E WINEMAKER DEPOT
ynapmoC tnempiuqE orepsor
P a
Est. 1972
Alicante BouschetAlicante Bouschet is one of the few grape varieties that “squeezes” out red juice and is blended with other varieties to add color. Alicante grape is dark skinned with crimson pulp. Even though Alicante’s color is intense and dark, the wine has very little acid and is actually light in body. This variety is rich on its own, and can be added to any red wine for better balance, mouth feel, and color.
BarberaThis grape comes from the Piedmont region of Ita-ly. The wine it makes has a distinct character with very high acid.
Cabernet SauvignonCabernet Sauvignon is the most popular delicious varietal in the world! This great grape produces a wine of pronounced varietal flavor, with good color and excellent balance. It’s the primary grape of Bor-deaux style wines. It also blends well when added to Merlot and Carignane for a robust wine.
CarignaneCarignane produces one of the most natural, well balanced wines. Used in many blends to make easy drinking wines. It produces medium acidity and color.
GrenacheThis grape is used primarily to make Rosé. It is fruity and extensively blended with a coloring va-riety such as Alicante for the production of deep-er colored wines. This variety is lower in acid, but higher in sugar, and a small amount will strengthen a low alcohol wine.
Red Grape Varieties MerlotThe secondary grape of Bordeaux. Medium bodied and soft – it is a great noble variety that blends well with Cabernet, Tempranillo, or Alicante Bouschet. Blended with Grenache it makes a great Rosé.
Petite SirahThe wines this grape produces are of good qual-ity with a distinctive, recognizable flavor and mod-est acidity. Contrary to it’s name “Petite”, meaning little, this grape produces big, bold wines with tons of mouth feel and complexity. The wine is very dark and usually has an abundance of tannin. It is also excellent for blending.
Pinot NoirThe most noble of grapes! Pinot Noir grape is used to make the Burgundy wines of France. The wines made from this grape are of an excellent quality. Do NOT blend anything with Pinot as its delicate flavor will be obliterated.
SangioveseThe primary grape used in Tuscany to make “Chi-anti”. If you want the traditional Italian wine this is a great varietal. It is naturally high in acidity and has moderate to high tannin content and light color. Blending with a little cabernet, merlot or Syrah can make a typical “Super Tuscan” blend.
Shiraz/SyrahKnown in the USA as Syrah and Australia as Shiraz but it is the same grape! But, not to be confused with “Petite Sirah”. This grape is BIG and tannic. Syrah is very fruit forward and shows its best char-acteristics when made to drink right away.
TempranilloThis is a newcomer to the US wine making indus-try. This is the principle grape of Riojas. It makes a stunningly well balanced, deep colored and flavor-ful red wine
Ruby CabernetRuby Cabernet was developed in California grafting Carignane and Cabernet Sauvignon. It produces big, lush reds with complete and mature tannins, acids, and complexities.

52015 HOME WINEMAKING GUIDE HOM
E WINEMAKER DEPOT
ynapmoC tnempiuqE orepsor
P a
Est. 1972
ChardonnayThe Versatile white produces wines as distinct and crisp as Chablis or as typically rich as those buttery ones from California. The only difference is levels of oak, and malolactic fermentation. Add some Semillon for a complementary taste treat. From this variety, the famous white Burgundy wines of France are produced. It produces a dry, fruity, excellent wine.
Chenin BlancChenin Blanc is the most versatile white on the market. This variety can produce either a dry or natural sweet table wine. It is used to achieve qual-ity table wines and also as a varietal wine. Any style of white wine can be made from this grape. Added to other noble varieties this adds body, pH balance, and depth.
French ColombardThis is used to create a quality table wine. It is also used in blending because of its high acid content; Similar to Chenin Blanc. It is also easy to ferment.
White Grape Varieties
Malvasia Bianca This variety has great acid and is mild, yet tangy, with a “Muscat” flavor. It is used best when added to other whites to increase floral characteristics.
MuscatThis variety is the most popular white variety shipped to home winemakers. It can produce a dry white wine, sparkling wine, or sweet wine with the distinct Muscat aroma and flavor.
Pinot GrigioCalled the “Grey” white, this variety produces a very light style, easy to drink white with moderate acidity. It is great for summertime.
Sauvignon BlancA versatile variety with citrus aromas and pro-nounced grapefruit flavor. This makes a very fine, dry white wine of pro-nounced character. It can rival Chardonnay in pop-ularity. This variety is fabulous with fish when dry, or delightful when made slightly sweet. It is easy to make.
Thompson SeedlessThis variety is popular with the home winemaker. It makes a light, low acid white wine which is great for blending with other whites and reds for a Rosé – type wine.
ViognierThe grape with the best floral characteristics. Viognier is added to whites for enhanced aroma, and often is added to Syrah in small quantities to increase its fruitiness. Wines 100% Viognier tend to be yellow and lack acid. It blends well with Chenin Blanc.
Ugni Blanc – Saint Emelion – TrebbianoThis variety makes a very light, neutral tasting white wine. It is great for blending with red grapes to make a Rosé.
ZinfandelKnown as “Primitivo” in Italy but, upon it’s arrival in the United States it’s name was changed to Zinfandel. Today, Zinfandel is the most widely used grape in California.
It makes a wine that has fruity flavor with medium acidity and color. Zinfandel contains immense flavor, but is markedly low in acid. It needs a small amount of Barbera or Sangiovese to fully express its desirable flavor profiles. White Zinfandel grape does NOT exist! White zinfandel blush wine is made with zinfandel grapes but, not fermented on the skins.

6 2015 HOME WINEMAKING GUIDE HOM
E WINEMAKER DEPOT
ynapmoC tnempiuqE orepsor
P a
Est. 1972
Wine Blends & Recipes
How to BeginFirst: Choose the highest quality grapes from California. This gives your finished wine a chance to be superb.
Second: Blending several varieties of grapes will often give better “balance” and complex-ity to your wine.
There are many “traditional” formulas for grape blending—these are called the “classic” blends.
Other blends can be enjoyed according to “individual tastes” and preferences. Many of these blends have been passed down from generation-to-generation. These are called the home winemaker’s blends.
Wine TermsBlend: A mixture of at least two different grapes where neither variety constitutes 75% or more of the wine.
Bordeaux: A region of France associated with classical cabernet Sauvignon that often includes Merlot, Cabernet Franc, Petite Ver-dot, and Malbec.
Burgundy: The area of France known for producing Pinot Noir and Chardonnay. In America, Burgundy is the term for any sort of hearty table wine blend.
Claret: Outdated British term for a dry red wine that has less color and body than most red wines – but is not a Rosé.
Chianti: An Italian wine made from Sangio-vese. In America, it has come to describe a fruity, easy drinking red wine.

72015 HOME WINEMAKING GUIDE HOM
E WINEMAKER DEPOT
ynapmoC tnempiuqE orepsor
P a
Est. 1972
Classic Full-Bodied Red Blends75% Cabernet Sauvignon • 25% Merlot
75% Cabernet Sauvignon • 10% Merlot • 5% Cabernet Franc • 5% Petite Verdot • Malbec 5%
50% Petite Sirah • 50% Syrah
80% Petite Sirah • 20% Zinfandel
75% Petite Sirah • 15% Zinfandel • 5% Petite Verdot • 5% Malbec
25% Petite Sirah • 25% Zinfandel • 25% Alicante Bouschet • 25% Carignane
60% Ruby Cabernet • 20% Carignane • 20% Zinfandel
50% Alicante Bouschet • 25% Petite Sirah • 25% Barbera
33% Syrah • 33% Tempranillo • 33% Zinfandel
Light Reds & Homemaker,s Blends
60% Sangiovese • 20% Cabernet Sauvignon • 20% Merlot
25% Grenache • 25% Zinfandel • 25% Alicante Bouschet • 25% Muscat
40% Grenache • 40% Sangiovese • 20% Zinfandel
50% Zinfandel • 50% Barbera
50% Alicante Bouschet • 50% Grenache
15% Grenache • 15% Alicante Bouschet • 35% Carignane • 35% Zinfandel
70% Merlot • 25% Cabernet Sauvignon • 5% Grenache
Rosé BlendsYou can blend any combination of the following grape varieties to achieve a Rosé type wine.
30% Grenache • 30% Zinfandel • 15% Merlot • 15% Barbera • 10% Muscat
Homemaker,s White Blends
40% Chenin Blanc • 50% Sauvignon Blanc • 10% Malvasia
50% Chenin Blanc • 50% French Colombard
70% Chardonnay • 20% French Colombard • 10% Viognier
33% Pinot Grigio • 33% Muscat Canelli • 33% French Colombard
50% Thompson Seedless (Chablis) • 50% Muscat

8 2015 HOME WINEMAKING GUIDE HOM
E WINEMAKER DEPOT
ynapmoC tnempiuqE orepsor
P a
Est. 1972
Soda ash is alkaline or a base and a very powerful cleaning agent. It is also known as “Sal Soda” and much like ordinary soap, it tends to be slippery. To remove this slipperiness after use, soda ash needs to be “neutralized” with an acid.
Step 1: Measure 4 tablespoons or 1/4 cup of Soda Ash and dissolve in 1 gallon of HOT water.
Brush this solution on all your equipment such as a press and crusher to remove stains and mold. It also removes the “stickiness” from fer-mentation tubs and stainless steel tanks.
You can also funnel the same solution into your carboys, bottles and containers to remove built up sediment without having to mix a new batch. After fi lling, shake and brush the solution through all these containers until they sparkle clean.
Discard the solution.Rinse equipment thoroughly with plain water.
Two Step Cleaning
Soda Ash(Step 1)
Citric Acid(Step 2)
Citric acid to neutralize soda ash
Step 2: Follow the exact same instructions for soda ash.
Measure 4 tablespoons or 1/4 cup of Citric Acid and dissolve in 1 gallon of hot water. Brush this solution on all your equipment to neutralize or remove the slipperiness of soda ash. Fill your carboys and bottles. Brush and shake the solu-tion through these containers.
Discard the SolutionRinse with plain water. Drain and store.

92015 HOME WINEMAKING GUIDE HOM
E WINEMAKER DEPOT
ynapmoC tnempiuqE orepsor
P a
Est. 1972

10 2015 HOME WINEMAKING GUIDE HOM
E WINEMAKER DEPOT
ynapmoC tnempiuqE orepsor
P a
Est. 1972
EquipmentHydrometer This instrument is used to measure the Brix or Balling (Sugar) before fermentation to get the “potential” alcohol of the finished wine, and to know when to press the grapes. EXAMPLE: If the hydrometer reads: 25 Balling or Brix, the potential alcohol of the finished wine would be approximately 14. 6 to 14.9%. Press the wine when the hydrometer reads: -1% or -2%.
Airlocks & Bungs The airlock is a plastic tube that is filled with water and potassium metabisulfite solution. The “sulfite” keeps the water sterile. The cor-rect size rubber bung is attached to a carboy or demijohn and the airlock inserted into the bung hole. This allows gas to escape from the fermenting wine juice or during the secondary fermentation (Malolactic fermentation).
Carboys/Glass Bottles Of Varying Sizes Once the wine has finished fermentation it must be siphoned or poured to within 1/8 of an inch to the top of the carboys or glass bottles. At-tach bungs and airlocks. DO NOT LEAVE ANY AIR-SPACE IN THE CARBOY or the wine will develop an infectious film on the surface. If the airlock and bung “pop” off the carboy, tape the bung securely to the carboy. Punch a hole in the tape with a knife and insert the airlock.
Barrel Full bodied wines such as Cabernet, Merlot, Petite Sirah, Malbec, and Shiraz, can be barrel aged. Lighter, fruitier wines should be aged in glass. Ask about barrel availability, preparation, and maintenance.
Winemaking Equipment, Chemicals & Materials
Food Grade Bucket Purchase several 2 to 5 gallon sized food grade buckets. Use it to hold juice or wine, to prepare a yeast starter, during pressing and pouring into carboys or barrels, and transporting.
Food Grade Fermentation Tub & Lid Wine and juice should only be made and stored in “Food Grade” containers. Crush the grapes (Now called “must”) in a fermentation tub and cover with a lid. Then at various times; prepare the “must” with the proper dose of Potassium Metabisulfite and enzymes at the start. Later, add yeast, nutrients, and tannin.
Crusher Or Crusher De StemmerA hand cranked or electric crusher is set on top of a fermentation tub. A crate of grapes is opened. The grapes are placed into the crusher’s “hopper”. The winemaker pierces the grapes by turning the hand crank or switching on the electric start button. An electric crusher-de stemmer pierces the grapes and “de-stems” at the same time.
Stainless Steel Plunger Or Wood Paddle For Punching Down Grape CapOnce the grapes have been crushed into the fermentation tub, and the juice begins to show visible signs of bubbling (Usually after one or two days after yeast addition) use a stainless steel plunger or an unfinished wood paddle to “punch-down-and-stir” the grapes at least twice daily. Punch down 3 or 4 times if the tempera-ture in the room is very warm or hot. This action distributes heat, yeast, and wets the grapes. After this punching down, wash the plunger or paddle with plain hot water and wipe dry with paper towels. Then take paper towels and disin-fect the plunger with a solution of water and me-tabisulfite. Rinse off the metabisulfite between punch downs. Never skip a punch down.

112015 HOME WINEMAKING GUIDE HOM
E WINEMAKER DEPOT
ynapmoC tnempiuqE orepsor
P a
Est. 1972
Basket PressA basket press is used to press the juice from the grapes after fermentation is complete-that is when the sugar in the grapes registers -1% or -2% on the hydrometer. Assemble the bas-ket press. Place a food grade bucket under the basket press to catch the wine. Then scoop the grapes and juice out of the fermenting tub and into the basket press. Crisscross wood blocks on top of the grapes. Ratchet down the wood blocks, pressing the wine into a food grade bucket that has been placed under the basket press. After the bucket is filled with wine, slide a new bucket in place of the filled one. Then pour the wine from the filled bucket into car-boys, demijohns or barrels. Repeat this proce-dure until all the wine has been pressed out of the grapes from the fermenting tub.
Six To Eight Feet Of Siphon Tubing Plus 1/2 Inch Round Dowel Sticks And Butcher’s Twine For Racking Or A Commercial Siphon ApparatusAfter pressing the grapes and cold storing the fin-ished wine for 3 days, the wine must be racked. You rack or siphon the wine off the thick sediment that lies at the bottom of your storage vessels and into empty vessels. This can be done with a homemade apparatus or a commercial one. This is done by first examining your carboys. The thick sediment or dirt in red wine will be light-er and pinker than the wine. Attach the six-foot long tubing to a 3 foot long dowel stick by ty-ing with butcher’s twine. Be sure to tie the tubing 2-3 inches above the sediment so as not to carry over any dirt into the empty vessel. If you are si-phoning carboys, arrange to have a full carboy of wine sit on a table and an empty carboy below to catch the wine as it is being siphoned. Top up the wine in all your carboys with your own wine or a similar store bought wine. Once you have finished racking attach bungs and airlocks. Wash out the sediment from your vessels with a bottle brush, hot water, and the proper chemicals. Then rinse with plain water, air dry, and store carboys until the next racking.
Bottle Brushes Of Varying SizesUse a large bottle brush to scrape and remove sediment and wine stains from your carboys and demijohns. Use a small brush to clean your gal-lons and wine bottles. All of your containers should sparkle, clean and sterile, before and after use.
Wine Thief Or Dripless BasterUse a Wine Thief or a Dripless baster for drawing wine from carboys and barrels for tasting and test-ing. After, top up containers with a similar wine.
Funnels Of Varying SizesTo pour wine from one vessel to another, use large, medium, and small size funnels to fit car-boys, barrels, and regular wine bottles.
Corks – Size # 9Use a #9 cork for bottling your wine temporarily or permanently. Stand wine bottles upright for 1–2 weeks to allow wine gases to escape before lay-ing them on their side. Replace corks that leak.
Floor CorkerUse a heavy duty floor corker to maximize the force needed to cork your wine bottles. NOTE: Hand held corkers lack efficiency
Bottle Washer - PlungerUse a bottle washer – plunger to rinse or steril-ize bottles before filling with wine. The washer is placed in the sink. The basin is filled with a solu-tion of hot water and a tablespoon of potassium metabisulfite. A bottle is then placed over the stem of the washer and “plunged” down several times to rinse. When all wine bottles have been steril-ized, use running cold water from the sink to con-tinuously fill the basin. Plunge each bottle several times to remove the metabisulfite solution.
Bottle Rack For Draining & Drying BottlesAfter the wine bottles have been sterilized and rinsed, place each one on a “stem” of the drying rack. Each section of the drying rack comes with 9 “stems” and can be screwed onto more sec-tions if needed. The drying rack holds between 9 and 81 bottles.
Materials

12 2015 HOME WINEMAKING GUIDE HOM
E WINEMAKER DEPOT
ynapmoC tnempiuqE orepsor
P a
Est. 1972
1. Soda Ash: To Clean EquipmentSoda ash is alkaline, or a base, like plain soap. It is a powerful cleaner that removes grape stains, mold, and sediment that clings to glass. It can also be used to remove sedi-ments and “muck” from barrels.
General Use: To clean one or more carboys or demijohns, dissolve 4 tablespoons or 1/4 cup of soda ash in 1 gallon of hot water. Funnel the solution into a carboy or demijohn. Shake and “Slosh” the solution, and then scrape the car-boy inside with a large bottle brush to loosen sediment and remove wine stains. Pour the same solution into each carboy and repeat. Rinse each carboy with plain water several times and drain. (Caution: Soda ash is “slip-pery” so handle carboys carefully). To remove this slipperiness, follow up with a citric acid treatment which “Neutralizes” the soda ash.
2. Citric Acid: To Remove Slipperiness Or Neutralize Soda Ash After CleaningUse citric acid to wash away the “slipperiness” or to neutralize bases such as soda ash.
General Use: Dissolve 4 tablespoons or 1/4 cup of citric acid in 1 gallon of hot water. Funnel the solution into a carboy or demijohn. Shake and “Slosh” the solution, then funnel the same solution into each carboy and repeat. Rinse car-boys with plain water several times and drain.
3. Potassium MetabisulfitePotassium metabisulfite or “meta” has 4 uses: (1) sterilizing equipment (2) filling air-locks (3) pre-fermentation dose with crushed grapes or juice (4) preserve wine.
Prepare Potassium metabisulfite after Soda ash and citric acid treatment to sterilize equipment.
General Use: 1. To sterilize or kill bacteria. Add two ta-blespoons of “meta” to 1 gallon of hot water. Funnel this solution through all your glass bot-tles, carboys, demijohns, fermentation tubs, crusher, press, and other wine making equip-ment. Then rinse all equipment thoroughly with plain water before crushing grapes or filling containers with wine or juice.
NOTE: If storing containers and equipment after wine making, it is not necessary to rinse until the following year. This will keep equip-ment sterile throughout the off-season. But, repeat “meta” treatment at the start of the new harvest – then rinse.
2. To fill airlocks. Prepare 1-2 tsp. in a quart of hot water. Use this solution to fill airlocks to the “fill” line. Cap the solution and save as needed.
3. Pre-fermentation dose. Use 1/2 teaspoon per 100 pounds of grapes dissolved in 3-4 cups of hot water. Stir this solution into the tub of grapes to kill mold and bacteria.
Example: 25 cases of grapes x 36 lbs. = 900 lbs. or 9.00 Hundreds x 1/2 = 4.5 teaspoons. A small quantity of “meta” goes a long way to-ward killing bacteria before adding yeast.
4. To preserve wine. After fermentation, “Cold” store the wine for 3 days then “rack” off the sediment. Stir in 1/4 teaspoon of “meta” in a cup of wine for every 5 gallons. Repeat for each racking.
Example: Using a 30 gallon barrelDivide 30 gal. by 5=6 (six) @ 5 gal. each. Multiply 6 x 1/4 teaspoon of “meta” = 1 1/2 teaspoons for 30 gallons.
3 Important Chemicals

132015 HOME WINEMAKING GUIDE HOM
E WINEMAKER DEPOT
ynapmoC tnempiuqE orepsor
P a
Est. 1972
Materials Cont. Red Star Yeast For Red Wine Prepare 1 (5 gram) packet of yeast for every 2 cases of grapes, or for every 5 gallons of wine.Example: Prepare 8 packets of yeast for 16 cases of grapes to be crushed. Each packet of yeast requires 2 ounces of warm water.
8 yeast x 2 ounces of warm water = 16 ounces or 2 cups of warm water; Add 16 ounces or 2 cups of warm water into a clean bowl - then empty 8 yeast packets onto the water and do not stir! Cover the bowl and wait 15–20 minutes for the yeast to absorb most of the water.
Meanwhile, fill a “food grade” bucket 3/4 full with crushed grapes and juice; this is the “pied de cu-vee”. Cover the pied de cuvee and keep warm. When the yeast is ready, about 20 minutes, stir the mix into the “pied de cuvee”. Wait until the pied de cuvee is fermenting, (no more than 4 hours) and add to the total amount of crushed grapes.
Champagne Yeast For White WineCrush or press white wine grapes and collect the juice. Prepare 1 (5 gram) packet of yeast for every 5 gallons as in the above procedure, except only use grape juice to fill an empty gallon about 1/2 full. This grape juice becomes the “pied de Cu-vee” for white wine. When this juice or the “pied de cuvee” begins fermenting vigorously, distribute evenly among the carboys and demijohns.
Fermaid: A Primary NutrientFermaid blends folic acid, thiamine and magne-sium, along with other vitamins and nutrients to aid the working yeast in converting sugar to alcohol and carbon dioxide. After 2 or 3 days of fermenta-tion, add a level 1/4 teaspoon of “Fermaid Nutrient” (Directly - no dissolving) for every gallon of wine.
Example: 24 gallons of wine x 1/4 teaspoon of fer-maid = 6.0 teaspoons or 2 tablespoons. (NOTE: 3 teaspoons = 1 tablespoon)Another level 1/4 teaspoon per gallon of fermaid may be added toward the end at about 5% to 2% on your hydrometer to complete fermentation.
Tannin
Adding Tannin to your wine helps as an anti-oxidant so wine keeps its color dur-ing aging. Tannin also provides structure and increased “fullness” in the mouth when drinking wine. General Use: After 3–4 days of fermen-tation, add 3-5 grams of a powdered tannin dissolved in one or two cups of hot water per hectoliter of juice.
Example: 1 hectoliter (hl) = 26.4 gallons1 case of grapes yields approximately 2.5 gallons of wine 32 cases of grapes x 2.5 gallons of wine = 80 gallons of wine80 gallons of wine divided by 26.4 = 3.03 hectoliters3.03 x 5 grams of tannin = 15 grams tan-nin total
You can also add another dose of tannin at the end of fermentation. This is done when the “must” is not producing any significant carbon dioxide to raise the grape cap above the wine. This dose is “sprinkled” on top of the grapes directly and left to sit without stirring just hours before pressing. This addition of tannin serves as an “anti-oxidant” to protect the wine and prevent it from losing color when the sugar reads -1% or -2% on your hydrometer.

14 2015 HOME WINEMAKING GUIDE HOM
E WINEMAKER DEPOT
ynapmoC tnempiuqE orepsor
P a
Est. 1972
Chris Hansen£s Malolactic CulturesFor Secondary Fermentation
When and How to Apply to Wine: After your wine has fermented to “dryness” minus one (-1) or minus two (-2) on your hydrometer, and been pressed, cold store the wine for 3 days and then rack off the sediment.
1) First prepare and add “Microessentials” to the entire lot of wine. (See “Microessentials” )
2) Remove Chris Hansen’s culture from the freezer or refrigerator. Bring to room temper-ature for 15 – 20 minutes.
3) Cut open the package and pour directly into the wine and stir immediately without al-lowing the culture to be exposed to air.
4) Stir the wine well every 5 minutes for 25 minutes.
5) Store the wine between 68 and 70 degrees until it starts to ferment. Then lower the tem-perature to 68 degrees.
This culture converts malic acid, a harsh acid in young wines, to lactic acid, a milder acid. This “secondary” fermentation adds smooth-ness and gives more of a vintage quality or characteristic to your wine.
The culture must be kept in the freezer until ready for use; just after fermentation is com-plete at -1% or -2%. It is brought to room temperature for 10–15 minutes, and then stirred directly into the wine.
NOTE: One packet contains 2 grams of cul-ture and ferments 65 gallons of wine and should not be divided. If fermenting more than 65 gallons, use two packages. So it is best to add the culture when the wine is all together in one “lot” or one container. The wine is then stirred every 5 minutes for approximately 25 minutes. The wine can then be divided and funneled into carboys, demi-johns and barrels with airlocks attached. It is then stored at a temperature of between 65 and 70 degrees to encourage the second-ary fermentation. Once bubbling and other
signs of the secondary fermentation are evident, the temperature can be lowered to 65 degrees. This process may continue for 2 weeks to several months or more. A few ounces of wine may be brought to the lab for testing to ensure that the secondary fermen-tation has been completed.

152015 HOME WINEMAKING GUIDE HOM
E WINEMAKER DEPOT
ynapmoC tnempiuqE orepsor
P a
Est. 1972
Example: 60 gallons of wine x 1/4 teaspoon = 15 teaspoons or 5 tablespoons. Dissolve in 1 cup of warm water and 1 cup of wine.
Tartaric AcidTartaric acid is used to in-crease the total acidity of the wine. Without the proper amount of acid wine tastes “flat” and uninspiring.
When to Add Tartaric Acid:Once the primary fermentation is complete and the wine measures a minus one (- 1) or a minus two/three (-2 or -3) on your hydrometer, bring in 1/2 cup of wine to the lab for testing.
Dap: A Secondary NutrientDAP is short for diammonium phosphate or nitrogen. This may be added to the wine juice or grapes toward the end of fer-mentation, if the sugar reading appears to be “stuck” and not moving down from +3% to +2% or lower on your hydrometer. The addition of DAP should give
the working yeast a “boost” so as to complete fermentation at -1% or -2%.
General Use: Stir in a level 1/4 teaspoon of DAP per gallon directly into the wine or grapes. (NOTE: An alternate to DAP is to add fermaid).
EnzymeThe addition of an enzyme after the crush will “extract” the maximum juice yield from the grapes. The enzyme also aids in extracting greater color from the grapes.
General Use: Dissolve 2–3 grams of a powdered enzyme in a cup or two of cold water per 100 kg and stir into the crushed grapes. (NOTE: 1 kg = 2.20 lbs)
Example: 34 cases of grapes x 36 pounds = 1,224 pounds of grapes divided by 2.20 lbs or 1 kg = 5.5 (100 kg) 5.5 (100 kg) x 3 grams of en-zyme = 16.5 grams of total enzyme.
Microessentials: Used Together With Chris Hansen’s Malolactic CultureMicroessentials are food in powder form to be used with the Chris Hansen malolactic cultures to help stimulate the Malolactic or secondary fermentation.
How to prepare: To treat 60 gallons of wine, pre-pare 1/4 teaspoon of microessentials in a bowl for each gallon. Add 1 cup of warm water and stir. Then add 1 cup of your wine to the mix and stir until completely dissolved. Pour the mix into the 60 gallons and stir well. Add Chris Hansen’s Malolactic culture.
Materials Cont.
Technically, total acidity for red wine should be in a range of .55 to .65% - Expressed in grams: 5.5 grams per liter to 6.5 grams per liter. However, even if technically correct within this range, tartaric acid can add a “sharp” taste to your wine. To avoid this, and to attain a more “full” bodied wine, shoot for the low end of the scale: .50 to 5.5% total acidity or 5.0 to 5.5 grams per liter.
The range of total acidity for white wine should be between .65 to .75% - Expressed in grams: 6.5 to 7.5 grams per liter. Howev-er, the same holds true when adding tartaric acid. Shoot for the low end of the scale: .65 to .70% total acidity or 6.5 to .70 grams per liter to enjoy a more full bodied and fresh tasting white wine.
AcidityRed vs. White

16 2015 HOME WINEMAKING GUIDE HOM
E WINEMAKER DEPOT
ynapmoC tnempiuqE orepsor
P a
Est. 1972
1. If fermentation tub is new, sterilize with a clean cloth and 1/4 cup of Potassium Metabisulfite mixed with hot water. Rinse thoroughly.
2. Set crusher-de-stemmer on tub in a room be-tween 68-72 degrees. Crush and de-stem grapes into tub. Cover tub with a lid. The crushed grape is now called “Must.”
3. Fill a “Food Grade” bucket with some of the crushed grape and juice—about 2-3 gallons. Cover the bucket with a towel and place in a warm room or a sink. Run 3-4 inches of hot wa-ter around the bucket to warm the juice. *Follow directions for preparing a yeast starter.
4. Siphon and strain about a cup of the grape juice. Fill the hydrometer jar 3/4 full. Place the hy-drometer in the juice and take a “Balling or Brix” reading=the sugar content of the grape juice. Read the “Potential Alcohol” side of the hydrom-eter. This tells you the approximate alcohol of the wine if all the sugar is fermented to dryness.
5. Go to large fermentation tub, and into the must, add Potassium Metabisulfite at the rate of 1/2 tea-spoon per 100 pounds of grapes dissolved in 2-3 cups of warm water to stun the wild yeast and kill bacteria. Stir the must thoroughly.
Note: Ask about adding enzymes on day one for greater color and juice extraction.
6. Take an acid test or bring a small “Plastic” bot-tle or container filled with a cup of strained juice to the winery for testing. Record the results. Do not adjust acidity until the end of fermentation. If the wine tastes flat or bitter, take another acid test. Ask the winemaker to help with the adjustment. A good, drinkable red wine’s acid range is about .50% to .60%. A good white wine’s range is about .65% - to .70% Note: Adjusting acid reduces bit-terness and adds freshness to the wine.
7. After three days of fermentation, stir “Fermaid” yeast nutrient into the fermentation tub at the rate of 1/4 teaspoon per gallon to help yeast ferment all the sugar and to avoid fusel oil forming during fermentation. 8. Check the bucket of juice and grapes that are warming after one hour for signs of fermen-tation—visible bubbling on the surface of the grapes. Stir with a stainless steel spoon and cover with a towel. After the second hour, if there are large bubbles, stir again, and then add the bucket of juice and grapes to the large fer-mentation tub. Do not wait more than 4 hours before adding the bucket of yeast starter to the large fermentation tub.
Step-by-Step Winemaking

172015 HOME WINEMAKING GUIDE HOM
E WINEMAKER DEPOT
ynapmoC tnempiuqE orepsor
P a
Est. 1972
Wine from Grapes Yeast Starter1
2
3
4
5
6
WARM 3-4 gal. of grape juice and grapes in a bucket or large pot
COVER with a kitchen towel
After 5 Minutes
After 15 Minutes
Fill a medium pot with 16 oz. of warm water
CUT OPEN all bags of yeast
Sprinkle into potDO NOT STIR!
ADD 10-16 more ounces of warm water to pot
STIR yeast mix
POUR into bucket of warm juice and grapes
COVER and STIR every hour for 3 hours
[HYDRATION]
[EXPANSION]
COVER pot with towel
COVER pot with towel
POUR juice and grapes into a large fermentation tub that is filled with grapes.
Example: 16 Cases/40 Gal. = 8 Bags of Yeast8x2 (ounces warm water)=16 oz./2 Cups
18 2015 HOME WINEMAKING GUIDE HOM
E WINEMAKER DEPOT
ynapmoC tnempiuqE orepsor
P a
Est. 1972
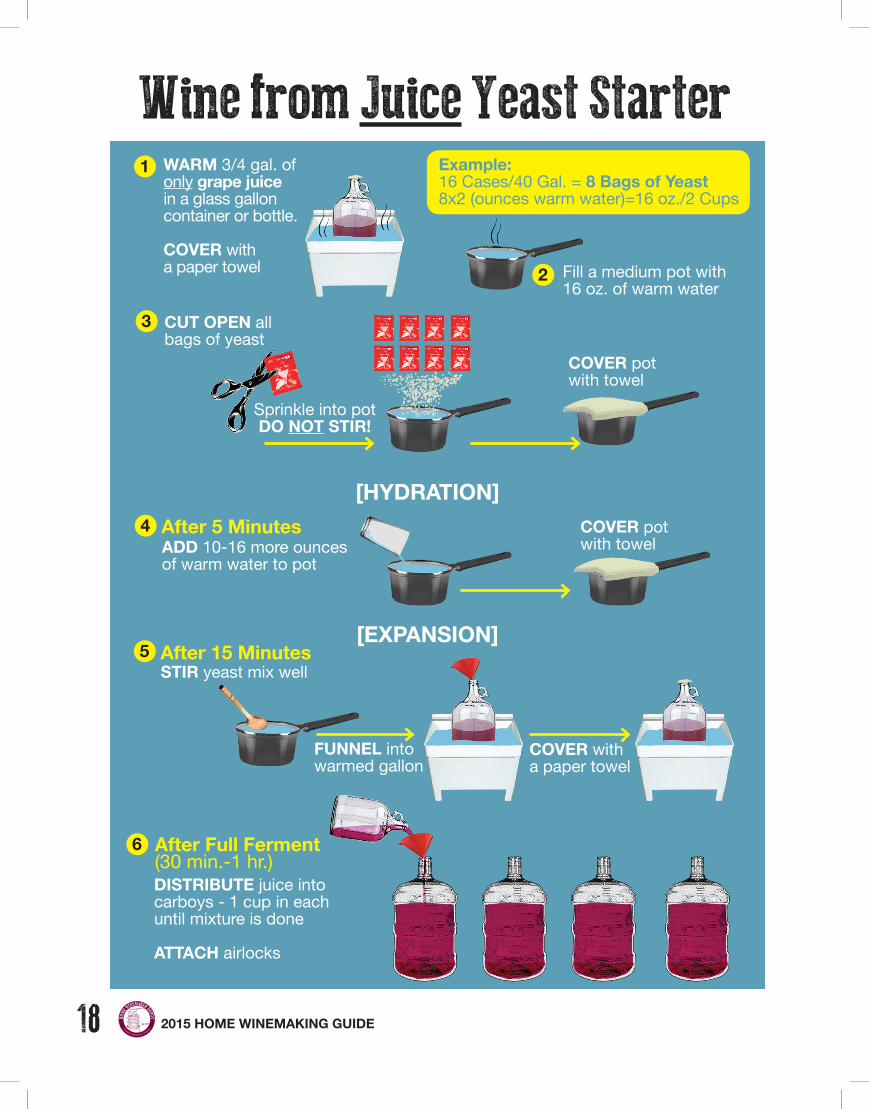
Wine from Juice Yeast Starter1
2
3
4
5
6
WARM 3/4 gal. of only grape juice in a glass gallon container or bottle.
COVER with a paper towel
After 5 Minutes
After 15 Minutes
After Full Ferment (30 min.-1 hr.)
Fill a medium pot with 16 oz. of warm water
CUT OPEN all bags of yeast
Sprinkle into potDO NOT STIR!
ADD 10-16 more ounces of warm water to pot
STIR yeast mix well
FUNNEL into warmed gallon
COVER with a paper towel
[HYDRATION]
[EXPANSION]
Example: 16 Cases/40 Gal. = 8 Bags of Yeast8x2 (ounces warm water)=16 oz./2 Cups
DISTRIBUTE juice into carboys - 1 cup in each until mixture is done
ATTACH airlocks
COVER pot with towel
COVER pot with towel

192015 HOME WINEMAKING GUIDE HOM
E WINEMAKER DEPOT
ynapmoC tnempiuqE orepsor
P a
Est. 1972
9. Purchase a stainless-steel “Punch-Down” paddle, and twice a day, punch down the grape “Cap.” Note: You can purchase a six-foot long unfinished dowel stick at the local hardware store like the one you would hang your coat on. Saw off about a foot for easier handling. Cleanse the punch-down paddle after each use with a sterile solution of metabisulfite. Rinse paddle with plain water between “Punch-Downs.” Note: Ask about adding tannin.
10. After 5-6 days of fermentation, take another sugar reading with the hydrometer. If Balling or Brix is anywhere from 8% to 3%, add 1/4 teaspoon of Fermaid nutrient per potential gallon. This will give the yeast a “Boost” to finish the fermentation. Af-ter a day or two, take another reading. If the % of sugar remaining is 0% or -1% or lower, do two things: (1) ask about doing a “Malolactic” or sec-ondary fermentation (2) skip one “Punch-Down” cycle and press grapes. Funnel wine into carboys (5 gallon glass containers) and/or demijohns (14.3 gallon glass container) or a sound, sterilized, wa-ter-proof barrel.
11. After Pressing and combining “Free-Run” juice with the pressed juice in the carboys or demijohns, attach rubber bungs and plastic air-locks filled with metabisulfite solution.
Note: Follow direction sheet for using meta-bisulfite. Top up the wine right to the bung.
Do not leave air-space. Air will ruin the wine be-cause it produces aerobic bacteria in the form of a white film on the surface. This film will grow and permeate the carboys making the wine undrink-able. Worse, air-space can produce vinegar! So, when the wine is settling and air-space occurs, top up each carboy with a similar wine or a similar store bought brand whenever necessary.
12. Keep the wine in a warm room after pressing: 65-68 degrees. Note: Speak to the winery about
the naturally occurring secondary fermentation. Observe the wine for a few days to see if it is still bubbling or fermenting. If there are no vis-ible signs of bubbling, move the wine to a cold room or garage to allow sediment-dirt to drop to the bottom of the glass carboys.
Do not move the wine to a detached garage with-out heat or another area where the temperature may drop below 24 degrees in the winter – wine freezes under 24 degrees! After this “Chilling” period, about 3-4 days, “Rack” or “Siphon” the wine off the sediment and into empty carboys.
Note: Purchase a wine siphoning kit. Draw off about a cup of wine and dissolve 1/4 teaspoon of metabisulfite into the cup. Stir the cup of wine thoroughly, then add to one 5 - gallon carboy. Repeat for each separate carboy by following the metabisulfite instruction sheet.
Place the wine in the coldest place possible for the winter – remember, not a place where the temperature may drop below 24 degrees. This is called “Cold Stabilizing the wine” and helps to clear the wine by allowing more sediment and acid to form a deposit at the bottom of the carboy. Rack or siphon the wine again after one month and add another 1/4 teaspoon of meta-bisulfite to each 5 gallon carboy.
13. Do not bottle the wine in the spring. Wait one full year before bottling. The secondary fermenta-tion, a.k.a., the malolactic fermentation, may still be occuring. This bubbling fermentation happens when the temperature in the spring rises above 60 degrees along with the temperature of the wine. This increase in temperature “Triggers” the malo-lactic bacterium to convert the wine from malic to lactic acid. If possible, bring the wine to a place where the temperature can reach between 65 to 70 degrees. This will speed up the process. This “Acid” fermentation improves the flavor of the wine and gives it a smoother, more mature taste. If the wine has been kept below 60 degrees and you bottle, you run the risk of the corks popping out or the bottles exploding!
Winemaking Cont.
20 2015 HOME WINEMAKING GUIDE HOM
E WINEMAKER DEPOT
ynapmoC tnempiuqE orepsor
P a
Est. 1972
Yeast Nutrients
This process may take several weeks or longer. But when there are no visible signs of any more bubbling, remove 2-3 cups of wine from each carboy, then take a 1/4 inch dowel stick and stir up the bottom. If the wine foams, you are releasing trapped carbon dioxide. In addition, the malic bacterium may still be active. Stir the wine every few minutes for 20 minutes. Replace the 2-3 cups of wine and observe. If the wine continues to bubble, repeat the stirring at least once a day until fermentation stops. You can also bring in a small sample for our winemaker who will do a Chromatography test and let you know if the wine has finished bubbling.
Leave the wine in a cool place for a few days after this fermentation is complete, then rack/siphon, add 1/4 teaspoon of metabisulfite for every 5 gallons, and age the wine.
14. It is important to permanently store your wine in a cool room between 55-65 degrees for red and 43-55 for white wine.
15. Most varietal red wines like Cabernet, Merlot, Syrah, Petite Sirah, need time to be drinkable. Be patient and give these wines a chance to de-velop in the bottle. Note: Bottle after 1 year. You may find that once your wine has been bottled, it may actually taste “thin” with flavor loss. Do not be concerned, because this is called “Bot-tle Shock” and bottle shock usually takes 2-4 months to disappear, after which the wine will improve dramatically in bouquet and taste.
16. Final Note: Remember to sterilize all equip-ment prior to, and after use for storage.There are 3 main chemicals to use:
Step # 1: Soda Ash – this removes stains and dis-coloration (wine never comes in contact with soda ash!) Generally 1/4 cup dissolved in 1 gallon of hot water is enough to clean all your equipment.
Step # 2: Citric Acid – Use after soda ash treat-ment because citric acid “neutralizes” soda ash which has a tendency to be slippery – follow the instruction sheet on cleaning.
Step # 3: Potassium Metabisulfite – Mix 2 table-spoons of the metabisulfite in a gallon of hot water and run it over and through all your jugs, bottles, jars, carboys and equipment. If storing this equip-ment after winemaking season, do not rinse. Next season, on “winemaking day” rinse all equipment you plan on using, and then apply another dose of metabisulfite and hot water. Rinse thoroughly with plain water and make your wine. Follow instruc-tion sheet for metabisulfite use.
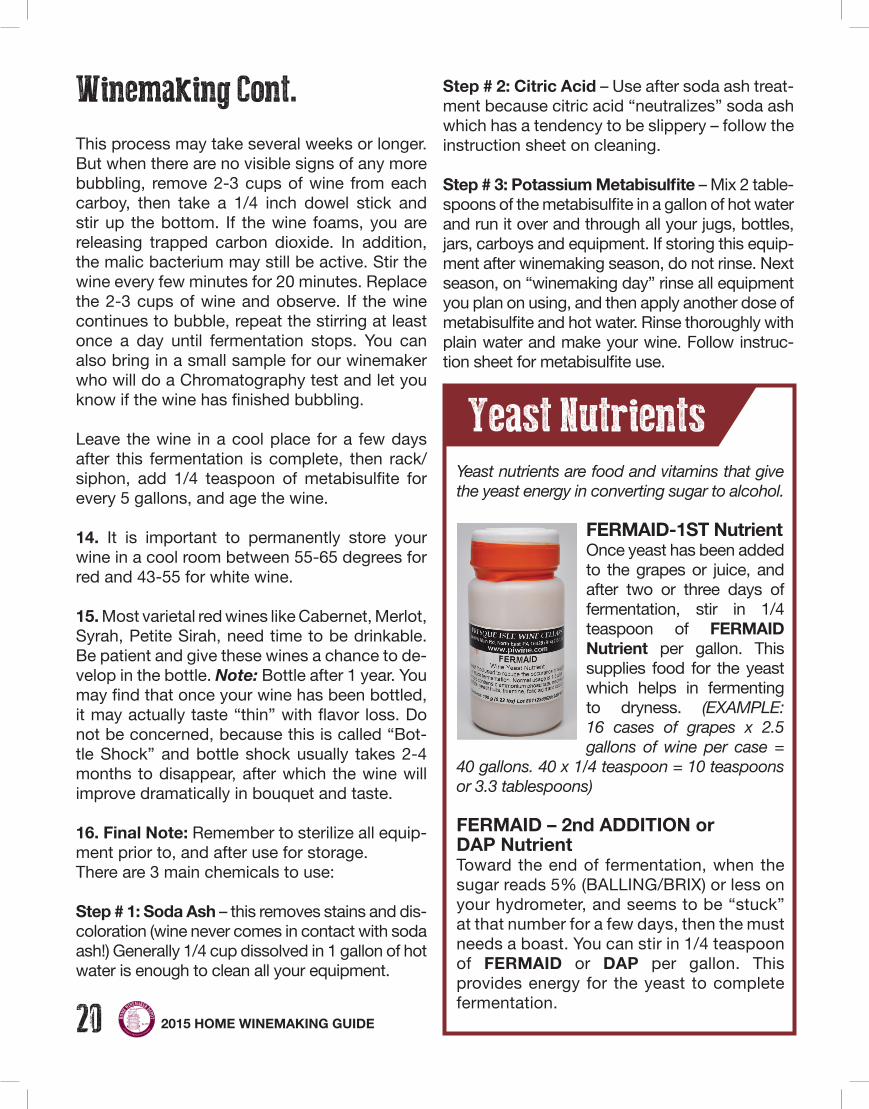
Yeast nutrients are food and vitamins that give the yeast energy in converting sugar to alcohol.
FERMAID-1ST NutrientOnce yeast has been added to the grapes or juice, and after two or three days of fermentation, stir in 1/4 teaspoon of FERMAID Nutrient per gallon. This supplies food for the yeast which helps in fermenting to dryness. (EXAMPLE: 16 cases of grapes x 2.5 gallons of wine per case =
40 gallons. 40 x 1/4 teaspoon = 10 teaspoons or 3.3 tablespoons)
FERMAID – 2nd ADDITION or DAP NutrientToward the end of fermentation, when the sugar reads 5% (BALLING/BRIX) or less on your hydrometer, and seems to be “stuck” at that number for a few days, then the must needs a boast. You can stir in 1/4 teaspoon of FERMAID or DAP per gallon. This provides energy for the yeast to complete fermentation.
Winemaking Cont.

212015 HOME WINEMAKING GUIDE HOM
E WINEMAKER DEPOT
ynapmoC tnempiuqE orepsor
P a
Est. 1972
Example 1:Red Wine
Given: You want to ferment 12 crates of crushed grapes (30 gallons).
You measured 17 Brix or Balling on your hy-drometer. This equals about 1.3 pounds of sug-ar per gallon of grape juice.
Goal: You want to achieve close to 13.5% alco-hol. At 17 Brix or Balling there is only about 1.3 pounds of sugar per gallon of grapes before fer-mentation. You want to bring up the sugar level to 1.90 pounds per gallon.
Procedure For Increasing Alcohol In A Low Sugar Must
Your hydrometer reads 17 Brix or Balling before fermenting 12 crates of crushed grapes. This means your finished alcohol will be about 9%. This percent is too low for any finished wine to be stable enough to protect against bacteria and spoilage organisms. The ideal alcohol for a finished red wine should fall between 12.5% and 14.7%.
Here’s how to achieve a higher level alcohol:What to do: Subtract 1.3 pounds of sugar per gallon from your goal of 1.90 pounds of sugar per gallon.
Increase Alcohol/Add Sugar1.90 – 1.3 = .6
This .6 represents the amount of “Domino” white sugar you need to add per gallon of grapes to achieve 13.5% alcohol.
Multiply .6 x 30 (gallons) = 18.0
This 18.0 represents 18 pounds of sugar. This is the amount of “Domino” white sugar you need to add to your grapes to achieve your goal of 13.5% alcohol in your finished red wine.

22 2015 HOME WINEMAKING GUIDE HOM
E WINEMAKER DEPOT
ynapmoC tnempiuqE orepsor
P a
Est. 1972
Example 2:Red Wine
Given: You want to ferment 12 crates of crushed grapes (30 gallons). Your hydrometer reads 20 Brix or Balling before fermenting. This means there is only about 1.6 pounds of sugar per gallon of grapes. The grapes will yield about 11% alcohol in a finished wine.
Goal: 13.5% alcohol for your finished wine.
At 20 Brix or Balling there is about 1.6 pounds of sugar per gallon. You want to bring up the sugar level to 1.9 pounds per gallon of grapes.
What to do: Subtract 1.6 pounds of sugar per gallon from your goal of 1.9 pounds of sugar per gallon.
Increase Alcohol/Add Sugar1.9 – 1.6 = .3
This .3 represents the amount of “Domino” white sugar you need to add per gallon of grapes to achieve 13.5% alcohol.
Multiply .3 x 30 (gallons) = 9.0
This 9.0 represents 9 pounds of sugar. This is the amount of “Domino” white sugar you need to add to your grapes to achieve your goal of 13.5% alcohol in your finished red wine.
Example 3:White Wine
Given: You want to ferment 12 crates of crushed grapes (30 gallons).
You measured 17 Brix or Balling on your hy-drometer. This equals about 1.3 pounds of sug-ar per gallon of grapes. This will yield about 9% alcohol in your finished wine.
Goal: You want to achieve close to 12.0% alco-hol. At 17 Brix or Balling there is only about 1.3 pounds of sugar per gallon of grapes before fer-mentation. You want to bring up the sugar level to 1.7 pounds per gallon.
What to do: Subtract 1.3 pounds of sugar per gallon from your goal of 1.7 pounds of sugar per gallon.
Increase Alcohol/Add Sugar1.7 – 1.3 = .4
This .4 represents the amount of “Domino” white sugar you need to add per gallon of grapes to achieve 12.0% alcohol in your finished white wine.
Multiply .4 x 30 (gallons) = 12.0
This 12.0 represents 12 pounds of sugar. This is the amount of “Domino” white sugar you need to add to your grapes to achieve your goal of 12.0% alcohol in your finished white wine.
Increasing Alcohol in A Low Sugar Must Cont.
232015 HOME WINEMAKING GUIDE HOM
E WINEMAKER DEPOT
ynapmoC tnempiuqE orepsor
P a
Est. 1972
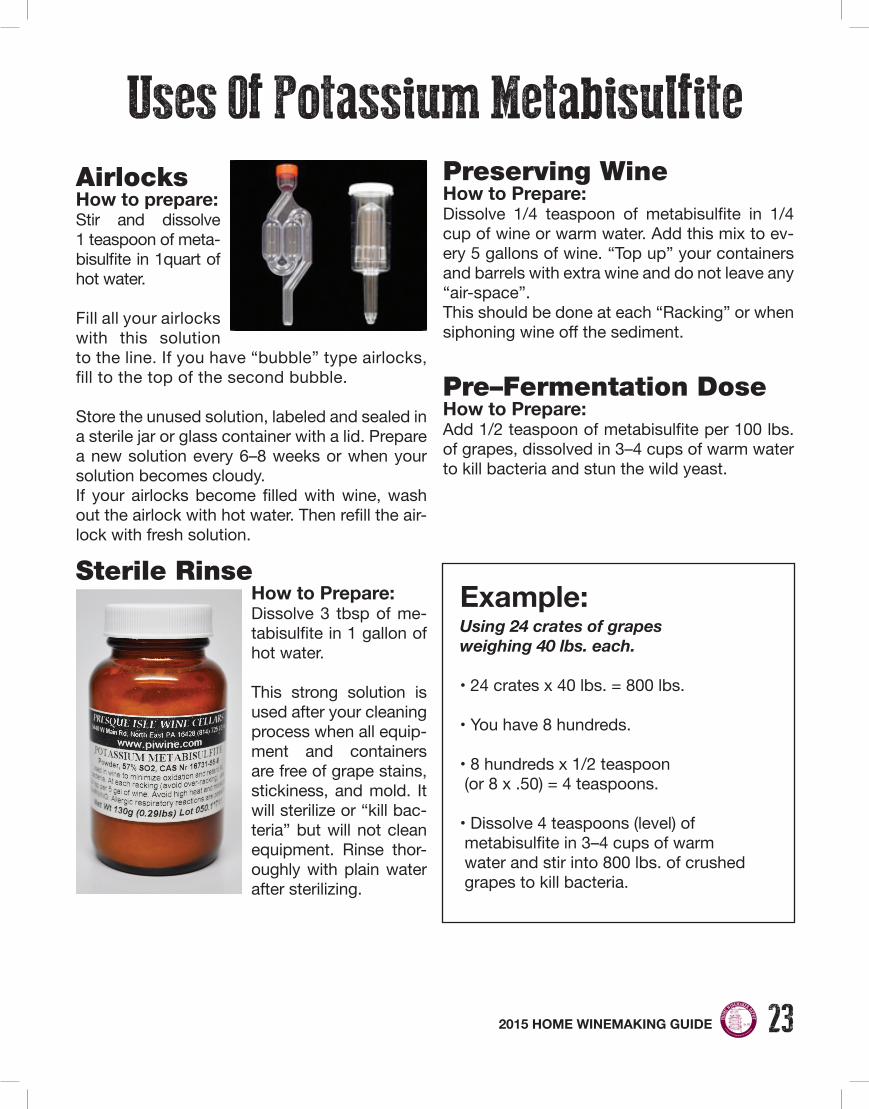
AirlocksHow to prepare:Stir and dissolve 1 teaspoon of meta-bisulfite in 1quart of hot water.
Fill all your airlocks with this solution to the line. If you have “bubble” type airlocks, fill to the top of the second bubble.
Store the unused solution, labeled and sealed in a sterile jar or glass container with a lid. Prepare a new solution every 6–8 weeks or when your solution becomes cloudy.If your airlocks become filled with wine, wash out the airlock with hot water. Then refill the air-lock with fresh solution.
Sterile RinseHow to Prepare:Dissolve 3 tbsp of me-tabisulfite in 1 gallon of hot water.
This strong solution is used after your cleaning process when all equip-ment and containers are free of grape stains, stickiness, and mold. It will sterilize or “kill bac-teria” but will not clean equipment. Rinse thor-oughly with plain water after sterilizing.
Preserving WineHow to Prepare:Dissolve 1/4 teaspoon of metabisulfite in 1/4 cup of wine or warm water. Add this mix to ev-ery 5 gallons of wine. “Top up” your containers and barrels with extra wine and do not leave any “air-space”.This should be done at each “Racking” or when siphoning wine off the sediment.
Pre–Fermentation DoseHow to Prepare:Add 1/2 teaspoon of metabisulfite per 100 lbs. of grapes, dissolved in 3–4 cups of warm water to kill bacteria and stun the wild yeast.
Uses Of Potassium Metabisulfite
Example:Using 24 crates of grapes weighing 40 lbs. each.
• 24 crates x 40 lbs. = 800 lbs.
• You have 8 hundreds.
• 8 hundreds x 1/2 teaspoon (or 8 x .50) = 4 teaspoons.
• Dissolve 4 teaspoons (level) of metabisulfite in 3–4 cups of warm water and stir into 800 lbs. of crushed grapes to kill bacteria.

24 2015 HOME WINEMAKING GUIDE HOM
E WINEMAKER DEPOT
ynapmoC tnempiuqE orepsor
P a
Est. 1972
The secondary fermentation is an “Acid” fer-mentation. You want to encourage this second-ary fermentation shortly after the primary or sugar fermentation has been completed. This acid fermentation is a slow process where your wine converts “Malic” acid into lactic acid. Mal-ic acid is found in apples, but in high quantities, gives wine a harsh flavor. Lactic acid is a milder acid found in milk. The conversion of malic to lactic acid smooths the wine, makes it drinkable sooner, and gives the wine a vintage character.
To get started:1. Purchase microessentials and Chris Hans-en’s “Direct Addition” vinaflora Oenos culture. The direct addition, Chris Hansen, culture does not need to be mixed with water. The 2 gram packet is enough to inoculate anywhere from 1 gallon to 65 gallons of wine. Larger amounts of the culture can be used to inocu-late up to 650 gallons.
2. Store the culture in the freezer and up to two years if you are not going to use it right away. If you plan on using the culture within two weeks, you can store it in the refrigerator.
What to do before adding the culture:3. Press your wine after the sugar or primary fermentation has been completed. This is when your hydrometer reads minus one (-1) or minus two (-2). Cold store the wine for 3 days and then “rack” the wine or siphon it off the gross sedi-ment and into one large container or stainless steel tank. Be sure the room temperature is be-tween 65 and 75 degrees at the start. Remove the Chris Hansen culture from the refrigerator and bring it up to room temperature – about 25 to 30 minutes. Prepare and add the microes-sentials and the Chris Hansen culture.
After a few days you should observe “bubbling” when drawing off some of the wine. Once this has begun, it indicates that the wine is entering the malolactic or secondary stage of fermenta-tion. The temperature in the room can then be lowered to between 65 and 68 degrees.
4. Procedure: Prepare the microessentials first after the wine has been cold stored for 3 days and racked. Microessentials are food to encourage the Chris Hansen culture to begin fermentation and needs to be added to about a cup of warm water and stirred. A cup of your wine is then added and the mix is dissolved completely.
Example: To treat 60 gallons of wine, use 1/4 teaspoon of microessentials per gallon dissolved in 1 cup of warm water – 60gallons of wine x 1/4 teaspoon of microessentilas = 15 teaspoons or 5 tablespoons of microessentials.
Stir well, then add 1 cup of wine and mix thor-oughly. Pour this mix into the 60 gallons of wine and stir well.
5. Once the microessentials have been stirred into your 60 gallons of wine, cut open the Chris Hansen package and pour the culture directly in and stir well. NOTE: DO NOT DISSOLVE THE CHRIS HANSEN CULTURE IN WATER. It can be added straight to the wine. Do not allow overexposure of the culture to air when opening the package – pour the culture right in and stir the wine.
6. Stir the wine every 5 minutes for 25 minutes (About 5 times).
7. Make sure your wine is stored in vessels, containers, carboys, demijohns and barrels that have “Airlocks” attached. The airlocks will allow the fermenting gas to escape.
WARNING NOTE: If you seal your vessels and do not use airlocks, you risk an explosion!
Secondary/Malolactic Fermentation

252015 HOME WINEMAKING GUIDE HOM
E WINEMAKER DEPOT
ynapmoC tnempiuqE orepsor
P a
Est. 1972
MicroessentialsPrepare microessentials at -1% or -2% Brix/Balling or af-ter alcoholic fermentation and after 3 days of cold storage and racking.
Calculate and measure 1/4 teaspoon of microsessentials per gallon.
Example: 24 gallons x 1/4 teaspoon = 6 teaspoons or 2 tablespoons
1. Dissolve the 6 teaspoons or 2 table-spoons of the microessentials in a cup of warm water
2. Add 1 cup of your wine to the mix and stir until the microessentials is dissolved completely
3. Add the mix to the 24 gallons
4. Stir the wine well
NOTE: Follow this by adding Chris Han-sen’s “direct” addition malolactic culture. Stir every 5 minutes for 25 minutes. This will encourage the secondary or malolactic fermentation.
5. Keep your wine warm; 65–68 degrees
Other Notes:8. Since this conversion from malic to lactic acid is a slow process, it may take several weeks to several months to complete, often two to three months or more.
9. Taste your wine before adding the microes-sentials and the Chris Hansen culture. Note and remember the taste.
10. During the malolactic fermentation, give your wine another taste. It will not taste good! The wine might taste “off ” - harsh or bitter because it is go-ing through another phase in its development and will improve dramatically when complete.
11. A Quick Test: When there are no visible signs of fermentation in a carboy, remove several cups of wine with a “wine thief” or baster. Have a fi st full of paper towels on hand because you are go-ing to stir the wine down to the bottom with a 1/4 inch or 1/2 inch thick dowel stick that is about 3 feet long. This is to “Batonage” or stir (see Fig A.). If the wine rises and begins to bubble vigorously, remove the dowel stick and push the paper tow-els on top of the carboy to prevent the wine from spilling over and onto the fl oor.
Allow the wine to settle down and then repeat the stirring. Stir the wine for 10 to 15 seconds and stop when the wine threatens to fl ow over the top. Repeat this procedure for several minutes each day until the wine stops rising to the top. This pro-cess allows “trapped” CO2 to escape.
12. Taste your wine. If it tastes “fi zzy” and has an “off ” taste, malolactic has not fi nished. Re-peat the stirring or batonage every few days.
13. Taste the wine again. If it tastes smooth and not harsh, and has no fi zz, bring it to the lab for a chromatography test.
14. If the test shows no malic acid and more lactic acid, the secondary fermentation is com-plete. Cold store the wine with airlocks still at-tached. Top up periodically.
Figure A.
Dowel Stick
Wine
Sediment
Batonage

26 2015 HOME WINEMAKING GUIDE HOM
E WINEMAKER DEPOT
ynapmoC tnempiuqE orepsor
P a
Est. 1972
PART A: September Harvest
ADVANCED WHITE WINEMAKING PROFILE
DAY 1: Crush your grapesAfter de-stemming, crush the grapes into a large fermentation tub and cover.
The fi rst two days of the winemaking process are essential preparation to assure proper fermenta-tion in the days that follow. The actual fermentation process is over at -1 or -2% of sugar on the hydrometer. This two day prep takes place prior to any fermentation which could take 21 days or more for white.
STEP 1: Test Total Acidity and adjust to .65 if necessary.
STEP 2: Test Brix/Balling and adjust to 13–14% if necessary.
Step 3: Stir in 40 ppm (Parts per Million) Potas-sium Metabisulfi te if grapes are of good quality (1/4 teaspoon or 1.6 grams potassium meta-bisulfi te for every 5 gallons).
STEP 4: Stir in Powdered Pectic Enzyme by pre-paring 2-4 grams of enzyme per hectoliter (26.4 gallons juice) dissolved in 1-2 cups cold water.
STEP 5: Allow juice to settle 24 hours then “rack” off the sediment and into stainless tanks, carboys, demijohns, or sound barrels and attach airlocks. Leave 1/4 to 1/3 head room space in vessels.
If juice is “brownish” or dark in color prepare Bentonite: 1–2 grams per gallon (See Bentonite instructions). If juice is “golden” proceed with-out Bentonite (Note: After fermentation, if wine is cloudy or hazy, prepare bentonite and then rack after 2 weeks).
DAY 2: Prepare yeast starter Prepare “Energizer” nutrient and add to yeast starter. When yeast starter mix is “bubbling” add to the larger amount of juice. Ferment at a cool temperature: 60 to 65 degrees.
1 2Crush Press

272015 HOME WINEMAKING GUIDE HOM
E WINEMAKER DEPOT
ynapmoC tnempiuqE orepsor
P a
Est. 1972
PART B: Nutrients And FermentationNutrientsAFTER 3 DAYS add 1/4 teaspoon of fermaidper gallon and again toward the end of fermen-tation at 5-3% Brix
FERMENT until hydrometer reads –1 or –2.
ADD 20 ppm of metabisulfi te (1/8 teaspoon for every 5 gallons).
RACK after 3 days
“Secondary” (Acid) fermentation Prepare Microessentials and Malolactic cul-ture.
Ferment at 65 degrees
After “Secondary”Fermentation “TOP UP” (Leave No air space in vessels) and
“COLD STABILIZE” at 40-24 degrees, then rack wine off the sediment after 3 days, and add 40 to 50 ppm of metabisulfi te. Continue to cold stabilize from October through December
PART C: Final RackingsRack in JanuaryADD 40-50 ppm metabisulfi te.
“COLD STABILIZE” at 40-24 degrees.
ADJUST Total Acidity to .65-.70 with tartaric/or citric acid.
Rack again in March ADD 40-50 ppm metabisulfi te
Bottle any time after one year or age in tanks/vessels/barrels.
Use any or all of the follwoing vessels to rack your wine:
Stainless Steel Tank
Carboywith airlock

28 2015 HOME WINEMAKING GUIDE HOM
E WINEMAKER DEPOT
ynapmoC tnempiuqE orepsor
P a
Est. 1972
Crush
ADVANCED RED WINEMAKING PROFILEPART A: September Harvest
DAY 1: Crush your grapesAfter de-stemming, crush the grapes into a large fermentation tub and cover.
The fi rst two days of the winemaking process are essential preparation to assure proper fermenta-tion in the days that follow. The actual fermentation process is over at -1 or -2% of sugar on the hydrometer. This two day prep takes place prior to any fermentation which could take between 6 and 18 days for red.
STEP 1: Test Total Acidity and adjust to .50 if necessary.
STEP 2: Test Brix/Balling and adjust to 13-14% if necessary.
STEP 3: Stir in 1/2 teaspoon Potassium Meta-bisulfi te for every 100 lbs of grapes.
STEP 4: Stir in Powdered Pectic Enzyme by preparing 2-4 grams of enzyme per hectoli-ter (26.4 gallons juice) dissolved in 1-2 cups cold water.
DAY 2: Prepare yeast starter Prepare “Energizer” and add to yeast starter. When yeast starter mix is “bubbling”, add to the crushed grapes in the fermentation tub. Ferment at warm a temperature: 65 to 70 degrees.
PART B: Nutrients And FermentationNutrients and TanninAFTER 3 DAYS add 1/4 teaspoon of fermaid per gallon and again toward the end of fermen-tation at 5 to 3% Brix.
ADD 5 grams of “Tannin” per hectoliter (26.4 gallons)

292015 HOME WINEMAKING GUIDE HOM
E WINEMAKER DEPOT
ynapmoC tnempiuqE orepsor
P a
Est. 1972
Punch down grape cap TWICE DAILY using a wine cap punch down tool.
FERMENT until hydrometer reads –1 or –2After this “Primary” (Sugar) fermentation:
“PRESS” grapes and fi ll stainless tanks, carboys, demijohns, or sound barrels.
ADD 20 ppm metabisulfi te (1/8 teas. for every 5 gallons)
“TOP UP” (Leave No air space in vessels) and attach airlocks.
“COLD STABILIZE” at 40-24 degrees.
“RACK” wine off the sediment after 3 days
“Secondary” (Acid) FermentationBring wine into a warm room: 68 to 70 degrees. Prepare Microessentials and Malolactic Cul-ture. Lower temperature to 65-68 degrees after wine begins bubbling.
After this “Secondary” (Acid) fermentation, rack off the sediment and add 40 ppm metabisulfi tefor every 5 gallons, and “Cold Stabilize” at 40-24 degrees.
PART C: Final RackingsRack in JanuaryADD 40 ppm metabisulfi te.
“COLD STABILIZE” at 40-24 degrees.
ADJUST Total Acidity to .50-.55 with tartaric/or citric acid.
Rack again in MarchADD 40 ppm metabisulfi te.Bottle any time after one year or age in barrels/vessels.
Use any or all of the follwoing vessels to rack your wine:
Stainless Steel Tank
Carboywith airlock

30 2015 HOME WINEMAKING GUIDE HOM
E WINEMAKER DEPOT
ynapmoC tnempiuqE orepsor
P a
Est. 1972
How to Prepare A New Oak BarrelProp your new barrel on a barrel rack or a con-crete cinder block. Be sure to place the barrel on a surface area to eliminate water damage like the end of your garage.
Fill the barrel with cold water only through your garden hose, or bucket cold water and fill through a large funnel. Place a rubber or silicon bung or cork in the “bung” hole. The new barrel will leak water for 3-4 days, so refill with cold water once or twice daily. After 5-6 days, if the barrel still leaks, bring it back to the dealer for a refund and purchase another new barrel. Then begin the procedure of filling the barrel again. If the barrel stops leaking completely, drain it, and turn it upside down with the bung hole facing the ground, and air dry for 6–7 days.
Disinfecting the BarrelOnce air dried, turn the barrel right side up again with the bung hole facing you. Pre-pare a “sulfur” ring by sliding a long, thin wire through the hole. Twist the wire to secure the sulfur ring. Holding the end of the wire, place the sulfur ring a few inches down and inside, from the top of the bung hole. Using a “bu-tane” lighter, ignite the sulfur ring (see Fig. A). Once the ring has been ignited, avoid inhal-ing the escaping gas and close the bung hole with a cork or bung (see Fig. B). Be sure the end of the wire lies on top of the barrel.
The sulfur ring will disinfect the barrel. After 24 hours, hold the wire that lies on top of the barrel, remove the bung or cork, careful not to inhale the escaping gas, and lift out the burned sulfur ring and discard.
Move your barrel to a storage area and im-mediately fill it with your wine. Close the bung hole with a bung or cork.
Topping upThe barrel will evaporate wine slowly because it is porous. So each week for the first month, remove the bung or cork and fill the barrel with a similar wine, either your own or store bought.
This keeps air off your wine and prevents bac-teria growth which can ruin your wine. Then after the first month, top up your wine every two weeks and do not miss a turn. Never use a spigot to draw wine from the barrel to drink, or leave air space in any container, bottle, or vessel. This will cause bacteria to grow on the surface of the wine and spoil it.
Important NoteKeep all of your wines topped up to the bung, cork, or airlock, whether using barrels or glass.
Never top up the barrel with a partially filled bottle that has been sitting around for a few days or longer. This half bottle of wine will cause contamination.

312015 HOME WINEMAKING GUIDE HOM
E WINEMAKER DEPOT
ynapmoC tnempiuqE orepsor
P a
Est. 1972
Figure B.
Figure A.
Butane Lighter
Sulfur Ring
Bung
End of Sulfur Ring Wire
Disinfecting Gas

32 2015 HOME WINEMAKING GUIDE HOM
E WINEMAKER DEPOT
ynapmoC tnempiuqE orepsor
P a
Est. 1972
Barrel Size Washing Soda (Soda Ash) 50 gallons (151 l) 1 cup (224 g)40 gallons (151 l) 3/4 cup (168 g)25 gallons (95 l) 1/2 cup (112 g)20 gallons (76 l) 1/3 cup (75 l)15 gallons (57 l) 5 tablespoons (70 g)10 gallons (38 l) 3 tablespoons (42 g)
How to Prepare A Used Oak BarrelStep 1 Prop your barrel on two, long, 2x4s in your driveway or another outdoor surface. This will elevate the belly of the barrel and keep it from scrap-ing the ground.
Step 2Measure and dissolve the amount of washing soda according to the size of your barrel in the least amount of water possible. Add this amount to a barrel fi lled half way with hot water. Bung the barrel.
Step 3With a friend, roll the barrel back and forth vigor-ously, sloshing the solution inside over all parts. Stand the barrel upright to treat the ends.
Do this for 10–15 minutes. The washing soda will remove mold, stains, and sediment.
Step 4Remove the bung. Turn the barrel over to drain out the washing soda and water. Fill the barrel halfway with “clear” water. Roll the bar-rel back and forth for 1–2 minutes to rinse.
Then drain. If the water is still “murky” and not clear, repeat step 3. Follow this procedure until the rinse water is clear.
Neutralizing the Washing Soda
Step 5If the rinse water runs clear, refi ll the barrel half-way with hot water. Measure and dissolve the exact same amount of “citric acid” as you did with the washing soda for the size barrel you are treating. Dissolve the citric acid in the least amount of water possible. Add this to the half-full barrel.
Step 6Roll the barrel back and forth vigorously, sloshing the solution inside over all parts. Do this for 5 minutes. The citric acid will remove the residue from the washing soda.
Step 7Drain the barrel of the citric acid solution. Fill the barrel half-way with cold water. Bung the barrel. Roll the barrel back and forth for 5 minutes and then drain. Smell the barrel. If it smells musty or vinegary, discard the barrel. If it smells sound, fi ll the barrel with cold water and allow it to swell so there are no leaks.
Step 8If there are no leaks, turn the barrel over, bung side facing the ground, and allow it to air-dry for 5–6 days.
Step 9After 5–6 days, ignite a sulfur ring in the barrel (See the instructions for using a sulfur ring in a new barrel)
Prop your barrel on two, long, 2x4s in your driveway or another outdoor surface. This will elevate the belly of the barrel and keep it from scrap-ing the ground.

332015 HOME WINEMAKING GUIDE HOM
E WINEMAKER DEPOT
ynapmoC tnempiuqE orepsor
P a
Est. 1972
Storing A Used Oak BarrelStep 1 - To Store "Dry££After draining your barrel of wine, immediately place the barrel on two, 2x4s in your driveway to rinse. Proceed by following the “Two-Step Cleaning” process, using soda ash and cit-ric acid, described on page 8.
Step 2 - To Store "Wet££After the two-step cleaning process is com-plete, fill the barrel with cold water.
Step 3Add potassium metabisulfite and citric acid in the following proportions:
Barrel Size Sulfite Citric Acid50 gallons 1 1/2 cups 1 cup40 gallons 1 cup 3/4 cup25 gallons 3/4 cup 1/2 cup20 gallons 2/3 cup 1/3 cup15 gallons 1/2 cup 5 tbls.10 gallons 1/3 cup 3 tbls.
Dissolve the sulfite and citric acid in water before adding it to the water in the barrel.
Step 4 - To Store "Dry££After the cleaning process, air-dry the barrel for 6-7 days. Then burn a sulfur ring and bung the barrel.
Step 5Every two months light a sulfur ring to disin-fect the barrel.
For the New Wine Season 1. Before using the barrel for the new sea-son, fill it with cold water and make sure after several days there are no leaks.
2. Drain the barrel upside down for six to seven days until dry.
3. Light a sulfur ring when the barrel is completely dry and keep it bunged for 24 hours.
4. Fill the barrel with your wine and bung it.

34 2015 HOME WINEMAKING GUIDE HOM
E WINEMAKER DEPOT
ynapmoC tnempiuqE orepsor
P a
Est. 1972
Oak-Mor is a granular oak preparation from Finer Filter Products which will impart an oaky char-acter to your wine. It is made from selected oak (Quercus Alba) which has not been kiln dried.
Oak-Mor can be used as a substitute for barrel aging or as a means of extending the life of an otherwise sound older barrel. We recommend using Oak-Mor instead of aging in barrels of less than 20 gallons capacity.
Oak-Mor may be added directly to your wine in granular form or you can make up a concentrated extract which may be blended back to get the precise level of oakiness desired. We recommend direct addition when making small batches.
Direct Addition Of Oak-MorYou will normally add 1 to 2 grams per liter (3.8 to 7.6 grams per gallon) to white wines and 2 to 5 grams (7.6 to 19 grams per gallon) to red wines. Sherries and other dessert wines would take the same as red wines. A level tablespoon of Oak-Mor weighs between 3 to 3.6 grams.
About 90% of the extractives will leach into the wine between 24 and 48 hours. You can therefore leave the Oak-Mor in contact for fair-ly long periods without fear of getting much more of the oaky character. The Oak-Mor will sink to the bottom so it will be easy to rack the wine afterwards. It is advisable to agitate the wine at least once a day for three or four days if you want to get the maximum extrac-tion. This can be done easily with a dowel or by bubbling nitrogen or carbon dioxide gas through the wine.
A safe way to add Oak-Mor in granular form is to add at the low end of the recommended amount and later add more if the intensity of oak is less than you want. It is much easier to add than to subtract.
Making A Concentrated Blending ExtractThis method will permit a more precise means of getting the level of oakiness you desire, but is not worth the time and effort with small batches.
Add 1 lb of Oak-Mor to 1 gallon of wine. Stir at least once a day for three or four days, then separate (though there is no problem with leav-ing the material in the wine longer). The aroma profile of the extract obtained in the first twelve hours will be heavier than the remainder. Some wineries separated these two fractions (called Hi-tone and Low-tone) when blending back.
Add the blending wine back to your main batch according to taste. Normal amounts are 1 to 3% by volume of the blending wine to white wines and 2 to 6% with red wines and dessert wines.
Source: Presque Isle Wine Cellars, North East, PA 16428
Oak-Mor Granular

The following chart will help to measure chemicals in the absence of a gram scale. The figures are for use with level measuring spoons. Accurate to + (plus) and – (minus) 10%.The definition of 1 part per million is 1 milligram per liter of any substance.
1 ounce (oz) = 28.3 grams1 pound (lb) = 454 grams2.204 lb = 1 kilogram1 fluid oz = 29.6 milliliters1 quart = 0.94 liters1 gallon = 3.785 liters
Measure Chemical1/4 tsp 1 tsp 1 tbsp
Metric EquivalentsParts per million (ppm) = 1 milligram per liter, 1 milligram per kilogram or 1 milliliter per liter1 gram of potassium metabisulfite in one gallon = 150 ppm1/4 teaspoon of potassium metabisulfite (1.6 grams) = 225 ppm in one gallon or 45 ppm in five gallons
Weights and Measures
1.6g 6.6g 20.0g Potassium Metabisulfite0.8g 3.3g 10.2g Potassium Sorbate1.0g 4.3g 12.9g Ascorbic Acid1.3g 4.9g 14.7g Tartaric Acid1.2g 4.8g 14.4g Citric Acid1.2g 4.5g 13.5g Malic Acid0.9g 3.8g 11.4g Calcium Carbonate1.2g 4.8g 14.5g Potassium Carbonate1.2g 4.6g 13.8g Diammonium Phosphate1.0g 3.7g 10.8g Super Ferment Nutrient1.3g 4.8g 14.4g Fermaid Nutrient0.7g 2.8g 8.4g Yeast Ghosts0.6g 2.5g 7.5g Nutrex 370 Yeast Hulls0.4g 1.5g 4.5g Bactiv-Aid M-L Nutrient1.1g 4.3g 12.7g Bentonite, KWK, Agglomerated0.3g 1.1g 3.4g Sparkolloid Powder, Hot Mix0.6g 2.3g 7.0g Isinglass (Drifine) Powder0.8g 2.9g 9.0g Gelatine, Powder0.8g 3.1g 9.5g Potassium Caseinate (Kolorfine)0.4g 1.6g 3.9g Polyclar VT, Powder0.4g 1.7g 5.1g Polyclar V, Powder0.4g 1.7g 5.2g Carbon, S51, deodorizing, Powder0.5g 2.1g 6.3g AR2000, Enzymes, Powder0.6g 2.4g 7.2g Rapidase Ex-Color Enzyme Powder0.4g 1.6g 4.8g Viniplus, Lactizyme, Powder0.6g 2.4g 7.0g Natural Grape Tannin, Powder0.4g 1.5g 4.7g Grap’ Tan S, Tannin, Powder0.3g 1.1g 4.4g Grap’ Tan PC, Tannin, Powder0.5g 1.9g 6.0g Grap’ Tan V, Tannin, Powder0.5g 2.0g 6.3g Grap’ Tan E, Tannin, Powder0.6g 2.4g 7.2g Quertanin, Tannin Powder 3.6g Oak-Mor Premium, White Oak 5.0g Oak-Mor Toasted, White Oak 5.0g Oak Chips, American or French

36 2015 HOME WINEMAKING GUIDE HOM
E WINEMAKER DEPOT
ynapmoC tnempiuqE orepsor
P a
Est. 1972
Acidity in Wine:When To Adjust The Acid In Your Wine
After your wine has finished its “primary” or sugar fermentation and is dry, that is when the hydrometer reads –1% or –2% Brix or Balling, and after the wine has completed the “second-ary” fermentation (Malolactic or acid fermenta-tion) – adjust the acid.
For full bodied red wine: Add the proper amount of tartaric acid to bring the “total acidity” of the wine to .55%. Do not adjust over .65%.
For full bodied white wine: Add the proper amount of tartaric acid to bring the total acidity of the wine to .65%. Do not adjust over .75%.
With Potassium Bicarbonate:Stir in 3.4 grams per gallon, any more will make the wine taste “salty.”
Potassium Bicarbonate weighs: 1/4 teaspoon = 1.2 grams1/2 teaspoon = 2.4 grams3/4 teaspoon = 3.6 grams1 teaspoon = 4.8 grams
First do a “Bench” test on 1 gallon. Then check the results. Does the wine taste salty? If so, use less on the next gallon.
NOTE: It is very important not to use Potassium Bicarbonate on all your wine until you first test it on a single gallon.
After treatment, move the wine into an area where “Cold Stabilization” can be achieved. If possible, try and keep the wine exposed to temperatures between 32 and 24 degrees.
Caution: Wine will freeze below 24 degrees and break your glass containers. So, it is important to hook up a thermometer in the area to where the wine is stored to monitor the temperature during the winter months.
Results: Treatment will reduce 70% of the acid im-mediately, but the wine needs to be “Cold Stabi-lized” to complete reduction of the remaining 30%.
Reducing Acidity In WineWith Potassium Bitartrate:Use “Potassium Bitartrate” in combination with Potassium Bicarbonate.
Potassium Bitartrate is a “Seeding” agent to promote cold stabilization.
Reducing AcidityUse 1–2 grams per gallon. Note: First do a “Bench Test” on 1 gallon of wine.
Potassium Bitartrate weighs: 1/4 teaspoon = 1 gram1/2 teaspoon = 2 grams3/4 teaspoon = 3 grams1 teaspoon = 4 grams
A) When adding 2 grams per gallon, follow by vigorous stirring.
B) Stir the batch of wine daily.
Results: This treatment will aid in getting tar-trates to drop out faster at any otherwise effec-tive temperature.
“Cold Stabilize” for a minimum of 2 weeks, pref-erably, keep the wine in a cold area throughout the winter. In the spring, “Rack or siphon” the wine off the sediment.

372015 HOME WINEMAKING GUIDE HOM
E WINEMAKER DEPOT
ynapmoC tnempiuqE orepsor
P a
Est. 1972
1. Set up the stand and attach the buret. Snap on the rubber pinchcock. Be sure the pinch-cock is high enough to slip a clear plastic cup or a glass underneath.
2. Uncap the Sodium Hydroxide, and using a small funnel, fill the buret with this solution.
3. Place a paper cup under the pinchcock and squeeze out several milliliters of the so-dium hydroxide to remove air.
4. Fill a plastic cup, glass, or beaker with 100 ml of “distilled” water.
5. Take the pipet, and using it like a straw, suck up 5 ml of your wine and “thumb” the end to keep the wine from spilling out of the pipet. If you have drawn off more than 5 ml, release your thumb until you can stop the wine at the 5 ml mark on the pipet. Add the 5 ml to the distilled water.
6. Unscrew the eye-dropper from the phenol-phthalein solution. Squeeze the eye-dropper until it is full with the solution. Then squeeze and count 5 drops into the distilled water.
7. Put the distilled water under the buret. Note the level of the sodium hydroxide in the buret and write down this starting point. 8. Squeeze the pinchcock and allow sever-al mls of sodium hydroxide to drop into the distilled water. The water should turn a sharp pink if white wine is tested, or a dark green or purple if red wine is tested. If you cannot see a color change because you are testing red wine, add 10 – 20 mls more of distilled water to lighten the solution.
9. Stir the mix with the pipet. The color chang-es will disappear. Squeeze the pinchcock and
allow one ml of sodium hydroxide to fall into the distilled water. Again, you will note a sharp pink or other color change. Stir until the color change disappears.
10. Repeat this process 1 ml or 1/2 ml at a time until you observe the first faint color change that will not disappear. This is the “end point.”
11. Write down the level of sodium Hydrox-ide that you released into the distilled water. Subtract this from your starting point number. Then multiply the difference by .15 which is the “constant.”
Example: Sodium hydroxide starting point in buret = 0. Sodium hydroxide expelled to reach the end point = 4 mls. Subtract 0 from 4; 0 - 4 = 4.4 x .15 = .60% total acidity.
How to Test Using an Acid Test Kit:

38 2015 HOME WINEMAKING GUIDE HOM
E WINEMAKER DEPOT
ynapmoC tnempiuqE orepsor
P a
Est. 1972
Bentonite is only for use on white wine. It re-moves protein “hazes” from your wine and clar-ifies it, giving it more “eye appeal” and a cleaner look. Bentonite keeps the good flavor of your wine intact and does not add off flavors.
How to use bentonite: Measure 1–2 grams per gallon and spoon the bentonite in a large bowl. Then mix and stir in 20 ml of hot water per gram.
Example: If you treat 10 gallons of wine, mix 10–20 grams of bentonite (1–2 tablespoons) in 200–400 ml of hot water, not wine. Stir every 5 minutes during the next 2 hours.
After 2 to 24 hours, add the mix to your 10 gallons of wine and stir well for 3-5 minutes. The bentonite will fall to the bottom of your
container after 1–2 weeks. Once this settling has taken place, you can “siphon” your wine off the sediment and the expelled bentonite.
Check acidity level of your wine after fermenta-tion has been completed. If the red wine indi-cates a total acidity of .45% you can bump it up to .55% by using either tartaric or citric acid. 3.3 grams of citric acid per gallon of wine will raise total acid .10%. Therefore; .45% + .10% = .55%. You can add the required amount of acid by knowing how much citric acid weighs.
Citric acid weighs 4.3 grams per teaspoon and 1.1 grams per quarter teaspoon. Thus, 3/4 tea-spoon = 3.3 grams or .10%.
To raise the acid .10% on 5 gallons of wine, add 3 1/2 teaspoons; 5 gallons of wine x 3.3 grams of cit-ric acid per gallon = 16.5 grams needed to adjust.
Caution: Do not use more than 3.3 grams per gallon. Why? Your wine will taste like lemonade!
Citric acid has the advantage of not upsetting tartrate stability. Like tartaric acid, it buffers to a low pH.
If you need to adjust acid to a higher level after adding citric, then blend in tartaric. Tartaric weighs 1.2 grams per 1/4 teaspoon and 4.8 grams per teaspoon. 3.6 grams of tartaric or 3/4 teaspoon per gallon raises total acidity .10%.
However, after adding tartaric, the wine has to be “cold-stabilized” by storing in an area be-tween 24 – 32 degrees for two weeks.
Adjusting Total Acidity
Bentonite
With Citric or Tartaric Acid

392015 HOME WINEMAKING GUIDE HOM
E WINEMAKER DEPOT
ynapmoC tnempiuqE orepsor
P a
Est. 1972
Acetic Acid Aftertaste Aromatic Astringent Austere Balance Big Bitter Body Bouquet Brilliant Butyric Character Clean Cloudy Cloying Coarse Color Common Complex Cooked Corky Crisp Delicate Distinguished Dry Dull Dumb Earthy Elegant Empty Extract Faded Fat Fiery Fine Finesse Firm Flabby Flat Flinty Flowery Foxy FragrantFresh Fruity Full Gassy Geranium Great Green Grip Hard Harmonious Harsh Hazy Heavy Herbaceous Hollow Light Lively Maderized Mature Mellow Mercaptans Metallic Mild Moldy Mousy Neutral Noble Nutty Oaky Off Ordinary Overripe Oxidized Perfume Piquant Pleasant Poor Powerful Rancid Rich Ripe Robust Rotten Egg Rough Round Short Sick Silky Small Soapy Soft Solid Sound Sour Spicy Spoiled Spritz Steely Stemmy Sturdy Subtle Sulfur Supple Sweet Tannic Tart Thin Velvety Vinous Withered Woody Yeasty Young
One Word Wine Descriptions
Source: Bespaloff, Akexis. The New Frank Schoonmaker Encyclopedia of Wine. New York: William Morrow and Company, Inc., 1988.

40 2015 HOME WINEMAKING GUIDE HOM
E WINEMAKER DEPOT
ynapmoC tnempiuqE orepsor
P a
Est. 1972
Chemical 1/4 teaspoon 1 teaspoonPotassium metabisulfite, powder 1.5 grams 6.1 gramsTartaric acid, powder 1.2 grams 4.8 gramsCitric acid, powder 1.1 grams 4.3 gramsMalic acid, powder 1.0 grams 4.1 gramsAcid blend, powder 1.1 grams 4.4 gramsNatural grape tannin, powder 0.6 grams 2.4 gramsYeastex-61, yeast nutrient, powder 0.6 grams 2.4 gramsYeast hulls (Yeast ghosts), powder 0.6 grams 2.4 gramsFermaid, yeast nutrient, powder 1.2 grams 4.8 gramsBentonite, agglomerated KWK, powder 0.6 grams 2.3 gramsCalcium carbonate, USP powder 1.5 grams 6.0 gramsPotassium Bicarbonate, powder 1.5 grams 6.1 gramsAscorbic acid, powder 1.2 grams 4.8 grams
Measures and Conversions
The figures above are for use with measuring spoons where the material is wiped level, but not compressed. They are generally accurate within plus or minus 10%.
Hectoliter (hl.) 100 26.42 gal.Decaliter (dcl.) 10 2.64 gal.Liter (l.) 1 1.0567 qt.Centiliter (cl.) 0.01 0.338 fl.oz.Milliliter (ml.) 0.001 0.034 fl.oz.1 Qt. 0.09463 1 gal. 3.785
Kilogram (kg.) 1,000 2.204 lb.Hectogram (hg.) 100 3.527 oz.Decagram (dkg.) 10 0.353 oz.Gram (gm.) 1 15.432 grainsDecigram (dg.) 0.1 1.543 grainsCentigram (cg.) 0.01 Milligram (mg) 0.001 1 gr. 0.06481 oz. 28.34951 lb. 453.59
VOLUME (Liters) WEIGHT (Grams)
TEMPERATURE CONVERSIONS
Fahrenheit into Centigrade: Subtract 32, multiply by 5, divide by 9.
Centigrade into Fahrenheit: Multiply by 9, divide by 5, add 32.
3 tsp = 1 tbsp 1 cup = 8 fluid oz4 tbsp = 1/4 cup 1 cup = 1/2 pint5 1/3 tbsp = 1/3 cup 2 cups = 1 pint8 tbsp = 1/2 cup 4 cups = 1 quart10 2/3 tbsp = 2/3 cup 4 quarts = 1 gallon 12 tbsp = 3/4 cup 8 quarts = 1 peck16 tbsp = 1 cup 4 pecks = 1 bushel1 oz = 28.35 grams 1 quart = 946.4 ml1 gram = 0.035 oz 1 liter = 1.06 quarts
WEIGHTS AND MEASURES OF CHEMICALS
WEIGHTS AND MEASURES

412015 HOME WINEMAKING GUIDE HOM
E WINEMAKER DEPOT
ynapmoC tnempiuqE orepsor
P a
Est. 1972
Winemaking Notes

42 2015 HOME WINEMAKING GUIDE HOM
E WINEMAKER DEPOT
ynapmoC tnempiuqE orepsor
P a
Est. 1972
Winemaking Notes

432015 HOME WINEMAKING GUIDE HOM
E WINEMAKER DEPOT
ynapmoC tnempiuqE orepsor
P a
Est. 1972
Winemaking Notes

HOM
E WINEMAKER DEPOT
ynapmoC tnempiuqE orepsor
P a
Est. 1972
Prospero Equipment Corp.123 Castleton Street
Pleasantville, NY 10570Phone: (914) 769-6252 • Fax: (914) 769-6786E-mail: [email protected]
www.homewinemakerdepot.com