how to add fonts to kindle paperwhite
DESCRIPTION
If the default fonts of Kindle Paperwhite can't satisfy your reading demands,just add some other fonts for it. This slide will tell you how to add fonts to Kindle Paperwhite.TRANSCRIPT

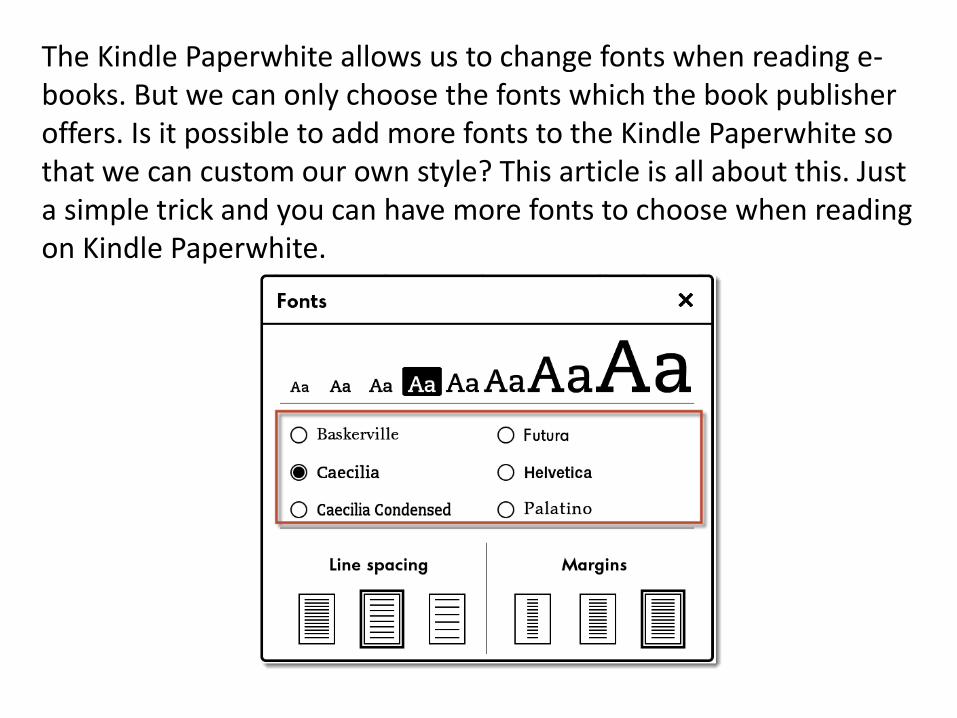
The Kindle Paperwhite allows us to change fonts when reading e-books. But we can only choose the fonts which the book publisher offers. Is it possible to add more fonts to the Kindle Paperwhite so that we can custom our own style? This article is all about this. Just a simple trick and you can have more fonts to choose when reading on Kindle Paperwhite.
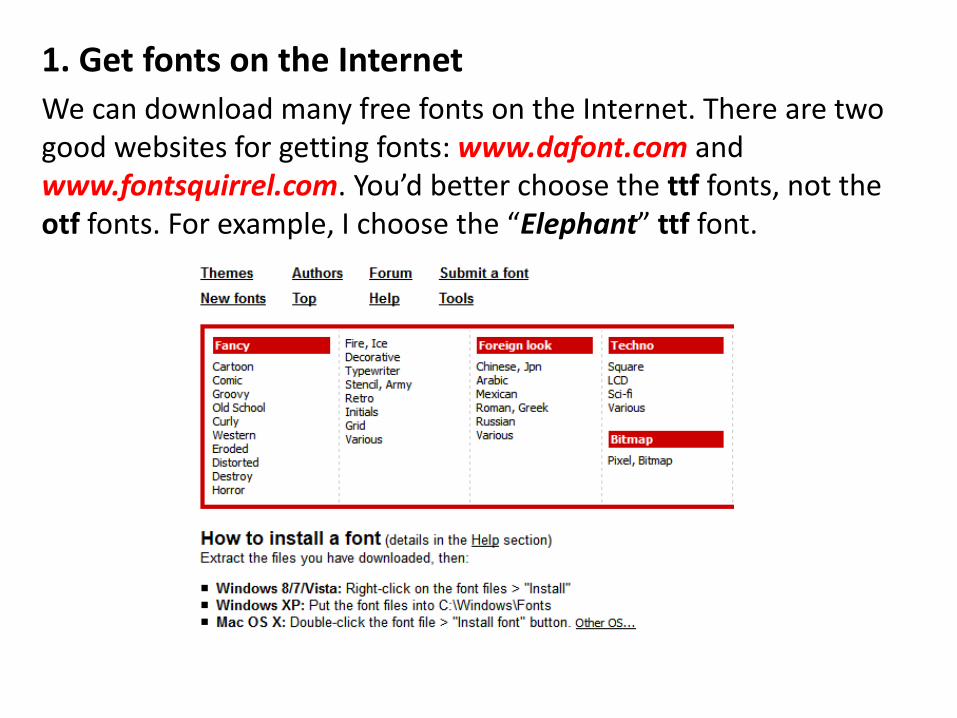
1. Get fonts on the Internet
We can download many free fonts on the Internet. There are two good websites for getting fonts: www.dafont.com and www.fontsquirrel.com. You’d better choose the ttf fonts, not the otf fonts. For example, I choose the “Elephant” ttf font.

2. Transfer fonts to Kindle Paperwhite
Use a USB cable to connect your Kindle Paperwhite to PC. Create a new folder called “fonts” at the root directory. And then copy and paste the new font here.
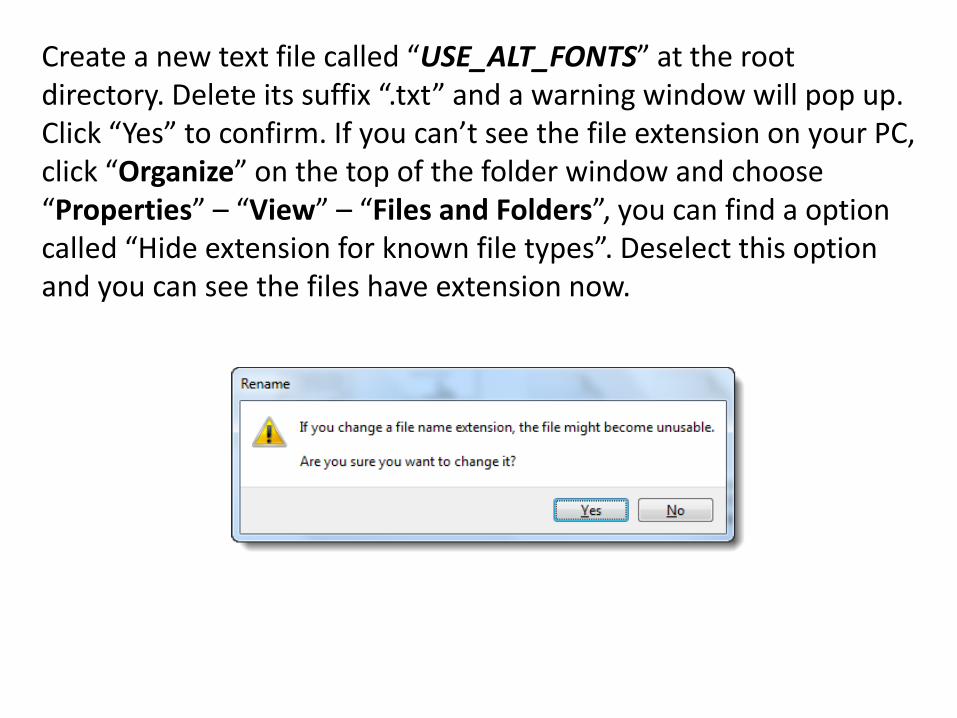
Create a new text file called “USE_ALT_FONTS” at the root directory. Delete its suffix “.txt” and a warning window will pop up. Click “Yes” to confirm. If you can’t see the file extension on your PC, click “Organize” on the top of the folder window and choose “Properties” – “View” – “Files and Folders”, you can find a option called “Hide extension for known file types”. Deselect this option and you can see the files have extension now.


3. Test the new font
Eject Kindle Paperwhite from computer and reboot it. Open any e-book and called out the font setting menu. You can find many more fonts which you never see before and of course the new font is in the list. Tap the new font and you can find it works.

PS:If you find there is no fonts to choose of an e-book, that means the publisher has locked the fonts. In this case, our trick doesn’t work.
Source: http://www.epubor.com/how-to-add-fonts-to-kindle-paperwhite.html