how to build a 7 node raspberry pi hadoop cluster - … to build a 7 node raspberry pi hadoop...
TRANSCRIPT
How to build a 7 node Raspberry Pi Hadoop Cluster
Introduction
Inspired by a desire to learn more about Hadoop and the fact I already owned a Raspberry Pi I
wondered whether anyone had yet built a Hadoop cluster based on this hobby computers. I wasn’t
surprised to discover that people have already done this and the following instructions are the
where I started:
Carsten Mönning: http://scn.sap.com/community/bi-platform/blog/2015/04/25/a-hadoop-data-lab-
project-on-raspberry-pi--part-14
Jonas Widriksson: http://www.widriksson.com/raspberry-pi-hadoop-cluster/
Jonas’s instructions are based on Hadoop version 1.0 and Carsten’s is based on version 2.x
If, like me, you’re interested in building with the newer version of Hadoop then follow Carsten’s
instructions but read through Jonas’s too because he provides useful links for downloading the
Raspian (Linux Operating System built specifically for the Raspberry Pi) distribution as well as
commands and example files for testing your cluster.
The first stage is to build a single node cluster where your one node performs all tasks such as
NameNode, Secondary NameNode and DataNode. Once you have this up-and-running you’re
reading to add a second node. This second node will be a dedicated DataNode from which you will
clone all subsequent DataNodes.
Creating the second node is slightly more difficult which is why I decided to write this post in the
hope that it will save others time and effort.
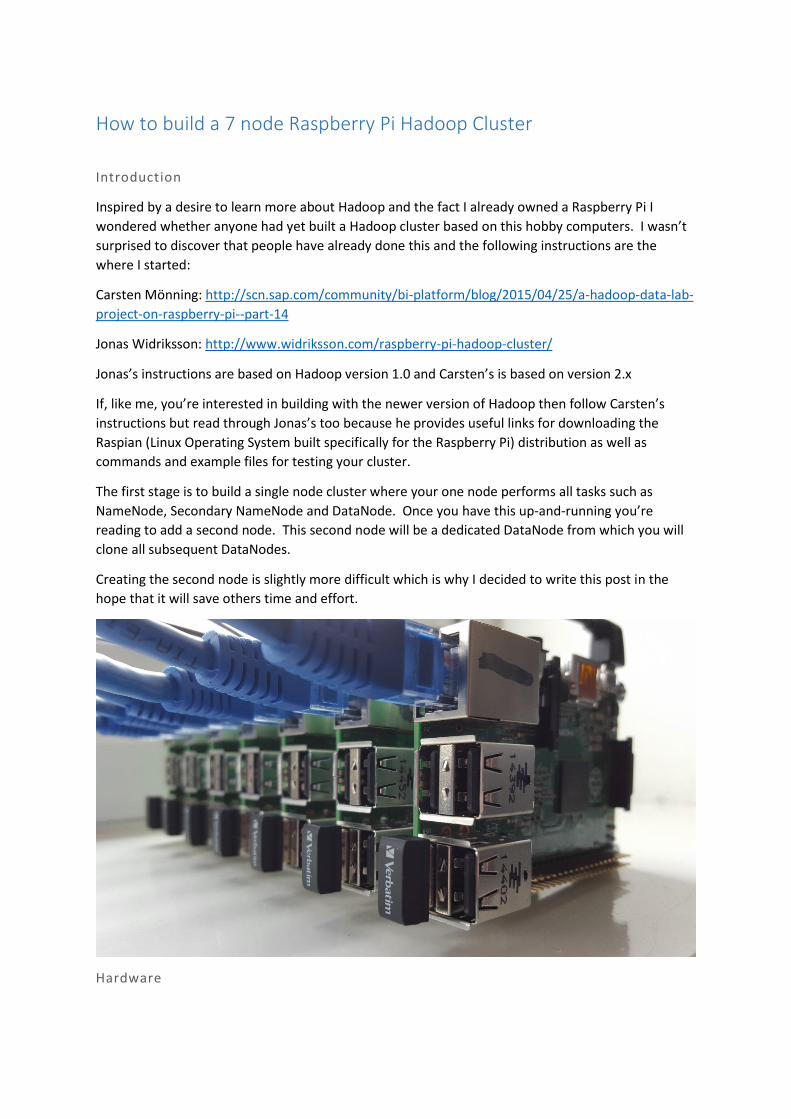
Hardware
For a seven node Raspberry Pi (Model 2 B+ used here) Hadoop cluster you will need the following
hardware:
7x Raspberry Pi Model 2 B+ (ThePiHut.com)
1x 10GigaBit Switch (8 Ports – TP-Link) (eBuyer.com)
1x USB Power Hub (7 Powered Ports by StarTech.com) (eBuyer.com)
7x 8GB Class 10 MicroSD cards - NB mine came with the NOOBs Operating System pre-
installed which shrinks the size to 3GB. You can expand this partition to use the whole disk
from within the raspi-config utility but I used fdisk to delete the existing partition and create
a new one (a reformat is required after doing this). (ThePiHut.com)
6x 19.05mm standoffs (ModMyPi.com)
7x Angled USB to MicroUSB cables (eBuyer.com)
7x Short Ethernet Cables (eBuyer.com)
7x 32GB Class 10 USB sticks (eBuyer.com)
1x Case to put it all in – Optional
Building the Single Node Cluster
So, as stated previously, follow these instructions to create your NameNode/Single Node Cluster:
http://scn.sap.com/community/bi-platform/blog/2015/04/25/a-hadoop-data-lab-project-on-
raspberry-pi--part-14
Adding a new node to the cluster
Once your NameNode (192.168.0.110 node1) is up and running adjust the following files to include
your planned/subsequent nodes. In order to edit the system owned files you’ll need to switch user
or ‘sudo’. The simplest editor to use on this flavour of Linux is ‘nano’:
$ sudo nano /etc/hosts
Add all the nodes you plan to have in your cluster:
~
192.168.0.110 node1
192.168.0.111 node2
192.168.0.112 node3
192.168.0.113 node4
192.168.0.114 node5
192.168.0.115 node6
192.168.0.116 node7
The Hadoop specific settings files, for versions 2.x can be found in the following directory:
/opt/hadoop/etc/hadoop
Two notable files are the master and slaves file. Ensure that node1 is the only line listed in your
master file and all nodes (if you configure your node1 to still be a DataNode) in the slaves file.
For simplicity I have zipped up the files I had to update so you may copy them directly to your node1
and node2 Pi’s or use them as reference:
http://www.nigelpond.com/uploads/node1-config-files.zip
http://www.nigelpond.com/uploads/node2-config-files.zip
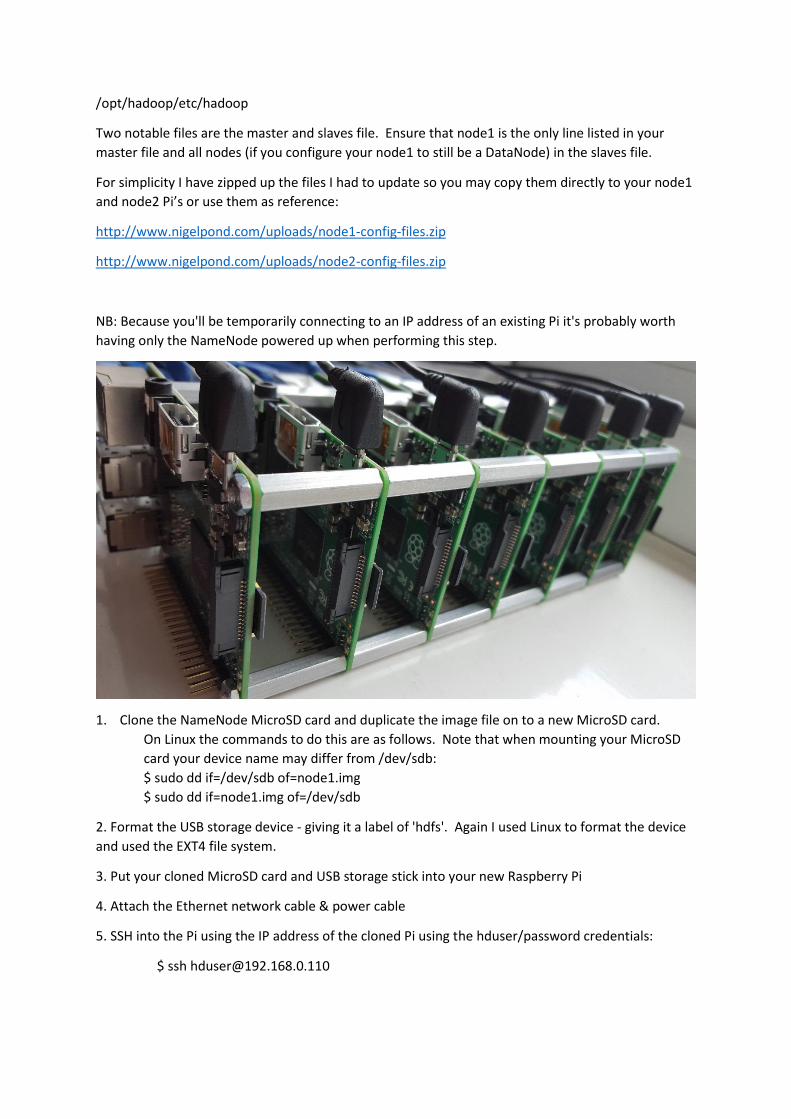
NB: Because you'll be temporarily connecting to an IP address of an existing Pi it's probably worth
having only the NameNode powered up when performing this step.
1. Clone the NameNode MicroSD card and duplicate the image file on to a new MicroSD card.
On Linux the commands to do this are as follows. Note that when mounting your MicroSD
card your device name may differ from /dev/sdb:
$ sudo dd if=/dev/sdb of=node1.img
$ sudo dd if=node1.img of=/dev/sdb
2. Format the USB storage device - giving it a label of 'hdfs'. Again I used Linux to format the device
and used the EXT4 file system.
3. Put your cloned MicroSD card and USB storage stick into your new Raspberry Pi
4. Attach the Ethernet network cable & power cable
5. SSH into the Pi using the IP address of the cloned Pi using the hduser/password credentials:
$ ssh [email protected]
6. Configure the Raspberry Pi using the raspi-config utility - you'll be prompted to reboot when
you've finished making this set of changes:
$ sudo raspi-config
o Change the node name (i.e. from node1 to node2)
o Check: enable SSH server
o Check: memory split - should be 16M
o Overclocking to Pi2 (reboot)
8. After the reboot from exiting raspi-config wait a few seconds and then SSH back in again. Edit the
/etc/network/interfaces file and change the IP address to the next available one:
$ sudo nano /etc/network/interfaces
9. Check the /etc/hosts file contains ALL the IP addresses and node names of ALL your Pi's:
$ cat /etc/hosts
10. Reboot the Pi
$ sudo reboot
11. SSH back into the Pi using the new IP address:
$ ssh [email protected]
12. From the new Pi node SSH into the NameNode - say 'yes' to question:
$ ssh node1
13. On the NameNode SSH to the new node name - say 'yes' to question – and then return to
node2:
$ ssh node2
$ exit
14. Creating the /hdfs data partition. Change directory into HDFS partition. Create the /tmp folder
and change ownership.
$ sudo mkdir -p /hdfs/tmp
$ sudo chown -R hduser:hadoop /hdfs
$ sudo chmod 750 /hdfs/tmp
15. Add an entry to the /etc/fstab file so that the /hdfs partition is mounted on boot
$ sudo nano /etc/fstab
Make it match this but remember the /dev/sd* may differ:
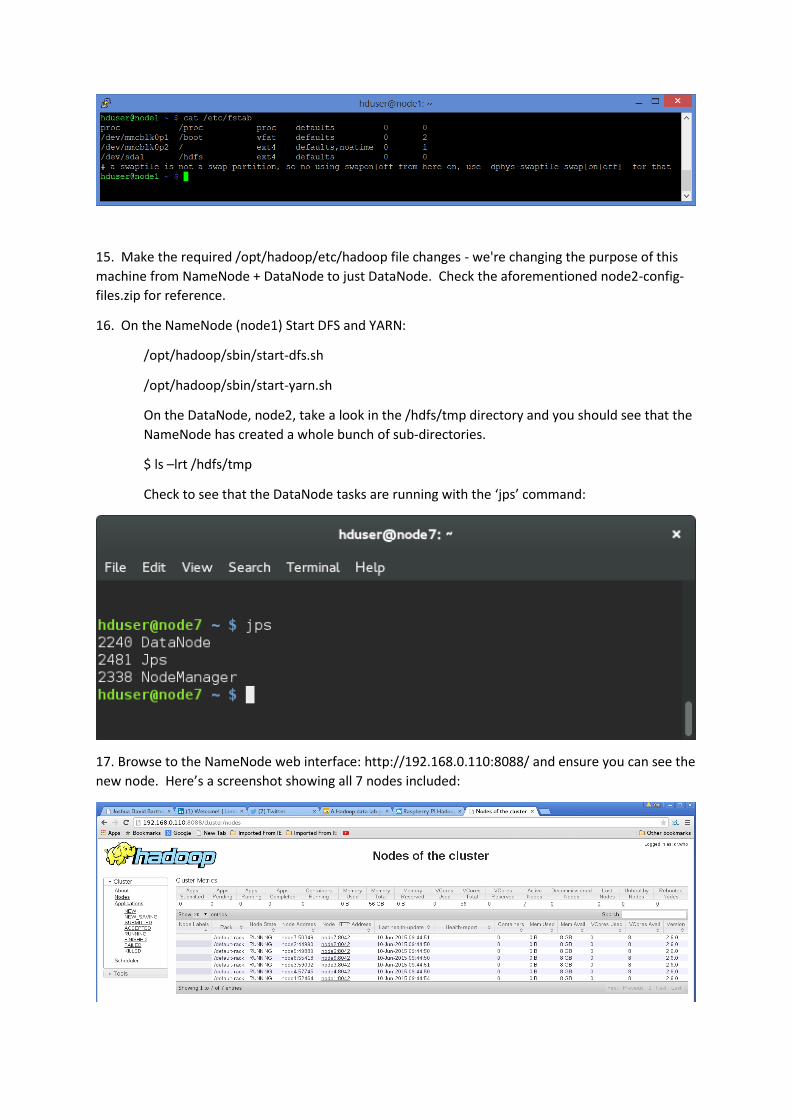
15. Make the required /opt/hadoop/etc/hadoop file changes - we're changing the purpose of this
machine from NameNode + DataNode to just DataNode. Check the aforementioned node2-config-
files.zip for reference.
16. On the NameNode (node1) Start DFS and YARN:
/opt/hadoop/sbin/start-dfs.sh
/opt/hadoop/sbin/start-yarn.sh
On the DataNode, node2, take a look in the /hdfs/tmp directory and you should see that the
NameNode has created a whole bunch of sub-directories.
$ ls –lrt /hdfs/tmp
Check to see that the DataNode tasks are running with the ‘jps’ command:
17. Browse to the NameNode web interface: http://192.168.0.110:8088/ and ensure you can see the
new node. Here’s a screenshot showing all 7 nodes included:
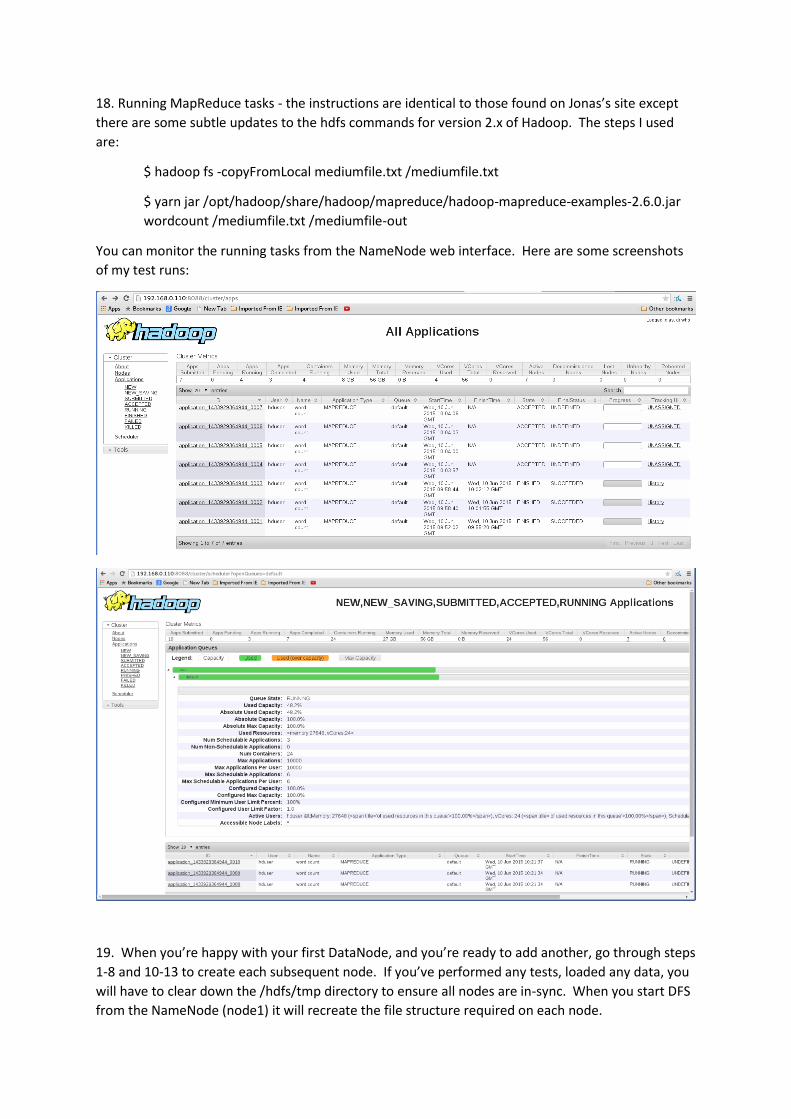
18. Running MapReduce tasks - the instructions are identical to those found on Jonas’s site except
there are some subtle updates to the hdfs commands for version 2.x of Hadoop. The steps I used
are:
$ hadoop fs -copyFromLocal mediumfile.txt /mediumfile.txt
$ yarn jar /opt/hadoop/share/hadoop/mapreduce/hadoop-mapreduce-examples-2.6.0.jar
wordcount /mediumfile.txt /mediumfile-out
You can monitor the running tasks from the NameNode web interface. Here are some screenshots
of my test runs:
19. When you’re happy with your first DataNode, and you’re ready to add another, go through steps
1-8 and 10-13 to create each subsequent node. If you’ve performed any tests, loaded any data, you
will have to clear down the /hdfs/tmp directory to ensure all nodes are in-sync. When you start DFS
from the NameNode (node1) it will recreate the file structure required on each node.
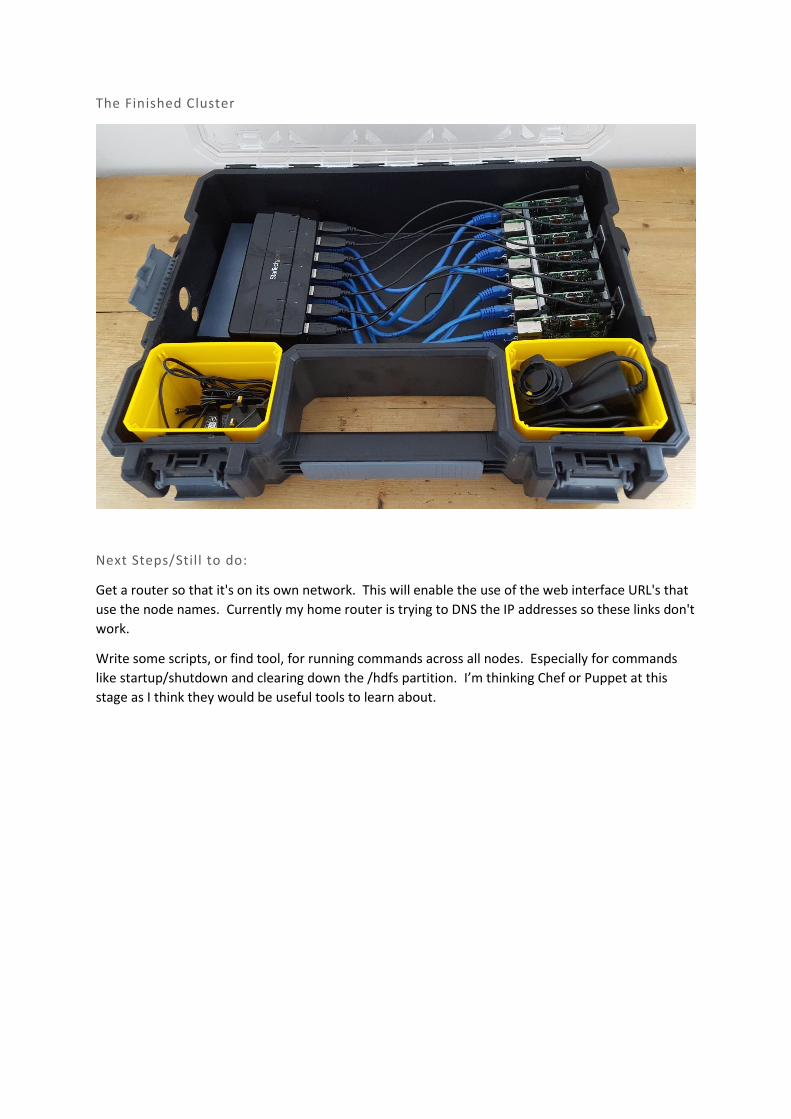
The Finished Cluster
Next Steps/Still to do:
Get a router so that it's on its own network. This will enable the use of the web interface URL's that
use the node names. Currently my home router is trying to DNS the IP addresses so these links don't
work.
Write some scripts, or find tool, for running commands across all nodes. Especially for commands
like startup/shutdown and clearing down the /hdfs partition. I’m thinking Chef or Puppet at this
stage as I think they would be useful tools to learn about.