how to create a voki - nsu | ndlw | homendlw.nsula.edu/assets/pdf/how-to-create-a-voki.pdf · how...
TRANSCRIPT
How to Create a VokiCREATING AN AVATAR FOR YOUR CLASSES THROUGH VOKI.COM

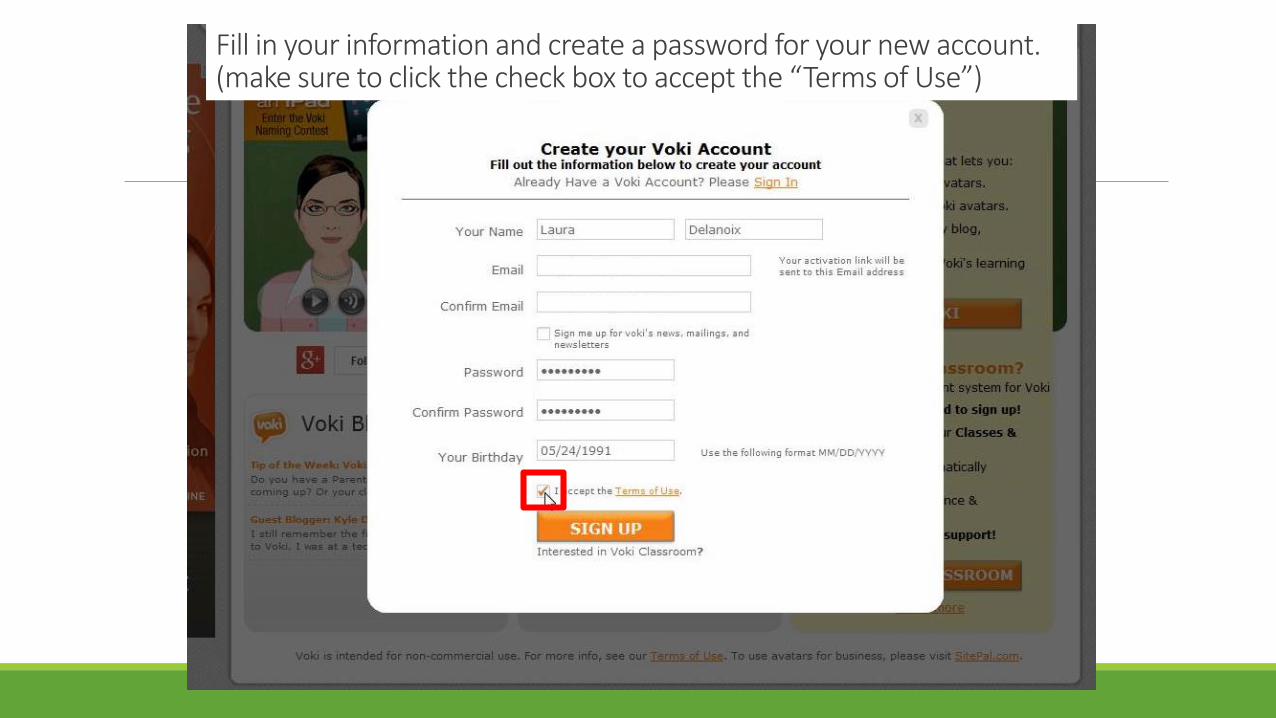
Fill in your information and create a password for your new account. (make sure to click the check box to accept the “Terms of Use”)
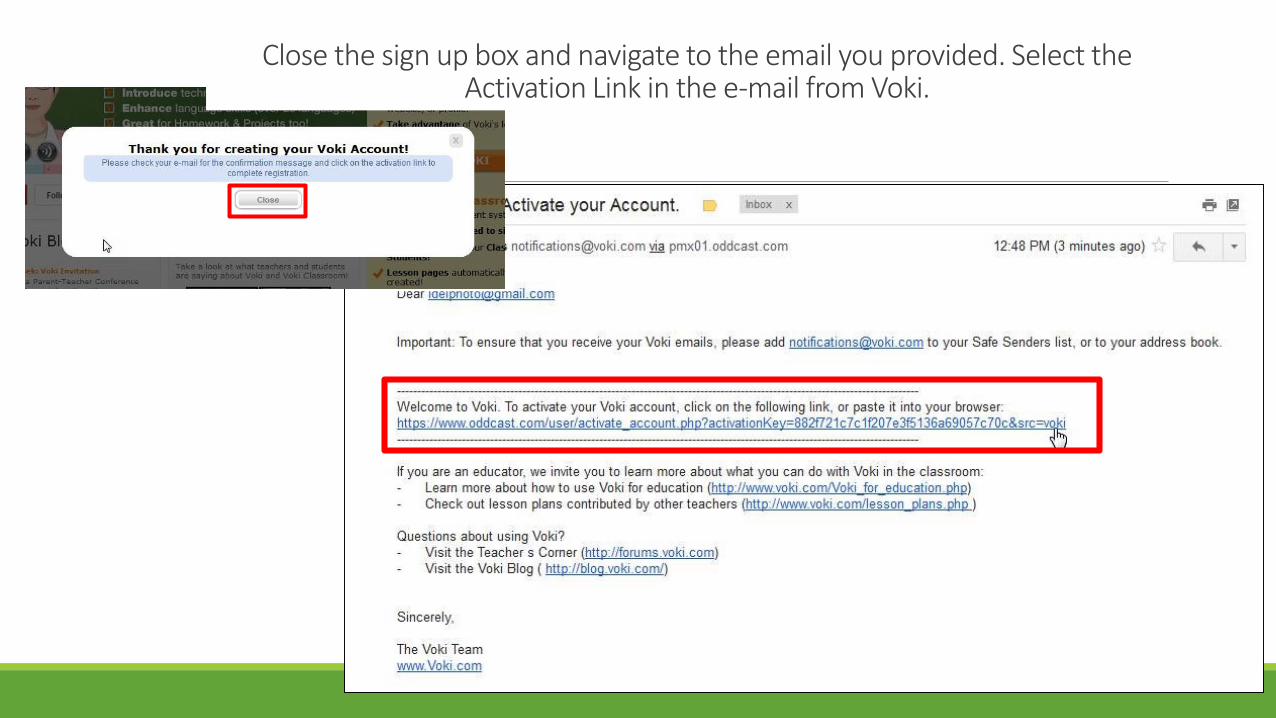
Close the sign up box and navigate to the email you provided. Select the Activation Link in the e-mail from Voki.

A window opens that allows you to sign into your new account.
(You can also sign into your Voki anytime in the top right corner of Voki.com)
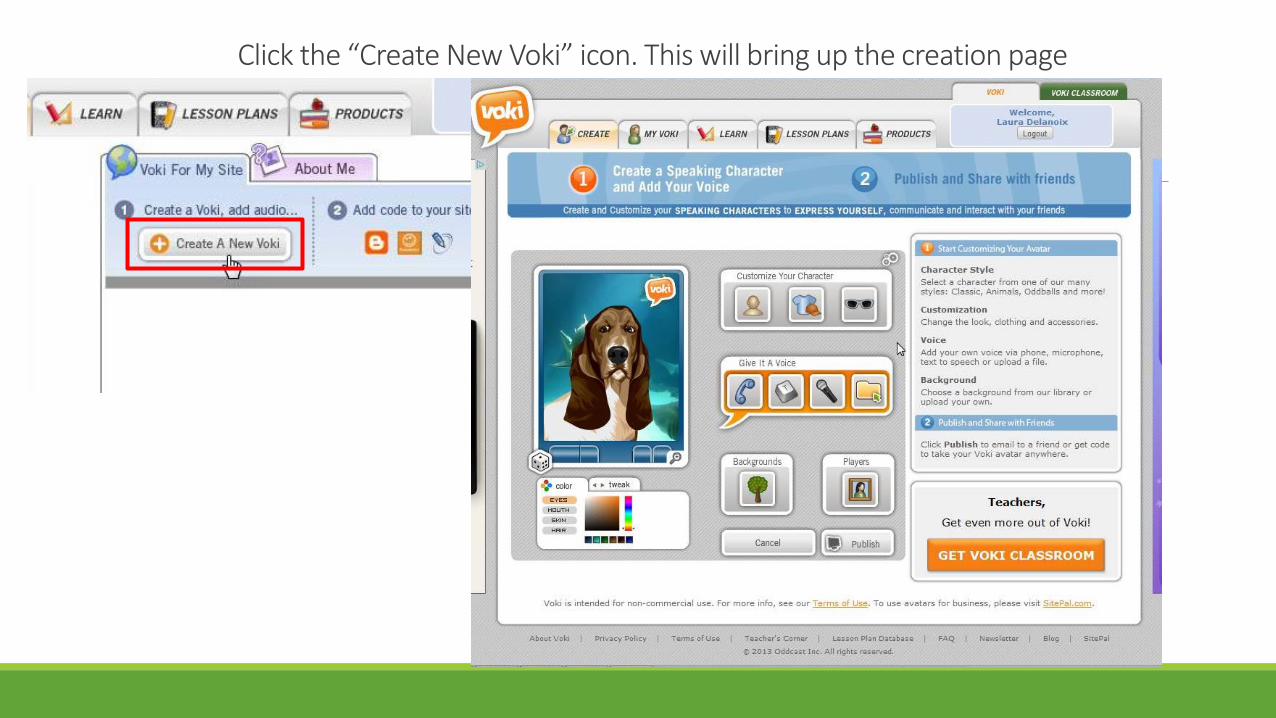
Click the “Create New Voki” icon. This will bring up the creation page
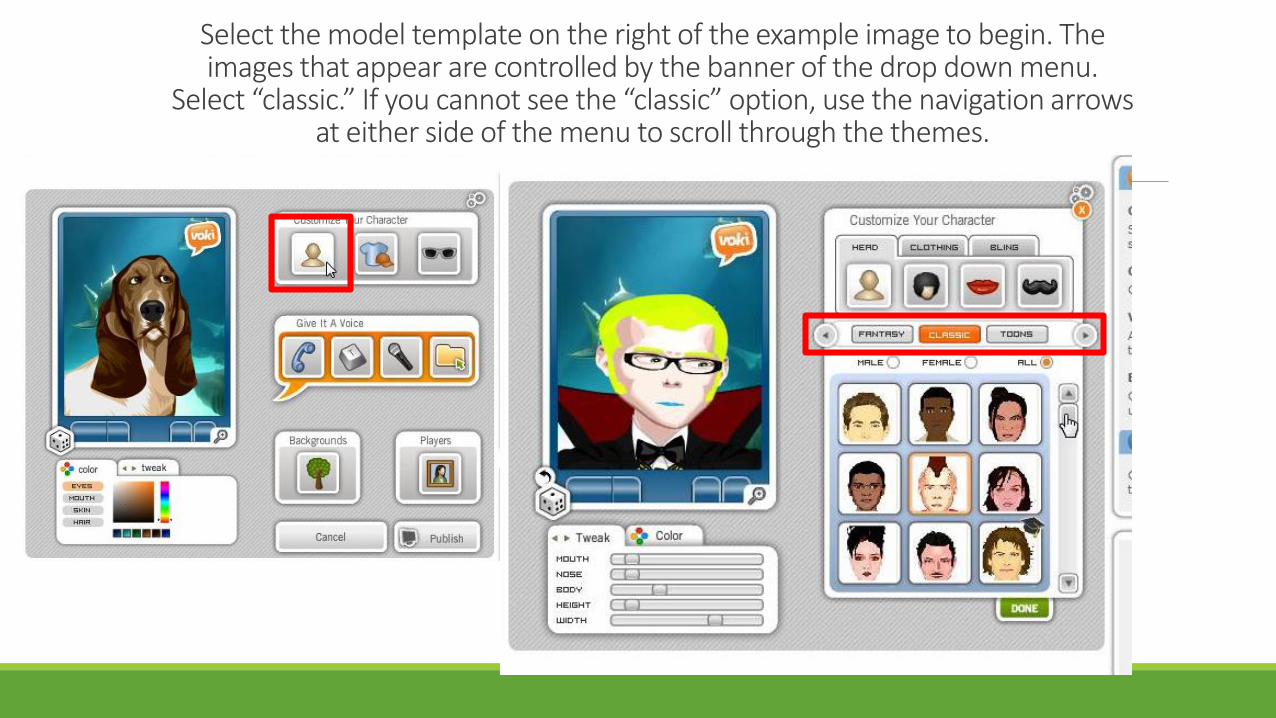
Select the model template on the right of the example image to begin. The images that appear are controlled by the banner of the drop down menu.
Select “classic.” If you cannot see the “classic” option, use the navigation arrows at either side of the menu to scroll through the themes.

Select an image from the “Classic” menu. The images with the graduation caps are only available for the Voki Classroom users, and a subscription must be bought for those features. Remember: the image you choose should be the one most similar to the facial structure you want. You will
edit the look of everything else soon.

Next to the template you selected before is the “Hair” icon. Click there to select a hairstyle for your image. The hair color can be edited later. You are just choosing a style for now. Do the same
for the “Lips” option.
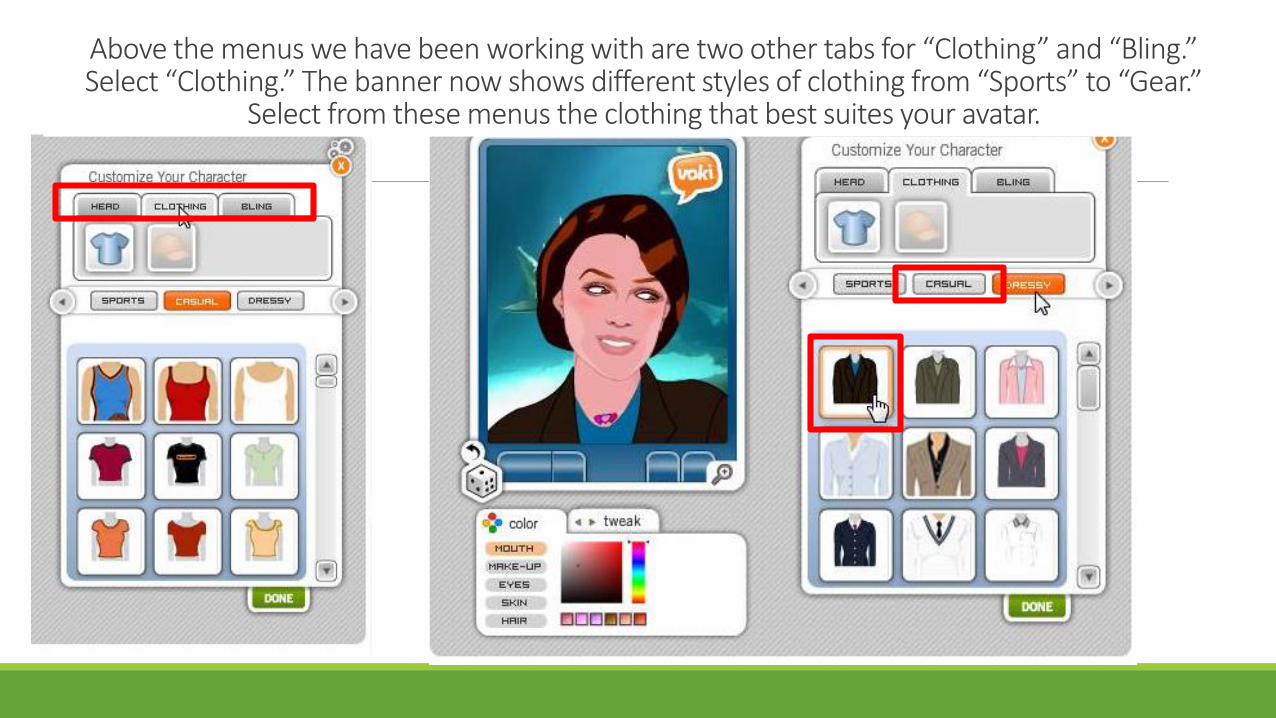
Above the menus we have been working with are two other tabs for “Clothing” and “Bling.” Select “Clothing.” The banner now shows different styles of clothing from “Sports” to “Gear.”
Select from these menus the clothing that best suites your avatar.

The final tab is “Bling.” Select this now and choose eyewear or necklaces that best suite your avatar. (remember the scroll bar to view all of the options)
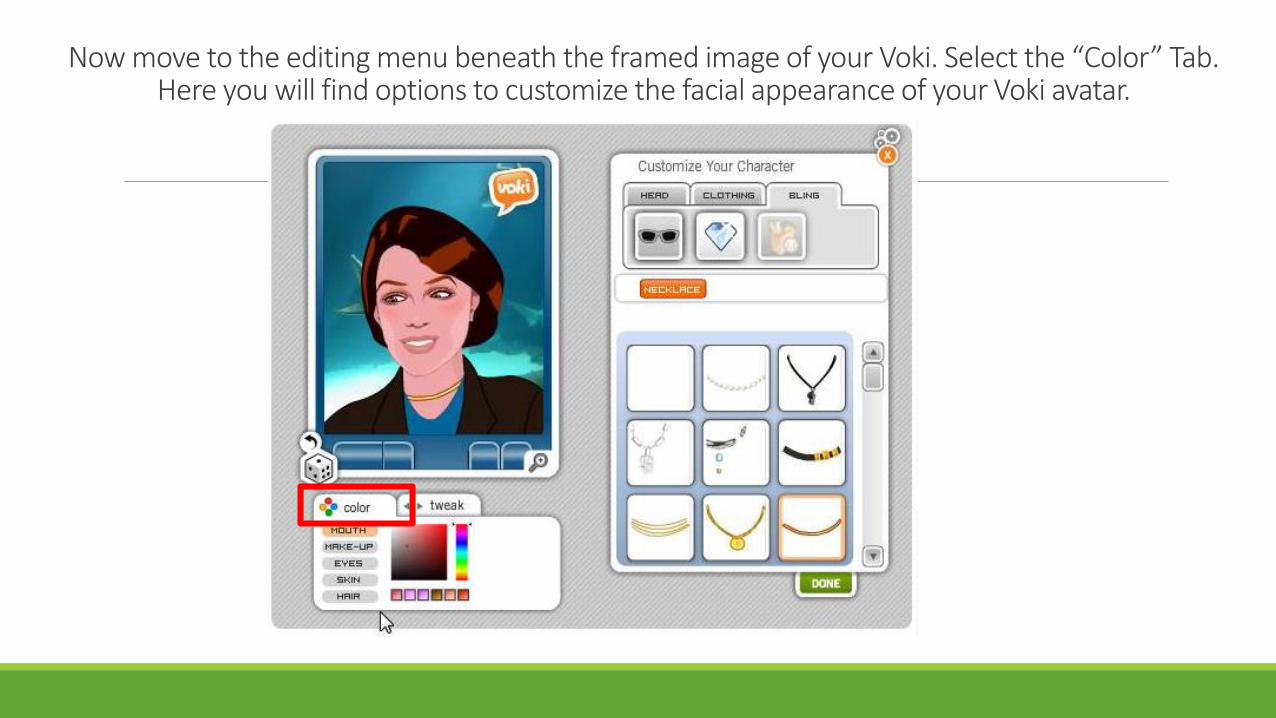
Now move to the editing menu beneath the framed image of your Voki. Select the “Color” Tab. Here you will find options to customize the facial appearance of your Voki avatar.

Select “Mouth” from the menu and choose one of the pre-made colors. If you like you can also mix your own color using the color mixer provided. Continue down the list to finish editing with
the tools provided.
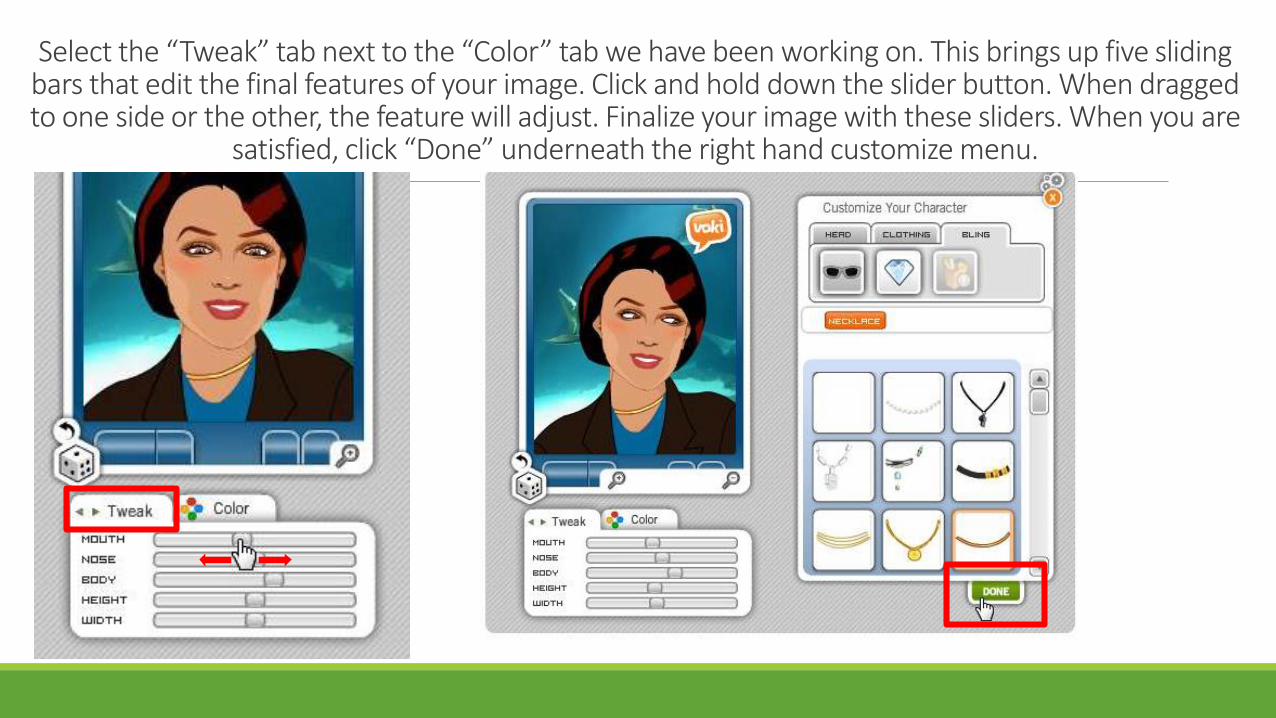
Select the “Tweak” tab next to the “Color” tab we have been working on. This brings up five sliding bars that edit the final features of your image. Click and hold down the slider button. When dragged to one side or the other, the feature will adjust. Finalize your image with these sliders. When you are
satisfied, click “Done” underneath the right hand customize menu.
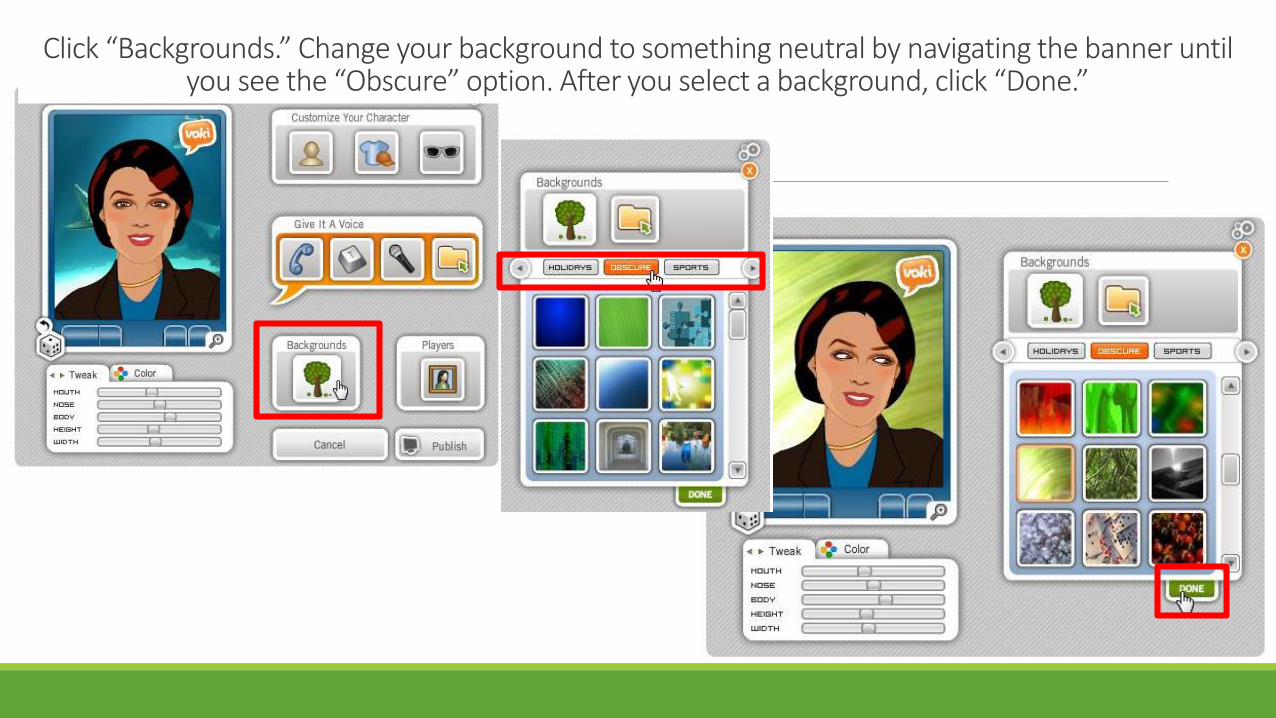
Click “Backgrounds.” Change your background to something neutral by navigating the banner until you see the “Obscure” option. After you select a background, click “Done.”
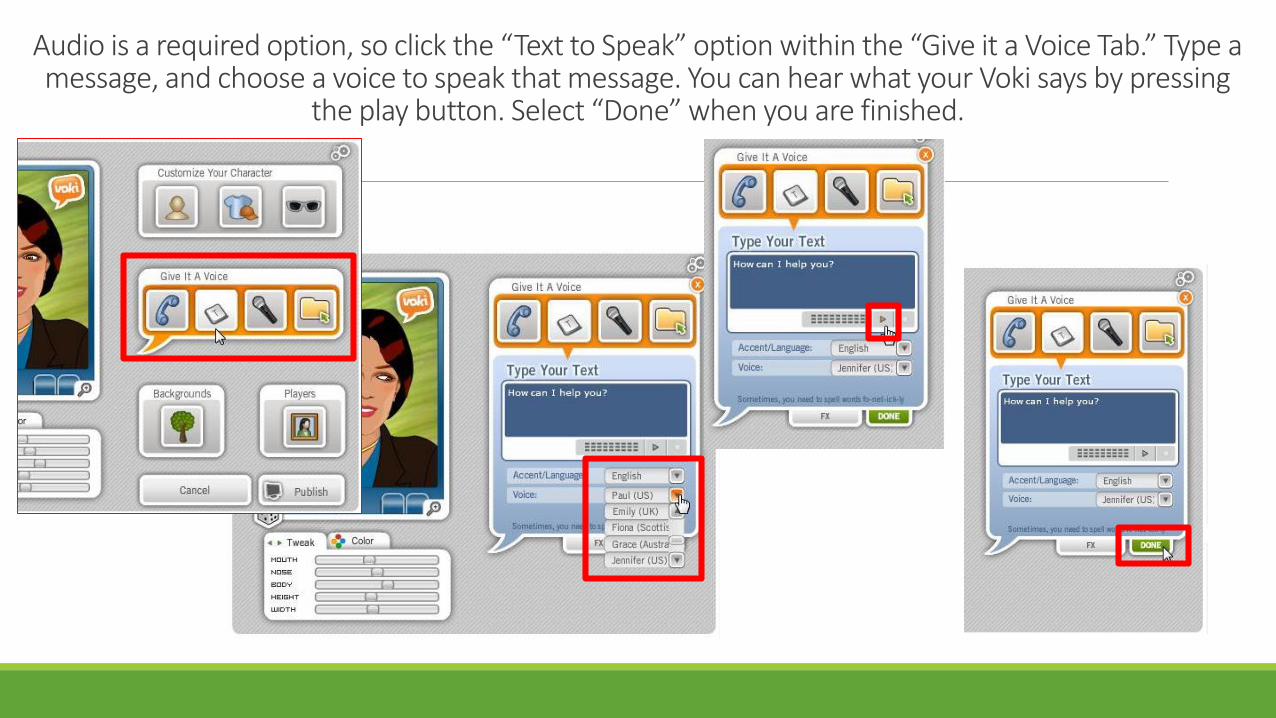
Audio is a required option, so click the “Text to Speak” option within the “Give it a Voice Tab.” Type a message, and choose a voice to speak that message. You can hear what your Voki says by pressing
the play button. Select “Done” when you are finished.
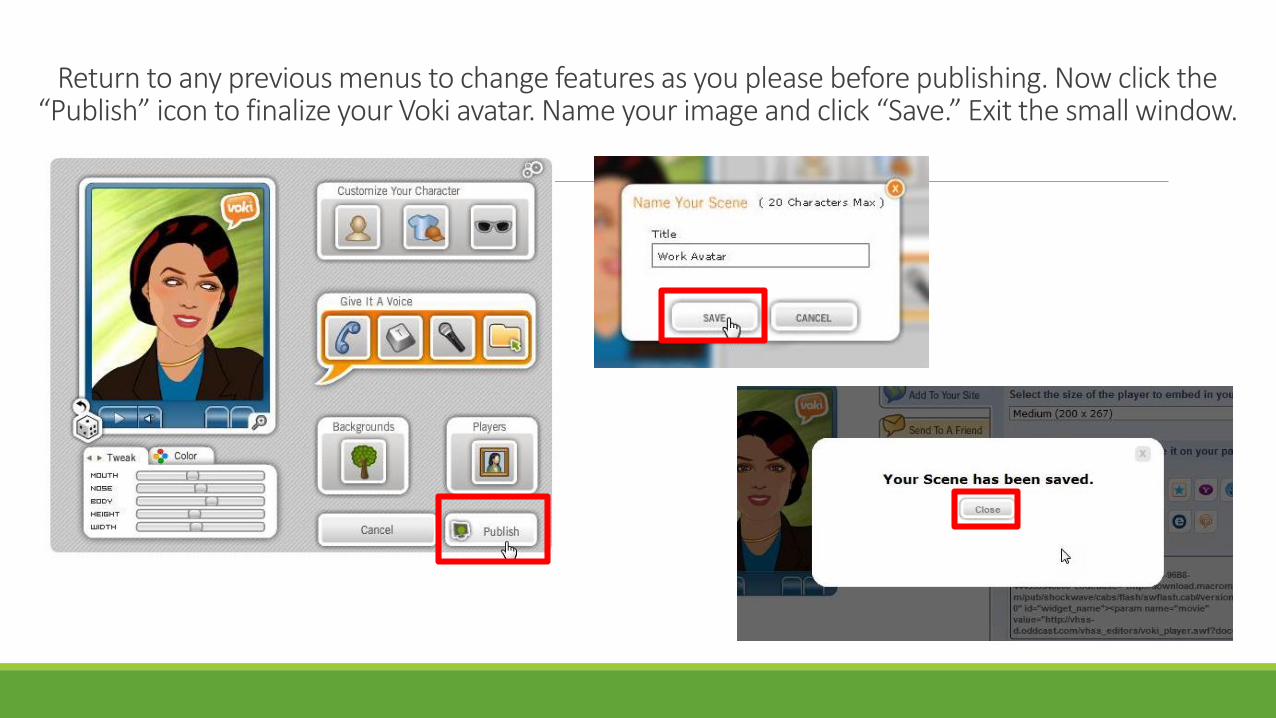
Return to any previous menus to change features as you please before publishing. Now click the “Publish” icon to finalize your Voki avatar. Name your image and click “Save.” Exit the small window.

Your Voki is now ready to be linked onto Moodle. The URL link will appear in the bottom box when “Standard Voki Link” is selected from the drop down menu. Right click your new link and select
“Copy.” Your Voki avatar can now be inserted into the Moodle Forums by link.