how to: how to remove the front bumper, install angel eyes … · how to: how to remove the front...
TRANSCRIPT

How to: How to remove the front bumper, install Angel Eyes (& HIDs)
MODERATOR NOTE: If you are going to follow this guide and install after market HIDs, make sure you understand the legal implications frst
As promised here is a guide on how to remove the front bumper and install Angel Eye headlights with a retroftted HID Xenon kit.
I have decided to start a new thread on the subject as the other seems to have gone well of subject in parts. Please note that this thread is not written to discuss the legalities of the subject matter it is instead published as a “how to” designed to assist forum members. Please do not go of topic.
The work was carried out to an E81 2.0d facelift M-Sport. I do not know how compatible the instructions are with any other model in the 1 series range and from research found there to be diferences between ftting/removing the M Sport and SE bumpers. I take no responsibility for the information contained in thread and will not be held responsible should you decide to refer to it to assist in any works you carry out.
Before pic. Here is the car to start (not my car as I didn’t have any pre-op pics sadly!)….
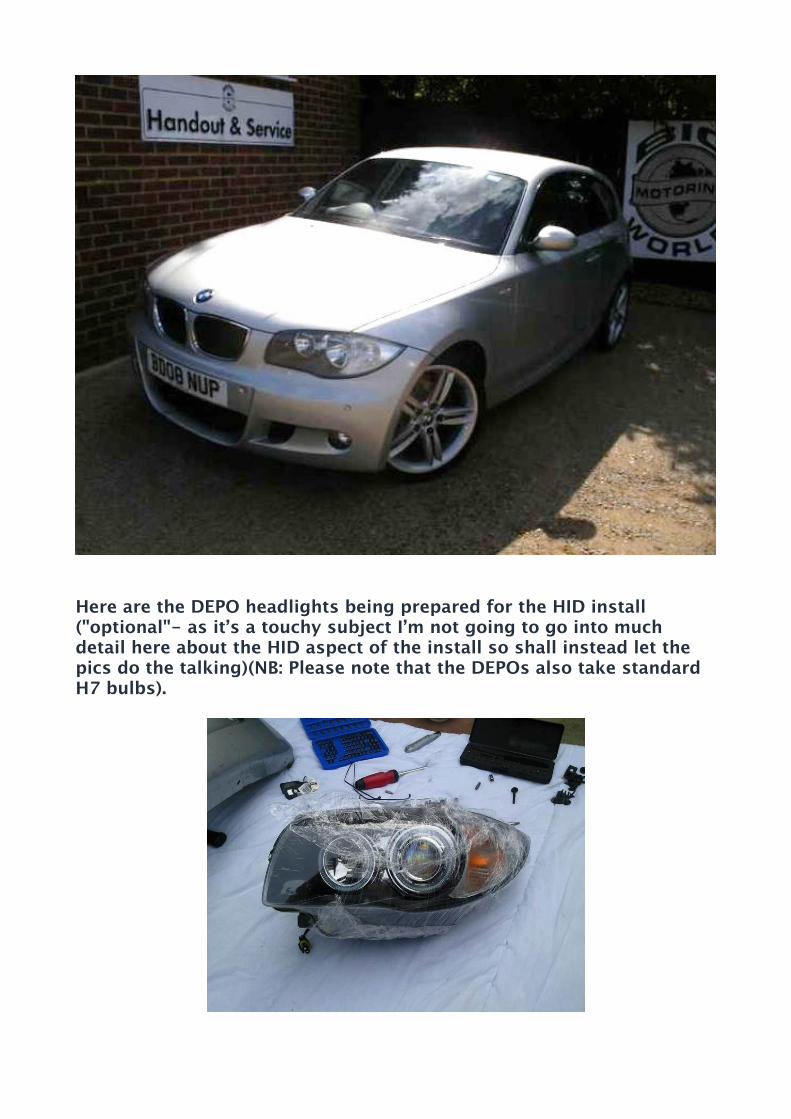
Here are the DEPO headlights being prepared for the HID install ("optional"- as it’s a touchy subject I’m not going to go into much detail here about the HID aspect of the install so shall instead let the pics do the talking)(NB: Please note that the DEPOs also take standard H7 bulbs).
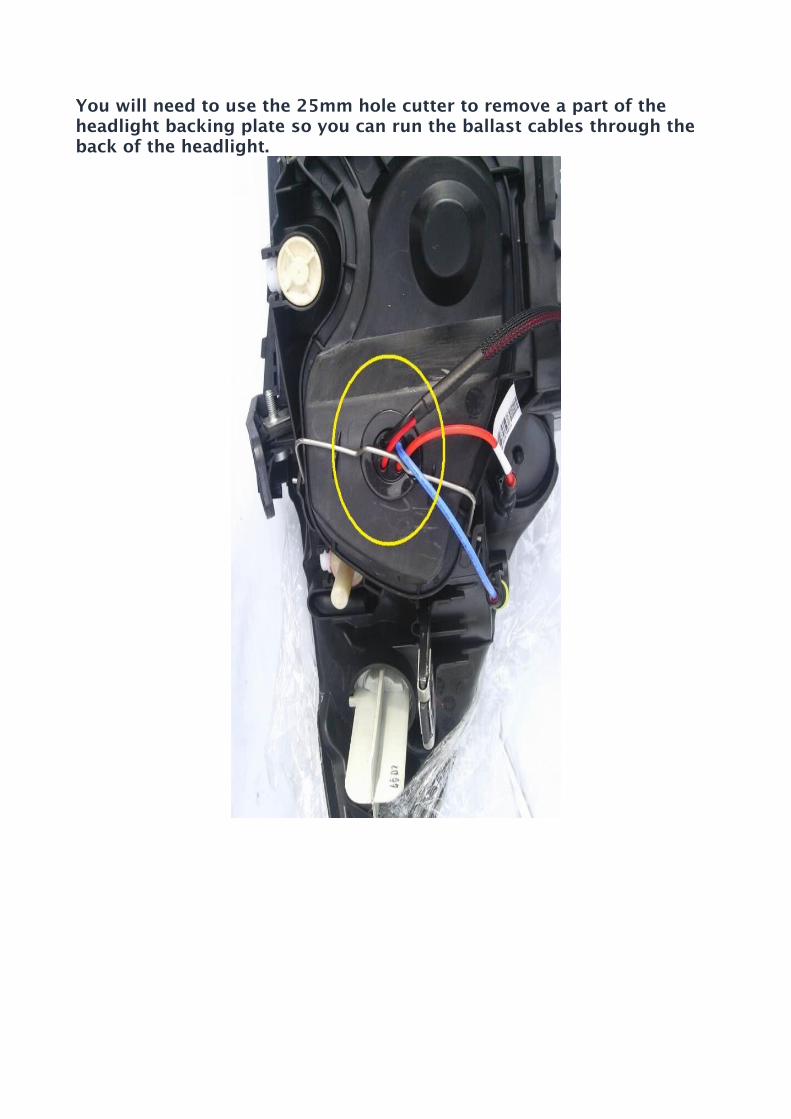
You will need to use the 25mm hole cutter to remove a part of the headlight backing plate so you can run the ballast cables through the back of the headlight.
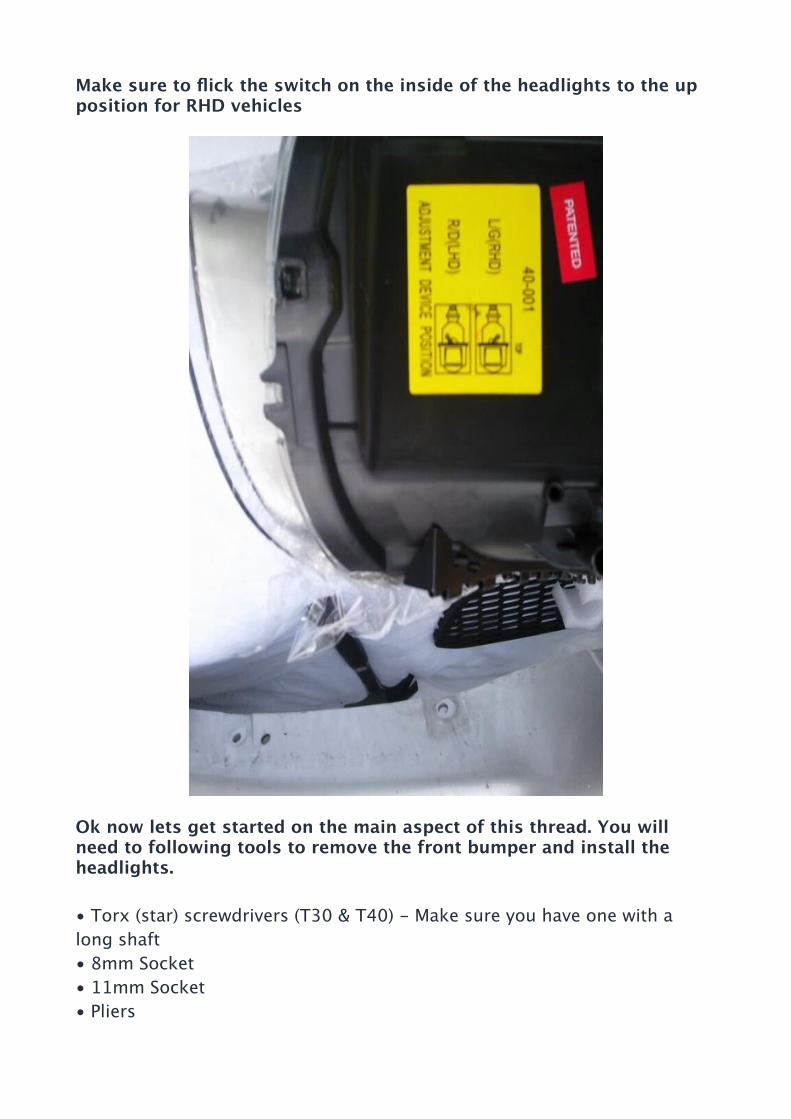
Make sure to fick the switch on the inside of the headlights to the up position for RHD vehicles
Ok now lets get started on the main aspect of this thread. You will need to following tools to remove the front bumper and install the headlights.
• Torx (star) screwdrivers (T30 & T40) - Make sure you have one with a long shaft• 8mm Socket• 11mm Socket• Pliers

• Wooden Spreader• Cable Ties• Car Jack• Axle Stands• Angel Eye Headlights• Drill 25mm hole cutter
To begin you will need to jack up the car. Jack the car up on the black plastic blocks protruding behind the sideskirts. These are the jacking points on the vehicle. One side of the car should be secured on the jack, the other an axle stand. You don’t need to do this, however it will make accessing the bottom half of the bumper much easier.
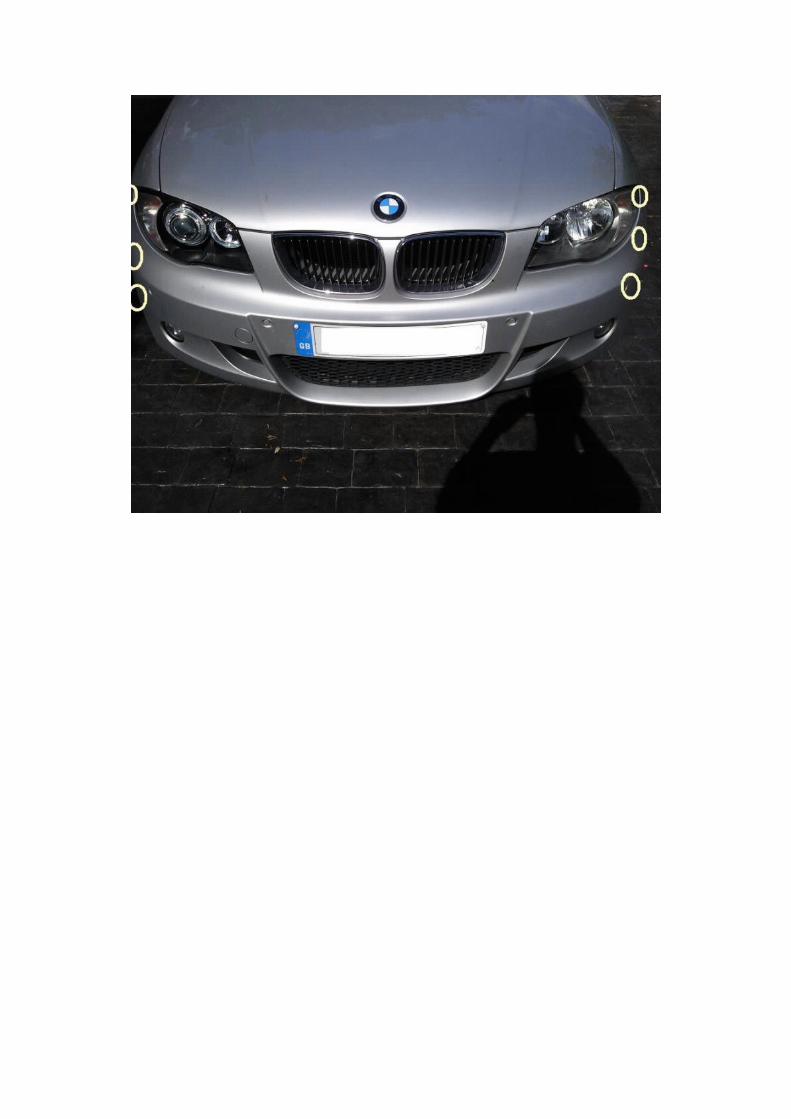
Once the car is jacked up you will be faced with something like this. I realise on Angel Eye is ftted but I didn’t have another front angle pic to use!
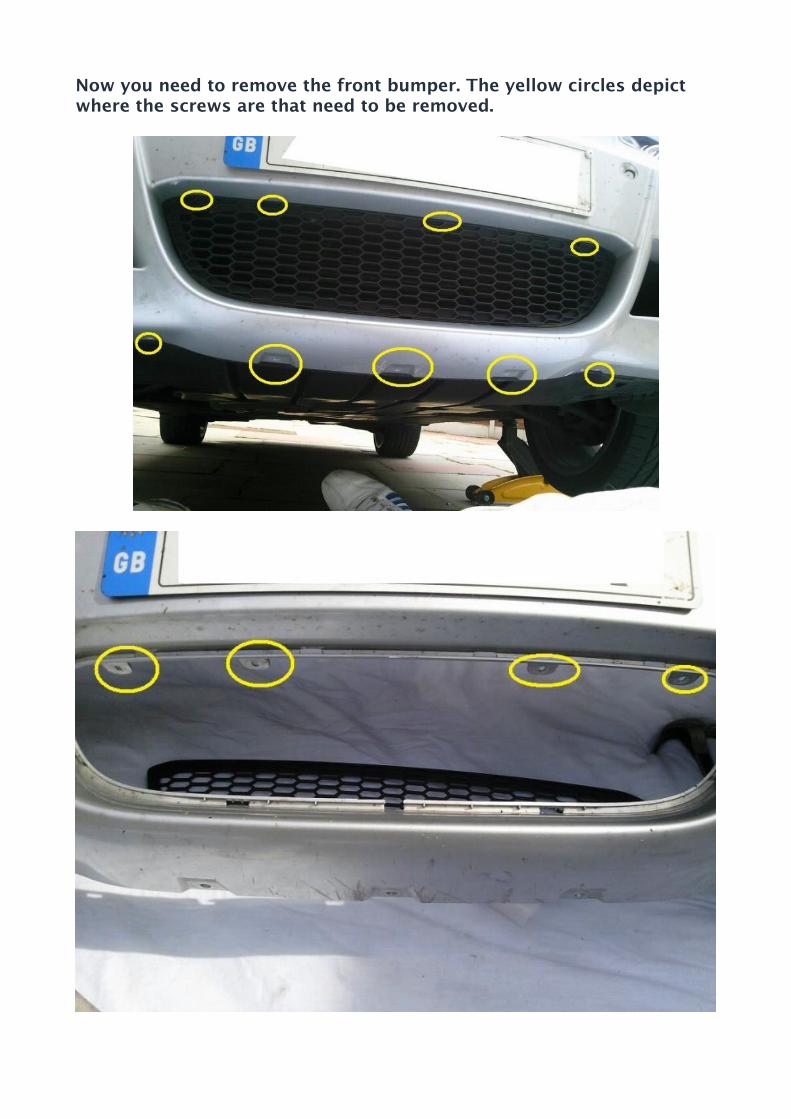
Now you need to remove the front bumper. The yellow circles depict where the screws are that need to be removed.
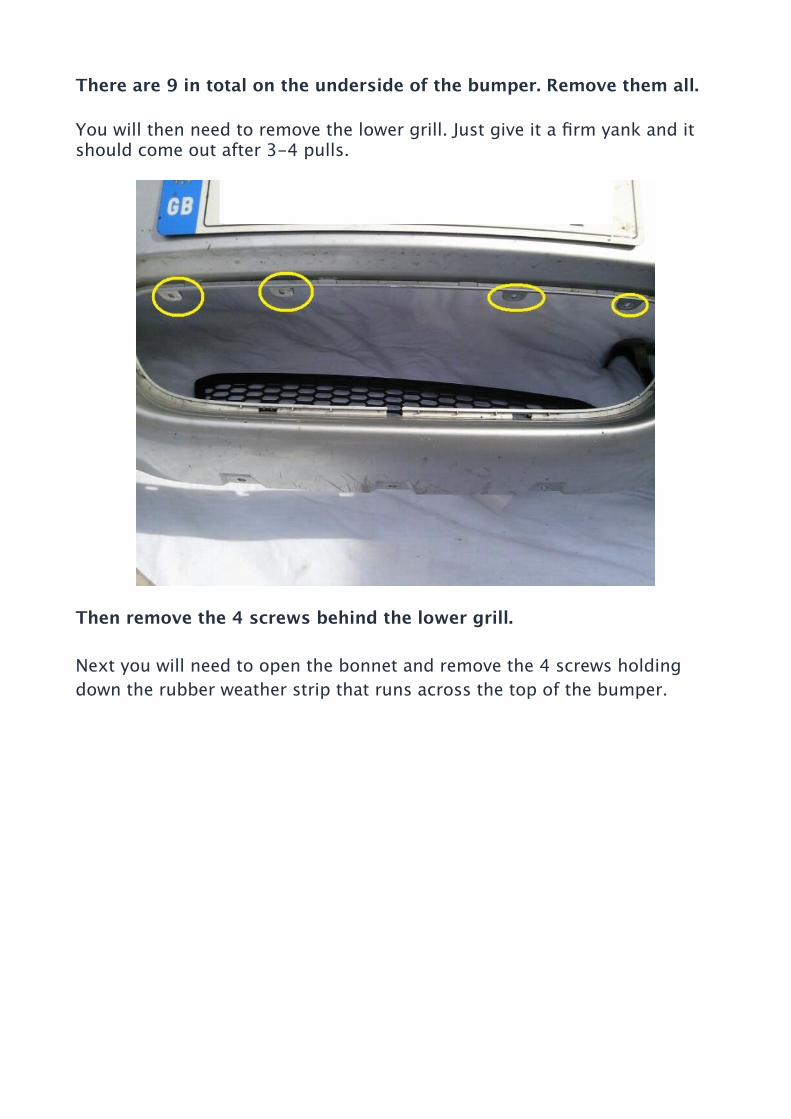
There are 9 in total on the underside of the bumper. Remove them all.
You will then need to remove the lower grill. Just give it a frm yank and it should come out after 3-4 pulls.
Then remove the 4 screws behind the lower grill.
Next you will need to open the bonnet and remove the 4 screws holding down the rubber weather strip that runs across the top of the bumper.
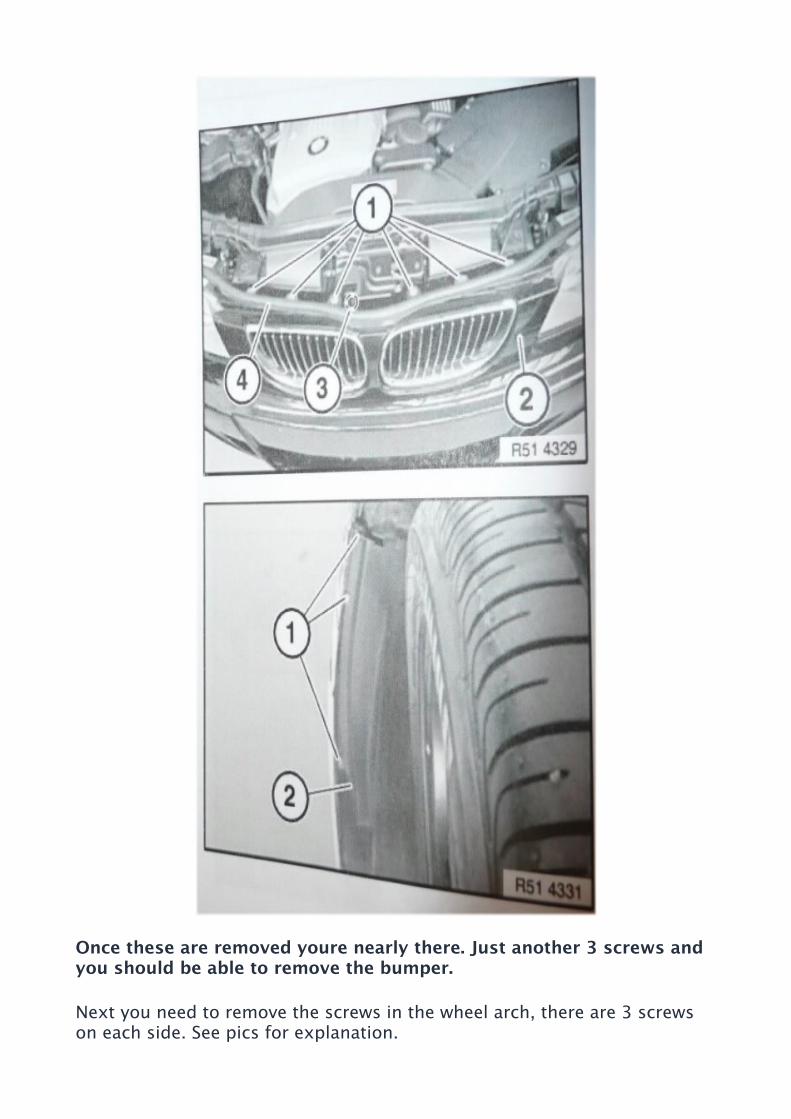
Once these are removed youre nearly there. Just another 3 screws and you should be able to remove the bumper.
Next you need to remove the screws in the wheel arch, there are 3 screws on each side. See pics for explanation.
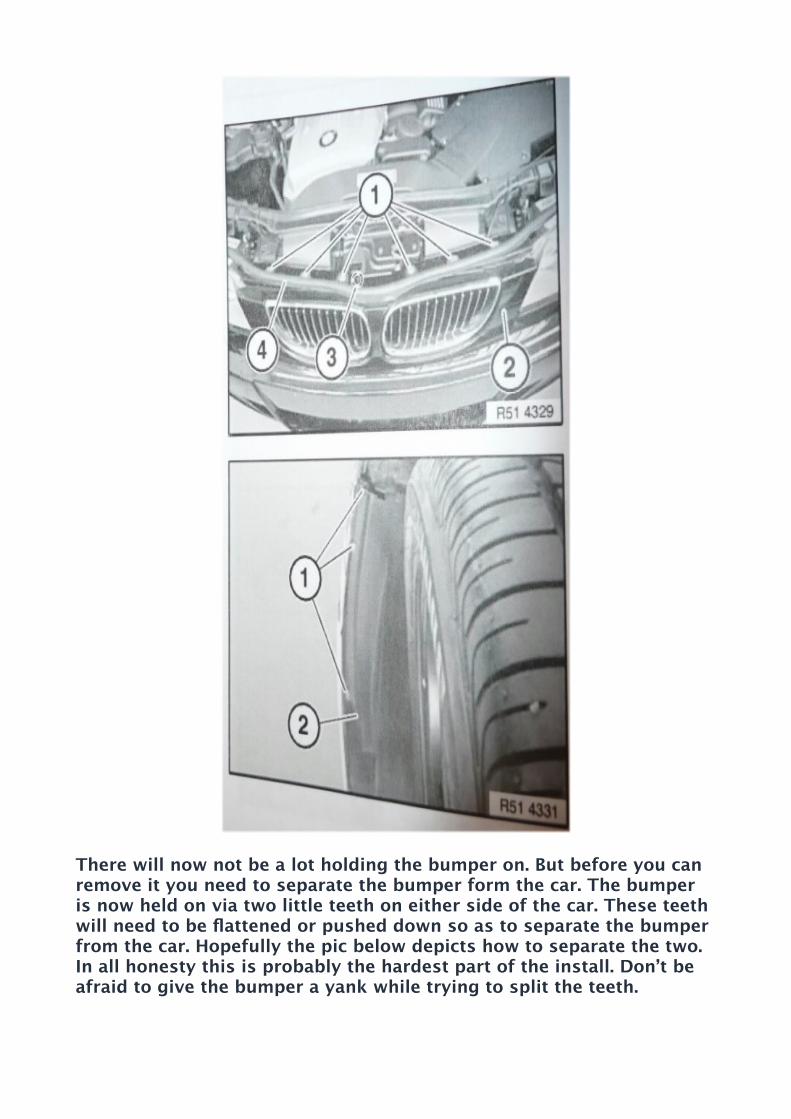
There will now not be a lot holding the bumper on. But before you can remove it you need to separate the bumper form the car. The bumper is now held on via two little teeth on either side of the car. These teeth will need to be fattened or pushed down so as to separate the bumper from the car. Hopefully the pic below depicts how to separate the two. In all honesty this is probably the hardest part of the install. Don’t be afraid to give the bumper a yank while trying to split the teeth.
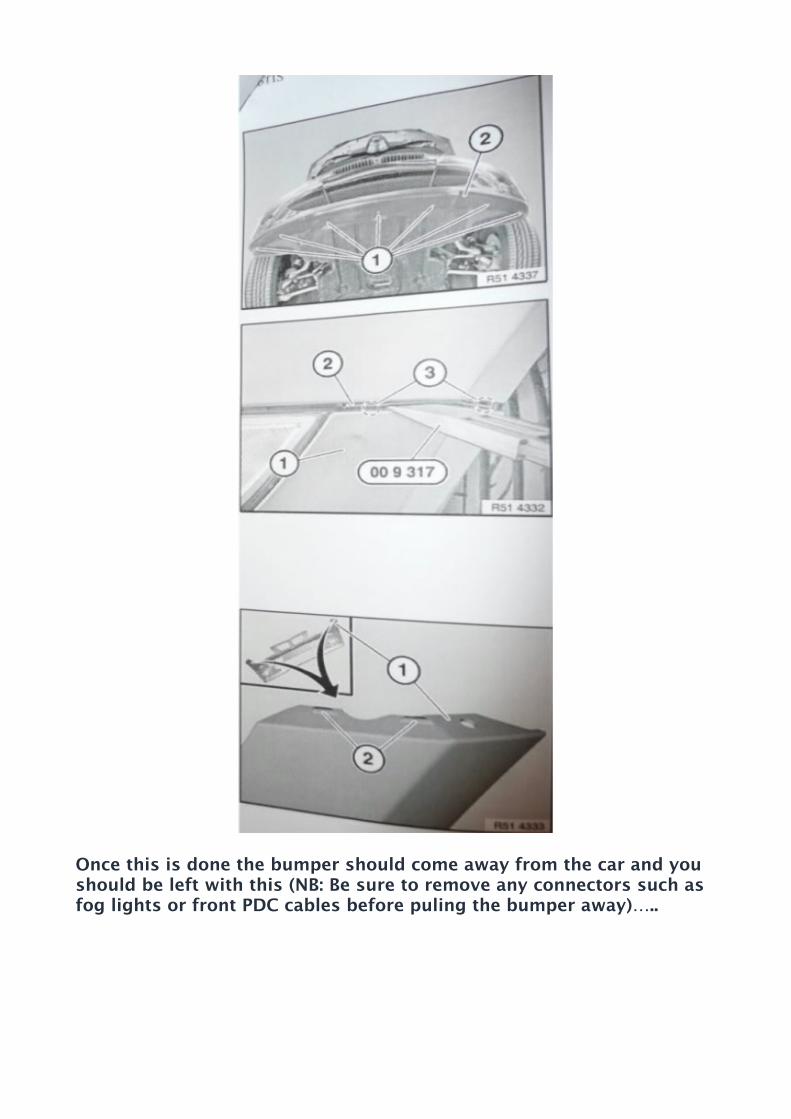
Once this is done the bumper should come away from the car and you should be left with this (NB: Be sure to remove any connectors such as fog lights or front PDC cables before puling the bumper away)…..
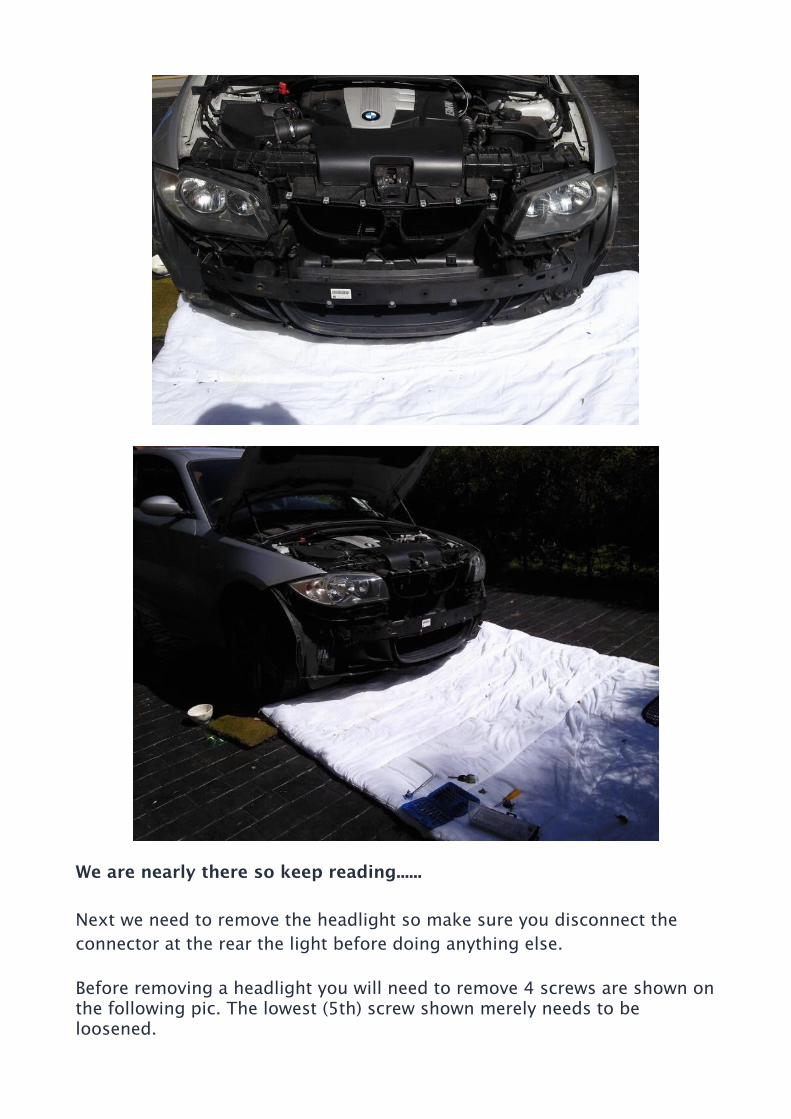
We are nearly there so keep reading......
Next we need to remove the headlight so make sure you disconnect the connector at the rear the light before doing anything else.
Before removing a headlight you will need to remove 4 screws are shown on the following pic. The lowest (5th) screw shown merely needs to be loosened.
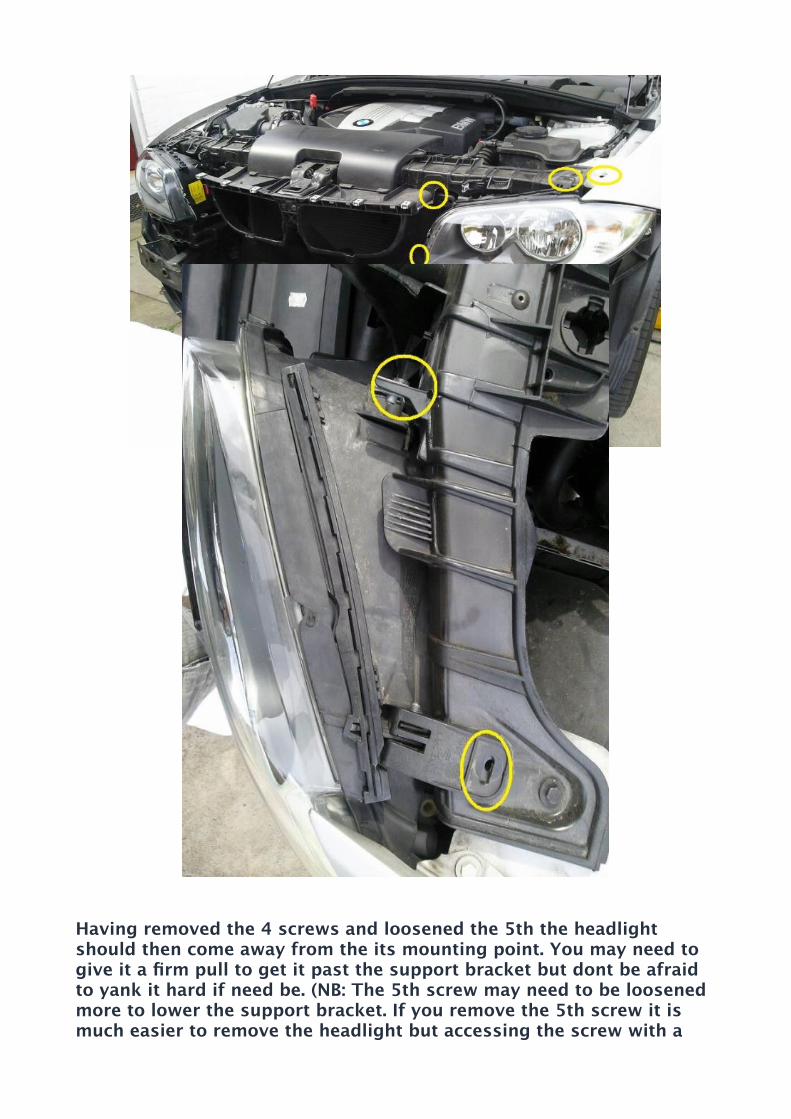
Having removed the 4 screws and loosened the 5th the headlight should then come away from the its mounting point. You may need to give it a frm pull to get it past the support bracket but dont be afraid to yank it hard if need be. (NB: The 5th screw may need to be loosened more to lower the support bracket. If you remove the 5th screw it is much easier to remove the headlight but accessing the screw with a
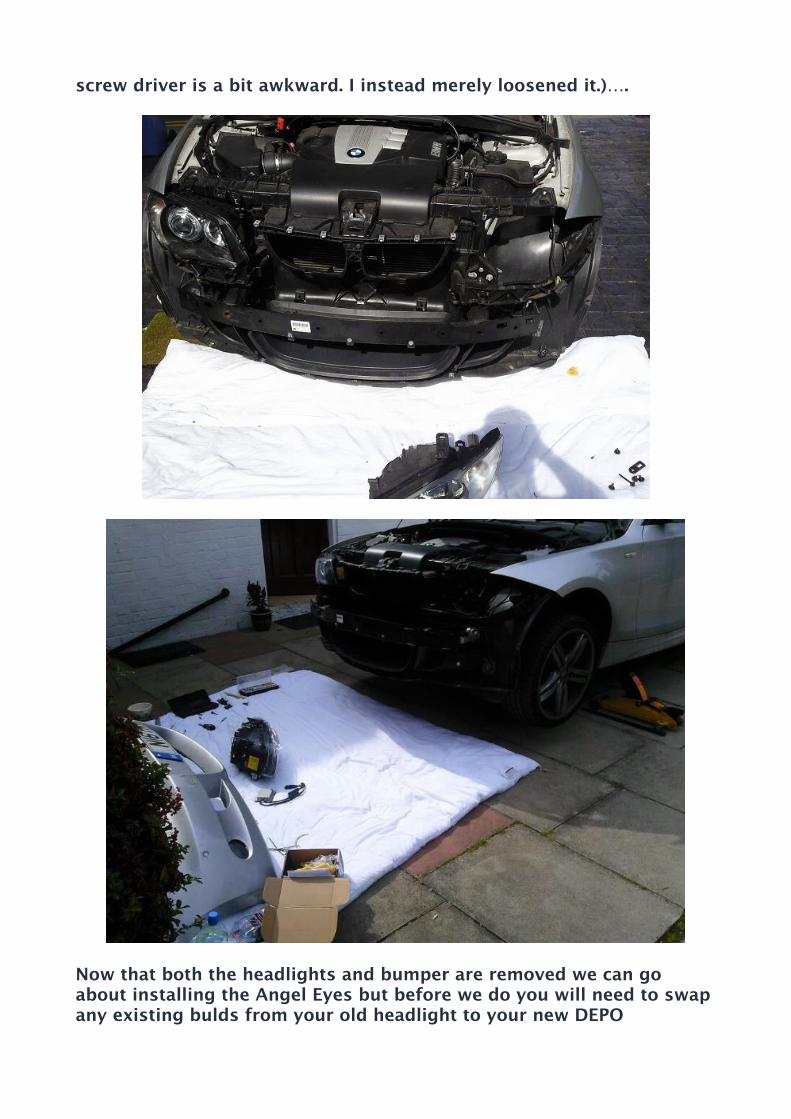
screw driver is a bit awkward. I instead merely loosened it.)….
Now that both the headlights and bumper are removed we can go about installing the Angel Eyes but before we do you will need to swap any existing bulds from your old headlight to your new DEPO

headlight.
To install the lights basically you will need to follow the instructions above, but in a reverse procedure.....
When instaling the lights be sure you line up the light housings properly, I used 2 wooden sticks to make sure the gaps between the light and the body work were perfectly spaced. Quite time consumimg but I like things perfect.
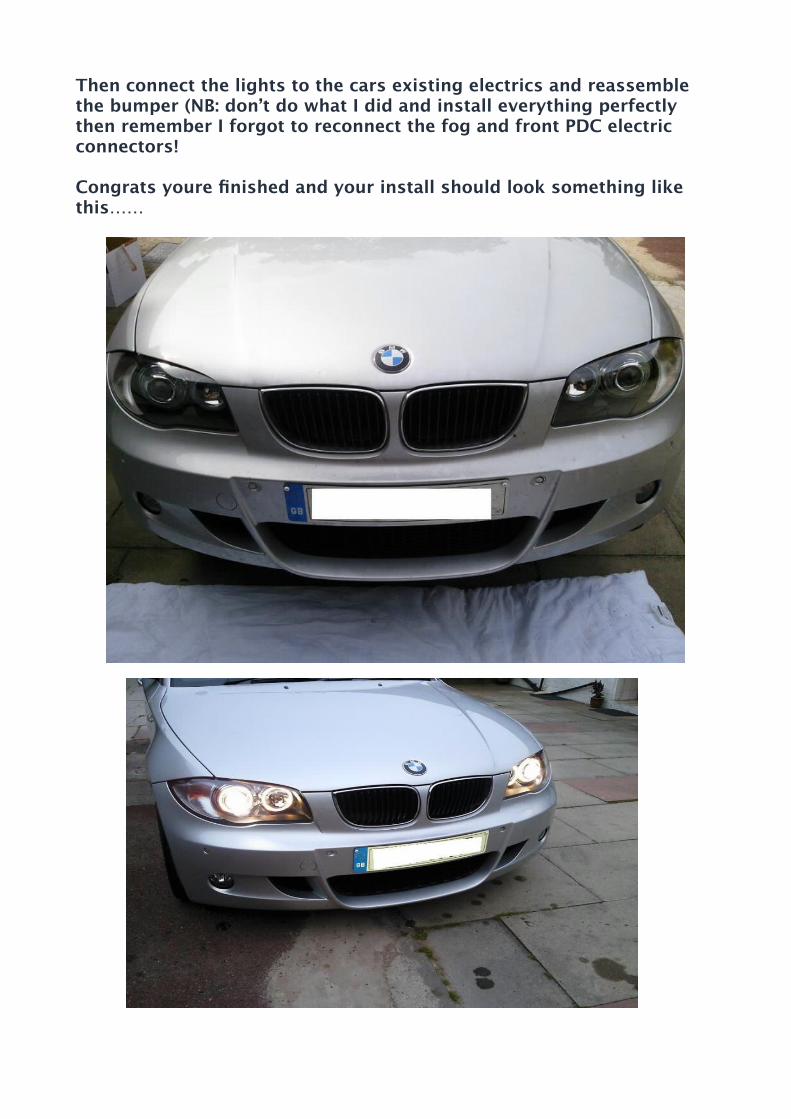
Then connect the lights to the cars existing electrics and reassemble the bumper (NB: don’t do what I did and install everything perfectly then remember I forgot to reconnect the fog and front PDC electric connectors!
Congrats youre fnished and your install should look something like this……
Wasn’t that hard after all and you’ve saved yourself a coupe of hundred quid the bodyshop may have charged
If youre not interested in the HID install then look away now.
If you are interested then please read on but note that I do not condone ftting HIDs to the original refector light housings as the amount of glare thrown out will be very dangerous. Refector based headlights are not designed for xenon bulbs and so do not scatter the light properly resulting in stray light which results in glaring on coming drivers and other road uses- not recommended. As an example, last year on a wintry night in the rain I had a civic behind me with a 6000k HID kit in his refector housings and it was blinding, I even had dimming mirrors but they didn’t help much- If I could have got hold of the driver I'd have bollocked him no end as he surely must of known what he was doing. I would only consider installing a HID kit into a projector based light housings.
If youre going for it and considering a HID kit you may wish to note that the 1 series requires special ballasts that do not throw error codes on the computer- so make sure you buy correctly. The £50 ebay kits probably do not work so be warned! I purchased on the basis of improved light output and not style so went for a 4300k canbus kit.
The retroft kit should integrate seamlessly with the existing light connectors….
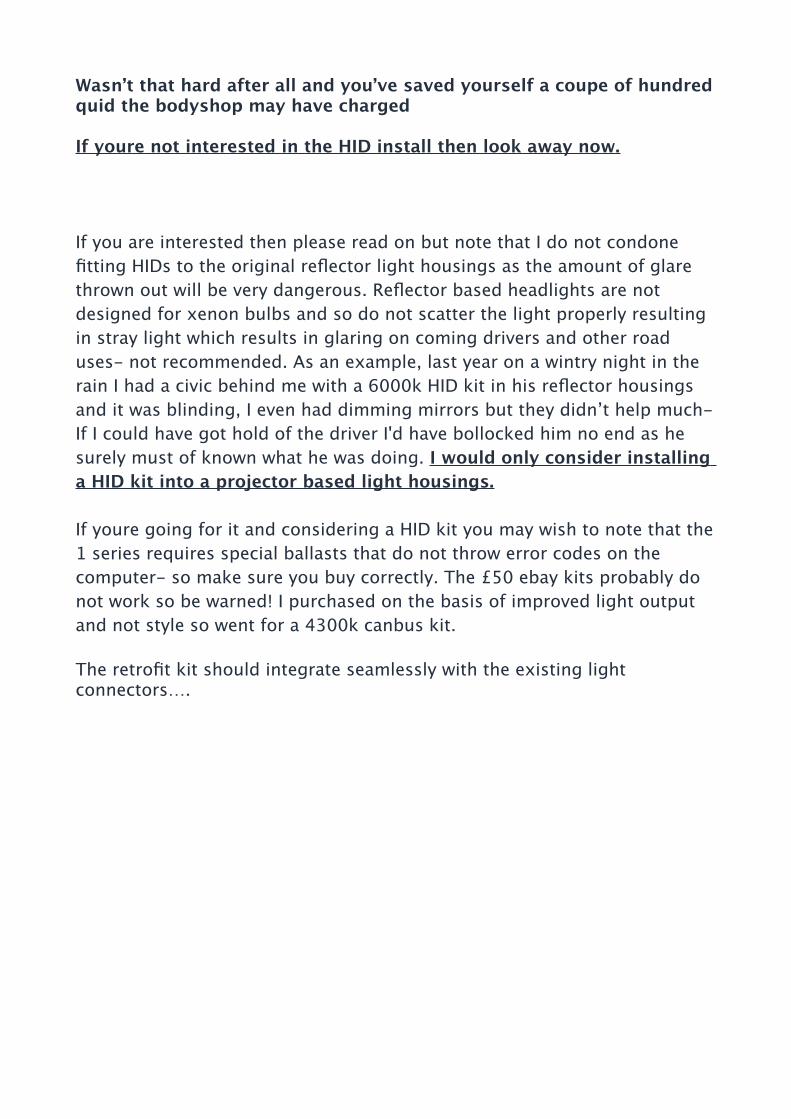
I like neat installs so installed the ballasts on the metal clips on the reverse of the headlight brackets using cable ties. They are ftted extremely frmly.
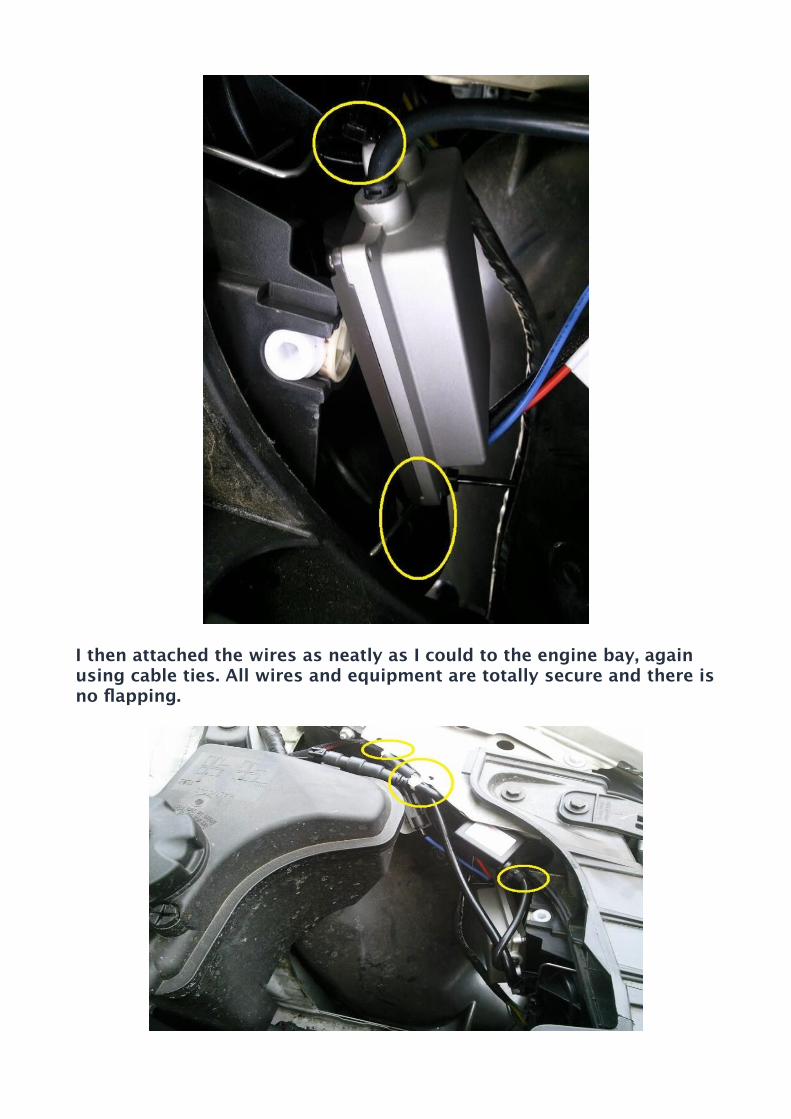
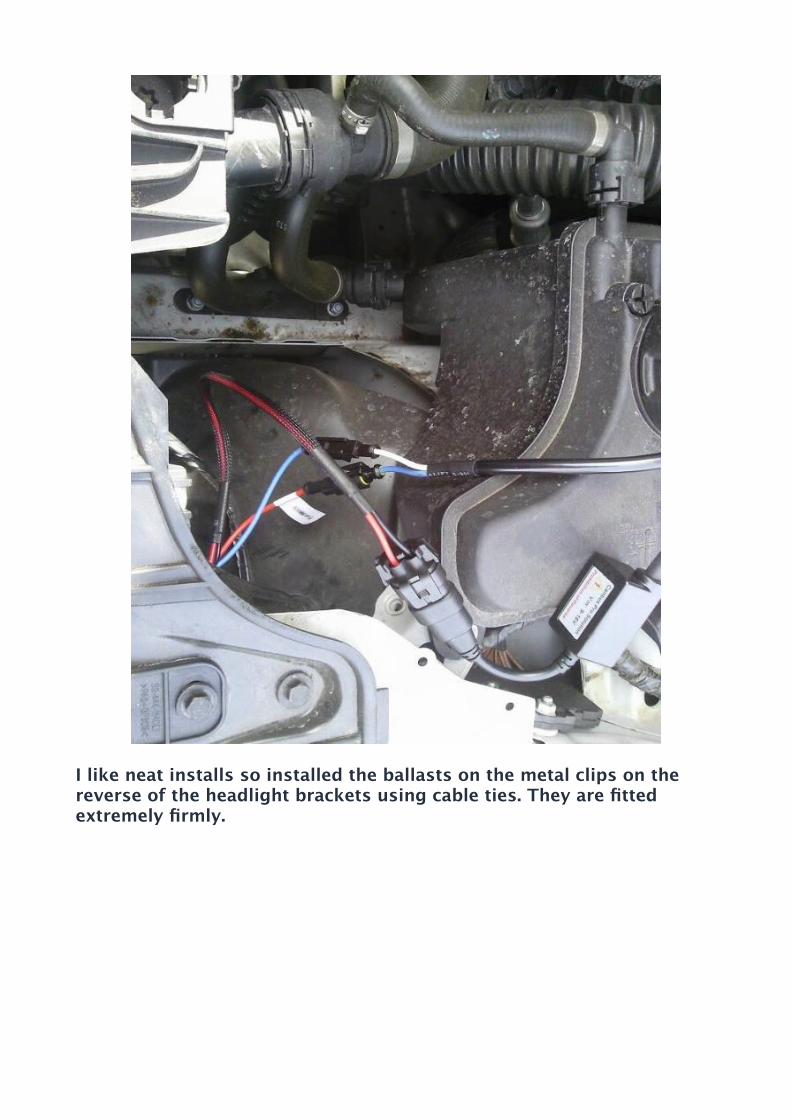
I then attached the wires as neatly as I could to the engine bay, again using cable ties. All wires and equipment are totally secure and there is no fapping.
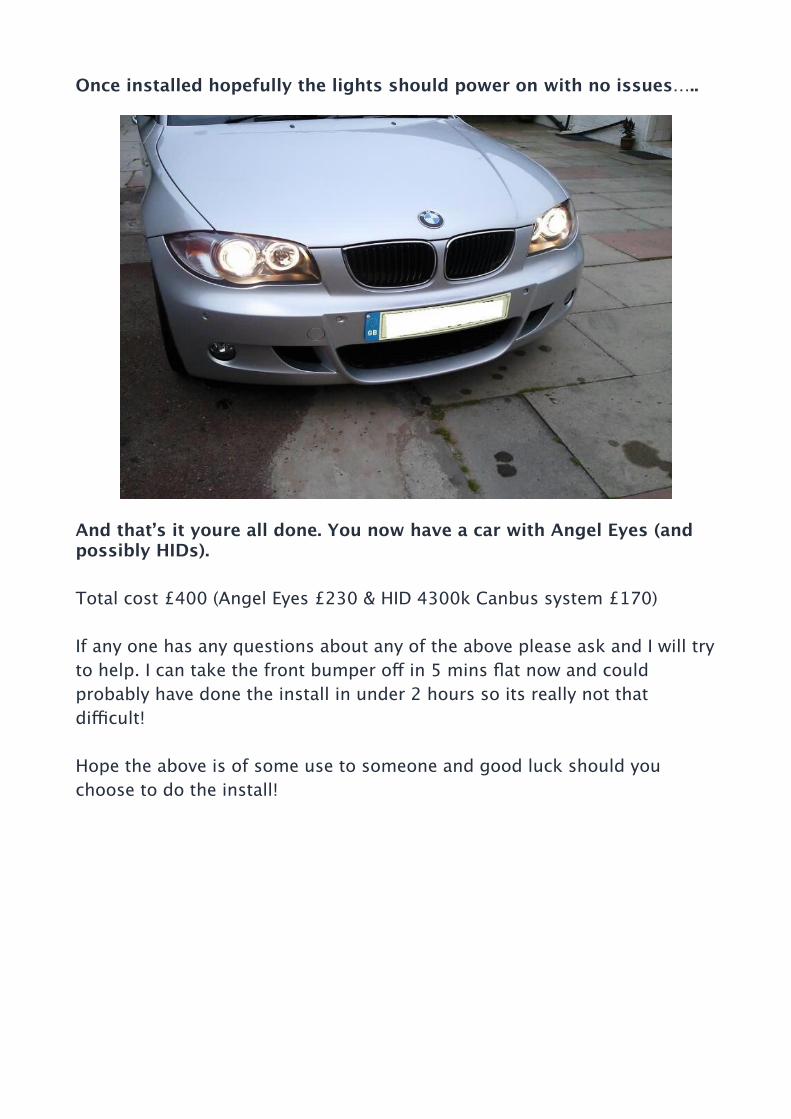
Once installed hopefully the lights should power on with no issues…..
And that’s it youre all done. You now have a car with Angel Eyes (and possibly HIDs).
Total cost £400 (Angel Eyes £230 & HID 4300k Canbus system £170)
If any one has any questions about any of the above please ask and I will try to help. I can take the front bumper of in 5 mins fat now and could probably have done the install in under 2 hours so its really not that difcult!
Hope the above is of some use to someone and good luck should you choose to do the install!