how to post blogs in wordpress note: these steps and screen shots were taken while using a mac....
Post on 18-Dec-2015
222 views
TRANSCRIPT

How to Post Blogs in WordPress
• Note: these steps and screen shots were taken while using a Mac. While Macs are still different from PCs, the steps and buttons used in WordPress are exactly the same on both platforms.

Enter your Username and Password for the account that you just created.
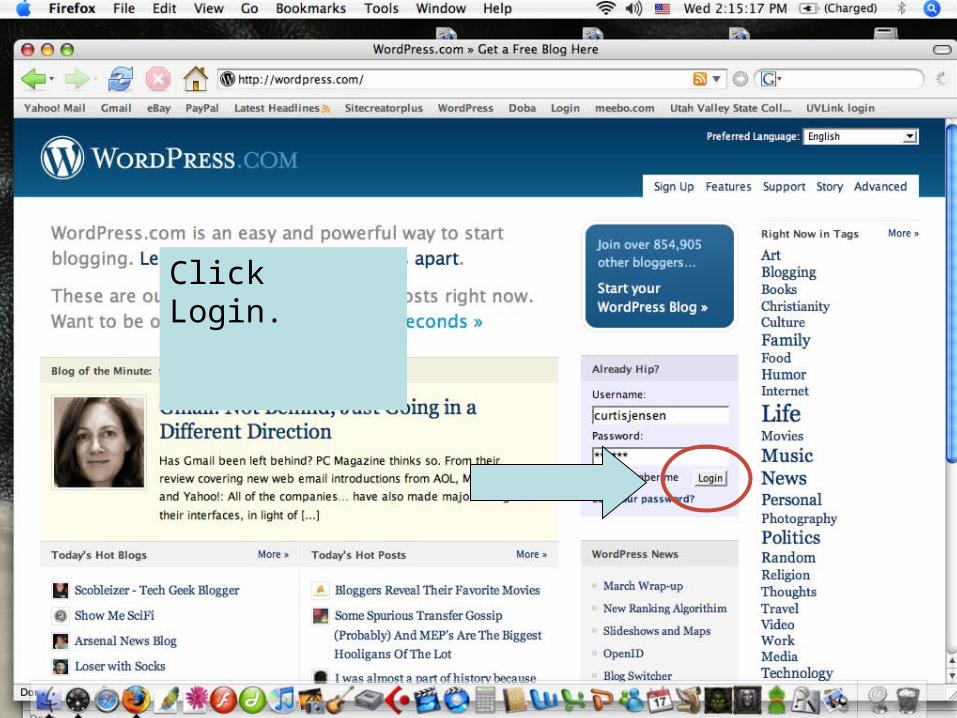
Click Login.

Click on Dashboard to get to your Dashboard (this is where you can create and edit your Posts, Pages, Themes, and everything else associated with the look of your blog

Click on Write to create a post for the blog.

Enter a title for your post.

Choose a Category.(if you don’t choose a category it will automatically be set as Uncategorized)
Enter your text for your post here

To turn text into a link to another site: highlight it with your mouse

Then click on the Insert/edit link button on your toolbar.

An Insert/edit link window will pop-up. There you will need to enter the Link URL for the site you want to include.

Click the Insert button to insert the link into your highlighted text.

Now your highlighted text will be a link to the site that you entered

If you want to include a picture in your post, scroll down to the Upload section below your Post editor box
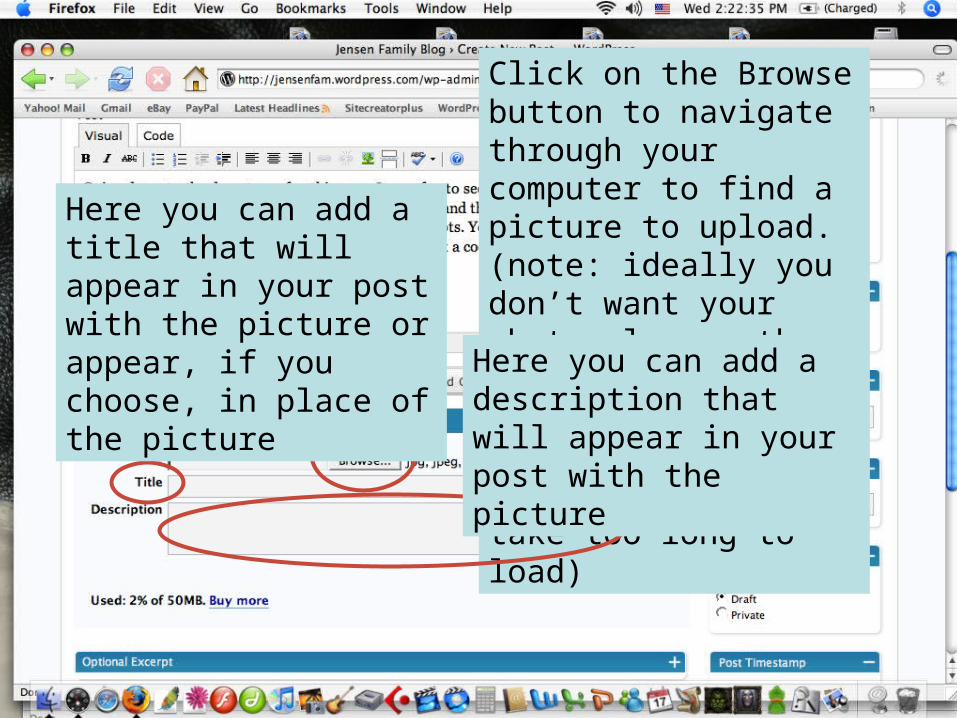
Click on the Browse button to navigate through your computer to find a picture to upload. (note: ideally you don’t want your photos larger than 640 x 640 pixels, otherwise the picture will be too large to view and take too long to load)
Here you can add a title that will appear in your post with the picture or appear, if you choose, in place of the picture Here you can add a
description that will appear in your post with the picture
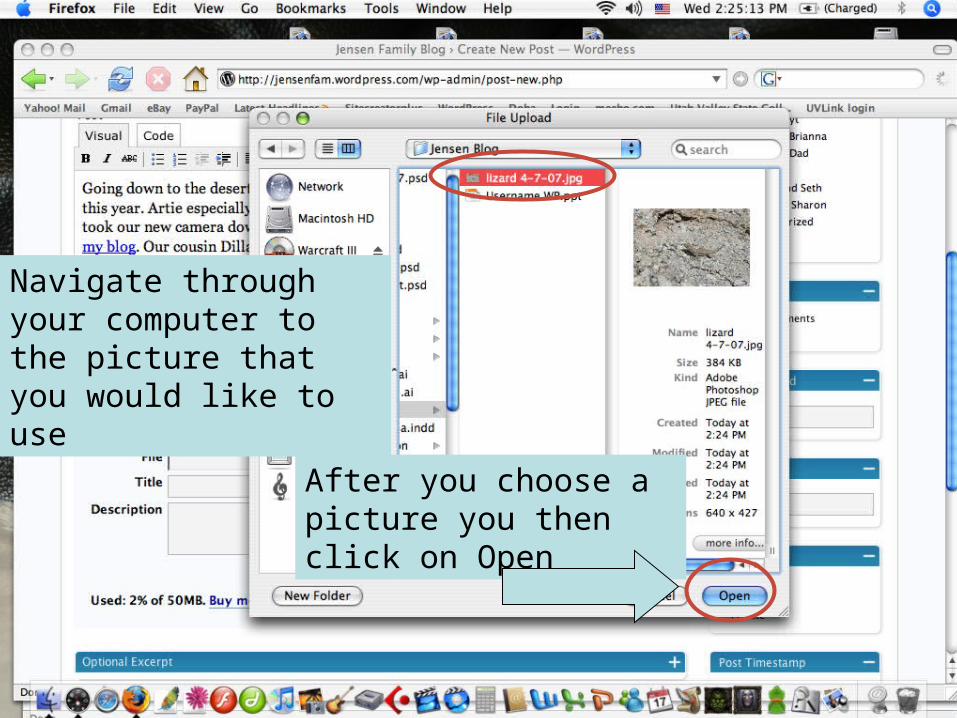
Navigate through your computer to the picture that you would like to use
After you choose a picture you then click on Open

Now click on Upload to add your picture to your post
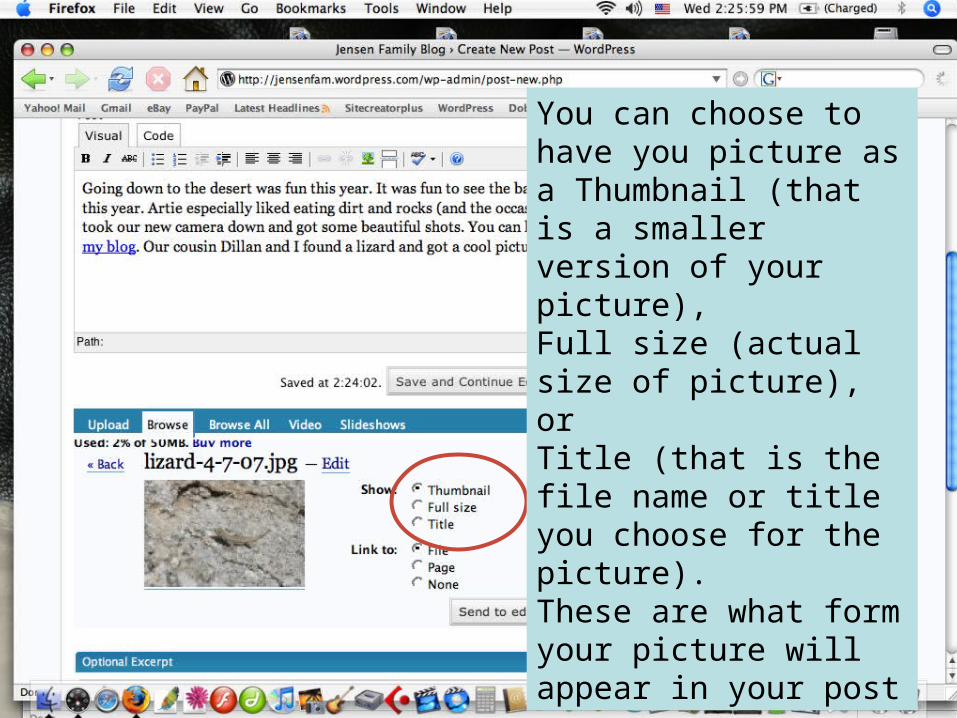
You can choose to have you picture as a Thumbnail (that is a smaller version of your picture), Full size (actual size of picture), or Title (that is the file name or title you choose for the picture).These are what form your picture will appear in your post

Here you can choose to have your Thumbnail, Full size, or Title, when you click on it go to: a File (a full sized picture on a different page), a Page (that will link the picture to a page of your choice), or None (the picture is only in the post with no link at all)

Click on Send to Editor to add your picture or file name to the post edit box

Your picture will be inserted in the post editor box wherever your curser was located before you sent the picture to the editor
Click on Publish to put your post into your blog

This page will appear, and you can click on View post to take a look at your post or…
…You can click on View site to look at your post on your blog Home page
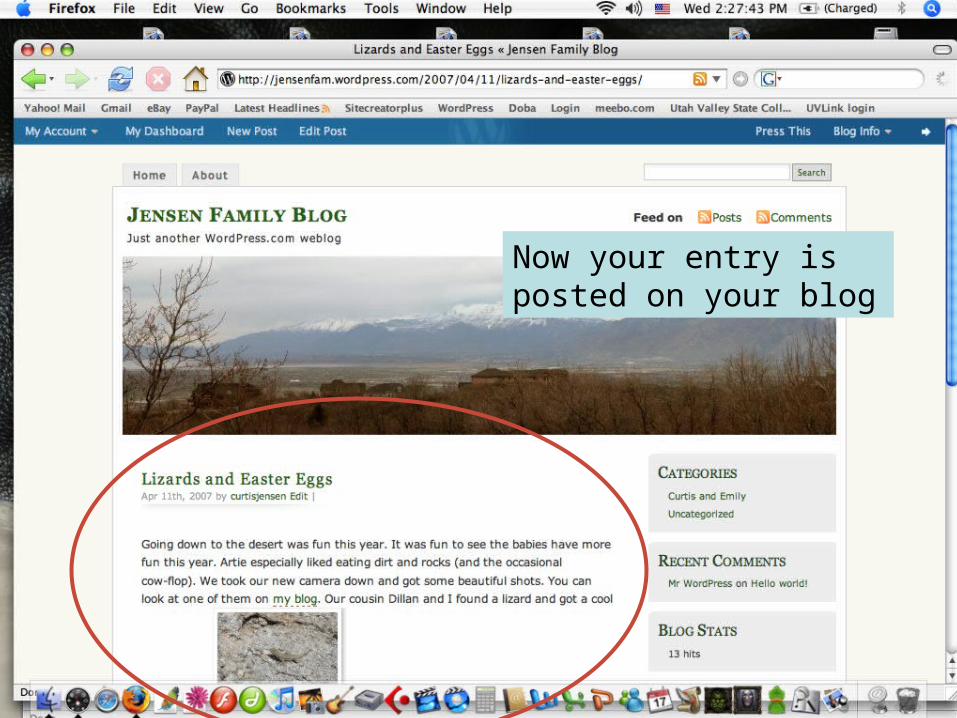
Now your entry is posted on your blog