how to render the illusion of 2 dimensional form on a flat...
TRANSCRIPT

Summary of Shading and Form: How to render the illusion of 2 dimensional form by Cindy Wider
Page 1 of 31 www.DrawPJ.com
Copyright to all articles images, text, projects, lessons and exercises within this course belong to StuartCindy Art and may not be reproduced or used for any commercial purposes whatsoever without the written permission of StuartCindy Art.
Summary of
Shading and Form: How to render the illusion of 2 dimensional form
on a flat page
With Artist and Author Cindy Wider

Summary of Shading and Form: How to render the illusion of 2 dimensional form by Cindy Wider
Page 2 of 31 www.DrawPJ.com
Copyright to all articles images, text, projects, lessons and exercises within this course belong to StuartCindy Art and may not be reproduced or used for any commercial purposes whatsoever without the written permission of StuartCindy Art.
Examples of work by Drawpj.com Course Graduates Note: many of these people went on to become award winning artists and are
currently enjoying careers in art.
Artist: Lyn Donald Title: ‘A Prayerful Life’ Medium: Graphite on paper

Summary of Shading and Form: How to render the illusion of 2 dimensional form by Cindy Wider
Page 3 of 31 www.DrawPJ.com
Copyright to all articles images, text, projects, lessons and exercises within this course belong to StuartCindy Art and may not be reproduced or used for any commercial purposes whatsoever without the written permission of StuartCindy Art.
Artist: Angela Deck Title: ‘Urban Decor’ Medium: Graphite on paper

Summary of Shading and Form: How to render the illusion of 2 dimensional form by Cindy Wider
Page 4 of 31 www.DrawPJ.com
Copyright to all articles images, text, projects, lessons and exercises within this course belong to StuartCindy Art and may not be reproduced or used for any commercial purposes whatsoever without the written permission of StuartCindy Art.
Artist: Gudveig Auestad WestrumTitle: ‘A Shoe Well-travelled’ Medium: Graphite on paper
Summary of Shading and Form: How to render the illusion of 2 dimensional form by Cindy Wider
Page 5 of 31 www.DrawPJ.com
Copyright to all articles images, text, projects, lessons and exercises within this course belong to StuartCindy Art and may not be reproduced or used for any commercial purposes whatsoever without the written permission of StuartCindy Art.
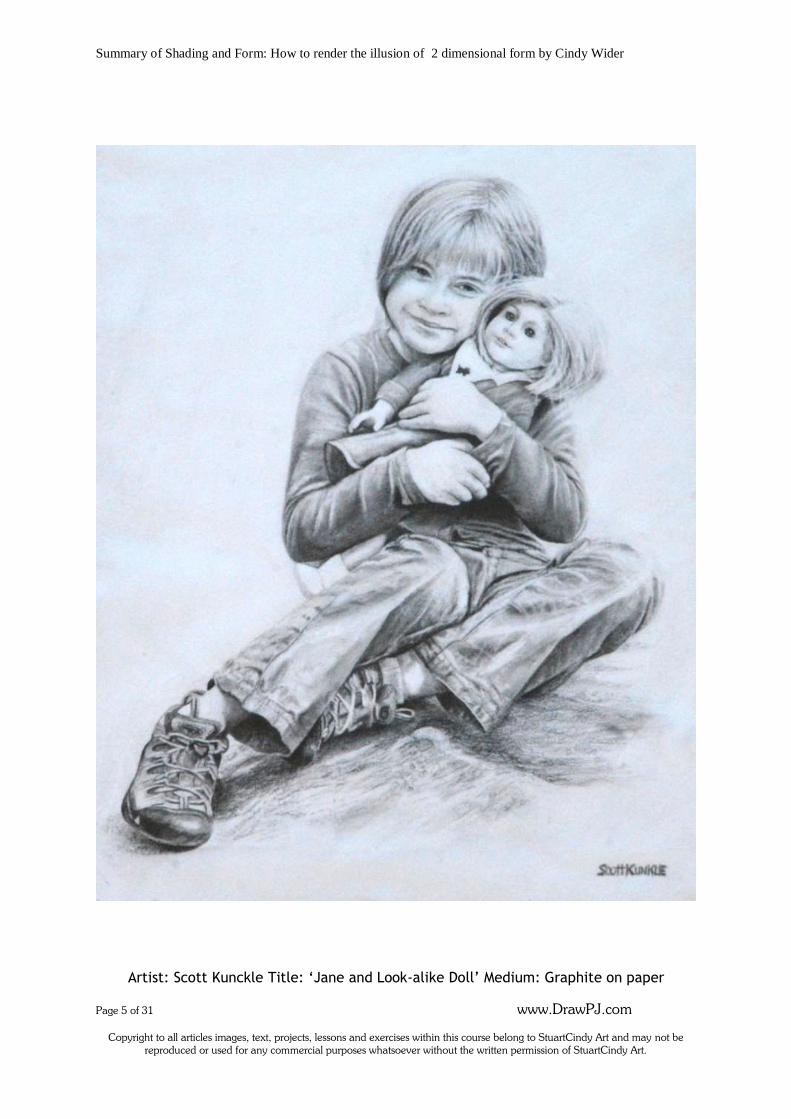
Artist: Scott Kunckle Title: ‘Jane and Look-alike Doll’ Medium: Graphite on paper

Summary of Shading and Form: How to render the illusion of 2 dimensional form by Cindy Wider
Page 6 of 31 www.DrawPJ.com
Copyright to all articles images, text, projects, lessons and exercises within this course belong to StuartCindy Art and may not be reproduced or used for any commercial purposes whatsoever without the written permission of StuartCindy Art.
Artist: Brigitte Back Title: ‘Two Boys’ Medium: Graphite on paper

Summary of Shading and Form: How to render the illusion of 2 dimensional form by Cindy Wider
Page 7 of 31 www.DrawPJ.com
Copyright to all articles images, text, projects, lessons and exercises within this course belong to StuartCindy Art and may not be reproduced or used for any commercial purposes whatsoever without the written permission of StuartCindy Art.
Artist: Daniele Galuppo Title: ‘Little Urn’ Medium: Graphite on paper

Summary of Shading and Form: How to render the illusion of 2 dimensional form by Cindy Wider
Page 8 of 31 www.DrawPJ.com
Copyright to all articles images, text, projects, lessons and exercises within this course belong to StuartCindy Art and may not be reproduced or used for any commercial purposes whatsoever without the written permission of StuartCindy Art.
Artist: Tannis Trydal Title: ‘Ducky’s Honor’ Medium: Graphite on paper

Summary of Shading and Form: How to render the illusion of 2 dimensional form by Cindy Wider
Page 9 of 31 www.DrawPJ.com
Copyright to all articles images, text, projects, lessons and exercises within this course belong to StuartCindy Art and may not be reproduced or used for any commercial purposes whatsoever without the written permission of StuartCindy Art.
How to render the smooth shading technique
Most of the exercises in this unit will require that you use the smooth shading technique. In the unit one ‘Outline Drawing’ week five course notes you were shown
how to prepare and hold your pencil for the smooth shading technique for large areas. The pencil is held on the side for shading large areas (see Figs 1a and 1b.)
Fig. 1a. Prepare your pencil for shading
Fig. 1b. Hold your pencil for shading

Summary of Shading and Form: How to render the illusion of 2 dimensional form by Cindy Wider
Page 10 of 31 www.DrawPJ.com
Copyright to all articles images, text, projects, lessons and exercises within this course belong to StuartCindy Art and may not be reproduced or used for any commercial purposes whatsoever without the written permission of StuartCindy Art.
Smooth shading in small areas
When you need to shade small areas, you can use a slightly different technique to
achieve a smooth area of shading. This technique involves using your pencil prepared for the traditional ‘Chisel Point Stroke’ which was presented to you in unit
one ‘Draw’ and is shown again her. Make sure you use the pencil laid on its side and prepared differently as shown above, for shading large and medium size areas. There are several ways that you can use a pencil prepared with the ‘Chisel Point’
including wide lines, tapered lines (when used with a flicking motion) and the smooth shading technique. However the ability to achieve the smooth shading technique with a chisel point is limited to small areas. The technique for preparing
your pencil with a chisel point is described below.
Step One: Prepare your pencil for the chisel point stroke
1. Prepare either a 2B or 4B pencil for this stroke by first of all resting the tip of the graphite on a sheet of fine sandpaper (see Fig. 2a.) Place it carefully on an angle that is approximately a little more than 30 degrees, but less than 45 degrees off
the surface of the sandpaper.
Fig. 2a. Prepare your pencil for the chisel point stroke by shaving it backwards and forwards across fine sandpaper
2. Begin to rub the graphite section backwards and forwards along the sandpaper.
You are shaping the tip of the pencil in this special way so that you create a wide ellipse-shape on the tip (see Fig. 2b.) Make sure you absolutely do not roll it at
all otherwise it will not form the shape properly.

Summary of Shading and Form: How to render the illusion of 2 dimensional form by Cindy Wider
Page 11 of 31 www.DrawPJ.com
Copyright to all articles images, text, projects, lessons and exercises within this course belong to StuartCindy Art and may not be reproduced or used for any commercial purposes whatsoever without the written permission of StuartCindy Art.
Fig. 2b. The Chisel point now has a wide ellipse shape on the end of the graphite
3. Double check that your pencil is on the correct angle, not too flat to the
sandpaper and not too perpendicular (see Fig. 2b.)
4. When viewed from side on, this ellipse appears as an angle on the tip of the
graphite section (see Fig. 2c.) 5. The chisel point stroke will only work if you prepare the chisel point correctly.
You must continually shave and prepare your point as you work using this procedure to avoid any indentations in your page that can be created by your
pencil if the tip becomes misshaped.
Fig. 2c. When viewed side on, the graphite now has an angle on the end of it

Summary of Shading and Form: How to render the illusion of 2 dimensional form by Cindy Wider
Page 12 of 31 www.DrawPJ.com
Copyright to all articles images, text, projects, lessons and exercises within this course belong to StuartCindy Art and may not be reproduced or used for any commercial purposes whatsoever without the written permission of StuartCindy Art.
Step Two: Hold your pencil for blending with the chisel point
1. First of all the ellipse shape must be placed flat and evenly onto the page surface. Make sure it is completely flat. This means it should be held on the exact
same angle that you recently held it on when you shaved it across the fine sandpaper (see Fig. 2a.)
2. Once you have placed the ellipse flat onto your page, you can either shade
sideways, back and forth across the area or use small circular motions. Try to
avoid using the pointed tip so that your page does not become indented (apart from around the edges of any hard-edge areas.)
Prepare your putty eraser
While you are shading you will find that many times you won’t achieve the perfect shape of an area that you were aiming for the first time. You will continually need to
adjust and refine your shapes using your putty eraser and pencils back and forth swapping between them as you refine. You can also use your hard plastic eraser and
cut a small slither off it to work with to create fine white lines, or shape it to a pointed edge using a craft knife. You could consider purchasing a ‘click eraser’ and sharpen that to a chisel point.
A great way to shape your putty eraser is what I call the ‘chook’s head’ (see Fig. 2d)
because it has a round ball and a pointy tip that looks like a chicken’s (or chook’s) head with a beak. You can either peck with the ball or tip just like a chicken pecks
seed, otherwise wipe with it like you are wiping a smear off a mirror with a cloth. You will need to get really quick at re-shaping this cone-like shape as you can only remove a small amount of graphite before you need to mould it again. This shape is
perfect for moving quickly. Only use small amounts of putty at a time for smaller areas. You can use larger amounts and the ball end for larger areas.
Fig. 2d. Shape your putty eraser like a chicken’s head

Summary of Shading and Form: How to render the illusion of 2 dimensional form by Cindy Wider
Page 13 of 31 www.DrawPJ.com
Copyright to all articles images, text, projects, lessons and exercises within this course belong to StuartCindy Art and may not be reproduced or used for any commercial purposes whatsoever without the written permission of StuartCindy Art.
Important note: The smooth shading technique is crucial to the success of all your images throughout this unit, please make sure you understand how to use this technique very well.
In particular please make sure that you are familiar with the correct
preparation of your pencils needed to achieve both the smooth shading technique for larger areas as explained during week 5 of unit one ‘Outline
Drawing.’ The value scale
A traditional method that artists have used throughout the centuries for comparing
various levels of light and shade in art is called a Value Scale. The Value Scale is an essential tool for artists of all levels of ability, not just the beginner. Often professional artists will draw a value scale at the top of the page they are working
on.
The Value Scale can contain as little as three different tones or as many as you desire. For the purposes of this unit, we will be using six tones on our Value Scale
shaded with graphite pencil (see Fig. 3.) A tone (or value) is the level of lightness or darkness of an area. We give these levels a number according to how close to or far away from black or white the tone is. White or the very lightest tone in the artwork
is usually represented by a number 1. Black or the darkest tone will be the very last number you are working with and is not usually black but very dark grey (graphite.)
In this course that number will be 6.
6 5 4 3 2 1
Fig. 3. A six tone Value Scale
Exercise One: Produce a value scale in Graphite pencil
Please note: Complete all of your exercise this week onto one single sheet of good
quality paper. In this exercise, you will create a six-tone value scale. As you draw, constantly refer
to the completed value scale in Fig.3 Keep in mind that your pencil will not look identical as obviously your printer ink will be a little darker than the pencil.

Summary of Shading and Form: How to render the illusion of 2 dimensional form by Cindy Wider
Page 14 of 31 www.DrawPJ.com
Copyright to all articles images, text, projects, lessons and exercises within this course belong to StuartCindy Art and may not be reproduced or used for any commercial purposes whatsoever without the written permission of StuartCindy Art.
Step One:
Before you begin to shade, prepare your three pencils HB, 2B and 4B for the smooth shading technique medium size areas. Make sure you remember to roll the
graphite section across a piece of fine sandpaper to smooth the edges. Remember this is different to the way you prepare the pencil for the chisel point shading, so
you need to make sure you read the instructions and practice this technique as presented to you in unit one ‘Outline Drawing’ week five.
Step Two:
Practice shading on a piece of thick, smooth quality paper (the same type of paper you will use for your exercises this week.) Use your whole arm and keep your wrist stiff. Only rest the outside of your little finger on the page as you slide your whole
arm back and forth. Your paper is crucial to the success of this stroke, you cannot achieve a good smooth shading technique on plain bond or printing paper. If your
paper is too textured there will be lots of little white dots everywhere.
Step Three:
1. Please allow room for all of your exercises on the one sheet of paper.
2. On a sheet of smooth textured quality paper, use your ruler and HB pencil to draw a rectangle 12cm long by 2cm wide.
3. Divide this rectangle into 2cm squares and place numbers from 6 to 1 underneath (see Fig. 4) but without the shading. The numbers indicate the
level of tone. Step Four:
1. Begin shading these squares by using your HB pencil and following the
example below (see Fig. 4.) as a guide. Don’t over fill the paper, if you place too much graphite on too soon the later layers will not adhere.
2. Use a soft touch to achieve a level 2 tone in all of the boxes apart from the level 1 box, which is left blank. When working in very small areas you can use tiny circular motions. However, be careful not to leave evidence of these
circles behind. There should be no pencil strokes evident, just smooth areas of graphite evenly distributed on the paper.
6 5 4 3 2 1
Fig. 4. Shade all boxes apart from the level 1 box

Summary of Shading and Form: How to render the illusion of 2 dimensional form by Cindy Wider
Page 15 of 31 www.DrawPJ.com
Copyright to all articles images, text, projects, lessons and exercises within this course belong to StuartCindy Art and may not be reproduced or used for any commercial purposes whatsoever without the written permission of StuartCindy Art.
Step Five:
1. Using your HB pencil again, press just a little bit firmer this time and begin in box number 6.
2. Gradually shade all the way through the boxes keeping a nice even pressure on your hand, and complete box number 3 (see Fig. 5.)
3. Leave box number 2 untouched as the level 2 tone. You should see no evidence of lines, circles or the direction of the shaded stroke – just a mass of shaded tone.
6 5 4 3 2 1
Fig. 5. Shade all boxes apart from the level 2 & 1 boxes
Tip: Don’t be tempted to build up too many layers with your HB pencil as it will never become really dark and it will repel the B range (darker) graphite pencils.
Step Six:
Using your 2B pencil this time, and don’t press too firmly, shade all the boxes, beginning with number 6, until you complete box 4. Leave box number 3 untouched
as the level 3 tone (see Fig. 6.)
6 5 4 3 2 1
Fig. 6. Shade the level 6, 5 & 4 boxes only
Step Seven:
Using your 4B pencil this time, pressing firmer, shade the remaining two boxes (6 and 5) leaving 4 untouched.
6 5 4 3 2 1
Fig. 7. Shade just the level 6 & 5 boxes

Summary of Shading and Form: How to render the illusion of 2 dimensional form by Cindy Wider
Page 16 of 31 www.DrawPJ.com
Copyright to all articles images, text, projects, lessons and exercises within this course belong to StuartCindy Art and may not be reproduced or used for any commercial purposes whatsoever without the written permission of StuartCindy Art.
Step Eight:
Using your 4B pencil prepared with the chisel point, pressing very firmly (not so firmly that the pencil indents the page or breaks the graphite.) This time to shade in
the number 6 box. Lift the pencil up on much more of an angle off the page.
Your value scale of six tones is now almost complete. Just go back and double check your tones to make sure there is a gradual gradation from dark (level 6) to light (level 1) just as you see here (see Fig. 8.)
6 5 4 3 2 1
Fig.8. Shade just the level 6 box only
Beginning to see the difference between the six values
There are two very important things to consider when applying shading to your
drawing in order to achieve the illusion of a three- dimensional form on a page. These are;
1. Draw the initial outline shape of the object and the shadow or highlight area
in the correct place and then shade it in an accurate shape. The shape of the
shadows and highlights are equally as important as the outline drawing itself. Press super softly so there are no dark outlines at all.
2. Shade the area to the correct level of tone for the area you are working in.
Throughout this course the outline drawings will be already drawn for you so that you can concentrate solely on shading the correct levels of tone.
Please note; before beginning the rest of the exercises in this course, it is best to work on quality drawing paper by transferring the image provided in the course
notes and using the graphite transfer technique to trace the image. See your unit one ‘Outline Drawing’ week five course notes for a reminder on how to use the graphite transfer technique. You will find the experience more enjoyable and
rewarding if you work on quality paper and your results will generally be easier to achieve.
Do not indent your page while transferring the image, press softly.

Summary of Shading and Form: How to render the illusion of 2 dimensional form by Cindy Wider
Page 17 of 31 www.DrawPJ.com
Copyright to all articles images, text, projects, lessons and exercises within this course belong to StuartCindy Art and may not be reproduced or used for any commercial purposes whatsoever without the written permission of StuartCindy Art.
Figure A
Figure B
Exercise One: The Ellipse
Of all the variations, the ellipse is probably the most important shape of all. It is only effective if drawn correctly and accurately which requires practice and skill to get
right. Once you have learned how to draw an ellipse in its basic form you can then go on to learn to draw it in perspective in a later unit of this course. For now you
can practice drawing an ellipse without perspective just to become acquainted with the shape itself.
The ellipse is by far the most magical of all shapes. Simply by placing two well-drawn ellipses onto an outline of something as simple as a rectangle, the drawing is
instantly transformed into a completely different and recognizable object, such as a cylinder. The secret is to draw the ellipse well!
Follow the step-by-step instructions to learn how to draw a basic ellipse. Practice until you are perfect at this shape and you will be very excited with your results!
1) Using your ruler, draw a horizontal line 8cm long.
Refer to Figure A. Use your natural gift of horizontal and vertical comparison to make
this line parallel to the top or bottom of your page.
2) Measure the exact centre of this line, then draw a
vertical line at 14mm.
Refer to Figure B. The shorter you draw this line, the
narrower your ellipse will be. It is easier to first learn to
draw the ellipse with both sides of the vertical line
perfectly even. Later in another unit of this course you will be shown that an ellipse
(when drawn in perspective) could be drawn shorter on the
top half of the horizontal guide line than the bottom, or visa versa depending on its
position compared to the horizon line.

Summary of Shading and Form: How to render the illusion of 2 dimensional form by Cindy Wider
Page 18 of 31 www.DrawPJ.com
Copyright to all articles images, text, projects, lessons and exercises within this course belong to StuartCindy Art and may not be reproduced or used for any commercial purposes whatsoever without the written permission of StuartCindy Art.
Figure C
Make sure these ends are always curved and never pointed
Figure D
3) Begin drawing the ellipse
by placing a soft curve on both ends of the horizontal
line (Figure C.)
These curved ends
determine the correct width of your ellipse. Think of them as two little open
mouths; one on each end. The wider you stretch them
open, the wider your ellipse becomes.
4) Gradually draw in the full
curves which form the ellipse shape.
Refer to Figure D.
Following are several helpful suggestions to keep in mind whenever you
draw ellipses:
Always carefully draw a centre horizontal and vertical line forming a cross
to use as a guide. Make sure you use your ruler to measure very carefully so that you have positioned the vertical line at exactly halfway across the
horizontal line. Do this before you begin your ellipse.
Sketch softly like a feather, remember what you learned during exercise
one week one of the unit one course.
Keep your hand on the inside of the curve at all times. Turn your page
upside down to do the bottom half.

Summary of Shading and Form: How to render the illusion of 2 dimensional form by Cindy Wider
Page 19 of 31 www.DrawPJ.com
Copyright to all articles images, text, projects, lessons and exercises within this course belong to StuartCindy Art and may not be reproduced or used for any commercial purposes whatsoever without the written permission of StuartCindy Art.
Figure E Figure F
Draw a little curved line on either end first to avoid flat sides which make
your ellipse look like a diamond or football shape. This will help you to avoid beginning and ending the ellipse on the horizontal line and creating
a point. An ellipse does not begin or end anywhere. It is just a flattened circle viewed in perspective so it continues around and around.
Your ellipse should be placed within an object so that the edges are just
touching the inner sides of it. See Figure E for the correct placement of
an ellipse inside a rectangle to form the top of a cylinder - and Figure F for the incorrect position.
Tip: If your ellipse doesn’t look right at first, don’t despair. Simply adjust it using the tips above and always correct the ellipse before erasing the part of the curve you
don’t like. You are better off correcting the ellipse you are working on than beginning a new one. To improve your drawing, keep your first attempt until you’ve
made the necessary adjustments by drawing over the top of it. This way it makes it easier to improve upon each successive attempt.
What to do for practice:
1. Practice first; take your time to draw many ellipses on plain bond paper
using your HB pencil and a ruler for the centre lines. Make sure you measure your centre lines carefully and accurately so that they are very even on each
side and vertical as well as horizontal. Make the center lines parallel to the sides of your page.
2. Once you are feeling confident and have practiced many of these, please
create two well-drawn ellipses measuring 8cm long by 14mm wide and make sure they are horizontal and vertical on your page.

Summary of Shading and Form: How to render the illusion of 2 dimensional form by Cindy Wider
Page 20 of 31 www.DrawPJ.com
Copyright to all articles images, text, projects, lessons and exercises within this course belong to StuartCindy Art and may not be reproduced or used for any commercial purposes whatsoever without the written permission of StuartCindy Art.
Exercise Three: Shading three different tonal changes
So far we have looked at six individual tones that were very separated from one another by hard outlined areas. However when we create shaded drawings of three-
dimensional images the tones are not always so obviously separated with neat hard edges. The different tones are often carefully blended within the object we are
drawing. There are different ways that the tones change from one into another. Let’s take a look at three different types of tonal changes that you can expect to see
in photographs, drawings or still life setups. You need to be able to firstly recognise these different tonal changes before you can render them;
1. Gradation (see Fig. 11a): Some times one tone will gradually transition
from white, to very light grey, to medium grey, into darker then very dark
grey or visa-versa. This gradual transition between tones is known as a ‘Gradation of tone.’ This gradation can sometimes be seen very obviously –
especially in a large area on an object, or it can occur in a small area which can be more difficult to detect.
2. Soft edge (see Fig. 11b): Other times there will be a very light tone laying alongside a medium or very dark tone but the edge where they meet is blended together forming a soft edge. This type of tonal change is called a
‘Soft Edge.’ 3. Hard edge (see Fig. 11c): There are times when the two tones form a
definite hard line which has been created as a result to the two tones butting up alongside one another. This is called a ‘Hard Edge.’
In this exercise you will create one rectangle for each of these three different types of tonal changes. Please remember to work on the same sheet that you completed
your other exercises on.
Fig. 11a. Fig. 11b. Fig. 11c.

Summary of Shading and Form: How to render the illusion of 2 dimensional form by Cindy Wider
Page 21 of 31 www.DrawPJ.com
Copyright to all articles images, text, projects, lessons and exercises within this course belong to StuartCindy Art and may not be reproduced or used for any commercial purposes whatsoever without the written permission of StuartCindy Art.
Introduction to the Theory of Light and Shade
Using a single powerful and directed light source is best when setting up objects for a still life drawing because it produces a strong pattern of light and shadows. A good
position to place the light source in is either off to the left or right and slightly in front of the object. This is the direction that the light source is coming from in the
drawings that you see in your course notes this week. When light touches an object, it produces an interesting pattern. The pattern you
are probably most familiar with would be as simple as very bright and light on one side, very dark on the other and an almost black shadow on the ground on the
opposite side of the object. If we look a little closer and stare at the object with our eyes squinted (half closed) it will blur the image and simplify the details for us so that all that is left is a variety of different shapes and sizes of light, dark, medium,
light and very light areas (tones.) Upon closer inspection still, we can see that this huge array of tones actually has a structure to it and forms a pattern that is
repeated in other objects when the light source is held in the same position. This pattern that I am talking about is the basis of the theory of light and shade and it
enables us to draw our objects more realistically. This basic theory is relevant when there is only one single light source present. Let’s
take a look at what we can expect to see in an object that is lit with a strong single light source. Please refer to the photograph of a cone (see Fig. 1) as you notice the
following things;
A: The closest part of an object to the light source is the brightest and lightest area. This area is called the Full Light area and is usually left as the
white of your page when drawing with graphite on white paper (tone level 1) B: The area where the object first disappears from the light is called the
Shadow Edge area (tone level 6 when working with a six-value scale) C: Between the Full Light area and the Shadow Edge area there is a gradual
transition from light into dark. This area is called the Half Tone area (tone levels change from 2 into 3 gradually, then quite rapidly into 4, 5 and finally reach the level 6 Shadow Edge area.)
D: The object casts a shadow on the floor opposite to the light source and
often a tiny bit under the object. This area is called the Cast Shadow area (tone level 6 near the base of the object then travels out to levels 5, 4 and sometimes lighter as it moves away from the object.)
E: Often light bounces off the floor and any reflective objects surrounding the
object you are drawing. This lights up the object and creates areas on the object called the Reflected Light area (tone levels can be as light as 1, 2, 3, 4 or 5.)

Summary of Shading and Form: How to render the illusion of 2 dimensional form by Cindy Wider
Page 22 of 31 www.DrawPJ.com
Copyright to all articles images, text, projects, lessons and exercises within this course belong to StuartCindy Art and may not be reproduced or used for any commercial purposes whatsoever without the written permission of StuartCindy Art.
Fig. 1. Theory of light and shade on photograph of a cone
A
D
E
B
C

Summary of Shading and Form: How to render the illusion of 2 dimensional form by Cindy Wider
Page 23 of 31 www.DrawPJ.com
Copyright to all articles images, text, projects, lessons and exercises within this course belong to StuartCindy Art and may not be reproduced or used for any commercial purposes whatsoever without the written permission of StuartCindy Art.
Construction drawing and shading the four basic shapes
Here is a reminder about the four basic shapes that was discussed in unit one of the Paint In Your Pyjamas art course, and an introduction for people who have not
completed unit one.
Construction Drawing This method which is used by many professional artists and handed down from the
great masters of art is based upon the knowledge that everything in the world is made up of four basic shapes or variations of them. These are the cube, sphere,
cylinder, or cone.
Cube Sphere Cone Cylinder
In unit one, you were just beginning to learn how to draw so you learned about these shapes in a flattened form; the square, circle, triangle and cylinder. It is easier to think of these four shapes in their flattened form because you are drawing onto a
flat surface (a page or canvas). During this unit, it is now time to move onto seeing things in their three-dimensional form
Learning to shade the four basic shapes will provide you with a great foundation in
understanding how to depict three-dimensional solid forms on a flat surface (the page.) The basic theory of light and shade that you apply to these four basic shapes can give you clues on how to shade other more complex subjects. Learning to see
basic shapes within objects helps you to seek out the shadow shapes more easily.

Summary of Shading and Form: How to render the illusion of 2 dimensional form by Cindy Wider
Page 24 of 31 www.DrawPJ.com
Copyright to all articles images, text, projects, lessons and exercises within this course belong to StuartCindy Art and may not be reproduced or used for any commercial purposes whatsoever without the written permission of StuartCindy Art.
Shaded drawing of a silver kettle
Fig. 2. Transfer the outline drawing and create your value map

Summary of Shading and Form: How to render the illusion of 2 dimensional form by Cindy Wider
Page 25 of 31 www.DrawPJ.com
Copyright to all articles images, text, projects, lessons and exercises within this course belong to StuartCindy Art and may not be reproduced or used for any commercial purposes whatsoever without the written permission of StuartCindy Art.
Fig. 3. Your reference – a photograph of the silver kettle

Summary of Shading and Form: How to render the illusion of 2 dimensional form by Cindy Wider
Page 26 of 31 www.DrawPJ.com
Copyright to all articles images, text, projects, lessons and exercises within this course belong to StuartCindy Art and may not be reproduced or used for any commercial purposes whatsoever without the written permission of StuartCindy Art.
Fig. 4. Begin the first layer of shading with a HB pencil then move onto a 2B

Summary of Shading and Form: How to render the illusion of 2 dimensional form by Cindy Wider
Page 27 of 31 www.DrawPJ.com
Copyright to all articles images, text, projects, lessons and exercises within this course belong to StuartCindy Art and may not be reproduced or used for any commercial purposes whatsoever without the written permission of StuartCindy Art.
Fig. 5a. Complete the final layers of shading using a 4B pencil then apply the finishing touches with all three pencils alternatively as needed to refine

Summary of Shading and Form: How to render the illusion of 2 dimensional form by Cindy Wider
Page 28 of 31 www.DrawPJ.com
Copyright to all articles images, text, projects, lessons and exercises within this course belong to StuartCindy Art and may not be reproduced or used for any commercial purposes whatsoever without the written permission of StuartCindy Art.
Fig. 5b. Use a tissue for the large areas and a Q-tip to blend the smaller areas and edges.
Use your putty eraser to pull back the highlights and neaten edges.

Summary of Shading and Form: How to render the illusion of 2 dimensional form by Cindy Wider
Page 29 of 31 www.DrawPJ.com
Copyright to all articles images, text, projects, lessons and exercises within this course belong to StuartCindy Art and may not be reproduced or used for any commercial purposes whatsoever without the written permission of StuartCindy Art.
Examples of Shaded Silver Kettles by Previous Course Participants:
Here are some great examples of previous course participants’ shaded drawings of the Silver Kettle. These students have kindly given permission for their images to be
shared here with you.
Drawing by Angela Deck Drawing by Yana Buzby
Drawing by Norma Corbin Drawing by Sonia

Summary of Shading and Form: How to render the illusion of 2 dimensional form by Cindy Wider
Page 30 of 31 www.DrawPJ.com
Copyright to all articles images, text, projects, lessons and exercises within this course belong to StuartCindy Art and may not be reproduced or used for any commercial purposes whatsoever without the written permission of StuartCindy Art.
Artist: Tannis Trydal Title: ‘Some bunny loves me’ Medium: Graphite on paper

Summary of Shading and Form: How to render the illusion of 2 dimensional form by Cindy Wider
Page 31 of 31 www.DrawPJ.com
Copyright to all articles images, text, projects, lessons and exercises within this course belong to StuartCindy Art and may not be reproduced or used for any commercial purposes whatsoever without the written permission of StuartCindy Art.
Artist: Alessandro Coraglia Title: ‘Splash’ Medium: Graphite on paper