hp photosmart a520 series yang terkandung dalam dokumen ini dapat berubah tanpa pemberitahuan. hak...
TRANSCRIPT
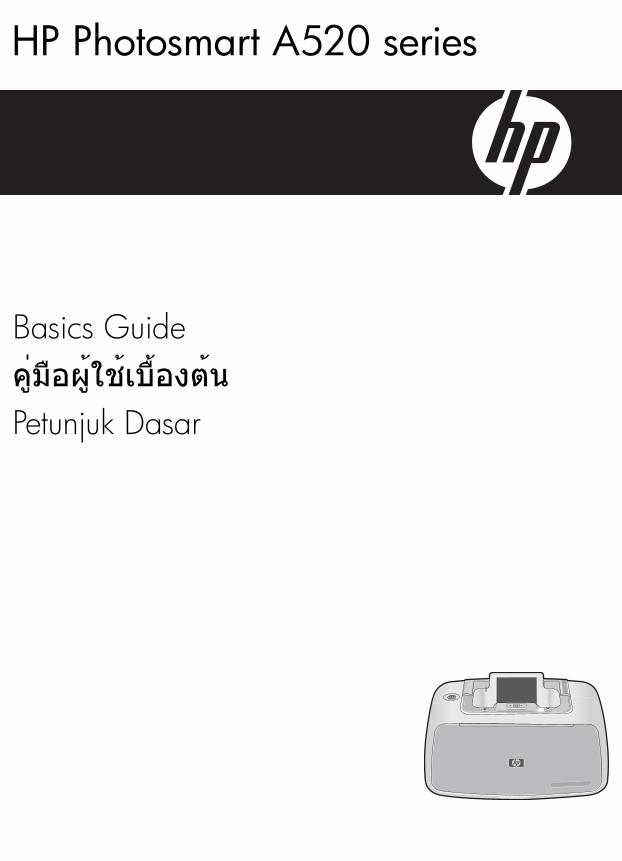
HP Photosmart A520 series
Basics Guideคู่มือผู้ใช้เบื้องต้นPetunjuk Dasar

Hewlett-Packard Company noticesThe information contained in this document is subject to change without notice.All rights reserved. Reproduction, adaptation, or translation of this material is prohibited without prior written permission of Hewlett-Packard, except as allowed under copyright laws. The only warranties for HP products and services are set forth in the express warranty statements accompanying such products and services. Nothing herein should be construed as constituting an additional warranty. HP shall not be liable for technical or editorial errors or omissions contained herein.© 2007 Hewlett-Packard Development Company, L.P.Windows, Windows 2000, and Windows XP are U.S. registered trademarks of Microsoft Corporation. Windows Vista is either a registered trademark or trademark of Microsoft Corporation in the United States and/or other countries. Intel and Pentium are trademarks or registered trademarks of Intel Corporation or its subsidiaries in the United States and other countries.The Bluetooth trademarks are owned by its proprietor and used by Hewlett-Packard Company under license.
Pemberitahuan Hewlett-Packard CompanyInformasi yang terkandung dalam dokumen ini dapat berubah tanpa pemberitahuan.Hak Cipta dilindungi Undang-Undang. Dilarang memperbanyak, mengadaptasi, atau menerjemahkan bahan ini tanpa izin tertulis dari Hewlett-Packard, kecuali sebagaimana yang diperbolehkan menurut hukum hak cipta. Jaminan yang diberikan untuk produk dan layanan HP hanya meliputi jaminan yang ditetapkan dalam pernyataan jaminan tersurat yang disertakan pada masing-masing produk dan layanan. Dokumen ini tidak memberikan jaminan tambahan apa pun. HP tidak bertanggung jawab atas segala ketidaklengkapan atau kesalahan teknis atau editorial dalam dokumen ini.© 2007 Hewlett-Packard Development Company, L.P.Windows, Windows 2000, dan Windows XP adalah merek dagang Microsoft Corporation yang terdaftar di AS.Windows Vista adalah merek dagang terdaftar atau merek dagang Microsoft Corporation di Amerika Serikat dan/atau negara-negara lain.Intel dan Pentium adalah merek dagang atau merek dagang terdaftar Intel Corporation atau anak perusahaannya di Amerika Serikat dan negara-negara lain.Merek dagang Bluetooth dimiliki oleh pemegang mereknya dan digunakan oleh Hewlett-Packard Company dengan lisensi.

HP Photosmart A520 seriesHP Photosmart A520 series Basics Guide
Engl
ish
Contents
1 Get startedThe HP Photosmart at a glance.................................................................................................5Control panel buttons and indicator lights..................................................................................6Printer menu...............................................................................................................................7
2 Print basicsLoad paper.................................................................................................................................7Insert a memory card..................................................................................................................8Print a photo...............................................................................................................................9Remove red eye in photos..........................................................................................................9Connect to a computer...............................................................................................................9
Install the software and connect the USB cable...................................................................9
3 Troubleshooting and SupportPrinting and hardware issues...................................................................................................10Insert or replace the print cartridge...........................................................................................11Support process.......................................................................................................................12Regulatory model identification number SDGOA-0701............................................................13Environmental statements........................................................................................................13Find more information...............................................................................................................13Printer specifications................................................................................................................13HP Warranty.............................................................................................................................15
4 HP Photosmart A520 series
English

1 Get startedThis section provides introductory information about the HP Photosmart A520 seriesprinter.
The HP Photosmart at a glance
Figure 1-1 Front and rear views
Label Description
1 Control panel: Control the basic functions of the printer from here.
2 Output tray (open): Collect your printed photos from this tray.
3 Print cartridge door (closed): Open this door to insert or replace a print cartridge.
4 USB port: Use this port to connect the printer to a computer using the supplied USBcable.
5 Power cord connection: Connect the power cord here.
6 Input tray (closed): Load paper here. Open the output tray first. The input trayopens automatically when you open the output tray.
Get started 5
Engl
ish

Control panel buttons and indicator lights
Figure 1-2 Control panel
Label Description
1 Power: Press to turn the printer on or off. The power button will glow when the poweris on. When the printer is idle, the button will pulse softly.
2 Printer screen: View photos and menus here.
NOTE: The features available on the printer may vary by country/region and/ormodel.
3 Red Eye: The Red Eye feature reduces the red-eye effect you sometime see in
or off.
4 Print: Press to print the currently viewed image from a memory card. The Printbutton glows when the printer power is on.
5 Navigation arrows: Press or to scroll through photos on a memory card or tonavigate the printer menu.
6 Cancel: Press to stop an action, exit a menu, or to cancel printing a queued image.
Figure 1-3 Indicator lights
Chapter 1
6 HP Photosmart A520 series
English
flash photos. This feature is off by default. Press this button to turn the feature on

Label Description
1 Attention LED: Flashes red when the printer requires attention.
2 Memory card LED: This light turns aqua blue after the memory card is correctlyinserted. It flashes blue when the printer is communicating with the memory cardor when a connected computer is performing a read, write, or delete operation.
Printer menuThe Printer menu gives you many print options, allows you to change the printer defaults,provides maintenance and troubleshooting tools, and provides how-to information forcommon printing tasks.
NOTE: The features available on the printer may vary by country/region and/ormodel.
To use the Printer menu
NOTE: If there is a memory card inserted in the card slots, remove it to access thePrinter menu.
1. Press or to open the Printer menu.2. Pressing will move to the next option and pressing will move to the previous
menu option.3. Press Print to select an option. Menu options that are not accessible are dimmed.4. To exit a menu, press the Cancel button.
2 Print basicsLoad paper
Use HP Advanced Photo Paper. It is especially designed to work with the inks in yourprinter to create beautiful photos. Other photo papers will produce inferior results.The printer is set, by default, to print the best quality photos on HP Advanced Photo Paper.If you print on a different type of paper, be sure to change the paper type. For informationon changing the paper type, see the onscreen Help.To order HP papers and other supplies, go to www.hp.com/buy/supplies. If prompted,choose your country/region, follow the prompts to select your product, and then click oneof the shopping links on the page.
To load paper1. Open the output tray. The input tray opens automatically.
Printer menu 7
Engl
ish

2. Load up to 20 sheets of photo paper with the print side or glossy side facing the frontof the printer. If you are using tabbed paper, load the paper so tab feeds in last. Whenloading, slide the paper to the left side of the input tray and push the paper down firmlyuntil it stops.
3. Adjust the paper-width guide to fit close to the edge of the paper without bending thepaper.
Insert a memory cardInsert a memory card into the appropriate slot with the label facing up and the metalcontacts going in first. Refer to the figure to select the correct slot for your memory card.
Figure 2-1 Memory card slots
Label Description
1 xD-Picture Card
2 Compact Flash I and II, Microdrive
3 Memory Stick
4 Secure Digital, MultiMediaCard (MMC)
CAUTION: Do not pull out the memory card while the memory card light is flashing.A flashing light means the printer or computer is accessing the memory card. Whenthe memory card light on the printer is solid, it is safe to pull the card out of the slot.
Chapter 2
8 HP Photosmart A520 series
English

Print a photo
To print a single photo1. Navigate through the photos on the inserted memory card.2. Display the photo you want to print.3. Press Print.
NOTE: To print additional copies of the current image, press Print again.
Remove red eye in photos
Connect to a computerPrinting from a computer gives you more options for printing your images. Before printingfrom your computer, you must install the HP Photosmart software and connect the USBcable from the printer (using the USB port on the back) to your computer.
NOTE: The USB 2.0 cable required for printing from a computer might not beincluded in the box with the printer, so you might need to purchase it separately.
Install the software and connect the USB cable
Windows users Mac users
Important: Do not connect a USB cable untilyou are prompted.1. Insert the HP Photosmart CD into your
computer CD-ROM drive. If the InstallWizard does not appear, locate thesetup.exe file on the CD-ROM drive anddouble-click it. Wait several minutes whilethe files load.
2. Click Next and follow the onscreeninstructions.
3. When prompted, connect one end of theUSB cable to the USB port on the back ofthe printer, and connect the other end to theUSB port on your computer.
4. Follow the onscreen instructions until theinstallation is finished and your computerrestarts.
1. Connect one end of the USB cable to theUSB port on the back of the printer, andconnect the other end to the USB port onyour computer.
2. Insert the HP Photosmart CD into yourcomputer's CD-ROM drive.
3. On your desktop, double-click theHP Photosmart CD icon.
4. Double-click the HP Installer icon, andfollow the instructions on each installationscreen to install the printer software.
5. When the Congratulations screen appears,click OK.
3 Troubleshooting and SupportPrint a photo 9
Engl
ish
The HP Photosmart A520 series includes a red-eye reduction function that fixes that red-eye effect that sometime occurs in flash photos. This feature is off by default when youturn on the printer. If you want to print a photo using this feature, you can turn it on by pressing the Red Eye button.

The HP Photosmart A520 series printer is designed to be reliable and easy to use. Thissection answers frequently asked questions about using the printer and printing withouta computer.
NOTE: Before contacting HP support, read this section for troubleshooting tips orgo to the online support services at www.hp.com/support.
Printing and hardware issues
The Attention light is flashing.Cause: A printer error has occurred. Try the following solutions.
Solution:• Check the printer screen for instructions. If you have a digital camera connected
to the printer, check the camera screen for instructions. If the printer is connectedto a computer, check the computer monitor for instructions.
• Turn off the printer.• If the light continues to flash, go to www.hp.com/support or contact HP support.
The printer is plugged in, but it will not turn on.
Solution:• The printer may be plugged into a power strip that is turned off. Turn on the power
strip, and then turn on the printer.• The printer may be plugged into an incompatible power source. If you are traveling
abroad, make certain the power source in the country/region you are visitingcomplies with the power requirements and power cord of the printer.
• Check that the power adapter is functioning properly. To check the power adapter:• Make sure the power adapter is connected to your printer and a compatible
power source.• Press and hold down the Power button on the printer. If the Power button
lights up, then the power cord is working properly. If it fails to light, go towww.hp.com/support or contact HP support.
The paper does not feed into the printer correctly, or the image printed off-center.
Solution:• The paper may not be loaded correctly. Reload the paper, making sure that the
paper is correctly oriented in the input tray and that the paper-width guide fitsclose to the edge of the paper. For paper-loading instructions, see “Load paper”on page 7.
• The print cartridge may need to be aligned. For more information, see theonscreen Help.
• The printer may need attention. Read the printer screen for instructions.
Chapter 3
10 HP Photosmart A520 series
English

• The power may be off or there may be a loose connection. Make sure that thepower is on and the power cord is securely connected.
• The paper may have jammed while printing. See the following section forinstructions on clearing a paper jam.
The paper jammed while printing.Solution: Try the following steps to clear the paper jam:1. Turn off the printer, and then unplug it from the power source.2. Pull out any paper that is jammed in the printer.3. Remove any wrinkled or torn paper from the input tray or output tray. Load new
paper in the input tray.4. Plug the printer back in, and turn it on. Try printing your document again.
Print quality is poor.
Solution:• The print cartridge may be running out of ink. Check the ink-level icon on the
printer screen, and replace the cartridge if necessary. For more information, see“Insert or replace the print cartridge” on page 11.
• The print cartridge may need to be cleaned or aligned. These tasks can beperformed from the Printer menu. For more information on using the Printer menu,see “Printer menu” on page 7.
• Reduce the size of the image and try printing again. For better results in the future,set the digital camera to a higher photo resolution.
• Make sure you are using the right type of photo paper for the project. For moreinformation, see “Load paper” on page 7.
• Make sure the print quality setting is set to the Best quality and that you haveselected the correct paper type. For more information, see the onscreen Help.
• Your photos are instantly dry, and can be handled immediately after they areprinted. However, HP recommends that you leave the printed surface of yourphotos exposed to the air for 3 minutes after printing, to allow the colors to fullydevelop before you stack them with other photos or place them in albums.
Insert or replace the print cartridgeUse the HP 110 Tri-color Inkjet print cartridge to print black-and-white and color photos.HP Vivera Inks deliver true-to-life photo quality and exceptional fade resistance, resultingin vivid colors that last. HP Vivera Inks are specially formulated and scientifically testedfor quality, purity, and fade resistance.
CAUTION: Check that you are using the correct print cartridges. Also, note that HPdoes not recommend modifying or refilling HP cartridges. Damage that results frommodifying or refilling HP cartridges is not covered by the HP warranty.
For best print quality, HP recommends that you install all retail print cartridges before thedate stamped on the box.
Insert or replace the print cartridge 11
Engl
ish

NOTE: Ink from the cartridges is used in the printing process in a number of differentways, including in the initialization process, which prepares the device and cartridgesfor printing, and in printhead servicing, which keeps print nozzles clear and ink flowingsmoothly. In addition, some residual ink is left in the cartridge after it is used. For moreinformation see www.hp.com/go/inkusage.
To insert or replace a print cartridge1. Make sure the power is on and you have removed the cardboard from inside the
printer.2. Open the print cartridge door of the printer.3. Remove the bright pink tape from the cartridge.
NOTE: Do not touch the copper-colored contacts on the print cartridge.
4. If you are replacing a cartridge, push down and pull outward on the cartridge in thecradle to remove it.
5. Hold the replacement cartridge with the label on top. Slide the cartridge at a slightupward angle into the cradle so the copper-colored contacts go in first. Push thecartridge until it snaps into place.
6. Close the print cartridge door.The printer starts print cartridge alignment. See the onscreen Help for moreinformation.Recycle the old cartridge. The HP Inkjet Supplies Recycling Program is available inmany countries/regions and lets you recycle used print cartridges free of charge. Formore information, go to www.hp.com/hpinfo/globalcitizenship/environment/recycle/inkjet.html.
Support process
If you have a problem, follow these steps:1. Check the documentation that came with the HP Photosmart.2. Visit the HP online support Web site at www.hp.com/support. HP online support is
available to all HP customers. It is the fastest source for up-to-date device informationand expert assistance and includes the following features:• Fast access to qualified online support specialists• Software and driver updates for the HP Photosmart• Valuable HP Photosmart and troubleshooting information for common problems• Proactive device updates, support alerts, and HP newsgrams that are available
when you register the HP Photosmart3. For Europe only: Contact your local point of purchase. If the HP Photosmart has a
hardware failure, you will be asked to bring it back to your local point of purchase.(Service is provided at no charge during the device limited warranty period. After thewarranty period, you will be quoted a service charge.)
4. Call HP support. Support options and availability vary by device, country/region, andlanguage.For a list of support phone numbers, see the phone number list on the inside of theback cover.
Chapter 3
12 HP Photosmart A520 series
English
Regulatory model identification number SDGOA-0701For regulatory identification purposes, the product is assigned a Regulatory ModelNumber. The Regulatory Model Number for the product is SDGOA-0701. This regulatorynumber should not be confused with the marketing name (HP Photosmart A520 series)or product number (Q8526A).
Environmental statementsFor Environmental Stewardship information, see the onscreen Help.
Find more informationYour new HP Photosmart A520 series printer comes with the following documentation:• Setup Guide: The setup instructions explain how to set up the printer, install the HP
Photosmart software, and print a photo. Read this document first.• Basics Guide: This is the book you are reading.• Onscreen Help: The onscreen Help describes how to use the printer with or without
a computer and contains troubleshooting information.After you have installed the HP Photosmart software on your computer, you can view theonscreen Help on your computer:• Windows PC: From the Start menu, select Programs (in Windows XP or Vista, select
All Programs) > HP > HP Photosmart A520 series > Photosmart Help.• Mac: Select Help > Mac Help in the Finder, then select Library > HP Product
Help.
Printer specificationsFor a complete list of specifications, see the onscreen Help. For information on accessingthe onscreen Help, see “Find more information” on page 13.
Operating SystemMicrosoft® Windows XP Home, XP Professional, x64 Edition, or VistaMac® OS X 10.3x, 10.4x
Environmental SpecificationsMaximum during operation: 5–40° C (41–104° F), 5–90% RHRecommended during operation: 15–35 ° C (59–95° F), 20–80% RH
Power ConsumptionU.S.Printing: 14.46 WIdle: 8.67 WOff: 6.63 WInternationalPrinting: 13.56 WIdle: 8.41 WOff: 7.19 W
Regulatory model identification number SDGOA-0701 13
Engl
ish

Power Supply Model NumberHP Part # 0957–2121 (North America), 120 Vac (±10%) 60 Hz (±3 Hz)HP Part # 0957–2120 (Rest of world), 100-240 Vac (±10%) 50/60 Hz (±3 Hz)
Media sizesPhoto paper 10 x 15 cm (4 x 6 inches)Photo paper with tab 10 x 15 cm with 1.25 cm tab (4 x 6 inches with 0.5 inch tab)Index cards 10 x 15 cm (4 x 6 inches)A6 cards 105 x 148 mm (4.1 x 5.8 inches)L-size cards 90 x 127 mm (3.5 x 5 inches)L-size cards with tab 90 x 127 mm with 12.5 mm tab (3.5 x 5 inches with 0.5 inch tab)Supported only when printing from a computer: Hagaki, 101 x 203 mm (4 x 8 inches), Panoramaphoto paper 10 x 30 cm (4 x 12 inches)
Paper TrayOne 10 x 15 cm (4 x 6 inches) photo paper trayPaper Tray Capacity20 sheets of photo paper, maximum thickness 292 µm (11.5 mil) per sheet10 sheets of 10 x 30 cm (4 x 12 inches) photo paper for panoramic printing
Chapter 3(continued)
14 HP Photosmart A520 series
English

HP Warranty 15
Engl
ish
HP Warranty

Chapter 3
16 HP Photosmart A520 series
English

HP Photosmart A520 seriesคูมือผูใชเบื้องตน HP Photosmart A520series
ไทย

สารบญั
1 เริม่ใชงานขอมูลท่ัวไปของ HP Photosmart..............................................................19ปุมบนแผงควบคุมและไฟแสดงสถานะ..........................................................20เมนูเครื่องพิมพ........................................................................................21
2 ความรูเบือ้งตนเกีย่วกบัการพิมพใสกระดาษ..............................................................................................21ใสการดหนวยความจํา...............................................................................22พิมพภาพถาย..........................................................................................23การลบตาแดงในภาพถาย...........................................................................23เช่ือมตอกับคอมพิวเตอร............................................................................23
ติดต้ังซอฟตแวรและตอสาย USB...........................................................24
3 การแกไขปญหาเบือ้งตนและการใหบรกิารปญหาเกี่ยวกับการพิมพและฮารดแวร...........................................................24การใสหรือเปลี่ยนตลับหมกึพิมพ..................................................................27ข้ันตอนการใหบริการ................................................................................28หมายเลขรุนตามขอบงัคับ SDGOA-0701...................................................29ประกาศดานสิ่งแวดลอม............................................................................29คนหาขอมูลเพิ่มเติม..................................................................................29ลักษณะเฉพาะของเครื่องพิมพ.....................................................................29การรับประกันจาก HP..............................................................................31
18 HP Photosmart A520 series
ไทย

1 เริม่ใชงานในสวนนี้จะใหขอมลูเบื้องตนเกี่ยวกบัเครื่องพิมพ HP Photosmart A520series
ขอมูลทัว่ไปของ HP Photosmart
ภาพ 1-1 ภาพดานหนาและดานหลงั
หมายเลข คาํอธบิาย
1 แผงควบคมุ: ควบคุมการทํางานเบื้องตนของเคร่ืองพิมพจากที่น่ี
2 ถาดรบักระดาษ (เปด): คณุสามารถรวบรวมภาพถายทีพ่ิมพจากถาดนี้
3 ฝาครอบตลบัหมกึพมิพ (ปดอยู): เปดฝานี้เพื่อใสหรือเปล่ียนตลับหมึกพิมพ
4 พอรต USB: ใชพอรตน้ีเพื่อเชื่อมตอเคร่ืองพิมพเขากบัเคร่ืองคอมพิวเตอรโดยใชสาย USB ที่ใหมา
5 การตอสายไฟ: เสียบสายไฟเขาทีน่ี่
6 ถาดปอนกระดาษ (ปดอยู): ใสกระดาษที่น่ี เปดถาดรับกระดาษกอน ถาดปอนกระดาษจะเปดขึ้นมาโดยอัตโนมัติเมื่อคุณเปดถาดรับกระดาษออก
เร่ิมใชงาน 19
ไทย

ปุมบนแผงควบคมุและไฟแสดงสถานะ
ภาพ 1-2 แผงควบคุม
หมายเลข คาํอธบิาย
1 เปด/ปด: กดเพื่อเปดหรือปดการทํางานของเครื่องพิมพ ปุมเปด/ปดจะติดสวางเมื่อเปดการทํางาน เม่ือเคร่ืองพิมพไมไดใชงาน ปุมจะกะพริบอยางชาๆ
2 หนาจอของเครือ่งพมิพ: ดูภาพถายและเมนูที่น่ี
หมายเหตุ คณุลักษณะทีพ่รอมใชงานของเคร่ืองพิมพอาจเปลี่ยนแปลงไดตามประเทศ/ภูมิภาค และ/หรือรุน
3
4 Print (พมิพ): กดปุมเพื่อส่ังพิมพภาพจากการดหนวยความจําทีก่ําลังแสดงอยู ปุมพิมพจะติดสวางเมื่อเปดการทํางานเครื่องพิมพ
5 ปุมลูกศร: กด หรือ เพื่อเล่ือนดูภาพถายตางๆ ในการดหนวยความจํา หรือเพื่อเล่ือนดูเมนูเคร่ืองพิมพ
6 ยกเลกิ: กดเพื่อหยดุการดําเนินการ ออกจากเมนู หรือเพื่อยกเลิกการพิมพภาพในควิการพิมพ
ภาพ 1-3 ไฟสถานะ
บท 1
20 HP Photosmart A520 series
ไทย
Red Eye (แกไขตาแดง): คุณลักษณะแกไขตาแดงสามารถลดตาแดงในภาพทีพ่บเปนบางครั้งจากภาพถายทีถ่ายโดยใชแฟลช คณุลักษณะน้ีถกูปดใชงานไวเปนคาดีฟอลต กดปุมน้ีเพื่อเปดหรือปดคุณลักษณะน้ี

หมายเลข คาํอธบิาย
1 ไฟเตอืน LED: กะพริบเปนสีแดงเมื่อเคร่ืองพิมพเกิดปญหา
2 ไฟ LED การดหนวยความจํา: ไฟจะเปล่ียนเปนสฟีานํ้าทะเลหลังจากเสียบการดหนวยความจําอยางถกูตองแลว ไฟจะกะพริบเปนสฟีาขณะทีเ่คร่ืองพิมพกําลังติดตอกับการดหนวยความจํา หรือเมื่อคอมพิวเตอรทีเ่ชื่อมตอไวกําลังอาน เขียน หรือลบขอมูล
เมนเูครือ่งพิมพเมนูเครื่องพิมพทําใหคุณมีตัวเลือกการพิมพมากขึ้น ชวยใหคุณเปลี่ยนเคร่ืองพิมพดีฟอลตได พรอมทั้งมเีครื่องมือในการบํารุงรักษาและการแกไขปญหาเบือ้งตน และใหขอมูลวิธีการใชงานเกี่ยวกับการพิมพทั่วไป
หมายเหตุ คุณลักษณะที่พรอมใชงานของเครื่องพิมพอาจเปลี่ยนแปลงไดตามประเทศ/ภมูภิาค และ/หรือรุน
การใชเมนเูครือ่งพิมพ
หมายเหตุ ถามกีารดหนวยความจําเสียบอยูในชองเสียบการด ใหนําการดออกเพื่อเขาสูเมนูเครื่องพิมพ
1. กด หรือ เพ่ือเปดเมนูเครื่องพิมพ2. การกดปุม จะเลื่อนไปยังตัวเลือกถัดไป และการกด จะเลื่อนไปยังตัว
เลือกเมนูกอนหนาน้ี3. กดปุม Print (พิมพ) เพ่ือเลือกตัวเลือก ตัวเลือกในเมนูที่ไมสามารถเขาใช
งานไดจะมีสีจาง4. การออกจากเมนู ใหกดปุม Cancel (ยกเลิก)
2 ความรูเบือ้งตนเกีย่วกบัการพมิพใสกระดาษ
การใช HP Advanced Photo Paper กระดาษชนิดนี้ออกแบบมาเปนพิเศษสําหรับการใชงานกับหมกึพิมพในเครื่องพิมพของคุณ เพ่ือภาพถายท่ีสวยงามกระดาษภาพถายแบบอื่นจะใหคุณภาพการพิมพท่ีดอยกวา
เครื่องพิมพไดรับการตั้งคาเปนดีฟอลตใหพิมพภาพถายคุณภาพดีที่สุดดวย HPAdvanced Photo Paper หากคุณใชกระดาษประเภทอื่น ควรตรวจสอบใหแนใจวาไดเปล่ียนประเภทกระดาษแลว สําหรับขอมูลเกี่ยวกับการเปลี่ยนประเภทกระดาษ โปรดดูวิธีการใชบนหนาจอ
หากตองการสั่งซื้อกระดาษของ HP หรือวัสดุอื่นๆ โปรดไปที่ www.hp.com/buy/supplies เมือ่เขาไปแลวใหเลือกประเทศ/ภมูิภาคของคุณ แลวปฏิบติัตาม
เมนูเคร่ืองพิมพ 21
ไทย

คําแนะนําบนหนาจอเพื่อเลือกผลิตภณัฑ จากนั้นคลิกเลือกลิงคสําหรับการชอปปงลิงคใดลิงคหน่ึงในหนาน้ัน
การใสกระดาษ1. เปดถาดรับกระดาษ ถาดปอนกระดาษจะเปดออกโดยอัตโนมติั
2. ใสกระดาษไดสูงสุด 20 แผนโดยใหดานที่จะพิมพหรือดานที่เปนมันวาวหงายขึ้น หากใชกระดาษที่มีแถบฉีก ใหใสดานที่มีแถบอยูนอกสุด เมื่อใสกระดาษ ใหเลื่อนกระดาษไปทางดานซายของถาดปอนกระดาษเขาแลวดันกระดาษเขาไปจนสุด
3. เลื่อนตัวปรับความกวางกระดาษใหชิดกับขอบกระดาษ โดยไมทําใหกระดาษงอ
ใสการดหนวยความจําใสการดหนวยความจําลงในชองที่เหมาะสมโดยหงายดานฉลากขึ้นและใสดานที่เปนโลหะเขาไปขางในกอน โปรดดูหมายเลขกํากับเพื่อเลือกชองสําหรับเสียบการดหนวยความจําที่ถูกตองของคุณ
ภาพ 2-1 ชองเสยีบการดหนวยความจาํ
บท 2
22 HP Photosmart A520 series
ไทย
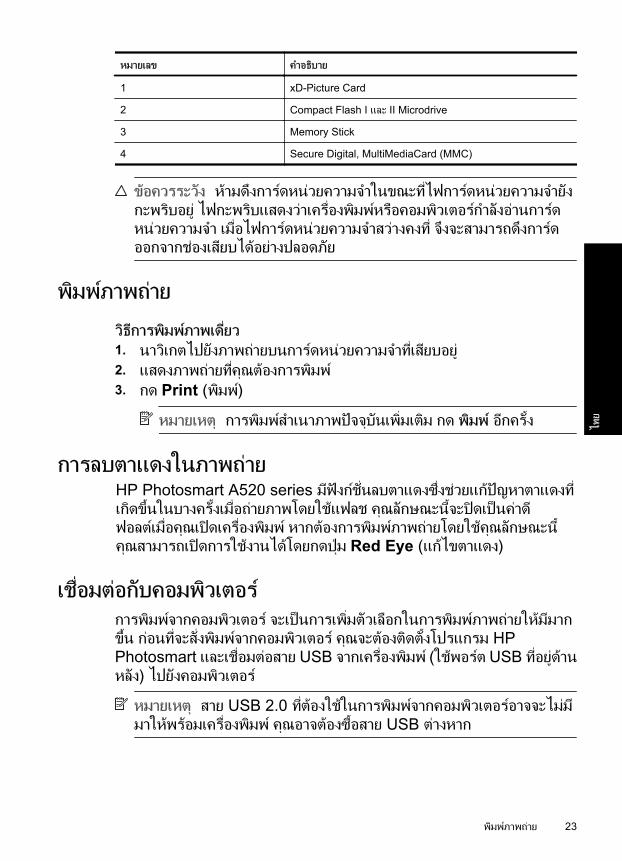
หมายเลข คาํอธบิาย
1 xD-Picture Card
2 Compact Flash I และ II Microdrive
3 Memory Stick
4 Secure Digital, MultiMediaCard (MMC)
ขอควรระวงั หามดึงการดหนวยความจําในขณะที่ไฟการดหนวยความจํายังกะพริบอยู ไฟกะพริบแสดงวาเครื่องพิมพหรือคอมพิวเตอรกําลังอานการดหนวยความจํา เมื่อไฟการดหนวยความจําสวางคงที่ จึงจะสามารถดึงการดออกจากชองเสียบไดอยางปลอดภัย
พิมพภาพถาย
วธิีการพิมพภาพเดีย่ว1. นาวิเกตไปยังภาพถายบนการดหนวยความจําท่ีเสียบอยู2. แสดงภาพถายที่คุณตองการพิมพ3. กด Print (พิมพ)
หมายเหตุ การพิมพสําเนาภาพปจจุบนัเพ่ิมเติม กด พิมพ อีกครั้ง
การลบตาแดงในภาพถาย
เชือ่มตอกับคอมพิวเตอรการพิมพจากคอมพิวเตอร จะเปนการเพ่ิมตัวเลือกในการพิมพภาพถายใหมีมากข้ึน กอนที่จะสั่งพิมพจากคอมพิวเตอร คุณจะตองติดต้ังโปรแกรม HPPhotosmart และเชื่อมตอสาย USB จากเคร่ืองพิมพ (ใชพอรต USB ท่ีอยูดานหลัง) ไปยังคอมพิวเตอร
หมายเหตุ สาย USB 2.0 ท่ีตองใชในการพิมพจากคอมพิวเตอรอาจจะไมมีมาใหพรอมเครื่องพิมพ คุณอาจตองซื้อสาย USB ตางหาก
พิมพภาพถาย 23
ไทย
HP Photosmart A520 series มฟีงกช่ันลบตาแดงซึง่ชวยแกปญหาตาแดงที่เกิดข้ึนในบางครั้งเมื่อถายภาพโดยใชแฟลช คุณลักษณะนี้จะปดเปนคาดีฟอลตเมือ่คุณเปดเครื่องพิมพ หากตองการพิมพภาพถายโดยใชคุณลักษณะนี้คุณสามารถเปดการใชงานไดโดยกดปุม Red Eye (แกไขตาแดง)

ตดิตัง้ซอฟตแวรและตอสาย USB
ผูใช Windows สาํหรบัผูใช Mac
ขอมลูสาํคญั: หามตอสาย USB จนกวาระบบจะแสดงขอความแจง1. ใสแผนซีดี HP Photosmart ลงในไดรฟซีดรีอม
ของคอมพิวเตอร หากวิซารดการติดตั้งไมปรากฏขึ้น ใหหาไฟล setup.exe ที่ไดรฟซีดีรอมแลวดับเบลิคลิก รอใหไฟลโหลดสักครู
2. คลิกที ่Next (ถดัไป) และปฏิบัติตามคําแนะนําบนหนาจอ
3. เมื่อไดรับขอความแจง ใหตอสาย USB เขากับพอรต USB ทีด่านหลังของเครื่องพิมพ จากน้ันตอปลายอีกดานหน่ึงเขากบัพอรต USB ของเคร่ืองคอมพิวเตอร
4. ทําตามคําแนะนําทีป่รากฏบนหนาจอจนกระทั่งการติดตั้งเสร็จสมบูรณและคอมพิวเตอรของคุณรีสตารท
1. ใหตอสาย USB เขากับพอรต USB ทีด่านหลังของเคร่ืองพิมพ จากน้ันตอปลายอีกดานหน่ึงเขากับพอรต USB ของเคร่ืองคอมพิวเตอร
2. ใสแผน CD HP Photosmart ลงในไดรฟ CD-ROM ของเคร่ืองคอมพวิเตอร
3. บนเดสกทอ็ปของคุณ ดับเบิ้ลคลิกทีไ่อคอน CDHP Photosmart
4. ดบัเบิ้ลคลิกไอคอน HP Installer และทาํตามคําแนะนําในหนาจอการติดตั้งแตละหนาจอเพื่อติดตั้งซอฟตแวรเคร่ืองพิมพ
5. เม่ือหนาจอ Congratulations ปรากฏขึ้น คลิกOK (ตกลง)
3 การแกไขปญหาเบือ้งตนและการใหบรกิารเครื่องพิมพ HP Photosmart A520 series ไดรับการออกแบบมาใหใชงานงายและเชื่อถือได สวนนี้จะเปนการตอบคําถามที่พบบอยเกี่ยวกับการใชเครื่องพิมพ และการพิมพโดยไมใชเครือ่งคอมพิวเตอร
หมายเหตุ กอนที่จะติดตอศูนยบริการ HP โปรดอานคําแนะนําในการแกไขปญหาเบื้องตนที่สวนนี้ หรือเขาไปที่บริการออนไลนที ่www.hp.com/support
ปญหาเกี่ยวกับการพมิพและฮารดแวร
ไฟสญัญาณเตอืนกาํลงักะพริบ
สาเหตุ: เกิดขอผิดพลาดเกี่ยวกับเครื่องพิมพ ลองแกไขดังน้ี
บท 3
24 HP Photosmart A520 series
ไทย

วธิแีกไข:• ดูคําแนะนําจากจอแสดงผลของเครื่องพิมพ หากมีกลองดิจิตอลตออยูกับ
เครื่องพิมพ ใหตรวจสอบคําแนะนําที่หนาจอของกลองดิจิตอล หากเครื่องพิมพเช่ือมตออยูกับคอมพิวเตอร ใหตรวจสอบคําแนะนําจากหนาจอคอมพิวเตอร
• ปดเคร่ืองพิมพ• หากไฟสถานะยังคงกะพริบอยู ใหเขาไปท่ี www.hp.com/support
หรือติดตอศูนยบริการของ HP
เครือ่งพิมพเสยีบสายไฟอยู แตเปดเครือ่งไมติด
วธิแีกไข:• เครื่องพิมพอาจเสียบอยูกับปลั๊กพวงที่ปดอยู เปดสวิตชไฟปลั๊กพวง จาก
นั้นใหเปดเครื่องพิมพ• เครื่องพิมพอาจจะเสียบอยูกับแหลงจายไฟท่ีใชดวยกันไมได หากตอง
เดินทางไปตางประเทศ ควรตรวจสอบใหแนใจวาแหลงจายไฟในประเทศ/ภมูภิาคนั้นๆ มีระบบไฟฟาที่สอดคลองกัน และใชกับปลั๊กไฟของเครื่องพิมพได
• ตรวจสอบวาอะแดปเตอรจายไฟทํางานตามปกติ การตรวจสอบอะแดปเตอรจายไฟ:• ตรวจสอบใหแนใจวาอะแดปเตอรจายไฟเชื่อมตอกับเคร่ืองพิมพ
และเขากันไดกับแหลงจายไฟ• กดปุม Power (เปด/ปด) ที่เคร่ืองพิมพคางไว หากปุม Power
(เปด/ปด) มไีฟติดสวางขึ้น แสดงวาปลั๊กไฟทํางานไดตามปกติ หากไฟไมติดสวาง ใหเขาไปท่ี www.hp.com/support หรือติดตอศูนยบริการของ HP
กระดาษปอนเขาสูเครือ่งพมิพไมถกูตอง หรอื พมิพภาพถายแลวไมอยูตรงกลางหนากระดาษ
วธิแีกไข:• คุณอาจปอนกระดาษไมถูกตอง ใสกระดาษใหม โดยตรวจดูใหแนใจ
วา วางกระดา ษตามแนวที่ถู กต องลงในถาดป อนกระดาษ และตัวปรับความกวางของกระดาษอยูชิดพอดีกับขอบกระดาษ สําหรับคําแนะนําเกี่ยวกับการใสกระดาษ โปรดดู “ใสกระดาษ” ในหนา 21
• อาจตองปรับตําแหนงตลับหมกึพิมพ โปรดดูขอมูลเพิ่มเติมไดจากวิธีใชบนหนาจอ
ปญหาเกีย่วกบัการพิมพและฮารดแวร 25
ไทย

• เครื่องพิมพอาจเกิดปญหา โปรดอานคําแนะนําจากหนาจอเคร่ืองพิมพ• อาจปดเครื่องอยู หรือปลั๊กเช่ือมตอตางๆ หลวม ตรวจสอบใหแนใจวาได
เปดเครื่องและเสียบสายไฟแนนดีแลว• กระดาษอาจติดระหวางการพิมพ โปรดดูคําแนะนําในสวนตอไปนี้
สําหรับการแกปญหากระดาษติด
กระดาษตดิขณะพิมพ
วธิแีกไข: ลองปฏิบติัตามข้ันตอนตอไปนี้เพ่ือนํากระดาษที่ติดอยูออก:1. ปดเครื่องพิมพ แลวถอดสายไฟออก2. ดึงกระดาษที่ติดอยูในเครื่องพิมพออก3. นํากระดาษที่มรีอยยับหรือฉีกขาดออกจากถาดปอนกระดาษหรือถาดรับ
กระดาษ วางกระดาษใหมลงในถาดปอนกระดาษ4. เสียบปลั๊กของเครื่องพิมพกลับเขาไป แลวเปดเครื่องพิมพ ลองสั่งพิมพ
เอกสารของคุณอีกครั้ง
คณุภาพงานพิมพต่ํา
วธิแีกไข:• หมึกในตลับหมกึพิมพอาจจะหมด ตรวจสอบไอคอนระดับหมกึที่จอ
แสดงผลของเครื่องพิมพ และเปลี่ยนตลับหมึกหากจําเปน สําหรับขอมูลเพ่ิมเติม โปรดดู “การใสหรือเปลี่ยนตลับหมึกพิมพ” ในหนา 27
• อาจตองทําความสะอาดหรือปรับตําแหนงตลับหมึกพิมพ งานนี้สามารถดําเนินการไดจากเมนูเคร่ืองพิมพ สําหรับขอมูลเพิ่มเติมเกี่ยวกับการใชเมนูเครื่องพิมพ โปรดดู “เมนูเครื่องพิมพ” ในหนา 21
• ลดขนาดของภาพ และลองสั่งพิมพอีกครั้ง เพ่ือใหไดผลลัพธท่ีดียิ่งข้ึนในอนาคต โปรดตั้งคาความละเอียดของกลองดิจิตอลใหสูงข้ึน
• ตรวจดูใหแนใจวาคุณใชกระดาษภาพถายประเภทที่เหมาะสมกับงานพิมพ สําหรับขอมลูเพิ่มเติม โปรดดู “ใสกระดาษ” ในหนา 21
• ตรวจดูใหแนใจวาการตั้งคาคุณภาพงานพิมพอยูที ่Best (ดีที่สุด) และคุณไดเลือกประเภทของกระดาษถูกตองแลว โปรดดูขอมลูเพิ่มเติมไดจากวิธีใชบนหนาจอ
• ภาพถายของคุณจะแหงทันที พรอมนําไปใชงานไดทันทีที่พิมพเสร็จอยางไรก็ตาม HP ขอแนะนําใหหงายภาพถายที่พิมพเสรจ็ข้ึนและวางทิ้งไว 3 นาที เพ่ือใหสีปรับสภาพไดเต็มทีก่อนท่ีจะนําภาพถายนั้นไปวางซอนทับกับภาพอื่นๆ หรือใสลงในอัลบั้ม
บท 3
26 HP Photosmart A520 series
ไทย

การใสหรอืเปลีย่นตลบัหมึกพมิพใชตลับหมึกพิมพ HP 110 Tri-color Inkjet เพ่ือพิมพภาพถายขาวดําและสีหมกึพิมพ HP Vivera ใหคุณภาพสีที่สมจริงและทนทานตอการลบเลือน ผลที่ไดคือภาพที่สดสวยและคมชัดยาวนาน หมึกพิมพของ HP Vivera ผลิตข้ึนมาเปนพิเศษและไดรับการทดสอบในหองทดลองเพื่อใหไดคุณภาพ ความบริสุทธ์ิ และไมซดีจาง
ขอควรระวงั โปรดตรวจสอบวาคุณใชตลับหมึกพิมพท่ีถูกตอง และโปรดทราบวา HP ไมแนะนําใหดัดแปลงแกไข หรือเติมหมึกในตลับหมกึของ HPความเสียหายเน่ืองจากการดัดแปลงหรือเติมหมึกในตลับหมึกของ HP จะไมไดรับความคุมครองตามการรับประกันของ HP
เพ่ือใหไดคุณภาพงานพิมพสูงสุด HP ขอแนะนําใหคุณติดต้ังตลับหมกึพิมพกอนวันที่ซึ่งประทับอยูบนกลอง
หมายเหตุ หมึกพิมพจากตลับหมึกใชในกระบวนการพิมพซึง่มอียูหลากหลายวิธี รวมถึงกระบวนการกําหนดการทํางานเริ่มตน ซึ่งเปนการเตรียมพรอมอุปกรณและตลับหมกึสําหรับการพิมพ รวมทั้งตรวจสอบหัวพนหมึก ซึ่งเปนการดูแลใหหัวพนหมึกสะอาดและหมกึไหลไดสะดวก นอกจากนี้ หมึกที่เหลือบางสวนจะอยูในตลับหมึกพิมพหลังจากการใชงาน สําหรับขอมูลเพิ่มเติม โปรดดู www.hp.com/go/inkusage
การใสหรอืเปลีย่นตลับหมกึพิมพ1. ตรวจดูใหแนใจวาไดเปดเครื่องไวแลวและคุณไดนํากระดาษกั้นออกจาก
เคร่ืองพิมพแลว2. เปดที่ปดตลับหมกึพิมพของเครื่องพิมพออก3. ดึงแถบสีชมพูออกจากตลับหมกึพิมพ
หมายเหตุ อยาสัมผัสแถบสีทองแดงท่ีอยูบนตลับหมกึพิมพ
4. ในกรณีที่เปลี่ยนตลับหมกึใหม ใหดันตลับหมึกเกาลงแลวดึงออกจากที่ใสหมกึ
การใสหรือเปล่ียนตลับหมึกพิมพ 27
ไทย

5. จับตลับหมกึพิมพใหมโดยใหฉลากอยูดานบน สอดตลับหมึกโดยเอียงข้ึนเล็กนอยลงในที่ใสหมกึพิมพ เพ่ือใหดานหนาสัมผัสทองแดงเขาไปกอน ดันตลับหมึกพิมพจนกระทั่งล็อคเขาท่ีอยางแนนหนา
6. ปดฝาครอบตลับหมกึพิมพเครื่องพิมพจะเริ่มปรับตําแหนงตลับหมกึพิมพ ดูวิธีใชบนหนาจอ สําหรับขอมูลเพิ่มเติมการนําตลับหมกึพิมพเกามารีไซเคิล โครงการรีไซเคิลวัสดุอิงคเจ็ตของ HPดําเนินงานอยูในหลายประเทศ/ภมูภิาค คุณสามารถนําตลับหมึกพิมพที่ใชแลวมารีไซเคิลไดโดยไมเสียคาใชจาย โปรดดูขอมูลเพิ่มเติมที่www.hp.com/hpinfo/globalcitizenship/environment/recycle/inkjet.html
ขัน้ตอนการใหบรกิาร
ถาคณุมปีญหาในการใชงานอปุกรณ โปรดปฏบิตัิตามขั้นตอนตอไปนี้:1. ตรวจสอบเอกสารประกอบที่ใหมาพรอมกับ HP Photosmart2. เขาไปที่เว็บไซตศูนยบริการลูกคาแบบออนไลนของ HP ที่ www.hp.com/
support ศูนยบริการลูกคาแบบออนไลนของ HP พรอมใหบริการลูกคาของ HP ทุกราย เว็บไซตน้ีเปนแหลงขอมูลที่เขาถึงไดรวดเร็วที่สุดเมือ่ตองการทราบขอมูลปจจุบนัของอุปกรณและความชวยเหลอืจากผูเช่ียวชาญ รวมทั้งใหบริการดังนี้:• เขาถึงผูเช่ียวชาญที่ทรงคุณวุฒิไดอยางรวดเร็ว ซึ่งพรอมใหการ
สนับสนุนแบบออนไลน• โปรแกรมอัพเดทซอฟตแวรและไดรเวอรสําหรับ HP Photosmart• HP Photosmart ที่มีประโยชนและขอมลูการแกไขปญหาเบือ้งตน
สําหรับปญหาทั่วๆ ไป• โปรแกรมอัพเดทอุปกรณลวงหนา ความพรอมในการใหบริการ และ
ขาวสารจาก HP จะมใีหบริการเมื่อคุณลงทะเบียน HP Photosmart3. เฉพาะยุโรปเทาน้ัน โปรดติดตอจุดส่ังซื้อผลิตภัณฑในพื้นท่ีของคุณ ถา HP
Photosmart มีปญหาฮารดแวรไมทํางาน คุณจะตองนําผลิตภณัฑนั้นกลับมายังจุดขายในทองถิ่นของคุณ (โดยไมตองเสียคาบริการนี้ หากอุปกรณยังอยูในระยะของการรับประกัน หากเกินระยะเวลาการรบัประกัน คุณจะตองเสียคาใชจายในการใหบริการ)
4. ติดตอศูนยบริการลูกคาของ HP ตัวเลือกสําหรับการบริการและความพรอมในการใหบริการจะแตกตางกันไปตามอุปกรณ ประเทศ/พ้ืนที่ และภาษาสําหรับรายชื่อศูนยบริการพรอมหมายเลขโทรศัพท โปรดดูท่ีดานในของฝาครอบดานหลัง
บท 3
28 HP Photosmart A520 series
ไทย

หมายเลขรุนตามขอบังคับ SDGOA-0701ผลิตภณัฑนี้มหีมายเลขรุนตามขอบงัคับ ซึง่ใชเพ่ือการระบุผลิตภณัฑ หมายเลขรุนตามขอบงัคับสําหรับผลิตภณัฑคือ SDGOA-0701. อยาจําสับสนระหวางหมายเลขรุนตามขอบงัคับและชื่อทางการตลาด (HP Photosmart A520series) หรือหมายเลขผลิตภณัฑ (Q8526A และอื่นๆ)
ประกาศดานสิ่งแวดลอมสําหรับขอมูลการดูแลดานสิ่งแวดลอม โปรดดูที่วิธีใชบนหนาจอ
คนหาขอมูลเพิม่เติมเคร่ืองพิมพ HP Photosmart A520 series เครื่องใหมของคุณมาพรอมกับเอกสารตอไปนี:้• คูมอืการติดตั้ง: คําแนะนําการติดต้ังจะอธิบายถึงวิธีการติดต้ังเครื่องพิมพ
การติดต้ังซอฟตแวร HP Photosmart และการพิมพภาพถาย โปรดอานเอกสารประกอบนี้กอน
• คูมอืผูใชเบือ้งตน: คูมือน้ีคือหนังสือที่คุณกําลังอานอยู• วธิใีชบนหนาจอ: วธิีใชบนหนาจอจะอธบิายถึงวิธีการใชเครื่องพิมพนี้โดยมี
หรือไมมีเครื่องคอมพิวเตอร อีกทั้งมขีอมลูเกี่ยวกับการแกไขปญหาเบือ้งตน
หลังจากติดต้ังซอฟตแวร HP Photosmart ลงในคอมพิวเตอรแลว คุณสามารถเรียกดูวิธีใชบนหนาจอไดจากเครื่องคอมพิวเตอรของคุณ• พซีทีีใ่ชระบบปฏบิตักิาร Windows: จากเมนู Start (เร่ิม) ใหเลือก
Programs (โปรแกรม) (ใน Windows XP หรือ Vista ใหเลือก AllPrograms (โปรแกรมทั้งหมด)) > HP > HP Photosmart A520series > Photosmart Help (วิธีใช Photosmart)
• Mac: เลือก Help (วิธีใช) > Mac Help (วิธีใช Mac) ใน Finder จากนั้นเลือก Library (ไลบรารี) > HP Product Help
ลกัษณะเฉพาะของเครื่องพมิพหากตองการทราบรายการขอมูลจําเพาะทั้งหมด โปรดดูที่วิธีใชบนหนาจอสําหรับขอมลูเกีย่วกับการเขาสูวิธีใชบนหนาจอ โปรดดู “คนหาขอมลูเพิ่มเติม”ในหนา 29
ระบบปฏบิตักิาร
Microsoft® Windows XP Home, XP Professional, x64 Edition หรือ VistaMac® OS X 10.3x, 10.4x
ขอมลูจําเพาะดานสภาพแวดลอม
หมายเลขรุนตามขอบังคับ SDGOA-0701 29
ไทย

คาสงูสดุระหวางการใชงาน: 5-40 องศาเซลเซียส (41-104 องศาฟาเรนไฮต ), 5-90% RHคาสงูสดุทีแ่นะนาํระหวางการใชงาน: 15-35 องศาเซลเซียส (59-95 องศาฟาเรนไฮต), 20-80% RH
การใชพลังงาน
สหรัฐอเมรกิา
การพิมพ: 14.46 วัตต
ขณะไมไดใชงาน: 8.67 วัตต
ขณะปด: 6.63 วัตต
มาตรฐานสากล
การพิมพ: 13.56 วัตต
ขณะไมไดใชงาน: 8.41 วัตต
ขณะปด: 7.19 วัตต
หมายเลขรุนของอปุกรณจายไฟ
HP Part # 0957-2121 (อเมริกาเหนือ), 120 V AC (± 10%) 60 Hz (± 3 Hz)HP Part # 0957-2120 (ประเทศอื่นทั่วโลก), 100-240 V AC (±10%) 50/60 Hz (±3 Hz)
ขนาดของสือ่
กระดาษภาพถาย 10 x 15 ซม. (4 x 6 น้ิว)
กระดาษภาพถายแท็บ 10 x 15 ซม. และแท็บ 1.25 ซม. (4 x 6 นิ้ว และแทบ็ขนาด 0.5 น้ิว)
บัตรดัชน ี10 x 15 ซม. (4 x 6 น้ิว)
การด A6 105 x 148 มม.. (4.1 x 5.8 นิ้ว)
การดขนาด L 90 x 127 มม. (3.5 x 5 น้ิว)
การดขนาด L แท็บ 90 x 127 มม. และแทบ็ 12.5 มม. (3.5 x 5 น้ิวและแท็บขนาด 0.5 น้ิว)
ขนาดที่รองรับเมือ่พิมพจากคอมพิวเตอร: Hagaki, 101 x 203 มม. (4 x 8 นิ้ว), กระดาษภาพถายพาโนรามา10 x 30 ซม. (4 x 12 นิ้ว)
ถาดกระดาษ
ถาดกระดาษภาพถาย 10 x 15 ซม. (4 x 6 น้ิว) หน่ึงถาด
ความจขุองถาดกระดาษ
20 แผนสําหรับกระดาษภาพถาย ความหนาสงูสุด 292 µm (11.5 mil) ตอแผน10 แผนสําหรับกระดาษภาพถาย 10 x 30 ซม. (4 x 12 น้ิว) ในการพิมพภาพถายพาโนรามา
บท 3(ทําตอ)
30 HP Photosmart A520 series
ไทย

การรบัประกันจาก HP
การรับประกันจาก HP 31
ไทย

บท 3
32 HP Photosmart A520 series
ไทย

HP Photosmart A520 seriesPanduan Dasar HP Photosmart A520 series
Bah
asa
Indo
nesi
a

Isi
1 MemulaiSekilas tentang HP Photosmart................................................................................................35Tombol panel kendali dan lampu indikator...............................................................................36Menu printer..............................................................................................................................37
2 Dasar pencetakanMemuat kertas..........................................................................................................................38Sisipkan kartu memori..............................................................................................................38Mencetak selembar foto...........................................................................................................39Menghilangkan mata merah pada foto.....................................................................................39Menghubungkan ke komputer..................................................................................................39
Memasang perangkat lunak dan menghubungkan kabel USB..........................................40
3 Mengatasi Masalah dan DukunganMasalah pencetakan dan perangkat keras...............................................................................40Memasukkan atau mengganti kartrij cetak...............................................................................42Proses dukungan......................................................................................................................43Nomor identifikasi model resmi SDGOA-0701.........................................................................44Pernyataan lingkungan.............................................................................................................44Mendapatkan informasi lebih lanjut..........................................................................................44Spesifikasi printer.....................................................................................................................44Garansi HP...............................................................................................................................46
34 HP Photosmart A520 series
Bahasa Indonesia

1 MemulaiBagian ini memberikan informasi pengenalan mengenai printer HP Photosmart A520series.
Sekilas tentang HP Photosmart
Gambar 1-1 Tampak depan dan belakang
Label Keterangan
1 Panel kendali: Jalankan fungsi dasar printer dari sini.
2 Baki keluaran (terbuka): Ambillah kertas hasil cetakan Anda dari baki ini.
3 Pintu kartrij cetak (tertutup): Buka pintu ini untuk memasukkan atau menggantikartrij cetak.
4 Port USB: Gunakan port ini untuk menghubungkan printer ke komputermenggunakan kabel USB yang disediakan.
5 Sambungan kabel listrik: Hubungkan kabel listrik di sini.
6 Baki masukan (tertutup): Muatkan kertas di sini. Buka baki keluaran terlebihdahulu. Baki masukan terbuka secara otomatis saat Anda membuka baki keluaran.
Memulai 35
Bah
asa
Indo
nesi
a

Tombol panel kendali dan lampu indikator
Gambar 1-2 Panel kendali
Label Keterangan
1 Daya: Tekan untuk menghidupkan atau mematikan printer. Tombol daya akanmenyala jika listrik dihidupkan. Jika printer tidak digunakan, nyala tombol akanmeredup.
2 Layar printer: Tampilkan foto dan menu di sini.
Catatan Fitur yang tersedia pada printer mungkin berbeda dari satu negara/wilayah dan/atau model ke negara/wilayah dan/atau model lainnya.
3 Red Eye (Mata Merah): Fitur Mata Merah mengurangi efek mata merah yang
berdasarkan pengaturan asal. Tekan tombol ini untuk menghidupkan ataumematikan fitur ini.
4 Cetak: Tekan untuk mencetak gambar yang sedang dilihat dari kartu memori.Tombol Cetak akan menyala jika printer dihidupkan.
5 Panah navigasi: Tekan atau untuk melihat foto dalam kartu memori ataumenjelajah menu printer.
6 Batal: Tekan untuk menghentikan pengoperasian tertentu, keluar dari menu, ataumembatalkan pencetakan gambar dalam antrian.
Bab 1
36 HP Photosmart A520 series
Bahasa Indonesia
kadang Anda baca pada foto yang menggunakan lampu kilat. Fitur ini mait

Gambar 1-3 Lampu indikator
Label Keterangan
1 Attention LED (Lampu Indikator): Berkedip merah jika printer memerlukanperhatian.
2 Memory card LED (Indikator kartu memori): Lampu ini kembali menyala hijau solidsetelah kartu memori disisipkan dengan benar. Lampu berkedip biru jika printerberkomunikasi dengan kartu memori atau jika komputer yang terhubung digunakanuntuk membaca, menulis, atau menghapus sesuatu.
Menu printerMenu Printer memberikan banyak pilihan cetak yang memampukan Anda untukmengubah pengaturan asal printer, menyediakan peralatan perawatan dan pemecahanmasalah, dan menyediakan informasi cara melakukan pekerjaan dasar pencetakan.
Catatan Fitur yang tersedia pada printer mungkin berbeda dari satu negara/wilayahdan/atau model ke negara/wilayah dan/atau model lainnya.
Untuk menggunakan menu Printer
Catatan Jika terdapat kartu memori terpasang pada slot kartu, lepaskan untukmengakses menu Printer.
1. Tekan atau untuk membuka menu Printer.2. Menekan akan beralih ke pilihan selanjutnya dan menekan akan beralih ke menu
sebelumnya.3. Tekan Print (Cetak) untuk memilih salah satu pilihan. Pilihan menu yang tidak dapat
diakses dipadamkan.4. Untuk keluar dari menu, tekan tombol Cancel (Batal).
2 Dasar pencetakan
Menu printer 37
Bah
asa
Indo
nesi
a

Memuat kertasGunakan HP Advanced Photo Paper. Kertas foto ini dirancang khusus untuk bekerjadengan tinta dalam printer Anda untuk menciptakan foto-foto yang indah. Kertas foto lainakan menghasilkan foto yang kurang bagus.Pengaturan asal printer adalah mencetak foto berkualitas terbaik pada HP AdvancedPhoto Paper. Jika Anda mencetak pada jenis kertas yang berbeda, pastikan untukmengubah jenis kertas. Untuk mendapatkan informasi mengenai pengubahan jeniskertas, baca Bantuan pada layar.Untuk memesan kertas HP dan persediaan lain, kunjungi www.hp.com/buy/supplies. Jikadiminta, pilih negara/wilayah Anda, ikuti petunjuk untuk memilih produk, lalu klik salahsatu link belanja pada halaman web.
Untuk memuatkan kertas1. Buka baki keluaran. Baki masukan terbuka secara otomatis.
2. Muatkan sampai 20 lembar kertas foto dengan permukaan cetak atau sisi mengilapmenghadap ke bagian depan printer. Jika Anda menggunakan kertas bertab,muatkan kertas sehingga tab masuk terakhir. Saat memuatkan, geser kertas ke sisikiri baki masukan dan dorong kertas ke bawah dengan kuat sampai berhenti.
3. Sesuaikan pemandu lebar kertas agar muat ke dekat ujung kertas tanpa melipatkertasnya.
Sisipkan kartu memoriMasukkan kartu memori ke dalam slot yang tepat dengan label menghadap ke atas dankontak logam masuk terlebih dulu. Baca pada gambar untuk memilih slot yang tepat untukkartu memori Anda.
Bab 2
38 HP Photosmart A520 series
Bahasa Indonesia

Gambar 2-1 Slot kartu memori
Label Keterangan
1 xD-Picture Card
2 Compact Flash I dan II, Microdrive
3 Memory Stick
4 Secure Digital, MultiMediaCard (MMC)
Perhatian Jangan menarik kartu memori sewaktu lampu kartu memori berkedip.Lampu yang berkedip menandakan printer atau komputer sedang mengakses kartumemori. Saat lampu kartu memori pada printer menyala solid, Anda dapat menarikkeluar kartu dari slotnya dengan aman.
Mencetak selembar foto
Untuk mencetak sebuah foto1. Telusuri foto yang ada di dalam kartu memori.2. Tampilkan foto yang ingin Anda cetak.3. Tekan Print (Cetak).
Catatan Untuk menambah jumlah salinan gambar yang sedang dicetak, tekanPrint (Cetak) sekali lagi.
Menghilangkan mata merah pada fotoHP Photosmart A520 series mengikutsertakan fungsi pengurangan mata merah yangmemperbaiki efek mata merah yang kadang timbul dalam foto yang menggunakan lampu
menekan tombol Red Eye (Mata Merah).
Menghubungkan ke komputerMencetak dari komputer memberikan Anda lebih banyak pilihan untuk mencetak gambarAnda. Sebelum mencetak dari komputer Anda, Anda harus menginstal perangkat lunak
Mencetak selembar foto 39
Bah
asa
Indo
nesi
a
kilat. Fitur ini mait berdasarkan pengaturan asal saat Anda mengghidupkan printer. Jikaingin mencetak foto menggunakan fitur ini, Anda dapat mematikannya dengan

HP Photosmart dan menghubungkan kabel USB dari printer (menggunakan port USBpada bagian belakang) ke komputer Anda.
Catatan Kabel USB 2.0 yang diperlukan untuk mencetak dari komputer mungkintidak disertakan dalam kemasan bersama printer, sehingga Anda mungkin perlumembelinya secara terpisah.
Memasang perangkat lunak dan menghubungkan kabel USB
Pengguna Windows Pengguna Mac
Mahalaga: Jangan hubungkan kabel USBsampai diperintahkan.1. Masukkan CD HP Photosmart ke dalam
kandar CD-ROM komputer Anda. JikaWisaya Instal tidak muncul, cari berkassetup.exe dalam kandar CD-ROM dan klikdua kali. Tunggu beberapa menitsementara berkas dimuatkan.
2. Klik Next (Berikutnya), lalu ikuti petunjukyang ada di layar.
3. Jika diminta, hubungkan salah satu ujungkabel USB ke port USB di belakang printer,dan hubungkan ujung lainnya ke port USBdi komputer Anda.
4. Ikuti petunjuk pada layar sampai instalasiselesai dan komputer Anda restart(memulai kembali).
1. Hubungkan salah satu ujung kabel USB keport USB di belakang printer, danhubungkan ujung lainnya ke port USB dikomputer Anda.
2. Masukkan CD HP Photosmart ke kandarCD ROM komputer Anda.
3. Pada desktop Anda, klik dua kali ikon HPPhotosmart CD.
4. Klik dua kali ikon HP Installer (PenginstalHP), dan ikuti petunjuk yang ada di setiaplayar instalasi untuk menginstal perangkatlunak printer.
5. Jika layar Selamat muncul, klik OK.
3 Mengatasi Masalah danDukunganPrinter HP Photosmart A520 series dirancang untuk penggunaan yang dapat diandalkandan mudah. Bagian ini menjawab pertanyaan yang sering diajukan mengenaipenggunaan printer dan mencetak tanpa komputer.
Catatan Sebelum menghubungi bagian Bantuan HP, bacalah bagian ini untukmendapatkan saran pemecahan masalah atau kunjungi layanan dukungan online diwww.hp.com/support.
Masalah pencetakan dan perangkat keras
Lampu Peringatan berkedip.Penyebab: Telah terjadi kerusakan printer. Coba solusi berikut ini.
Bab 3
40 HP Photosmart A520 series
Bahasa Indonesia

Solusi:• Periksa layar printer apakah ada petunjuk. Jika kamera digital Anda terhubung
ke printer, periksa petunjuk pada layar kamera. Jika printer terhubung dengankomputer, periksa petunjuk di monitor komputer.
• Matikan printer.• Jika lampu terus berkedip, kunjungi www.hp.com/support atau hubungi bantuan
HP.
Printer dihubungkan, tapi printer tidak mau menyala.
Solusi:• Printer mungkin dihubungkan ke perpanjangan kabel yang dimatikan. Hidupkan
perpanjangan kabel, lalu hidupkan printer.• Printer mungkin dihubungkan ke sumber listrik yang tidak kompatibel. Jika Anda
bepergian ke luar negeri, pastikan bahwa sumber listrik di negara/wilayah yangAnda kunjungi sesuai dengan persyaratan listrik dan kabel listrik printer.
• Pastikan bahwa adaptor listrik berfungsi dengan benar. Untuk memeriksa adaptorlistrik:• Pastikan bahwa adaptor listrik terhubung ke printer Anda dan sumber listrik
yang kompatibel.• Tekan dan tahan tombol Power (Daya) pada printer. Jika tombol Power
(Daya) menyala, maka kabel listrik berfungsi dengan benar. Jika tidakmenyala, kunjungi www.hp.com/support atau hubungi bantuan HP.
Kertas tidak masuk ke dalam printer dengan benar, atau gambar tidak dicetak ditengah.
Solusi:• Kertas mungkin tidak dimuatkan dengan benar. Muatkan kembali kertas, pastikan
kertas diorientasikan dengan benar di dalam baki masukan dan pemandu lebarkertas menempel pada tepi kertas. Untuk mendapatkan petunjuk mengenaimemuatkan kertas, baca “Memuat kertas” pada halaman 38.
• Kartrij cetak mungkin perlu disejajarkan. Untuk mendapatkan informasi lebihlanjut, baca Bantuan pada layar.
• Printer perlu ditangani. Bacalah layar printer apakah ada petunjuk.• Aliran listrik mungkin mati atau mungkin ada sambungan yang kendur. Pastikan
listrik hidup dan kabel listrik terhubung dengan erat.• Kertas mungkin macet saat dicetak. Baca bagian berikut untuk mendapatkan
petunjuk mengenai mengeluarkan kertas macet.
Kertas macet saat mencetak.Solusi: Coba langkah berikut untuk mengeluarkan kertas macet:1. Matikan printer, lalu cabut dari sumber listrik.2. Tarik kertas yang macet dalam printer.
Masalah pencetakan dan perangkat keras 41
Bah
asa
Indo
nesi
a

3. Keluarkan kertas yang berkerut atau sobek dari baki masukan atau baki keluaran.Muatkan kertas baru ke dalam baki masukan.
4. Sambungkan printer kembali, lalu hidupkan. Coba cetak kembali dokumen Anda.
Kualitas cetakan buruk.
Solusi:• Mungkin, kartrij cetak kehabisan tinta. Periksa ikon tingkat tinta pada layar printer,
lalu ganti kartrij jika perlu. Untuk mendapatkan informasi lebih lanjut, baca“Memasukkan atau mengganti kartrij cetak” pada halaman 42.
• Kartrij cetak mungkin perlu dibersihkan atau disejajarkan. Tugas ini dapatdilakukan dari menu Printer. Untuk mendapatkan informasi lebih lanjut mengenaipenggunaan menu Printer, baca “Menu printer” pada halaman 37.
• Kurangi ukuran gambar dan coba mencetak kembali. Untuk hasil yang lebih baikdi masa depan, pasang kamera digital ke resolusi foto yang lebih tinggi.
• Pastikan Anda telah memilih jenis kertas yang benar untuk projek Anda. Untukmendapatkan informasi lebih lanjut, baca “Memuat kertas” pada halaman 38.
• Pastikan pengaturan kualitas cetak dipasang ke kualitas Best (Terbaik) dan Andatelah memilihjenis kertas yang tepat. Untuk mendapatkan informasi lebih lanjut,baca Bantuan pada layar.
• Foto Anda akan kering seketika dan dapat segera ditangani setelah dicetak.Namun, HP menyarankan agar Anda membiarkan permukaan tercetak foto Andaagar terpajan udara selama 3 menit setelah pencetakan, agar warna matangsepenuhnya sebelum Anda menumpuknya dengan foto lain ataumenempatkannya dalam album.
Memasukkan atau mengganti kartrij cetakGunakan kartrij cetak HP 110 Tri-color Inkjet untuk mencetak foto hitam putih danberwarna.HP Vivera Inks akan menghasilkan kualitas foto yang akurat dan sangat tahan pudarsehingga warna tetap jelas selama kurun waktu yang lama. HP Vivera Inks secara khususdiformulasikan dan telah teruji secara ilmiah dalam hal kualitas, kemurnian, dan tahanpudar.
Perhatian Pastikan Anda menggunakan kartrij cetak yang tepat. Harap diingat jugabahwa HP tidak menyarankan memodifikasi atau mengisi ulang kartrij HP. Kerusakanakibat memodifikasi atau mengisi ulang kartrij HP tidak tercakup dalam garansi HP.
Untuk kualitas cetakan terbaik, HP menganjurkan Anda memasang semua kartrij cetakeceran sebelum tanggal kadaluwarsa yang tertera pada kotaknya.
Bab 3
42 HP Photosmart A520 series
Bahasa Indonesia

Catatan Tinta dari kartrij digunakan dalam proses pencetakan dalam sejumlah carayang berbeda, termasuk proses inisialisasi, yang mempersiapkan perangkat dankartrij untuk pencetakan, dan dalam pembersihan kepala cetak, yang menjaga noselcetak tetap bersih dan tinta mengalir lancar. Sebagai tambahan, sisa tinta tertinggaldalam kartrij setelah digunakan. Untuk mendapatkan informasi lebih lanjut, bacawww.hp.com/go/inkusage.
Untuk memasukkan atau mengganti kartrij cetak1. Pastikan bahwa aliran listrik menyala dan Anda telah melepaskan kertas karton dari
bagian dalam printer.2. Buka pintu print cartridge printer.3. Lepaskan pita merah muda dari cartridge.
Catatan Jangan sentuh kontak berwarna tembaga pada kartrij cetak.
4. Jika Anda mengganti cartridge, tekan ke bawah dan tarik keluar cartridge padapemegangnya untuk melepaskannya.
5. Pegang cartridge pengganti dengan label di sisi atas. Geser cartridge dengan sedikitmiring ke atas ke dalam pemegang cartridge sehingga kontak berwarna tembaganyamasuk terlebih dahulu. Dorong cartridge sampai menghentak masuk ke dalamtempatnya.
6. Tutup pintu print cartridge.Printer mulai mencetak penyejajaran kartrij cetak. Baca Bantuan pada layar untukmendapatkan informasi lebih lanjut.Daur ulang kartrij lama. HP Inkjet Supplies Recycling Program tersedia di banyaknegara/wilayah dan memperbolehkan Anda mendaur ulang kartrij cetak bekas tanpabiaya. Untuk mendapatkan informasi lebih lanjut, kunjungi www.hp.com/hpinfo/globalcitizenship/environment/recycle/inkjet.html.
Proses dukungan
Jika Anda mengalami masalah, ikuti langkah-langkah ini:1. Periksa dokumentasi yang menyertai HP Photosmart.2. Kunjungi situs web dukungan online HP di www.hp.com/support. Dukungan online
HP tersedia untuk semua pelanggan HP. Situs ini adalah sumber tercepat untukmendapatkan informasi perangkat mutakhir dan bantuan pakar, dan mencakup fiturberikut ini:• Akses cepat ke para pakar dukungan online yang berpengalaman• Perbaruan perangkat lunak dan penggerak untuk HP Photosmart• Informasi HP Photosmart dan pemecahan masalah yang berharga untuk
masalah umum• Perbaruan perangkat, peringatan dukungan, dan kawat berita HP proaktif yang
tersedia apabila Anda mendaftarkan HP Photosmart Anda
Proses dukungan 43
Bah
asa
Indo
nesi
a

3. Hanya untuk Eropa: Hubungi tempat pembelian printer Anda. Jika perangkat kerasHP Photosmart rusak, Anda akan diminta untuk membawanya kembali ke tempatpembeliannya. (Perbaikan akan diberikan tanpa biaya selama masa garansi terbatasperangkat. Setelah masa garansi, Anda akan dikenakan biaya perbaikan.)
4. Hubungi dukungan HP. Pilihan dan ketersediaan dukungan bervariasi menurutperangkat, negara/wilayah, dan bahasa.Untuk mendapatkan daftar nomor telepon bantuan, baca daftar nomor telepon padabagian dalam sampul belakang.
Nomor identifikasi model resmi SDGOA-0701Untuk tujuan identifikasi pengaturan, produk memiliki Nomor Model Resmi. Nomor ModelResmi untuk produk Anda adalah SDGOA-0701. Nomor resmi ini berbeda dengan namapemasaran (HP Photosmart A520 series) atau nomor produk (Q8526A).
Pernyataan lingkunganUntuk mendapatkan informasi mengenai Pelayanan Lingkungan, baca Bantuan padalayar.
Mendapatkan informasi lebih lanjutPrinter HP Photosmart A520 series baru Anda dilengkapi dengan dokumentasi berikut:• Panduan Pemasangan: Petunjuk pemasangan menjelaskan cara memasang
printer, menginstal perangkat lunak HP Photosmart, dan mencetak foto. Bacadokumen ini terlebih dahulu.
• Panduan Dasar: Panduan Pengguna adalah buku yang sedang Anda baca.• Bantuan Pada Layar: Bantuan pada layar menjelaskan cara menggunakan printer
dengan atau tanpa komputer dan memuat informasi pemecahan masalah.Setelah Anda memasang perangkat lunak HP Photosmart pada komputer Anda, Andadapat melihat Bantuan pada layar pada komputer Anda:• Windows PC: Dari menu Start (Mulai), pilih Programs (Program) (dalam Windows
XP atau Vista, pilih All Programs (Semua Program)) > HP > HP Photosmart A520series > Photosmart Help (Bantuan Photosmart).
• Mac: Pilih Help (Bantuan) > Mac Help (Bantuan Mac) dalam Finder, lalu pilihLibrary (Pustaka) > HP Product Help (Bantuan Produk HP).
Spesifikasi printerUntuk mendapatkan daftar spesifikasi lengkap, baca Bantuan pada layar. Untukmendapatkan informasi mengenai pengaksesan Bantuan pada layar, baca“Mendapatkan informasi lebih lanjut” pada halaman 44.
Sistem OperasiMicrosoft® Windows XP Home, XP Professional, x64 Edition, atau VistaMac® OS X 10.3x, 10.4x
Spesifikasi Lingkungan
Bab 3
44 HP Photosmart A520 series
Bahasa Indonesia

Suhu maksimum selama pengoperasian: 5-40° C (41-104° F), 5-90% RHSuhu yang direkomendasikan selama pengoperasian: 15-35 ° C (59-95° F), 20-80% RH
Konsumsi ListrikAmerika SerikatMencetak: 14,46 WTanbeban: 8,67 WMati: 6,63 WInternasionalMencetak: 13,56 WTanbeban: 8,41 WMati: 7,19 W
Nomor Model Catu DayaHP Part # 0957-2121 (Amerika Utara), 120 Vac (±10%) 60 Hz (±3 Hz)HP Part # 0957-2120 (Selain Amerika Utara), 100-240 Vac (±10%) 50/60 Hz (±3 Hz)
Ukuran mediaKertas foto 10 x 15 cm (4 x 6 inci)Kertas foto dengan tab 10 x 15 cm dengan tab 1,25 cm (4 x 6 inci dengan tab 0,5 inci)Kartu indeks 10 x 15 cm (4 x 6 inci)Kartu A6 105 x 148 mm (4,1 x 5,8 inci)Kartu ukuran L 90 x 127 mm (3,5 x 5 inci)Kartu ukuran L dengan tab 90 x 127 mm dengan tab 12,5 mm (3,5 x 5 inci dengan tab 0,5 inci)Hanya didukung saat mencetak dari komputer Hagaki, 101 x 203 mm (4 x 8 inci), kertas fotoPanorama 10 x 30 cm (4 x 12 inci)
Baki KertasSatu baki kertas foto 10 x 15 cm (4 x 6 inci)Kapasitas Baki Kertas20 lembar kertas foto, ketebalan maksimum 292 µm (11,5 mil) per lembar10 kertas foto 10 x 30 cm (4 x 12 inci) untuk pencetakan panorama
(bersambung)
Spesifikasi printer 45
Bah
asa
Indo
nesi
a

Garansi HP
Bab 3
46 HP Photosmart A520 series
Bahasa Indonesia

110
Print Cartridge Selection Number
สั่งซื้อวัสดุสิ้นเปลืองของแท้จาก HP ได้ที่ www.hp.com/buy/supplies (บางรายการอาจมีจำหน่ายเฉพาะในบางประเทศ/ภูมิภาค)
Printed in [country] - Enu
© 2007 Hewlett-Packard Development Company, L.P. www.hp.com/support
*Q8526-90031* *Q8526-90031* Q8526-90031
Tri-color / สามสี / Triwarna
หมายเลขการเลือกตลับหมึกพิมพ์
Order genuine HP supplies at www.hp.com/buy/supplies (availability varies by country/region)
Nomor pemilihan kartrid cetak
Pesan pasokan HP asli di www.hp.com/buy/supplies (ketersediaan bisa berbeda tergantung negara/wilayah)