hunter safety instructor “mini manual” - dnr.wi.gov · hunter safety instructor “mini...
TRANSCRIPT
Hunter Safety Instructor
“Mini Manual”
Helpful Course Tips
Training Aids Information
& Hands On Training Lesson Plans
DNR Publication LEH143
2016 Edition

This Manual belongs to: ___________________________________________________
Local Warden: Phone: Email: Instructor #
______________________ ________________ ________________ ____________
Local Warden: Phone: Email: Instructor #
______________________ ________________ ________________ ____________
Instructor: Phone: Email: Instructor #
______________________ ________________ ________________ ____________
Instructor: Phone: Email: Instructor #
______________________ ________________ ________________ ____________
Instructor: Phone: Email: Instructor #
______________________ ________________ ________________ ____________
Instructor: Phone: Email: Instructor #
______________________ ________________ ________________ ____________
Instructor: Phone: Email: Instructor #
______________________ ________________ ________________ ____________
Instructor: Phone: Email: Instructor #
______________________ ________________ ________________ ____________
Instructor: Phone: Email: Instructor #
______________________ ________________ ________________ ____________
Instructor: Phone: Email: Instructor #
______________________ ________________ ________________ ____________
Instructor: Phone: Email: Instructor #
______________________ ________________ ________________ ____________
Instructor: Phone: Email: Instructor #
______________________ ________________ ________________ ____________
Instructor: Phone: Email: Instructor #
______________________ ________________ ________________ ____________
Instructor: Phone: Email: Instructor #
______________________ ________________ ________________ ____________
Instructor: Phone: Email: Instructor #
______________________ ________________ ________________ ____________

HUNTER SAFEY MINI MANUAL - TABLE OF CONTENTS Page
VOLUNTEER INSTRUCTOR CORNER WEBSITE & RSW MAP 1-2
DNR CUSTOMER ID NUMBER 3
ORGANIZING A SAFETY COURSE CHECKLIST 4
STUDENT NAME TENT (Print and have students use during class) 5
TABK POSTER 6
THE EDOC STYLE OF INSTRUCTION 7 8-9GUIDELINES for the USE of INTERACTIVE MEDIA
HANDS ON LESSON PLAN USE FOR HUNTER SAFETY COURSES 10
HUNTER SAFETY FIELD TEST – INSTRUCTOR COPY 11-14
LESSON PLANS
BASIC & EXTENDED COURSE AGENDA 15-20
Lesson Plan 1: TABK – FOUR RULES OF FIREARM SAFETY 21-22
Lesson Plan 2A: LOCATION & USE OF THE FIREARM SAFETY 23-24
Lesson Plan 2B: ACTIONS, SIGHTS & AMMUNITION 25-26
27-28
29-30
31-32
33-34
35-36
Lesson Plan 3: FIREARM CARRIES
Lesson Plan 4: SIGHT ALIGNMENT AND SHOOTING POSITIONS
Lesson Plan 5A: SAFE SHOOTING ZONES – INSIDE INSTRUCTION
Lesson Plan 5B: SAFE SHOOTING ZONES – OUTSIDE INSTRUCTION
Lesson Plan 6: FENCE AND OBSTACLE CROSSING
Lesson Plan 7: HUNTING FROM ELEVATED DEVICES 37-39
Lesson Plan 8: BLOOD TRAIL & DEER TAGGING EXERCISE 40-43CARCASS TAG (Copy or Print to use as a Training Aid)
Lesson Plan 9: ETHICS AND RESPONSIBILITY 44-45
Lesson Plan 10: FINDING PROPERTY & GETTING PERMISSION to HUNT 46-47
Lesson Plan 11: BASIC FIRST AID and SURVIVAL 48-49
Lesson Plan 12: ATV & SNOWMOBILE SAFETY FOR HUNTERS 50
BOW HUNTER SAFETY ADD-ON COURSE AGENDA 51-53
1
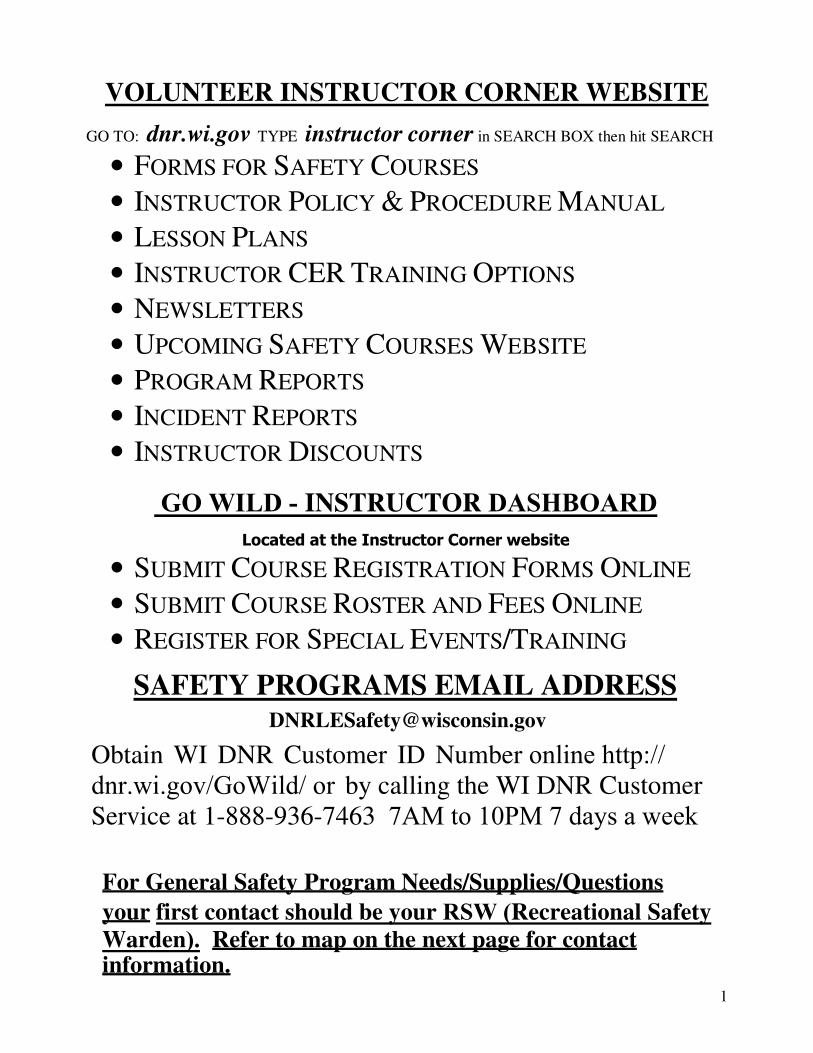
VOLUNTEER INSTRUCTOR CORNER WEBSITE
GO TO: dnr.wi.gov TYPE instructor corner in SEARCH BOX then hit SEARCH
• FORMS FOR SAFETY COURSES
• INSTRUCTOR POLICY & PROCEDURE MANUAL
• LESSON PLANS
• INSTRUCTOR CER TRAINING OPTIONS
• NEWSLETTERS
• UPCOMING SAFETY COURSES WEBSITE
• PROGRAM REPORTS
• INCIDENT REPORTS
• INSTRUCTOR DISCOUNTS
GO WILD - INSTRUCTOR DASHBOARDLocated at the Instructor Corner website
• SUBMIT COURSE REGISTRATION FORMS ONLINE
• SUBMIT COURSE ROSTER AND FEES ONLINE
• REGISTER FOR SPECIAL EVENTS/TRAINING
SAFETY PROGRAMS EMAIL ADDRESS
Obtain WI DNR Customer ID Number online http://dnr.wi.gov/GoWild/ or by calling the WI DNR Customer
Service at 1-888-936-7463 7AM to 10PM 7 days a week
For General Safety Program Needs/Supplies/Questions
your first contact should be your RSW (Recreational Safety
Warden). Refer to map on the next page for contact information.

WI DNR Recreational Safety Warden Administrative Areas
Northern Region - West Mark Little (715) 635-4112 810 W Maple St Spooner WI 54801 [email protected]
Douglas Bayfield
Ashland Iron
Northern Region - East Vacant (715) 623-4190 ext. 3109 223 E Steinfest Rd Antigo WI 54409 Mark Little - Volunteer InstructorsJeremy Cords - Rec Vehicle Patrols
Burnett
Polk
St Croix
Washburn
Barron
Sawyer
Rusk
Chippewa
Price
Taylor
Vilas
Oneida
Lincoln Langlade
Forest
Florence
Marinette
Northeast Region - North Jeremy Cords (920) 662-5129 2984 Shawano Ave Green Bay WI 54313-0448 [email protected]
Pierce
Dunn
Pepin
Eau Claire Clark
Marathon
Portage
Menominee
Shawano
Waupaca
Oconto
Door
Kewaunee
Buffalo
Trempealeau Jackson
Wood Outagamie Brown
Manitowoc
West Central Region - North Vacant (715) 839-3717 La Crosse Monroe
Adams Waushara
Winnebago Calumet Northeast Region - South
Heather Gottschalk (920) 948-4818
1300 W Clairemont Ave Eau Claire WI 54702 RSW Asst. – Linda Xiong [email protected]
Vernon
Juneau
Sauk
Marquette GreenLake
Columbia
Fond du Lac
Dodge
Sheboygan
Ozaukee
427 E. Tower Dr, Suite 100 Wautoma WI 54982 [email protected]
Southeast Region - North
South Central Region - West
Crawford
Richland
Iowa Dane Jefferson
Washington
Waukesha Milwaukee
Kyle Drake (262) 574-2163 141 NW Barstow St RM: 180 Waukesha WI 53188 [email protected]
Vacant - contact: Linda Xiong (northern counties) Catherina Nooyen (southern counties)
Grant
Lafayette Green Rock Walworth Racine
Kenosha
Southeast Region - South Jason Roberts (262) 574-2169 101 NW Barstow St RM: 180
Kyle Drake
Heather Gottschalk
Jason Roberts
Mark Little
Vacant
Jeremy Cords
Vacant
Vacant
Catherina Nooyen
South Central Region - East Catherina Nooyen (608) 275-3253 3911 Fish Hatchery Rd Fitchburg WI 53711 [email protected]
Waukesha WI 53188 [email protected]
rev. 2016
3
ATTENTION All Wisconsin Recreational Safety Students
IMPORTANT It is the responsibility of the student/customer to make sure their customer profile in Go Wild is up to date. DNR will no longer print safety certifications. Student must log in to their Go Wild account and under the "Student Dashboard" link they will be able to print their own safety certificatons for all safety education programs.
- - - - - - - - - - - - - - - - CUT HERE - - - - - - - - - - - - - - - - -
ATTENTION All Wisconsin Recreational Safety Students
Requirement: All WI Recreational Safety Students are required to obtain a WI DNR Customer ID Number before the completion of any Recreational Safety Class and will also be required to provide that WI DNR Customer ID Number along with students personal information to the instructor. Obtain a WI DNR Customer ID Number online at http://dnr.wi.gov/GoWild/ or by calling the WI DNR Customer Service at 1-888-936-7463 7AM to 10PM 7 days a week. You can also visit a WI DNR Service Center during their regular scheduled hours. For WI DNR Service Center hours and locations go to: http://dnr.wi.gov/contact/officelocations.html
ONE CUSTOMER ID NUMBER FITS ALL SAFETY PROGRAMS!
IMPORTANT It is the responsibility of the student/customer to make sure their customer profile in Go Wild is up to date. DNR will no longer print safety certifications. Student must log in to their Go Wild account and under the "Student Dashboard" link they will be able to print their own safety certificatons for all safety education programs.
Requirement: All WI Recreational Safety Students are required to obtain a WI DNR Customer ID Number before the completion of any Recreational Safety Class and will also be required to provide that WI DNR Customer ID Number along with students personal information to the instructor. Obtain a WI DNR Customer ID Number online at http://dnr.wi.gov/GoWild/ or by calling the WI DNR Customer Service at 1-888-936-7463 7AM to 10PM 7 days a week. You can also visit a WI DNR Service Center during their regular scheduled hours. For WI DNR Service Center hours and locations go to: http://dnr.wi.gov/contact/officelocations.html
ONE CUSTOMER ID NUMBER FITS ALL SAFETY PROGRAMS!
4
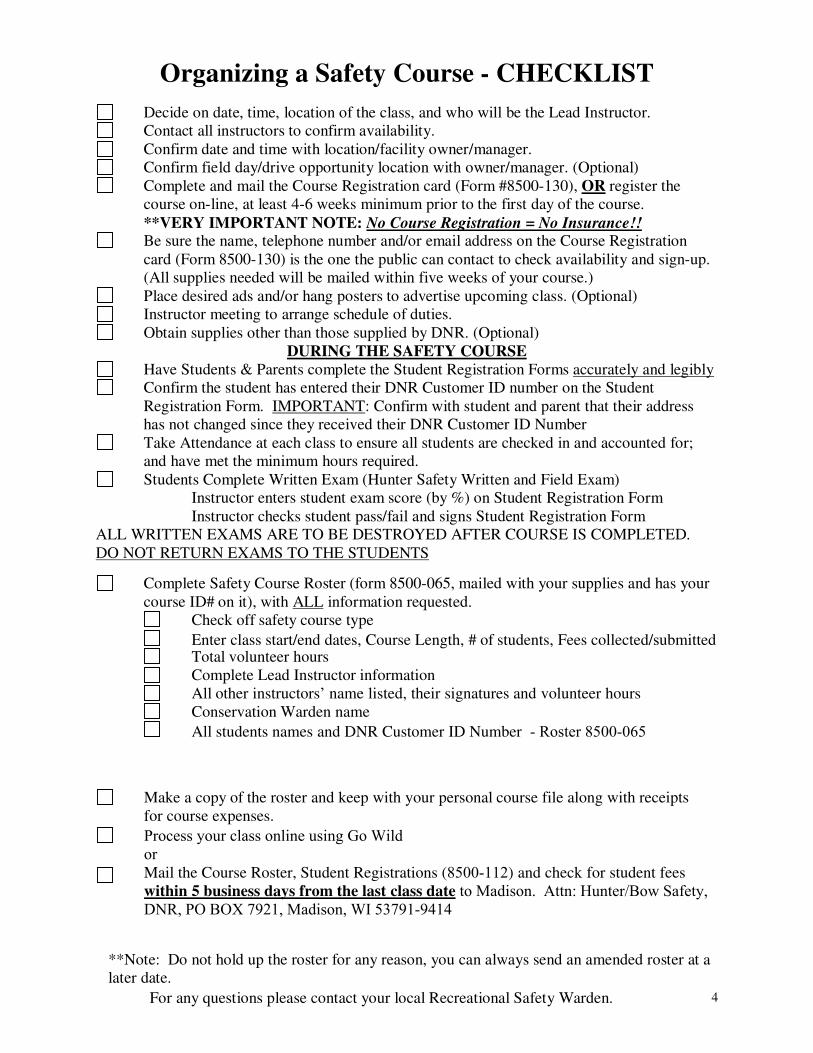
Organizing a Safety Course - CHECKLIST
Decide on date, time, location of the class, and who will be the Lead Instructor.
Contact all instructors to confirm availability.
Confirm date and time with location/facility owner/manager.
Confirm field day/drive opportunity location with owner/manager. (Optional)
Complete and mail the Course Registration card (Form #8500-130), OR register the
course on-line, at least 4-6 weeks minimum prior to the first day of the course.
**VERY IMPORTANT NOTE: No Course Registration = No Insurance!! Be sure the name, telephone number and/or email address on the Course Registration
card (Form 8500-130) is the one the public can contact to check availability and sign-up.
(All supplies needed will be mailed within five weeks of your course.)
Place desired ads and/or hang posters to advertise upcoming class. (Optional)
Instructor meeting to arrange schedule of duties.
Obtain supplies other than those supplied by DNR. (Optional)
DURING THE SAFETY COURSE
Have Students & Parents complete the Student Registration Forms accurately and legibly
Confirm the student has entered their DNR Customer ID number on the Student
Registration Form. IMPORTANT: Confirm with student and parent that their address
has not changed since they received their DNR Customer ID Number
Take Attendance at each class to ensure all students are checked in and accounted for;
and have met the minimum hours required.
Students Complete Written Exam (Hunter Safety Written and Field Exam)
Instructor enters student exam score (by %) on Student Registration Form
Instructor checks student pass/fail and signs Student Registration Form
ALL WRITTEN EXAMS ARE TO BE DESTROYED AFTER COURSE IS COMPLETED.
DO NOT RETURN EXAMS TO THE STUDENTS
Complete Safety Course Roster (form 8500-065, mailed with your supplies and has your
course ID# on it), with ALL information requested.
Check off safety course type
Enter class start/end dates, Course Length, # of students, Fees collected/submitted Total volunteer hours
Complete Lead Instructor information
All other instructors’ name listed, their signatures and volunteer hours
Conservation Warden name
All students names and DNR Customer ID Number - Roster 8500-065
Make a copy of the roster and keep with your personal course file along with receipts
for course expenses.
Process your class online using Go WildorMail the Course Roster, Student Registrations (8500-112) and check for student fees
within 5 business days from the last class date to Madison. Attn: Hunter/Bow Safety, DNR, PO BOX 7921, Madison, WI 53791-9414
**Note: Do not hold up the roster for any reason, you can always send an amended roster at a
later date.
For any questions please contact your local Recreational Safety Warden.

NOTES PAGE

5
__________________________________ fold here_____________________________________
Treat every firearm as if it were loaded.
Always point the muzzle in a safe direction.
Be sure of your target and what is beyond it.-
Keep your finger outside the trigger guard until you are ready to shoot.
- - - - - - - - - - - - - - - - - - - - - -CUT HERE - - - - - - - - - - - - - - - - - -
_____________________________ fold here __________________________________
Treat every firearm as if it were loaded.
Always point the muzzle in a safe direction.
Be sure of your target and what is beyond it.-
Keep your finger outside the trigger guard until you are ready to shoot.

6
TAB-K = RULES OF FIREARM SAFETY
T = TREAT EVERY FIREARM AS IF IT WAS LOADED.
A = ALWAYS KEEP THE MUZZLE POINTED
IN A SAFE DIRECTION.
B = BE SURE OF YOUR TARGET; AND WHAT IS IN
FRONT OF, AND BEYOND THE TARGET.
K = KEEP YOUR FINGER OUTSIDE THE TRIGGER
GUARD UNTIL YOU ARE READY TO SHOOT.

7
Using the EDOC Style of Instruction is
recommended as part of the “multiple teaching
styles” and “hands on” learning that is the best way
for all the students to gain understanding and
learning. Use the EDOC methods for any lesson
that involves Safety, Responsibility and Ethics.
There are many Lesson Plans developed to help the
instructors with this EDOC Style of Instruction.
E.D.O.C.
� E – EDUCATE or tell students what you
want them to know.
� D – DEMONSTRATE the proper skill so
students know to right or preferred way of
doing things.
� O – OBSERVE each student as they
verbally explain and physically demonstrate
what has been taught.
� C – CONGRATULATE every student as
they perform the lesson properly.

NOTES PAGE

GUIDELINES FOR THE USE OF INTERACTIVE MEDIA (HE Tools™
)
The WI DNR has purchased a site license to copy and distribute HE Tools to Hunter Safety
Instructors. The purpose of this document is to provide specific guidelines on the use of the HE
Tools. HE Tools provides animated exercises and video demonstrations covering a wide range
of hunting safety topics. Many of these tools will allow instructors to demonstrate concepts that
students may struggle to understand. These visual tools greatly enhance the learning experience
for Hunter Safety students. As with other multi media options such as Videos and Power Point
programs, the HE Tools program can be used to assist instruction by ENHANCING:
• Hands On Lesson Plans
• Mechanics of Firearms
• Sight Alignment
• Ethics/Responsibility
There are so many helpful programs available in HE Tools that instructors will be challenged to
keep the focus of the course on the need to know training. The instructors will need to guard
against turning the course into a HE Tools Hunter Safety course. The following outline lists
the various HE Tools programs that would enhance the Hunter Safety course instruction and the
hands on lesson plans used to provide BASIC Hunter Safety Course instruction. It is
recommended that instructors follow the Basic/Extended Hunter Safety Course Agenda to help
determine what multimedia options are available to enhance course instruction.
Lesson Plan and HE Tool Recommendations Topic - Know Your Firearm Equipment:
Lesson Plans to use for this area of instruction:
� Location and Use of the Firearm Safety
� Actions, Sights and Ammunition
HE Tools units that are useful to enhance the lesson plan instruction include:
• Firearm Basics
• Shotguns
• Rifles
• Ammunition
Topic - Basic Shooting Skills Basic shooting skills are learned skills that take time to become proficient. The Hunter Safety
course is NOT a marksmanship course. So, the goal for instruction is to teach the BASICS the
students need, to hone their shooting expertise on their own.
Lesson Plans to Use for this area of instruction include:
� Sight Alignment and Shooting Positions
HE Tools units that are useful to enhance the lesson plan instruction include:
• Shotguns
a. Shotgun Range
b. Pointing a Shotgun
• Rifles
a. Sight Picture
b. Rifle Range
• Marksmanship and Shooting Fundamentals
a. Shooting Positions
8
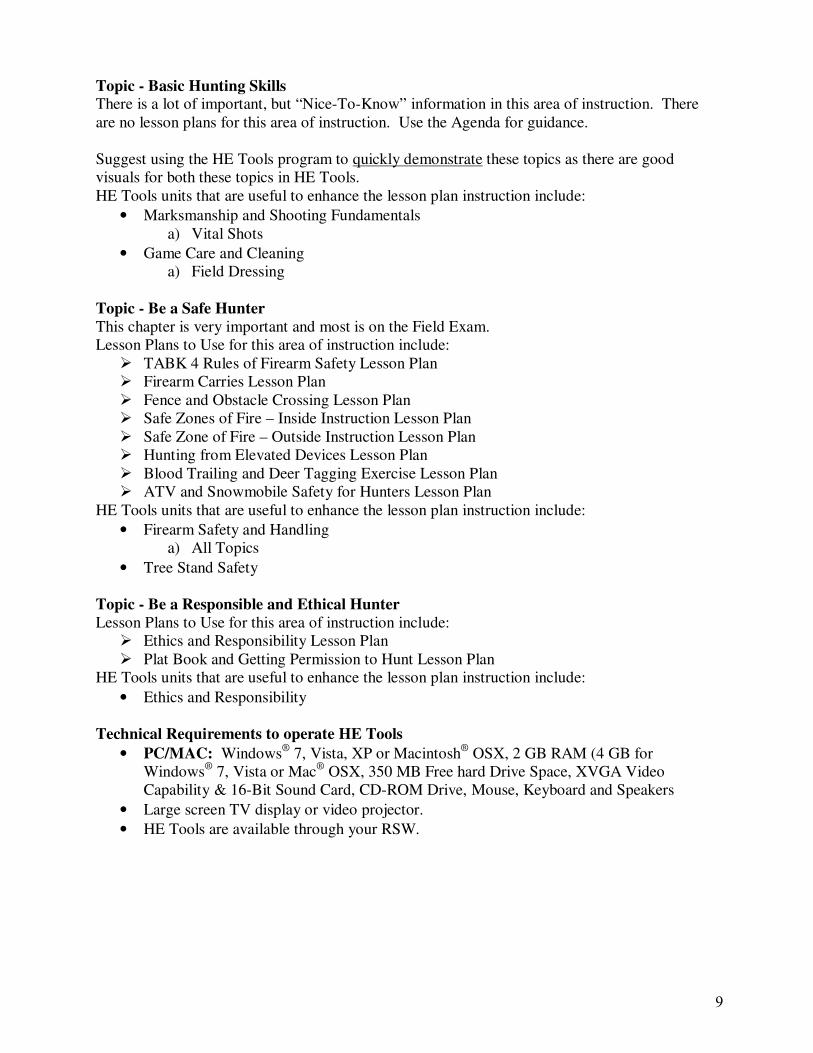
Topic - Basic Hunting Skills There is a lot of important, but “Nice-To-Know” information in this area of instruction. There
are no lesson plans for this area of instruction. Use the Agenda for guidance.
Suggest using the HE Tools program to quickly demonstrate these topics as there are good
visuals for both these topics in HE Tools.
HE Tools units that are useful to enhance the lesson plan instruction include:
• Marksmanship and Shooting Fundamentals
a) Vital Shots
• Game Care and Cleaning
a) Field Dressing
Topic - Be a Safe Hunter
This chapter is very important and most is on the Field Exam.
Lesson Plans to Use for this area of instruction include:
� TABK 4 Rules of Firearm Safety Lesson Plan
� Firearm Carries Lesson Plan
� Fence and Obstacle Crossing Lesson Plan
� Safe Zones of Fire – Inside Instruction Lesson Plan
� Safe Zone of Fire – Outside Instruction Lesson Plan
� Hunting from Elevated Devices Lesson Plan
� Blood Trailing and Deer Tagging Exercise Lesson Plan
� ATV and Snowmobile Safety for Hunters Lesson Plan
HE Tools units that are useful to enhance the lesson plan instruction include:
• Firearm Safety and Handling
a) All Topics
• Tree Stand Safety
Topic - Be a Responsible and Ethical Hunter
Lesson Plans to Use for this area of instruction include:
� Ethics and Responsibility Lesson Plan
� Plat Book and Getting Permission to Hunt Lesson Plan
HE Tools units that are useful to enhance the lesson plan instruction include:
• Ethics and Responsibility
Technical Requirements to operate HE Tools
• PC/MAC: Windows® 7, Vista, XP or Macintosh
® OSX, 2 GB RAM (4 GB for
Windows® 7, Vista or Mac
® OSX, 350 MB Free hard Drive Space, XVGA Video
Capability & 16-Bit Sound Card, CD-ROM Drive, Mouse, Keyboard and Speakers
• Large screen TV display or video projector.
• HE Tools are available through your RSW.
9

10
Hands On Lesson Plan Use for Hunter Safety Courses:
The practical Field Test-Instructor Copy ((Form 8500-83) (attached)) is the basic
reference for the minimum EDOC- Hands On Lesson Plans offered in the Hunter Safety
courses. Whether the hands on training is provided to the students in the class room or
a training field day, the first time your students actually perform the Field Test
exercises SHOULD/MUST NOT happen during the actual Field Test. The Field
Test-Student Study Checklist (Form 8500-83A) should be given to the students at the
beginning of the course so they can practice at home.
Additional EDOC-Hands On Lessons instruction is encouraged, but are not required.
Time, number of instructors, class size, and facility size all need to be considered when
offering more EDOC–Hands On Lessons. Time is of special importance to consider.
Focus on the “Need” to know, rather than the “Nice” to know. Added topics should not
make a basic course too lengthy. Most of the public prefer shorter, more basic courses.
What topics to use the EDOC-Hands On Lessons should be rated on how the subject
relates to Safety, Responsibility, and/or Ethics.
Additional EDOC-Hands On Lessons could include:
• Live Firing of firearms at range
• Mock Hunts – (Situations where most Accidental shootings occur)
o Upland Birds
o Deer Drives
o Turkey Set Ups
• Tree Stand Use & Safety Topics
• Deer Blood Trailing and Tagging
• Range Estimation
• Basic Compass Use
• Muzzle Loaders
• Bow Hunting (Consider including Bow Hunter Safety certification)
There are a number of EDOC-Hands On Lesson Plans developed and approved by the
Department that are available for your Hunter Safety course(s).
Use of those lesson plans will:
• Make Good Instructors - BETTER
• Your Hunter Safety course - Exceptional
• Improve student understanding and lesson retention
• This will lead to Safe, Ethical and Responsible Hunters
* Many of the lesson plans approved by the Department were developed by Instructors.
If you develop a better or additional lesson plan it must be approved by your
Recreational Safety Warden before using it in your course. This is so the Department
can ensure a consistent course message, as well as share your good ideas with other
instructor groups.

11
Notice: Use this form to record student field test performance on commonly accepted principles of safety in handling firearms used in hunting, under s. 29.591, Wis. Stats. Instructors do not need to maintain a copy of this form after results are forwarded to the DNR.
• FIELD EXAM SHALL BE ADMINISTERED AS AN INDIVIDUAL TEST
• A SCORE OF 80% (NO MORE THAN 4 WRONG) IS NECESSARY TO PASS.
• STUDENTS MUST DEMONSTRATE MUZZLE CONTROL AT ALL TIMES DURING THEFIELD EXAM
• PARTIAL CREDIT SHALL NOT BE GIVEN FOR INCOMPLETE ANSWERS OR TASKS.CHECK EITHER PASS OR FAIL IN THE BOXES PROVIDED.
________________________________________________________________________________ Student Name: Instructor Name: Score:
Instructor will have a firearm(s) lying on a table, unloaded and with the action(s) open. PASS FAIL
1. What are the four basic rules of firearm safety using TAB-K? (Studentmust know all four rules to pass, but any order is acceptable.)
� T - Treat every firearm as if it is loaded.� A - Always point the muzzle in a safe direction.� B - Be certain of your target and what's beyond it.� K - Keep your finger outside of the trigger guard until ready to shoot.
2. Pick up the firearm from the table (optional-gun in case), checking tobe sure it is unloaded and safe, work the action, identify the type of action being held and name all other action types. Student should:
� Open the action if it is closed.
� Look inside the action and make sure the chamber is empty.
� Check the magazine.
� Action types: bolt, lever, pump, semi-automatic, break (hinge) action.
3. Locate the safety and explain and demonstrate how to use it.� Found with thumb or index finger of shooting hand.� Student should explain and demonstrate how to work the safety.
4. Show me the three basic parts of a firearm (in no particular order).� Stock� Action� Barrel
5. What does the action do?
� Loads, unloads, fires, and ejects cartridge or shot shell.
6. Identify the make, model, caliber or gauge of the firearm. Is it a shotgunor rifle? (Student should read this information from the barrel or receiver of firearm they are holding.)
� Make� Model� Caliber or gauge� Shotgun or rifle
12
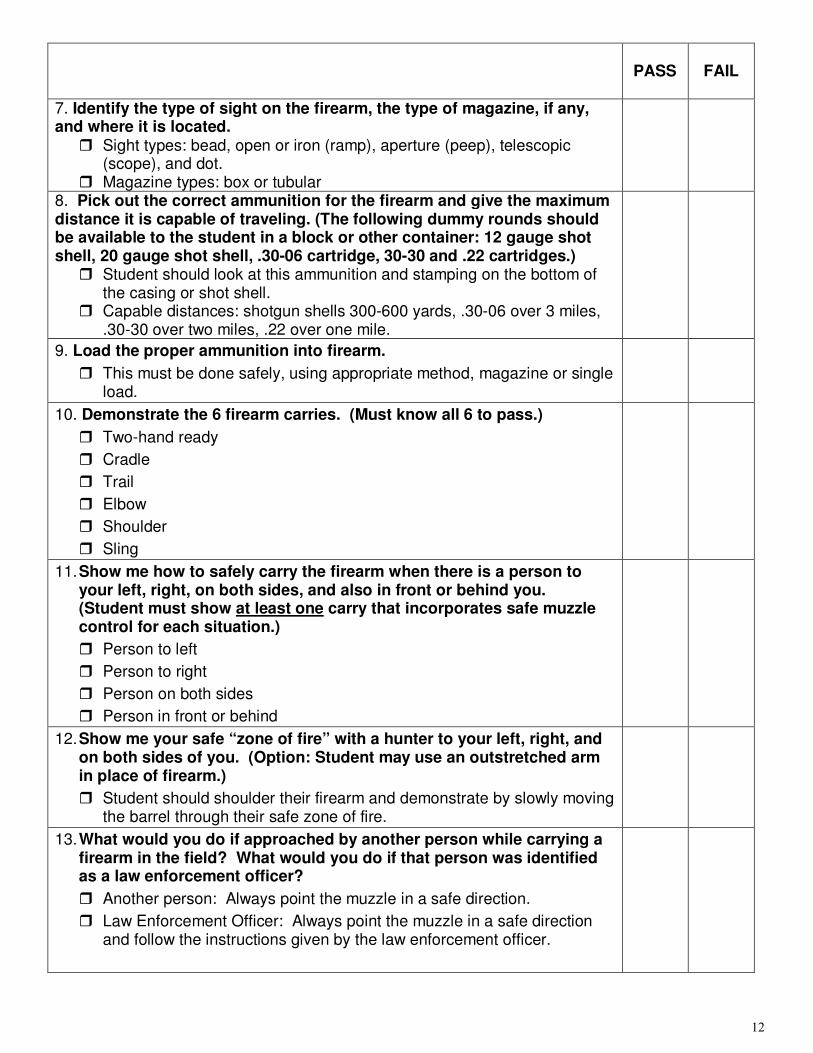
PASS FAIL
7. Identify the type of sight on the firearm, the type of magazine, if any,and where it is located.
� Sight types: bead, open or iron (ramp), aperture (peep), telescopic(scope), and dot.
� Magazine types: box or tubular8. Pick out the correct ammunition for the firearm and give the maximumdistance it is capable of traveling. (The following dummy rounds should be available to the student in a block or other container: 12 gauge shot shell, 20 gauge shot shell, .30-06 cartridge, 30-30 and .22 cartridges.)
� Student should look at this ammunition and stamping on the bottom ofthe casing or shot shell.
� Capable distances: shotgun shells 300-600 yards, .30-06 over 3 miles,.30-30 over two miles, .22 over one mile.
9. Load the proper ammunition into firearm.
� This must be done safely, using appropriate method, magazine or singleload.
10. Demonstrate the 6 firearm carries. (Must know all 6 to pass.)
� Two-hand ready
� Cradle
� Trail
� Elbow
� Shoulder
� Sling
11. Show me how to safely carry the firearm when there is a person toyour left, right, on both sides, and also in front or behind you.(Student must show at least one carry that incorporates safe muzzlecontrol for each situation.)
� Person to left
� Person to right
� Person on both sides
� Person in front or behind
12. Show me your safe “zone of fire” with a hunter to your left, right, andon both sides of you. (Option: Student may use an outstretched armin place of firearm.)
� Student should shoulder their firearm and demonstrate by slowly movingthe barrel through their safe zone of fire.
13. What would you do if approached by another person while carrying afirearm in the field? What would you do if that person was identifiedas a law enforcement officer?
� Another person: Always point the muzzle in a safe direction.
� Law Enforcement Officer: Always point the muzzle in a safe directionand follow the instructions given by the law enforcement officer.
13
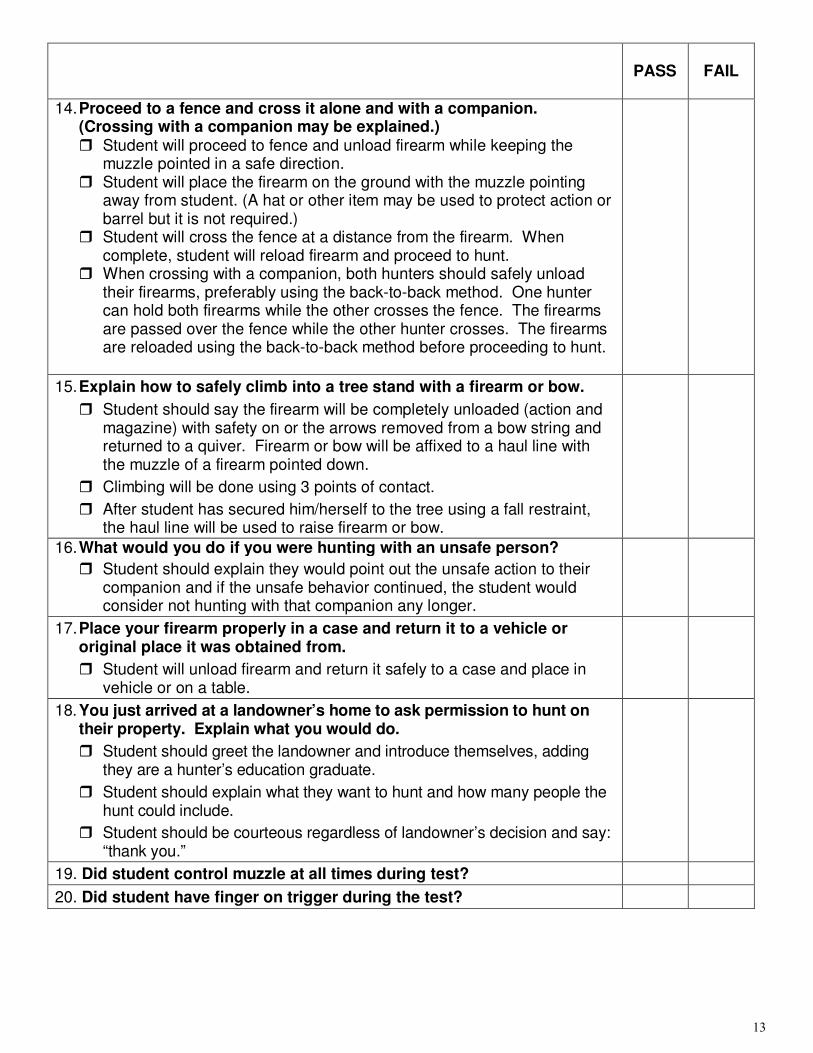
PASS FAIL
14. Proceed to a fence and cross it alone and with a companion.(Crossing with a companion may be explained.)� Student will proceed to fence and unload firearm while keeping the
muzzle pointed in a safe direction.� Student will place the firearm on the ground with the muzzle pointing
away from student. (A hat or other item may be used to protect action orbarrel but it is not required.)
� Student will cross the fence at a distance from the firearm. Whencomplete, student will reload firearm and proceed to hunt.
� When crossing with a companion, both hunters should safely unloadtheir firearms, preferably using the back-to-back method. One huntercan hold both firearms while the other crosses the fence. The firearmsare passed over the fence while the other hunter crosses. The firearmsare reloaded using the back-to-back method before proceeding to hunt.
15. Explain how to safely climb into a tree stand with a firearm or bow.
� Student should say the firearm will be completely unloaded (action andmagazine) with safety on or the arrows removed from a bow string andreturned to a quiver. Firearm or bow will be affixed to a haul line withthe muzzle of a firearm pointed down.
� Climbing will be done using 3 points of contact.
� After student has secured him/herself to the tree using a fall restraint,the haul line will be used to raise firearm or bow.
16. What would you do if you were hunting with an unsafe person?
� Student should explain they would point out the unsafe action to theircompanion and if the unsafe behavior continued, the student wouldconsider not hunting with that companion any longer.
17. Place your firearm properly in a case and return it to a vehicle ororiginal place it was obtained from.
� Student will unload firearm and return it safely to a case and place invehicle or on a table.
18. You just arrived at a landowner’s home to ask permission to hunt ontheir property. Explain what you would do.
� Student should greet the landowner and introduce themselves, addingthey are a hunter’s education graduate.
� Student should explain what they want to hunt and how many people thehunt could include.
� Student should be courteous regardless of landowner’s decision and say:“thank you.”
19. Did student control muzzle at all times during test?
20. Did student have finger on trigger during the test?

14
Instructor Comments:
Instructor Name Instructor Signature Instructor Number Date
____________________ ______________________ _______________ __/__/____ (PRINT) (Signature)

NOTES PAGE

HE BASIC COURSE or EXTENDED COURSE AGENDA Guidance on How to Conduct a Basic or an Extended Hunter Safety Course
Instructor Training Aids and References • Lesson Plans, Student Manual, HE Tools, REES approved DVDs, and
all the equipment required for teaching a Hunter Safety course• The Basic Course Agenda was based on an Instructor group
consisting of 3-5 instructors with 30 students to be able to providehigh quality, hands on instruction with a reasonable amount ofaudio/visual reinforcement training in 12-14 hours.
• Fewer Instructors and/or more students will require more time tocomplete the course with the same level of quality training.
TIME PERIOD (APPROXIMATELY): Basic Course 12-14 Hours Extended Course 16-19 Hours
TYPE OF LESSON E.D.O.C. LECTURE DISCUSSION PRACTICAL
OBJECTIVE(S) • For each instructor group to have a general understanding on what topics to spend time on
when giving a Basic Hunter Safety course versus a more involved and extended course.• How to decide what type of course fits the needs of the instructor group and students.
LESSON OUTLINE ITEMS NEEDED
EDUCATE: How to Decide “What to Teach?” 1. The number of pages and information devoted to any topic in the manual
does not always reflect the importance of, or time devoted to, the topic.Examples Include:
a. The 4 Rules of Firearm Safety is only mentioned in one place in themanual, but is the most important item to learn of the course.
b. Black Powder Firearms, Bow Hunting, Survival (beyond basic),First Aid (beyond basic), Wildlife Management and WildlifeIdentification have pages of information, but are all “Nice-to-Know” items rather than “Need-to-Know” items.
c. A Basic Hunter Safety course typically eliminates most of theinstruction time related to “Nice-to-Know” items.
2. A very good, but BASIC, Hunter Safety course, using hands on lessontraining can be done in about 12 hours over 2-4 class days. The publicgenerally prefer the short, basic courses to better meet their busyfamily/school schedules.
3. Basic Course - “Need-To-Know” Items and the use of Hands On LessonPlans.
a. At a MINIMUM the Lesson Plans used will be the Field Examexercises that the students are expected to perform as part of thecourse.• The first time the students perform these exercises must not be
during the Field Exam.b. Additional Lesson Plan use is encouraged, but instructors must take
into account that additional course time would then be needed.c. “Need-To-Know” items are the main topics that relate directly to
HUNTER SAFETY, RESPONSIBILITY and ETHICS.d. A Basic course generally will not include live fire of firearms. This
is not a marksmanship course and about 50% of the Hunter Safetycourses do not provide live fire of firearms.
15

4. Extended Course – Includes topics not related directly to Hunter Safety,Responsibility and Ethics and are considered “Nice-To-Know” items andwill require extended course time. “Nice-To-Know” Topics include:
a. Primitive Hunting (Black Powder and Bow Hunting)b. Additional Survival and First Aid instruction beyond basic
informationalc. Navigational methods beyond basic compass use. (GPS,
Orienteering)d. Wildlife Management and Wildlife Identificatione. Live Fire of Firearms. However this is a popular “Nice-To-Know”
topic to add to Extend the Basic course. “Nice-To-Know” Topics can be taught, but additional time must be
added to the course. Depending on how detailed of instruction is givenon the “Nice-To-Know” topics the Hunter Safety Course could easilyexceed 20 hours if the instructors do not strike a good balance between“Need and/or Nice to Know” instruction.
It is okay to teach some “Nice-To-Know” topics, and not other “Nice-To-Know” topics to strike that good balance.
Never sacrifice “Need-To-Know” topics or time to make time for the“Nice-To-Know” topics. Always add time to the Basic course time.
5. Meeting the Needs. When making the decision on what type of course toconduct, either Basic or Extended, the instructor group must consideroutside factors.
a. What best meets the needs and expectations of the Instructor Group?• Basic or Extended?• Number of Instructors?• Time/Schedule availability of the Instructors?• Expertise – Specialized or Basic?
b. What best meets the needs and expectations of the Students?• Basic or Extended?• Generally the students prefer short basic courses
c. What best meets the needs and expectations of the Facility beingused?• Basic or Extended?• Is the facility available for an extended time period?
d. What best meets the needs and expectations of the Community?• Basic or Extended?• Generally the community prefers short basic courses offered at
multiple times of the year
CONTINUED NEXT PAGE
16

BASIC COURSE AGENDA with EXTENDED COURSE ADVICE: Chapter One: Introduction to Hunter Education: 1. Give general overview of what the students will learn in this course.
• OPTION – “Firearms Safety & The Hunter” DVDo Gives good overview of course
2. Hunter Education Funding Sources• Hunting/Wildlife Organizations• Sportsmen Organizations• Firearm & Archery Manufacturers• Pittman Robertson Act
o Wildlife Restoration Fundingo State & Federal Agency Funding
Chapter Two: Know Your Firearm Equipment: 1. This chapter is very important and almost all is on the Field Exam. Cover
the material in this chapter entirely and use all the suggested Lesson Plansto supplement the lessons in the manual.
2. Lesson Plans to use for Chapter Two:• TABK - The 4 Rules of Firearm Safety (Entire Lesson Plan)
o Add “Firearm Safety in the Home” from Chapter Six• Location and Use of the Firearm Safety• Actions, Sights and Ammunition
3. NOTE: After teaching the lesson plan for TABK in this chapter, the 4 basicrules of firearm safety “TABK” should be quizzed to the students throughthe entire course.
4. The students are expected to know and understand the acronym TABK andbe able to recite the rules.
Chapter Three: Basic Shooting Skills 1. This chapter is an important chapter, but almost none is on the Field Exam.
There are a lot of skill items in this chapter that really fall into the “Need-To-Know” category. However, these are learned skills that take time tobecome proficient. The Hunter Safety course is NOT a marksmanshipcourse. So, the goal of this chapter is to teach the BASICS the studentsneed, to hone their shooting expertise on their own.
2. Lesson Plans to Use in Chapter Three:• Sight Alignment and Shooting Positions
3. Rifle Firing and Shotgun Shooting Sections:• Cover sections in the manual• HE Tools has excellent training programs to enhance instruction
4. Handgun Shooting Section: Instruction for this section is discouraged.
Chapter Four: Basic Hunting Skills 1. There is a lot of important, but “Nice-To-Know” information in this
chapter. The material in the manual should be covered in its entirety.However, just the basic information should be explained, except as noted inHunting Strategies.
2. Planning & Preparation Section: Teach the Basics in the manual.
CONTINUED NEXT PAGE
DVD
Cover exam questions on funding sources.
There are several programs in the HE Tools program that will be useful with the chapter and lesson plan instruction
There are several programs in the HE Tools program that will be useful with the chapter and lesson plan instruction
17

3. Hunting Strategies Sections: Teach the Basics in the manual andemphasize the following points:
• Driving and Posting:o Plan Your Hunt and Hunt Your Plano Very effective Hunting Method but also Most Dangerouso Good Communication and Discipline is Necessaryo Never put getting game over safety!!!
• Ground Blind and Elevated (Enclosed) Stands:o Danger of hiding from other Hunters.o Recommend Hunter Orange on all sides of the blind.o Hunter Orange visible for 360 degrees is required when
hunting from ground blinds on State lands. (Cover law inRegulations)
4. The Vital Shots and Field Care of Game are also important topics to becovered a bit more thoroughly. But again, no need to train in any extremedetail. Suggest using the HE Tools program to quickly demonstrate thesetopics as there are good visuals for both these topics in HE Tools.
Chapter Five: Primitive Hunting Equipment and Techniques 1. This is definitely a “Nice-To-Know” chapter of topics. There are no exam
questions from this chapter and therefore there is no real need to coverthese topics as part of a Basic Hunter Safety course.
2. If the instructor group wishes to teach this chapter additional time must beadded to extend the total course hours.
3. If Bow Hunting is important to the Instructor group an option to considerwould be to conduct an Add-On Bow Hunter Safety course and teach bowhunting in the Add-On portion. Consult your RSW for information on BowHunter Instructor certification and the Add-On Course Agenda
Chapter Six: Be a Safe Hunter 1. This chapter is very important and most is on the Field Exam. Cover the
material in this chapter entirely and use all the suggested Lesson Plans tosupplement the lessons in the manual.
2. “Why Firearm Safety Is Important” may seem to be “out of place”. Thissection is part of the “TABK-Four Rules of Firearm Safety” lesson plan thatis recommended to be taught in Chapter Two. It is recommended to add the“Firearm Safety in the Home” portion to the instruction in Chapter Two.
3. “Safely Carrying Firearms in the Field”• Firearm Carries Lesson Plan• Fence and Obstacle Crossing Lesson Plan
4. “Safely Loading and Unloading Firearms” instruction is part of the“Actions, Sights & Ammunition” and the “Fence and Obstacle Crossing”lesson plans mentioned and taught previously in the Agenda.
5. “Safely Transporting Firearms”: There are no lesson plans for this training,but it is part of the Field Exam and hands on instruction must be conducted.
6. “Safe Zone of Fire”• Safe Zones of Fire – Inside Instruction Lesson Plan• Safe Zone of Fire – Outside Instruction Lesson Plan
CONTINUED NEXT PAGE
Deer Hunting Regulations
HE Tools has good visual programs for these topics
Bow Hunter Add-On Course Agenda
HE Tools has good visual programs most of the topics in this chapter
Lesson Plans
Lesson Plans
18

7. “Other Safety Considerations”: Self Control and Target Identification aretaught in other portions of the course. There are no lesson plans forAlcohol and Drugs and the topic is not on the written or field exams.However, the students should be taught what is in the manual.
8. “Hunting from Elevated Stands”• Hunting from Elevated Devices Lesson Plan• Blood Trailing and Deer Tagging Exercise Lesson Plan
9. “Hunting With Boats”: There are no lesson plans for Hunting With Boatsand the topic is not on the written or field exams. However, the studentsshould be taught what is in the manual.
10. “Hunting With All-Terrain Vehicles”:• ATV and Snowmobile Safety for Hunters Lesson Plan
Chapter Seven: Be a Responsible and Ethical Hunter 1. The students should be instructed in all the material in the manual in this
chapter. Use these Lesson Plans to enhance the training from this chapter.• Ethics and Responsibility Lesson Plan• Plat Book and Getting Permission to Hunt Lesson Plan
2. Audio/Visual OPTIONs: - Both DVDs provide good lessons for discussion.• “The Hunter’s Path” DVD• “Shoot/Don’t Shoot” DVD
Chapter Eight: Preparation and Survival Skills 1. This is definitely an important but “Nice-To-Know” chapter of topics. The
Basic course should be confined to brief instruction on basic preparation,basic compass use and basic survival/first aid. Any additional time andinstruction on these topics will be reserved for an extended course.
2. Instructors Need to consider the Goals of the Hunter Safety Course whenmaking the decision on what to instruct in this chapter.
• Most of these topics are expertise related items that require a lot oftime for the students to gain any real knowledge.
• Most of these topics require at least 40 hours of training to becomeproficient in the skills.
• Hunter Safety Instructors are not allowed to spend excessive coursetime to most of these topics.
• There currently are only three exam questions from this chapter.One from the Planning & Preparation Section, one in regard toHypothermia, and one in regard to stopping bleeding. So there isno need to spend a lot of time on the topics in this chapter.
• If time is devoted to these topics it should be intended as basic andinformational, and for the exam. Not as skill training.
3. Topic Instruction for this Chapter• Instructors need to explain the importance of knowing Basic First
Aid, CPR, Orienteering and Survival Skills. The chances ofneeding or using one or more of these skills some time in their livesis fairly high. Most likely the need will come from an incidentunrelated to hunting.
• Instructors need to encourage the students to take these courseswhen offered in the community. (School, Fire Departments,Technical Institutes, Boy & Girl Scouts, YMCA…etc)
CONTINUED NEXT PAGE
Lesson Plans
Lesson Plan
Lesson Plans
Suggested DVD’s
19
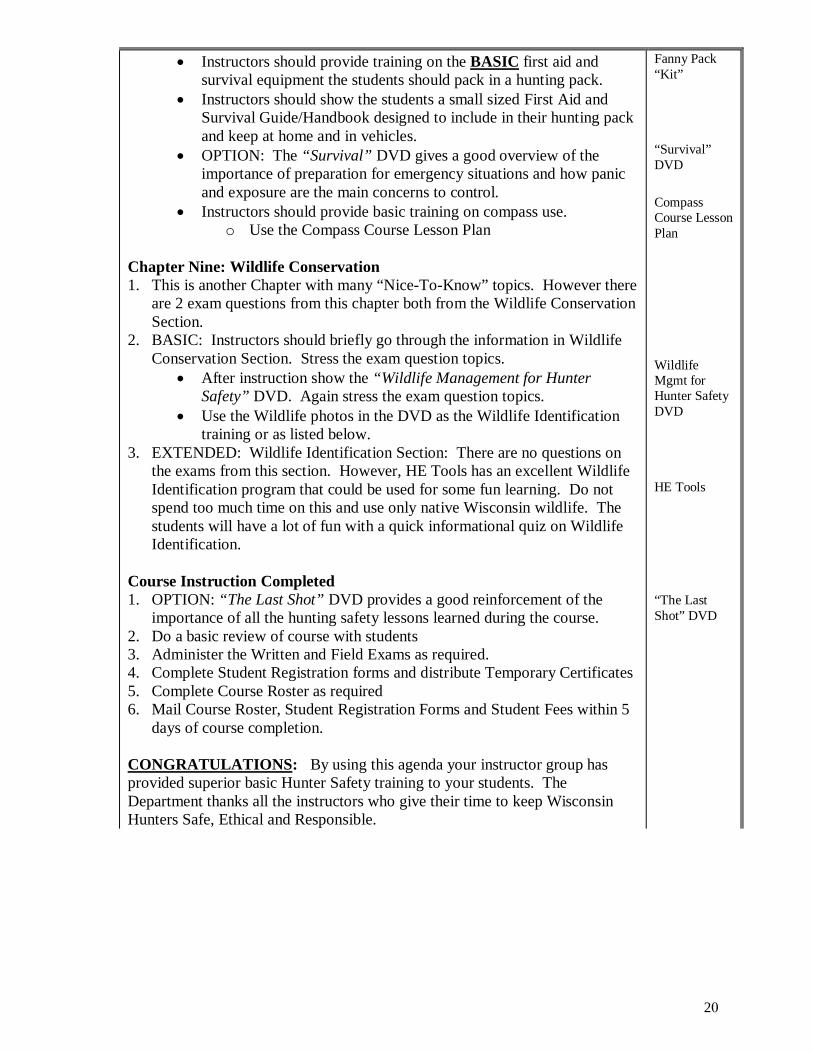
• Instructors should provide training on the BASIC first aid andsurvival equipment the students should pack in a hunting pack.
• Instructors should show the students a small sized First Aid andSurvival Guide/Handbook designed to include in their hunting packand keep at home and in vehicles.
• OPTION: The “Survival” DVD gives a good overview of theimportance of preparation for emergency situations and how panicand exposure are the main concerns to control.
• Instructors should provide basic training on compass use.o Use the Compass Course Lesson Plan
Chapter Nine: Wildlife Conservation 1. This is another Chapter with many “Nice-To-Know” topics. However there
are 2 exam questions from this chapter both from the Wildlife ConservationSection.
2. BASIC: Instructors should briefly go through the information in WildlifeConservation Section. Stress the exam question topics.
• After instruction show the “Wildlife Management for HunterSafety” DVD. Again stress the exam question topics.
• Use the Wildlife photos in the DVD as the Wildlife Identificationtraining or as listed below.
3. EXTENDED: Wildlife Identification Section: There are no questions onthe exams from this section. However, HE Tools has an excellent WildlifeIdentification program that could be used for some fun learning. Do notspend too much time on this and use only native Wisconsin wildlife. Thestudents will have a lot of fun with a quick informational quiz on WildlifeIdentification.
Course Instruction Completed 1. OPTION: “The Last Shot” DVD provides a good reinforcement of the
importance of all the hunting safety lessons learned during the course.2. Do a basic review of course with students3. Administer the Written and Field Exams as required.4. Complete Student Registration forms and distribute Temporary Certificates5. Complete Course Roster as required6. Mail Course Roster, Student Registration Forms and Student Fees within 5
days of course completion.
CONGRATULATIONS: By using this agenda your instructor group has provided superior basic Hunter Safety training to your students. The Department thanks all the instructors who give their time to keep Wisconsin Hunters Safe, Ethical and Responsible.
Fanny Pack “Kit”
“Survival” DVD
Compass Course Lesson Plan
Wildlife Mgmt for Hunter Safety DVD
HE Tools
“The Last Shot” DVD
20

HE Lesson Plan 1 TABK Four Rules of Firearm Safety
Instructor Training Aids and References
At least 1 firearm and/or At least 1 Laser Aim
Hunting Incident Synopsis Report This Lesson Plan
TIME PERIOD (APPROXIMATELY): 15 minutes
TYPE OF LESSON
E.D.O.C.
LECTURE
DISCUSSION
PRACTICAL
OBJECTIVE(S) For each student to:
� Understand the purpose of the 4 Rules of Firearm Safety.
� Understand, know, and recite the meaning of each letter of the TAB-K Acronym.
LESSON OUTLINE ITEMS
NEEDED
Educate Tell them what they need to know:
The 4 Rules of Firearm Safety can be remembered by the acronym TABK
T = Treat every firearm as if it was a loaded firearm.
A = Always control the muzzle of the firearm.
B = Be sure of your target and what is before and beyond your target.
K = Keep your fingers outside of the trigger guard until ready to shoot.
T = TREAT EVERY FIREARM AS IF IT WAS LOADED 1. This is a mind set before a firearm is even handled.
2. Always consider every firearm to be loaded until you personally confirm
that it is not.
3. When first handling a firearm, immediately open the action and check the
chamber and magazine. (Demonstrate how to open action, & location of
magazine)
4. If someone is handing you a firearm ask them to open the action prior to
handing you the firearm.
STUDENT PARTICIPATION - Ask Reasons Why Open Action is Safe:
• Open action means the firearm cannot be fired.
• Open action allows the chamber to be seen and checked.
• Open action allows most magazines to be seen and checked.
A = ALWAYS CONTROL THE MUZZLE OF THE FIREARM 1. Show students muzzle of firearm. Keep the muzzle pointed in a safe
direction.
2. Usually muzzle straight up with 2 hands on the firearm is the safest way to
control the muzzle.
STUDENT PARTICIPATION - Ask Reasons Why Muzzle Control is Safe
• Keeps from hitting an unintended target in case of an accidental discharge
• Assures others that you are a safe firearm handler
• If action is open and you know the firearm is not loaded is it okay to not be
concerned about the muzzle?
• ACTIVELY HUNTING
• HUNTING, BUT NOT “ACTIVELY” (walking to/from stand/field,
lunch/break, planning next drive…etc)
1 or more
firearms for
demonstration
purposes
A Lazer Ed
gun works
well as an
alternative
Use Laser
Aim to show
typical unsafe
firearm
handling that
occurs when
not actively
hunting
21
B = BE SURE OF YOUR TARGET AND WHAT IS BEFORE AND
BEYOND YOUR TARGET 1. Bullets and pellets do not know what your target is.
2. Bullets and pellets just fly through the air until they hit something.
3. If there is anything before or beyond the target there is a good chance those
things will be hit by the bullets and pellets.
4. The shooter is responsible for all bullets and pellets fired.
STUDENT PARTICIPATION - Ask Reasons Why the below may be Unsafe
• Swinging on running or flying game
• Game at crest of hills or in wide open areas
• Game at long distances
K = KEEP YOUR FINGERS OUTSIDE OF THE TRIGGER GUARD
UNTIL READY TO SHOOT
1. The trigger fires the firearm. Your finger has no business being anywhere
near the trigger until you intentionally want to shoot something.
STUDENT PARTICIPATION - Ask Reasons Why the below may be Unsafe
• Bored/Playing with trigger and/or safety
• Mechanical Safety failure
• Using trigger guard as handle or rope tying spot.
DISCUSSION: – Use Hunting Incident Briefs (Link at top of lesson plan)
1. Read examples of hunting incidents from report(s).
2. Have students discuss what Rules of Firearm Safety were broken
OR: Use the following SAMPLE HUNTING INCIDENT BRIEFS:
1. Self Inflicted: Shooter was crossing ditch and slipped causing .22LR rifle to
discharge striking shooter in the knee. TABK?
2. 2 Person Same Party: Shooter and victim were hunting turkey but were
unaware of the exact location of the other. Shooter shot at “turkey” which
really was the red shirt collar of the victim who what 76 yards away.
Victim was struck in the face with several pellets. TABK?
3. 2 Person Not Same Party: Shooter and victim were hunting squirrels on the
same private property open to hunting by FCL. Shooter saw movement on
tree trunk and shot at “squirrel” with .22LR rifle but struck the victim in the
thigh at 97 yards away. TABK?
4. 2 Person Same Party: Shooter was “stander” and victim “driver” were both
part of an 8 person deer drive on private property. Shooter shot 2 times
with a .270 rifle at a running buck over 100 yards away and struck victim in
the hip at a distance of 167 yards. TABK?
CONGRATULATE: The students for their attention and participation.
• Tell the students that they are expected to follow the TABK rules
and procedures at all times during the entire course.
•
INSTRUCTORS: Quiz the students occasionally during each class and
throughout the entire course so that the TABK rules are memorized and the
students can recite each of the 4 TABK rules by the end of the course.
Hunting
Incident
Synopsis
22

Hunter Ed Lesson Plan 2A & 2B (Combine into 1 lesson session) Location of Safety and Safe Firearm Handling Exercise
Instructor Training Aids and References
• Firearms of all actions and varied safety locations.
• Firearm with a "half cock" for safety
• Student manual, this lesson plan,
TIME PERIOD (APPROXIMATELY): 60-75 minutes both 2A & 2B
TYPE OF LESSON
E.D.O.C.
LECTURE
DISCUSSION
PRACTICAL
OBJECTIVE(S)
• Students will learn an easy method to locate the location of the safety on any firearm.
• Students will learn the additional safety precautions needed when using a "half cock" safety.
• Students will learn the safe procedure for handing a firearm to another person.
LESSON OUTLINE ITEMS
NEEDED
EDUCATE:
• The purpose of this demonstration is to show how to use a safety, and an easy
method to find the safety.
• The location of the safety, on all firearms, can be done with the trigger finger or
thumb of the shooting hand.
• The location of the safety can actually be done without looking at the firearm.
• The "Half Cock" safety will be discussed and demonstrated.
• Stress that any mechanical safety on a firearm can, and sometimes does, fail; and
should not be completely trusted to keep the firearm from discharging.
• The most reliable safety IS THE FIREARM HANDLER.
• The proper method to use when handing firearms to another person will be
discussed and demonstrated.
DEMONSTRATE: Location of Safety on Firearms
• After opening the action and checking the chamber and magazine, the instructor
will hold a firearm in the 2 hand ready position.
• The instructor will show the location of the safety on the firearm by pointing to it
with either the thumb or trigger finger of the shooting hand.
• The instructor will then demonstrate (using either the thumb or trigger finger of the
shooting hand) that the location of the safety on any firearm can be found in one of the
following places on the firearm:
� Either inside of, in front of, or behind the trigger guard.
� On top of the tang.
� Along the top of the stock beside the bolt, or on the bolt shroud.
� The instructor will demonstrate how the instructor knows the firearm is in the
"safe" or "fire" position by using the following information:
1) The safety position will show an "F" for Fire or "S" for Safe on most lever
type safeties.
2) On cross bolt or button type safeties there SHOULD be a red mark showing
on the safety when in the "fire" position. Sometimes there is no marking.
3) On cross bolt or button type safeties the "safe" position may be indicated, but
typically there is no indication the firearm is in the "safe" position, other than
there are no "fire" position indicators showing.
• The instructor should conduct the same demonstration on other action types and
safety locations if the firearms are available.
Refer to
manual and
this Lesson
Plan.
Muzzle
control a must
Firearms with
different
safety
locations
23

DEMONSTRATE: Firearms with "HALF COCK SAFETY”
• After opening the action and checking the chamber and magazine, the instructor
will hold a firearm in the 2 hand ready position.
o Firearm must have the "half cock" for a safety
• The instructor will demonstrate the location of the "safety" on the firearm by
putting the hammer in the half-cocked position.
• The instructor will ask the students to name the safety.
o Answer = Half Cocked Safety or Half Cocked Position.
• The instructor will then stress that the Half Cocked Safety/Position is not a safety,
but simply an extra notch on the hammer.
o The other half of Half Cocked is Fully Cocked!
• The only safety on a firearm with a Half Cock “Safety” is the firearm handler!
DEMONSTRATE: Safe Procedure Used When Handing a Firearm to Another
• Two instructors are needed for this demonstration.
• Tell the students that the following procedure is used when handing a firearm to
another person.
1. After opening the action and checking the chamber and magazine, the instructor
will hold a firearm in the 2 hand ready position with the action open.
2. The instructor will hand the firearm to the other instructor, but wait until the
receiving instructor says, “I HAVE IT”, before releasing the firearm.
3. Tell the students that during the course if the action is not open the receiving
student will ask for the action to be opened before taking the firearm.
4. Ask the students why communication must occur between firearm handlers.
o A common response will be so the firearm is not dropped
5. PURPOSE of this procedure is the students will VERIFY CONTROL OF THE
FIREARM; and that the person receiving the firearm is WILLING TO TAKE
RESPONSIBILITY FOR THE FIREARM.
• Again, stress that any mechanical safety on a firearm should not be trusted. The
most reliable safety IS ALWAYS THE FIREARM HANDLER.
• Stress the importance of using these safety lessons at all times when handling
firearms, and not simply during "class time".
INFORM THE STUDENTS THAT THEY NEED TO FOLLOW THE TAB-K
RULES AND THE ABOVE SAFE GUN HANDLING PRACTICE DURING
THE ENTIRE COURSE.
TRANSITION TO LESSON PLAN 2B:
.
Firearms with
half cock
safety
Firearm
24
HE Lesson Plan 2A & 2B (Combine into 1 lesson) ACTIONS, SIGHTS, AMMUNITION & LOADING
Instructor Training Aids and References • At least 1 firearm of the 5 main action types bolt, break, semi-auto,
pump/slide and lever • At least 1 firearm with bead, open and telescopic sights.• Aperture/Peep and Dot sights are optional• A variety of dummy ammunition for both shotgun and rifle• Student manual, this lesson planTIME PERIOD (APPROXIMATELY): 60-75 minutes (Both 2A & 2B)
TYPE OF LESSON E.D.O.C. LECTURE DISCUSSION PRACTICAL
OBJECTIVE(S) For each student to: Understand the 3 main parts of a firearm: Barrel, Action and Stock. Understand and successfully operate the 5 common types of firearm actions. Demonstrate how to locate and work the safety on all firearms. Identify the basic types of sights. Bead, Open, Telescopic, Aperture/Peep, Dot Identify where to look for the Gauge/Caliber of any given firearm. Understand what types of magazines there are and what their firearm uses. Identify and select proper ammunition for any given firearm. Identify the range of the selected ammunition (12/20 gauge, .22LR, 30-30, 30-06) Demonstrate how to load the proper ammunition into the magazines/firearms.
LESSON OUTLINE ITEMS NEEDED
EDUCATE: • Each firearm is distinct in nature and you must familiarize yourself with the
type of action, sights, ammunition and safety of every firearm before you startusing it.
• Show the 3 main parts of a firearm: BARREL, STOCK, ACTIONo ACTION: Loads, Unloads and fires the ammunition
• Familiarize the students with the 5 basic firearm actions and how it worksBOLT LEVER BREAK PUMP/SLIDE SEMI-AUTOMATIC
• Show the location of the safety, and how it works.• Familiarize the students with basic firearm sights.BEAD OPEN TELESCOPIC and if available APERTURE/PEEP DOT • Show the basic types of magazine.
TUBULAR BOX DETACHABLE BOX • Familiarize the students with how to identify the make model and
caliber/gauge of firearms using data stamp on the firearms • Familiarize the students on how to identify the caliber of ammunition using the
data stamp on the cartridge/shell and how to match the ammunition with the firearm.
• Shotgun Ammunition Components and Rangeo Shotgun Ammo: Shell Case, Primer, Gun Powder, Wad and Shoto Show 1 of each 12ga. and 20ga.
Point out size differences (20ga will fit into 12ga barrel) Shell Case Color differences NOT universal Range 300-600 yards
Briefly explain each step with one firearm.
Show all action types
Shotgun Shells 12 & 20 gauge
25
• Rifle Ammunition Components and Rangeo Rifle Ammo: Cartridge Case, Primer, Gun Powder and Bullet
Show 1 of each .22LR, 30-30 and 30-06 Point out size/shape/primer differences Range 22LR over 1 mile Range 30-30 over 2 miles Range 30-06 over 3 miles
• Stress the importance of proper matching of the ammunition to the firearm.• Loading of the firearms will be done during small group instruction.
BREAK INTO SMALL GROUPS for INSTRUCTION Based on firearm and instructor availability do one of the following: 1. One action per instructor and rotate each group through the 5 actions
• Preferred Option2. Two or more actions per instructor and rotate groups through actions.DEMONSTRATE: An Instructor for each group will demonstrate where to find these items and how they work 1. Show them the 3 main parts of a firearm: Barrel, Action, Stock2. Show them each of the five action types and how the action operates.3. How to locate the safety and how it operates4. What type of sight on each firearm.5. Location and the type of magazine (if any)6. Where to find the make, model, caliber/gauge imprinted on the barrel7. How to identify the caliber/gauge of ammunition and match to firearm.
• Range of .22LR over1 mile, 30-30 over 2 miles, 30-06 over 3 miles• Range of 12 & 20 ga shotgun = 300-600yds
8. How to load the magazine and work action to load the firearm.
OBSERVE: Each student will perform the following steps: • Coach students through steps as needed.
1. Instructor hands a firearm to a student using safe gun handling procedure.2. Ask student(s) the 3 main parts of the firearm.3. Ask student(s) the type and have them work the action.4. Ask student(s) the location of the safety and how it operates.5. Ask student(s) the type of sight on the firearm.6. Ask student(s) the location and type of the magazine.7. Ask student(s) the Gauge or Caliber of the firearm.8. Ask student(s) to identify and select the proper ammunition for the firearm.9. Ask student(s) to identify range of all 5 basic ammunition types.10. Ask students(s) to load the magazine and work action to load the firearm.11. Students pass the firearm to a student without a firearm, acknowledging
that they have control of it.12. Repeat above steps for each student.13. Instructor accepts firearm from the last studentRotate student groups for each firearm action type. C = Congratulate. Give praise after each student is successful with every new firearm. Congratulate the group when all are finished.
Rifle Cartridges .22 LR, 30-30, 30-06
More detailed instruction will come in the Demonstration Section
Firearm Actions Depending on number of groups.
Have a mix of the various dummy ammo 12/20gauge .22LR, 30-30 and 30-06
All students should have the opportunity to do this on all five action types
26

Hunter Ed Lesson Plan 3 FIREARM CARRIES
Instructor Training Aids and References
Student manual, this lesson plan, firearms and/or Laser Aims
TIME PERIOD (APPROXIMATELY): 15 minutes
TYPE OF LESSON
E.D.O.C.
LECTURE
DISCUSSION
PRACTICAL
OBJECTIVE(S) For each student to:
� Understand the purpose of the 4 Rules of Firearm Safety as it applies to firearm carries.
� Learn safe firearms carries and when to use them in multiple hunter situations.
LESSON OUTLINE ITEMS
NEEDED
EDUCATE:
Firearm Carry selection is based primarily on:
• Muzzle Control
• Location of Hunting Companions
• Terrain.
DEMONSTRATE:
Instructors will demonstrate carries and tell the students the advantages and
disadvantages for each of the firearm carry positions.
• Two Handed/Ready Carry
o Always provides the best control of the firearm.
• Cradle Carry
o Comfortable
o Very secure & reduces arm fatigue
• Trail Carry
o Leaves a hand free for balance
o Don’t use when someone is in front of you
• Elbow Carry
o Comfortable
o Has the least muzzle control
• Shoulder Carry
o Good in high brush
o Don’t use if someone is behind you
• Sling Carry is an easy carry for long treks through open country
o Keep hand on sling when walking
o Large buttons sewn on the shoulder of a jacket will help secure
the sling from slipping.
Refer to
manual.
Muzzle
control a must
Each student
should have a
gun of some
kind. Air
Rifles, or
wooden cutout
works fine
also.
27

OBSERVE:
• Break into small student groups and have each student:
o Show all 6 of the firearm carries.
• Students will team up in 3 or more hunter groups and:
o Demonstrate the safe firearm carry each hunter must use
o Walking single file
o Hunting in a typical horizontal line.
o Instructors correct as necessary
• Reinforce to the students that the Two Handed Carry is by far the safest.
• Muzzle “awareness” is a must no matter what firearm carry is used
CONGRATULATE:. Give praise throughout and also at the conclusion to the
entire group
Use firearms
Lazer Ed
guns, or
firearm
substitute
Watch muzzle
control
28
HE Lesson Plan 4 Sight Alignment & Shooting Positions
Instructor Training Aids and References
Laser Ed guns, Targets, Student manual, HE Tools, sight alignment illustrations,
various types of sights, shooting sticks, this lesson plan
TIME PERIOD (APPROXIMATELY): 30 minutes
TYPE OF LESSON
E.D.O.C.
LECTURE
DISCUSSION
PRACTICAL
OBJECTIVE(S) For each student to:
• Demonstrate safe handling of firearms during the entire course by using TAB – K methods
• Learn proper sight alignment with open, aperture/peep, telescopic, and red dot sights.
• Learn the standard shooting positions of standing, kneeling, sitting and prone
LESSON OUTLINE ITEMS
NEEDED
EDUCATE
• Sight alignment is one of the most important parts for shooting accuracy.
• Sights must be aligned exactly the same for each shot for consistent accuracy
• Shooting position selection is based primarily on terrain and type of game being
hunted.
• Shooting positions vary on stability and stability equals accuracy.
• Students need to practice sight alignment and all the shooting positions to improve
accuracy.
DEMONSTRATE:
1. Show the proper sight alignment for open, aperture/peep, telescopic, and red dot.
a. Show correct and incorrect sight alignment
b. Precise sight alignment is critical!
2. Using a Laser Ed gun, or other training aid, demonstrate correct and incorrect
sight alignment on target
3. Using a Laser Ed gun, demonstrate the 4 shooting position while aiming at a
target. Comment on how the laser point is most steady in the prone and least
steady when standing.
Prone Position: Provides the best control, most stable = most accurate shooting
• Lie on a mat that is canted slightly (about 45 degrees) towards the target
• Place both elbows on the mat making sure the elbow under the firearm is
directly underneath the forearm.
• Advise that the strong side leg should either be straight or cocked slightly
• Rifle resting on the palm of the weak side hand
• Cheek firmly against the stock
Sitting Position: Both elbows on both knees is comfortable and very steady:
• Sit on the mat canted slightly away from the target
• Place both elbows on the inside of each knee respectively
• Feet can be apart / or legs can be crossed. Right handed shooters have the left
leg over the right and visa versa for left handed shooters
• Rifle resting on the palm of the weak side hand
• Cheek firmly against the stock
HE Tools, student
manual,
illustrations,
Laser Ed gun
29
Kneeling Position: Leaves the shooting arm and elbow unsupported, making it less
steady than prone or sitting:
• Strong side knee placed on the mat with body slightly canted away from the
target
• Weak side foot placed flat on the ground in front of body
• Weak side elbow (flat part) placed slightly forward of the knee-cap
• Strong side elbow positioned for balance
• Rifle resting on the palm of the weak side hand
• Cheek firmly against the stock
Standing Position: The least stable shooting position = least accurate shooting. Using
shooting sticks can greatly increase the stability of this position.
• Body canted slightly away from the target
• Feet about shoulder width apart
• Weak side elbow underneath the forearm
• Rifle resting on the palm of the weak side hand
• Strong side elbow almost parallel with the ground
• Buttstock firmly against the shoulder and slightly high in the shoulder pocket
• Cheek firmly against the stock
OBSERVE:
Have each student shoot the Laser Ed gun at a target(s) using the 4 shooting positions
described above. An instructor will mentor each student in this lesson.
1. Students will have the Actions Open, Safety On, Fingers outside the trigger
guard when receiving a firearm.
2. Students will have the Actions Closed Safety On, Fingers outside the trigger
guard until ready to shoot while participating in this sight alignment and
shooting positions lesson.
• Instructors watch for muzzle control.
3. The instructors will be coaching for proper shooting positions and that the
instructors may need to touch the students to aid the student into that proper
shooting position.
• Instructors – Improper touching of students is not tolerated.
• Instructors inform the student prior to touching if necessary to coach into
proper shooting position.
• Never be alone with a student!
4. Students will perform the 4 shooting positions using proper sight alignment.
• Instructors coach for proper shooting positioning.
• Instructors use students’ “shot” placement to coach for proper sight alignment.
• Instructors will comment to the students on how the laser point is most steady
in the prone position and least steady when standing.
Each student will open the action and put the safety on before passing the gun to the
next student.
CONGRATULATE: Give praise throughout and also at the conclusion to the entire
group. Reinforce to the group that while the standing position is commonly used for
shooting a rifle, it is the least stable. As a shooter gets closer to the ground the more
stable their shooting platform becomes.
Shooting
Sticks
Laser Ed guns
Targets
30

HE Lesson Plan 5A
Safe Shooting Zones – Indoor Lesson Plan
Instructor Training Aids and References
Laser Ed Guns, Laser Pointer, HE Tools, Student Manual, Hunting
Incident Summary
TIME PERIOD (APPROXIMATELY): 15- 30 minutes
TYPE OF LESSON
E.D.O.C.
LECTURE
DISCUSSION
PRACTICAL
OBJECTIVE(S)
• Students will learn the importance and need for a safe zone of fire.
• Familiarize students with Safe Shooting Zones of Fire
o Single and multiple Hunters
o Use slow paced Laser simulated hunting situations.
• Use this Inside Lesson Plan prior to the practical Outside Lesson Plan
LESSON OUTLINE ITEMS
NEEDED
EDUCATE:
Instructor will explain to the students what a “safe zone of fire” and why
hunters need to strictly follow safe zone of fire rules.
1. Pre-establishes safe shooting lanes
2. Gives “side boards” for muzzle control
3. All hunters must know where everyone is located.
• Continual communication by Sound, Voice or Visual contacts
4. Plan your hunt and hunt your plan.
5. TABK Rule 3 – Be aware of your target and what is before and beyond.
6. Use anytime multiple hunters are hunting together.
o Deer Drives
o Pheasant, Grouse, Rabbit Hunting situations where everyone is
in a line with each other.
DEMONSTRATE:
Two or Three Instructors will demonstrate the safe shooting zones that apply to
hunters in a line with each other. Similar to pheasant, grouse or rabbit hunting.
OPTION: Choose 2 or more students to assist with the demonstration:
1. Hunters should stand in a line several feet apart and facing the same wall.
2. All Hunters are given a firearm and show proper safe gun handling. Laser
Ed firearms are preferred. Otherwise use firearms and/or air rifles.
3. Each Hunter is to use the laser ed gun to demonstrate their safe zone of fire.
4. Show overlap of safe zones of fire.
Refer to
student
manual to
show safe
zones of
fire.
HE Tools
has a great
illustration
Discuss
Hunting
Incident
Summary
Examples
Preferably 3
hunters to
show 2
sides and
center safe
zones of
fire.
31

OBSERVE:
1. Groups of 3 or more students will perform the above steps which includes:
• Actions Open, Safety On, Fingers outside the trigger guard when
receiving a firearm.
• Actions Closed Safety On, Fingers outside the trigger guard until ready
to shoot while participating in simulated hunt.
2. Each group will then perform a simulated pheasant hunt. Instructors need
to coach and/or correct the students as needed in this exercise.
• Use laser pointer at a slow and steady pace to simulate the flight of
pheasant on wall and ceiling.
• “Fly” across, away and back through the students.
• Students will cover the laser pointer “bird” using the laser aims. Laser
Aims “On” while within their safe zone of fire. Off when not. If using
firearms or air rifles then the firearms should be shouldered and students
swing on laser dot while in their safe shooting zone, then return to the ready
position when the laser dot is not in their safe shooting zone.
• Students should demonstrate proper swing and stay within their safe
zone of fire.
• Students will be able to see overlap of safe zones of fire.
3. Each group will then perform a simulated rabbit hunt.
• Use same procedure as pheasant, except all the simulation will be on the
floor.
• Same safe zone of fire rules apply.
CONGRATULATE EACH GROUP ON COMPLETING THE TASK.
Reinforce to the students that it does not matter what the terrain is when you
are hunting or whatever you may be hunting. Safe Zones of Fire always apply
under any hunting situation. Reinforce the need for good communication and
the establishing of an ethical and safe group leader to:
“Plan the Hunt and Hunt the Plan.”
Watch for
muzzle
control
issues and
correct as
needed.
32

Hunter Ed Lesson Plan 5B
Safe Shooting Zones - Outside Instruction
Instructor Training Aids and References
Firearms of any type, frisbees and/or small and medium sized balls,
student manual, Hunting Incident Summary, this lesson plan.
Note: Due to the fast pace of this simulated hunt activity it is
recommended and preferred that the Indoor Lesson Plan for Safe
Shooting Zones to be conducted prior to the Outside Lesson Plan
TIME PERIOD (APPROXIMATELY): 15 - 30 minutes
TYPE OF LESSON
E.D.O.C.
LECTURE
DISCUSSION
PRACTICAL
OBJECTIVE(S)
For each student to:
• To familiarize the student that communication and shooting within your “safe zone of
fire” is vital while hunting.
• This requires planning your hunt and hunting your plan.
• A responsible hunter is aware of their hunting companions location at all times.
LESSON OUTLINE ITEMS
NEEDED
EDUCATE:
1. Explain definition of a safe zone of fire:
2. Muzzle swing into another hunters’ zone is not allowed.
3. TABK rule 3 is explained how it applies to the safe zone of fire.
4. Use Hunting Incident Summaries for examples to lead discussion.
DEMONSTRATE:
1. Instructors will demonstrate the safe zone of fire for each hunting
position.
2. Instructors will explain to the students that this exercise is a simulated
hunt (Pheasant and/or Rabbit) by throwing frisbees and balls.
• Frisbees simulate pheasants. Instructors can use different colors to
simulate roosters and hens.
• Soft balls simulate rabbits
• Volley balls or basket balls can be used to simulate dogs
3. Instructors will demonstrate how the students should:
•••• Decide on a group leader
•••• Plan the Hunt and establish each hunters’ Safe Zone of Fire.
•••• Decide on how to keep track of each other: Visual and/or Sound
•••• Hunt the Plan using good communication when necessary.
Student
Manual
HE Tools
program
Incident
Summary
Firearms, air
rifles or Laser
Aims
Frisbees
Balls
33

OBSERVE:
1. Groups of 3 or more students will perform the above steps.
•••• Actions Open, Safety On, Fingers outside the trigger guard when
receiving a firearm
•••• Actions Closed Safety On, Fingers outside the trigger guard until ready
to shoot while participating in simulated hunt
•••• Decide on a group leader
•••• Plan the Hunt
•••• Establish each hunters Safe Zone of Fire.
•••• Decide on how to keep track of each other: Visual and/or Sound.
•••• Hunt the Plan using good communication when necessary.
2. During the simulated hunt; Instructors/students/parents will throw
Frisbees and balls across, away and back through the path of the students
participating in the simulated hunt.
3. Hunting Students will swing on the game while the game is within their
established safe zone of fire.
•••• Students will use safe firearm handling techniques at all times
•••• Students will use the Two Hand Ready carry when not swinging on
game.
4. Instructor(s) will follow and mentor each hunting group so that
corrections and encouragement can be made immediately during the hunt.
•••• WATCH FOR MUZZLE CONTROL
CAUTION: This is a very fast paced exercise and some students may
become confused and not participate well. THIS IS OKAY. Do not let the
students get discouraged. Let them know that they will get better with
practice.
INSTRUCTOR OPTION: It is helpful to end the simulated hunt at a
fence and then transition to the Fence & Obstacle Crossing Lesson Plan.
CONGRATULATE EACH GROUP ON COMPLETING THE HUNT
Reinforce to the students that it does not matter what the terrain is when you
are hunting or whatever you may be hunting. Safe Zones of Fire always apply
under any hunting situation. Reinforce the need for good communication and
the establishing of an ethical and safe group leader to:
“Plan the Hunt and Hunt the Plan.”
Watch for
muzzle
control, good
communication,
ie HEN, ROOSTER,
STAY IN
LINE, WAIT
34

HE Lesson Plan 6 Fence and Obstacle Crossing
Instructor Training Aids and References
1. Portable Fence (IHEA design or WDNR approved)
2. Real fence if you have access to one. NOT barbed wire.
3. Firearm(s)
4. Dummy Ammunition
TIME PERIOD (APPROXIMATELY): 20 minutes
TYPE OF LESSON
E.D.O.C.
LECTURE
DISCUSSION
PRACTICAL
OBJECTIVE(S)
• To teach students a safe method for crossing a fence/obstacle while hunting alone
• To teach students a safe method for crossing a fence/obstacle while hunting with others
• To teach students safe loading and unloading while hunting with others
• To teach a safe procedure when meeting someone or law enforcement while hunting
LESSON OUTLINE ITEMS
NEEDED
EDUCATE:
There are numerous situations where hunters come upon obstacles in the field.
Rough terrain and fences are the two most common situations. Hunters don’t
always hunt alone; therefore it is important to know how to deal with these
situations in either case. A conscious awareness of safety must be maintained at
all times.
DEMONSTRATE:
Single Hunter Crossing a Fence
1. Unload your firearm.
2. Place your firearm under the fence with the muzzle pointing away.
• Place it at least one fence post away from where you are crossing.
• Use a cap or jacket to lay the muzzle on to avoid barrel obstructions
3. Cross under, over, or through the fence depending on its type and
landowner preference.
4. Retrieve your firearm.
5. Check barrel for obstructions.
6. Reload your firearm.
7. Verify that the safety is in the safe position on the firearm.
Lesson Plan
Firearms
Dummy
Ammo
Fence
Courtesy to
Landowner to
not stretch
wire
35

Two or more Hunters Crossing a Fence & Back to Back Loading/Unloading
1. Unload Firearms by demonstrating the back to back unloading.
2. First hunter holding both firearms in safe muzzle up manner. OR
3. First hunter puts firearms safely to the side and assists second hunter by
holding fence wires apart/down
4. Second hunter crosses fence using techniques done in single crossing.
5. First hunter hands second hunter both firearms over the fence using safe
handling techniques.
6. First hunter then crosses fence using techniques in single crossing. OR
7. Second hunter puts firearms safely to the side and assists first hunter by
holding fence wires apart/down
8. Reload Firearms by demonstrating the back to back loading.
9. Verify that the safety is in the safe position on all firearms.
OBSERVE:
1. The students perform the above steps as a single hunter.
2. The students perform the above steps as 2 or more hunter group
• Use back to back loading and unloading
3. Coach the students whenever necessary
******ADDITIONAL INSTRUCTION TO NOTE:******
1. Instructors should inform the students that on rough terrain or
another barrier such as a steep hill side, thick brush, or stream, where
the fence crossing techniques cannot be used that the student shouldunload their firearms and carefully cross the terrain or barrier.
2. Instructors should inform the students to use this procedure when
meeting someone during the hunt.
a. When approaching or being approached by another person;
maintain control of your muzzle in a safe direction throughout
the contact. It is recommended to also open the action and
unload your firearm.
b. When approached by law enforcement; maintain control of your
muzzle in a safe direction and wait for instruction from law
enforcement.
CONGRATULATE: Give praise throughout and also at the conclusion to the
entire group
Watch for
muzzle control
36
HE Lesson Plan 7 Hunting From Elevated Devices - Tree-Stands and Tree-Stand Safety
Instructor Training Aids and References Commercial tree stand (Ladder, Hang On and/or Climbing) Stands shall
not to exceed 7feet from seat to ground. Portable Tree (WDNR approved) or suitable live tree, Climbing Devices,
Safety/Life Lines, Vest type Safety Harnesses, Firearm/Bow/Crossbow,
Haul Line, Dummy Ammunition
TIME PERIOD (APPROXIMATELY): 30 - 60 minutes
TYPE OF
LESSON
E.D.O.C.
LECTURE
DISCUSSION
PRACTICAL
OBJECTIVE(S)
• The advantages/disadvantages and dangers associated with all types of elevated stands
• The value of fall restraint systems
• and to properly set the fall restraint systems.
• Making a firearm/bow/crossbow safe while entering/exiting an elevated stand.
• Always use a haul line to raise and lower firearms/bows/crossbows and other equipment.
LESSON OUTLINE ITEMS
NEEDED
EDUCATE: There are numerous types of tree-stands and elevated devices
from which to hunt from. All have their own advantages and disadvantages.
TREE STAND TYPES
1. Ladder Stand:
• CON - Bulky and Heavy
• CON - Limited to certain heights
• CON - Difficult to put up
• PRO - Offers a good platform from which to shoot
• PRO - Works on most suitable trees
2. Climbing Stand:
• CON - Practical only on straight limbless trees
• PRO - Light weight and easy to use
• PRO - Offer their own climbing system = No steps or ladders needed
3. Hang-On Stand:
• CON - Can be difficult to secure to tree
• CON - Require climbing equipment
• CON - Safe once installed, but small seat/platform
• PRO - Useable on most suitable trees
• PRO - Light weight and very portable
4. Tri-Pod Stand:
• CON - Bulky and Heavy
• CON - Need to use vehicle to carry to hunting site
• PRO - Useful where no/inadequate trees are present
5. Home-Made Stand (varieties of the list above)
• CON - Require a high degree of maintenance
• CON – Typically will permanently damage trees = Illegal on public land
• PRO - Usually less expensive
• PRO - Can be made to your specifications
Tree-Stand
Guide
Examples of
each type of
tree stand if
you have them
Use of screws
or nails to
attach to tree
is illegal on
public lands
37

6. Pop Up Blinds – Show and inform Only
• CON - Typically camouflaged, should use orange during gun season
o Blaze orange required on State property during gun deer season.
• CON - Typically less safe shots (less backstops) than tree stands
• PRO - Light Weight and easy to carry
• PRO - No danger of falling out of tree
CLIMBING DEVICES – Discuss Advantages and Disadvantages of each type
• Climbing sticks of various types and systems to secure to trees
• Ladder Sections
• Screw In and Strap on Steps
a. Screw In damage trees and are illegal on most public property
b. Metal steps tend to be brittle and slippery in cold weather
FALL RESTRAINT SYSTEMS – Discuss Advantages and Disadvantages
STATISTICS SHOW 1 of 3 HUNTERS WHO USE TREE STANDS WILL
FALL. MANY ARE SERIOUSLY INJURED AND EVEN KILLED.
Most Falls Occur While Climbing Into and Out Of TREE STANDS.
DON’T BE ONE OF THOSE HUNTERS.
1. ALWAYS use a Fall Restraint Harness of some kind
• Full Body Harness
• Vest Harness
a. Climbing Safety Strap (Lineman’s Strap)
b. Suspension Relief Foot Loop Strap (If equipped)
• Safety/Life Lines (ground to stand/stand to ground protection)
a. “New” safety technique for tree stand safety borrowed from
mountain/rock climbing practices.
b. Protects from falls while climbing up to and down from the tree
stand.
GENERAL TREE STAND SAFTEY
1. Always follow the tree stand manufacturer recommendations for stand
assembly and placement/use on trees or similar structure.
2. Always use a Safety/Life Line while Climbing in and out of the stand.
• Provides ground to stand & stand to ground protection.
3. Always use 3 points of contact when climbing into or out of the stand.
• 2 hands 1 foot or 2 feet 1 hand.
• Discuss Reasons for 3 points of Contact
o Steps/Rungs Slippery or Break
o 1 of 3 Hunters who use stands fall out of the stands
o Most falls occur climbing in to or out of a stand.
4. Always use a Haul Line for ALL of your equipment.
5. Always unload your firearm/bow/crossbow when raising or lowering it.
• Unload crossbows by removing the bolt. Crossbow will likely need
to remain cocked when climbing into or out of a stand.
• Unload muzzleloaders by removing the primer, percussion cap or
powder from the pan.
Pop Up Blind
Examples of
Climbing
Devices
Examples of
Fall Restraint
Harnesses and
Systems
Lifeline
products
Tree Stand
Safety Guide
Haul Line
Types
38

DEMONSTRATE: Instructors will have a ladder stand top ready and set up with
Vest Type Safety Harness, haul line(s), Safety/Life Line, and choice of
firearm/bow/crossbow, dummy ammo, blunt arrows/bolts,
Instructors will then perform the following steps for the demonstration:
1. Unload your firearm/bow/crossbow and attach it to your haul line
• When possible position the haul line so firearm/bow/crossbow are
suspended in air and not laying on the ground
• Generally cannot do this when using climbing tree stands
• Firearm/Bow/Crossbow should be pointed down, horizontal, or in a case
• Also use haul line(s) for backpacks and/or other bulky equipment
2. Put on Vest Type Safety Harness over hunting clothes
• Demonstrate proper fit
• Demonstrate Lineman’s strap (if part of harness
• Demonstrate suspension relief foot loop strap (if part of harness)
3. Attach safety strap from Vest Type safety harness to the Safety/Life Line
• Demonstrate how prusik knot functions
• Often useful to have a second prusik knot on the Safety/Life Line
a) Clip equipment to loop
b) Foot loop in case of fall
• Be sure to tie off Safety/Life Line to bottom of tree or stand so that prusik
knot(s) will slide up and down the Safety/Life Line.
4. Using 3 points of contact climb into your tree-stand
• 2 hands 1 foot or 2 feet 1 hand
5. Once in the stand immediately attach your safety harness to tree strap
• Some newer harnesses have 2 straps so the hunter doesn’t need to unclip
from the prusik knot to attach to tree strap
• A Properly Set Tree Strap to Safety Harness Connection:
� Will allow only 3-4 inches of slack from the seated position
� Will prevent a fall due to a momentary loss of balance
� Will stop a fall in a few inches so the hunter can return to the stand
6. Haul your firearm, bow and equipment up into the stand using a haul line(s)
7. Load the firearm or nock an arrow/bolt
8. To climb down, reverse the order above
***ASK STUDENTS IF THEY HAVE ANY QUESTIONS***
- - - - - - - - INTERNET FIELD DAY STOPS HERE- - - - - - - - -
OBSERVE: Observe the student perform the above demonstration procedure
1. Students Perform the 8 steps of the demonstration
2. Each student is to SAY each action before performing
CONGRATULATE: Give praise throughout and at the conclusion to the group.
INSTRUCTORS NOTE:
1. Tree Stand Seat must not be more than 7 feet off the ground
2. Watch for MUZZLE CONTROL
3. Coach students whenever necessary for proper procedure.
4. Bow Hunter Safety courses should include a demonstration of the proper
installation and safe use of the common types of stands. (Ladder, Hang On,
Climbing and Pop Up Blinds
Read 1 – 8
from the
lesson plan
Hunter Safety courses: If
time allows
have some or
all of the
students
perform the 8
steps.
Bow Hunter
Safety courses
all students
should perform all 8
steps
39

HE Lesson Plan 8 rev. 5/2016 Blood Trail/Deer Tagging Exercise
Instructor Training Aids and References Fake Blood, Bright Colored Plastic Tape, and/or toilet paper Copy of Current Carcass Tag, Knife, 3-D deer decoy, (buck or doe), string or plastic cable zip-tie TIME PERIOD (APPROXIMATELY): 15 - 30 minutes
TYPE OF LESSON
E.D.O.C. LECTURE DISCUSSION PRACTICAL
OBJECTIVE(S) • To show the students how to follow up on shots they take with a bow or gun at a deer• To instill responsibility to make an effort to look for any game the hunter have shot at• The importance of following a blood trail• The proper tagging and validation procedure for a deer
LESSON OUTLINE ITEMS NEEDED
EDUCATE: 1. Explain to student the importance of making a reasonable effort to find any
game that the hunter has shot at. Whether they think the game was hit ornot.
2. For deer hit by an arrow or a bullet a different part of the hunt starts.• Just because the deer runs off doesn’t mean you have missed the shot
3. Immediately upon killing a deer validate your tag by writing the date andtime of kill. You may not leave your carcass unless the tag is attached.Registration is required by 5pm the day after recovery.
DEMONSTRATE& OBSERVE Instructors will explain/demonstrate the following tracking process while coaching the chosen students who will be performing the lesson. 1. After taking a shot(s) at a deer the hunter should do this:
• Stay Calm and Quiet• Identify the last location the deer was seen
Memorize identifying landmark nearby (tree, boulder, fence) Take Compass Bearing
• Wait 45 minutes – 1 hour when bow hunting• Can trail almost immediately when firearm hunting• If using a tree stand unload firearm/bow and prepare equipment forlowering out of tree stand using haul line.
2. Beginning the Tracking Process• Designate one student as the shooter and give that student the carcass tag• Designate 2-4 students to help shooter track deer.• The students should go to the location where the deer was hit. Thisshould be about 25 yards (Bow Hunter Safety) or 50 yards (Hunter Safety) away from the shooting location or tree stand.
Hunting Regulations
Tree Stand Safety Lesson Plan.
Lesson Plan Fake Carcass Tag
40

Look for blood, hair, and bone signs that the deer was hit andmark with tape or toilet paper
If there is a blood trail follow the blood trail.• If there is no sign where the deer was hit, the students should go to thelast location that the deer was seen.
Using identifying landmark and/or compass bearing from stand. Look for blood, hair, and bone signs that the deer was hit and
mark with tape or toilet paper There should be blood for the students to find
• Students should follow a fairly easy to find blood trail for about 50 yardsto find the deer decoy or anatomy deer.
There should be blood for the students to find on grass, leaves,branches…etc.
Each blood sign should be marked by students with tape ortoilet paper.
At the last blood sign location the students should be able tolook ahead of them and observe the deer decoy.
• Instructors show the students how to approach downed deer Approach from behind the head, and watch for the rise and fall
of the chest to indicate the deer is alive Deer die with eyes wide open (poke with stick)
3. The Tagging Process• Instructor now tells the group that the deer must now be properly tagged.
Direct Student Shooter to get out carcass tag Instructor will demonstrate how to properly validate carcass tag
by using a knife with tag on a tree, stump or the deer. Student Shooter will tag antler or ear using a string or zip tie Tell students to see instructions on WI DNR Deer Carcass tag
for validating, registering and attaching instructions.• Instructor tells group that a blaze orange jacket could be placed on abranch or brush nearby for safety reasons.
4. The Tagging Rules• Instructor explains to the students that if they hunt with a group duringthe gun deer season that practices “group bagging” of deer, theresponsibility of the deer being tagged properly belongs to the shooter ofthe deer.• This does not apply to bow hunting as archers are responsible forshooting and tagging their own animal and group deer hunting is notallowed.
CONGRATULATE: Give praise throughout and at the conclusion to the group.
HE Lesson Plan 8 Blood Trail/Deer Tagging Exercise – Additional Information Instructor Training Aids and References:
Fake Blood
Tape or Toilet Paper
Fake Carcass Tag Knife Zip Tie or String
Orange Jacket
Deer Hunting Regulations
41

• Ingredients/Recipes for Fake Blood• Tips for laying out a blood trail
OBJECTIVE(S) • Enable the instructors to lay out a realistic looking blood trail• To enhance the students experience with the training received in the
Blood Trailing and Tagging exercise lesson plan.
Fake Blood Recipes: Use whichever one that the instructor prefers 1. 8 oz. of Glycerin, 2 oz of Water and 0.75 oz of Red Food ColoringFake Blood Characteristics • Has a shiny consistency• Holds color well as it dries• Holds up better in wet conditions• Most expensive to make
2. Whole Milk or Half & Half Cream and Red Food Coloring.Fake Blood Characteristics • Mix to desired color• Blood has a high protein and fat content similar to blood• Readily available ingredients• Can be lightened or darkened to simulate arterial or venous blood• Can be made frothy to simulate a lung hit• Has realistic color when dry• Does not hold up well in wet conditions
3. Karo Syrup and Red Food ColoringFake Blood Characteristics • Mix to desired color• May need to add water to thin mixture• Shiny consistency• Holds color well• Readily available ingredients• Holds up well in wet conditions
Tips for laying out a blood trail: 1. Put mixture in plastic squeeze bottle.2. Walk along path with bottle and squeeze out drops or spurts of blood3. Create blood trail on ground, brush, leave, tree branches…etc4. Blood on both sides of trail to simulate a pass through shot.5. Blood on one side of trail to simulate a non pass through shot.6. To simulate a lung hit the blood can be put in a spray bottle and misted7. The use of deer hair at the spot of the initial “hit” can add to realism8. Different types of hair can be used to simulate area of hit on deer.9. For Hunter Safety lay out a blood trail that is fairly easy to follow.10. For Bow Hunter Safety lay out a more difficult blood trail.
42


HE Lesson Plan 9
ETHICS and RESPONSIBILITY
Instructor Training Aids and References
Flip chart, chalk board, overhead or power point projector
TIME PERIOD (APPROXIMATELY): 30 minutes
TYPE OF LESSON
E.D.O.C.
LECTURE
DISCUSSION
PRACTICAL
OBJECTIVE(S)
• To help students be responsible and present a good public image through legal, ethical
hunting practices and behaviors.
• Students will learn a 5 Step Check List to help them determine if an activity is Ethical and
Responsible
LESSON OUTLINE ITEMS
NEEDED
EDUCATE:
Brain Storming
1. Instructor divides the class into smaller groups of 5 to 10 each.
2. Instructor writes or shows a list of the following words to the class:
COMPETITOR SAFE ENVIRONMENTALIST NEAT
RESPONSIBLE LAW ABIDING PREPARED WOODSMAN
UNDERSTANDING KNOWS GAME LAWS…..HAS INTEGRITY
QUICK SHOT…..EXPERIENCED RESPECTED ETHICAL
MARKSMAN WELL KNOWN CAPABLE FRIENDLY
3. Each group is to discuss these words and choose only 5 that they feel
represent a responsible hunter.
4. Give 10 minutes for this discussion and assist groups when necessary.
5. Each group is to provide their list of words. Instructors should facilitate
discussion when there are disagreements.
• Remember , there is no wrong answer
Bringing it Together – 5 Steps
Instructor explains that there is an easy way for hunters to gauge their behavior.
Using your hand let each finger represent a standard. In all of your actions ask
these questions represented by an individual finger:
1. Is it SAFE?
2. Is it LEGAL?
3. Is it SPORTING
4. Is it RESPECTFUL?
5. Does it PROJECT a POSITIVE IMAGE?
If the answer to all 5 questions is YES then what you are doing is ETHICAL
and RESPONSIBLE.
44

Dilemma Questions:
Instructors read the following dilemma questions and ask the Students to apply
the 5 Steps for determining Ethical and Responsible activities.
SAFE LEGAL ETHICAL RESPONSIBLE PROJECTS a POSITIVE IMAGE
1. Shooting over a ridge.
2. Shooting beyond your effective range and/or ability. Bow or Gun
• Example shooting at a running deer
3. Entering private property without the landowner’s permission to recover
game that has crossed a fence.
4. Stop hunting to help someone drag a deer out of the woods
5. Searching a few minutes for an animal you thought you hit and then saying,
“Oh well! I must have missed it”, and go back hunting.
6 Shooting at a chipmunk, sparrow or tree to practice your shots.
7. Bragging about hitting a deer, but losing it.
8. Carrying a trophy deer on top of a vehicle for many days so that everyone
can see what you shot.
9. Point out unsafe firearm handling practices to members of your hunting
group and say you will not tolerate unsafe behaviors.
10. Assume hunting hours close only when it “gets dark”.
11. Intimidate or threaten other hunters who come near “Your” traditional area
to hunt on public lands.
12. You have a 150 yard shot at a nice buck, but a few minutes ago you saw a
couple hunters moving slowly about 200 yards directly down range from the
shot you have at the deer. You can’t see the other hunters anymore. What do
you do? (Encourage discussion by tossing in other variables into the dilemma)
CONGRATULATE the students for paying attention and participating in the
discussion.
45
HE Lesson Plan 10 Finding Property to Hunt & Getting Permission to Hunt Private Property
Instructor Training Aids and References
This lesson plan, Thank You Cards, County Plat Book, DNR and County
Forestry websites
TIME PERIOD (APPROXIMATELY): 30 minutes
TYPE OF LESSON
E.D.O.C.
LECTURE
DISCUSSION
PRACTICAL
OBJECTIVE(S) For each student to:
� Learn the use of plat books/websites/apps for locating property open to hunting.
� Understand that there are landowners who will allow them to hunt private property.
� Learn, and feel comfortable with, a proper method to approach landowners.
� Learn a proper method to maintain relationships with landowners.
LESSON OUTLINE ITEMS
NEEDED
EDUCATE:
1. Not having a place to hunt is one of the top reasons people do not hunt.
• All lands are owned either privately or publicly
• It is illegal to trespass – Stay off lands unless you have permission.
• Ask students what land is open to hunting
o Their own family/friends private property
o Public property – Federal, State, County, Township
o Private Lands Open due to
� Forest Crop Law (FCL)
� Managed Forest Law –Open (MFL-O)
o Other Private Lands ONLY with permission to hunt
� Most property is in this category
2. How do we find the areas open to hunting?
• County Plat Books
a. Available at County Clerk Office for purchase
b. Available at some local libraries
• County GIS Property Tax websites
• County Forestry websites for MFL and FCL locations
• DNR websites & smart phone apps:
a. http://dnr.wi.gov/topic/ForestLandowners/openToPublic.html
b. http://dnr.wi.gov/mobileapps/
3. How do we get permission to hunt the private property?
• Ask in a polite and proper manner
DEMONSTRATE or DESCRIBE/EXPLAIN: 1. What Information is available in the Plat Book and Websites/Apps
• Shows Property Lines and Ownership
• Public Lands Open to the public are often color coded
• Private Lands marked with an FCL or MFL-O are usually open for
public hunting purposes.
o Be sure confirm with the County Forest/Land Office
o MFL-C are closed to hunting without permission
Plat Book(s)
Provide local
websites
46

2. DEMONSTRATE PROPER METHOD FOR ASKING PERMISSION
• Use 2 Instructors with this demonstration.
• Use a plat book/website/app to determine the land owner
• If possible go well ahead of time to ask the landowner for permission.
o The same day is not recommended but works sometimes
• Introduce yourself tell them what game you are interested in hunting
and ask permission to hunt the landowner’s property.
o Name and where you are from.
o What game you want to hunt
o When you want to hunt.
o Permission would only be for those present
o Never bring anyone else to the property without first getting
permission from the property owner
• If the landowner says NO, then thank them for their time and leave.
• If asking to hunt deer the usual answer is NO, but don’t be discouraged.
o Often the landowner may allow other types of hunting
o Often a good impression with small game hunting may
eventually lead to include deer hunting.
• If the landowner says YES, then you have permission to hunt.
o Give the landowner the Thanks for Permission To Hunt Card
• Be a responsible guest hunter so you are invited back.
o Stick to where you have permission to hunt
o Pick up any litter you see even if it is not yours
o Leave fences and gates as you found them.
o Stop when leaving to let the landowner know how you did
o Offer the landowner some of the game.
o Provide the landowner a small gift of appreciation
o Offer to help the landowner with some work
OBSERVE:
1. Break students into small groups and go through the asking permission
steps as outlined above.
• Keep the lesson simple/focused and quickly move through the exercise
in a positive manner.
• Doing this in a “Skit Format” works well and adds realism.
• Have the students take turns so that each gets some experience.
2. OPTIONAL: Break the students into small groups and go through some
Plat Book/Website/App locations for public and private property
identification practice.
CONGRATULATE: Give praise throughout and also at the conclusion to the
entire group
Thank You for
Permission to
Hunt Card
47
HE Lesson Plan 11 Basic First Aid and Survival
Instructor Training Aids and References
Fanny pack with basic and practical training aids for basic first aid
and survival. Hunter Safety manual, “Survival” DVD
TIME PERIOD: 15 minutes without DVD, 45 minutes with DVD
TYPE OF LESSON
E.D.O.C.
LECTURE
DISCUSSION
DEMONSTRATION
OBJECTIVE(S)
• Understand the importance of basic first aid and survival skills.
• Understand that these skills cannot be competently learned in the Hunter Safety Course.
• Encourage additional First Aid, CPR and Survival training from other educational sources.
LESSON OUTLINE ITEMS
NEEDED
EDUCATE:
• The chance of needing to know basic first aid and CPR sometime in
your life is fairly high. Most of the time these skills will be used at home,
work or during activities other than hunting, ATV and snowmobile use.
• If you do any recreational activity in semi remote areas then having basic
survival skills are necessary.
• There is not enough time in this safety program to develop these skills.
• Take First Aid, CPR and Survival skill training when offered.
o Schools, Technical Institutes
o Hospitals, Fire Departments
o Boy/Girl Scouts
o YMCA
• Having a pack with the basic first aid and survival equipment, and knowing
how to use them, will help keep a situation from becoming an emergency.
• Keep the pack small enough that you would carry it whenever recreating
outdoors. Hunting, ATV, Snowmobile, Hiking, Camping…etc.
D=DEMONSTRATE: Show Pack and basic items 1. Pack: Medium Sized Fanny Pack
2. First Aid: Compact kit with band aids, bandage, tape, antiseptic wipes
a. Show Contents and explain basic usage
3. Water & Food: bottle(s), canteen, filter bottle, trail mix
4. Fire: Metal Match, Lighter, Matches and type of tinder
a. Tinder = Magnesium, Alcohol wipes, Vaseline soaked cotton balls
5. Shelter: Space Blanket, Poncho, 1/8” cord, duct tape, cable ties
6. Personal Comfort: Toilet Paper, Wipes, Insect Repellent, Sun Block
7. Signal: Sonic Whistle, Mini Flashlight, Metal Mirror
8. Tools: Knife, Multi-Tool
9. Communication: Cell Phone, 2 way radios
10. Navigation: Compass(s), GPS, map
Survival/First Aid Handbook: Compact size
Other sources
Other food?
Other tinder?
48

DISCUSSION ITEMS:
• There are many more first aid and survival items available.
o Don’t get overly supplied with every gadget
• Important to keep pack and items limited so can easily carry all the time.
o Too large/heavy of a pack will discourage usage.
• Proper preparation & equipment can limit panic.
o A key factor in survival situations.
o “Survival” video shows how panic becomes a major survival factor.
• Proper preparation can keep bad situations from becoming an emergency.
• Importance of letting others know your plans, location and return time.
o Another key factor in survival situations.
• Remind students to take these courses when available.
• Ask students if they have had experiences with using first aid/survival skills.
• MOST IMPORTANT is to always carry this first aid & survival pack
whenever recreating in semi remote areas.
TEACHING THIS CHAPTER: After covering the above portion of this lesson plan:
• Use Course Agenda and this lesson plan to help guide what to teach.
• BRIEFLY go through the material in the student manual.
• Cover the material that is on the exam.
• Remember First Aid, CPR and Survival Skills take quite a bit of time and
training to become proficient. There is not time for this level of training in
the DNR Safety Programs.
C = CONGRATULATE: The students for their attention and participation.
FIRST AID/SURVIVAL PACK CONTENTS
Allen Nomad 3 Pocket Fanny Pack Compass Knife
First Aid, Survival and CPR Home and Field Pocket Guide
Adventure Medical Kit Frontier Water Filter System Water Bottle
Magnesium Fire Starter LED Mini Flashlight 25’ Cord Cable Ties
Survival Whistle/Match Box/Compass Combo Survival Blanket
Rain Poncho 10’ Duct Tape Insect Repellent Stick Wet Wipes
“Survival”
DVD
49
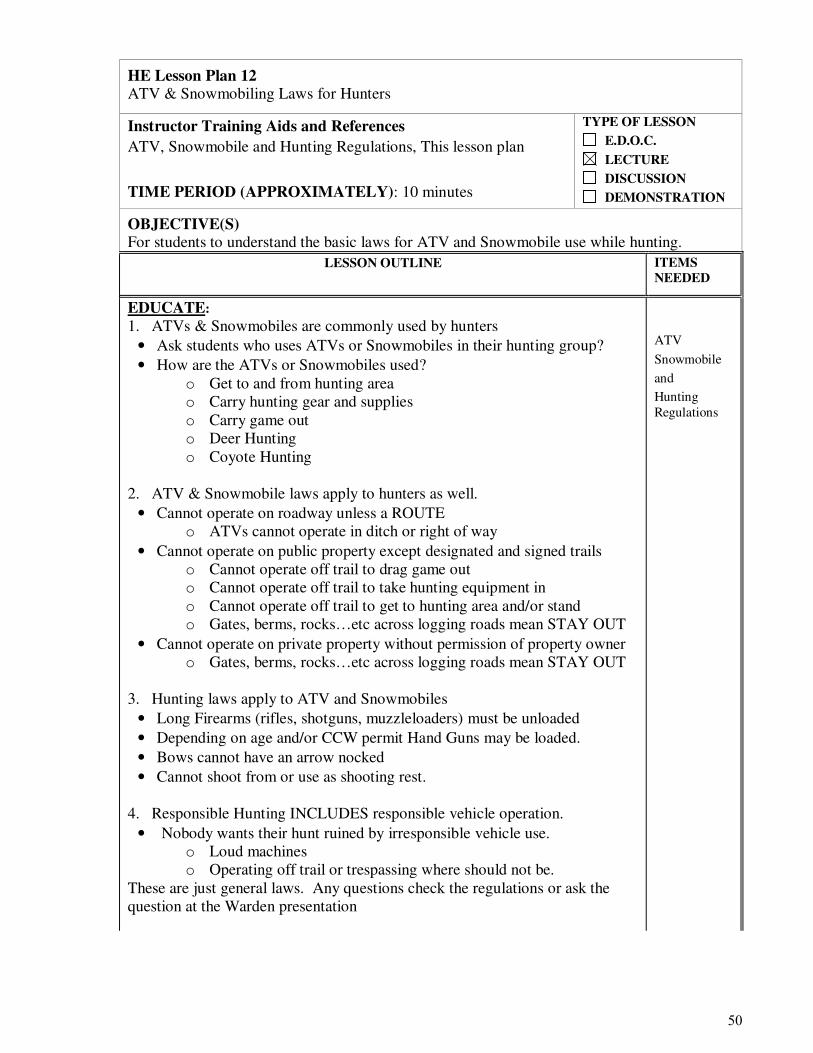
HE Lesson Plan 12 ATV & Snowmobiling Laws for Hunters
Instructor Training Aids and References
ATV, Snowmobile and Hunting Regulations, This lesson plan
TIME PERIOD (APPROXIMATELY): 10 minutes
TYPE OF LESSON
E.D.O.C.
LECTURE
DISCUSSION
DEMONSTRATION
OBJECTIVE(S) For students to understand the basic laws for ATV and Snowmobile use while hunting.
LESSON OUTLINE ITEMS
NEEDED
EDUCATE:
1. ATVs & Snowmobiles are commonly used by hunters
• Ask students who uses ATVs or Snowmobiles in their hunting group?
• How are the ATVs or Snowmobiles used?
o Get to and from hunting area
o Carry hunting gear and supplies
o Carry game out
o Deer Hunting
o Coyote Hunting
2. ATV & Snowmobile laws apply to hunters as well.
• Cannot operate on roadway unless a ROUTE
o ATVs cannot operate in ditch or right of way
• Cannot operate on public property except designated and signed trails
o Cannot operate off trail to drag game out
o Cannot operate off trail to take hunting equipment in
o Cannot operate off trail to get to hunting area and/or stand
o Gates, berms, rocks…etc across logging roads mean STAY OUT
• Cannot operate on private property without permission of property owner
o Gates, berms, rocks…etc across logging roads mean STAY OUT
3. Hunting laws apply to ATV and Snowmobiles
• Long Firearms (rifles, shotguns, muzzleloaders) must be unloaded
• Depending on age and/or CCW permit Hand Guns may be loaded.
• Bows cannot have an arrow nocked
• Cannot shoot from or use as shooting rest.
4. Responsible Hunting INCLUDES responsible vehicle operation.
• Nobody wants their hunt ruined by irresponsible vehicle use.
o Loud machines
o Operating off trail or trespassing where should not be.
These are just general laws. Any questions check the regulations or ask the
question at the Warden presentation
ATV
Snowmobile
and
Hunting
Regulations
50

Subject: Wisconsin Bow Hunter Safety Add-On Certification Course*
*Taught as an addition to a traditional Hunter Safety Course
Instructor Training Aids and References: Today’s Bow Hunter Student Safety Manual
HE Tools NBEF Anatomy & Shot Placement Guide Anatomy Deer
Easton Arrow Tuning and Maintenance Guide Rubber Band Frame
Bow Tuning and Kinetic Energy DVD
Bow Hunting A Timeless Tradition video
Actual Equipment: Bows, Arrows, Accessories, Clothing…etc.
*Review Time/Items Suggested Column on Right side of Page.
Time: A minimum of 5 hours required for the Bow Hunter Safety Add-On
course. Refer to Course Objectives, Requirements and Agenda
Type of Lesson
EDOC
Lecture
Discussion
Practical
Bow Hunter Safety Add-On Course Objectives:
Wisconsin has adopted the National Bow Hunter Education Foundation's (NBEF) International Bow
Hunter Education Program which is accepted worldwide. Although Wisconsin's Bow Hunter education
program is voluntary and a Bow Hunter Education certificate is not currently required to bow hunt in
Wisconsin. The Wisconsin Bow Hunter Education course is NBEF approved and graduates receive a
certificate that is accepted in all states and provinces where bow certification is required.
The Department offers a NBEF approved Bow Hunter Safety Add-On Course to allow the instructors
to provide the public with a streamlined mechanism for Bow Hunter Education certification as an
addition to the traditional Hunter Safety Course and certification. However, the Bow Hunter Safety
Add-On course is an optional course for the students. The students cannot be required to take
the Bow Hunter Add-On course. To maintain NBEF certification standards to conduct the Bow
Hunter Safety Add-On Course the instructors must follow all the Bow Hunter Safety Add-On Course
Requirements and the Bow Hunter Safety 5 Hour Add-On Course Agenda listed below.
Bow Hunter Safety Add-On Course Requirements
• Minimum length is 5 hours immediately following the traditional Hunter Safety Course.
• Must be registered as a separate Bow Hunter Safety course using a separate Safety Course
Registration form, and listed in the notes section of the Safety Course Registration Form as an
Add-On Bow Hunter Safety Course, with a registered traditional Hunter Safety Course.
This process forms the Hunter Safety and Bow Hunter Safety Add-On Course “Set”.
• Must be conducted by a certified Bow Hunter Education Instructor(s).
• Must be taught as a separate course.
• Must use a separate Course Roster, Student Registration Forms and Remittance Forms.
• Must collect a separate course fee of $10 per student.
• Must administer the separate Bow Hunter Safety Exam as required.
• Must cover Bow Hunter Safety topics not covered in the traditional Hunter Safety course. These
include all the topics on the Bow Hunter Safety Add-On Course Agenda.
• Students must attend 100% of the Bow Hunter Safety Add-On Course Agenda.
• Students WITH prior Hunter Safety certification are allowed to take only the Bow Hunter Safety
Add-On for safety certification.
• Students WITHOUT prior Hunter Safety certification ARE NOT allowed to take only the Bow
Hunter Safety Add-On course for safety certification.
• If there are any questions on the students eligibility for the Bow Hunter Safety Add-On Course the
Instructor must contact their local RSW for clarification.
• The RSWs may adjust the Bow Hunter Safety Add-On Course requirements based on individual
circumstances.
51
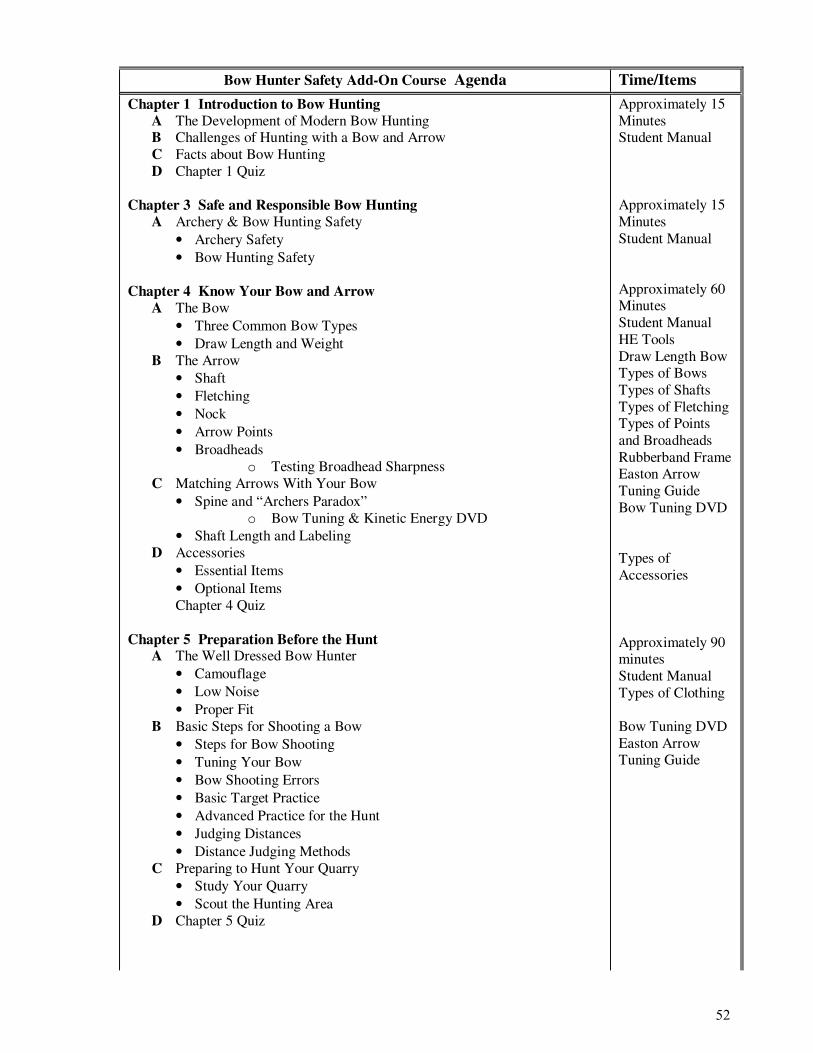
Bow Hunter Safety Add-On Course Agenda Time/Items
Chapter 1 Introduction to Bow Hunting
A The Development of Modern Bow Hunting
B Challenges of Hunting with a Bow and Arrow
C Facts about Bow Hunting
D Chapter 1 Quiz
Chapter 3 Safe and Responsible Bow Hunting
A Archery & Bow Hunting Safety
• Archery Safety
• Bow Hunting Safety
Chapter 4 Know Your Bow and Arrow
A The Bow
• Three Common Bow Types
• Draw Length and Weight
B The Arrow
• Shaft
• Fletching
• Nock
• Arrow Points
• Broadheads
o Testing Broadhead Sharpness
C Matching Arrows With Your Bow
• Spine and “Archers Paradox”
o Bow Tuning & Kinetic Energy DVD
• Shaft Length and Labeling
D Accessories
• Essential Items
• Optional Items
Chapter 4 Quiz
Chapter 5 Preparation Before the Hunt A The Well Dressed Bow Hunter
• Camouflage
• Low Noise
• Proper Fit
B Basic Steps for Shooting a Bow
• Steps for Bow Shooting
• Tuning Your Bow
• Bow Shooting Errors
• Basic Target Practice
• Advanced Practice for the Hunt
• Judging Distances
• Distance Judging Methods
C Preparing to Hunt Your Quarry
• Study Your Quarry
• Scout the Hunting Area
D Chapter 5 Quiz
Approximately 15
Minutes
Student Manual
Approximately 15
Minutes
Student Manual
Approximately 60
Minutes
Student Manual
HE Tools
Draw Length Bow
Types of Bows
Types of Shafts
Types of Fletching
Types of Points
and Broadheads
Rubberband Frame
Easton Arrow
Tuning Guide
Bow Tuning DVD
Types of
Accessories
Approximately 90
minutes
Student Manual
Types of Clothing
Bow Tuning DVD
Easton Arrow
Tuning Guide
52

Chapter 6 Methods of Bow Hunting A Still Hunting, Stalking and Glassing
• Advantages
• Disadvantages
B Ground Blinds
• Advantages
• Disadvantages
C Elevated Stands
• Advantages
• Disadvantages
• Types
D Scents and Lures
• Cover Scents
• Attractants
• White Tail Deer Tips
E Game Calls
F Bow Fishing
G Chapter 6 Quiz
Chapter 7 Shot Placement & Recovery Techniques
A Shot Impact: How Arrows and Bullets Differ
• How a Broadhead Causes Death
o Testing Broadhead Sharpness exercise
B Shot Placement
• Chest Cavity – The Main Vital Area
• Abdominal Cavity
• Shots Outside the Main Body Cavities
• Spine Shots
C Shot Strategy
• Visualize and Practice Your Strategy
• Choose the Proper Shot Angle
• Consider Your Location
D Setting Up the Perfect Shot
• List from Student Manual
• Picking the Right Moment to Shoot
• Why Shots Go Wrong
E Big Game Recovery
• The Second Hunt
• Attention to Clues
• When to Begin Recovery
• Trailing Game
• Blood Sign
• Lost Sign
F Chapter 7 Quiz
EXAM – Administered per Policy & Procedure Manual
Approximately 40
minutes, if tree
stand safety was
covered in Hunter
Safety course
Student Manual
Types of Stands
and Blinds
Types of Scents
and Lures
Types of Decoys
Types of Calls
Fishing Arrows
Approximately 40
minutes, if blood
trailing exercise
was covered in
Hunter Safety
course
Student Manual
NBEF Guide
Anatomy Deer
HE Tools
Rubberband Frame
Student Manual
HE Tools
Student Manual
Approximately 50
minutes
53

THANK YOU FOR YOUR
EFFORTS TO KEEP
HUNTERS AND HUNTING
SAFE AND GETTING
SAFER!!
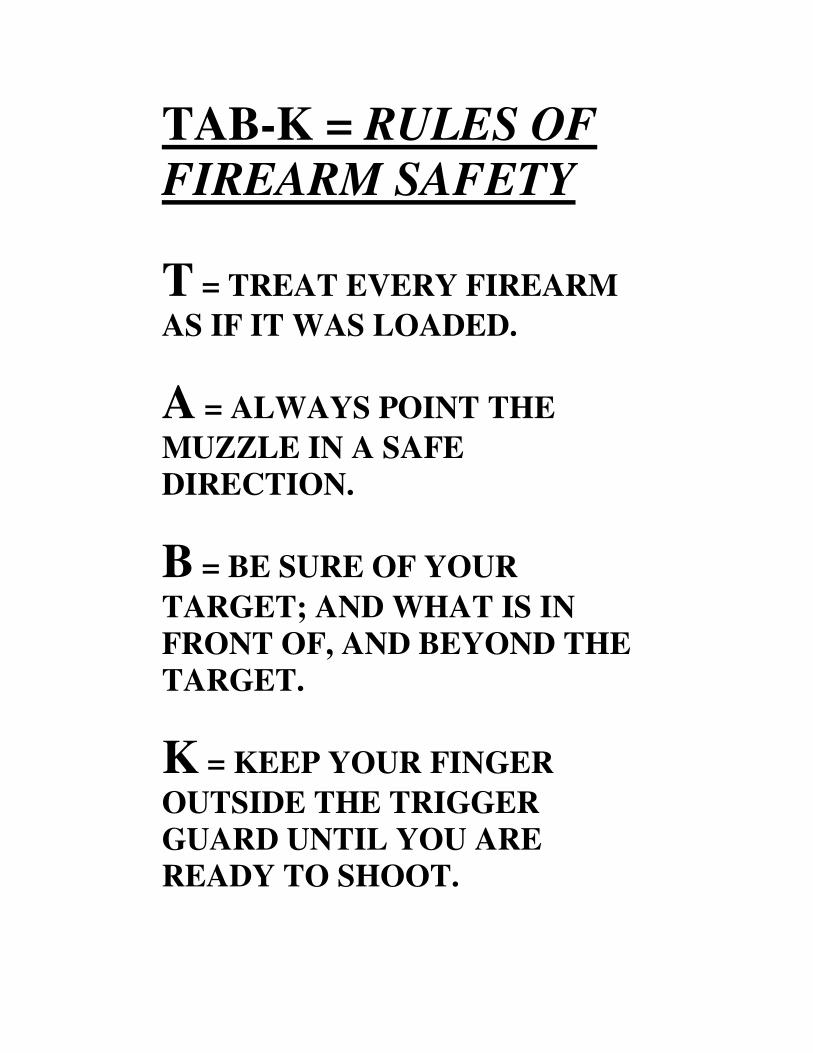
TAB-K = RULES OF
FIREARM SAFETY
T = TREAT EVERY FIREARM
AS IF IT WAS LOADED.
A = ALWAYS POINT THE
MUZZLE IN A SAFE
DIRECTION.
B = BE SURE OF YOUR
TARGET; AND WHAT IS IN
FRONT OF, AND BEYOND THE
TARGET.
K = KEEP YOUR FINGER
OUTSIDE THE TRIGGER
GUARD UNTIL YOU ARE
READY TO SHOOT.