hyundai terracan - owner's manual uk (4/11)
DESCRIPTION
Hyundai Terracan - Owner's Manual UK (4/11)TRANSCRIPT

3
If the Engine Will Not Start .......................................... 3-2Jump Starting .............................................................. 3-3If the Engine Overheats ............................................... 3-4Spare Tyre ................................................................... 3-6In the Event of a Puncture ........................................... 3-7Changing a Flat Tyre ................................................... 3-7If Your Car Must Be Towed ........................................3-14Emergency Towing .....................................................3-16If You Lose Your Keys................................................3-17
IN CASE OF EMERGENCY
3
3 IN CASE OF EMERGENCY
2
!WARNING:
If the engine refuses to start, noattempt should be made to push ortow start the vehicle. Vehicles withautomatic transmission or fuel in-jection will not be able to be startedin this manner since no drive istransmitted through the automatictransmission whilst the engine isnot running, and in the case of fuelinjected derivatives, the fuel pumpwill not operate under tow startconditions. In addition, if the ve-hicle is equipped with an exhaustcatalyst, damage to the catalyst mayresult if the vehicle is tow started.
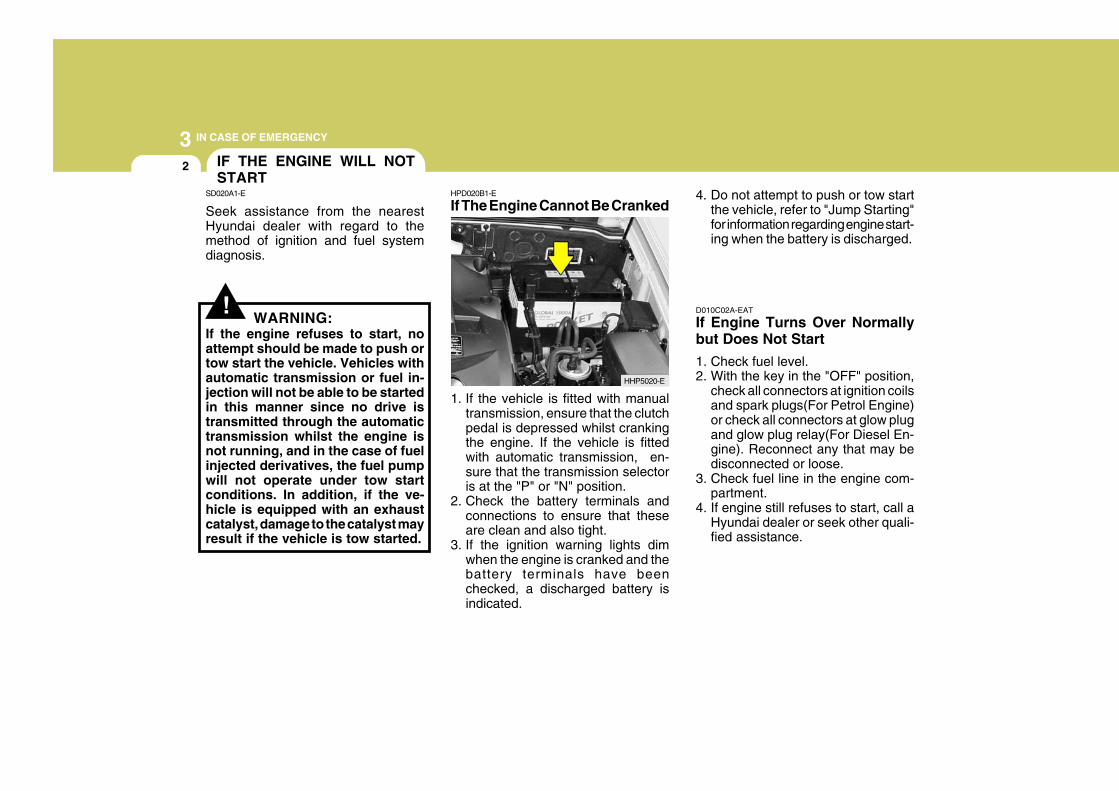
HPD020B1-E
If The Engine Cannot Be Cranked
1. If the vehicle is fitted with manualtransmission, ensure that the clutchpedal is depressed whilst crankingthe engine. If the vehicle is fittedwith automatic transmission, en-sure that the transmission selectoris at the "P" or "N" position.
2. Check the battery terminals andconnections to ensure that theseare clean and also tight.
3. If the ignition warning lights dimwhen the engine is cranked and thebattery terminals have beenchecked, a discharged battery isindicated.
4. Do not attempt to push or tow startthe vehicle, refer to "Jump Starting"for information regarding engine start-ing when the battery is discharged.
D010C02A-EAT
If Engine Turns Over Normallybut Does Not Start
1. Check fuel level.2. With the key in the "OFF" position,
check all connectors at ignition coilsand spark plugs(For Petrol Engine)or check all connectors at glow plugand glow plug relay(For Diesel En-gine). Reconnect any that may bedisconnected or loose.
3. Check fuel line in the engine com-partment.
4. If engine still refuses to start, call aHyundai dealer or seek other quali-fied assistance.
IF THE ENGINE WILL NOTSTART
SD020A1-E
Seek assistance from the nearestHyundai dealer with regard to themethod of ignition and fuel systemdiagnosis.
HHP5020-E

3IN CASE OF EMERGENCY
3
!D010A01A-EAT
If Engine Stalls Whilst Driving
1. Reduce your speed gradually, keep-ing a straight line. Move cautiouslyoff the road to a safe place.
2. Turn on your emergency flashers.3. Try starting the engine again. If your
vehicle will not start, contact Hyundaidealer or seek other qualified assis-tance.
CAUTION:Personal injury and damage to thevehicle may occur if jump starting isnot performed correctly. If any doubtexists as to how this operation shouldbe performed, seek assistance fromqualified personnel.
WARNING:Motor vehicle batteries containsulphuric acid and emit hydrogengas. Protective clothing should beworn and care exercised to preventthe acid from coming into contactwith skin or clothing and the ve-hicle. Naked lights should not bepermitted in the vicinity of the bat-tery. Care should be exercised toprevent sparks occurring duringconnection. If acid accidentallycomes into contact with skin oreyes, the affected area should im-mediately be flushed with copiousamounts of water and medical as-sistance sought.
!
JUMP STARTING
SD030A1-E
HHP4001-EBooster battery
Dischargedbattery

3 IN CASE OF EMERGENCY
4
!
1. Ensure that the booster battery is 12volt type. If the booster battery isinstalled in another vehicle, ensurethat the two vehicles are not touch-ing.
2. Turn off all unnecessary electricalequipment in both vehicles.
3. Ensure that the engine of the ve-hicle providing the jump start is run-ning prior to connection of the jumpcables.
4. Connect the red jump cable to thepositive (+) terminal of the boosterbattery and the other end to thepositive (+) terminal of the dis-charged battery.
5. Attach the black jump cable to thenegative (-) terminal of the boosterbattery, and the other end to a groundpoint within the engine compartmentof the vehicle with the flat bat-tery.Do not connect to the negative bat-tery terminal of the flat battery sincesparks may be generated with thesubsequent risk of explosion.
6. Raise the booster vehicle enginespeed to 2,000 r.p.m. and start theengine of the vehicle with the flatbattery.
7. Switch "ON" the main beamheadlamps before carefully remov-ing the jumper cables in the reverseorder of attachment. Once thejumper cables have been removed,switch "OFF" the main beamheadlamps.
CAUTION:If the jump cable is incorrectly in-stalled, damage to the vehicle elec-trical system may occur, in particu-lar the electronic components suchas the Fuel Injection system com-puter and the Automatic transmis-sion computer. The battery mustnever be disconnected whilst theengine is running.
IF THE ENGINE OVERHEATS
HPD040A2-E
If the temperature gauge indicatesoverheating:
1. Pull off the road and stop as soon asit is safe to do so.
2. Place the gear selector lever in "P"(automatic), or neutral (manual trans-mission) and set the parking brake. Ifthe air conditioning is on, turn it off.
3. If coolant is running out under the caror steam is coming out from underthe bonnet, stop the engine. Do notopen the bonnet until the coolant hasstopped running or the steaming hasstopped. If there is no visible loss ofcoolant and no steam, leave theengine running and check to be surethe engine cooling fan is operating.If the fan is not running, turn theengine off.
4. Check to see if the water pump drivebelt is missing. If it is not missing,check to see that it is tight. If thedrive belt seems to be satisfactory,check for coolant leaking from theradiator, hoses or under the car. (Ifthe air conditioning had been in use,it is normal for cold water to bedraining from it).
3IN CASE OF EMERGENCY
5
!
!
! WARNING:Whilst the engine is running, keephands and clothing away from mov-ing parts such as the fan and drivebelts to prevent injury.
WARNING (Diesel only):Never work on injection system withengine running or within 30 secondsafter shutting off engine. High pres-sure pump, rail, injectors and highpressure pipes are subject to highpressure even after the enginestopped. The fuel jet produced byfuel leaks may cause serious in-jury, if it touch the body. Peopleusing pacemakers should not movethan 30cm closer to the ECU orwiring harness within the engineroom while engine is running, sincethe high currents in the CommonRail system produce considerablemagnetic fields.
5. If the water pump drive belt is brokenor coolant is leaking out, stop theengine immediately and call the near-est Hyundai dealer for assistance.
WARNING:Do not remove the radiator cap whenthe engine is hot since steam andboiling water may be ejected fromthe radiator resulting in burns orscalding.
6. If the cause of the overheating can-not be found, wait until the enginetemperature has returned to normal.Then, if coolant has been lost, care-fully remove the radiator cap and addwater to bring the fluid level in thereservoir(page 6-10) up to the baseof the radiator fill opening. Fill thecoolant expansion tank to the half-way mark.
7. Proceed with caution until it is estab-lished that the engine is operatingnormally. If the engine overheatsrepeatedly, the advice of a Hyundaidealer should be sought.
! CAUTION:Serious loss of coolant indicatesthere is a leak in the cooling systemand this should be checked as soonas possible by a Hyundai dealer.

3 IN CASE OF EMERGENCY
6
D040B03HP-EAT
Handling the Spare Tyre
1. Obtain the spare wheel rod (Jackhandle) after folding up the seatcushion of the rear seat .To fold up the seat cushion, refer tothe page 1-23.
2. Insert the spare wheel rod into thehole in the upper pad of the rearbumper.
3. Connect the wheel nut wrench tothe spare wheel rod.
4. Turn the wheel nut wrench counter-clockwise and the spare tyre willlower.
Tyre Size
Inflation Pressure
FULL Size
29 psi (200 kPa)
SPARE TYRE
YD050A1-E
For Full Size
The following instructions for the FULLSIZE spare tyre should be observed:Check inflation pressure as soon aspossible after installing the spare tyre,and adjust to the specified pressure.The tyre pressure should be periodi-cally checked and maintained at thespecified pressure whilst the tyre isstored.
Spare Tyre Pressure HHP4015
HHP4025
3IN CASE OF EMERGENCY
7
!
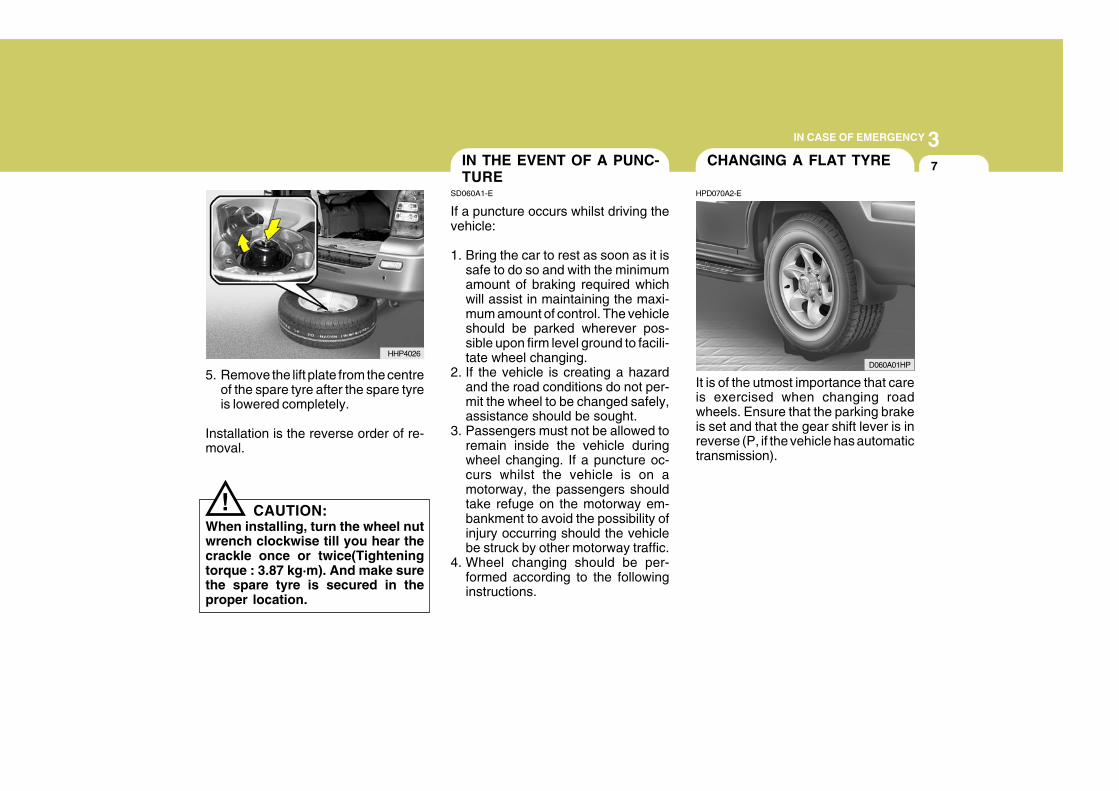
5. Remove the lift plate from the centreof the spare tyre after the spare tyreis lowered completely.
Installation is the reverse order of re-moval.
CAUTION:When installing, turn the wheel nutwrench clockwise till you hear thecrackle once or twice(Tighteningtorque : 3.87 kg·m). And make surethe spare tyre is secured in theproper location.
It is of the utmost importance that careis exercised when changing roadwheels. Ensure that the parking brakeis set and that the gear shift lever is inreverse (P, if the vehicle has automatictransmission).
HHP4026
IN THE EVENT OF A PUNC-TURE
SD060A1-E
If a puncture occurs whilst driving thevehicle:
1. Bring the car to rest as soon as it issafe to do so and with the minimumamount of braking required whichwill assist in maintaining the maxi-mum amount of control. The vehicleshould be parked wherever pos-sible upon firm level ground to facili-tate wheel changing.
2. If the vehicle is creating a hazardand the road conditions do not per-mit the wheel to be changed safely,assistance should be sought.
3. Passengers must not be allowed toremain inside the vehicle duringwheel changing. If a puncture oc-curs whilst the vehicle is on amotorway, the passengers shouldtake refuge on the motorway em-bankment to avoid the possibility ofinjury occurring should the vehiclebe struck by other motorway traffic.
4. Wheel changing should be per-formed according to the followinginstructions.
CHANGING A FLAT TYRE
HPD070A2-E
D060A01HP
3 IN CASE OF EMERGENCY
8
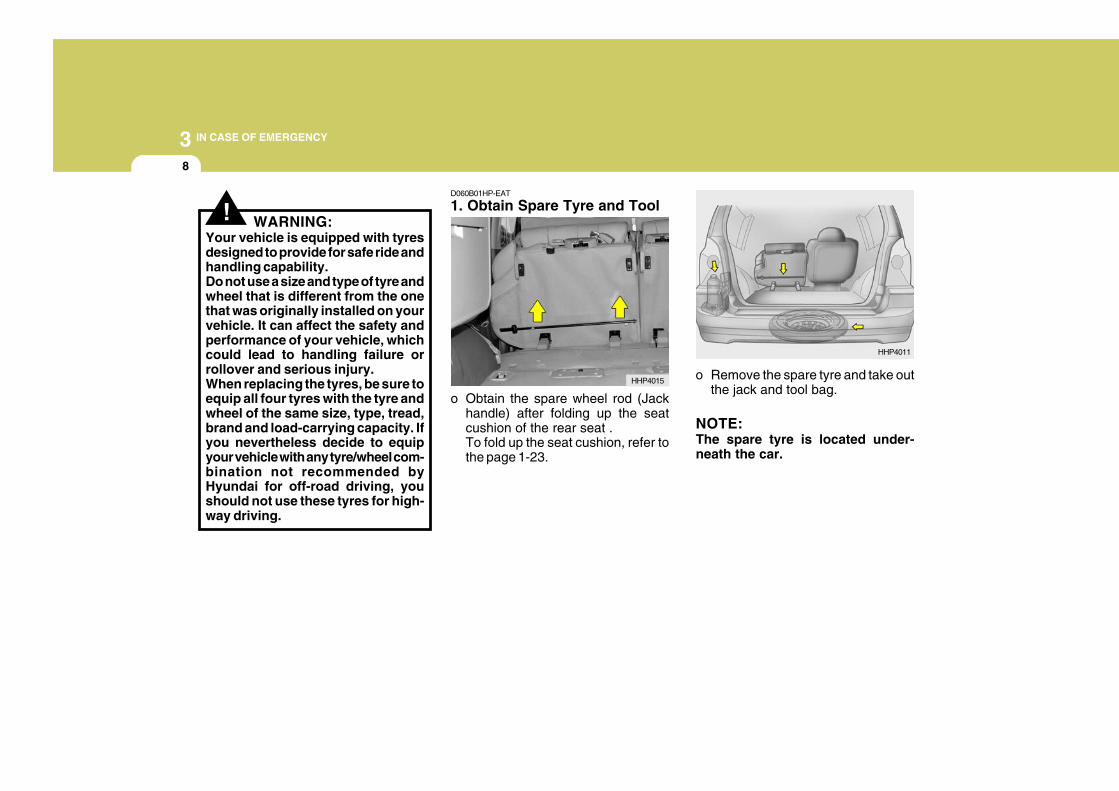
D060B01HP-EAT
1. Obtain Spare Tyre and Tool
o Obtain the spare wheel rod (Jackhandle) after folding up the seatcushion of the rear seat .To fold up the seat cushion, refer tothe page 1-23.
o Remove the spare tyre and take outthe jack and tool bag.
NOTE:The spare tyre is located under-neath the car.
! WARNING:Your vehicle is equipped with tyresdesigned to provide for safe ride andhandling capability.Do not use a size and type of tyre andwheel that is different from the onethat was originally installed on yourvehicle. It can affect the safety andperformance of your vehicle, whichcould lead to handling failure orrollover and serious injury.When replacing the tyres, be sure toequip all four tyres with the tyre andwheel of the same size, type, tread,brand and load-carrying capacity. Ifyou nevertheless decide to equipyour vehicle with any tyre/wheel com-bination not recommended byHyundai for off-road driving, youshould not use these tyres for high-way driving.
HHP4015
HHP4011
3IN CASE OF EMERGENCY
9
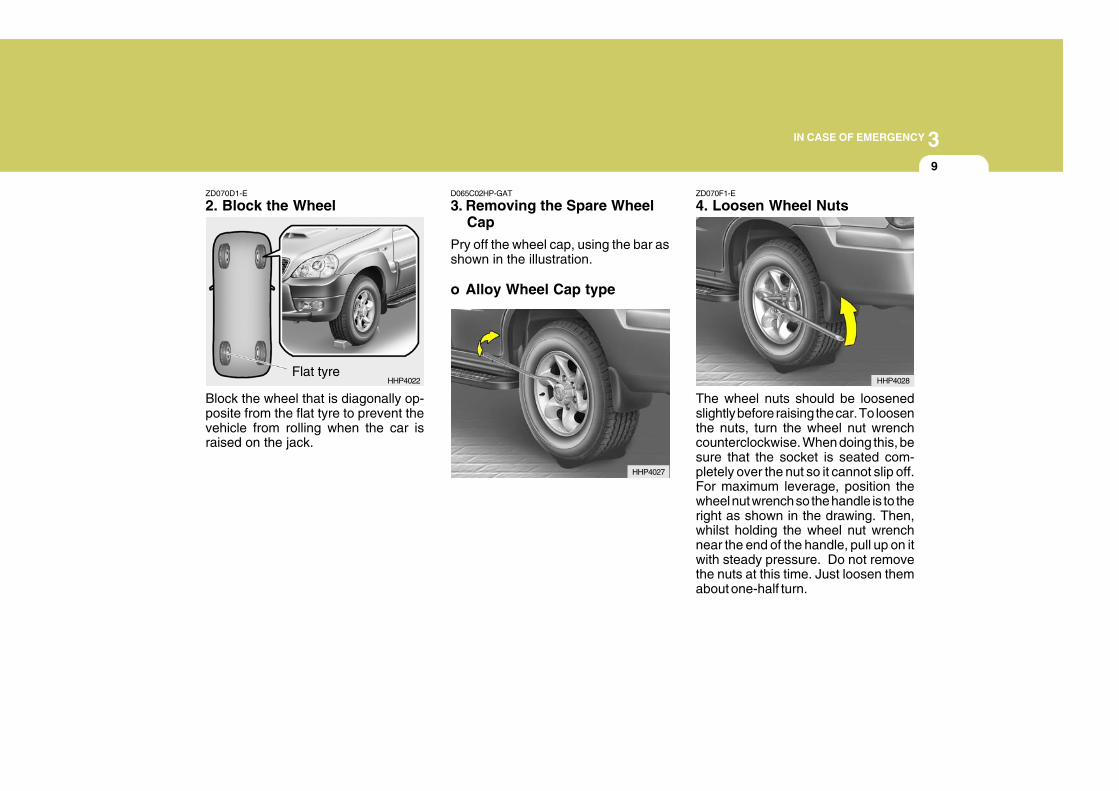
ZD070D1-E
2. Block the Wheel
Block the wheel that is diagonally op-posite from the flat tyre to prevent thevehicle from rolling when the car israised on the jack.
Flat tyreHHP4022
D065C02HP-GAT
3. Removing the Spare Wheel Cap
Pry off the wheel cap, using the bar asshown in the illustration.
o Alloy Wheel Cap type
HHP4027
ZD070F1-E
4. Loosen Wheel Nuts
The wheel nuts should be loosenedslightly before raising the car. To loosenthe nuts, turn the wheel nut wrenchcounterclockwise. When doing this, besure that the socket is seated com-pletely over the nut so it cannot slip off.For maximum leverage, position thewheel nut wrench so the handle is to theright as shown in the drawing. Then,whilst holding the wheel nut wrenchnear the end of the handle, pull up on itwith steady pressure. Do not removethe nuts at this time. Just loosen themabout one-half turn.
HHP4028
3 IN CASE OF EMERGENCY
10
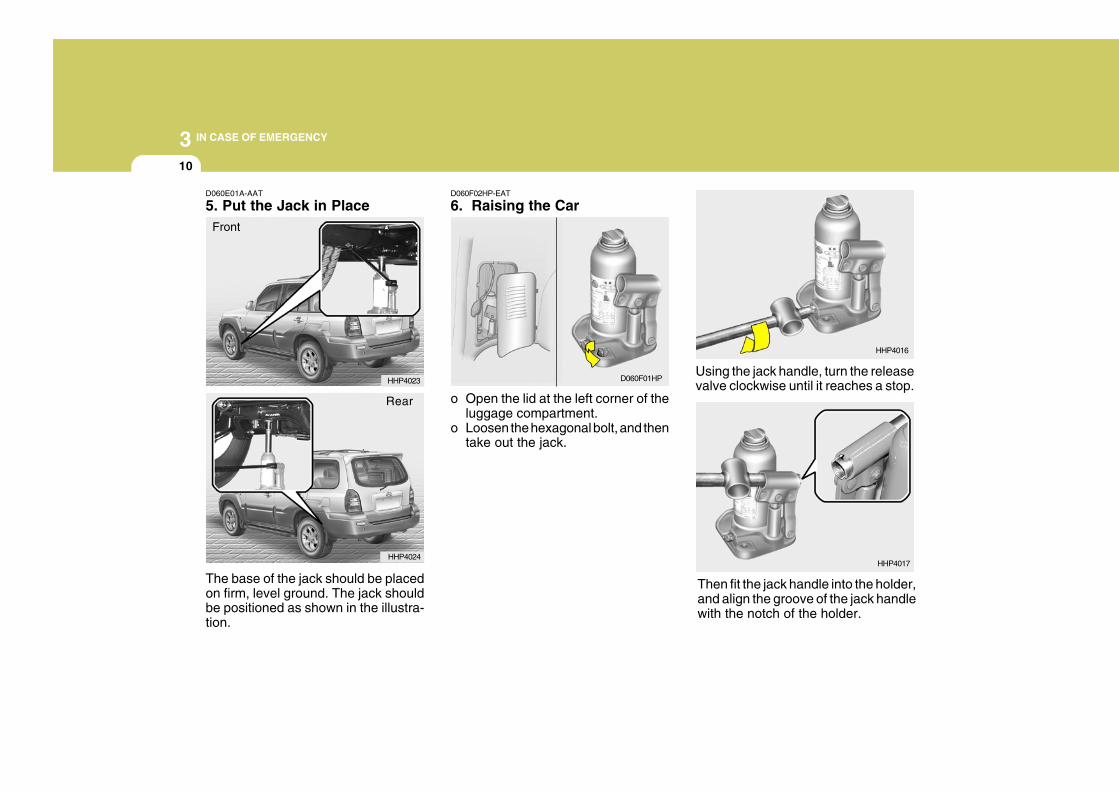
D060F02HP-EAT
6. Raising the Car
o Open the lid at the left corner of theluggage compartment.
o Loosen the hexagonal bolt, and thentake out the jack.
Using the jack handle, turn the releasevalve clockwise until it reaches a stop.
Then fit the jack handle into the holder,and align the groove of the jack handlewith the notch of the holder.
D060E01A-AAT
5. Put the Jack in Place
The base of the jack should be placedon firm, level ground. The jack shouldbe positioned as shown in the illustra-tion.
Front
HHP4023
HHP4024
Rear
D060F01HP
HHP4016
HHP4017
3IN CASE OF EMERGENCY
11
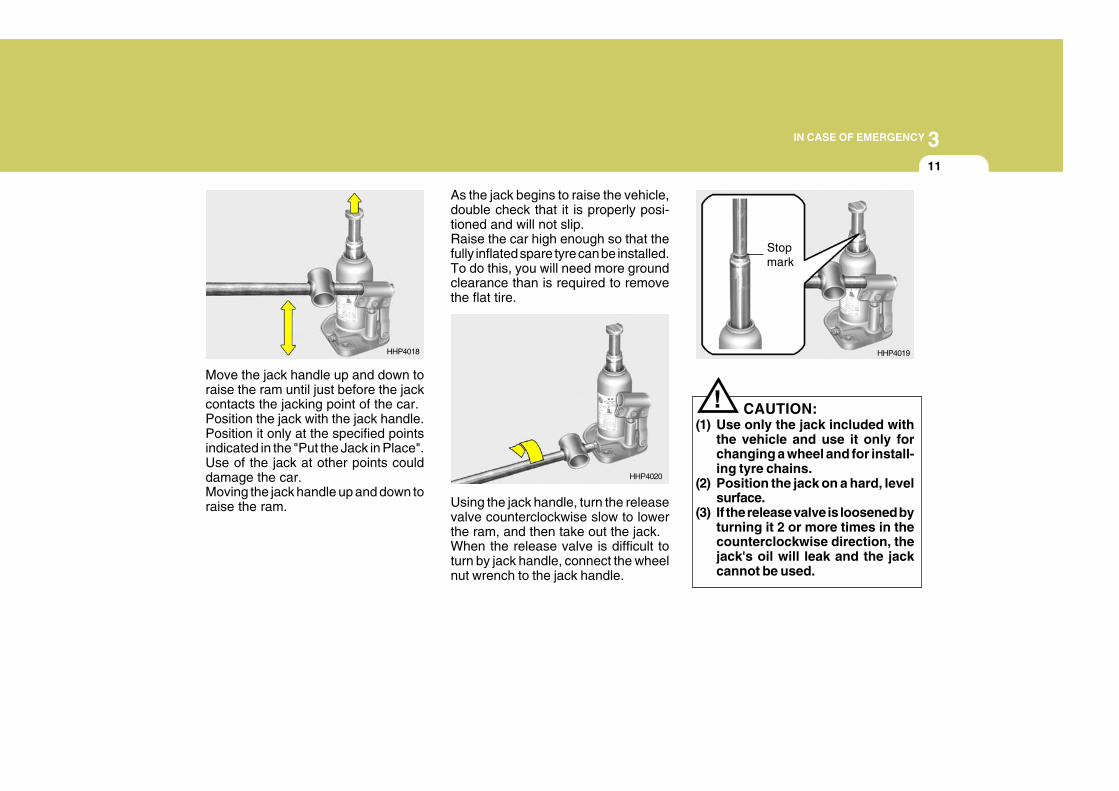
Move the jack handle up and down toraise the ram until just before the jackcontacts the jacking point of the car.Position the jack with the jack handle.Position it only at the specified pointsindicated in the "Put the Jack in Place".Use of the jack at other points coulddamage the car.Moving the jack handle up and down toraise the ram.
HHP4018
As the jack begins to raise the vehicle,double check that it is properly posi-tioned and will not slip.Raise the car high enough so that thefully inflated spare tyre can be installed.To do this, you will need more groundclearance than is required to removethe flat tire.
Using the jack handle, turn the releasevalve counterclockwise slow to lowerthe ram, and then take out the jack.When the release valve is difficult toturn by jack handle, connect the wheelnut wrench to the jack handle.
HHP4020
Stopmark
HHP4019
! CAUTION:(1) Use only the jack included with
the vehicle and use it only forchanging a wheel and for install-ing tyre chains.
(2) Position the jack on a hard, levelsurface.
(3) If the release valve is loosened byturning it 2 or more times in thecounterclockwise direction, thejack's oil will leak and the jackcannot be used.
3 IN CASE OF EMERGENCY
12
!
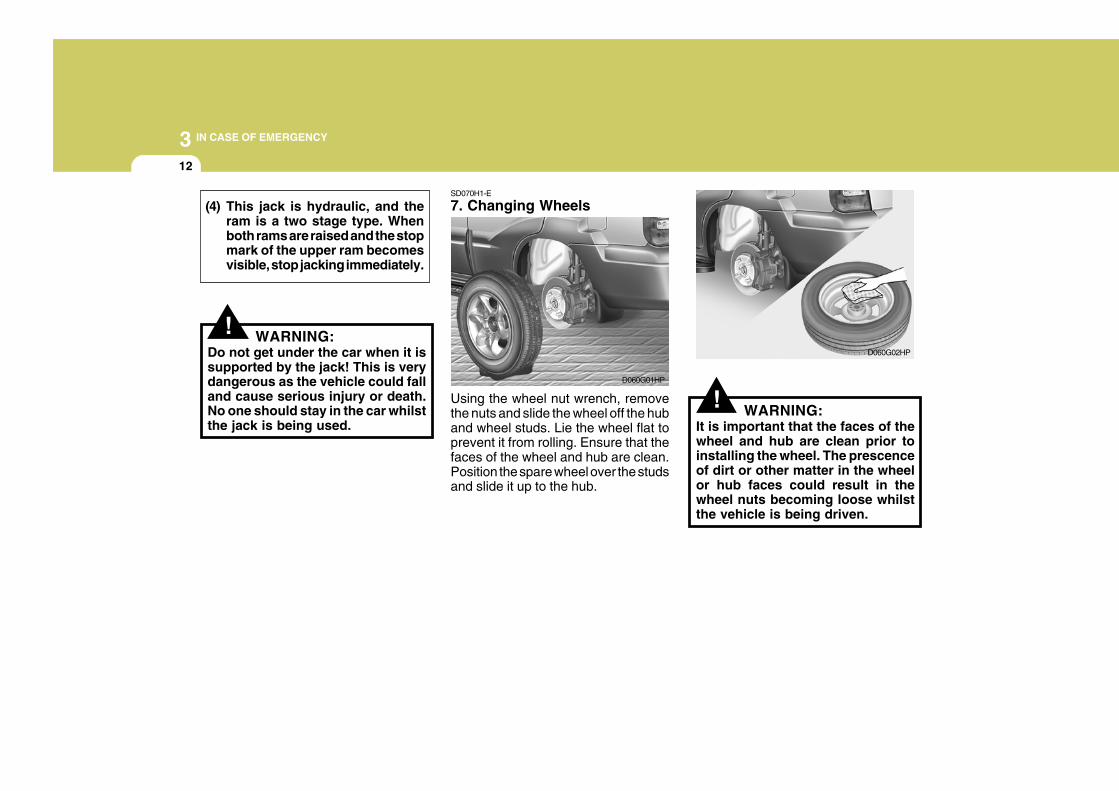
SD070H1-E
7. Changing Wheels
Using the wheel nut wrench, removethe nuts and slide the wheel off the huband wheel studs. Lie the wheel flat toprevent it from rolling. Ensure that thefaces of the wheel and hub are clean.Position the spare wheel over the studsand slide it up to the hub.
WARNING:It is important that the faces of thewheel and hub are clean prior toinstalling the wheel. The prescenceof dirt or other matter in the wheelor hub faces could result in thewheel nuts becoming loose whilstthe vehicle is being driven.
!
(4) This jack is hydraulic, and theram is a two stage type. Whenboth rams are raised and the stopmark of the upper ram becomesvisible, stop jacking immediately.
WARNING:Do not get under the car when it issupported by the jack! This is verydangerous as the vehicle could falland cause serious injury or death.No one should stay in the car whilstthe jack is being used.
D060G01HP
D060G02HP
3IN CASE OF EMERGENCY
13
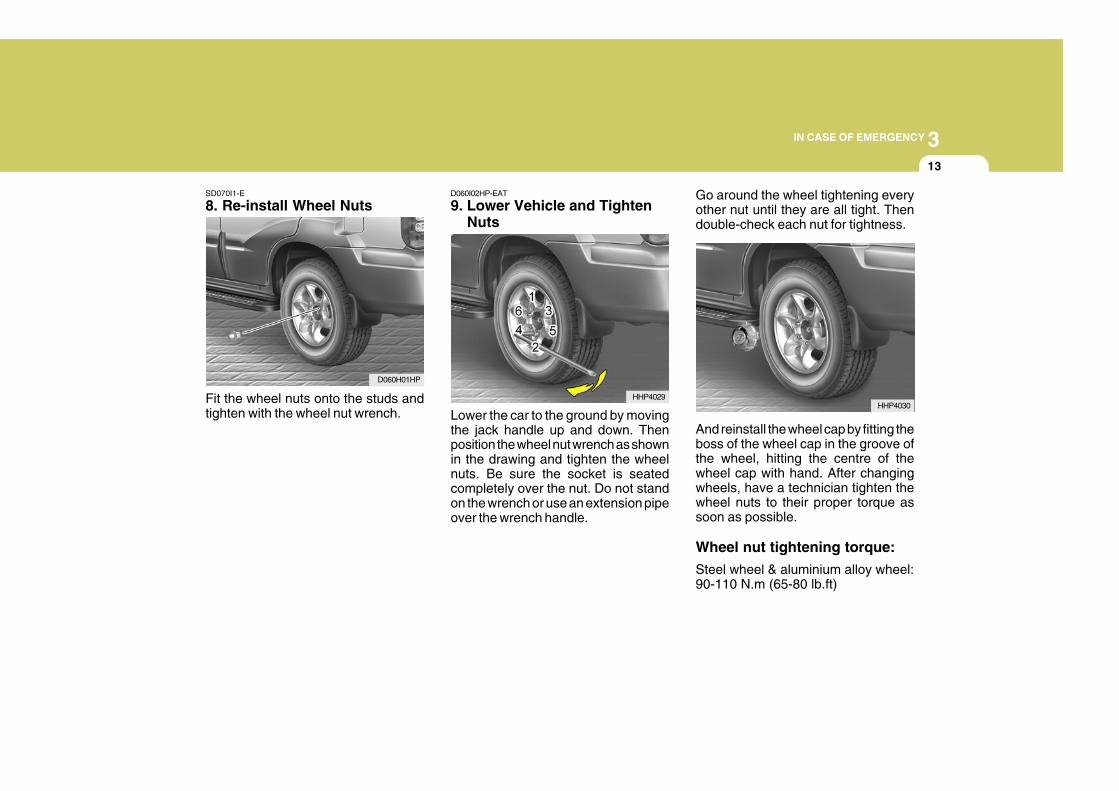
SD070I1-E
8. Re-install Wheel Nuts
Fit the wheel nuts onto the studs andtighten with the wheel nut wrench.
D060H01HP
D060I02HP-EAT
9. Lower Vehicle and Tighten Nuts
Lower the car to the ground by movingthe jack handle up and down. Thenposition the wheel nut wrench as shownin the drawing and tighten the wheelnuts. Be sure the socket is seatedcompletely over the nut. Do not standon the wrench or use an extension pipeover the wrench handle.
Go around the wheel tightening everyother nut until they are all tight. Thendouble-check each nut for tightness.
And reinstall the wheel cap by fitting theboss of the wheel cap in the groove ofthe wheel, hitting the centre of thewheel cap with hand. After changingwheels, have a technician tighten thewheel nuts to their proper torque assoon as possible.
Wheel nut tightening torque:
Steel wheel & aluminium alloy wheel:90-110 N.m (65-80 lb.ft)
HHP4029HHP4030
3 IN CASE OF EMERGENCY
14
! CAUTION:Your car can be damaged if towedincorrectly!
If your car has to be towed, it should bedone by your Hyundai dealer or a com-mercial tow truck service. This will helpassure that your car is not damaged intowing. Also, professionals are gener-ally aware of local laws governing tow-ing. In any case, rather than risk dam-age to your car, it is suggested that youshow this information to the tow truckoperator. Be sure that a safety cablesystem is used and that all current lawsassociated with vehicle towing are ob-served.
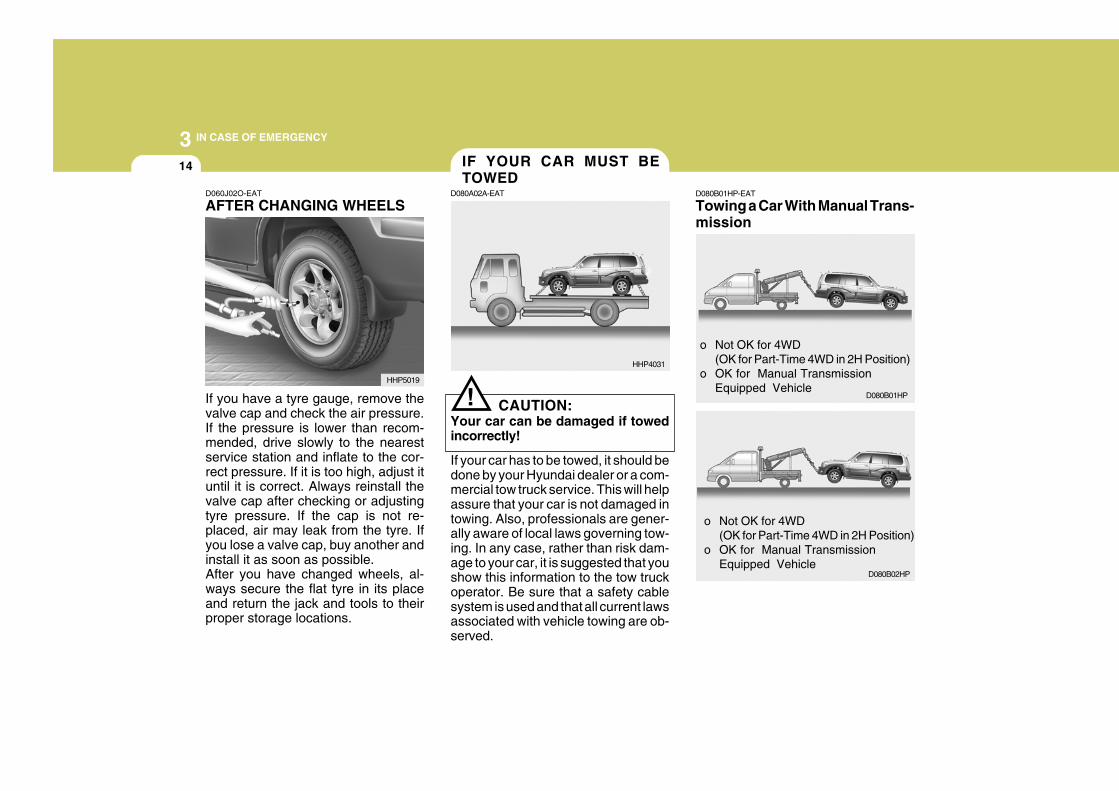
D080B01HP-EAT
Towing a Car With Manual Trans-mission
D060J02O-EAT
AFTER CHANGING WHEELS
If you have a tyre gauge, remove thevalve cap and check the air pressure.If the pressure is lower than recom-mended, drive slowly to the nearestservice station and inflate to the cor-rect pressure. If it is too high, adjust ituntil it is correct. Always reinstall thevalve cap after checking or adjustingtyre pressure. If the cap is not re-placed, air may leak from the tyre. Ifyou lose a valve cap, buy another andinstall it as soon as possible.After you have changed wheels, al-ways secure the flat tyre in its placeand return the jack and tools to theirproper storage locations.
HHP5019
IF YOUR CAR MUST BETOWED
HHP4031
D080A02A-EAT
o Not OK for 4WD(OK for Part-Time 4WD in 2H Position)
o OK for Manual TransmissionEquipped Vehicle
D080B02HP
D080B01HP
o Not OK for 4WD(OK for Part-Time 4WD in 2H Position)
o OK for Manual TransmissionEquipped Vehicle

3IN CASE OF EMERGENCY
15
o Be sure that the ignition key is in the"ACC" position. This is necessary toprevent damage to the steering lockmechanism, which is not designedto hold the front wheels straightwhilst the car is being towed.
o If any of the loaded wheels or sus-pension components are damaged,a towing dolly must be used.
D080C02HP-EAT
Towing A Car With AutomaticTransmission
Be sure that the transmission is inneutral. Do not tow at speeds greaterthan 30 mph (50 km/h) and for morethan 15 miles (25 km).
NOTE:Before towing, check the level of thetransmission fluid. If it is below the"HOT" range on the dipstick, addfluid. If you cannot add fluid, a tow-ing dolly must be used.
! CAUTION:A car with an automatic transmis-sion should never be towed from thefront with the rear wheels on theground. This can cause serious dam-age to the transmission. If the carmust be towed from the front, a tow-ing dolly must be used under therear wheels.
D080B03HP
o Ok for 4WDo Ok for Manual Transmission
Equipped Vehicle
! CAUTION:Full-time 4 Wheel Drive cannot betowed with a tow truck.It must be towed by lifting all 4wheels.
o Not OK for 4WD(OK for Part-Time 4WD in 2H Position)
o OK for Automatic TransmissionEquipped Vehicle
D080B01HP
o Not OK Automatic TransmissionEquipped Vehicle
D080C02HP

3 IN CASE OF EMERGENCY
16
D080D02HP-EAT
Emergency TowingFor emergency towing when no com-mercial yow vehicle is avaiable, attachchain or strap to one of the towinghooks under the front/rear of your car.Be very careful when attempting thisprocedure when the vehicle is on anyunpaved surface to avoid damage toyour vehicle.Nor should towing be attempted if thewheels, drive train, axles, steering orbrakes are damaged. Before towing,be sure the transmission is in neutraland the key is in "ACC" (with theengine off) or in the "ON" position (withthe engine running). A driver must bein the towed car to steer it and operatethe brakes.
D080B03HP
o Ok for 4WDo Ok for Automatic or Manual Trans- mission Equipped Vehicle
! CAUTION:Full-time 4 Wheel Drive cannot betowed with a tow truck.It must be towed by lifting all 4wheels.
Front
HHP4035
HHP4036
Rear
3IN CASE OF EMERGENCY
17
HHP4037
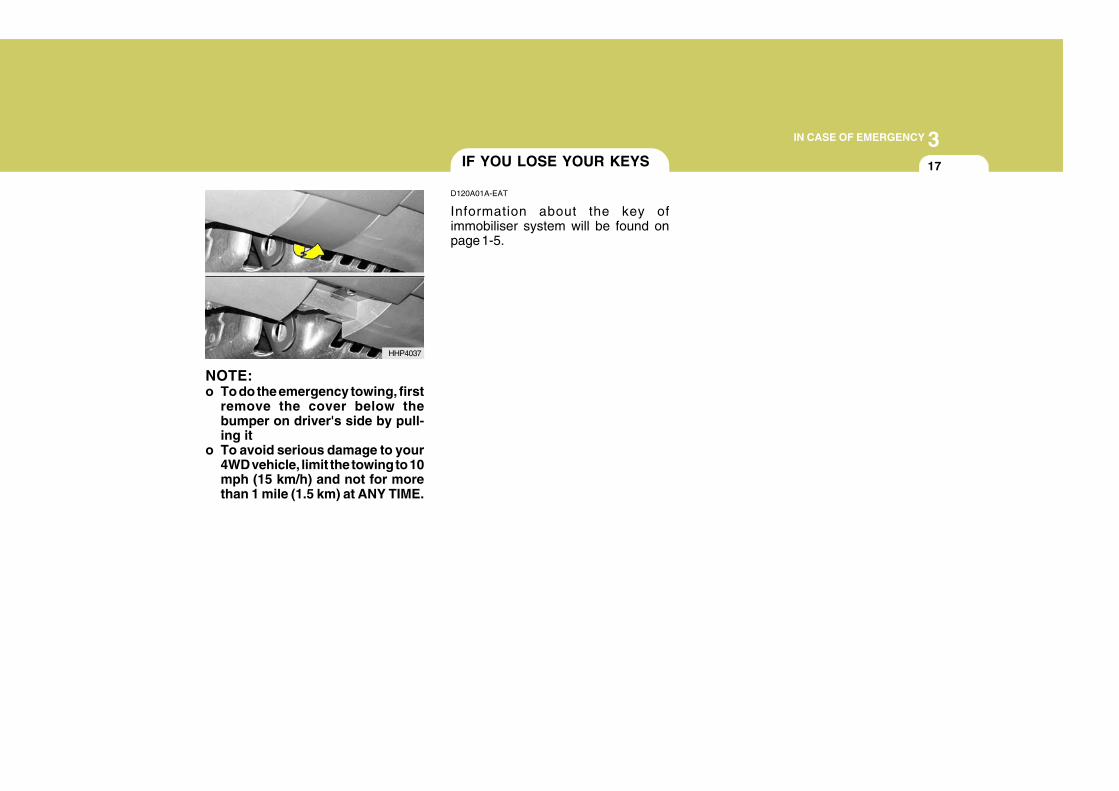
NOTE:o To do the emergency towing, first
remove the cover below thebumper on driver's side by pull-ing it
o To avoid serious damage to your4WD vehicle, limit the towing to 10mph (15 km/h) and not for morethan 1 mile (1.5 km) at ANY TIME.
IF YOU LOSE YOUR KEYS
D120A01A-EAT
Information about the key ofimmobiliser system will be found onpage 1-5.