ibm tivoli storage manager for virtual environments: data ... · sample script for validating full...
TRANSCRIPT

IBM Tivoli Storage Manager for Virtual EnvironmentsVersion 7.1.8
Data Protection for VMware User'sGuide
IBM


IBM Tivoli Storage Manager for Virtual EnvironmentsVersion 7.1.8
Data Protection for VMware User'sGuide
IBM

Note:Before you use this information and the product it supports, read the information in “Notices” on page 245.
This edition applies to version 7, release 1, modification 8 of IBM Tivoli Storage Manager for Virtual Environments(product number 5725-A44) and to all subsequent releases and modifications until otherwise indicated in neweditions.
© Copyright IBM Corporation 2011, 2017.US Government Users Restricted Rights – Use, duplication or disclosure restricted by GSA ADP Schedule Contractwith IBM Corp.

Contents
About this publication . . . . . . . . vWho should read this publication . . . . . . . vPublications . . . . . . . . . . . . . . v
What's new in Version 7.1.8. . . . . . vii
Chapter 1. IBM Tivoli Storage Managerfor Virtual Environments: DataProtection for VMware overview . . . . 1Backup and restore types . . . . . . . . . . 6How Tivoli Storage Manager nodes are used in avirtual environment . . . . . . . . . . . . 7
Mount proxy node and data mover noderequirements . . . . . . . . . . . . . 11
Tape media guidelines . . . . . . . . . . . 13Controlling which disks are processed . . . . . 14VM templates and vApps in a vSphere environment 14Automated client failover. . . . . . . . . . 15Out-of-space errors on VMware datastores . . . . 16Full VM instant restore environment requirements 17VMware vCenter Server user privilege requirements 18
Chapter 2. Managing data with the IBMData Protection extension . . . . . . 23Getting started . . . . . . . . . . . . . 23Available features . . . . . . . . . . . . 25Connecting to the Data Protection for VMwarevSphere GUI . . . . . . . . . . . . . . 26Enabling tagging support. . . . . . . . . . 26
Setting a data mover node as a tag-based node 26Creating tags in the virtual machine inventory . 28
Configuring backup policies . . . . . . . . . 29Excluding virtual machines from scheduledbackup services . . . . . . . . . . . . 29Specifying the retention policy of virtual machinebackups . . . . . . . . . . . . . . 30
Managing data protection . . . . . . . . . 30Viewing the history of backup tasks for virtualmachines . . . . . . . . . . . . . . 31Restoring a virtual machine . . . . . . . . 31Starting an on-demand backup of a virtualmachine . . . . . . . . . . . . . . 32
Chapter 3. Getting started with filerestore . . . . . . . . . . . . . . . 35Common tasks for restoring files . . . . . . . 35File restore prerequisites . . . . . . . . . . 36Logging in to restore files . . . . . . . . . 38Restoring files from a virtual machine backup . . . 38
Chapter 4. Protection for in-guestapplications . . . . . . . . . . . . 41Microsoft Exchange Server data protection inVMware environments . . . . . . . . . . 41
Configuring the software for Exchange Serverdata protection in a VMware environment . . . 42Managing backups . . . . . . . . . . . 47Restoring data . . . . . . . . . . . . 52Tivoli Storage Manager file space information . . 65
Microsoft SQL Server data protection in VMwareenvironments . . . . . . . . . . . . . . 66
Configuring the software for SQL Server dataprotection in a VMware environment . . . . . 67Managing backups . . . . . . . . . . . 72Restoring data . . . . . . . . . . . . 76Sample script for validating full virtual machinebackups . . . . . . . . . . . . . . 80Tivoli Storage Manager file space information . . 81
Application protection for Active Directory domaincontrollers . . . . . . . . . . . . . . . 82
Chapter 5. Data Protection for VMwarecommand-line interface . . . . . . . 85Backup . . . . . . . . . . . . . . . . 86Restore . . . . . . . . . . . . . . . . 89Inquire_config . . . . . . . . . . . . . 95Inquire_detail . . . . . . . . . . . . . 100Set_domain . . . . . . . . . . . . . . 103Set_mapping . . . . . . . . . . . . . 104Set_option . . . . . . . . . . . . . . 105Set_password . . . . . . . . . . . . . 107Get_password_info . . . . . . . . . . . 109Start_guest_scan . . . . . . . . . . . . 110Profile parameters . . . . . . . . . . . . 113
Chapter 6. Recovery Agentcommand-line interface . . . . . . . 121Starting the Recovery Agent command-lineinterface . . . . . . . . . . . . . . . 121Recovery Agent command-line interface overview 121
Mount command . . . . . . . . . . . 123Set_connection command . . . . . . . . 127Help command. . . . . . . . . . . . 127Recovery Agent command-line interface returncodes . . . . . . . . . . . . . . . 127
Chapter 7. Backing up VMware data 129Backing up virtual machine data to Tivoli StorageManager . . . . . . . . . . . . . . . 129
Setting options for an incremental foreverbackup schedule . . . . . . . . . . . 132
Backing up virtual machine data to local disks . . 132Backing up virtual machine data to Tivoli StorageManager and local disks. . . . . . . . . . 134
© Copyright IBM Corp. 2011, 2017 iii

Backing up migrated virtual machines . . . . . 136Backing up organization vDCs to Tivoli StorageManager . . . . . . . . . . . . . . . 137Backing up vApps to Tivoli Storage Manager. . . 138Backing up data by disk usage . . . . . . . 139
Scenario: Including four disks for backupprocessing . . . . . . . . . . . . . 140Scenario: Excluding four disks for backupprocessing . . . . . . . . . . . . . 141Scenario: Separating disks for backup andrestore processing . . . . . . . . . . . 142
Backing up virtual machines by domain level . . 143Scenario: Backing up virtual machines by clusterserver . . . . . . . . . . . . . . . 144Scenario: Backing up virtual machines byVMware datastore . . . . . . . . . . . 145Scenario: Backing up virtual machines by namepattern . . . . . . . . . . . . . . 145
Backing up multiple virtual machines in parallel 146Scenario: Backing up multiple virtual machinesin parallel . . . . . . . . . . . . . 146
Backing up virtual machines that host ActiveDirectory controllers . . . . . . . . . . . 147Specifying a management class to associate objects 148
Scenario: Specifying a management class forVMware backups in a vSphere environment . . 148Scenario: Specifying a management class forVMware control files in a vSphere environment . 149Scenario: Specifying a management class forobjects in a vCloud environment . . . . . . 150
Specifying objects to include in backup and restoreoperations . . . . . . . . . . . . . . 150
Scenario: Specifying objects to include forbackup and restore operations in a vSphereenvironment. . . . . . . . . . . . . 151Scenario: Specifying objects to include forbackup and restore operations in a vCloudenvironment. . . . . . . . . . . . . 152
Chapter 8. Restoring VMware data 153Mounting a virtual machine disk and exporting thevolumes . . . . . . . . . . . . . . . 153vCloud environment restore scenario . . . . . 156vSphere environment restore scenario . . . . . 157Full VM instant restore scenarios . . . . . . . 157
Full VM instant restore cleanup and repairscenarios . . . . . . . . . . . . . . 158
Full VM instant restore integrity validationscenarios . . . . . . . . . . . . . . . 160Verifying that the Active Directory DomainController replicated successfully . . . . . . . 162
Appendix A. Troubleshooting . . . . 165Troubleshooting file restore operations . . . . . 174
Trace options for file restore . . . . . . . 175File restore solutions . . . . . . . . . . 176
VMware attributes. . . . . . . . . . . . 176Troubleshooting IBM Data Protection extensionproblems . . . . . . . . . . . . . . . 177
Resolving Platform Services Controllerconnection problems . . . . . . . . . . 177Enabling tracing . . . . . . . . . . . 178Messages for the IBM Data Protection extension 179
Appendix B. Tivoli Storage Managerrecovery agent operations . . . . . . 183Mounting snapshots with the recovery agent . . . 183Restoring files with the recovery agent . . . . . 186
Restoring files from a Windows system with therecovery agent . . . . . . . . . . . . 187Restoring files from a Linux system with therecovery agent . . . . . . . . . . . . 189
Restoring volumes instantly with the recoveryagent . . . . . . . . . . . . . . . . 191
Restoring volumes instantly from a Windowssystem with the recovery agent . . . . . . 191Restoring volumes instantly from a Linuxsystem with the recovery agent . . . . . . 194
Appendix C. Data Protection forVMware vSphere GUI and DataProtection for VMware vCloud GUImessages . . . . . . . . . . . . . 199
Appendix D. Tivoli Storage Managerrecovery agent messages . . . . . . 219
Appendix E. Accessibility features forthe Tivoli Storage Manager productfamily. . . . . . . . . . . . . . . 243
Notices . . . . . . . . . . . . . . 245
Glossary . . . . . . . . . . . . . 249
Index . . . . . . . . . . . . . . . 251
iv IBM Tivoli Storage Manager for Virtual Environments: Data Protection for VMware User's Guide
About this publication
This publication provides overview, planning, and user instructions for IBM®
Tivoli® Storage Manager for Virtual Environments.
Who should read this publicationThis publication is intended for administrators and users who are responsible forimplementing a backup solution with IBM Tivoli Storage Manager for VirtualEnvironments in one of the supported environments.
In this publication, it is assumed that you have an understanding of the followingapplications:v Tivoli Storage Manager backup-archive clientv Tivoli Storage Manager serverv VMware vSphere or vCloud Director
Installation, configuration, and upgrade information is documented in the IBMTivoli Storage Manager for Virtual Environments: Data Protection for VMwareInstallation Guide.
PublicationsThe Tivoli Storage Manager product family includes IBM Tivoli StorageFlashCopy® Manager, IBM Tivoli Storage Manager for Space Management, IBMTivoli Storage Manager for Databases, and several other storage managementproducts from IBM.
To view IBM product documentation, see IBM Knowledge Center.
© Copyright IBM Corp. 2011, 2017 v

vi IBM Tivoli Storage Manager for Virtual Environments: Data Protection for VMware User's Guide

What's new in Version 7.1.8
IBM Tivoli Storage Manager for Virtual Environments Version 7.1.8 introduces newfeatures and updates.
For a list of new features and updates in this release and previous Version 7releases, see Data Protection for VMware updates.
New and changed information in this product documentation is indicated by avertical bar (|) to the left of the change.
© Copyright IBM Corp. 2011, 2017 vii

viii IBM Tivoli Storage Manager for Virtual Environments: Data Protection for VMware User's Guide

Chapter 1. IBM Tivoli Storage Manager for VirtualEnvironments: Data Protection for VMware overview
IBM Tivoli Storage Manager for Virtual Environments: Data Protection for VMwareprovides a comprehensive solution for protecting VMs.
Data Protection for VMware eliminates the impact of running backups on a VM byoffloading backup workloads from a VMware ESX or ESXi-based host to avStorage Backup server. Data Protection for VMware works with the Tivoli StorageManager backup-archive client (installed on the vStorage Backup server) tocomplete full and incremental backups of VMs. The client node installed on thevStorage Backup server is called the data mover node. This node "moves" the datato the Tivoli Storage Manager server for storage, and for VM image-level restore ata later time. Instant restore is available at the disk volume level and full VM level.In addition, protection of vApps and organization vDCs in a vCloud Directorenvironment is also available.
The Tivoli Storage Manager backup-archive client is a separately licensedcomponent that contains its own user interfaces and documentation. Familiaritywith this product and its documentation is necessary in order to adequatelyintegrate a comprehensive plan for protecting your VMs with Data Protection forVMware. Tivoli Storage Manager for Virtual Environments for Microsoft Windows64-bit includes the Tivoli Storage Manager backup-archive client data moverfeatures on the product DVD or download package.
© Copyright IBM Corp. 2011, 2017 1

Data Protection for VMware provides several components to assist with protectingyour VMs.
Data Protection for VMware vSphere GUI
This component is a graphical user interface (GUI) that accesses VM data on theVMware vCenter Server. The content of the GUI is available in three views:v A web browser view. This view is accessed in a supported web browser by
using the URL for the GUI web server host. For example:https://guihost.mycompany.com:9081/TsmVMwareUI/
v A plug-in view that integrates with the VMware vSphere Client. This plug-in isaccessed as a vCenter Server extension in the Solutions and Applications panelof your vCenter Server System. The panels and functionality of this view are thesame as offered in the browser view.
Web browser
Tivoli Storage Managerfile restore interface
vCenterServer
vStorage API(VADP)
Proxy
Tivoli StorageManager
server
Storage hierarchy
vStorage backup server
Data Protection forVMware vSphere
GUI
Data Protection forVMware CLI
Tivoli StorageManager
API
Tivoli StorageManager
Recovery Agent
Data mover(Tivoli Storage
Managerbackup-archive
client)Guestmachines
Host machines(ESX, ESXi)
VMDKVMFS
NAS/local
Datastore
SAN
DatastoreDatastore
vSphereclient
Data Protectionfor VMwarevSphere GUI plug-in
IBM Data Protectionextension
(in VMware vSphereWeb Client)
Figure 1. Tivoli Storage Manager for Virtual Environments system components in a VMware vSphere user environment
2 IBM Tivoli Storage Manager for Virtual Environments: Data Protection for VMware User's Guide

Tip: The plug-in view is not supported in a VMware vSphere 6 environment.v The IBM Data Protection extension view in the VMware vSphere Web Client.
The panels in this view are uniquely designed to integrate within the web client,but data and commands for this view are obtained from the same GUI webserver as the other views. The IBM Data Protection extension provides a subsetof the functions that are available in the web browser and plug-in views andsome additional functions. Configuration and advanced reporting functions arenot offered in this view.
You can specify one or more views during installation.
The Data Protection for VMware vSphere GUI can be installed on any system thatmeets the operating system prerequisites. The Data Protection for VMware vSphereGUI resource requirements are minimal as it does not process I/O data transfers.Installing the Data Protection for VMware vSphere GUI on the vStorage BackupServer is the most common configuration.
For the web-browser and plug-in views, you can register multiple Data Protectionfor VMware vSphere GUIs to a single vCenter Server. This scenario reduces thenumber of datacenters (and their VM guest backups) that are managed by a singleVMware Data Protection for VMware vSphere GUI. Each plug-in can then managea subset of the total number of datacenters that are defined on the vCenter Server.For each plug-in that is registered to the vCenter Server, one Data Protection forVMware package must be installed on a separate host. To update the manageddatacenters, go to Configuration > Edit TSM Configuration. In the GUI Domainpage, reduce the list of datacenters that are managed by the plug-in. Managing asubset of all available datacenters reduces the query and processing time that isrequired by the plug-in to complete operations.
When you register multiple Data Protection for VMware vSphere GUIs to a singlevCenter Server, the following guidelines apply:v Each datacenter can be managed by only one installed Data Protection for
VMware vSphere GUI.v A unique VMCLI node name is required for each installed Data Protection for
VMware vSphere GUI.v Using unique data mover node names for each installed Data Protection for
VMware vSphere GUI simplifies managing the nodes.
The Data Protection for VMware vSphere GUI must have network connectivity tothe following systems:v vStorage Backup Serverv Tivoli Storage Manager serverv vCenter Server
In addition, ports for the Derby Database (default 1527) and GUI web server(default 9081) must be available.
Tivoli Storage Manager file restore GUI
The web-based file restore GUI enables you to restore files from a VMware virtualmachine backup without administrator assistance. The GUI is installedautomatically when the Data Protection for VMware vSphere GUI is installed. Formore information, see Chapter 3, “Getting started with file restore,” on page 35.
Chapter 1. Protection for VMs 3

Tivoli Storage Manager recovery agent
This service enables the mounting of any snapshot volume from the Tivoli StorageManager server. You can view the snapshot locally, with read-only access, on theclient system, or use an iSCSI protocol to access the snapshot from a remotecomputer. In addition, the recovery agent provides the instant restore function. Avolume used in instant restore processing remains available while the restoreprocess proceeds in the background. The recovery agent is accessed with therecovery agent GUI or command-line interface.
The recovery agent command-line interface is installed on a Windows system toperform the following tasks from a remote machine:v Gather information about available restorable data, including lists of:
– Backed-up VMs– Snapshots available for a backed-up machine– Partitions available in a specific snapshot
v Mount a snapshot as a virtual device.v Get a list of virtual devices.v Remove a virtual device.
Important: Information about how to complete tasks with the Tivoli StorageManager recovery agent GUI is provided in the online help that is installed withthe GUI. Click Help in any of the GUI windows to open the online help for taskassistance.
For detailed information regarding commands, parameters, and return codes, seeChapter 6, “Recovery Agent command-line interface,” on page 121.
Data Protection for VMware command-line interface
The Data Protection for VMware CLI is a full-function command-line interface thatis installed with the Data Protection for vSphere GUI. You can use it to completethese tasks:v Initiate a backup of your VMs to a Tivoli Storage Manager server, or schedule a
backup for a later time.v Initiate a full recovery of your VMs, VM files, or VM Disks (VMDKs) from a
Tivoli Storage Manager server.v View configuration information about the backup database and environment.
Although the Data Protection for vSphere GUI is the primary task interface, theData Protection for VMware CLI provides a useful secondary interface. Forexample, it can be used to implement a scheduling mechanism different from theone implemented by the Data Protection for vSphere GUI. Also, it is useful whenevaluating automation results with scripts.
For detailed information regarding available commands, see Chapter 5, “DataProtection for VMware command-line interface,” on page 85.
4 IBM Tivoli Storage Manager for Virtual Environments: Data Protection for VMware User's Guide
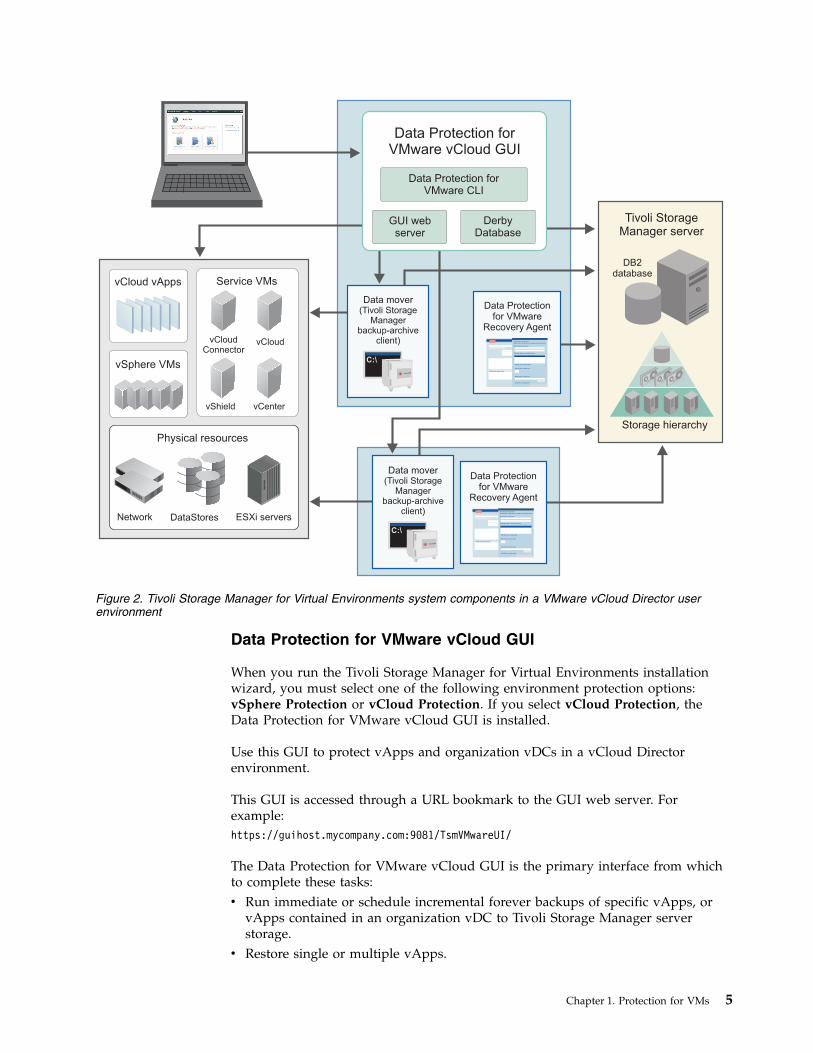
Data Protection for VMware vCloud GUI
When you run the Tivoli Storage Manager for Virtual Environments installationwizard, you must select one of the following environment protection options:vSphere Protection or vCloud Protection. If you select vCloud Protection, theData Protection for VMware vCloud GUI is installed.
Use this GUI to protect vApps and organization vDCs in a vCloud Directorenvironment.
This GUI is accessed through a URL bookmark to the GUI web server. Forexample:https://guihost.mycompany.com:9081/TsmVMwareUI/
The Data Protection for VMware vCloud GUI is the primary interface from whichto complete these tasks:v Run immediate or schedule incremental forever backups of specific vApps, or
vApps contained in an organization vDC to Tivoli Storage Manager serverstorage.
v Restore single or multiple vApps.
Tivoli StorageManager server
Storage hierarchy
DB2database
Physical resources
Network DataStores ESXi servers
vSphere VMs
vCloud vApps Service VMs
vShield
vCloudConnector
vCloud
vCenter
Data Protectionfor VMware
Recovery Agent
Data Protectionfor VMware
Recovery Agent
Data mover(Tivoli Storage
Managerbackup-archive
client)
Data mover(Tivoli Storage
Managerbackup-archive
client)
Data Protection forVMware vCloud GUI
Data Protection forVMware CLI
GUI webserver
DerbyDatabase
Figure 2. Tivoli Storage Manager for Virtual Environments system components in a VMware vCloud Director userenvironment
Chapter 1. Protection for VMs 5
v Generate reports to display progress information about your tasks and spaceusage information about your backups.
v Display information about the progress of your tasks, the most recent events thatcompleted, the backup status of your vApps, and space usage. This informationcan help you troubleshoot errors that occurred in backup processing.
Backup and restore typesData Protection for VMware provides the following types of backup and restorefunctions:
Incremental forever backups
Data Protection for VMware provides incremental forever backup. Rather thanscheduling weekly full backups, this backup solution requires only one initial fullbackup. Afterward, an ongoing (forever) sequence of incremental backups occurs.The incremental forever backup solution provides these advantages:v Reduces the amount of data that goes across the network.v Reduces data growth because all incremental backups contain only the blocks
that changed since the previous backup.v No comparison with the backup target is needed since only changed blocks are
identified.v Minimizes impact to the client system.v Reduces the length of the backup window.v No need to schedule an initial full backup as a separate schedule: the first issue
of an incremental forever backup automatically defaults to an incrementalforever full backup.
In addition, the restore process is optimized, as only the latest versions of blocksthat belong to a restored backup are restored. Since the same area on theproduction disk is recovered only one time, the same block is not written tomultiple times.
Full VM backups
Back up an entire VM in your VMware vCenter to Tivoli Storage Manager storage.This is an entire VM image snapshot, which is a single snapshot that contains all ofthe VM disks. All data is backed up at the disk block level. The data can then berestored to a disk, or mounted as a virtual volume to restore a file. These backupsare managed and retained according to storage policies set up by the Tivoli StorageManager administrator.
Incremental VM backups
Back up only the VM data that has changed since the last full backup completed.All data is backed up at the disk block level. When a full backup has not beenissued for the VM, Data Protection for VMware issues a full backup by default.
You can also use Data Protection for VMware to interface with the Windowsbackup-archive client in order to use the Change Block Tracking capabilitiesprovided by the vStorage APIs for Data Protection (VADP).
6 IBM Tivoli Storage Manager for Virtual Environments: Data Protection for VMware User's Guide

File restore
Use the Tivoli Storage Manager file restore interface to restore files with aweb-based interface. File owners can search, locate, and restore files from a VMbackup without administrator assistance.
Instant restore
With instant restore, you can restore the content of a single volume from asnapshot. This restore uses the snapshot data that is generated by thebackup-archive client. Instant restore can be done from a full or incremental VMbackup. You can use the volume immediately, while the restore process continuesin the background. Instant restore requires an in-guest installation.
Full VM restore
Restore a full or incremental VM backup. The entire VM is restored to the state itexisted in when originally backed up.
Full VM instant restore
With full VM instant restore, the restored VM becomes available for instant use,either for validating the backed up VM or for restoring the VM to permanentstorage. The restored VM is available for instant use in read/write mode.
How Tivoli Storage Manager nodes are used in a virtual environmentData Protection for VMware communicates to VMs during backup, restore, andmount operations through Tivoli Storage Manager nodes.
A node represents a system on which the backup-archive client, Data Protection forVMware, or other application client is installed. This system is registered to theTivoli Storage Manager server. Each node has a unique name (node name) that isused to identify the system to the Tivoli Storage Manager server. Communication,storage policy, authority, and access to VM data are defined based on a node.
In a Data Protection for VMware vSphere production environment, the most basicnode is the data mover node. This node represents a specific backup-archive client(data mover) that "moves data" from one system to another. In a basic vSphereenvironment, where VMs are backed up by a single client, the VM data is storeddirectly under the data mover node.
In some scenarios, several data movers are used to back up a complete virtualenvironment, such as a VMware datacenter. In this scenario, since the backup workis distributed among multiple data movers, the VM data is stored in a shared node(instead of a specific data mover node). This shared node is called the datacenternode. Thus, in this large system vSphere environment, the data mover nodes storeVM data into the datacenter node.
In a large vSphere virtual environment, where multiple data movers anddatacenter are operative, a third node is used to communicate among the nodesand Tivoli Storage Manager server. This node is the VMCLI node.
A mount proxy node represents the Linux or Windows proxy system that accessesthe mounted VM disks through an iSCSI connection. These nodes enable the filesystems on the mounted VM disks to be accessible as mount points on the proxy
Chapter 1. Protection for VMs 7

system. You can then retrieve the files by copying them from the mount points toyour local disk. Mount proxy nodes are created in pairs and are required by thedatacenter node for each Windows or Linux system that serves as a proxy. Toincrease the number of available mount points, you can configure a datacenternode to have multiple pairs of mount proxy nodes.
Use the Data Protection for VMware vSphere GUI configuration wizard orconfiguration notebook to set these nodes in a vSphere environment.
Table 1. Tivoli Storage Manager nodes in a vSphere environment
Node Description
vCenter node The virtual node that represents a vCenter.
datacenter node The virtual node that maps to a data center. The datacenternodes hold the data.
VMCLI node The node that connects the Data Protection for VMwarecommand-line interface to the Tivoli Storage Manager serverand the data mover node. Unlike the data mover node, theVMCLI node does not require its own Tivoli Storage Managerclient acceptor or scheduler service.
data mover node The node name for the backup-archive client that is installed onthe vStorage Backup Server. This node performs the datamovement. Each data mover node requires its own clientacceptor and scheduler service.Important: Data Protection for VMware stores sensitiveinformation locally on the data mover, and the data movermight also have direct access to VM storage. Access to the datamover must be protected. Allow only trusted users access to thedata mover system.
mount proxy node This node represents the Linux or Windows proxy system thataccesses the mounted VM disks through an iSCSI connection.These nodes enable the file systems on the mounted VM disksto be accessible as mount points.
8 IBM Tivoli Storage Manager for Virtual Environments: Data Protection for VMware User's Guide

Backup-archive clientinstances running on
vStorage Backup Server
dsm/dsmcnode=VC1_VCLI1asnode=VC1_DC1_DM1vmchost=ESX1
vStorageBackup Server
Tivoli StorageManager server
Disk storage pool
DB2Database
dsm/dsmcnode=VC1_DC1_DM1asnode=VC1_DC1_DM2vmchost=ESX2
Guest machines
Host MachineESX2
VMFSDataStore
VM4 VM5 VM6
Filespaces forVC1_DC1
Organization of virtual machines inTivoli Storage Manager database
VM1
VM2
VM3
VM4
VM5
VM6
VC1_DC1_DM2
Guest machines
Host MachineESX1
VMFSDataStore
VM1 VM2 VM3
VC1_DC1_DM1
Figure 3. Node relationships and applications in a vSphere production environment that contains one VMware datacenter and two data move nodes.
Chapter 1. Protection for VMs 9

In a Data Protection for VMware vCloud Director production environment, severaltypes of nodes are employed. Some nodes are used to represent vCloud entitiesand other nodes represent Tivoli Storage Manager entities.
The first node is the vCloud director node, which, as its name implies, representsthe vCloud director. This node is the topmost node in the system. Next, vCloudprovider virtual data centers (provider vDCs) are represented by correspondingprovider vDC nodes. vCloud organization virtual data centers (organization vDCs)are represented by organization vDC nodes. The backup data for vApps (containedin a virtual data center) is stored in the corresponding organization vDC node.
On the Tivoli Storage Manager side, a data mover node represents a specificbackup-archive client (data mover). This node "moves" data between the vCloudenvironment and the various data-storing organization vDC nodes. Each datamover node is associated with a single provider virtual data center (provider vDC)node, and moves data only for organization vDCs allocated from its provider. Aprovider vDC can have one or more data mover nodes that move data for itsorganization vDCs.
Finally, a central node is used to communicate among the nodes and the DataProtection for VMware vCloud GUI. This node is the VMCLI node.
Use the Data Protection for VMware vCloud GUI configuration wizard orconfiguration notebook to set these nodes in a vCloud Director environment.
Table 2. Tivoli Storage Manager nodes in a vCloud Director environment
Node Description Example
vCloud DirectorNode
This node represents the vCloudDirector and is the top-level node.
This node typically contains theprefix VCD_ in its name.
Provider VDCNode
This node represents a provider vDCin your vCloud environment.
This node typically contains theprefix PVDC_ in its name.
vCenter
(VC1)
Tivoli Storage Manager data mover agent
(VC1_DC1_DM1)
(VC1_VCLI1)(VC1_DC1)
Data center
(VC1_DC2)
Data center
Tivoli Storage Manager data mover agent
(VC1_DC2_DM1)
Data Protection for VMware CLI
Figure 4. Proxy relationships among the nodes in a vSphere environment that uses two VMware datacenters. Thearrows point from the proxy agent node to the proxy target node.
10 IBM Tivoli Storage Manager for Virtual Environments: Data Protection for VMware User's Guide
Table 2. Tivoli Storage Manager nodes in a vCloud Director environment (continued)
Node Description Example
OrganizationVDC Node
This node represents an organizationvDC in your vCloud environment.
This node holds the data andtypically contains the prefixOVDC_ in its name.
Data MoverNode
This node represents abackup-archive client and isassociated with a single providervDC and all of its organization vDCs.It is authorized to do operations forall organization vDCs that belong tothe provider vDC.
This node typically contains theprefix DM_ in its name.
VMCLI Node This node connects the DataProtection for VMware vCloud GUIto the Tivoli Storage Manager serverand the other nodes.
This node typically contains theprefix VMCLI_ in its name.
Mount proxy node and data mover node requirementsOperations require specific node types and certain environment settings.
Consider these Data Protection for VMware node requirements before you attemptany tasks:v Data mover nodes are required for the following operations:
– Incremental forever backup– Periodic full backup– Full VM restore
v Mount proxy nodes are required for the following operations:– Full VM instant access– Full VM instant restore– Mount
v A mount operation accesses a Windows system and a Linux system that functionas mount proxy systems. Each proxy system requires its own mount proxy nodeand client acceptor. The Windows proxy system also requires the recovery agentto be installed. These two mount proxy nodes function together during a mountoperation. Mount proxy nodes are created in pairs and are required by thedatacenter node for each Windows or Linux system that serves as a proxy.
v Only one mount proxy node is allowed for each physical or virtual Windowsmount proxy system. If you want to use multiple mount proxy node pairs, youmust install each Windows mount proxy node on a separate system, along withits own client acceptor and recovery agent.
v You cannot mount the backup of a Windows mount proxy node or Linux mountproxy node to itself.
The recovery agent is restricted to one node assignment. This node must be amount proxy node. Although a Windows system might contain multiple datamover nodes, only one proxy mount node is allowed for the recovery agent to use.As a result, operations that use the recovery agent fail when you attempt toconnect to a system with a node that is not assigned to the recovery agent.
These examples show types of operations that fail when a node that is notassigned to the recovery agent is used:
Chapter 1. Protection for VMs 11

Mount operationsWhen you run a mount operation with the mount proxy node fromVMware datacenter DC1, the recovery agent connects to that mount proxynode. Because that connection to the mount proxy node is the only correctconnection, the recovery agent does not use another mount operation withany other nodes on that mount proxy system. As a result, the mountoperation fails when you use a mount proxy node from VMwaredatacenter DC2.
Instant access or instant restore operationsYou attempt to run an instant access or instant restore operation with amount proxy node from a Windows system that is used as a mount proxysystem. A Windows mount proxy system requires the recovery agent to beinstalled. Because the connection from the recovery agent to the Windowsmount proxy node (to run the mount operation) is the only correctconnection, an instant access or instant restore operation that attempts touse this mount proxy node (from the same Windows system) fails.
Mount proxy nodes and mount proxy nodes require proxy authority to thedatacenter node. This proxy authority is granted automatically when you set upyour nodes with the Data Protection for VMware vSphere GUI ConfigurationWizard. However, if you manually set up your mount proxy nodes and datamover nodes, you must grant this proxy authority to the datacenter nodes on theTivoli Storage Manager server with the GRANT PROXYNODE command. For example:GRANT PROXYNODE TARGET=DC_NODE AGENT=LOCAL_MP_WINGRANT PROXYNODE TARGET=DC_NODE AGENT=LOCAL_MP_LNX
File sharing security
When you share a mounted virtual machine snapshot, certain security issues canoccur that are related to NFS (Linux) and CIFS (Windows) protocols. Review theseissues to better understand the security impact when you share a mounted virtualmachine snapshot.
When all of the following conditions exist on Linux systems, respective users canaccess directories on the shared system:v The mounted volumes that belong to Linux system (B) are shared to a different
Linux host (A).v The Linux host (A) has the same user names as the Linux system (B) that was
backed up
For example, root user (A) can access all root user (B) files, and tester (A) can accessall of tester (B) files. In this situation, the permission group and user are changed tonobody.
This output is an example of access to mounted volumes:
esx2vm55:/opt/tivoli/tsm/client/ba/bin # ls -la /CVT/TSM/ESX2VM21/2014-05-22-01_32_53/Volume7
total 19drwx------ 4 500 500 1024 Apr 28 23:53 .drwxr-xr-x 8 root root 4096 May 27 22:06 ..drwxrwxr-x 2 500 500 1024 Apr 28 23:52 RAID_0drwx------ 2 root root 12288 Apr 28 23:52 lost+found
This output is an example of access to shared volumes:
12 IBM Tivoli Storage Manager for Virtual Environments: Data Protection for VMware User's Guide

[tester1@ESX2VM51 Volume7]$ ls -la
total 19drwx------ 4 nobody nobody 1024 Apr 28 23:53 .drwxr-xr-x 8 nobody nobody 4096 May 27 22:06 ..drwxrwxr-x 2 nobody nobody 1024 Apr 28 23:52 RAID_0drwx------ 2 nobody nobody 12288 Apr 28 23:52 lost+found
Make sure that the correct Linux hostname/IP address or Windows user name isspecified. If the correct hostname/IP address or user name is not specified, theshare operation fails. This failure is identified by the operating system.
On Windows systems, a user with the same credentials as the backed up Windowsvirtual machine can access the shared volumes on any Windows system.
Tape media guidelinesIf your environment contains virtual machine backup data on tape media (such asa tape storage pool or virtual tape library), and the data was either directly storedon tape or migrated to tape over time, consider these guidelines.
Configurationv Ensure that virtual machine control file data is always on a disk storage pool.
You can specify the destination storage pool for virtual machine control file datawith the backup-archive client vmctlmc option. For more information, seeVmctlmc.
v Use collocation by file space to optimize the tape that contains virtual machinebackup data.When a virtual machine is backed up to the Tivoli Storage Manager server, eachbackup is represented as a separate file space on the server. The collocation byfile space setting saves data from multiple incremental backups of the samevirtual machine to the same volume (disk file). When migration to tape occurs,these backups are together on the physical tape.You can enable collocation at the file space level with the Tivoli Storage Managerserver COLLOCATE=FILESPACE parameter. For more information, see DEFINESTGPOOL
v Be aware of migration thresholds and how data availability is affected bythresholds. For example, a block in Data Protection for VMware that neverchanges can be migrated to tape even though the most active backup needs theblock.
Recovery
You can restore files from tape media with either the Tivoli Storage Manager filerestore interface or the Data Protection for VMware vSphere GUI Mount wizard.However, file restore reads data in a way that causes random read requests. As aresult, processing might be slow when a sequential-access device (such as tapemedia) is used. File restore from disk storage is the preferred method.
Consider moving target virtual machine backup data from tape media to diskstorage before you attempt a file restore operation. Do not move the virtualmachine control data because this data should already be in separate disk storagepool. Also, do not move backup data to the disk storage pool on which the control
Chapter 1. Protection for VMs 13
data resides. If you move backup and control data to the same pool, you will haveto complete an IFFULL backup to move the backup and control data to separatepools.
To move backup data, use the Tivoli Storage Manager server MOVE NODEDATAcommand and ensure that the FROMstgpool and TOstgpool parameters do notspecify pools that contain control data.
Long term retention
Run traditional full VM backups to tape storage regularly as a solution forlong-term storage or tape retention of your data. For example, you can run a fullVM backup to tape monthly as a solution for archive needs.
For additional information related to tape media, see technote 7021081.
Controlling which disks are processedSet include and exclude statements to control the disks to be processed.
Use Data Protection for VMware in conjunction with the Tivoli Storage Managerbackup-archive client to determine which disks in the VM environment are backedup and restored. VM environments typically contain a combination of system,normal, independent, and raw device mapping (RDM) disks. The ability to extendcontrol granularity to specific disks provides benefits in these situations:v Recover the disk where the operating system is located in order to replace a
corrupted system drive.v Protect disks in VM environments that use Tivoli Storage Manager Data
Protection applications as guests that contain large database and log files.v VM configuration information is lost. The VM configuration information is
recovered while the disks remain in place.
In previous versions of Data Protection for VMware, a new VM was requiredwhenever a VM restore was performed. If the VM already existed, the restorefailed. With this feature, you can restore selected virtual disks but leave the rest ofan existing VM intact.
VM templates and vApps in a vSphere environmentData Protection for VMware supports backing up and restoring VM templates andvApps.
A VM template is a master image of a VM. The template can include an installedguest operating system and a set of applications.
VM templates can be restored to the original VM template, or to an alternative VMtemplate and data store location. Because Data Protection for VMware marks theVM template as one unit, a single file restore of a VM template is not feasible. Asingle virtual disk cannot be restored, nor can a single virtual disk backup beattached on an ESX host to a target VM.
VMs that are contained in a vApp can be backed up and restored. A vApp is alogical entity that consists of one or more VMs. By using a vApp, you can specifyand include all components of a multitier application. A vApp also includes theoperational policies and associated service levels of the application contained in thevApp.
14 IBM Tivoli Storage Manager for Virtual Environments: Data Protection for VMware User's Guide

The VMs in the vApp are identified in the Data Protection for VMware vSphereGUI as VMs. While you select the VM to back up, you cannot select a vApp. Whenyou restore the VM, the VM is added to one of the following locations:v If the vApp is present with the original full inventory path, the VM is restored
to that location.v When the original full inventory path is not present or was changed, the VM is
restored to the top-level default location on the target ESX host. No containersare created during the restore operation.
When backing up a VM template, and a full backup does not exist for this VMtemplate, the following occurs:v If the selected backup type is incremental-forever-incremental, and the VM
template contains changes, the backup type changes to incremental-forever-full.v If the selected backup type is incremental, and the VM template contains
changes, the backup type changes to full.v If the selected backup type is full, and the VM template contains changes, the
VM template is backed up.v If the selected backup type is incremental-forever-full, this type ensures that the
VM template is backed up regardless of whether it contains changes.
Automated client failoverIf you backed up data to the Tivoli Storage Manager server, Data Protection forVMware can automatically fail over to the secondary server for data recoverywhen there is an outage on the Tivoli Storage Manager server.
The Tivoli Storage Manager server that the Tivoli Storage Manager data movernode connects to during normal production processes is called the primary server.When the primary server and data mover node are set up for node replication, theclient data on the primary server can be replicated to another Tivoli StorageManager server, which is the secondary server.
During normal operations, connection information for the secondary server isautomatically sent to the data mover node from the primary server during thelogon process. The secondary server information is automatically saved to theclient options file on the data mover node. No manual intervention is required byyou to add the information for the secondary server.
Each time the data mover node logs on to the server, it attempts to contact theprimary server. If the primary server is unavailable, the data mover nodeautomatically fails over to the secondary server, according to the secondary serverinformation in the client options file. In failover mode, you can restore anyreplicated client data. When the primary server is online again, the data movernode automatically fails back to the primary server the next time the data movernode connects to the server.
Requirements: Before the connection information for the secondary server is sentto the client options file, the following processes must occur:v The primary server, secondary server, and data mover node must be at the V7.1
level.v The primary and secondary servers must be set up for node replication, and the
client node must be configured for node replication on the server.v You must back up VMware data at least one time to the primary server.
Chapter 1. Protection for VMs 15

v Client data on the primary server must be replicated to the secondary server atleast one time.
Restriction: The following restrictions apply to Data Protection for VMware duringfailover:v Any operations that require data to be stored on the Tivoli Storage Manager
server, such as backup operations, are not available.v Schedules are not replicated to the secondary server. Therefore, schedules are not
run while the primary server server is unavailable.v Instant restore of virtual machines is not available.v Validation of virtual machine backups is not available.v The Data Protection for VMware GUI does not fail over. You must use the
backup-archive client on the data mover node to restore data from the secondaryserver.
v For more information about the failover capabilities of Tivoli Storage Managercomponents, see technote 1649484.
Out-of-space errors on VMware datastoresLinux Windows
To prevent out-of-space errors during virtual machine backups, you can set a datausage threshold for VMware datastores by using the vmdatastorethreshold option.
Use the vmdatastorethreshold option to the set the threshold percentage of spaceusage for each VMware datastore of a virtual machine. When you initiate a virtualmachine backup, the client checks the data usage of the VMware datastores beforethe virtual machine snapshot is created. If the threshold is exceeded in any of theVMware datastores, the virtual machine is not backed up.
For example, virtual machine vm1 spans datastore1 and datastore2. You can issuethe following command to ensure that the VMware datastores of a virtual machineare at most 90% full before the virtual machine is backed up:dsmc backup vm vm1 -vmdatastorethreshold=90
As a result, the client checks the space usage of both datastore1 and datastore2before the snapshot operation begins. If the space usage of either VMwaredatastore exceeds the 90% threshold, the backup request for vm1 is not started.
Requirements:
v Ensure that the threshold is low enough so that the snapshot does not use up allthe available space in the VMware datastores. Otherwise, you will run out ofspace on the VMware datastores and the snapshot will not be created.
v If you use multiple clients that act as data mover nodes, you must add thevmdatastorethreshold option to the options file for each data mover.
The client checks the data usage of the VMware datastore that contains the virtualmachine disk snapshots. By default, the snapshots are created in the same directoryas that of the parent virtual disk (.vmdk) file. The client checks the data usage onlyin the default location.
16 IBM Tivoli Storage Manager for Virtual Environments: Data Protection for VMware User's Guide

If you use the EXCLUDE.VMDISK option to exclude one or more disks from a backup,the threshold check is still run on these disks. Even though these disks are notbacked up, VMware still takes a snapshot of these disks.
Independent disks are not checked during space verification processing because asnapshot of these disks does not use any VMware datastore space.
For more information about the vmdatastorethreshold option, seeVmdatastorethreshold.
Full VM instant restore environment requirements
Windows
Review the applications, systems, and versions that are required for full VMinstant restore operations.
The following environment requirements must exist before attempting a full VMinstant restore operation:v Full VM instant restore is supported only for Tivoli Storage Manager
backup-archive client 7.1 (or later) Windows 64-bit and Windows vStorageBackup servers.
v Instant access and instant restore capability is supported only for VMware VMsthat are hosted on VMware ESXi 5.1 servers, or later versions.
v Full VM instant restore is supported only for disks and virtual tape libraries(VTL). Physical tape storage pools are not supported.
v The Tivoli Storage Manager recovery agent 7.1 (or later) must be installed on thesame system as the Tivoli Storage Manager backup-archive client 7.1 (or later)data mover system.
v A data mover node that was used for version 7.1.0 instant restore and instantaccess operations cannot be used for version 7.1.8 instant restore and instantaccess operations. After you upgrade IBM Tivoli Storage Manager for VirtualEnvironments to version 7.1.8, you must create a pair of mount proxy nodes torun instant restore and instant access operations. You can create a mount proxynode pair by using either of the following methods:– Go to the Configuration window in the Data Protection for VMware vSphere
GUI and click Edit Configuration. Go to the Mount Proxy Node Pairs pageand follow the instructions on that page.
– Follow the steps in Manually configuring the mount proxy nodes on a remoteWindows system.
v VMs that were backed up with backup-archive client 6.3 (or later) can berestored by using full VM instant restore.
v The data mover system requires the IBM Tivoli Storage Manager for VirtualEnvironments 7.1 (or later) license file.
v iSCSI mount (with the Tivoli Storage Manager recovery agent) is used to exposethe VM disks to the ESX as virtual RDMs. Instant access and instant restoreoperations require an iSCSI software or hardware adapter that is configured onthe ESX host that is used for these operations.
v Storage vMotion must be installed and configured on the ESX servers that hostthe VMs to be used during instant restore operations. Instant access operations(that validate the VM backup data) do not require Storage vMotion.
v Instant access and instant restore operations require vSphere privileges thatpower on VMs (Virtualmachine.Interaction.PowerOn).
Chapter 1. Protection for VMs 17

For detailed configuration instructions, see Configuring your environment for fullvirtual machine instant restore operations.
VMware vCenter Server user privilege requirementsCertain VMware vCenter Server privileges are required to run Data Protection forVMware operations.
vCenter Server privileges required to install the vSphere Clientplug-in or IBM Data Protection extension view for the DataProtection for VMware vSphere GUI
To install the vSphere Client plug-in or IBM Data Protection extension view for theData Protection for VMware vSphere GUI, the vSphere user requires the Extension> Register extension, Unregister extension, Update extension privileges. From theVMware vSphere client, you can create a role and add to the role the extension setof associated privileges. You must then assign this role to the vCenter object in theVMware vCenter Server hierarchy for the user ID that you plan to use during theinstallation process. You must enter this user ID when prompted for the vCenteruser name on the following pages of the Tivoli Storage Manager for VirtualEnvironments installation wizard:v vSphere Client plug-in: Plug-in Registration vCenter pagev IBM Data Protection extension: Data Protection for VMware vSphere GUI
information page
Tip: Alternatively, rather than creating a specific role for the installation, you canenter the administrator user name when prompted for the vCenter user name.
vCenter Server privileges required to protect VMwaredatacenters with the web-browser or vSphere Client plug-in viewfor the Data Protection for VMware vSphere GUI
The vCenter Server user ID that signs on to the browser or plug-in views for theData Protection for VMware vSphere GUI must have sufficient VMware privilegesto view content for a datacenter that is managed by the GUI.
For example, a VMware vSphere environment contains five datacenters. A user,“jenn”, has sufficient privileges for only two of those datacenters. As a result, onlythose two datacenters where sufficient privileges exist are visible to “jenn” in theviews. The other three datacenters (where “jenn” does not have privileges) are notvisible to the user “jenn”.
The VMware vCenter Server defines a set of privileges collectively as a role. A roleis applied to an object for a specified user or group to create a privilege. From theVMware vSphere web client, you must create a role with a set of privileges. Tocreate a vCenter Server role for backup and restore operations, use the VMwarevSphere Client Add a Role function. You must assign this role to a user ID for aspecified vCenter Server or datacenter. If you want to propagate the privileges toall datacenters within the vCenter, specify the vCenter Server and select thepropagate to children check box. Otherwise, you can limit the permissions if youassign the role to the required datacenters only with the propagate to childrencheck box selected. Enforcement for the browser and plug-in view GUIs is at thedatacenter level.
18 IBM Tivoli Storage Manager for Virtual Environments: Data Protection for VMware User's Guide

The following example shows how to control access to datacenters for twoVMware user groups. First, create a role that contains all of the privileges definedin technote 7047438. The set of privileges in this example are identified by the rolenamed “TDPVMwareManage”. Group 1 requires access to manage virtualmachines for the Primary1_DC and Primary2_DC datacenters. Group 2 requiresaccess to manage virtual machines for the Secondary1_DC and Secondary2_DCdatacenters.
For Group 1, assign the “TDPVMwareManage” role to the Primary1_DC andPrimary2_DC datacenters. For Group 2, assign the “TDPVMwareManage” role tothe Secondary1_DC and Secondary2_DC datacenters.
The users in each VMware user group can use the Data Protection for VMwareGUI to manage virtual machines in their respective datacenters only.
Tip: When you create a role, consider adding extra privileges to the role that youmight need later to complete other tasks on objects.
vCenter Server privileges required to use the data mover
The Tivoli Storage Manager backup-archive client that is installed on the vStorageBackup server (the data mover node) requires the VMCUser and VMCPw options. TheVMCUser option specifies the user ID of the vCenter or ESX server that you want toback up, restore, or query. The required privileges that are assigned to this user ID(VMCUser) ensure that the client can run operations on the virtual machine and theVMware environment. This user ID must have the VMware privileges that aredescribed in technote 7047438.
To create a vCenter Server role for backup and restore operations, use the VMwarevSphere Client Add a Role function. You must select the propagate to childrenoption when you add privileges for this user ID (VMCUser). In addition, consideradding other privileges to this role for tasks other than backup and restore. For theVMCUser option, enforcement is at the top-level object.
vCenter Server privileges required to protect VMwaredatacenters with theIBM Data Protection extension view for theData Protection for VMware vSphere GUI
The IBM Data Protection extension requires a set of privileges that are separatefrom the privileges that are required to sign in to the GUI.
During the installation the following custom privileges are created for the IBMData Protection extension:v Datacenter > IBM Data Protection
v Global > IBM Data Protection
Custom privileges that are required for the IBM Data Protection extension areregistered as a separate extension. The privileges extension key iscom.ibm.tsm.tdpvmware.IBMDataProtection.privileges.
These privileges allow the VMware administrator to enable and disable access toIBM Data Protection extension content. Only users with these custom privileges onthe required VMware object can access the IBM Data Protection extension content.One IBM Data Protection extension is registered for each vCenter Server and isshared by all GUI hosts that are configured to support the vCenter Server.
Chapter 1. Protection for VMs 19

From the VMware vSphere web client, you must create a role for users who cancomplete data protection functions for virtual machines by using the IBM DataProtection extension. For this role, in addition to the standard virtual machineadministrator role privileges required by the web client, you must specify theDatacenter > IBM Data Protection privilege. For each datacenter, assign this rolefor each user or user group where you want to grant permission for the user tomanage virtual machines.
The Global > IBM Data Protection privilege is required for the user at the vCenterlevel. This privilege allows the user to manage, edit, or clear the connectionbetween the vCenter Server and the Data Protection for VMware vSphere GUI webserver. Assign this privilege to administrators that are familiar with the DataProtection for VMware vSphere GUI that protects their respective vCenter Server.Manage your IBM Data Protection extension connections on the extensionConnections page.
The following example shows how to control access to datacenters for two usergroups. Group 1 requires access to manage virtual machines for the NewYork _DCand Boston_DC datacenters. Group 2 requires access to manage virtual machines forthe LosAngeles_DC and SanFranciso_DC datacenters.
From the VMware vSphere client, create for example the “IBMDataProtectManage”role, assign the standard virtual machine administrator role privileges and also theDatacenter > IBM Data Protection privilege.
For Group 1, assign the “IBMDataProtectManage” role to the NewYork _DC andBoston_DC datacenters. For Group 2, assign the “IBMDataProtectManage” role tothe LosAngeles_DC and SanFranciso_DC datacenters.
The users in each group can use the IBM Data Protection extension in the vSphereweb client to manage virtual machines in their respective datacenters only.
Issues related to insufficient permissions
When the web browser or vSphere Client plug-in view user does not havesufficient permissions for any datacenter, access to the view is blocked. Instead, theerror message GVM2013E is issued to advise that the user is not authorized toaccess any managed datacenters due to insufficient permissions. Other newmessages are also available that inform users of issues that result from insufficientpermissions. To resolve any permissions-related issues, make sure that the user roleis set up as described in the previous sections. The user role must have allprivileges that are identified in the Required privileges vCenter Server user ID anddata mover table, and these privileges must be applied at the datacenter level withthe propagate to children check box.
When the IBM Data Protection extension user does not have sufficient permissionsfor a datacenter, the data protection functions for that datacenter and its contentare made unavailable in the extension.
When the Tivoli Storage Manager user ID (specified by the VMCUser option)contains insufficient permissions for a backup and restore operation, the followingmessage is shown:ANS9365E VMware vStorage API error."Permission to perform this operation was denied."
20 IBM Tivoli Storage Manager for Virtual Environments: Data Protection for VMware User's Guide

When the Tivoli Storage Manager user ID contains insufficient permissions to viewa machine, the following messages are shown:Backup VM command started. Total number of virtual machines to process: 1ANS4155E Virtual Machine ’tango’ could not be found on VMware server.ANS4148E Full VM backup of Virtual Machine ’foxtrot’ failed with RC 4390
To retrieve log information through the VMware Virtual Center Server forpermission problems, complete these steps:1. In vCenter Server Settings, select Logging Options and set "vCenter Logging to
Trivia (Trivia).2. Re-create the permission error.3. Reset vCenter Logging to its previous value prevent recording excessive log
information.4. In System Logs, look for the most current vCenter Server log (vpxd-wxyz.log)
and search for the string NoPermission. For example:[2011-04-27 15:15:35.955 03756 verbose ’App’] [VpxVmomi] Invoke error:vim.VirtualMachine.createSnapshot session: 92324BE3-CD53-4B5A-B7F5-96C5FAB3F0EEThrow: vim.fault.NoPermission
This log message indicates that the user ID did not contain sufficientpermissions to create a snapshot (createSnapshot).
Chapter 1. Protection for VMs 21

22 IBM Tivoli Storage Manager for Virtual Environments: Data Protection for VMware User's Guide

Chapter 2. Managing data with the IBM Data Protectionextension
The IBM Data Protection extension is a VMware vSphere Web Client extension thatprovides a view of the Data Protection for VMware vSphere GUI.
The IBM Data Protection extension is designed to integrate within the VMwarevSphere Web Client, but data and commands for this extension are obtained fromthe Data Protection for VMware vSphere GUI web server.
The IBM Data Protection extension provides a subset of the functions that areavailable in the browser and plug-in views for the Data Protection for VMwarevSphere GUI and some additional functions. Depending on your environment, youcan use this extension to configure backup policies to fit your backup managementneeds, such as excluding virtual machines from scheduled backup services, andviewing the backup history of virtual machines. You can also start on-demandbackup and restore operations from the extension.
Restriction: Backup management and on-demand backup functions are notavailable for virtual machines that are protected by IBM Tivoli Storage FlashCopyManager.
Getting startedLearn about the tasks for installing, setting up, and using the IBM Data Protectionextension to manage data protection for your VMware datacenter.
Table 3. Roadmap of installation, set up, and management tasks for the IBM DataProtection extension
Task Description Learn more
Check systemrequirements
Check the system requirementsto ensure that your environmentcontains the requiredcomponents.
Learn about the features that areavailable by vSphere level andby the product that you areusing to back up data: TivoliStorage FlashCopy Manager orTivoli Storage Manager.
Requirements for the IBM DataProtection extension
Install the IBM DataProtection extension
To install the IBM DataProtection extension, selectRegister as an Extension invSphere Web Client if you areinstalling by using theinstallation wizard. If you areinstalling in silent mode, use theREGISTER_EXTENSION parameter.
IBM Data Protection extension
Installing the Data Protection forVMware components
© Copyright IBM Corp. 2011, 2017 23

Table 3. Roadmap of installation, set up, and management tasks for the IBM DataProtection extension (continued)
Task Description Learn more
Configure theinformation that isrequired for the IBMData Protectionextension
When the installation wizardcompletes, the configurationwizard opens. Follow theinstructions in the wizard tocomplete the configuration.
Configuring a new installationwith the wizard
Assign privileges forthe IBM DataProtection extensionto roles
During installation, the customprivileges are created for theIBM Data Protection extension.You must assign these privilegesto roles for VMwareadministrators and users.
VMware vCenter Server userprivilege requirements
Connect to the DataProtection forVMware vSphere GUI
The IBM Data Protectionextension relies on back-endservices that are provided by theData Protection for VMwarevSphere GUI (web GUI) that hasbeen preconfigured for avCenter. To enable the extensionfor a vCenter, you must firstcreate a connection to the webGUI for that vCenter.
Connecting to the DataProtection for VMware vSphereGUI
Enable taggingsupport and configurebackup policies(optional)
You can use the IBM DataProtection extension to changebackup policies such asexcluding virtual machines(VMs) from scheduled backupservices or changing theretention policy of the VMbackups.
To use this feature, you mustenable support for VMwaretagging. You can enable supportfor tagging from the IBM DataProtection extension or from atool such as vSphere PowerCLIversion 5.5 R2 or later.
Enabling tagging support
“Configuring backup policies”on page 29
Manage dataprotection
Use the IBM Data Protectionextension to manage dataprotection tasks for yourVMware datacenter.
“Managing data protection” onpage 30
Troubleshooting Learn how to resolve issuessuch as Platform ServicesController connection problems,enable tracing, and get moredetails about IBM DataProtection extension messages.
“Troubleshooting IBM DataProtection extension problems”on page 177
24 IBM Tivoli Storage Manager for Virtual Environments: Data Protection for VMware User's Guide

Available featuresThe features that are available in the extension depend on the components andcomponent versions that integrate with the extension.
The features that are available in the IBM Data Protection extension depend on theversion of VMware vSphere that you are using and the storage products andversions that you are using to back up your data.
If you are using only Tivoli Storage Manager, the restore, backup, and backupmanagement features are available where supported by the product versions.
If you are using any configuration that includes IBM Tivoli Storage FlashCopyManager to back up your data, only the restore feature is available.
The following tables show the features that are available by vSphere version, DataProtection for VMware and Data Protection for VMware vSphere GUI versions,and extension version.
Important: The configurations that are shown in the table are the standardconfigurations. If you have a non-standard configuration in which the extensionversion is earlier than the Data Protection for VMware vSphere GUI version, nofeatures are available. If you have a configuration in which the Data Protection forVMware vSphere GUI is earlier than the extension version, the features that areavailable are determined by the Data Protection for VMware vSphere GUI version.
Table 4. IBM Data Protection extension functions available with vSphere 6.0 or later
Data Protection for VMwareVersion / Data Protection forVMware vSphere GUIVersion
IBM Data Protectionextension version Features Available
7.1.1 - 7.1.4/2.1.1 - 2.1.4 2.1.1 - 2.1.4 Restore
7.1.6/2.1.6 2.1.6 Restore, Backup1, Tagging(required for backupmanagement)1 2
1 This feature is not available if you are using any configuration that includes IBMTivoli Storage FlashCopy Manager to back up your data.
2 VMware Platform Services Controller must be available and configured if youwant to use the VMware tagging feature to enable backup management settings inIBM Data Protection extension.
Table 5. IBM Data Protection extension functions available with vSphere 5.5
Data Protection for VMwareVersion / Data Protection forVMware vSphere GUIVersion
IBM Data Protectionextension version Features Available
7.1.1 - 7.1.4/2.1.1 - 2.1.4 2.1.1 - 2.1.4 Restore
7.1.6/2.1.6 2.1.6 Restore, Backup1
1 This feature is not available if you are using any configuration that includes IBMTivoli Storage FlashCopy Manager to back up your data.
Chapter 2. Managing data with the IBM Data Protection extension 25

Related tasks:“Enabling tagging support”
Connecting to the Data Protection for VMware vSphere GUIThe IBM Data Protection extension relies on back-end services that are provided bythe Data Protection for VMware vSphere GUI (web GUI) that has beenpreconfigured for a vCenter. To enable the extension for a vCenter, you must firstcreate a connection to the web GUI for that vCenter.
Procedure
To create a connection to the web GUI:1. In the vSphere Web Client, click IBM Data Protection.2. Click the Connections tab. The vCenters that you can manage by using the
IBM Data Protection extension are shown in a table.3. Select a vCenter, and then click the Edit icon.4. Enter the host name or IP address and port for the web GUI server, and then
click Save.
Results
If the connection is successful, Verified Connection is displayed in the ConnectionStatus column for the vCenter.
Enabling tagging supportTo use the IBM Data Protection extension for backup management, you mustconfigure a data mover node as a tag-based node. If you do not use the IBM DataProtection extension, you must create backup management tags and categories thatcan be added to virtual machines.
Setting a data mover node as a tag-based nodeWhen tagging support is enabled on a data mover node, administrators can applybackup management tags to virtual machines in the vSphere inventory.
Before you begin
Ensure that the following requirements are met:v VMware vCenter Server must be at version 6.0 Update 1 or later.v A data mover and the Data Protection for VMware vSphere GUI must be
installed on the same server. The data mover node must be configured so thatthe vCenter server credentials are saved by running the configuration wizard tosave the data mover node password. Other data movers can be installedelsewhere.
v Linux On Linux operating systems, the Data Protection for VMware vSphereGUI must be installed by using the default user name (tdpvmware).
v Linux
For Linux data mover nodes, the default password file (/etc/adsm/TSM.PWD)must be used.
26 IBM Tivoli Storage Manager for Virtual Environments: Data Protection for VMware User's Guide

About this task
You can use data protection tags to change backup policy, such as excluding orincluding virtual machines in VMware inventory objects in scheduled backups, orchanging the retention policy of backups. These data protection tags are presentedas settings that can be changed in the IBM Data Protection extension. The virtualmachines must be in the protection set that is defined by the domain.vmfull datamover option in the schedule definition. A protection set is a group of virtualmachines that is added to a schedule domain.
Procedure
Use one of the following methods:v To configure a new data mover for tagging support on Windows by using the
Data Protection for VMware vSphere GUI, complete the following steps:1. On the Windows system where the Data Protection for VMware vSphere GUI
is installed, start the GUI by opening a web browser and entering the GUIweb server address. For example:https://<GUI web server address>:9081/TsmVMwareUI/
Log on with the vCenter user ID and password.2. Go to the Configuration tab, and select the Edit Tivoli Storage Manager
Configuration action.3. Go to the Data Mover Nodes page of the configuration notebook.4. Complete the steps to add a data mover node.
a. For the data mover node that you want to set up tagging support for,select Create Services, then select Tag Based Node.
b. Click OK to save your changes.v To configure a new or existing Linux or existing Windows data mover node for
tagging support, add the vmtagdatamover yes option in the client options file(dsm.sys for Linux and dsm.opt for Windows).
Results
After the data mover node is enabled for tagging support, the data mover queriesthe VMware inventory for tagging information when it runs a backup. The datamover then backs up the virtual machines according to the data protection tagsthat are set. If the data mover node is not configured for tagging support, any dataprotection tags are ignored during a backup operation.Related tasks:“Configuring backup policies” on page 29Related information:
Vmtagdatamover
Chapter 2. Managing data with the IBM Data Protection extension 27
Creating tags in the virtual machine inventoryIf you do not use the IBM Data Protection extension to manage backups, you mustcreate backup management tags and categories that can be assigned to virtualmachines (VMs).
About this task
After the backup management tags and categories are created in the VM inventory,you can use tools such as vSphere PowerCLI version 5.5 R2 or higher to applythese tags to VMs to change their backup policy.
Procedure
Use one of the following methods to create backup management tags andcategories in the VM inventory:v Use the IBM Data Protection extension to configure backup policies for a VM.
Changing the backup policy of a VM automatically applies the appropriatebackup management tags to the VM.
v Run the dsmc set vmtags command on the data mover node. You need to runthis command only one time. You do not need to run the command on everydata mover node.
v From the data mover node, back up a VM with the vmtagdatamover yes optionin the client options file or as part of the backup vm command. For example:backup vm testvm -vmtagdatamover=yes
Results
The following tags are created.
Category Tag Tag description
Backup Management (IBMSpectrum Protect)
Excluded The object is excludedfrom backups by IBMSpectrum Protect
Management Class (IBMSpectrum Protect)
Management_class_name The policy used forretention settings in IBMSpectrum Protect
Where:
ExcludedExcludes a VM from scheduled backup services.
Management_class_nameThe name of the retention policy that defines how long backup versionsare kept on the Tivoli Storage Manager server or how many backupversions can exist on the server before they are expired.
If you do not use the Management_class_name tag value, the defaultretention policy for the VMware datacenter node is used.
When the vmtagdatamover option is set to yes, all tags that are assigned to a VMare backed up when a VM is backed up to the Tivoli Storage Manager server andrestored when the VM is restored.Related tasks:“Setting a data mover node as a tag-based node” on page 26“Configuring backup policies” on page 29
28 IBM Tivoli Storage Manager for Virtual Environments: Data Protection for VMware User's Guide

Related information:
Vmtagdatamover
Set Vmtags
Configuring backup policiesYou can change the way your virtual machine backups are managed, such asexcluding virtual machines (VMs) from scheduled backup services or changing theretention policy of VM backups.
Excluding virtual machines from scheduled backup servicesYou can use the IBM Data Protection extension to exclude virtual machines (VMs)from scheduled backup services.
About this task
Typically, the VMs in your VMware datacenter are protected by scheduled backupservices with IBM Tivoli Storage Manager for Virtual Environments: DataProtection for VMware. In some scenarios, you might want to exclude a VM fromscheduled backups. For example, if it is used only for testing or it is accessedinfrequently.
Procedure
Exclude a VM from scheduled backup services by using one of the followingmethods:
Method Steps
Exclude a single VM fromscheduled backupservices:
1. In the vSphere Web Client, select a VM from the tree in thenavigator.
2. Complete one of the following steps:
v Click Manage > IBM Data Protection. Review the dataprotection settings for the VM and click Edit.
v Click Actions > All IBM Data Protection Actions >Manage Data Protection.
3. Select Yes in the Exclude from backup field and click OK.
Exclude one or more VMsfrom scheduled backupservices:
1. In the vSphere Web Client, select one or more VMs fromthe inventory list in the workspace. The selected VMs mustbelong to the same datacenter.
2. Click Actions > All IBM Data Protection Actions >Manage Data Protection.
3. Select Yes in the Exclude from backup field and click OK.
Results
The excluded VMs will not be backed up in future scheduled backup operations.However, you can still run an on-demand backup of an excluded VM.Related tasks:“Starting an on-demand backup of a virtual machine” on page 32
Chapter 2. Managing data with the IBM Data Protection extension 29

Specifying the retention policy of virtual machine backupsYou can specify how long to keep a virtual machine (VM) backup or how manyversions of the backup to keep on the Tivoli Storage Manager server.
About this task
The retention policy can be either the number of days that backup versions canexist on the Tivoli Storage Manager server before they expire, or the number ofbackup versions that exist on the server before they expire. When backup versionsexpire on the server, they are removed from server storage.
If you do not specify a retention policy, the default retention policy for theVMware datacenter node is used.
Procedure
To change the retention policy of VM backups, use one of the following methods:
Method Steps
Change the retentionpolicy of a single VM:
1. In the vSphere Web Client, select a VM from the tree in thenavigator.
2. Complete one of the following steps:
v Click Manage > IBM Data Protection. Review the dataprotection settings for the VM and click Edit.
v Click Actions > All IBM Data Protection Actions >Manage Data Protection.
3. Select a policy from the Retention Policy list and click OK.Tip: Retention policies cannot be selected for a VM whenYes is selected in the Exclude from backup field.
Change the retentionpolicy of one or moreVMs:
1. In the vSphere Web Client, select one or more VMs fromthe inventory list in the workspace. The selected VMs mustbelong to the same VMware datacenter.
2. Click Actions > All IBM Data Protection Actions >Manage Data Protection.
3. Select a policy from the Retention Policy list and click OK.Tip: Retention policies cannot be selected for a VM whenYes is selected in the Exclude from backup field.
Results
The retention policy that you set for the selected VMs will be used for all futurebackup operations.
Managing data protectionUse the IBM Data Protection extension to manage data protection of virtualmachines in your VMware datacenter.
30 IBM Tivoli Storage Manager for Virtual Environments: Data Protection for VMware User's Guide
Viewing the history of backup tasks for virtual machinesYou can view the recent backup history of a virtual machine (VM) to identifybackup tasks that might require attention. Backup history is available only forTivoli Storage Manager tasks.
About this task
The number of backup tasks that are shown depends on the number of days thatare set by the Tivoli Storage Manager server SET SUMMARYRETENTION command.
Procedure
To view backup tasks for a VM:1. In the vSphere Web Client, select a VM and click the Monitor tab.2. Click IBM Data Protection.
The backup tasks for the selected virtual machine are shown. Information suchas the backup time, the status of the backup, and the amount of data that istransmitted is shown for each task.If you want to view the backups that are available for the VMs in a datacenter,select a datacenter in the vSphere Web Client and click Manage > IBM DataProtection.
Restoring a virtual machineYou can restore virtual machines (VMs) that have Tivoli Storage FlashCopyManager or Tivoli Storage Manager backups.
Procedure
To restore a VM:1. In the vSphere Web Client, right-click a VM and click Actions > All IBM Data
Protection Actions > Restore.If you want to restore a VM that is no longer in the inventory because it isdeleted, select a datacenter and click Manage > IBM Data Protection. If theVM that you want to restore is listed, select the VM and then click Restore.
2. Follow the instructions in the Restore a Virtual Machine wizard to select arestore point and destination location. You can restore to the original location ofthe VM or to an alternative location.If you want to restore to the original location, you can accept the informationthat is provided on the Select Destination page of the wizard. By default, theVM name is the original name appended with a date and time. You can usethis name or enter another name that is not already used by another VM in thedatacenter. If you want to restore to an alternative location, enter theinformation for that location.
3. Click All Users' Tasks in the Recent Tasks section of the vSphere Web Client toview the progress of the restore operation in a task view.
Results
After the restore operation is complete, the virtual machine is shown in thelocation that you selected.
Chapter 2. Managing data with the IBM Data Protection extension 31

Starting an on-demand backup of a virtual machineWhen you start an on-demand backup of a virtual machine (VM), the backupoperation begins immediately without waiting for a schedule to run.
Before you begin
You cannot run a backup operation for VMs if you are using any configurationthat includes Tivoli Storage FlashCopy Manager to back up your data.
About this task
Typically, the VMs in your VMware datacenter are backed up when a schedule isrun. However, you might want to start an on-demand backup if you notice that aVM was not backed up recently or if a backup completed with errors. You can alsostart an on-demand backup of a VM that is excluded from scheduled backupservices.
Tip: Any retention policy settings are observed during an on-demand backup. Theretention policy for a VM determines how many backup versions of a VM canexist on the Tivoli Storage Manager server. Depending on how many backupversions of a VM can exist on the server, running an on-demand backup of a VMmight cause older backups to expire. When backup versions expire on the server,they are removed from server storage. For example, if a VM was backed up fourtimes, and only four backup versions can exist on the server, running anon-demand backup causes the oldest backup version to expire.
To check the number of backup versions that can exist on the server, select a VMin the vSphere Web Client and click Manage > IBM Data Protection.
Procedure
To start an on-demand backup of a VM, complete the following steps:1. In the vSphere Web Client, right-click a VM and click Actions > All IBM Data
Protection Actions > Back Up.2. In the Backup a Virtual Machine window, select a type of backup to run.v Incremental: Backs up VM data that changed since the last incremental or
full backup. If no previous backup exists, a full backup is run.v Full: Backs up an entire VM regardless of when the last backup occurred.
3. Select a data mover node to back up the VMs. The data mover node containsthe Tivoli Storage Manager backup-archive client that runs the backupoperations.Typically, you can accept the default data mover node. However, to improveworkload balancing in some situations, you might select a data mover that isnot heavily used.
4. Click OK to begin the backup operation.5. Click All Users' Tasks in the Recent Tasks section of the vSphere Web Client to
view the progress of the backup operation in a task view.
Results
After the backup operation is completed, select a VM and click Monitor > IBMData Protection to view the backup information for the VM.Related tasks:
32 IBM Tivoli Storage Manager for Virtual Environments: Data Protection for VMware User's Guide

“Excluding virtual machines from scheduled backup services” on page 29
Chapter 2. Managing data with the IBM Data Protection extension 33

34 IBM Tivoli Storage Manager for Virtual Environments: Data Protection for VMware User's Guide

Chapter 3. Getting started with file restore
To restore files from a web-based interface without administrator assistance, filerestore is available for use. After the configuration is complete, file owners cansearch, locate, and restore files.
The web-based interface does not require a file manager application to manuallycopy files. When you restore a file, you specify a restore point, search or browse tolocate the file, and start the restore.
When the configuration is complete, no administrator interaction is required toaccess or restore files. During the configuration process, the administrator gives thefile owner access to the virtual machine that contains their data. File owners accessthe data with local virtual machine credentials so administrators can monitor filerestore resources. File owner permissions do not have to be managed.
You can view demonstration videos that help you learn about the Tivoli StorageManager file restore interface. The Find and Restore Files and Monitoring Restoresvideos display when you first log in to the file restore interface. Videos areavailable in English only.
Common tasks for restoring filesDifferent types of users set up and use the file restore feature. Each user isresponsible for a set of tasks.
File owner
The file owner maintains business data such as text documents, spreadsheets, andpresentation files.
The file owner completes the following tasks:v “Logging in to restore files” on page 38.v “Restoring files from a virtual machine backup” on page 38
Administrator
The administrator creates initial software deployments, schedules virtual machinebackups to the Tivoli Storage Manager server, and manages user accounts andpermissions in the VMware environment.
The administrator completes the following tasks to set up the environment for filerestore:1. Enabling the environment for file restore operations2. Backing up virtual machine data to Tivoli Storage Manager3. Optional: Setting up file restore operations on Linux
When running Data Protection for VMware in a Linux environment or incombination with Tivoli Storage FlashCopy Manager for VMware, the filerestore feature must be installed on a Windows system to enable the file restorefeature.
© Copyright IBM Corp. 2011, 2017 35

After the environment is ready for file restore operations, the following optionaltasks can be done by the administrator:v Modifying options for file restore operationsv Configuring log activity for file restore operations
File restore prerequisitesBefore you restore files with the Tivoli Storage Manager file restore interface,ensure that your environment meets the minimum prerequisites.
To enable the file restore feature, Data Protection for VMware must be installed ona Windows system.
VMware virtual machine prerequisites
The following prerequisites apply to the VMware virtual machine that contains thefiles to be restored:
v Linux Windows VMware Tools must be installed on the virtual machine.
v Linux Windows The virtual machine must be running during the file restoreoperation.
v Windows The virtual machine must belong to the same Windows domain as thedata mover system.
v Windows When a virtual machine is deleted from a Windows domain and thenrestored later, the virtual machine must rejoin the domain to ensure the domaintrust relationship. Do not attempt a file restore from the virtual machine untilthe domain trust relationship is restored.
v Windows If the user does not own the file to be restored, the MicrosoftWindows Restore Files and Directories privilege must be assigned to the userfor that virtual machine.
v Linux Local user authentication is required for the virtual machine.Authentication is not available through Windows domain, Lightweight DirectoryAccess Protocol (LDAP), Kerberos, or other network authentication methods.
v Linux On a Red Hat Enterprise Linux 6 operating system, theChallengeResponseAuthentication option in the sshd daemon configuration file(/etc/ssh/sshd_config) must specify YES or be commented out. For example,either of the following statements are valid:ChallengeResponseAuthentication yes
#ChallengeResponseAuthentication no
Restart the sshd daemon after you modify this option.
Data mover prerequisites
The data mover system represents a specific backup-archive client that "movesdata" from one system to another.
Windows
The data mover system must belong to the same Windows domain as
the virtual machine that contains the files to be restored.
36 IBM Tivoli Storage Manager for Virtual Environments: Data Protection for VMware User's Guide

Mount proxy prerequisites
The mount proxy system represents the Linux or Windows proxy system thataccesses the mounted virtual machine disks through an iSCSI connection. Thissystem enables the file systems on the mounted virtual machine disks to beaccessible as restore points to the Tivoli Storage Manager file restore interface.
Linux
Linux operating systems provide a daemon that activates Logical
Volume Manager (LVM) volume groups as these groups become available to thesystem. Set this daemon on the Linux mount proxy system so that LVM volumegroups are not activated as they become available to the system. For detailedinformation about how to set this daemon, see the appropriate Linuxdocumentation.
Linux
Windows
The Windows mount proxy system and Linux mount proxy
system must be on the same subnet.
Microsoft Windows domain account prerequisites
The following prerequisites apply to Windows domain accounts:
v Windows Windows domain administrator credentials are required to access thenetwork share. An administrator enters these credentials in the Data Protectionfor VMware vSphere GUI configuration wizard or notebook to enable theenvironment for file restore operations.
v Windows A file owner accesses the remote virtual machine (that contains thefiles to be restored) with Windows domain user credentials. These credentials areentered in the Tivoli Storage Manager file restore interface during login. Domainuser credentials verify that the file owner has permission to log in to the remotevirtual machine and restore files into the remote virtual machine. Thesecredentials do not require any special permissions.
v Windows If a file owner uses a Windows domain user account that limits accessto specific computers (instead of access to all computers within the domain),ensure that the mount proxy system is included in the list of computers that areaccessible to this domain user account. Otherwise, the file owner is unable to login to the Tivoli Storage Manager file restore interface.
Tape media prerequisites
File restore from tape media is supported. However, recovery of individual filesgenerates random read request patterns. As a result, processing might be slowwhen a sequential-access device (such as tape media) is used. File restore from diskstorage is the preferred method.
Consider moving target virtual machine backup data from tape media to diskstorage before you attempt a file restore operation. You can do move data with theTivoli Storage Manager server MOVE NODEDATA command. You can also runtraditional full VM backups regularly.
For more information related to tape media, see “Tape media guidelines” on page13.
Chapter 3. Getting started with file restore 37

Logging in to restore filesLinux Windows
You can log in to the Tivoli Storage Manager file restore interface to restore yourfiles with minimal assistance from the administrator.
About this task
When you log in to this interface, you can locate and restore your files at yourconvenience.
Procedure1. Access the Tivoli Storage Manager file restore interface by opening a web
browser and entering the URL that you received from your administrator.2. Enter the network name or IP address of the virtual machine that contains your
files. For example, myhost.mycompany.com.3. Enter the user account that you use to access your files.
Windows Use the Windows_domain_name\user_name format.4. Enter the user account password and click Log in.
Restoring files from a virtual machine backupLinux Windows
Locate your files and restore them to a preferred location.
Before you begin
Ensure that you are logged in to the Tivoli Storage Manager file restore interface. Abackup must exist before you can restore your files.
About this task
Only those files and directories for which you have permission to view on theoperating system are visible.
Procedure1. Select a backup by completing the following steps:
a. Click a date in the calendar.b. If necessary, select a time in the Available backups field.c. Click Choose backup.
The virtual machine disks or directories are displayed in the table.2. Optional: If the default backup is not the one you want, select a different
backup by completing the following steps:a. Click the calendar.b. Click a date in the calendar.c. If necessary, select a time.d. Click Change backup.
38 IBM Tivoli Storage Manager for Virtual Environments: Data Protection for VMware User's Guide

Restriction: If you change the backup date or time, any file selections thatyou made are lost. However, the new backup loads to the directory whereyou previously explored. If that directory is unavailable, the backup loadsto the top directory.
The virtual machine disks or directories are displayed in the table.3. To select files to restore, complete the following steps:
a. Click a disk or directory in the table to view the subdirectories and files.b. Optional: To search for a file in the current directory and subdirectories,
type a name in the Search field and press Enter. The results are displayedin the order they are found.
c. Select one or more files and directories to restore. If you select a directorythat has no contents, the empty directory is not restored.
4. Select where to restore files.v To restore files and directories to the original location, select Restore to >
Original Location.v To restore files and directories to a different location, select Restore to >
Alternate Location.5. After you make your selections, click Restore. If you are restoring files to an
alternative directory, select an existing directory on your virtual machine orcreate a directory to place restored files. Then, click Restore. If a file with thesame name exists, the restored file's original modification date and time isadded to the file name. Subsequent restores of the same file contain a number(_N) after the original modification date and time. For example:t2.2015-03-07-07-28-03_1.txt
What to do next
Click the restore icon ( ) to view information about active and recent restores.By default, information is kept for 7 days after a restore completes.
If a restore completed with an error or warning, view additional information byclicking Details. To save the error or warning information, click Export and savethe information in .CSV format.
Chapter 3. Getting started with file restore 39

40 IBM Tivoli Storage Manager for Virtual Environments: Data Protection for VMware User's Guide

Chapter 4. Protection for in-guest applications
Data Protection for VMware protects Microsoft Exchange Server, Microsoft SQLServer, and Active Directory Domain Controllers that run inside VMware VMguests in a VMware vSphere environment.
Microsoft Exchange Server data protection in VMware environmentsFor Microsoft Exchange Server workloads that are running in a VMware ESXivirtual guest machine, you can take application-consistent backups of virtualmachines that are hosting Microsoft Exchange Server data. By using IBM TivoliStorage FlashCopy Manager software, you can recover database-level andmailbox-level backups from a virtual machine.
Before you back up data, identify your recovery point objective (RPO). The RPOhelps you decide how often to back up data and affects the cost that is associatedwith data backups.
For example, you can schedule frequent virtual machine backups for necessaryrecovery points. The recovery point of a virtual machine backup is the time of thebackup. While change-block tracking and data deduplication offer savings, virtualmachine backups can be expensive if you create and delete many virtual machinesnapshots.
Most traditional in-guest data protection methods provide appropriate RPOs, butthese in-guest methods lose the efficiencies that are introduced by backing up dataat the virtual machine level.
You can use IBM Tivoli Storage Manager for Virtual Environments: Data Protectionfor VMware and Tivoli Storage FlashCopy Manager with Data Protection forMicrosoft Exchange Server to back up data at a virtual machine level in a way thatpreserves backup efficiencies.
To protect Microsoft Exchange Server data in a VMware environment, ensure thatthe following products are installed and configured on your system:v Tivoli Storage Manager for Virtual Environments: Data Protection for VMware
V7.1.8 (which includes the Tivoli Storage Manager client)v Tivoli Storage FlashCopy Manager with Data Protection for Microsoft Exchange
Server V4.1.6
These software offerings work together to protect Microsoft Exchange Server datain a VMware environment when no other software products are used to back upMicrosoft Exchange Server data. Tivoli Storage FlashCopy Manager for VMwarecannot be used with this solution.
For permission required to back up and restore application data for MicrosoftExchange Server, see technote 1647986.
Application protection is supported for VMware VMs in a VMware vSphereenvironment only. In-guest application protection is not supported for VMwarevApps in a vCloud environment.
© Copyright IBM Corp. 2011, 2017 41

Configuring the software for Exchange Server data protectionin a VMware environment
To protect Microsoft Exchange Server workloads that are running in a VMwareESXi virtual guest machine, install and configure Data Protection for VMware.Then, install and configure Data Protection for Microsoft Exchange Server.
Before you begin
The configuration instructions that follow are based on a configuration scenariothat might not match your environment. Adjust the configuration for yourenvironment.
The following list summarizes the scenario for quick reference:
Windows host nameEXC10
VSS requestor node nameEXC10_VSS
Data Protection for Microsoft Exchange Server node nameEXC10_EXC
Virtual machine namevm_exc10
Data mover node namesdatamover10 and datamover20
Datacenter node namedatacenter10
VM file space\VMFULL-vm_exc10
About this task
The following details describe the scenario that is used.v A single Microsoft Exchange Server database on a virtual machine that is named
vm_exc10 must be recovered.v Virtual machine vm_exc10 is protected by Data Protection for VMware by using
the node name datacenter10. This node name in the Tivoli Storage Managerserver represents the vSphere datacenter. The data mover nodes are calleddatamover10 and datamover20.
v The virtual machine guest is configured with the virtual machine name ofvm_exc10 and the Microsoft Windows host name is EXC10.
v Data Protection for Microsoft Exchange Server is installed in the virtual guestmachine and is configured to the Tivoli Storage Manager server to use nodename EXC10_EXC.
v The Tivoli Storage Manager client in the virtual guest machine is configured asthe VSS requestor node and is using the node name EXC10_VSS.
Procedure1. Follow the installation and configuration instructions that are provided with
each software package.
42 IBM Tivoli Storage Manager for Virtual Environments: Data Protection for VMware User's Guide
If you install Data Protection for Microsoft Exchange Server before DataProtection for VMware, you cannot specify the VMware datacenter node in theData Protection for Microsoft Exchange Server configuration wizard because thefield is disabled.
Tip: In this case, reconfigure Data Protection for Microsoft Exchange Server toenable the VMware datacenter node after Data Protection for VMware isinstalled.
2. Complete the tasks in this checklist:v Verify that Microsoft Exchange Server databases and mailboxes are hosted on
VMware virtual disks.v Verify that no Exchange Server database is hosted on raw device mapped
(RDM) disks in physical compatibility mode, independent disks, or on disksthat are attached directly to the guest through in-guest iSCSI.
3. Outside of the VM guest, in the datamover, configure Data Protection forVMware to protect Microsoft Exchange Server databases and mailboxes.
4. Within the guest, take the following actions:v Verify that the Data Protection for VMware recovery agent command-line
interface is configured to work with the recovery agent on the guest virtualmachine.
v Configure Data Protection for Microsoft Exchange Server to complete backupand restore operations from a virtual machine backup.
Related tasks:“Configuring Data Protection for VMware”“Configuring Data Protection for Microsoft Exchange Server” on page 45
Configuring Data Protection for VMwareYou must configure Data Protection for VMware to preserve Microsoft VSSmetadata information during a virtual machine backup for systems that are hostingMicrosoft Exchange Server data.
About this task
Data Protection for VMware provides application consistency when you back upvirtual machines that are hosting Microsoft Exchange Servers. With these backups,you can recover the virtual machine with Microsoft Exchange Server in a consistentstate.
To recover only selected databases or mailboxes from this type of backup withTivoli Storage Manager, without having to recover the entire virtual machine,preserve information about the state of the Microsoft Exchange Server at the timeof the virtual machine snapshot and backup. This information is collected as partof the Microsoft Volume Shadow Copy Services (VSS) interaction that occursduring a virtual machine snapshot.
For Data Protection for VMware to collect the Microsoft VSS metadata forMicrosoft Exchange Server, you must configure Data Protection for VMware toobtain this information from the virtual machine during the backup operation.
Procedure1. Configure Data Protection for VMware to preserve the Microsoft VSS metadata
information during a virtual machine backup for systems that are hostingMicrosoft Exchange Server data.
Chapter 4. Protection for in-guest applications 43

a. Locate the options file for the Data Protection for VMware data mover. OnWindows systems, the options file is dsm.opt. On Linux systems, theoptions file is dsm.sys.
b. Specify the INCLUDE.VMTSMVSS option for the virtual machine. You must setthis option for virtual machine backups to preserve the Microsoft VSSmetadata information. For example, specify INCLUDE.VMTSMVSSvm_display_name where vm_display_name refers to the name of the virtualmachine as shown in the VMware vSphere Client and vSphere Web Client.
c. Optional: Back up a passive copy of a database that is part of an ExchangeServer Database Availability Group (DAG). Specify the vmpreferdagpassiveyes option for the virtual machine. Backing up the passive copy typicallyreduces the performance impact to the active copy in the productiondatabase. If no valid passive copy is available, the active database copy isbacked up.
d. Verify that the Virtual Machine Disks (VMDK) that host the MicrosoftExchange Server database are not being excluded from the virtual machinebackup operation. Repeat the preceding steps for all data movers thatprotect virtual machines that are hosting Microsoft Exchange Server.
2. On each data mover, for example, datamover10, store the guest virtual machinecredentials to Data Protection for VMware by running the following commandfrom the Tivoli Storage Manager backup-archive client command line:dsmc set password –type=vmguest vm_guest_display_nameguest_admin_ID guest_admin_pw
This command stores the guest virtual machine credentials, which areencrypted on the system that hosts the data mover. The following minimumpermissions are required for guest_admin_ID guest_admin_pw:v Backup rights: Microsoft Exchange Server 2010 and 2013: Organization
Management permissions (membership in the management role group,Organization Management).
What to do next
You can verify the virtual machine backup configuration and ensure that theVMDKs are included. In addition, you can view other parameters by issuing thebackup command with the preview option from the backup-archive client, forexample:dsmc backup vm vm_display_name -preview -asnode=datacenter_node
You can also use the Tivoli Storage Manager scheduler to schedule periodicbackups of your virtual machines. You can also back up the virtual machine that ishosting the Microsoft Exchange Server by using the backup-archive clientcommand line:dsmc backup vm vm_display_name -asnode=datacenter_node
44 IBM Tivoli Storage Manager for Virtual Environments: Data Protection for VMware User's Guide

Verifying that the configuration backs up data that can berestoredBefore you can restore individual Microsoft Exchange Server databases from a DataProtection for VMware virtual machine backup, you must complete at least onesuccessful virtual machine backup. For the restore operation to work, the backupmust contain Microsoft Exchange Server database metadata.
Procedure1. Issue the following backup-archive client query command on one of the data
mover nodes:dsmc query vm vmname -detail -asnode=datacenter_node
where:v vmname specifies the name of the virtual machinev datacenter_node specifies the name of the datacenter node
.2. In the command output, look for the following details:
Application(s) protected: MS Exchange 2013 (database-level recovery)
Ensure that Excluded is not indicated in any Virtual Machine Disk (VMDK)status fields for virtual disks that host Microsoft Exchange Server database files.The Excluded status indicates that one or more of the VMDKs that are requiredto recover a Microsoft Exchange Server database are not being protected. Forexample:
Query Virtual Machine for Full VM backup# Backup Date Mgmt Class Size Type A/I Virtual Machine- ----------- ---------- ----- ---- --- -----------------1 02/20/2015 STANDARD 43.94GB IFFULL A vm_exc10
12:43:59
Size of this incremental backup: n/aNumber of incremental backups since last full: 0Amount of extra data: 0TSM object fragmentation: 0Backup is represented by: 328 TSM objectsApplication protection type: TSM VSSApplication(s) protected: MS EXC 2013 (database-level recovery)VMDK[1]Label: Hard Disk 1VMDK[1]Name: [ess800_dev2] vm_exc10/vm_exc10 .vmdkVMDK[1]Status: Protected...VMDK[6]Label: Hard Disk 6VMDK[6]Name: [ess800_dev2] vm_exc10/vm_exc10_5.vmdkVMDK[6]Status: Protected
Configuring Data Protection for Microsoft Exchange ServerAfter you configure Data Protection for VMware and verify that you created avirtual machine backup that is suitable for recovery of a single Microsoft ExchangeServer database, configure Data Protection for Microsoft Exchange Server in theguest virtual machine.
Procedure1. Log on to the virtual machine that hosts the Microsoft Exchange Server
database.2. Verify that the following packages are installed:
Chapter 4. Protection for in-guest applications 45
v Tivoli Storage Manager recovery agent, recovery agent command-lineinterface (CLI), and license (from the Data Protection for VMware productpackage)
v Tivoli Storage Manager backup-archive clientv Data Protection for Microsoft Exchange Server
You can install the recovery agent, CLI, license, and backup-archive clienttogether by using the Data Protection for VMware installation program. Toinstall the packages together, select the following advanced installation option:Install a complete data mover for in-guest application protection. DataProtection for Microsoft Exchange Server is installed separately.
3. Configure Data Protection for Microsoft Exchange Server by using the TivoliStorage Manager configuration wizard. When you open the Tivoli StorageManager Node Names page of the wizard, enter the VMware datacenter nodename, Microsoft Exchange Server node name, and VSS requestor node name. Ifthe datacenter node name field is disabled, the Tivoli Storage Manager recoveryagent is not installed correctly.
4. After Data Protection for Microsoft Exchange Server is configured, verify thatthe Configuring Recovery Agent rule status indicates Passed.
5. Log on to a data mover instance and complete the following steps. Do notrepeat these steps for all data mover instances.a. Copy the contents of the data mover options file dsm.opt to a temporary file
named dsm.setaccess.opt and make the following changes to the file. Donot make these changes in the dsm.opt file.1) Delete any line that contains an ASNODE entry.2) Set the NODENAME option to the VMware datacenter node name. For
example:NODENAME datacenter10
Tip: If the dsm.opt file does not contain ASNODE entries and the NODENAMEoption is set to the correct data center node, you can use this file rather thancreating the dsm.setaccess.opt file.
b. From the datacenter node that was defined in the NODENAME option, issue theset access command to grant the VSS requestor node access to the virtualmachine backups as shown in the following example.You must complete this step because the VSS requestor node accesses thevirtual machine backups on behalf of Data Protection for MicrosoftExchange Server.If the password for the datacenter node is unknown when you run the setaccess command, you will receive an error message and the Tivoli StorageManager server administrator must reset the password to issue thecommand.
Example
The following example shows the required parameters for the set accesscommand. The parameters specify the virtual machine name (vm_exc10), the VSSrequestor node name (EXC10_VSS), and the name of the options file that defines thedatacenter node name (dsm.setaccess.opt).
The example also shows the results of the query access command, which showsthe backup access authorization for the VSS requestor node.
46 IBM Tivoli Storage Manager for Virtual Environments: Data Protection for VMware User's Guide

dsmc set access backup –type=VM vm_exc10 EXC10_VSS –optfile=dsm.setaccess.opt
ANS1148I “Set Access” command successfully completed.
dsmc query accessNode name: datacenter10Type Node User Path------ ------ ------ ------Backup EXC10_VSS * \VMFULL-vm_exc10\*\*
ANS1148I “Query Access” command completed successfully
Managing backupsAfter you configure Data Protection for Microsoft Exchange Server, you canschedule virtual machine backups and separately, you can update the mailboxinformation in Exchange Server database backups on the virtual machine.
Scheduling virtual machine backupsTo ensure that your data is protected, schedule virtual machine backups.
Before you begin
Before you back up virtual machines that are hosting Microsoft Exchange Serverdatabases, mount the databases.
By default, the maximum size allowed for a VMDK in a backup operation is 2 TB.However, the maximum is 8 TB. To increase the maximum size, use thevmmaxvirtualdisks option. For more information, see Vmmaxvirtualdisks.
About this task
During backup processing, Data Protection for VMware bypasses a guest MicrosoftExchange Server database that is dismounted, corrupted, suspended, or not in ahealthy state in a Database Availability Group (DAG). Databases in such invalidstates are excluded from virtual machine backups and are not available to restore.
Procedure1. Log on to the Data Protection for VMware user interface.2. Click the Backup tab.3. Click Create Schedule to specify a backup schedule name, source (the virtual
machines to include in the backup schedule), and other scheduling options.4. Verify that the source of the schedule includes the virtual machines that are
hosting Microsoft Exchange Server.5. Verify that one of the following services is running:v If you are using scheduler that is managed by a Client Acceptor Daemon
(CAD), ensure that the CAD service is running on the data mover.v If you are using the stand-alone scheduler, ensure that the scheduler service
is running.
Chapter 4. Protection for in-guest applications 47

Updating mailbox information in Microsoft Exchange ServerbackupsWhen you back up a virtual machine that is hosting Microsoft Exchange Serverdata, mailbox history is automatically uploaded with the virtual machine backup ifData Protection for Microsoft Exchange Server is detected on virtual machine.
About this task
Unless Data Protection for Microsoft Exchange Server is installed on the virtualmachine, mailbox history information is not automatically updated in ExchangeServer database backup operations. Automatic uploading of mailbox history mightalso be disabled by specifying the VMBACKUPMAILBOXHISTORY No in the data moveroptions file, that is, dsm.opt on Windows systems or dsm.sys on Linux systems.
You can manually update mailbox history information by using the Data Protectionfor Microsoft Exchange Server command-line interface.
Tip: Complete this task before you back up the virtual machines that containMicrosoft Exchange servers. In this way, you can ensure that you have consistentlocation information for the mailbox history and the mailboxes in databasebackups.
Procedure1. To update only the mailbox history information in Exchange Server database
backups, issue the backup /UpdateMailboxInfoOnly command as shown in thefollowing example:tdpexcc backup DB1 full /UpdateMailboxInfoOnly
where DB1 is the database name, and full is the type of database backup.
Tip: To update information for all the mailboxes in the Exchange organization,specify an asterisk (*) character as the database name.
2. Optional: Verify that the mailbox information is updated correctly bycompleting the following steps.a. Review the mailbox information for database backups on IBM Spectrum
Protect server by issuing the query /SHOWMAILBOXInfo command as shownin the following example:tdpexcc query tsm /showmailboxinfo
b. Start Microsoft Management Console (MMC), and in the Mailbox Restoreor Mailbox Restore Browser view, verify the list of updated mailboxes thatare available to restore.
Verifying backupsAfter you create a backup, verify that you can query the virtual machine backupsand the database backups from the Data Protection for Microsoft Exchange Serverinterface.
About this task
You can recover one or more Microsoft Exchange databases based on yourrecovery point objectives (RPO).
48 IBM Tivoli Storage Manager for Virtual Environments: Data Protection for VMware User's Guide
|||||
|
|||||
||
||||
|
|||
|
|
||
||
|||
|
|||
|

Procedure1. From Microsoft Management (MMC), select a Microsoft Exchange Server.2. Click the Recover tab.3. Select View > Databases. A list of Microsoft Exchange Server database backups
that can be restored is displayed.Microsoft Exchange Server databases that are backed up with Data Protectionfor VMware are identified with the vmvss backup method.
Troubleshooting VSS backup operations on guest virtualmachinesIf you encounter a problem during Volume Shadow Copy Service (VSS) backupprocessing on a guest VM, try to reproduce the problem in your environment.
About this task
Contact IBM Support for further assistance if you have a problem that you areunable to solve by reproducing the issue or reviewing the information that follows.
VSS writer service causes a VM backup to fail:
You can bypass any VSS writer that is causing a VM backup to fail and exclude itfrom the backup.
About this task
Before a VM backup, the VSS writer is in a stable state and has no errors. DuringVM backup processing, a VSS writer might encounter an error that causes theentire VM backup to fail.
For example, if the Microsoft Forefront Protection VSS Writer is installed on aguest VM, the VM backup fails and the VSS writer status changes to Retryableerror, Waiting for completion, or a status other than Stable. Complete thefollowing steps to exclude the writer service from the VM backup.
Procedure
1. In the VSS administrative command-line tool on the guest VM, list the VSSwriters by issuing the vssadmin list writers command. In the followingcommand example, the Microsoft Forefront Protection VSS Writerservice isidentified by writer name, ID, and instance ID:Writer name: ’FSCVSSWriter’
Writer Id: {68124191-7787-401a-8afa-12d9d7ccc6ee}Writer Instance Id: {f4cc5385-39a5-463b-8ab4-aafb2b35e21e}State: [1] StableLast error: No error
2. In the datamover options file, dsm.opt or dsm.sys, add theEXCLUDE.VMSYSTEMSERVICE option followed by the Writer Name as shown in thefollowing example.EXCLUDE.VMSYSTEMSERVICE FSCVSSWriter
Tip: If the data mover machine is on a UNIX system, the option file is dsm.sys.If the guest VM and datamover machine use different language sets, specify theWriter ID or Writer Instance Id instead of the Writer Name.For example:EXCLUDE.VMSYSTEMSERVICE {68124191-7787-401a-8afa-12d9d7ccc6ee}
Chapter 4. Protection for in-guest applications 49
||||
|
||
|
||
|
|||
||||
|
||||
|||||
|||
|
||||
|
Results
The VM backup completes successfully even if the Microsoft ForefrontProtection VSS Writer service is running on the guest VM.
No application protection file APPPROTECTIONDBINFO.XML and no warningmessages for skipped databases:
Under certain conditions, a dismounted Exchange 2010 Server database is skippedduring a backup operation and no warning is issued.
About this task
When the following conditions exist during a VM backup of a guest VM withExchange 2010 Server:v The Exchange 2010 Server is not a member of a Database Availability Group
(DAG).v All Exchange 2010 Server databases are dismounted.
The following warning message is generated:
ANS4063W IBM Tivoli Storage Manager application protection cannot copythe application metafile ’APPPROTECTIONDBINFO.XML ’ from the following VM: ’<name_name>’.Individual database restore from this backup is not supported.
ANS4063W IBM Tivoli Storage Manager application protection cannot copy theapplication metafile ’___________________________L’ from the following VM: ’<vm_name>’.Individual database restore from this backup is not supported.
In this situation, the VM backup is available for only full VM restore. Individualdatabase restore from this VM backup is not available.
To prevent this situation, mount the Exchange 2010 Server databases before youstart the VM backup operation.
When Exchange 2010 Server DAG databases or Exchange Server 2013 databases aredismounted, a VM backup operation of a guest VM generates the followingwarning message:
ANS2234W Restore from virtual machine backup is not available fordismounted database <database>
For a dismounted Exchange 2010 Server database that is not a member of a DAG,Tivoli Storage Manager does not detect that the databases are dismounted. As aresult, warning message ANS4063W is generated instead of ANS2234W.
Transaction error due to mixing of deduplicated and non-deduplicated data inthe same transaction:
Under certain conditions, a transaction error occurs when deduplicated andnon-deduplicated data is mixed in the same transaction.
About this task
When data deduplication is enabled, a Data Protection for VMware backup withapplication protection of a virtual machine might generate the following error inthe dsmerror.log file:
50 IBM Tivoli Storage Manager for Virtual Environments: Data Protection for VMware User's Guide
|
||
||
||
|
||
||
|
|
|||||||||
||
||
|||
||||
|||
||
||
|
|||

ANS0246E Issue dsmEndTxn and then begin a new transaction session.ANS5250E An unexpected error was encountered.
TSM function name : vmSendViaFile()TSM function : Failed sending file
/tmp/tsmvmbackup/fullvm/vmtsmvss/member1/IIS CONFIG WRITER.XMLTSM return code : 2070TSM file : vmmigration.cpp (1383)
This error is recoverable and can be ignored. The error occurs when DataProtection for VMware attempts to send the XML file (that was excluded fromdeduplication due to its small size) in the same transaction with deduplicated data.Data Protection for VMware resends the XML file (identified in the error message)in a new transaction.
Verifying that virtual machine backups do not exclude MicrosoftExchange Server volumesThe volumes in Virtual Machine Disks (VMDKs) must contain the MicrosoftExchange Server databases that are not excluded from the Data Protection forVMware backup processing.
About this task
The databases cannot be on physical compatibility mode raw device mapping(RDM) disks, independent disks, or on disks that are attached directly to the guestoperating system through iSCSI.
Procedure1. Ensure that any EXCLUDE.VMDISK statements in the Data Protection for VMware
data mover that is used to back up the virtual machine do not inadvertentlyexclude VMDKs that are hosting volumes that contain Microsoft ExchangeServer files, file space, database, and mailboxes.For example:v vm_exc10.vmdk contains logical volume C:v vm_exc10.vmdk contains logical volumes E: and F:v The label for vm_exc10_1.vmdk is Hard Disk 1.v The label for vm_exc10_2.vmdk is Hard Disk 2.v The Microsoft Exchange Server database files to be backed up are on the E:
and F: drive.2. Verify that no statements exclude vm_exc10_2.vmdk from the virtual machine
backup by ensuring that the data mover does not contain the following orsimilar statements:EXCLUDE.VMDISK VM_EXC10 “Hard Disk 2”EXCLUDE.VMDISK * “Hard Disk 2”
Alternatively, if you exclude most hard disks, you must explicitly include thevirtual machine disks by using one of the following statements:INCLUDE.VMDISK VM_EXC10 “Hard Disk 2”INCLUDE.VMDISK * “Hard Disk 2”
Include and exclude statements are processed from bottom to top as they aredisplayed in the dsm.opt file. To achieve the goal, enter the statements in thecorrect order.You can specify the exclusion and inclusion of a virtual machine disk from thecommand-line interface:dsmc backup vm “VM_EXC10:-vmdisk=Hard Disk 2” -asnode=datacenter10
Chapter 4. Protection for in-guest applications 51
|||||||||
|||||

Restoring dataAfter you back up data, you can recover the data based on a recovery pointobjective (RPO).
A recovery operation restores a full backup of the Microsoft Exchange Serverdatabase or mailbox from the Data Protection for VMware backup.
If you restore the entire virtual machine, all Microsoft Exchange Server databasesand mailboxes on the virtual machine are restored and recovered to the point ofthe virtual machine backup.
Starting the Microsoft iSCSI Initiator ServiceThe iSCSI protocol is used to mount the disks that are used for a recoveryoperation. Ensure that the Microsoft iSCSI Initiator Service is started and is set tothe automatic startup type on the system where the data is to be restored.
Procedure1. In the Windows Services list, right-click Microsoft iSCSI Initiator Service.2. Click Properties.3. On the General tab, set the following options:
a. In the Startup type list, select Automatic.b. Click Start, and then click OK.
Results
In the Services list, Microsoft iSCSI Initiator Service shows a status of Startedand the startup type is Automatic.
Restoring database backups by using the graphical userinterfaceYou can recover a full Microsoft Exchange Server database backup from a virtualmachine backup by using the Data Protection for Microsoft Exchange Servergraphical user interface.
Procedure1. To start a full database recovery from a virtual machine, start Microsoft
Management (MMC). In the navigation pane, expand the Protect and Recovernode and select a Microsoft Exchange Server server.
2. On the Recover tab, select Database Restore. All backups, including alldatabase backups from a virtual machine backup, are listed.
3. Select a full database backup to restore.4. In the Actions pane, click Restore.
52 IBM Tivoli Storage Manager for Virtual Environments: Data Protection for VMware User's Guide

Restoring backups of another virtual machineBy using Data Protection for Microsoft Exchange Server, you can access backups ofanother virtual machine on IBM Spectrum Protect server and restore the backup.
About this task
You can restore database and mailbox backups to a different Database AvailabilityGroup (DAG) node than the original backup node. For more information aboutrestoring a DAG database backup, see the IBM Tivoli Storage FlashCopy ManagerInstallation and User's guide for Windows.
The following scenario assumes that you have Exchange virtual machines in yourvirtual environment: vm1 and vm2. You want to enable Data Protection for MicrosoftExchange Server on vm2 to access and restore database and mailbox backups onvm1 and vm2.
Procedure1. Configure self-contained application protection to protect Microsoft Exchange
Server data on vm1 and vm2.2. Back up vm1 and vm2 by issuing the dsmc backup vm command on the
command-line interface.3. On vm2, install Data Protection for Microsoft Exchange Server and configure the
software for Exchange Server data protection in a VMware environment.4. To enable Data Protection for Microsoft Exchange Server on vm2 to access
backups on vm1 and vm2, issue the set access command as shown in thefollowing examples:dsmc set access backup -type=vm vm1 vm2_vss
dsmc set access backup -type=vm vm2 vm2_vss
5. Restore database or mailbox backups on vm1 or vm2.Related tasks:“Configuring Data Protection for VMware” on page 43“Configuring the software for Exchange Server data protection in a VMwareenvironment” on page 42“Configuring Data Protection for Microsoft Exchange Server” on page 45
Restoring mailbox dataIBM Spectrum Protect™ Snapshot backs up mailbox data at the database level, andalso restores individual mailbox items from the database backup.
Before you begin
You must have role-based access control (RBAC) permissions to completeindividual mailbox restore operations. For more information, see the topic thatexplains security requirements for backup and restore operations in the DataProtection for Microsoft Exchange Server Installation and User's guide.
If you plan to restore mail or folders by using a Simple Mail Transfer Protocol(SMTP) server, ensure that you configure the SMTP server before you start arestore operation. To set the configuration in the Management Console, right-clickDashboard in the tree view and select Properties. From the E-mail property page,enter the SMTP server and port.
Chapter 4. Protection for in-guest applications 53
|||
|
||||
||||
|
||
||
||
|||
|
|
|
|
|
||
|
About this taskv In Exchange Server 2013, you can restore a public folder mailbox database, a
public folder mailbox, or only a part of the mailbox, for example, a specificpublic folder.– To restore an Exchange 2013 public folder mailbox, the Exchange user must
have the Public Folders management role.– You can restore a public folder mailbox only to an existing public folder
mailbox that is on the Exchange Server.– You can restore a public folder only to an existing public folder. The public
folder on the Exchange Server must have the same folder path as the publicfolder to be restored. If the public folder is deleted from the public foldermailbox on the Exchange Server, you must re-create the public folder with thesame folder path as the public folder to be restored, before you start therestore operation.
– As a best practice, restore public folder mailboxes separately from usermailboxes. Select only one public folder mailbox to restore at a time if youwant to restore a specific public folder in the mailbox, or if you want torestore to a different public folder mailbox than the original mailbox.If you restore multiple mailboxes in a single restore operation, and at leastone of the mailboxes is a public folder mailbox, the mailboxes are restoredonly to their original mailbox locations. You cannot specify a filter or analternate mailbox destination.
– You might restore to a different public folder mailbox than the originalmailbox if, for example, the public folder is relocated after the time of thebackup. Before you complete the public folder restore operation, ensure thatthe public folder exists with the same folder path in the alternate mailboxlocation.
v In Exchange Server 2010 or later, you can restore an archive mailbox or a part ofthe mailbox, for example, a specific folder. You can restore archive mailboxmessages to a mailbox that is on the Exchange Server, to an archive mailbox, orto an Exchange Server .pst file.If you enable a user mailbox to be archived, ensure that the user is logged on tothat mailbox at least once before you complete a backup and restore operationon the mailbox.
v If you restore multiple mailboxes, and you want to retain the recovery databaseafter the restore operation is complete, ensure that all the mailboxes are in thesame recovery database.
v By default, IBM Spectrum Protect Snapshot restores the latest backup that isavailable for the specified mailbox.
The amount of time that it takes to complete the restore process depends on thesize of the mailbox databases, the network speed, and the number of mailboxes toprocess.
Procedure1. Start Microsoft Management Console (MMC) and select Exchange Server in the
navigation tree.2. On the Recover tab for the Exchange Server instance, select the Mailbox
Restore view.3. Select one or more mailboxes to restore. A list of mailboxes that are backed up
is displayed. If you restore mail to a Unicode personal folder (.pst) file, or yourestore a mailbox that is deleted or re-created after the time of the backup, IBM
54 IBM Tivoli Storage Manager for Virtual Environments: Data Protection for VMware User's Guide

Spectrum Protect Snapshot requires a temporary mailbox to store the mailboxmessages. Create a temporary mailbox by setting the Alias of temporarymailbox option on the Properties page, under the General tab.Attention: Ensure that the temporary mailbox that you create is on a databasewith enough disk storage capacity to accommodate all of the mailbox itemsthat you are restoring.
4. Optional: Optional: To restore individual messages instead of the entiremailbox, select Item-Level Mailbox Filters.a. Click Show Filter Options and Add Row.b. In the Column Name field, click the down arrow and select an item to
filter.v You can filter public mailbox folders only by the Folder Name column.v You can filter Unicode .pst files only by Backup Date, Folder Name and
All Content filters.v You can filter by backup date, and click the default date and time to edit
the table cell. To change the date, click the arrow at the end of the cell.The calendar date selection tool is displayed. After you select a date, todisplay the date in the field, press Enter. To edit the time, enter the timeby using the 12-hour clock time convention such as 2 p.m.When you specify a backup date, Data Protection for Exchange Serversearches for a backup that corresponds to that exact date. If a backupwith that exact date is not found, Data Protection for Exchange Serverselects the first backup after that date.
c. In the Operator field, select an operator.d. In the Value field, specify a filter value.e. If you want to filter on more items, click Add Row.
5. Specify the restore options by clicking Show Restore Options.
Table 6. Database restore options
Task Action
Keep Recovery Database After Restore Use this option to retain a recoverydatabase after a mailbox restore operationis complete. The default value is No. Ifyou set the value to Yes, Data Protectionfor Exchange Server automatically retainsthe recovery database after mailbox restoreprocessing.
Mailbox If the alias of the mailbox to restore is notdisplayed in the list of mailboxes, specifythe alias. This option overrides anyselected mailboxes.
Mailbox Original Location Use this option only if the mailbox wasdeleted or re-created since the time of theselected backup, and mailbox history isdisabled. Specify the Exchange Server andthe database where the mailbox was at thetime of the backup. Use the followingformat: server-name,db-name, for example,serv1,db1.
Mark Restored Messages As Unread Use this option to automatically mark themailbox messages as unread after therestore operation is completed. The defaultvalue is Yes.
Chapter 4. Protection for in-guest applications 55

Table 6. Database restore options (continued)
Task Action
Use Existing Recovery Database Use this option to restore the mailbox froman existing recovery database. The defaultvalue is Yes.
If you set the value to No and a recoverydatabase is mounted on the server beforeyou restore the mailbox, Data Protectionfor Exchange Server automaticallyremoves the recovery database duringmailbox restore processing.
6. To complete the restore operation, click one of the following Restore options.
Table 7. Restore options
Task Action
Restore Mail to Original Location Select this action to restore mail items totheir location at the time of the backupoperation.
Restore Mail to Alternate Location Select this action to restore the mail itemsto a different mailbox.
Restore Mail to non-Unicode PST file Select this action to restore the mail itemsto a non-Unicode personal folders (.pst)file.
When you restore mail items to a .pst filewith one selected mailbox, you areprompted for a file name. When yourestore mail items to a .pst file with morethan one selected mailbox, you areprompted for a directory location. Eachmailbox is restored to a separate .pst filethat reflects the name of the mailbox at thespecified directory.
If the .pst file exists, the file is used.Otherwise, the file is created.Restriction: The contents of each foldercannot exceed 16,383 mail items.
56 IBM Tivoli Storage Manager for Virtual Environments: Data Protection for VMware User's Guide

Table 7. Restore options (continued)
Task Action
Restore Mail to Unicode PST file Select this action to restore the mail itemsto a Unicode .pst file.
When you restore mail items to a .pst filewith one selected mailbox, you areprompted for a file name. When yourestore mail items to a .pst file with morethan one selected mailbox, you areprompted for a directory location.
You can enter a standard path name (forexample, c:\PST\mailbox.pst) or aUniversal Naming Convention (UNC) path(for example, \\server\c$\PST\mailbox.pst). When you enter a standardpath, the path is converted to a UNC path.If the UNC path is a non-default UNCpath, enter the UNC path directly.
Each mailbox is restored to a separate .pstfile that reflects the name of the mailbox atthe specified directory. If the .pst fileexists, the file is used. Otherwise, the fileis created.
Restore Public Folder Mailbox Select this action to restore a public foldermailbox to an existing online public foldermailbox.
You can filter the mailbox and restore aspecific public folder to an existing onlinepublic folder. In the Folder to be restoredfield, enter the name of the public folderthat you want to restore. If you arerestoring a subfolder in a parent folder,specify the full folder path in this format:parent_folder_name/sub_folder_name. Torestore all subfolders in a parent folder,use parent_folder_name/*. If the fullfolder path includes spaces, enclose thefolder path in double quotation marks,and do not append a backslash character(\) at the end of the folder path.
You can also restore all or part of a publicfolder mailbox to a different public foldermailbox than the original mailbox. In theTarget public folder mailbox field, specifythe destination public folder mailbox thatyou want to restore to.
Chapter 4. Protection for in-guest applications 57

Table 7. Restore options (continued)
Task Action
Restore Mail to Archive Mailbox This action applies to a primary mailboxor an archive mailbox. Select this action torestore all or part of either type of mailboxto the original archive mailbox or to analternate archive mailbox.
You can filter the archive mailbox andrestore a specific mailbox folder. In theFolder to be restored field, enter the nameof the folder in the archive mailbox thatyou want to restore. If you are restoring asubfolder in a parent folder, specify thefull folder path in this format:parent_folder_name/sub_folder_name. Torestore all subfolders in a parent folder,use parent_folder_name/*. If the fullfolder path includes spaces, enclose thefolder path in double quotation marks,and do not append a backslash character(\) at the end of the folder path.
In the Target archive mailbox field,specify the archive mailbox destinationthat you want to restore to.
Restoring relocated and deleted mailboxesThe Tivoli Storage Manager backup solution for restoring mailboxes that arerelocated and deleted after a virtual machine backup consists of Data Protection forVMware and Data Protection for Microsoft Exchange Server.
Before you begin
Decide where the mailbox data from the deleted mailbox is to be restored.
If you restore mail to a Unicode personal folder (.pst) file, or you restore amailbox that is deleted or re-created after the time of the backup, Data Protectionfor Exchange Server requires a temporary mailbox to store the mailbox messages.Create a temporary mailbox by setting the Alias of temporary mailbox option onthe Properties page, under the General tab.
Attention: Ensure that the temporary mailbox that you create is on a databasewith enough disk storage capacity to accommodate all of the mailbox items thatyou are restoring.
About this task
When you restore the backups, and complete a full database restore operation fromthe backup, Data Protection for VMware restores the files to their original location.
If database or log files are relocated during the backup cycle, Data Protection forMicrosoft Exchange Server restores the files in their original locations.
If any databases or mailboxes were created during the backup cycle, DataProtection for Microsoft Exchange Server re-creates the new files. If database or logfiles were deleted during the backup cycle, those files are not restored.
58 IBM Tivoli Storage Manager for Virtual Environments: Data Protection for VMware User's Guide

Procedure
Complete one of the following actions:v Restore the deleted mailbox data to the original location. Before you run the
mailbox restore operation, re-create the mailbox that is using Exchange.If the backup that contains the deleted mailbox was created with a version ofFlashCopy Manager for Microsoft Exchange Server earlier than version 6.1, or ifthe mailbox history is disabled, and the mailbox was relocated after the time itwas backed up, you must specify the Exchange Server and the database wherethe mailbox was at the time of backup. Use the Mailbox Original Locationoption in the GUI to specify this information. Alternatively, issue therestoremailbox command parameter, /MAILBOXORIGLOCATION.
v Restore the deleted mailbox data into an active alternative mailbox in an onlineExchange Server.
v Restore the deleted mailbox data into an Exchange Server personal folders (.pst)file.
Restoring mailbox messages interactively with the MailboxRestore BrowserYou can use the Mailbox Restore Browser to interactively restore a mailbox oritems from a mailbox on Exchange Server.
Before you begin
You must have role-based access control (RBAC) permissions to completeindividual mailbox restore operations.
If you plan to restore mail or folders by using a Simple Mail Transfer Protocol(SMTP) Server, ensure that you configure the SMTP Server before you attempt arestore operation. Set the configuration in Microsoft Management Console (MMC)by right-clicking Dashboard in the tree view and selecting Properties. Then, in theE-mail property page, enter the SMTP server and port.
About this taskv In Exchange Server 2013, you can restore a public folder mailbox database, a
public folder mailbox, or only a part of the mailbox, for example, a specificpublic folder. However, you cannot restore individual messages in a publicfolder by using the Mailbox Restore Browser interface.– To restore an Exchange 2013 public folder mailbox, the Exchange user must
have the Public Folders management role.– You can restore a public folder mailbox only to an existing public folder
mailbox that is on the Exchange Server.– You can restore a public folder only to an existing public folder. The public
folder on the Exchange Server must have the same folder path as the publicfolder to be restored. If the public folder is deleted from the public foldermailbox on the Exchange Server, you must re-create the public folder with thesame folder path as the public folder to be restored, before you start therestore operation.
– As a best practice, restore public folder mailboxes separately from usermailboxes. Select only one public folder mailbox to restore at a time if youwant to restore a specific public folder in the mailbox, or if you want torestore to a different public folder mailbox than the original mailbox.
Chapter 4. Protection for in-guest applications 59

If you restore multiple mailboxes in a single restore operation, and at leastone of the mailboxes is a public folder mailbox, the mailboxes are restoredonly to their original mailbox locations. You cannot specify a filter or analternate mailbox destination.
– You might restore to a different public folder mailbox than the originalmailbox if, for example, the public folder is relocated after the time of thebackup. Before you complete the public folder restore operation, ensure thatthe public folder exists with the same folder path in the alternate mailboxlocation.
v If you restore multiple mailboxes, and you want to retain the recovery databaseafter the restore operation is complete, ensure that all the mailboxes are in thesame recovery database.
v By default, IBM Spectrum Protect Snapshot restores the latest backup that isavailable for the specified mailbox.
Restriction: Only mailboxes within the same database can be restored in a singlemailbox restore action.
Procedure1. Start MMC.2. Under the Protect and Recover Data node in the navigation tree, select
Exchange Server.3. On the Recover panel, click View > Mailbox Restore Browser.4. In the Select Source window, specify the mailbox that you want to restore.
Choose from the actions in the following table:
Table 8. Selecting mailboxes to restore
Task Action
Browse mailboxes and select one to restore 1. From the drop-down list, select BrowseMailboxes.
2. Select a mailbox.
3. Click OK.
Tip: Use the Search field to filter themailboxes. You can also sort the mailboxesby columns.
Specify a mailbox to restore by name 1. In the Mailbox Name field, enter thename of the mailbox to restore.
2. Click OK.
Restore a mailbox backup that was createdat a specific time
1. In the Backup Date/Time field, clickthe default date and time to edit thedetails.
2. To change the date, click the calendaricon, select a date, and press Enter.
3. To change the time of day, use the12-hour system convention such as 2p.m.
4. Click OK.
60 IBM Tivoli Storage Manager for Virtual Environments: Data Protection for VMware User's Guide

Table 8. Selecting mailboxes to restore (continued)
Task Action
Review the mailbox backups that areavailable to restore before you completethe restore operation
1. From the drop-down list, select BrowseMailboxes.
2. Select a mailbox for which backupsexist.
3. From the Available Database Backupslist, review the backups that areavailable for the mailbox and select abackup version to restore.
4. Ensure that the Backup Date/Timefield reflects the time stamp for theselected mailbox backup.
5. Click OK.
Restore a mailbox that was deleted orre-created after the time of the backup
In the Actions pane, click Properties, andon the General page, enter the temporarymailbox alias.Tip: If you do not enter the alias, themailbox restore operation uses theadministrator mailbox as a temporarystorage location.
Browse all databases in a backup 1. From the drop-down list, select BrowseDatabases.
2. Select a database.
3. Click OK.
Tip: Use the Search field to filter thedatabases. You can also sort the mailboxesby columns.
After the selected mailbox is restored to the recovery database, the restoredmailbox and folders are displayed in the results pane.
5. In the results pane, browse the folders and messages that are contained withinthe selected mailbox. Choose from the following actions to select the mailbox,folder, or message to restore:
Table 9. Previewing and filtering mailbox items
Task Action
Preview mailbox items 1. Select a mailbox item to display itscontents in the preview pane.
2. When an item contains an attachment,click the attachment icon to preview itscontents. Click Open or save the itemby clicking Save.
Chapter 4. Protection for in-guest applications 61

Table 9. Previewing and filtering mailbox items (continued)
Task Action
Filter mailbox items Use the filter options to narrow the list offolders and messages in the result pane.
1. Click Show Filter Options and AddRow.
2. Click the down arrow in the ColumnName field and select an item to filter.You can filter by folder name, subjecttext, and so on.
You can filter public mailbox foldersonly by the Folder Name column.
When you select All Content, themailbox items are filtered byattachment name, sender, subject, andmessage body.
3. In the Operator field, select anoperator.
4. In the Value field, specify a filtervalue.
5. If you want to filter on more items,click Add Row.
6. Click Apply Filter to filter themessages and folders.
6. In the Actions pane, click the folder or messages restore task that you want torun. If you click Save Mail Message Content, which becomes available onlywhen a message is selected in the preview pane, a Windows Save File windowis displayed. Specify the location and message name and click Save. TheRestore Progress window opens and shows the progress of the restoreoperation. IBM Spectrum Protect Snapshot restores the mailbox backup to itsoriginal mailbox location.
7. To restore a mailbox or mailbox item to either of the following locations,complete the following steps. Choose from the actions in the following table:
Table 10. Restoring a mailbox to another mailbox or .pst file
Task Action
Restore a mailbox or mailbox item to adifferent mailbox
1. On the Actions pane, click OpenExchange Mailbox.
2. Enter the alias of the mailbox toidentify it as the restore destination.
3. Drag the source mailbox to thedestination mailbox on the resultspane.
62 IBM Tivoli Storage Manager for Virtual Environments: Data Protection for VMware User's Guide

Table 10. Restoring a mailbox to another mailbox or .pst file (continued)
Task Action
Restore a mailbox to an Outlook personalfolders (.pst) file
1. On the Actions pane, click Open PSTFile.
2. When the Windows File windowopens, select an existing .pst file orcreate a .pst file.
3. Drag the source mailbox to thedestination .pst file on the resultspane.
Restriction: You can use the MailboxRestore Browser only with non-Unicode.pst files.
Restore Public Folder Mailbox Select this action to restore a public foldermailbox to an existing online public foldermailbox.
You can filter the mailbox and restore aspecific public folder to an existing onlinepublic folder. In the Folder to be restoredfield, enter the name of the public folderthat you want to restore. If you arerestoring a subfolder in a parent folder,specify the full folder path in this format:parent_folder_name/sub_folder_name. Torestore all subfolders in a parent folder,use parent_folder_name/*. If the fullfolder path includes spaces, enclose thefolder path in double quotation marks,and do not append a backslash character(\) at the end of the folder path.
You can also restore all or part of a publicfolder mailbox to a different public foldermailbox than the original mailbox. In theTarget public folder mailbox field, specifythe destination public folder mailbox thatyou want to restore to.
In the Actions pane, the Close Exchange Mailbox and Close PST File tasks aredisplayed only when a destination mailbox or .pst file is opened.
8. Optional: Remove the recovery database by clicking Close Mailbox to Restore.This option is displayed only after a recovery database is created. IBMSpectrum Protect Snapshot removes the recovery database and cleans up therestored files. If you do not select Close Mailbox to Restore, the recoverydatabase is not removed even if you exit MMC.If MMC also detects a recovery database that is created outside of IBMSpectrum Protect Snapshot, it automatically connects to it. When you completeyour mailbox restore tasks, you must manually remove the recovery database.You cannot use the Close Mailbox to Restore option.
Chapter 4. Protection for in-guest applications 63

Restoring data by using the command-line interfaceIf you prefer, you can use the command-line interface to start a full MicrosoftExchange Server database recovery from a virtual machine.
Procedure1. Issue the query command to find the database full backups. The following
example finds all backups for the Microsoft Exchange Server database calledexc_db10.tdpexcc q tsm exc_db10 IBM Tivoli Storage Manager for Mail:Data Protection for Microsoft Exchange Server Version 7, Release 1, Level 3.0...Querying Tivoli Storage Manager server for a list ofdata backups, please wait....
Connecting to TSM Server as node “exc_db10”...Connecting to Local DSM Agent “exc”...Using backup node “exc_db10”...
Exchange Server : exc
Database : exc_db10
Backup Date Size S Type Loc Object Name------------------- ---- - ---- --- ----------------------10/15/2014 19:17:26 5.40 B A full Srv 20141015191726 (VMVSS)
The operation completed successfully. (rc = 0)
2. To restore the database without applying transaction logs, issue the databaserestore command as shown in the following example:TDPEXCC RESTore databaseName FULL /BACKUPDEstination=TSM/BACKUPMethod=VMVSS
The following sample output results when you issue the command with theMicrosoft Exchange Server database called exc_db10.TDPEXCC RESTore exc_db10 FULL /BACKUPDEstination=TSM /BACKUPMethod=VMVSSIBM Tivoli Storage Manager for Mail:Data Protection for Microsoft Exchange ServerVersion 7, Release 1, Level 3.0 (C) CopyrightIBM Corporation 1997, 2015. All rights reserved.
Connecting to TSM Server as node “exc_db10”...
Connecting to Local DSM Agent “exc”...Using backup node “exc_db10”...
Starting Microsoft Exchange restore...Beginning VSS restore of “exc_db10”’...
Restoring “exc_db10” via file-level copy from snapshot(s).This operation could take a while, please wait
...
The operation completed successfully. (rc = 0)
You can restore the database to a different location by adding the /INTODBparameter. For example:TDPEXCC RESTore TestDB1 FULL /INTODB=Test2/BACKUPDEstination=TSM /BACKUPMethod=VMVSS
64 IBM Tivoli Storage Manager for Virtual Environments: Data Protection for VMware User's Guide
What to do next
You can restore inactive backups by using the Data Protection for MicrosoftExchange Server command-line interface, TDPEXCC. When you issue the restorecommand, specify the database object name for the specific backup.
To obtain the database object name, issue the following command:tdpexcc q tsm dbname full /all
After you have the database object name value, specify the database object nameon the /OBJect=objectname parameter of the TDPEXCC restore command, whereobjectname is the database object name. For example:TDPEXCC RESTore db44 FULL /OBJect=20140311131051 /BACKUPDEstination=TSM/BACKUPMethod=VMVSS
Restoring data by using Windows PowerShell cmdletsIf you prefer, you can use Windows PowerShell cmdlets with Tivoli StorageFlashCopy Manager to start a full Microsoft Exchange Server database recoveryfrom a virtual machine.
Procedure1. Issue the query cmdlet to find the database full backups. For example, to find
all of the database full backups, enter the following command:Get-DpExcBackup -Name * -FromExcServer *
2. Issue the database restore cmdlet. For example:Restore-DpExcBackup -Name ExchDb01 -Full-BACKUPDESTINATION TSM -FROMEXCSERVer PALADIN20-INTODB Zwen
3. Issue the restore cmdlets with parameter intodb to restore to an alternativelocation. For example:Restore-DpExcBackup -Name ExchDb01 -Full-BACKUPDESTINATION TSM -FROMEXCSERVer PALADIN20-OBJect 20140923100738 -INTODB ExchDb01_altRdb
Tivoli Storage Manager file space informationYou might never need to know the file names or locations for your virtual machinefiles. However, if the underlying file structure interests you, Data Protection forVMware backups are stored under the node name of the vSphere datacenter (forexample, datacenter10).
The following example shows the file space information for the virtual machinethat is called vm_exc10.
Chapter 4. Protection for in-guest applications 65

tsm: ORION>q file datacenter10 f=d
Node Name: DATACENTER10Filespace Name: \VMFULL-vm_exc10Hexadecimal Filespace Name:FSID: 61Collocation Group Name:Platform: TDP VMwareFilespace Type: API:TSMVMIs Filespace Unicode?: NoCapacity: 0 KBPct Util: 0.0Last Backup Start Date/Time: 03/13/2014 21:29:17Days Since Last Backup Started: 31Last Full NAS Image Backup Completion Date/Time:Days Since Last Full NAS Image Backup Completed:Last Backup Date/Time From Client (UTC):Last Archive Date/Time From Client (UTC):Last Replication Start Date/Time:Days Since Last Replication Started:Last Replication Completion Date/Time:Days Since Last Replication Completed:Backup Replication Rule Name: DEFAULTBackup Replication Rule State: EnabledArchive Replication Rule Name: DEFAULTArchive Replication Rule State: EnabledSpace Management Replication Rule Name: DEFAULTSpace Management Replication Rule State: EnabledAt-risk type: Default intervalAt-risk interval:
Microsoft SQL Server data protection in VMware environmentsFor Microsoft SQL Server workloads that are running in a VMware ESXi virtualguest machine, you can take application-consistent backups of virtual machinesthat are hosting Microsoft SQL Server data. By using Tivoli Storage Managersoftware, you can also recover backups from the virtual machine.
Before you back up data, identify your recovery point objective (RPO). The RPOhelps you decide how often to back up data and affects the cost that is associatedwith data backups.
For example, you can schedule frequent virtual machine backups for necessaryrecovery points. The recovery point of a virtual machine backup is the time of thebackup. While change-block tracking and data deduplication offer savings, virtualmachine backups can be expensive if you create and delete many virtual machinesnapshots.
Most traditional in-guest data protection methods provide appropriate RPOs, butthese in-guest methods lose the efficiencies that are introduced by backing up dataat the virtual machine level.
You can use IBM Tivoli Storage Manager for Virtual Environments: Data Protectionfor VMware and Tivoli Storage FlashCopy Manager with Data Protection forMicrosoft SQL Server to back up data at a virtual machine level in a way thatpreserves backup efficiencies.
To protect Microsoft SQL Server data in a VMware environment, ensure that thefollowing products are installed and configured on your system:v Tivoli Storage Manager for Virtual Environments: Data Protection for VMware
V7.1.8 (which includes the Tivoli Storage Manager client)
66 IBM Tivoli Storage Manager for Virtual Environments: Data Protection for VMware User's Guide

v Tivoli Storage FlashCopy Manager with Data Protection for Microsoft SQLServer V4.1.6
For permission required to back up and restore application data for Microsoft SQLServer, see technote 1647995.
Application protection is supported for VMware VMs in a VMware vSphereenvironment only. In-guest application protection is not supported for VMwarevApps in a vCloud environment.
Configuring the software for SQL Server data protection in aVMware environment
To protect Microsoft Exchange Server workloads that are running in a VMwareESXi virtual guest machine, install and configure Data Protection for VMware.Then, install and configure Data Protection for Microsoft SQL Server.
Before you begin
The following instructions are based on a configuration scenario that might notmatch your environment. Adjust the configuration for your environment.
The following list summarizes the scenario for quick reference:
Windows host nameSQL10
VSS requestor node nameSQL10_VSS
Data Protection for Microsoft SQL Server node namesql10_SQL
Virtual machine namevm_sql10
Data mover node namesdatamover10 and datamover20
Datacenter node namedatacenter10
VM file space\VMFULL-vm_sql10
About this task
The following details describe the scenario that is used.v A single Microsoft SQL Server database on a virtual machine that is named
vm_sql10 must be recovered.v Virtual machine vm_sql10 is protected by Data Protection for VMware by using
the node name datacenter10. This node name in the Tivoli Storage Managerserver represents the vSphere datacenter). The data mover nodes are calleddatamover10 and datamover20.
v The virtual machine guest is configured with the virtual machine name ofvm_sql10 and the Microsoft Windows host name is SQL10.
v Data Protection for Microsoft SQL Server is installed in the guest and isconfigured to the Tivoli Storage Manager server to use node name sql10_SQL.
Chapter 4. Protection for in-guest applications 67

v The Tivoli Storage Manager client in the virtual guest machine is configured asthe VSS requestor node and is using the node name SQL10_VSS.
Procedure1. Follow the installation and configuration instructions that are provided with
each software package.If you install Data Protection for Microsoft SQL Server before Data Protectionfor VMware, you cannot specify the VMware datacenter node in the DataProtection for Microsoft SQL Server configuration wizard because the field isdisabled.
2. Complete the tasks in this checklist:v Verify that Microsoft SQL Server databases and mailboxes are hosted on
VMware virtual disks.v Verify that no Microsoft SQL Server database is hosted on raw device
mapped (RDM) disks in physical compatibility mode, independent disks, oron disks that are attached directly to the guest through in-guest iSCSI.
v Verify that policies are set to keep sufficient versions of Microsoft SQL Serverlogs and virtual machine backups.
v Verify that SQL Server databases are on a single server and are notparticipating in any type of clustering, for example, failover clusters,AlwaysOn Availability Groups or AlwaysOn Failover Cluster instances.
3. Outside of the virtual guest machine, in the datamover, configure DataProtection for VMware to protect Microsoft SQL Server databases
4. Within the virtual guest machine, take the following actions:v Verify that the Data Protection for VMware recovery agent command-line
interface is configured to work with the recovery agent on the guest virtualmachine.
v Configure Data Protection for Microsoft SQL Server to complete SQL Serverlog backups and restore SQL Server databases from a virtual machinebackup.
Related tasks:“Configuring Data Protection for VMware” on page 43“Configuring Data Protection for Microsoft SQL Server” on page 71
Configuring Data Protection for VMwareYou must configure Data Protection for VMware to preserve Microsoft VSSmetadata information during a virtual machine backup for systems that are hostingMicrosoft SQL Server data.
About this task
Data Protection for VMware provides application consistency when you back upvirtual machines that are hosting Microsoft SQL Servers. With these backups, youcan recover the virtual machine with Microsoft SQL Server in a consistent state.
To recover only selected databases from this type of backup with Tivoli StorageManager, without having to recover the entire virtual machine, preserveinformation about the state of the Microsoft SQL Server at the time of the virtualmachine snapshot and backup. This information is collected as part of theMicrosoft Volume Shadow Copy Services (VSS) interaction that occurs during avirtual machine snapshot.
68 IBM Tivoli Storage Manager for Virtual Environments: Data Protection for VMware User's Guide

For Data Protection for VMware to collect the Microsoft VSS metadata forMicrosoft SQL Server, you must configure Data Protection for VMware to obtainthis information from the virtual machine during the backup operation.
Procedure1. Configure Data Protection for VMware to preserve the Microsoft VSS metadata
information during a virtual machine backup for systems that are hostingMicrosoft SQL Server data.a. Locate the options file for the Data Protection for VMware data mover. On
Windows systems, the options file is dsm.opt. On Linux systems, theoptions file is dsm.sys.
b. Specify the INCLUDE.VMTSMVSS option for the virtual machine. You must setthis option for virtual machine backups to preserve the Microsoft VSSmetadata information. Choose from the options in the following table:
Table 11. INCLUDE.VMTSMVSS options
Option Result
INCLUDE.VMTSMVSS vm_display_name When you set this option, virtualmachine applications receive anotification when a backup is going tooccur. This notification allows theapplication to commit transactions andtruncate transaction logs so that theapplication can resume from a consistentstate when the backup completes.
vm_display_name refers to the name ofthe virtual machine as shown in theVMware vSphere Client and vSphereWeb Client.
INCLUDE.VMTSMVSS vm_display_nameOPTions=KEEPSqllog
When you set this option, SQL serverlogs are not truncated when a datamover node backs up a virtual machinethat runs a SQL server. By specifyingthis parameter, you can manuallypreserve the SQL Server logs and restoreSQL transactions to a specific checkpointafter the virtual machine is restored.When you specify this option, the SQLlog is not truncated.
c. Verify that the Virtual Machine Disks (VMDK) that host the Microsoft SQLServer database are not being excluded from the virtual machine backupoperation. Repeat the preceding steps for all data movers that protect virtualmachines that are hosting Microsoft SQL Server.
2. On each data mover, for example, datamover10, store the guest virtual machinecredentials to Data Protection for VMware by running the following commandfrom the Tivoli Storage Manager backup-archive client command line:dsmc set password –type=vmguest vm_guest_display_nameguest_admin_ID guest_admin_pw
This command stores the guest virtual machine credentials, which areencrypted on the system that hosts the data mover. The following minimumpermissions are required for guest_admin_ID guest_admin_pw:v Backup rights: Users with the db_backupoperator database role are granted
to run the self-contained application data backup. If the user is a member of
Chapter 4. Protection for in-guest applications 69

the SQL Server sysadmin fixed server role, the user can back up anydatabases of Microsoft SQL Server instance. The user can also back up thedatabases for which the user is the owner and does not have backup rightsto a specific database. The guest VM user must have permission to createVolume Shadow Copies and to truncate SQL Server logs.
v Restore rights: If the database exists, you can complete the restoreoperation ifyou are a member of the dbcreator fixed server role, or if you are thedatabase owner. Users with a Microsoft SQL Server sysadmin fixed serverrole have permission to restore a database from any backup sets. For otherusers, the situation depends on whether the database exists.
What to do next
You can verify the virtual machine backup configuration and ensure that theVMDKs are included. In addition, you can view other parameters by issuing thebackup command with the preview option from the backup-archive client, forexample:dsmc backup vm vm_display_name -preview -asnode=datacenter_node
You can also use the Tivoli Storage Manager scheduler to schedule periodicbackups of your virtual machines. You can also back up the virtual machine that ishosting the Microsoft SQL Server by using the backup-archive client commandline:dsmc backup vm vm_display_name -asnode=datacenter_node
Verifying that the configuration backs up data that can berestoredBefore you can restore individual Microsoft SQL Server databases from a DataProtection for VMware virtual machine backup, you must complete at least onesuccessful virtual machine backup. For the restore operation to work, the backupmust contain Microsoft SQL Server database metadata.
Procedure1. Issue the following backup-archive client query command on one of the data
mover nodes:dsmc query vm vmname -detail -asnode=datacenter_node
where:v vmname specifies the name of the virtual machinev datacenter_node specifies the name of the datacenter node
.2. In the command output, look for the following details:
Application(s) protected: MS SQL 2008 (database-level recovery)
Ensure that Excluded is not indicated in any Virtual Machine Disk (VMDK)status fields for virtual disks that host Microsoft SQL Server database files. TheExcluded status indicates that one or more of the VMDKs that are required torecover a Microsoft SQL Server database are not being protected. For example:
70 IBM Tivoli Storage Manager for Virtual Environments: Data Protection for VMware User's Guide

Query Virtual Machine for Full VM backup# Backup Date Mgmt Class Size Type A/I Virtual Machine- ----------- ---------- ----- ---- --- -----------------1 02/20/2014 STANDARD 43.94GB IFFULL A vm_sql10
12:43:59
Size of this incremental backup: n/aNumber of incremental backups since last full: 0Amount of extra data: 0TSM object fragmentation: 0Backup is represented by: 328 TSM objectsApplication protection type: TSM VSSApplication(s) protected: MS SQL 2008 (database-level recovery)VMDK[1]Label: Hard Disk 1VMDK[1]Name: [ess800_dev2] vm_sql10/vm_sql10 .vmdkVMDK[1]Status: Protected...VMDK[6]Label: Hard Disk 6VMDK[6]Name: [ess800_dev2] vm_sql10/vm_sql10_5.vmdkVMDK[6]Status: Protected
Configuring Data Protection for Microsoft SQL ServerAfter you configure Data Protection for VMware and verify that you created avirtual machine backup that is suitable for recovery of a single Microsoft SQLServer database, configure Data Protection for Microsoft SQL Server in the guestvirtual machine.
Procedure1. Log on to the virtual machine that hosts the Microsoft SQL Server database.2. Verify that the following packages are installed:v Tivoli Storage Manager recovery agent, recovery agent command-line
interface (CLI), and license (from the Data Protection for VMware productpackage)
v Tivoli Storage Manager backup-archive clientv Data Protection for Microsoft SQL Server
You can install the recovery agent, CLI, license, and backup-archive clienttogether by using the Data Protection for VMware installation program. Toinstall the packages together, select the following advanced installation option:Install a complete data mover for in-guest application protection. DataProtection for Microsoft SQL Server is installed separately.
3. Configure Data Protection for Microsoft SQL Server by using the Tivoli StorageManager configuration wizard. When you open the Tivoli Storage ManagerNode Names page of the wizard, enter the VMware datacenter node name,Microsoft SQL Server node name, and VSS requestor node name. If thedatacenter node name field is disabled, the Tivoli Storage Manager recoveryagent is not installed correctly.
4. After Data Protection for Microsoft SQL Server is configured, verify that theConfiguring Recovery Agent rule status indicates Passed.
5. Log on to a data mover instance and complete the following steps. Do notrepeat these steps for all data mover instances.a. Copy the contents of the data mover options file dsm.opt to a temporary file
named dsm.setaccess.opt and make the following changes to the file. Donot make these changes in the dsm.opt file.1) Delete any line that contains an ASNODE entry.2) Set the NODENAME option to the VMware datacenter node name. For
example:
Chapter 4. Protection for in-guest applications 71

NODENAME datacenter10
Tip: If the dsm.opt file does not contain ASNODE entries and the NODENAMEoption is set to the correct datacenter node, you can use this file rather thancreating the dsm.setaccess.opt file.
b. From the datacenter node that was defined in the NODENAME option, issue theset access command to grant the VSS requestor node access to the virtualmachine backups as shown in the following example.You must complete this step because the VSS requestor node accesses thevirtual machine backups on behalf of Data Protection for Microsoft SQLServer.If the password for the datacenter node is unknown when you run the setaccess command, you will receive an error message and the Tivoli StorageManager server administrator must reset the password to issue thecommand.
Example
The following example shows the required parameters for the set accesscommand. The parameters specify the virtual machine name (vm_sql10), the VSSrequestor node name (SQL10_VSS), and the name of the options file that defines thedatacenter node name (dsm.setaccess.opt).
The example also shows the results of the query access command, which showsthe backup access authorization for the VSS requestor node.
dsmc set access backup –type=VM vm_sql10 SQL10_VSS –optfile=dsm.setaccess.opt
ANS1148I “Set Access” command successfully completed.
dsmc query accessNode name: datacenter10Type Node User Path------ ------ ------ ------Backup SQL10_VSS * \VMFULL-vm_sql10\*\*
ANS1148I “Query Access” command completed successfully
Managing backupsAfter you configure Data Protection for Microsoft SQL Server, you can schedulebackups. You must set up a virtual machine backup schedule and a Microsoft SQLServer log backup before you can start a backup.
Scheduling virtual machine backupsTo ensure that your data is protected, schedule virtual machine backups.
Before you begin
By default, the maximum size allowed for a VMDK in a backup operation is 2 TB.However, the maximum is 8 TB. To increase the maximum size, use thevmmaxvirtualdisks option. For more information, see Vmmaxvirtualdisks.
Procedure1. Log on to the Data Protection for VMware user interface.2. Click the Backup tab.
72 IBM Tivoli Storage Manager for Virtual Environments: Data Protection for VMware User's Guide

3. Click Create Schedule to specify a backup schedule name, source (the virtualmachines to include in the backup schedule), and other scheduling options.
4. Verify that the source of the schedule includes the virtual machines that arehosting Microsoft SQL Server.
5. Verify that one of the following services is running:v If you are using a scheduler that is managed by a Client Acceptor Daemon
(CAD), ensure that the CAD service is running on the data mover.v If you are using the stand-alone scheduler, ensure that the scheduler service
is running.
Scheduling Microsoft SQL Server log backupsAfter the virtual machine backup schedule is created, you can create the MicrosoftSQL Server log backup schedule.
About this task
Backing up SQL server logs provides a more granular level of recovery points. Youmight find it unnecessary to back up SQL server logs if the frequency of yourbackups provides you with enough recovery points, and assuming that you didnot specify the INCLUDE.VMTSMVSS vm_display_name OPTions=KEEPSqllog option forthe backup.
Procedure1. Start the Data Protection for Microsoft SQL Server user interface from the
virtual machine that is hosting Microsoft SQL Server.2. In the navigation pane, expand the Manage node.3. Under the Manage node, right-click Scheduling > Scheduling Wizard.4. Open the Scheduling Wizard to identify the schedule name and time.5. For the Define the Scheduled Task page, select Command Line.6. Click the icon to select the SQL Server template. Click Next.7. Use the command-line interface and SQL Server template to specify the
database log backup, for example:tdpsqlc backup * log /truncate=yes 2>&1
Tip: Alternatively, you can schedule Microsoft SQL Server backups by usingthe Tivoli Storage Manager centralized scheduling service. This service helpsyou to create a backup schedule for all Microsoft SQL Server instances on avirtual machine.
Verifying backupsAfter you create a backup, verify that you can query the virtual machine backupsand the database backups from the Data Protection for Microsoft SQL Serverinterface.
About this task
You can recover one or more Microsoft SQL databases based on your recoverypoint objectives.
Procedure1. From Microsoft Management (MMC), select a Microsoft SQL Server.2. Click the Recover tab.
Chapter 4. Protection for in-guest applications 73
3. Select View > Databases. A list of Microsoft SQL Server database backups thatcan be restored is displayed.Microsoft SQL Server databases that are backed up with Data Protection forVMware are identified with the backup method vmvss. Microsoft SQL Serverlogs that are backed withData Protection for Microsoft SQL Server areidentified with the backup method Legacy.
Managing versions of backupsBy using Data Protection for Microsoft SQL Server, you can manage expiration ofbackups. You can specify the number of snapshot backups to retain and the lengthof time to retain snapshots.
About this task
To set the retention for Microsoft SQL Server backups, complete the followingsteps. This procedure assumes that you want to retain backups for 30 days.
Procedure1. Define the retention parameters in the management class that is used for virtual
machine backups. For example:Retain extra versions = 30Retain only versions = 30Versions data exists = nolimitVersions data deleted = nolimit
Use the vmmc option in the data mover option file to specify the managementclass that is used for the virtual machine backups.Scheduled virtual machine backups are associated with the Data Protection forVMware client.
2. Define the retention parameters in the management class that is used forMicrosoft SQL Server backups. For example:Retain extra versions = 0Retain only versions = 1Versions data exists = nolimitVersions data deleted = nolimit
Specify the management class for the Microsoft SQL Server backups in thedsm.opt file that is used by the Data Protection for Microsoft SQL Server agent.See the following INCLUDE options:INCLUDE *:\...\*log management_class_nameINCLUDE *:\...\log\..\* management_class_name
3. With Data Protection for Microsoft SQL Server running on the virtual machine,issue the inactivate command to explicitly deactivate all active log backupsfor all databases on the Microsoft SQL Server. For example:tdpsqlc inactivate * log=* /OLDERTHAN=30
Log backups that are created by Data Protection for Microsoft SQL Server mustbe explicitly deactivated because the full database backups are being completedby Data Protection for VMware. This configuration allows for a one-day graceperiod after the Microsoft SQL Server log backups are deactivated before theTivoli Storage Manager server deletes them.
74 IBM Tivoli Storage Manager for Virtual Environments: Data Protection for VMware User's Guide

Tip: You can retain log backups on the Tivoli Storage Manager server only ifthe full database backup with which they are associated are retained. In themanagement class, set the RETONLY value for log backups to match the RETEXTRAparameter for full database backups.
Verifying that virtual machine backups do not exclude MicrosoftSQL Server volumesThe volumes in Virtual machine disks (VMDKs) must contain the Microsoft SQLServer databases that are not excluded from the Data Protection for VMwarebackup processing.
About this task
The databases cannot be on physical compatibility mode raw device mapping(RDM) disks, independent disks, or on disks that are attached directly to the guestoperating system through iSCSI.
Procedure1. Ensure that any EXCLUDE.VMDISK statements in the Data Protection for VMware
data mover that is used to back up the virtual machine do not inadvertentlyexclude VMDKs that are hosting volumes that contain Microsoft ExchangeServer files, file space, database, and mailboxes.For example:v vm_sql10.vmdk contains logical volume C:v vm_sql10.vmdk contains logical volumes E: and F:v The label for vm_sql10_1.vmdk is Hard Disk 1.v The label for vm_sql10_2.vmdk is Hard Disk 2.v The Microsoft SQL Server database files to be backed up are on the E: and F:
drive.2. Verify that no statements exclude vm_exc10_2.vmdk from the virtual machine
backup by ensuring that the data mover does not contain the following orsimilar statements:EXCLUDE.VMDISK VM_SQL10 “Hard Disk 2”EXCLUDE.VMDISK * “Hard Disk 2”
Alternatively, if you exclude most hard disks, you must explicitly include thevirtual machine disks by using one of the following statements:INCLUDE.VMDISK VM_SQL10 “Hard Disk 2”INCLUDE.VMDISK * “Hard Disk 2”
Include and exclude statements are processed from bottom to top as they aredisplayed in the dsm.opt file. To achieve the goal, enter the statements in thecorrect order.You can specify the exclusion and inclusion of a virtual machine disk from thecommand-line interface:dsmc backup vm “VM_SQL10:-vmdisk=Hard Disk 2” -asnode=datacenter10
Chapter 4. Protection for in-guest applications 75

Restoring dataAfter you back up data, you can recover the data based on a recovery pointobjective (RPO).
A recovery operation restores a full backup of the Microsoft SQL Server databasefrom the Data Protection for VMware backup.
If you restore the entire virtual machine, all Microsoft SQL Server databases on thevirtual machine are restored and recovered to the point of the virtual machinebackup. In this scenario, you cannot restore and recover any backups that werecreated after that point.
Starting the Microsoft iSCSI Initiator ServiceThe iSCSI protocol is used to mount the disks that are used for a recoveryoperation. Ensure that the Microsoft iSCSI Initiator Service is started and is set tothe automatic startup type on the system where the data is to be restored.
Procedure1. In the Windows Services list, right-click Microsoft iSCSI Initiator Service.2. Click Properties.3. On the General tab, set the following options:
a. In the Startup type list, select Automatic.b. Click Start, and then click OK.
Results
In the Services list, Microsoft iSCSI Initiator Service shows a status of Startedand the startup type is Automatic.
Restoring database backups by using the graphical userinterfaceYou can recover a full Microsoft SQL Server database backup from a virtualmachine backup by using the Data Protection for Microsoft SQL Server graphicaluser interface.
Procedure1. To start a full database recovery from a virtual machine, start Microsoft
Management (MMC). In the navigation pane, expand the Protect and Recovernode and select a Microsoft SQL Server server.
2. On the Recover tab, select Database Restore. All backups, including alldatabase backups from a virtual machine backup, are listed.
3. Select a full database backup to restore.4. In the Actions pane, click Restore.
76 IBM Tivoli Storage Manager for Virtual Environments: Data Protection for VMware User's Guide

Restoring data by using the command-line interfaceIf you prefer, you can use the command-line interface to start a full Microsoft SQLServer database recovery from a virtual machine.
Procedure1. Issue the query command to find the full and log database backups. The
following example finds all backups for the Microsoft SQL Server databasecalled sql_db10.tdpsqlc q tsm sql_db10IBM Tivoli Storage Manager for Databases:Data Protection for Microsoft SQL ServerVersion 7, Release 1, Level 3.0...Querying TSM Server for Backups ....Backup Object Information -------------------------SQL Server Name ........................ SQL10SQL Database Name ........................ sql_db10Backup Method ........................ VMVSS...Backup Creation Date / Time .............. 11/14/2014 13:41:18...Backup Object Information-------------------------SQL Server Name ........................SQL10 SQL Database Name ........................sql_db10Backup Method ........................ Lgcy...Backup on Secondary Replica ..............No Backup Object State ......................Active Backup Creation Date / Time .............. 11/14/2014 15:46:07...The operation completed successfully. (rc = 0)
2. To restore the database without applying transaction logs, issue the databaserestore command as shown in the following example:tdpsqlc restore databaseName /backupMethod=vmvss
The following examples show the output of the command when you specifythe Microsoft SQL Server database called sql_db10.tdpsqlc restore sql_db10 /backupmethod=vmvss /sqlserver=sql10/fromsqlserver=sql10 /recovery=noIBM Tivoli Storage Manager for Databases:Data Protection for Microsoft SQL ServerVersion 7, Release 1, Level 3.0(C) Copyright IBM Corporation 1997, 2015. All rights reserved.
Connecting to SQL Server, please wait...Querying TSM Server for Backups ....Connecting to TSM Server as node “SQL10_SQL”...Connecting to Local DSM Agent “SQL10”...Using backup node “SQL10_SQL”...Starting Sql database restore...
Beginning VSS restore of “sql_db10”...
Restoring “sql_db10” via file-level copy from snapshot(s). Thisprocess may take some time. Please wait
Files Examined/Completed/Failed: [ 2 / 2 / 0 ] Total Bytes: 3146070
VSS Restore operation completed with rc = 0Files Examined : 2Files Completed : 2Files Failed : 0Total Bytes : 3146070
Chapter 4. Protection for in-guest applications 77

Total LanFree Bytes : 0
The operation completed successfully. (rc = 0)
3. After the full database restore operation is completed successfully, issue thecommand to restore the logs. For example, to restore all logs based on therestored Microsoft SQL database sql_db10, issue the following command.tdpsqlc restore databaseName /backupMethod=vmvss
/recovery=no
You can also use the /stopat option to specify a more granular point in time.
tdpsqlc restore sql_db10 log=* /sqlserver=sql10/fromsqlserver=sql10 /recovery=yesIBM Tivoli Storage Manager for Databases:Data Protection for Microsoft SQL ServerVersion 7, Release 1, Level 3.0(C) Copyright IBM Corporation 1997, 2015. All rights reserved.
Connecting to SQL Server, please wait...Starting Sql database restore...Connecting to TSM Server as node “SQL10_SQL”...Querying Tivoli Storage Manager server for a listof database backups, please wait...
Beginning log restore of backup object sql_db10\20131114154607\00000DB0,1 of 3, to database sql_db10 ...
Beginning log restore of backup object sql_db10\20131114155130\00000DB0,2 of 3, to database sql_db10 ....
Total database backups inspected: 3Total database backups requested for restore: 3Total database backups restored: 3Total database skipped: 0Throughput rate: 134.32 Kb/SecTotal bytes transferred: 385,536Total LanFree bytes transferred: 0Elapsed processing time: 2.80 SecsThe operation completed successfully. (rc = 0)
What to do next
You can restore inactive backups by using the Data Protection for Microsoft SQLServer command-line interface, TDPSQLC. When you issue the restore command,specify the database object name for the specific backup.
To obtain the database object name, issue the following command:tdpsqlc q tsm dbname full /all
After you have the database object name value, specify the database object nameon the /OBJect=objectname parameter of the TDPSQLC restore command, whereobjectname is the database object name. For example:tdpsqlc restore db44 /object=20140311131051 /backupdestination=tsm/backupmethod=vmvss
Restriction: You cannot recover a Microsoft SQL database to an alternative locationon the virtual machine.
78 IBM Tivoli Storage Manager for Virtual Environments: Data Protection for VMware User's Guide

Restoring Microsoft SQL Server log backupsAfter the full database is restored successfully, you can restore transaction logs.
Procedure1. Select a Microsoft SQL Server, and click the Recover tab.2. Verify that the AutoSelect option is set to False.3. Change the RunRecovery option to True.4. Select all the logs that you want to recover.5. Click Restore.
Restoring relocated and deleted mailboxesThe Tivoli Storage Manager backup solution for restoring databases and log filesthat are relocated and deleted after a virtual machine backup consists of DataProtection for VMware and Data Protection for Microsoft SQL Server.
Before you begin
Decide where the database and log file data is to be restored.
About this task
When you restore the backups, and complete a full database restore operation fromthe backup, Data Protection for VMware restores the files to their original location.
If database or log files are relocated during the backup cycle, Data Protection forMicrosoft SQL Server restores the files in their original locations.
If any databases or log files were created during the backup cycle, Data Protectionfor Microsoft SQL Server re-creates the new files. If database or log files weredeleted during the backup cycle, those files are not restored.
Procedure1. Use Data Protection for VMware to back up the virtual machine. Consider the
following example. You back up virtual machine vm_sql10 that includesMicrosoft SQL Server database moose at 2:00 p.m. The Microsoft SQL Serverdatabase consists of the following files at 2:00 p.m:v C:\sqldbs\moose\moose.mdf
v C:\sqldbs\moose\moose_log.ldf
2. Relocate a database backup to an alternate location. Consider the followingexample. You want to relocate the database moose at 6:00 p.m. to the followinglocation:v E:\sqldbs\moose\moose.mdf
v F:\sqldbs\moose\moose_log.ldf
3. Add files to the database backup. Consider the following example. You want toadd two new files to database moose at 7:00 p.m. The database now consists ofthe following files:v E:\sqldbs\moose\moose.mdf
v F:\sqldbs\moose\moose_log.ldf
v E:\sqldbs\moose\moose2.ndf
v F:\sqldbs\moose\moose2_log.ldf
4. Use Data Protection for Microsoft SQL Server to complete a log backup.Consider the following example. You start a log backup at 9:00 p.m.
Chapter 4. Protection for in-guest applications 79

5. Restore the database backup. Consider the following example. You want torestore the entire moose database.v You restore the full database from the Data Protection for VMware backup
with runrecovery=false.v At 9:00 p.m, you restore the log backup and apply it.
The moose database is restored to the following location:v C:\sqldbs\moose\moose.mdf
v C:\sqldbs\moose\moose_log.ldf
v E:\ sqldbs\moose\moose2.ndf
v F:\ sqldbs\moose\moose2_log.ldf
The full virtual machine restore restores the files to their original location.When you applied the log backup, the files that were added after the relocationare restored.
Sample script for validating full virtual machine backupsBefore you back up Microsoft SQL Server logs, verify that you have a valid fullvirtual machine backup. One procedure for checking for the existence of a fullvirtual machine backup is to schedule the usage of a script.
This sample script checks for the instance of a full backup and then runs theMicrosoft SQL Server log backups if a full virtual machine backup exists. Thisscript can be used with a scheduler service such as the Tivoli Storage Managerscheduler.
@echo offdsmc q vm sql01_SQL -detail -asnode=datacenter01 | find /c“database-level recovery” > c:\temp.txtSET /p VAR=<c:\temp.txt
if %VAR% == “1” (tdpsqlc back * log) ELSE (echo “There is no full backup”set ERRORLEVEL=1)
This script produces the following output:
80 IBM Tivoli Storage Manager for Virtual Environments: Data Protection for VMware User's Guide

IBM Tivoli Storage Manager for Databases:Data Protection for Microsoft SQL ServerVersion 7, Release 1, Level 3.0(C) Copyright IBM Corporation 1997, 2015. All rights reserved.Connecting to SQL Server, please wait...Starting SQL database backup...Connecting to TSM Server as node ’SQL01_SQL’...Using backup node ’SQL01_SQL...ACO5458W The TSM Server ’backup delete’ setting for node (SQL01_SQL) is set toNO. It should be set to YES for proper operation. Processing will continue.Beginning log backup for database model, 1 of 2.Full: 0 Read: 87808 Written: 87808 Rate: 32.54 Kb/SecDatabase Object Name: 20140303011509\000007CCBackup of model completed successfully.Beginning log backup for database sqldb test2, 2 of 2.Full: 0 Read: 88832 Written: 88832 Rate: 132.44 Kb/SecDatabase Object Name: 20140303011511\000007CCBackup of sqldb test2 completed successfully.Total SQL backups selected: 4Total SQL backups attempted: 2Total SQL backups completed: 2Total SQL backups excluded: 2Total SQL backups deduplicated: 0Throughput rate: 51.85 Kb/SecTotal bytes inspected: 176,640Total bytes transferred: 176,640Total LanFree bytes transferred: 0Total bytes before deduplication: 0Total bytes after deduplication: 0Data compressed by: 0%Deduplication reduction: 0.00%Total data reduction ratio: 0.00%Elapsed processing time: 3.33 SecsThe operation completed successfully. (rc = 0)
You can also use the Tivoli Storage Manager activity log and extended summarytable to determine whether virtual machine backups are successful.
Tivoli Storage Manager file space informationYou might never need to know the file names or locations for your virtual machinefiles. However, if the underlying file structure interests you, Data Protection forVMware backups are stored under the node name of the vSphere datacenter (forexample, datacenter10).
The following example shows the file space information for the virtual machinethat is called vm_sql10.
Chapter 4. Protection for in-guest applications 81

tsm: ORION>q file datacenter10 f=d
Node Name: DATACENTER10Filespace Name: \VMFULL-vm_sql10Hexadecimal Filespace Name:FSID: 61Collocation Group Name:Platform: TDP VMwareFilespace Type: API:TSMVMIs Filespace Unicode?: NoCapacity: 0 KBPct Util: 0.0Last Backup Start Date/Time: 03/13/2014 21:29:17Days Since Last Backup Started: 31Last Full NAS Image Backup Completion Date/Time:Days Since Last Full NAS Image Backup Completed:Last Backup Date/Time From Client (UTC):Last Archive Date/Time From Client (UTC):Last Replication Start Date/Time:Days Since Last Replication Started:Last Replication Completion Date/Time:Days Since Last Replication Completed:Backup Replication Rule Name: DEFAULTBackup Replication Rule State: EnabledArchive Replication Rule Name: DEFAULTArchive Replication Rule State: EnabledSpace Management Replication Rule Name: DEFAULTSpace Management Replication Rule State: EnabledAt-risk type: Default intervalAt-risk interval:
Application protection for Active Directory domain controllersData Protection for VMware provides back up and restore protection for VMs thathost Microsoft Active Directory Domain Controllers in both stand-alone andclustered environments. A clustered environment contains multiple domaincontrollers that participate in Active Directory. This protection prevents USNrollback.
USN rollback is a condition that results from restoring the Active Directory domaincontroller in an improper manner. When the domain controller is locally restored,this condition prevents any of its changes from being replicated to other domaincontrollers. These changes are not replicated because the restored USN is earlierthan the USN that is tracked by the other domain controllers. Similar changes onother remote domain controllers are not replicated back to the locally restoreddomain controller. As a result, the topology remains in an unsynchronized state.
To prevent USN rollbacks, Data Protection for VMware protects guest VMs in aclustered environment where multiple domain controllers participate in ActiveDirectory replication. The backed up VM guest that hosts the Active Directorydomain controller is recovered by implementing non-authoritative restore.
Non-authoritative restore recovers the Active Directory (or domain controller) tothe version taken at the time of the backup. When the recovered Active Directory(or domain controller) is restored, it is updated with information from the otherdomain controllers through the existing replication process.
82 IBM Tivoli Storage Manager for Virtual Environments: Data Protection for VMware User's Guide
Environment requirements
Data Protection for VMware protects Windows VM guests that host ActiveDirectory Domain Controllers. The following guest versions that host ActiveDirectory Domain Controllers are supported:
v Windows Microsoft Windows 2008 (32-bit, 64-bit), Microsoft Windows 2008 R2(64-bit), or Microsoft Windows Server 2012
Important: To protect Active Directory on a VM guest that is running onMicrosoft Windows Server 2012, one of the following levels of VMware arerequired:– VMWare vSphere 5.0 Update 2 (vCenter Server and ESXi must both be at 5.0
Update 2)– VMWare vSphere 5.1 (ESXi 5.0 Update 2 or later)
v Windows A current version of VMware Tools must be installed and must berunning on the VM guest at the time that it is backed up. This VM guest mustbe powered on for Data Protection for VMware to detect Active Directory.Otherwise, Active Directory will not be detected and restore protection will beunavailable.
v Windows The Data Protection for VMware Enablement File must be installed onthe vStorage Backup server for successful restore of VMs that host ActiveDirectory Domain Controllers.
Restriction:
When a VM guest contains Active Directory or a domain controller, ensure thatWindows NT Directory Services (NTDS) is running so that the VSS backups anddomain controller discovery can function correctly. You cannot use applicationprotection for domain controllers to complete these tasks:v Restore backups that are created by Tivoli Storage FlashCopy Manager for
VMwarev Restore backups that are created by Data Protection for VMware and Tivoli
Storage FlashCopy Manager for VMware.v Restore from a Tivoli Storage Manager data mover if the data mover is on
Linux, and the version of Microsoft Windows operating system is 2008 or 2008R2. Because of an Active Directory limitation in this environment, the restoretask cannot be completed successfully.
v Run a file restore of Active Directory objectsv Back up and restore VMs that run Active Directory Lightweight Directory
Services (AD LDS)v Recover expired Active Directory tombstone objects
Tip: To help prevent Active Directory objects from expiring, run backups morefrequently than the default tombstone life of 60 days.
v Run a full VM instant restore operationInstant access and instant verification processing is prevented when the ActiveDirectory domain controller is detected on the VM backup to be restored and theVM guest is on Windows 2008 or Windows 2008 R2.
Chapter 4. Protection for in-guest applications 83
||||

84 IBM Tivoli Storage Manager for Virtual Environments: Data Protection for VMware User's Guide

Chapter 5. Data Protection for VMware command-lineinterface
Use the Data Protection for VMware command-line interface to back up, restore, orview configuration information in a vSphere or vCloud environment.
Linux Windows
About this task
The Data Protection for VMware command-line interface provides thesecommands:
“Backup” on page 86Initiate® full and incremental backups of your VMs.
“Restore” on page 89Restore backups of your VMs.
“Inquire_config” on page 95View configuration information about the backup database.
“Inquire_detail” on page 100View configuration information about the backup environment.
“Set_domain” on page 103Apply changes to the domain settings.
“Set_mapping” on page 104Set mapping between the vCloud objects and Tivoli Storage Manager node name.
“Set_option” on page 105Set a parameter in the vmcliprofile.
“Set_password” on page 107Set the password for the Data Protection for VMware command-line interface nodename.
“Get_password_info” on page 109View the status of guest credentials that are set for the managed data centers.
“Start_guest_scan” on page 110Scan guest VMs for application information.
Example
Access the Data Protection for VMware command-line interface in the followingdirectories:
Linux
/opt/tivoli/tsm/tdpvmware/common/scripts
© Copyright IBM Corp. 2011, 2017 85

Windows (32-bit)C:\Program Files\Common Files\Tivoli\TDPVMware\VMwarePlugin\scripts
Windows (64-bit)C:\Program Files (x86)\Common Files\Tivoli\TDPVMware\VMwarePlugin\scripts
For Data Protection for VMware command-line interface messages that contain theFMM prefix, message information is available in the IBM Knowledge Center:FMM, FMF, FMV, FMX, FMY: Tivoli Storage FlashCopy Manager messages
BackupUse this vmcli command to start full and incremental backups of your VMs or VMtemplates.
Syntax
The vmcli -f backup command uses this syntax:
vmcli -f backup -t backupType -I backupObjectListFile -d datacenternodename |providervDCnodename -o datamovernodename [--name taskName] [--descriptiondescriptionInFile.txt] [-s tsmserverhostname][ -n vctrclinodename] [-p tsmserverport]
Linux
You must issue the vmcli -f backup command as tdpvmware user, and not as root.
Parameters
Before you issue a vmcli -f backup command, issue the vmcli -f inquire_configcommand to verify that your configuration is correct. Also, use the informationfrom the vmcli -f inquire_config command output as a guide for setting yourbackup parameters.
When a backup operation is running, there is no command or method available tostop the backup, including the Ctrl + C command. You must wait for the operationto complete on its own.
The vmcli -f backup command requires that the VE_VCENTER_NODE_NAME is setcorrectly in the vmcliprofile. You cannot overwrite this parameter with acommand-line entry.
The data mover system (the vStorage Backup Server where the Tivoli StorageManager backup-archive client is installed) must not set the ASNODENAME option.
-t backupTypeSpecify the type of backup to complete. You can choose from one of thefollowing types:
TSM_INCRCreates an incremental backup of the specified backup object. Thisparameter is valid only in vSphere mode.
TSM_FULLCreates a full image backup of the specified backup objects. Thisparameter is valid only in vSphere mode.
86 IBM Tivoli Storage Manager for Virtual Environments: Data Protection for VMware User's Guide

TSM_IFFULLCreates an incremental forever full backup of the specified backupobjects. When TSM_IFFULL is specified, template VMs that areunchanged since the last backup are also included. This parameter isvalid in both vSphere and vCloud mode.
TSM_IFINCRCreates an incremental forever incremental backup of the specifiedbackup object. This type backs up only the changed data since the lastbackup. This parameter is valid in both vSphere and vCloud mode.This type is the default.
The backup process does not create a snapshot of template VMs in the samemanner that a snapshot is created for regular VMs. As a result, VMware VDDKadvanced transports (SAN, HotAdd mode), change block tracking (CBT), andincremental backups are not available.
-I backupObjectListFileSpecify the file that contains the list of objects to back up. Each line containsone specification for backup.
In vCloud mode, the backupObjectListFile uses the following format:vappname:Org=organization,OrgvDC=organization VDC[,vApp=vApp]
The org, orgvdc, and vapp keywords must be followed by an equal sign (=)and separated from the next keyword by a comma (,).
In vCloud mode, the backupObjectListFile uses the following keywords:
vappnameSpecify the name of the vApp to back up. Each line in thebackupObjectListFile must start with this keyword. You can repeat thiskeyword for each vApp you want to back up.
org Specify the name of the organization from which the vApps are backedup. This parameter must be specified immediately after the vappnamekeyword. If you backup vApps from different organizations, createmultiple lines.
orgvdcSpecify the name of the organization vDC from which the vApps arebacked up. This parameter must be specified as the third parameter ofan input line (after the org keyword). If you backup vApps fromdifferent organization vDCs, create multiple lines.
vapp Specify the name of the vApp to back up. This parameter must bespecified as the fourth parameter of an input line (after the orgvdckeyword). If you backup multiple vApps, create multiple lines. If thisparameter is not specified, all vApps from the organization vDC(orgvdc) of the organization (org) are backed up.
In vSphere mode, the backupObjectListFile uses the following keyword:
vmnameSpecify the name of the VM to back up. You can specify this keywordfor each VM you want to back up. For example:
vmname:vm1vmname:vm2
Chapter 5. Data Protection for VMware command-line interface 87
Restrictions:
v Do not specify a VM host name in the backupObjectListFile. DataProtection for VMware does not support backing up a VM that isidentified by the VM host name.
v When you specify the name of a VM by using the vmname keywordin the backupObjectListFile, Data Protection for VMware does notdifferentiate between a colon (:) used as a keyword separator or acolon that is used in the VM name. Therefore, use caution when youspecify keyword values. In addition, backing up a VM that containsa comma in its name is not supported.
v Data Protection for VMware support for VM backup operations islimited to VM names and datacenter names that contain English7-bit ASCII characters only. VM names and datacenter names thatuse other language characters are not currently supported. Morecharacter restrictions are listed in Appendix A, “Troubleshooting,” onpage 165.
v A VMware vCenter allows the existence of two VMs with the samename. However, Data Protection for VMware does not supportbacking up two VMs with the same name. To prevent errors orbackup failures, do not have two VMs with the same name in avCenter.
-d datacenternodename | providervDCnodename | organizationvDCnodenameWhen the VE_TSM_MODE parameter specifies VSPHERE, specify the datacenternode name.
When the VE_TSM_MODE parameter specifies vCloud, specify the provider vDCnode name (backup and restore operations) or the organization vDC nodename (query operations).
-o datamovernodenameSpecify the data mover node name. This name is the node name for the TivoliStorage Manager backup-archive client that is installed on the vStorage BackupServer. This node performs the data movement.
[--name taskName]Specify the string that identifies the backup task.
[--description descriptionInFile.txt]Specify the name of the text file that contains a description of the backup task.
[-s tsmserverhostname]Specify the host name or IP address of the Tivoli Storage Manager server. Ifthis parameter is not specified, the value in the profile is used.
[-n vmclinodename]Specify the VMCLI node name. This node connects the Data Protection forVMware command-line interface to the Tivoli Storage Manager server and thedata mover node. If this parameter is not specified, the value in the profile isused.
[-p tsmserverport]Specify the port of the Tivoli Storage Manager server.v If this parameter is not specified in the Data Protection for VMware
command-line interface and not specified in the profile, the default port(1500) is used.
88 IBM Tivoli Storage Manager for Virtual Environments: Data Protection for VMware User's Guide

v If this parameter is not specified in the Data Protection for VMwarecommand-line interface, but is specified in the profile, the value in theprofile is used.
RestoreUse this vmcli command to restore backups of your VMs, VM templates, orvApps.
Syntax
The vmcli -f restore command uses this syntax:
vmcli -f restore [-c tsm_mode] -I restoreObjectListFile -d datacenternodename -odatamovernodename [-s tsmserverhostname] [-n vmclinodename] [-p tsmserverport][-vmrestoretype (noninstant | instantrestore | instantaccess | mount |vmcleanup | vmfullcleanup | mountcleanup)]
Linux
You must issue the vmcli -f restore command as tdpvmware user, and not asroot.
Parameters
The vmcli -f restore command requires that the VE_VCENTER_NODE_NAME is setcorrectly in the vmcliprofile. You cannot overwrite this parameter with acommand-line entry.
The data mover system (the vStorage Backup Server where the backup-archiveclient is installed) must not set the ASNODENAME option.
-c tsm_modeSpecify the mode in which Tivoli Storage Manager restores up the virtualenvironment. The value is set in the VE_TSM_MODE parameter in thevmcliprofile. You can choose from one of the following modes:
VSPHERESpecify this value when Tivoli Storage Manager restores individualVMs from a vCenter.
VCloudSpecify this value when Tivoli Storage Manager restores vApps from avCloud director.
If the mode is not set in the vmcliprofile, the VSPHERE mode is used withthe vmcli command.
-I restoreObjectListFileSpecify the file that contains the list of VMs or vApps to restore. Each line cancontain only one VM identifier (vSphere mode) or one restore specification fora vApps (vCloud mode).
The restoreObjectListFile uses the following keyword in vSphere mode andvCloud mode:
backupidEach line must begin with the backupid. The syntax isbackupid:your_backup_ID. Specify the Tivoli Storage Manager Object IDfor a specific VM backup (vSphere mode) or vApps backup (vCloud
Chapter 5. Data Protection for VMware command-line interface 89
mode). Locate the Object ID by using the vmcli -f inquire_detailcommand. This keyword is required for a restore operation.
The restoreObjectListFile uses the following keywords in vSphere mode only:
vmnameIn vSphere mode, specify the name of the VM that was originallybacked up. If this keyword is not specified, the name vmname is usedfor the restore.
Restriction: Restrictions: When you specify a keyword in therestoreObjectListFile, Data Protection for VMware does not differentiatebetween a colon (:) used as a keyword separator or a colon that is usedin a keyword value. Therefore, use caution when you specify keywordvalues. In addition, Data Protection for VMware support for VMrestore operations is limited to VM names and VMware datacenternames that contain English 7-bit ASCII characters only. VM names anddatacenter names that use other language characters are not currentlysupported. Additional character restrictions are listed in Appendix A,“Troubleshooting,” on page 165.
The restore process does not create a snapshot of template VMs in thesame manner that a snapshot is created for regular VMs. As a result,VMware VDDK advanced transports (SAN, HotAdd mode), changeblock tracking (CBT), and incremental backups are not available.
vmnameIn vSphere mode, specify the name that you want the restored VM tobe named. This keyword is the second entry. Existing VMs are notoverwritten. Therefore, either rename the VM (by using this keyword)or delete the original VM before you issue the vmcli -f restorecommand.
-vmdk=cnfgIn vSphere mode, specify that the virtual machine configurationinformation is restored. The configuration information is alwaysrestored when the entire virtual machine is restored. However, bydefault the configuration is not restored when you restore only selecteddisks with the vmdk=disk label option.
Ordinarily, restoring configuration information to an existing virtualmachine fails because the restored configuration information conflictswith the existing virtual machine configuration information. Use thisoption if the existing configuration file for a virtual machine on theESX server was deleted, and you want to use the backed upconfiguration to re-create it.
For example, this entry in restoreObjectListFile restores all VMDKs forvirtual machine VM1 and keeps the same name:
backupid:26801107 vmname:VM1:-vmdk=cnfg
vmdk=disk labelIn vSphere mode, specify the disk label of the virtual disks to includein the restore operation. You specify this option only if you want topartially restore virtual machine data by restoring only specific disks.
For example, this entry in restoreObjectListFile restores only the VMDKnamed Hard Disk 1 as a new virtual machine:
90 IBM Tivoli Storage Manager for Virtual Environments: Data Protection for VMware User's Guide

backupid:26801107 vmanme:myvm:vmdk=Hard Disk 1::vmname:newname
-vmdk=disk labelIn vSphere mode, specify the disk label of one or more virtual disks toexclude from the restore operation.
For example, this entry in restoreObjectListFile restores all VMDKsexcept the one named Hard Disk 1 as a new virtual machine:
backupid:26801107 vmanme:myvm:-vmdk=Hard Disk 4::vmname:newname
This entry restores VMDKs for the virtual machine as a new virtualmachine without configuration information:
backupid:26801107 vmname:oldvmname:-vmdk=cnfg::vmname:newname
newdatacenternameIn vSphere mode, when you want the restore destination to be adifferent datacenter, specify the name of that datacenter with thiskeyword.
newesxhostnameIn vSphere mode, when you want the restore destination to be adifferent ESX host, specify the name of that ESX host with thiskeyword.
newdatastoreurlIn vSphere mode, specify the name (not the URL) of the VMwaredatastore where the VM is to be restored. For example, a datastorename such as datastore1 is supported. A datastore URL such assanfs://vmfs_uuid:4d90pa2d-e9ju45ab-065d-00101a7f1a1d/ is notsupported. The datastore can be on a SAN, NAS, iSCSI device, orVMware virtual volume (vVol).
vmtempdatastoreIn vSphere mode, when you want to issue an instant restore operation,specify a temporary datastore on the ESX host. This temporarydatastore contains the configuration information and data of the VMthat is created during the operation.
vmautostartvmIn vSphere mode, when a VM is created for instant access(vmrestoretype instantaccess), specify whether to automatically startthe VM:
YES The VM created for instant access is automatically started.
NO The VM created for instant access is not automatically started.It must be manually started by the user. This value is thedefault.
vmdiskprovisionIn vSphere mode, specify the type of provisioning for the VM disk thatis restored during an instant restore process (vmrestoretype instant):
THICKThe disk is created with thick provisioning. This value is thedefault.
Chapter 5. Data Protection for VMware command-line interface 91

THIN The disk is created with thin provisioning.
An example restoreObjectListFile in vSphere mode is provided here:
# restore of VM "678912345" named "vmName6" to new vmname "vm6newName" to datacenter"DataCenter2" to ESX esxhostname:esxHost1Name to new datastore "datastore2"backupid:678912345 vmname:vmName6::vmname:vm6newName newdatacentername:DataCenter2newesxhostname:esxHost1Name newdatastoreurl:datastore2 vmtempdatastore:datastore2tempvmdiskprovision:thin
Each restore specification must be on a single line. However, for the sake ofpage formatting, the restore specification in this example is on multiple lines.
The restoreObjectListFile uses the following keywords in vSphere mode formount operations:
vmostypeSpecify the type of operating system for the backed up VM.
AUTOMATICThe operating system of the backed up VM is automaticallydetected. This value is the default.
LINUXThe operating system of the backed up VM is Linux.
WINDOWSThe operating system of the backed up VM is Windows.
exportfsExports the mounted file system to the location specified by the valueof the exportparameter.
YES The mounted file system is exported.
NO The mounted file system is not exported. This value is thedefault.
exportparameterThe location where the file system is exported.
Linux IP or machine nameThe IP address or name of the machine that mounts theexported file system.
Windows user nameThe user name that is allowed to access Windows Share. It isthe user's responsibility to be aware of which users and groupshave access to their shared files.
mountpoint mount point pathSpecify the path of the mount point.
Linux
The default value is /mnt/vmname.
Windows
The default value is D:\tsmvemount\vmname.
mounttag stringThis string is text that you enter to make the mount point name easierto identify when you search on the local file system. Specify this stringas part of the mount path.
92 IBM Tivoli Storage Manager for Virtual Environments: Data Protection for VMware User's Guide

Linux
The full path to a disk is /mount root/tag/vmname/snapshot
date and time/file system number. For example:/mnt/tickel-4711/VM1/2013-12-12-12:12:12/disk1
Windows The full path to a disk is mount root\tag\vmname\snapshotdate and time\file system number. For example:C:\Users\Admin\tickel-4711\VM1\2013-12-12-12:12:12\disk1
An example restoreObjectListFile in vSphere mode for mount operations isprovided here:
Linux
backupid:1167852 vmname:VM-Lin4 mounttag:limor exportparameters:9.123.456.78exportfs:yes vmostype:linux mountpoint:/tmp/tsm-mounts
Windows
backupid:1167850 vmname:VM-Name3 mounttag:limor exportparameters:WinUser1exportfs:yes vmostype:windows mountpoint:C:\temp\mnt
The restoreObjectListFile uses the following keywords in vCloud mode only:
vappnameIn vCloud mode, specify the restore spec for one vApps. This keywordis specified after the backupid keyword. The vappname value isconsisted of this triplet entry:org=organization name,orgvdc=organization vDC node name,vapp=vApp name
For example, the following restoreObjectListFile entry restores vAppsnamed "vApp1" from organization "Mainz_org" and organizationvirtual datacenter "MZ_Silver" to a new vApps named"vApp1_restore":
vappname "vApp1_restore"backupid:47110815 vappname:org=Mainz_org,orgvdc=MZ_Silver,vapp=vApp1vappname_new:vApp1_restore
org=organization,orgvdc=organization vdc,vapp=name of vApp backupIn vCloud mode, use this triplet to specify the following information:
org The name of the organization to which the vApps belongs.
orgvdcThe name of the organization vDC to which the vAppsbelongs.
vapp The name of the vApps that was originally backed up.
vappname_newIn vCloud mode, specify the new name for vApps to be restored.Existing vApps are not overwritten. As a result, use thevappname_new keyword to rename the restore vApps or delete theoriginal vApps before you start the restore operation. If this keyword isnot specified, the vappname value is used for the restore.
An example restoreObjectListFile is provided here:
Chapter 5. Data Protection for VMware command-line interface 93
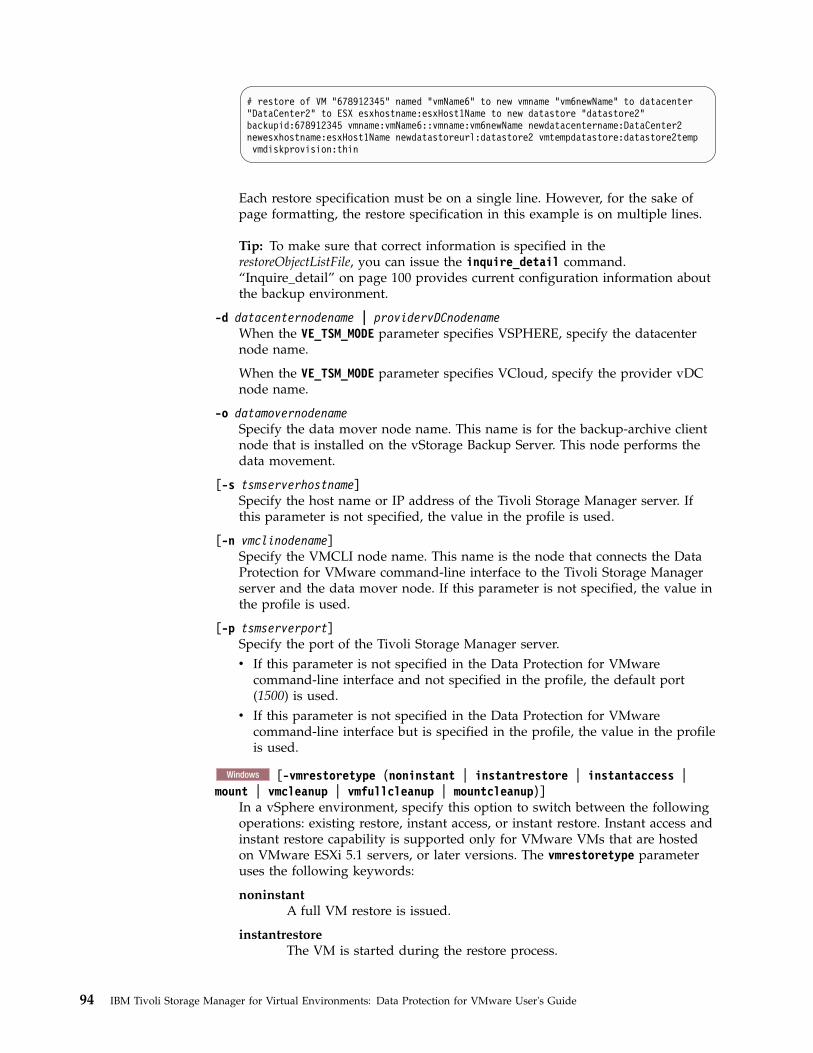
# restore of VM "678912345" named "vmName6" to new vmname "vm6newName" to datacenter"DataCenter2" to ESX esxhostname:esxHost1Name to new datastore "datastore2"backupid:678912345 vmname:vmName6::vmname:vm6newName newdatacentername:DataCenter2newesxhostname:esxHost1Name newdatastoreurl:datastore2 vmtempdatastore:datastore2tempvmdiskprovision:thin
Each restore specification must be on a single line. However, for the sake ofpage formatting, the restore specification in this example is on multiple lines.
Tip: To make sure that correct information is specified in therestoreObjectListFile, you can issue the inquire_detail command.“Inquire_detail” on page 100 provides current configuration information aboutthe backup environment.
-d datacenternodename | providervDCnodenameWhen the VE_TSM_MODE parameter specifies VSPHERE, specify the datacenternode name.
When the VE_TSM_MODE parameter specifies VCloud, specify the provider vDCnode name.
-o datamovernodenameSpecify the data mover node name. This name is for the backup-archive clientnode that is installed on the vStorage Backup Server. This node performs thedata movement.
[-s tsmserverhostname]Specify the host name or IP address of the Tivoli Storage Manager server. Ifthis parameter is not specified, the value in the profile is used.
[-n vmclinodename]Specify the VMCLI node name. This name is the node that connects the DataProtection for VMware command-line interface to the Tivoli Storage Managerserver and the data mover node. If this parameter is not specified, the value inthe profile is used.
[-p tsmserverport]Specify the port of the Tivoli Storage Manager server.v If this parameter is not specified in the Data Protection for VMware
command-line interface and not specified in the profile, the default port(1500) is used.
v If this parameter is not specified in the Data Protection for VMwarecommand-line interface but is specified in the profile, the value in the profileis used.
Windows [-vmrestoretype (noninstant | instantrestore | instantaccess |mount | vmcleanup | vmfullcleanup | mountcleanup)]
In a vSphere environment, specify this option to switch between the followingoperations: existing restore, instant access, or instant restore. Instant access andinstant restore capability is supported only for VMware VMs that are hostedon VMware ESXi 5.1 servers, or later versions. The vmrestoretype parameteruses the following keywords:
noninstantA full VM restore is issued.
instantrestoreThe VM is started during the restore process.
94 IBM Tivoli Storage Manager for Virtual Environments: Data Protection for VMware User's Guide

instantaccessThe VM might be started but it is not restored.
mount The volumes of the VM defined in the input file are mounted inread-only mode on the data mover. On Linux, all the volumes of theVM are mounted as a Network File System (NFS). On Windows, all thevolumes of the VM are mounted as a Common Internet File System(CIFS).
vmcleanupComponents that are no longer needed are cleaned up.
vmfullcleanupThe VM and all its components are cleaned up, regardless of thecurrent state.
mountcleanupAll mounted volumes of the selected VM are cleaned up. This cleanuptask includes removing file systems that were exposed for the restoreoperation and the file shares (CIFS, NFS).
Restriction: When an instant restore or instant access operation that is issuedfrom the backup-archive client (dsmc) is followed by an instant restore orinstant access operation that is issued from the Data Protection for VMwarecommand-line interface (vmcli) or Data Protection for VMware vSphere GUI,the TDPVMwareMount service must be restarted. This situation applies onlywhen the Data Protection for VMware command-line interface accesses theTivoli Storage Manager server with a node name different from the one usedby the backup-archive client. This restriction applies to any order of operationsbetween the two products.
Restart the service by going to Start > Administrative Tools > ComputerManagement > Services and Applications > Services. Look for service nameTivoli Storage Manager recovery agent in the Services window. The path tothe Services window might vary depending on your operating system.
The service does not have to be restarted when the VMware datacenter nameis specified with the asnodename option in the dsm.opt file.
Inquire_configUse this vmcli command to view configuration information about the TivoliStorage Manager nodes associated with Data Protection for VMware.
Syntax
The vmcli -f inquire_config command uses this syntax:
vmcli -f inquire_config [-t backuptype] [-v vcenternodename | vcloudnodename] [-stsmserverhostname] [-n vctrclinodename] [-p tsmserverport]
Linux
You must issue the vmcli -f inquire_config command as tdpvmware user, and notas root.
Chapter 5. Data Protection for VMware command-line interface 95

Parameters
[-t backuptype]Specify the type of backup. You can choose from one of the following types:
TSM Select a backup that was created with Tivoli Storage Manager forVirtual Environments. This type must be specified when in vCloudmode.
FCM Select a backup that was created with IBM Tivoli Storage FlashCopyManager for VMware.
[-v vcenternodename | vcloudnodename]Depending on the backup environment, specify the virtual node that representseither a vCenter or the vCloud Director. If this parameter is not specified in theData Protection for VMware command-line interface, the value in the profile isused.
[-s tsmserverhostname]Specify the host name or IP address of the Tivoli Storage Manager server. Ifthis parameter is not specified, the value in the profile is used.
[-n vctrclinodename]Specify the VMCLI node name. This name is the node that connects the DataProtection for VMware command-line interface to the Tivoli Storage Managerserver and the data mover node. If this parameter is not specified, the value inthe profile is used.
[-p tsmserverport]Specify the port of the Tivoli Storage Manager server.v If this parameter is not specified in the Data Protection for VMware
command-line interface and not specified in the profile, the default port(1500) is used.
v If this parameter is not specified in the Data Protection for VMwarecommand-line interface but is specified in the profile, the value in the profileis used.
vSphere environment example
The parameter values in this output for the vmcli -f inquire_config -s TSMcommand show that the Data Protection for VMware command-line interfacerecognizes the Tivoli Storage Manager node configuration. As a result, theconfiguration is correct:#TASK 38 inquire_config 20140108213337381#PARAM INSTALLED=TSM#RUN 32 20140108213337381#LANG en_US#PARAM BACKEND=TSM#PARAM OPERATION_TYPE 5#PHASE_COUNT 4#PHASE PREPARE#PARAM BACKUP_TYPE=0#PARAM TSM_SERVER_NAME=FVTSERIES11ESX6.STORAGE.MYCOMPANY.COM#PARAM TSM_SERVER_PORT=1500#PARAM TSMCLI_NODE_NAME=DPM02_VMCLI#PARAM VCENTER_NODE_NAME=DPM02_VC1#PARAM DATACENTER_NODE_NAME=#PARAM OFFLOAD_HOST_NAME=#PARAM PASSWORD_TYPE=CLINODE#PARAM TSM_OPTFILE=C:\Users\ADMINI~1\AppData\Local\Temp\2\T4VBE42.tmp#PARAM INPUT_FILE=#PARAM TRACEFILE=#PARAM TRACEFLAGS=
96 IBM Tivoli Storage Manager for Virtual Environments: Data Protection for VMware User's Guide

#PARAM RUNID=38#PHASE INITIALIZE#PHASE INQUIRE_DATACENTER_NODES#CHILD datacenternode:DC1::DPM02_DC1#PARENT vcenternode:DPM02_VC1#PHASE INQUIRE_PROXY_NODES#CHILD targetnode:DPM02_DC1#PARENT peernode:DPM02_DC1_DM#CHILD hladdress:tsmveesx2vm50.storage.mycompany.com#PARENT peernode:DPM02_DC1_DM#CHILD lladdress:49394#PARENT peernode:DPM02_DC1_DM#CHILD nodetype:DMNODE#PARENT peernode:DPM02_DC1_DM#CHILD partner:#PARENT peernode:DPM02_DC1_DM#CHILD targetnode:DPM02_DC1#PARENT peernode:DPM02_DC1_2_MP_WIN#CHILD hladdress:tsmveesx2vm50.storage.mycompany.com#PARENT peernode:DPM02_DC1_2_MP_WIN#CHILD lladdress:49453#PARENT peernode:DPM02_DC1_2_MP_WIN#CHILD nodetype:MPNODE#PARENT peernode:DPM02_DC1_2_MP_WIN#CHILD partner:DPM02_DC1_2_MP_LNX#PARENT peernode:DPM02_DC1_2_MP_WIN#CHILD targetnode:DPM02_DC1#PARENT peernode:DPM02_DC1_2_MP_LNX#CHILD hladdress:#PARENT peernode:DPM02_DC1_2_MP_LNX#CHILD lladdress:#PARENT peernode:DPM02_DC1_2_MP_LNX#CHILD nodetype:MPNODE#PARENT peernode:DPM02_DC1_2_MP_LNX#CHILD partner:DPM02_DC1_2_MP_WIN#PARENT peernode:DPM02_DC1_2_MP_LNX#PARAM STATUS=success#PARAM STATUS=success#END RUN 32 20140108213340100#END TASK 38#INFO FMM16014I The return code is 0.#END
The PHASE INQUIRE_DATACENTER_NODES section shows the mapping of the datacentername (DC1) from vSphere to the Tivoli Storage Manager node name for thatdatacenter (DPM02_DC1). The datacenter name is case sensitive and must be identicalto the name shown in vSphere for the mapping to function.
The PHASE INQUIRE_PROXY_NODES section shows the data mover nodes with proxyaccess to each data center node. The format for this proxy relationship is shown inpairs:#CHILD targetnode::<datacenter node name>#PARENT peernode::<data mover node name>
Two types of proxy nodes are identified in the PHASE INQUIRE_PROXY_NODES section:v The CHILD nodetype:DMNODE subsection identifies the data mover nodes and their
proxy relationships.v The CHILD nodetype:MPNODE subsection identifies the mount proxy nodes and
their proxy relationships. These nodes represent the proxy system that accessesmounted VM disks through an iSCSI connection. Mount proxy nodes arerequired for file restore operations.
Chapter 5. Data Protection for VMware command-line interface 97

vCloud environment example
The parameter values in this output for the vmcli -f inquire_config -s TSMcommand show that the Data Protection for VMware command-line interfacerecognizes the Tivoli Storage Manager node configuration. As a result, theconfiguration is correct:#TASK 3 inquire_config 20130109143746117#PARAM INSTALLED=TSM#RUN 2 20130109143746117#LANG en_US#PARAM BACKEND=TSM#PARAM OPERATION_TYPE 4#PHASE_COUNT 5
#PHASE PREPARE#PARAM BACKUP_TYPE=0#PARAM TSM_SERVER_NAME=VM-08R2-TSMDEV2#PARAM TSM_SERVER_PORT=1500#PARAM VCLOUD#PARAM TSMCLI_NODE_NAME=VMCLI_OFIR#PARAM VCLOUD_NODE_NAME=VCD_EUROPE#PARAM DATACENTER_NODE_NAME=#PARAM OFFLOAD_HOST_NAME=#PARAM PASSWORD_TYPE=CLINODE#PARAM TSM_OPTFILE=C:\Users\qa\AppData\Local\Temp\1\T4VEEF3.tmp#PARAM INPUT_FILE=#PARAM TRACEFILE=tsmcli.trace#PARAM TRACEFLAGS=api api_detail
#PHASE INITIALIZE
#PHASE INQUIRE_PVDC_NODES
#CHILD targetnode:VCD_EUROPE#PARENT peernode:PVDC_GOLD#CHILD pvdcname:Gold provider vDC#PARENT peernode:PVDC_GOLD#CHILD targetnode:VCD_EUROPE#PARENT peernode:PVDC_SILVER#CHILD pvdcname:Silver provider vDC#PARENT peernode:PVDC_SILVER
#PHASE INQUIRE_OVDC_NODES
#CHILD targetnode:PVDC_GOLD#PARENT peernode:OVDC_HAIFA#CHILD orgname:Israel#PARENT peernode:OVDC_HAIFA#CHILD orgvdcname:Haifa organization virtual data center#PARENT peernode:OVDC_HAIFA#CHILD targetnode:PVDC_SILVER#PARENT peernode:OVDC_JERUSALEM#CHILD orgname:Israel#PARENT peernode:OVDC_JERUSALEM#CHILD orgvdcname:Jerusalem organization virtual data center#PARENT peernode:OVDC_JERUSALEM#CHILD targetnode:PVDC_GOLD#PARENT peernode:OVDC_MUNICH#CHILD orgname:Germany#PARENT peernode:OVDC_MUNICH#CHILD orgvdcname:Munich organization virtual data center#PARENT peernode:OVDC_MUNICH#CHILD targetnode:PVDC_SILVER#PARENT peernode:OVDC_MAINZ
98 IBM Tivoli Storage Manager for Virtual Environments: Data Protection for VMware User's Guide

#CHILD orgname:Germany#PARENT peernode:OVDC_MAINZ#CHILD orgvdcname:Mainz organization virtual data center#PARENT peernode:OVDC_MAINZ
#PHASE INQUIRE_DM_NODES
#CHILD targetnode:PVDC_GOLD#PARENT peernode:DM_DM1#CHILD targetnode:OVDC_HAIFA#PARENT peernode:DM_DM1#CHILD targetnode:OVDC_MUNICH#PARENT peernode:DM_DM1#CHILD hladdress:vm-DM1.com#PARENT peernode:DM_DM1#CHILD lladdress:49391#PARENT peernode:DM_DM1
#CHILD targetnode:PVDC_GOLD#PARENT peernode:DM_DM2#CHILD targetnode:OVDC_HAIFA#PARENT peernode:DM_DM2#CHILD targetnode:OVDC_MUNICH#PARENT peernode:DM_DM2#CHILD hladdress:vm-DM2.com#PARENT peernode:DM_DM2#CHILD lladdress:49392#PARENT peernode:DM_DM2
#CHILD targetnode:PVDC_SILVER#PARENT peernode:DM_DM3#CHILD targetnode:OVDC_JERUSALEM#PARENT peernode:DM_DM3#CHILD targetnode:OVDC_MAINZ#PARENT peernode:DM_DM3#CHILD hladdress:vm-DM3.com#PARENT peernode:DM_DM3#CHILD lladdress:49391#PARENT peernode:DM_DM3
#CHILD targetnode:PVDC_SILVER#PARENT peernode:DM_DM4#CHILD targetnode:OVDC_JERUSALEM#PARENT peernode:DM_DM4#CHILD targetnode:OVDC_MAINZ#PARENT peernode:DM_DM4#CHILD hladdress:vm-DM4.com#PARENT peernode:DM_DM4#CHILD lladdress:49392#PARENT peernode:DM_DM4
#PARAM STATUS=success#END RUN 2 20130109143749906#END TASK 3#INFO FMM16014I The return code is 0.#END
The PHASE INQUIRE_PVDC_NODES section shows the provider VDC nodes with proxyaccess to each vCloud Director node. The format for this proxy relationship isshown in pairs:#CHILD targetnode::<vCloud Director node name>#PARENT peernode::<provider VDC name>
The PHASE INQUIRE_OVDC_NODES section shows the organization VDC nodes withproxy access to each provider VDC node. The format for this proxy relationship isshown in pairs:
Chapter 5. Data Protection for VMware command-line interface 99

#CHILD targetnode::<provider VDC node name>#PARENT peernode::<organization VDC node name>
The PHASE INQUIRE_DM_NODES section shows the data mover nodes with proxyaccess to each provider VDC node and organization VDC node. The format for thisproxy relationship is shown in pairs:#CHILD targetnode::<provider VDC node name> OR <organization VDC node name>#PARENT peernode::<data mover node name>
Inquire_detailUse this vmcli command to view configuration information about the backupenvironment that is associated with Data Protection for VMware.
Syntax
The vmcli -f inquire_detail command uses this syntax:
vmcli -f inquire_detail -d datacenternodename | organizationvDCnodename [-a] [-nvmclinodename] [-o datamovernodename] [-p tsmserverport] [-e vmdetail | vappdetail ][-q dmverify | vmfs | vmsingle | vappfs | vappsingle (-I inputfile)] [-stsmserverhostname] [-t backupType] [-vmrestoretype (instantrestore | instantaccess |alltype | mount)]
Linux
You must issue the vmcli -f inquire_detail command as tdpvmware user, and notas root.
Parameters
-d datacenternodename | organizationvDCnodenameWhen the VE_TSM_MODE parameter specifies VSPHERE, specify the datacenternode name.
When the VE_TSM_MODE parameter specifies vCloud, specify the organizationvDC node name.
[-a]Specify to show only the active backups on the Tivoli Storage Manager server.
[-n vmclinodename]Specify the VMCLI node name. This name is the node that connects the DataProtection for VMware command-line interface to the Tivoli Storage Managerserver and the data mover node. If this parameter is not specified, the value inthe profile is used.
[-o datamovernodename]Specify the data mover node name.
[-p tsmserverport]Specify the port of the Tivoli Storage Manager server.v If this parameter is not specified in the Data Protection for VMware
command-line interface and not specified in the profile, the default port(1500) is used.
v If this parameter is not specified in the Data Protection for VMwarecommand-line interface but is specified in the profile, the value in the profileis used.
100 IBM Tivoli Storage Manager for Virtual Environments: Data Protection for VMware User's Guide

[-e vmdetail | vmappdetailSpecify vmdetail to show more detailed information about the backed up VMs.For example, the parameter shows information about disks that are attached tothe VM. This parameter is valid only when the VE_TSM_MODE parameterspecifies VSPHERE.
Specify vmappdetail to show more detailed information about the backed upvApps. For example, this parameter shows the following information:v VMs that are attached to the vApp.v VM name as it appears in both vCloud and vSphere mode.v Success or fail status for the VM backup.
This parameter is valid only when the VE_TSM_MODE parameter specifiesvCloud.
[-q dmverify | vmfs | vmsingle | vappfs | vappsingle (-I inputfile)]
dmverifySpecify to query the status of the data mover node identified by the -oparameter. You must specify the -d and -o parameters when youspecify dmverify.
vmfs Specify to query all VMware Virtual Machine File Systems (VMFS).This parameter shows high-level information about all VMs. Thisparameter is valid only in vSphere mode.
vmsingleSpecify to query individual VMs that are being restored during aninstant access or instant restore operation. This parameter is valid onlyin vSphere mode.
vappfsSpecify to show high-level information about all vApps. Thisparameter is valid only in vCloud mode.
vappsingleSpecify to show information about individual vApps that are identifiedin the inputfile. This parameter is valid only in vCloud mode.
-I inputfileThe inputfile value defines the full path and name of the input file. Thiskeyword is valid with the vmsingle and vappsingle parameters only.
In vSphere mode, specify the name of the VM to query. You canspecify this keyword for each VM that you want to query:vmname:vmname. For example:
vmname:vm1vmname:vm2
In vCloud mode, specify the name of the VM to query. You can specifythis keyword for each VM you want to query: vappname:vappname. Forexample:
vappname:vapp1vappname:vapp2
When the q option is not specified, the default value is vmfs (in vSpheremode) and vappfs (in vCloud mode). When the inputfile entry contains spaces,enclose the entry with quotation marks. For example:
Chapter 5. Data Protection for VMware command-line interface 101

-I "/my dir/my file"
[-s tsmserverhostname]Specify the host name or IP address of the Tivoli Storage Manager server. Ifthis parameter is not specified, the value in the profile is used.
[-t backupType]Specify one of the following backup types to query:
ALL Specifies that the inquire_detail command is applied to all registeredbackup types.
FCM Specifies that the inquire_detail command is applied to only TivoliStorage FlashCopy Manager for VMware backups.
Tivoli Storage FlashCopy Manager for VMware is a separately licensedproduct that contains its own user documentation. Familiarity with thisproduct and its documentation is necessary to adequately implement acomprehensive plan for protecting your VMs.
TSM Specifies that the inquire_detail command is applied to only DataProtection for VMware backups. This value must be specified when invCloud mode.
Windows [-vmrestoretype (instantrestore | instantaccess | alltype |mount)]
Specify this option to query active instant access or restore operations. Thisoption also queries stale or orphan artifacts after a failure. The vmrestoretypeparameter uses the following keywords:
instantrestoreThe query lists VMs that are active in an instant restore operation.
instantaccessThe query lists VMs that are active in an instant access process.
alltypeThe query lists VMs that are active in all instant operations.
mount The query lists all active mount operations. For each mount operation,the output lists the mounted snapshots (restore points) that werecreated during a restore operation for a particular VM.
Restriction: When an instant restore or instant access operation that is issuedfrom the backup-archive client (dsmc) is followed by an instant restore orinstant access operation that is issued from the Data Protection for VMwarecommand-line interface (vmcli) or Data Protection for VMware vSphere GUI,the recovery agent service must be restarted. This situation applies only whenthe vmcli accesses the server with a node name different from the one used bythe backup-archive client. This restriction applies to any order of operationsbetween the two products.
Restart the service by going to Start > Administrative Tools > ComputerManagement > Services and Applications > Services. Look for service nameTivoli Storage Manager recovery agent in the Services window. The path tothe Services window might vary depending on your operating system.
The service does not have to be restarted when the VMware datacenter nameis specified with the asnodename option in the dsm.opt file.
102 IBM Tivoli Storage Manager for Virtual Environments: Data Protection for VMware User's Guide

Example
In this example, the vmcli -f inquire_detail command is issued to query the VMnamed antures for details:vmcli -f inquire_detail -s BORODIN.MAINZ.DE.IBM.COM -p 1505 -n JF_VMCLI_HANNE-v CHRISTO.MAINZ.DE.IBM.COM -o JF_MAINZ_DEVELOPMENT_DC_DM -d JF_MAINZ_DEVELOPMENT_DC-q vmsingle -I .\inputfile.txt --vmrestoretype (instantrestore | instantaccess)
The inputfile contains this statement:
vmname:antures
Set_domainUse this vmcli command to apply changes to the domain settings.
Syntax
The vmcli -f set_domain command uses this syntax:
vmcli -f set_domain -I domainObjectListFile
Linux
You must issue the vmcli -f set_domain command as tdpvmware user, and not asroot.
The new domain value is stored in the vmcli database.
Parameters
-I domain ObjectListFileThe domainObjectListFile has the following requirements:v The file contains one VMware datacenter identifier per line.v The valid identifier is the datacenter name.
If no domain is configured, the current instance is used to manage alldatacenters that are available in the vCenter. When the vmcli -f set_domaincommand is run without -I parameter, the domain configuration is deleted.
An example domainObjectListFile is provided here:#datacentername:datacenterNamedatacentername:datacenterXYZdatacentername:datacenterA*datacentername:datacenterB*...
Chapter 5. Data Protection for VMware command-line interface 103

Set_mappingUse this vmcli command to set mapping between the vCloud objects and TivoliStorage Manager node name.
Syntax
The vmcli -f set_mapping command uses this syntax:
vmcli -f set_mapping -I mappingInputFile [-s tsmserverhostname] [-n vmclinodename][-p tsmserverport]
Linux
You must issue the vmcli -f set_mapping command as the tdpvmware user, andnot as root.
To confirm that the mapping is set correctly, issue the vmcli -f inquire_configcommand.
The vmcli -f set_mapping command is valid only in a vCloud environment.
Parameters
-I mappingInputFileSpecify the following mapping information in this file:
pvdcnode: provider vDC node nameSpecify the provider vDC node name.
pvdcname: provider vDC nameSpecify the provider vDC name. The name is case sensitive.
orgname: organization nameSpecify the name of the organization. The name is case sensitive.
orgvdcname: organization vDCSpecify the name of the organization vDC. The name is case sensitive.
orgvdcnode: organization vDC node nameSpecify the organization vDC node name. The name is converted toupper case.
The following keywords are required to set the provider vDC name:v pvdcnodev pvdcname
The following keywords are required to set the organization and organizationvDC name:v pvdcnodev orgnamev orgvdcnamev orgvdcnodename
When the mappingInputFile entry contains more spaces, enclose the entry withquotation marks. For example:-I "/my dir/my input file"
104 IBM Tivoli Storage Manager for Virtual Environments: Data Protection for VMware User's Guide

[-s tsmserverhostname]Specify the host name or IP address of the Tivoli Storage Manager server. Ifthis parameter is not specified, the value in the profile is used.
[-p tsmserverport]Specify the port of the Tivoli Storage Manager server.v If this parameter is not specified in the Data Protection for VMware
command-line interface and not specified in the profile, the default port(1500) is used.
v If this parameter is not specified in the Data Protection for VMwarecommand-line interface, but is specified in the profile, the value in theprofile is used.
[-n vmclinodename]Specify the VMCLI node name. This is the node that connects the DataProtection for VMware command-line interface to the Tivoli Storage Managerserver and the data mover node. If this parameter is not specified, the value inthe profile is used.
Example
In this example, the vmcli -f set_mapping command is issued to set the mappingbetween the Tivoli Storage Manager node "pvdc_oslo" and the real provider vDC,"Oslo Norway". The mappingInputFile contains this entry:
pvdcnode:pvdc_oslopvdcname:Oslo Norway
In this example, the vmcli -f set_mapping command is issued to set the mappingfor the provider vDC node pvdc_oslo, the organization "Production", theorganization vDC "Oslo 1", and the organization vDC node "ovdc_oslo1". ThemappingInputFile contains this entry:
pvdcnode:pvdc_osloorgname:Productionorgvdcname:Oslo1orgvdcnode:ovdc_oslo1
Related reference:“Inquire_config” on page 95
Set_optionUse this vmcli command to set a parameter in the vmcliprofile.
Syntax
The vmcli -f set_option command uses this syntax:
vmcli -f set_option [-c tsm_mode] [-m datacentermapping][-n datamovernodename] [-ptsmserverport] [-s tsmserverhostname] [-v vctrnodename]
Linux
You must issue the vmcli -f set_option command as the tdpvmware user, andnot as root.
Chapter 5. Data Protection for VMware command-line interface 105
Parameters
-c tsm_modeSpecify the mode in which Tivoli Storage Manager backs up the virtualenvironment. The value is set in the VE_TSM_MODE parameter in thevmcliprofile. You can choose from one of the following modes:
VSPHERESpecify this value when Tivoli Storage Manager backs up and restoresindividual VMs from a vCenter.
VCloudSpecify this value when Tivoli Storage Manager backs up and restoresvApps from a vCloud director.
If the mode is not set in the vmcliprofile, the VSPHERE mode is used with thevmcli command.
-m datacentermappingSpecify the name of the data center that is associated with the datacenter nodename (DC_name::DC_nodename). The DC_name value is case sensitive and mustmatch the name of your datacenter.
[-n datamovernodename]Specify the data mover node name. This name is the node name for the TivoliStorage Manager backup-archive client that is installed on the vStorage BackupServer. This node performs the data movement.
[-p tsmserverport]Specify the port of the Tivoli Storage Manager server.v If this parameter is not specified in the Data Protection for VMware
command-line interface and not specified in the profile, the default port(1500) is used.
v If this parameter is not specified in the Data Protection for VMwarecommand-line interface, but is specified in the profile, the value in theprofile is used.
[-s tsmserverhostname]Specify the host name or IP address of the Tivoli Storage Manager server. Ifthis parameter is not specified, the value in the profile is used.
[-v vcenternodename]Specify the vCenter node name. This node is the virtual node that represents avCenter. If this parameter is not specified in the Data Protection for VMwarecommand-line interface, the value in the profile is used.
Example
In this example, the vmcli -f set_option command is issued to set the TivoliStorage Manager server and its port:vmcli -f set_option -s TEMPLE.MYCOMPANY.XYZ.COM -p 1650
The following output is displayed:
Setting VE_TSM_SERVER_NAME to: TEMPLE.MYCOMPANY.XYZ.COMSetting VE_TSM_SERVER_PORT to: 1650#INFO FMM16014I The return code is 0.
106 IBM Tivoli Storage Manager for Virtual Environments: Data Protection for VMware User's Guide

In this example, the vmcli -f set_option command is issued to set the data centermapping:vmcli -f set_option -m DataCenter2::NANO_DATACENTER123
The following mapping is set in the profile:
VE_DATACENTER_NAME DataCenter2::NANO_DATACENTER123
Set_passwordUse this vmcli command to set the password for the guest VM.
Syntax
The vmcli -f set_password command uses this syntax:
vmcli -f set_password [-type VMGuest] -I passwordfile
The -type VMGuest parameter is required when you set the password forapplication protection reporting.
Linux
You must issue the vmcli -f set_password command as tdpvmware user, and notas root.
Linux Windows
You must issue the vmcli -f set_password command before you run a guest scanoperation.
Parameters
-type VMGuestThis parameter identifies that the password applies to a VM. This parameter isrequired when you set the password for application protection reporting.
-I passwordfileSpecify the following information in this file:
datacentername: data center in vmcliprofileSpecify the datacenter that contains the VM guests. The datacentermust be defined in the vmcliprofile. The password is applied to thatdatacenter only. For example:datacentername:DataCenter1
username: common VM guest userSpecify the user name that logs in to the VM guest. For Windows, theDOMAIN\User format is allowed for the user name. For example:username:Domain1\Administrator
password: passwordSpecify the password to log in to the VM guest.
The settings in the passwordfile must be specified on the same line.
Chapter 5. Data Protection for VMware command-line interface 107

Examples
Linux This example creates (or sets) a common VM guest name and passwordthat is associated with DataCenter3. The vmcliprofile contains the followingVE_DATACENTER_NAME settings:VE_DATACENTER_NAME DataCenter1::TSM_DC1VE_DATACENTER_NAME DataCenter2::TSM_DC2VE_DATACENTER_NAME DataCenter3::TSM_DC3VE_DATACENTER_NAME DataCenter4::TSM_DC4
The passwordfile contains the following settings. The settings in the passwordfilemust be specified on the same line:datacentername:DataCenter3 username:tdpvmwareuserY password:tdpvmwareuserYpwd
As a result, the vmcli -f set_password -type VMGuest -I password.txt sets thepassword as shown in the command output:
Tivoli Storage Manager Command Line Wrapper for Virtual Environments Version: 7.1.8Build Date: Mon Jul 11 20:03:31 2016Tivoli Storage Manager API Version 71600Tivoli Storage Manager Command Line Wrapper Compile Version 71600#PARAM OPERATION_TYPE 8#PHASE_COUNT 3#PHASE PREPARE#PARAM BACKUP_TYPE=0#PARAM TSM_SERVER_NAME=ORION.FINANCE.MYCOMPANY.COM#PARAM TSM_SERVER_PORT=1500#PARAM TSMCLI_NODE_NAME=KA3095_TSMCLI_SLUDGE#PARAM VCENTER_NODE_NAME=#PARAM DATACENTER_NODE_NAME=#PARAM OFFLOAD_HOST_NAME=#PARAM TSM_OPTFILE=/tmp/T4VE_OD3PZ9#PARAM INPUT_FILE=/opt/tivoli/tsm/tdpvmware/common/scripts/password.txt#PARAM TRACEFILE=#PARAM TRACEFLAGS=#PHASE INITIALIZE#PHASE SET_PASSWORDSTATUS=success#END
Windows This example creates (or sets) a common VM guest name and passwordthat is associated with DataCenter1. The vmcliprofile contains the followingVE_DATACENTER_NAME settings:VE_DATACENTER_NAME DataCenter1::TSM_DC1VE_DATACENTER_NAME DataCenter2::TSM_DC2
The passwordfile contains the following settings. The settings in the passwordfilemust be specified on the same line:datacentername:DataCenter1 username:Domain1\Administrator password:secret1
As a result, the vmcli -f set_password -type VMGuest -I password.txt sets thepassword as shown in the command output:
108 IBM Tivoli Storage Manager for Virtual Environments: Data Protection for VMware User's Guide

Tivoli Storage Manager Command Line Wrapper for Virtual Environments Version: 7.1.8Build Date: Mon Jul 11 20:03:31 2016Tivoli Storage Manager API Version 71600Tivoli Storage Manager Command Line Wrapper Compile Version 71600#PARAM OPERATION_TYPE 8#PHASE_COUNT 3#PHASE PREPARE#PARAM BACKUP_TYPE=0#PARAM TSM_SERVER_NAME=ORION.FINANCE.MYCOMPANY.COM#PARAM TSM_SERVER_PORT=1500#PARAM TSMCLI_NODE_NAME=KA3095_TSMCLI_SLUDGE#PARAM VCENTER_NODE_NAME=#PARAM DATACENTER_NODE_NAME=#PARAM OFFLOAD_HOST_NAME=#PARAM TSM_OPTFILE=/tmp/T4VE_OD3PZ9#PARAM INPUT_FILE=C:\Program Files\Common Files\Tivoli\TDPVMware\VMwarePlugin\scripts\password.txt#PARAM TRACEFILE=#PARAM TRACEFLAGS=#PHASE INITIALIZE#PHASE SET_PASSWORDSTATUS=success#END
Windows When you create the password file by using the echo command, makesure that a space does not exist between the password (password1) and thegreater-than sign (>). For example:echo password1> pwd.txt
orecho password1>pwd.txt
This example sets the password (password1) in file pwd.txt:vmcli -f set_password -I pwd.txt
Linux Create the password file (pwd.txt) by specifying the echo command:echo password1 > pwd.txt
This example sets the password (password1) in file pwd.txt:vmcli -f set_password -I pwd.txt
Linux Windows This example sets the password in file pwd.txt for domainmydomain and user user1:set -f set_password -I pwd.txt -pwtype domain -domain mydomain -user user1
Get_password_infoUse this vmcli command to view the status of guest credentials that are set for themanaged datacenters.
Syntax
The vmcli -f get_password_info command uses this syntax:
vmcli -f get_password_info -type VMGuest
Linux
Chapter 5. Data Protection for VMware command-line interface 109

You must issue the vmcli -f get_password_info command as tdpvmware user, andnot as root.
Parameters
-type VMGuestThis required parameter identifies that the password information is returnedfor a guest VM. The username value (shown in the #CHILD statement) of thecommand output confirms that the password is set for that username. Thedatacentername value (shown in the #PARENT statement) of the commandoutput identifies the associated datacenter for which the password is set.
Example
Windows This example shows the status of the managed datacenters that areassociated with the VM guest:vmcli -f get_password_info -type VMGuest
#TASK 0 get_password_info 20130129162344670#RUN 0 20130129162344685#LANG en_US#PARAM BACKEND=TSM#PARAM OPERATION_TYPE 4#PHASE PREPARE#PARAM BACKUP_TYPE=0#PARAM TSM_SERVER_NAME=#PARAM TSM_SERVER_PORT=#PARAM TSMCLI_NODE_NAME=#PARAM VCENTER_NODE_NAME=#PARAM DATACENTER_NODE_NAME=#PARAM OFFLOAD_HOST_NAME=#PARAM PASSWORD_TYPE=VMGUEST#PARAM TSM_OPTFILE=C:\Users\ADMINI~1\AppData\Local\Temp\2\T4V3B15.tmp#PARAM INPUT_FILE=#PARAM TRACEFILE=#PARAM TRACEFLAGS=#CHILD username:<mydomain\myuser>#PARENT datacentername:DataCenter1#CHILD username:<mydomain\myuser>#PARENT datacentername:DataCenter2#CHILD username:<mydomain\myuser>#PARENT datacentername:DataCenter3#PARAM STATUS=success#END RUN 0 2013012916234513#END TASK 0#INFO FMM16014I The return code is 0.#END
Start_guest_scanUse this vmcli command to scan guest VMs for application information.
The vmcli -f start_guest_scan command saves VM name, application, andglobally unique identifier (GUID) information to the Tivoli Storage Manager server.
You must issue the vmcli -f set_password command before you run a guest scanoperation.
Syntax
The vmcli -f start_guest_scan command uses this syntax:
110 IBM Tivoli Storage Manager for Virtual Environments: Data Protection for VMware User's Guide

vmcli -f start_guest_scan -dcscan "datacenterNvmcliprofile,...," | ALL_DC -odatamovernodename
Required Parameters
-dcscan datacenterNvmcliprofile | ALL_DCSpecify one or more datacenter names that are defined in the vmcliprofile.Repeat datacenter names with a comma. Double quotation marks (") must bespecified at the beginning and at the end of the datacenter name list. Forexample:-dcscan "Local DC,svc"
To scan all VM guests in all datacenters, specify the ALL_DC parameter.
-o datamovernodenameSpecify the data mover node that is configured with proxy authority access tothe datacenters specified by -dcscan.
During a vmcli -f start_guest_scan operation, Data Protection for VMwarecopies files to a temporary subdirectory in the remote directory($TEMP_REMOTE\TSMSCAN) on the guest VM. The remote directory must be unlockedand not used by another application. Data Protection for VMware determines thelocation of the remote directory in the following order:1. If the TEMP environment variable is set, TEMP_REMOTE is set as the TEMP
environment variable.2. If the TEMP environment variable is not set, TEMP_REMOTE is set as C:\TEMP.
Example
Windows In this example, the vmcliprofile contains the followingVE_DATACENTER_NAME settings:VE_DATACENTER_NAME: DataCenter1:TSM_DC1VE_DATACENTER_NAME: DataCenter2:TSM_DC2
The data mover node, VC1_DC1_DM1, is configured with proxy authority accessto DataCenter1 and DataCenter2.
Windows
The following command is issued to scan all guest VMs in DataCenter1
and DataCenter2:vmcli -f start_guest_scan -dcscan "DataCenter1,DataCenter2" -o VC1_DC1_DM1
The following application information is displayed:Tivoli Storage Manager Command Line Wrapper for Virtual EnvironmentsVersion: 7.1.8Build Date: Mon Jul 11 20:03:31 2016Tivoli Storage Manager API Version 71600Tivoli Storage Manager Command Line Wrapper Compile Version 71600#PARAM OPERATION_TYPE 9#PHASE_COUNT 4#PHASE PREPARE#PARAM BACKUP_TYPE=0#PARAM TSM_SERVER_NAME=OREO.STORE.XYZ.COM#PARAM TSM_SERVER_PORT=1500#PARAM TSMCLI_NODE_NAME=VC1_VCLI1#PARAM VCENTER_NODE_NAME=VC1#PARAM DATACENTER_NODE_NAME=VC1_DC1#PARAM OFFLOAD_HOST_NAME=VC1_DC1_DM1#PARAM PASSWORD_TYPE=CLINODE
Chapter 5. Data Protection for VMware command-line interface 111

#PARAM TSM_OPTFILE=C:\Users\ADMINI~1\AppData\Local\Temp\2\T4V9393.tmp#PARAM INPUT_FILE=#PARAM TRACEFILE=c:\amd64_unicode\tsmcli.trace#PARAM TRACEFLAGS=service,VMVCB,VMTSMVSS,verbdetail,C2C#PHASE INITIALIZE#CHILD targetnode:VC1_DC1#PARENT peernode:VC1_DC1_DM1#CHILD hladdress:9.52.62.65#PARENT peernode:VC1_DC1_DM1#CHILD lladdress:50408#PARENT peernode:VC1_DC1_DM1#PHASE READ_DATACENTER_GUEST_PASSWORD#PHASE SCANGUEST#PARAM STATUS=success
#CHILD scanid: DataCenter1::VC1_DC1.1358316054281#PARENT datacentername: DataCenter1::VC1_DC1#PARAM OPERATION_TYPE 9 #PHASE_COUNT 4#PHASE PREPARE#PARAM BACKUP_TYPE=0#PARAM TSM_SERVER_NAME=OREO.STORE.XYZ.COM#PARAM TSM_SERVER_PORT=1500#PARAM TSMCLI_NODE_NAME=VC1_VCLI1#PARAM VCENTER_NODE_NAME=VC1#PARAM DATACENTER_NODE_NAME=VC1_DC2#PARAM OFFLOAD_HOST_NAME=VC1_DC1_DM1#PARAM PASSWORD_TYPE=CLINODE#PARAM TSM_OPTFILE=C:\Users\ADMINI~1\AppData\Local\Temp\2\T4V50B.tmp#PARAM INPUT_FILE= #PARAM TRACEFILE=c:\amd64_unicode\tsmcli.trace#PARAM TRACEFLAGS=service,VMVCB,VMTSMVSS,verbdetail,C2C#PHASE INITIALIZE #CHILD targetnode:VC1_DC2#PARENT peernode:VC1_DC1_DM1#CHILD hladdress:9.52.62.65#PARENT peernode:J_VC1_DC1_DM1#CHILD lladdress:50408#PARENT peernode:VC1_DC1_DM1#PHASE READ_DATACENTER_GUEST_PASSWORD#PHASE SCANGUEST#PARAM STATUS=success#CHILD scanid: DataCenter2::VC1_DC2.1358316054281#PARENT datacentername:DataCenter2::VC1_DC2#INFO FMM16014I The return code is 0.#END
Windows The #PARAM STATUS=success message (in the #PHASE SCANGUEST section)confirms only that the datacenter was successfully submitted for processing by thedata mover. The actual scan status for each VM is available only after the datamover completed processing that VM. To view the scan status of an individualVM, see the value in the Scan Status column of the Data Protection for VMwarevSphere GUI Application Configuration Status report. To view the overall status ofthe scan operation, see the Overall Scan Status value in the Data Protection forVMware vSphere GUI Report window.
Important: If you receive an error after you run the vmcli -f start_guest_scancommand, view the contents of the dsmerror.log file for more information. Thedsmerror.log file is on the system that is associated with the data mover nodedefined by the OFFLOAD_HOST_NAME parameter in the command output. By default,error log files are in the installation directory:C:\Program Files\Tivoli\TSM\baclient
112 IBM Tivoli Storage Manager for Virtual Environments: Data Protection for VMware User's Guide

Profile parametersUse the Data Protection for VMware command-line interface profile to configuresettings for backup and restore tasks in your environment.
The profile is located in this directory on the system where the Data Protection forVMware vSphere GUI is installed:
Linux
/home/tdpvmware/tdpvmware/config
Windows C:\Program Files\Common Files\Tivoli\TDPVMware\VMwarePlugin\scripts
DERBY_HOME <path to Derby database>This parameter specifies the location of the Derby database that is used by theData Protection for VMware command-line interface.
Example:Linux
DERBY_HOME /home/tdpvmware/tdpvmware
Windows
DERBY_HOME C:\Program Files\Common Files\Tivoli\TDPVMware\VMwarePlugin\derby
This parameter is valid in a vSphere or vCloud Director environment.
VE_DATACENTER_NAME <data_center_name::DATA_CENTER_NODE_NAME>Specify the VMware datacenter (datacenter name) with a value that iscase-sensitive and that matches the datacenter name used in the vCenter.Specify the virtual node (DATA_CENTER_NODE_NAME) that maps to the datacenter.If the vCenter manages several datacenters, you can specify this parameter foreach datacenter. However, the Data Protection for VMware vSphere GUI doesnot support datacenters with the same name in the vCenter.
Example:
VE_DATACENTER_NAME DataCenter1::Fin_Datacenter1VE_DATACENTER_NAME DataCenter2::Fin_Datacenter2
This parameter is valid only in a vSphere environment.
Restriction: Data Protection for VMware support for VM backup and restoreoperations is limited to VM names and datacenter names that contain English7-bit ASCII characters only. VM names and datacenter names that use otherlanguage characters are not currently supported. Additional characterrestrictions are listed in Appendix A, “Troubleshooting,” on page 165.
After a datacenter name is created and associated with a Tivoli StorageManager node, be aware of these restrictions:v Do not change the datacenter name in the vCenter without also creating a
Tivoli Storage Manager node name and associating it with the newdatacenter name.
v Do not change the datacenter name and the profile without also changingthe Tivoli Storage Manager node name.
Chapter 5. Data Protection for VMware command-line interface 113

v Do not create a datacenter mapping value in the profile with a previouslyused Tivoli Storage Manager node.
When the datacenter name in the vCenter has changed, you must completethese steps before attempting any operations:1. Register a datacenter node for the new datacenter name.2. Grant proxy authority to the new datacenter node to perform tasks on
behalf of the vCenter node.3. Update the profile with the new datacenter mapping.4. Grant proxy authority to the data mover nodes to perform tasks on behalf
of the new datacenter node.5. Remove any entry from the profile that used the previous datacenter node
or vCenter node name.
VE_TRACE_FILE <path and name of trace file>Specify the full path and name of the file to be used to contain traceinformation. Activate tracing only when instructed to do so by IBM SoftwareSupport.
This parameter is valid in a vSphere or vCloud Director environment.
VE_TRACE_FLAGS <flags>Specify one or more trace flags. Multiple trace flags are separated with a space.Activate tracing only when instructed to do so by IBM Software Support.
This parameter is valid in a vSphere or vCloud Director environment.
VE_TSMCLI_NODE_NAME <VMCLI node>Specify the VMCLI node. This node connects the Data Protection for VMwarecommand-line interface to the Tivoli Storage Manager server and data movernode.
Example:
VE_TSMCLI_NODE_NAME VC1_VCLI1
This parameter is valid in a vSphere or vCloud Director environment.
Restriction: The VMCLI node does not support the SSL protocol or LDAPauthentication when communicating with the Tivoli Storage Manager server.
VE_TSM_MODE VCLOUD I VSPHERESpecify the VMware environment that Data Protection for VMware protects.You can specify one of the following environments:
VCLOUDSpecify this value when Data Protection for VMware protects data in avCloud Director environment.
VSPHERESpecify this value when Data Protection for VMware protects data in avSphere environment.
Example:
VE_TSM_MODE VCLOUD
This parameter is valid in a vSphere or vCloud Director environment.
114 IBM Tivoli Storage Manager for Virtual Environments: Data Protection for VMware User's Guide

VE_TSM_SERVER_NAME <server host name or IP address>Specify the host name or IP address of the Tivoli Storage Manager server usedfor backup operations. There is no default value.
Example:
VE_TSM_SERVER_NAME tsmserver.xyz.yourcompany.com
This parameter is valid in a vSphere or vCloud Director environment.
VE_TSM_SERVER_PORT <port name>Specify the port name to use for the Tivoli Storage Manager server. The defaultvalue is 1500.
Example:
VE_TSM_SERVER_PORT 1500
This parameter is valid in a vSphere or vCloud Director environment.
VE_TSM_SSL YES|NOSpecify whether to enable Secure Sockets Layer (SSL) to provide secure clientand server communications. No is the default.
VE_TSM_SSLACCEPTCERTFROMSERV YES|NOSpecify whether the backup-archive client or the API application accept andtrust the Tivoli Storage Manager server's Secure Sockets Layer (SSL) publiccertificate the first time they connect. YES is the default. You can use this optionto connect only to a Tivoli Storage Manager server V7.1.8 and later V7 levels,and V8.1.2 and later levels.
VE_TSM_SSLREQUIRED DEFAULT|YES|NO|SERVERONLYSpecify the conditions when SSL is or is not required when the client logs onto the Tivoli Storage Manager server or storage agents. DEFAULT is the default.When communicating with the Tivoli Storage Manager server V7.1.8 and laterV7 levels, and V8.1.2 and later levels, this option no longer applies since SSL isalways used.
VE_VCENTER_NODE_NAME <vCenter node>Specify the vCenter node. This virtual node represents a vCenter.
Example:
VE_VCENTER_NODE_NAME VC1
In vCloud mode, the VE_VCENTER_NODE_NAME parameter is the top-level nodethat represents the vCloud.
This parameter is valid in a vSphere or vCloud Director environment.
VMCLI_DB_BACKUP NO AT[day[, day[,.....]]] time TO backup locationThis parameter controls the backup of the Derby database containing themetadata of the Data Protection for VMware command-line interface. Specifyone of these values:
NO This option does not perform a backup of the Derby database.
AT [day[, day[,....]]] time_in _24_HThis option creates a backup on the specified day or days at thespecified time, which is triggered by the scheduler. If the day value isnot specified, a daily backup is created. Specify one of these values:
Chapter 5. Data Protection for VMware command-line interface 115

MON, TUE, WED, THU, FRI, SAT, SUN.You can separate these values by a comma or a blank space.
AFTER_BACKUP This option creates a backup of the Derby database after each DataProtection for VMware backup operation.
The default location for the backups of the Derby database isinstall_dir/derby_backups. Specify TO path to set a custom path.
Example:
VMCLI_DB_BACKUP AT 00:00
This parameter is valid in a vSphere or vCloud Director environment.
VMCLI_DB_BACKUP_VERSIONS <number>Specify the maximum number of backup generations that are maintained forthe Derby database, before the oldest version is overwritten by a new version.This parameter applies only to the backups of the Derby database containingmetadata. It has no effect on the number of backup generations that aremaintained for the backups of a vSphere environment. The default value is 3.
Example:
VMCLI_DB_BACKUP_VERSIONS 3
This parameter is valid in a vSphere or vCloud Director environment.
VMCLI_DB_HOST <Derby database local host name>Specify the local host name of the Derby database. You can specify the hostname (localhost) or the IP address (0.0.0.0).
Example:
VMCLI_DB_HOST localhost
This parameter is valid in a vSphere or vCloud Director environment.
VMCLI_DB_NAME <Derby database name>Specify the name of the Derby database. The default value is VMCLIDB.
Example:
VMCLI_DB_NAME VMCLIDB
This parameter is valid in a vSphere or vCloud Director environment.
VMCLI_DB_PORT <Derby database port number>Specify the Derby database port on which the Data Protection for VMwarecommand-line interface starts and connects to the database. The default valueis 1527. If this port is in use by another application, specify a different port.
Example:
VMCLI_DB_PORT 1527
This parameter is valid in a vSphere or vCloud Director environment.
VMCLI_GRACE_PERIOD <seconds>When a backup is no longer available on Tivoli Storage Manager, the backup is
116 IBM Tivoli Storage Manager for Virtual Environments: Data Protection for VMware User's Guide

marked for deletion as defined by a deletion date. However, before the backupis deleted, a grace period exists. Use this parameter to specify the grace period(length of time) between the deletion date and the date the backup is deletedfrom the Derby database. The default value is 2592000 seconds (30 days).
Example:
VMCLI_GRACE_PERIOD 1296000
This parameter is valid in a vSphere or vCloud Director environment.
VMCLI_LOG_DIR <path of log file>Specify the absolute location or the relative location of the installation directorywhere the Data Protection for VMware command-line interface writes its logfiles. The default value is logs. If the default value logs is used, then all logs(and trace information) are written to these locations:.
Linux
/opt/tivoli/tsm/tdpvmware/common/logs
Windows C:\Program Files\Common Files\Tivoli\TDPVMware\logs
Example:
VMCLI_LOG_DIR logs
This parameter is valid in a vSphere or vCloud Director environment.
VMCLI_RECON_INTERVAL_TSM <seconds>This parameter specifies the interval between reconciliation operations on theDerby database with Data Protection for VMware. Reconciliation operationsdelete metadata for backups that are no longer available. This action ensuresthe Derby database remains synchronized with the Data Protection forVMware repository. The default value is 1200 seconds.
Example:
VMCLI_RECON_INTERVAL_TSM 1200
This parameter is valid in a vSphere or vCloud Director environment.
VMCLI_RESTORE_TASK_EXPIRATION_TIME <seconds>Specify the time that a Data Protection for VMware command-line interfacerestore task is stored in the Derby database. The default value is 2592000seconds (30 days).
Example:
VMCLI_RESTORE_TASK_EXPIRATION_TIME 2592000
This parameter is valid in a vSphere or vCloud Director environment.
VMCLI_SCHEDULER_INTERVAL <seconds>Specify the interval, in seconds, between scheduler checks for scheduled tasksdue to begin. The default value is 1 second.
Example:
VMCLI_SCHEDULER_INTERVAL 60
This parameter is valid in a vSphere or vCloud Director environment.
Chapter 5. Data Protection for VMware command-line interface 117

VMCLI_TASK_EXPIRATION_TIME <seconds>This parameter specifies the time that a task is stored in the Data Protection forVMware command-line interface Derby database. This parameter applies onlyto the inquire_config command. The default value is 864000 seconds (10 days).
Example:
VMCLI_TASK_EXPIRATION_TIME 864000
This parameter is valid in a vSphere or vCloud Director environment.
VMCLI_TRACE YES|NOSpecify that tracing files are activated. Activate tracing only when instructed todo so by IBM Software Support.
This parameter is valid in a vSphere or vCloud Director environment.
Example Linux profile in a vSphere environment
Linux
VE_TSM_SERVER_NAME 9.11.90.28VE_TSM_SERVER_PORT 1500VE_TSMCLI_NODE_NAME my_vc1_vcli1VE_VCENTER_NODE_NAME my_vc1VE_DATACENTER_NAME Clovis Lab::MY_VC1_DC1VMCLI_TASK_EXPIRATION_TIME 864000 # in seconds, defaults to 864000s = 10 daysVMCLI_RESTORE_TASK_EXPIRATION_TIME 2592000 # in seconds, defaults to 2592000s = 30 daysVMCLI_GRACE_PERIOD 2592000 # in seconds, defaults to 2592000s = 30 daysVMCLI_SCHEDULER_INTERVAL 60 # in seconds, defaults to 1sVMCLI_DB_HOST localhostVMCLI_DB_PORT 1527VMCLI_CACHE_EXPIRATION_TIME 600 # in seconds, defaults to 600s = 10 minVMCLI_DB_NAME VMCLIDBVMCLI_RECON_INTERVAL_FCM 600 # setting in seconds default 600s = 10 minVMCLI_RECON_INTERVAL_TSM 1200 # setting in seconds default 1200s = 20 minVMCLI_DB_BACKUP AT 00:00VMCLI_DB_BACKUP_VERSIONS 3VMCLI_LOG_DIR logsDERBY_HOME /home/tdpvmware/tdpvmware
Example Windows profile in a vSphere environment
Windows
VE_TSM_SERVER_NAME philadelphia # -sVE_TSM_SERVER_PORT 1500 # -pVE_TSMCLI_NODE_NAME CLI_WIN8x32 # -nVE_VCENTER_NODE_NAME VC_WIN8x32 # -vVE_DATACENTER_NAME DC_CVT::DC_Win8x32VMCLI_TASK_EXPIRATION_TIME 864000 # in seconds, defaults to 864000s = 10 daysVMCLI_RESTORE_TASK_EXPIRATION_TIME 2592000 # in seconds, defaults to 2592000s = 30 daysVMCLI_GRACE_PERIOD 2592000 # in seconds, defaults to 2592000s = 30 daysVMCLI_SCHEDULER_INTERVAL 60 # in seconds, defaults to 1sVMCLI_DB_HOST localhostVMCLI_DB_PORT 1527VMCLI_CACHE_EXPIRATION_TIME 600 # in seconds, defaults to 600s = 10 minVMCLI_DB_NAME VMCLIDBVMCLI_RECON_INTERVAL_FCM 600 # setting in seconds default 600s = 10 minVMCLI_RECON_INTERVAL_TSM 1200 # setting in seconds default 1200s = 20 minVMCLI_DB_BACKUP AT 00:00VMCLI_DB_BACKUP_VERSIONS 3VMCLI_LOG_DIR logsDERBY_HOME C:\Program Files\Common Files\Tivoli\TDPVMware\VMwarePlugin\derby
118 IBM Tivoli Storage Manager for Virtual Environments: Data Protection for VMware User's Guide

Example Linux profile in a vCloud environment
Linux
VE_TSM_SERVER_NAME fvtseries11esx6VE_TSM_SERVER_PORT 1500VE_TSMCLI_NODE_NAME VMCLI_LNX_TEST2VE_VCENTER_NODE_NAME VCD_LNX_TEST2VMCLI_TRACE NO#VE_TSM_SERVER_NAME tsmservername # -s#VE_TSM_SERVER_PORT 1500 # -p#VE_TSMCLI_NODE_NAME tsmclinodename # -n#VE_VCENTER_NODE_NAME vcenternodename # -v#VE_TRACE_FILE tsmcli.trace # -x tsmcli trace file#VE_TRACE_FLAGS api api_detail # -y trace flags#VE_DATACENTER_NAME datacentername::datacenternodenameVMCLI_TASK_EXPIRATION_TIME 864000 # in seconds, defaults to 864000s = 10 daysVMCLI_RESTORE_TASK_EXPIRATION_TIME 2592000 # in seconds, defaults to 2592000s = 30 daysVMCLI_GRACE_PERIOD 2592000 # in seconds, defaults to 2592000s = 30 daysVMCLI_SCHEDULER_INTERVAL 60 # in seconds, defaults to 1sVMCLI_DB_HOST localhostVMCLI_DB_PORT 1527VMCLI_CACHE_EXPIRATION_TIME 600 # in seconds, defaults to 600s = 10 minVMCLI_DB_NAME VMCLIDBVMCLI_RECON_INTERVAL_FCM 600 # in seconds default 600s = 10 minVMCLI_RECON_INTERVAL_TSM 1200 # in seconds default 1200s = 20 minVMCLI_DB_BACKUP AT 00:00VMCLI_DB_BACKUP_VERSIONS 3
Example Windows profile in a vCloud environment
Windows
VE_TSM_SERVER_NAME hardingVE_TSM_SERVER_PORT 1500VE_TSMCLI_NODE_NAME VMCLI_WINSTRVE_VCENTER_NODE_NAME VCD_WINSTRVMCLI_TRACE NO#VE_TSM_SERVER_NAME tsmservername # -s#VE_TSM_SERVER_PORT 1500 # -p#VE_TSMCLI_NODE_NAME tsmclinodename # -n#VE_VCENTER_NODE_NAME vcenternodename # -v#VE_TRACE_FILE tsmcli.trace # -x tsmcli trace file#VE_TRACE_FLAGS api api_detail # -y trace flags#VE_DATACENTER_NAME datacentername::datacenternodenameVMCLI_TASK_EXPIRATION_TIME 864000 # in seconds, defaults to 864000s = 10 daysVMCLI_RESTORE_TASK_EXPIRATION_TIME 2592000 # in seconds, defaults to 2592000s = 30 daysVMCLI_GRACE_PERIOD 2592000 # in seconds, defaults to 2592000s = 30 daysVMCLI_SCHEDULER_INTERVAL 60 # in seconds, defaults to 1sVMCLI_DB_HOST localhostVMCLI_DB_PORT 1527VMCLI_CACHE_EXPIRATION_TIME 600 # in seconds, defaults to 600s = 10 minVMCLI_DB_NAME VMCLIDBVMCLI_RECON_INTERVAL_FCM 600 # in seconds default 600s = 10 minVMCLI_RECON_INTERVAL_TSM 1200 # in seconds default 1200s = 20 minVMCLI_DB_BACKUP AT 00:00VMCLI_DB_BACKUP_VERSIONS 3VMCLI_LOG_DIR logsDERBY_HOME C:\Program Files (x86)\Common Files\Tivoli\TDPVMware\VMwarePlugin\derbyVE_TSM_MODE VCLOUDVE_DATACENTER_NAME Local DC::WINMA_LOCAL_DC
Chapter 5. Data Protection for VMware command-line interface 119

120 IBM Tivoli Storage Manager for Virtual Environments: Data Protection for VMware User's Guide

Chapter 6. Recovery Agent command-line interface
Use the Recovery Agent command-line interface (CLI) to access Data Protection forVMware functions.
The Recovery Agent CLI can be viewed as a command-line API to the TivoliStorage Manager recovery agent. Changes completed with the Recovery Agent CLIto the Tivoli Storage Manager recovery agent take effect immediately.
You can use the Recovery Agent CLI to manage only one system running theTivoli Storage Manager recovery agent.
Starting the Recovery Agent command-line interfaceStart the Recovery Agent CLI from the Windows Start menu.
About this task
To start the Recovery Agent CLI, complete the following steps:
Procedure1. From the Windows Start menu, click Programs > Tivoli Storage Manager >
Data Protection for VMware > Tivoli Storage Manager recovery agent.2. In the command prompt window, enter one of the following commands:v To run the Recovery Agent CLI:
RecoveryAgentShell.exe -c command type tag parameter
v Windows To display the help for the Recovery Agent CLI:RecoveryAgentShell.exe -h
Recovery Agent command-line interface overviewWhen you use the commands, some parameters are not required. See the followingsections for details regrading required parameters.
For the parameters that are not required and not entered, default values are used.Parameters with spaces must be enclosed in quotation marks. For example, if youwant to use the Accounting, Daily parameter, type "Accounting, Daily".
To read a syntax diagram for entering a command, follow the path of the line.Read from left to right, and from top to bottom, and use the following guidelines:v The >>- character sequence indicates the beginning of a syntax diagram.v The --> character sequence at the end of a line indicates that the syntax diagram
continues on the next line.v The >-- character sequence at the beginning of a line indicates that a syntax
diagram continues from the previous line.v The -->< character sequence indicates the end of a syntax diagram.
Symbols
Enter these symbols exactly as they are displayed in the syntax diagram:
© Copyright IBM Corp. 2011, 2017 121
* Asterisk
{} Braces
: Colon
, Comma
= Equal sign
- Hyphen
() Parentheses
. Period
Space
" Quotation mark
' Single quotation mark
Variables
Italicized lowercase items such as <variable_name> indicate variables. In thisexample, you can specify a <variable_name> when you enter the cmd_namecommand.
►► -cmd_name <variable_name> ►◄
Required choices
When two or more items are in a stack and one of them is on the line, you mustspecify one item. In the following example, you must choose either A, B, or C:
►► -cmd_name ABC
►◄
Optional choices
When an item is below the line, that item is optional. In the following example,you can select either A or nothing at all:
►► -cmd_nameA
►◄
When two or more items are in a stack below the line, all items are optional. In thefollowing example, you can choose either A, B,C, or nothing.
►► -cmd_nameABC
►◄
122 IBM Tivoli Storage Manager for Virtual Environments: Data Protection for VMware User's Guide

Mount commandUse the mount command to complete various Tivoli Storage Manager recoveryagent tasks.
The Recovery Agent CLI can be used to mount (mount add) and unmount (mountdel) volumes and disks, and to view a list of mounted volumes (mount view).Touse the mount command, Tivoli Storage Manager recovery agent must be running.Use the set_connection command to connect a RecoveryAgentShell.exe to themount application.
Snapshots are mounted or unmounted on the system where Tivoli StorageManager recovery agent is running.
The mount command is supported in command mode. The following commandtypes are available. The appropriate tags and parameters are listed alongside eachcommand type.
add Use this command type to mount a disk or volume of a snapshot to thesystem where Tivoli Storage Manager recovery agent is running. Thefollowing list identifies the tags and parameters for the add type:v -target - This tag is required.
Use this tag to specify the following targets:
– Windows
Virtual volume - only for a partition mount
– Windows
Reparse point - only for a partition mount
– Windows
Linux
iSCSI target
The following examples use the -target tag:
– Windows
In the following example V: is the virtual volume mount
target:-target "V:"
– In the following example a reparse point volume mount target isspecified:-target "C:\SNOWBIRD@FASTBACK\SnowbirtK\Snowbird\K\\"
– Windows
Linux
In the following example an iSCSI target is
specified:-target "ISCSI: target=<target_name> initiator=<initiator_name>"
When you use the Tivoli Storage Manager recovery agent in an iSCSInetwork, and the Recovery Agent does not use a data mover, go tothe C:\ProgramData\Tivoli\TSM\RecoveryAgent\mount\RecoveryAgent.conf file and specify the [IMOUNT] tag and Target IPparameter:[IMOUNT config]Target IP=<IP address of the network card on the systemthat exposes the iSCSI targets.>
For example:[General config]param1param2...[IMount config]Target IP=9.11.153.39
Chapter 6. Recovery Agent command-line interface 123

After you add or change the Target IP parameter, restart the RecoveryAgent GUI or Recovery Agent CLI.
v -rep - This tag is required.Use it to specify the Tivoli Storage Manager server that is storing theVMware snapshots, and the Tivoli Storage Manager node that has accessto the VMware backups. For example:tsm: ip=<ip/host_name> port=<port_number>node=<node_name> pass=<node_password>
You can also specify the as_node and from_node options. If the passwordfield is empty, the Tivoli Storage Manager recovery agent attempts to usethe password for the stored node.
v -type - This tag is required. Use it to specify that you want to mount adisk or a partition. The options are:
-type disk-type partition
v -VMname - This tag is required. Use it to specify the VMware machinename that is source of the snapshot. The specified value is case-sensitive.
v -disk - This tag is required. Use it to specify the disk number of thesource backed up VMware machine to be mounted.
v -date - This tag is required. Use it to specify the date of the snapshotthat you want to mount. The date format is yyyy-Mmm-dd hh:mm:ss. Forexample:-date "2013-Apr-12 22:42:52 AM"
To view the active (or latest) snapshot, specify last snapshot.v -PartitionNumber - This tag is optional. If the -type is partition, enter the
partition number to mount.v -ro|-fw - Use this tag to specify whether the mounted volume is
read-only (-ro) or fake-write (-fw).v -disk - This tag is required. Use it to specify the disk number of the
source backed up VMware machine to be mounted.v -ExpireProtect - This tag is optional. During a mount operation, the
snapshot on the Tivoli Storage Manager server is locked to prevent itfrom expiring during the operation. Expiration might occur becauseanother snapshot is added to the mounted snapshot sequence. Thisvalue specifies whether to disable expiration protection during themount operation. You can specify one of the following values:
Yes Specify Yes to protect the snapshot from expiration. This value isthe default. The snapshot on the Tivoli Storage Manager serveris locked and the snapshot is protected from expiration duringthe mount operation.
No Specify No to disable expiration protection. The snapshot on theTivoli Storage Manager server is not locked and the snapshot isnot protected from expiration during the mount operation. As aresult, the snapshot might expire during the mount operation.This expiration can produce unexpected results and negativelyimpact the mount point. For example, the mount point canbecome unusable or contain errors. However, expiration does notaffect the current active copy. The active copy cannot expireduring an operation.
124 IBM Tivoli Storage Manager for Virtual Environments: Data Protection for VMware User's Guide

When the snapshot is on a target replication server, the snapshotcannot be locked because it is in read-only mode. A lock attemptby the server causes the mount operation to fail. To avoid thelock attempt and prevent such a failure, disable expirationprotection by specifying No.
The following example shows how to specify the add type to mount a disk:mount add -rep "tsm: ip=10.10.10.01 port=1500 node=tsm-ba pass=password"-target "iscsi: target=test1 initiator=initiator_name" -type disk-vmname VM-03ENT -disk 1 -date "2014-Jan-21 10:46:57 AM -ExpireProtect=Yes"
In this example, a snapshot of VMware named VM-03ent is located on a TivoliStorage Manager server with IP 10.10.10.01. Disk number 1 of this snapshot ismounted to the system where Tivoli Storage Manager recovery agent is running.
del Use this command type to dismount one or all mounted backups from thesystem where Tivoli Storage Manager recovery agent is running. Thefollowing list identifies the tags and parameters for the del type:v -target - This tag is required. Use this tag to specify the target for
dismounting. The target for dismounting can be a virtual volume,reparse point, or iSCSI target created using the mount command. Use theeverything variable to dismount all mounted backups.
v -force - Use this tag to force an unmount. The default option is not toforce an unmount if the target is currently in use.
For example, to force an unmount of a snapshot that is currently mounted at thedirectory, c:\gever, use the following command:mount del -target "c:\gever" -force
To dismount a snapshot currently mounted as volume V:, use the followingcommand:mount del -target V:
To dismount a snapshot currently mounted as an iSCSI target, use the followingcommand:mount del -target "ISCSI:<target_name>"
dump Use this command type to get a list of all the available backups to mount.v -rep - This tag is required. Use this tag to specify the Tivoli Storage
Manager server storing the VMware snapshots, and to specify the TivoliStorage Manager node that has access to the VMware backups. Forexample:tsm: ip=<IP/host name> port=<PortNumber>node=<NodeName> pass=<NodePassword>
v -file - This tag is optional. Use this tag to identify a file name to storethe dump text. If this tag is not specified, the dump text is printed onlyto stdout.
The following examples show how to specify the dump type:v List all the available backed up VMs.
mount dump –type TSM –for TSMVE -rep P -requestListVM [–file <FileNameAndPath>]
v List all the available disk snapshots of a VMware.mount dump –type TSM –for TSMVE -rep P -requestListSnapshots -VMName P [-file <FileNameAndPath>]
Chapter 6. Recovery Agent command-line interface 125

v List all the available partitions of a disk snapshot.mount dump –type TSM –for TSMVE -rep P -requestListPartitions -VMName P -disk P -date P [-file <FileNameAndPath>]
removeUse this type to remove the connection to a Tivoli Storage Manager server.A connection cannot be removed when it is in use, such as when mountedvolumes exist. There is only one tag for the remove type:
-rep - This tag is required. Use this tag to specify the Tivoli StorageManager server connection to be removed.
In the following example, remove the connection to a Tivoli Storage Managerserver (10.10.10.01) using node NodeName:mount remove -rep "tsm: NodeName@ip"
view Use this type to view a list of all mounted snapshots. This type has notags. The following example uses the view type:mount view
Mounting a disk
The following syntax diagram is for the command for mounting a disk:
►► RecoveryAgentShell.exe -c mount add -rep "tsm: ip = IPhost_name
►
► port = portNumber node = nodeName-as_node = nodeName
►
► pass = NodePassword" -vmname vmname -type disk -disk disk_number ►
► date date_format ►
► -target "ISCSI: target = target_name initiator = initiator_name" ►◄
Mounting a partition
The following syntax diagram is for the command for mounting a partition:
►► RecoveryAgentShell.exe -c mount add -rep "tsm: ip = IPhost_name
►
► port = portNumber node = nodeName-as_node = nodeName
►
► pass = NodePassword" -vmname vmname -disk disk_numbervmdk
►
► date date_format -type partition -PartitionNumber partNum ►
► -target volume_letter"ISCSI: target = target_name initiator = initiator_name"
►◄
126 IBM Tivoli Storage Manager for Virtual Environments: Data Protection for VMware User's Guide

Set_connection commandThe set_connection command sets the Recovery Agent CLI to work with aspecified Tivoli Storage Manager recovery agent.
Use the following format for the set_connection command:RecoveryAgentShell.exe -c set_connection Command_Tag <hostname or IP address>
The following tag can be used with the set_connection command:
mount_computer - Use to set the Tivoli Storage Manager recovery agent connection.
In the following example, the Recovery Agent CLI is set to work with TivoliStorage Manager recovery agent on the ComputerName host.set_connection mount_computer ComputerName
Help commandThe help command displays the help for all of the supported Recovery Agent CLIcommands.
Use the following format for the help command:RecoveryAgentShell.exe -h
Recovery Agent command-line interface return codesReturn codes help identify the results of Recovery Agent CLI operations.
Use these return codes to check the status of your Recovery Agent CLI operations.
Table 12. Recovery Agent CLI return codes
ReturnCode Value Description
0 FBC_MSG_MOUNT_SUCCESS Command submitted successfully toData Protection for VMware mount.
0 FBC_MSG_DISMOUNT_SUCCESS Successfully dismounted a snapshot.
0 FBC_MSG_VIEW_SUCCESS View operation successful.
0 FBC_MSG_DUMP_SUCCESS Dump operation successful.
0 FBC_MSG_REMOVE_SUCCESS Remove operation successful.
1 FBC_MSG_MOUNT_FAIL Mount failed (See the mount logs fordetails).
2 FBC_MSG_MOUNT_DRIVER_ERROR Mount driver error.
3 FBC_MSG_VOLUME_LETTER_BUSY Volume letter or reparse point is inuse.
4 FBC_MSG_MOUNT_WRONG_PARAMETERS
Incorrect parameters assigned to themount command (See the mount logsfor details).
5 FBC_MSG_MOUNT_ALREADY_MOUNTED
Job is already mounted on therequested target.
6 FBC_MSG_MOUNT_WRONG_PERMISSIONS
Insufficient permissions.
7 FBC_MSG_MOUNT_NETWORK_DRIVE
Cannot mount on network mappedvolume.
Chapter 6. Recovery Agent command-line interface 127

Table 12. Recovery Agent CLI return codes (continued)
ReturnCode Value Description
8 FBC_MSG_MOUNT_LOCKED_BY_SERVER
Snapshot locked by the server.
9 FBC_MSG_CAN_NOT_CHANGE_REPOSITORY
Cannot change repository.
11 FBC_MSG_DISMOUNT_FAIL Failed to dismount a mountedsnapshot.
13 FBC_MSG_VIEW_FAIL Retrieving list of virtual volumesfailed.
15 FBC_MSG_DUMP_FAIL Dump command list creation failed.
16 FBC_MSG_CONNECTION_FAILED Disconnected from Data Protectionfor VMware mount.
17 FBC_MSG_CONNECTION_TIMEOUT Operation timed out.
18 FBC_MSG_MOUNT_FAILED_TO_FIND_REPOSITORY
Failed to find a valid repository withsnapshots.
19 FBC_MSG_MOUNT_JOB_NOT_FOUND
Failed to find the requested snapshot.
20 FBC_MSG_MOUNT_JOB_FOLDER_NOT_FOUND
Failed to find the requested snapshotdata.
22 FBC_MSG_CAN_NOT_REMOVE_REPOSITORY
Cannot remove selected repository.
23 FBC_MSG_REPOSITORY_GOT_MOUNTS
Repository has mounted snapshots.
38 FBC_MSG_MOUNT_NOT_WRITABLE_VOLUME
The mount volume is not writable
39 FBC_MSG_NO_TSM_REPOSITORY No Tivoli Storage Manager repositorywas located.
40 FBC_MSG_MOUNT_NOT_ALLOWED_AS_READONLY
Mounting the iSCSI target as readonly is not allowed.
41 FBC_MSG_RESOURCE_BUSY_IN_TAPE_MODE
Data Protection for VMware isrunning in tape mode - media isbusy.
42 FBC_MSG_DISK_TYPE_NOT_SUPPORTED
Partition operation not supported forthis type of disk.
43 FBC_MSG_MOUNT_INITIALIZING The operation failed, Data Protectionfor VMware mount is currentlyinitializing. Try again later.
44 FBC_MSG_CANNOT_LOCK_SNAPSHOT
The snapshot cannot be protectedagainst expiration during thisoperation. For more information, seethe documentation.
128 IBM Tivoli Storage Manager for Virtual Environments: Data Protection for VMware User's Guide

Chapter 7. Backing up VMware data
Use Data Protection for VMware to store backup versions of your VMware virtualmachines on the Tivoli Storage Manager server.
Restriction: The following restrictions apply to VMware VMDKs that are involvedin a backup operation:v For incremental forever backup mode, each individual VMDK involved in a
backup operation cannot exceed 8 TB. If a VMDK exceeds 8 TB, the backupoperation fails. To increase the size of the VMDK to be larger than the default 2TB, specify the maximum size with the vmmaxvirtualdisks option. For moreinformation, see Vmmaxvirtualdisks.
v For periodic full backup mode, each individual VMDK involved in a backupoperation cannot exceed 2 TB. If a VMDK exceeds 2 TB, the backup operationfails.
To prevent a failure during either backup mode, you can skip processing theVMDK by specifying vmskipmaxvirtualdisks yes in the backup-archive clientoptions file. For more information, see Vmskipmaxvirtualdisks.
Backing up virtual machine data to Tivoli Storage ManagerCreate a run now backup task or scheduled backup task for your virtual machinedata. The data is stored on Tivoli Storage Manager server storage.
Before you begin
Before you back up virtual machines that are hosting Microsoft Exchange Serverdatabases, mount the Exchange databases.
About this taskv During backup processing, Data Protection for VMware bypasses a guest
Exchange Server database that is dismounted, corrupted, or in a Suspend statein a Database Availability Group (DAG). Databases in these states are excludedfrom virtual machine backups and are not available to restore.
v A run now backup task can be issued immediately or at a later time. Ascheduled backup task is issued by the Tivoli Storage Manager server at thescheduled time. It cannot be issued immediately.
Procedure
Back up your virtual machine by following these steps:1. Start the Data Protection for VMware vSphere GUI with either of these
methods:v Click the Data Protection for VMware vSphere GUI icon in the Solutions and
Applications window of the vSphere Client.v Open a web browser, and go to the GUI web server. For example:
https://guihost.mycompany.com:9081/TsmVMwareUI/
Log on with the vCenter user ID and password.
© Copyright IBM Corp. 2011, 2017 129

2. In the Getting Started window, click Define a backup task to open theSchedule a Backup wizard. Review the welcome information and click Next tocreate the backup task.
3. Click Next to begin the wizard. Follow the instructions in each page of thewizard and click Next to continue to the next page.
4. In the General page, specify a name for the backup schedule you are creatingin the Backup schedule name field. The schedule name must not contain anyspaces. You can optionally add a description for the schedule.
5. In the Source page, select a VMware datacenter and expand the branches in thenavigation tree. Select the virtual machines, virtual machine templates, hostcluster, or host that you want to back up.If you want to include newly added or discovered virtual machines to futureruns of this task, check Newly added virtual machines are included in thisbackup task. This check box has the following characteristics:v If you select all of the virtual machines on one ESX host and you select this
option, the schedule backs up that ESX host. That is, all virtual machines onthat host, present and future, are backed up.
v If you select one or more virtual machines on an ESX host (but not all), andyou select this option, then the schedule includes only the selected virtualmachines and any future virtual machines that are added to the host. Theremaining virtual machines on that host that are not selected are excluded.
v If you rename a virtual machine, and you select this option, the schedulebacks up the renamed virtual machine.
v If you do not select this option, only virtual machines can be selected forbackup. Host clusters and hosts cannot be selected.
v To easily exclude virtual machines that follow a naming convention frombeing added, expand the Advanced VM filter option. Enter a text patternthat identifies the virtual machines to exclude. Specify an asterisk (*) tomatch any character. Specify a question mark (?) to match a single character.For example:vm=prod1*,*testvm,*dept*, dept4?prod
Click Apply filter to disable selection for these virtual machines. If you entera virtual machine name without wildcard characters, and the virtual machineis known in the source tree, then this virtual machine is removed from thefilter display. However, it is shown in the tree as not checked.
6. In the Destination page, select the data mover node that runs the backupoperation. Select a data mover node that is not currently used in a backup orrestore operation.
7. In the Schedule page, specify when to run the backup by clicking Run thebackup now or Schedule for later. If your user authority is insufficient,Schedule for later is unavailable. Select the appropriate Backup strategy fromthe drop-down list:
Incremental Forever Backup Strategy (Default)After an initial full backup is taken, an ongoing (forever) sequence ofincremental backups occurs. This strategy requires no additionalschedules to be defined.
Select the appropriate Backup type:v Click Incremental to back up the blocks that changed since the
previous backup (full or incremental). The most recent incremental isappended to the previous backup. If a full backup does not exist for
130 IBM Tivoli Storage Manager for Virtual Environments: Data Protection for VMware User's Guide

this virtual machine, a full backup is automatically performed. As aresult, you do not have to verify that a full backup exists.
v Click Full to create an image of an entire virtual machine. After thefull backup is taken, there is no requirement to schedule additionalfull backups. When full is selected, virtual machine templates thatare unchanged since the last backup are also included.
Periodic Full Backup StrategyBacks up an image of an entire virtual machine. Additional periodicfull backups are required in order to expire the old versions.
Select the appropriate Backup type:v Click Incremental to back up the data that changed since the last
backup. If a full backup does not exist for this virtual machine, a fullbackup is performed.
v Click Full to create an image of an entire virtual machine. After thefull backup is taken, there is no requirement to schedule additionalfull backups.
If you selected Schedule for later, click A full backup, followed by sixincremental backups to run a full backup weekly followed by six dailyincremental backups. You must enter the name of the incrementalbackup schedule.
v If you selected Schedule for later, click Next and proceed to Step 8.v If you selected Run the backup now, click Next, and proceed to Step 9.
8. In the Repetition page, specify the following information:a. If you selected A full backup, followed by six incremental backups in the
previous step:1) Specify the date and time to run the first backup. The first full backup is
scheduled to run at this date and time.2) The six incremental backups are scheduled to run on the remaining six
days of the week and at the selected time.b. If you selected Incremental or Full in the previous step:
1) Specify the date and time to run the first backup.2) Specify the interval that you want the backup to run.
c. Click Next.9. In the Summary page, review your backup settings and click Finish to save
your task. If you selected Run the backup now, the backup operation beginsimmediately when you click Finish.
What to do next
After the backup schedule has completed, you can verify that the virtual machineshave been backed up in the Reports tab.
Chapter 7. Backing up VMware data 131

Setting options for an incremental forever backup scheduleWhen you schedule incremental forever backups, you can ensure that there arefrequent backups of the VMs and reduce the size of each backup.
Before you begin
Ensure that client-side data deduplication is enabled for the storage pool.
Procedure1. Start a backup-archive client command-line session:
v Windows Open a command prompt and change to the backup-archive clientinstallation directory. For example:cd "C:\Program Files\tivoli\tsm\baclient"
v Linux Open a terminal window and change to the backup-archive clientinstallation directory. For example:cd /opt/tivoli/tsm/client/ba/bin
2. Edit the Tivoli Storage Manager client backup-archive client options file.
v Windows Specify these options in the dsm.opt options file.
v Linux Specify these options in the dsm.sys file in the stanza for the datamover node.
a. Enable compression by adding the option compression yes to the file.b. Enable deduplication by adding the option deduplication yes to the file.c. Modify the trigger values for megablock refreshes by setting one of the
following options:v Enable a number of objects as the trigger by adding mbobjrefreshthresh
number to the file.v Enable a percentage of objects as the trigger by adding
mbpctrefreshthresh percentage to the file.
For more information, see the backup-archive client mbobjrefreshthresh andmbpctrefreshthresh options in Client options reference.
3. Repeat Step 2 for each VMware guest.
Backing up virtual machine data to local disksYou can create a schedule to back up your VM data and store it on a storagedevice that is configured in the Tivoli Storage FlashCopy Manager for VMwareprofile. You can run the schedule immediately or at a later time.
Before you begin
Before you back up virtual machines that are hosting Microsoft Exchange Serverdatabases, mount the Exchange databases.
About this task
During backup processing, Data Protection for VMware bypasses a guest ExchangeServer database that is dismounted, corrupted, or in a Suspend state in a DatabaseAvailability Group (DAG). Databases in these states are excluded from virtualmachine backups and are not available to restore.
132 IBM Tivoli Storage Manager for Virtual Environments: Data Protection for VMware User's Guide

Procedure
Create a schedule to back up VM by following these steps:1. Start the Tivoli Storage FlashCopy Manager for VMware GUI with either of
these methods:v Click the Tivoli Storage FlashCopy Manager for VMware GUI icon in the
Solutions and Applications window of the vSphere Client.v Open a web browser, and go to the GUI web server. For example:
https://guihost.mycompany.com:9081/TsmVMwareUI/
Log on with the vCenter user ID and password.2. In the Getting Started window, click Define a backup task to open the
Schedule a Backup wizard. Review the welcome information and click Next tocreate the backup task.
3. In the Backup settings page, select Back up to Tivoli Storage FlashCopyManager as the Type of backup to run.
4. In the General page, specify a name for the backup schedule you are creatingin the Backup Schedule Name field. The schedule name must not contain anyspaces. You can optionally add a description for the schedule.
5. In the Source page, select a VMware datacenter to view all VMs available forthat datacenter. You can also expand the datacenter and select a VMwaredatastore to view all VMs available for that datastore. Select the VMs or VMtemplates to back up in the selection table. If you do not know the location of aVM, select a datacenter to view all its VMs.
Tip: Fine-tune the list of VMs by entering text in the Filter field. The wildcardcharacter (*) is not allowed.
6. In the Settings page, select the type of VMware snapshot to take when backingup to the local Tivoli Storage FlashCopy Manager for VMware disk.
7. In the Destination page, select the device class on the local disk of TivoliStorage FlashCopy Manager for VMware to back up to. The device classdefines the storage device and target disks that are used to create the hardwaresnapshot of the logical units (LUNs) that are used for the datastores. The deviceclasses must be defined in the Tivoli Storage FlashCopy Manager for VMwareconfiguration before they are available in the list.
8. In the Schedule page, you can select to run the backup immediately orschedule the backup to run at a later time.v To begin the backup at the completion of this wizard, select Execute
immediately.v To schedule your backup to run at a later time, do the following steps:
a. Select Schedule for later (repeated) execution.b. In the Date and time of the first backup field, specify when you want to
run the schedule for the first time.c. Specify the interval that you want the schedule to run in the How often
to run the backup field.d. In the Date and time of the last backup field, specify when you want to
stop the schedule from running. If you do not specify the date and timeof the last backup, the schedule creation cannot continue.
e. If you want to include newly added or discovered VMs to future runs ofthis schedule, select Newly added virtual machines are included in thisbackup task. The table lists the datastores that contain the newly addedVMs. This check box has the following characteristics when selected:
Chapter 7. Backing up VMware data 133

– If you select all of the VMs on one datastore or datacenter, theschedule backs up that datastore or datacenter. That is, all VMs on thatdatastore or datacenter, present and future, are backed up.
– If you select one or more VMs on a datastore or datacenter (but notall), then the schedule includes only the selected VMs and any futureVMs that are added to the datastore or datacenter. The remaining VMson that datastore or datacenter that are not selected are excluded.
– If you rename a VM, and you select this option, the schedule backs upthe renamed VM.
To modify the list of datastores, go to the Source page and select VMsfrom only the preferred datastores. Clear the selected VMs from thenon-preferred datastores.
9. In the Summary page, review your backup settings and click Finish to saveyour schedule. If you selected to run the backup now, the backup operationbegins immediately when you click Finish.
What to do next
After the backup schedule completes, you can verify that the VMs were backed upin the Reports tab.
Backing up virtual machine data to Tivoli Storage Manager and localdisks
You can create a schedule to back up VM data and store the backups to both TivoliStorage FlashCopy Manager for VMware and Data Protection for VMware. You canrun the schedule immediately or at a later time.
Before you begin
Before you back up virtual machines that are hosting Microsoft Exchange Serverdatabases, mount the Exchange databases.
About this task
During backup processing, Data Protection for VMware bypasses a guest ExchangeServer database that is dismounted, corrupted, or in a Suspend state in a DatabaseAvailability Group (DAG). Databases in these states are excluded from virtualmachine backups and are not available to restore.
Procedure
Create a schedule to back up a VM by following these steps:1. Start the Data Protection for VMware vSphere GUI with either of these
methods:v Click the Data Protection for VMware vSphere GUI icon in the Solutions
and Applications window of the vSphere Client.v Open a web browser, and go to the GUI web server. For example:
https://guihost.mycompany.com:9081/TsmVMwareUI/
Log on with the vCenter user ID and password.
134 IBM Tivoli Storage Manager for Virtual Environments: Data Protection for VMware User's Guide

2. In the Getting Started window, click Define a backup task to open theSchedule a Backup wizard. Review the welcome information and click Next tocreate the backup task.
3. Click Next to begin the wizard. Follow the instructions in each page of thewizard and click Next to continue to the next page.
4. In the Backup settings page, do the following steps:a. In the Type of backup to run list, select Back up to Tivoli Storage
FlashCopy Manager for VMware and to Tivoli Storage Manager.b. In the Type of VMware snapshot to take list, select the snapshot for your
operation.5. In the General page, specify a name for the backup schedule you are creating
in the Backup schedule name field. The schedule name must not contain anyspaces. You can optionally add a description for the schedule.
6. In the Source page, select a VMware datacenter to view all VMs available forthat datacenter. You can also expand the datacenter and select a VMwaredatastore to view all VMs available for that datastore. Select the VMs or VMtemplates to back up in the selection table. If you do not know the location ofa VM, select a datacenter to view all its VMs.
Tip: Fine-tune the list of VMs by entering text in the Filter field. The wildcardcharacter (*) is not allowed.
7. In the Additional backup settings page, make the following selections:a. Select the backup strategy that you want to implement.b. Select the type of backup that you want to run.c. If you back up with Tivoli Storage Manager, select the action to take when
there is an active backup on Tivoli Storage Manager.8. In the Destination page, select a destination to send the backup version of the
VM:v Select the device class on the local disk of Tivoli Storage FlashCopy
Manager for VMware to back up to. The device class defines the storagedevice and target disks that are used to create the hardware snapshot of thelogical units (LUNs) that are used for the datastores. The device classesmust be defined in the Tivoli Storage FlashCopy Manager for VMwareconfiguration before they are available in the list.
v If you also back up to Data Protection for VMware, select the data movernode that runs the backup.
9. In the Schedule page, you can select to run the backup immediately orschedule the backup to run at a later time.v To begin the backup at the completion of this wizard, select Execute
immediately.v To schedule your backup to run at a later time, do the following steps:
a. Select Schedule for later (repeated) execution.b. In the Date and time of the first backup field, specify when you want
to run the schedule for the first time.c. Specify the interval that you want the schedule to run in the How often
to run the backup field.d. In the Date and time of the last backup field, specify when you want to
stop the schedule from running. If you do not specify the date and timeof the last backup, the schedule creation cannot continue.
e. If you want to include newly added or discovered VMs to future runs ofthis schedule, select Newly added virtual machines are included in this
Chapter 7. Backing up VMware data 135

backup task. The table lists the datastores that contain the newly addedVMs. This check box has the following characteristics when selected:– If you select all of the VMs on one datastore or datacenter, the
schedule backs up that datastore or datacenter. That is, all VMs onthat datastore or datacenter, present and future, are backed up.
– If you select one or more VMs on a datastore or datacenter (but notall), then the schedule includes only the selected VMs and any futureVMs that are added to the datastore or datacenter. The remainingVMs on that datastore or datacenter that are not selected areexcluded.
– If you rename a VM, and you select this option, the schedule backsup the renamed VM.
To modify the list of datastores, go to the Source page and select VMsfrom only the preferred datastores. Clear the selected VMs from thenon-preferred datastores.
10. In the Summary page, review your backup settings and click Finish to saveyour schedule. If you selected to run the backup now, the backup operationbegins immediately when you click Finish.
Tip: The Summary page lists selected VMs that contain RDM disks.
What to do next
After the backup schedule completes, you can verify that the VMs were backed upin the Reports tab.
Backing up migrated virtual machinesWhen you migrate virtual machines to a different VMware datacenter or vCenterserver, you can back up the virtual machines.
Before you begin
To back up migrated virtual machines, meet the following prerequisites:v The migrated virtual machine must be running in a VMware vSphere 6
environment.v Before you migrate the virtual machine, back up the virtual machine with Data
Protection for VMware V7.1.3 or later. Verify that the backup completed withouterror.
v On the virtual machine, verify that VMware Storage vMotion is installed.
The following environment migrations are supported:v Migrate from one vCenter to another vCenter. For example: vCenter A,
datacenter A, and data mover A migrated to vCenter B, datacenter B, and datamover B.
v Migrate from one datacenter to another datacenter within the same vCenter. Forexample: vCenter A, datacenter A, and data mover A migrated to vCenter A,datacenter C, and data mover C.
About this task
To migrate a virtual machine from one VMware datacenter to another datacenterwithin the same vCenter server, complete the following steps:
136 IBM Tivoli Storage Manager for Virtual Environments: Data Protection for VMware User's Guide

Procedure1. Start a backup-archive client command-line session:
v Windows Open a command prompt and change to the backup-archive clientinstallation directory. For example:cd "C:\Program Files\tivoli\tsm\baclient"
v Linux Open a terminal window and change to the backup-archive clientinstallation directory. For example:cd /opt/tivoli/tsm/client/ba/bin
2. Create a full VM backup of the migrated virtual machine. Store the backup onthe original datacenter node from where the virtual machine was migrated.For example, if virtual machine VM_1 was migrated from VMware datacenterDC_A to datacenter DC_C, then back up VM_1 from data mover DM_A todatacenter DC_C directly. The following sample command is provided:dsmc backup vm VM_1 -vmbackuptype=fullvm -nodename=DC_C nodename-password=DC_C nodename_password
3. Deactivate the active backup of the migrated virtual machine on the originaldatacenter. Issue this command on the original datacenter node from where thevirtual machine was migrated. For example, if virtual machine VM_1 wasmigrated from VMware datacenter DC_A to datacenter DC_C, then issue thiscommand on datacenter node DC_A. The following sample command isprovided:dsmc expire -objtype=vm VM_1 -nodename=DC_A nodename-password=DC_A nodename_password
Backing up organization vDCs to Tivoli Storage ManagerYou can create an immediate backup (Back Up Now) or schedule a backup (CreateBackup Schedule) for an organization vDC. The data that is backed up is storedon Tivoli Storage Manager server storage.
Procedure
Back up your organization vDCs by following these steps:1. In the Cloud Resources window, click Organization VDCs. You can also click
Organizations (in the Cloud Resources window), then drill down to theorganization that contains the organization vDC.
2. Select one or more organization vDCs to back up and click one of the followingbackup tasks:v To start an immediate organization vDC backup to Tivoli Storage Manager
server storage, click Back Up Now.v To create a scheduled organization vDC backup to Tivoli Storage Manager
server storage, click Create Backup Schedule.3. In the wizard, complete the following steps:
a. Select the backup type:
Incremental Forever - Incremental (Default)Backs up the blocks that changed since the previous backup (full orincremental). If a full backup does not exist for a vApp in thisorganization vDC, a full backup is automatically started. As a result,you do not have to verify that a full backup exists. After the initialfull backup is taken, an ongoing (forever) sequence of incrementalbackups occurs. This strategy requires no additional backup tasks tobe defined.
Chapter 7. Backing up VMware data 137

Incremental Forever - FullCreates an image of all vApps in this organization vDC. After thefull backup is taken, there is no requirement to schedule more fullbackups.
b. Select the data mover node that runs the backup operation. Select a datamover node that is not currently used in a backup or restore operation.
c. If you clicked Create Backup Schedule, enter a name to identify this task.The task name must not contain any spaces. You can add a description forthe task. If you clicked Back Up Now, you can change the default backupname (BackUpNow) and also add a description.
d. Click Next.v If you clicked Back Up Now, click Next and proceed to Step 5.v If you clicked Create Backup Schedule, click Next, and proceed to Step 4.
4. In the Schedule page of the Create Schedule wizard, complete the followingsteps:a. Specify the date and time to run the first backup.b. Specify the interval that you want the backup to run.
5. Review the Summary page. If the information reflects your backup objective,click Finish to start the backup task or to create the schedule. Otherwise, clickBack to make revisions.
Backing up vApps to Tivoli Storage ManagerYou can create an immediate backup (Back Up Now) or schedule a backup (CreateBackup Schedule) for a vApp. The data that is backed up is stored on TivoliStorage Manager server storage.
Before you begin
Review the following information before you attempt a backup operation:v When you use vCloud Administrator authority, you can back up and restore all
vApps in the vCloud regardless of the organization in which they belong.v You can back up only a complete vApp. You cannot include or exclude a specific
VM or specific VM disk. However, vApp backup processing completessuccessfully even when the backup of some of the VMs that belong to the vAppfails.
About this task
A vApp backup contains vApp properties such as name, physical location, VMboot order, and networks. It also includes snapshots of all the VMs contained inthe vApp.
Procedure
Back up vApps by completing the following steps:1. In the Cloud Resources window, click Organization VDCs. You can also click
Organizations or Provider VDCs (in the Cloud Resources window), then drilldown to the organization vDC that contains the vApp.
2. Select the organization vDC that contains the vApp to back up.
138 IBM Tivoli Storage Manager for Virtual Environments: Data Protection for VMware User's Guide

3. The Organization VDC page shows all the vApps that are available in theorganization vDC. Select one or more vApps and click one of the followingbackup tasks:v To start an immediate vApp backup to Tivoli Storage Manager server
storage, click Back Up Now.v To create a scheduled vApp backup to Tivoli Storage Manager server storage,
click Create Backup Schedule.4. In the wizard, complete the following steps:
a. Select the backup type:
Incremental Forever - Incremental (Default)Backs up the blocks that changed since the previous backup (full orincremental). The most recent incremental is appended to theprevious backup. If a full backup does not exist for this vApp, a fullbackup is automatically started. As a result, you do not have toverify that a full backup exists. After the initial full backup is taken,an ongoing (forever) sequence of incremental backups occurs. Thisstrategy requires no additional backup tasks to be defined.
Incremental Forever - FullCreates an image of an entire vApp. After the full backup is taken,there is no requirement to schedule more full backups.
b. Select the data mover node that runs the backup operation. Select a datamover node that is not currently used in a backup or restore operation.
c. If you clicked Create Backup Schedule, enter a name to identify this task.The task name must not contain any spaces. You can add a description forthe task. If you clicked Back Up Now, you can change the default backupname (BackUpNow) and also add a description.
d. Click Next.v If you clicked Back Up Now, click Next and proceed to Step 6.v If you clicked Create Backup Schedule, click Next, and proceed to Step 5.
5. On the Schedule page of the Create Schedule wizard, complete the followingsteps:a. Specify the date and time to run the first backup.b. Specify the interval that you want the backup to run.
6. Review the Summary page. If the information reflects your backup objective,click Finish to start the backup task or to create the schedule. Otherwise, clickBack to make revisions.
Backing up data by disk usageSpecify the virtual machine disks that you want to include or exclude for backupservices by setting include and exclude options.
Before you begin
Review the backup-archive client domain.vmfull, include.vmdisk, andexclude.vmdisk options in Client options reference.
About this task
To include virtual machines in your full virtual machine image backup operations,use the domain.vmfull option.
Chapter 7. Backing up VMware data 139

To include a virtual machine disk in a Backup VM operation, use theinclude.vmdisk option.
To exclude a virtual machine's disk from a Backup VM operation, use theexclude.vmdisk option.
Use these options for virtual disks that do not require backup. For example, usethe options for those virtual disks that contain data that does not need to berestored, or the data is preserved by another backup mechanism.
Restriction: A virtual disk excluded from the backup operation is considered asdeleted from the VM for that backup. If the VM is restored from that backup, theexcluded virtual disk is not restored. Only the disk definition is restored.
Procedure1. Start a backup-archive client command-line session:
v Windows Open a command prompt and change to the backup-archive clientinstallation directory. For example:cd "C:\Program Files\tivoli\tsm\baclient"
v Linux Open a terminal window and change to the backup-archive clientinstallation directory. For example:cd /opt/tivoli/tsm/client/ba/bin
2. Optional: View the disk name and label of the virtual disk by issuing thepreview option. For example:dsmc backup vm VM1 -preview
3. Exclude a virtual disk, set the exclude.vmdisk option in the Tivoli StorageManager backup-archive client dsm.opt options file. For example:
EXCLUDE.VMDISK VM1 "Hard Disk 3"
4. Issue the backup command:dsmc backup vm VM1
Scenario: Including four disks for backup processingUse the include.vmdisk and domain.vmfull options to include four virtual machinedisks for backup services.
About this task
In the following examples, virtual machine vm5_fin_com contains four disks:Hard Disk 1Hard Disk 2Hard Disk 3Hard Disk 4
Procedure1. Start a backup-archive client command-line session:
v Windows Open a command prompt and change to the backup-archive clientinstallation directory. For example:cd "C:\Program Files\tivoli\tsm\baclient"
v Linux Open a terminal window and change to the backup-archive clientinstallation directory. For example:
140 IBM Tivoli Storage Manager for Virtual Environments: Data Protection for VMware User's Guide

cd /opt/tivoli/tsm/client/ba/bin
2. Use the include.vmdisk statement to back up disks Hard Disk 1 and Hard Disk2. For example:INCLUDE.VMDISK vm5_fin_com "Hard Disk 1"INCLUDE.VMDISK vm5_fin_com "Hard Disk 2"
3. Issue the backup command:dsmc backup vm vm5_fin_com
Because an include disk statement is specified, this statement implies that onlydisks specifically included are backed up. As a result, Hard Disk 3 and HardDisk 4 are not backed up.
4. Use the domain.vmfull statement to back up disks Hard Disk 1 and Hard Disk2: For example:DOMAIN.VMFULL "vm5_fin_com:vmdk=Hard Disk 1:vmdk=Hard Disk 2"
5. Issue the backup command:dsmc backup vm vm5_fin_com
Hard Disk 3 and Hard Disk 4 are not backed up.You can include or exclude one or more disks with a domain.vmfull statement.You can specify include and exclude on the same statement. For example, thefollowing statement is valid:domain.vmfull "vm5_fin_com:vmdk=Hard Disk 1:-vmdk=Hard Disk 2:vmdk=HardDisk 3:vmdk=Hard Disk 4"
If an include statement is present, it causes all other disks in the virtualmachine to be excluded from a backup operation, unless the other disks arealso specified with an include statement. For example, the following statementexcludes all disks except for Hard Disk 1:domain.vmfull "vm5_fin_com:vmdk=Hard Disk 1"
Scenario: Excluding four disks for backup processingUse the exclude.vmdisk and domain.vmfull options to exclude four virtualmachine disks for backup services.
About this task
In the following examples, virtual machine vm5_fin_com contains four disks:Hard Disk 1Hard Disk 2Hard Disk 3Hard Disk 4
Procedure1. Start a backup-archive client command-line session:
v Windows Open a command prompt and change to the backup-archive clientinstallation directory. For example:cd "C:\Program Files\tivoli\tsm\baclient"
v Linux Open a terminal window and change to the backup-archive clientinstallation directory. For example:cd /opt/tivoli/tsm/client/ba/bin
2. Use the exclude.vmdisk statement to back up disks Hard Disk 1 and Hard Disk2. For example:
Chapter 7. Backing up VMware data 141

EXCLUDE.VMDISK vm5_fin_com "Hard Disk 3"EXCLUDE.VMDISK vm5_fin_com "Hard Disk 4"
3. Issue the backup command:dsmc backup vm vm5_fin_com
Because an exclude disk statement is specified, this statement implies that onlydisks specifically excluded are not backed up. As a result, Hard Disk 3 andHard Disk 4 are not backed up.
4. Use the domain.vmfull statement to back up disks Hard Disk 3 and Hard Disk4: For example:DOMAIN.VMFULL "vm5_fin_com:vmdk=Hard Disk 3:vmdk=Hard Disk 4"
5. Issue the backup command:dsmc backup vm vm5_fin_com
Hard Disk 3 and Hard Disk 4 are not backed up.
Scenario: Separating disks for backup and restore processingCoordinate the backup and restore capability of Data Protection for VMware andan IBM Data Protection agent installed in a guest virtual machine to protect yourdata.
Before you begin
Tivoli Storage Manager provides applications that protect specific database andmail server data. The data protection application servers typically run in a virtualmachine. To use Data Protection for VMware effectively with the Tivoli StorageManager data protection applications, you must coordinate the backup and restoreprocessing for each application. One way to coordinate backup and restoreprocessing for each application is to separate processing by disk usage.
About this task
In this scenario, virtual machine VM2-08R2EX10-1 has Tivoli Storage Manager forMail: Data Protection for Microsoft Exchange Server installed on Disk1 and usesthis disk (.vmdk) configuration:v Disk1: Operating system filesv Disk2: Microsoft Exchange Server database filesv Disk3: Microsoft Exchange Server log filesv Disk4: Contains files other than Microsoft Exchange Server files
Procedure1. Use Data Protection for Microsoft Exchange Server to back up Disk2 and Disk3:
a. Start a Data Protection for Microsoft Exchange Server command-line sessionby opening a command prompt and changing to the installation directory:For example:cd "C:\program files\tivoli\tsm\tdpexc"
b. Issue the following backup command:tdpexcc backup * full /backupmethod=vss /backupdestination=tsm
2. Use the backup-archive client to back up Disk1 and Disk4:a. Start a backup-archive client command-line session by opening a command
prompt and changing to the backup-archive client installation directory: Forexample:
142 IBM Tivoli Storage Manager for Virtual Environments: Data Protection for VMware User's Guide
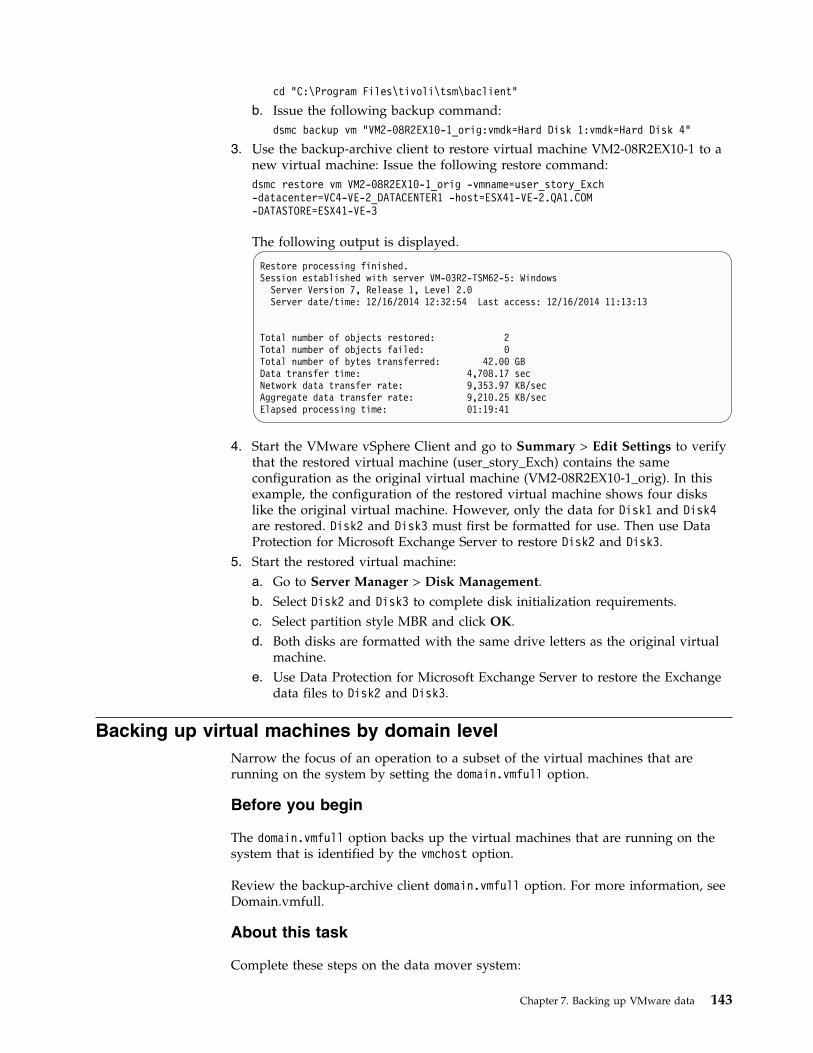
cd "C:\Program Files\tivoli\tsm\baclient"
b. Issue the following backup command:dsmc backup vm "VM2-08R2EX10-1_orig:vmdk=Hard Disk 1:vmdk=Hard Disk 4"
3. Use the backup-archive client to restore virtual machine VM2-08R2EX10-1 to anew virtual machine: Issue the following restore command:dsmc restore vm VM2-08R2EX10-1_orig -vmname=user_story_Exch-datacenter=VC4-VE-2_DATACENTER1 -host=ESX41-VE-2.QA1.COM-DATASTORE=ESX41-VE-3
The following output is displayed.
Restore processing finished.Session established with server VM-03R2-TSM62-5: Windows
Server Version 7, Release 1, Level 2.0Server date/time: 12/16/2014 12:32:54 Last access: 12/16/2014 11:13:13
Total number of objects restored: 2Total number of objects failed: 0Total number of bytes transferred: 42.00 GBData transfer time: 4,708.17 secNetwork data transfer rate: 9,353.97 KB/secAggregate data transfer rate: 9,210.25 KB/secElapsed processing time: 01:19:41
4. Start the VMware vSphere Client and go to Summary > Edit Settings to verifythat the restored virtual machine (user_story_Exch) contains the sameconfiguration as the original virtual machine (VM2-08R2EX10-1_orig). In thisexample, the configuration of the restored virtual machine shows four diskslike the original virtual machine. However, only the data for Disk1 and Disk4are restored. Disk2 and Disk3 must first be formatted for use. Then use DataProtection for Microsoft Exchange Server to restore Disk2 and Disk3.
5. Start the restored virtual machine:a. Go to Server Manager > Disk Management.b. Select Disk2 and Disk3 to complete disk initialization requirements.c. Select partition style MBR and click OK.d. Both disks are formatted with the same drive letters as the original virtual
machine.e. Use Data Protection for Microsoft Exchange Server to restore the Exchange
data files to Disk2 and Disk3.
Backing up virtual machines by domain levelNarrow the focus of an operation to a subset of the virtual machines that arerunning on the system by setting the domain.vmfull option.
Before you begin
The domain.vmfull option backs up the virtual machines that are running on thesystem that is identified by the vmchost option.
Review the backup-archive client domain.vmfull option. For more information, seeDomain.vmfull.
About this task
Complete these steps on the data mover system:
Chapter 7. Backing up VMware data 143

Procedure1. Start a backup-archive client command-line session:
v Windows Open a command prompt and change to the backup-archive clientinstallation directory: cd "C:\Program Files\tivoli\tsm\baclient".
v Linux Open a terminal window and change to the backup-archive clientinstallation directory: cd /opt/tivoli/tsm/client/ba/bin.
2. Open the backup-archive client options file (dsm.opt) with your preferred texteditor.
3. Enter the option name and one or more blank spaces, followed by the optionvalue. For example:domain.vmfull vmhostcluster=Dev0105
Scenario: Backing up virtual machines by cluster serverUse the domain.vmfull vmhostcluster option to back up virtual machines for aspecific cluster server.
About this task
The VMware environment consists of more than 3,000 VMs. Host clusters are usedto manage the hardware resources. Although most of the clusters each contain 3 - 4ESXi hosts, some clusters contain as many as 10 ESXi hosts. However, some ESXihosts are running 1 - 3 VMs for larger, critical VMs. To manage the load, additionalVMware hosts are frequently added or removed as they are needed. Each ESXihost in the cluster manages 10 - 30 VMs. Because the total number of VMs in eachcluster ranges from 100 - 200, each host cluster is backed up to a dedicatedvStorage backup server. Each server uses a dedicated data mover node to back updata.
Procedure1. Start a backup-archive client command-line session:
v Windows Open a command prompt and change to the backup-archive clientinstallation directory. For example:cd "C:\Program Files\tivoli\tsm\baclient"
v Linux Open a terminal window and change to the backup-archive clientinstallation directory. For example:cd /opt/tivoli/tsm/client/ba/bin
2. Include all virtual machines in cluster server TivDev01 in full VM backupoperations.a. Set the domain.vmfull option with the vmhostcluster parameter in the client
options file (dsm.opt). For example:domain.vmfull vmhostcluster=TivDev01
b. Issue the backup command. For example:dsmc backup vm -vmbackuptype=fullvm
3. Repeat Step 2 for each cluster server.
144 IBM Tivoli Storage Manager for Virtual Environments: Data Protection for VMware User's Guide

Scenario: Backing up virtual machines by VMware datastoreUse the domain.vmfull vmdatastore option to back up virtual machines for aspecific VMware datastore.
Procedure1. Start a backup-archive client command-line session:
v Windows Open a command prompt and change to the backup-archive clientinstallation directory. For example:cd "C:\Program Files\tivoli\tsm\baclient"
v Linux Open a terminal window and change to the backup-archive clientinstallation directory. For example:cd /opt/tivoli/tsm/client/ba/bin
2. Include all virtual machines in VMware datastore datastore_03 in full VMbackup operations.a. Set the domain.vmfull option with the vmdatastore parameter in the client
options file (dsm.opt). For example:domain.vmfull vmhostcluster=datastore_03
b. Issue the backup command. For example:dsmc backup vm -vmbackuptype=fullvm
3. Repeat Step 2 for each datastore.
Scenario: Backing up virtual machines by name patternUse the domain.vmfull vm option to back up virtual machines by a specific namepattern.
Procedure1. Start a backup-archive client command-line session:
v Windows Open a command prompt and change to the backup-archive clientinstallation directory. For example:cd "C:\Program Files\tivoli\tsm\baclient"
v Linux Open a terminal window and change to the backup-archive clientinstallation directory. For example:cd /opt/tivoli/tsm/client/ba/bin
2. Include all virtual machines that contain MailDept at the beginning of theirname in full VM backup operations.a. Set the domain.vmfull option with the vm parameter in the client options file
(dsm.opt). For example:domain.vmfull vm=MailDept*
b. Issue the backup command. For example:dsmc backup vm -vmbackuptype=fullvm
3. Repeat Step 2 for each name pattern.
Chapter 7. Backing up VMware data 145
Backing up multiple virtual machines in parallelYou can back up multiple virtual machines at the same time with one data mover.
Before you begin
With Data Protection for VMware parallel backup processing, you can use a singledata mover node to back up multiple virtual machines at the same time. To useparallel backup processing, set the backup-archive client vmmaxparallel,vmlimitperhost, and vmlimitperdatastore options in the dsm.opt file that isdefined for each data mover node. For more information, see Client optionsreference.
About this task
Complete these steps on the data mover system:
Procedure
1. Start a backup-archive client command-line session: Windows Open a commandprompt and change to the backup-archive client installation directory: cd"C:\Program Files\tivoli\tsm\baclient".
2. Open the dsm.opt file with your preferred text editor.3. Enter the option name and one or more blank spaces, followed by the option
value. For example:vmmaxparallel 3vmlimitperdatastore 1vmlimitperhost 0
4. Issue the backup command.
Scenario: Backing up multiple virtual machines in parallelSet backup-archive client options so that one data mover backs up six virtualmachine guests during a parallel backup operation.
About this task
The Data Protection for VMware environment contains 2 ESX hosts. Each hostcontains 6 virtual machines that are connected to three data stores. The backupschedule targets virtual machine guests that use the same data store. Parallelbackups are run without causing contention among the three data stores.
Procedure1. Start a backup-archive client command-line session on the data mover:
Windows Open a command prompt and change to the backup-archive clientinstallation directory: cd "C:\Program Files\tivoli\tsm\baclient".
2. Open the dsm.opt file with your preferred text editor.3. Specify a maximum of three virtual machines to be backed up, at any one time,
during the parallel backup operation. For example:vmmaxparallel 3
4. Specify a maximum of one virtual machine per data store to be backed upduring the parallel backup operation. For example:vmlimitperdatastore 1
146 IBM Tivoli Storage Manager for Virtual Environments: Data Protection for VMware User's Guide

5. Specify that no virtual machines in an ESX server can be included in theparallel backup operation. For example:vmlimitperhost 0
Results
One schedule backs up the six virtual machines.v Three backup operations start in parallel.v The fourth backup operation starts after the three previous operations finish
backing up the three VMware datastores.
Backing up virtual machines that host Active Directory controllers
About this task
The environment consists of a data center with five domain controllers (VDC1 -VDC5). The domain controllers are in two geographic locations. Each domaincontroller is on a VMware guest. One physical domain controller is included. Thedomain controllers are in two geographic locations and replicate by using anActive Directory replication process.
Procedure
1. Start a backup-archive client command-line session: Windows Open a commandprompt and change to the backup-archive client installation directory: cd"C:\Program Files\tivoli\tsm\baclient".
2. Back up the virtual machine guests that host VDC1 and VDC3. In theseexamples, virtual machine guest VM1 hosts domain controller VDC1, andvirtual machine guest VM3 hosts domain controller VDC3:dsmc backup vm VM1
dsmc backup vm VM3
3. Recover the virtual machine guest that hosts VDC1. In this example, virtualmachine guest VM1 hosts domain controller VDC1:dsmc restore vm VM1
The domain controller is restored to the version taken at the time of thebackup. After the server restarts, the restored Active Directory domaincontroller (on VDC1) replicates data by using other domain controllers in thenetwork.
4. Restart the restored virtual machine guest.5. Verify that replication processing completed successfully.Related tasks:“Verifying that the Active Directory Domain Controller replicated successfully” onpage 162
Chapter 7. Backing up VMware data 147
Specifying a management class to associate objectsSpecify how to manage virtual machine and vApp backups operations on theTivoli Storage Manager server.
Before you begin
Review the backup-archive client vmmc, vmctlmc, and vappmc options in Clientoptions reference.
Procedure1. Start a backup-archive client command-line session:
v Windows Open a command prompt and change to the backup-archive clientinstallation directory. For example:cd "C:\Program Files\tivoli\tsm\baclient"
v Linux Open a terminal window and change to the backup-archive clientinstallation directory. For example:cd /opt/tivoli/tsm/client/ba/bin
2. Open the backup-archive client options file (dsm.opt) with your preferred texteditor.
3. Enter the option name and one or more blank spaces, followed by the optionvalue. For example:vmmc myManagmentClass
vmctlmc diskonlymc
vappmc MCPRODVAPPS
Scenario: Specifying a management class for VMwarebackups in a vSphere environment
Use the vmmc option to store the VMware backups with a management class otherthan the default management class.
About this task
Assign a virtual machine backup to a non-default management class.
Procedure1. Start a backup-archive client command-line session:
v Windows Open a command prompt and change to the backup-archive clientinstallation directory. For example:cd "C:\Program Files\tivoli\tsm\baclient"
v Linux Open a terminal window and change to the backup-archive clientinstallation directory. For example:cd /opt/tivoli/tsm/client/ba/bin
2. Create a full VM backup of the virtual machine. Assign the backup to anon-default management class.For example, to assign the backup of virtual machine myVirtualMachine tomanagement class myManagmentClass, specify the vmmc option in the command.For example:dsmc backup vm "myVirtualMachine" -vmmc=myManagmentClass
148 IBM Tivoli Storage Manager for Virtual Environments: Data Protection for VMware User's Guide

For information about how management class rebinding applies to VMwarebackup data on the Tivoli Storage Manager server, see technote 1665032.
Scenario: Specifying a management class for VMware controlfiles in a vSphere environment
Use the vmctlmc option to assign the VMware control files to a management classother than the default management class.
Before you begin
VMware control files are assigned to the default management class. Use the vmmcoption to assign VMware data and VMware control files to a non-defaultmanagement class. The vmctlmc option overrides the default management class andthe vmmc option for VMware control files.
Under certain conditions, it might be necessary to assign VMware control files to adifferent management class than the VMware data files.
Use the vmctlmc option if VMware data files are backed up to tape. Back up theVMware control files to a disk-based storage pool that is not migrated to tape. Thestorage pool can contain random access volumes and sequential file volumes; thestorage pool can be a deduplicated pool. Use the vmctlmc option to specify amanagement class that stores control files in such a storage pool.
Restriction: The management class that is specified by the vmctlmc optiondetermines only the destination storage pool for VMware control files. Retention ofVMware control files is determined by the vmmc option, if specified, or by thedefault management class. The retention for the VMware control files alwaysmatches the retention of the VMware data files.
About this task
Assign a virtual machine backup to a non-default management class.
Procedure1. Start a backup-archive client command-line session:
v Windows Open a command prompt and change to the backup-archive clientinstallation directory. For example:cd "C:\Program Files\tivoli\tsm\baclient"
v Linux Open a terminal window and change to the backup-archive clientinstallation directory. For example:cd /opt/tivoli/tsm/client/ba/bin
2. Create a full VM backup of the virtual machine. Assign the backup to anon-default management class.For example, to assign the backup of virtual machine myVirtualMachine tomanagement class myManagmentClass, specify the vmmc option in the command:dsmc backup vm "myVirtualMachine" -vmmc=myManagmentClass
Chapter 7. Backing up VMware data 149

Scenario: Specifying a management class for objects in avCloud environment
Use the backup-archive client vappmc option to store VMware vCloud vAppbackup data by using a management class other than the default managementclass.
About this task
Assign VMware vCloud vApp backup data to a non-default management class.
Procedure1. Start a backup-archive client command-line session:
v Windows Open a command prompt and change to the backup-archive clientinstallation directory. For example:cd "C:\Program Files\tivoli\tsm\baclient"
v Linux Open a terminal window and change to the backup-archive clientinstallation directory. For example:cd /opt/tivoli/tsm/client/ba/bin
2. Create a full VM backup of the VMware vCloud vApp backup data. Assign thebackup data to a non-default management class.For example, to assign the backup data for vApps org1, vdc1, and vapp1 tomanagement class MCPRODVAPPS, specify the vappmc parameter in the command:dsmc backup vapp "org1,vdc1,vapp1" -vappmc=MCPRODVAPPS
Specifying objects to include in backup and restore operationsSpecify the VMs or vApps that you want to include for backup services by settinginclude options.
Before you begin
Review the backup-archive client include.vm and include.vapp options. For moreinformation, see Virtual machine include options.
About this task
Complete these steps on the data mover system:
Procedure1. Start a backup-archive client command-line session:
v Windows Open a command prompt and change to the backup-archive clientinstallation directory: cd "C:\Program Files\tivoli\tsm\baclient".
v Linux Open a terminal window and change to the backup-archive clientinstallation directory: cd /opt/tivoli/tsm/client/ba/bin.
2. Open the backup-archive client options file (dsm.opt) with your preferred texteditor.
3. Enter the option name and one or more blank spaces, followed by the optionvalue. For example:include.vm vmtest*
150 IBM Tivoli Storage Manager for Virtual Environments: Data Protection for VMware User's Guide

Scenario: Specifying objects to include for backup andrestore operations in a vSphere environment
Use include options to specify the objects that you want to include in backup andrestore operations.
Before you begin
To define when objects are included in a backup, how long they are kept on theserver, and how many versions of the object the server keeps, use a managementclass. Set the management class for an object by using the backup-archive clientvmmc option. Place this option in the client options file dsm.opt or in the clientsystem options file dsm.sys.
You can also change how files are processed, for example to use a differentmanagement class, by using the backup-archive client include.vm option.
About this task
This scenario assumes the following active management classes on the TivoliStorage Manager server:v MCFORTESTVMSv MCFORPRODVMSv MCUNIQUEVM
Procedure1. Start a backup-archive client command-line session:
v Windows Open a command prompt and change to the backup-archive clientinstallation directory: cd "C:\Program Files\tivoli\tsm\baclient".
v Linux Open a terminal window and change to the backup-archive clientinstallation directory: cd /opt/tivoli/tsm/client/ba/bin.
2. Open the backup-archive client options file (dsm.opt) with your preferred texteditor.
3. Associate all virtual machine backups, with names that begin with VMTEST, tomanagement class MCFORTESTVMS:include.vm vmtest* MCFORTESTVMS
4. Associate virtual machine backup WINDOWS VM1 [PRODUCTION] tomanagement class MCFORPRODVMS:include.vm "WINDOWS VM1 ?PRODUCTION?" MCFORPRODVMS
The following values are used:v The virtual machine is enclosed in quotation marks because it contains space
characters.v The question mark (?) wildcard is used to match the special characters in the
virtual machine name.5. Associate virtual machine backup VM1 to management class MCUNIQUEVM:
include.vm VM1 MCUNIQUEVM
Chapter 7. Backing up VMware data 151

Scenario: Specifying objects to include for backup andrestore operations in a vCloud environment
Use include options to specify the objects that you want to include in backup andrestore operations.
Before you begin
To define when objects are included in a backup, how long they are kept on theserver, and how many versions of the object the server keeps, use a managementclass. Set the management class for an object by using the backup-archive clientvappmc option. Place this option in the client options file dsm.opt or in the clientsystem options file dsm.sys.
You can also change how files are processed, for example to use a differentmanagement class, by using the backup-archive client include.vapp option.
About this task
This scenario assumes the following active management classes on the TivoliStorage Manager server:v MCFORTESTVAPPSv MCFORPRODVAPPSv MCUNIQUEVAPP
Procedure1. Start a backup-archive client command-line session:
v Windows Open a command prompt and change to the backup-archive clientinstallation directory: cd "C:\Program Files\tivoli\tsm\baclient".
v Linux Open a terminal window and change to the backup-archive clientinstallation directory: cd /opt/tivoli/tsm/client/ba/bin.
2. Open the backup-archive client options file (dsm.opt) with your preferred texteditor.
3. Associate all vApp backups to management class MCFORTESTVAPPS:include.vapp *::*::* vm vmtest* MCFORTESTVAPPS
The asterisk (*) wildcards are used to match the special characters in all vApp,organization, and organization virtual data center names.
4. Associate all vApp backups from VMware organization ORG1 and organizationvirtual data center ORG1VDC to management class MCFORPRODVAPPS:include.vapp "ORG1::ORGVDC1::*" MCFORPRODVAPPS
The asterisk (*) wildcard is used to match the special characters in all vAppnames.
5. Associate vApp backup VAPP1 to management class MCUNIQUEVAPP:include.vapp MY_ORG::MY_VDC::VAPP1 MCUNIQUEVAPP
152 IBM Tivoli Storage Manager for Virtual Environments: Data Protection for VMware User's Guide

Chapter 8. Restoring VMware data
Data Protection for VMware restore scenarios are provided in this section.
Mounting a virtual machine disk and exporting the volumesYou can restore one (or more) files from a virtual machine that was backed up toTivoli Storage Manager server storage.
Before you begin
File restore from tape media is supported. However, file restore reads data in away that causes random read requests. As a result, processing might be slow whena sequential-access device (such as tape media) is used. File restore from diskstorage is the preferred method.
Consider moving target virtual machine backup data from tape media to diskstorage before you attempt a file restore operation. You can move data with theTivoli Storage Manager server MOVE NODEDATA command. You can also runtraditional full VM backups regularly.
Procedure
To mount a backed up virtual machine disk and export the mounted volume for afile restore operation, complete the following steps:1. Configure the mount proxy nodes:
a. Go to the Configuration window in the Data Protection for VMwarevSphere GUI.
b. Click Edit TSM Configuration in the Tasks list. The configuration notebookmight take a few moments to load.
c. Go to the Mount Proxy Node Pairs page and select a VMware datacenter inthe table.
d. Click Add Mount Proxy Node Pair.e. Click New Settings in the table.
For Linux operating systems, the Linux mount proxy node must beconfigured manually. Use the sample dsm.sys file content that is shown inthe Mount Proxy Settings dialog when you configure the Linux mountproxy node.For Windows operating systems, only one client acceptor is created. If youwant to add a second Windows mount proxy node, you must manuallyconfigure the client acceptor on a remote system.
f. Specify the storage device type from which the snapshot is mounted bysetting the client vmstoragetype option in the client options file on theWindows mount proxy node.1) Open a command prompt and change to the backup-archive client
installation directory. For example:cd "C:\Program Files\tivoli\tsm\baclient"
2) Open the backup-archive client options file (dsm.opt) with yourpreferred text editor.
3) Set the vmstoragetype option with one of the following device types:
© Copyright IBM Corp. 2011, 2017 153

DISK The snapshots to be mounted are on Disk or File storage pools.This value is the default.
VTL The snapshots to be mounted are on VTL storage pools.
TAPE The snapshots to be mounted are on Tape storage pools.2. Validate that the mount proxy nodes are online and that the iSCSI service is
running:a. Go to the Configuration window in the Data Protection for VMware
vSphere GUI.b. Select a VMware datacenter in the navigation tree.c. Select the mount proxy node (created in Step 1) in the table and click
Validate Selected Node. The validation results might take a few momentsto complete. A successful validation shows the Status: Running message foreach mount proxy node in the Status Details pane. An unsuccessfulvalidation shows the Status: error message for each mount proxy nodethat encountered an error.
Remember: By default, the iSCSI service is started manually. If the systemwhere this service is running restarts, the iSCSI service must be restartedmanually.If you receive an error message, investigate possible causes that are basedon error messages that are shown in the Task Details pane of the RecentTasks report.
3. Go to the Restore window in the Data Protection for VMware vSphere GUI andclick Restore Points in the header.
4. Expand the list of VMware datacenters and select a virtual machine from thenavigation pane. All active and inactive backup versions for the selected virtualmachine are identified as restore points in the Restore Points table. Virtualmachine template backups are identified in the Template column in the RestorePoints table.Depending on the number of managed vCenters, the list might take a fewmoments to load.
5. Select one or more restore points for one virtual machine in the table and clickMount to open the Mount wizard.
6. On the Mount Options page, complete the following steps:a. Select the mount proxy node.b. Optional: To select the operating system where the backed up virtual
machine disks are to be mounted, click the Guest Operating System listand make your selection.
Tip: When the operating system where the disks are to be mounted isdifferent from the operating system of the mount proxy node, the mountpoint path updates automatically.
c. Enter the absolute path of the mount point. The following characters aresupported: a-z, A-Z, 0-9, colon (:), forward slash (/), backward slash (\),and underscore (_). The maximum length is 200 characters.
v Windows The absolute path to a disk is mount root\tag\vmname\snapshotdate and time\file system number. For example:C:\tsmmount\ticket_9471\tangowin2k12test\2014-07-01-10_35_50\Volume1\
The default value is C:\tsmvemount\vmname.
154 IBM Tivoli Storage Manager for Virtual Environments: Data Protection for VMware User's Guide

Restriction: The maximum length of the path and file name that isaccessed in a mounted volume on Windows cannot exceed 6255characters. This maximum length includes the total characters in the path,volume name, mount point, virtual machine name, tag description, andsnapshot date.
v Linux For Linux operating systems, the absolute path to a disk ismount root/tag/vmname/snapshot date and time/file system number. Forexample:/tsmmount/ticket_9471/vm1/2014-07-01-10_35_23/Volume1
The default value is /mnt/vmname.
Restriction: The maximum length of the path and file name that isaccessed in a mounted volume on Linux cannot exceed 4096 characters.This maximum length includes the total characters in the path, volumename, mount point, virtual machine name, tag description, and snapshotdate.
d. Enter a description of this mount operation in the Description Tag field.This description becomes part of the mount path so that the administratorcan easily identify the operation. The following characters are supported:a-z, A-Z, 0-9, and underscore (_). The maximum length is 20 characters.
e. Optional: If you want the mounted virtual machine disks on a networkshare, select Create Network share and enter the appropriate credentials.v For Windows operating systems, enter the user name that is allowed to
access Windows Share.
Tip: For security reasons, ensure that files are shared only by users andgroups who are authorized to access those files.
v For Linux operating systems, enter the IP address or name of the systemthat mounts the exported file system.
f. Click Next.7. In the Summary page, review the settings and click Finish to start the mount
operation. To change your mount settings, click Back.After the operation starts, you can monitor its progress (Recent Tasks) in theReports window.If the mount operation does not complete successfully, investigate possiblecauses that are based on error messages that are shown in the Task Detailspane of the Recent Tasks report.
8. Export (or share) the mounted volumes from the virtual machine:a. Go to the Restore window in the Data Protection for VMware vSphere GUI.b. Click Mount Status in the header.c. Select the mount operation that contains the volumes you want to export.d. Copy the content in the Network Share pane by using Ctrl + C and send to
the user who accesses the mounted volumes to restore the files.9. Log in to the system where the files will be restored and complete the
following step:v For Windows operating systems, connect to the Common Internet File
System (CIFS) where the files are mounted. Copy the files with a filemanager application such as Windows Explorer.
v For Linux operating systems, connect to the Network File System (NFS)where the files are mounted. Copy the files with a file manager application.
Chapter 8. Restoring VMware data 155

What to do next
After the files are restored by the user, dismount the volumes:1. Go to the Restore window in the Data Protection for VMware vSphere GUI.2. Click Mount Status in the header.3. Select the mount operation that contains the volumes you want to export and
click Dismount. Your mount operation is identified by Type=HelpDesk in theMount Status table.
vCloud environment restore scenarioThis scenario demonstrates how to restore vApps with the vmcli -f restorecommand.
These vCloud Director objects can also be restored with the following userinterfaces:
Data Protection for VMware vCloud GUIInformation about how to complete backup tasks with the Data Protectionfor VMware vCloud GUI is provided in the online help that is installedwith the GUI. Click Learn More in any of the GUI windows to open theonline help for task assistance.
Tivoli Storage Manager backup-archive client command-line interfaceInformation about how to complete backup tasks with the dsmc RestoreVAPP command is provided in the command-line help that is installed withthe product (dsmc help restore vapp). Information is also available atRestore VAPP
This scenario restores vApp1 from organization Mainz_org and organization vDCMZ_Silver to a new vApp named vApp1_restore.
To identify that the backup environment is within vCloud Director, the followingvmcli -f set_option command is issued:vmcli -f set_option -c vcloud
Then, the following vmcli -f restore command is issued:vmcli -f restore -I vapplistfile
The vapplistfile contains this statement:backupid:47110815 vappname:org=Mainz_org,orgvdc=MZ_Silver,vapp=vApp1vappname_new:vApp1_restore
You can restore a single or multiple vApps. You cannot exclude individual VMsfrom a vApp restore, nor can you restore a single VM into an existing vApp.
156 IBM Tivoli Storage Manager for Virtual Environments: Data Protection for VMware User's Guide

vSphere environment restore scenarioThis scenario demonstrates how to restore VMs with the vmcli -f restorecommand.
The VMs can also be restored with the following user interfaces:
Data Protection for VMware vSphere GUIInformation about how to complete restore tasks with the Data Protectionfor VMware vSphere GUI is provided in the online help that is installedwith the GUI. Click Learn More in any of the GUI windows to open theonline help for task assistance.
Tivoli Storage Manager backup-archive client GUIInformation about how to complete restore tasks with the backup-archiveclient GUI is provided in the online help that is installed with the GUI.Click Help in any of the GUI windows to open the online help for taskassistance.
Tivoli Storage Manager backup-archive client command-line interfaceInformation about how to complete restore tasks with the dsmc Restore VMcommand is provided in the command-line help that is installed with theproduct (dsmc help restore vm). Information is also available at RestoreVM.
This scenario completes an instant restore of vmName6 to a new VM, data center,ESX host, and data store. During the restore process, the disk is created with thinprovisioning.
The following vmcli -f restore command is issued:vmcli -f restore -vmrestoretype instantrestore -I vmlistfile
The vmpplistfile contains this statement:backupid:678912345 vmname:vmName6::vmname:vm6newNamenewdatacentername:DataCenter2 newesxhostname:esxHost1Namenewdatastoreurl:datastore2 vmtempdatastore:datastore2tempvmdiskprovision:thin
Full VM instant restore scenarios
Windows
A backed up VM is restored and available for immediate use.
Instant access and instant restore capability is supported only for VMware VMsthat are hosted on VMware ESXi 5.1 servers, or later versions.
This command completes an instant restore of the VM with the name Cologne.dsmc restore vm Cologne -vmrest=INSTANTRestore -vmtempdatastore=Verify_datastore
This command completes a regular restore (without starting the VM) when the VMnamed San_Jose is being restored.dsmc restore vm San_Jose
Alternatively, you can also use the following command:dsmc restore vm San_Jose -vmrest=noni
Chapter 8. Restoring VMware data 157

In this command, the -vmtempdatastore option specifies a temporary data store onthe ESX host. The data for the new VM is stored in this temporary data store:dsmc restore vm Haifa -VMRESToretype=INSTANTRestore -vmname=Haifa_verify-VMTEMPDAtastore=Verify_Datastore
The temporary data store is used by Storage vMotion to store the configuration ofthe restored virtual machine during the instant restore process. The name that youspecify must be unique. It cannot match the name of any of the original data storesthat were used by the virtual machine when it was backed up, and it cannot be thesame as the name specified on the optional –datastore option. If the –datastoreoption is omitted, the virtual machine files are restored to the data stores that theyused when the virtual machine was backed up.
This command completes an instant restore of the VM with the name Oslo withthe -pick option to pick a specific backup version.dsmc restore vm Oslo -vmrest=INSTANTRestore -pick -vmtempdatastore=datastore_temp
This command queries to find all active and failed instant restore sessions.dsmc query vm * -VMRESToretype=INSTANTRestore
This command retrieves the metadata for all instant restore session from the TivoliStorage Manager server and prints that information as a list.
This command completes a cleanup of the VM and all its components. Thesecomponents include iSCSI mounts, devices, and temporary data that are identifiedby the VM name on the ESX host.dsmc restore vm Oslo -VMRESToretype=VMCLeanup -vmname=Oslo_Verify
This command queries information about the real state of the listed VMs based oninformation from the vSphere SDK on the ESX host.dsmc query vm * -VMRESToretype=INSTANTRestore -Detail
Full VM instant restore cleanup and repair scenariosWhen an instant restore operation fails after the VM is powered on, manualcleanup and repair tasks are required.
An instant restore operation that fails with storage vMotion running creates eitherof the following situations:v The instant restore operation generates an error message.v The instant restore operation suspends indefinitely and the VM is not
responsive.
To determine the cause of the problem, perform a detailed query of the VM byusing the following command:dsmc q vm * -vmrestoretype=instantrestore -detail
In the output that is produced by this command, for each VM in the output, lookfor the line that contains Action Needed. Use the following Action Neededparagraphs to recover from failed instant restore operation, depending on theAction Needed status.
Instant access and instant restore capability is supported only for VMware VMsthat are hosted on VMware ESXi 5.1 servers, or later versions.
158 IBM Tivoli Storage Manager for Virtual Environments: Data Protection for VMware User's Guide

Action Needed: Cleanup
In the output of the query vm * -vmrestoretype=instantrestore -detailcommand, verify that the storage vMotion status is successful (vMotion Status:Successful) and that all VM disks are physical disks (Disk Type: Physical). Thisstatus confirms that the VM was restored and cleanup of orphaned components,such as iSCSI mounts, is needed.
This type of failure occurs as a result of either of the following situations:v The instant restore failed and Storage vMotion is running. VMware vSphere
continues the vMotion process.v Storage vMotion finished successfully, but the automatic cleanup of the iSCSI
mounts fails.
To clean up any orphaned components, run the restore vm command with the-VMRESToretype=VMCLeanup parameter. For example:dsmc restore vm original_vmname -vmname=new_vm_name -VMRESToretype=VMCLeanup
Action Needed: Repair
In the output of the query vm * -vmrestoretype=instantrestore -detailcommand, verify that the iSCSI device that is attached to the VM is dead (status isDisk Path: Dead).
This type of failure occurs as a result of one of the following three situations:v The VM that is used as a data mover or the physical data mover machine failed.v A network failure occurred between the data mover and the ESX host or the
data mover and the Tivoli Storage Manager server.v The Tivoli Storage Manager recovery agent Service failed.
The iSCSI device must be returned to an active state before any other instantoperation is attempted.
To attempt to recover from a data mover failure, complete the following steps:1. Investigate that cause of the failure and restart the data mover machine if it
does not start automatically. This action starts an automatic recovery of themounted iSCSI disks.
2. In the output of the query vm * -vmrestoretype=instantrestore -detailcommand, verify that the VM disks are active (Disk Path: Active). This statusmeans that the VM was restored and is available for use.
3. Restart storage vMotion in the vSphere client and monitor its progress in thevSphere client status bar.
4. If storage vMotion processing completed successfully, run the restore vmcommand with the -vmrestoretype=VMCLeanup parameter to clean up the iSCSIdisks. For example:dsmc restore vm original_vmname -vmname=new_vm_name -VMRESToretype=VMCLeanup
To attempt recovery after a network failure, complete the following steps:1. Repair the network issue so that communication between the data mover and
the ESX host, and the data mover and the Tivoli Storage Manager serverresumes.
Chapter 8. Restoring VMware data 159

2. In the output of the query vm * -vmrestoretype=instantrestore -detailcommand, verify that the VM disks are active (Disk Path: Active). This statusmeans that the VM was restored and is available for use.
3. If the network failure did not cause storage vMotion to time out, no action isrequired.
4. If the network failure caused storage vMotion to time out, and the errormessage indicates that the source disk is not responding, restart storagevMotion in the vSphere client. When storage vMotion processing completes,run the restore vm command with the -vmrestoretype=VMCLeanup parameter toclean up the iSCSI disks. For example:dsmc restore vm original_vmname -vmname=new_vm_name -VMRESToretype=VMCLeanup
To attempt recovery after a Tivoli Storage Manager recovery agent service failure,complete the following steps:1. Investigate that cause of the failure and restart the Tivoli Storage Manager
recovery agent service if it does not start automatically. This action starts anautomatic recovery of the mounted iSCSI disks.
2. In the output of the query vm * -vmrestoretype=instantrestore -detailcommand, verify that the VM disks are active (Disk Path: Active). This statusmeans that the VM was restored and is available for use.
3. If the Tivoli Storage Manager recovery agent service failure did not causestorage vMotion to time out, no action is required.
4. If the Tivoli Storage Manager recovery agent service failure caused storagevMotion to time out, and the error message indicates that the source disk asnot responding, restart storage vMotion in the vSphere client. When storagevMotion processing completes, run the restore vm command with the-vmrestoretype=VMCLeanup parameter to clean up the iSCSI disks. For example:dsmc restore vm original_vmname -vmname=new_vm_name -VMRESToretype=VMCLeanup
Full cleanup
If you are not able to recover from a failure and want to remove the VM and itscomponents, run the restore vm with the -vmrestoretype=VMFULLCLeanupparameter. For example:dsmc restore vm original_vmname -vmname=new_vm_name -VMRESToretype=VMFULLCLeanup
A VMFULLCLeanup operation forces removal of the VM and all of its components,regardless of the state of the virtual machine. Do not start a full clean up operationwhile vMotion is still migrating a virtual machine.
Full VM instant restore integrity validation scenarios
Windows
A new VM is built from the requested VM backup and is available for immediateuse.
The process that creates a VM for verification is referred to as instant access. Theverification itself is done by a specific application that the user must provide andoperate. In this scenario, since the VM guest data remains in the Tivoli StorageManager server repository, no additional storage is required on the primary datastore.
160 IBM Tivoli Storage Manager for Virtual Environments: Data Protection for VMware User's Guide
Instant access and instant restore capability is supported only for VMware VMsthat are hosted on VMware ESXi 5.1 servers, or later versions.
Start an instant access scenario
Start the instant access operation by entering the following Tivoli Storage Managerbackup-archive client command and options:dsmc restore vm Haifa -VMRESToretype=instanta -vmname=Haifa_verify
This command verifies the VM backup named Haifa without having to restore theVM. Since the original VM exists, the -vmname option assigns the new VM nameHaifa_verify.
In this command, the -vmautostart option specifies that the VM created forverification is powered on automatically:dsmc restore vm Haifa -VMRESToretype=instanta -vmname=Haifa_verify-VMAUTOSTARTvm=YES
By default, the VM created for verification is not powered on automatically. Thisdefault value allows the VM to be reconfigured before startup (if needed).
Specify the -inactive and -pick options to select the VM backup to validate froma list of all backed up VMs. Or, specify the -pitdate and -pittime options to selecta VM backup by its backup date and time.
All location options (such as -vmname, -datacenter, -host, and -datastore) aresupported by the -vmrestoretype=instantaccess and-vmrestoretype=instantrestore options.
This command returns a list of VMs that are running in instant access mode:dsmc query vm * -VMRESToretype=instanta
This command starts the cleanup process for a VM backup:dsmc restore vm Haifa -VMRESToretype=VMCLeanup -vmname=Haifa_Verify
This command completes the instant access session. A cleanup process includesthese actions:v The temporary VM created for verification is deleted on the ESX host.v The iSCSI mounts are unmounted on the vStorage Backup Server.v The iSCSI device list is cleaned on the ESX host.v The temporary data that is generated during verification is deleted by removing
the VMware snapshot.
You cannot use the –VMRESToretype=VMCleanup option or the–VMRESToretype=VMFULLCLeanup option to clean up a virtual machine while StoragevMotion is migrating it to a host.
Chapter 8. Restoring VMware data 161

Verifying that the Active Directory Domain Controller replicatedsuccessfully
When a VM guest that contains an Active Directory Domain Controller (AD DC) isrestored with Data Protection for VMware, the DC (on that VM) is restored from abackup copy of the AD database.
Before you begin
The original VM must be powered off before the restored VM is started. Inaddition, the restored VM must be manually rebooted for replication to occur.
About this task
The following tasks occur upon a successful Data Protection for VMware restoreand subsequent reboot of the VM guest that contains the AD DC:
Procedure1. The DC is updated from a backup copy of the AD DC database. A new
invocationID is assigned to the Directory Server. This update is indicated byevent 1109 in the event log on the VM guest. To verify this update:a. In the Computer Management window on the restored system, go to
System Tools > Event Viewer.b. When the AD DC restored successfully, the Information type event for the
restored DC displays the following message:ActiveDirectory 1109 Replication
The message in the Event Viewer also confirms a successful restore becauseof the changed invocationID attribute:
The invocationID attribute for this directory server has been changed.The highest update sequence number at the time the backup was created is <time>InvocationID attribute (old value):<Previous InvocationID value>InvocationID attribute (new value):<New InvocationID value>Update sequence number:<USN>The InvocationID is changed when a directory server is restored from backup mediaor is configured to host a writeable application directory partition.
2. The restored DC replicates itself non-authoritatively with its replicationpartners in the network. It is updated with the most current domain, schema,configuration, and application partitions:
Note: Data Protection for VMware does not support authoritative restore.a. Log in to the VM guest that was restored by using Data Protection for
VMware as an Administrator.b. Open a Windows command prompt.c. Check the status of the last replication that involved the restored DC by
issuing the repadmin /showrepl command1. This command shows thereplication partners for each directory partition on the DC and the status ofthe last replication.If the replication schedule did not start, you can manually start thereplication operation. Go to the Active Directory Sites and Services, selectthe replication partners, and right-click Replicate Now.
1. Repadmin.exe is a Microsoft command-line tool that is installed with Microsoft Active Directory.
162 IBM Tivoli Storage Manager for Virtual Environments: Data Protection for VMware User's Guide

For detailed information about initiating replication, see the followingMicrosoft Knowledge Base article:http://support.microsoft.com/kb/232072When the status is newer than the restore time, this status means that thereplication was successful and completed automatically. Thefollowing output shows that replication was successful:
Repadmin: running command /showrepl against full DC localhostDefault-First-Site-Name\DC12012DSA Options: IS_GCSite Options: <none>DSA Object GUID: 8393da24-f18b-453a-b197-b8dc6956d51fDSA invocationID: 8393da24-f18b-453a-b197-b8dc6956d51f
==== INBOUND NEIGHBORS ===============================
CN=Configuration,DC=his,DC=localDefault-First-Site-Name\DC22012 via RPCDSA Object GUID: 790c6f2d-61f1-4704-bdcf-6ef731bcb96eLast attempt @ 2013-01-25 14:33:10 was successful.
When the repadmin /showrepl command displays a successful replication,the AD DC replication is considered successful. No additional tasks arerequired.
d. When the repadmin /showrepl command shows that replication was notsuccessful, output similar to the following is shown:
Repadmin: running command /showrepl against full DC localhostDefault-First-Site-Name\DC12012DSA Options: IS_GCSite Options: <none>DSA Object GUID: 8393da24-f18b-453a-b197-b8dc6956d51fDSA invocationID: 8393da24-f18b-453a-b197-b8dc6956d51f
==== INBOUND NEIGHBORS ===============================
CN=Schema,CN=Configuration,DC=his,DC=localDefault-First-Site-Name\DC22012 via RPCDSA Object GUID: 790c6f2d-61f1-4704-bdcf-6ef731bcb96eLast attempt @ 2013-01-25 14:30:32 failed, result 1908 <0x774>:Could not find the domain controller for this domain.1 consecutive failure(s).Last success @ 2012-12-14 15:01:36.
If a replication failure exists or persists, follow the instructions provided inthe next section.
Recover from Replication Failures
Use the following methods to investigate the cause of a persistent replicationfailure:1. Use the Microsoft Domain Controller Diagnostics tool (dcdiag.exe) to view
information about all components, objects, and permissions that are requiredfor successful replication. For example:a. Open a Windows command prompt as an administrator.b. Issue the dcdiag /test:replications command. Use the output information
to resolve any issues. If the command fails, investigate the events that are atEvent Viewer > Directory Service > ActiveDirectory_DomainServices.
2. Use the Microsoft Repadmin.exe command-line tool to view the retiredinvocationID on a DC. For example:
Chapter 8. Restoring VMware data 163

a. Open a Windows command prompt as an administrator.b. Issue the repadmin /showsig [DC_LIST] command. This output shows that
restore from Tivoli Storage Manager was successful because a retiredinvocationID exists:
C:\Users\Administrator>repadmin /showsig rodcDefault-First-Site-Name\RODC
Current DSA invocationID: ed8ea6b9-d347-4695-b886-b5128be280c42c995946-2389-4d98-bc78-3708ba906e01 retired on 2012-12-19 16:56:21at USN 17703
When the output contains the statement No retired signatures, the ADwas not restored from Tivoli Storage Manager correctly. As a result,replication cannot be completed because the partner DCs mistake the newinvocationID as evidence for a completed replication. For example:
C:\Users\Administrator>repadmin /showsig rodcDefault-First-Site-Name\RODC
Current DSA invocationID: ed8ea6b9-d347-4695-b886-b5128be280c4No retired signatures
When the invocationID is retired, the replication can be started. However,this statement does not guarantee success of the replication.
164 IBM Tivoli Storage Manager for Virtual Environments: Data Protection for VMware User's Guide

Appendix A. Troubleshooting
Solutions to Data Protection for VMware vSphere GUI and Data Protection forVMware command-line interface issues are provided.
Locating log files
For information about Data Protection for VMware log files, see the followingtopics:v Log file activityv File restore log activity optionsv “Trace options for file restore” on page 175
Data Protection for VMware vSphere GUI or Data Protection forVMware vCloud GUI backup or restore operation fails
Complete these tasks to resolve a backup or restore failure:1. Log on to the system where the backup-archive client is installed.2. Start a command-line session:
v Windows Open the Windows Start menu and select Programs > TivoliStorage Manager > Backup Client Command Line.
v Linux Open a terminal window.3. If not already there, go to the installation directory:
Windows
cd C:\Program Files\Tivoli\TSM\baclient
Linux
cd /opt/tivoli/tsm/client/ba/bin
By default, error log files are in the installation directory.4. View these backup-archive client log files to see if an error was generated:v dsmerror.log: All client messages.v dsmwebcl.log: All web client messages.v dsmj.log: All client Oracle Java™ GUI messages.
These log files are located in the directory you specify with the DSM_LOGenvironment variable or in the current working directory.
Tip: You can view error explanations in IBM Knowledge Center at Messages,return codes, and error codes.
5. If neither of these files contain an error, run a backup-archive client backup andrestore operation to see if it fails.
6. If the backup-archive client operations complete successfully, run a DataProtection for VMware command-line interface “Backup” on page 86 and
© Copyright IBM Corp. 2011, 2017 165

“Restore” on page 89 operation. Set the appropriate trace parameters (asdescribed in “Profile parameters” on page 113) so you can view any errors thatmight be generated.
Data Protection for VMware command-line interface backup failswith scSignOnAsAdmin: Error 53
In this situation, a Data Protection for VMware command-line interface backupoperation failed and this error was generated to the backup-archive clientdsmerror.log:scSignOnAsAdmin: Error 53 receiving SignOnAsAdminResp verb from server
Typically, this error results when the VMCLI node name is different from itsadministrator name. Tivoli Storage Manager requires these two names to be thesame.
Data mover nodes are not visible during a backup operation
Verify that the correct proxy node authority was granted on the Tivoli StorageManager server. If the correct authority exists, then the data center mappingspecified by the VE_DATACENTER_NAME profile parameter is incorrect. See“Profile parameters” on page 113 for a complete description and correct syntax ofthe VE_DATACENTER_NAME parameter.
The inquire_detail command failed with Return Code 53
In this situation, the vmcli -f inquire_detail command failed and this error wasgenerated to your log file:
ANS1033E (RC-53) An invalid TCP/IP address was specified.
This error occurs when a node name does not match its administrator name. Thisissue can happen when you rename a node but do not rename its administrator.The solution is to either rename the administrator to match the new node name orregister a new administrator for the new node.
The commands in these examples are issued from the Tivoli Storage Manageradministrative command Line:v Rename the administrator at the same time you rename the node:
rename node <current_node_name> <new_node_name>rename admin <current_admin_name> <new_node_name>
For example:rename node DC_VC5 DC_WIN2K8_X64rename admin DC_VC5 DC_WIN2K8_X64
As a result, the new administrator name matches the new node name.v Register the administrator directly after renaming the node:
rename node <current_node_name> <new_node_name>register admin <new_admin_name> <password>
For example:rename node DC_VC5 DC_WIN2K8_X64register admin DC_WIN2K8_X64 DC_WIN2K8_X64PWD
166 IBM Tivoli Storage Manager for Virtual Environments: Data Protection for VMware User's Guide

As a result, the new administrator name matches the new node name.
Invalid sign on and invalid password errors received
In this situation, Data Protection for VMware command-line interface, DataProtection for VMware vSphere GUI, or Data Protection for VMware vCloud GUIoperations failed and your log file contained one (or more) of these errors:
GVM1170E: A VMCLI command failed.
ANR2177I FRSV123015.TSMCLI has 1 invalid sign-on attempts. The limit is 5.
ANR0424W Session 125713 for node FRSV128215.TSMCLI (TSM4VE)refused - invalid password submitted.
This issue can occur when a VMCLI node set password attempt was made byusing a password that was previously set.
When the VMCLI node password is set, the password is registered and thenautomatically changed. As a result, you do not know this changed password. Ifyou must change the VMCLI node password after it is already set, the TivoliStorage Manager administrator must use the update node command to reset thisnode on the Tivoli Storage Manager server. When the node has been reset, set theVMCLI node password again and specify the new password.
The VMCLI node password is set by either of these methods:v Data Protection for VMware command-line interface: vmcli -f set_password
commandv Data Protection for VMware vSphere GUI: Configuration > Tasks > Edit
Configuration > VMCLI Node
v Data Protection for VMware vCloud GUI: Configuration > Tasks > EditConfiguration > VMCLI Node
Session timeout
The Tivoli Storage Manager server COMMTIMEOUT option affects the duration ofthe Data Protection for VMware session. If the processing time of the DataProtection for VMware operation exceeds this value, the server ends the sessionwith Data Protection for VMware. Therefore, if you are sure that no error occurredduring a Data Protection for VMware operation and the COMMTIMEOUT valuehas been reached, increase the value. Likewise, if an error occurred but DataProtection for VMware did not report the error in a timely manner, then decreasethe value for better real-time reporting.
vSphere Client displays a Data Protection for VMware vSphereGUI connection error
In this situation, the Data Protection for VMware vSphere GUI was installedsuccessfully on the vCenter node. However, when viewing the Data Protection forVMware vSphere GUI in the vSphere Client Plug-in Manager (Menu > Plug-ins >Manage Plug-ins), the following message is shown:
Appendix A. Troubleshooting 167

Tivoli Data Protection for VMwareIBM Tivoli Storage Manager 2.1.1DisabledTivoli Data Protection for VMware Plug-inThe following error occured while downloading the script plugin fromhttps://guihost.mycompany.com:9081/TsmVMwareUI/plugin/config.xml:The request failed because of a connection failure. (Unable to connectto the remote server)
This issue can occur when the web server cannot access ports that are specified inthe bootstrap.properties file. During installation, the web server accesses port9081. However, when these additional ports cannot be accessed, the vSphere Clientcannot connect to the Data Protection for VMware vSphere GUI.
Complete these tasks to resolve this issue:1. On the system where the Data Protection for VMware vSphere GUI is installed,
go to the following directory for your operating system: Linux
/opt/tivoli/tsm/tdpvmware/common/webserver/usr/servers/veProfile
Windows
C:\IBM\tivoli\tsm\tdpvmware\webserver\usr\servers\veProfile
2. Open the bootstrap.properties file to view the eWAS port settings. Forexample:
veProfile.http.port=9080veProfile.https.port=9081veProfile.keystore.pswd={xor}KzosK2spOg==
3. Issue the netstat -a command to view all active connections and ports.Compare the results with the port settings in the bootstrap.properties file. Ifany of the ports (specified in the bootstrap.properties file) are not open,complete either of the following tasks to resolve this connection issue:v Open the closed ports.v Update the bootstrap.properties file with ports that are available.
4. Restart the GUI web server:
v Windows
a. Click Start > Control Panel > Administrative Tools > Services.b. Right-click Data Protection for VMware Web Server Service and click
Restart.
v Linux Issue the following command as root:[root@bold4win /]# service webserver restart
Restarting the WebSphere Liberty Profile ...Stopping server veProfile.Server veProfile stopped.Starting server veProfile.Server veProfile started with process ID 17894.
5. Start the Data Protection for VMware vSphere GUI with either of thesemethods:v Click the Data Protection for VMware vSphere GUI icon in the Solutions and
Applications window of the vSphere Client.v Open a web browser and go to the GUI web server. For example:
168 IBM Tivoli Storage Manager for Virtual Environments: Data Protection for VMware User's Guide
https://guihost.mycompany.com:9081/TsmVMwareUI/
Login by using the vCenter user name and password.
Tip: The plug-in access method is not supported in a VMware vSphere 6environment.
Resolving a VM guest (with application protection) backup failure
In this situation, a backup (with application protection) of a guest machine isstopped by the user. When the backup-archive client backup process (dsmagent ordsmc) ends in this manner, the cleanup of the application protection does not takeplace. As a result, the next backup (with application protection) of the same guestmachine can be issued only after a 10-minute interval. This interval is the length oftime necessary for the process to recognize that the guest machine is not backedup.
To manually clean up application protection without waiting 10 minutes forcommunication to clear, complete these steps:1. Log on to the guest machine with the same user ID and password that was
entered when you issued the backup operation.2. Open a command prompt window and issue this command:
echo %TEMP%
3. Go to the %TEMP% directory, then change to the TSM directory. For example:C:\Users\Administrator\AppData\Local\Temp\TSM
4. Delete the BackupHeartBeat.txt file.5. Back up the guest machine.
Event log contains event ID 8194, VSS message
After a backup of a VM guest with application protection completes, the event logcontains the event ID 8194, VSS error message. This cause of this message is anincorrect security setting in the Volume Shadow Copy Service (VSS) writer orrequestor process.
To resolve this error, complete these steps:1. Log on to the VM guest as an administrator and run the Microsoft
dcomcnfg.exe utility in the Start > Run dialog:dcomcnfg.exe
Click OK.The dcomcnfg.exe utility is used to modify registry settings.
2. In the Component Services interface, go to Component Services > Computers.Right-click My Computer and select Properties.
3. In the My Computer properties panel, go to COM Security > AccessPermissions: Edit Default.
4. In the Access Permission panel, add the Network Service account with LocalAccess permission set to Allow.
5. Apply your changes and close all open Component Services panels.6. Restart the VM guest.7. Back up the VM guest and verify that the event ID 8194, VSS error message is
not issued to the event log.
Appendix A. Troubleshooting 169

Data Protection for VMware installation failure: deploymentengine initialization
The Data Protection for VMware installation might be stopped due to adeployment engine initialization failure due to .lock files. If the deploymentengine interferes with the Data Protection for VMware installation, the followingerror message is produced:Deployment Engine failed to initialize.The installer will now shutdown. Please check with the log files for a morecomplete description of the failure.PRESS ENTER TO CONTINUE:
The cause might be deployment engine .lock files that come from a concurrentinstallation that is running or from an installation that stopped before it completed.If another installation is running, wait until that installation finishes before youinstall Data Protection for VMware. If there are no other installations that arestarted and you encounter this problem, delete any .lock files.
Important: Do not delete any .lock files if there are other Data Protection forVMware installations running.
Windows
To delete .lock files on Windows, issue the following command:
cd C:\Program Files\IBM\Common\acsi\logsdel .lock*
Linux To delete .lock files on Linux, issue the following command:cd /usr/ibm/common/acsi/logsrm .lock*
After you remove these files, restart the installation.
Unsupported characters in VM or datacenter name
Data Protection for VMware does not support backing up VMs or datacenters thatcontain any of the following characters in their name:
" Double quotation mark
' Single quotation mark
: Colon
; Semicolon
* Asterisk
? Question mark
, Comma
< Less than sign
> Greater than sign
/ Forward slash
\ Backward slash
| Vertical bar
170 IBM Tivoli Storage Manager for Virtual Environments: Data Protection for VMware User's Guide

Issues encountered after changing the vCenter
After you change the vCenter in the Data Protection for VMware vSphere GUI, thefollowing two issues might occur:v A data center that is associated with the new vCenter does not appear on the
Configuration Status page.To resolve this issue, manually set the domain for the new vCenter. See“Set_domain” on page 103 for details about issuing this command.
v In the Restore tab, an ESX host (associated with a previous data center) displaysunder a new data center within the new vCenter. This issue is a knownlimitation. There is not a workaround for this issue.
Consolidating VM backups
After a VM backup, the VM might contain preexisting snapshots even though nosnapshots are present in the Snapshot Manager. For example, the VM hard diskpoints to snapshot VMDK files (for example *-000001.vmdk) instead of regularVMDK files. Although preexisting snapshots might be intentionally retained, DataProtection for VMware does not provide a mechanism to verify whether theVMDK points to a valid snapshot. When snapshots are not consolidated, and a VMwith preexisting snapshot files is backed up, Data Protection for VMware mightreport an incorrect size for the backup on the Tivoli Storage Manager server.Snapshot consolidation also prevents other VMware related issues. As a result,consolidate your snapshots whenever this situation occurs.
To resolve this potential problem, VMware vSphere Client 5.x (or later) notifies youwhen a VM requires snapshot consolidation. For detailed information, see thefollowing VMware Knowledge Base article: http://kb.vmware.com/selfservice/microsites/search.do?language=en_US&cmd=displayKC&externalId=2003638
For vSphere 4.1 (or earlier), no consolidation option is available. However, theequivalent task is to create a snapshot and then complete a Delete All action.
Re-register the Data Protection for VMware vSphere GUI
To use the Data Protection for VMware vSphere GUI as a vSphere Client plug-in, itmust be registered to the vCenter. When the IP address changes on the systemwhere it is installed, you must re-register the GUI. If you cannot find the GUI inthe plug-in Manager, re-register it.Use this procedure when the IP address changesor you did not enable GUI access as a plug-in during installation:1. Log in to the system where the Data Protection for VMware vSphere GUI is
installed.2. Go to the following directory:
Linux
/opt/tivoli/tsm/tdpvmware/common/scripts
Windows (64-bit) C:\Program Files (x86)\Common Files\Tivoli\TDPVMware\VMwarePlugin\
3. To register the Data Protection for VMware vSphere GUI, enter the command:Linux
../jre/jre/bin/java -jar reg.jar <vCenterServer> <vCenterUser><vCenterPassword> <new_guiHostnameShort> <new_guiHostnameFull> 9081
Appendix A. Troubleshooting 171

The new_guiHostnameShort value is the name that is shown for the DataProtection for VMware vSphere GUI icon in the vCenter.The new_guiHostnameFull value is either the full DNS host name or the IPaddress. For example:../jre/jre/bin/java -jar reg.jar vctr.archive.mycompany.com administratorpass4admin myguihost myguihost.mydomain.mycompany.com 9081
Windows Issue the reg.jar command from the IBM Java directory. Forexample:C:\IBM\tivoli\tsm\tdpvmware\webserver\jre\jre\bin\java -cp . -jar reg.jar<vCenter Server address> <vCenter User ID> <vCenter Password><GUI web server host name> <GUI web server address><GUI web server HTTPS port>
For example:C:\IBM\tivoli\tsm\tdpvmware\webserver\jre\jre\bin\java -cp . -jar reg.jarvctr.archive.mycompany.com administrator pass4admin myguihostmyguihost.mydomain.mycompany.com 9081
A config.xml file is created.To register the IBM Data Protection extension, issue the same command withthe -wc_ext parameter. For example:C:\IBM\tivoli\tsm\tdpvmware\webserver\jre\jre\bin\java -cp . -jar reg.jar-wc_ext <vCenter Server address> <vCenter User ID> <vCenter Password><GUI web server host name> <GUI web server address><GUI web server HTTPS port>
4. Copy the config.xml file to the following directory:
Linux
/opt/tivoli/tsm/tdpvmware/common/webserver/usr/servers/
veProfile/apps/tsmVmGUI.war/plugin/
Windows C:\IBM\tivoli\tsm\tdpvmware\webserver\usr\servers\veProfile\apps\tsmVmGUI.war\plugin\
5. Restart the GUI web server:
v Linux Issue the following command as root:[root@bold4win /]# service webserver restart
v Windows
a. Click Start > Control Panel > Administrative Tools > Services.b. Right-click Data Protection for VMware Web Server Service and click
Restart.6. Restart the vSphere Client and confirm that the Data Protection for VMware
vSphere GUI is now registered.
Tip: The plug-in access method is not supported in a VMware vSphere 6environment.
An error occurred while making the Web server request(GVM0103E)
In this situation, the Data Protection for VMware vSphere GUI or Data Protectionfor VMware vCloud GUI shows the following error when you tried to access it:
GVM0103E: An error occurred while making the Web server request. If this error persists,check the network connection with the Web server and verify that the Web server is running.
172 IBM Tivoli Storage Manager for Virtual Environments: Data Protection for VMware User's Guide

To prevent this error, make sure that the following conditions exist before you startthe GUI:
v Linux Windows The Data Protection for VMware vSphere GUI is installedon a system that meets the operating system prerequisites. It must have networkconnectivity to the following systems:– vStorage Backup Server– Tivoli Storage Manager server– vCenter Server (Data Protection for VMware vSphere GUI)– vCloud Director (Data Protection for VMware vCloud GUI)
v Windows The Data Protection for VMware vSphere GUI host URL address mustbe set in your Internet Explorer trusted sites zone. In the Internet Explorer menubar, go to Tools > Internet Options > Security > Trusted sites. Click Sites andadd the host URL address. Make sure to apply your changes. For example:
Add this website to the zone:http://myvctrmachine.xyzco.com
v Windows For vSphere Web Client 5.1, when you are using Internet Explorer onWindows Server 2008 or Windows 2012 Server, Enhanced Security Configuration(IE ESC) must be disabled. Go to the Server Manager and make sure that IE ESCis set to Off.
v Windows On Windows Server 2008, if you start the Data Protection for VMwarevSphere GUI and then add the address as a trusted site, a JavaScript errordenies continued access to the Data Protection for VMware vSphere GUI. Toresolve this issue, close and restart the Data Protection for VMware vSphereGUI.
Data Protection for VMware vSphere GUI does not displaycorrectly in the VMware vCenter
In this situation, the Data Protection for VMware vSphere GUI is registered as avCenter plug-in. However, the Data Protection for VMware vSphere GUI icon doesnot display in the Solutions and Applications window of the vSphere Client. Whenyou view the Data Protection for VMware vSphere GUI in the vSphere ClientPlug-in Manager (Menu > Plug-ins > Manage Plug-ins), the following message isshown:
The following error occured while downloading the script pluginfrom http://192.168.66.58:9080/TsmVMwareUI/plugin/config.xml:The request failed because of a connection failure.(Unable to connect to the remote server)
To resolve this error, complete the steps as described in the following procedure:“ Re-register the Data Protection for VMware vSphere GUI” on page 171.
Tip: The plug-in access method is not supported in a VMware vSphere 6environment.
Return codes for VM backup operations
The following return codes apply to VM backup operations on Linux or Windowssystems:
Appendix A. Troubleshooting 173

Table 13. Return codes for VM backup operations
Return Code Description
0 A command to process one or more VMs completed successfully.
8 A command to process multiple VMs succeeded on only some of the VMsthat were targeted by the command. Examine the log file to determine theprocessing status for each of the targeted VMs.
12 A command was issued to process one or more VMs. The command didnot complete for any of the VMs that were targeted by the command.Examine the log file to determine possible reasons for the failure.
Data Protection for VMware vSphere GUI plug-in privileges arenot removed
When you remove the Data Protection for VMware vSphere GUI plug-inprivileges, only the labels and descriptions that are associated with the privilegesare removed. The actual privileges are not removed.
For detailed information, see the following VMware Knowledge Base article:http://kb.vmware.com/kb/2004601
Tip: The plug-in access method is not supported in a VMware vSphere 6environment.
Troubleshooting file restore operationsYou can retrieve diagnostic information to resolve file restore issues, by runningMicrosoft Windows PowerShell cmdlet commands.
Before you begin
Ensure that Microsoft Windows PowerShell 3 or later is available on the systemwhere Data Protection for VMware is installed. To view which version ofPowerShell is installed, enter the following command in a PowerShell session:PS C:\> $PSVersionTable.PSVersion
The number that displays in the Major column is the PowerShell version.
About this task
Complete these steps on the system where Data Protection for VMware is installed.
Procedure1. Start a Microsoft Windows PowerShell or Microsoft Windows PowerShell ISE
session with administrator authority. For example:Start > All Programs > Accessories > Windows PowerShell.Right-click Windows PowerShell and select Run as administrator.
2. Verify that execution policy is set to RemoteSigned by issuing the followingcommand:PS C:\> Get-ExecutionPolicy
If another policy is shown, set the execution policy to RemoteSigned by issuingthe following command:PS C:\> Set-ExecutionPolicy RemoteSigned
174 IBM Tivoli Storage Manager for Virtual Environments: Data Protection for VMware User's Guide

This policy allows the vetools.psm1 script to run on the system.
Tip: The Set-ExecutionPolicy command must be issued only once.3. Import the Data Protection for VMware PowerShell module to make the
cmdlets available:PS C:\> Import-Module C:\ibm\tivoli\tsm\tdpvmware\webserver\usr\servers\veProfile\tsmVmGUI\vetools.psm1
4. Display log file information in a PowerShell Viewer by issuing the followingcommand:PS C:\> Show-VeFileRestoreLogEntries
You can investigate and share log information in the PowerShell Viewer withany of the following actions:v Enter a term to filter the results.v Click Add criteria to filter the information by more detailed specifications.v Click one or more rows to save or copy their content for sharing.
5. Optional: Display trace information from a trace file by issuing the followingcommand:PS C:\> Show-VeFileRestoreTraceEntries
6. Optional: If you need to gather logs to review detailed diagnostic information(-review) or to send to IBM Support, save the logs in a compressed file byissuing the following command:PS C:\> Get-VeProblemDeterminationInfo -review
By default, this command saves the VeProblemDetermination.zip file on thedesktop.
Tip: If this command returns an error in the default "PowerShell" interface,start the "PowerShell ISE" interface as an administrator. Then, run thecommand again.
7. Optional: Each cmdlet provides parameters. To view parameters, issue thefollowing help command:help cmdlet name -ShowWindow
Related information:
File restore log activity options
Log file activity
Trace options for file restoreBy setting tracing options in the FRLog.config file, you can troubleshoot problemsthat you might encounter during file restore operations.
Modify the options in the FRLog.config file with a text editor in administratormode. The FRLog.config file is in the following directory:C:\IBM\tivoli\tsm\tdpvmware\webserver\usr\servers\veProfile\logs
FR.API.TRACE=ON | OFFSpecify whether to trace API activity at the recommended level of detail.
Note: The following values are also supported and indicate the least,recommended, and highest level of detail: DEBUG, TRACE, ALL.
Appendix A. Troubleshooting 175

API_MAX_TRACE_FILES=numberSpecify the maximum number of trace files to be created or used. The defaultvalue is 8.
API_MAX_TRACE_FILE_SIZE=numberSpecify the maximum size of each trace file in KB. The default value is 8192KB.
API_TRACE_FILE_NAME=API_trace_file_nameSpecify the name of the API trace file. The default value is fr_api.trace.
API_TRACE_FILE_LOCATION=API_trace_file_locationSpecify the location of the API trace file. Specify the location by using aforward slash (/). The default location is Install_Directory/IBM/tivoli/tsm/tdpvmware/webserver/usr/servers/veProfile/logs.
File restore solutionsResolve unique or infrequent issues that interfere with file restore operations.
Log in issues
In this scenario, the following information message displays when a fully qualifiedhost name (myhost.mycompany.com) or numeric IP address (192.0.2.0) is entered inthe login page:The host cannot be found. Verify the host name and log in again.If the problem persists, contact your administrator.
To resolve this issue, enter either the fully qualified domain name(myhost.mydomain) or the short host name (myhost).
VMware attributesReview how Data Protection for VMware interacts with VMware attributes.
VMware custom attributes
Data Protection for VMware includes VMware custom attributes in backup andrestore operations. However, custom attributes are only included when the datamover node is connected directly to a vCenter Server and not an ESXi Server. Toset this connection, specify a vCenter Server with the VMCHost option that is on thedata mover node.
For more information, see the following VMware Knowledge Base article:http://kb.vmware.com/kb/1005720
VMware configuration attributes
Data Protection for VMware does not directly access, modify, or back up the .vmxfile. The .vmx file is non-portable. As a result, Data Protection for VMware doesnot save values that are contained in the file or save the actual file. The mainobjective of Data Protection for VMware is to recover the VM to a usable (orstartable) state.
To view a list of VMware configuration attributes that are preserved by DataProtection for VMware, see technote 1631315.
176 IBM Tivoli Storage Manager for Virtual Environments: Data Protection for VMware User's Guide

Troubleshooting IBM Data Protection extension problemsSolutions are provided for IBM Data Protection extension issues. You can learnhow to resolve Platform Services Controller connection problems, enable tracing,and get more details about IBM Data Protection extension messages.v “Resolving Platform Services Controller connection problems”v “Enabling tracing” on page 178v “Messages for the IBM Data Protection extension” on page 179
Resolving Platform Services Controller connection problemsTags and categories that are used for the management of virtual machine backupsare stored and managed on the VMware Platform Services Controller (PSC). To beable to use the tagging feature for backup management, the tag-based data movernode and the IBM Data Protection extension must be able to connect to thePlatform Services Controller by using the Single Sign On process.
The Platform Services Controller server hosts the VMware Lookup Service thatregisters the location of vSphere components and handles the vCenter Single SignOn process.
SymptomsWhen connection problems occur, the data mover node cannot complete the SingleSign On process and cannot access the tags and categories in the Platform ServicesController.
If the Platform Services Controller cannot be reached, the tag information will notbe displayed in the IBM Data Protection extension. Virtual machine backupoperations will also fail.
Resolving the problemComplete the following tasks to diagnose and resolve connectivity problems:v Ensure that the Platform Services Controller and the vCenter server are installed
on the same host.v Ensure that the Platform Services Controller host is powered on and accessible
over the network.v Ensure that the VMware Lookup Service is active and accepting connections at
the following address: https://PSC-FQDN/lookupservice/sdk, where PSC-FQDNis the fully qualified domain name of the Platform Services Controller host.
v Ensure that a data mover is installed on the same server that hosts the DataProtection for VMware vSphere GUI. The data mover node must be configuredso that the vCenter server credentials are saved, for example, by using the dsmcset password command in the backup-archive command-line.
v Linux For Linux data mover nodes, ensure that the default password file(/etc/adsm/TSM.PWD) is used.
v Ensure that client option vmchost is set by using the same value and format thatwas used for the vCenter server field during the installation of Data Protectionfor VMware. The preferred format for the vCenter server address is the vCenterserver's fully qualified domain name (FDQN). Use the vCenter server IP addressonly if it was used during the registration of the vCenter, although the IPaddress is not preferred by VMware.
v The system time on the data mover host must be in sync with the system timeon the Platform Services Controller and vCenter. The system time and time zone
Appendix A. Troubleshooting 177
must be set correctly on all three systems. Otherwise, a Platform ServicesController connection error occurs. The following message is typical of this typeof error:ANS2378E Single Sign On login to the vSphere Server failed in functionvisdkGetSecurityToken - Issue. "The time now Wed Apr 20 21:31:58 UTC 2016does not fall in the request lifetime interval extended with clocktolerance of 600000 ms: [ Wed Apr 20 16:20:46 UTC 2016; Wed Apr 2016:50:46 UTC 2016). This might be due to a clock skew problem."
ANS2373E The VMware vCloud Suite plug-in library failed to connect to thePlatform Services Controller (PSC) and perform a single sign-on session.
If you need to trace this problem, on the backup-archive client command line,enable the client tracing feature by using the VCLOUD trace flag, then run thecommand again and analyze the trace for additional messages. For example:TRACEFLAGS VCLOUDTRACEFILE c:\temp\tracex64.txt
04/20/2016 12:30:50.253 : ..\common\vcloudSuiteReturnValue.cpp( 108):vcloudSuiteReturnValue::HandleReturnValue: exception description:
connect(): Connections to all Platform Service Controllers failed. Thefollowing exceptions were encountered: https://psc.home.lan/sts/STSService/vsphere.local: javax.xml.ws.soap.SOAPFaultException: The timenow Wed Apr 20 17:32:02 EDT 2016 does not fall in the request lifetimeinterval extended with clock tolerance of 600000 ms: [ Wed Apr 2012:20:50 EDT 2016; Wed Apr 20 12:50:50 EDT 2016). This might be due to aclock skew problem.
v For more information about messages that occurred, see “Messages for the IBMData Protection extension” on page 179.
Enabling tracingBy enabling the tracing feature, you can troubleshoot problems that you mightencounter during operations with the IBM Data Protection extension or thetag-based data mover node.
About this task
To enable tracing in the common VMware vCloud Suite layer for both thebackup-archive command-line client and the IBM Data Protection extension, thefollowing trace files and trace properties files are used:
Log locationTrace output is added to the following log files:
v Windows (Client) C:\Program Files\Tivoli\TSM\baclient\vcsplugin.log
v Linux (Client) /opt/tivoli/tsm/client/ba/bin/vcsplugin.log
v Windows (Data Protection for VMware) C:\IBM\tivoli\tsm\tdpvmware\webserver\usr\servers\veProfile\logs\vcsplugin.log
v Linux (Data Protection for VMware) /opt/tivoli/tsm/tdpvmware/common/webserver/usr/servers/veProfile/logs/vcsplugin.log
Log property locationThe property values are updated in the following trace properties files toenable tracing:
178 IBM Tivoli Storage Manager for Virtual Environments: Data Protection for VMware User's Guide

v Windows (Client) C:\Program Files\Tivoli\TSM\baclient\plugins\vcloudsuite\sdk\log4j.properties
v Linux (Client) /opt/tivoli/tsm/client/ba/bin/plugins/vcloudsuite/sdk/log4j.properties
v Windows (Data Protection for VMware) C:\IBM\tivoli\tsm\tdpvmware\webserver\usr\servers\veProfile\apps\tsmVmGUI.war\WEB-INF\classes\log4j.properties
v Linux (Data Protection for VMware) /opt/tivoli/tsm/tdpvmware/common/webserver/usr/servers/veProfile/apps/tsmVmGUI.war/WEB-INF/classes/log4j.properties
Procedure1. To view more detailed trace information for the common VMware vCloud Suite
layer, change the following property value from INFO to TRACE in thecorresponding log4j.properties file:log4j.logger.com.ibm.tivoli.tsm.ve=TRACE
2. To view more detailed trace information for the common vCloud Suite layer,VMware vCloud Suite SDK, and associated .jar files, change the followingproperty value from WARN to TRACE, in the corresponding log4j.properties filelog4j.rootLogger=TRACE,file
3. Rerun the actions or commands that caused the error. If the error occurred inthe IBM Data Protection extension, you must restart the server that hosts theData Protection for VMware vSphere GUI.
Messages for the IBM Data Protection extensionTo help you understand IBM Data Protection extension messages, review thefollowing information:v GVM5107Ev GVM5110Ev GVM5111Ev GVM5112E
GVM5107E: Data protection settings are not available becausethe login credentials provided are invalid for the 'name' PlatformServices ControllerThe symptoms, cause, and user response are provided for this IBM Data Protectionextension message.
SymptomsData protection settings cannot be displayed in the IBM Data Protection extension.
CausesThe credentials that are required to log in to the Platform Services Controller areinvalid for the vCenter.
Resolving the problemAsk the Tivoli Storage Manager server administrator to update the vCenter Servercredentials by using the dsmc set password command in the backup-archivecommand-line client on the server where the Data Protection for VMware vSphereGUI is installed.dsmc set password -type=vm vmchost username password
Appendix A. Troubleshooting 179

The value for the vmchost option must match the value that is in the client optionsfile. It must also match the vCenter server address that was used during theinstallation of the Data Protection for VMware vSphere GUI.
You might also receive the following backup-archive client messages that areassociated with this error:v Client message ANS9331Wv Client message ANS9332E
Related information
Set Password
GVM5110E: Data protection settings are not available because anerror occurred connecting to the 'name' Platform ServicesControllerThe symptoms, cause, and user response are provided for this IBM Data Protectionextension message.
SymptomsData protection settings cannot be displayed in the IBM Data Protection extension.
CausesOther errors are causing connection issues to the Platform Services Controller andvCenter.
Resolving the problemEnsure that the Platform Services Controller listed is running as expected. Formore information, see “Resolving Platform Services Controller connectionproblems” on page 177.
You might also receive the following backup-archive client message that isassociated with this error:v Client message ANS2373E
GVM5111E: Data protection settings are not available because nologin credentials are found for the 'name' Platform ServicesControllerThe symptoms, cause, and user response are provided for this IBM Data Protectionextension message.
SymptomsData protection settings cannot be displayed in the IBM Data Protection extension.
CausesThe credentials that are required to log in to the Platform Services Controllercannot be found for the vCenter. For example:
v Windows The value for the vmchost option cannot be found in the Windowsregistry.
v Linux The Tivoli Storage Manager password file (TSM.PWD) cannot beaccessed or the value for the vmchost option cannot be found in the TSM.PWD file.
Resolving the problemWindows
180 IBM Tivoli Storage Manager for Virtual Environments: Data Protection for VMware User's Guide
Ask the Tivoli Storage Manager server administrator to update the vCenter Servercredentials by using the dsmc set password command in the backup-archivecommand-line client on the server where the Data Protection for VMware vSphereGUI is installed.dsmc set password -type=vm vmchost username password
The value for the vmchost option must match the value that is in the client optionsfile. It must also match the vCenter server address that was used during theinstallation of the Data Protection for VMware vSphere GUI.
Linux
If the TSM.PWD file cannot be found, try the following actions:v The default location for the TSM.PWD file is /etc/adsm/TSM.PWD. Verify that this
file exists. If it does not, ask the Tivoli Storage Manager administrator to createthe password file. The administrator must complete the following steps in thebackup-archive command-line client (data mover) on the server where the DataProtection for VMware vSphere GUI is installed:1. Generate and save the password for the data mover node by running the
following command:dsmc set password
2. Refresh or restart the client acceptor daemon (dsmcad).3. Run the following command:
dsmc set password -type=vm vmchost username password
The value for the vmchost option must match the value that is in the clientoptions file. It must also match the vCenter server address that was usedduring the installation of the Data Protection for VMware vSphere GUI.
v If you specified an alternative location for the password file with thepassworddir option the in dsm.sys file, you must also specify the followingoption in the vcs.properties file. The following location is typical for thevcs.properties file:/opt/tivoli/tsm/tdpvmware/common/webserver/usr/servers/veProfile/apps/tsmVmGUI.war/WEB-INF/config/vcs.properties
Add the following statement to the file:passwordfile=<absolute path of the TSM.PWD file>
For example:passwordfile=/etc/security/tsm/TSM.PWD
If the TSM.PWD file cannot be accessed due to permission issues, complete the followsteps:1. Ensure that the TSM.PWD file is accessible by the tdpvmware user.2. If you receive a permission error, check that the permissions for the TSM.PWD
appear as follows:-rw-r----- 1 root tdpvmware
If the permissions do not match, go to the directory that contains the TSM.PWDfile and change the permissions with the following commands:chgrp tdpvmware TSM.PWDchmod g+r TSM.PWD
Appendix A. Troubleshooting 181

You might also receive the following backup-archive client messages that areassociated with this error:v Client message ANS9331Wv Client message ANS9332E
Related information
Set Password
GVM5112E: Data protection settings are not available because anerror occurred processing the login credentials that are providedfor the 'name' Platform Services ControllerThe symptoms, cause, and user response are provided for this IBM Data Protectionextension message.
SymptomsData protection settings cannot be displayed in the IBM Data Protection extension.
CausesThe credentials that are required to log in to the Platform Services Controller areavailable but one or more of the following errors occurred:v An error occurred processing the credentials.v An error occurred loading the native library that is needed to process the
credentials.
Resolving the problemContact the Tivoli Storage Manager server administrator for assistance.
You might also receive the following backup-archive client messages that areassociated with this error:v Client message ANS2635Ev Client message ANS9365E
182 IBM Tivoli Storage Manager for Virtual Environments: Data Protection for VMware User's Guide

Appendix B. Tivoli Storage Manager recovery agentoperations
This service enables the mounting of any snapshot volume from the Tivoli StorageManager server. You can view the snapshot locally, with read-only access, on theclient system, or use an iSCSI protocol to access the snapshot from a remotecomputer.
In addition, the recovery agent provides the instant restore function. A volume thatis used in instant restore processing remains available while the restore processproceeds in the background. The recovery agent is accessed with the recoveryagent GUI or command-line interface.
Important: Previous versions of Tivoli Storage Manager for Virtual Environmentsdelivered mount and file restore function with the Tivoli Storage Manager recoveryagent. Although this function is still supported by the recovery agent, the TivoliStorage Manager file restore interface is the preferred method, as described in thefollowing topic:
Chapter 3, “Getting started with file restore,” on page 35
The content in this "Tivoli Storage Manager recovery agent operations" collection isprovided as a reference for users who prefer the recovery agent method.
Mounting snapshots with the recovery agentLinux Windows
You can use Tivoli Storage Manager recovery agent to mount a snapshot and usethe snapshot to complete data recovery.
Mount snapshots with either the Tivoli Storage Manager recovery agent GUI orwith the “Mount command” on page 123. Install and run the Tivoli StorageManager recovery agent on a system that is connected to the Tivoli StorageManager server through a LAN. You cannot use the Tivoli Storage Managerrecovery agent component operations in a LAN-free path.
Be aware of these three situations when running mount operations:v When the Tivoli Storage Manager recovery agent is installed on a guest machine,
you cannot start an instant restore or a mount operation for any file system ordisk while the guest machine is being backed up. You must either wait for thebackup to complete, or you must cancel the backup before running an instantrestore or a mount operation. These operations are not allowed because thelocking mechanism is for a full VM.
v When you browse the snapshot backup inventory, the operating system versionof the VM is the version that was specified when the VM was originally created.As a result, Tivoli Storage Manager recovery agent might not reflect the currentoperating system.
v A volume becomes unstable when a network failure interrupts a mountoperation. A message is issued to the event log. When the network connection is
© Copyright IBM Corp. 2011, 2017 183

reestablished, another message is issued to the event log. These messages are notissued to the Tivoli Storage Manager recovery agent GUI.
A maximum of 20 iSCSI sessions is supported. The same snapshot can be mountedmore than one time. If you mount a snapshot from the same tape storage pool byusing multiple instances of the Tivoli Storage Manager recovery agent, one of thefollowing actions occurs:v The second Tivoli Storage Manager recovery agent instance is blocked until the
first instance is complete.v The second Tivoli Storage Manager recovery agent instance might interrupt the
activity of the first instance. For example, it might interrupt a file copy processon the first instance.
v The Tivoli Storage Manager recovery agent cannot connect to multiple servers ornodes simultaneously.
As a result, avoid concurrent Tivoli Storage Manager recovery agent sessions onthe same tape volume.
Mounting snapshot guidelines for Windows systems
Snapshots can be mounted in either read-only or read/write mode. In read/writemode, the recovery agent saves changes to data in memory. If the service isrestarted, the changes are lost.
The recovery agent operates in either of the following two modes:
No user is logged inThe recovery agent runs as a service. This service enables remoteconnections through the Data Protection for VMware command-lineinterface.
User is logged inThe recovery agent continues to run as a service until you start therecovery agent and use the GUI. When you close the recovery agent andGUI, the service restarts. You can use only the recovery agent applicationand GUI when running with administrator login credentials. Only onecopy of the recovery agent application can be active at any time.
When mounted volumes exist and you start Mount from the Start menu onWindows 7, Windows 8, Windows Vista, or Windows 2008, this message isdisplayed:
Some snapshots are currently mounted. If you choose to continue, these snapshots will bedismounted. Note that if a mounted volume is currently being used by an application, theapplication may become unstable. Continue?
When Yes is clicked, the mounted volumes are unmounted, even when they are inuse.
Restriction: When exposing snapshots as iSCSI targets, and a snapshot of adynamic disk is displayed to its original system, the UUIDs become duplicated.Likewise when a snapshot of a GPT disk is displayed to its original system, theGUIDs become duplicated. To avoid this duplication, expose dynamic disks andGPT disks to a system other than the original system. For example, expose thesedisk types to a proxy system, unless the original disks no longer exist.
184 IBM Tivoli Storage Manager for Virtual Environments: Data Protection for VMware User's Guide

Mounting snapshot guidelines for Linux systems
Use either of these methods to mount (and restore) files on Linux:v Use the Tivoli Storage Manager recovery agent to create an iSCSI target. You can
use an iSCSI initiator on the Linux machine to mount the target volume. TheLinux machine does not require the Tivoli Storage Manager recovery agent to beinstalled. iSCSI mount is the preferred method to mount (and restore) files onLinux.
v Install the Tivoli Storage Manager recovery agent command-line interface on aWindows system. Use the Tivoli Storage Manager recovery agent GUI on theLinux machine.
Be aware of these requirements when running mount operations:v The Tivoli Storage Manager recovery agent GUI on Windows must be able to
access the IBM Tivoli Storage Manager server. The Tivoli Storage Managerrecovery agent GUI on Windows displays snapshots as iSCSI targets. Therefore,the snapshots must be accessible to the target Linux system.
v Linux mount and restore operations require the iSCSI port to be open on anyfirewall between the Windows mount system, the iSCSI target, and the systemthat completes the restore (the iSCSI initiator). The iSCSI default port is 3260.
Be aware of these two actions when running mount operations:v To prevent possible mount errors, disable the FS Automount option for the
Tivoli Storage Manager disks. This option is set in the configuration file used forthe HAL daemon. If you do not disable the FS Automount option, the unmountoperation might fail.
v To prevent the recovery process from mounting the device, stop the crondaemon. For example:/etc/init.d/cron stop
Start the cron daemon when the processing completes.
When running a Linux instant restore or mount, Tivoli Storage Manager recoveryagent saves changes to data on a virtual volume in the write cache. The path isC:\Documents and Settings\All Users\Application Data\Tivoli\TSM\tdpvmware\mount, and the size is set to a maximum of 90% of the available space. Thesesettings can be configured by clicking settings in the main Tivoli Storage Managerrecovery agent window. The write cache must be on a local drive and cannot beset to a path on a shared folder. You cannot enable or disable the write cache fromthe UI or from configuration files. Specify the write cache location in a non-systemfolder on a local disk to prevent possible errors. For example, Windows 2008 has adifferent path: C:\ProgramData\Tivoli\TSM\TDPVMWare\mount.
Restriction: These two restrictions affect mount operations:v To prevent any interruption during restore processing, exclude the write cache
path from all antivirus software protection settings.v When restoring several volumes to several partitions on the same disk, only one
volume can be active. The other volumes remain in the DELAYED state. Theirprogress as shown on the user interface remains at 0% until they move out ofthe DELAYED state after the active synchronization completes.
Appendix B. Tivoli Storage Manager recovery agent operations 185

Restoring files with the recovery agentLinux Windows
Use the Tivoli Storage Manager recovery agent for efficient file restores and tominimize downtime by mounting snapshots to virtual volumes.
Tivoli Storage Manager recovery agent can be used for the following tasks:v Recovering lost or damaged files from a backupv Mounting a VM guest volume and creating an archive of the VM guest filesv Mounting database applications for batch reports
The virtual volume can be viewed by using any file manager, for exampleWindows Explorer. The directories and files in the snapshot can be viewed andmanaged like any other file. If you edit the files and save your changes, after youunmount the volume, your changes are lost because the changed data is held inmemory and never saved to disk. Because the changes are written to memory,Tivoli Storage Manager recovery agent can use a large amount of RAM whenworking in read/write mode.
You can copy the changed files to another volume before unmounting the volume.
The default read only mount option is the preferred method, unless a mountedvolume must be writeable. For example, an archive application might require writeaccess to the archived volume.
The Tivoli Storage Manager recovery agent mounts snapshots from the TivoliStorage Manager server. In the Tivoli Storage Manager recovery agent GUI, clickRemove to close an existing connection to a Tivoli Storage Manager server. Youmust remove any existing connection before you can establish a new connection toa different server or different node. Dismount all volumes before you clickRemove. The remove operation fails if there are active mount and restore sessionsin the Linux or Windows Mount machines. You cannot remove the connection to aserver when you are running a file restore or an instant restore from that server.You must first dismount all virtual devices and stop all instant restore sessionsbefore you disconnect from a server. If you do not do so, the connection is notremoved.
You must unmount all virtual volumes before uninstalling Tivoli Storage Managerrecovery agent. Otherwise, these mounted virtual volumes cannot be unmountedafter Tivoli Storage Manager recovery agent is reinstalled.
Restoring file information for a block-level snapshot is a random-access process. Asa result, processing might be slow when a sequential-access device (such as a tape)is used. To run a file restore of data that is stored on tape, consider moving thedata to disk or file storage first. From a Tivoli Storage Manager serveradministrative command-line client (dsmadmc), issue the QUERY OCCUPANCY commandto see where the data is stored. Then, issue the MOVE NODEDATA command to movethe data back to disk or file storage.
Mounting a snapshot from the same tape storage pool by two instances of Mountcan cause one of these results:v The second Mount instance is blocked until the first instance is complete.v Both mounts succeed, but the performance is poor.
186 IBM Tivoli Storage Manager for Virtual Environments: Data Protection for VMware User's Guide

When restoring data from a mirrored volume, mount only one of the disks thatcontains the mirrored volume. Mounting both disks causes Windows to attempt aresynchronization of the disks. However, both disks contain a different timestampif mounted. As a result, all data is copied from one disk to the other disk. Thisamount of data cannot be accommodated by the virtual volume. When you mustrecover data from a volume that spans two disks, and those disks contain amirrored volume, complete these steps:1. Mount the two disks.2. Use the iSCSI initiator to connect to the first disk.3. Use Windows Disk Manager to import this disk. Ignore any message regarding
synchronization.4. Delete the mirrored partition from the first (or imported) disk.5. Use the iSCSI initiator to connect to the second disk.6. Use Windows Disk Manager to import the second disk.
Both volumes are now available.
Restriction: Do not change a Tivoli Storage Manager node password whilerunning a file restore or an instant restore from snapshots stored in that node.
Restoring files from a Windows system with the recoveryagent
Windows
You can use Tivoli Storage Manager recovery agent for efficient file restore and tominimize downtime by mounting snapshots to virtual volumes.
Before you begin
Important: Previous versions of Tivoli Storage Manager for Virtual Environmentsdelivered mount and file restore function with the Tivoli Storage Manager recoveryagent. Although this function is still supported by the recovery agent, the TivoliStorage Manager file restore interface is the preferred method, as described in thefollowing topic:
Chapter 3, “Getting started with file restore,” on page 35
The content in this "Tivoli Storage Manager recovery agent operations" collection isprovided as a reference for users who prefer the recovery agent method.
You can use Tivoli Storage Manager recovery agent for efficient file restore and tominimize downtime by mounting snapshots to virtual volumes. On supportedWindows operating systems, file restore is supported from snapshots of NTFS,FAT, or FAT32 volumes.
In order to recover Microsoft Exchange Server mailbox items, you must use theIBM Tivoli Storage Manager for Microsoft Exchange Server product anddocumentation. As a result, IBMTivoli Storage Manager for Microsoft ExchangeServer must be purchased separately with a valid license. For more information,see the following product website:http://www.ibm.com/software/products/tivostormanaformail/
The mount function cannot be used to mount a snapshot of partitions from adynamic or GPT-based disk as a virtual volume. Only partitions from an
Appendix B. Tivoli Storage Manager recovery agent operations 187

MBR-based, basic disk can be mounted as virtual volumes. File restore from GPT,dynamic, or any other non-MBR or non-basic disk is possible by creating a virtualiSCSI target and using an iSCSI initiator to connect it to your system.
Important: The ACL values associated with the folders and files that are restoredin a file restore operation are not transferred to the recovered files. In order tomaintain ACL values, use the XCOPY command when copying files from thetarget.
Before proceeding, make sure you have reviewed the following information:v “Mounting snapshots with the recovery agent” on page 183
To mount a backed up VM disk from a Windows system for file restore, use theData Protection for VMware vSphere GUI mount wizard.
In order to recover Microsoft Exchange Server mailbox items, you must use theIBM Tivoli Storage Manager for Microsoft Exchange Server product anddocumentation. As a result, IBM Tivoli Storage Manager for Microsoft ExchangeServer must be purchased separately with a valid license. For more information,see the following product website:http://www.ibm.com/software/products/tivostormanaformail/.
About this task
Windows To run a file restore for a Windows system, complete the following steps:
Procedure1. Log on to the system where you want to restore files. Tivoli Storage Manager
recovery agent must be installed on the system.2. Start the Tivoli Storage Manager recovery agent GUI from the Start > All
Programs menu or by clicking the Tivoli Storage Manager recovery agent iconin the taskbar.
3. Connect to a Tivoli Storage Manager server by clicking Select TSM server.The target node is where the backups are located. You can manage the level ofaccess to the target node data by specifying a different node name in the Nodeaccess method section.A list of VMs with snapshots stored in the specified node displays.
4. Select a VM from the list. A list of snapshots for the selected VM displays.
Tip: You can find your VM quickly by typing the first few letters of themachine name in the edit portion of the list box. The list shows only thosemachines that match the letters you entered. Machine names arecase-sensitive.A VM might display in the list, but if you select it, the snapshots list might beempty. This situation occurs because of one of the following reasons:v No snapshots completed successfully for that VM.v The Fromnode option was used and the specified node is not authorized to
restore the selected VM.5. Select the preferred snapshot date. A list of VM disks that are backed up in
the selected snapshot displays. Select a disk and click Mount.6. In the Select Mount Destination dialog, check Create virtual volume from
selected partition. A list of partitions available on the selected disk is shown.For each partition, its size, label, and file system type are displayed.
188 IBM Tivoli Storage Manager for Virtual Environments: Data Protection for VMware User's Guide

v If the disk is not MBR-based, an error message is displayed.v By default, only partitions that can be used for file restore are displayed.v To display all partitions that existed on the original disk, clear the Show
only mountable partitions check box.7. Select the required partition. Partitions formatted using unsupported file
systems cannot be selected.8. Specify a drive letter or an empty folder as a mount point for the virtual
volume.9. Click OK to create a Virtual Volume that can be used to recover the files.
10. When the Virtual Volume is created, use Windows Explorer to copy the filesto your preferred location.
Important: The ACL values associated with the folders and files that arerestored in a file restore operation are not transferred to the recovered files. Inorder to maintain ACL values, use the XCOPY command when copying filesfrom the target.
Restoring files from a Linux system with the recovery agentLinux
File restore on Linux is available from snapshots of disks.
Before you begin
Important: Previous versions of Tivoli Storage Manager for Virtual Environmentsdelivered mount and file restore function with the Tivoli Storage Manager recoveryagent. Although this function is still supported by the recovery agent, the TivoliStorage Manager file restore interface is the preferred method, as described in thefollowing topic:
Chapter 3, “Getting started with file restore,” on page 35
The content in this "Tivoli Storage Manager recovery agent operations" collection isprovided as a reference for users who prefer the recovery agent method.
File restore is supported from snapshots of disks that use any of the following:v MBR-style partition tables.v Partitions formatted using one of these file systems:
– EXT2– EXT3– EXT4– ReiserFS
Be aware of these considerations before attempting a file restore on Linux:v If, during a file restore on a Linux machine, the iSCSI target is dismounted, the
file restore fails, and the restored data remains uncompleted.v The Tivoli Storage Manager recovery agent GUI must be configured before
attempting a file restore. To configure, click Select TSM server and Settings inthe Tivoli Storage Manager recovery agent GUI and enter the requiredinformation.
Appendix B. Tivoli Storage Manager recovery agent operations 189

v This procedure assumes that you are logged on to the Linux system with rootuser authority and the Tivoli Storage Manager recovery agent GUI is available.
v Linux requires all iSCSI devices to be unmounted before rebooting or shuttingdown the system.
v The Tivoli Storage Manager recovery agent component does not support filerestore operations over a wide area network (WAN).
Before proceeding, make sure you have reviewed the following information:v “Mounting snapshots with the recovery agent” on page 183
To mount a backed up VM disk from a Linux system for file restore, use theData Protection for VMware vSphere GUI mount wizard. Follow the instructionsin “Mounting a virtual machine disk and exporting the volumes” on page 153.
v “Restoring files with the recovery agent” on page 186
About this task
This task describes how to use Tivoli Storage Manager recovery agent to restore asnapshot volume (file) on a Linux system.
Procedure1. Identify the Tivoli Storage Manager server where the snapshots are stored by
clicking Select TSM server. Although the Select TSM server list appears tocontain multiple servers, this list contains a maximum of one server only. ClickRefresh after selecting a server.Tivoli Storage Manager recovery agent queries the server for a list of protectedVMs and displays the list.
2. Select a VM from the list. Tivoli Storage Manager recovery agent queries theserver for a list of snapshots available for the specified VM. A VM might bedisplayed in the VMs list, but if you select it, the snapshots list might be empty.This situation might occur for one of the following reasons:v No snapshots have yet completed successfully for that VM.v The node used for authentication was not granted permission to restore the
selected VM.
Tip: To quickly locate the required VM from the available VM list, type thefirst few letters of the VM name.
3. Select the required snapshot by selecting the date and disk. Tivoli StorageManager recovery agent displays a list of partitions available on the selecteddisk. For each partition, size, label, and file system type are displayed. Bydefault, only mountable partitions are displayed.
Note: Mount points are not displayed.4. Click Mount.5. Select the required partition in the Choose mount destination dialog. To display
all partitions, clear the Show only mountable partitions check box.6. Specify the path where the virtual volume is mounted in the Use the
following mount point field.7. Click OK to complete the mount operation. After the mount process is
completed successfully, a new entry is displayed in the Mounted Volumesfield. For example:/mnt is mount of [tsm-ba-1@tsm-ve-1]-[vm-1]-[2010-Mar-2410:10:10]-[Hard Disk 1]-[Partition 0]
190 IBM Tivoli Storage Manager for Virtual Environments: Data Protection for VMware User's Guide

8. Locate the files you are interested in and restore them from the backup.
Important: The ACL values associated with the folders and files that arerestored in a file restore operation are not transferred to the restored files. Inorder to maintain ACL values, use the cp -p command when copying files.
Restoring volumes instantly with the recovery agentLinux Windows
Unlike a conventional volume restore, instant restore provides access to volumecontents while the restore process is in progress. Less downtime is required beforea recovered volume can be used. After you start an instant restore, you can usedata on the disk while the restore is in progress.
Instant restore works only with local volumes. The term "local" is used regardingthe Tivoli Storage Manager recovery agent since it must be installed on the guestmachine that contains the volume to be restored. Local volumes must have anassigned drive letter. Instant restore cannot be used to restore the system volume.
Instant restore destination volumes must be either on basic disks, or simplevolumes on dynamic disks. Destination volumes cannot be spanned volumes,mirrored volumes, or Software RAID 0, RAID 1, and RAID 5 volumes. You can usea basic disk as a destination volume and then convert the basic disk to a dynamicdisk. The file system on the destination volume cannot be a FAT file system. If youplan to restore into a FAT volume, you must format it as NTFS before attemptingan instant restore.
You can complete an instant restore of a volume in a supported clusteredenvironment. While instant restore process is running, you can access the volume.Other volumes in the cluster might not be affected, and you can work with thecluster, and with that volume, in parallel. During the instant restore, the disk thatis being restored cannot fail over if the node fails.
If a system is shut down while instant restore is in progress, the instant restoreautomatically continues from the same point when power is restored.
Restoring volumes instantly from a Windows system with therecovery agent
Windows
With instant restore, you can restore a volume and almost immediately use therestored volume. Less downtime is required before a recovered volume can beused because you can use data on the disk while the restore is in progress.
Before you begin
Important: Previous versions of Tivoli Storage Manager for Virtual Environmentsdelivered mount and file restore function with the Tivoli Storage Manager recoveryagent. Although this function is still supported by the recovery agent, the TivoliStorage Manager file restore interface is the preferred method, as described in thefollowing topic:
Chapter 3, “Getting started with file restore,” on page 35
Appendix B. Tivoli Storage Manager recovery agent operations 191

The content in this "Tivoli Storage Manager recovery agent operations" collection isprovided as a reference for users who prefer the recovery agent method.
Instant restore operations on Windows require the Tivoli Storage Manager recoveryagent to be installed on the guest machine.
Instant restore is available only from Data Protection for VMware snapshots on asource volume that is on a simple, MBR-based disk. The volume format ofvolumes on those disks must be NTFS, FAT, or FAT32. However, instant restore toa destination partition on FAT volumes is not supported. As a result, if you plan torestore to a destination partition that is formatted as FAT, you must format thepartition as NTFS before attempting a restore. In addition, when selecting adestination volume for instant restore, make sure that the volume is on a physicaldisk, and not on a virtual iSCSI disk.v Restoring a volume involves overwriting data on the existing storage volume.
After the restore begins, the current volume contents are permanently erased.Before you start the restore, verify that the correct volume is selected, and thatthere are no open handles or processes that are using that volume.
v The restore operation fails if there are open files or applications that are runningon the target restore volume. Selecting Ignore open handles on the destinationvolume causes Data Protection for VMware to ignore the open files andapplications that are running on the destination volume. This situation can causea problem with applications and loss of data in files that are open on the targetvolume.
Use the Max CPU slider to adjust the processor usage for the restore process.
To cancel the restore process, select the instant restore session that is in progressand click Abort. All data on the target drive is lost. You can click Abort All tocancel all processes. If you stop an instant restore without clicking Abort or Abortall, the restored volume is displayed as a valid volume, but the data on thevolume is invalid. The data is invalid because the data was partially restored, butthe restore process did not have time to complete, and the shutdown wasabnormal.
If the service is stopped while instant restore is running, the volume appears to bea valid volume. Trying to access the area of the volume that is not yet restoredfails, and the data appears corrupted. After the service restarts, the restore processcontinues, and the data appears valid. If a power failure occurs during instantrestore, after the machine restarts, the volume appears to be unformatted. Do notattempt to format or modify the volume. After the service starts, the instant restoreprocess resumes, and the volume appears valid.
A temporary problem might prevent the session from running. For example, anetwork problem might cause a temporary loss of access to the Tivoli StorageManager server. In that case, the instant restore session pauses. To continue to therestore process after the pause, select the appropriate line in the instant restore listand click Resume. During the period when the session is paused, the parts of thevolume that are not yet restored are inaccessible.
You can use instant restore to restore into a simple volume that is on a dynamicdisk. However, the source volume must be an MBR-based disk. The source volumecannot be a dynamic disk. This restore might cause the disk status to change toOnline (Errors). In addition, the status of all volumes on the disk might change toAt Risk. This change in disk status can occur when network traffic is too heavy for
192 IBM Tivoli Storage Manager for Virtual Environments: Data Protection for VMware User's Guide

instant restore to operate. In this situation, the volumes are online and mounted.You can return the disk and volume status to normal by going to the ComputerManagement Console. Right-click the disk; then, click Reactivate Disk.
Before proceeding, make sure you have reviewed the following information:v “Mounting snapshots with the recovery agent” on page 183v “Restoring volumes instantly with the recovery agent” on page 191
The Tivoli Storage Manager recovery agent GUI must be configured beforeattempting a file restore operation. To configure, click Select TSM server andSettings in the Tivoli Storage Manager recovery agent GUI and enter the requiredinformation.
About this task
Use the Max CPU slider to adjust the processor usage for the restore process.
To cancel the restore process, select the instant restore session that is in progressand click Abort. All data on the target drive is lost. You can click Abort All tocancel all processes. If you stop an instant restore without clicking Abort or Abortall, the restored volume is displayed as a valid volume, but the data on thevolume is invalid. The data is invalid because the data was partially restored, butthe restore process did not have time to complete, and the shutdown wasabnormal.
If the service is stopped while instant restore is running, the volume appears to bea valid volume. Trying to access the area of the volume that is not yet restoredfails, and the data appears corrupted. After the service restarts, the restore processcontinues, and the data appears valid. If a power failure occurs during instantrestore, after the machine boots up, the volume appears to be unformatted. Afterthe service starts, the instant restore process resumes, and the volume appearsvalid.
A temporary problem might prevent the session from running. For example, anetwork problem might cause a temporary loss of access to the Tivoli StorageManager server. In that case, the instant restore session pauses. To continue to therestore process after the pause, select the appropriate line in the instant restore listand click Resume. During the period when the session is paused, the parts of thevolume that are not yet restored are inaccessible.
You can use instant restore to restore a simple volume that is located on a dynamicdisk. The destination volume can be a dynamic disk; however, the source volumecannot be a dynamic disk. This restore might cause the disk status to change toOnline (Errors). In addition, the status of all volumes on the disk might change toAt Risk. This change in disk status can occur when network traffic is too heavy forinstant restore to operate. In this situation, the volumes are online and mounted.You can return the disk and volume status to normal by going to the ComputerManagement Console. Right-click the disk; then, click Reactivate Disk.
Procedure
To perform an instant restore, complete the following steps:1. On the guest machine, start the Tivoli Storage Manager recovery agent GUI
from the Start > All Programs menu or by clicking the Tivoli Storage Managerrecovery agent icon in the taskbar.
Appendix B. Tivoli Storage Manager recovery agent operations 193

2. In the Tivoli Storage Manager recovery agent window, select the Tivoli StorageManager server to use as the source by clicking Select TSM server. Althoughthe Select TSM server list appears to contain multiple servers, this list containsa maximum of one server only. Tivoli Storage Manager recovery agent queriesthe Tivoli Storage Manager server for a list of protected VMs and displays thelist.
3. Select a VM, date, time, and disk, and then click Restore.4. Tivoli Storage Manager recovery agent displays a list of partitions available on
the selected disk. For each partition, its size, label, and file system type aredisplayed. Select the required partition. By default, only partitions that can berestored are displayed. To display all the partitions that are available on one ormore disks, clear the Show only restorable partitions check box. Select therequired partition from the list.
Note:
v Drive letters are not displayed.v If a disk cannot be parsed, an error message is displayed and the Instant
Restore dialog is closed. For example, this occurs when the disk is dynamicor a GUID partition table (GPT).
5. Select the destination partition into which the data is to be restored. Thedestination location size must be equal or larger than the source size.
6. Click Restore.7. A confirmation message is displayed. Verify the information and click Yes. The
restore process begins. In the instant restore section, you can see the status ofthe restore process. When the status changes to restoring, the volume isavailable for use.
Restoring volumes instantly from a Linux system with therecovery agent
Linux
Tivoli Storage Manager recovery agent on Linux is used to restore individual files(file level restore) or volumes (instant restore). Unlike a conventional volumerestore, instant restore provides access to volume contents while the restore processis in progress. Less downtime is required before a recovered volume can be used.After you start an instant restore, you can use data on the disk while the restore isin progress.
Before you begin
Important: Previous versions of Tivoli Storage Manager for Virtual Environmentsdelivered mount and file restore function with the Tivoli Storage Manager recoveryagent. Although this function is still supported by the recovery agent, the TivoliStorage Manager file restore interface is the preferred method, as described in thefollowing topic:
Chapter 3, “Getting started with file restore,” on page 35
The content in this "Tivoli Storage Manager recovery agent operations" collection isprovided as a reference for users who prefer the recovery agent method.
Before attempting an instant restore on Linux review the following information:
194 IBM Tivoli Storage Manager for Virtual Environments: Data Protection for VMware User's Guide

v Multiple instant restore sessions to different target disks run in parallel.However, multiple instant restore sessions to different target partitions on thesame disk do not run in parallel. As a result, the first instant restore sessionmust complete before the next Instant Restore session begins.
v The Tivoli Storage Manager recovery agent GUI must be configured beforeattempting an instant restore. To configure, click Select TSM server and Settingsin the Tivoli Storage Manager recovery agent GUI and enter the requiredinformation.
v This procedure assumes that you are logged on to the Linux system with rootuser authority and that the Tivoli Storage Manager recovery agent user interfaceis available.
v SUSE Linux Enterprise Server 11 require all iSCSI devices to be unmountedbefore rebooting or shutting down the system.
v Instant restore is available for snapshots of disks that use MBR-style partitiontables only. The partition used as the source for an instant restore operationmust be formatted by using one of the following file systems:– EXT2– EXT3– EXT4– ReiserFS
v When selecting a destination volume for instant restore, make sure that thevolume resides on a physical disk, and not on a virtual iSCSI disk.
v The Tivoli Storage Manager recovery agent component does not support instantrestore operations over a wide area network (WAN).
The instant restore progress can be slow in some situations. This can be due tosuch things as connectivity issues, very large volumes, restore from tape, or highI/O operations. The restore process identifies no progress was made on theMDADM device (/dev/md0) for the last 5 minutes and responds to it as apotential problem. As a result, a cleanup is performed, and the restore restartsitself, continuing from the point at which it stopped. The cleanup can cause I/Ooperations to fail. To fix this problem, you can increase the restore process periodby editing the /etc/crn.d/tsmmount_recover file. Increase the restore processperiod to 10 minutes or to 20 minutes if the volume is very large, or the I/O isintense.
Before proceeding, make sure you have reviewed the following information:v “Mounting snapshots with the recovery agent” on page 183v “Restoring volumes instantly with the recovery agent” on page 191
About this task
This task guides you through how to use Tivoli Storage Manager recovery agent torestore a snapshot volume (instant restore) on a Linux system.
Procedure1. Identify the Tivoli Storage Manager server where the snapshots are stored by
clicking Select TSM server. Click Refresh after selecting a server.Tivoli Storage Manager recovery agent queries the server for a list of protectedVMs and displays the list.
2. Select a VM from the list. Tivoli Storage Manager recovery agent queries theserver for a list of snapshots available for the specified VM.
Appendix B. Tivoli Storage Manager recovery agent operations 195

Tip: To quickly locate the required VM from the available VM list, type thefirst few letters of the VM name.
3. Select the required snapshot by selecting the date and disk.4. Click Restore.5. Select the required partition in the Choose instant restore destination dialog.
Tivoli Storage Manager recovery agent displays a list of partitions available onthe selected disk. For each partition, its size, label, and file system type isdisplayed. By default, only restorable partitions are displayed. To display allpartitions, clear the Show only restorable partitions check box.
Note: Mount points are not displayed.6. Specify the destination partition into which the data is to be restored, by
specifying a mount point or a block device. If you specify both, make sure theblock device is mounted on the specified mount point.
7. Click OK. The restore process starts. After a short initialization period, thevolume is available for use while the restore process runs in the backgroundand until the volume is completely restored.
What to do next
Linux Restoring to the same volume again:If you plan to restore another snapshot into the same target volume, complete oneof the following steps:v Restart the Linux system.v Manually stop the mirror device and mount the restored volume.
For example, in the following procedure sdc1 is the target block device and md0is the mirror device:1. Issue the command: umount /dev/md0.2. Issue the command: mdadm --stop /dev/md0.3. Issue the command: mount /dev/sdc1 /restoredVolume.
Linux
Checking the file system
After the instant restore completes, you can verify the file system restored volumeby using the fsck file system utility:1. Unmount the RAID device by issuing this command: umount /dev/md02. Type in the fsck command to run the file system check.
Responding to a timeout during a file level restore or an instantrestore (Linux)During a file level restore or an instant restore, a timeout might occur. If a timeoutdoes occur, the user interface displays a message saying that manual interventionmight be needed.
About this task
Linux Follow this procedure if the timeout occurs during a file level restore(Mount operation):
Procedure1. Stop the restore process by commenting out the one line in
/etc/cron.d/tsmmount_recover Ensure that the restore process is not runningby issuing this command:
196 IBM Tivoli Storage Manager for Virtual Environments: Data Protection for VMware User's Guide

ps -ef | grep tsmRecover
2. Ensure that the required snapshot is mounted in the Tivoli Storage Managerrecovery agent Windows backup server. If the snapshot is not mounted, mountit manually.
3. Ensure that the iSCSI target is connected to the Linux machine by usingiscsiadm -m session. If the iSCSI target is not connected to the Linux machine,perform a manual login to the target by issuing this command:iscsiadm -m discovery -t sendtargets -p <windows_server_ip> --login
4. Mount the iSCSI device locally by using the Linux mount command. Forexample:mount /dev/sde1 /Mount1
Ensure that you use the same mount point as was requested in the userinterface. This operation can take long time to complete depending on theconsistency of the snapshot.
5. When the mount operation is completed, uncomment the line in/etc/cron.d/tsmmount_recover.
6. When you want to unmount, do so first locally by using umount. Then use theLinux user interface to unmount the session.
What to do next
For an instant restore operation the manual intervention is to halt and then retrythe restore session.
Appendix B. Tivoli Storage Manager recovery agent operations 197

198 IBM Tivoli Storage Manager for Virtual Environments: Data Protection for VMware User's Guide

Appendix C. Data Protection for VMware vSphere GUI andData Protection for VMware vCloud GUI messages
This information contains explanations and suggested actions for messages issuedby the Data Protection for VMware vSphere GUI and Data Protection for VMwarevCloud GUI.
For messages shown in the Data Protection for VMware vSphere GUI and DataProtection for VMware vCloud GUI that contain the FMM prefix, messageinformation is available at the following web site: FMM, FMF, FMV, FMX, FMY:Tivoli Storage FlashCopy Manager messages
GVM0001E The operation failed with return codereturn code
GVM0002E An internal error occurred: type of error
GVM0003E A connection with the IBM TivoliStorage Manager server could not beestablished.
Explanation: The server might not be running.
Administrator response: Check the networkconnection with the server machine. Verify that theserver is running and try to log in again.
GVM0004W Are you certain that you want to deletethis data?
Explanation: You cannot recover the data after it isdeleted. Ensure that the data is not needed before youdelete it.
Administrator response: Click OK to delete the dataor click Cancel to cancel this action.
GVM0005W The connection with the IBM TivoliStorage Manager server has timed out.
Explanation: Possible causes include a long-runningoperation, a problem on the server, or acommunications problem.
Administrator response: If the operation islong-running, the operation might be complete or itmight soon be complete. Before trying the operationagain, determine if the expected result occurred. Checkthe activity log of the IBM Tivoli Storage Managerserver for errors related to the operation. Using a SSLport without selecting SSL can cause this error.
GVM0006I A server connection with the nameserver name has been successfullycreated. Click OK to continue.
GVM0007W There is no IBM Tivoli Storage Managerserver definition found.
Explanation: A connection for a IBM Tivoli StorageManager server must be defined before any serveroperations or queries are performed.
Administrator response: To define a server: Click theConfiguration tab.Click the Edit Configuration Settingsaction link.Click the IBM Tivoli Storage Manager ServerCredentials tab.
GVM0008E An error occurred while writing to theserver's database file, tsmserver.props
Explanation: The server definition could not bewritten to the tsmserver.props file.
Administrator response: The file must reside in theinstall directory of IBM Tivoli Data Protection forVMware. Before you try the action again, verify thatthe file exists and that the file is not write protected.
GVM0011I The VM VM name is spanned intomultiple datastores. It can only berestored to its original location.
GVM0011W The VM VM name exists, are you goingto over-write it?
GVM0012W The VM VM name is running, make surethe system is powered down, then hitOK to continue.
GVM0020E A connection with the vCenter servercould not be established.
Explanation: The server might not be running.
Administrator response: This might indicate anetwork problem. Ensure that the server is running andthe machine is accessible. Try the action again.
© Copyright IBM Corp. 2011, 2017 199
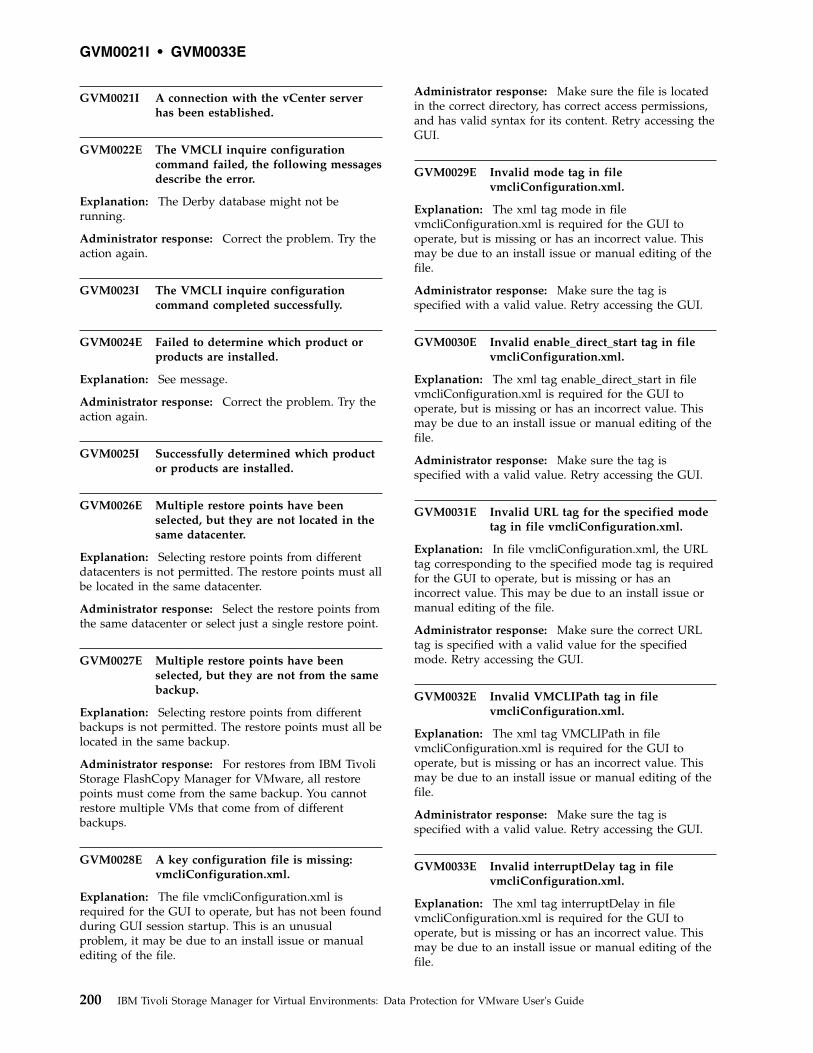
GVM0021I A connection with the vCenter serverhas been established.
GVM0022E The VMCLI inquire configurationcommand failed, the following messagesdescribe the error.
Explanation: The Derby database might not berunning.
Administrator response: Correct the problem. Try theaction again.
GVM0023I The VMCLI inquire configurationcommand completed successfully.
GVM0024E Failed to determine which product orproducts are installed.
Explanation: See message.
Administrator response: Correct the problem. Try theaction again.
GVM0025I Successfully determined which productor products are installed.
GVM0026E Multiple restore points have beenselected, but they are not located in thesame datacenter.
Explanation: Selecting restore points from differentdatacenters is not permitted. The restore points must allbe located in the same datacenter.
Administrator response: Select the restore points fromthe same datacenter or select just a single restore point.
GVM0027E Multiple restore points have beenselected, but they are not from the samebackup.
Explanation: Selecting restore points from differentbackups is not permitted. The restore points must all belocated in the same backup.
Administrator response: For restores from IBM TivoliStorage FlashCopy Manager for VMware, all restorepoints must come from the same backup. You cannotrestore multiple VMs that come from of differentbackups.
GVM0028E A key configuration file is missing:vmcliConfiguration.xml.
Explanation: The file vmcliConfiguration.xml isrequired for the GUI to operate, but has not been foundduring GUI session startup. This is an unusualproblem, it may be due to an install issue or manualediting of the file.
Administrator response: Make sure the file is locatedin the correct directory, has correct access permissions,and has valid syntax for its content. Retry accessing theGUI.
GVM0029E Invalid mode tag in filevmcliConfiguration.xml.
Explanation: The xml tag mode in filevmcliConfiguration.xml is required for the GUI tooperate, but is missing or has an incorrect value. Thismay be due to an install issue or manual editing of thefile.
Administrator response: Make sure the tag isspecified with a valid value. Retry accessing the GUI.
GVM0030E Invalid enable_direct_start tag in filevmcliConfiguration.xml.
Explanation: The xml tag enable_direct_start in filevmcliConfiguration.xml is required for the GUI tooperate, but is missing or has an incorrect value. Thismay be due to an install issue or manual editing of thefile.
Administrator response: Make sure the tag isspecified with a valid value. Retry accessing the GUI.
GVM0031E Invalid URL tag for the specified modetag in file vmcliConfiguration.xml.
Explanation: In file vmcliConfiguration.xml, the URLtag corresponding to the specified mode tag is requiredfor the GUI to operate, but is missing or has anincorrect value. This may be due to an install issue ormanual editing of the file.
Administrator response: Make sure the correct URLtag is specified with a valid value for the specifiedmode. Retry accessing the GUI.
GVM0032E Invalid VMCLIPath tag in filevmcliConfiguration.xml.
Explanation: The xml tag VMCLIPath in filevmcliConfiguration.xml is required for the GUI tooperate, but is missing or has an incorrect value. Thismay be due to an install issue or manual editing of thefile.
Administrator response: Make sure the tag isspecified with a valid value. Retry accessing the GUI.
GVM0033E Invalid interruptDelay tag in filevmcliConfiguration.xml.
Explanation: The xml tag interruptDelay in filevmcliConfiguration.xml is required for the GUI tooperate, but is missing or has an incorrect value. Thismay be due to an install issue or manual editing of thefile.
GVM0021I • GVM0033E
200 IBM Tivoli Storage Manager for Virtual Environments: Data Protection for VMware User's Guide

Administrator response: Make sure the tag isspecified with a valid value. Retry accessing the GUI.
GVM0099E The VM name entered VM nameconflicts with an existing VM. Pleaseenter a different name.
GVM0100E An error occurred while processing therequest to the Web server. If this errorpersists, check the network connectionwith the Web server and verify that theWeb server is running.Detail: exceptionexception message
GVM0101E A request to the server took too long tocomplete. If this error persists, check thenetwork connection with the Web serverand verify that the Web server isrunning.
GVM0102E An error occurred while processing theresponse from the Web server.Detail:error
GVM0103E An error occurred while making theWeb server request. If this error persists,check the network connection with theWeb server and verify that the Webserver is running.Error: message
GVM0104E No matching device class found. Pleasereturn to source page and reselect.
GVM0105E No matching proxy node found. Pleasereturn to source page and reselect.
GVM0106E No proxy ESX hosts available.
GVM0107I Password set successfully.
GVM0108E Set password failed.Error: message
Explanation: The password may be incorrect or theserver is not running.
Administrator response: Verify the password iscorrect then try the action again. Or check the networkconnection with the server machine and verify that theserver is running then try the action again.
GVM0109E Get managed domain failed.Error:message
GVM0110E Multiple restore points have beenselected, but they are not the samebackup type.
Explanation: Selecting restore points of different typesis not allowed. The restore points must all be locatedon either a IBM Tivoli Storage Manager server or in theIBM Tivoli Storage FlashCopy Manager for VMwarerepository.
Administrator response: Select the same type ofrestore points or select just a single restore point.
GVM0111E Backup ID is null.
Explanation: An internal error occurred.
Administrator response: Refresh the table andperform the action again.
GVM0112E Task ID is null.
Explanation: An internal error occurred.
Administrator response: Refresh the table andperform the action again.
GVM0113E Could not open a pop-up window.
Explanation: An internal error occurred.
Administrator response: Try the action again.
GVM0114E Virtual machine name is null.
Explanation: An internal error occurred.
Administrator response: Refresh the table andperform the action again.
GVM0115E Datastore does not exist.
Explanation: An internal error occurred.
Administrator response: Refresh the table andperform the action again.
GVM0116I No selection was made, the wholevirtual machine will be attached.
Explanation: No selection was made.
Administrator response: Continue with the action orcancel the action.
GVM0117I Domain set successfully.
GVM0118E Set domain failed.Error: message
Explanation: The server might not be running. Thepermissions on the file directory may be incorrect.
Administrator response: Check the networkconnection with the server machine. Verify that the
GVM0099E • GVM0118E
Appendix C. Data Protection for VMware vSphere GUI and Data Protection for VMware vCloud GUI messages 201

server is running and try the action again. Check thepermissions of the directory indicated in SystemErr.logif error indicates incorrect permissions.
GVM0119E The schedule requires use of thefollowing datacenters that are not in theactive domain. Datacenters: list Action:This schedule may not be updated,instead either update the domainconstruct to include the datacenters, orcreate a new schedule withoutdependence on these datacenters. Detail:The schedule definition is as follows:Schedule Summary summary
GVM0120E The schedule requires use of thefollowing datacenters that are notknown to the system. Datacenters: listAction: This schedule may not beupdated, instead create a new schedulewithout dependence on thesedatacenters. Detail: The scheduledefinition is as follows: ScheduleSummary: summary
GVM0121E The schedule requires use of thefollowing hosts that are not known tothe system. Hosts: list Action: Thisschedule may not be updated, insteadcreate a new schedule withoutdependence on these hosts. Detail: Theschedule definition is as follows:Schedule Summary: summary
GVM0122E The schedule requires use of thefollowing datastores that are not knownto the system. Datastores: list Action:This schedule may not be updated,instead create a new schedule withoutdependence on these datastores. Detail:The schedule definition is as follows:Schedule Summary: summary
GVM0123E The schedule requires use of thefollowing virtual machines that are notknown to the system. Virtual Machines:list Action: This schedule may not beupdated, instead create a new schedulewithout dependence on these virtualmachines. Detail: The scheduledefinition is as follows: ScheduleSummary: summary
GVM0124I Password set successfully. Warning:message
Explanation: The password was set successfully witha warning.
Administrator response: Follow the action describedin the warning message.
GVM0125E An error occurred while making theWeb server request. If this error persists,check the network connection with theWeb server and verify that the Webserver is running. Error: error
GVM1100E The following command requiresconfirmation from the server: Command
Explanation: A command was issued, and a reply wasexpected. Some commands require a confirmation,which you cannot issue through the IBM Tivoli DataProtection for VMware GUI.
Administrator response: Issue the command from thecommand line.
GVM1101E The following command is unknown tothe server: Command
Explanation: An unknown command was issued tothe server. The command might not be valid on theserver version and platform or the command syntaxmight be incorrect.
Administrator response: Verify that the command isvalid for the server version and platform, and verifythat the command syntax is correct.
GVM1102E The syntax of the following command isincorrect: Command.
Explanation: See message.
Administrator response: Correct the syntax and issuethe command from the command line. The activity logof the IBM Tivoli Storage Manager Server shows all thecommands issued before and after this command.
GVM1103E An internal server error occurred.
Explanation: See message.
Administrator response: Try the command again. Ifthis does not work, contact customer support. Youmight be asked to provide tracing information andinformation about the actions performed before thefailure occurred.
GVM0119E • GVM1103E
202 IBM Tivoli Storage Manager for Virtual Environments: Data Protection for VMware User's Guide

GVM1104E The server ran out of memory whileprocessing the request. Close anyunnecessary processes on the IBM TivoliStorage Manager server and try theoperation again.
Explanation: See message.
Administrator response: Before trying the actionagain, contact the administrator of the IBM TivoliStorage Manager server.
GVM1105E The database recovery log is full.
Explanation: See message.
Administrator response: Before trying the actionagain, extend the recovery log or back up the IBMTivoli Storage Manager server database. Contact theadministrator of the IBM Tivoli Storage Manager server.
GVM1106E The server database is full.
Explanation: See message.
Administrator response: Before trying the actionagain, extend the server database. Contact theadministrator of the IBM Tivoli Storage Manager server.
GVM1107E The server is out of storage space.
Explanation: See message.
Administrator response: Before trying the actionagain, contact the administrator of the IBM TivoliStorage Manager server.
GVM1108E You are not authorized to perform thisaction. An administrator with systemauthority can change your authoritylevel to allow you to perform thisaction.
GVM1109E The object that you are attempting toaccess does not exist on the server.
GVM1110E The object that you are attempting toaccess is currently in use by anothersession or process. Retry the action at alater time.
GVM1111E The object that you are attempting toremove is referenced by another objectdefined to the server. Remove the otherobject before removing this one.
GVM1112E The object that you are attempting toaccess or remove is not available.
Explanation: See message.
Administrator response: Before trying the actionagain, contact the administrator of the IBM TivoliStorage Manager server.
GVM1113E The server encountered an I/O errorwhile processing the request. For moreinformation, see the operating systemevent or error log.
GVM1114E The action failed because the transactioncould not be committed.
Explanation: See message.
Administrator response: Retry the action at a latertime. Before trying the action again, contact theadministrator of the IBM Tivoli Storage Manager server.
GVM1115E The action failed because of a resourcelock conflict.
Explanation: See message.
Administrator response: Retry the action at a latertime. Before trying the action again, contact theadministrator of the IBM Tivoli Storage Manager server.
GVM1116E The action failed because of a modeconflict.
Explanation: See message.
Administrator response: Retry the action at a latertime. Before trying the action again, contact theadministrator of the IBM Tivoli Storage Manager server.
GVM1117E The action failed because the servercould not start a new thread.
Explanation: See message.
Administrator response: Retry the action at a latertime. Before trying the action again, contact theadministrator of the IBM Tivoli Storage Manager server.
GVM1118E The server is not licensed to performthis action. If a license was purchased,use the command line to register thelicense.
GVM1119E The specified destination is not valid.
Explanation: See message.
Administrator response: Enter a different destinationor update the configuration with a valid destination,and try the action again.
GVM1104E • GVM1119E
Appendix C. Data Protection for VMware vSphere GUI and Data Protection for VMware vCloud GUI messages 203

GVM1120E The specified input file cannot beopened. Verify the file name anddirectory permissions, then try theaction again.
GVM1121E The specified output file cannot beopened. Verify the file name anddirectory permissions, then try theaction again.
GVM1122E An error occurred while writing to thespecified output file.
Explanation: See message.
Administrator response: Check the file system toensure that there is enough space. Check the operatingsystem event or error log for more information.
GVM1123E The specified administrator is notdefined to this server.
Explanation: See message.
Administrator response: Ensure that the administratorname was entered correctly. Before trying the actionagain, contact the administrator of the IBM TivoliStorage Manager server.
GVM1124E The SQL statement could not beprocessed.
Explanation: An exception occurred while processingthe SQL statement. Possible exceptions includedivide-by-zero, math overflow, temporary table storagespace unavailable, and data-type errors.
Administrator response: Correct the SQL query andtry again.
GVM1125E This operation is not allowed with thisobject.
Explanation: See message.
Administrator response: Before trying the actionagain, contact the administrator of the IBM TivoliStorage Manager server.
GVM1126E The table was not found in the serverdatabase.
Explanation: See message.
Administrator response: Before trying the actionagain, contact the administrator of the IBM TivoliStorage Manager server.
GVM1127E The specified file space name is notcompatible with the filespace type.
Explanation: Unicode file space names areincompatible with non-unicode names.
Administrator response: Enter a file space name ofthe correct type and try the action again.
GVM1128E The specified TCP/IP address is notvalid. Verify the TCP/IP address and trythe action again.
GVM1129E No objects were found that match thesearch conditions.
GVM1130E Your administrative ID on this server islocked. An administrator with systemauthority can unlock your ID.
GVM1131E The connection to the server was lostwhile performing the action.
Explanation: See message.
Administrator response: This might indicate anetwork problem. Ensure that the server is running andthe machine is accessible. Retry the action.
GVM1132E Your ID or password is not valid forthis server.
Explanation: See message.
Administrator response: Launch the ConfigurationEditor from the Configuration Tab and enter a valid IDor password for your IBM Tivoli Storage ManagerServer.
GVM1133E Your password expired on this server.
Explanation: Your IBM Tivoli Storage Managerpassword has expired.
Administrator response: Reset your password on theIBM Tivoli Storage Manager Server or contact your IBMTivoli Storage Manager Server administrator to reset it.
GVM1134E The server cannot accept new sessions.If sessions are disabled for this server,issue the ENABLE SESSIONS commandfrom the command line.
GVM1135E A communications failure occurredwhile processing the request. Retry theaction at a later time.
GVM1120E • GVM1135E
204 IBM Tivoli Storage Manager for Virtual Environments: Data Protection for VMware User's Guide

GVM1136E The administrative API encountered aninternal error while processing therequest.
GVM1137E The administrative API cannot processthe command document sent from theserver.
Explanation: The XML command document could notbe parsed. Either the file could not be read, or the fileis corrupted.
Administrator response: Before trying the actionagain, contact the administrator of the IBM TivoliStorage Manager server.
GVM1138E The following command contains one ormore invalid parameters: command.
Explanation: The IBM Tivoli Data Protection forVMware GUI tried to run a command, but the call tothe API contained one or more invalid parameters.
Administrator response: Check the parameters in thecommand. If you entered text in a field, you might findthe error in the parameters and correct it. Viewing theactivity log might help to determine the cause of theproblem. Before trying the action again, contact theadministrator of the IBM Tivoli Storage Manager server.
GVM1139E The administrative API encounteredinvalid parameters while processing therequest.
Explanation: A command was run through theadministrative API, but one of the parameters to anAPI method was invalid.
Administrator response: This is typically an internalerror, but it can be caused by unusual parameters. Forexample, characters such as: < > & can cause theproblem. Check the parameters in the command. If youentered text in a field, you might find the error in theparameters and correct it.
GVM1140E The administrator's authority level onthis server cannot be determined.
Explanation: See message.
Administrator response: Use a different administratorID. Before trying the action again, contact theadministrator of the IBM Tivoli Storage Manager server.
GVM1141E An object with the name that youspecified already exists on the server.Enter a different name.
GVM1142E The version of the server is notsupported by the IBM Tivoli DataProtection for VMware GUI.
GVM1143E An internal error has occurred.
Explanation: The operation failed after encounteringan internal error.
Administrator response: Retry the operation. If thisdoes not work, contact customer support. You might beasked to provide tracing information and informationabout the actions performed before the failure occurred.
GVM1144E The operation failed, please go to thelog for more details.
GVM1145E Wrong format of the end date and time.Please enter the end date and timeformat as yyyyMMddHHmmss.
GVM1146E Sorry, the description of the backup taskwas not created in a file. Please tryagain.
Explanation: On the general page of the backupwizard, you can describe your backup task in general.
GVM1147E The ESXHOST name you entered is toolong. Please change to a shorter one.
GVM1148E Wrong Backup ID. Please try again.
GVM1150E An error occurred when processing thebackup object file. Please try again later.
Explanation: When you click submit in the backupwizard, the object list will be stored in a file. Whenprocessing this file, an error occurred.
GVM1151E No backup object is selected. You mustchoose a source node to backup.
Explanation: To initiated a backup task, you have tochoose an object on the source page of the backupwizard.
GVM1152E Wrong format of the start date and time.Please enter the start date and timeformat as yyyyMMddHHmmss.
GVM1153I Backup task Task Name started, wouldyou like to monitor this task now?
GVM1136E • GVM1153I
Appendix C. Data Protection for VMware vSphere GUI and Data Protection for VMware vCloud GUI messages 205

GVM1154I Delete backup task completedsuccessfully.
GVM1155E Delete backup task failed, please checklog for more detail.
GVM1156I Restore Task Task ID is startedsuccessfully, would you like to monitorthis task now?
GVM1157E Error Or Warning
GVM1158I Mounted backup Item could not berestored.
GVM1159I Result of attach is status ( Task ID: TaskID ), refer to events list to get thedetails.
GVM1160I Result of detach is status ( Task ID: TaskID ), refer to events list to get thedetails.
GVM1161I Command successfully submitted to theIBM Tivoli Storage Manager server.Detail: Server Messages
GVM1162E The command submitted to the IBMTivoli Storage Manager server failed.Error: Error Code Error Messages
Explanation: The cause of the problem is identified inthe message text.
Administrator response: Correct the problem basedon the information that is provided in the message text.Then, try the action again.
GVM1163E No IBM Tivoli Storage Manager serverconnection, please configure the IBMTivoli Storage Manager server in theconfiguration panel.
GVM1164E The selected items can only be underONE datacenter.
GVM1165E Authentication failed. Could not connectto vCenter. Make sure you log in usingthe VMware vSphere client and have avalid session.
GVM1166E Authentication failed. Please log inusing the VMware vSphere client.
GVM1167E The virtual machine VM name exists.Delete the virtual machine first beforerestoring it.
GVM1168E The target virtual machine VM name isrunning. Close the virtual machinebefore restoring virtual disks to it.
GVM1169E Some of selected virtual disks exist intarget virtual machine. Remove thosevirtual disks from target virtual machinebefore restoring to it.
GVM1170E A VMCLI command failed. Error: ErrorMessages
Explanation: The cause of the problem is identified inthe message text.
Administrator response: Correct the problem basedon the information that is provided in the message text.Then, try the action again.
GVM1171E A request submitted to the VMwarevCenter server failed. Error: ErrorMessages
Explanation: The cause of the problem is identified inthe message text.
Administrator response: Correct the problem basedon the information that is provided in the message text.Then, try the action again.
GVM1172E A command submitted to the IBMTivoli Storage Manager server failed.Error: Error Messages
Explanation: The cause of the problem is identified inthe message text.
Administrator response: Correct the problem basedon the information that is provided in the message text.Then, try the action again.
GVM1173E Cannot find the file with format'summary.date.log' in the path: path
GVM1174E Cannot find the IBM Tivoli StorageFlashCopy Manager for VMwareinstallation path using the VMCLIinquire_config command.
GVM1154I • GVM1174E
206 IBM Tivoli Storage Manager for Virtual Environments: Data Protection for VMware User's Guide
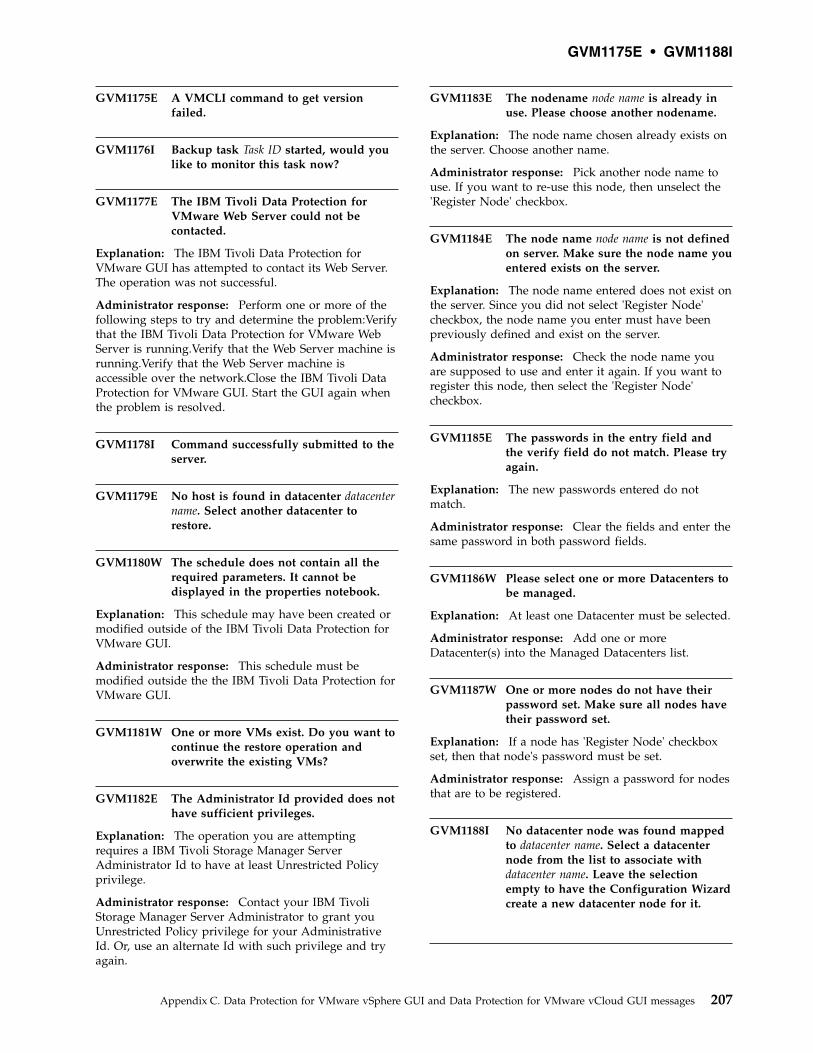
GVM1175E A VMCLI command to get versionfailed.
GVM1176I Backup task Task ID started, would youlike to monitor this task now?
GVM1177E The IBM Tivoli Data Protection forVMware Web Server could not becontacted.
Explanation: The IBM Tivoli Data Protection forVMware GUI has attempted to contact its Web Server.The operation was not successful.
Administrator response: Perform one or more of thefollowing steps to try and determine the problem:Verifythat the IBM Tivoli Data Protection for VMware WebServer is running.Verify that the Web Server machine isrunning.Verify that the Web Server machine isaccessible over the network.Close the IBM Tivoli DataProtection for VMware GUI. Start the GUI again whenthe problem is resolved.
GVM1178I Command successfully submitted to theserver.
GVM1179E No host is found in datacenter datacentername. Select another datacenter torestore.
GVM1180W The schedule does not contain all therequired parameters. It cannot bedisplayed in the properties notebook.
Explanation: This schedule may have been created ormodified outside of the IBM Tivoli Data Protection forVMware GUI.
Administrator response: This schedule must bemodified outside the the IBM Tivoli Data Protection forVMware GUI.
GVM1181W One or more VMs exist. Do you want tocontinue the restore operation andoverwrite the existing VMs?
GVM1182E The Administrator Id provided does nothave sufficient privileges.
Explanation: The operation you are attemptingrequires a IBM Tivoli Storage Manager ServerAdministrator Id to have at least Unrestricted Policyprivilege.
Administrator response: Contact your IBM TivoliStorage Manager Server Administrator to grant youUnrestricted Policy privilege for your AdministrativeId. Or, use an alternate Id with such privilege and tryagain.
GVM1183E The nodename node name is already inuse. Please choose another nodename.
Explanation: The node name chosen already exists onthe server. Choose another name.
Administrator response: Pick another node name touse. If you want to re-use this node, then unselect the'Register Node' checkbox.
GVM1184E The node name node name is not definedon server. Make sure the node name youentered exists on the server.
Explanation: The node name entered does not exist onthe server. Since you did not select 'Register Node'checkbox, the node name you enter must have beenpreviously defined and exist on the server.
Administrator response: Check the node name youare supposed to use and enter it again. If you want toregister this node, then select the 'Register Node'checkbox.
GVM1185E The passwords in the entry field andthe verify field do not match. Please tryagain.
Explanation: The new passwords entered do notmatch.
Administrator response: Clear the fields and enter thesame password in both password fields.
GVM1186W Please select one or more Datacenters tobe managed.
Explanation: At least one Datacenter must be selected.
Administrator response: Add one or moreDatacenter(s) into the Managed Datacenters list.
GVM1187W One or more nodes do not have theirpassword set. Make sure all nodes havetheir password set.
Explanation: If a node has 'Register Node' checkboxset, then that node's password must be set.
Administrator response: Assign a password for nodesthat are to be registered.
GVM1188I No datacenter node was found mappedto datacenter name. Select a datacenternode from the list to associate withdatacenter name. Leave the selectionempty to have the Configuration Wizardcreate a new datacenter node for it.
GVM1175E • GVM1188I
Appendix C. Data Protection for VMware vSphere GUI and Data Protection for VMware vCloud GUI messages 207
GVM1189I Are you sure you want to proceedwithout entering a IBM Tivoli StorageManager Administrative ID? WithoutIBM Tivoli Storage ManagerAdministrative access, the Wizard willnot validate node names or registernodes. Instead, a macro file will begenerated at the end of this Wizard foryou to give to your IBM Tivoli StorageManager Administrator to execute.
GVM1190I This task was skipped because it wasnot necessary or a pre-requisite taskfailed.
GVM1191E There was an error writing to script file:file path.
Explanation: An error was encountered when tryingto write to file at the path indicated.
Administrator response: Try the operation again.
GVM1192I Managed datacenters have changed.Please go to the data mover page toverify or change your current mappings.
GVM1193I No datacenter nodes were found for thevCenter node vCenter node and VMCLInode VMCLI node configuration. TheWizard will generate a default set ofdatacenter nodes for you.
GVM1194E The password entered is not acceptable.Choose another password.
Explanation: IBM Tivoli Storage Manager Server couldnot accept the password chosen. It could be because thepassword did not meet certain password rule(s).
Administrator response: Try with another password.
GVM1195W Unchecking this checkbox means youare supplying a node name that isalready defined on the IBM TivoliStorage Manager Server AND that it ismeant to be used for your configuration.Since this Wizard is proceeding withoutAdministrative access, it cannot verify ifthe node exists or not. You should onlyproceed if you understand what you aredoing.
Explanation: Since you are using the ConfigurationWizard without a IBM Tivoli Storage ManagerAdministrative ID, you should be very careful. Themacro script file generated at the end of running theConfiguration Wizard could contain errors becausevalues are not validated.
Administrator response: We strongly recommend youuse the Configuration Wizard with a proper IBM TivoliStorage Manager Administrative ID.
GVM1196W The IBM Tivoli Storage Manager nodenode has already been identified. If youwant a different name other than thedefault name, edit this field again. Ifyou want to use the same data moverfor multiple Datacenters, please useConfiguration Settings to do this.
Explanation: The node is already being used in thisconfiguration.
Administrator response: Try using another nodename.
GVM1197W The IBM Tivoli Storage Manager nodenode has invalid characters or exceeds 64characters. Choose a different name andedit this field again.
Explanation: The node name is invalid or longer than64 characters.
Administrator response: Try using another nodename.
GVM1198E The password entered is not acceptableon this Server because it containsinvalid characters. The valid charactersare: validCharsString
Explanation: IBM Tivoli Storage Manager Server couldnot accept the password chosen because of invalidcharacters in the password.
Administrator response: Try with another passwordthat only contain valid characters.
GVM1199E The password entered is not acceptableon this Server because of the reasonbelow. Choose another password. Error:message
Explanation: IBM Tivoli Storage Manager Server couldnot accept the password chosen. The reason why thispassword is not valid is given in the message.
Administrator response: Try with another passwordthat meets the rule(s).
GVM1200E Filter has changed, select Apply filterbefore continuing.
Explanation: Filter pattern must be applied after it ischanged.
Administrator response: Click the Apply filter button.
GVM1189I • GVM1200E
208 IBM Tivoli Storage Manager for Virtual Environments: Data Protection for VMware User's Guide

GVM1201E Select at least one item from adatacenter to continue.
Explanation: A host, host cluster, or VM must beselected to do a backup.
Administrator response: Select an item under adatacenter.
GVM1202E Your selections exceed the 512 characterlimit allowed for backups, change yourselection.
Explanation: The number of characters required to listthe selected items exceeds the limit of 512 characters.Also, if hosts have been partially selected, charactersare needed to list the VMs that are excluded from thebackup.
Administrator response: Create multiple backup tasks,with less selected items per task.
GVM1203I Changing the newly added virtualmachines checkbox clears all selectionsof host clusters, hosts, and virtualmachines. Press OK to proceed, orCancel to leave unchanged.
Explanation: The state of the newly added virtualmachines checkbox significantly impacts what isallowed to be selected on the source panel, so selectionsare cleared when the state changes.
Administrator response: Select OK to proceed, orselect Cancel to retain all selections.
GVM1204E Datacenter node datacenter node namedoes not have a TSM node mapped inthe vmcli configuration file.
Explanation: The datacenter node must have acorresponding TSM node listed in the configuration filenamed vmcliprofile.
Administrator response: Correct the problem by goingto the Configuration tab in the GUI and selecting EditConfiguration to update the mapping for thedatacenter. Also resolve any other configuration errorsthat are reported on the Configuration tab.
GVM1205E TSM datacenter node datacenter nodename maps to vCenter datacenter namedatacenter name in the vmcliconfiguration file, but datacenter namedoes not exist in the vCenter.
Explanation: The vCenter datacenter name maps to adatacenter node in the vmcli configuration file namedvmcliprofile, but the data enter name does not exist inthe vCenter.
Administrator response: Correct the problem by goingto the Configuration tab in the GUI and selecting Edit
Configuration to update the mapping for thedatacenter. Also resolve any other configuration errorsthat are reported on the Configuration tab.
GVM1206E You have selected items from multipledatacenters: datacenter list. This is notallowed, all selections must be from onedatacenter.
Explanation: A backup task only supports items fromone datacenter. If this is an existing task, changes in thevCenter configuration after task creation may havecaused this problem.
Administrator response: Check and correct theselections to make sure all selections are under thesame datacenter.
GVM1207E The selected items item list are not foundunder datacenter datacenter name in thevCenter, please review and de-selectthem.
Explanation: Items originally selected are no longerfound under the datacenter associated with the backuptask. This may be caused by changes in the vCenterconfiguration.
Administrator response: Review if the items are nowlocated under a different datacenter. De-select the notfound items, and make new selections under the otherdatacenter or create a new backup task for these items.
GVM1208I The datacenter in the source page haschanged, please reselect the data movernode in the Destination page.
Explanation: When item selection is changed to adifferent datacenter, the valid data movers may change.You are required to select the data mover again on theDestination page.
Administrator response: Reselect the data mover nodein the Destination Page.
GVM1209I Are you sure you want to use node datamover node as a data mover fordatacenter datacenter?
GVM1210I Are you sure you want to use node nodename that is already registered on theTSM server as a data mover fordatacenter datacenter? If so, we will markthe node as such and you will be unableto make any further changes to thenode.
GVM1201E • GVM1210I
Appendix C. Data Protection for VMware vSphere GUI and Data Protection for VMware vCloud GUI messages 209
GVM1211E The password entered is not acceptableon this Server because it is too short.Passwords must have a leastminPasswordLength characters.
Explanation: IBM Tivoli Storage Manager Server couldnot accept the password chosen because it is too short.
Administrator response: Try with another passwordthat is longer than the required minimum length.
GVM1212E Component is downlevel, so its use isdisabled in the GUI. You will only beable to use the GUI for component.
GVM1213E Mismatching IBM Tivoli StorageManager Server entries in the currentsettings is detected. IBM Tivoli StorageManager Server definition used by theGUI: server1 IBM Tivoli StorageManager Server where backups arestored: server2 Click Reset Serverdefinition to clear the IBM TivoliStorage Manager definition and enternew credentials. Or click onReconfigure Environment to launch theConfiguration Wizard to reconfigureyour IBM Tivoli Data Protection forVMware environment.
Explanation: IBM Tivoli Storage Manager detectedmismatching IBM Tivoli Storage Manager Server entriesbetween the vmcliprofile and the current GUI's IBMTivoli Storage Manager Server connection.
Administrator response: Pick one of the two actionsavailable. You may either reset the IBM Tivoli StorageManager Server definition/credentials OR use theConifiguration Wizard to set up a new environment.
GVM1214E The SSL Connection could not be made.The TSM SSL certificate is missing.Check for valid TSM certificate in theTSM-ve-truststore.jks
Explanation: IBM Tivoli Storage Manager Server didnot accept the SSL connection. SSL keystore is not inthe default location or does not contain a TSMcertificate.
Administrator response: Check theTSM-ve-truststore.jks for a valid certificate, ensureTSM-ve-truststore.jks is in the correct default location.
GVM1215E The password entered is not acceptableon this Server because it is too long.Passwords cannot have more thanmaxPasswordLength characters.
Explanation: IBM Tivoli Storage Manager Server couldnot accept the password chosen because it is too long.
Administrator response: Try with another passwordthat is shorter than the allowed maximum length.
GVM1216E The SSL Connection could not be made.The TSM SSL certificate has expired.
Explanation: IBM Tivoli Storage Manager Server didnot accept the SSL connection. TheTSM-ve-truststore.jks has an expired TSM SSLcertificate.
Administrator response: Obtain a new valid TSM SSLcertificate from the TSM server and place it in theTSM-ve-truststore.jks.
GVM1217E The non-SSL connection could not bemade. This IBM Tivoli Storage ManagerAdmin ID requires a TSM SSLconnection.
Explanation: IBM Tivoli Storage Manager Server didnot accept the non-SSL connection. The TSM Serverrequires SSL be used with this Admin ID.
Administrator response: Use SSL with this Admin ID.Ensure that the TSM-ve-truststore.jks with a valid TSMserver SSL certificate is installed in the default location.
GVM1218E Your selections have caused the backuptask definition to require countcharacters, which exceeds the 512character limit. This can be caused by along virtual machine exclude list, whichis the list of all VMs under host(s) thatwere not selected. Either select moreVMs under selected hosts or de-selectthe newly added virtual machinescheckbox.
Explanation: When the newly added virtual machinescheckbox is selected, the resulting backup task must listall unselected VMs for hosts that are partially selected.The backup task definition has a 512 character limit,and the combination of selected items and excludedVMs exceeds this limit.
Administrator response: De-select the newly addedvirtual machines checkbox or create multiple backuptasks with less selected items per task.
GVM1219E Your selection of virtual machines hascaused the backup task definition torequire count characters, which exceedsthe 512 character limit. Either createmultiple backup tasks with less virtualmachines per task, or select the newlyadded virtual machines checkbox andchoose entire hosts with no more than afew unselected VMs.
Explanation: The backup task definition has a 512character limit, and the total number of characters for
GVM1211E • GVM1219E
210 IBM Tivoli Storage Manager for Virtual Environments: Data Protection for VMware User's Guide

the selected items exceeds this limit.
Administrator response: Create multiple backup taskswith less selected virtual machines per task, or selectthe newly added virtual machines checkbox and thenselect hosts instead of individual virtual machines (youcan de-select a small number of virtual machines perhost if desired.)
GVM1220E There is no data mover node proxyrelationship for datacenter nodedatacenter node name. Review the datamover relationships on theConfiguration tab or the IBM TivoliStorage Manager server.
GVM1221E There is no datacenter node defined fordatacenter datacenter name. Review thenode configuration on the Configurationtab.
GVM1222I Node name name is currently locked. TheConfiguration Wizard will attempt tounlock this node if you choose tocontinue.
GVM1223E A connection with the IBM TivoliStorage Manager server (Address:Port)could not be established. Please verifythe server address and Server or Adminport are correct.
Explanation: The server might not be running orspecified admin port or server port may be incorrect.
Administrator response: Check the networkconnection with the IBM Tivoli Storage Manager servermachine. Verify that the server is running and try tolog in again. Also verify server port and admin portinformation is correct.
GVM1224E The vCenter user name or password isnot valid. Please try again.
Explanation: The vCenter user name or password isnot valid.
Administrator response: Enter the user name orpassword again.
GVM1225E Permission to perform this operationwas denied. Please try with other username.
Explanation: The vCenter user name is not valid.
Administrator response: Enter another user name.
GVM1250I A IBM Tivoli Storage ManagerAdministrative ID and password iscurrently not set. The absence of thisinformation limits the actions that youcan take in the GUI. Click OK to betaken to the configuration settings paneland enter an ID and password. ClickCancel to continue without using an IDand password.
GVM1251W You have chosen an Administrative IDthat has less authority than the currentID. Are you sure you want change thisID? Current IBM Tivoli StorageManager Authority Level: Current LevelNew IBM Tivoli Storage ManagerAuthority Level: New Level Current Role:Current Role New Role: New Role ClickOK to accept these changes, or Cancel toexit without change.
GVM1252I Here are the current and new roles forIBM Tivoli Storage Manager AdminIDs. Review and confirm these changes.Current IBM Tivoli Storage ManagerAuthority Level: Current Level New IBMTivoli Storage Manager Authority Level:New Level Current Role: Current RoleNew Role: New Role Click OK to acceptthese changes, or Cancel to exit withoutchange.
GVM1253I ID has been changed without save.Previous ID will be loaded.
GVM1254I Your current UI role does not allow youto unlock or reset the VMCLI node. Inorder to make changes, go to the ServerCredentials page and enter a TSMAdmin ID and password that has thenecessary priviliges for making VMCLInode updates. Select OK to save thesecredentials, then re-open theConfiguration Settings notebook andyou can make VMCLI node updates.
GVM1255I Your current UI role does not allow youvisit other panels. Select OK to savethese credentials, then re-open theConfiguration Settings notebook andyou can make other updates.
GVM1256I There are non-English characterscontained in one or more datacenters.The domain will be adjustedaccordingly.
GVM1220E • GVM1256I
Appendix C. Data Protection for VMware vSphere GUI and Data Protection for VMware vCloud GUI messages 211

GVM1257E Datacenter DataCenter Name cannot beadded to the domain because it containsnon-English characters.
Explanation: Datacenters that contain non-Englishcharacters are not currently supported. Therefore, theycannot be added to the domain.
Administrator response: Datacenter will not be addedto the domain.
GVM1258W Node Node Name already exists on theserver. Attempt to rename node to NewNode Name?
Explanation: Node name is already registered on theIBM Tivoli Storage Manager server.
Administrator response: Click Yes to attempt torename node. Click No to make other changes.Example: unclick register node, rename node manually.
GVM1259W The following virtual machines for hostHost Name have unsupported charactersin their name: Invalid Virtual MachineNames. Therefore, these virtual machinesare not backed up, regardless of yourselections. You must rename thesevirtual machines to back them up.
Explanation: The following characters are notsupported in virtual machine names: ' : ; * ? , < > / \ |
Administrator response: Rename the identified virtualmachines to remove unsupported characters from theirname.
GVM1260E The following host clusters haveunsupported characters in their name:Invalid Host Clusters. These host clusterscannot be selected for backup becausethey contain unsupported characters.Rename these host clusters or removethem from selection.
Explanation: The following characters are notsupported in host cluster names: ' : ; * ? , < > / \ |
Administrator response: Rename the identified hostclusters to remove unsupported characters from theirname. Or, remove them from your backup selection.
GVM1261E Your selections created an empty virtualmachine list for backup. This issuemight occur because all the selectedvirtual machines contain unsupportedcharacters in their names. Make surethat you selected virtual machines thatdo not contain unsupported charactersin their names.
Explanation: The following characters are notsupported in virtual machine names: ' : ; * ? , < > / \ |
. Virtual machine names that contain these charactersare automatically removed from the backup taskdefinition. This removal can cause an empty taskdefinition.
Administrator response: Rename the identified virtualmachines to remove unsupported characters from theirname. Or, select different virtual machines to back up.
GVM1262E The filter pattern cannot be appliedbecause it contains unsupportedcharacters. Change the pattern to removethe unsupported characters, then applythe filter again.
Explanation: The following characters are notsupported in filter patern: ' : ; < > / \ |
Administrator response: Change the filter pattern toremove unsupported characters, then apply the filteragain.
GVM1263E A temporary datastore is not available toperform this operation. This temporarydatastore is required in addition to therestore destination datastore.
Explanation: A datastore is required for use as atemporary restore destination for this operation. Thistemporary datastore must be from the same ESX hostas the datastore that is used for the actual restoredestination. However, the temporary datastore cannotbe the same datastore that is used for the actual restoredestination.
Administrator response: Add a datastore to thedestination ESX host. Then, select this datastore as thetemporary restore destination.
GVM1264E There was an error creating opt file: filename.
Explanation: An error was encountered when tryingto write to file.
Administrator response: Try the operation again.
GVM1265E Creating service has failed. No serviceswere created for data mover node nodename.
Explanation: An error was encountered when tryingto create TSM service for data mover node specified.
Administrator response: Check environment andensure user has proper rights before trying operationagain.
GVM1257E • GVM1265E
212 IBM Tivoli Storage Manager for Virtual Environments: Data Protection for VMware User's Guide

GVM1266E Creating firewall for service has failed.Please manually add firewall rules forservices installed.
Explanation: An error has occured when attemptingto add firewall rule for specified executable.
Administrator response: Check environment andensure user has proper rights before trying operationagain or manually add rule to firewall for TSM clientacceptor , TSM Agent and TSM Scheduler.
GVM1267W Local services were setup successfullybut were unable to verify firewall accessfor these executable files: agentExecadExe schedExe If any problems areexperienced related to local services,verify that firewall access is availablefor these executable files.
Explanation: Microsoft firewall may be disabled oranother firewall may be in place.
Administrator response: Check environment and addrules manually if needed for the TSM client acceptor ,TSM Agent, and TSM Scheduler.
GVM1268E Data mover node node name wassuccessfully registered on the server,however no services were created.
Explanation: An error has occured when trying tocreate services for specified node.
Administrator response: Check environment andensure user has proper rights before trying operationagain.
GVM1269E Reason Code reason This error wasreported by the TSM data mover. Nofurther description is available. Formore information, review the error logerrorLog on the data mover host machinehostname at address 'address'.
Explanation: The data mover encountered an errorwith the reported reason code.
Administrator response: Log into the host machinespecified and view the error log for more information.
GVM1270W Warning: If this task is canceled, allcreated data on the virtual machines thatare not completely restored is lost andthe virtual machines are removed fromthe ESX host. Are you sure that youwant to cancel this task?
Explanation: A cancel task command is submitted.Refresh to see the cancel progress.
Administrator response: Cancel the selected task orallow the task to continue processing.
GVM1271W Scan schedule schedule name wassuccessfully defined on the server andassociated with node node name, howeverno services were created to run theschedule. Detail: error
Explanation: An error was encountered in one of thesteps below when trying to create IBM Tivoli StorageManager services for the VMCLI node. Create theoption file for the VMCLI node. Set the password forthe VMCLI node to a temporary password for the nextstep. Run the IBM Tivoli Storage Manager ClientService Configuration Utility to create the services. Runthe IBM Tivoli Storage Manager Client ServiceConfiguration Utility to start the client acceptor service.Reset the VMCLI node password.
Administrator response: Delete the schedule andcreate the schedule again to automatically configure theservices or manually configure the services. Checkenvironment and ensure user has proper rights beforetrying operation again.
GVM1272W Scan schedule schedule name wassuccessfully defined on the server andassociated with node node name. IBMTivoli Storage Manager services werecreated to run the schedule. However,reseting the VMCLI node passwordfailed. Detail: error
Explanation: An error was encountered while tryingto reset the VMCLI node password.
Administrator response: Use the ConfigurationSettings to reset the VMCLI node password.
GVM1273W A dismount operation removes theiSCSI disks but does not remove theVM or its data. Before proceeding withdismount, make sure the followingconditions exist: -The mounted iSCSIdisk is recovered. -Storage vMotioncompleted migrating the VM to a localdatastore. If the recovery operationfailed and you want to delete the VM,its data, and dismount any iSCSItargets, click Dismount and Delete.Dismount and Delete is a destructiveaction and deletes the VM and its data,regardless of the success or failure ofthe instant restore operation. Based onthis information, do you want dismountthe VMs that are selected for instantrestore?
Explanation: A dismount operation removes the iSCSIdisks but does not remove the VM or its data. Beforeproceeding with dismount, make sure the followingconditions exist: The mounted iSCSI disk isrecovered,Storage vMotion completed migrating theVM to a local datastore.If the recovery operation failed
GVM1266E • GVM1273W
Appendix C. Data Protection for VMware vSphere GUI and Data Protection for VMware vCloud GUI messages 213

and you want to delete the VM, its data, and dismountany iSCSI targets, click Dismount and Delete. Dismountand Delete is a destructive action and deletes the VMand its data, regardless of the success or failure of theinstant restore operation.
Administrator response: Click 'Dismount' to dismountthe virtual machines that are selected for the instantrestore operation. Click 'Dismount and Delete' todismount the virtual machines that are selected for theinstant restore operation, remove them from the ESXhost, and verify that Storage vMotion is not running.
GVM1274W During a dismount operation, all createddata on the virtual machines is lost andthe virtual machines are removed fromthe ESX host. Dismount the selectedInstant Access virtual machines?
Explanation: All created data on the virtual machinesis lost and the virtual machines are removed from theESX host.
Administrator response: Click 'Dismount' to dismount(cleanup) the instant access virtual machines.
GVM1275E Selecting multiple virtual machines withdifferent restore types is not allowed.
Explanation: Restoring multiple virtual machines withdifferent restore types is not supported.
Administrator response: Select virtual machines thathave the same restore type.
GVM1276I Cleanup Task Task ID is startedsuccessfully, would you like to monitorthis task now?
GVM1277W Are you sure that you want to cancelthis task?
Explanation: A cancel task command is submitted.Refresh to see the cancel progress.
Administrator response: Cancel the selected task orallow the task to continue processing.
GVM1278I Your current UI role does not allow youto view backup property notebook.
GVM1279I Your current UI role does not allow youto edit nodes. In order to make changes,open the Configuration Settingsnotebook and go to the ServerCredentials page and enter a TSMAdmin ID and password that has thenecessary priviliges for making nodeupdates.
GVM1280E Reason Code reason This error wasreported by the TSM data mover. Nofurther description is available. Formore information, review the error log'dsmerror.log' on the data mover hostmachine.
Explanation: The data mover encountered an errorwith the reported reason code.
Administrator response: Log into the host machinewhere data mover resides and view the error log formore information.
GVM1281W Login information for vCenter needed.
Explanation: In order to install new local dm services,vCenter credentials are needed.
Administrator response: Enter vCenter credentials inorder to continue.
GVM1282E You do not have the privileges requiredto access the GUI.
Explanation: In order to access GUI content, the usermust have the necessary vSphere privileges.
Administrator response: Add the required privilegesfor the user.
GVM1283E You do not have the permissionsrequired to access the GUI.
Explanation: In order to access GUI content, the usermust have the necessary vSphere permissions.
Administrator response: Add the requiredpermissions for the user.
GVM1284I A new data center (name) was detected.Go to the Data Mover Nodes page toadd a data center node for it.
GVM1285W The following shares and mounts willbe removed and that data in there willbe no longer accessible to the end user.Dismount the selected shares andmounts?mounts
Explanation: The selected shares and mounts will beremoved.
Administrator response: Click 'Dismount' to dismount(cleanup) the mounts and shares.
GVM1286I Dismount Task Task ID is startedsuccessfully, would you like to monitorthis task now?
GVM1274W • GVM1286I
214 IBM Tivoli Storage Manager for Virtual Environments: Data Protection for VMware User's Guide

GVM1287W An error was encountered during thedelete operation for option file: file name.
Explanation: An error was encountered during thedelete operation. For example, this error might becaused by insufficient user permissions or the file nolonger exists.
Administrator response: Make sure the option filewas deleted. If it still exists, delete this file manually.
GVM1288W The remove operation for IBM TivoliStorage Manager service: service failed.
Explanation: An error prevented the IBM TivoliStorage Manager service from being removed.
Administrator response: Check the environment andensure that the user has sufficient rights to run thisoperation. Then, try the operation again.
GVM1289E Fail to start iSCSI for mount proxy nodenode name.
Explanation: An error was encountered when tryingto start iSCSI service for mount proxy node specified.
Administrator response: Start the iSCSI servicemanually.
GVM1500E You have selected organization VDCsfrom more than one provider VDC. Forbackup tasks, all selected organizationVDCs must belong to the same providerVDC. Change your selections and retrythe operation.
GVM1501E The following vcloud resources(vApp,organization, organization vDC) areinvalid for selection because they haveunsupported characters in their name:reslist
Explanation: In order to create backup tasks, vcloudresources names must not contain any of the followingcharacters: ' : ; * ? , < > / \ | .
Administrator response: Rename the identifiedresources to remove unsupported characters from theirname. Or, remove them from your backup selection.
GVM1502E You have selected the vApp from adifferent organization VDC. For restoretasks, all selected vApps must belong tothe same organization VDC. Changeyour selections and retry the operation.
GVM1503E The vApp vApp name exists. Choose adifferent vApp name to be the target ofthe restore.
GVM2001E Your selection of items to back up hascaused the backup task definition torequire count characters, which exceedsthe 512 character limit. Please createmultiple backup tasks with less itemsper task.
Explanation: The backup task definition has a 512character limit, and the total number of characters forthe selected items exceeds this limit.
Administrator response: Create multiple backup taskswith less items per task
GVM2002E The Organization VDC node can not beincluded because its Provider VDC nodeis not included. Please select the includecheckbox for the Provider VDC nodefirst, and try again.
GVM2004E The nodename node name is already inuse. Please uncheck the register nodecheckbox or choose another nodename.
Explanation: The node name chosen already exists onthe server. Either choose to not register it or useanother name.
Administrator response: Pick another node name touse. If you want to re-use this existing node, thenunselect the 'Register Node' checkbox.
GVM2005W Are you certain that you want to removethe data mover node node name?
GVM2006W The IBM Tivoli Storage Manager nodeTSM node has already been used. If youwant a different name other than thedefault name, edit this field again.
Explanation: The node is already being used in thisconfiguration.
Administrator response: Try using another nodename.
GVM2007E The Organization VDC node can not beregistered because its provider VDC isnot valid.
GVM2008E The Organization VDC name OVDCname is invalid. For information aboutsupported characters, refer to the TSMAdministrator's Reference publication sectionabout naming IBM Tivoli Storage Managerobjects.
GVM1287W • GVM2008E
Appendix C. Data Protection for VMware vSphere GUI and Data Protection for VMware vCloud GUI messages 215

GVM2009I This task was skipped because it wasnot necessary. No further action isrequired.
GVM2010W Internet explorer version version is notsupported, please use a supportedversion or another browser. You may seevisual and functional issues if youcontinue to use this unsupportedbrowser.
Explanation: Due to differences in Internet Explorerimplementation by version number, only specificversions are supported. The use of astandards-compliant browser such as Mozilla Firefox isrecommended. However, if you are accessing the GUIas a plug-in from the vSphere Client, you are limited tousing the Internet Explorer browser installed on thesystem where the vSphere client is installed.
Administrator response: Use a supported version ofInternet Explorer or another browser. Supportedbrowser versions are documented in the online help.
GVM2011W The browser version is not supported,please use a supported browser. Youmay see visual and functional issues ifyou continue to use this unsupportedbrowser.
Explanation: Due to differences in browserimplementations, only specific versions are supported.
Administrator response: Use a supported browser.Supported browser versions are documented in theonline help.
GVM2012E At least one virtual machine that youhave selected for restore to alternatelocation already exists in the Datacenter,so restore is not allowed. To restore toan alternate location when thedestination virtual machine alreadyexists, select only one virtual machinefor the restore operation and choose anew name for the destination virtualmachine. Duplicated VM: VM name
Explanation: When restoring to an alternate location,the destination virtual machine must not already exist.
Administrator response: Use the single virtualmachine restore wizard so that you can rename thedestination virtual machine.
GVM2012W Target datastore not found, select adifferent destination datastore.
GVM2013E The user User Name is not authorized toany managed datacenters. Contact yoursystem administrator.
GVM2014E You do not have required permissions toview virtual machines for this Event.
GVM2015E You do not have required permissions toview restore points for this virtualmachine.
GVM2016E You do not have required permissions toview some attached points.
GVM2017E You do not have required permissions toview restore points for this datastore.
GVM2018E You do not have required permissions todetach for the restore point.
GVM2019E An error occurred processing userpermissions. Contact your systemadministrator.
GVM2020I Some datacenters are not shown due topermissions requirements.
GVM2021E You do not have permissions to cancelthis task.
GVM2022I The task is still in the starting state,please refresh the task and try thecancel again.
GVM2025E An error occurred while writing to theflrConfig.props configuration file.
Explanation: The flrConfig.props file containsconfiguration options for file level restore processing.Possible reasons for this error include the followingsituations: The flrConfig.props file is not in the IBMTivoli Data Protection for VMware installationdirectory. The flrConfig.props file is write-protected.
Administrator response: Verify that the file exists inthe IBM Tivoli Data Protection for VMware installationdirectory and that the file is not write-protected.
GVM2026E The local mount proxy node pair cannotbe removed while the file level restorefeature is enabled.
Explanation: File level restore processing requires alocal mount proxy node.
Administrator response: Disable the file level restore
GVM2009I • GVM2026E
216 IBM Tivoli Storage Manager for Virtual Environments: Data Protection for VMware User's Guide

feature. Then, choose whether you want to remove themount proxy node pair.
GVM2027E An error occurred while reading theflrConfig.props configuration file.
Explanation: The flrConfig.props file containsconfiguration options for file level restore processing.The file cannot be read. A common reason for this erroris that the file is read-protected.
Administrator response: Verify that the file is notread-protected.
GVM2030W The specified user does not havesufficient permissions to access thefollowing data centers: list of data centers.Click OK to continue or cancel to enteranother user name.
Explanation: The user credentials that you use toauthenticate to the vCenter Server must have thecorrect privileges to access the VMware datacenters.
Administrator response: Verify that you have thecorrect privileges. See the vCenter Server credentialsonline help page to see the privileges that are required.
GVM2031I The specified user has sufficientpermissions to access the following datacenters: list of data centers. Click OK tocontinue or cancel to enter another username.
Explanation: The user credentials that you use toauthenticate to the vCenter Server must have thecorrect privileges to access the VMware datacenters.
Administrator response: Verify that you have thecorrect privileges. See the vCenter Server credentialsonline help page to see the privileges that are required.
GVM2032W The specified user does not havesufficient permissions to access any datacenter. Click OK to continue or cancel toenter another user name.
Explanation: The user credentials that you use toauthenticate to the vCenter Server must have thecorrect privileges to access the VMware datacenters.
Administrator response: Verify that you have thecorrect privileges. See the vCenter Server credentialsonline help page to see the privileges that are required.
GVM2132E An error occurred when connecting tothe IBM Tivoli Storage Manager serverserver name. Either your admin ID orpassword is not valid, or the TCPPORTnumber was entered in the admin portfield instead of the TCPADMINPORTor SSLTCPADMINPORT number.
Explanation: See message.
Administrator response: Launch the ConfigurationEditor from the Configuration Tab and enter a valid IDor password for your IBM Tivoli Storage ManagerServer.
GVM2133E The password for the administrativeuser ID admin id expired on the IBMTivoli Storage Manager server servername.
Explanation: Your IBM Tivoli Storage Manageradministrative password has expired.
Administrator response: Contact your IBM TivoliStorage Manager Server administrator to reset thepassword for the administrative user ID.
GVM2134E The IBM Tivoli Storage Manager serverport number tcp port is incorrect. Theexpected value for this port is tcp portfrom query, which is the value of theTCPPORT option. Please enter theexpected value using the configurationwizard.
Explanation: The value entered in the IBM TivoliStorage Manager server port field must match theTCPPORT option on the IBM Tivoli Storage Managerserver.
Administrator response: Use the configuration wizardto change the IBM Tivoli Storage Manager server portfield to the correct value.
GVM2135E This schedule contains an unsupportedoption so it cannot be edited. Thissituation can occur when the schedulewas created or updated by a tool otherthan the Data Protection for VMwareGUI.
GVM2136E An error occurred while processing aVMCLI command, and the GUI sessionwill be closed. Log in and try theoperation again. If the problem persists,contact your administrator.
GVM3000E Windows domain credentials areincorrect. Open the ConfigurationEditor, go to File Restore page, and tryentering the credentials again.
Explanation: The Windows domain credentials thatwas entered on the File Restore page in theConfiguration Editor is incorrect.
Administrator response: Run the Configuration Editoragain and re-enter the correct Windows domaincredentials.
GVM2027E • GVM3000E
Appendix C. Data Protection for VMware vSphere GUI and Data Protection for VMware vCloud GUI messages 217

GVM4001E This action cannot be peformed becausethere is not a VMCLI node defined. Toresolve, use the configuration wizard todefine the VMCLI node and completethe other steps in the wizard.
GVM4002E This action cannot be peformed becausethere is not a vCloud Director nodedefined. To resolve, use theconfiguration wizard to define thevCloud Director node and complete theother steps in the wizard.
GVM4003E This action cannot be peformed becausethe connection to the TSM Server is notoperational. Correct the connectionproblem, and retry this action.
GVM4004E This task requires use of the providerVDC node provider VDC node name fromTSM, but this node is not mapped to aknown provider VDC in the vCloudDirector. This task may not be updated,instead create a new task withoutdependence on this provider VDC.
GVM4005E The Organization VDCs listed belowwere selected but are not configured tothe TSM server. You must remove theseselections in order to execute this action.org VDC name
GVM4006I Your current UI role does not allow youto view node details.
GVM4001E • GVM4006I
218 IBM Tivoli Storage Manager for Virtual Environments: Data Protection for VMware User's Guide

Appendix D. Tivoli Storage Manager recovery agent messages
This information contains explanations and suggested actions for messages issuedby the Tivoli Storage Manager recovery agent.
FBP0001E The Recovery Agent is already running.
Explanation: This issue is encountered when multipleusers are logged on to the system and attempting torun the Recovery Agent. Only one active RecoveryAgent instance is supported.
System action: The Recovery Agent was not started.
User response: To resolve this issue, close the currentRecovery Agent instance or start the Recovery Agenton a different system.
FBP0002E The Tivoli Storage Manager serverconnection cannot be removed.
Explanation: There are currently active instant restoresessions or mounted volumes that require theconnection to the Tivoli Storage Manager server. As aresult, the existing connection cannot be removed.
System action: The remove connection operation iscanceled.
User response: To resolve this issue, wait until theinstant restore sessions complete. Or, forcibly end theinstant restore sessions or mounted volumes and thendisconnect the Tivoli Storage Manager server.
FBP0003E 'Authentication node' and 'Target node'cannot specify the same node.
Explanation: Three node authentication methods areavailable to access snapshots on the Tivoli StorageManager server: 'Asnodename' authenticates with aproxy node, 'Fromnode' authenticates with a node thatcontains limited access, and 'Direct' authenticatesdirectly. When 'Fromnode' or 'Asnodename' areselected, a target node must be specified. The targetnode is the Tivoli Storage Manager node where thevirtual machine backups are located.
System action: The system waits for a user response.
User response: Specify the correct 'Authenticationnode' and 'Target node'. See information about the nodeauthentication methods in the product documentation.
FBP0004E Recovery Agent failed to mount.
Explanation: The mount operation on the WindowsRecovery Agent proxy host failed.
System action: The operation is canceled.
User response: Check the Windows Recovery Agentproxy host logs for information about why the mountoperation failed.
FBP0005E RAID mirror status was not obtained.
Explanation: During the instant restore session, theRecovery Agent failed to obtain the status of themdadm mirror device.
System action: An attempt to recover the instantrestore session is being made.
User response: Check the instant restore status in theRecovery Agent GUI and the Recovery Agent enginelogs for solutions to this problem.
FBP0006E Incorrect parameters were specifiedduring the Recovery Agent mountoperation.
Explanation: The mount operation on the WindowsRecovery Agent proxy host failed because incorrectparameters were specified.
System action: The operation is canceled.
User response: Check the Windows Recovery Agentproxy host logs for information about why the mountoperation failed.
FBP0007E The selected snapshot is alreadymounted.
Explanation: The Windows Recovery Agent proxyhost identified the selected snapshot as alreadymounted to the requested target.
System action: None.
User response: The instant restore session or mountedsnapshot is available for use.
FBP0010E Failed to dismount.
Explanation: The dismount operation on the WindowsRecovery Agent proxy host failed.
System action: The operation is canceled.
User response: Check the Windows Recovery Agentproxy host logs for information about why thedismount operation failed.
FBP0011E The node data was not retrieved.
© Copyright IBM Corp. 2011, 2017 219

Explanation: The Windows Recovery Agent proxyhost failed to retrieve the node data when querying theTivoli Storage Manager server.
System action: The operation is canceled.
User response: Check the Windows Recovery Agentproxy host logs for information about why thequerying operation failed.
FBP0012E Tivoli Storage Manager server snapshotswere not found.
Explanation: The Windows Recovery Agent proxyhost failed to expose the snapshots on the specifiedTivoli Storage Manger server.
System action: The operation is canceled.
User response: Verify that the correct Tivoli StorageManager server and node that own the snapshots arespecified.
FBP0013E The snapshot was not found. Click'Refresh'.
Explanation: The selected snapshot was not found onthe Tivoli Storage Manager server.
System action: The operation is canceled.
User response: Click Refresh in the Recovery AgentGUI to load the current snapshots on the Tivoli StorageManager server.
FBP0016E Invalid parameters were specified.
Explanation: The mount operation on the WindowsRecovery Agent proxy host failed.
System action: The operation is canceled.
User response: Check the Windows Recovery Agentproxy host logs for information about why the mountoperation failed.
FBP0017E The mdadm version is not supported.
Explanation: The installed version of the mdadmutility on the Linux machine is not supported.
System action: The operation is canceled.
User response: Upgrade the mdadm utility on yourRecovery Agent Linux machine to a supported version.For current software requirements, see technote1505139.
FBP0018E The mdadm utility was not found.
Explanation: The mdadm utility is not installed on theLinux machine.
System action: The operation is canceled.
User response: Install the mdadm utility on your
Recovery Agent Linux machine. For current softwarerequirements, see technote 1505139.
FBP0019E The iscsiadm version is not supported.
Explanation: The installed version of the iscsiadmutility (for Recovery Agent on RedHat Linux machines)or open-iscsi (for Recovery Agent on SUSE Linuxmachines) is not supported.
System action: The operation is canceled.
User response: Upgrade the iscsiadm or open-iscsiutility on your Recovery Agent Linux machine to asupported version. For current software requirements,see technote 1505139.
FBP0020E The iscsiadm utility was not found.
Explanation: The iscsiadm utility is not installed onthe Linux machine.
System action: The operation is canceled.
User response: Install the iscsiadm utility on yourRecovery Agent Linux machine. For current softwarerequirements, see technote 1505139.
FBP0021E The lsscsi version is not supported.
Explanation: The installed version of the lsscsi utilityis not supported.
System action: The operation is canceled.
User response: Upgrade the lsscsi utility on yourRecovery Agent Linux machine to a supported version.For current software requirements, see technote1505139.
FBP0022E The lsscsi utility was not found.
Explanation: The lsscsi utility is not installed on theLinux machine.
System action: The operation is canceled.
User response: Install the lsscsi utility on yourRecovery Agent Linux machine. For current softwarerequirements, see technote 1505139.
FBP0023E The Secure Shell (SSH) version is notsupported.
Explanation: The installed version of the SSH client isnot supported.
System action: The operation is canceled.
User response: Upgrade the SSH client on yourRecovery Agent Linux machine to a supported version.For current software requirements, see technote1505139.
FBP0012E • FBP0023E
220 IBM Tivoli Storage Manager for Virtual Environments: Data Protection for VMware User's Guide

FBP0024E The Secure Shell (SSH) was not found.
Explanation: The SSH client is not installed on theLinux machine.
System action: The operation is canceled.
User response: Install the SSH client on yourRecovery Agent Linux machine. For current softwarerequirements, see technote 1505139.
FBP0025E Not all instant restore sessions werestopped.
Explanation: The Recovery Agent was unable to stopall instant restore sessions.
System action: Some of the instant restore sessions arestill visible in the Recovery Agent 'Instant Restore'panel.
User response: Try stopping the instant restoresessions one after the other. If the problem persists,check the Linux Recovery Agent engine log file. Thisfile is usually located at /opt/tivoli/tsm/TDPVMWare/mount/engine/var/TSM4VE_IR_LOG_0040.sf. Also check the WindowsRecovery Agent proxy host logs for any errors relatedto this issue.
FBP0026E Failed to read instant restore session.
Explanation: The Recovery Agent was unable to readthe instant restore status file.
System action: Information about the instant restore isnot available.
User response: Try restarting the instant restoresession. If the problem persists, check the Linux systemlog (usually located at /var/log/messages) for anyerrors related to this issue.
FBP0027E Mount session already exists.
Explanation: The selected snapshot is alreadymounted to the requested target.
System action: None.
User response: The instant restore session or mountedsnapshot is available for use.
FBP0028E Failed to create the mount sessionsdirectory.
Explanation: The Recovery Agent was unable to createthe directory for the mount operation.
System action: The operation is canceled.
User response: Try the mount operation again. If theproblem persists, check the Linux system log (usuallylocated at /var/log/messages) for any errors related tothis issue.
FBP0029E Failed to encrypt node credentials.
Explanation: The Recovery Agent was unable toencrypt the node credentials.
System action: The operation is canceled.
User response: Try the operation again. If the problempersists, check the Linux system log (usually located at/var/log/messages) for any errors related to this issue.
FBP0030E Failed to decrypt node credentials.
Explanation: The Recovery Agent was unable todecrypt the node credentials.
System action: The operation is canceled.
User response: Try the operation again. If the problempersists, check the Linux system log (usually located at/var/log/messages) for any errors related to this issue.
FBP0031E Failed to remove mount session.
Explanation: The Recovery agent was unable to deletethe mount status file.
System action: The mounted snapshot remain in theRecovery Agent 'Mounted Volumes' panel.
User response: Try unmounting the mountedsnapshot again. If the problem persists, check the LinuxRecovery Agent engine log file. This file is usuallylocated at /opt/tivoli/tsm/TDPVMWare/mount/engine/var/TSM4VE_IR_LOG_0040.sf for moreinformation. Also check the Linux system log (usuallylocated at /var/log/messages) for any errors related tothis issue.
FBP0032E Instant restore session already exists.
Explanation: A similar instant restore session alreadyexists or a similar instant restore status file exists.
System action: The new instant restore session iscanceled.
User response: Check the Linux Recovery Agentengine log file for more information. This file is usuallylocated at /opt/tivoli/tsm/TDPVMWare/mount/engine/var/TSM4VE_IR_LOG_0040.sf.
FBP0033E Failed to create the instant restoresessions directory.
Explanation: The Recovery Agent was unable to createthe directory for the instant restore operation.
System action: The instant restore operation iscanceled.
User response: Try the instant restore operation again.If the problem persists, check the Linux system log(usually located at /var/log/messages) for any errorsrelated to this issue.
FBP0024E • FBP0033E
Appendix D. Tivoli Storage Manager recovery agent messages 221

FBP0034E Failed to remove the instant restoresession.
Explanation: The Recovery Agent was unable todelete the instant restore status file.
System action: The instant restore session remains inthe Recovery Agent 'Instant Restore' panel.
User response: Try stopping the instant restore sessionagain. If the problem persists, check the LinuxRecovery Agent engine log file. This file is usuallylocated at /opt/tivoli/tsm/TDPVMWare/mount/engine/var/TSM4VE_IR_LOG_0040.sf for moreinformation. Also check the Linux system log (usuallylocated at /var/log/messages) for any errors related tothis issue.
FBP0035E Failed to read from the configurationfile that is used for mount and instantrestore operations.
Explanation: The Recovery Agent was unable to readthe configuration file.
System action: Information about the mount or instantrestore is not available.
User response: Try the operation again. If the problempersists check the Linux system log (usually located at/var/log/messages) for any errors related to this issue.
FBP0036E Failed to write to the configuration filethat is used for mount and instantrestore operations.
Explanation: The Recovery Agent was unable to writeto the configuration file.
System action: Information about the mount or instantrestore is not available.
User response: Try the operation again. If the problempersists, check the Linux system log (usually located at/var/log/messages) for any errors related to this issue.
FBP0037E Failed to read from the configurationfile section that is used for mount andinstant restore operations.
Explanation: The Recovery Agent was unable to readthe configuration file.
System action: Information about the mount or instantrestore is not available.
User response: Try the operation again. If the problempersists, check the Linux system log (usually located at/var/log/messages) for any errors related to this issue.
FBP0038E Failed to write to the configuration filesection that is used for mount andinstant restore operations.
Explanation: The Recovery Agent was unable to writeto the configuration file.
System action: Information about the mount or instantrestore is not available.
User response: Try the operation again. If the problempersists, check the Linux system log (usually located at/var/log/messages) for any errors related to this issue.
FBP0039E Failed to unmount. Device is busy.
Explanation: The Recovery Agent was not able tounmount the file system of the selected mountedsnapshot because the file system is in use.
System action: The unmount operation is canceled.
User response: Close any application that might beaccessing this volume. Then, try the operation again. Ifthe problem persists, check the Linux system log(usually located at /var/log/messages) for any errorsrelated to this issue.
FBP0040E Not all mount sessions wereunmounted.
Explanation: The Recovery Agent did not unmount allmounted snapshots.
System action: Some of the mounted snapshotssessions are still visible in the Recovery Agent'Mounted Volumes' panel.
User response: Try to unmount the mountedsnapshots one after the other. If the problem persistscheck the Linux Recovery Agent engine log file. Thisfile is usually located at /opt/tivoli/tsm/TDPVMWare/mount/engine/var/TSM4VE_IR_LOG_0040.sf.
FBP0041E Failed to retrieve data from theRecovery Agent CLI.
Explanation: The Recovery Agent was unable to readthe Recovery Agent CLI (TDPVMWareShell) output file.
System action: The operation is canceled.
User response: Try the operation again. If the problempersists, check the Linux system log (usually located at/var/log/messages) for any errors related to this issue.
FBP0042E Failed to parse data from the RecoveryAgent CLI.
Explanation: The Recovery Agent was unable to parsethe data from the Recovery Agent CLI(TDPVMWareShell) output file.
System action: The operation is canceled.
FBP0034E • FBP0042E
222 IBM Tivoli Storage Manager for Virtual Environments: Data Protection for VMware User's Guide
User response: Try the operation again. If the problempersists, check the Linux Recovery Agent engine logfile. This file is usually located at /opt/tivoli/tsm/TDPVMWare/mount/engine/var/TSM4VE_IR_LOG_0040.sf.
FBP0043E Failed to create query for the RecoveryAgent CLI.
Explanation: The Recovery Agent was unable to createthe Recovery Agent CLI (TDPVMWareShell) output file.
System action: The operation is canceled.
User response: Try the operation again. If the problempersists, check the Linux system log (usually located at/var/log/messages) for any errors related to this issue.
FBP0044E Failed to retrieve mount data from theRecovery Agent CLI.
Explanation: The Recovery Agent was unable to createthe Recovery Agent CLI (TDPVMWareShell) output file.
System action: The operation is canceled.
User response: Try the operation again. If the problempersists, check the Linux system log (usually located at/var/log/messages) for any errors related to this issue.
FBP0045E Failed to create mount query for theRecovery Agent CLI.
Explanation: None.
FBP0046E Failed to connect to the Recovery AgentCLI.
Explanation: The Linux Recovery Agent was unable toretrieve the Recovery Agent CLI (TDPVMWareShell)installation path from the registry on the Windowsmachine.
System action: The operation is canceled.
User response: Check the connectivity to the Windowsmachine, verify that the SSH is configured correctly,and that the user defined on Cygwin hasadministrative privileges. For more information, see theproduct documentation.
FBP0047E Failed to create the mount directory.
Explanation: The Recovery Agent was unable to locateor create the directory for the mount operation.
System action: The mount operation is canceled.
User response: Try the mount operation again. If theproblem persists, check the Linux system log (usuallylocated at /var/log/messages) for any errors related tothis issue.
FBP0048E Failed to mount the file system of thesnapshot.
Explanation: The Recovery Agent succeededconnecting to the mounted snapshot iSCSI device.However, the Recovery Agent was unable to mount thefile system of the snapshot.
System action: The mount operation failed. TheRecovery Agent automatically attempts to mount thefile system every 5 minutes.
User response: Since the mounted snapshot isavailable as an iSCSI device, attempt to mount the filesystem of the device. If the problem persists, check theLinux system log (usually located at/var/log/messages) for any errors related to this issue.
FBP0049E Failed to set the SSH server address.
Explanation: The Recovery Agent was unable to setthe SSH server address. The specified server addressmight be incorrect.
System action: The operation is canceled.
User response: Try the operation again. If the problempersists, check the Linux Recovery Agent engine logfile for more information. This file is usually located at/opt/tivoli/tsm/TDPVMWare/mount/engine/var/TSM4VE_IR_LOG_0040.sf.
FBP0050E Failed to set SSH user name.
Explanation: The Recovery Agent cannot access theWindows Recovery Agent CLI (TDPVMWareShell)using the defined 'SSH login' user.
System action: The operation is canceled.
User response: Using Secure Shell verify that you canconnect to the Windows Recovery Agent CLI machineusing the user defined under 'Settings'>'SSH login'.
FBP0051E Failed to run SSH command.
Explanation: None.
FBP0052E Failed to send query to the TDPVMwareShell.
Explanation: None.
FBP0053E Failed to send query to the RecoveryAgent CLI.
Explanation: While using SSH, the Recovery Agentfailed to send an input command file to the WindowsRecovery Agent CLI (TDPVMWare Shell). This issuemight be caused by an SSH user without read andwrite privileges on the Windows Recovery Agent CLImachine.
System action: The operation is canceled.
FBP0043E • FBP0053E
Appendix D. Tivoli Storage Manager recovery agent messages 223

User response: Verify that the SSH user defined under'Settings'>'SSH login' has read and write privileges onthe Windows Recovery Agent CLI machine. Also checkthe Linux Recovery Agent engine log file for moreinformation. This file is usually located at/opt/tivoli/tsm/TDPVMWare/mount/engine/var/TSM4VE_IR_LOG_0040.sf.
FBP0056E Failed to locate the block devicespecified for the mount point.
Explanation: The Recovery Agent failed to locate theblock device for the mount point that was specified forthe instant restore operation.
System action: The instant restore operation iscanceled.
User response: Verify that the mount point specifiedfor the instant restore operation is correct.
FBP0057E Failed to locate the mount point for thespecified block device.
Explanation: The Recovery Agent failed to locate themount point for the specified instant restore blockdevice.
System action: The instant restore operation iscanceled.
User response: Verify that the specified block devicefor the instant restore operation is correct and mounted.
FBP0058E The specified mount point is notmounted on the block device.
Explanation: The specified mount point is notmounted on the specified block device.
System action: The instant restore operation iscanceled.
User response: Verify that the specified mount pointand block device are correct, and that the mount pointis mounted on that block device.
FBP0059E Restore is not allowed to '/' or '/boot'.
Explanation: The Recovery Agent does not supportinstant restore operations to target devices that are '/'or '/boot' volumes.
System action: The instant restore operation iscanceled.
User response: Specify a different target device for theinstant restore operation.
FBP0060E Restore is not allowed to RAID devices.
Explanation: The Recovery Agent does not supportinstant restore operations to RAID devices.
System action: The instant restore operation iscanceled.
User response: Specify a different target device for theinstant restore operation.
FBP0061E The restore operation failed to start.
Explanation: The Recovery Agent failed to start theinstant restore operation.
System action: The instant restore operation iscanceled.
User response: Try the operation again. If the problempersists, check the Linux Recovery Agent engine logfile for more information. This file is usually located at/opt/tivoli/tsm/TDPVMWare/mount/engine/var/TSM4VE_IR_LOG_0040.sf.
FBP0062E Failed to get the iSCSI initiator name.
Explanation: No iSCSI initiator was specified.
System action: The operation is canceled.
User response: Verify that the iSCSI initiator name isspecified correctly.
FBP0063E iSCSI target is not logged in.
Explanation: None.
FBP0064E Failed to resolve the IP address to ahostname.
Explanation: The Recovery Agent failed to associate ahostname with the specified IP address.
System action: The operation is canceled.
User response: Verify that the IP or hostname arecorrect. Then, try the operation again. If the problempersists, check the Linux Recovery Agent engine logfile for more information. This file is usually located at/opt/tivoli/tsm/TDPVMWare/mount/engine/var/TSM4VE_IR_LOG_0040.sf.
FBP0065E The iSCSI service was not found.
Explanation: The iSCSI daemon is not installed on theRecovery Agent Linux machine.
System action: The operation is canceled.
User response: Install the required iSCSI daemon onthe Recovery Agent Linux machine. See informationabout related iSCSI tasks in the product documentation.
FBP0056E • FBP0065E
224 IBM Tivoli Storage Manager for Virtual Environments: Data Protection for VMware User's Guide

FBP0066E Failed to start the iSCSI daemon.
Explanation: The Recovery Agent was unable to startthe iSCSI daemon.
System action: The operation is canceled.
User response: Try the operation again. If the problempersists, check the Linux system log (usually located at/var/log/messages) for any errors related to this issue.
FBP0067E Failed to discover iSCSI targets.
Explanation: The Recovery Agent was unable todiscover the iSCSI targets.
System action: The operation is canceled.
User response: Try the operation again. If the problempersists, check the Linux system log (usually located at/var/log/messages) for any errors related to this issue.
FBP0068E Failed to log in to the iSCSI target.
Explanation: The Recovery Agent was unable to log into the iSCSI target.
System action: The operation is canceled.
User response: Check the Linux system log (usuallylocated at /var/log/messages) for any errors related tothis issue.
FBP0069E Failed to log out of the iSCSI target.
Explanation: The Recovery Agent was unable to logout of the iSCSI target.
System action: The operation is canceled.
User response: Check the Linux system log (usuallylocated at /var/log/messages) for any errors related tothis issue.
FBP0070E Failed to delete the iSCSI target.
Explanation: The Recovery Agent was unable todelete the iSCSI target.
System action: The operation is canceled.
User response: Check the Linux system log (usuallylocated at /var/log/messages) for any errors related tothis issue.
FBP0071E Failed to identify the block device forthe iSCSI target.
Explanation: The Recovery Agent successfully loggedin to the iSCSI target; however, the iSCSI block devicewas not found.
System action: The operation is canceled.
User response: Check the Linux system log (usually
located at /var/log/messages) for any errors related tothis issue.
FBP0072E Failed to create the RAID mirror device.
Explanation: The Recovery Agent was unable to createthe RAID mirror device using the mdadm utility.
System action: The instant restore operation iscanceled.
User response: Check the Linux system log (usuallylocated at /var/log/messages) for any errors related tothis issue.
FBP0073E Failed to stop the RAID mirror device.
Explanation: The Recovery Agent uses the mdadmutility to stop the RAID mirror device. However, theRecovery Agent was unable to stop the RAID mirrordevice.
System action: The instant restore operation iscanceled.
User response: Check the Recovery Agent engine logfile on the Linux machine for more details about whythe device did not stop. This file is usually located at/opt/tivoli/tsm/TDPVMWare/mount/engine/var/TSM4VE_IR_LOG_0040.sf. Also check the Linux systemlog (usually located at /var/log/messages).
FBP0074E Failed to add the target block device tothe RAID mirror.
Explanation: The Recovery Agent uses the mdadmutility to add the target block device to the RAIDmirror. However, the Recovery Agent was unable toadd the target block device to the RAID mirror.
System action: The instant restore operation iscanceled.
User response: Check the Recovery Agent engine logfile on the Linux machine for more details about whythe device was unable to add the target block device tothe RAID mirror. This file is usually located at/opt/tivoli/tsm/TDPVMWare/mount/engine/var/TSM4VE_IR_LOG_0040.sf. Also check the Linux systemlog (usually located at /var/log/messages).
FBP0075E Failed to mark the target block device inRAID mirror as faulty.
Explanation: The Recovery Agent uses the mdadmutility to mark the target block device in the RAIDmirror. However, the Recovery Agent was unable tomark the target block device as faulty.
System action: The instant restore session is paused.
User response: Check the Recovery Agent engine logfile on the Linux machine for more details about whythe device was not marked. This file is usually located
FBP0066E • FBP0075E
Appendix D. Tivoli Storage Manager recovery agent messages 225

at /opt/tivoli/tsm/TDPVMWare/mount/engine/var/TSM4VE_IR_LOG_0040.sf. Also check the Linux systemlog (usually located at /var/log/messages).
FBP0076E Failed to remove the target block devicefrom the RAID mirror.
Explanation: The Recovery Agent uses the mdadmutility to remove the target block device from the RAIDmirror. However, the Recovery Agent was unable toremove the target block device.
System action: The instant restore operation iscanceled.
User response: Check the Recovery Agent engine logfile on the Linux machine for more details about whythe device was not removed. This file is usually locatedat /opt/tivoli/tsm/TDPVMWare/mount/engine/var/TSM4VE_IR_LOG_0040.sf. Also check the Linux systemlog (usually located at /var/log/messages).
FBP0079E Unknown key.
Explanation: None.
FBP0080E The operation timed-out.
Explanation: The Recovery Agent engine scripts didnot reply to the Recovery Agent GUI in a timelymanner.
System action: The operation is canceled.
User response: Try the operation again. If the problempersists, check the Recovery Agent engine log file onthe Linux machine. This file is usually located at/opt/tivoli/tsm/TDPVMWare/mount/engine/var/TSM4VE_IR_LOG_0040.sf.
FBP0081E Internal error.
Explanation: None.
FBP0083E The snapshot does not contain apartition with a supported file system.
Explanation: The Recovery Agent successfully parsedthe partition structure of the disk. However, thepartitions do not use any of these supported filesystems: FAT, NTFS, EXT2, EXT3, EXT4, or ReiserFS. Asa result, volume-level operations, such as 'InstantRestore' and 'Mount as Virtual Volume', are notsupported for this snapshot.
System action: The operation is canceled.
User response: To restore data from the selectedsnapshot, use the Windows Recovery Agent proxy hostto mount and expose the snapshot. See informationabout mounting as iSCSI targets in the productdocumentation.
FBP0084E Failed to retrieve partitions.
Explanation: The Windows Recovery Agent proxyhost was unable to retrieve the partition list from thedisk snapshot.
System action: The operation is canceled.
User response: Check the Windows Recovery Agentproxy host logs about why the partition list was notretrieved.
FBP0085E Recovery Agent can connect only to aTivoli Storage Manager server node.
Explanation: None.
FBP0086E Failed to remove the Tivoli StorageManager server connection.
Explanation: The Windows Recovery Agent proxyhost reported that there are active instant restoresessions or mounted volumes that require theconnection to the Tivoli Storage Manager server. As aresult, the existing connection cannot be removed.
System action: The remove connection operation iscanceled.
User response: Check the Windows Recovery Agentproxy host logs about the active instant restore sessionsor mounted volumes.
FBP0088E Mount operation failed because theWrite cache is either full or configuredincorrectly.
Explanation: Mount and instant restore sessions (thatrun on the Linux machine) access the Virtual Volumewrite cache on the Windows Recovery Agent proxyhost . This proxy host reported that the write cache isunavailable.
System action: The operation is canceled.
User response: Check the log files on the WindowsRecovery Agent proxy host for information about whythe write cache is unavailable. Verify that the VirtualVolume write cache is configured correctly in theWindows Recovery Agent GUI. See information aboutsetting the Virtual Volume write cache options in theproduct documentation.
FBP0089E The Recovery Agent GUI storage typeoption is 'Tape', and the requestedmedia is busy.
Explanation: When the Recovery Agent GUI storagetype option specifies 'Tape', only a single snapshot canbe mounted.
System action: The operation is canceled.
User response: Dismount the currently mounted
FBP0076E • FBP0089E
226 IBM Tivoli Storage Manager for Virtual Environments: Data Protection for VMware User's Guide

snapshot before you attempt to mount anothersnapshot.
FBP0090E Operation timed-out. Manualintervention might be required.
Explanation: The Linux Recovery Agent GUIoperation timed-out during a mount or instant restoreoperation.
System action: The operation is canceled.
User response: Follow the "Responding to a timeoutduring a file restore or an instant restore (Linux)"procedure documented in the Data Protection forVMware Installation and User's Guide.
FBP0091E The selected disk is not an MBR disk.
Explanation: The Recovery Agent cannot parse thepartition structure of the disk, because the disk is not aBasic, MBR-based disk. Volume-level operations, suchas 'Instant Restore' and 'Mount as Virtual Volume', arenot supported for this snapshot.
System action: Mount and instant restore operationsare disabled.
User response: To restore data from the selectedsnapshot, use the Windows Recovery Agent proxy hostto mount and expose the snapshot using 'Mount asiSCSI target' method.
FBP0092E Operation failed. Recovery Agent isinitializing.
Explanation: Mount and instant restore operationscannot proceed when the Windows Recovery Agentproxy host is initializing.
System action: The mount or instant restore operationis canceled.
User response: Wait until the Windows RecoveryAgent proxy host completes initializing. Then, try theoperation again.
FBP0093E The mount point is already in use byanother mount session.
Explanation: The mount operation failed because thetarget mount point is currently in use.
System action: The mount operation is canceled.
User response: Specify a target mount point that isnot in use.
FBP0094E The mount point is already in use byanother instant restore session.
Explanation: The instant restore operation failedbecause the target mount point is currently in use.
System action: The instant restore operation iscanceled.
User response: Specify a target mount point that isnot in use.
FBP1001I The folder:folder pathdoes not exist. Doyou want to create the folder?
Explanation: The selected folder does not exist. Youcan create the folder by proceeding with theinstructions displayed on the screen.
System action: The system waits for a user response.
User response: Specify Yes to create the folder andcontinue with the operation. Specify No to not createthe folder and end the current operation.
FBP1003I Specify a folder for the cache files
Explanation: A folder that is used to store the virtualdisk and virtual volume cache files was not specified.The cache is used to store write operations to thevirtual disk and virtual volume during the mountoperation.
System action: The system waits for a user response.
User response: Specify a folder to store the virtualdisk and virtual volume cache files.
FBP1005I mount path already has a mountedvirtual volume.Do you want todismount the volume before youcontinue?
Explanation: The selected path already has a mountedvirtual volume. This existing mounted virtual volumemust be dismounted to continue with the currentmount operation.
System action: The system waits for a user response.
User response: Specify Yes to dismount the existingmounted virtual volume and continue with the currentmount operation. Specify No to end the current mountoperation.
FBP1008I Recovery Agent cannot be startedbecause it is being used by another user
Explanation: The Recovery Agent application isalready running on this machine. For example, thissituation occurs when the application is started byanother user on another session.
System action: The operation is canceled.
User response: Log in to the machine as the user thatstarted the Recovery Agent application.
FBP0090E • FBP1008I
Appendix D. Tivoli Storage Manager recovery agent messages 227

FBP1009I Recovery Agent cannot be closed whilemounted volumes exist. Do you want todismount all volumes?
Explanation: Existing mounted virtual volumes andvirtual disks must be dismounted before closing theRecovery Agent application.
System action: The system waits for a user response.
User response: Specify Yes to dismount all the existingmounted virtual volumes and virtual disks and closethe Recovery Agent application. Specify No to notdismount all the existing mounted virtual volumes andvirtual disks and return to the Recovery Agentapplication.
FBP1011I The Virtual Volume Driver wasregistered successfully
Explanation: Successful Recovery Agent VirtualVolume Driver registration is required to use the mountfunction.
System action: Operation completed successfully.
User response: The Recovery Agent application isready for operations.
FBP1013I Connection to Tivoli Storage Managerserver resumed.
Explanation: Communication between the RecoveryAgent application and the Tivoli Storage Managerserver is established.
System action: Operation completed successfully.
User response: The Recovery Agent application isready for operations.
FBP1014I You must restart the Recovery Agentapplication for changes to the DataAccess options to take effect.
Explanation: Recent changes to the Data Accessoptions cannot be implemented until the RecoveryAgent application is restarted.
System action: The Recovery Agent applicationoperates with the existing Data Access options settinguntil it is restarted.
User response: Restart the Recovery Agent applicationso that changes to the Data Access options areimplemented.
FBP1100I Received CONTINUE from servicemanager
Explanation: The Recovery Agent service received aSERVICE_CONTROL_CONTINUE command.
System action: The Recovery Agent service resumesactivities.&msgnl;The latest Recovery Agent driver
events are written to the Recovery Agent log file.
User response: The Recovery Agent application isready for operations.
FBP1101I Received PAUSE from service manager
Explanation: The Recovery Agent service received aSERVICE_CONTROL_PAUSE command.
System action: This command has no effect on theRecovery Agent service.
User response: The Recovery Agent application isready for operations.
FBP1102I Received a STOP command from theservice manager
Explanation: The Recovery Agent service received aSERVICE_CONTROL_STOP command. This message isissued when the service is stopped from the servicemanager. Opening the Recovery Agent GUI from theStart menu sends a stop command to the service.
System action: The Recovery Agent service stops.
User response: The Recovery Agent application isready for operations.
FBP1103I Service stopped, reporting to servicemanager
Explanation: The Recovery Agent service stops. Theservice can be restarted from the service manager.
System action: The Recovery Agent application stops.
User response: No user action required.
FBP1104I --- Recovery Agent version string started---
Explanation: The Recovery Agent application started.The version string is printed in the message.
System action: Operation completed successfully.
User response: The Recovery Agent application isready for operations.
FBP1300I License is OK.
Explanation: The license file is valid.
System action: Operation completed successfully.
User response: The Recovery Agent application isready for operations.
FBP1301W Not for resale license.
Explanation: The license file is valid.
System action: Operation completed successfully.
FBP1009I • FBP1301W
228 IBM Tivoli Storage Manager for Virtual Environments: Data Protection for VMware User's Guide

User response: The Recovery Agent application isready for operations.
FBP1302E Error accessing license file.
Explanation: The license file could not be accessed.This situation occurs when the license file cannot belocated, it cannot be opened because of permissionrestrictions, or the file is corrupted.
System action: The Recovery Agent application stops.
User response: Obtain a new license for the RecoveryAgent application.
FBP1303E Corrupted license file.
Explanation: The license registration string is notvalid.
System action: The Recovery Agent application stops.
User response: Obtain a new license for the RecoveryAgent application.
FBP1304E Trial period has expired.
Explanation: The license registration string is notvalid.
System action: The Recovery Agent application stops.
User response: Obtain a new license for the RecoveryAgent application.
FBP1305I Try and buy license. days left.
Explanation: The license file is valid.
System action: Operation completed successfully.
User response: The Recovery Agent application isready for operations.
FBP5003W target volume : The repository is notloaded.Load the repository and resumethe session.
Explanation: The instant restore session is unable toresume since the Recovery Agent failed to reestablishconnection to the Tivoli Storage Manager server wherethe backup snapshots are located.The restored volumeis inaccessible while the session is paused.
System action: The instant restore session is paused.
User response: Click "Select TSM server" in theRecovery Agent GUI to connect to the Tivoli StorageManager server and resume the instant restore session.
FBP5005W Windows indicates the destinationvolume target volume might be anetwork-mapped drive. If volume targetvolume again is confirmed as anetwork-mapped drive, the operationfails. Continue anyway?
Explanation: The Recovery Agent does not supportinstant restore sessions to a network-mapped drive.
System action: The instant restore session is canceled.
User response: Specify a destination volume that isnot on a network-mapped drive.
FBP5007W Read block from the source hasfailedThe problem might have beencaused by a network failure.See log filefor more details.If the problem wascaused by a network failure,correct theproblem and resume the session.
Explanation: The instant restore session is unable toretrieve data from the Tivoli Storage Manager server.As a result, the instant restore session is paused.Theproblem might be caused by a network failure. Therestored volume is inaccessble while the session ispaused.
System action: The instant restore session is paused.
User response: Check the Recovery Agent logs forinformation regarding the cause of the problem. Afterresolving the issue, resume the session.
FBP5008W There are open handles to the volumebeing restored (volume name).Close anyapplication (such as Windows Exploreror a command prompt) that might beaccessing this volume and try again.Ifyou select Ignore, applications usingthese handles might become unstableonce the restore process begins.
Explanation: The target volume for the restore is inuse.Restoring a volume to a viewable storage volumeinvolves overwriting data on that existing storagevolume. After the restore begins, the current volumecontents are permanently erased.
System action: The system waits for a user response.
User response: Close any application (such asWindows Explorer or a command prompt) that mightbe accessing this volume and try the operation again.Ifyou select Ignore, applications that currently use theseopen handles might become unstable when the restoreoperation begins.
FBP1302E • FBP5008W
Appendix D. Tivoli Storage Manager recovery agent messages 229

FBP5010W System is low on memory.Writeoperations to virtual volumes might belost.
Explanation: Changes that are done on mountedvolumes are written to memory. As a result, theRecovery Agent can use a large amount of RAM whenit operates in read/write mode.
System action: Write operations to virtual volumesmight be lost.
User response: Dismount some of the mountedvolumes (when possible) or mount the volumes asread-only.The value of the 'Read Ahead cache size'option affects the memory usage. See information aboutsetting this option in the product documentation.
FBP5011W Recovery Agent still has number ofmounted volumes volumes mounted.Stopping the Recovery Agent mightcause the system to become unstable.Are you sure you want to stop theRecovery Agent?
Explanation: Stopping the Recovery Agent withoutfirst dismounting the virtual volumes might cause boththe system and active applications to become unstable.
System action: The system waits for a user response.
User response: Specify No to prevent the RecoveryAgent from stopping, then dismount any mountedvolumes.Specify Yes to stop the Recovery Agent, eventhough both the system and active applications mightbecome unstable.
FBP5012W The Recovery Agent still has number ofactive sessions active instant restoresession. These sessions will be pausedand the restored volumes will appearunformatted, until the Recovery Agentservice restarts.Are you sure you want tostop the Recovery Agent?
Explanation: Stopping the Recovery Agent withoutwaiting for the restore to complete makes the restoredvolumes display as if they are unformatted. The restoreprocess resumes when the Recovery Agent servicerestarts.
System action: The system waits for a user response.
User response: Specify No to prevent the RecoveryAgent from stopping and to continue the instant restoresession.Specify Yes to stop the Recovery Agent, eventhough the volumes that are still being processeddisplay as if they are unformatted.Do not attempt toformat these volumes as such an attempt causes dataloss.
FBP5013W Abort selected sessions?All data is lostand volumes require reformatting.
Explanation: Aborting the instant restore sessionscauses the loss of all data that was written to therestored volumes.The restored volumes display asunformatted and require reformatting.
System action: The system waits for a user response.
User response: Specify Yes to abort the instant restoresessions. All data that was written to the restoredvolumes during these sessions is lost.Specify No tocontinue the instant restore sessions.
FBP5015W All data on target drive volume name willbe lost. Note 1: Successful instantrestore processing requires sufficientnetwork connectivity and bandwidth tothe repository. Note 2: Use of instantrestore is recommended only forapplications that primarily issue READI/O's.Do you want to continue?
Explanation: Instant restore processing overwritesdata on the target storage volume.A sufficient datatransfer rate from the Tivoli Storage Manager server isrequired for a successful instant restore operation.
System action: The system waits for a user response.
User response: Click YES to confirm that youunderstand the effects and to start the instant restoreoperation.
FBP5017W There are open files on the volumemounted on:mounted volume name.Aforced dismount invalidates all of theopen files.Are you sure you want tocontinue?
Explanation: The virtual volume that is beingdismounted is in use by another application. Forexample, the volume might be open in WindowsExplorer. For virtual iSCSI devices, the iSCSI initiator isstill logged on to the device.Forcing this volume todismount might cause the files or applications that areaccessing the volume to become unstable.
System action: The system waits for a user response.
User response: Identify and close any files orapplications that are accessing the volume. Or, specify'Continue' to ignore the warning message and continuedismounting the volume.For iSCSI devices, make surethat the iSCSI initiator is logged off the device.
FBP5010W • FBP5017W
230 IBM Tivoli Storage Manager for Virtual Environments: Data Protection for VMware User's Guide

FBP5018W The volume selected for restore islocated on a clustered disk.See theproduct documentation for guidelineswhen restoring clusteredvolumes.Failure to follow theseguidelines might result in data loss, if ahardware or Windows error occurs.Doyou want to continue?
Explanation: Instant restore of a volume in a clusteredenvironment is supported.Other volumes in the clusterare not affected. You can work with the cluster andwith the restored volume in parallel.During the instantrestore operation, the disk that is being restored cannotfail over if the node fails.
System action: The system waits for a user response.
User response: Specify YES to confirm that youunderstand the guidelines and to start the instantrestore operation.
FBP5020W The Virtual Volume Driver is not yetregistered. Recovery Agent can registerthe driver now. During registration, aMicrosoft Windows Logo warning maybe displayed. Accept this warning toallow the registration to complete.Doyou want to register the Virtual VolumeDriver now?
Explanation: User should register the Virtual VolumeDriver in order to work with the Recovery Agent.Thismessage is displayed following the first attempt tomount after a silence install, since the driverregistration is not performed in silent install.
System action: The system waits for a user response.
User response: Specifying Yes will start theregistration process. After registration the RecoveryAgent application is ready for operations.
FBP5021W The mounted volume 'mounted volumename' is in use.Dismounting the volumemight cause the application that is usingit to become unstable.Do you want tocontinue?
Explanation: The virtual volume that is beingdismounted is in use by another application. Forexample, the volume might be open in WindowsExplorer. For virtual iSCSI devices, the iSCSI initiator isstill logged on to the device.
System action: The system waits for a user response.
User response: Identify and close any applicationsthat are accessing the volume. Or, specify 'Continue' toignore the warning message and continue dismountingthe volume.For iSCSI devices, make sure that the iSCSIinitiator is logged off the device.
FBP5023W There are active instant restoresessions.These sessions will be pausedand the restored volumes will appearunformatted, until the applicationfinishes loading and resumes thesessions.Do you want to continue?
Explanation: Opening the Recovery Agent UI from the'Start>All Programs' menu stops the service.The activeinstant restore sessions are paused until the applicationfinishes loading and resumes the sessions.
System action: The system waits for a user response.
User response: Specify Yes to stop the service andload the Recovery Agent UI. This action pauses andthen resumes the instant restore sessions.Specify No tonot load the Recovery Agent UI. This action leaves theinstant restore sessions to run in the background inservice mode.
FBP5025W There are 'num active sessions' sessionsusing the write cache. Updates to thecache settings are processed when thereare no active sessions that use the cache.Do you want to continue?
Explanation: Updates to the write cache settings weredetected. These updates are applied when there are noactive sessions that use the cache.
System action: The Recovery Agent applicationoperates with the existing write cache settings.
User response: Update the write cache settings whenthere are no active sessions that use the cache.
FBP5026W The size of the write cache is num writecache percentage% full.
Explanation: Mount and instant restore sessions thatrun on a Linux machine use the Recovery Agent VirtualVolume write cache for write operations. The Cachesize is approaching its maximum limit.Linux mountand instant restore sessions might fail when the cachesize reaches its limit.
System action: None.
User response: Do not start a new Recovery Agentmount or instant restore session on the Linux machineuntil the Virtual Volume write 'Cache size' valuedecreases.See information about setting this option inthe product documentation.
FBP5028W The file system of the selected partition(partition format) might not be supportedby the current operating system.Theappropriate File System driver must beinstalled for Windows to read thevolume.Do you want to continue?
Explanation: The partition file system must besupported and recognized by the Windows operating
FBP5018W • FBP5028W
Appendix D. Tivoli Storage Manager recovery agent messages 231

system where the volume is mounted. This condition isrequired to view the file structure of the mountedpartition..It is recommended to mount volumes withnative Linux file systems on a Linux machine.
System action: The system waits for a user response.
User response: Make sure the appropriate file systemdriver is installed on the Windows operating systemwhere the volume is mounted.
FBP5029W The connection to Tivoli StorageManager server was lost.
Explanation: The connection between the RecoveryAgent application and the Tivoli Storage Managerserver was lost.
System action: Mounted volumes might becomeinaccessible. The instant restore sessions are paused.
User response: Check the Recovery Agent logs forinformation regarding the connection failure. Afterresolving the issue, resume any paused instant restoresessions.
FBP5030W No snapshots are available for theselected virtual machine. Or, theAuthentication node is not authorized torestore this virtual machine.
Explanation: No snapshots were located for theselected virtual machine.Either no snapshot completedsuccessfully, or if the 'From node' access method wasused, the Authenticate node does not have permissionto restore the selected virtual machine.
System action: The operation is canceled.
User response: If the 'From node' access method isused, make sure sufficient permissions are set for theAuthetication node.See the product documentation fordetails and an example of how to set permissions byusing the Tivoli Storage Manager Backup-Archive client'set access' command.
FBP5031W Some snapshots are currently mounted.If you continue, these snapshots will bedismounted.If a mounted volume iscurrently being used by an application,the application might becomeunstable.Do you want to continue?
Explanation: Opening the Recovery Agent UI from the'Start>All Programs' menu stops the service.The activemounted volumes are dismounted.
System action: The system waits for a user response.
User response: Close any application (such asWindows Explorer or a command prompt) that mightbe accessing the mounted volumes. Then, open theRecovery Agent UI.If you continue without closing theapplications that are accessing the mounted volumes,
these applications might become unstable.
FBP5032W The selected snapshot will not beprotected from expiration during thisoperation. See the productdocumentation for information aboutexpiration.
Explanation: When the 'From node' authenticationmethod is used, the Authentication node is grantedRead-only access to the target node with the 'set access'command. The target node owns the snapshot.As aresult, the snapshot cannot be marked as being in useon the server. Therefore, the snapshot might expirewhile the restore operation is in progress.
System action: The system waits for a user response.
User response: If you proceed, disable the expirationprocess for the snapshot during the operation. Or, makesure that no snapshots are created for the restoredmachine during the restore operation.Otherwise, cancelthe restore operation.
FBP5033W No snapshots exist in the selected node.
Explanation: Either no snapshot was completed, orthe selected Tivoli Storage Manager node is not thenode that owns the snapshots.
System action: No snapshot is shown.
User response: If Tivoli Storage Manager for VirtualEnvironments snapshots were completed, select theTivoli Storage Manager node that owns the snapshots.
FBP5034W The snapshots are not protected fromexpiration during the mount operation.An expiration can produce unexpectedresults and negatively impact the mountpoint.
Explanation: The mounted snapshots will not bemarked as being in use on the server. Therefore, thesnapshots might expire while the restore operation is inprogress.
System action: The system waits for a user response.
User response: If you proceed, make sure that nosnapshots are created for the restored machines duringthe restore operations.Otherwise, enable the expirationprotection.
FBP5035W The selected snapshot is not protectedfrom expiration during this mountoperation. An expiration can produceunexpected results and negativelyimpact the mount point.
Explanation: The mounted snapshot will not bemarked as being in use on the server. Therefore, the
FBP5029W • FBP5035W
232 IBM Tivoli Storage Manager for Virtual Environments: Data Protection for VMware User's Guide

snapshot might expire while the restore operation is inprogress.
System action: The system waits for a user response.
User response: If you proceed, make sure that nosnapshots are created for the restored machine duringthe restore operation.Otherwise, enable the expirationprotection on the 'settings' panel and perform theoperation again.
FBP7003E The folder:folder name is invalid.
Explanation: The specified path is not a valid folderpath.
System action: The system waits for a user response.
User response: Specify a valid folder path.
FBP7004E The folder:folder name could not becreated.
Explanation: The system failed to create the requestedfolder.
System action: The operation is canceled.
User response: Check the Recovery Agent logs forinformation about why the folder was not created.
FBP7005E folder name is not empty.Only emptyfolders can be used as a mount point.
Explanation: The system can mount a volumesnapshot only to an empty folder.
System action: The operation is canceled.
User response: Specify an empty folder path.
FBP7006E snapshot size (snapshot size) is largerthan target size (partition name)
Explanation: The volume size of the destinationlocation must be equal to, or greater than, the size ofthe original volume on the snapshot to be restored.
System action: The instant restore operation iscanceled.
User response: Specify a target volume with a sizeequal to, or greater than, the source volume on thesnapshot to be restored.
FBP7007E A valid iSCSI target name must bespecified. Valid iSCSI names consist ofthe following items: lower-case Englishcharacters, digits, '.', ':' and '-'.
Explanation: When a snapshot is exposed as an iSCSItarget, a valid iSCSI target name must be entered.
System action: The system waits for a user response.
User response: Specify a valid iSCSI target name.
FBP7008E A valid iSCSI initiator name must bespecified. Valid iSCSI names consist ofthe following items: lower-case Englishcharacters, digits, '.', ':' and '-'.
Explanation: The specified iSCSI initiator is not avalid initiator name. When a snapshot is exposed as aniSCSI target, a valid initiator name must be specified bythe user.
System action: The system waits for a user response.
User response: Specify a valid iSCSI initiator name.
FBP7009E A valid folder name must be specified.
Explanation: The path to the folder is invalid or wasnot specified. The path to the mount point for thevolume snapshot must include an empty folder.
System action: The system waits for a user response.
User response: Specify a valid path to an emptyfolder.
FBP7012E Already connected to a Tivoli StorageManager server.To connect to a differentserver, or to a different node within theserver, select the current server from thelist and click 'Remove'.
Explanation: Recovery Agent can connect only to asingle Tivoli Storage Manager server and node.
System action: The operation is canceled.
User response: Remove the existing connection byselecting the server from the list and click 'Remove'.You cannot remove a connection to a server that hasactive mounted volumes or instant restore sessions.
FBP7013E Instant restore is not supported in TapeMode.
Explanation: Instant restore of snapshot data that isstored on tape is not supported.
System action: The operation is canceled.
User response: Either migrate the snapshot data to adisk storage pool, or use a different restore method.
FBP7014E Cannot mount more than one snapshotin Tape Mode.
Explanation: Only a single snapshot can be mountedwhen the snapshot data is stored on a tape.
System action: The operation is canceled.
User response: Dismount the currently mountedsnapshot before you attempt to mount anothersnapshot.
FBP7003E • FBP7014E
Appendix D. Tivoli Storage Manager recovery agent messages 233

FBP7015E No local volume is available as adestination for instant restore.
Explanation: Instant restore is done to a local volumethat has a volume letter and is not the system volume.
System action: The operation is canceled.
User response: Make sure you have a local volumethat has a volume letter and that is not the systemvolume as a destination for the instant restore.
FBP7016E The Recovery Agent 'Read Ahead size'option requires a value of 0 through8192.
Explanation: The Recovery Agent 'Read Ahead size'value specifies the number of extra data blocksretrieved from the storage device after a read request issent to a single block.
System action: The system waits for a user response.
User response: Specify a valid 'Read Ahead size' valueof 0 through 8192. See information about setting thisoption in the product documentation.
FBP7017E The Recovery Agent 'Read Ahead cachesize' option requires a value of 1000through 75000. The value must also beat least 1 block larger than the value ofthe 'Read Ahead size' option.
Explanation: Recovery Agent 'Read Ahead cache size'value specifies the size of the cache where the 'ReadAhead' extra data blocks are stored.
System action: The system waits for a user response.
User response: Specify a valid 'Read Ahead cache size'value of 1000 through 75000 and at least 1 block largerthan than the value of the 'Read Ahead size' option. Seeinformation about setting this option in the productdocumentation.
FBP7018E The Recovery Agent cannot read thesnapshot data from the Tivoli StorageManager server. Make sure that thestorage type setting matches the actualstorage device. For example, if the dataresides on tape, make sure that thestorage type is set to 'Tape'. If this doesnot solve the problem, check the TivoliStorage Manager server activity log foradditional errors.
Explanation: The required data does not exist on theserver or the data is inaccessible.Inaccessible data istypically caused by a 'Storage type' configuration thatdoes not match the actual storage where the data isstored. Recovery Agent cannot read data stored onTape or VTL if storage type is set to 'Disk'.
System action: The operation is canceled.
User response: Click 'Settings' in the Recovery AgentGUI and select the correct storage device from which tomount the snapshot. You can select 'Disk/File', 'Tape',or 'VTL'. When the storage type is changed, you mustrestart the Recovery Agent for the changes to takeeffect. Also, check the Recovery Agent logs and theTivoli Storage Manager server activity log for anyadditional errors.
FBP7019E The selected disk is not a basic diskwith an MBR partition style.
Explanation: Recovery Agent could not parse thepartition structure of the disk, because the disk is not aBasic, MBR-based disk. Volume-level operations, suchas 'Instant Restore' and 'Mount as Virtual Volume', arenot supported for this snapshot.
System action: Volume-level operations are disabled.
User response: Use other methods, such as 'Mount asiSCSI target', to restore data from the selected snapshot.
FBP7020E The partitions in the selected disk arenot formatted with a supported filesystem.
Explanation: Recovery Agent successfully parsed thepartition structure of the disk. However, none of thepartitions use these supported file systems: FAT, NTFS,EXT2, EXT3, EXT4, or ReiserFS. As a result,volume-level operations, such as 'Instant Restore' and'Mount as Virtual Volume', are not supported for thissnapshot.
System action: Volume-level operations are disabled.
User response: Use other methods, such as 'Mount asiSCSI target', to restore data from the selected snapshot.
FBP7021E Select the node access method.
Explanation: Three node authentication methods areavailable to access snapshots on the Tivoli StorageManager server: 'Asnodename' authenticates with aproxy node, 'Fromnode' authenticates with a node thatcontains limited access, and 'Direct' authenticatesdirectly.
System action: The system waits for a user response.
User response: Specify the node authenticationmethod to access the snapshots on the Tivoli StorageManager Server. See information about these threemethods in the product documentation.
FBP7022E You must specify a Tivoli StorageManager server name or IP.
Explanation: Recovery Agent requires this informationto access the virtual machines backup snapshots on theTivoli Storage Manager Server.
System action: The system waits for a user response.
FBP7015E • FBP7022E
234 IBM Tivoli Storage Manager for Virtual Environments: Data Protection for VMware User's Guide

User response: Specify the host name or IP address ofthe Tivoli Storage Manager Server where the backupsnapshots are located.
FBP7023E You must specify a valid Tivoli StorageManager Server port.
Explanation: Recovery Agent requires this informationto access the virtual machines backup snapshots on theTivoli Storage Manager Server.
System action: The system waits for a user response.
User response: Specify the port number that is usedby the Tivoli Storage Manager Server where the backupsnapshots are located.
FBP7024E You must specify an authenticationnode.
Explanation: No authentication node was specified.Specify the Tivoli Storage Manager node that owns thesnapshots.
System action: The system waits for a user response.
User response: Specify the Tivoli Storage Managernode that owns the snapshots. See information aboutthe node authentication methods in the productdocumentation.
FBP7025E You must specify a target node.
Explanation: Recovery Agent provides three nodeauthentication methods. When 'Fromnode' or'Asnodename' are selected, a target node must bespecified.The target node is the Tivoli Storage Managernode where the virtual machine backups are located.
System action: The system waits for a user response.
User response: Specify the target node where thevirtual machine backups are located. See informationabout the node authentication methods in the productdocumentation.
FBP7026E You must specify a node password.
Explanation: No password was specified for theauthentication node.
System action: The system waits for a user response.
User response: Enter the password of the TivoliStorage Manager node that owns the virtual machinesnapshots.
FBP7027E The Recovery Agent 'Driver timeout'option requires a value of 60 through300.
Explanation: The Recovery Agent 'Driver timeout'option specifies the amount of time (in seconds) toprocess data requests from the file system driver. When
processing does not complete within the specified time,the request is canceled and an error is returned to thefile system driver.
System action: The system waits for a user response.
User response: Specify a valid 'Driver timeout' valueof 60 through 300. See information about setting thisoption in the product documentation.
FBP7028E The Recovery Agent 'Write cache size'option requires a value of 1 throughupper limit
Explanation: During Linux instant restore and mountoperations, the Recovery Agent on the Windowsbackup proxy host saves data changes in the writecache folder.The maximum cache size is 90% of theavailable space for the selected folder.
System action: The system waits for a user response.
User response: Specify a valid Virtual Volume write'Cache size' value. See information about setting thisoption in the product documentation.
FBP7029E The Recovery Agent CLI mountcommand is missing one or morerequired parameters.
Explanation: The Recovery Agent CLI mountcommand cannot complete without all requiredparameters.
System action: The operation is canceled.
User response: Issue the 'RecoveryAgentShell.exe -hmount' (Windows) or 'RecoveryAgentShell -h mountdump' (Linux) command to view the requiredparameters. Then, issue the mount command againwith all required parameters.
FBP7030E Repository 'repository name' was notfound
Explanation: The Tivoli Storage Manager Serverconnection specified in the Recovery Agent '-rep' tagwas not found.
System action: The operation is canceled.
User response: Correct the Recovery Agent CLIcommand '-rep' tag to identify the Tivoli StorageManager Server where the backup snapshots arelocated.
FBP7031E A valid iSCSI target name must bespecified. Valid iSCSI names consist ofthe following items: lower-case Englishcharacters, digits, '.', ':' and '-'.
Explanation: When a snapshot is exposed as an iSCSItarget, a valid iSCSI target name must be entered.
System action: The operation is canceled.
FBP7023E • FBP7031E
Appendix D. Tivoli Storage Manager recovery agent messages 235

User response: Specify a valid iSCSI target name.
FBP7032E Mount target 'mount target' is not valid.
Explanation: The specified mount path is not a validfolder path.
System action: The operation is canceled.
User response: Specify a valid folder path.
FBP7033E Reparse point 'reparse point' was notfound and cannot be created
Explanation: The specified mount target path was notfound and cannot be created.
System action: The operation is canceled.
User response: Specify a valid folder path.
FBP7035E Failed to load partition 'partition'
Explanation: The Recovery Agent was unable toretrieve the partition list from the disk snapshot.
System action: The operation is canceled.
User response: Check the Recovery Agent logs forinformation about why the partition list was notretrieved.
FBP7036E Incorrect partition number 'partitionnumber'
Explanation: The specified partition was not found onthe disk snapshot.
System action: The operation is canceled.
User response: Specify a valid partition number.
FBP7037E 'Cache size' must be at least 1GB.
Explanation: Mount and instant restore sessions thatrun on a Linux machine use the Recovery Agent Cachefor write operations.
System action: The system waits for a user response.
User response: Specify a valid size for the 'WriteCache' size field. 'Cache size' must be at least 1GB.
FBP7038E The value of the Recovery Agent write'Cache size' option must not exceed maxsize in GBGB
Explanation: During Linux instant restore and mountoperations, the Recovery Agent on the Windowsbackup proxy host saves data changes in the writecache folder.The maximum cache size is 90% of theavailable space for the selected folder.
System action: Linux mount and instant restoresessions might fail when the cache size reaches its limit.
User response: Do not start a new Recovery Agentmount or instant restore session on the Linux machineuntil the Virtual Volume write 'Cache size' valuedecreases.See information about setting this option inthe product documentation.
FBP8001E resume failed
Explanation: The instant restore session is unable toresume. As a result, the instant restore sessionpauses.The restored volume is inaccessible while thesession is paused.
System action: The instant restore session pauses.
User response: Check the Recovery Agent logs forinformation about why the resume failed. After theissue is resolved, resume the session.
FBP8002E failed to mount because of too manymount points
Explanation: The Recovery Agent supports amaximum of 128 simultaneously mounted snapshots.That maximum was exceeded.
System action: The mounting operation is canceled.
User response: Dismount at least one of the currentlymounted snapshots before an attempt to mount anothersnapshot.
FBP8003E failed to dismount mounted volume name
Explanation: The Recovery Agent failed to dismountthe mounted snapshot.This issue might be caused by adisconnection from the Tivoli Storage Manager serverthat owns the snapshots.
System action: The dismount operation is canceled.
User response: Check the Recovery Agent logs forinformation about why the dismount operation failed.
FBP8004E failed to load repository name
Explanation: The Recovery Agent failed to expose thesnapshots of the specified Tivoli Storage Managerserver.
System action: The operation is canceled.
User response: Verify that the correct Tivoli StorageManager server and node that own the snapshots arespecified.
FBP8007E Virtual Volume Driver not enabled
Explanation: Mount operations require a workingRecovery Agent Virtual Volume Driver.
System action: The mount operations are canceled.
User response: Check the Recovery Agent logs for
FBP7032E • FBP8007E
236 IBM Tivoli Storage Manager for Virtual Environments: Data Protection for VMware User's Guide
information about why the Virtual Volume Driver isnot enabled.
FBP8008E snapshot not found.
Explanation: The selected snapshot was not found onthe Tivoli Storage Manager server.
System action: The operation is canceled.
User response: Click Refresh in the Recovery AgentGUI to load the current snapshots on the Tivoli StorageManager server.
FBP8009E already mounted
Explanation: The selected snapshot was alreadymounted to the requested target.
System action: None.
User response: The mounted snapshot is available foruse.
FBP8012E target is a network-mapped drive
Explanation: Mounting snapshots to anetwork-mapped drive is not supported.
System action: The mount operation is canceled.
User response: Specify a target drive that is not on anetwork-mapped drive.
FBP8015E volume letter is in use. Select another
Explanation: The selected drive letter for the mountoperation is in use.
System action: The mount operation is canceled.
User response: Select a target drive letter that is not inuse.
FBP8016E failed to mount
Explanation: The Recovery Agent failed to completethe mount operation.
System action: The mount operation is canceled.
User response: Check the Recovery Agent logs forinformation about why the mount operation failed tocomplete.
FBP8019E failed to stop
Explanation: The current request to abort the selectedinstant restore session failed because the RecoveryAgent could not locate the selected session.
System action: None.
User response: The abort request for the instantrestore session was already done.
FBP8020E failed to finalize the session
Explanation: The product encountered an internalerror when it attempted to finalize the instant restoresession.
System action: The operation is canceled.
User response: Check the Recovery Agent logs forinformation about why the session did not finalize.
FBP8023E target partition is too small
Explanation: The volume size of the destinationlocation must be equal to, or greater than, the size ofthe original volume on the snapshot to be restored.
System action: The instant restore operation iscanceled.
User response: Specify a target volume with a sizeequal to, or greater than, the source volume on thesnapshot to be restored.
FBP8024E load repository repository name failed:error message
Explanation: The Recovery Agent failed to expose thesnapshots of the specified Tivoli Storage Manger server.
System action: The operation is canceled.
User response: Verify that the correct Tivoli StorageManager server and Node that own the snapshots arespecified.
FBP8025E repository inaccessible. Dismountingvolume
Explanation: The Recovery Agent is unable to retrievedata from the Tivoli Storage Manager server. As aresult, the currently mounted snapshots aredismounted.
System action: Mounted snapshots are dismounted.
User response: Check the Recovery Agent logs forinformation about why the repository is inaccessible.
FBP8026E 'path to repository' inaccessible or not arepository
Explanation: The Recovery Agent failed to expose thesnapshots of the specified Tivoli Storage Manger server.
System action: The operation is canceled.
User response: Verify that the correct Tivoli StorageManager server and Node that own the snapshots arespecified.
FBP8008E • FBP8026E
Appendix D. Tivoli Storage Manager recovery agent messages 237

FBP8027E failed to open repository
Explanation: The Recovery Agent failed to expose thesnapshots of the specified Tivoli Storage Manger server.
System action: The operation is canceled.
User response: Verify that the correct Tivoli StorageManager server and Node that own the snapshots arespecified.
FBP8029E session stopped by user
Explanation: The user requested to abort the instantrestore session.Aborting the instant restore sessionscauses all data that was written to the restored volumeto be lost.
System action: The instant restore session ends.
User response: The restored volume is shown asunformatted and requires reformatting.
FBP8031E Exclusive access to the mountedsnapshot was not obtained on the TivoliStorage Manager server.
Explanation: An exclusive access to the snapshot dataon the Tivoli Storage Manager server could not beobtained. As a result, the version being restored couldexpire, leading to inability to complete the restore.Failure to obtain exclusive access is often the result ofthe snapshot data residing on a target replicationserver.
System action: The mount operation is canceled.
User response: If expiration protection is enabled,check the status of the target Tivoli Storage Managerserver. If the target server is the replication server infailover mode, or if you verified no snapshots arerunning on the primary server, disable expirationprotection. Then, try the operation again. If expirationprotection was disabled when this error occurred, visitthe IBM Support Portal for additional information athttp://www.ibm.com/support/entry/portal/.
FBP8032E failed to unmount volume
Explanation: The target volume for the restoreoperation is in use. As a result, the instant restoreoperation did not start. Restoring a volume to aviewable storage volume involves overwriting data onthat existing storage volume. After the restore sessionbegins, the data on the existing volume is permanentlyerased.
System action: The instant restore session is canceled.
User response: Close any application (such asWindows Explorer or a command prompt) that mightbe accessing this volume. Then, try the operation again.
FBP8033E failed to restore blocks
Explanation: The instant restore operation is eitherunable to retrieve data from the Tivoli Storage Managerserver or unable to write data to the target volume.
System action: The instant restore session ends.
User response: Check the Recovery Agent logs forinformation about why the blocks failed to restore. Therestored volumes display as unformatted and requirereformatting.
FBP8034E failed to mount volume
Explanation: The Recovery Agent failed to mount thetarget volume and start the instant restore operation.
System action: The instant restore operation iscanceled.
User response: Check the Recovery Agent logs forinformation regarding why the target volume could notbe mounted.
FBP8036E Failed to finalize
Explanation: The Recovery Agent failed to finalize theinstant restore session.
System action: The instant restore session is canceled.
User response: Check the Recovery Agent logs forinformation about the cause of the problem. Therestored volumes might display as unformatted andrequire reformatting.
FBP8037E initialization failed. See logs for thereason
Explanation: The Recovery Agent failed to initializethe instant restore operation.
System action: The instant restore operation iscanceled.
User response: Check the Recovery Agent logs forinformation about the cause of the problem.
FBP8041E cannot restore to a dynamic disk
Explanation: Instant restore to a dynamic volume isnot supported.
System action: The instant restore operation iscanceled.
User response: Select a basic volume as the instantrestore target. Then, try the operation again.
FBP8027E • FBP8041E
238 IBM Tivoli Storage Manager for Virtual Environments: Data Protection for VMware User's Guide

FBP8042E cannot restore to clustered disk
Explanation: Instant restore of a volume in a clusteredenvironment is supported. However, the user canceledthe restore to a volume in a clustered environment.
System action: The instant restore operation iscanceled.
User response: Select a different volume as the instantrestore target. Then, try the operation again.
FBP8043E failed to create bitmap
Explanation: The Recovery Agent failed to create therequired internal data structure for the instant restoreoperation.
System action: The instant restore operation iscanceled.
User response: Check the Recovery Agent logs forinformation about why the data structure was notcreated.
FBP8044E failed to scramble first block
Explanation: The Recovery Agent failed to overwritethe first sector of the disk.
System action: The instant restore operation iscanceled.
User response: Check the Recovery Agent logs forinformation about why the overwrite to disk failed.
FBP8045E failed to notify driver
Explanation: The Recovery Agent failed to notify thekernel driver regarding the start of the instant restoresession.
System action: The instant restore operation iscanceled.
User response: Check the Recovery Agent logs forinformation about why the driver was not notified.
FBP8046E failed to unscramble first block
Explanation: The Recovery Agent failed to overwritethe first sector of the disk.
System action: The instant restore session ends.
User response: Check the Recovery Agent logs forinformation about why the overwrite to disk failed. Therestored volumes might display as unformatted andrequire reformatting.
FBP8047E cannot restore to a FAT volume. Formattarget volume as NTFS
Explanation: Instant restore to a volume formatted asan FAT32 file system is not supported.
System action: The instant restore operation iscanceled.
User response: Format the volume as an NTFS filesystem. Then, try the operation again.
FBP8048E session not responding
Explanation: The instant restore session did notrespond to the abort request within 5 minutes. As aresult, the instant restore session was forcibly stopped.
System action: The instant restore session ends.
User response: Check the Recovery Agent logs forinformation about why the Recovery Agent did notrespond to the abort request. The restored volumesmight display as unformatted and require reformatting.
FBP8050E failed to create first block file
Explanation: The Recovery Agent failed to create amemory-mapped file for the instant restore session.
System action: The instant restore operation iscanceled.
User response: Check the Recovery Agent logs forinformation regarding why the memory-mapped filewas not created.
FBP8051E cannot restore to disk with signature '0'
Explanation: Instant restore in not supported for diskswithout an MBR disk signature.
System action: The instant restore operation iscanceled.
User response: Select an instant restore target volumeon an MBR disk that contains a disk signature.
FBP8052E Recovery Agent is currently initializing.
Explanation: Mount and instant restore operationscannot proceed when the Recovery Agent is initializing.
System action: The mount or instant restore operationis canceled.
User response: Wait until the Recovery Agentcompletes initializing. Then, try the operation again.
FBP8053E failed to read data from server
Explanation: The Recovery Agent failed to expose thesnapshots of the specified Tivoli Storage Manger server.
System action: The operation is canceled.
FBP8042E • FBP8053E
Appendix D. Tivoli Storage Manager recovery agent messages 239

User response: Verify that the correct Tivoli StorageManager server and Node that own the snapshots arespecified. Check the Recovery Agent logs for moreinformation.
FBP9000E failed connecting to a kernel driver
Explanation: Instant restore operations require aworking Recovery Agent kernel driver.
System action: The instant restore operations arecanceled.
User response: Check the Recovery Agent logs forinformation about why the Recovery Agent failed toconnect to the driver.
FBP9001E Incompatible Virtual Volume Driver(FBVV) Version , expecting expected majorversion.expected minor version , installedinstalled major version.installed minorversion
Explanation: The kernel driver version does not matchthe Recovery Agent version. A valid driver is requiredfor the Recovery Agent to work properly.
System action: The Recovery Agent application closes.
User response: The Recovery Agent was not installedcorrectly. Follow the Recovery Agent installationinstructions in the product documentation.
FBP9002E Cannot initialize Windows Sockets.
Explanation: The Recovery Agent failed to initializethe Windows Sockets DLL file.
System action: The Recovery Agent application closes.
User response: Check the Windows events logs forerrors related to this issue. Also check the RecoveryAgent logs for information about why the WindowsSockets DLL file failed to initialize.
FBP9003E Cannot obtain the application datadirectory path
Explanation: The Recovery Agent was unable toretrieve the application data directory path from theoperating system.
System action: The Recovery Agent application closes.
User response: Check the Windows events log forerrors related to this issue. Also check the RecoveryAgent logs for information about why the RecoveryAgent was unable to obtain the application datadirectory path.
FBP9004E Cannot create directory directory name
Explanation: The Recovery Agent failed to create theapplication data directory.
System action: The Recovery Agent application closes.
User response: Check the Windows events logs forany errors. Check the Recovery Agent logs forinformation about why the Recovery Agent failed tocreate the application data directory.
FBP9005E failed to initialize module name module
Explanation: The Recovery Agent failed to initialize.
System action: The Recovery Agent application closes.
User response: Check the Recovery Agent logs forinformation about why the Recovery Agent failed toinitialize.
FBP9006E another instance of Recovery Agent isalready running
Explanation: Only one active Recovery Agent instanceis supported. This issue is encountered when multipleusers are logged on to the system and attempting torun the Recovery Agent.
System action: The Recovery Agent is not started.
User response: Either close the current RecoveryAgent instance or run the Recovery Agent on adifferent system.
FBP9007E unable to install the Recovery Agent
Explanation: The Recovery Agent failed to install. Avalid installation is required for the Recovery Agent tofunction properly.
System action: The Recovery Agent is not started.
User response: Follow the Recovery Agent installationinstructions in the product documentation.
FBP9008E Cannot get folder name for AFS.dll
FBP9009E Registration of Virtual Volume Driverfailed .Check the file filename\\installFBVV.log for moreinformation Do you want to retryregistering the Virtual Volume Driver?
Explanation: The Virtual Volume Driver must beregistered correctly in order for the Recovery Agent tofunction correctly.
System action: The system waits for a user response.
User response: >Check the Recovery Agent logs forinformation about why the Recovery Agent failed toregister the driver.Click 'Retry' to make another attempt
FBP9000E • FBP9009E
240 IBM Tivoli Storage Manager for Virtual Environments: Data Protection for VMware User's Guide

to register the driver or click 'Cancel' to end theoperation.
FBP9010E Write Cache is full.
Explanation: Mount and instant restore sessions thatrun on a Linux machine use the Recovery Agent VirtualVolume write cache for write operations. Linux mountand instant restore sessions might fail when the cachesize reaches its limit.
System action: Write operations to the Linux instantrestore and virtual volumes might be lost.
User response: Unmount some of the mountedvolumes on the Linux machine to make available spacein the write cache. Instant restore volumes on the Linuxmachine might display as unformatted. When the cacheis full, all data that is written to the Linux instantrestore volumes is lost.
FBP9010E
Appendix D. Tivoli Storage Manager recovery agent messages 241

242 IBM Tivoli Storage Manager for Virtual Environments: Data Protection for VMware User's Guide

Appendix E. Accessibility features for the Tivoli StorageManager product family
Accessibility features help users who have a disability, such as restricted mobilityor limited vision to use information technology products successfully.
Accessibility features
The IBM Tivoli Storage Manager family of products includes the followingaccessibility features:v Keyboard-only operation using standard operating-system conventionsv Interfaces that support assistive technology such as screen readers
The command-line interfaces of all products in the product family are accessible.
Tivoli Storage Manager Operations Center provides the following additionalaccessibility features when you use it with a Mozilla Firefox browser on aMicrosoft Windows system:v Screen magnifiers and content zoomingv High contrast mode
The Operations Center and the Tivoli Storage Manager server can be installed inconsole mode, which is accessible.
The Operations Center help system is enabled for accessibility. For moreinformation, click the question mark icon on the help system menu bar.
Vendor software
The Tivoli Storage Manager product family includes certain vendor software that isnot covered under the IBM license agreement. IBM makes no representation aboutthe accessibility features of these products. Contact the vendor for the accessibilityinformation about its products.
IBM and accessibility
See the IBM Human Ability and Accessibility Center (http://www.ibm.com/able)for information about the commitment that IBM has to accessibility.
© Copyright IBM Corp. 2011, 2017 243

244 IBM Tivoli Storage Manager for Virtual Environments: Data Protection for VMware User's Guide

Notices
This information was developed for products and services offered in the U.S.A.
IBM may not offer the products, services, or features discussed in this document inother countries. Consult your local IBM representative for information on theproducts and services currently available in your area. Any reference to an IBMproduct, program, or service is not intended to state or imply that only that IBMproduct, program, or service may be used. Any functionally equivalent product,program, or service that does not infringe any IBM intellectual property right maybe used instead. However, it is the user's responsibility to evaluate and verify theoperation of any non-IBM product, program, or service.
IBM may have patents or pending patent applications covering subject matterdescribed in this document. The furnishing of this document does not grant youany license to these patents. You can send license inquiries, in writing, to:
IBM Director of LicensingIBM CorporationNorth Castle Drive, MD-NC119Armonk, NY 10504-1785United States of America
For license inquiries regarding double-byte character set (DBCS) information,contact the IBM Intellectual Property Department in your country or sendinquiries, in writing, to:
Intellectual Property LicensingLegal and Intellectual Property LawIBM Japan Ltd.19-21, Nihonbashi-Hakozakicho, Chuo-kuTokyo 103-8510, Japan
The following paragraph does not apply to the United Kingdom or any othercountry where such provisions are inconsistent with local law:INTERNATIONAL BUSINESS MACHINES CORPORATION PROVIDES THISPUBLICATION "AS IS" WITHOUT WARRANTY OF ANY KIND, EITHEREXPRESS OR IMPLIED, INCLUDING, BUT NOT LIMITED TO, THE IMPLIEDWARRANTIES OF NON-INFRINGEMENT, MERCHANTABILITY OR FITNESSFOR A PARTICULAR PURPOSE. Some states do not allow disclaimer of express orimplied warranties in certain transactions, therefore, this statement may not applyto you.
This information could include technical inaccuracies or typographical errors.Changes are periodically made to the information herein; these changes will beincorporated in new editions of the publication. IBM may make improvementsand/or changes in the product(s) and/or the program(s) described in thispublication at any time without notice.
Any references in this information to non-IBM websites are provided forconvenience only and do not in any manner serve as an endorsement of thosewebsites. The materials at those websites are not part of the materials for this IBMproduct and use of those websites is at your own risk.
© Copyright IBM Corp. 2011, 2017 245

IBM may use or distribute any of the information you supply in any way itbelieves appropriate without incurring any obligation to you.
Licensees of this program who want to have information about it for the purposeof enabling: (i) the exchange of information between independently createdprograms and other programs (including this one) and (ii) the mutual use of theinformation which has been exchanged, should contact:
IBM Corporation2Z4A/10111400 Burnet RoadAustin, TX 78758US
Such information may be available, subject to appropriate terms and conditions,including in some cases, payment of a fee.
The licensed program described in this document and all licensed materialavailable for it are provided by IBM under terms of the IBM Customer Agreement,IBM International Program License Agreement or any equivalent agreementbetween us.
Any performance data contained herein was determined in a controlledenvironment. Therefore, the results obtained in other operating environments mayvary significantly. Some measurements may have been made on development-levelsystems and there is no guarantee that these measurements will be the same ongenerally available systems. Furthermore, some measurements may have beenestimated through extrapolation. Actual results may vary. Users of this documentshould verify the applicable data for their specific environment.
Information concerning non-IBM products was obtained from the suppliers ofthose products, their published announcements or other publicly available sources.IBM has not tested those products and cannot confirm the accuracy ofperformance, compatibility or any other claims related to non-IBM products.Questions on the capabilities of non-IBM products should be addressed to thesuppliers of those products.
This information contains examples of data and reports used in daily businessoperations. To illustrate them as completely as possible, the examples include thenames of individuals, companies, brands, and products. All of these names arefictitious and any similarity to the names and addresses used by an actual businessenterprise is entirely coincidental.
COPYRIGHT LICENSE:
This information contains sample application programs in source language, whichillustrate programming techniques on various operating platforms. You may copy,modify, and distribute these sample programs in any form without payment toIBM, for the purposes of developing, using, marketing or distributing applicationprograms conforming to the application programming interface for the operatingplatform for which the sample programs are written. These examples have notbeen thoroughly tested under all conditions. IBM, therefore, cannot guarantee orimply reliability, serviceability, or function of these programs. The sampleprograms are provided "AS IS", without warranty of any kind. IBM shall not beliable for any damages arising out of your use of the sample programs.
246 IBM Tivoli Storage Manager for Virtual Environments: Data Protection for VMware User's Guide

Each copy or any portion of these sample programs or any derivative work, mustinclude a copyright notice as follows:Portions of this code are derived from IBM® Corp. Sample Programs.
© Copyright IBM® Corp. _enter the year or years_. All rights reserved.
Trademarks
IBM, the IBM logo, and ibm.com® are trademarks or registered trademarks ofInternational Business Machines Corp., registered in many jurisdictions worldwide.Other product and service names might be trademarks of IBM or other companies.A current list of IBM trademarks is available on the Web at "Copyright andtrademark information" at www.ibm.com/legal/copytrade.shtml.
Adobe is a registered trademark of Adobe Systems Incorporated in the UnitedStates, and/or other countries.
Linear Tape-Open, LTO, and Ultrium are trademarks of HP, IBM Corp. andQuantum in the U.S. and other countries.
Intel and Itanium are trademarks or registered trademarks of Intel Corporation orits subsidiaries in the United States and other countries.
Linux is a registered trademark of Linus Torvalds in the United States, othercountries, or both.
Microsoft, Windows, and Windows NT are trademarks of Microsoft Corporation inthe United States, other countries, or both.
Java and all Java-based trademarks and logos are trademarks or registeredtrademarks of Oracle and/or its affiliates.
UNIX is a registered trademark of The Open Group in the United States and othercountries.
Terms and conditions for product documentation
Permissions for the use of these publications are granted subject to the followingterms and conditions.
ApplicabilityThese terms and conditions are in addition to any terms of use for the IBMwebsite.
Personal useYou may reproduce these publications for your personal, noncommercialuse provided that all proprietary notices are preserved. You may notdistribute, display or make derivative work of these publications, or anyportion thereof, without the express consent of IBM.
Commercial useYou may reproduce, distribute and display these publications solely withinyour enterprise provided that all proprietary notices are preserved. Youmay not make derivative works of these publications, or reproduce,distribute or display these publications or any portion thereof outside yourenterprise, without the express consent of IBM.
Rights Except as expressly granted in this permission, no other permissions,
Notices 247

licenses or rights are granted, either express or implied, to the publicationsor any information, data, software or other intellectual property containedtherein.
IBM reserves the right to withdraw the permissions granted hereinwhenever, in its discretion, the use of the publications is detrimental to itsinterest or, as determined by IBM, the above instructions are not beingproperly followed.
You may not download, export or re-export this information except in fullcompliance with all applicable laws and regulations, including all UnitedStates export laws and regulations.
IBM MAKES NO GUARANTEE ABOUT THE CONTENT OF THESEPUBLICATIONS. THE PUBLICATIONS ARE PROVIDED "AS-IS" ANDWITHOUT WARRANTY OF ANY KIND, EITHER EXPRESSED ORIMPLIED, INCLUDING BUT NOT LIMITED TO IMPLIED WARRANTIESOF MERCHANTABILITY, NON-INFRINGEMENT, AND FITNESS FOR APARTICULAR PURPOSE.
Privacy policy considerations
IBM Software products, including software as a service solutions, (“SoftwareOfferings”) may use cookies or other technologies to collect product usageinformation, to help improve the end user experience, to tailor interactions withthe end user, or for other purposes. In many cases no personally identifiableinformation is collected by the Software Offerings. Some of our Software Offeringscan help enable you to collect personally identifiable information. If this SoftwareOffering uses cookies to collect personally identifiable information, specificinformation about this offering’s use of cookies is set forth below.
This Software Offering does not use cookies or other technologies to collectpersonally identifiable information.
If the configurations deployed for this Software Offering provide you as customerthe ability to collect personally identifiable information from end users via cookiesand other technologies, you should seek your own legal advice about any lawsapplicable to such data collection, including any requirements for notice andconsent.
For more information about the use of various technologies, including cookies, forthese purposes, see IBM’s Privacy Policy at http://www.ibm.com/privacy andIBM’s Online Privacy Statement at http://www.ibm.com/privacy/details in thesection entitled “Cookies, Web Beacons and Other Technologies,” and the “IBMSoftware Products and Software-as-a-Service Privacy Statement” athttp://www.ibm.com/software/info/product-privacy.
248 IBM Tivoli Storage Manager for Virtual Environments: Data Protection for VMware User's Guide
Glossary
A glossary is available with terms and definitions for the IBM Tivoli Storage Manager family of products.
See Tivoli Storage Manager glossary.
To view glossaries for other IBM products, see IBM Terminology.
© Copyright IBM Corp. 2011, 2017 249

250 IBM Tivoli Storage Manager for Virtual Environments: Data Protection for VMware User's Guide

Index
Special characters.vmx file
attributes 176
Aaccessibility features 243Active Directory
verify replication 162Active Directory domain controllers 82application protection
Active Directory domain controllers 82USN Rollback 82
automated client failoveroverview 15
Bback up virtual machines
on-demand 26backing up virtual machine data
with Data Protection for VMware 129backing up VM data
with bothTivoli Storage FlashCopy Manager for VMwareand Data Protection for VMware 134
with Tivoli Storage FlashCopy Manager for VMware 132backup
backing up with one data mover 146migrated virtual machine 136organization vDC 137specifying domain-level parameters 143specifying objects 150task 136, 143, 146, 150templates 14vApp 14, 138vmcli command 86
backup managementconfigure backup policy 29, 30
backup policychange retention policy 30configure 29, 30exclude virtual machines 29
Cchange retention policy
configure backup policy 30configure IBM Data Protection extension
create backup management tags 28set data mover node 26tagging support 26
create tagsconfigure IBM Data Protection extension 28
Ddata protection
general help 49
Data Protection for VMwareusing Data Protection for Microsoft Exchange Server 49
disability 243disks
control 14domain controller
verify replication 162
Eenable tracing
troubleshooting the IBM Data Protection extension 178errors 165exclude virtual machines
configure backup policy 29
Ffailover
client 15FBP1001I 227FBP1003I 227FBP1005I 227FBP1008I 227FBP1009I 228FBP1011I 228FBP1013I 228FBP1014I 228FBP1100I 228FBP1101I 228FBP1102I 228FBP1103I 228FBP1104I 228FBP1300I 228FBP1301W 228FBP1302E 229FBP1303E 229FBP1304E 229FBP1305I 229FBP5003W 229FBP5005W 229FBP5007W 229FBP5008W 229FBP5010W 230FBP5011W 230FBP5012W 230FBP5013W 230FBP5015W 230FBP5017W 230FBP5018W 231FBP5020W 231FBP5021W 231FBP5023W 231FBP5025W 231FBP5026W 231FBP5028W 231FBP5029W 232FBP5030W 232FBP5031W 232FBP5032W 232
© Copyright IBM Corp. 2011, 2017 251

FBP5033W 232FBP5034W 232FBP5035W 232FBP7003E 233FBP7004E 233FBP7005E 233FBP7006E 233FBP7007E 233FBP7008E 233FBP7009E 233FBP7012E 233FBP7013E 233FBP7014E 233FBP7015E 234FBP7016E 234FBP7017E 234FBP7018E 234FBP7019E 234FBP7020E 234FBP7021E 234FBP7022E 234FBP7023E 235FBP7024E 235FBP7025E 235FBP7026E 235FBP7027E 235FBP7028E 235FBP7029E 235FBP7030E 235FBP7031E 235FBP7032E 236FBP7033E 236FBP7035E 236FBP7036E 236FBP7037E 236FBP7038E 236FBP8001E 236FBP8002E 236FBP8003E 236FBP8004E 236FBP8007E 236FBP8008E 237FBP8009E 237FBP8012E 237FBP8015E 237FBP8016E 237FBP8019E 237FBP8020E 237FBP8023E 237FBP8024E 237FBP8025E 237FBP8026E 237FBP8027E 238FBP8029E 238FBP8031E 238FBP8032E 238FBP8033E 238FBP8034E 238FBP8036E 238FBP8037E 238FBP8041E 238FBP8042E 239FBP8043E 239FBP8044E 239FBP8045E 239FBP8046E 239FBP8047E 239
FBP8048E 239FBP8050E 239FBP8051E 239FBP8052E 239FBP8053E 239FBP9000E 240FBP9001E 240FBP9002E 240FBP9003E 240FBP9004E 240FBP9005E 240FBP9006E 240FBP9007E 240FBP9008E 240FBP9009E 240FBP9010E 241file restore
configuring tracing 175description 35logging in 38prerequisites 36procedure 38solutions
unique issues 176troubleshooting
diagnostic procedure 174files
restore overview 186restore task (Linux) 194restore task (Windows) 187
full VM instant restoreenvironment requirements 17scenarios 157validation scenarios 160
Gget_password_info
vmcli command 109
IIBM Data Protection extension
troubleshooting 177IBM Data Protection extension messages
troubleshooting 179IBM Knowledge Center vinquire_config
vmcli command 95inquire_detail
vmcli command 100installing
roadmap 23instant restore
overview 186task (Linux) 194task (Windows) 191
Kkeyboard 243Knowledge Center v
252 IBM Tivoli Storage Manager for Virtual Environments: Data Protection for VMware User's Guide

LLAN environment 183
Mmailbox history information
updating in Microsoft Exchange Server backups 48messages
Data Protection for VMware vSphere GUI 199Tivoli Storage Manager recovery agent 219
Microsoft Exchange Server backupsupdating mailbox history 48
mounting a disk 153mounting snapshots 183
NNew in Data Protection for VMware Version 7.1.8 vii
Oon-demand virtual machine backup 26operating systems
Linux 183Windows 183
organization vDCbackup 137
out-of-space errors 16
Pplanning
roadmap 23platform services controller connection
troubleshooting the IBM Data Protection extension 177problem determination 165publications v
Rreplication
verify Active Directory 162verify domain controller 162
restoreconfiguring tracing 175file 36, 38, 175
solutions 176troubleshooting 174
file restore description 35instant
full VM requirements 17logging in 38prerequisites 36procedure 38templates 14vApp 14vCloud scenario 156vmcli command 89vSphere scenario 157
restoring dataExchange Server 2010 59Exchange Server 2013 59Mailbox Restore Browser 59
Sscheduling a backup
with both Tivoli Storage FlashCopy Manager for VMwareand Data Protection for VMware 134
with Data Protection for VMware 129with Tivoli Storage FlashCopy Manager for VMware 132
set tag data moverconfigure IBM Data Protection extension 26
set_domianvmcli command 103
set_mappingvmcli command 104
set_optionvmcli command 105
set_passwordvmcli command 107
snapshotsmounting 183
start_guest_scanvmcli command 110
Ttagging support
configure IBM Data Protection extension 26templates 14tracing
file restore 175troubleshooting 165
file restorediagnostic procedure 174unique issues 176
IBM Data Protection extension problems 177troubleshooting the IBM Data Protection extension
enable tracing 178messages 179platform services controller connection 177
Uupdating mailbox history information 48USN Rollback 82
VvApp 14
backup 138VM backup 132vmcli command
backup 86get_password_info 109inquire_config 95inquire_detail 100restore 89set_domain 103set_mapping 104set_option 105set_password 107start_guest_scan 110
vmdatastorethresholdusage 16
volumesrestore overview 186restore task (Linux) 194restore task (Windows) 187
Index 253

VSS backup Data Protection for VMwarewith Data Protection for Microsoft Exchange Server 49
254 IBM Tivoli Storage Manager for Virtual Environments: Data Protection for VMware User's Guide


IBM®
Product Number: 5725-A44
Printed in USA