inkscape tutorial - tracing images and photos · inkscape tutorial - tracing images and photos 1....
TRANSCRIPT
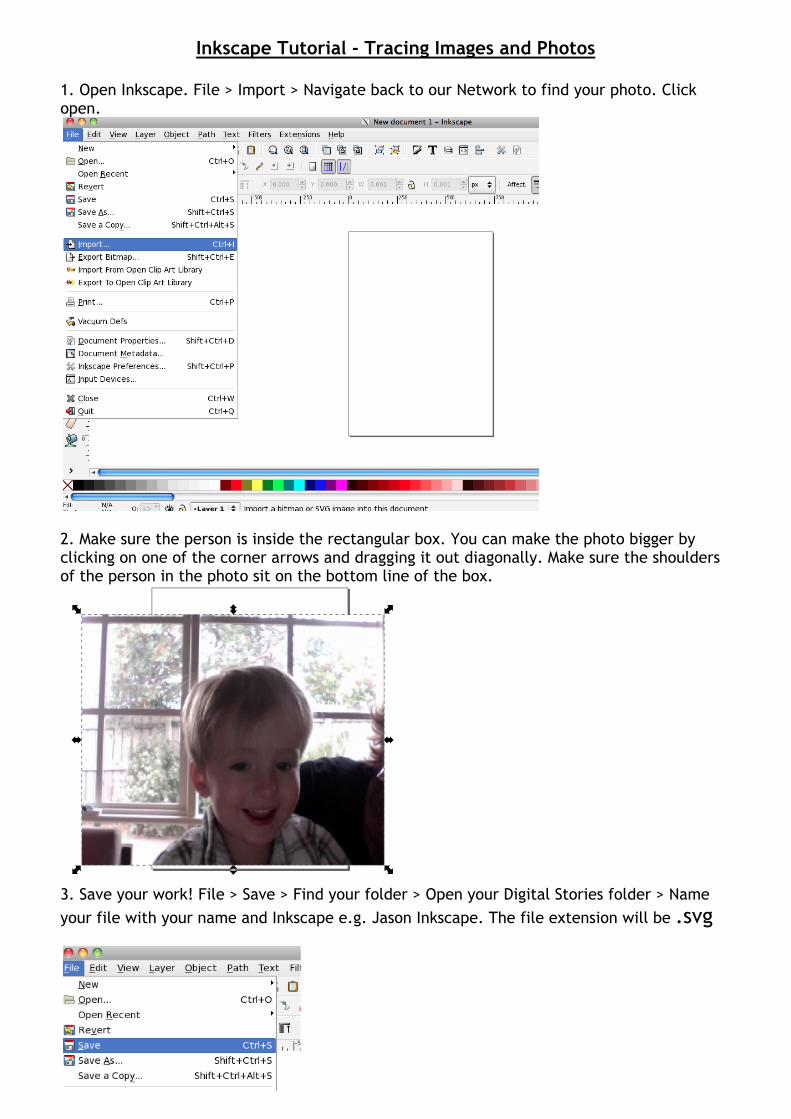
Inkscape Tutorial - Tracing Images and Photos 1. Open Inkscape. File > Import > Navigate back to our Network to find your photo. Click open.
2. Make sure the person is inside the rectangular box. You can make the photo bigger by clicking on one of the corner arrows and dragging it out diagonally. Make sure the shoulders of the person in the photo sit on the bottom line of the box.
3. Save your work! File > Save > Find your folder > Open your Digital Stories folder > Name your file with your name and Inkscape e.g. Jason Inkscape. The file extension will be .svg
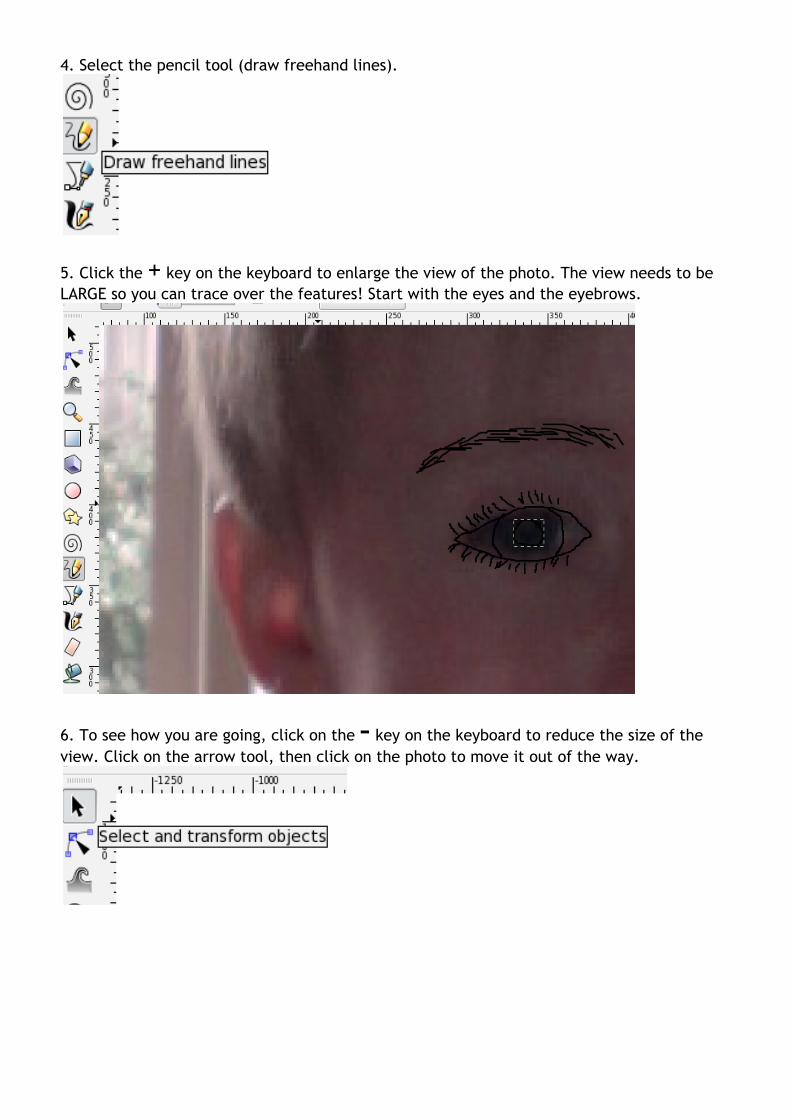
4. Select the pencil tool (draw freehand lines).
5. Click the + key on the keyboard to enlarge the view of the photo. The view needs to be LARGE so you can trace over the features! Start with the eyes and the eyebrows.
6. To see how you are going, click on the – key on the keyboard to reduce the size of the view. Click on the arrow tool, then click on the photo to move it out of the way.
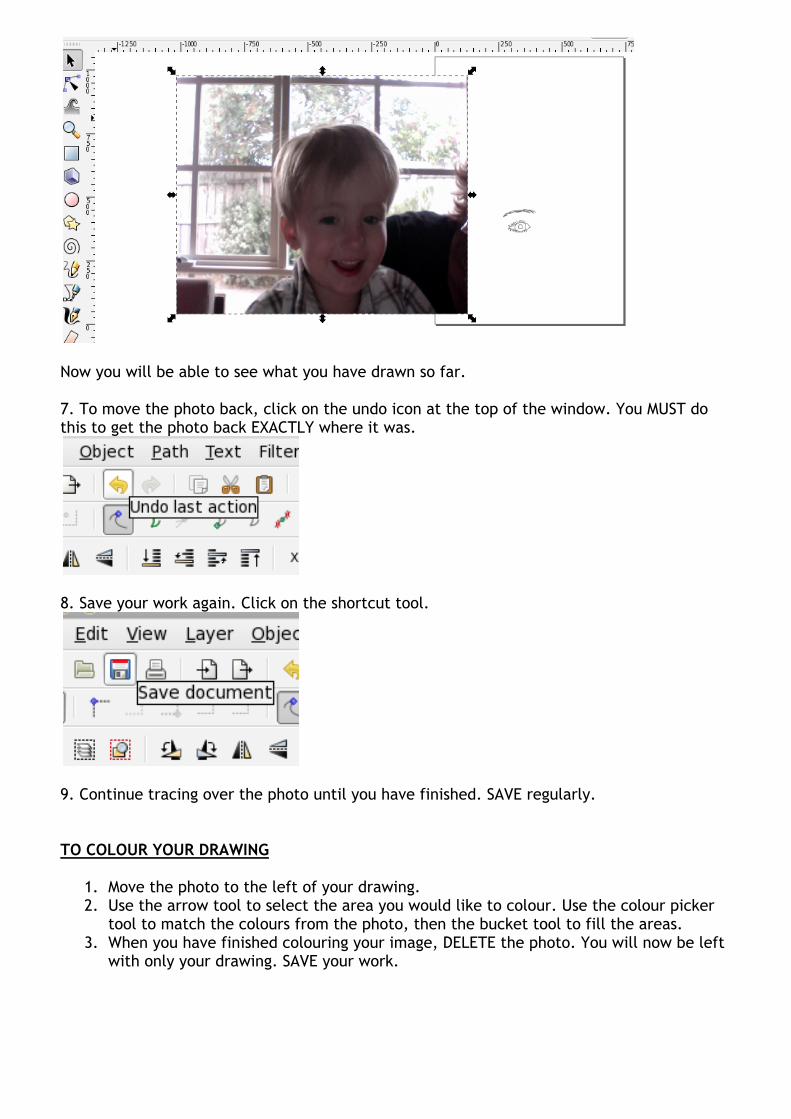
Now you will be able to see what you have drawn so far. 7. To move the photo back, click on the undo icon at the top of the window. You MUST do this to get the photo back EXACTLY where it was.
8. Save your work again. Click on the shortcut tool.
9. Continue tracing over the photo until you have finished. SAVE regularly. TO COLOUR YOUR DRAWING
1. Move the photo to the left of your drawing. 2. Use the arrow tool to select the area you would like to colour. Use the colour picker
tool to match the colours from the photo, then the bucket tool to fill the areas. 3. When you have finished colouring your image, DELETE the photo. You will now be left
with only your drawing. SAVE your work.
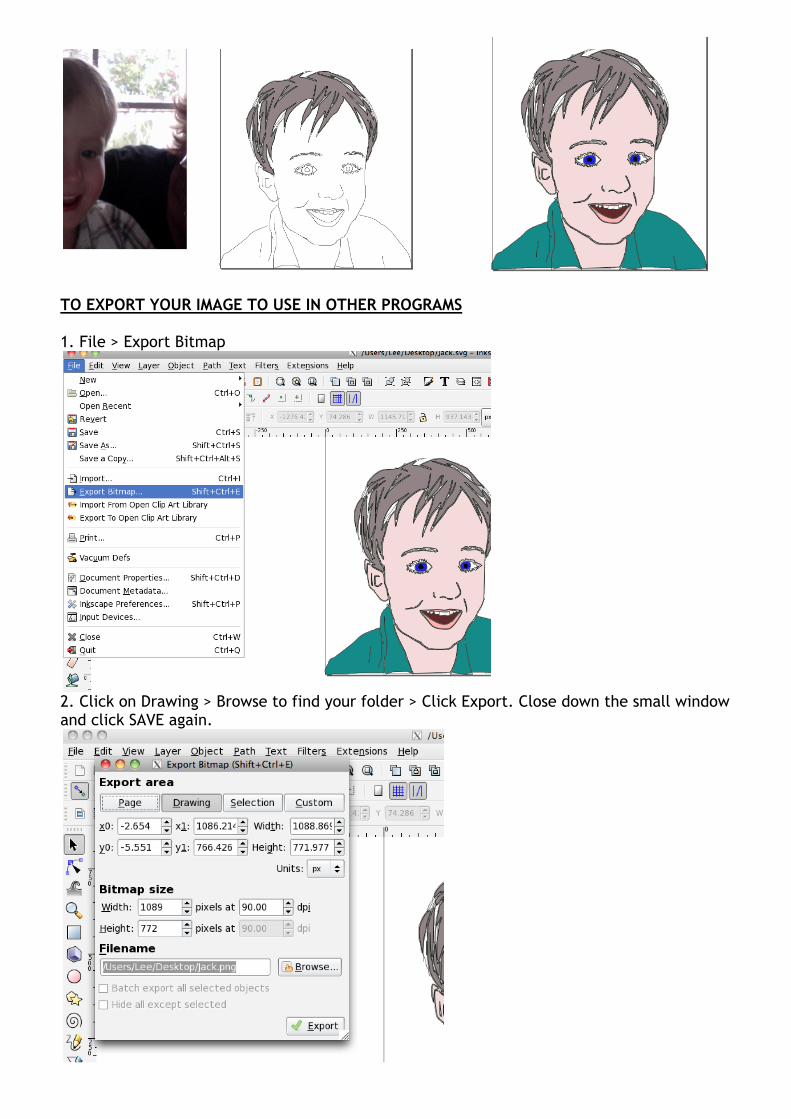
TO EXPORT YOUR IMAGE TO USE IN OTHER PROGRAMS 1. File > Export Bitmap
2. Click on Drawing > Browse to find your folder > Click Export. Close down the small window and click SAVE again.

TO IMPORT YOUR IMAGE INTO ANOTHER PROGRAM To import into Photostory: Open Photostory > Import images > navigate to your folder where the image is stored > click on the image (Jason Inkscape.png) > click OPEN. To import into Word: Open Word > Insert > Image > navigate to your folder where the image is stored > click on the image (Jason Inkscape.png) > click OPEN.