installing adobe livecycle workbench 11 last updated 11/19/2013 chapter 1: about this document this...
TRANSCRIPT

INSTALLING ADOBE® LIVECYCLE® WORKBENCH 11

Last updated 11/19/2013
Legal notices
Legal noticesFor legal notices, see http://help.adobe.com/en_US/legalnotices/index.html.
iii
Last updated 11/19/2013
Contents
Chapter 1: About This Document
1.1 Who should read this document? . . . . . . . . . . . . . . . . . . . . . . . . . . . . . . . . . . . . . . . . . . . . . . . . . . . . . . . . . . . . . . . . . . . . . . . . . . . . . . . . . . . 1
1.2 Additional information . . . . . . . . . . . . . . . . . . . . . . . . . . . . . . . . . . . . . . . . . . . . . . . . . . . . . . . . . . . . . . . . . . . . . . . . . . . . . . . . . . . . . . . . . . . . . 1
Chapter 2: Before You Install
2.1 Workbench installation overview . . . . . . . . . . . . . . . . . . . . . . . . . . . . . . . . . . . . . . . . . . . . . . . . . . . . . . . . . . . . . . . . . . . . . . . . . . . . . . . . . . . 2
2.2 System prerequisites . . . . . . . . . . . . . . . . . . . . . . . . . . . . . . . . . . . . . . . . . . . . . . . . . . . . . . . . . . . . . . . . . . . . . . . . . . . . . . . . . . . . . . . . . . . . . . . 2
2.3 Upgrade considerations . . . . . . . . . . . . . . . . . . . . . . . . . . . . . . . . . . . . . . . . . . . . . . . . . . . . . . . . . . . . . . . . . . . . . . . . . . . . . . . . . . . . . . . . . . . . 3
2.4 Designer installation considerations . . . . . . . . . . . . . . . . . . . . . . . . . . . . . . . . . . . . . . . . . . . . . . . . . . . . . . . . . . . . . . . . . . . . . . . . . . . . . . . . 3
Chapter 3: Installing Workbench
3.1 Installing and running Workbench . . . . . . . . . . . . . . . . . . . . . . . . . . . . . . . . . . . . . . . . . . . . . . . . . . . . . . . . . . . . . . . . . . . . . . . . . . . . . . . . . . 5
3.2 Upgrading processes . . . . . . . . . . . . . . . . . . . . . . . . . . . . . . . . . . . . . . . . . . . . . . . . . . . . . . . . . . . . . . . . . . . . . . . . . . . . . . . . . . . . . . . . . . . . . . . 6
3.3 Installing the Workbench Eclipse feature . . . . . . . . . . . . . . . . . . . . . . . . . . . . . . . . . . . . . . . . . . . . . . . . . . . . . . . . . . . . . . . . . . . . . . . . . . . . 6
3.4 Configuring and logging in to a server . . . . . . . . . . . . . . . . . . . . . . . . . . . . . . . . . . . . . . . . . . . . . . . . . . . . . . . . . . . . . . . . . . . . . . . . . . . . . . 6
3.5 Configuring time-out settings . . . . . . . . . . . . . . . . . . . . . . . . . . . . . . . . . . . . . . . . . . . . . . . . . . . . . . . . . . . . . . . . . . . . . . . . . . . . . . . . . . . . . 7
3.6 Configuring Workbench to connect over HTTPS . . . . . . . . . . . . . . . . . . . . . . . . . . . . . . . . . . . . . . . . . . . . . . . . . . . . . . . . . . . . . . . . . . . . . 7
3.7 Configuring cache settings for dynamically generated templates . . . . . . . . . . . . . . . . . . . . . . . . . . . . . . . . . . . . . . . . . . . . . . . . . . . . 8
3.8 Uninstalling Workbench . . . . . . . . . . . . . . . . . . . . . . . . . . . . . . . . . . . . . . . . . . . . . . . . . . . . . . . . . . . . . . . . . . . . . . . . . . . . . . . . . . . . . . . . . . . . 9
Chapter 4: Configuring Adobe LiveCycle XDC Editor 10
1
Last updated 11/19/2013
Chapter 1: About This Document
This document provides instructions for installing and configuring Adobe® LiveCycle® Workbench 11. The installation
program also installs Adobe® LiveCycle® Designer 11.
1.1 Who should read this document?
This document is intended for administrators or developers who are responsible for installing, configuring,
administering, or deploying Workbench. Also included is information needed to configure your system to support
your upgraded Adobe® LiveCycle® Enterprise Suite (ES) Update 1 (8.2.x) and Adobe® LiveCycle® Enterprise Suite 2
(ES2) processes. The information provided is based on the assumption that anyone reading this document is familiar
with Microsoft® Windows® operating systems.
1.2 Additional information
The resources in this table can help you learn more about and get started using Adobe® LiveCycle® Enterprise Suite 4
(ES4).
For information about See
Procedural information for Workbench Workbench Help
General information about LiveCycle and how it integrates with
other Adobe products
LiveCycle Overview
A tutorial for creating a LiveCycle application and testing it in
Adobe® LiveCycle® Workspace 11
Creating Your First LiveCycle Application
All the documentation available for LiveCycle LiveCycle documentation
Other services and products that integrate with LiveCycle http://www.adobe.com/
Patch updates, technical notes, and additional information on this
product version
Contact Adobe Enterprise Support
2
Last updated 11/19/2013
Chapter 2: Before You Install
Workbench is an integrated development environment (IDE) that developers and form authors use to create
automated business processes and forms. It is also used to manage the resources and services that the processes and
forms use.
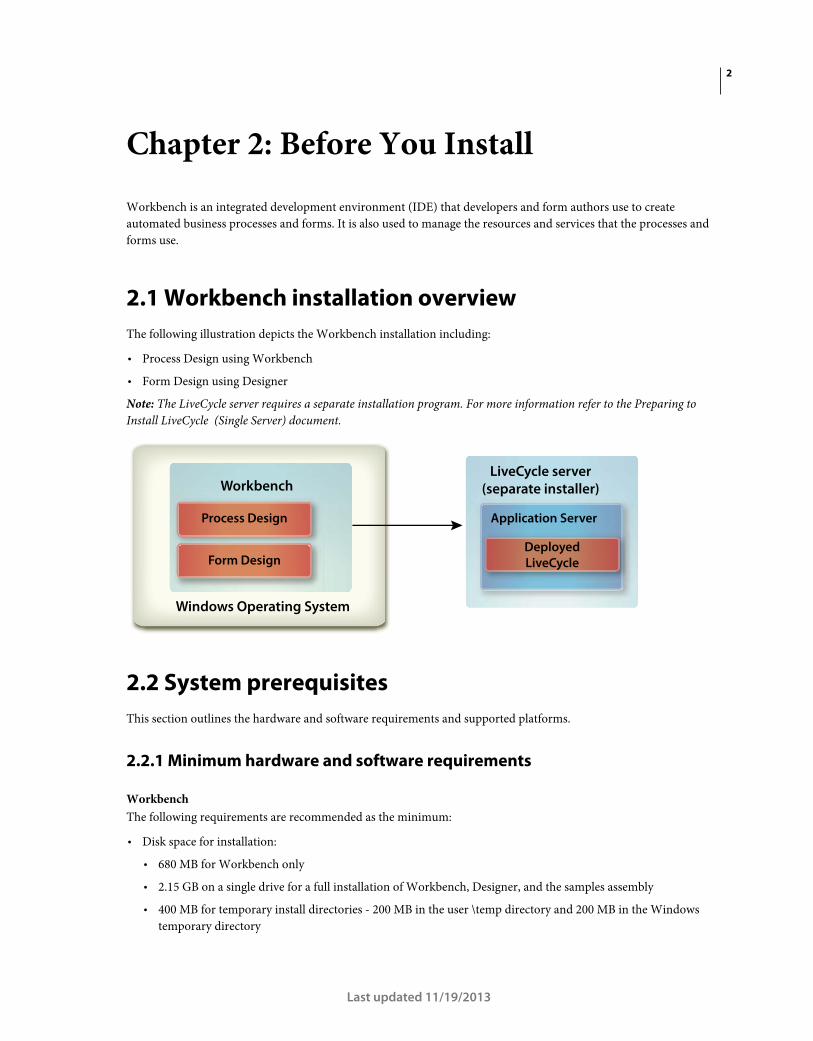
2.1 Workbench installation overview
The following illustration depicts the Workbench installation including:
• Process Design using Workbench
• Form Design using Designer
Note: The LiveCycle server requires a separate installation program. For more information refer to the Preparing to
Install LiveCycle (Single Server) document.
2.2 System prerequisites
This section outlines the hardware and software requirements and supported platforms.
2.2.1 Minimum hardware and software requirements
Workbench
The following requirements are recommended as the minimum:
• Disk space for installation:
• 680 MB for Workbench only
• 2.15 GB on a single drive for a full installation of Workbench, Designer, and the samples assembly
• 400 MB for temporary install directories - 200 MB in the user \temp directory and 200 MB in the Windows
temporary directory
Windows Operating System
Deployed LiveCycle
LiveCycle server(separate installer)
Process Design
Workbench
Form Design
Application Server
3INSTALLING ADOBE LIVECYCLE WORKBENCH 11
Before You Install
Last updated 11/19/2013
Note: If all of these locations reside on a single drive, there must be 1.5 GB of space available during installation. The
files copied to the temporary directories are deleted when installation is complete.
• Hardware requirement: Intel® Pentium® 4 or AMD equivalent, 1 GHz processor.
• Download and install the latest version of Adobe AIR (from http://www.adobe.com) required for Community Help
Client, integrated with Workbench.
• Java™ Runtime Environment (JRE) 6.0 update 22 or later updates to 6.0 *New for 10*
• Minimum1024 X 768 pixels or greater monitor resolution with 16-bit color or higher
• TCP/IPv4 or TCP/IPv6 network connection to the LiveCycle server
Note: If you have Adobe® Acrobat® X installed on your machine, ensure that you uninstall it before installing Workbench.
You can reinstall Acrobat after installing Workbench.
Note: You must have Administrative privileges to install Workbench. If you are installing using a non-administrator
account, the installer will prompt you for the credentials for an appropriate account.
Designer
The following minimum requirements are necessary to take advantage of the latest Designer features.
• A minimum of Acrobat X Pro Extended is required to benefit from all the new features in Designer 11.
• Adobe® Flash® Player 10.2 or later.
• (Optional) Adobe® Flash® Builder™ 4.5 or later.
• (Optional) Adobe® Flex® 4 SDK (required for customizing form guide (deprecated) components that are shipped
with Designer).
Note: Use the Flex 4 SDK included with the Designer installer only. Do not use any version of Flex SDK obtained from
the Adobe web site.
2.2.2 Supported platforms
See the complete list of supported platforms for Workbench at Adobe LiveCycle ES4 Supported Platforms.
2.3 Upgrade considerations
The Workbench installer creates new directories and installs all new files, which allows Workbench to co-exist on the
same machine with an existing Workbench installation. Upgrading your LiveCycle 8.2.x and LiveCycle 9.x processes
to LiveCycle is supported and will run as expected on your upgraded LiveCycle server. However, these processes and
their dependent assets have to be upgraded before they can be deployed. (See “3.2 Upgrading processes” on page 6)
Once you have determined that your Workbench installation is running properly, you can uninstall Workbench. (See
“3.8 Uninstalling Workbench” on page 9)
2.4 Designer installation considerations
By default, the Workbench installation includes a corresponding English-only version of Designer. If the Workbench
installation application detects an existing version of Designer on your computer, the installation may terminate and
you will be required to remove the current version of Designer before you can continue.

4INSTALLING ADOBE LIVECYCLE WORKBENCH 11
Before You Install
Last updated 11/19/2013
The table below has a complete list of possible Designer installation scenarios that you may encounter, as well as any
actions you must take, when installing Workbench.
2.4.1 To uninstall Designer (stand-alone):
1 Select Start > Settings > Control Panel > Add/Remove Programs.
2 In the Currently installed programs list, select Adobe LiveCycle Designer 11.
3 Click Remove and then click Yes.
2.4.2 To uninstall Designer (stand-alone) on Windows 7:
1 Select Start > Settings > Control Panel > Programs and Features.
2 In the Currently installed programs list, select Adobe LiveCycle Designer 11.
3 Click Remove and then click Yes.
2.4.3 To uninstall Designer included with Acrobat Pro or Acrobat Pro
Extended:
1 Select Start > Settings > Control Panel > Add/Remove Programs.
2 In the Currently installed programs list, select Adobe Acrobat Pro or Adobe Acrobat Pro Extended.
3 Click Change/Remove and then click Next.
4 Select Modify, and then click Next.
5 Select Adobe LiveCycle Designer 11, select This feature will not be available, and then click Next.
6 Click Update and then click Finish.
2.4.4 To uninstall Designer included with Acrobat Pro or Acrobat Pro
Extended in Windows 7:
1 Select Start > Settings > Control Panel > Programs and Features.
2 In the Currently installed programs list, select Adobe Acrobat Pro or Adobe Acrobat Pro Extended.
3 Click Change/Remove and then click Next.
4 Select Modify, and then click Next.
5 Select Adobe LiveCycle Designer 11, select This feature will not be available, and then click Next.
6 Click Update and then click Finish.
Version of Designer 11 currently installed Required actions
Acrobat Pro or Acrobat Pro Extended (includes
Designer)
None. The Workbench installation detects an instance of Designer on your computer that
was installed with either Acrobat Pro or Acrobat Pro Extended.
Different versions of Designer can coexist on the same system, for example Designer 8.2.x
and 9.0.x. It is not necessary to uninstall the version of Designer installed with Acrobat 10
Pro or Acrobat 10 Pro Extended.
Designer (stand-alone) None. The version of Designer included with Workbench is English-only. The Workbench
installer will not reinstall a new version of Designer. Instead an updated version, bundled
with the Workbench installer, will be patched. This also allows you to use your localized
version of Designer within Workbench.
5
Last updated 11/19/2013
Chapter 3: Installing Workbench
This chapter describes how to install Workbench.
Before you install Workbench, you must ensure that your environment includes the software and hardware required
to run it. (See “Before You Install” on page 2.)
3.1 Installing and running Workbench
This procedure explains how to install Workbench. This procedure installs Designer and the Workbench Eclipse
feature.
3.1.1 To install and run Workbench:
1 Do one of these tasks:
• Navigate to the \workbench directory on the install media and double click the run_windows_installer.bat file.
• Download and decompress the Workbench to your file system. After it is downloaded, navigate to the
\workbench directory and double click the run_windows_installer.bat file.
Important: The Workbench installer only runs from a DVD or local drive. It cannot be run from a remote site.
2 On the Introduction screen, click Next.
3 Read the Product License Agreement, select I accept the terms of the License Agreement, and then click Next.
4 (Optional) Select Install Adobe LiveCycle Designer 11 if you require this tool to create and modify forms.
Note: You can continue to use Designer installed with Acrobat 10 by leaving this option deselected.
5 Accept the default directory as listed, or click Choose and navigate to the directory where you will install
Workbench, and then click Next.
Note: The installation directory path should not contain # (pound) and $ (dollar) characters.
6 Review the preinstallation summary and click Install. The installation program displays the progress of the
installation.
7 Review the installation summary. Select Start Adobe LiveCycle Workbench 11 to launch Workbench and click
Next.
8 Review the Release Notes and click Done.
9 The following items are now installed on your computer:
• Workbench: To run Workbench from the Start menu, select All Programs > Adobe LiveCycle ES4 >
Workbench 11, if you chose to store the shortcut folder there. For information , see Using Workbench.
• Designer: You can access Designer from inside Workbench. For information, see Getting Started topic in
Designer Help.
• Workbench plug-in: Follow the instructions in “3.3 Installing the Workbench Eclipse feature” on page 6.
• LiveCycle SDK: For more information on using the SDK, see Programming with LiveCycle.
6INSTALLING ADOBE LIVECYCLE WORKBENCH 11
Installing Workbench
Last updated 11/19/2013
3.2 Upgrading processes
LiveCycle ES Update 1 and LiveCycle ES2 processes can be upgraded to LiveCycle ES4 applications using the Upgrade
Wizard. See Upgrading legacy artifacts for more information.
3.3 Installing the Workbench Eclipse feature
You can optionally add the Workbench feature to Eclipse. You can add Workbench after you have installed
Workbench. For example, for JBoss the following location contains the file:
• Workbench_DVD/additional/eclipse
Download and install Eclipse 3.6 from www.eclipse.org/downloads/.
3.3.1 Configuring Eclipse update feature for Workbench
Workbench supports the update feature to ensure you are using the most updated Eclipse version. However, you must
ensure that certain additional modules are included with each download:
3.3.1.1 To install and deploy the Workbench feature to Eclipse:
1 Start Eclipse.
2 Select Help > Install New Software, click Add to open the Add Repository dialog.
3 On the Add Repository dialog, click Local and browse to the directory where the Workbench installation saved the
plug-in ZIP file, select workbench-updatesite.zip, and then click Open.
4 Follow the instructions on the subsequent screens to deploy the Workbench feature to Eclipse.
Note: Ignore the message "Warning: You are about to install an unsigned feature,” and click Install to continue.
The Adobe LiveCycle Discovery Plug-in for Flash Builder enables you to quickly build Adobe Flex and AIR
applications that invoke a service that is part of LiveCycle through its remoting endpoints. Information about how to
install and update the plug-in is available on the Adobe web site at www.adobe.com/go/learn_flex4_sdp_en.
3.4 Configuring and logging in to a server
To use Workbench, you must have an instance of LiveCycle running, typically on a separate computer. You must have
a user name and password to log in to LiveCycle , as well as details about the location of the server.
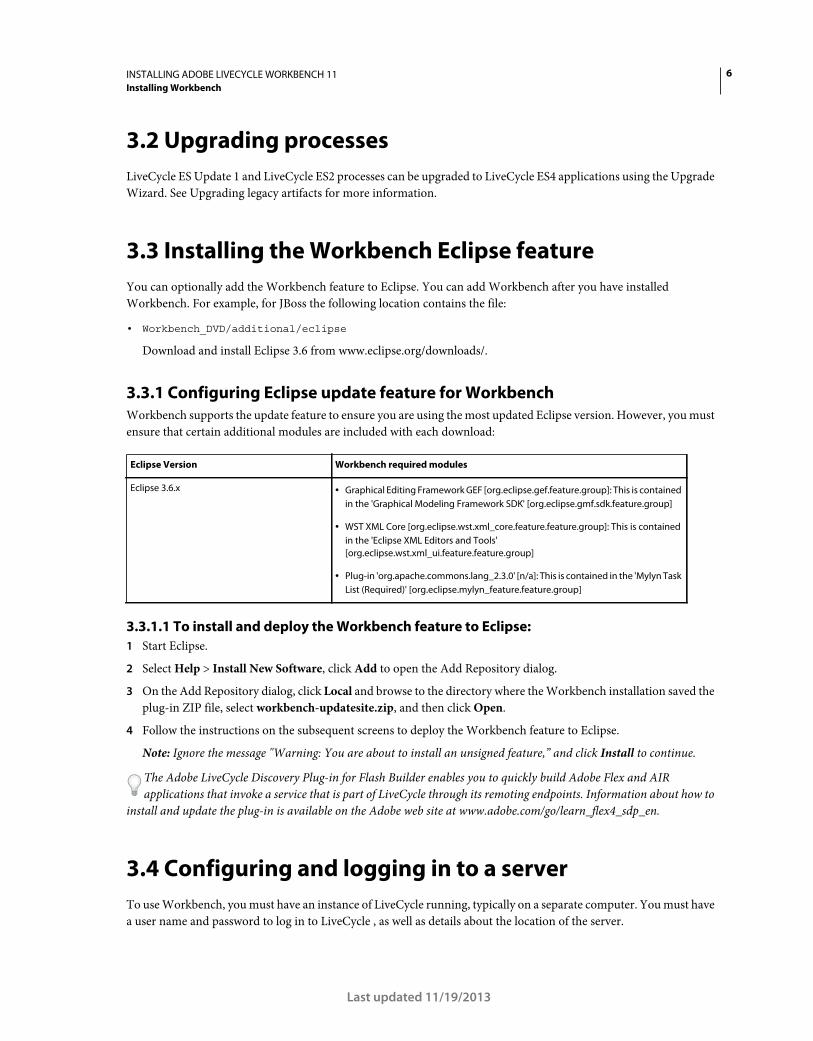
Eclipse Version Workbench required modules
Eclipse 3.6.x • Graphical Editing Framework GEF [org.eclipse.gef.feature.group]: This is contained
in the 'Graphical Modeling Framework SDK' [org.eclipse.gmf.sdk.feature.group]
• WST XML Core [org.eclipse.wst.xml_core.feature.feature.group]: This is contained
in the 'Eclipse XML Editors and Tools'
[org.eclipse.wst.xml_ui.feature.feature.group]
• Plug-in 'org.apache.commons.lang_2.3.0' [n/a]: This is contained in the 'Mylyn Task
List (Required)' [org.eclipse.mylyn_feature.feature.group]
7INSTALLING ADOBE LIVECYCLE WORKBENCH 11
Installing Workbench
Last updated 11/19/2013
Note: If you configured LiveCycle to use the EMC Documentum or IBM FileNet repository provider and you want to log
in to a repository other than the repository that is configured as the default in LiveCycle Administration Console, provide
the user name as username@Repository.
3.5 Configuring time-out settings
By default, Workbench times out after two hours, regardless of activity or inactivity. To edit the time-out setting, see
“Configuring User Management > Configure advanced system attributes” in the Administration Console Help.
3.6 Configuring Workbench to connect over HTTPS
To connect Workbench to a LiveCycle server over HTTPS, you must ensure that the certificate authority (CA) that
issued the public key will be recognized as being trusted by Workbench. If the certificate is not recognized as coming
from a trusted source, you must update the cacert file located in the [Workbench_HOME]/jre/lib/security directory.
Note: [Workbench_HOME] represents the directory where you installed Workbench. The default location is C:\Program
Files (x86)\Adobe\Adobe LiveCycle Workbench ES4\workbench.
Ensure that you connect to HTTPS by using the name that is specified in the certificate. This name is typically the fully
qualified host name.
3.6.1 To update the cacert file:
1 Ensure that you have a copy of the Secure Sockets Layer (SSL) certificate. Either contact the administrator who
configured the SSL server or export the certificate by using a web browser.
To export the certificate, open a web browser and log in to Administration Console, install the certificate in the
browser, then export the certificate from the browser to a temporary storage location (or directly to the
[Workbench_HOME]/jre/lib/security directory).
2 Copy the certificate to the [Workbench_HOME]/jre/lib/security directory.
3 Open a command prompt window, navigate to [Workbench_HOME]/jre/bin, and then type the following
command:
keytool -import -storepass changeit -file [Workbench_HOME]\jre\lib\security\ssl_cert_for_certname.cer -keystore [Workbench_HOME]\jre\lib\security\cacerts -alias example
where:
• changeit is the default password to the cacerts keystore.
• certname is the certificate you selected in step 1.
• example is the alias you choose for the certificate. This value can be changed.
4 When prompted to trust the certificate, type Yes and hit the Enter key. The keytool proceeds to import the cacerts
file in to the [Workbench_HOME]/jre/lib/security directory.
5 Close and restart Workbench for the changes to take affect.
8INSTALLING ADOBE LIVECYCLE WORKBENCH 11
Installing Workbench
Last updated 11/19/2013
3.7 Configuring cache settings for dynamically generated templates
The following aspects of cache operation should be considered if your application generates unique templates on the
fly by automatically updating XFA content. In effect, each transaction uses a new, unique template.
When Adobe® LiveCycle® Forms Standard 11 or Adobe® LiveCycle® Output 11 searches for, or updates, entries in the
cache for a specific form template, it uses several key values to locate the specific cache entry that will be accessed.
• Template file name: The location and filename of the template used as the primary unique identifier of the cached form.
• Timestamp: The template file contains a timestamp used to determine the last update time of the form.
• Template UUID: Designer inserts in each template a unique identifier (UUID) for the form and its version. Each
time the form is updated, the embedded UUID is updated. For example, an XDP template might show the following
content:
<?xml version="1.0" encoding="UTF-8"?>
<?xfa generator="AdobeLiveCycleDesignerES_V8.2"
APIVersion="2.6.7185.0"?><xdp:xdp xmlns:xdp=http://ns.adobe.com/xdp/
timeStamp="2008-07-29T21:22:12Z"
uuid="823e538f-ff6c-4961-b759-f7626978a223"><template
xmlns="http://www.xfa.org/schema/xfa-template/2.6/">
• Render options: Within the rendered form cache, the cache contents are stored separately for each set of unique
render options.
The Forms service receives templates by reference to filename or repository location, or by value as a XML object in
memory.
• Templates passed by reference: Uses the content root and the form name. If unique templates with different
filenames are passed in every request using this method, the disk cache will grow endlessly and will never be reused.
To prevent this, unique templates should be passed with same filename to ensure that same cache is updated for all
requests.
• Templates passed by value: Uses template bytes passed along with the data using theinDataDoc parameter. If
unique templates with different UUID are passed using this method, the disk cache will grow endlessly and will
never be reused. To prevent this, the UUID attribute should be stripped from all templates to ensure that no cache
is created for the template. Alternatively, passing the same non-null UUID allows the cache objects to be created,
but ensures that the same cache is updated with each request.
As well, in order to prevent the cache from growing endlessly, consider the following factors for rendering dynamically
generated templates using the new LiveCycle APIs, those being renderHTMLForm2 and renderPDFForm2.
When using the new APIs, the template is passed as a document object, which is handled in the Forms service based
on whether it is passivated or not:
For passivated documents in which the UUID and content root serve as the cache key, consider the following aspects:
• The cache is not created for passivated input templates with no UUID.
• If more than one passivated input template having the same UUID and content root are passed, then the same cache
is overwritten.
9INSTALLING ADOBE LIVECYCLE WORKBENCH 11
Installing Workbench
Last updated 11/19/2013
For non-passivated documents in which the filename and content root serve as the cache key, consider the following
aspect:
• For non-passivated input templates, caching depends on the content root and filename from which the document
was generated. The same cache will be used only for requests with the same content root and template filename.
The following best practices will ensure that the cache does not grow endlessly when dynamically generated
templates are passed to the Forms service:
• Strip the UUID or pass the same UUID in all dynamically generated templates.
• Generate the document either from template bytes or from the same filename on disk.
3.8 Uninstalling Workbench
In Windows XP, use the Add or Remove Programs function in the Control Panel to start the Uninstaller. The
Workbench and Designer applications have separate uninstall programs.
In Windows Vista, click Start > Control Panel > Programs > Programs and Features. Select Adobe LiveCycle ES4 -
Workbench 11 and then click Uninstall.
In Windows 7, click Start > Control Panel > Programs and Features. Select Adobe LiveCycle ES4 - Workbench 11 and
then click Uninstall.
10
Last updated 11/19/2013
Chapter 4: Configuring Adobe LiveCycle XDC Editor 10
Using the XDC Editor, network printer administrators can create and modify XML Forms Architecture Device
Configuration (XDC) files. XDC files describe the capabilities of printers, such as the printer language or the
correlation between paper size and tray location.
Before your network printer administrator uses the XDC Editor, relocate the sample XDC files and see Creating device
profiles using XDC Editor.
To obtain the sample XDC files:
1 On the LiveCycle server, locate the XDC folder in [LiveCycle root]\sdk\samples\Output\IVS.
2 Copy the contents of this folder into a directory that is accessible from the Workbench or Eclipse system.
To obtain the XDC Editor Help:
1 Go to the LiveCycle documentation website.
2 Click the Develop tab and navigate to Creating device profiles using Adobe® LiveCycle® XDC Editor 10. Download
the xdc_editor_help_web.zip file and install the Help files by following the instructions provided in the Readme file.