installing cisco unified contact center express … · apply a patch during installation of the...
TRANSCRIPT

Installing Cisco Unified Contact Center Express Release 8.0(1)
May 7, 2012
Americas Headquarters: Cisco Systems, Inc., 170 West Tasman Drive, San Jose, CA 95134-1706 USA

THE SPECIFICATIONS AND INFORMATION REGARDING THE PRODUCTS IN THIS MANUAL ARE SUBJECT TO CHANGE WITHOUT NOTICE. ALL STATEMENTS, INFORMATION, AND RECOMMENDATIONS IN THIS MANUAL ARE BELIEVED TO BE ACCURATE BUT ARE PRESENTED WITHOUT WARRANTY OF ANY KIND, EXPRESS OR IMPLIED. USERS MUST TAKE FULL RESPONSIBILITY FOR THEIR APPLICATION OF ANY PRODUCTS.
THE SOFTWARE LICENSE AND LIMITED WARRANTY FOR THE ACCOMPANYING PRODUCT ARE SET FORTH IN THE INFORMATION PACKET THAT SHIPPED WITH THE PRODUCT AND ARE INCORPORATED HEREIN BY THIS REFERENCE. IF YOU ARE UNABLE TO LOCATE THE SOFTWARE LICENSE OR LIMITED WARRANTY, CONTACT YOUR CISCO REPRESENTATIVE FOR A COPY.
The Cisco implementation of TCP header compression is an adaptation of a program developed by the University of California, Berkeley (UCB) as part of UCB’s public domain version of the UNIX operating system. All rights reserved. Copyright © 1981, Regents of the University of California.
NOTWITHSTANDING ANY OTHER WARRANTY HEREIN, ALL DOCUMENT FILES AND SOFTWARE OF THESE SUPPLIERS ARE PROVIDED “AS IS” WITH ALL FAULTS. CISCO AND THE ABOVE-NAMED SUPPLIERS DISCLAIM ALL WARRANTIES, EXPRESSED OR IMPLIED, INCLUDING, WITHOUT LIMITATION, THOSE OF MERCHANTABILITY, FITNESS FOR A PARTICULAR PURPOSE AND NONINFRINGEMENT OR ARISING FROM A COURSE OF DEALING, USAGE, OR TRADE PRACTICE.
IN NO EVENT SHALL CISCO OR ITS SUPPLIERS BE LIABLE FOR ANY INDIRECT, SPECIAL, CONSEQUENTIAL, OR INCIDENTAL DAMAGES, INCLUDING, WITHOUT LIMITATION, LOST PROFITS OR LOSS OR DAMAGE TO DATA ARISING OUT OF THE USE OR INABILITY TO USE THIS MANUAL, EVEN IF CISCO OR ITS SUPPLIERS HAVE BEEN ADVISED OF THE POSSIBILITY OF SUCH DAMAGES.
CCDE, CCENT, CCSI, Cisco Eos, Cisco HealthPresence, Cisco IronPort, the Cisco logo, Cisco Nurse Connect, Cisco Pulse, Cisco SensorBase, Cisco StackPower, Cisco StadiumVision, Cisco TelePresence, Cisco Unified Computing System, Cisco WebEx, DCE, Flip Channels, Flip for Good, Flip Mino, Flipshare (Design), Flip Ultra, Flip Video, Flip Video (Design), Instant Broadband, and Welcome to the Human Network are trademarks; Changing the Way We Work, Live, Play, and Learn, Cisco Capital, Cisco Capital (Design), Cisco:Financed (Stylized), Cisco Store, Flip Gift Card, and One Million Acts of Green are service marks; and Access Registrar, Aironet, AllTouch, AsyncOS, Bringing the Meeting To You, Catalyst, CCDA, CCDP, CCIE, CCIP, CCNA, CCNP, CCSP, CCVP, Cisco, the Cisco Certified Internetwork Expert logo, Cisco IOS, Cisco Lumin, Cisco Nexus, Cisco Press, Cisco Systems, Cisco Systems Capital, the Cisco Systems logo, Cisco Unity, Collaboration Without Limitation, Continuum, EtherFast, EtherSwitch, Event Center, Explorer, Follow Me Browsing, GainMaker, iLYNX, IOS, iPhone, IronPort, the IronPort logo, Laser Link, LightStream, Linksys, MeetingPlace, MeetingPlace Chime Sound, MGX, Networkers, Networking Academy, PCNow, PIX, PowerKEY, PowerPanels, PowerTV, PowerTV (Design), PowerVu, Prisma, ProConnect, ROSA, SenderBase, SMARTnet, Spectrum Expert, StackWise, WebEx, and the WebEx logo are registered trademarks of Cisco Systems, Inc. and/or its affiliates in the United States and certain other countries.
All other trademarks mentioned in this document or website are the property of their respective owners. The use of the word partner does not imply a partnership relationship between Cisco and any other company. (0910R)
Installing Unfied Contact Center Express, Release 8.0(1) © 2010 Cisco Systems, Inc. All rights reserved.
2Installing Cisco Unified Contact Center Express Release 8.0(1)

Preface
PrefaceThe Cisco Unified Contact Center Express (Unified CCX), Release 8.0(1) uses a different installation framework than previous releases of Unified CCX. Review all installation instructions carefully prior to installing Unified CCX 8.0(1).
This document includes information about installing Unified CCX 8.0(1) on a single node setup (Standalone) or two-node setup (High Availability) in a cluster environment.
For information about upgrading from a previous release (5.x or 7.x) of Unified CCX to the current appliance version, which is 8.0(1), see Upgrading to Cisco Unified Contact Center Express Release 8.0(1) available here:
http://www.cisco.com/en/US/products/sw/custcosw/ps1846/prod_installation_guides_list.html
3Installing Cisco Unified Contact Center Express Release 8.0(1)

Contents
ContentsThis guide contains the following topics:
• Overview, page 4
• Audience, page 5
• Related Documentation, page 5
• Installation Scenarios, page 5
• Performing Pre-Installation Tasks, page 10
• Installing Unified Contact Center Express, page 30
• Performing Post-Installation Tasks, page 61
• Obtain Additional Support and Documentation, page 76
• Documentation Feedback, page 76
• Glossary
• Index
OverviewUnified CCX provides a single, consistent, and easy-to-manage platform for the following products:
• Unified CCX
• Unified IP IVR
This document provides instructions and related information for installing, reinstalling, and patching Unified CCX 8.0(1), and for performing initial setup tasks.
4Installing Cisco Unified Contact Center Express Release 8.0(1)

Audience
AudienceThis guide is intended for Cisco Unified Communications system administrators. You should have the network and telephony knowledge that is required to install and set up the Unified CCX software. You should also be familiar with the Cisco Unified Communications Manager (Unified CM) or Cisco Unified Communications Manager Express (Unified CME) configurations at your site.
Related DocumentationFor additional installation-related information, see the following documents:
• Upgrading to Cisco Unified Contact Center Express, Release 8.0(1) http://www.cisco.com/en/US/products/sw/custcosw/ps1846/prod_installation_guides_list.html
• Cisco Unified Contact Center Express Administration Guide, Release 8.0 http://www.cisco.com/en/US/products/sw/custcosw/ps1846/products_installation_and_configuration_guides_list.html
For further information about Unified CCX documentation, see the following URL:
http://www.cisco.com/en/US/products/sw/custcosw/ps1846/tsd_products_support_series_home.html
Installation ScenariosYou can use this document to perform the following different installation scenarios:
• Install Software from a DVD on the First Node
• Install Software from a DVD on the Second Node
• Apply a Patch During Installation of the First Node
• Apply a Patch During Installation of the Second Node
• Add the Second Node for HA
5Installing Cisco Unified Contact Center Express Release 8.0(1)

Installation Scenarios
The following sections provide an overview of the high-level tasks that you must perform for each of these installation scenarios. Each high-level task also includes a link to another section of the document, which you can follow for detailed information about the task.
Install Software from a DVD on the First NodeTo install software that you have on a DVD on the first node, follow the steps in Table 1.
Install Software from a DVD on the Second NodeTo install software from a DVD on the second node, follow the steps in Table 2.
Table 1 Installing Software from a DVD on the First Node
Task For More Information
Step 1 Perform all pre-installation tasks that apply to your site.
For a list of pre-installation tasks, see “Performing Pre-Installation Tasks” section on page 10.
Step 2 Follow the procedure to begin installing the software on the DVD to your server.
See the “Starting the Installation” section on page 31.
Step 3 Follow the procedure for performing a basic installation.
See the “Performing the Basic Installation” section on page 43.
Step 4 When the First Node Configuration window displays, choose Yes to configure the new server as the first node.
See Step 9 in the “Performing the Basic Installation” section on page 43.
Step 5 Follow the procedure to configure the first node.
See “Configuring the First Node” section on page 50.
Step 6 Perform all post-installation tasks that apply to your site.
For a list of post-installation tasks, see Table 9 on page 62.
6Installing Cisco Unified Contact Center Express Release 8.0(1)
Installation Scenarios
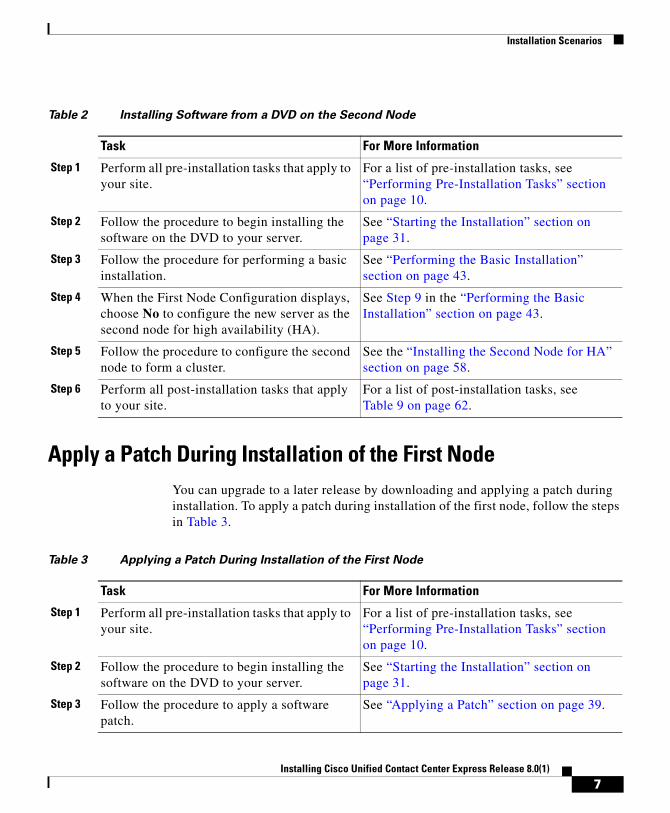
Apply a Patch During Installation of the First NodeYou can upgrade to a later release by downloading and applying a patch during installation. To apply a patch during installation of the first node, follow the steps in Table 3.
Table 2 Installing Software from a DVD on the Second Node
Task For More Information
Step 1 Perform all pre-installation tasks that apply to your site.
For a list of pre-installation tasks, see “Performing Pre-Installation Tasks” section on page 10.
Step 2 Follow the procedure to begin installing the software on the DVD to your server.
See “Starting the Installation” section on page 31.
Step 3 Follow the procedure for performing a basic installation.
See “Performing the Basic Installation” section on page 43.
Step 4 When the First Node Configuration displays, choose No to configure the new server as the second node for high availability (HA).
See Step 9 in the “Performing the Basic Installation” section on page 43.
Step 5 Follow the procedure to configure the second node to form a cluster.
See the “Installing the Second Node for HA” section on page 58.
Step 6 Perform all post-installation tasks that apply to your site.
For a list of post-installation tasks, see Table 9 on page 62.
Table 3 Applying a Patch During Installation of the First Node
Task For More Information
Step 1 Perform all pre-installation tasks that apply to your site.
For a list of pre-installation tasks, see “Performing Pre-Installation Tasks” section on page 10.
Step 2 Follow the procedure to begin installing the software on the DVD to your server.
See “Starting the Installation” section on page 31.
Step 3 Follow the procedure to apply a software patch.
See “Applying a Patch” section on page 39.
7Installing Cisco Unified Contact Center Express Release 8.0(1)

Installation Scenarios
Apply a Patch During Installation of the Second NodeYou can upgrade to a later release by downloading and applying a patch during installation. To apply a patch during installation of the first node, follow the steps in Table 4.
Step 4 Follow the procedure for performing a basic installation.
See “Performing the Basic Installation” section on page 43.
Step 5 When the First Node Configuration window displays, choose Yes to configure the new server as the first node.
See Step 9 in the “Performing the Basic Installation” section on page 43.
Step 6 Follow the procedure to configure the first node.
See the “Configuring the First Node” section on page 50.
Step 7 Perform all post-installation tasks that apply to your site.
For a list of post-installation tasks, see Table 9 on page 62.
Table 3 Applying a Patch During Installation of the First Node
Task For More Information
Table 4 Applying a Patch During Installation of the Second Node
Task For More Information
Step 1 Perform all pre-installation tasks that apply to your site.
For a list of pre-installation tasks, see “Performing Pre-Installation Tasks” section on page 10.
Step 2 Follow the procedure to begin installing the software on the DVD to your server.
See “Starting the Installation” section on page 31.
Step 3 Follow the procedure to apply a software patch.
See “Applying a Patch” section on page 39.
Step 4 Follow the procedure for performing a basic installation.
See “Performing the Basic Installation” section on page 43.
Step 5 When the First Node Configuration window displays, choose No to configure the new server as the second node.
See Step 9 in the “Performing the Basic Installation” section on page 43.
8Installing Cisco Unified Contact Center Express Release 8.0(1)

Installation Scenarios
Add the Second Node for HATo add the second node for HA, follow the steps in Table 5.
Step 6 Follow the procedure to configure the second node to form a cluster.
See the “Installing the Second Node for HA” section on page 58.
Step 7 Perform all post-installation tasks that apply to your site.
For a list of post-installation tasks, see Table 9 on page 62.
Table 4 Applying a Patch During Installation of the Second Node
Task For More Information
Table 5 Adding the Second Node for HA
Task For More Information
Step 1 Before you make any changes to a cluster, be sure that you have a current backup file.
For more information, see the Cisco Unified Contact Center Express Disaster Recovery System Administration Guide Release 8.0(1) available here:
http://www.cisco.com/en/US/products/sw/custcosw/ps1846/prod_maintenance_guides_list.html
Step 2 Perform all pre-installation tasks that apply to your site.
For a list of pre-installation tasks, see “Performing Pre-Installation Tasks” section on page 10.
Step 3 Ensure that you have the appropriate number of licenses to support adding a new node.
For more information on specifying the required number of licenses, see the Cisco Unified Contact Center Express Administration Guide Release 8.0(1) available here:
http://www.cisco.com/en/US/products/sw/custcosw/ps1846/products_installation_and_configuration_guides_list.html
9Installing Cisco Unified Contact Center Express Release 8.0(1)

Performing Pre-Installation Tasks
Performing Pre-Installation TasksThis section contains the important considerations, frequently asked questions, and pre-installation tasks that you need to perform to ensure that you can successfully install Unified CCX.
Step 4 Before you install the new node, ensure that you have configured it on the first node. From the Unified CCX Administration of the first node, add the IP address/Hostname of the second node.
See “Performing Initial Setup for the Second Node” section on page 72.
Step 5 Record the configuration settings for the server that you plan to install.
To record your configuration settings, see Table 6 on page 18.
Step 6 You must install the same software version on both nodes in the cluster.
For more information on the different installation options, see the “Installation Overview” section on page 29.
Step 7 Follow the procedure to begin installing the software on the DVD to your server.
See “Starting the Installation” section on page 31.
Step 8 If you need to upgrade the version of Unified CCX, continue with the procedure for applying a software patch.
See “Applying a Patch” section on page 39.
Step 9 Follow the procedure for performing the basic installation.
See “Performing the Basic Installation” section on page 43.
Step 10 When the First Node Configuration displays, choose No to configure the new server as the second node.
See Step 9 in the “Performing the Basic Installation” section on page 43.
Step 11 Follow the procedure for configuring the second node.
See the “Installing the Second Node for HA” section on page 58.
Step 12 Perform all post-installation tasks that apply to your site.
For a list of post-installation tasks, see Table 9 on page 62.
Table 5 Adding the Second Node for HA
Task For More Information
10Installing Cisco Unified Contact Center Express Release 8.0(1)

Performing Pre-Installation Tasks
Planning to Install Unified CCXUnified CCX is the backbone of the Cisco Unified Contact Center environment, comprising:
• The first node. Required in all deployments of Unified CCX.
• The second node. The second node provides fault tolerance to the system and provides standby capabilities if the first node goes down. The second node, also called high availabiilty (HA) node is optional. The first and second nodes can be split across the local area network (LAN) and wide area network (WAN).
Unified CCX 8.0(1) is an appliance application similar to Unified CM. It must be installed on dedicated servers, which must be Media Convergence Servers (MCS). For details on the server requirements, see “Server Requirements” section on page -12.
Important ConsiderationsBefore you proceed with the installation, consider the following requirements and recommendations:
• Be aware that installing Unified CCX 8.0(1) on an existing (repurposed) server will format the hard drive and erase all data. It might also upgrade the system Basic Input Output System (BIOS), firmware, and Redundant Array of Inexpensive Disks (RAID) configuration if found outdated.
• Ensure that you connect each Unified CCX node to an uninterruptible power supply (UPS) to provide backup power and protect your system. Failure to do so may result in damage to physical media and require a new installation of Unified CCX.
• Install the Unified CCX software on the first node or publisher node first and then on the second node.
• If you plan to install the Unified CCX software without DNS information, then make sure you provide only the IP Address as reference instead of host names.
• Before starting installation of the second node, make sure that the server to be configured as the second node can reach the first node via LAN or WAN.
11Installing Cisco Unified Contact Center Express Release 8.0(1)

Performing Pre-Installation Tasks
• When you enter the Security password on the first node, be sure that you write it down and save it. You must enter the same password while installing the second node. Install the software during off-peak hours or a maintenance window to avoid impact from interruptions.
• Configure the server by using a static IP address to ensure that the server obtains a fixed IP address.
• Remember that all values that you enter on the configuration wizard screens, such as for hostname, user names, and passwords, are case-sensitive.
• On the configuration wizard screens, use the same Maximum Transmission Unit (MTU) setting for all servers in the cluster.
• If you are already running a windows version of Unified CCX and planning to install Unified CCX 8.0(1), make sure you run the Pre-Upgrade Tool to back up all of the system data from your existing CRS or Unified CCX system and restore this data on your system after installing Unified CCX 8.0(1).
• Do not attempt to uninstall Unified CCX as it is not supported. However, if you want to remove Unified CCX from a server, you must re-image the server. Make sure to back up your Unified CCX data before you re-image or the data will be lost permanently.
• Carefully read the information that follows before you proceed with the installation.
Installation Requirements, Prerequisites, and Related Procedures
Server Requirements
Unified CCX 8.0(1) is packaged with the Linux-based Unified Communications Operating System (UCOS). It is an appliance model developed by Cisco. This appliance model provides a collection of frameworks, such as installation, serviceability, service management, and more so that Unified CCX installed on this platform can leverage more out of this in terms of integration, communication and administration in coordination with Unified Communications Manager (Unified CM) or Unified Communications Manager Enterprise (Unified CME).
An approved server on which you install Unified CCX must meet these hardware requirements:
12Installing Cisco Unified Contact Center Express Release 8.0(1)

Performing Pre-Installation Tasks
• Hardware—Approved MCS servers
• Hard disk—146 GB minimum
• RAM—2 GB minimum
For a list of approved MCS servers, see the Cisco Unified Contact Center Express Software and Hardware Compatibility Guide available here:
http://www.cisco.com/en/US/products/sw/custcosw/ps1846/products_device_support_tables_list.html
Note To prevent unpredictable behavior due to power failure, you must ensure uninterrupted power supply to the Unified CCX servers at all times.
Client System Requirements
After you install Unified CCX 8.0(1), you can access the Unified CCX 8.0(1) Administration web interface from a remote client system using a web browser, having access to your network. To install the client systems, such as Cisco Agent Desktop, Cisco Supervisor Desktop, and Cisco Desktop Administrator, your system should have the following hardware requirements:
• Windows XP Professional with Service Pack 2/3, or Windows Vista Business/Ultimate
• 500 MHz Intel Pentium
• 512 MB RAM
• 650 MB available disk space
• 100 MB (Fast Ethernet) Network Interface card (NIC)
• 800x600 screen resolution
Browser Requirements
You can access Unified CCX Administration web interface using the following browsers:
• Microsoft Internet Explorer version 6.x or later
• Mozilla Firefox version 2.0 or later
13Installing Cisco Unified Contact Center Express Release 8.0(1)
Performing Pre-Installation Tasks
Cisco does not support or test other browsers.
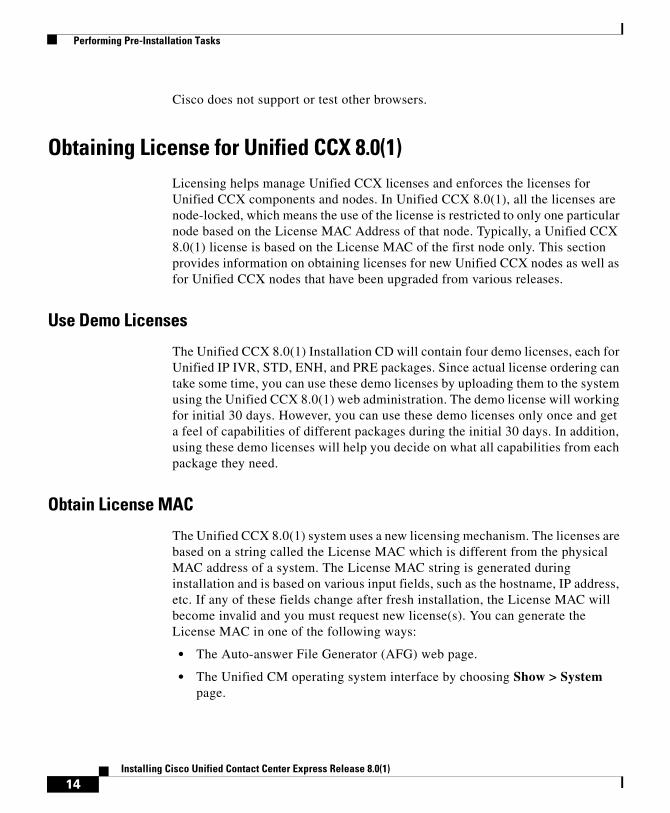
Obtaining License for Unified CCX 8.0(1)Licensing helps manage Unified CCX licenses and enforces the licenses for Unified CCX components and nodes. In Unified CCX 8.0(1), all the licenses are node-locked, which means the use of the license is restricted to only one particular node based on the License MAC Address of that node. Typically, a Unified CCX 8.0(1) license is based on the License MAC of the first node only. This section provides information on obtaining licenses for new Unified CCX nodes as well as for Unified CCX nodes that have been upgraded from various releases.
Use Demo Licenses
The Unified CCX 8.0(1) Installation CD will contain four demo licenses, each for Unified IP IVR, STD, ENH, and PRE packages. Since actual license ordering can take some time, you can use these demo licenses by uploading them to the system using the Unified CCX 8.0(1) web administration. The demo license will working for initial 30 days. However, you can use these demo licenses only once and get a feel of capabilities of different packages during the initial 30 days. In addition, using these demo licenses will help you decide on what all capabilities from each package they need.
Obtain License MAC
The Unified CCX 8.0(1) system uses a new licensing mechanism. The licenses are based on a string called the License MAC which is different from the physical MAC address of a system. The License MAC string is generated during installation and is based on various input fields, such as the hostname, IP address, etc. If any of these fields change after fresh installation, the License MAC will become invalid and you must request new license(s). You can generate the License MAC in one of the following ways:
• The Auto-answer File Generator (AFG) web page.
• The Unified CM operating system interface by choosing Show > System page.
14Installing Cisco Unified Contact Center Express Release 8.0(1)

Performing Pre-Installation Tasks
Obtain License MAC after installing Unified CCX 8.0(1)
License MAC will be displayed during system install. You must make a note of this for ordering license files. To obtain License MAC after installing Unified CCX 8.0(1), complete the following steps:
Step 1 Log in to the Unified CCX 8.0(1) system command line interface (CLI) using Unified CCX Administrator credentials.
Step 2 Run “show status” command. Output of this command contains the License MAC.
Obtain License MAC before installing Unified CCX 8.0(1)
To obtain License MAC prior to installing Unified CCX 8.0(1), complete the following steps:
Step 1 Go to auto answer file generation web site. http://www.cisco.com/web/cuc_afg/index.html
Step 2 Select Cisco Unified CCX from Product Options.
Step 3 Fill in all the configuration information used for installation, such as IP address, hostname, and more on that site.
Answer file generated from this can be used for unattended Unified CCX 8.0(1) installation. You can also use this answer file to generate the License MAC (based on given parameters) so you can order the license prior to building the machine.
Caution If you change any of the parameters or configuration information after ordering the license, License MAC will be changed and the ordered license file may become invalid.
To obtain a node license file for new Unified CCX servers and to obtain additional node-locked licenses, complete the following steps:
15Installing Cisco Unified Contact Center Express Release 8.0(1)

Performing Pre-Installation Tasks
Step 1 Enter the Product Authorization Key (PAK) that you received with your Unified CCX or phone order in the License Registration web tool at http://www.cisco.com/go/license.
Step 2 Click Submit.
Step 3 Follow the system prompts. You must enter the License MAC of the first node of the Unified CCX cluster. You must enter a valid e-mail address as well as the number of nodes for which you want licenses.
The system sends the license file(s) to you via e-mail by using the E-mail ID that you provided. The format of a license file specifies uccx_80_<timestamp>.lic. If you retain the .lic extension, you can rename the license file. You cannot use the license if you edit the contents of the file in any way.
Note Unified CCX 8.0(1) supports only node-locked licenses. However, Unified CCX 8.0(1) continues to recognize the existing licenses used for Unified CCX versions earlier than 8.0(1) on an upgraded system. This feature is currently available in Standalone UCOS setup only.
Step 4 You must upload the license file to the server with the matching License MAC address that you provided in Step 3. This server then takes on the functionality of the license manager.
For more information on how to upload a license file and view license information, see the Cisco Unified Contact Center Express Administration Guide Release 8.0(1) available here:
http://www.cisco.com/en/US/products/sw/custcosw/ps1846/products_installation_and_configuration_guides_list.html.
Step 5 For Unified CCX HA setup, a Warm Standby License is issued to enable this feature. The process of ordering such a license is the same as that of a single node Standalone license.
The Unified CCX 8.0(1) Warm Standby license and all other licenses are node-locked to the License MAC Address of the first node (typically the Database Publisher node) of a Unified CCX cluster. When a second node is added, it is verified that the first node has the valid add-on Warm Standby License. Once the cluster is set up, the licenses will be valid on both the nodes in a cluster.
16Installing Cisco Unified Contact Center Express Release 8.0(1)
Performing Pre-Installation Tasks
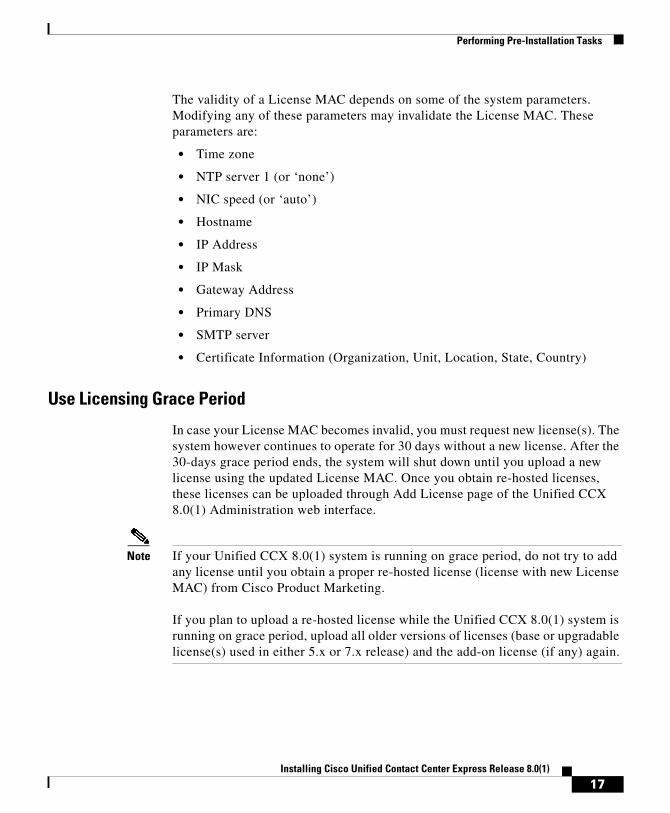
The validity of a License MAC depends on some of the system parameters. Modifying any of these parameters may invalidate the License MAC. These parameters are:
• Time zone
• NTP server 1 (or ‘none’)
• NIC speed (or ‘auto’)
• Hostname
• IP Address
• IP Mask
• Gateway Address
• Primary DNS
• SMTP server
• Certificate Information (Organization, Unit, Location, State, Country)
Use Licensing Grace Period
In case your License MAC becomes invalid, you must request new license(s). The system however continues to operate for 30 days without a new license. After the 30-days grace period ends, the system will shut down until you upload a new license using the updated License MAC. Once you obtain re-hosted licenses, these licenses can be uploaded through Add License page of the Unified CCX 8.0(1) Administration web interface.
Note If your Unified CCX 8.0(1) system is running on grace period, do not try to add any license until you obtain a proper re-hosted license (license with new License MAC) from Cisco Product Marketing. If you plan to upload a re-hosted license while the Unified CCX 8.0(1) system is running on grace period, upload all older versions of licenses (base or upgradable license(s) used in either 5.x or 7.x release) and the add-on license (if any) again.
17Installing Cisco Unified Contact Center Express Release 8.0(1)

Performing Pre-Installation Tasks
Gathering Configuration Information for InstallationUse the following table to record the information about your server that both the Answer File Generator and the basic installation wizard prompt you to enter. Gather this information for each Unified CCX 8.0(1) server that you install. You may not need to obtain all the information; gather only the information that is pertinent to your system and network configuration. You should make copies of this table and record your entries for each server in a separate table so it is easy to configure your system.
Note Because some of the fields are optional, they may not apply to your configuration. For example, if you choose not to set up an SMTP host during installation, the parameter still displays, but you do not need to enter a value.
Caution You cannot change some of the fields after installation without reinstalling the software, so be sure to enter the values that you want. The last column in the table shows whether you can change a field after installation, and if you can, it provides the appropriate CLI command.
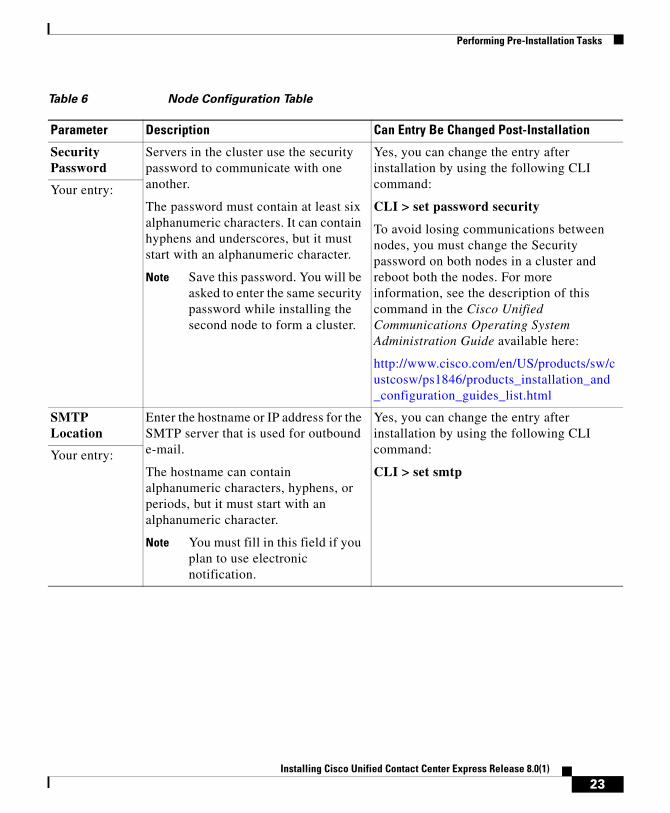
Table 6 Node Configuration Table
Parameter Description Can Entry Be Changed Post-Installation
Administrator ID
This field specifies the administrator account user ID that you use for secure shell access to the CLI, for logging into Unified Communications Operating System Administration and for logging into the Disaster Recovery System.
Yes, you can change the entry after installation by using the following CLI command:
CLI > utils reset_ui_administrator_nameYour entry:
18Installing Cisco Unified Contact Center Express Release 8.0(1)

Performing Pre-Installation Tasks
Administrator Password
This field specifies the password for the Administrator account, which you use for secure shell access to the CLI, for logging into Unified Communications Operating System Administration and for logging into the Disaster Recovery System. Ensure the password is at least six characters long; it can contain alphanumeric characters, hyphens, and underscore.
Yes, you can change the entry after installation by using the following CLI command:
CLI > set password adminYour entry:
Application User Name
You use the Application User name as the default user name for applications that are installed on the system, including Unified CCX.
Yes, you can change the entry after installation by using the following CLI command:
CLI > utils reset_application_ui_administrator_name
Your entry:
Application User Password
You use the Application User password as the default password for applications that are installed on the system, including Unified CCX and Unified CM.
Yes, you can change the entry after installation by using the following CLI command:
CLI > utils reset_application_ui_administrator_password
Your entry:
Country From the list, choose the appropriate country for your installation.
Note The value you enter gets used to generate a Certificate Signing Request (CSR) and self-signed certificates.
Yes, you can change the entry after installation by using the following CLI command:
CLI > set web-security
Your entry:
Table 6 Node Configuration Table
Parameter Description Can Entry Be Changed Post-Installation
19Installing Cisco Unified Contact Center Express Release 8.0(1)

Performing Pre-Installation Tasks
DNS Enable A DNS server resolves a hostname into an IP address or an IP address into a hostname. If you do not have a DNS server, enter No.
If you have a DNS server, it is important that you enter Yes to enable DNS.
Note When DNS is not enabled, you should only enter IP addresses (not host names) for all network devices in a Unified CCX cluster.
Yes, you can change the entry after installation by using the following CLI command:
CLI > set network dns
Your entry:
DNS Primary Enter the IP address of the DNS server that you want to specify as the primary DNS server. Enter the IP address in dotted decimal format as ddd.ddd.ddd.ddd.
Consider this field mandatory if DNS is set to yes (DNS enabled).
Yes, you can change the entry after installation by using the following CLI command:
CLI > set network dns primary
Your entry:
DNS Secondary (optional)
Enter the IP address of the DNS server that you want to specify as the optional secondary DNS server.
Yes, you can change the entry after installation by using the following CLI command:
CLI > set network dns secondaryYour entry:
Domain This field represents the name of the domain in which this machine is located.
Consider this field mandatory if DNS is set to yes.
Yes, you can change the entry after installation by using the following CLI command:
CLI > set network domain
Your entry:
Table 6 Node Configuration Table
Parameter Description Can Entry Be Changed Post-Installation
20Installing Cisco Unified Contact Center Express Release 8.0(1)

Performing Pre-Installation Tasks
Gateway Address
Enter the IP address of the network gateway.
If you do not have a gateway, you must still set this field to 255.255.255.255. Not having a gateway may limit you to only being able to communicate with devices on your subnet.
Yes, you can change the entry after installation by using the following CLI command:
CLI > set network gatewayYour entry:
Hostname Enter a host name that is unique to your server.
The host name can comprise up to 64 characters and can contain alphanumeric characters and hyphens.
No, hostname change is not supported in Cisco Unified CCX 8.0(1).
For information on how to change the IP Address and Host Name for Unified CCX, see the Cisco Unified Contact Center Express Administration Guide Release 8.0(1) available here:
http://www.cisco.com/en/US/products/sw/custcosw/ps1846/products_installation_and_configuration_guides_list.html
Your entry:
IP Address Enter the IP address of your server. Yes, you can change the entry after installation.
For information on how to change the IP Address and Host Name for Unified CCX, see the Cisco Unified Contact Center Express Administration Guide Release 8.0(1) or Cisco Unified Serviceability Administration Guide available here:
http://www.cisco.com/en/US/products/sw/custcosw/ps1846/products_installation_and_configuration_guides_list.html
Your entry:
IP Mask Enter the IP subnet mask of this machine.
Yes, you can change the entry after installation by using the following CLI command:
CLI > set network ip eth0
Your entry:
Table 6 Node Configuration Table
Parameter Description Can Entry Be Changed Post-Installation
21Installing Cisco Unified Contact Center Express Release 8.0(1)

Performing Pre-Installation Tasks
MTU Size The maximum transmission unit (MTU) represents the largest packet, in bytes, that this host will transmit on the network.
Enter the MTU size in bytes for your network. If you are unsure of the MTU setting for your network, use the default value.
Default: 1500 bytes
The MTU setting must be the same on all nodes in a cluster.
Yes, you can change the entry after installation by using the following CLI command:
CLI > set network mtu
Your entry:
NIC Duplex Choose the duplex mode for the network interface card (NIC), either Full or Half.
Note This parameter only displays when you choose not to use Automatic Negotiation.
Yes, you can change the entry after installation by using the following CLI command:
CLI > set network nic
Your entry:
NIC Speed Choose the speed for the NIC, either 10 megabits per second or 100 megabits per second.
Note This parameter only displays when you choose not to use Automatic Negotiation.
Yes, you can change the entry after installation by using the following CLI command:
CLI > set network nic
Your entry:
NTP Server Enter the hostname or IP address of one or more network time protocol (NTP) servers with which you want to synchronize.
Note You can enter up to five NTP servers.
Yes, you can change the entry after installation by using the following CLI command:
CLI > utils ntp config
Your entry:
Table 6 Node Configuration Table
Parameter Description Can Entry Be Changed Post-Installation
22Installing Cisco Unified Contact Center Express Release 8.0(1)
Performing Pre-Installation Tasks
Security Password
Servers in the cluster use the security password to communicate with one another.
The password must contain at least six alphanumeric characters. It can contain hyphens and underscores, but it must start with an alphanumeric character.
Note Save this password. You will be asked to enter the same security password while installing the second node to form a cluster.
Yes, you can change the entry after installation by using the following CLI command:
CLI > set password security
To avoid losing communications between nodes, you must change the Security password on both nodes in a cluster and reboot both the nodes. For more information, see the description of this command in the Cisco Unified Communications Operating System Administration Guide available here:
http://www.cisco.com/en/US/products/sw/custcosw/ps1846/products_installation_and_configuration_guides_list.html
Your entry:
SMTP Location
Enter the hostname or IP address for the SMTP server that is used for outbound e-mail.
The hostname can contain alphanumeric characters, hyphens, or periods, but it must start with an alphanumeric character.
Note You must fill in this field if you plan to use electronic notification.
Yes, you can change the entry after installation by using the following CLI command:
CLI > set smtpYour entry:
Table 6 Node Configuration Table
Parameter Description Can Entry Be Changed Post-Installation
23Installing Cisco Unified Contact Center Express Release 8.0(1)

Performing Pre-Installation Tasks
Location Enter the location of the server. The system uses this information to generate certificate signing requests (CSRs), which are used to obtain third-party certificates.
You can enter any location that is meaningful within your organization.
Examples include the state or the city where the server is located.
Yes, you can change the entry after installation by using the following CLI command:
CLI > set web-security
Your entry:
Country From the list, choose the appropriate country for your installation.
Note The value you enter gets used to generate a Certificate Signing Request (CSR) and self-signed certificates.
Yes, you can change the entry after installation by using the following CLI command:
CLI > set web-security
Your entry:
State Enter the state where the server is located.
Note The value you enter gets used to generate a Certificate Signing Request (CSR).
Yes, you can change the entry after installation by using the following CLI command:
CLI > set web-security
Your entry:
Organization Enter the name of your organization.
Note The value you enter gets used to generate a Certificate Signing Request (CSR).
Yes, you can change the entry after installation by using the following CLI command:
CLI > set web-security
Your entry:
Time Zone This field specifies the local time zone and offset from Greenwich Mean Time (GMT).
Choose the time zone that most closely matches the location of your machine.
Yes, you can change the entry after installation by using the following CLI command:
CLI > set timezone
Your entry:
Table 6 Node Configuration Table
Parameter Description Can Entry Be Changed Post-Installation
24Installing Cisco Unified Contact Center Express Release 8.0(1)

Performing Pre-Installation Tasks
Frequently Asked Questions about InstallationThe following section contains information about commonly asked questions and responses. Review this section carefully before you begin the installation.
What User Names and Passwords Do I Need to Specify?
Note The system checks your passwords for strength. For guidelines on creating a strong password, see the “What is a Strong Password?” section on page 27.
During the installation, you must specify the following user names and passwords:
• Administrator User Name and Password, page 25
• Application User Name and Password, page 26
• Security Password, page 26
Administrator User Name and Password
You use the Administrator user name and password to log in to the following areas:
• Unified Communications Operating System Administration
• Disaster Recovery System
• Command Line Interface
To specify the Administrator user name and password, follow these guidelines:
Unit Enter your unit.
Note The value you enter gets used to generate a Certificate Signing Request (CSR).
Yes, you can change the entry after installation by using the following CLI command:
CLI > set web-security
Your entry:
Table 6 Node Configuration Table
Parameter Description Can Entry Be Changed Post-Installation
25Installing Cisco Unified Contact Center Express Release 8.0(1)

Performing Pre-Installation Tasks
• Administrator user name—The Administrator user name must start with an alphabetic character and can contain alphanumeric characters, hyphens and underscores.
• Administrator password—The Administrator password must be at least six characters long and can contain alphanumeric characters, hyphens, and underscores. See the “What is a Strong Password?” section on page 27 for additional information on how to create a strong password.
You can change the Administrator password or add a new Administrator by using the command line interface. For more information, see the Cisco Unified Communications Operating System Administration Guide available here:
http://www.cisco.com/en/US/products/sw/custcosw/ps1846/products_installation_and_configuration_guides_list.html
Application User Name and Password
You use the Application User name and password to access applications that are installed on the system, including Cisco Unified Real-Time Monitoring Tool (Unified RTMT).
To specify the Application User name and password, follow these guidelines:
• Application User name—The Application User name must start with an alphabetic character and can contain alphanumeric characters, hyphens and underscores.
• Application User password—The Application User password must be at least six characters long and can contain alphanumeric characters, hyphens, and underscores. See the “What is a Strong Password?” section on page 27 for additional information on how to create a strong password.
You can change the Application User name and password by using the command line interface. For more information, see the Cisco Unified Communications Operating System Administration Guide available here:
http://www.cisco.com/en/US/products/sw/custcosw/ps1846/products_installation_and_configuration_guides_list.html
Security Password
The system uses this password to authorize communications between nodes, and you must ensure that this password is identical on both the nodes in a cluster.
26Installing Cisco Unified Contact Center Express Release 8.0(1)

Performing Pre-Installation Tasks
The Security password must be at least six characters long and can contain alphanumeric characters, hyphens, and underscores. See the “What is a Strong Password?” section on page 27 for additional information on how to create a strong password.
What is a Strong Password?
The installation wizard checks to ensure that you enter a strong password. To create a strong password, follow these recommendations:
• Mix uppercase and lowercase letters.
• Mix letters and numbers.
• Include hyphens and underscores.
• Remember that longer passwords are stronger and more secure than shorter ones.
Avoid the following types of passwords:
• Do not use recognizable words, such as proper names and dictionary words, even when combined with numbers.
• Do not invert recognizable words.
• Do not use word or number patterns, such as aaabbb, qwerty, zyxwvuts, 123321, and so on.
• Do not use recognizable words from other languages.
• Do not use personal information of any kind, including birthdays, postal codes, names of children or pets, and so on.
Which Servers Does Cisco Support for this Installation?
For information about supported server models, see the folowing documents:
• Cisco Unified Contact Center Express Software and Hardware Compatibility Guide, available at: http://www.cisco.com/en/US/products/sw/custcosw/ps1846/products_device_support_tables_list.html
• Release notes for your product release, available at: http://www.cisco.com/en/US/products/sw/custcosw/ps1846/prod_release_notes_list.html
27Installing Cisco Unified Contact Center Express Release 8.0(1)

Performing Pre-Installation Tasks
Can I Install Other Software on the Server?
You must perform all software installations and upgrades by using Unified Communications Operating System Administration. The system can upload and process only software approved by Cisco Systems.
You cannot install or use third-party or Windows-based software applications that you may have been using with a previous version of Unified CCX with Unified CCX 8.0(1).
Using the Unified Communications Answer File GeneratorUnified Communications Answer File Generator, a web application, generates answer files for unattended installations of Unified CCX 8.0(1) or later. Individual answer files (platformConfig.xml) are copied to the root directory of a USB key or a floppy diskette and are used in addition to the Unified CCX DVD during the installation process.
The web application supports the following features:
• Allows simultaneous generation and saving of answer files for unattended installation on the publisher node and the subscriber node.
• Provides syntactical validation of data entries.
• Provides online help and documentation.
However, the web application supports only basic installations and not upgrades.
You can access the Unified Communications Answer File Generator at the following URL:
http://www.cisco.com/web/cuc_afg/index.html
The Unified Communications Answer File Generator supports Internet Explorer version 6.0 or higher and Mozilla version 1.5 or higher.
Note Cisco requires that you use USB keys that are compatible with Linux 2.4. It is important that you use USB keys that are pre-formatted to be compatible with Linux 2.4 for the configuration file. These keys will have a W95 FAT32 format.
28Installing Cisco Unified Contact Center Express Release 8.0(1)

Performing Pre-Installation Tasks
Handling Network Errors during InstallationDuring the installation process, the installation program verifies that the server can successfully connect to the network by using the network configuration that has been entered. If the installer fails to connect, a relevant message is displayed prompting you to select one of the following options:
• RETRY —The installation program tries to validate networking again. If validation fails again, the error dialog box displays again.
• REVIEW (Check Install)—This option allows you to review and modify the networking configuration. When detected, the installation program returns to the network configuration windows.
Networking gets validated after you complete each networking window, so the message might display multiple times.
• HALT— The installation halts. You can copy the installation log files to a USB disk to aid troubleshooting of your network configuration.
• IGNORE —The installation continues. The networking error gets logged. In some cases, the installation program validates networking multiple times, so this error dialog box might display multiple times. If you choose to ignore network errors, the installation may fail.
Installation OverviewUnified CCX 8.0(1) uses a different installation framework than previous releases. The installation process allows you to perform a basic installation, factory installation, installation using Answer File Generator, patch upgrade to a newer service release during the installation, and upgrade from Cisco CRS 5.x and Unified CCX 7.x to Unified CCX 8.0(1).
For a more detailed description of the different installation types, see Table 7.
29Installing Cisco Unified Contact Center Express Release 8.0(1)

Installing Unified Contact Center Express
Installing Unified Contact Center ExpressThis section describes how to install the operating system and Unified CCX application. You install the operating system and application by running one installation program. This document divides the procedure for using this installation program into the following major topics:
• Navigating within the Installation Wizard, page 31
• Starting the Installation, page 31
• Entering Pre-existing Configuration Information, page 38
• Applying a Patch, page 39
• Performing the Basic Installation, page 43
• Configuring the First Node, page 50
Table 7 Installation Options
Installtion Type Description
Basic This option allows you to install the Unified CCX 8.0(1) software from the installation disc and configure it simultaneously.
Factory This option allows you to obtain a MCS hardware from Cisco, pre-installed with the Unified CCX 8.0(1) software, which you need to configure upon receiving in order to complete the installation.
Use Answer File Generator This option allows you to install the Unified CCX 8.0(1) software unattended if you provide the pre-existing configuration information on a USB key or floppy disk.
Apply Patch (upgrade during installation)
This option allows you to apply a patch in order to upgrade the software available on the installation disc. You can only apply one patch during the installation process.
Note Ensure that you have the upgrade patch available on a DVD or on a remote server prior to choosing this option.
30Installing Cisco Unified Contact Center Express Release 8.0(1)

Installing Unified Contact Center Express
• Installing the Second Node for HA, page 58
Navigating within the Installation WizardFor instructions on how to navigate within the installation wizard, see Table 8.
Note During installation it is possible for your monitor screen to go blank if you left it unattended for a long time. In such a situation, it is recommended not to use the Space bar as pressing the Space bar chooses the default option available on the current window and moves to the next window. Instead, press Escape on your keyboard to display the current screen with the available options open for you to choose and proceed with the installation.
Starting the InstallationIf you are installing the second node to form a cluster, you must configure the host name or IP address of the new node on the first node. From the Unified CCX Administration web interface of the first node, choose System > Server and enter the IP address or host name of the second node. For more information, see the Cisco Unified Contact Center Express Administration Guide Release 8.0(1)
Table 8 Installation Wizard Navigation
To Do This Press This
Move to the next field Tab
Move to the previous field Alt-Tab
Choose an option Space bar or Enter
Scroll up or down in a list Up or Down arrow
Go to the previous window Space bar or Enter to choose Back (when available)
Get help information on a window Space bar or Enter to choose Help (when available)
31Installing Cisco Unified Contact Center Express Release 8.0(1)

Installing Unified Contact Center Express
available here: http://www.cisco.com/en/US/products/sw/custcosw/ps1846/products_installation_and_configuration_guides_list.html
To start the installation, complete the following steps:
Step 1 If you have a USB key with configuration information that the Answer File Generator generated, insert it now.
Note If you have a new server with the software pre-installed, you do not need to install from a DVD, unless you want to reimage the server with a later product release. You can go directly to the “Entering Pre-existing Configuration Information” section on page 38.
Step 2 Insert the installation DVD into the tray and restart the server, so it boots from the DVD. After the server completes the boot sequence, the DVD Found window displays.
Step 3 To perform the media check, choose Yes. To skip the media check, choose No.
The media check checks the integrity of the DVD. If your DVD passed the media check previously, you might choose to skip the media check.
Step 4 If you choose Yes to perform the media check, the Media Check Result window displays. Perform these tasks:
a. If the Media Check Result displays Pass, click OK to continue the installation.
b. If the media fails the Media Check, either download another copy from Cisco.com or obtain another DVD directly from Cisco.
Step 5 The system installer performs the following hardware checks to ensure that your system is correctly configured. If the installer makes any changes to your hardware configuration settings, you will get prompted to restart your system. Leave the DVD in the drive during the reboot:
a. First, the installation process checks for the correct drivers, and you may see the following warning:
No hard drives have been found. You probably need to manually choose device drivers for install to succeed. Would you like to select drivers now?
To continue the installation, choose Yes.
32Installing Cisco Unified Contact Center Express Release 8.0(1)
Installing Unified Contact Center Express
b. The installation next checks to see whether you have a supported hardware platform. If your server does not meet the exact hardware requirements, the installation process fails with a critical error. If you think this is not correct, capture the error and report it Cisco support.
c. The installation process next verifies RAID configuration and BIOS settings.
Note If this step repeats, choose Yes again.
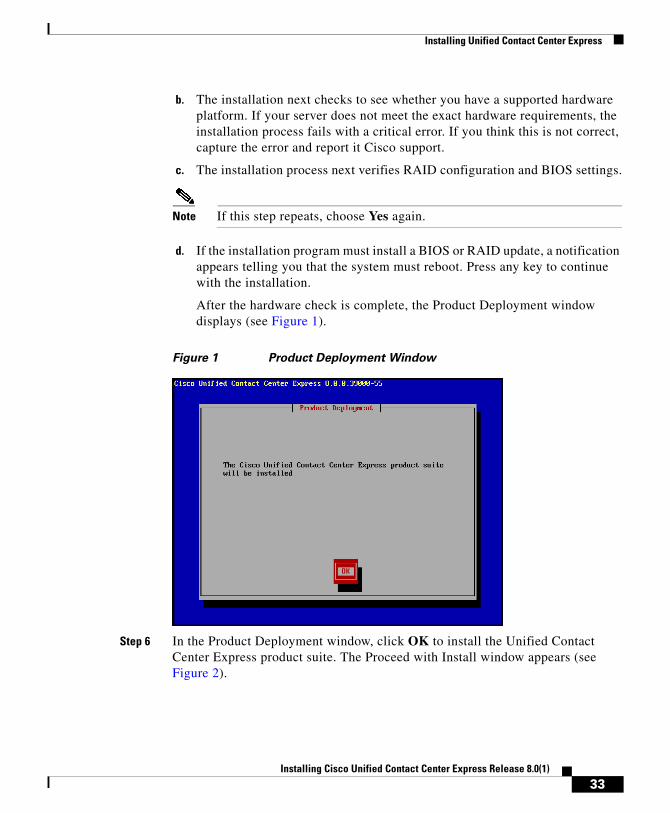
d. If the installation program must install a BIOS or RAID update, a notification appears telling you that the system must reboot. Press any key to continue with the installation.
After the hardware check is complete, the Product Deployment window displays (see Figure 1).
Figure 1 Product Deployment Window
Step 6 In the Product Deployment window, click OK to install the Unified Contact Center Express product suite. The Proceed with Install window appears (see Figure 2).
33Installing Cisco Unified Contact Center Express Release 8.0(1)

Installing Unified Contact Center Express
Figure 2 Proceed with Install Window
Step 7 If an earlier version of the software is currently installed on the server, the Proceed with Install window displays the software version currently existing on your hard drive and the version available on the DVD. Choose Yes to continue with the installation or No to cancel.
Caution If you choose Yes in the Proceed with Install window, all existing data on your hard drive gets overwritten and lost.
The Platform Installation Wizard window displays (see Figure 3).
34Installing Cisco Unified Contact Center Express Release 8.0(1)

Installing Unified Contact Center Express
Figure 3 Platform Installation Wizard Window
Step 8 Choose one of the following options:
• To enter your configuration information manually and have the installation program install the configured software on the server, choose Proceed and continue with this procedure. The Apply Patch window appears (see Figure 4).
• To do any of the following tasks, choose Skip and continue with the “Entering Pre-existing Configuration Information” section on page 38.
– Manually configure the software that is pre-installed on your server—In this case, you do not need to install the software, but you must configure the pre-installed software.
– Perform an unattended installation—In this case, you provide pre-existing configuration information on a USB key, floppy disk or an Answer File Generator.
– Install the software before manually configuring it—In this case, the installation program installs the software, then prompts you to configure it manually. You can choose Skip if you want to pre-install the application on all your servers first and then enter the configuration information at a later time. This method might cause you to spend more time performing the installation than the other methods.
35Installing Cisco Unified Contact Center Express Release 8.0(1)
Installing Unified Contact Center Express
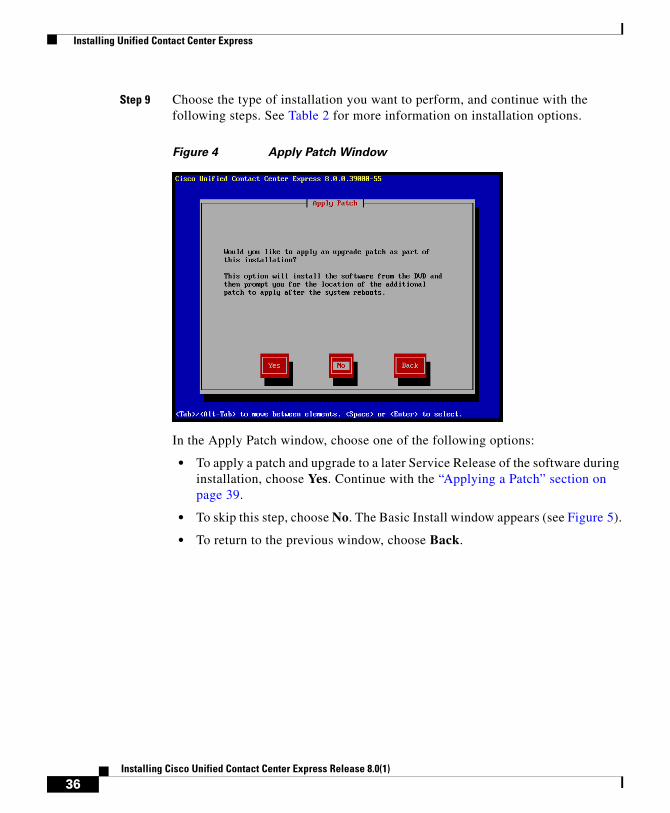
Step 9 Choose the type of installation you want to perform, and continue with the following steps. See Table 2 for more information on installation options.
Figure 4 Apply Patch Window
In the Apply Patch window, choose one of the following options:
• To apply a patch and upgrade to a later Service Release of the software during installation, choose Yes. Continue with the “Applying a Patch” section on page 39.
• To skip this step, choose No. The Basic Install window appears (see Figure 5).
• To return to the previous window, choose Back.
36Installing Cisco Unified Contact Center Express Release 8.0(1)

Installing Unified Contact Center Express
Figure 5 Basic Install Window
Step 10 In the Basic Install window, choose Continue to install the software version on the DVD or configure the pre-installed software. The Timezone Configuration window displays (see Figure 6). Continue with the “Performing the Basic Installation” section on page 43.
Figure 6 Timezone Configuration Window
37Installing Cisco Unified Contact Center Express Release 8.0(1)

Installing Unified Contact Center Express
Entering Pre-existing Configuration InformationStart here if you have a server that has the product pre-installed or if you chose Skip in the Platform Installation Wizard window. To start entering pre-existing configuration information, complete the following steps:
Step 1 After the server restarts, the Pre-existing Installation Configuration window displays.
Step 2 If you have pre-existing configuration information created using the Answer File Generator and stored on a CD or a USB key, insert the disc or the USB key now and choose Continue. The installation wizard will read the configuration information during the installation process.
Note If a popup window states that the system detected new hardware, press any key and then choose Install from the next window.
The Platform Installation Wizard window displays (see Figure 3).
Step 3 To continue with the Platform Installation Wizard, choose Proceed.
Step 4 Choose the type of installation you want to perform, and continue with the following steps. See Table 7 for more information on installation options.
In the Apply Patch window, choose one of the following options:
• To apply a patch and upgrade to a later Service Release of the software during installation, choose Yes. Continue with the “Applying a Patch” section on page 39.
• To skip this step, choose No. The Basic Install window appears (see Figure 5).
• To return to the previous window, choose Back.
Step 5 In the Basic Install window, choose Continue. The Timezone Configuration window displays (see Figure 6). Continue with the “Performing the Basic Installation” section on page 43.
38Installing Cisco Unified Contact Center Express Release 8.0(1)

Installing Unified Contact Center Express
Applying a PatchIf you choose Yes in the Apply Patch window, the installation wizard installs the software version on the DVD first and then restarts the system. You must obtain the appropriate upgrade file from Cisco.com before you apply an upgrade patch during installation.
Note You can upgrade to any supported higher release as long as you have a full patch, which is not an engineering special (ES) or a service release (SR), in which case you can only upgrade to a later service release within the same maintenance release.
For information about supported upgrades, see the Cisco Unified Contact Center Express Software and Hardware Compatibility Guide, available here: http://www.cisco.com/en/US/products/sw/custcosw/ps1846/products_device_support_tables_list.html
You can also find relevant information in the Release Notes for your product release available here:
http://www.cisco.com/en/US/products/sw/custcosw/ps1846/prod_release_notes_list.html
You can access the upgrade file during the installation process from either a local disk (DVD) or from a remote FTP or SFTP server. To start applying the patch, complete the following steps:
Step 1 The Install Upgrade Retrieval Mechanism Configuration window displays.
Step 2 Choose the upgrade retrieval mechanism to use to retrieve the upgrade file:
• SFTP—Retrieves the upgrade file from a remote server by using the Secure File Transfer Protocol (SFTP). Skip to the “Upgrading from a Remote Server” section on page 41.
• FTP—Retrieves the upgrade file from a remote server by using File Transfer Protocol (FTP). Skip to the “Upgrading from a Remote Server” section on page 41.
• LOCAL—Retrieves the upgrade file from a local DVD. Continue with the “Upgrading from a Local Disk” section on page 40.
39Installing Cisco Unified Contact Center Express Release 8.0(1)

Installing Unified Contact Center Express
Upgrading from a Local Disk
Before you can upgrade from a local disk, you must download the appropriate patch file from Cisco.com and use it to create an upgrade DVD. You must create an ISO image on the DVD from the upgrade file.
To start upgrading from a local disk, complete the following steps:
Note Simply copying the ISO file to a DVD will not work.
Step 1 When the Local Patch Configuration window displays, enter the patch directory and patch name, if required, and click OK.
The Install Upgrade Patch Selection Validation window displays.
Step 2 The window displays the patch file that is available on the DVD. To update the system with this patch, choose Continue.
The system installs the patch, then restarts the system with the upgraded software version running. After the system restarts, the Pre-existing Configuration Information window displays.
Step 3 To continue the installation, choose Proceed.
The Platform Installation Wizard window displays (see Figure 3).
Step 4 To continue the installation, choose Proceed or choose Cancel to stop the installation.
• If you choose Proceed, the Apply Patch window displays (see Figure 4). Continue with Step 5.
• If you choose Cancel, the system halts, and you can safely power down the server.
Step 5 When the Apply Patch window appears, choose No and continue with “Performing the Basic Installation” section on page 43.
40Installing Cisco Unified Contact Center Express Release 8.0(1)

Installing Unified Contact Center Express
Upgrading from a Remote Server
Before you can upgrade from a remote server, you must download the appropriate patch file from Cisco.com to an FTP or SFTP server to which your server (on which you are applying the patch) has access.
As a selection of SFTP or FTP requires that you configure network settings so that the server can connect to the network, this selection opens with the Auto Negotiation Configuration screen.
To start upgrading from a remote server, complete the following steps:
Step 1 The Auto Negotiation Configuration window displays.
Step 2 The installation process allows you to automatically set the speed and duplex settings of the Ethernet network interface card (NIC) by using automatic negotiation. You can change this setting after installation.
Note To use this option, your hub or Ethernet switch must support automatic negotiation.
• To enable automatic negotiation, choose Yes.
The MTU Configuration window displays. Continue with Step 4.
• To disable automatic negotiation, choose No. The NIC Speed and Duplex Configuration window displays. Continue with Step 3.
Step 3 If you chose to disable automatic negotiation, manually choose the appropriate NIC speed and duplex settings now and click OK to continue.
The MTU Configuration window displays.
Step 4 In the MTU Configuration window, you can change the MTU (maximum transmission unit) size from the operating system default.
The MTU represents the largest packet, in bytes, that this host will transmit on the network. If you are unsure of the MTU setting for your network, use the default value.
Caution If you configure the MTU size incorrectly, your network performance can be affected.
41Installing Cisco Unified Contact Center Express Release 8.0(1)
Installing Unified Contact Center Express
• To accept the default value (1500 bytes), choose No.
• To change the MTU size from the operating system default, choose Yes, enter the new MTU size, and click OK.
The Static Network Configuration window displays.
Step 5 For network configuration, enter your static network configuration values and click OK. See Table 6 for field descriptions. The DNS Client Configuration window displays.
Step 6 To enable DNS, choose Yes, enter your DNS client information, and click OK. See Table 6 for field descriptions.
After the system configures the network and checks for connectivity, the Remote Patch Configuration window appears.
Step 7 Enter the location and login information for the remote file server. The system connects to the remote server and retrieves a list of available upgrade patches.
If the upgrade file is located on a LINUX or UNIX server, you must enter a forward slash at the beginning of the directory path. For example, if the upgrade file is in the patches directory, you must enter /patches.
If the upgrade file is located on a Windows server, remember that you are connecting to an FTP or SFTP server, so use the appropriate syntax, including:
• Begin the path with a forward slash (/) and use forward slashes throughout the path.
• The path must start from the FTP or SFTP root directory on the server, so you cannot enter a Windows absolute path, which starts with a drive letter (for example, C:).
The Install Upgrade Patch Selection Validation window displays.
Step 8 Choose the upgrade patch to install. The system downloads, unpacks, and installs the patch and then restarts the system with the upgraded software version running.
After the system restarts, the Pre-existing Configuration Information window appears.
Step 9 To continue the installation, choose Proceed.
The Platform Installation Wizard window displays.
Step 10 To continue the installation, choose Proceed or choose Cancel to stop the installation.
• If you choose Proceed, the Apply Patch window displays. Continue with Step 11.
42Installing Cisco Unified Contact Center Express Release 8.0(1)

Installing Unified Contact Center Express
• If you choose Cancel, the system halts, and you can safely power down the server.
Step 11 When the Apply Patch window displays, choose No and continue with the “Performing the Basic Installation” section on page 43.
Performing the Basic InstallationTo perform the basic installation, complete the following steps:
Step 1 When the Timezone Configuration window displays, choose the appropriate time zone for the server and then click OK.
The Auto Negotiation Configuration window displays (see Figure 7).
Figure 7 Auto Negotiation Configuration Window
Step 2 The installation process allows you to automatically set the speed and duplex settings of the Ethernet network interface card (NIC) by using automatic negotiation. You can change this setting after installation.
• To enable automatic negotiation, choose Yes and continue with Step 5.
43Installing Cisco Unified Contact Center Express Release 8.0(1)

Installing Unified Contact Center Express
The MTU Configuration window displays (see Figure 8).
Figure 8 MTU Configuration Window
Note To use this option, your hub or Ethernet switch must support automatic negotiation.
• To disable automatic negotiation, choose No and continue with Step 3.
The NIC Speed and Duplex Configuration window displays.
Step 3 If you chose to disable automatic negotiation, manually choose the appropriate NIC speed and duplex settings now and click OK to continue.
The MTU Configuration window displays (see Figure 8).
Step 4 In the MTU Configuration window, you can change the MTU size from the operating system default.
The MTU represents the largest packet, in bytes, that this host will transmit on the network. If you are unsure of the MTU setting for your network, use the default value, which is 1500 bytes.
44Installing Cisco Unified Contact Center Express Release 8.0(1)

Installing Unified Contact Center Express
Caution If you configure the MTU size incorrectly, your network performance can be affected.
• To accept the default value (1500 bytes), choose No.
• To change the MTU size from the operating system default, choose Yes, enter the new MTU size, and click OK.
The Static Network Configuration window displays (see Figure 9).
Figure 9 Static Network Configuration Window
Step 5 For network configuration, enter your static network configuration values and click OK. See Table 6 for field descriptions. The DNS Client Configuration window displays (see Figure 10).
45Installing Cisco Unified Contact Center Express Release 8.0(1)
Installing Unified Contact Center Express
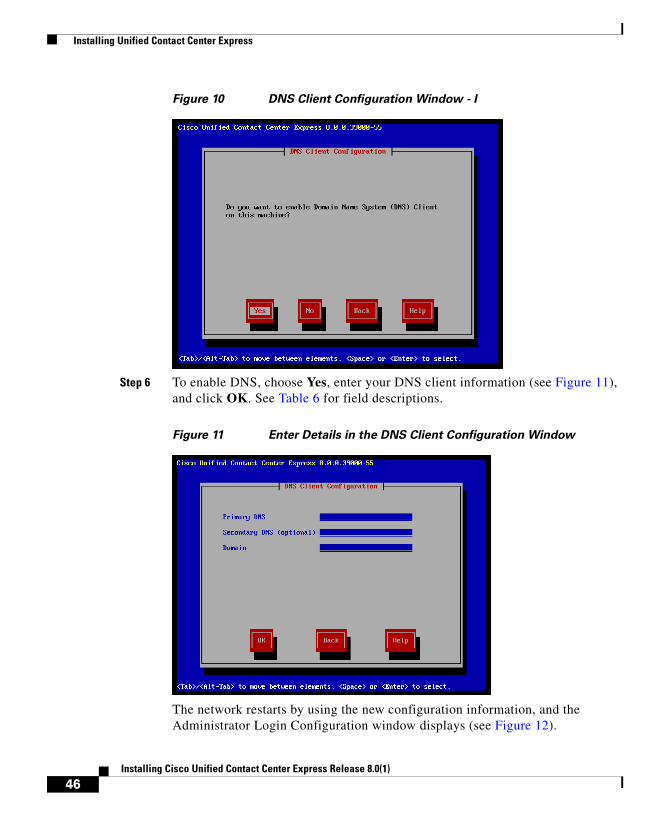
Figure 10 DNS Client Configuration Window - I
Step 6 To enable DNS, choose Yes, enter your DNS client information (see Figure 11), and click OK. See Table 6 for field descriptions.
Figure 11 Enter Details in the DNS Client Configuration Window
The network restarts by using the new configuration information, and the Administrator Login Configuration window displays (see Figure 12).
46Installing Cisco Unified Contact Center Express Release 8.0(1)

Installing Unified Contact Center Express
Figure 12 Administrator Login Configuration Window
Step 7 Enter your Administrator login and password from Table 6 and click OK. The Certificate Information window displays (see Figure 13).
Note The Administrator login must start with an alphabetic character, be at least six characters long, and can contain alphanumeric characters, hyphens, and underscores. You will need the Administrator login to log in to Unified OS Administration, the command line interface, and the Disaster Recovery System.
47Installing Cisco Unified Contact Center Express Release 8.0(1)

Installing Unified Contact Center Express
Figure 13 Certificate Information Window
Step 8 Enter data to create your Certificate Signing Request—Organization, Unit, Location, State, and Country and click OK.
The First Node Configuration window displays (see Figure 14).
Figure 14 First Node Configuration Window
48Installing Cisco Unified Contact Center Express Release 8.0(1)

Installing Unified Contact Center Express
Step 9 You can configure this server as either the first node or the second node in a Unified CCX cluster.
• To configure this server as the first Unified CCX node, choose Yes. The Network Time Protocol Client Configuration window displays (see Figure 15). Continue with the “Configuring the First Node” section on page 50.
Figure 15 Network Time Protocol Client Configuration Window
• To configure this server as the second node in the cluster, choose No. The First Node Configuration Warning message displays (see Figure 16). Continue with the “Installing the Second Node for HA” section on page 58.
49Installing Cisco Unified Contact Center Express Release 8.0(1)

Installing Unified Contact Center Express
Figure 16 First Node Configuration Window with Warning Message
Configuring the First NodeAfter you finish the basic installation, to configure the server as the first node in the cluster, complete the following steps.
Step 1 In the Network Time Protocol Client Configuration window, choose whether you want to configure an external NTP server or manually configure the system time.
Note It is important that you use external NTP servers to ensure that system time is kept accurate.
• To set up an external NTP server, choose Yes in the Network Time Protocol Client Configuration window (see Figure 16) and then enter the IP address, NTP server name, or NTP server pool name for at least one NTP server (see Figure 17). You can configure up to five NTP servers, and it is important that you use at least three. Click OK to continue with the installation.
50Installing Cisco Unified Contact Center Express Release 8.0(1)

Installing Unified Contact Center Express
Figure 17 Setting Up External NTP Servers
Note Ensure the external NTP server is stratum 9 or higher (meaning stratums 1-9). The second node in a cluster will get its time from the first node.
The system contacts an NTP server and automatically sets the time on the hardware clock.
Note If the Test button displays, you can choose Test to check whether the NTP servers are accessible.
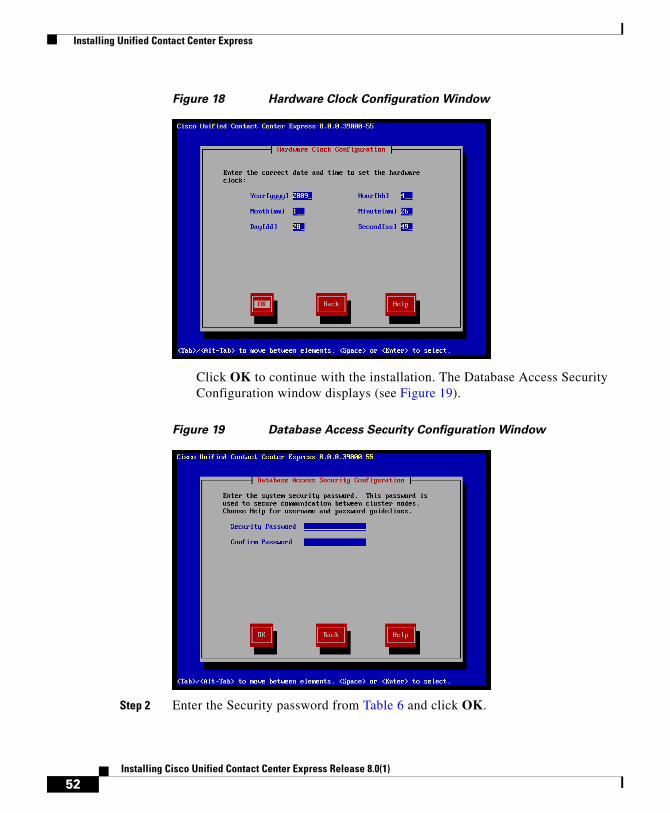
• To manually configure the system time, click No and enter the appropriate date and time to set the hardware clock in the Hardware Clock Configuration window (see Figure 18).
51Installing Cisco Unified Contact Center Express Release 8.0(1)
Installing Unified Contact Center Express
Figure 18 Hardware Clock Configuration Window
Click OK to continue with the installation. The Database Access Security Configuration window displays (see Figure 19).
Figure 19 Database Access Security Configuration Window
Step 2 Enter the Security password from Table 6 and click OK.
52Installing Cisco Unified Contact Center Express Release 8.0(1)

Installing Unified Contact Center Express
Note The Security password must start with an alphanumeric character, be at least six characters long, and can contain alphanumeric characters, hyphens, and underscores. The system uses this password to authorize communications between nodes, and you must ensure this password is identical on both the nodes in a cluster.
The SMTP Host Configuration window displays (see Figure 20).
Figure 20 SMTP Host Configuration Window
If you want to configure an SMTP (Simple Mail Transfer Protocol) server for your system, choose Yes (see Figure 21).
Note You must configure an SMTP server to use certain platform features; however, you can also configure an SMTP server later by using the platform GUI or the command line interface.
53Installing Cisco Unified Contact Center Express Release 8.0(1)
Installing Unified Contact Center Express
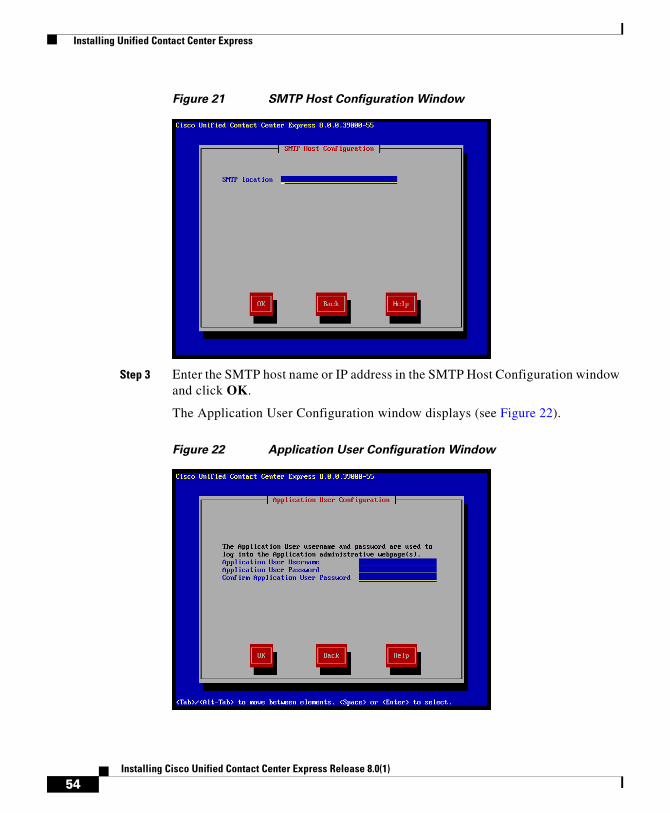
Figure 21 SMTP Host Configuration Window
Step 3 Enter the SMTP host name or IP address in the SMTP Host Configuration window and click OK.
The Application User Configuration window displays (see Figure 22).
Figure 22 Application User Configuration Window
54Installing Cisco Unified Contact Center Express Release 8.0(1)

Installing Unified Contact Center Express
Step 4 Enter the Application User name and password from Table 6 and confirm the password by entering it again. Click OK.
The Platform Configuration Confirmation window displays (see Figure 23).
Figure 23 Platform Configuration Confirmation Window
Step 5 To continue with the installation, click OK. The Unified CCX Deployment Type Selection window displays (see Figure 24).
To modify the platform configuration, choose Back on the Platform Configuration Confirmation window.
55Installing Cisco Unified Contact Center Express Release 8.0(1)

Installing Unified Contact Center Express
Figure 24 Unified CCX Deployment Type Selection Window
Step 6 In the Unified CCX Deployment Type Selection window, do the following.
a. Choose either of these options:
– Cisco Unified Communications Manager—Choose this option if you wish to use Unified CCX with Unified CM
– Cisco Unified Communications Manager Express—Choose this option if you wish to use Unified CCX with Unified CME
Note Unified CCX 8.0(1) supports UC500 and UC520 Series Routers. If you deploy Unified CCX 8.0(1) with the UC500 or UC520 Series Routers during installation, select Cisco Unified Communications Manager Express as the deployment type in the Unified CCX 8.0(1) installation wizard.
b. Click OK.
The system installs and configures the software. The DVD drive ejects, and the server reboots.
Caution Do not reinsert the DVD.
56Installing Cisco Unified Contact Center Express Release 8.0(1)

Installing Unified Contact Center Express
Step 7 When the installation process completes, you get prompted to log in using the Administrator user name and password.
Step 8 Complete the post-installation tasks that are listed in the “Performing Post-Installation Tasks” section on page 61.
Configuring the Second NodeBefore you install Unified CCX 8.0(1) on the second node, you must add the server details of second node on the first node Unified CCX Administration using the Unified CCX Administration web interface.
To configure a new server that needs to be added to form a Unified CCX cluster for an HA setup, complete the following steps:
Step 1 On the Unified CCX Administration web interface of the first node, choose System > License Information > Add License(s).
Step 2 Browse to select an HA premium or standard license and click Upload.
Step 3 Once the HA license is successfully uploaded and validated, choose System > Server. The List Servers window displays.
You can use the List Servers window to view, add, and remove servers in the cluster.
Step 4 Click Add New. The Server Configuration window displays.
Note If you have not uploaded an HA license yet, you will be prompted with a warning message to upload one. Click OK to go to the License Information window and upload.
Step 5 In the Server Configuration window, enter the values for the following fields:
57Installing Cisco Unified Contact Center Express Release 8.0(1)
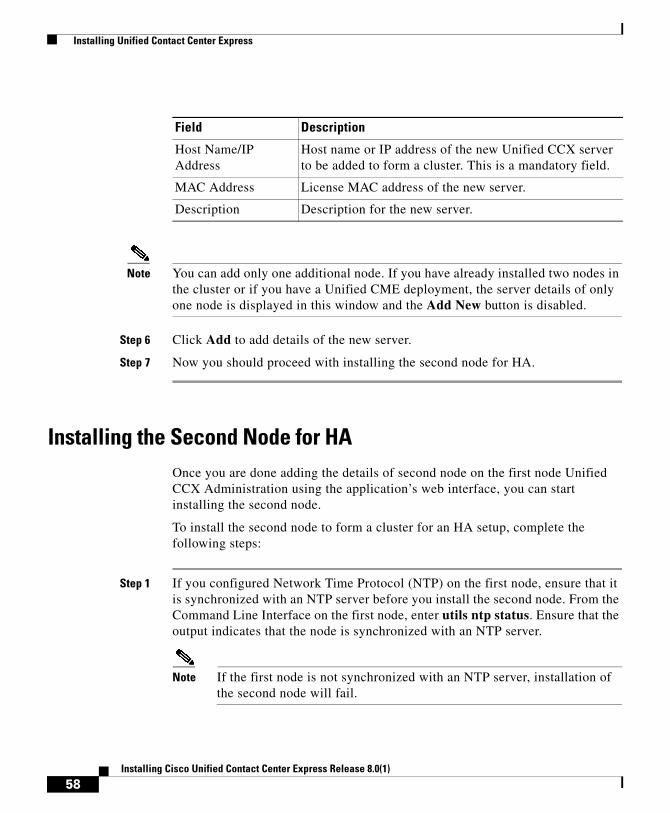
Installing Unified Contact Center Express
Note You can add only one additional node. If you have already installed two nodes in the cluster or if you have a Unified CME deployment, the server details of only one node is displayed in this window and the Add New button is disabled.
Step 6 Click Add to add details of the new server.
Step 7 Now you should proceed with installing the second node for HA.
Installing the Second Node for HAOnce you are done adding the details of second node on the first node Unified CCX Administration using the application’s web interface, you can start installing the second node.
To install the second node to form a cluster for an HA setup, complete the following steps:
Step 1 If you configured Network Time Protocol (NTP) on the first node, ensure that it is synchronized with an NTP server before you install the second node. From the Command Line Interface on the first node, enter utils ntp status. Ensure that the output indicates that the node is synchronized with an NTP server.
Note If the first node is not synchronized with an NTP server, installation of the second node will fail.
Field Description
Host Name/IP Address
Host name or IP address of the new Unified CCX server to be added to form a cluster. This is a mandatory field.
MAC Address License MAC address of the new server.
Description Description for the new server.
58Installing Cisco Unified Contact Center Express Release 8.0(1)

Installing Unified Contact Center Express
Step 2 On the First Node Configuration window, read the Warning and make sure you have correctly configured the first node (see Figure 25). To continue with the installation of the second node, click OK.
Figure 25 First Node Configuration Warning Window
The Network Connectivity Test Configuration window displays (see Figure 26).
59Installing Cisco Unified Contact Center Express Release 8.0(1)

Installing Unified Contact Center Express
Figure 26 Network Connectivity Test Configuration Window
Step 3 During installation of the second node, the system checks to ensure that the second node can connect to the first node.
• To pause the installation after the system successfully verifies network connectivity, choose Yes.
• To continue the installation without a pause, click No.
The First Node Access Configuration window displays.
Step 4 Enter the first node connectivity information (Host Name, IP Address, and Security Password) and click OK.
The system checks for network connectivity.
If you chose to pause the system after the system successfully verifies network connectivity, the Successful Connection to First Node window displays. Choose Continue.
Note If the network connectivity test fails, the system always stops and allows you to go back and re-enter the parameter information.
The SMTP Host Configuration window displays.
Step 5 If you want to configure an SMTP server, choose Yes and enter the SMTP host name or IP address.
60Installing Cisco Unified Contact Center Express Release 8.0(1)
Performing Post-Installation Tasks
Note To use certain operating system features, you must configure an SMTP server; however, you can also configure an SMTP server later by using the operating system GUI or the command line interface. If you have configured an SMTP server for the first node, you must configure it for the second node also.
The Platform Configuration Confirmation window displays.
Step 6 To start installing the software, click OK. The system installs and configures the software. The DVD drive ejects, and the system reboots.
Note Your system automatically fetches the configuration information from the first node to set up and configure the second node for HA.
To modify the platform configuration, choose Back on the Platform Configuration Confirmation window.
Step 7 When the installation process completes, log in to the Unified CCX Administration using the Application user account and password.
Step 8 Complete the post-installation tasks that are listed in the“Performing Post-Installation Tasks” section on page 61.
Performing Post-Installation TasksAfter installing Unified CCX on your server, you must set some configuration parameters and perform other post-installation tasks before you start using it.
It is recommended that you perform these tasks on the first node prior to installing Unified CCX on a second node. See Table 9 for a list of post-installation tasks.
61Installing Cisco Unified Contact Center Express Release 8.0(1)

Performing Post-Installation Tasks
Performing Initial Setup for the First NodeAfter you install Unified CCX, use the web interface of Unified CCX Administration to perform the initial system setup.
Unified CCX Administration is a web-based application that allows you to control, configure, and monitor many functions of your Unified CCX system. The setup procedure that you perform depends on:
• Your deployment of Unified CCX with Unified CM
• Your deployment of Unified CCX with Unified CME
• Your deployment Unified CCX is SA (single-node) or HA (two-node).
Table 9 Post-Installation Tasks
Post-Installtion Task Important Notes
Perform the initial setup of Unified CCX. See the “Performing Initial Setup for the First Node” section on page 62.
The locale English_United_States installs automatically on the server; however, you can add new locales to the server, if required.
See the Cisco Unified Communications Operating System Administration Guide available here:
http://www.cisco.com/en/US/products/sw/custcosw/ps1846/products_installation_and_configuration_guides_list.html
If applicable, configure any network management systems in use at your site.
See the Cisco Unified Serviceability Administration Guide available here:
http://www.cisco.com/en/US/products/sw/custcosw/ps1846/products_installation_and_configuration_guides_list.html
Back up your Unified CCX data daily. See the Cisco Unified Contact Center Express Disaster Recovery System Administration Guide Release 8.0(1) available here:
http://www.cisco.com/en/US/products/sw/custcosw/ps1846/prod_maintenance_guides_list.html.
62Installing Cisco Unified Contact Center Express Release 8.0(1)

Performing Post-Installation Tasks
If you later need to update information that you specify during the setup procedure, you can use Unified CCX Administration to make changes. For more information, see the Cisco Unified Contact Center Express Administration Guide Release 8.0(1), available here: http://www.cisco.com/en/US/products/sw/custcosw/ps1846/products_installation_and_configuration_guides_list.html
Performing the Initial Setup for a Deployment with Unified CM
After you complete the installation of Unified CCX 8.0(1), you must access the Unified CCX Administration web interface through its Authentication page (using the Application username and password that you created during installation) to perform the initial setup procedure.
Start the Initial Setup Configuration on the Unified CCX 8.0(1) Server
To perform the initial setup on the Unified CCX 8.0(1) system, complete the following steps:
Step 1 From any computer in the network that meets the requirements described in the “Client System Requirements” section on page 13, enter the following URL in a web browser, where servername is the host name or the IP address of the server on which you installed Unified CCX and then click the Cisco Unified Contact Center Express link.
http://servername/
Enter the IP address or host name of the server on which you will perform the initial setup procedure. The Unified CCX Administration Authentication page displays.
Note While accessing the Unified CCX Administration for the first time, a security alert message might appear prompting you to install a security certificate (signed by a third party) if you have not installed a security certificate. This security certficate is required for a secure connection to the server. For more information on how to install a security certificate, see the Cisco Unified Contact Center Express Administration Guide Release 8.0(1), available here: http://www.cisco.com/en/US/products/sw/custcosw/ps1846/products_installation_and_configuration_guides_list.html
63Installing Cisco Unified Contact Center Express Release 8.0(1)

Performing Post-Installation Tasks
Step 2 In the Unified CCX Administration Authentication page, enter the Application username and password that you created during installation (see Table 6).
Note Since the Application user password is case-sensitive, make sure that you enter the password exactly as created.
Step 3 Click Login. The Unified CCX Administrator Setup window for the initial setup procedure displays.
Step 4 Choose Fresh Install and then click Next to continue. The Unified CM Configuration - Service Provider Configuration window displays.
Step 5 In the Unified CM Configuration - Service Provider Configuration window, enter the Unified CM hostname or IP address, AXL Admin User Name and Password in the respective fields for the Unified CM that you have installed for communicating with Unified CCX 8.0(1), and then click Next to continue. The License Information window displays.
Step 6 In the License Information window, click Browse to select the license file that you have purchased, and then click Next to continue. The License Information window with validation information displays.
Step 7 Verify the validation information that appears in the License Information window and then click Next to continue. The Component Activation window displays.
Step 8 Wait until all the components get activated. Once all the components are successfully activated, click Next to continue. The Publisher Activation window displays.
Step 9 Select the checkboxes corresponding to each datastore to activate the Publisher. If the checkboxes corresponding to the listed datastores are already selected and grayed out, it means this is the first node in the cluster which would be the Publisher by default. Click Next to continue. The Unified CM Configuration window displays.
Step 10 In the Unified CM Configuration window, the Unified CCX 8.0(1) AXL Service Provider Configuration area for a Unified CM Cluster setup displays a list of IP addresses of the AXL Service Providers sorted by priority, where the Unified CM Publisher is listed first followed by the Unified CM Subscribers. During the AXL Service Provider Authentication in the Unified CM Cluster deployment, the priority is given to the Unified CM Publisher. However, if the Unified CM
64Installing Cisco Unified Contact Center Express Release 8.0(1)

Performing Post-Installation Tasks
Publisher is offline or not available, the next available Unified CM Subscriber is chosen for user authentication. You can also change the priority of the AXL Service Providers, if necessary, by selecting the IP address of an AXL Service Provider in the list and clicking the up and down arrow.
Note As per the Unified CM design, even if the Unified CM Publisher is listed after a Unified CM Subscriber, the system will use the Unified CM Publisher for authentication. However, if the Unified CM Publisher is offline, the Unified CM Subscriber will use its own database to authenticate.
a. In the AXL Service Provider Configuration area, do the following:
– Move the IP address of the Unified CM server or servers that you want to use as the AXL service provider from the Available AXL Service Providers list box to the Selected AXL Service Providers list box.
By default, the Selected AXL Service Providers list box is pre-populated with the IP address of the server that you specified in Step 5.
To move an item from one list box to the other, select the item and then click the left arrow (<) or right arrow (>).
– In the User Name field, enter a user name for the AXL service provider, if you want to change the name that displays.
This field is pre-populated with the user name that you specified in Step 5.
The AXL Admin user name must not be the Unified CM Administrator username. In case you specify a user name other than the Unified CM Administrator username, add the user name of the AXL Administrator to the Standard Unified CCX Administrators group and "Standard AXL API Access" roles in Unified CM.
– In the Password field, enter a password for the AXL service provider, if you want to change the password.
This field is pre-populated with the password that you specified in Step 5.
b. In the Unified CM Telephony Subsystem - Unified CM Telephony Provider Configuration area, do the following:
65Installing Cisco Unified Contact Center Express Release 8.0(1)

Performing Post-Installation Tasks
– Move the IP address of the Unified CM server that you want to use as the Computer Telephony Integration provider for the Unified CM Telephony subsystem from the Available CTI Managers list box to the Selected CTI Managers list box.
To move an item from one list box to the other, select the item and then click left arrow (<) or right arrow (>).
– In the User Prefix field, enter an application user name for the Unified CM Telephony subsystem.
– In the Password and Confirm Password fields, enter a password for the Unified CM Telephony subsystem application user.
c. In the RmCm Subsystem - RmCm Provider Configuration area, move the IP address of the Unified CM server that you want to use as the Computer Telephony Integration provider for the RmCm subsystem from the Available CTI Managers list box to the Selected CTI Managers list box.
To move an item from one list box to the other, select the item and then click left arrow (<) or right arrow (>).
Note Depending on your Unified CCX license, the RmCm Subsystem - RmCm Provider Configuration area may not be available on your system.
d. In the User ID field in the RmCm Subsystem - RmCm Provider Configuration area, enter an application user name for the RmCm subsystem.
e. In the Password and Confirm Password fields in the Unified Telephony Subsystem - Unified CM Telephony Provider Configuration area, enter a password for the RmCm subsystem application user.
Step 11 Click Next to continue. The System Parameters Configuration page displays.
Step 12 In the Systems Parameters Configuration window, do the following:
a. In the Number of HR Session Licenses field, enter the maximum number of Unified CCX Historical Reporting sessions that you will run simultaneously.
b. In the Recording Count field, enter the maximum number of simultaneous recordings that you will make.
This field displays only if you have a Unified CCX premium license.
66Installing Cisco Unified Contact Center Express Release 8.0(1)

Performing Post-Installation Tasks
c. In the Number of Outbound seats field, enter the maximum number of outbound seats.
d. From the Codec drop-down list, choose the codec to use for prompts.
Step 13 Click Next to continue. The Languages Configuration window displays.
Step 14 In the Languages Configuration window, do the following:
a. In the IVR Language Configuration area, choose a language from the drop-down list that you want to be available for prompts.
A list of available languages for the language group that you selected displays under the Language Group column.
b. If you required a custom country-specific language, select the Group Default radio button corresponding to that language in order to use it as a base for your custom country-specific language.
c. Check the Country Specific check box for each language to install. A country-specific language includes appropriate rules for dates, times, currency, and so on, for the designated country.
d. In the CAD Language Configuration area, choose a language from the CAD Language drop-down list that you want to be available for use in the agent desktops and supervisor desktops.
Step 15 Click Next to continue. The User Configuration page displays.
Step 16 In the User Configuration page, do the following:
a. In the Cisco Unified CM Users list box, select the Unified CM user that you want to designate as the Unified CCX Administrator.
If the desired user does not appear in the Cisco Unified CM Users list box, enter part or full user name in the Search field and click Search.
If you are still unable to find the user in the Cisco Unified CM Users list box, you need to create a new user. For more information on how to create a new user in Unified CM, see Creating New Unified CM Users, page 68.
b. Click the left arrow (<) to move the selected user to the Cisco Unified CCX Administrator list box.
Step 17 Click Finish. The Unified CCX Setup Result Information window displays. This window confirms the result of the initial setup. The Unified CCX engine will restart.
Step 18 Close your web browser.
67Installing Cisco Unified Contact Center Express Release 8.0(1)

Performing Post-Installation Tasks
You have completed the initial setup of Unified CCX. Henceforth, you or the user selected as the Unified CCX Administrator (in Step 16) can access the Unified CCX Administration using the Administrator credentials.
To change the configuration settings that you made or to perform additional configuration activities, see the Cisco Unified Contact Center Express Administration Guide Release 8.0(1), available here: http://www.cisco.com/en/US/products/sw/custcosw/ps1846/products_installation_and_configuration_guides_list.html
Creating New Unified CM Users
To create new Unified CM users, follow these steps:
Step 1 Access the Unified CM Administration Authentication window and log in using the Administrator credentials.
Step 2 In the Unified CM Administration Setup window, choose User Management > End User.
Step 3 In the Find and List Users window, click Add New.
Step 4 Create an end user by specifying the mandatory fields and other required details.
Step 5 Once the end user creation is successful, navigate back to Unified CCX Administration and in the User Configuration window, assign the newly created user as Administrator.
Step 6 Choose Tools > User Management and then select the Administrator Capability View.
Step 7 Click Update if the User Configuration window does not display the new end user in the Cisco Unified CM Users list box.
Step 8 In the Cisco Unified CM Users list box, select the Unified CM user that you want to designate as the Unified CCX Administrator.
Step 9 Click the left arrow (<) to move the selected user to the Cisco Unified CCX Administrator list box.
Step 10 Click Finish.
68Installing Cisco Unified Contact Center Express Release 8.0(1)

Performing Post-Installation Tasks
Performing the Initial Setup for a Deployment with Unified CME
If you are deploying Unified CCX with Unified CME, perform the setup procedure that is described in this section. You perform this procedure one time to provide information about Unified CME, license files, and other system parameters.
To perform the initial setup, complete the following steps:
Step 1 From any computer in the network that meets the requirements described in the “Client System Requirements” section on page 13, enter the following URL in a web browser, where servername is the host name or the IP address of the server on which you installed Unified CCX and then click the Cisco Unified Contact Center Express link.
http://servername/
Enter the IP address or host name of the server on which you will perform the initial setup procedure. The Unified CCX Administration Authentication page displays.
Note While accessing the Unified CCX Administration for the first time, a security alert message might appear prompting you to install a security certificate (signed by a third party) if you have not installed a security certificate. This security certficate is required for a secure connection to the server. For more information on how to install a security certificate, see the Cisco Unified Contact Center Express Administration Guide Release 8.0(1), available here: http://www.cisco.com/en/US/products/sw/custcosw/ps1846/products_installation_and_configuration_guides_list.html.
Step 2 In the Unified CCX Administration Authentication page, enter the Application username and password that you created during installation (see Table 6).
Note Since the Application user password is case-sensitive, make sure that you enter the password exactly as created.
Step 3 Click Login. The Unified CCX Administrator Setup window for the initial setup procedure displays.
69Installing Cisco Unified Contact Center Express Release 8.0(1)

Performing Post-Installation Tasks
Step 4 Choose Fresh Install and then click Next to continue. The Unified CME Configuration - AXL User Configuration window displays.
Step 5 In the Unified CME Configuration - AXL User Configuration window, do the following:
a. In the Cisco Unified CME server hostname or IP address field, enter the host name or IP address of the Unified CME router.
b. In the AXL User ID field, enter the AXL user ID that you created in Unified CME.
c. In the AXL User Password field, enter the AXL password that you created in Unified CME.
Step 6 Click Next. to continue. The License Information window displays.
Step 7 In the License Information window, click Browse to select the license file that you have purchased, and then click Next to continue. The License Information window with validation information displays.
Step 8 Verify the validation information that appears in the License Information window and then click Next to continue. The Component Activation window displays.
Step 9 Wait until all the components get activated. Once all the components are successfully activated, click Next to continue. The System Parameters Configuration window displays.
Step 10 In the Systems Parameters Configuration window, do the following:
a. In the Number of HR Session Licenses field, enter the maximum number of Unified CCX Historical Reporting sessions that you will run simultaneously.
b. In the Recording Count field, enter the maximum number of simultaneous recordings that you will make.
This field displays only if you have a Unified CCX premium license.
Note The Codec field does not apply to deployments with Unified CME.
Step 11 Click Next to continue. The Languages Configuration window displays.
70Installing Cisco Unified Contact Center Express Release 8.0(1)

Performing Post-Installation Tasks
Step 12 In the Languages Configuration window, do the following:
a. In the IVR Language Configuration area, choose a language from the drop-down list that you want to be available for prompts.
A list of available languages for the language group that you selected displays under the Language Group column.
b. If you will create a custom country-specific language, select the Group Default radio button corresponding to that language in order to use it as a base for your custom country-specific language.
c. Check the Country Specific check box for each language to install. A country-specific language includes appropriate rules for dates, times, currency, and so on, for the designated country.
d. In the CAD Language Configuration area, choose a language from the CAD Language drop-down list that you want to be available for use in the agent desktops and supervisor desktops.
Step 13 Click Next to continue. The User Configuration page displays.
Step 14 In the User Configuration page, do the following to create login credentials for a new Unified CCX Administrator:
a. In the User ID field, enter a user ID for the Unified CCX Administrator.
b. In the First Name field, enter the first name of the user. This field is optional.
c. In the Last Name field, enter the last name of the user.
d. In the Name Dialing field, accept the default entry or enter a new value.
e. In the Password Field, enter a password for the user.
f. In the Confirm Password field, enter the password again.
g. In the PIN field, enter a PIN for the user.
h. In the Confirm PIN field, enter the PIN again.
i. Click Finish.
The Unified CCX Setup Result information displays. This window confirms the results of the initial setup.
Step 15 Close your web browser.
71Installing Cisco Unified Contact Center Express Release 8.0(1)

Performing Post-Installation Tasks
You have completed the initial setup of Unified CCX. Henceforth, you or the user selected as the Unified CCX Administrator (in Step 14) can access the Unified CCX Administration using the Administrator credentials.
To change the configuration settings that you made or to perform additional configuration activities, see the Cisco Unified Contact Center Express Administration Guide Release 8.0(1), available here: http://www.cisco.com/en/US/products/sw/custcosw/ps1846/products_installation_and_configuration_guides_list.html
Performing Initial Setup for the Second NodeBefore you install the second node to form a Unified CCX cluster, you should configure the server details for this node on the first node.
To configure a new server that needs to be added to form a Unified CCX cluster for an HA setup, complete the following steps:
Step 1 From any computer in the network that meets the requirements described in the “Client System Requirements” section on page 13, enter the following URL in a web browser, where servername is the host name or the IP address of the server on which you installed Unified CCX and then click the Cisco Unified Contact Center Express link.
http://servername/
If you access a server on which you will perform the server setup procedure, enter the IP address or the host name of that server. The Unified CCX Administration Authentication page displays.
Note While accessing the Unified CCX Administration for the first time, a security alert message might appear prompting you to install a security certificate (signed by a third party) if you have not installed a security certificate. This security certficate is required for a secure connection to the server. For more information on how to install a security certificate, see the Cisco Unified
72Installing Cisco Unified Contact Center Express Release 8.0(1)

Performing Post-Installation Tasks
Contact Center Express Administration Guide Release 8.0(1), available here: http://www.cisco.com/en/US/products/sw/custcosw/ps1846/products_installation_and_configuration_guides_list.html
Step 2 In the Unified CCX Administration Authentication page, enter the Application username and password that you created during installation (see Table 6).
Note Since the Application user password is case-sensitive, make sure that you enter the password exactly as created.
Step 3 Click Login. The Welcome to UCCX Replication Wizard window displays.
Step 4 On the Welcome to UCCX Replication Wizard window, enter the following:
Step 5 Click Next. The Component Activation window displays.
Step 6 Wait until all the components get activated. Once all the components are successfully activated, and then click Next.
The Unified CCX Setup Result Information window displays. This window confirms the result of the setup.
Field Description
Cluster Server IP Address This field is pre-populated with the first node IP address.
Cisco Unified CCX Administrator User ID
Enter the user name that you created to log in to the first node of Unified CCX Administration.
Cisco Unified CCX Administrator Password
Enter the password that you created to log in to the first node of Unified CCX Administration.
Network Deployment Type Choose the HA network deployment type as either LAN or WAN.
73Installing Cisco Unified Contact Center Express Release 8.0(1)

Performing Post-Installation Tasks
Note It is important that after the Add to Cluser operation is performed, the administrators must configure the failover collector settings for RTMT by choosing Tools > Service Parameters > AMC Service in Unified CCX Serviceability.
Step 7 Close your web browser.
You have completed the setting up the Unified CCX second node for HA. To change the configuration settings that you made or to perform additional configuration activities, see the Cisco Unified Contact Center Express Administration Guide Release 8.0(1), available here: http://www.cisco.com/en/US/products/sw/custcosw/ps1846/products_installation_and_configuration_guides_list.html
Switching Network Deployment from LAN to WANYou can change a LAN-based two-node setup to work over WAN. Redeploying Cisco Unified CCX over a WAN requires careful design and planning. Before you begin the process of switching your LAN deployment to a WAN deployment, you must ensure that the design of your WAN deployment fully addresses your requirements.
A successful redeployment requires three key steps:
1. Design your planned WAN deployment
2. Dismantle your current LAN deployment
3. Implement your planned WAN deployment
Note If you are using Cisco Unified CCX 7.0, switching directly from a LAN deployment to a WAN deployment is not supported. You must first upgrade to a LAN-based deployment of Cisco Unified CCX 8.0 before you can switch to a WAN deployment using the steps listed in this section.
To change the network deployment from LAN to WAN for a two-node setup, do the following:
74Installing Cisco Unified Contact Center Express Release 8.0(1)

Performing Post-Installation Tasks
Step 1 Log in to the Publisher node using the Web interface of the Cisco Unified CCX Administration.
Step 2 Choose System > Server and complete the following steps to dismantle your current LAN deployment:
a. Delete the current Call Control Groups (CCGs).
b. Delete the current triggers which are associated with the CCGs.
c. Remove or backup all recordings stored in the file system.
d. Delete the Subscriber node (Node 2) from the list.
Step 3 To implement the WAN deployment, complete the following steps:
a. Install Cisco Unified CCX over WAN as a first-time deployment.
a. Reinstall Node 2 to the cluster. See “Installing the Second Node for HA” section on page 58.
b. For the Network Deployment Type, choose WAN during the initial setup of Node 2. See the “Performing Initial Setup for the Second Node” section on page 72 for details.
c. Assign a new IP address or hostname to Node 2.
Note The secondary node cannot reuse an existing IP address or hostname; it must have a completely different IP address or hostname.
Step 4 Re-enter the details of Node 2 for HA over WAN on the Publisher node. If any configuration changes (for example, agents, CSQs, skills, team creation, etc.) are planned as part of your WAN deployment design, make the required modifications. Your existing UCCX configuration data are preserved if no configuration changes are planned.
Step 5 Add or configure new Unified CM Telephony call control group(s) for the Subscriber node (Node 2). For more information, see the “Adding a New Unified CM Telephony Call Control Group” section of the Cisco Unified Contact Center Express Administration Guide available here: http://www.cisco.com/en/US/products/sw/custcosw/ps1846/products_installation_and_configuration_guides_list.html
Step 6 Add back the existing triggers or modify them to fit your WAN design considerations. Re-associate the triggers with the newly-created CCGs.
75Installing Cisco Unified Contact Center Express Release 8.0(1)

Obtain Additional Support and Documentation
Examining Log FilesIf you encounter problems with the installation, you may be able to examine the install log files by entering the following commands in Command Line Interface.
To obtain a list of install log files from the command line, enter:
CLI>file list install *
To view the log file from the command line, enter:
CLI>file view install log_file
where log_file is the log file name.
You can also view logs by using Unified RTMT. For more information on using and installing the Unified RTMT, see the Cisco Unified Serviceability Administration Guide Release 8.0(1), available here: http://www.cisco.com/en/US/products/sw/custcosw/ps1846/products_installation_and_configuration_guides_list.html
Obtain Additional Support and DocumentationFor information on obtaining support, obtaining additional documentation, providing documentation feedback, security guidelines, and also recommended aliases and general Cisco documents, see the monthly What's New in Cisco Product Documentation, which also lists all new and revised Cisco technical documentation, at:
http://www.cisco.com/en/US/docs/general/whatsnew/whatsnew.html
Documentation FeedbackYou can provide comments about this document by sending an email to the following address:
We appreciate your comments.
76Installing Cisco Unified Contact Center Express Release 8.0(1)

Installing Cisco Unified Contact Center Express, Releas
G L O S S A R Y
A - B - C - D - E - F - G - H - I - J - K - L - M - N - O - P - R - S - T- U- V- W
A
Access
Entrance granted to a specific user such that they have the ability to get the information they want or need.
Access Control
The administrative control mechanisms and policies used to selectively restrict access to specific resources, including files, directories, networks, servers, printers, and other devices. An Access Control List, for example, specifies what operations different users can perform on specific files and directories.
Access Level
A security measure used to check the sensitivity of data and then to permit or authorize a user.
Access List
A list of users, programs, and/or processes and the level of access allowed to each.
Access Type
The specific degree of access privileges given to a user with regard to a particular device, program, or file.
ACL
Access Control List. A table that tells a computer operating system which access rights each user has to a particular system object, such as a file directory or individual file.
GL-1e 8.0(1)

Glossary
Adapter
See NIC.
Address
A name or piece of data used to describe some location or identitity, be that a hardware device or a position in computer memory. See also, IP Address.
Administrator
In technical terms, someone who manages security and user access, usually for larger computer systems, such as universities and corporations, but technically on any scale.
Administrative Tools
A software tool for managing processes or information, especially remotely.
Administrative Security
A The management level constraints and controls established independently of physical security, which define and ensure an acceptable level of protection for information resources.
AFG
Answer File Generator. Unified Communications Answer File Generator, a web application, generates answer files for unattended installations of Unified CCX. However, this application supports only basic installations and not upgrades.
Alert
A message formulated for the purpose of describing a circumstance relevant to network security.
API
Application Program Interface. The means by which an application program talks to communications software. Standardized APIs allow application programs to be developed independently of the underlying method of communication. A set of standard software interrupts, calls, and data formats that computer application programs use to initiate contact with other devices (for example, network services, mainframe communications programs, or other program-to-program communications). Typically, APIs make it easier for software developers to create the links that an application needs to communicate with the operating system or with the network.
GL-2Installing Cisco Unified Contact Center Express, Release 8.0(1)

Glossary
Application
In general, an application is a program that helps you accomplish a specific task; for example, a word processing program, a spreadsheet program, or an FTP client. Applications should be distinguished from system programs, which control the computer and run applications, and utilities, which are small assistance programs. In Unified CCX, an application represents a configured combination of one or more triggers, a script, and the values for any parameter in that script.
ASCII
American Standard Code for Information Interchange. 8-bit code for character representation (7 bits plus parity).
Authenticate
To positively verify the identity of a user, device, or other entity in a computer system, often as a prerequisite to allowing access to resources in a system.
Authorization
The process of granting or denying access rights to network resources, programs, or processes.
AXL
Administrative XML Layer. A Cisco API that provides a mechanism for inserting, retrieving, updating, and removing data from a Unified CM database. It allows:
• It allows access to Unified CM data using XML
• It uses requests that are a combination of HTTP and SOAP
• It is a provisioning and configuration API
B
BIOS
Basic Input/Output System. Provides the basic instructions for controlling system hardware. BIOS is coded into the ROM of some computers.
Bit
Binary Digit. The smallest unit of data used in computing. Its value is either zero or one.
GL-3Installing Cisco Unified Contact Center Express, Release 8.0(1)

Glossary
Boot
To start up a computer, which involves loading the operating system and other basic software.
Browser
An Internet application used to survey World Wide Web content.
Byte
8 bits.
C
Capability
Identification of an object that specifies the access privileges given to the accessor possessing the ability.
Certification
A thorough evaluation of security features as well as the verification that the designs and implementations of those features adhere to a set of security requirements protocols.
CAD
Cisco Agent Desktop. A computer telephony integration (CTI) solution for single- and multisite IP-based contact centers.
Client
A software program or computer that is served data or resources from a server software program or computer.
Cluster
A Unified CCX cluster consists of a server (node) running Unified CCX components in your Unified CCX deployment.
Cluster profile
The Unified CCX web page (home page) displays information about the cluster profile. A cluster profile includes data relating to the Unified CCX servers, components, and licenses installed in a cluster.
GL-4Installing Cisco Unified Contact Center Express, Release 8.0(1)

Glossary
Component
An installation unit, either hardware or software, that you can install on a Unified CCX system. Unified CCX software components include the Unified CCX Engine, the Database component, the Monitoring component, and the recording component. Hardware components include servers and client computers. You select the components you want when you install the system.
Configuration Control
The management of changes to a system's hardware, firmware, software, and documentation, ensuring that a system is safe from improper alterations before, during, and after system implementation.
Configuration file
A file containing information for a computer or an application.
Configuration Management
See Configuration Control.
Contact
A connection with a remote customer.
CPU
Central Processing Unit. Often called the processor, this is the most important element of a computer system because it is where most calculations occur.
CSV
Comma-separated value. A text file format used as a way of recording database fields.
CTI
Computer Telephony Integration. It is a technology that integrates the functions of telephones with computers.
GL-5Installing Cisco Unified Contact Center Express, Release 8.0(1)

Glossary
D
Data
Information that has been translated into a form that is more convenient to move or process. Data is information converted into binary or digital form.
Database
A compilation of data that is organized in such away as to facilitate easy access, management, and access.
Datastores
See Unified CCX Datastores.
Data type
In a programming language, a set of data with values having predefined characteristics. Examples include integer, floating point unit number, character, string, and pointer. Usually, a limited number of such data types come built into a language. The language usually specifies the range of values for a given data type, how the values are processed by the computer, and how they are stored.
Deployment scenario
A set of Unified CCX features and options on a server or servers.
Device
Any machine or component that attaches to a computer, i.e. a disk drive, a printer, a mouse, or a modem.
DNS
Domain Name System. The system by which a domain name (somewhere.com) is translated to and from an IP address (123.123.123.123).
DNS Server
A server which uses the Domain Name System to translates domain names (mydomain.com) into IP addresses (123.456.789.012).
GL-6Installing Cisco Unified Contact Center Express, Release 8.0(1)
Glossary
Domain
On the Internet, a name that identifies one or more IP addresses. Here are some examples of some top-level domains:.gov - government agencies
.edu - educational institutions
.org - organizations (nonprofit)
.mil - military
.com - commercial business
.net - network organizations
.ca - Canada
.th - Thailand
E
Encryption
A change made to data, code, or a file so it no longer can be read or accessed without processing or decrypting. Roughly synonymous with encoding.
Ethernet
A very common method of networking computers in a LAN. Ethernet will handle about 10,000,000 bits-per-second and can be used with almost any kind of computer.
Event
An occurrence that is significant to an application and that may call for a response from the application.
Execute
To carry out a task or set of tasks. To execute a program, for example, is to load it into memory and run it. An executable file is a program file. To execute code is to carry out the instructions described by the code.
GL-7Installing Cisco Unified Contact Center Express, Release 8.0(1)

Glossary
Export
To convert a file from the format of one application to the format of another application, or to move data out of one file and import it into another file.
F
FAQ
Frequently Asked Questions. Originally designed to cut down on basic technical support, FAQs list and answer the most common questions on a particular subject.
FAT
File Allocation Table. Hard disks store and retrieve files using this filing system, which involves a table of file locations on the disk.
Field (also database field)
An item in a database record. For example, Name, City, or Zip Code. A group of fields make up a record.
File
A block of labeled data on disk. There ar many kinds of files, including data files, text files, program files, and directory files.
File Management System
The set of procedures that an operating system or program uses to organize and keep track of files.
Firewall
A system or combination of systems that enforces a boundary between two or more networks, or a gateway that limits access between networks in accordance with local security policy. The typical firewall is an inexpensive UNIX based computer kept clean of critical data.
Firmware
Software that is stored permanently, usually on a ROM chip. Firmware is hard software, or soft hardware, depending on perspective.
GL-8Installing Cisco Unified Contact Center Express, Release 8.0(1)

Glossary
FTP
File Transfer Protocol. A simple Internet protocol for transferring files using the TCP/IP protocols.
G
Gateway
A piece of hardware or software that translates between dissimilar protocols, or any mechanism providing access to another system. A gateway is used to link dissimilar networks together. An AppleTalk network and a Microsoft network must be linked by a gateway computer. An ISP links its modem users to the Internet via a gateway.
GUI
Graphical User Interface. A computer interface composed of graphical components, designed to allow a user to navigate a program without keyboard commands. Usually a windowing system.
H
Hard Disk
A magnetic disk that can store computer data. Hard disks hold more data and are faster than floppy disks.
Hard Drive
Hard Disk Drive. The drive that reads and writes data to/from a hard disk.
Hardware
Any physical component.
Hardware Address
Every network interface has a hardware address, unique to itself, and defined by the manufacturer. The software portion of a network relies on hardware addresses to absolutely identify a machine.
Host
A single computer or workstation, connected to a network. Often refers to a computer which hosts services.
GL-9Installing Cisco Unified Contact Center Express, Release 8.0(1)

Glossary
Hostname
On the Internet, the name used to locate a host's IP-address.
HTTP
Hypertext Transfer Protocol. The set of rules for transferring files on the World Wide Web. HTTP is an application protocol built on the TCP/IP protocols.
I
IMAP
Internet Message Access Protocol. A versatile way of managing email messages on a remote server.
Information System
A system of software, firmware, and hardware used to store, manipulate, control, display, transmit, and/or receive data.
Interactive Voice Response
See IVR.
Interface
Connects two separate entities, such as a computer with a user, a program to a program, a device to device, or a program to a device.
Internet
A communications network consisting of countless networks and computers across the world.
Intranet
A restricted network, usually within a company, that uses HTML and other Internet protocols to communicate over a local area network. An Intranet has web pages, just like the Internet, but on a reduced scale.
IP
Internet Protocol. The protocol by which data is sent from one computer to another on the Internet.
GL-10Installing Cisco Unified Contact Center Express, Release 8.0(1)

Glossary
IP Address
A unique numeric address used to identify a machine on the Internet (i.e. 123.456.789.012). IP Addresses conform to the IP.
ISO
International Standards Organization. Afederation of national standards bodies from over 100 countries, one federation per country. The standards federation in the U.S., for example, is ANSI.
IVR
Interactive Voice Response. A system that provides information as recorded messages over telephone lines in response to user input in the form of spoken words or, more commonly, DTMF signaling.
J
JAR
Java Archive - A format used to store compressed Java applets, developed by Sun Microsystems.
Java
An interpreted (vs. compiled) Internet based programming language, developed by Sun Microsystems. Java is used for adding a higher level of programmable functionality to web sites.
JDK
Java Development Kit. A software development package from Sun Microsystems that implements the basic set of tools needed to write, test and debug Java applications and applets.
JTAPI
Java Telephony API. It supports telephony call control. It is an extensible API designed to scale for use in a range of domains, from first-party call control in a consumer device to third-party call control in large distributed call centers.
K
Key
A symbol or sequence of symbols used to encrypt or decrypt data.
GL-11Installing Cisco Unified Contact Center Express, Release 8.0(1)
Glossary
Kilobyte
1024 Bytes (2^10).
L
LAN
Local Area Network. A network that is relatively small in scope, commonly found in businesses.
License Manager
A server application that manages the use of a multi-license client application.
Linux
A free or low cost UNIX derived operating system with a reputation for efficiency and fast performance. Linux includes many components usually found in a comprehensive UNIX system. Linux was originally developed by Linus Torvalds at the University of Helsinki in Finland.
Login Prompt
A request for a user to enter their login name and password in order to access a system or drive on a computer.
Log file
A file that keeps track of the activity of a computer or an application.
M
MCS
Media Convergence Server. A turnkey server platform for Unified CCX.
Media Convergence Server
See MCS.
Megabyte
1024 Kilobytes.
GL-12Installing Cisco Unified Contact Center Express, Release 8.0(1)
Glossary
N
Network
Two or more machines interconnected for the purpose of data transfer.
Network Security
Protection of networks and their services from unauthorized modification, destruction, or disclosure, and provision of assurance that the network performs its critical functions correctly and there are no harmful side-effects. Network security includes providing for data integrity.
NIC
Network Interface Card - the hardware card that serves as an interface between a network and a computer.
Node
End point of a network connection. Nodes include any device attached to a network such as computers, file servers, printers, or workstations.
Node Devices
Any computer or peripheral that is connected to the network.
O
Operating System
A program that serves as a file management system as well as an interface, graphical or otherwise, for other programs.
OS
Operating System. See Operating System.
P
Pane
A part of a window that is devoted to a specific function.
GL-13Installing Cisco Unified Contact Center Express, Release 8.0(1)

Glossary
Password
A series of characters, usually without spaces, that is unique to a single username. A password is leveraged to determine the authenticity of a user.
Port
Generally a specific spot that enables a physical connection to another device, usually involving a socket and a plug. Personal computer are usually equipped with serial ports and usually one parallel port. As a network term, port refers to a specific position in device memory that is remotely accessible, and through which network data is routed.
Process
A series of planned events used to achieve a specific goal or set of goals. For example, any executing program is a process.
Profile
A pattern of user activity which can be used to detect changes in normal routines.
Program
A collection of software algorithms designed to accomplish some task.
Prompts
A message from a computer that asks the operator to do something, such as enter a command, enter a password, or enter data, or that indicates that the computer is ready to accept input.
Protocol
Agreed-upon methods of communications used by computers. A specification that describes the rules and procedures that products should follow to perform activities on a network, such as transmitting data. If they use the same protocols, products from different vendors should be able to communicate on the same network.
R
RAID
Redundant Array of Inexpensive Drives - a fault tolerance system that mirrors important data within an individual system.
GL-14Installing Cisco Unified Contact Center Express, Release 8.0(1)
Glossary
Record (also database record)
In a database, a group of fields that make up one complete entry. For example, record about a customer might contain fields for name, address, and telephone number.
S
Script
A list of commands that can be executed without user interaction. A script is also known as a macro or batch file.
Security
Protective measures to ensure the absence of intrusion or other damaging activity.
Serial Port
A computer port that uses serial data transfer to transmit and receive data. Serial data transfer involves sending one small piece of information at a time, as opposed to many at a time (as with a parallel port).
Server
Any computer or software program that serves another computer or software program (the client). A server usually provides network services such as disk storage and file transfer.
Service
A program, routine, or process that performs a specific system function to support other programs, particularly at a low (close to the hardware) level. In Unified CCX, you can have a master service and a standby service.
Serviceability
Enables remote network management support for the Unified CCX system. Serviceability enables this support through CiscoWorks and through any other third-party network management system (NMS) that uses standard protocols.
GL-15Installing Cisco Unified Contact Center Express, Release 8.0(1)

Glossary
SNMP
Simple Network Management Protocol. The standard protocol for network management software. Using SNMP, programs called SNMP agents monitor devices on the network. Another program collects the data from the agents. The database created by the monitoring operations is called a management information base (MIB).
Software
Programs or information that are stored electronically.
SQL
Structured Query Language. A series of instructions used to access and work with information in a database. SQL is by far the most widespread database control language.
Step
A single element in the Unified CCX Editor that accomplishes a specific function
Subsystem
Extensible modular development environment that performs a particular function.
T
Table (also database table)
A presentation of information organized in rows and columns.
U
Unified CCX
Cisco Unified Contact Center Express. An application that uses the Unified CCX platform to provide a multimedia (voice, data, and web) IP-enabled customer-care environment to enhance the efficiency of contact center. Unified CCX is available in Unified CCX Standard, Unified CCX Enhanced, and Unified CCX Premium packages.
GL-16Installing Cisco Unified Contact Center Express, Release 8.0(1)

Glossary
Unified CCX Engine
Execution vehicle for Unified CCX scripts. The Unified CCX Engine can run multiple scripts simultaneously. On startup, the Unified CCX Engine loads all scripts and configuration information from the Unified CCX configuration datastore server. Individual scripts can be updated in real time and manually pushed to the Unified CCX Engine without restarting the engine. Scripts that are running when a download occurs will not be affected by updates; they will run to completion with the pre-update logic. One Unified CM can support multiple Unified CCX engines, but the Unified CCX engines bind to only one Unified CM.
One Unified CM supports many Unified CCX Clusters (and not just one engine) and one Unified CCX cluster, which may contain up to 2 Unified CCX Engines, binds to one Unified CM.
Unified CCX Datastores
Components that allow you to manage and monitor historical, repository, and configuration data across all servers in the Unified CCX cluster.
UPS
Uninteruptible Power Supply. A device that functions as high capacity battery for sustaining equipment through a power outage.
URL
Uniform/Universal Resource Locator - Address for any resource on the Internet that is part of the World Wide Web. (i.e. http://www.securityportal.com/).
User
An individual who uses a computer or computer services. An end user is an individual who runs an application program.
V
VNC
Virtual Network Computing. A remote display system that displays a 'desktop' environment not only on the machine where the program is running, but on any machine on the Internet.
GL-17Installing Cisco Unified Contact Center Express, Release 8.0(1)

Glossary
VPN
Virtual Private Network. A network in which some of the parts are connected using the public Internet. The data sent across the Internet is encrypted, so the entire VPN is "virtually" private. VPN is a method for accessing a remote network via "tunneling" through the Internet.
W
WAN
Wide Area Network. A network connecting Local and Metropolitan Area networks together. A Wide Area Network may span a country or even the globe.
WWW
World Wide Web. Often mistakenly called "The Internet", it is a client/server hypertext system that gathers and retrieves information using the Internet. Graphic, music, and video files, in the form of .gif, .jpg/.jpeg, .png, .wav, .mov etc., files can be viewed/listened to over the WWW.
GL-18Installing Cisco Unified Contact Center Express, Release 8.0(1)

Index
INDEX
A
Adding second node for HA 7
Administrator Account password
change 20
type 20
Administrator Account user name
add new 20
type 20
Answer file 22
Answer File Generator 13
Application User name
change 21
create 21
Application User password
change 21
create 21
Applying a patch
from local disk 33
from remote server 34
overview 33
Apply patch
during first node installation 5
during second node installation 6
Audience 3
Installing Cisco Un
B
Basic Installation of Cisco Unified CCX 37
BIOS 9
C
Case-sensitive 10
Cisco Unified CCX 1
appliance application 9
appliance version 1
audience 3
Browser support 11
installation 1
installation framework 1
installing on first node 4
installing on the second node 4
installing on UCOS 10
Linux-based 10
overview 2
pre-installation tasks 8
similar to Unified CM 9
unattended installation 22
uninstall 10
Cisco Unified CCX 8.0(1) 1
Cisco Unified CCX Administration
accessing 56
administrator 60
Cisco Unified CCX Cluster
IN-1ified Contact Center Express, Release 8.0(1)

Index
profile 5
Cisco Unified Communications 3
Cisco Unified Communications Answer File Generator 22
Cisco Unified Communications Manager 3
Cisco Unified Communications Manager Express 3
Cisco Unified Contact Center Express 1
Cisco Unified IP IVR 2
Client System Requirements 11
Command Line Interface 13
Configuration information
Administrator ID 14
Administrator Password 14
Application User Name 14
Application User Password 14
Country 15, 19
DNS Enable 15
DNS Primary 15
DNS Secondary 15
Domain 16
Gateway Address 16
Hostname 16
IP Address 16
IP Mask 16
Location 18
MTU Size 17
NIC Duplex 17
NIC Speed 17
NTP Server 17
IN-2Installing Cisco Unified Contact Center Express,
Organization 19
Security Password 18
SMTP Location 18
State 19
Time Zone 19
Unit 19
Creating New Cisco Unified CM Users 61
D
Database Publisher node 13
Documentation Feedback 67
F
Firmware 9
Frequently Asked Questions (FAQs) 19
H
Hardware
dedicated servers 9
MCS 9
High Availability setup 1
I
initial setup
changing information 55
Release 8.0(1)

Index
overview 55
Installation
apply upgrade patch 24
basic 24
Cisco supported servers 22
configure first node 44
configure second node for HA 51
factory 24
frequently asked questions 19
handle network errors 23
navigating the wizard 25
overview 24
prerequisites 10
record configuration entries 13
related procedures 10
requirements 10
scenarios 3
steps 26
types 24
uninstalling Unified CCX 10
using Answer File Generator 24
with pre-existing configuration information 32
Installing
Cisco Unified CCX application 24
nodes in cluster 9
operating system 24
Language
country specific 60, 63
for prompts 60, 63
Installing Cisco Un
group default 60, 63
Licenses
for HA setup 13
license file format 12
License Registration web tool 12
MAC address-specific 12
node-locked 11
obtain license files 11
Product Authorization Key 12
view license information 12
warm standby license 13
M
Multimedia Communications Server 9
N
Network Errors
HALT 23
IGNORE 23
RETRY 23
REVIEW (Check Install) 23
O
Overview 2
IN-3ified Contact Center Express, Release 8.0(1)

Index
P
Post-installation tasks
access Cisco Unified Serviceability 55
change default password 55
examine log files 67
overview 54
Power backup 9
Pre-installation considerations 9
Pre-Installation Tasks 8
Product Activation Key (PAK) 12
profile, cluster 5
R
RAID 9
Related Documentation 3
S
Security Password 21
Security password 9
Server Requirements 10
Setup
single node (standalone) 1
two-node (high availability) 1
Standalone setup 1
Strong Password 21
IN-4Installing Cisco Unified Contact Center Express,
U
Unattended installation 22
Unified Communications Operating System (UCOS) 10
Uninstalling Cisco Unified CCX 10
Upgrade retrieval mechanism 33
UPS 9
USB keys 23
USB keys for Linux 2.4 23
Release 8.0(1)