instructions for 230v 6amp 6v/12v intelligent battery charger · instructions for 230v 6amp 6v/12v...
TRANSCRIPT

INSTRUCTIONS FOR
230V 6Amp 6V/12VIntelligent Battery Charger
Stock No.38254 Part No.IBC1IMPORTANT: PLEASE READ THESE INSTRUCTIONS CAREFULLY TO ENSURE THE SAFE AND
EFFECTIVE USE OF THIS PRODUCT.
GENERAL INFORMATION
These instructions accompanying the product are the original instructions. This document is part of the product, keep it for the life of the product passing it on to any subsequent holder of the product. Read all these instructions before assembling, operating or maintaining this product.This manual has been compiled by Draper Tools describing the purpose for which the product has been designed, and contains all the necessary information to ensure its correct and safe use. By following all the general safety instructions contained in this manual, it will ensure both product and operator safety, together with longer life of the product itself.All photographs and drawings in this manual are supplied by Draper Tools to help illustrate the operation of the product.Whilst every effort has been made to ensure the accuracy of information contained in this manual, the Draper Tools policy of continuous improvement determines the right to make modifications without prior warning.

1. TITLE PAGE
1.1 INTRODUCTION:USER MANUAL FOR:
6AMP 6V/12V INTELLIGENT BATTERY CHARGERStock no. 38254Part no. IBC11.2 REVISIONS:
As our user manuals are continually updated, users should make sure that they use the very latest version.
Downloads are available from: http://www.drapertools.com/b2c/b2cmanuals.pgm
DRAPER TOOLS LIMITED WEBSITE: www.drapertools.comHURSLEY ROAD PRODUCT HELPLINE: +44 (0) 23 8049 4344CHANDLER’S FORD GENERAL FAX: +44 (0) 23 8026 0784EASTLEIGHHAMPSHIRESO53 1YFUK
1.3 UNDERSTANDING THIS MANUALS SAFETY CONTENT:
WARNING! Information that draws attention to the risk of injury or death.
CAUTION! Information that draws attention to the risk of damage to the product or surroundings. NOTE! Important information.
1.4 COPYRIGHT © NOTICE:Copyright © Draper Tools Limited.Permission is granted to reproduce this publication for personal & educational use only. Commercial copying, redistribution, hiring or lending is prohibited.No part of this publication may be stored in a retrieval system or transmitted in any other form or means without written permission from Draper Tools Limited.
In all cases this copyright notice must remain intact.
Date first published December 2013.
2. CONTENTS
3
2.1 CONTENTSPage content Page1 TITLE PAGE 1.1 INTRODUCTION ............................................................................................... 2 1.2 REVISION HISTORY........................................................................................... 2 1.3 UNDERSTANDING THIS MANUAL ................................................................... 2 1.4 COPYRIGHT NOTICE......................................................................................... 22 CONTENTS 2.1 CONTENTS ........................................................................................................ 33 GUARANTEE 3.1 GUARANTEE ..................................................................................................... 44 INTRODUCTION 4.1 SCOPE ............................................................................................................... 5 4.2 SPECIFICATION ................................................................................................. 5 4.3 HANDLING & STORAGE ................................................................................... 55 HEALTH & SAFETY INFORMATION 5.1 GENERAL SAFETY INSTRUCTIONS FOR BATTERY CHARGER USE .................. 6 5.2 CONNECTION TO THE POWER SUPPLY........................................................... 7A6 TECHNICAL DESCRIPTION 6.1 IDENTIFICATION ............................................................................................... 8B 6.2 MAIN COMPONENT DESCRIPTIONS ................................................................ 8A7 UNPACKING & CHECKING 7.1 PACKAGING...................................................................................................... 98 PREPARING THE CHARGER 8.1 INSTALLATION.................................................................................................. 109 CHARGING YOUR BATTERY 9.1 THE CHARGING PROCESS................................................................................. 11 9.2 THE CHARGING INDICATORS........................................................................... 1110 MAINTENANCE 10.1 MAINTENANCE................................................................................................. 1211 EXPLANATION OF SYMBOLS 11.1 EXPLANATION OF SYMBOLS ........................................................................... 1312 DISPOSAL 12.1 DISPOSAL.......................................................................................................... 14DECLARATION OF CONFORMITY .....................................................................................ENCLOSED

4
3. GUARANTEE
3.1 GUARANTEEDraper tools have been carefully tested and inspected before shipment and are guaranteed to be free from defective materials and workmanship.Should the tool develop a fault, please return the complete tool to your nearest distributor or contact Draper Tools Limited, Chandler's Ford, Eastleigh, Hampshire, SO53 1YF. England. Telephone Sales Desk: (023) 8049 4333 or Product Helpline (023) 8049 4344.A proof of purchase must be provided with the tool.If upon inspection it is found that the fault occurring is due to defective materials or workmanship, repairs will be carried out free of charge. This guarantee period covering parts/labour is 12 months from the date of purchase except where tools are hired out when the guarantee period is ninety days from the date of purchase. The guarantee is extended to 24 months for parts only. This guarantee does not apply to normal wear and tear, nor does it cover any damage caused by misuse, careless or unsafe handling, alterations, accidents, or repairs attempted or made by any personnel other than the authorised Draper warranty repair agent.Note: If the tool is found not to be within the terms of warranty, repairs and carriage charges will be quoted and made accordingly.This guarantee applies in lieu of any other guarantee expressed or implied and variations of its terms are not authorised.Your Draper guarantee is not effective unless you can produce upon request a dated receipt or invoice to verify your proof of purchase within the guarantee period.Please note that this guarantee is an additional benefit and does not affect your statutory rights.Draper Tools Limited.
5
4. INTRODUCTION
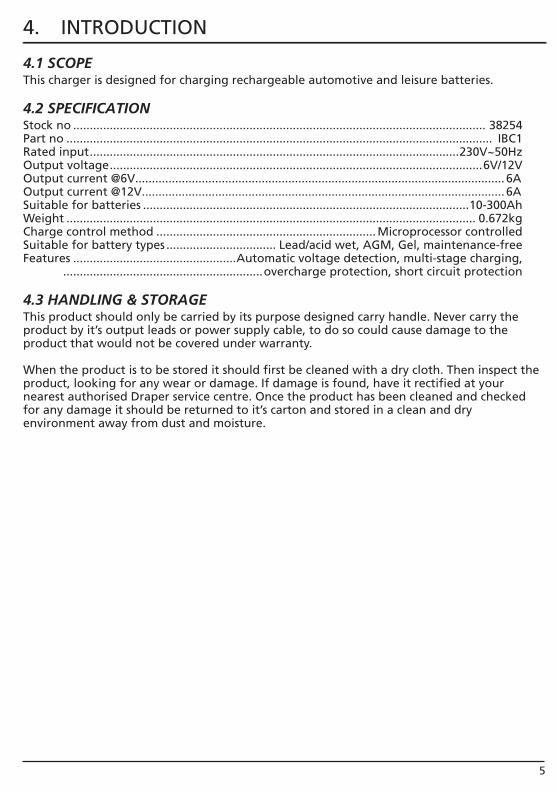
4.1 SCOPEThis charger is designed for charging rechargeable automotive and leisure batteries.
4.2 SPECIFICATIONStock no ............................................................................................................................ 38254Part no ................................................................................................................................ IBC1Rated input...............................................................................................................230V~50HzOutput voltage................................................................................................................6V/12VOutput current @6V............................................................................................................... 6AOutput current @12V............................................................................................................. 6ASuitable for batteries ..................................................................................................10-300AhWeight ........................................................................................................................... 0.672kgCharge control method .................................................................. Microprocessor controlledSuitable for battery types ................................. Lead/acid wet, AGM, Gel, maintenance-freeFeatures .................................................Automatic voltage detection, multi-stage charging, ............................................................overcharge protection, short circuit protection
4.3 HANDLING & STORAGEThis product should only be carried by its purpose designed carry handle. Never carry the product by it’s output leads or power supply cable, to do so could cause damage to the product that would not be covered under warranty.
When the product is to be stored it should first be cleaned with a dry cloth. Then inspect the product, looking for any wear or damage. If damage is found, have it rectified at your nearest authorised Draper service centre. Once the product has been cleaned and checked for any damage it should be returned to it’s carton and stored in a clean and dry environment away from dust and moisture.
5. HEALTH & SAFETY INFORMATION
6
5.1 GENERAL SAFETY INSTRUCTIONS FOR BATTERY CHARGERSWARNING! Explosive gases. When a battery is charged it can produce hydrogen gas which is explosive. Charging should be carried out in a well ventilated area and away from sources of heat, flames and sparks.
Indoor use only. This charger must not be used outside in rain or snow conditions.
Disconnect the mains cable. Before making or breaking the connection to the battery terminals, remove the plug from the power supply.
Connect the charger carefully. Make sure the red clamp is attached to the battery positive terminal. The black clamp attaches to the negative. Do not reverse the clamps or allow them to touch each other.
Refer to the vehicle manufacturers information. Follow these instructions fully to make sure no damage occurs to the vehicle or it’s equipment.
Do not cover the charger. Allow air to circulate around the charger to prevent over heating. The charger is equipped with a time-lag fuse inside. Over-heating will trip the fuse to prevent damage and will not reset until sufficiently cooled.
Do not use the charger within the vehicle. Stand it on a level firm surface to prevent damage to the charger or vehicle.
Do not tamper with this product. Repairs and maintenance must be carried out by an authorized service agent. Only use genuine Draper spare parts. Do not modify this product in any way.
Wear approved safety goggles (not safety glasses) and latex/nitrile gloves. Before charging a maintenance type battery the electrolyte (battery acid) must be filled to the maximum marked levels. Never use tap water. Distilled water or electrolyte must be used.
Never attempt to charge non-rechargeable batteries. Only charge lead acid batteries within the voltage and amp hour capacities of the charger.
Never attempt to charge a frozen battery.
Never attempt to charge a damaged or distorted battery.
Keep out of the reach of children.

7A
5. HEALTH & SAFETY INFORMATION
Wear personal protective equipment (PPE). Batteries can contain hazardous materials so it is important to ensure that adequate hand and eye protection is worn when charging batteries.
5.2 CONNECTION TO THE POWER SUPPLYMake sure the power supply information on the machine’s rating plate are compatible with the power supply you intend to connect it to.This charger comes supplied with a UK standard 3 pin plug fitted. It is designed for connection to a domestic power supply rated at 230V AC.Because it is constructed mostly of metal parts, it is a Class 1 machine; meaning, it must have an earth connection in the power supply. This is to prevent electrocution in the event of a failure.
Apart from replacing the fuse in the plug, no other electrical work is recommended on this product.

7B
Blank page
6. TECHNICAL DESCRIPTION
8A
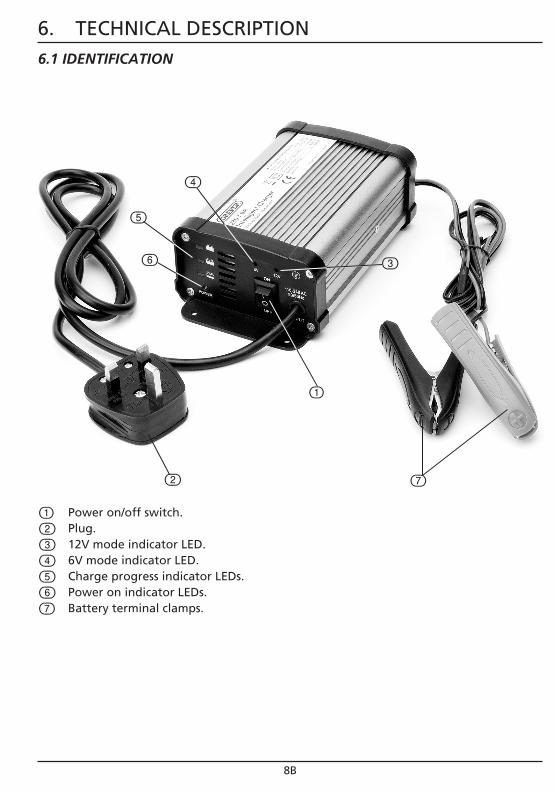
6.2 MAIN COMPONENT DESCRIPTIONS1. Power switch: used to turn the charger on/off.
2. Mains plug.
3. 12V mode indicator: will illuminate when 12V battery is detected.
4. 6V mode indicator: will illuminate when 6V battery is detected.
5. Charge progress indicator LEDs: these indicator LEDs will illuminate to indicate the status of the charge.
6. Power on indicator: this will illuminate when the charger is switched on.
7 Battery terminal clamps: used to connect the charger to the battery that needs to be charged (observe correct polarity).
6. TECHNICAL DESCRIPTION
8B
Power on/off switch. Plug. 12V mode indicator LED. 6V mode indicator LED. Charge progress indicator LEDs. Power on indicator LEDs. Battery terminal clamps.
6.1 IDENTIFICATION
9
7. UNPACKING & CHECKING
7.1 PACKAGINGCarefully remove the charger from the packaging and examine it for any sign of damage that may have happened during shipping. Lay the contents out and check them against the parts shown below. If any part is damaged or missing; please contact the Draper Helpline (the telephone number appears on the Title page) and do not attempt to use the charger.
The packaging material should be retained at least during the guarantee period: in case the machine needs to be returned for repair.
Warning! Some of the packaging materials used may be harmful to children. Do not leave any of these materials in the reach of children.
If any of the packaging is to be thrown away, make sure they are disposed of correctly; according to local regulations.
10
8. PREPARING THE CHARGER
8.1 INSTALLATION1. When selecting a suitable location to use this charger be sure to choose a clean, dry and tidy location.
2. Ensure that the charger can be placed in a stable position and that there is ample room next to the charger for the battery to be located.
3. Ensure that the charger is in good working condition before each use. Any damage or defects should be rectified immediately, the charger should not be used if there is any damage to the charger or it’s cables.
4. Once you have carried out the inspection listed above and satisfied yourself that the charger is in good condition and safe to use, connect the battery connection clamps to the batteries terminals being careful to ensure that the correct polarity is observed (Red + Black-).
5. Plug in the charger to the mains power supply. You are now ready to charge your battery.
11
9.1 THE CHARGING PROCESSWarning: Do not make any of the following adjustments with the product connected to the power supply.With your charger connected to your battery (ensuring correct polarity) as described earlier and the charger connected to a mains supply matching the requirements stated on the machines rating plate, you can now turn on the charger.With the charger turned on, the 6V or the 12V LED will be lit to indicate the voltage of the connected battery. Once the battery has been detected by the charger, it will commence charging using the correct charging parameters for your battery.
9.2 THE CHARGING INDICATORSDuring the charging process, the progress of the charge is displayed by means of the charge progress indicators.The charger indicator LEDs will illuminate to indicate the following.
9. CHARGING YOUR BATTERY
Green indicator LED: This indicates that the battery has reached its capacity, if the charger is left on it will automatically enter trickle charge mode. This mode maintains your battery at its capacity until you disconnect or turn off the charger.
Red indicator LED: Medium battery capacity, constant voltage stage. During this stage the charge current will automatically be reduced as the battery capacity increases.
Red indicator LED: Battery capacity is low, constant fast charge phase.

12
10. MAINTENANCE
10.1 MAINTENANCEWith only minimal maintenance, this charger will deliver years of dependable service.
Follow these simple steps to maintain the charger in optimum condition:-
• After each use clean the battery charger with a soft cloth. Be sure to remove any battery fluid present that could cause corrosions of the battery terminal clamps.
• Clean the outside of the charger with a soft cloth.
• Keep the charger leads loosely coiled during storage to prevent damage to the leads. Do not use the charger if the leads or clamps have been damaged in any way.
13
11. EXPLANATION OF SYMBOLS
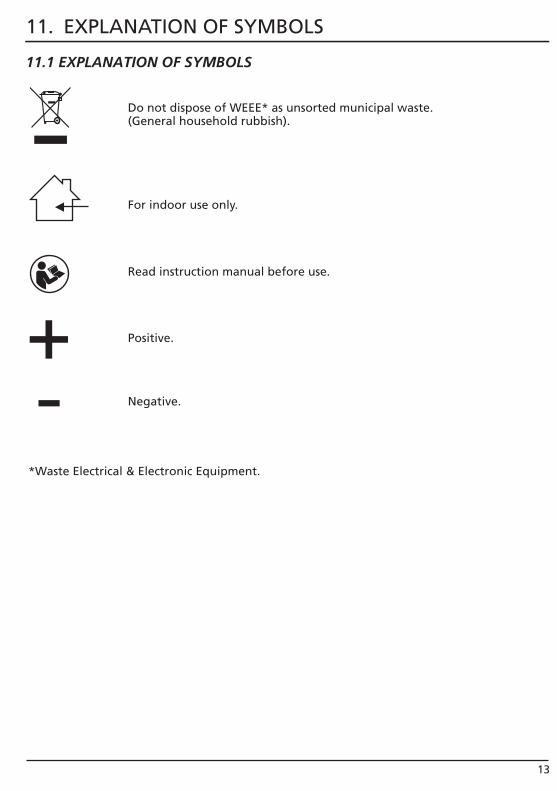
11.1 EXPLANATION OF SYMBOLS
+-
Do not dispose of WEEE* as unsorted municipal waste.(General household rubbish).
*Waste Electrical & Electronic Equipment.
For indoor use only.
Read instruction manual before use.
Positive.
Negative.
14
12. DISPOSAL
12.1 DISPOSAL- At the end of the machine’s working life, or when it can no longer be repaired, ensure
that it is disposed of according to national regulations.- Contact your local authority for details of collection schemes in your area. In all circumstances: • Do not dispose of power tools with domestic waste. • Do not incinerate. • Do not abandon in the environment. • Do not dispose of WEEE* as unsorted municipal waste.
* Waste Electrical & Electronic Equipment.

15

CONTACTS
- DRAPER TOOLS LIMITED, Hursley Road, Chandler's Ford, Eastleigh, Hampshire. SO53 1YF. U.K.
- Helpline: (023) 8049 4344 - Sales Desk: (023) 8049 4333 - Website: www.drapertools.com - E-mail: [email protected] - Sales Fax: (023) 8049 4209 - General Enquiries: (023) 8026 6355
- Service/Warranty Repair Agent For aftersales servicing or warranty repairs, please contact the Draper Tools Helpline for details of an agent in your local area.
YOUR DRAPER STOCKIST
KCLJ200515