integrate gis functionality into windows apps with arcgis...
TRANSCRIPT
36 au Winter 2015 esri.com
Integrate GIS Functionality into Windows Apps with
ArcGIS Runtime SDK for .NET
Features and functionality for the MapView discussed in this article include setting the map background, defining map interaction op-tions, defining an initial map extent, building geometry, using graph-ics, working with shapefiles, and performing client-side labeling. This release of the .NET SDK also provides offline editing, security, and li-censing options and an enhanced application deployment experience.
MapViewThe ArcGIS Runtime SDK for .NET was designed to support the model-view-viewmodel (MVVM) workflows from the start. The rela-tionship between the MapView and Map control exhibits this design. The MapView control is simply a container for a Map control that exposes display-related properties and interaction events. The Map control is an object with a collection of layers and is de-signed to support binding scenarios where the map is maintained in a view model or model. The example in Listing 1 shows how easy it is to bind a map created in a view model to the Map property of a MapView. Note that the Map control contents are constructed within the view model and exposed via a public property, MyMap.
<Page.Resources> <local:MyViewModel x:Key=”myViewModel” /></Page.Resources><Grid DataContext=”{StaticResource myViewModel}”> <esri:MapView Map=”{Binding MyMap}” /></Grid>
Listing 1
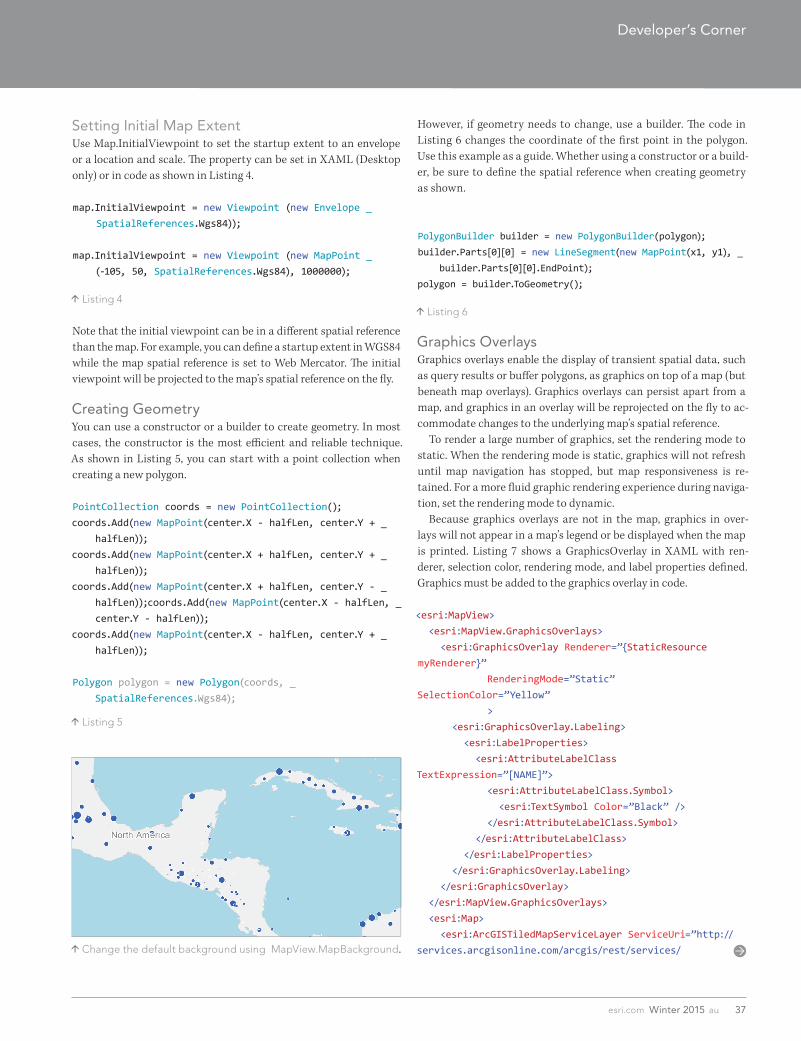
MapView BackgroundTo set the background for a map, use the MapView.MapBackground. By default, the map background is gray and contains a grid. To
adjust this default, set the color, grid line color, grid width, and line width. Listing 2 provides an example in which the background color is set to light blue and the grid lines are made transparent.
<esri:MapView> <esri:MapView.MapBackground> <esri:MapBackgroundColor=”LightBlue” GridColor=”Transparent” /> </esri:MapView.MapBackground> . . .
Listing 2
MapView Interaction OptionsMapView has InteractionOptions to control interaction with a map using a variety of inputs. This includes enabling and disabling all interaction or just a subset of pan, rotation, and zoom options. For example, the XAML in Listing 3 demonstrates how a set of pan op-tions are enabled, but the user cannnot rotate or zoom in on a map in the MapView.
<esri:MapView.InteractionOptions> <esri:InteractionOptions IsEnabled=”True”> <esri:InteractionOptions.PanOptions> <esri:PanOptions IsEnabled=”True” IsDragEnabled=”True” IsFlickEnabled=”True” IsKeyboardEnabled=”True”> </esri:PanOptions> </esri:InteractionOptions.PanOptions> <esri:InteractionOptions.RotationOptions> <esri:RotationOptions IsEnabled=”False” /> </esri:InteractionOptions.RotationOptions> <esri:InteractionOptions.ZoomOptions> <esri:ZoomOptions IsEnabled=”False” /> </esri:InteractionOptions.ZoomOptions> </esri:InteractionOptions> </esri:MapView.InteractionOptions>
Listing 3
The first commercial edition of the ArcGIS Runtime SDK for the Microsoft .NET Framework was released as ver-sion 10.2.4 in October 2014. ArcGIS Runtime SDK for .NET enables developers to build rich, high-performance GIS applications for Windows PCs, tablets, and phones. The SDK includes three APIs that support building .NET apps for Windows Desktop, Windows Store, and Windows Phone. The APIs share a common design and structure, which encourages sharing implementation logic across the Desktop, Store, and Phone platforms.
By Rex Hansen, Esri ArcGIS Runtime SDK for .NET
G66612_AU-Winter_12-22-14_mmp_finaledits.indd 36 12/22/14 3:19 PM
37esri.com Winter 2015 au
Setting Initial Map ExtentUse Map.InitialViewpoint to set the startup extent to an envelope or a location and scale. The property can be set in XAML (Desktop only) or in code as shown in Listing 4.
map.InitialViewpoint = new Viewpoint (new Envelope _ SpatialReferences.Wgs84));
map.InitialViewpoint = new Viewpoint (new MapPoint _ (-105, 50, SpatialReferences.Wgs84), 1000000);
Listing 4
Note that the initial viewpoint can be in a different spatial reference than the map. For example, you can define a startup extent in WGS84 while the map spatial reference is set to Web Mercator. The initial viewpoint will be projected to the map’s spatial reference on the fly.
Creating GeometryYou can use a constructor or a builder to create geometry. In most cases, the constructor is the most efficient and reliable technique. As shown in Listing 5, you can start with a point collection when creating a new polygon. PointCollection coords = new PointCollection();coords.Add(new MapPoint(center.X - halfLen, center.Y + _ halfLen));coords.Add(new MapPoint(center.X + halfLen, center.Y + _ halfLen));coords.Add(new MapPoint(center.X + halfLen, center.Y - _ halfLen));coords.Add(new MapPoint(center.X - halfLen, _ center.Y - halfLen));coords.Add(new MapPoint(center.X - halfLen, center.Y + _ halfLen));
Polygon polygon = new Polygon(coords, _ SpatialReferences.Wgs84);
Listing 5
However, if geometry needs to change, use a builder. The code in Listing 6 changes the coordinate of the first point in the polygon. Use this example as a guide. Whether using a constructor or a build-er, be sure to define the spatial reference when creating geometry as shown.
PolygonBuilder builder = new PolygonBuilder(polygon);builder.Parts[0][0] = new LineSegment(new MapPoint(x1, y1), _ builder.Parts[0][0].EndPoint);polygon = builder.ToGeometry();
Listing 6
Graphics OverlaysGraphics overlays enable the display of transient spatial data, such as query results or buffer polygons, as graphics on top of a map (but beneath map overlays). Graphics overlays can persist apart from a map, and graphics in an overlay will be reprojected on the fly to ac-commodate changes to the underlying map’s spatial reference. To render a large number of graphics, set the rendering mode to static. When the rendering mode is static, graphics will not refresh until map navigation has stopped, but map responsiveness is re-tained. For a more fluid graphic rendering experience during naviga-tion, set the rendering mode to dynamic. Because graphics overlays are not in the map, graphics in over-lays will not appear in a map’s legend or be displayed when the map is printed. Listing 7 shows a GraphicsOverlay in XAML with ren-derer, selection color, rendering mode, and label properties defined. Graphics must be added to the graphics overlay in code.
<esri:MapView> <esri:MapView.GraphicsOverlays> <esri:GraphicsOverlay Renderer=”{StaticResource myRenderer}” RenderingMode=”Static” SelectionColor=”Yellow” > <esri:GraphicsOverlay.Labeling> <esri:LabelProperties> <esri:AttributeLabelClass TextExpression=”[NAME]”> <esri:AttributeLabelClass.Symbol> <esri:TextSymbol Color=”Black” /> </esri:AttributeLabelClass.Symbol> </esri:AttributeLabelClass> </esri:LabelProperties> </esri:GraphicsOverlay.Labeling> </esri:GraphicsOverlay> </esri:MapView.GraphicsOverlays> <esri:Map> <esri:ArcGISTiledMapServiceLayer ServiceUri=”http://services.arcgisonline.com/arcgis/rest/services/
Developer’s Corner
Integrate GIS Functionality into Windows Apps with
ArcGIS Runtime SDK for .NET
Change the default background using MapView.MapBackground.
G66612_AU-Winter_12-22-14_mmp_finaledits.indd 37 12/22/14 3:19 PM

38 au Winter 2015 esri.com
World_Topo_Map/MapServer” /> </esri:Map></esri:MapView>
Listing 7
Working with ShapefilesThe .NET SDK supports direct read of shapefiles for display in a map as a feature layer. Listing 8 shows how to add a shapefile to a map in code (adding shapefiles in XAML is not supported). A default renderer is provided. Set the renderer on the feature layer to change symbology.
string filename = @”C:\data\world-continents.shp”;Esri.ArcGISRuntime.Data.ShapefileTable table = _ await Esri.ArcGISRuntime.Data.ShapefileTable. _ OpenAsync(filename);FeatureLayer layer = new FeatureLayer(table);mv.Map.Layers.Add(layer);
Listing 8
Shapefiles do not support editing. Calls to add/update/delete op-erations will throw a System.NotSupportedException. Also, shape-files do not support reprojection on the fly. The spatial reference of the map and the shapefile must match for features in the shapefile to be visible. To reproject a shapefile manually, wait until the spatial reference of the map is set, iterate through features in the shapefile, reproject to the map spatial reference, and add the shapefile features as graph-ics to a graphics layer or overlay. The code in Listing 9 shows simple conditional logic to determine if shapefile contents need to be dis-played as graphics or features. If using a graphics overlay, a renderer must be defined.
Esri.ArcGISRuntime.Data.ShapefileTable table = _ await Esri.ArcGISRuntime.Data.ShapefileTable. _ OpenAsync(filename);
if (table.SpatialReference != mv.SpatialReference){ var items = await table.QueryAsync(new Esri. _ ArcGISRuntime.Data.QueryFilter() { MaximumRows = _ 1000}); GraphicsOverlay overlay = new GraphicsOverlay() { GraphicsSource = items.Select(f => new Graphic _ (f.Geometry, f.Attributes)), RenderingMode = GraphicsRenderingMode.Static };
// Define renderer for graphics overlay overlay.Renderer = myRenderer;
mv.GraphicsOverlays.Add(overlay);}else
{
FeatureLayer layer = new FeatureLayer(table);
mv.Map.Layers.Add(layer);
}
Listing 9
It is important to note that QueryAsync will load the entire shape-file into memory. The code example in Listing 9 also shows how to limit the number of features returned using the MaximumRows property. You can use this technique to control the number of features, and thus memory, used in your application.
Client-Side LabelingClient-side labeling supports feature layers and graphics overlays. If a feature layer references a layer in an ArcGIS service (either map or feature) that defines label info, it will be honored. The API supports defining label properties to manage duplicates, text wrapping, scale limits, placement, position, and the text symbol to use for display—all on the client. In addition, labeling can be enabled or disabled completely on the MapView. In the example in Listing 10, label properties are defined on a feature layer that contains parcel polygons. Label text uses the attribute value in the “APN” field and places the label hori-zontally in the center of the polygon but will reposition the label for a best fit. If unable to place, then the label will be removed.
<esri:MapView> <esri:MapView.Labeling> <esri:ViewLabelProperties IsEnabled=”True” /> </esri:MapView.Labeling> <esri:Map> <esri:ArcGISTiledMapServiceLayerServiceUri=”http://services.arcgisonline.com/arcgis/rest/services/World_Topo_Map/MapServer” /> <esri:FeatureLayer> <esri:ServiceFeatureTableServiceUri=”http://serverapps102.esri.com/arcgis/rest/ser-vices/AnaheimParcelsSmallLabels/MapServer/0” /> <esri:FeatureLayer.Labeling> <esri:LabelProperties IsEnabled=”True”> <esri:AttributeLabelClass TextExpression=”[APN]” LabelPlacement=”PolygonAlwaysHorizontal” LabelPosition=”RepositionOrRemove”> <esri:AttributeLabelClass.Symbol> <esri:TextSymbol Color=”Black” BackgroundColor=”White” /> </esri:AttributeLabelClass.Symbol> </esri:AttributeLabelClass> </esri:LabelProperties>
G66612_AU-Winter_12-22-14_mmp_finaledits.indd 38 12/22/14 3:19 PM

39esri.com Winter 2015 au
Developer’s Corner
</esri:FeatureLayer.Labeling> </esri:FeatureLayer> </esri:Map></esri:MapView>
Listing 10
Offline EditingUse sync-enabled feature services hosted by ArcGIS for Server (version 10.2.2 or higher) and ArcGIS Online to generate local geo-databases with editable feature tables. Local geodatabases can be generated on the fly at runtime or provisioned beforehand and made available on a device. The local geodatabase contains feature tables that can be displayed on a map and features that can be added, up-dated, and deleted. To apply local edits to a feature table in a geoda-tabase hosted by a remote feature service, merely synchronize local changes when a connection to the remote service is available. The code example in Listing 11 shows a simplified workflow for creating a local geodatabase from a sync-enabled feature service and then synchronizing changes with the service.
// Create a new task that will be used to generate a local geodatabase from a sync enabled feature service. GeodatabaseSyncTask syncTask = new GeodatabaseSyncTask(new Uri(“http://sampleserver6. arcgisonline.com/arcgis/rest/services/Sync/SaveTheBaySync/MapServer”));// Generate the local geodatabase. Input variables in-clude generation parameters such as sync model and layer queries, // time span to check progress on the asynchronous re-quest, and details on progress. // When complete, an action handles the result and re-turns details on where the geodatabase is available for download. GenerateGeodatabaseResult result = await syncTask.GenerateGeodatabaseAsync(options, completionAction,
TimeSpan.FromSeconds(3), generationProgress, CancellationToken.None);// Sync changes in the local geodatabase to the feature service. Input variables include the local geodatabase, time span// to check progress on the asynchronous request, and details on progress. When the changes (deltas) in the local geodatabase// are up uploaded, and optional action can capture the result to determine success or failure. When sync is complete, // an action handles the result and returns details on the success of failure of the operation. await syncTask.SyncGeodatabaseAsync(gdbTable.Geodatabase, completionAction, deltaUploadAction, TimeSpan.FromSeconds(3), syncProgress, CancellationToken.None);
Listing 11
Keep in mind that the edits that are last committed (synced) to the service will overwrite previously committed edits, even if commit-ted edits were made at a later time.
Security OptionsAccessing secure resources is easy and flexible. Here is a list of the key characteristics of IdentityManager and its related components.IdentityManager is active by default. IdentityManager’s challenge delegate has been replaced with a challenge interface, IChallengeHandler. The API also includes a ChallengeHandler class that implements IChallengeHandler and the constructor can be passed a method that matches the interface definition required to handle a challenge, shown in Listing 12.
IdentityManager.Current.ChallengeHandler = _ new ChallengeHandler(CreateCredentialAsync);. . . public async Task<Credential> CreateCredentialAsync _ (CredentialRequestInfo info){ // get or create a credential return credential;}
Listing 12
The Windows Store platform includes Credential Picker, a stand-ard UI for entering credentials. As a result, the default challenge handler (named DefaultChallengeHandler), which is included with ArcGIS Runtime SDK for .NET, is only supported for use with the Windows Store API. The Windows Desktop and Phone platforms do not have a standard UI for entering credentials at this time. The ArcGIS Runtime Toolkit for .NET contains examples of Client-side labeling supports feature layers and graphics overlays.
G66612_AU-Winter_12-22-14_mmp_finaledits.indd 39 12/22/14 3:19 PM
For all your ArcGIS® needs, Esri has the solution for you.
Take advantage of our cost-effective solutions to con� gure or upgrade your geographic information system (GIS). Esri works with leading hardware vendors to provide server, desktop, mobile, and data products that are prepackaged with ArcGIS software. Custom hardware-only con� gurations are also available for ex isting Esri customers.
For more information, visit esri.com/hardware
Copyright © 2013 Esri. All rights reserved.
Esri® Hardware Offerings
G67005_Esri-Hardware-AU_1214.indd 1 12/18/14 4:42 PM
40 au Winter 2015 esri.com
dialogs for entering credentials on both platforms that are avail-able on GitHub (github.com/Esri/arcgis-toolkit-dotnet). See the SignInChallengeHandler class for more details. Customizing the UI for the SignInChallengeHandler requires modifying source code in the toolkit. The DefaultChallengeHandler (Windows Store only) and SignInChallengeHandler for Windows Phone support use of a credential locker to store and retrieve credential details. The ex-ample in Listing 13 will cast the current challenge handler to DefaultChallengeHandler, enable saving credentials in the credential locker, and include an option in the UI for the user to opt into saving credentials and enable it by default. Since Desktop does not provide a credential locker out of the box, implementation for a credential man-ager (Desktop only) is included with the ArcGIS Runtime Toolkit for .NET on GitHub.
DefaultChallengeHandler dch = IdentityManager.Current.ChallengeHandler as DefaultChallengeHandler; dch.AllowSaveCredentials = true;dch.CredentialSaveOption = Windows.Security.Credentials._ UI.CredentialSaveOption.Selected;
Listing 13
IdentityManager supports accessing resources on systems secured using ArcGIS tokens, OAuth, network authentica-tion (e.g., Integrated Windows Authentication [IWA]), and client certificates. This includes secure resources hosted by ArcGIS for Server, Portal for ArcGIS, and ArcGIS Online. A set of classes is derived from Esri.ArcGISRuntime.Security.Credential to reference different types of security protocols. These include ArcGISTokenCredential, OAuthTokenCredential, ArcGISNetworkCredential, and CertificateCredential. During a challenge, use CredentialRequestInfo.AuthenicationType to deter-mine the type of credential to create or return. IdentityManager supports a global OAuth authorize component via the IdentityManager.Current.OAuthAuthorizeHandler property. The component must implement IOAuthAuthorizeHandler and con-tains logic for hosting the sign-in page and handling authorization results. Windows Store includes OAuth implementation with the DefaultChallengeHandler. The ArcGIS Runtime Toolkit for .NET contains sample handler implementations for entering credentials on both Phone and Desktop. See these samples on GitHub.
LicensingA set of classes under Esri.ArcGISRuntime support the SDK licens-ing structure. By default, the SDK runs in developer mode. Running in developer mode results in a watermark on the map (text indicat-ing the SDK is being used for development); debug messages when standard license functionality is used; and a message box when local server starts (Desktop only). To run an app with a basic license, get a client ID from the ArcGIS for Developers site. Standard licenses are available for purchase in
deployment packs. See the licensing documentation on the ArcGIS for Developers site for more details. The code in Listing 14 shows the licensing code workflow execut-ed on application startup. Note that once an application session is licensed, it cannot be unlicensed.
// Required for Basic and Standard licenseArcGISRuntimeEnvironment.ClientId = “<client id>”;
// Standard license string from a deployment packArcGISRuntimeEnvironment.License.SetLicense _ (“<standard license string>”); // -OR- // Standard license info when logged in as a named user account to an ArcGIS Online organization or Portal for ArcGISArcGISRuntimeEnvironment.License.SetLicense _ (portal.ArcGISPortalInfo.LicenseInfo);
// Initialize runtime with license details provided. ArcGISRuntimeEnvironment.Initialize();
Listing 14
Deployment ExperiencePreparing an application for deployment is integrated with Visual Studio 2013 and 2012 editions (Express editions are not supported). To create a deployment, merely right-click a project in Solution Explorer and select Add ArcGIS Runtime Deployment Manifest. This will create a Deployment.arcgisruntimemanifest file with a UI to enable or disable the inclusion of resources and components required for use by the application. The resources and components differ depending on the API. When you open the file or build the pro-ject, you will be prompted to include imports in your project file to support deployment and reload your project. When the project is built, resources for deployment will be copied to the output folder for the project. The contents of the output folder can be distributed as a WPF application or used to build an app package for Store or Phone.
Next StepsTo learn more, go to the ArcGIS Runtime SDK for .NET section of the ArcGIS for Developers website (developers.arcgis.com/net), where you can download the product and browse system require-ments, guide documentation, and API reference. Source code for an extensive toolkit, instructive samples, and demo applications are available on GitHub (github.com/Esri/arcgis-toolkit-dotnet) to enhance your development experience. For those developers who want to get started quickly with Visual Studio, Esri provides NuGet packages for both the core product and toolkit. Details about the NuGet packages and other tools and features can be found on the ArcGIS for Developers website.
G66612_AU-Winter_12-22-14_mmp_finaledits.indd 40 12/22/14 3:19 PM