international students - university of … · international students documents system ......
TRANSCRIPT

INTERNATIONALSTUDENTS
DOCUMENTSSYSTEM-STUDENTS
This application provides UHCL International Students with a way to submit
Forms, Updates and Requests to the International Advising Office, where
they will be processed by Advising Staff.
RevisedDecember, 2014
Table of Contents 1
Accessing the Form Management System 2 Creating a Portal Account 3 Creating a Portal Account in Detail 4 Logging in with a Portal Id 5 Editing Account Information 6 Change Password 7 Reset Password 8 Additional Account Information 9 Obtaining Forms 10 PDF Form Examples 11 Submitting a PDF Form 12 Webform Examples 13 View Submitted Forms 14 Submitting Additional Documentation 15

Accessing the Form Management System
Go to the address https://apps.uhcl.edu/ISD.
Current Students will log in using their UHCL ID and password. They will use the prefix “PCLAB\{username}” to log in.
If you are a new or prospective student who has not enrolled in classes yet, OR you are an Alumni who has graduated
and whose UHCL computer account has expired, you will need to create a Portal Account to access the forms.
Therefore, you will need to click on the button, “New Students and Alumni”
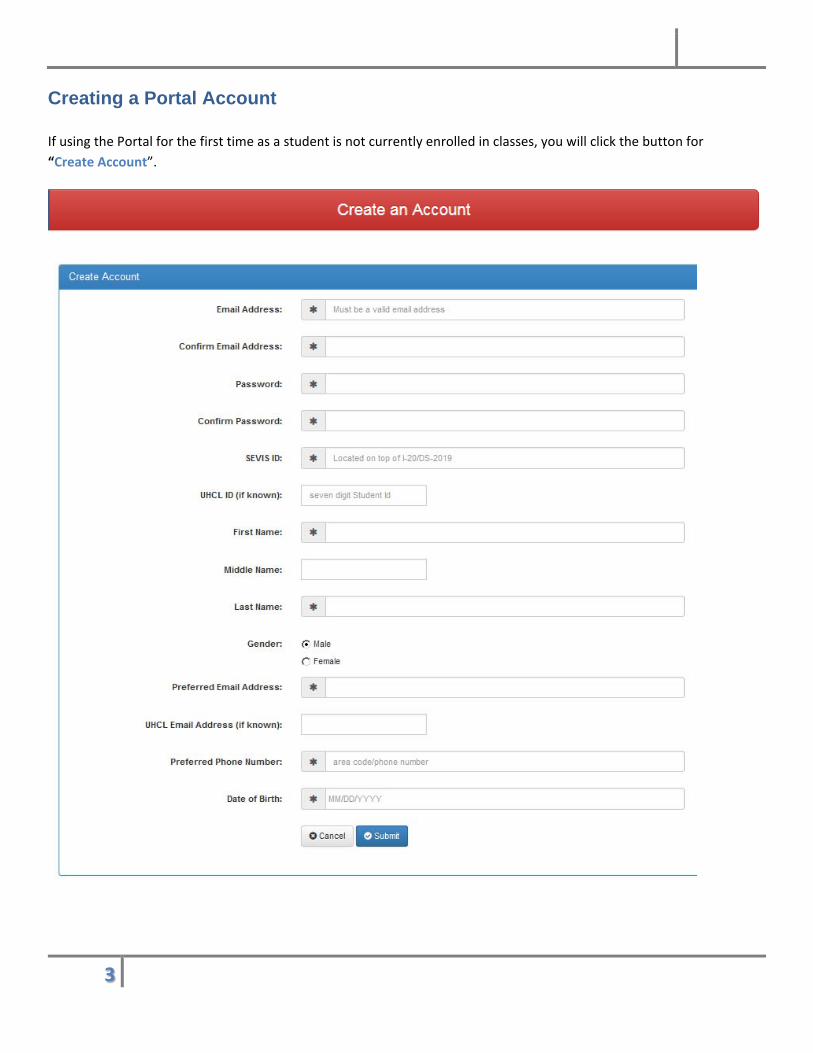
Creating a Portal Account
If using the Portal for the first time as a student is not currently enrolled in classes, you will click the button for
“Create Account”.

Creating an Account in Detail Email Address: You will need to enter a valid email address for your User Id. This cannot be changed once created. You
can add a different “Preferred Email Address” for which to receive correspondence should your email address listed
here becomes inaccessible in the future. This address must match the entry made in the “Confirm Email Address Field”.
Password: This is a required field. For security, it is recommended that you use at least one upper case letter, one
number and one special character, “# $ ! % & ^” in the password. This entry must match the “Confirm Password Field”.
SEVIS ID: This is a required field. This is the number is located on top of your I‐20/DS‐2019.
UHCL Id: This field is not required. If you are an Alumni whose computer account has expired with the University, you
may enter it here as additional identification and to help unite the portal accounts with UHCL records.
First Name: This name should be the name you submitted with your application or match UHCL records.
Last Name: This name should be your legal last name.
Gender: Male or Female. The default selection is “Male” and should be changed accordingly.
Preferred Email Address: This is the address where your correspondence will be directed. Unlike your User Id, this
address can be changed.
UHCL Email Address: If you have or obtain a UHCL email address, it can be entered in this field. This is not a required
entry.
Preferred Phone Number: This is the phone number where you can be reached for direct contact or to retrieve
messages.
Date of Birth: This is a required field.

Logging in with a Portal Account Id
To log in with a portal account, click “New Students or Alumni” on the home screen.
Click “I have an existing Account”.
Enter your User Id (email address used to register) and your password.
Click “Login”.

Editing Account Information
Upon successful completion, you will see confirmation that the account was created. You
will not need to register with the portal again, rather you will log in under the Portal
Account Login Screen.
Upon login, you will be directed to the main page of the portal. From here, you can submit forms, view form
submissions and edit account information.
Clicking the tab for “Edit Account Information” will take you to the following screen:
You can edit your account information or change your password from this screen.

Change Password
To change your password, click the button for “Change Password” from the “Edit Account Information” Tab.
Enter your new password. Enter the same information in the Confirm Password field. These must match!
On successful change, you will receive confirmation:

Reset Password At some time, you may have forgotten your password. In this case, proceed to the portal login screen (New
Student\Alumni then to “I have a Portal Account”)
Click “Reset Password”.
Enter your User Id and confirm. A new password will be generated and emailed to your “Preferred Email Address” on
file. You will not be able to log in with your previous password when a reset password is submitted.
When you have logged in successfully, you should change your password to something secure that you can remember
by clicking on the “Edit Account Information” tab and choosing the button to “Change Password”.

Additional Account Information You can enter an invalid password 5 times before the account will be locked out. The account will remain locked out
until you wait 5 minutes, or contact the Office of International Advising to have them unlock. They will not be able to
tell you your password and they will not be able to reset it for you. You will need to use the Change Password and Reset
Password features available in the program.
If you have trouble creating an account or have questions, please email the Office of International Advising at
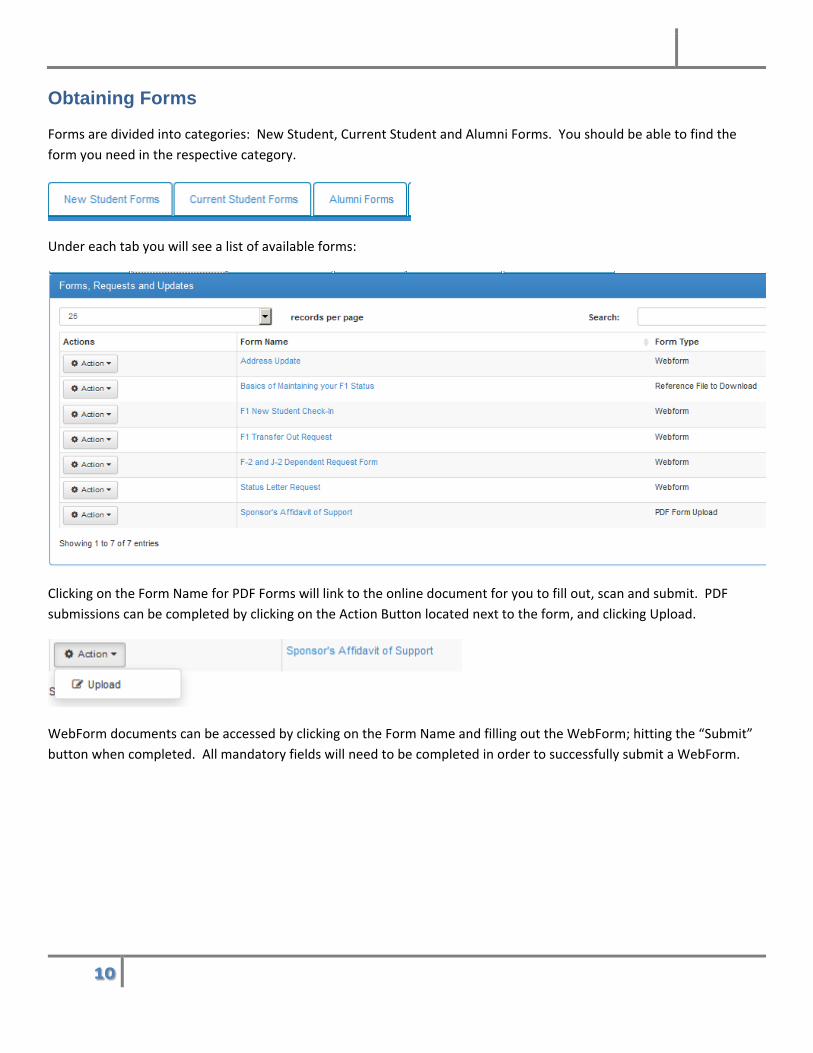
Obtaining Forms
Forms are divided into categories: New Student, Current Student and Alumni Forms. You should be able to find the
form you need in the respective category.
Under each tab you will see a list of available forms:
Clicking on the Form Name for PDF Forms will link to the online document for you to fill out, scan and submit. PDF
submissions can be completed by clicking on the Action Button located next to the form, and clicking Upload.
WebForm documents can be accessed by clicking on the Form Name and filling out the WebForm; hitting the “Submit”
button when completed. All mandatory fields will need to be completed in order to successfully submit a WebForm.

PDF Form Examples
Click on the form name and the link will open the online PDF Form.
Save the form to your desktop. Fill it out. When complete, log back in, click on the Action button next to the form load
that reads “Upload”.
The form will be populated with the information retained in the UHCL System for your UserId:

Submitting a PDF Form
Click “Browse” to find the completed PDF file you are ready to upload. After selecting the file, click the “submit” button.
Upon Successful upload, the following message will display:

WebForm Examples
Click on the form name to open the form:
Fill out the form and hit the submit button at the bottom:
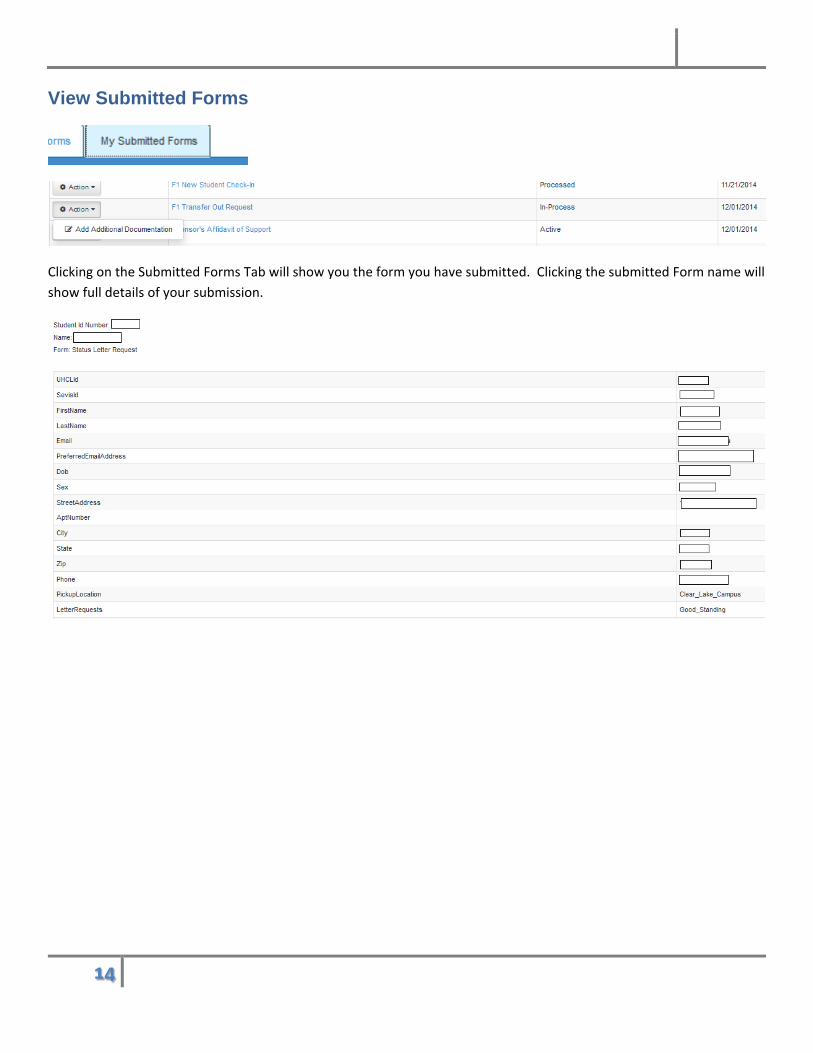
View Submitted Forms
Clicking on the Submitted Forms Tab will show you the form you have submitted. Clicking the submitted Form name will
show full details of your submission.
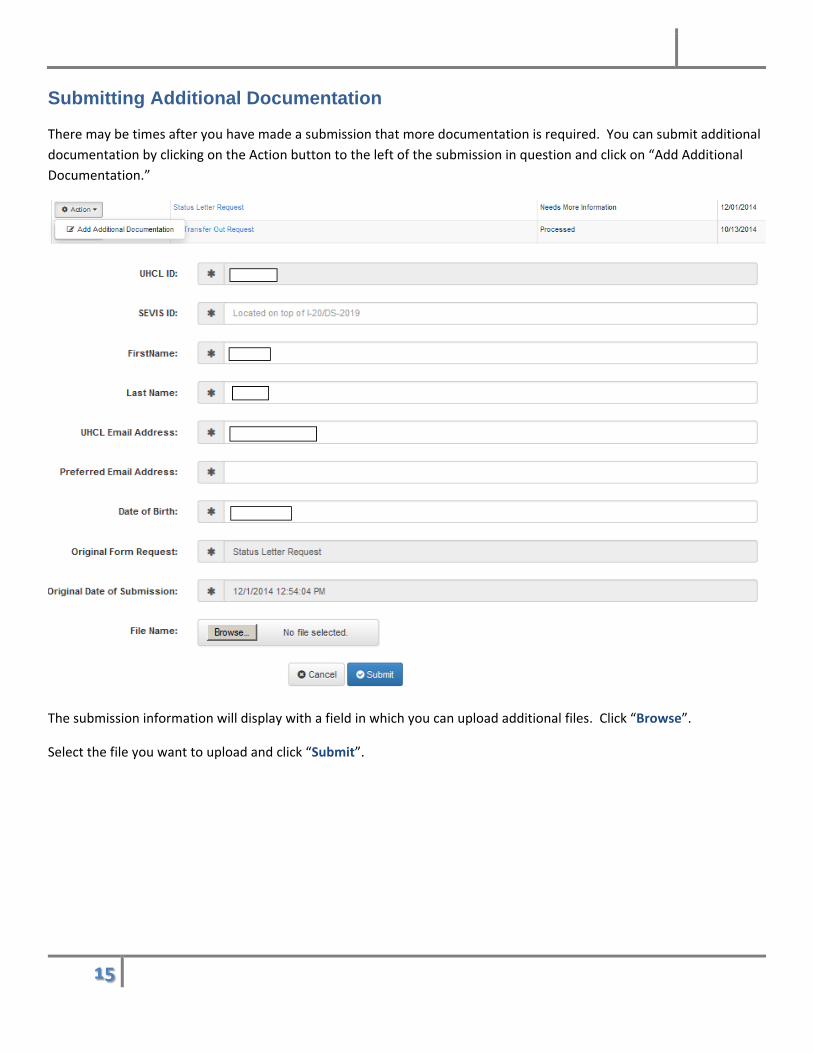
Submitting Additional Documentation
There may be times after you have made a submission that more documentation is required. You can submit additional
documentation by clicking on the Action button to the left of the submission in question and click on “Add Additional
Documentation.”
The submission information will display with a field in which you can upload additional files. Click “Browse”.
Select the file you want to upload and click “Submit”.