introduction - shaolinnm.com · introduction every good barbarian ... armed escort were viciously...
TRANSCRIPT

1
INTRODUCTION
Every Good Barbarian Deserves Favour Expansion Pack contains three new, exciting adventures
for your Warhammer Quest heroes! In order to complete their tasks, the Warriors must battle vicious enemies, search for ancient relics, and navigate through dangerous caverns.
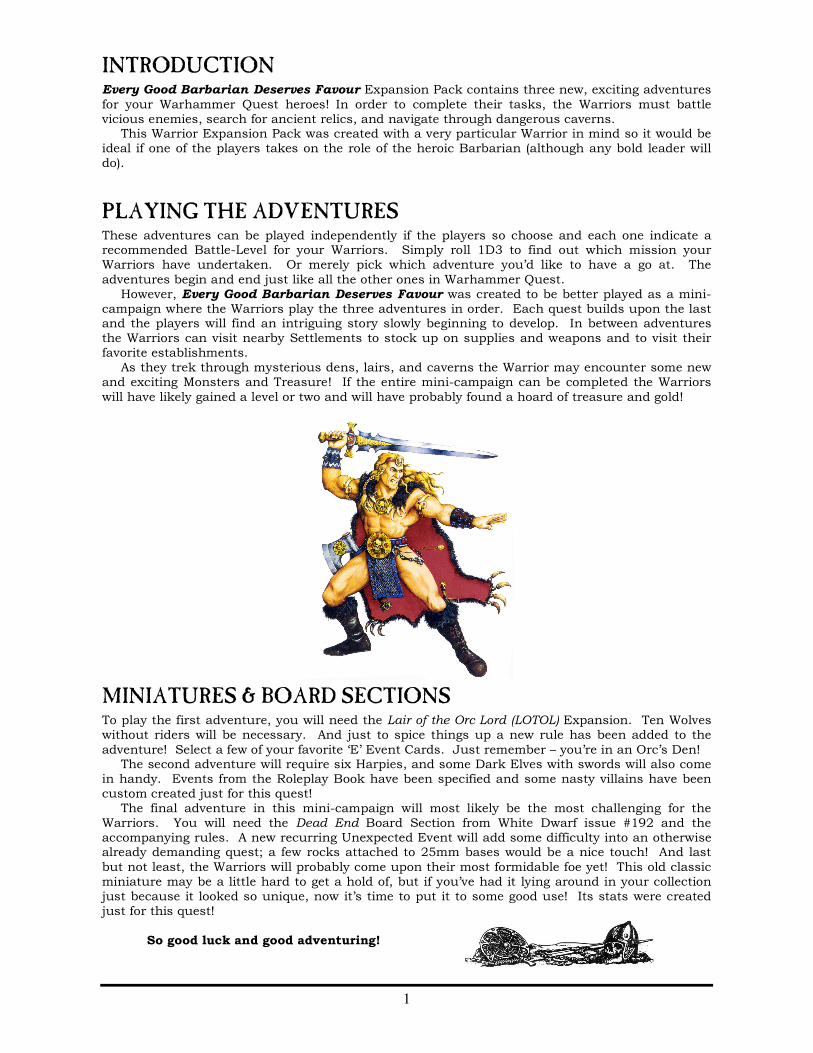
This Warrior Expansion Pack was created with a very particular Warrior in mind so it would be ideal if one of the players takes on the role of the heroic Barbarian (although any bold leader will do).
PLAYING THE ADVENTURES
These adventures can be played independently if the players so choose and each one indicate a recommended Battle-Level for your Warriors. Simply roll 1D3 to find out which mission your Warriors have undertaken. Or merely pick which adventure you’d like to have a go at. The
adventures begin and end just like all the other ones in Warhammer Quest. However, Every Good Barbarian Deserves Favour was created to be better played as a mini-
campaign where the Warriors play the three adventures in order. Each quest builds upon the last and the players will find an intriguing story slowly beginning to develop. In between adventures the Warriors can visit nearby Settlements to stock up on supplies and weapons and to visit their favorite establishments.
As they trek through mysterious dens, lairs, and caverns the Warrior may encounter some new and exciting Monsters and Treasure! If the entire mini-campaign can be completed the Warriors
will have likely gained a level or two and will have probably found a hoard of treasure and gold!
MINIATURES & BOARD SECTIONS
To play the first adventure, you will need the Lair of the Orc Lord (LOTOL) Expansion. Ten Wolves without riders will be necessary. And just to spice things up a new rule has been added to the
adventure! Select a few of your favorite ‘E’ Event Cards. Just remember – you’re in an Orc’s Den! The second adventure will require six Harpies, and some Dark Elves with swords will also come
in handy. Events from the Roleplay Book have been specified and some nasty villains have been custom created just for this quest!
The final adventure in this mini-campaign will most likely be the most challenging for the Warriors. You will need the Dead End Board Section from White Dwarf issue #192 and the accompanying rules. A new recurring Unexpected Event will add some difficulty into an otherwise already demanding quest; a few rocks attached to 25mm bases would be a nice touch! And last
but not least, the Warriors will probably come upon their most formidable foe yet! This old classic miniature may be a little hard to get a hold of, but if you’ve had it lying around in your collection just because it looked so unique, now it’s time to put it to some good use! Its stats were created just for this quest!
So good luck and good adventuring!

2
1 A LAST REQUEST (Designed for Battle-Level 1)
The Warriors are traveling the road to Altdorf when they encounter a severely
injured Priest of Sigmar who claims to be the only survivor of an Orc ambush. He seems to be missing a ring finger. The battered priest retells how he and a small, armed escort were viciously attacked by an Orc warband as they were taking an artefact on a pilgrimage to a holy shrine to perform a sacrament – a special ritual that is performed only once every hundred years. The stolen artefact is the ancient Horn of LeStarr and the priest reveals that the Orc raiders, led by Ripfang Fingertaker, have stolen the item away to their hideout nearby. The man imparts on the Warriors that his spirit will remain in eternal suffering for failing in his mission! The Barbarian (or party leader if there is no Barbarian in the group) quickly steps
forward in a moment of chivalry and pledges that the Warriors will retrieve the ancient Horn from the wicked Orc raiders and their leader, Ripfang Fingertaker, and return it to the Temple of Sigmar, thus
saving the priest’s soul. As soon as the promise leaves the Warrior’s lips, the holy man expires.
SETTING UP
Shuffle in the Shaman’s Den Board Section into the top 6 cards and shuffle the Gorgut’s Lair Objective Room Board Section into the bottom 6 cards to make a regular 13 card dungeon. Treat the Shaman’s Den as a regular Dungeon Room except that if the room contains Monsters, the maximum number appears. Gorgut’s Lair follows all the normal rules from the LOTOL rulebook.
RUMMAGES, REPOSITIONS & RAIDS
Many items are often hidden or inconspicuously placed about a dungeon by its inhabitants (especially Orcs!). When Warriors are cautiously watching out for well-laid traps and fending off dangerous adversaries, they can often overlook many unique and potentially helpful items.
In this adventure, the Warriors may decide to take extra time to comb the area in hopes of finding something they may have initially missed.
The unpredictability of the dungeon, however, insists that the Warriors quickly (and quite vociferously) scour the room. We call this superfluous, optimistic search a Rummage! The Warriors may Rummage any Dungeon Room they encounter (including the Shaman’s Den), if they have resolved all Events and so long as there
are no Monsters on the Board. Each Warrior Rummaging must simply state
they are doing so at the end of a turn, but before the Exploration Phase. This declaration must be done at the same time and Rummaging Warriors must each roll on the table below in unison. Any Warrior that doesn’t declare they are Rummaging or does not roll with the group does nothing but stay in the space they are in.
‘RUMMAGING’ RESULT (Roll 1D6)
1-3 The Warrior finds nothing.
4 The Warrior finds 1D6x10 gold!
5 The Warrior finds a Potion that heals 1D6 Wounds!
6 The Warrior finds a Dungeon Room Treasure!
REPOSITION
After Rummaging through the room for hidden valuables each searching Warrior will probably find himself displaced from his original location. To figure out which square your Warrior is now in, use a Board Section not in use that is similar to the one the Warriors are on. Now simply close your eyes, hold your dice a few inches above the board tile, and let it drop. Wherever the dice land is where your Warrior was at when the Rummaging was completed. Repeat as necessary.
RIPFANG’S RAIDERS Searching every nook and cranny involves tapping on the walls and floor for false stones, moving rubble and furniture, grunting and arguing with other Warriors, and pretty much everything else that involves making noise! So after Rummaging, the Warriors must roll another 1D6. On a 1 or 2
their search ends in mayhem! Roll on the Monster Table to see which of Ripfang’s minions burst into the room. These Monsters gain an immediate Ambush attack on any Warrior who was searching! Non-searching Warriors quickly draw steel and are able to fend off the ambush assault. If the Warriors defeat the Monsters, they gain no treasure other than the gold for killing them.

3
THE ORC’S DEN OBJECTIVE ROOM The Horn of LeStarr is being held in the den of the Orc Leader, Ripfang, the room appropriately represented by the Gorgut’s Lair Objective Room Board Section. Follow all the rules in the Lair of the Orc Lord rulebook for this room. In addition to Ripfang, roll three times on the Monster Table to see who guards the final room, adding +1 to the first dice roll, +2 to the second dice roll, and finally +3 to the third dice roll! Fortunately for the Warriors, the Monsters they encounter in the Objective Room are all that are left in the Orc’s Den, which means that no other Monsters will arrive as an Unexpected Event. Note that the Warriors may not Rummage in the Objective Room since it is already assuming that they are doing so – and they find nothing but the Horn of LeStarr and normal treasure for defeating the Monsters!
RIPFANG FINGERTAKERRIPFANG FINGERTAKERRIPFANG FINGERTAKERRIPFANG FINGERTAKER Orc Leader wielding his
Mace of No Mercy and carrying his Shield
of the Wyvern!
RIPFANG, Orc Leader
Wounds 10
Move 4
Weapon Skill 4
Ballistic Skill 5+
Strength 4
Toughness 3(4)
Attacks 1
Damage 1 + 1D3 (6+)
Gold 450
Special Rules: Ripfang Fingertaker carries the Shield of the Wyvern which gives him +1 Toughness. It also allows him to ignore the first blow that strikes him in Combat. Ripfang also wields the Mace of No Mercy which causes an extra 1D3 Damage if the To Hit roll was a 6. If Ripfang knocks a Warrior to 0 Wounds, he slices off one of their fingers (Warrior’s choice)! If a Warrior loses one finger on his primary hand, he is -1 Weapon Skill permanently. If they lose two fingers on his primary hand, then he must be retired from the
adventuring world… Whichever Warrior delivers the final blow to the Orc Leader may take his Mace of No Mercy for himself. The shield is unfortunately destroyed in the battle. The Warriors find the Horn of LeStarr in the green bag at the back of the chamber. They can then return the ancient instrument back to the Temple of Sigmar, where they are each rewarded with 2D6x50 gold. If they should fail in their task but somehow survive in the adventure, each Warrior must donate 1D6x100 gold pieces to the Temple of Sigmar, selling equipment and treasure if necessary, in retribution for their failed promise!
ORC’S DEN MONSTER TABLE (2D6)
11 3 Ogres
12-13 1D6 Orcs with Swords and 1D6 Orcs w/Bows
13-16 1D6+3 Giant Wolves
21-23 3 Cave Squigs
24-26 1D6 Goblin Netters & 1D6 Goblin Clubbers
31-33 1D3 Minotaurs
34-36 2D6 Snotlings
41-43 1D6 Orcs w/Swords & 1D6 Orcs w/Bows
44-46 1D3 Cave Squigs
51-53 2D6 Orcs with Spears
54-56 1D3 Ogres
61-63 1D6+4 Giant Wolves
64-65 6 Goblin Netters & 1D6 Goblin Clubbers
66 3 Minotaurs
67 3 Minotaurs & 3 Orcs w/Bows
68 3 Minotaurs, 1 Ogre & 6 Giant Wolves
69 3 Minotaurs, 2 Ogres & 6 Orcs w/Bows
ORC’S DEN BESTIARY QUICK REFERENCE
Monster Type M WS BS S T W I A Gold Arm. Dam. Special Rules
Giant Wolves 9 4 - 3 3 7 3 1 70 - 1 -
Goblin Netters & Clubbers
4 2 5+ 3 3 2 2 1 35 - S Armed w/Nets & Clubs.
Minotaurs 6 4 4+ 4 4 15 3 2 440 - 2 -
Ogres 6 3 5+ 4 5 13 3 2 400 - 1/2(5+) -
Orcs w/Swords 4 3 4+ 3 4 3 2 1 55 - 1 -
Orcs w/Spears 4 3 4+ 3 4 3 2 1 55 - 1 Fight in Ranks.
Orcs w/Bows 4 3 4+ 3 4 3 2 1 55 - 1 (Bow Strength 4).
Snotlings 4 1 - 1 1 1 1 1 10 - S Ambush, Magic A; Gang Up.
Wild Cave Squigs S 4 - 5 3 3 5 2 200 - 1 Never Pinned; Wild Squig Attack.
4
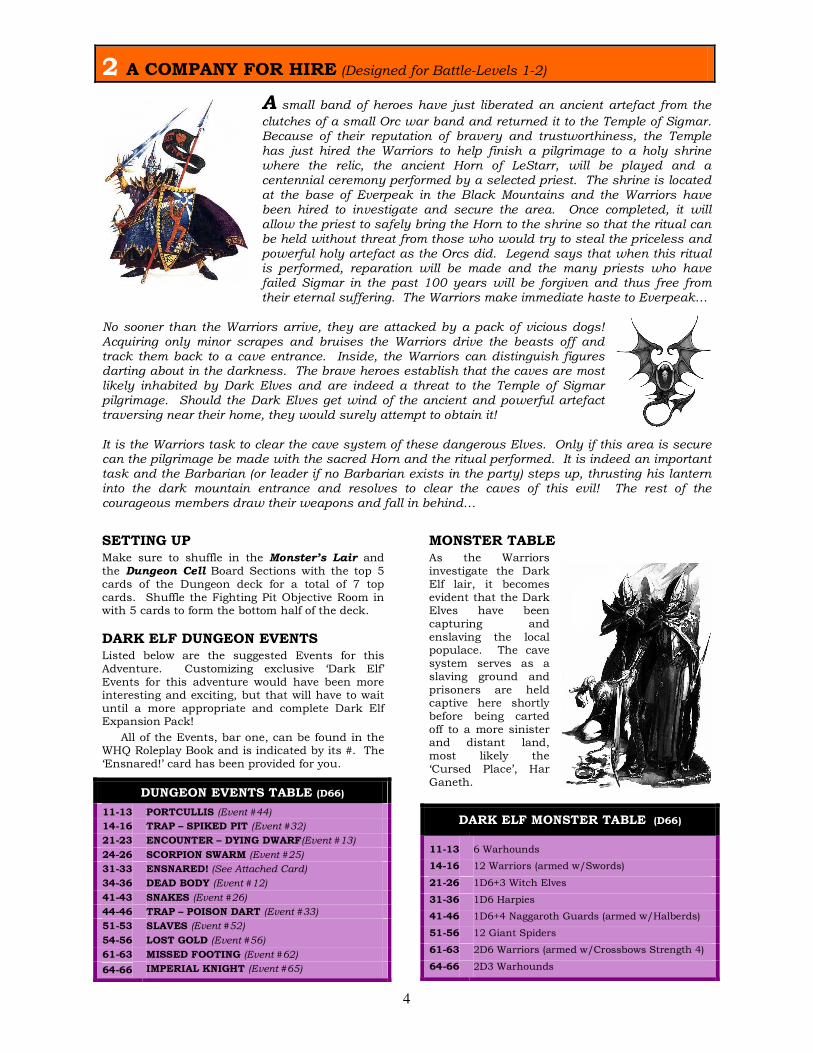
2 A COMPANY FOR HIRE (Designed for Battle-Levels 1-2)
A small band of heroes have just liberated an ancient artefact from the
clutches of a small Orc war band and returned it to the Temple of Sigmar. Because of their reputation of bravery and trustworthiness, the Temple has just hired the Warriors to help finish a pilgrimage to a holy shrine where the relic, the ancient Horn of LeStarr, will be played and a centennial ceremony performed by a selected priest. The shrine is located at the base of Everpeak in the Black Mountains and the Warriors have been hired to investigate and secure the area. Once completed, it will allow the priest to safely bring the Horn to the shrine so that the ritual can be held without threat from those who would try to steal the priceless and powerful holy artefact as the Orcs did. Legend says that when this ritual is performed, reparation will be made and the many priests who have failed Sigmar in the past 100 years will be forgiven and thus free from their eternal suffering. The Warriors make immediate haste to Everpeak…
No sooner than the Warriors arrive, they are attacked by a pack of vicious dogs! Acquiring only minor scrapes and bruises the Warriors drive the beasts off and track them back to a cave entrance. Inside, the Warriors can distinguish figures darting about in the darkness. The brave heroes establish that the caves are most likely inhabited by Dark Elves and are indeed a threat to the Temple of Sigmar pilgrimage. Should the Dark Elves get wind of the ancient and powerful artefact traversing near their home, they would surely attempt to obtain it!
It is the Warriors task to clear the cave system of these dangerous Elves. Only if this area is secure can the pilgrimage be made with the sacred Horn and the ritual performed. It is indeed an important task and the Barbarian (or leader if no Barbarian exists in the party) steps up, thrusting his lantern into the dark mountain entrance and resolves to clear the caves of this evil! The rest of the courageous members draw their weapons and fall in behind…
SETTING UP Make sure to shuffle in the Monster’s Lair and the Dungeon Cell Board Sections with the top 5 cards of the Dungeon deck for a total of 7 top cards. Shuffle the Fighting Pit Objective Room in with 5 cards to form the bottom half of the deck.
DARK ELF DUNGEON EVENTS Listed below are the suggested Events for this Adventure. Customizing exclusive ‘Dark Elf’ Events for this adventure would have been more interesting and exciting, but that will have to wait until a more appropriate and complete Dark Elf Expansion Pack!
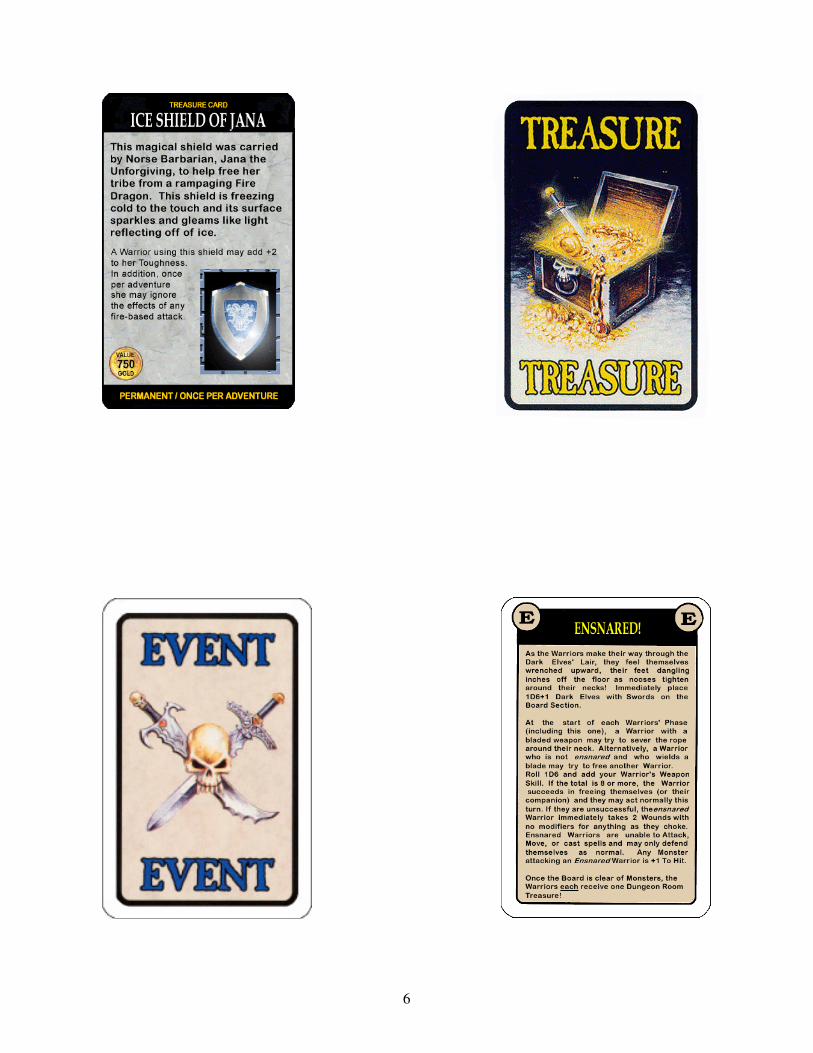
All of the Events, bar one, can be found in the WHQ Roleplay Book and is indicated by its #. The ‘Ensnared!’ card has been provided for you.
DUNGEON EVENTS TABLE (D66)
11-13 PORTCULLIS (Event #44)
14-16 TRAP – SPIKED PIT (Event #32)
21-23 ENCOUNTER – DYING DWARF(Event #13)
24-26 SCORPION SWARM (Event #25)
31-33 ENSNARED! (See Attached Card)
34-36 DEAD BODY (Event #12)
41-43 SNAKES (Event #26)
44-46 TRAP – POISON DART (Event #33)
51-53 SLAVES (Event #52)
54-56 LOST GOLD (Event #56)
61-63 MISSED FOOTING (Event #62)
64-66 IMPERIAL KNIGHT (Event #65)
MONSTER TABLE As the Warriors investigate the Dark Elf lair, it becomes evident that the Dark Elves have been capturing and enslaving the local populace. The cave system serves as a slaving ground and prisoners are held captive here shortly before being carted off to a more sinister and distant land, most likely the ‘Cursed Place’, Har Ganeth.
DARK ELF MONSTER TABLE (D66)
11-13 6 Warhounds
14-16 12 Warriors (armed w/Swords)
21-26 1D6+3 Witch Elves
31-36 1D6 Harpies
41-46 1D6+4 Naggaroth Guards (armed w/Halberds)
51-56 12 Giant Spiders
61-63 2D6 Warriors (armed w/Crossbows Strength 4)
64-66 2D3 Warhounds
5
DUNGEON CELL (Mendek, Dark Elf Executioner)
When the Warriors enter the Dungeon Cell, they are aghast to find it filled with prisoners shackled in chains against the walls and bound with ropes in corners. The down-trodden prisoners gaze upward at the Warriors and a small glimmer of hope enters their eyes. Their dreams of freedom quickly fade as Mendek the Ruthless and his
minions step out from the shadows… In addition to rolling on the Dark Elf Monster Table, the Dark Elf Executioner, Mendek the Ruthless, is also present. Draw a Warrior counter to see who he attacks. Special Rules:
Mendek has the Executioner’s Blow ability which means that if his To Hit roll is a 5+ he causes an extra 1D6 Damage. Mendek hates Elves and gains an extra Attack against them, but is -1 To Hit. If Mendek and his minions are defeated and the Board is clear of Monsters, draw a Treasure Card as normal. In addition, each Warrior may roll 1D6 and add her initiative. This total number represents how many slaves the Warrior was able to free and she should record this number on her Adventure Record Sheet, the significance to be explained later.
MONSTER’S LAIR (Karnith/Rhyme, Beastmasters)
Instead of drawing a normal Event Card, when the Warriors enter the Monster’s Lair, they encounter a Rat Ogre who is being controlled (tortured) by two Dark Elf Beastmasters, Karnith & Ryme. The Beastmasters are positioned as missile troops and are armed with crossbows while the Rat Ogre slave is placed in hand-to-hand Combat. The Rat Ogre slave will always attack the Warriors so long as either Karnith or Ryme remain on the Board Section. If both Beastmasters are killed, the Rat Ogre slave will randomly attack any model on the Board each turn, but is subjected to the rules for Pinning. Statistics for these enemies are listed below.
If the Board is clear of Monsters, the Warriors do not roll for Treasure as normal. Instead, the Warriors can examine the items in the room. Roll one time on each Table below to determine exactly what the Warriors find.
Make only one roll for the entire group on each table!
The Green Moss (D66)
11-26 It is corrosive and no one goes near...
31-36 It is sticky but immediately heals 1 Wound to each Warrior!
41-56 It works as a salve and immediately heals 1D6 Wounds to each Warrior!
61-66 It works as a salve and immediately heals 2D6 Wounds to each Warrior.
The Green Moss works automatically on fallen Warriors!
The Clothing (D66)
11-26 It is tattered, worn, and worthless.
31-36 It is Tilean fabric worth 1D6 x 10 gold pieces.
41-46 It is a Cloak of Deception. See Treasure Card.
51-56 It is a Tunic of Brawn and adds +1 to the wearer’s Strength. (200GP)
61-63 It is a Cloak of Protection and adds +1 to the wearer’s Toughness. (400GP)
64-66 It is a Vest of Slaying and adds +1 to the wearer’s Damage Dice. (750GP)
The Shield (D66)
11-26 It is brittle and of no value.
31-46 It is an Enchanted Shield. See Treasure Card.
51-56 It is a Dragon Shield. See Treasure Card.
61-66 It is the Shield of Jana. See Special Treasure Card attached to this article.
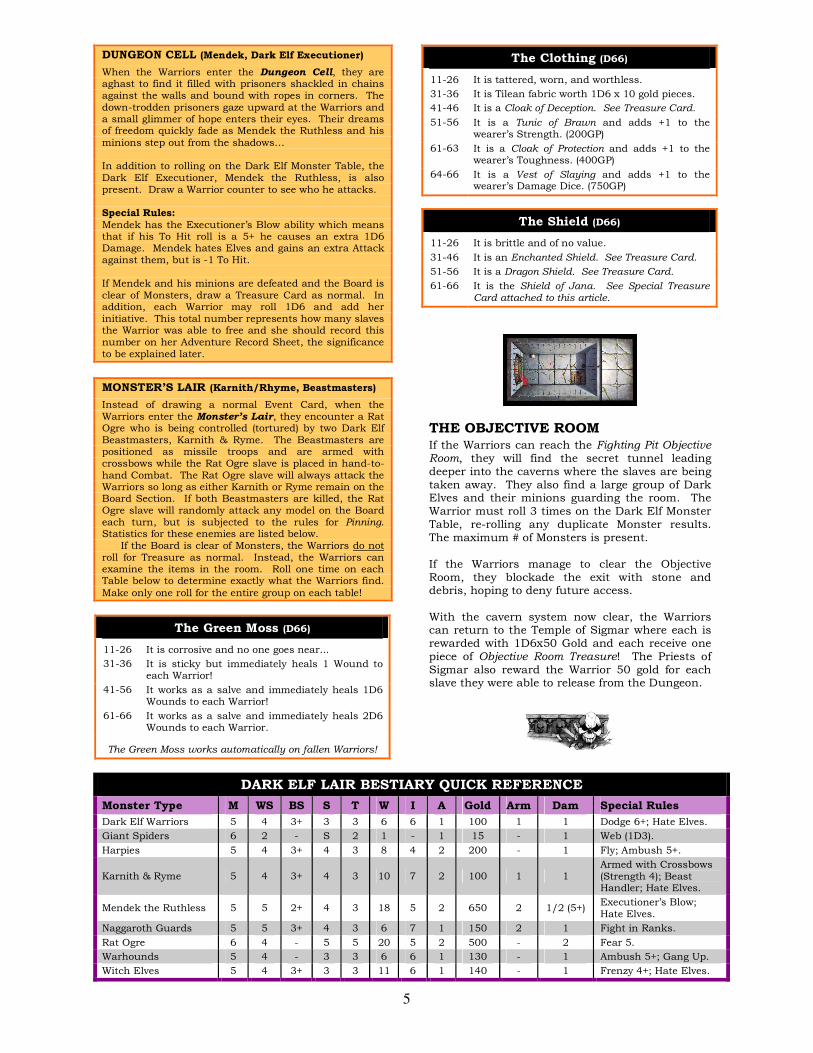
THE OBJECTIVE ROOM If the Warriors can reach the Fighting Pit Objective Room, they will find the secret tunnel leading deeper into the caverns where the slaves are being taken away. They also find a large group of Dark Elves and their minions guarding the room. The Warrior must roll 3 times on the Dark Elf Monster Table, re-rolling any duplicate Monster results. The maximum # of Monsters is present. If the Warriors manage to clear the Objective Room, they blockade the exit with stone and debris, hoping to deny future access. With the cavern system now clear, the Warriors can return to the Temple of Sigmar where each is rewarded with 1D6x50 Gold and each receive one piece of Objective Room Treasure! The Priests of Sigmar also reward the Warrior 50 gold for each slave they were able to release from the Dungeon.
DARK ELF LAIR BESTIARY QUICK REFERENCE
Monster Type M WS BS S T W I A Gold Arm Dam Special Rules
Dark Elf Warriors 5 4 3+ 3 3 6 6 1 100 1 1 Dodge 6+; Hate Elves.
Giant Spiders 6 2 - S 2 1 - 1 15 - 1 Web (1D3).
Harpies 5 4 3+ 4 3 8 4 2 200 - 1 Fly; Ambush 5+.
Karnith & Ryme 5 4 3+ 4 3 10 7 2 100 1 1 Armed with Crossbows (Strength 4); Beast Handler; Hate Elves.
Mendek the Ruthless 5 5 2+ 4 3 18 5 2 650 2 1/2 (5+) Executioner’s Blow; Hate Elves.
Naggaroth Guards 5 5 3+ 4 3 6 7 1 150 2 1 Fight in Ranks.
Rat Ogre 6 4 - 5 5 20 5 2 500 - 2 Fear 5.
Warhounds 5 4 - 3 3 6 6 1 130 - 1 Ambush 5+; Gang Up.
Witch Elves 5 4 3+ 3 3 11 6 1 140 - 1 Frenzy 4+; Hate Elves.
6

7
3 A HAZARDOUS RUSE (designed for Battle-Levels 2-3)
Word has spread that the priests of Sigmar are set to make a second attempt at
a pilgrimage to a holy shrine in Everpeak and they will be carrying a powerful
and mysterious instrument; the ancient Horn of LeStarr. The shrine has been kept secret, but it is a well-known fact that the area of Everpeak has been secured in order to safely perform a religious sacrament that only happens once every 100 years. The once secret location in Everpeak in the Black Mountains is now common knowledge and everyone is certain that evil forces will try to intercept the Horn en route to the service, as had happened just months before.
The secret shrine location in Everpeak has, in fact, been a fabrication by the Temple of Sigmar to draw attention away from the true location where the ancient prayer ritual will be held. Just as a large and highly visible armed escort departs to Everpeak, the Temple of Sigmar entrusts the Warriors to safely escort a specially chosen priest, Ebramicus, and the priceless Horn to Fire Mountain instead. Inside is a golden shrine where the priest will perform the sacrament and then play the ancient Horn. (Whilst in the cave system of Fire Mountain, Ebramicus will cautiously stay close by the Warriors and conceal himself in the shadows when opposition is encountered. The priest prays diligently during Combat and the Warriors always seem to save him before any Monster can land a blow. No model is therefore needed to represent Ebramicus on the Board.)
To keep the real shrine location a complete secret, the Temple of Sigmar has been unable to send an advance party to investigate the area. Fire Mountain will be unpredictably treacherous, famous for its instability and somewhat dormant volcanoes, and it is reasonable to think that after 100 years, foul creatures dwell within.
If they can safely lead Ebramicus to the shrine to perform the ancient rite, the Temple promises that the Warriors will gain the favour of Sigmar and he will shine his light down upon them …
SETTING UP Make sure to shuffle in the Collapsed
Passageway and the Dead End Board Sections into the Dungeon deck to represent the unstable and narrow passageways that exist in Fire Mountain. Use the White Dwarf 192 Dead End Board Section rules.
DANGER – FALLING ROCKS!
In addition to an Unexpected Event, a ‘1’ rolled in the Power Phase may also signify a Falling Rock. Each Warrior should immediately roll a 1D6. If any of them rolls a ‘1’, this means that a portion of the cavern ceiling has collapsed and a large boulder has crashed down upon that Warrior causing 1 Wound per Dungeon Level (no modifiers) pinning him to the ground. The Warrior model is laid on its back and a rock counter is placed on top of it; the space considered impassable for now. A Warrior wedged under a Fallen Rock is considered ‘trapped’, unable to fight although Monsters are unable to attack him.
At the beginning of each Warrior’s Phase, any Warrior may spend their entire turn attempting to move a Fallen Rock 1 square in any direction, as long as there is an unoccupied space adjacent to it. The attempter must be standing next to, or be ‘trapped’ under, a Fallen Rock. During their turn, each attempter rolls 1D6 and adds their Strength. If the total amount of all the dice equals 11 or greater, the Warrior is free to stand again and the Fallen Rock counter is placed into any adjacent space. However, if any of the Warriors roll the same number, the stone slips from their grasp and falls back into the space it was in (or back onto the Warrior if they were trying to move it off him, which causes 1 more Wound per Dungeon Level with no modifiers for anything!).
Falling Rocks do not occur on the Fire Bridge on in the Collapsed Passageway (since it has already collapsed).
IT’S CHAOS IN HERE!
As misfortune would have it, the holy shrine has inadvertently been overrun in the past hundred years by many foul creatures, and most recently by the forces of Chaos. Beastmen and the followers of Khorne, the Blood God, currently infest Fire Mountain and have established a stronghold. From here they launch ferocious attacks on the city-states and fiefdoms of the Border Princes, returning to the mountain to carry out savage rituals on their captors to appease their god. For the Warriors, it means that these forces of Chaos must be eliminated so that they may carry out their mission given to them by the Temple, but just as importantly, to bring peace to the region.
CAVERNS OF KHORNE MONSTER TABLE (D66)
11-12 1 Scorpion Dragon (see below for stats!)
13-16 4D3 Chaos Warriors (w/Hand Weapons)
21-26 3D3 Chaos Hounds
31-36 1D3 Centaurs (w/Bows Strength 4)
41-46 3D3 Bloodletters of Khorne
51-56 3D3 Beastmen
61-64 4D3 Chaos Warriors (w/Hand Weapons)
65-66 2 Gigantic Spiders

8
THE FIRECHASM OBJECTIVE ROOM
The sacred shrine the Warriors are
looking for is the golden dragon altar in the Firechasm Objective Room. All the rules for ‘Crossing the Chasm’ from the Adventure Book should be used here.
If the Warriors have not yet encountered a Scorpion Dragon, it will be here in the Objective Room. (Only 1 Scorpion Dragon can be the Objective Room at one time.) The Warriors must roll 1D6 as soon as they enter the Firechasm Objective Room. On a score of ‘5’ or ‘6’, they must roll two times on the Caverns of Khorne Monster Table.
If the Warriors defeat all of the Monsters, the priest Ebramicus can perform the sacrament. Within minutes, everything is prepared; the correct words are spoken and the Priest removes the Horn of LeStarr from a large pouch. Just as the Priest is about to blow the Horn, the Barbarian (or group leader if there is no Barbarian in the party) distinguishably steps forward. A surprisingly
skilled musician, he takes the Horn of LeStarr and begins to play an exquisitely haunting tune! When the melody concludes the ritual is complete! When the Warriors return to the Temple of Sigmar they may make one roll on Sigmar’s Favour Table below. The Barbarian who played the horn (or party leader if there was no Barbarian in the party) may add +1 to his roll! The Warriors receive no other reward.
BETRAYED!
If, however, the Warriors enter the Objective Room and roll a 1-4, then something is dreadfully wrong! Ebramicus breaks from the cover of the Warriors and dashes across the fire bridge with the horn!
Ebramicus reveals himself as an evil servant of Khorne who has been masquerading as a Priest of Sigmar for many years in order to steal the powerful artefact! He has led the Warriors into
this trap and they will be sacrificed in the name of the Blood God, Lord of Skulls. In exchange for the sacrifice, the Blood God has agreed to let Ebramicus take the artefact for himself.
In addition to a Scorpion Dragon (if applicable), roll 3 times on the Caverns of Khorne Monster Table (rerolling any duplicates) with the maximum numbers of Monsters appearing. This represents the fact that the Warriors have been deceived by Ebramicus and that his forces of Chaos have been waiting for the party to arrive!
If the Warriors manage to defeat all of the Monsters in the Objective Room and cross the bridge safely, they dispatch Ebramicus
automatically although he is worth no gold. The Warriors may reclaim the Horn of LeStarr and if there is a Warrior Priest or a Sister of Sigmar in the party, they may perform the ancient sacrament in lieu of the fallen priest. The Barbarian (or party leader), as mentioned before, gives a stunning performance on the Horn. The Warriors may now return to the Temple of Sigmar with the priest’s body and receive one roll on Sigmar’s Favour Table below (the Barbarian again may add+1 to the roll)!
SIGMAR’S FAVOUR TABLE (Roll 1D6)
1 Sigmar grants the Warrior +1 Initiative
2 Sigmar grants the Warrior +1 Willpower
3 Sigmar grants the Warrior +1 Wound
4 Sigmar grants the Warrior +1 Weapon Skill
5 Sigmar grants the Warrior +1 Luck
6 Sigmar grants the Warrior +1 Strength
Sigmar’s favours are permanent!
If there is no Sister of Sigmar or Warrior Priest in the party, the heroes can only take the Horn of LeStarr and Ebramicus’s body back to the Temple of Sigmar where the priests locate a ‘Mark of Chaos’ on the conspirator’s body. The mortified priests are grateful for the Warriors exposing the traitor, but the holy ritual has not yet been performed and time is scarce. The priests pay each Warrior (1D6x25 gold per Battle-Level) for services as well as 1D6x25 gold each for their silence in this potentially embarrassing matter. The Warriors are then sent on their way…
CAVERNS OF KHORNE BESTIARY QUICK REFERENCE
Monster Type M WS BS S T W I A Gold Arm. Dam. Special Rules
Beastmen 4 4 4+ 3 4 6 3 1 100 - 1 Throw Spears (Str 3).
Bloodletters 4 5 2+ 4 3 7 6 2 200 - 1 Armed with Hellblade;
Daemonic -1; Fear 5.
Centaurs 8 3 3+ 4 3 12 3 2 300 - 2 Fear 4.
Chaos Hounds 6 4 - 4 4 8 4 2 160 2 1 Ambush 5+; Gang Up.
Chaos Warriors 4 6 1+ 4 4 12 6 2 240 2 1 -
Gigantic Spiders 5 3 - S 4 20 1 2 450 - 2 Web (1D6).
Scorpion Dragon 5 5 - 6 6 30 4 2 700 - 2 Fear 8; Fly; Sting (2D6).