introduction - بازی سنتر have you experienced ... weapons weapons are a ninja's best...
TRANSCRIPT
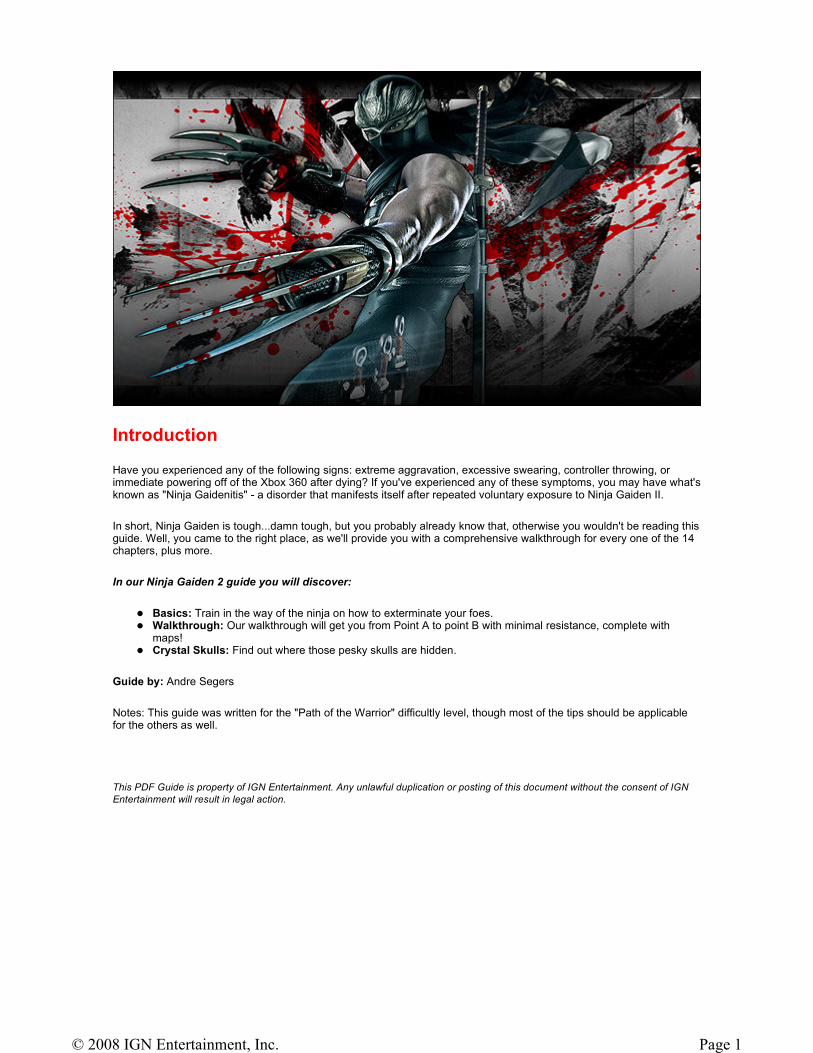
Introduction
Have you experienced any of the following signs: extreme aggravation, excessive swearing, controller throwing, or immediate powering off of the Xbox 360 after dying? If you've experienced any of these symptoms, you may have what's known as "Ninja Gaidenitis" - a disorder that manifests itself after repeated voluntary exposure to Ninja Gaiden II.
In short, Ninja Gaiden is tough...damn tough, but you probably already know that, otherwise you wouldn't be reading this guide. Well, you came to the right place, as we'll provide you with a comprehensive walkthrough for every one of the 14 chapters, plus more.
In our Ninja Gaiden 2 guide you will discover:
� Basics: Train in the way of the ninja on how to exterminate your foes. � Walkthrough: Our walkthrough will get you from Point A to point B with minimal resistance, complete with
maps! � Crystal Skulls: Find out where those pesky skulls are hidden.
Guide by: Andre Segers
Notes: This guide was written for the "Path of the Warrior" difficultly level, though most of the tips should be applicable for the others as well.
This PDF Guide is property of IGN Entertainment. Any unlawful duplication or posting of this document without the consent of IGN
Entertainment will result in legal action.
Page 1© 2008 IGN Entertainment, Inc.
Ninja Gaiden 2 Basics
If you've played a Ninja Gaiden game before, you pretty much know what to expect. But there have been a few changes that can take some getting used to. And for those new to the series, check our tips below to make your jorney much easier.
Health Health works a little bit differently this time around. The blue portion of your health bar represents your life. This portion also slowly refills if you can avoid taking damage. However, during battle, you'll also sustain something known as "lasting damage"
Essence Essence, the glowing orbs that you find in chests and from downed enemies, serve a couple of different functions. The blue ones restore health, red recharges your Ninpo, while yellow acts as the game's currency.
Blocking & Countering Blocking is crucial in the world of Ninja Gaiden - if you're not attacking, you should be blocking. It's generally best to alternate between the two during battle; that is: attack, then block if an enemy's nearby. Wait for him to attack (while still blocking) - after he's deflected, drop your guard and take him down.
Another important skill to master is the ability to counter - if you're being attacked, try pressing either attack button while blocking to perform a counter. But you have to time this move at the same time as your opponent's attack, so practice, practice, practice.
Weapons Weapons are a ninja's best friend, and Ryu has a lot of friends. As you progress through the adventure, you'll find additional weapons to add to your repertoire, each with their own strengths and weaknesses. However, even with your vast selection, we've found that the default Dragon Sword is generally the best weapon for most situations. So unless we state otherwise in the guide, we suggest keeping this equipped as your main weapon of choice.
Attacks Ryu has a plethora of attacks at his disposal; a repertoire that will only grow larger as you progress through the game. However, even with all of the additional moves you'll acquire, your very best and most effective attacks are generally the ones you start with, so it's important to master them early.
Flying Swallow The Flying Swallow is a quick and long-reaching attack that allows you to decapitate foes while being minimally exposed. Try perform this move back and forth in crowded situations to quickly reduces your foe's count.
Ultimate Technique Ultimate Techniques are the Ryu's most powerful attack. In it, he unleashes a brutal combo of attacks that can tear apart a small army of fiends. To perform one, hold the "Strong Attack" button at any time to begin charging the attack - the longer you charge it, the stronger it becomes (when the flames around you turn red, that means it's at max power).
However, charging it can take some time, but there's a quicker method. If there's any essence nearby, begin charging the Ultimate Technique - it'll draw the essence to you, and will immediately charge your attack - sweet!
Page 2© 2008 IGN Entertainment, Inc.
Walkthrough
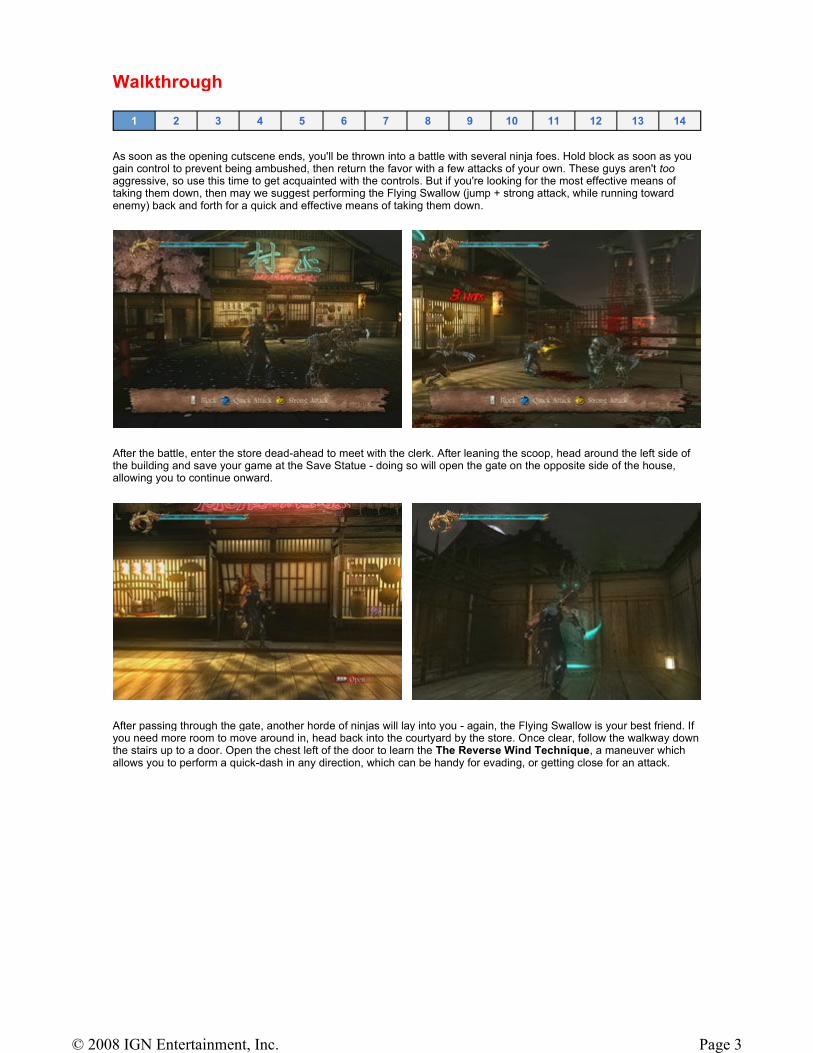
As soon as the opening cutscene ends, you'll be thrown into a battle with several ninja foes. Hold block as soon as you gain control to prevent being ambushed, then return the favor with a few attacks of your own. These guys aren't too aggressive, so use this time to get acquainted with the controls. But if you're looking for the most effective means of taking them down, then may we suggest performing the Flying Swallow (jump + strong attack, while running toward enemy) back and forth for a quick and effective means of taking them down.
After the battle, enter the store dead-ahead to meet with the clerk. After leaning the scoop, head around the left side of the building and save your game at the Save Statue - doing so will open the gate on the opposite side of the house, allowing you to continue onward.
After passing through the gate, another horde of ninjas will lay into you - again, the Flying Swallow is your best friend. If you need more room to move around in, head back into the courtyard by the store. Once clear, follow the walkway down the stairs up to a door. Open the chest left of the door to learn the The Reverse Wind Technique, a maneuver which allows you to perform a quick-dash in any direction, which can be handy for evading, or getting close for an attack.
1 2 3 4 5 6 7 8 9 10 11 12 13 14
Page 3© 2008 IGN Entertainment, Inc.
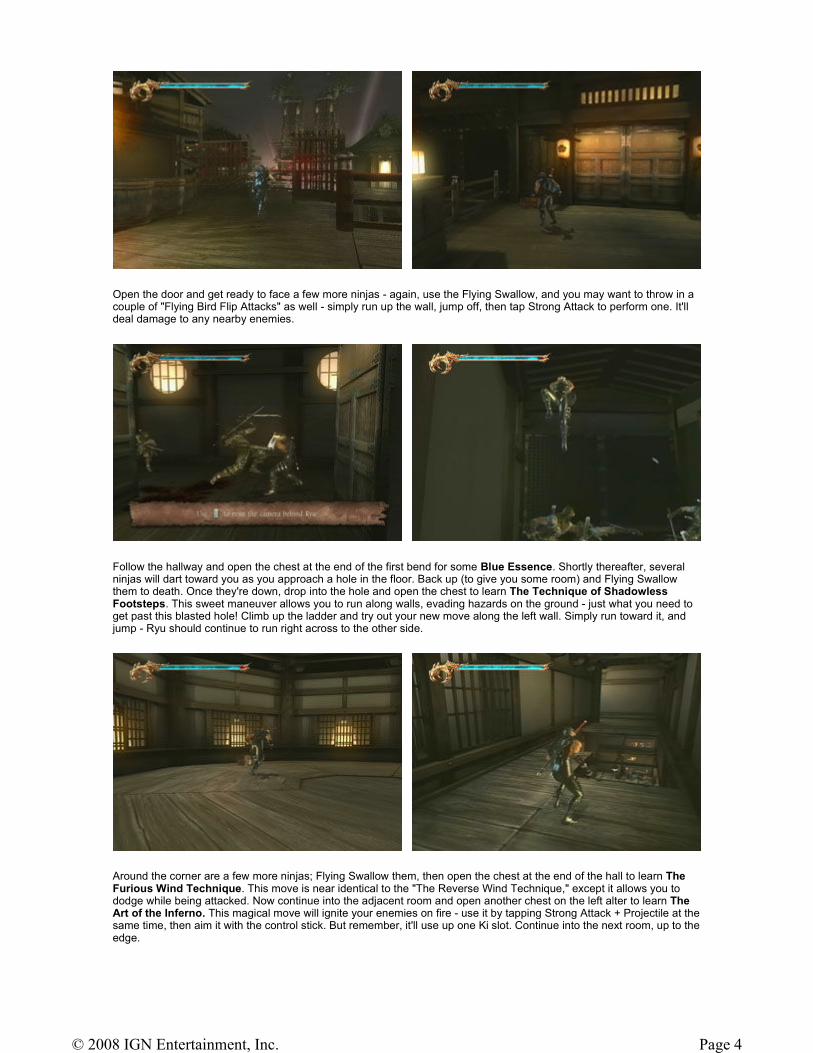
Open the door and get ready to face a few more ninjas - again, use the Flying Swallow, and you may want to throw in a couple of "Flying Bird Flip Attacks" as well - simply run up the wall, jump off, then tap Strong Attack to perform one. It'll deal damage to any nearby enemies.
Follow the hallway and open the chest at the end of the first bend for some Blue Essence. Shortly thereafter, several ninjas will dart toward you as you approach a hole in the floor. Back up (to give you some room) and Flying Swallow them to death. Once they're down, drop into the hole and open the chest to learn The Technique of Shadowless Footsteps. This sweet maneuver allows you to run along walls, evading hazards on the ground - just what you need to get past this blasted hole! Climb up the ladder and try out your new move along the left wall. Simply run toward it, and jump - Ryu should continue to run right across to the other side.
Around the corner are a few more ninjas; Flying Swallow them, then open the chest at the end of the hall to learn The Furious Wind Technique. This move is near identical to the "The Reverse Wind Technique," except it allows you to dodge while being attacked. Now continue into the adjacent room and open another chest on the left alter to learn The Art of the Inferno. This magical move will ignite your enemies on fire - use it by tapping Strong Attack + Projectile at the same time, then aim it with the control stick. But remember, it'll use up one Ki slot. Continue into the next room, up to the edge.
Page 4© 2008 IGN Entertainment, Inc.
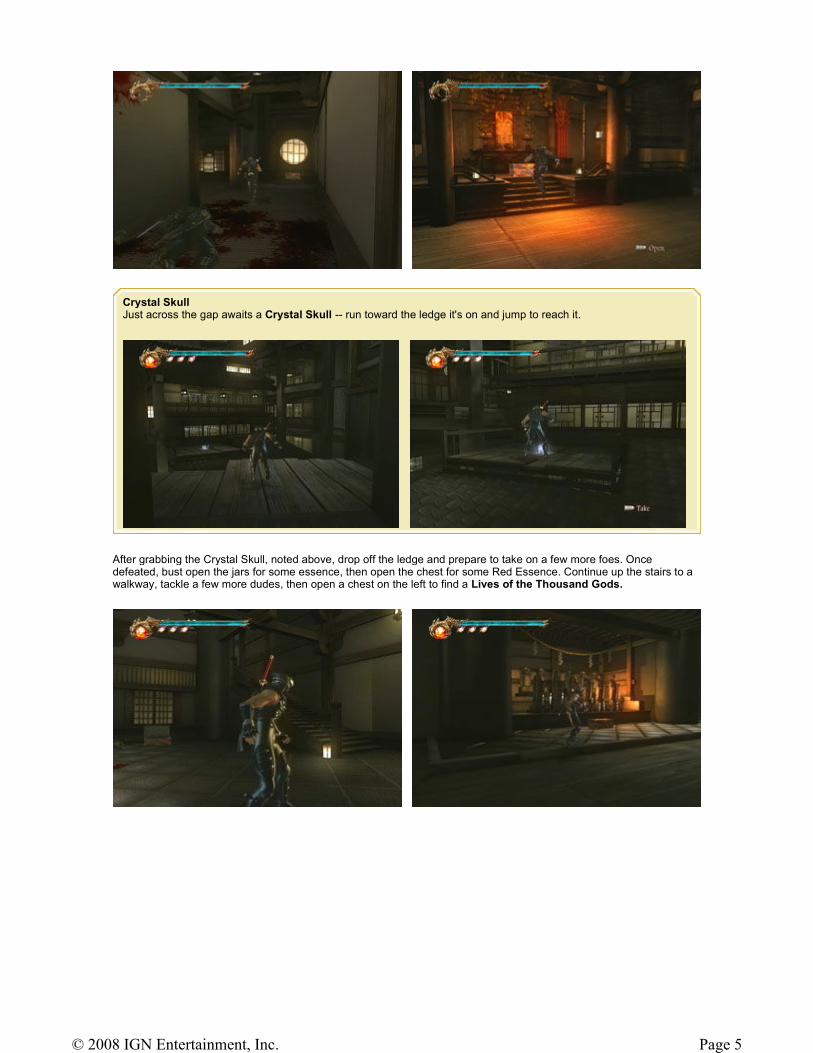
After grabbing the Crystal Skull, noted above, drop off the ledge and prepare to take on a few more foes. Once defeated, bust open the jars for some essence, then open the chest for some Red Essence. Continue up the stairs to a walkway, tackle a few more dudes, then open a chest on the left to find a Lives of the Thousand Gods.
Crystal Skull Just across the gap awaits a Crystal Skull -- run toward the ledge it's on and jump to reach it.
Page 5© 2008 IGN Entertainment, Inc.
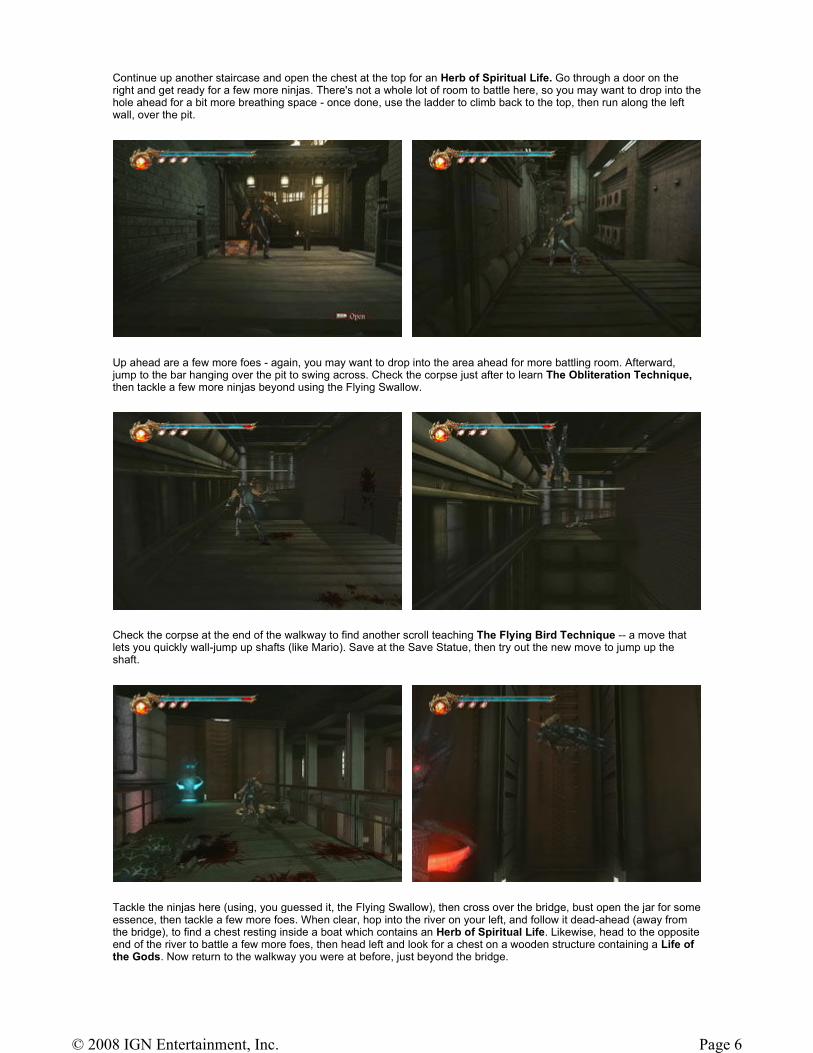
Continue up another staircase and open the chest at the top for an Herb of Spiritual Life. Go through a door on the right and get ready for a few more ninjas. There's not a whole lot of room to battle here, so you may want to drop into the hole ahead for a bit more breathing space - once done, use the ladder to climb back to the top, then run along the left wall, over the pit.
Up ahead are a few more foes - again, you may want to drop into the area ahead for more battling room. Afterward, jump to the bar hanging over the pit to swing across. Check the corpse just after to learn The Obliteration Technique, then tackle a few more ninjas beyond using the Flying Swallow.
Check the corpse at the end of the walkway to find another scroll teaching The Flying Bird Technique -- a move that lets you quickly wall-jump up shafts (like Mario). Save at the Save Statue, then try out the new move to jump up the shaft.
Tackle the ninjas here (using, you guessed it, the Flying Swallow), then cross over the bridge, bust open the jar for some essence, then tackle a few more foes. When clear, hop into the river on your left, and follow it dead-ahead (away from the bridge), to find a chest resting inside a boat which contains an Herb of Spiritual Life. Likewise, head to the opposite end of the river to battle a few more foes, then head left and look for a chest on a wooden structure containing a Life of the Gods. Now return to the walkway you were at before, just beyond the bridge.
Page 6© 2008 IGN Entertainment, Inc.

Follow the walkway around the corner to find a few more ninjas, but take them down quick to avoid the archers on a walkway above - use your Fire Ninpo to deal with them.
Further up the walkway, you'll spot a ladder on the right; drop down and open the chest for some Blue Essence. Afterward, continue to the end of the walkway, but be ready for a sneak attack from behind. Open the chest at the end for another Life of the Gods. Now climb back up the ladder to the walkway above.
Crystal Skull After taking down the archers, wall-run up the tree with your back to the walkway the archers were on to land on an awning. Follow this to that very walkway to find a Crystal Skull in the corner.
Page 7© 2008 IGN Entertainment, Inc.
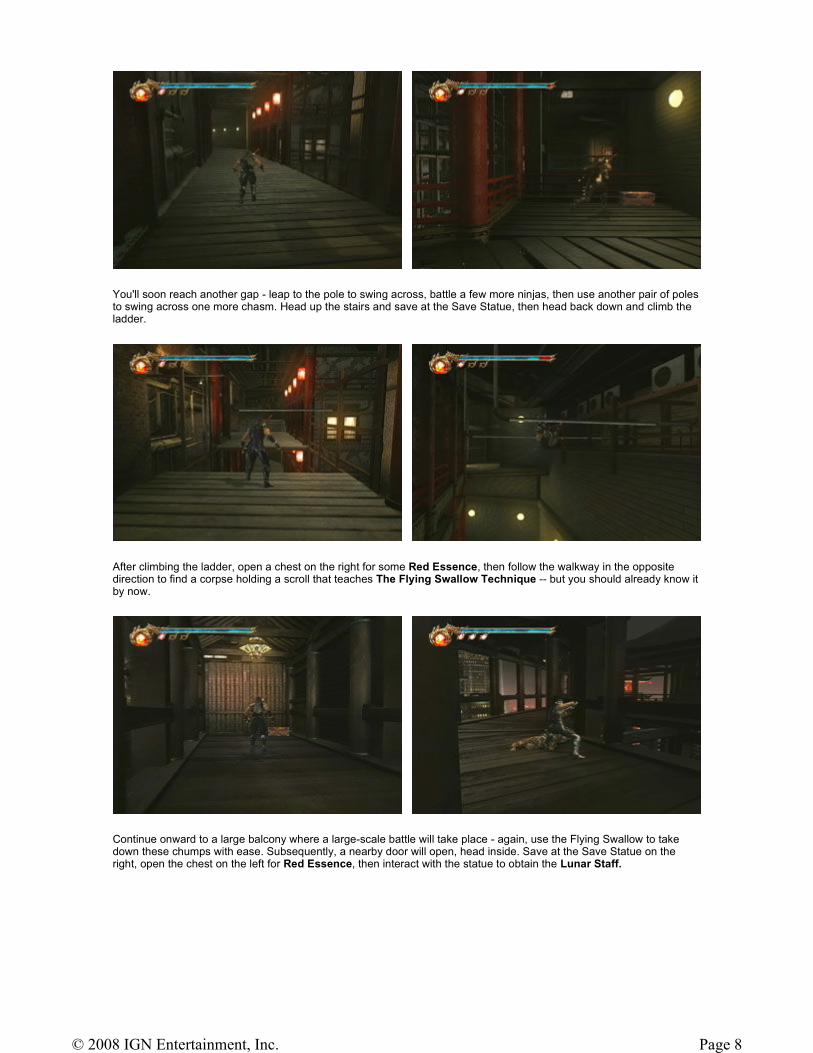
You'll soon reach another gap - leap to the pole to swing across, battle a few more ninjas, then use another pair of poles to swing across one more chasm. Head up the stairs and save at the Save Statue, then head back down and climb the ladder.
After climbing the ladder, open a chest on the right for some Red Essence, then follow the walkway in the opposite direction to find a corpse holding a scroll that teaches The Flying Swallow Technique -- but you should already know it by now.
Continue onward to a large balcony where a large-scale battle will take place - again, use the Flying Swallow to take down these chumps with ease. Subsequently, a nearby door will open, head inside. Save at the Save Statue on the right, open the chest on the left for Red Essence, then interact with the statue to obtain the Lunar Staff.
Page 8© 2008 IGN Entertainment, Inc.

Page 9© 2008 IGN Entertainment, Inc.
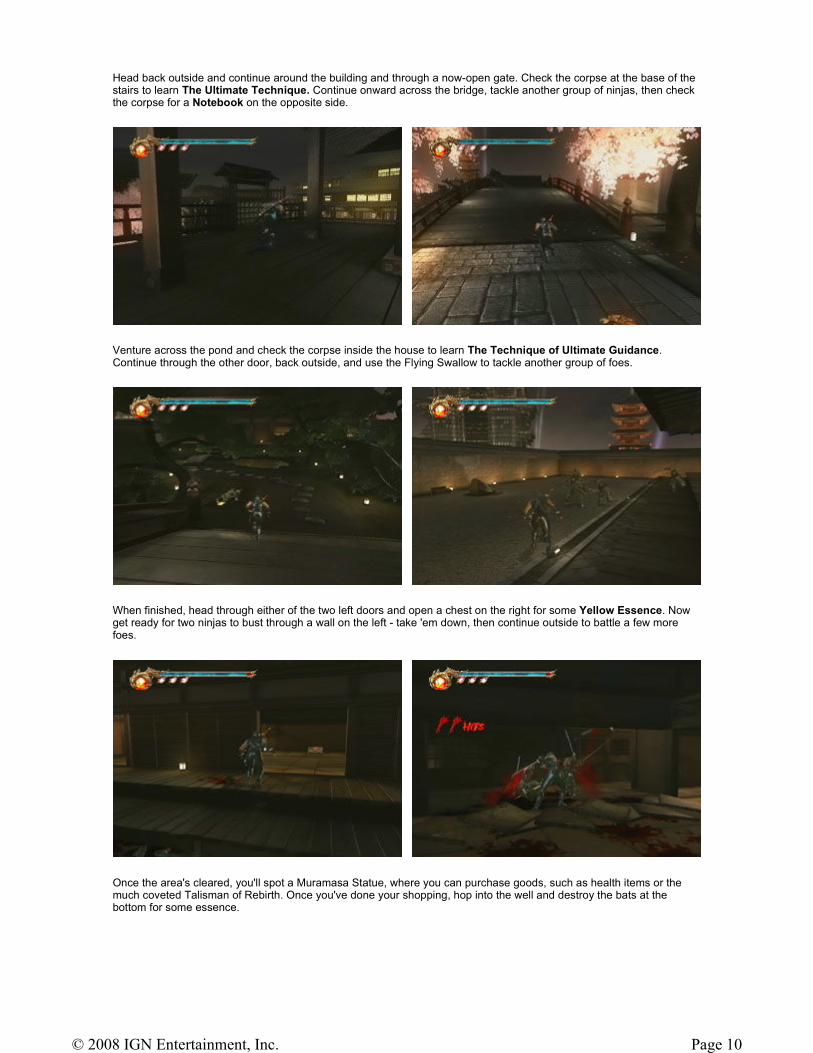
Head back outside and continue around the building and through a now-open gate. Check the corpse at the base of the stairs to learn The Ultimate Technique. Continue onward across the bridge, tackle another group of ninjas, then check the corpse for a Notebook on the opposite side.
Venture across the pond and check the corpse inside the house to learn The Technique of Ultimate Guidance. Continue through the other door, back outside, and use the Flying Swallow to tackle another group of foes.
When finished, head through either of the two left doors and open a chest on the right for some Yellow Essence. Now get ready for two ninjas to bust through a wall on the left - take 'em down, then continue outside to battle a few more foes.
Once the area's cleared, you'll spot a Muramasa Statue, where you can purchase goods, such as health items or the much coveted Talisman of Rebirth. Once you've done your shopping, hop into the well and destroy the bats at the bottom for some essence.
Page 10© 2008 IGN Entertainment, Inc.
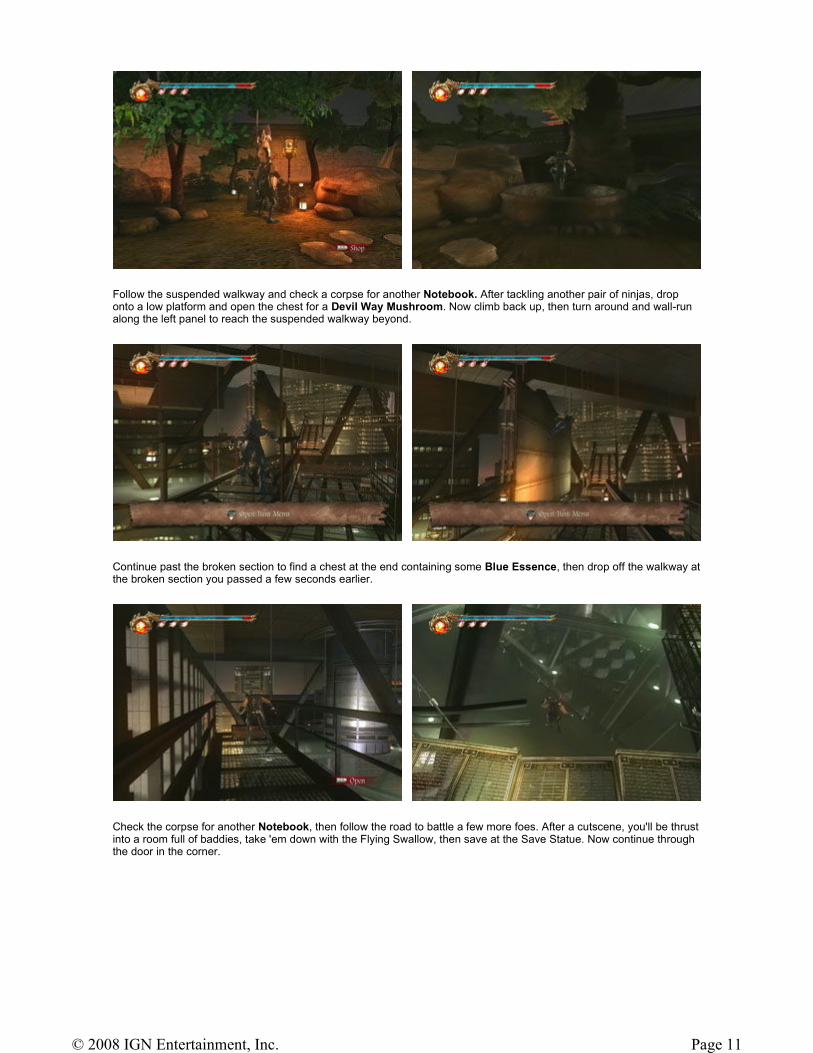
Follow the suspended walkway and check a corpse for another Notebook. After tackling another pair of ninjas, drop onto a low platform and open the chest for a Devil Way Mushroom. Now climb back up, then turn around and wall-run along the left panel to reach the suspended walkway beyond.
Continue past the broken section to find a chest at the end containing some Blue Essence, then drop off the walkway at the broken section you passed a few seconds earlier.
Check the corpse for another Notebook, then follow the road to battle a few more foes. After a cutscene, you'll be thrust into a room full of baddies, take 'em down with the Flying Swallow, then save at the Save Statue. Now continue through the door in the corner.
Page 11© 2008 IGN Entertainment, Inc.
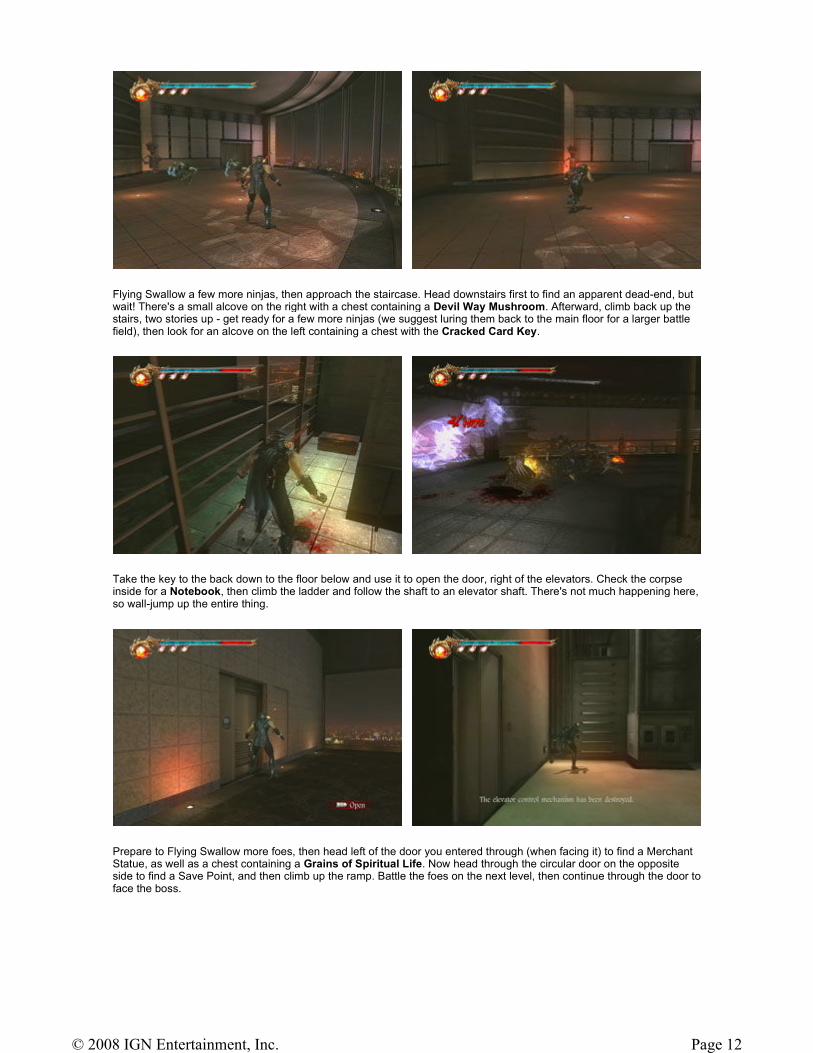
Flying Swallow a few more ninjas, then approach the staircase. Head downstairs first to find an apparent dead-end, but wait! There's a small alcove on the right with a chest containing a Devil Way Mushroom. Afterward, climb back up the stairs, two stories up - get ready for a few more ninjas (we suggest luring them back to the main floor for a larger battle field), then look for an alcove on the left containing a chest with the Cracked Card Key.
Take the key to the back down to the floor below and use it to open the door, right of the elevators. Check the corpse inside for a Notebook, then climb the ladder and follow the shaft to an elevator shaft. There's not much happening here, so wall-jump up the entire thing.
Prepare to Flying Swallow more foes, then head left of the door you entered through (when facing it) to find a Merchant Statue, as well as a chest containing a Grains of Spiritual Life. Now head through the circular door on the opposite side to find a Save Point, and then climb up the ramp. Battle the foes on the next level, then continue through the door to face the boss.
Page 12© 2008 IGN Entertainment, Inc.
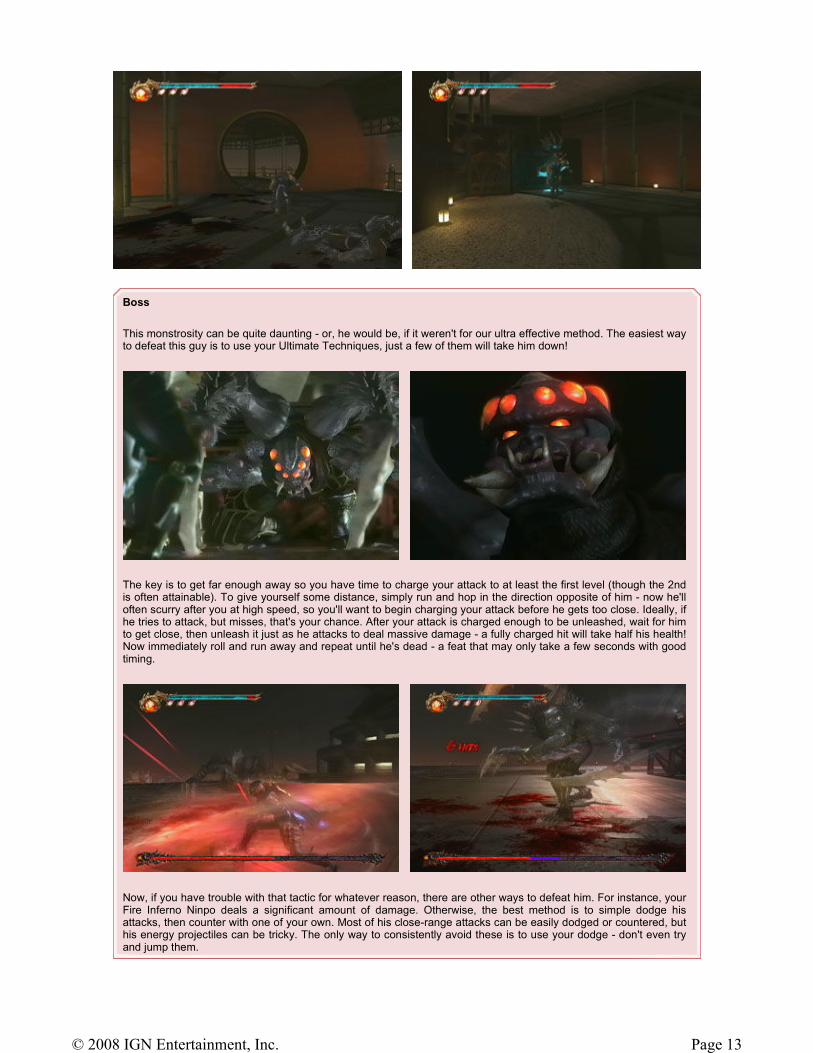
Boss
This monstrosity can be quite daunting - or, he would be, if it weren't for our ultra effective method. The easiest way to defeat this guy is to use your Ultimate Techniques, just a few of them will take him down!
The key is to get far enough away so you have time to charge your attack to at least the first level (though the 2nd is often attainable). To give yourself some distance, simply run and hop in the direction opposite of him - now he'll often scurry after you at high speed, so you'll want to begin charging your attack before he gets too close. Ideally, if he tries to attack, but misses, that's your chance. After your attack is charged enough to be unleashed, wait for him to get close, then unleash it just as he attacks to deal massive damage - a fully charged hit will take half his health! Now immediately roll and run away and repeat until he's dead - a feat that may only take a few seconds with good timing.
Now, if you have trouble with that tactic for whatever reason, there are other ways to defeat him. For instance, your Fire Inferno Ninpo deals a significant amount of damage. Otherwise, the best method is to simple dodge his attacks, then counter with one of your own. Most of his close-range attacks can be easily dodged or countered, but his energy projectiles can be tricky. The only way to consistently avoid these is to use your dodge - don't even try and jump them.
Page 13© 2008 IGN Entertainment, Inc.
Ninja Gaiden 2 Walkthrough
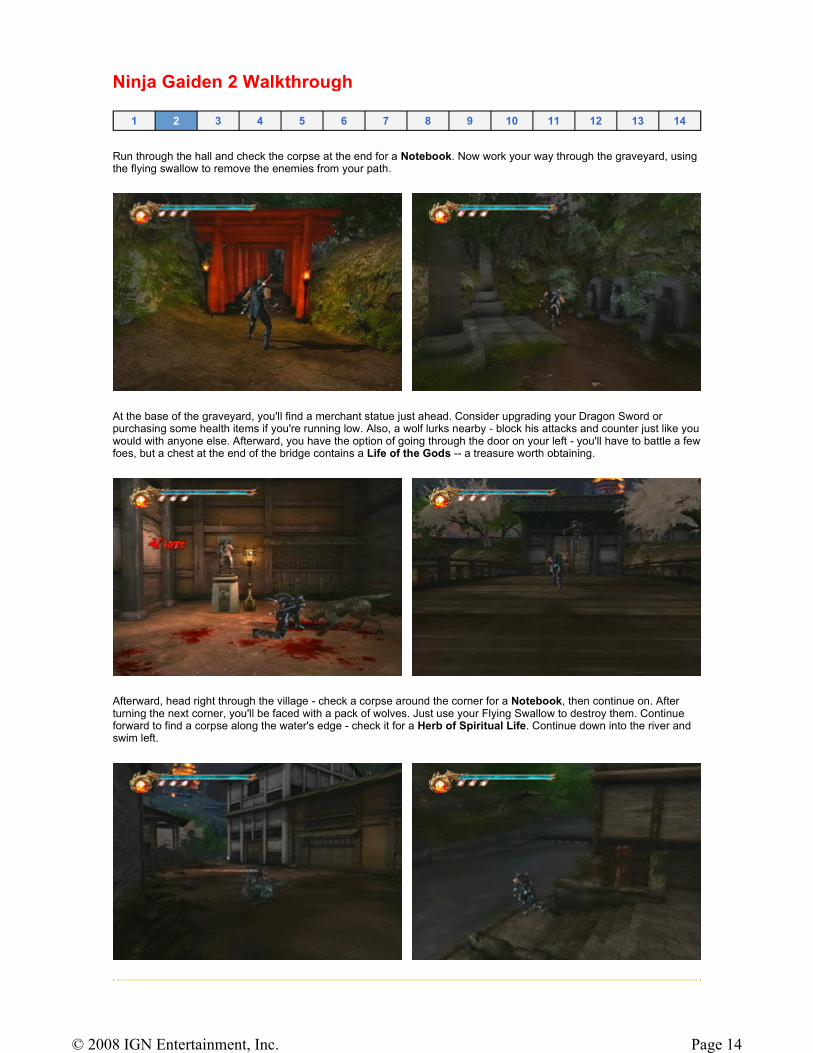
Run through the hall and check the corpse at the end for a Notebook. Now work your way through the graveyard, using the flying swallow to remove the enemies from your path.
At the base of the graveyard, you'll find a merchant statue just ahead. Consider upgrading your Dragon Sword or purchasing some health items if you're running low. Also, a wolf lurks nearby - block his attacks and counter just like you would with anyone else. Afterward, you have the option of going through the door on your left - you'll have to battle a few foes, but a chest at the end of the bridge contains a Life of the Gods -- a treasure worth obtaining.
Afterward, head right through the village - check a corpse around the corner for a Notebook, then continue on. After turning the next corner, you'll be faced with a pack of wolves. Just use your Flying Swallow to destroy them. Continue forward to find a corpse along the water's edge - check it for a Herb of Spiritual Life. Continue down into the river and swim left.
1 2 3 4 5 6 7 8 9 10 11 12 13 14
Page 14© 2008 IGN Entertainment, Inc.
After grabbing the Crystal Skull, return to the surface and run on top of the river to quickly take down an archer on the land beyond. Once he's down, battle another up the staircase, then check a corpse at the top to learn The Counter Attack Technique.
Save at the Save Point to the right, then follow the wooden walkway bordering the house around the corner to take on some more ninjas - because there's some archers in the back, we suggest backing back out to the previous area and battling the ninjas there, then return for the archers.
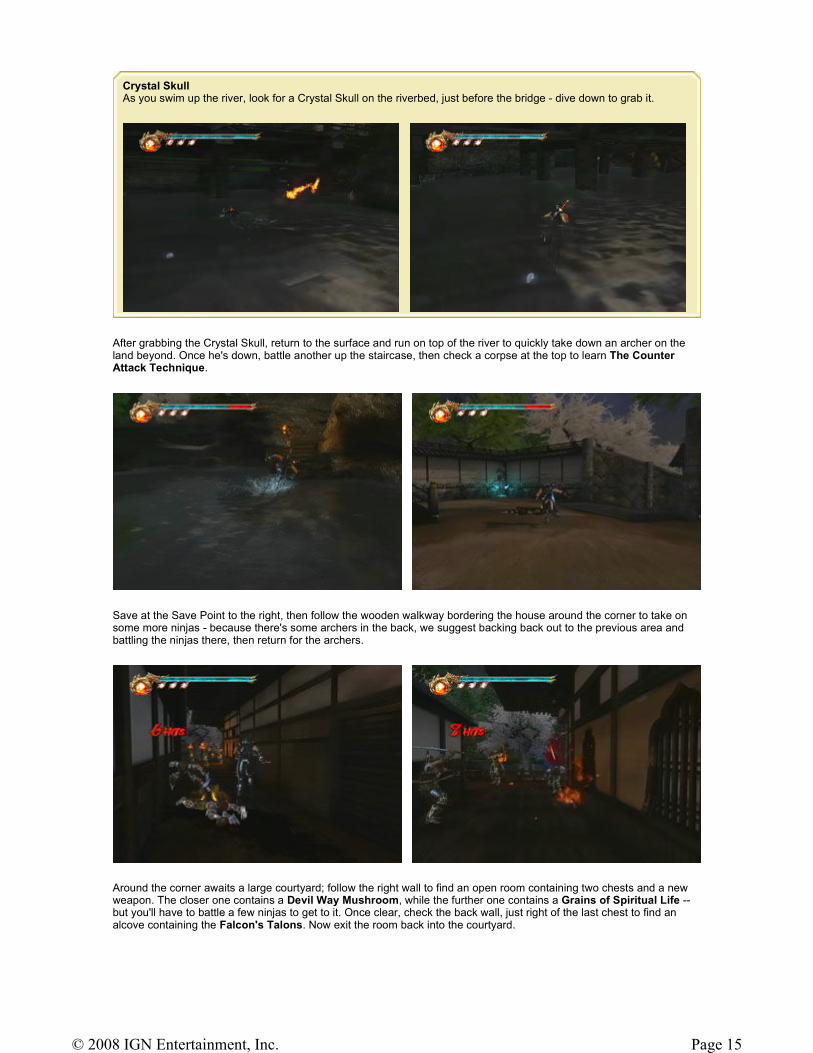
Around the corner awaits a large courtyard; follow the right wall to find an open room containing two chests and a new weapon. The closer one contains a Devil Way Mushroom, while the further one contains a Grains of Spiritual Life -- but you'll have to battle a few ninjas to get to it. Once clear, check the back wall, just right of the last chest to find an alcove containing the Falcon's Talons. Now exit the room back into the courtyard.
Crystal Skull As you swim up the river, look for a Crystal Skull on the riverbed, just before the bridge - dive down to grab it.
Page 15© 2008 IGN Entertainment, Inc.
Battle your way up the staircase ahead - when you reach the opening at the top, wall jump between the two wooden structures to find a chest containing Blue Essence.
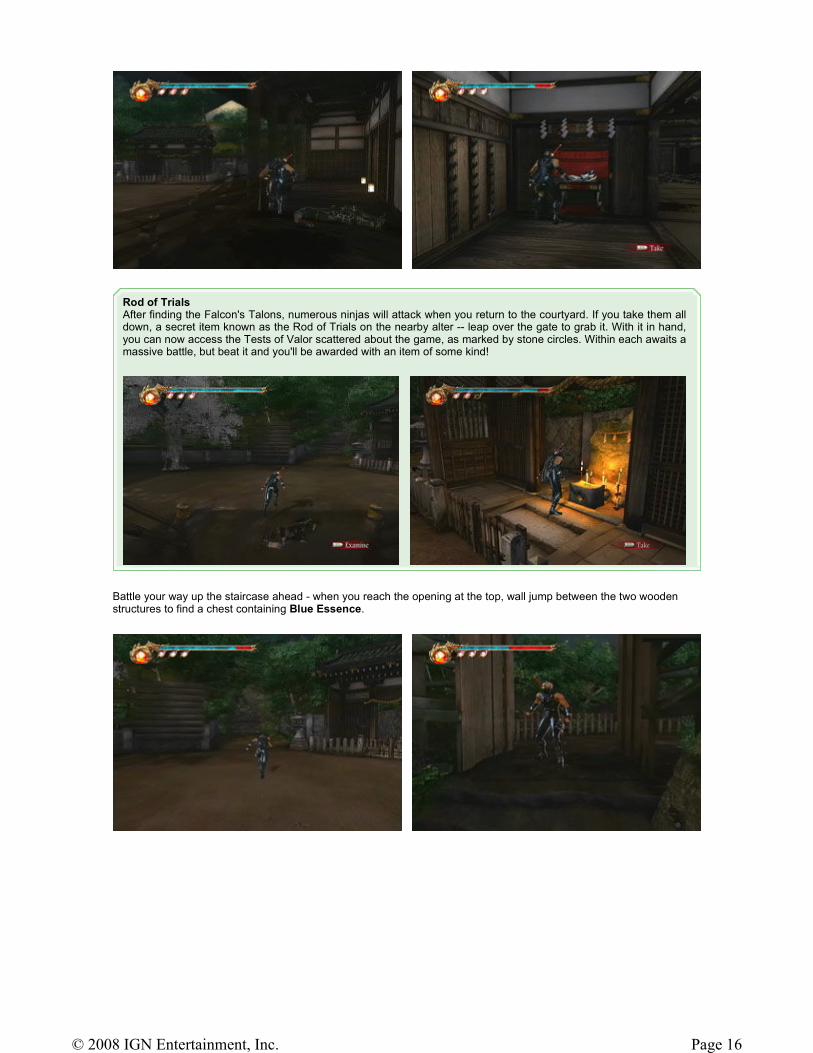
Rod of Trials After finding the Falcon's Talons, numerous ninjas will attack when you return to the courtyard. If you take them all down, a secret item known as the Rod of Trials on the nearby alter -- leap over the gate to grab it. With it in hand, you can now access the Tests of Valor scattered about the game, as marked by stone circles. Within each awaits a massive battle, but beat it and you'll be awarded with an item of some kind!
Page 16© 2008 IGN Entertainment, Inc.
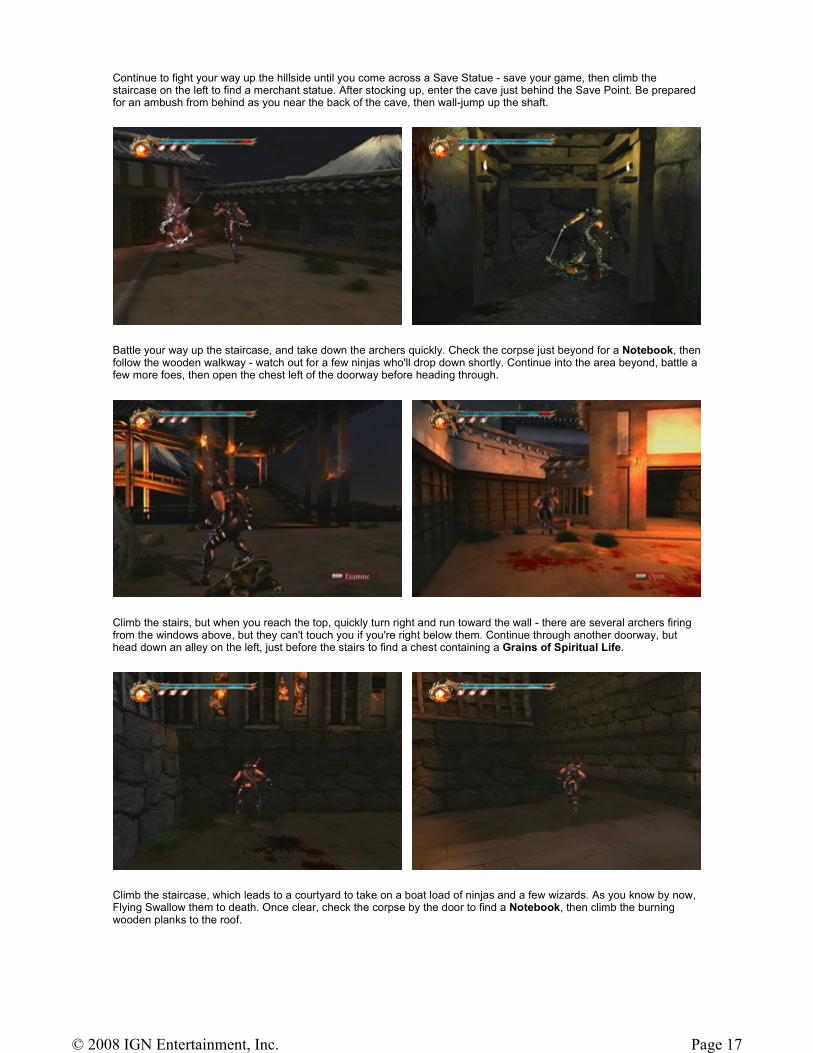
Continue to fight your way up the hillside until you come across a Save Statue - save your game, then climb the staircase on the left to find a merchant statue. After stocking up, enter the cave just behind the Save Point. Be prepared for an ambush from behind as you near the back of the cave, then wall-jump up the shaft.
Battle your way up the staircase, and take down the archers quickly. Check the corpse just beyond for a Notebook, then follow the wooden walkway - watch out for a few ninjas who'll drop down shortly. Continue into the area beyond, battle a few more foes, then open the chest left of the doorway before heading through.
Climb the stairs, but when you reach the top, quickly turn right and run toward the wall - there are several archers firing from the windows above, but they can't touch you if you're right below them. Continue through another doorway, but head down an alley on the left, just before the stairs to find a chest containing a Grains of Spiritual Life.
Climb the staircase, which leads to a courtyard to take on a boat load of ninjas and a few wizards. As you know by now, Flying Swallow them to death. Once clear, check the corpse by the door to find a Notebook, then climb the burning wooden planks to the roof.
Page 17© 2008 IGN Entertainment, Inc.
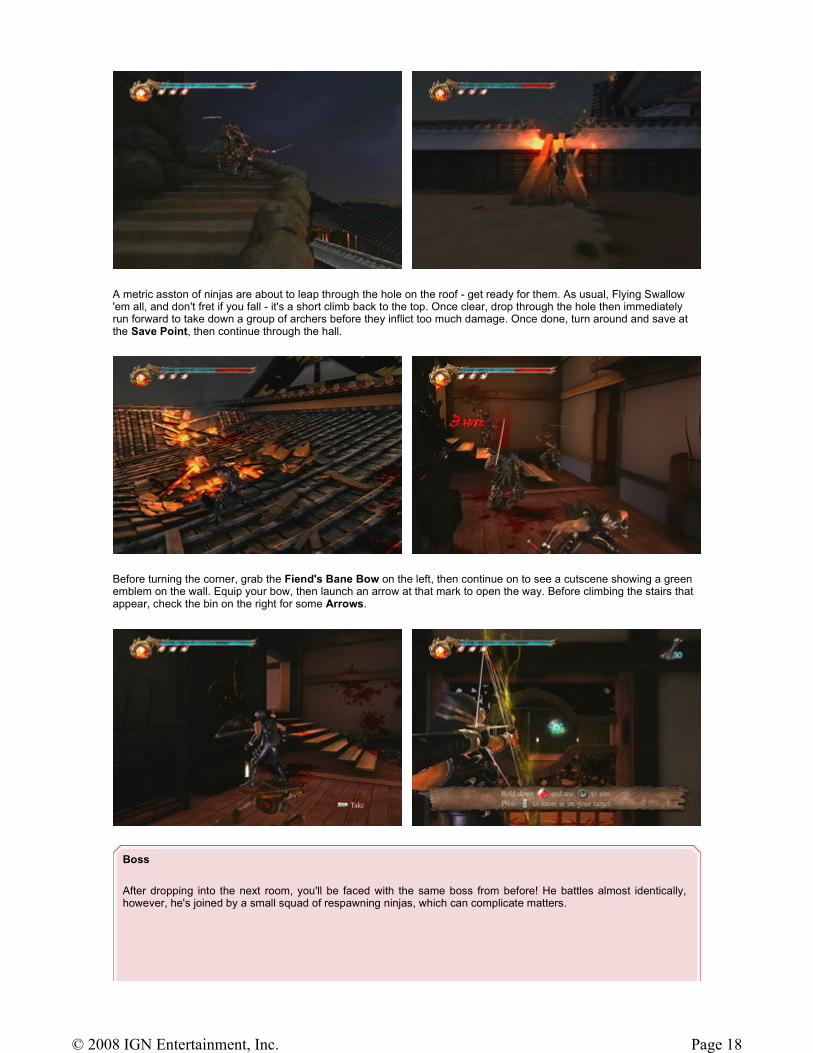
A metric asston of ninjas are about to leap through the hole on the roof - get ready for them. As usual, Flying Swallow 'em all, and don't fret if you fall - it's a short climb back to the top. Once clear, drop through the hole then immediately run forward to take down a group of archers before they inflict too much damage. Once done, turn around and save at the Save Point, then continue through the hall.
Before turning the corner, grab the Fiend's Bane Bow on the left, then continue on to see a cutscene showing a green emblem on the wall. Equip your bow, then launch an arrow at that mark to open the way. Before climbing the stairs that appear, check the bin on the right for some Arrows.
Boss
After dropping into the next room, you'll be faced with the same boss from before! He battles almost identically, however, he's joined by a small squad of respawning ninjas, which can complicate matters.
Page 18© 2008 IGN Entertainment, Inc.
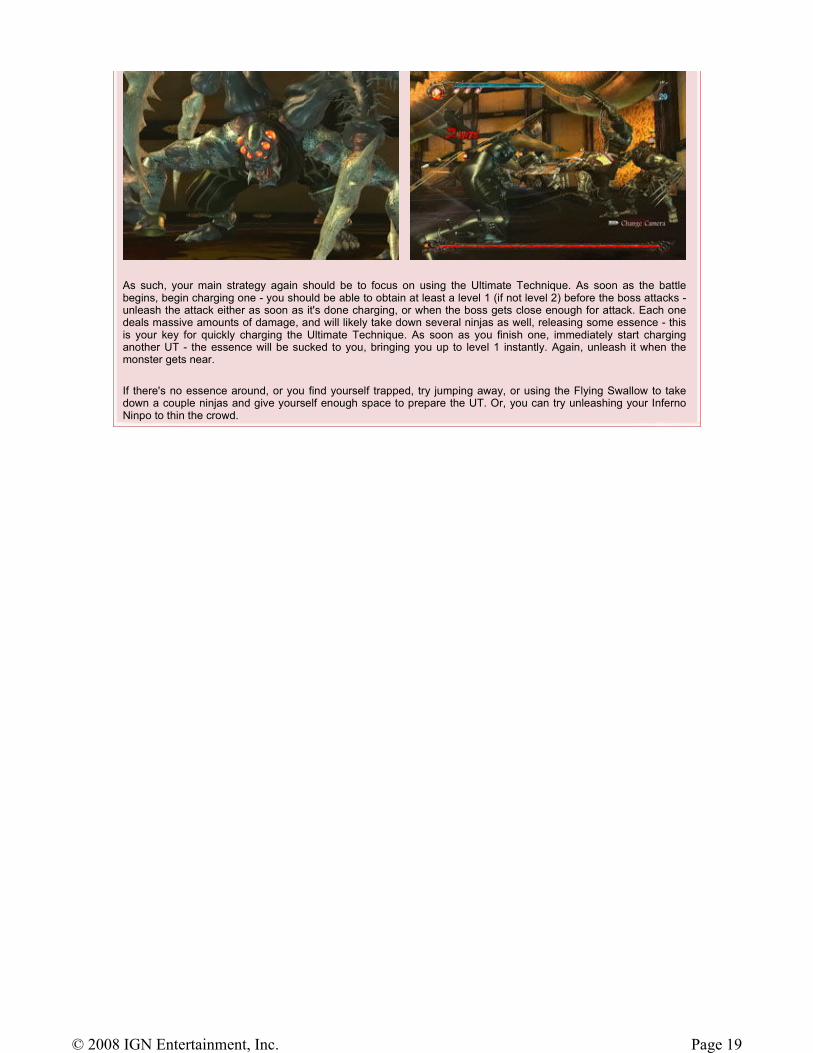
As such, your main strategy again should be to focus on using the Ultimate Technique. As soon as the battle begins, begin charging one - you should be able to obtain at least a level 1 (if not level 2) before the boss attacks - unleash the attack either as soon as it's done charging, or when the boss gets close enough for attack. Each one deals massive amounts of damage, and will likely take down several ninjas as well, releasing some essence - this is your key for quickly charging the Ultimate Technique. As soon as you finish one, immediately start charging another UT - the essence will be sucked to you, bringing you up to level 1 instantly. Again, unleash it when the monster gets near.
If there's no essence around, or you find yourself trapped, try jumping away, or using the Flying Swallow to take down a couple ninjas and give yourself enough space to prepare the UT. Or, you can try unleashing your Inferno Ninpo to thin the crowd.
Page 19© 2008 IGN Entertainment, Inc.
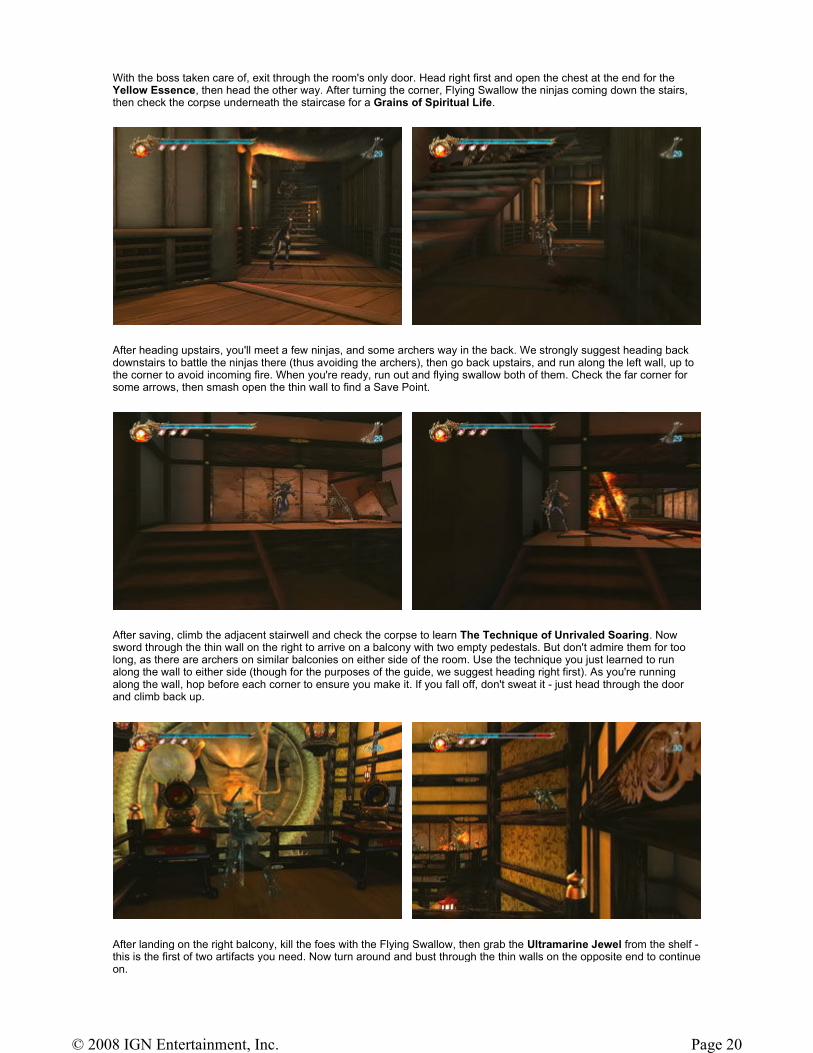
With the boss taken care of, exit through the room's only door. Head right first and open the chest at the end for the Yellow Essence, then head the other way. After turning the corner, Flying Swallow the ninjas coming down the stairs, then check the corpse underneath the staircase for a Grains of Spiritual Life.
After heading upstairs, you'll meet a few ninjas, and some archers way in the back. We strongly suggest heading back downstairs to battle the ninjas there (thus avoiding the archers), then go back upstairs, and run along the left wall, up to the corner to avoid incoming fire. When you're ready, run out and flying swallow both of them. Check the far corner for some arrows, then smash open the thin wall to find a Save Point.
After saving, climb the adjacent stairwell and check the corpse to learn The Technique of Unrivaled Soaring. Now sword through the thin wall on the right to arrive on a balcony with two empty pedestals. But don't admire them for too long, as there are archers on similar balconies on either side of the room. Use the technique you just learned to run along the wall to either side (though for the purposes of the guide, we suggest heading right first). As you're running along the wall, hop before each corner to ensure you make it. If you fall off, don't sweat it - just head through the door and climb back up.
After landing on the right balcony, kill the foes with the Flying Swallow, then grab the Ultramarine Jewel from the shelf - this is the first of two artifacts you need. Now turn around and bust through the thin walls on the opposite end to continue on.
Page 20© 2008 IGN Entertainment, Inc.

After grabbing the skull, jump over a trap door on the floor, then examine the corpse beyond for a Devil Way Mushroom. Now bust through another set of walls and Flying Swallow the poor enemies. Afterward, grab the Vermilion Jewel from the pedestal, and wall-run back to the main balcony you first entered from (or if you fall, just climb your way back up.)
Set both Jewels down on their respective pedestals to cause a strange orb to appear, as well as the dragon's mouth to open. Fire an arrow at the orb to lower a platform, which allows you to cross into the dragon's mouth, which conceals a tunnel.
Crystal Skull After busting through the wall, look for a Crystal Skull on the shelf with the chopped wood.
Page 21© 2008 IGN Entertainment, Inc.
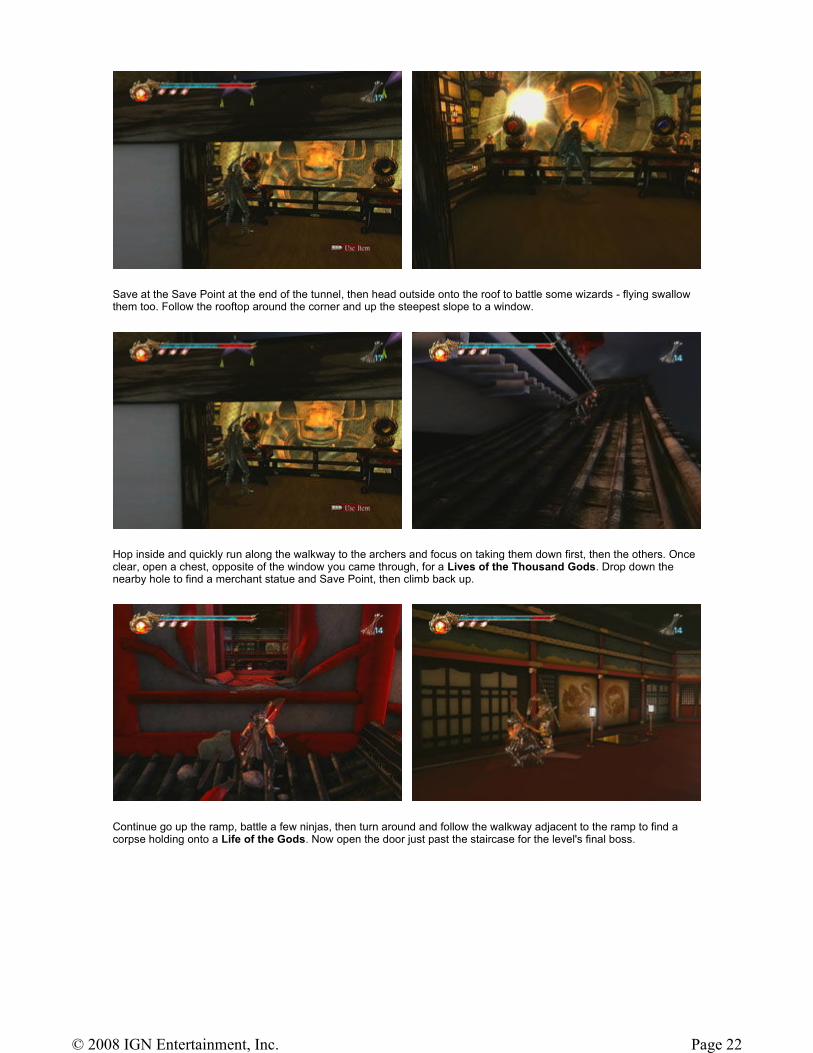
Save at the Save Point at the end of the tunnel, then head outside onto the roof to battle some wizards - flying swallow them too. Follow the rooftop around the corner and up the steepest slope to a window.
Hop inside and quickly run along the walkway to the archers and focus on taking them down first, then the others. Once clear, open a chest, opposite of the window you came through, for a Lives of the Thousand Gods. Drop down the nearby hole to find a merchant statue and Save Point, then climb back up.
Continue go up the ramp, battle a few ninjas, then turn around and follow the walkway adjacent to the ramp to find a corpse holding onto a Life of the Gods. Now open the door just past the staircase for the level's final boss.
Page 22© 2008 IGN Entertainment, Inc.
Boss
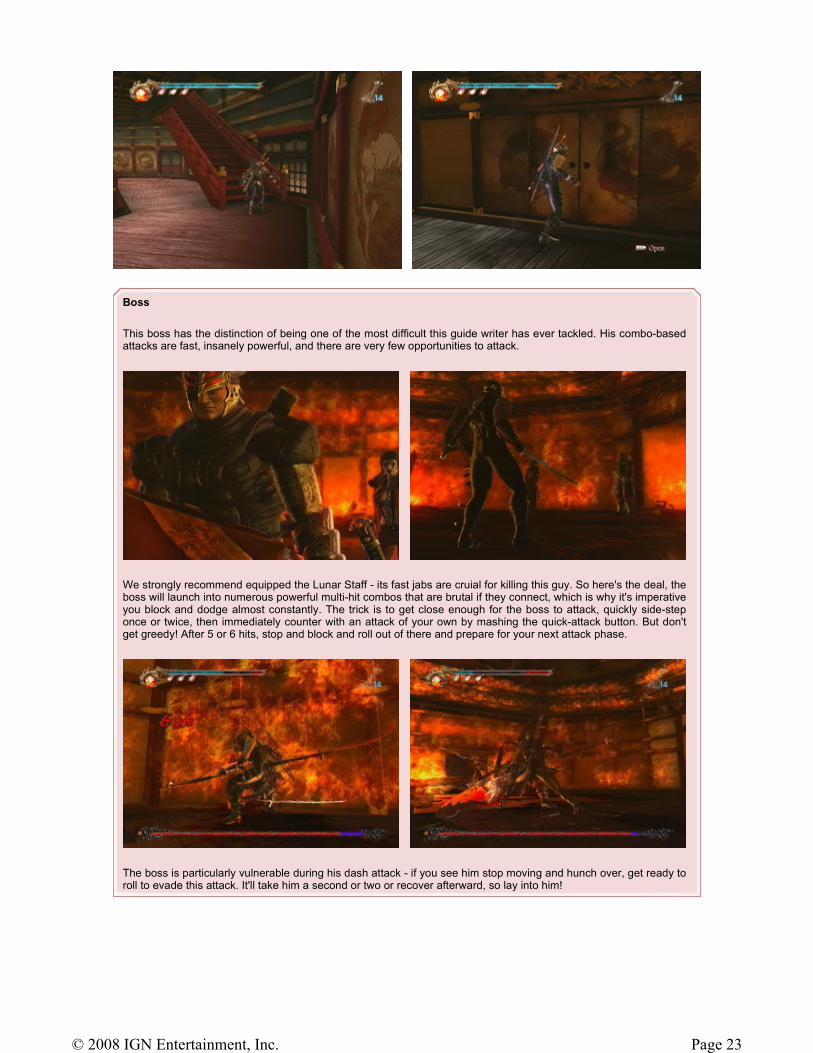
This boss has the distinction of being one of the most difficult this guide writer has ever tackled. His combo-based attacks are fast, insanely powerful, and there are very few opportunities to attack.
We strongly recommend equipped the Lunar Staff - its fast jabs are cruial for killing this guy. So here's the deal, the boss will launch into numerous powerful multi-hit combos that are brutal if they connect, which is why it's imperative you block and dodge almost constantly. The trick is to get close enough for the boss to attack, quickly side-step once or twice, then immediately counter with an attack of your own by mashing the quick-attack button. But don't get greedy! After 5 or 6 hits, stop and block and roll out of there and prepare for your next attack phase.
The boss is particularly vulnerable during his dash attack - if you see him stop moving and hunch over, get ready to roll to evade this attack. It'll take him a second or two or recover afterward, so lay into him!
Page 23© 2008 IGN Entertainment, Inc.
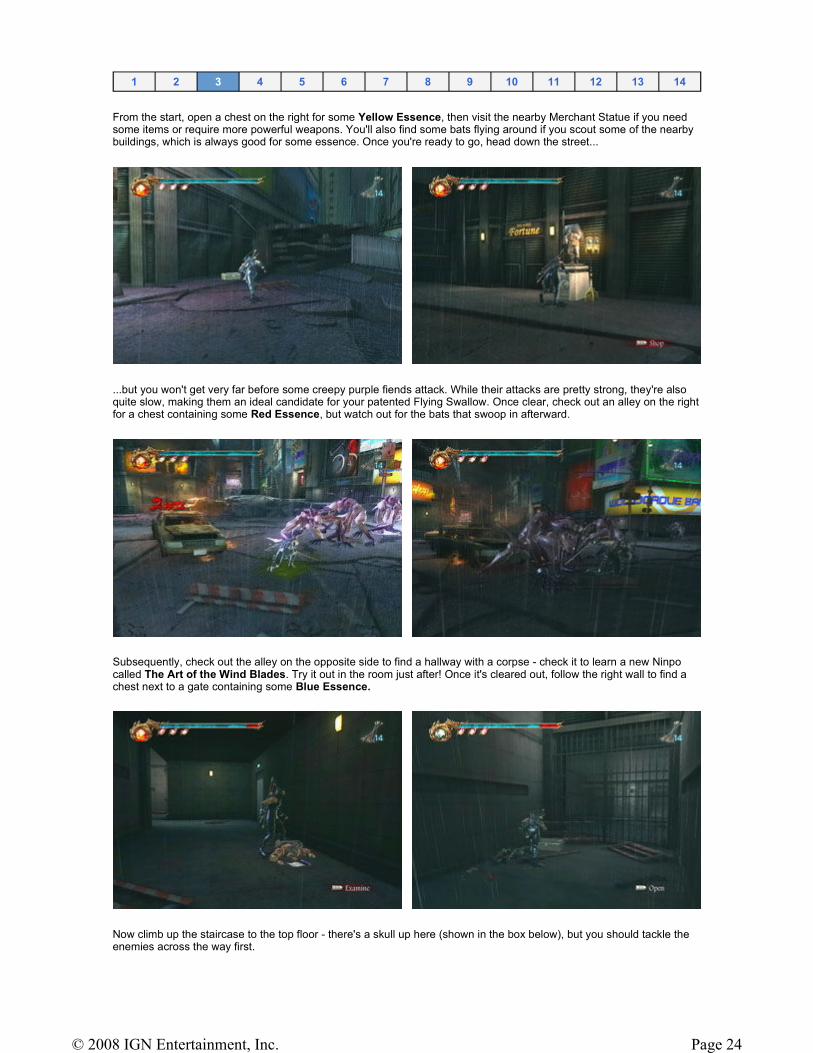
From the start, open a chest on the right for some Yellow Essence, then visit the nearby Merchant Statue if you need some items or require more powerful weapons. You'll also find some bats flying around if you scout some of the nearby buildings, which is always good for some essence. Once you're ready to go, head down the street...
...but you won't get very far before some creepy purple fiends attack. While their attacks are pretty strong, they're also quite slow, making them an ideal candidate for your patented Flying Swallow. Once clear, check out an alley on the right for a chest containing some Red Essence, but watch out for the bats that swoop in afterward.
Subsequently, check out the alley on the opposite side to find a hallway with a corpse - check it to learn a new Ninpo called The Art of the Wind Blades. Try it out in the room just after! Once it's cleared out, follow the right wall to find a chest next to a gate containing some Blue Essence.
Now climb up the staircase to the top floor - there's a skull up here (shown in the box below), but you should tackle the enemies across the way first.
1 2 3 4 5 6 7 8 9 10 11 12 13 14
Page 24© 2008 IGN Entertainment, Inc.
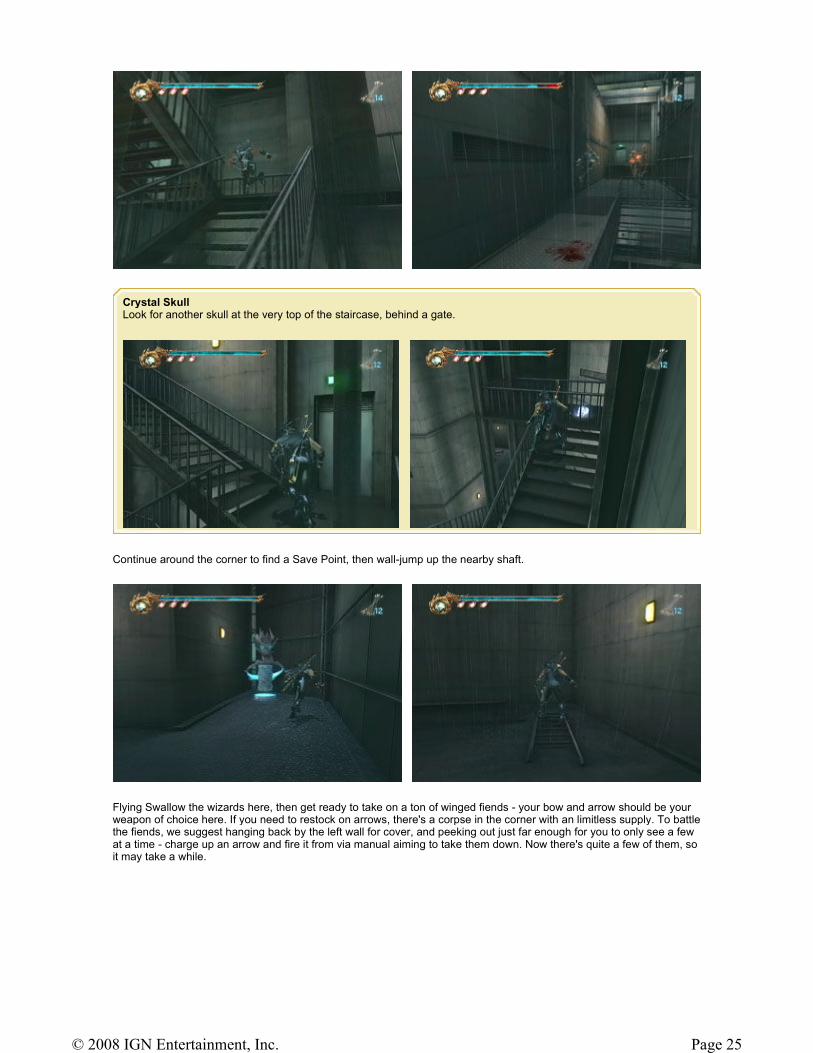
Continue around the corner to find a Save Point, then wall-jump up the nearby shaft.
Flying Swallow the wizards here, then get ready to take on a ton of winged fiends - your bow and arrow should be your weapon of choice here. If you need to restock on arrows, there's a corpse in the corner with an limitless supply. To battle the fiends, we suggest hanging back by the left wall for cover, and peeking out just far enough for you to only see a few at a time - charge up an arrow and fire it from via manual aiming to take them down. Now there's quite a few of them, so it may take a while.
Crystal Skull Look for another skull at the very top of the staircase, behind a gate.
Page 25© 2008 IGN Entertainment, Inc.
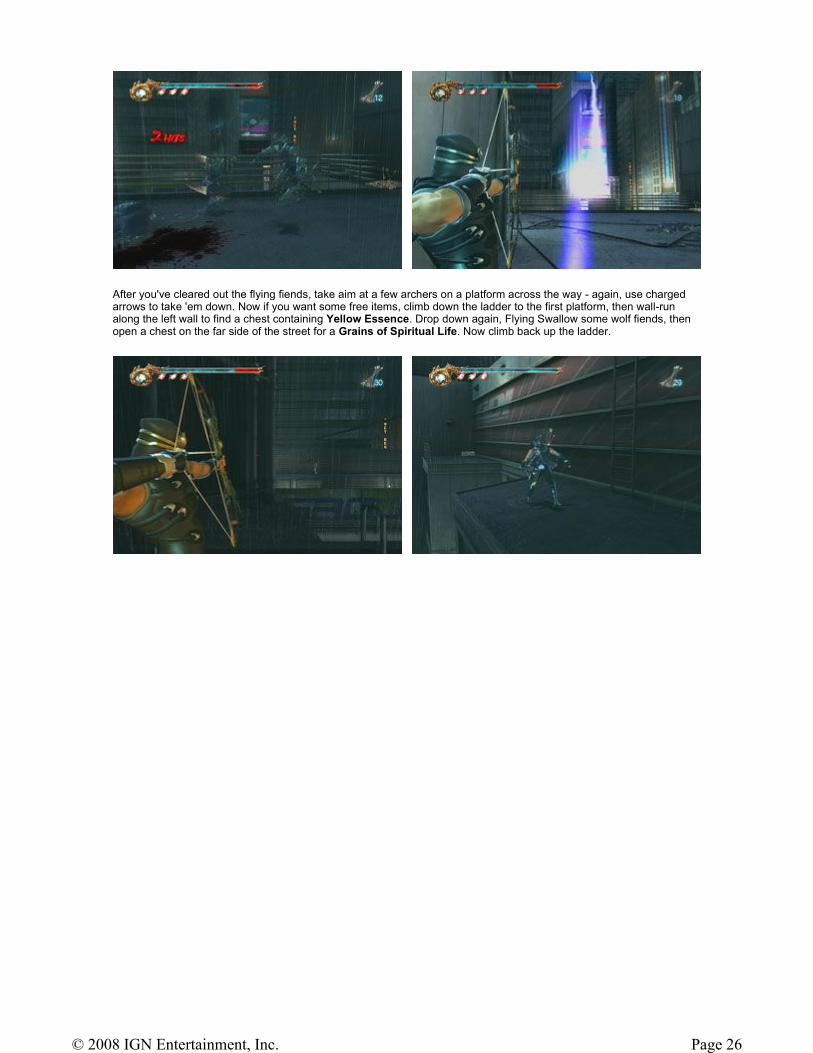
After you've cleared out the flying fiends, take aim at a few archers on a platform across the way - again, use charged arrows to take 'em down. Now if you want some free items, climb down the ladder to the first platform, then wall-run along the left wall to find a chest containing Yellow Essence. Drop down again, Flying Swallow some wolf fiends, then open a chest on the far side of the street for a Grains of Spiritual Life. Now climb back up the ladder.
Page 26© 2008 IGN Entertainment, Inc.
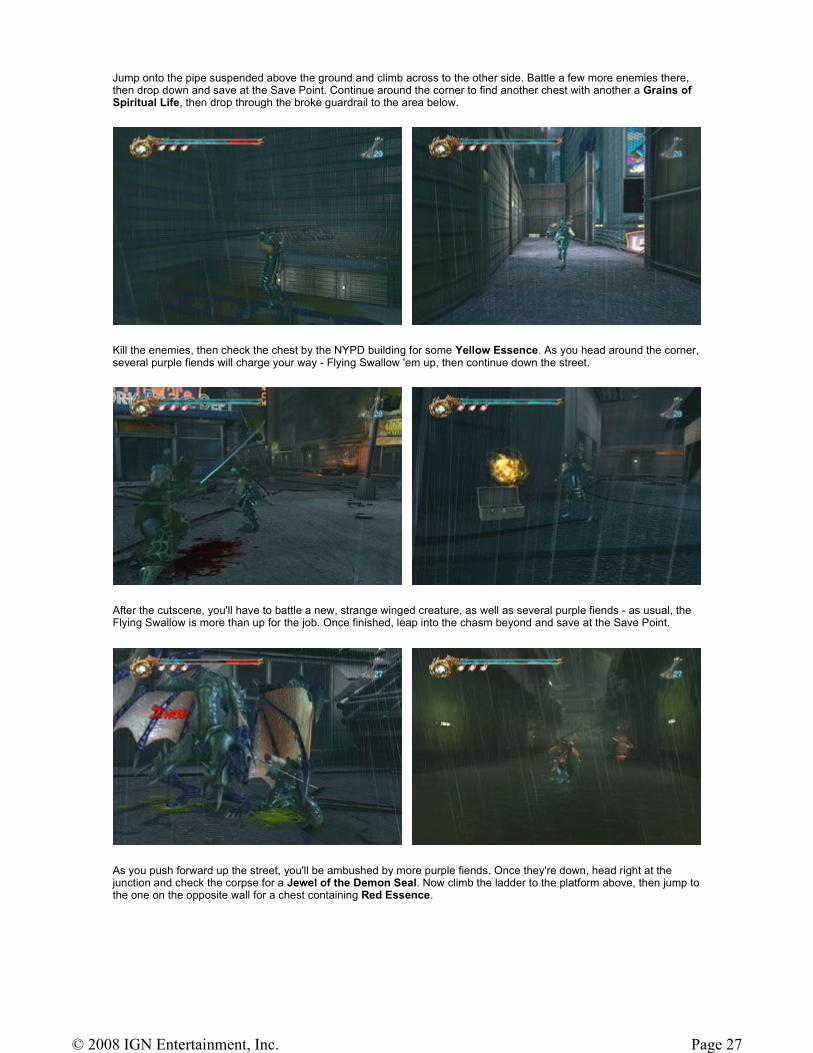
Jump onto the pipe suspended above the ground and climb across to the other side. Battle a few more enemies there, then drop down and save at the Save Point. Continue around the corner to find another chest with another a Grains of Spiritual Life, then drop through the broke guardrail to the area below.
Kill the enemies, then check the chest by the NYPD building for some Yellow Essence. As you head around the corner, several purple fiends will charge your way - Flying Swallow 'em up, then continue down the street.
After the cutscene, you'll have to battle a new, strange winged creature, as well as several purple fiends - as usual, the Flying Swallow is more than up for the job. Once finished, leap into the chasm beyond and save at the Save Point.
As you push forward up the street, you'll be ambushed by more purple fiends. Once they're down, head right at the junction and check the corpse for a Jewel of the Demon Seal. Now climb the ladder to the platform above, then jump to the one on the opposite wall for a chest containing Red Essence.
Page 27© 2008 IGN Entertainment, Inc.
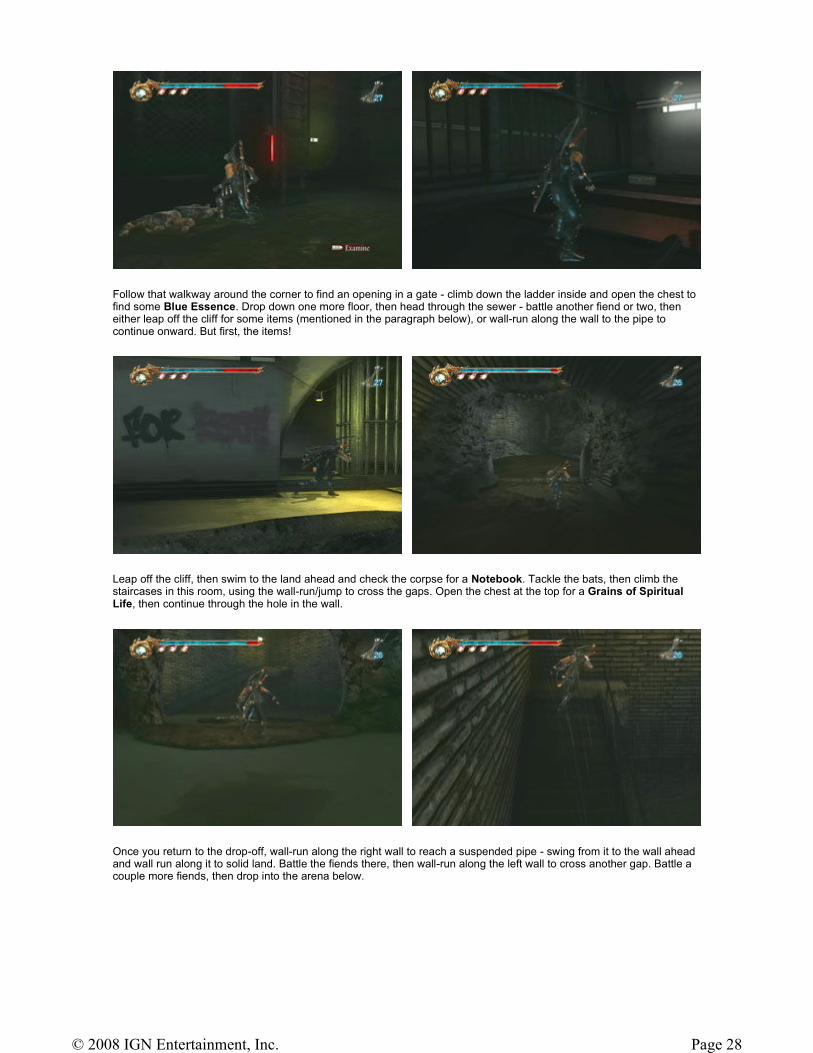
Follow that walkway around the corner to find an opening in a gate - climb down the ladder inside and open the chest to find some Blue Essence. Drop down one more floor, then head through the sewer - battle another fiend or two, then either leap off the cliff for some items (mentioned in the paragraph below), or wall-run along the wall to the pipe to continue onward. But first, the items!
Leap off the cliff, then swim to the land ahead and check the corpse for a Notebook. Tackle the bats, then climb the staircases in this room, using the wall-run/jump to cross the gaps. Open the chest at the top for a Grains of Spiritual Life, then continue through the hole in the wall.
Once you return to the drop-off, wall-run along the right wall to reach a suspended pipe - swing from it to the wall ahead and wall run along it to solid land. Battle the fiends there, then wall-run along the left wall to cross another gap. Battle a couple more fiends, then drop into the arena below.
Page 28© 2008 IGN Entertainment, Inc.

Check the corpse along the left wall for some Arrows, then continue through the cave Get ready for some more fiends to attack as you enter the next corridor, then head left and check the corpse to learn the The Technique of the Invisible Path.
After grabbing the skull above, drop into the water and dive below the surface to find a chest containing a Life of the gods. Now swim back up the river and wall-jump up the shaft to the area above.
Crystal Skull Try it your new move on the two nearby walls, above the cavern. Jump between both to reach a Crystal Skull on the far platform.
Page 29© 2008 IGN Entertainment, Inc.
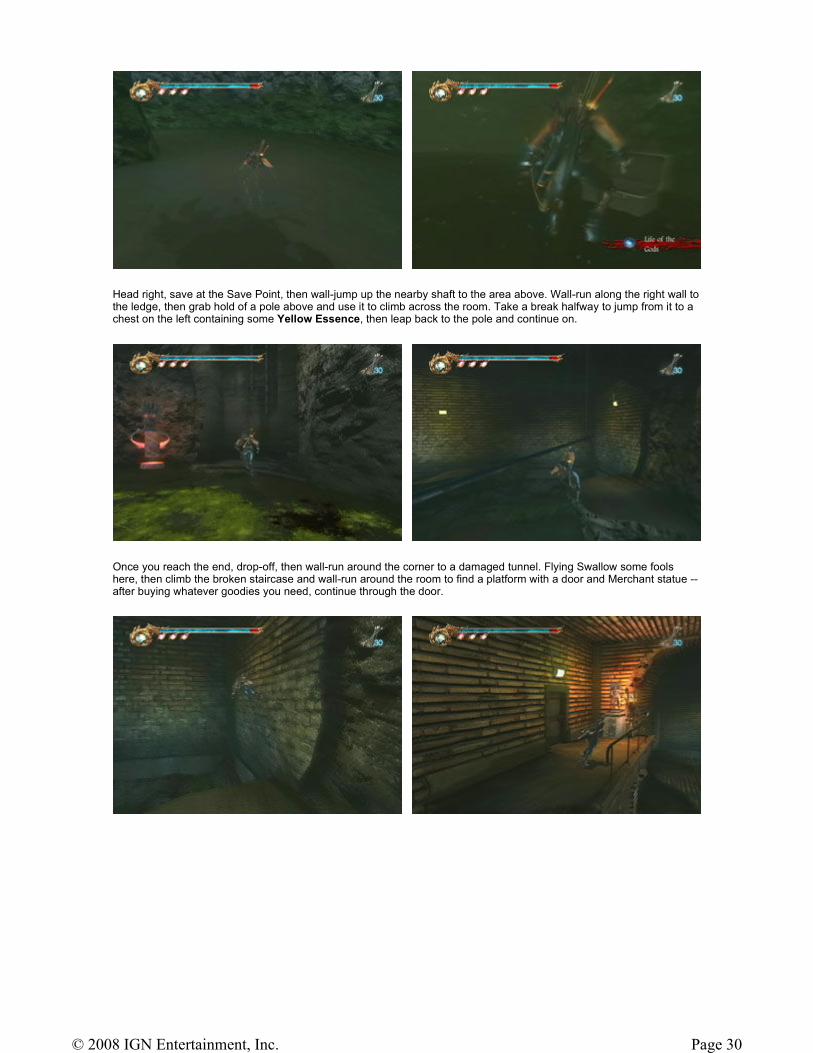
Head right, save at the Save Point, then wall-jump up the nearby shaft to the area above. Wall-run along the right wall to the ledge, then grab hold of a pole above and use it to climb across the room. Take a break halfway to jump from it to a chest on the left containing some Yellow Essence, then leap back to the pole and continue on.
Once you reach the end, drop-off, then wall-run around the corner to a damaged tunnel. Flying Swallow some fools here, then climb the broken staircase and wall-run around the room to find a platform with a door and Merchant statue -- after buying whatever goodies you need, continue through the door.
Page 30© 2008 IGN Entertainment, Inc.
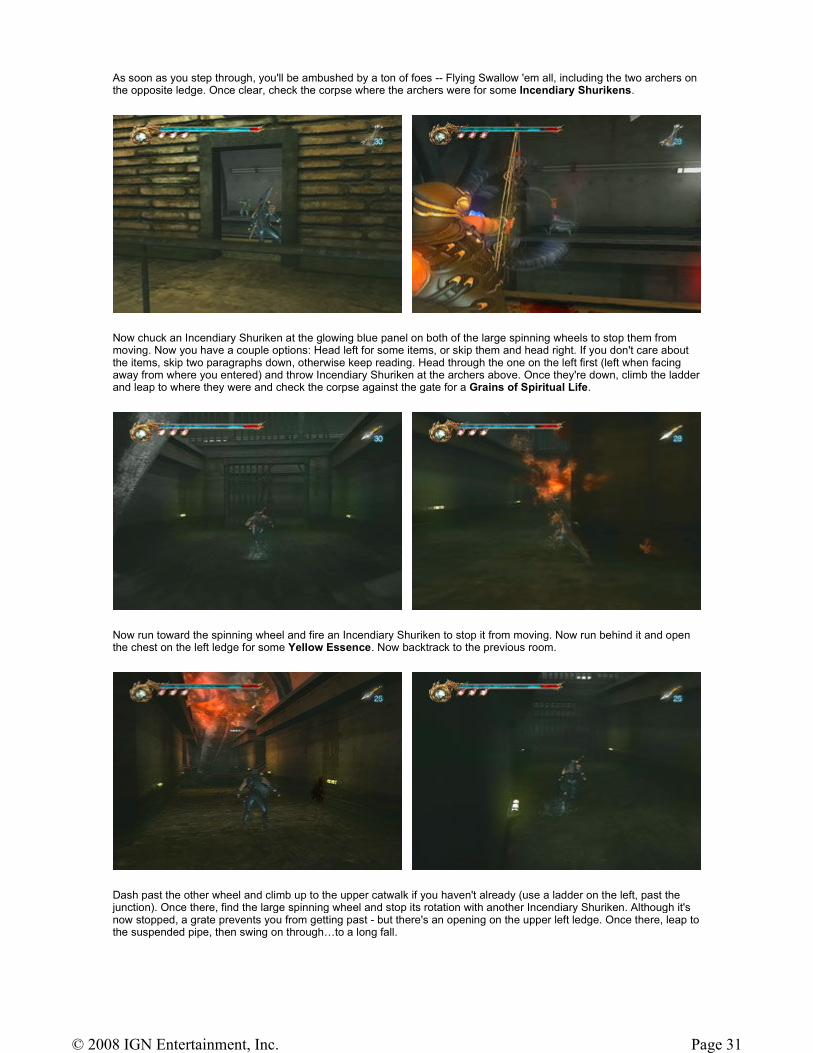
As soon as you step through, you'll be ambushed by a ton of foes -- Flying Swallow 'em all, including the two archers on the opposite ledge. Once clear, check the corpse where the archers were for some Incendiary Shurikens.
Now chuck an Incendiary Shuriken at the glowing blue panel on both of the large spinning wheels to stop them from moving. Now you have a couple options: Head left for some items, or skip them and head right. If you don't care about the items, skip two paragraphs down, otherwise keep reading. Head through the one on the left first (left when facing away from where you entered) and throw Incendiary Shuriken at the archers above. Once they're down, climb the ladder and leap to where they were and check the corpse against the gate for a Grains of Spiritual Life.
Now run toward the spinning wheel and fire an Incendiary Shuriken to stop it from moving. Now run behind it and open the chest on the left ledge for some Yellow Essence. Now backtrack to the previous room.
Dash past the other wheel and climb up to the upper catwalk if you haven't already (use a ladder on the left, past the junction). Once there, find the large spinning wheel and stop its rotation with another Incendiary Shuriken. Although it's now stopped, a grate prevents you from getting past - but there's an opening on the upper left ledge. Once there, leap to the suspended pipe, then swing on through…to a long fall.
Page 31© 2008 IGN Entertainment, Inc.
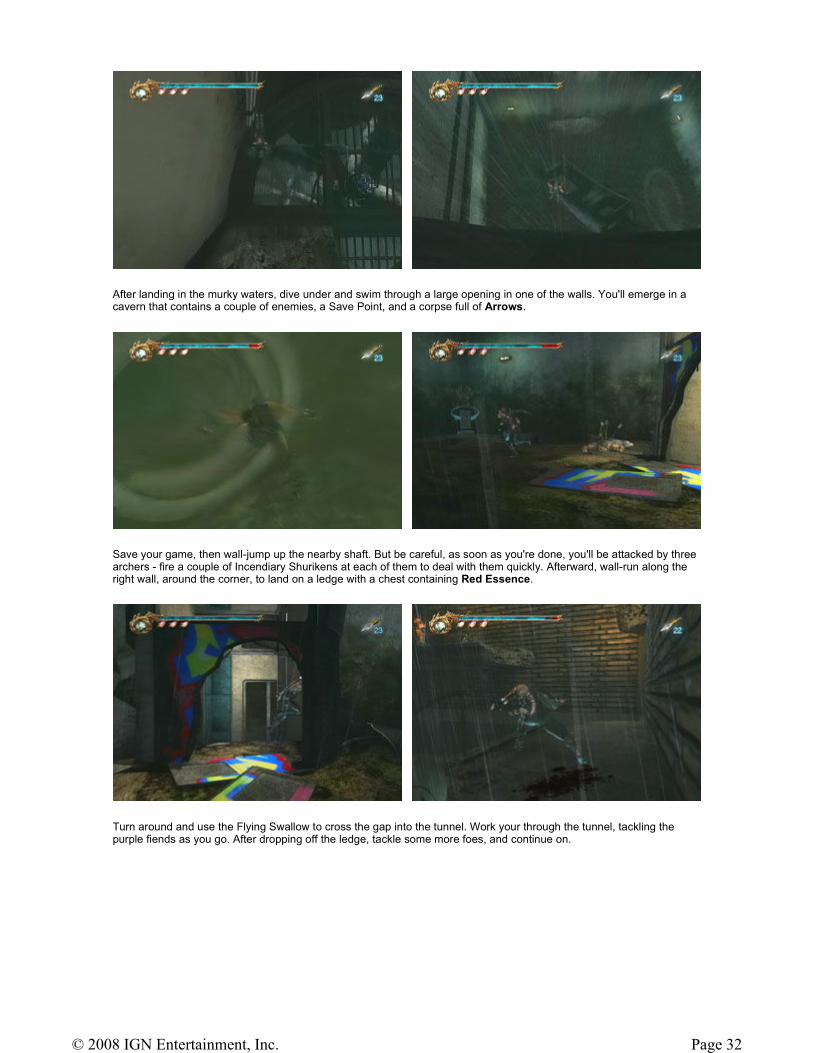
After landing in the murky waters, dive under and swim through a large opening in one of the walls. You'll emerge in a cavern that contains a couple of enemies, a Save Point, and a corpse full of Arrows.
Save your game, then wall-jump up the nearby shaft. But be careful, as soon as you're done, you'll be attacked by three archers - fire a couple of Incendiary Shurikens at each of them to deal with them quickly. Afterward, wall-run along the right wall, around the corner, to land on a ledge with a chest containing Red Essence.
Turn around and use the Flying Swallow to cross the gap into the tunnel. Work your through the tunnel, tackling the purple fiends as you go. After dropping off the ledge, tackle some more foes, and continue on.
Page 32© 2008 IGN Entertainment, Inc.
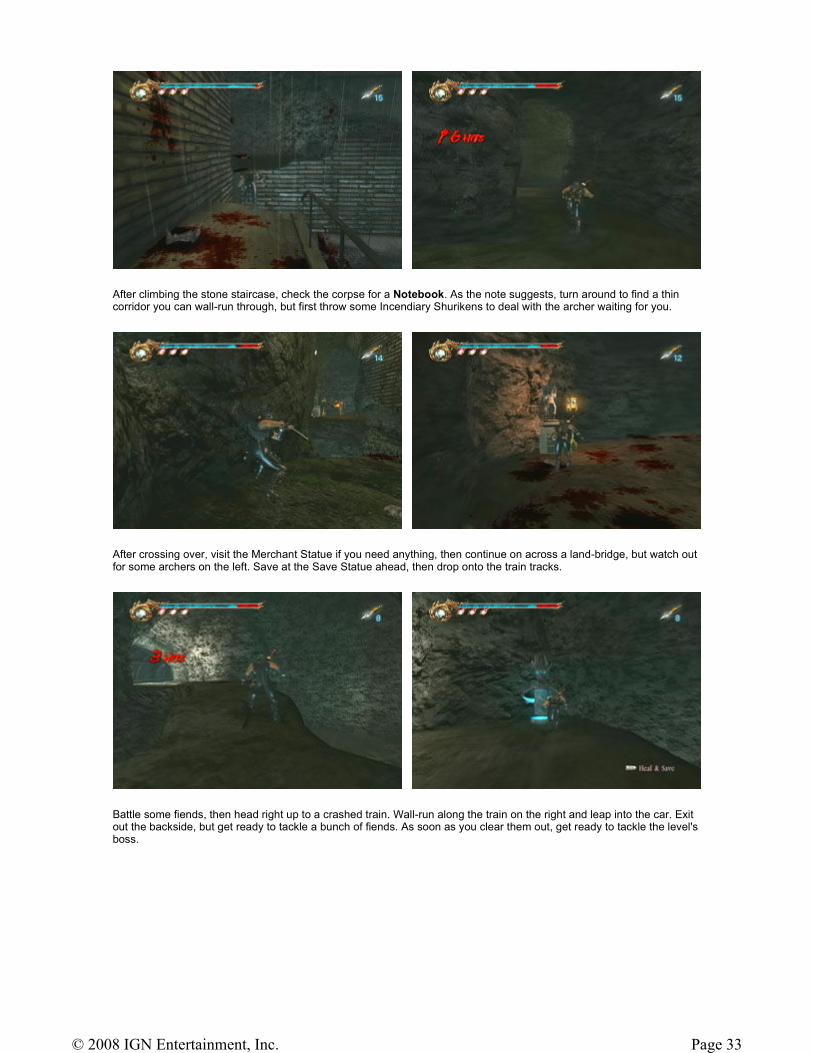
After climbing the stone staircase, check the corpse for a Notebook. As the note suggests, turn around to find a thin corridor you can wall-run through, but first throw some Incendiary Shurikens to deal with the archer waiting for you.
After crossing over, visit the Merchant Statue if you need anything, then continue on across a land-bridge, but watch out for some archers on the left. Save at the Save Statue ahead, then drop onto the train tracks.
Battle some fiends, then head right up to a crashed train. Wall-run along the train on the right and leap into the car. Exit out the backside, but get ready to tackle a bunch of fiends. As soon as you clear them out, get ready to tackle the level's boss.
Page 33© 2008 IGN Entertainment, Inc.
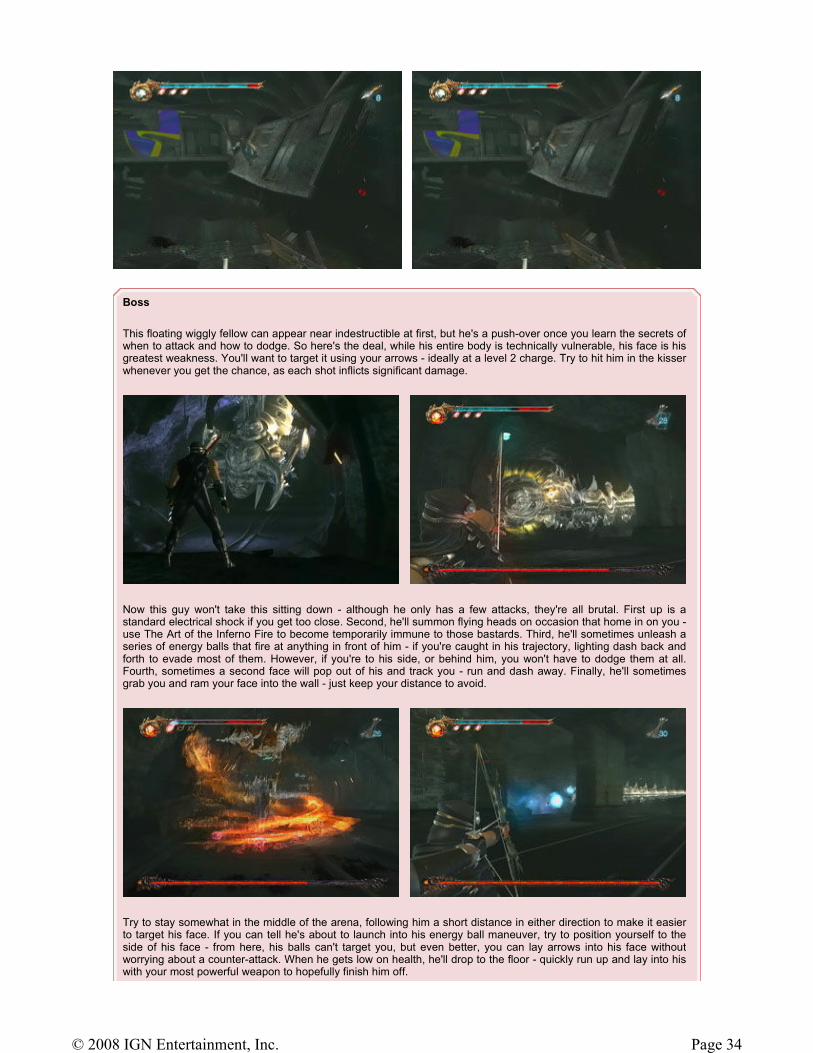
Boss
This floating wiggly fellow can appear near indestructible at first, but he's a push-over once you learn the secrets of when to attack and how to dodge. So here's the deal, while his entire body is technically vulnerable, his face is his greatest weakness. You'll want to target it using your arrows - ideally at a level 2 charge. Try to hit him in the kisser whenever you get the chance, as each shot inflicts significant damage.
Now this guy won't take this sitting down - although he only has a few attacks, they're all brutal. First up is a standard electrical shock if you get too close. Second, he'll summon flying heads on occasion that home in on you - use The Art of the Inferno Fire to become temporarily immune to those bastards. Third, he'll sometimes unleash a series of energy balls that fire at anything in front of him - if you're caught in his trajectory, lighting dash back and forth to evade most of them. However, if you're to his side, or behind him, you won't have to dodge them at all. Fourth, sometimes a second face will pop out of his and track you - run and dash away. Finally, he'll sometimes grab you and ram your face into the wall - just keep your distance to avoid.
Try to stay somewhat in the middle of the arena, following him a short distance in either direction to make it easier to target his face. If you can tell he's about to launch into his energy ball maneuver, try to position yourself to the side of his face - from here, his balls can't target you, but even better, you can lay arrows into his face without worrying about a counter-attack. When he gets low on health, he'll drop to the floor - quickly run up and lay into his with your most powerful weapon to hopefully finish him off.
Page 34© 2008 IGN Entertainment, Inc.

Page 35© 2008 IGN Entertainment, Inc.

Look, a merchant statue! There, on the right! It's about time one was placed conveniently! If you haven't already, you may want to upgrade your Dragon Sword to level 2 or 3, which will greatly enhance the Flying Swallow attack. After paying him a visit, work your way through the tunnel, Flying Swallowing the foes as you go. Drop through the hole at the end, but get ready to be immediately attacked by a few more fools.
Beware of some more ninjas who'll appear as you approach the wrecked subway car ahead. After passing through, look for a chest on the left, just behind the first section of wreckage for some Red Essence.
Continue up to a loading platform ahead, but get ready for some purple and dragon fiends to appear. Exploit your amazing Flying Swallow move to eradicate them, then exit the subway via the stairwell on the left.
Save at the Save Point at the bend, then continue up another staircase to battle a few foes. Once clear, there are a few places to grab items around here - look for an Herb of Spiritual Life in both the hallway along the same wall as the staircase you came up from, as well as behind the nearby door in another chest.
1 2 3 4 5 6 7 8 9 10 11 12 13 14
Page 36© 2008 IGN Entertainment, Inc.
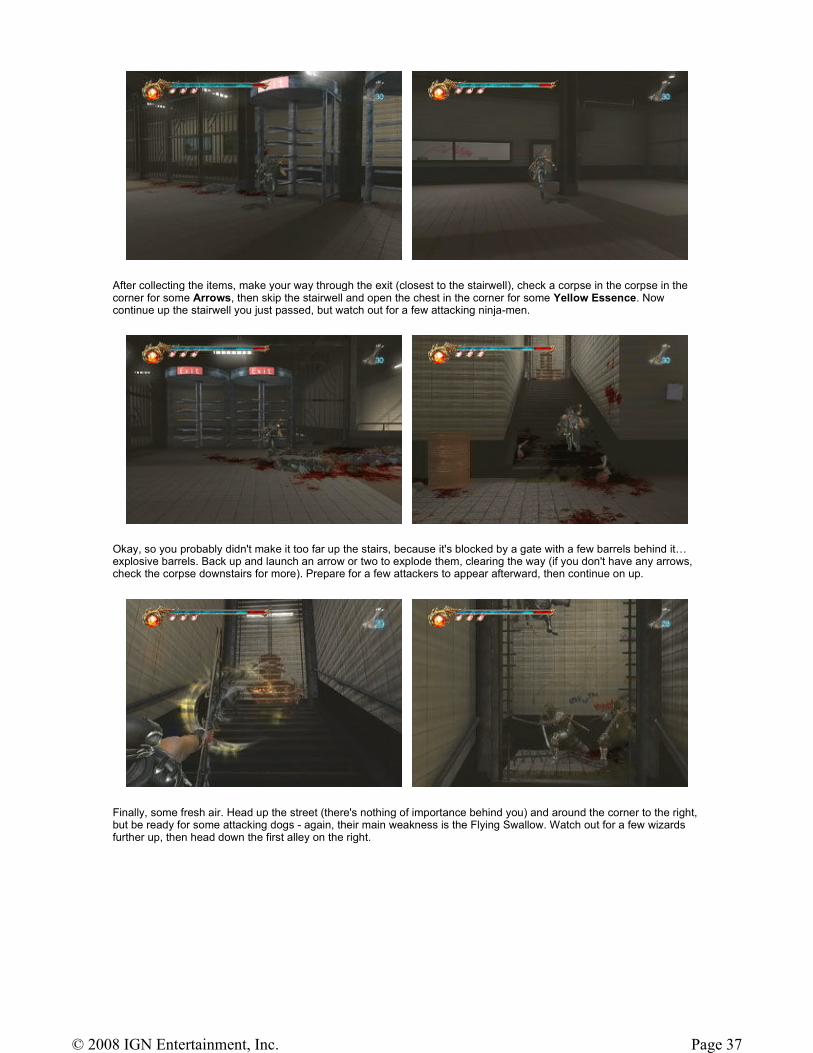
After collecting the items, make your way through the exit (closest to the stairwell), check a corpse in the corpse in the corner for some Arrows, then skip the stairwell and open the chest in the corner for some Yellow Essence. Now continue up the stairwell you just passed, but watch out for a few attacking ninja-men.
Okay, so you probably didn't make it too far up the stairs, because it's blocked by a gate with a few barrels behind it…explosive barrels. Back up and launch an arrow or two to explode them, clearing the way (if you don't have any arrows, check the corpse downstairs for more). Prepare for a few attackers to appear afterward, then continue on up.
Finally, some fresh air. Head up the street (there's nothing of importance behind you) and around the corner to the right, but be ready for some attacking dogs - again, their main weakness is the Flying Swallow. Watch out for a few wizards further up, then head down the first alley on the right.
Page 37© 2008 IGN Entertainment, Inc.
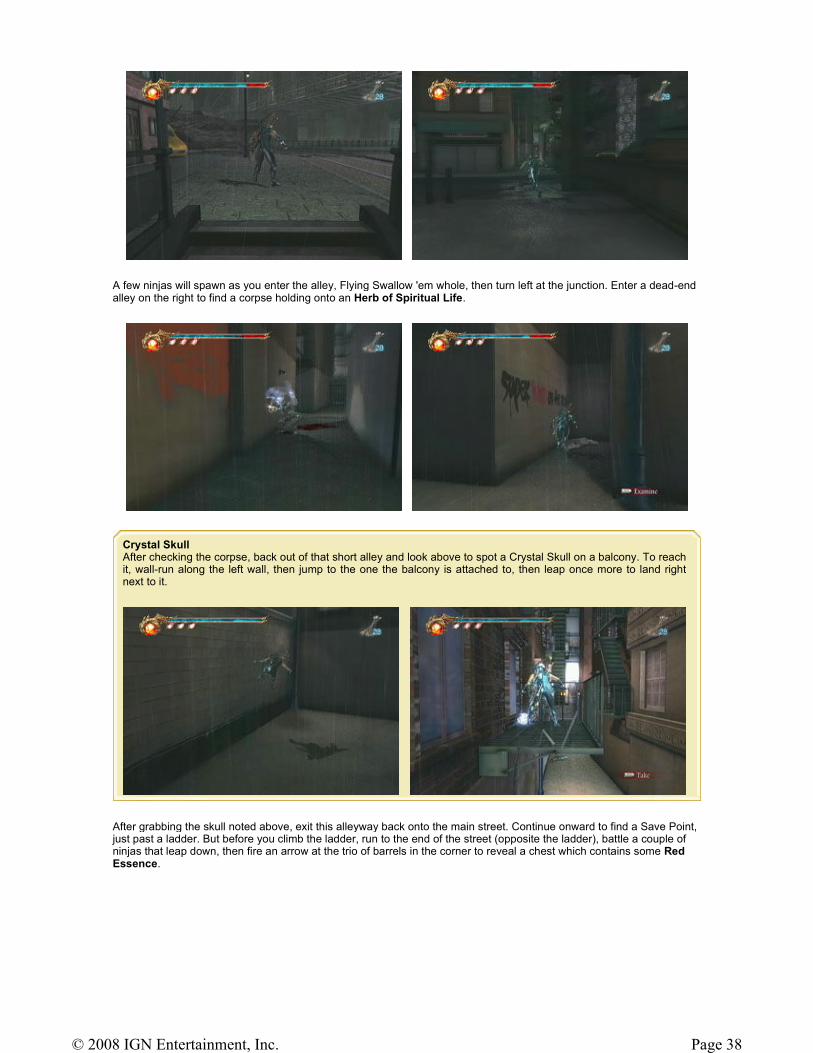
A few ninjas will spawn as you enter the alley, Flying Swallow 'em whole, then turn left at the junction. Enter a dead-end alley on the right to find a corpse holding onto an Herb of Spiritual Life.
After grabbing the skull noted above, exit this alleyway back onto the main street. Continue onward to find a Save Point, just past a ladder. But before you climb the ladder, run to the end of the street (opposite the ladder), battle a couple of ninjas that leap down, then fire an arrow at the trio of barrels in the corner to reveal a chest which contains some Red Essence.
Crystal Skull After checking the corpse, back out of that short alley and look above to spot a Crystal Skull on a balcony. To reach it, wall-run along the left wall, then jump to the one the balcony is attached to, then leap once more to land right next to it.
Page 38© 2008 IGN Entertainment, Inc.
Page 39© 2008 IGN Entertainment, Inc.
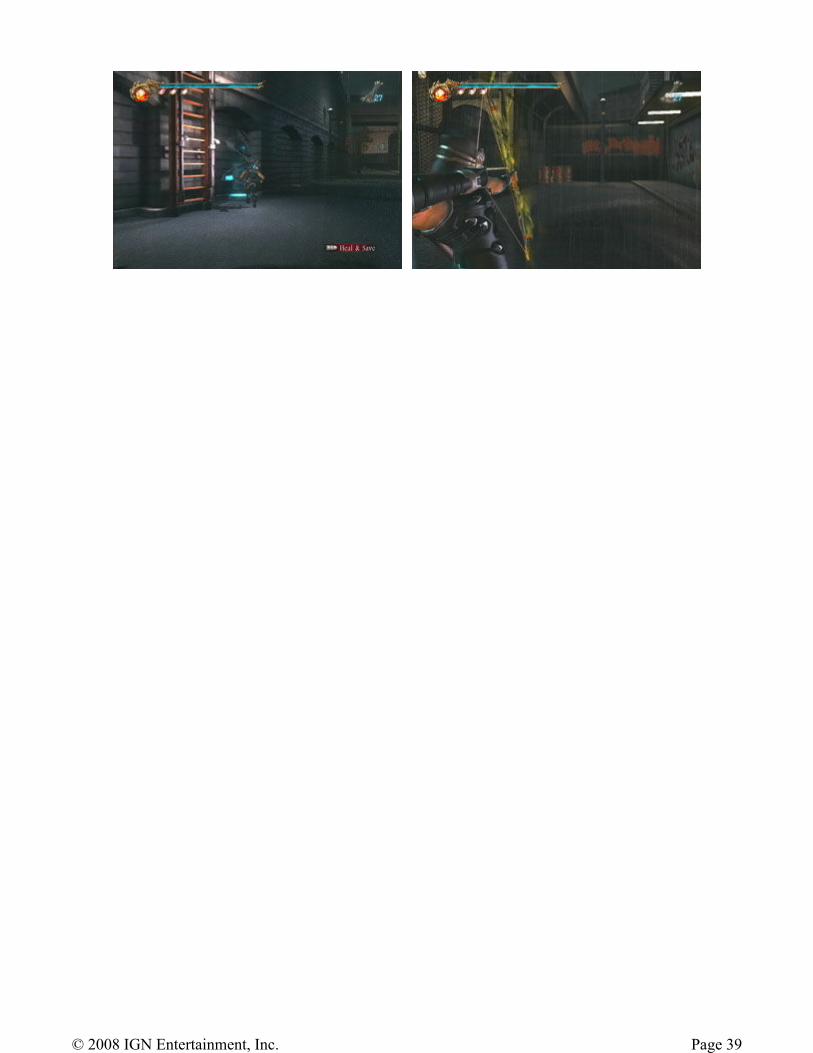
Return to the ladder and climb it to a street above. Check the corpse with the sword sticking out of him for a Jewel of the Demon Seal. Continue through a broken guardrail ahead, but get ready to be ambushed by several purple and winged fiends. Deal with the ground-based enemies first (using you know what), then focus on the aerial jerks. Use arrows or Incendiary Shurikens to take 'em down - if you need more of the latter, check a corpse on the left.
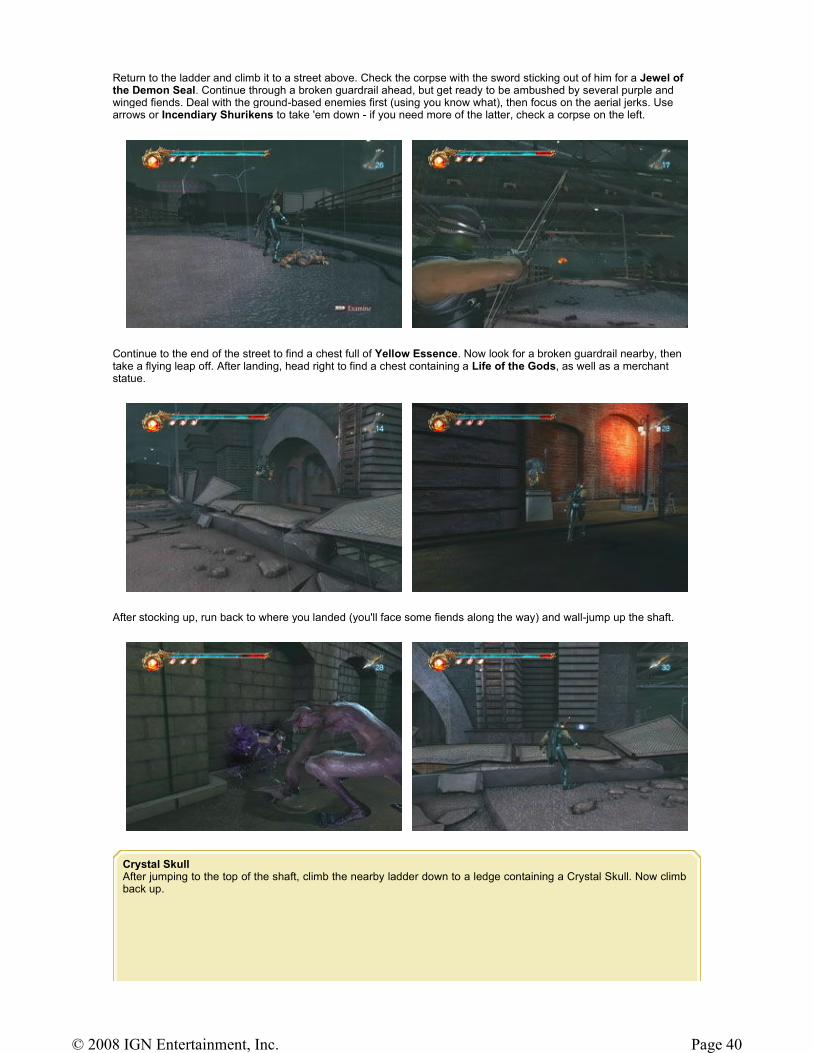
Continue to the end of the street to find a chest full of Yellow Essence. Now look for a broken guardrail nearby, then take a flying leap off. After landing, head right to find a chest containing a Life of the Gods, as well as a merchant statue.
After stocking up, run back to where you landed (you'll face some fiends along the way) and wall-jump up the shaft.
Crystal Skull After jumping to the top of the shaft, climb the nearby ladder down to a ledge containing a Crystal Skull. Now climb back up.
Page 40© 2008 IGN Entertainment, Inc.
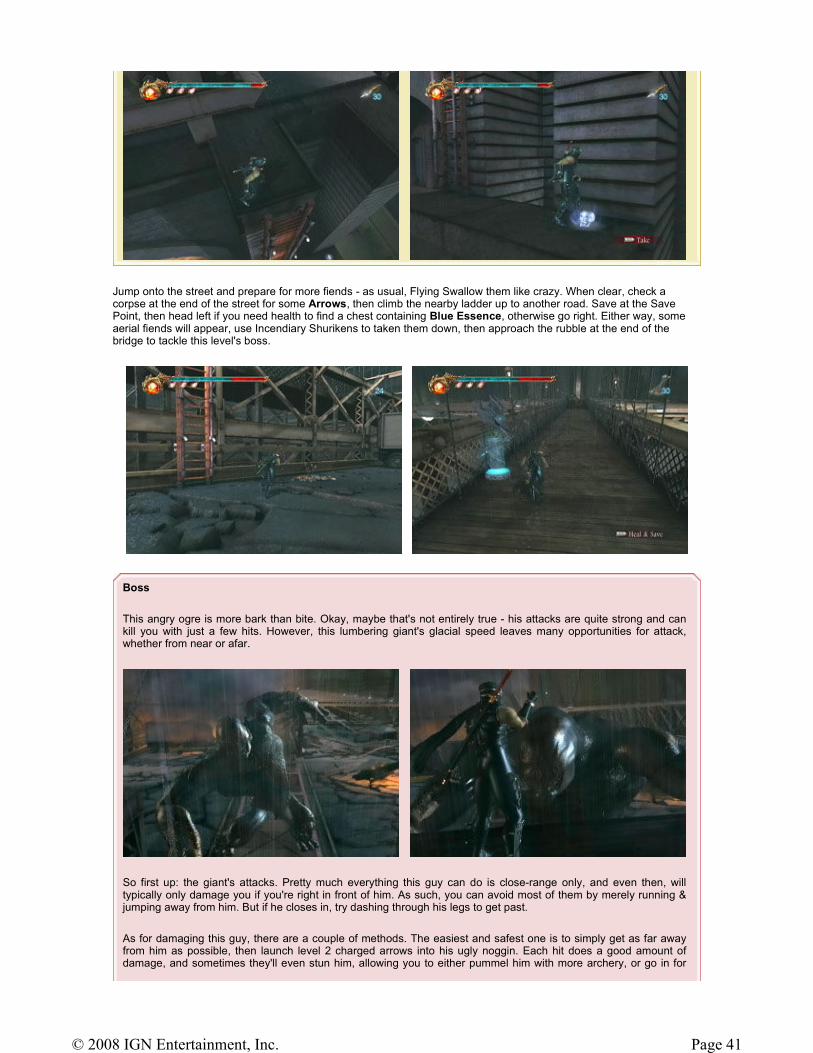
Jump onto the street and prepare for more fiends - as usual, Flying Swallow them like crazy. When clear, check a corpse at the end of the street for some Arrows, then climb the nearby ladder up to another road. Save at the Save Point, then head left if you need health to find a chest containing Blue Essence, otherwise go right. Either way, some aerial fiends will appear, use Incendiary Shurikens to taken them down, then approach the rubble at the end of the bridge to tackle this level's boss.
Boss
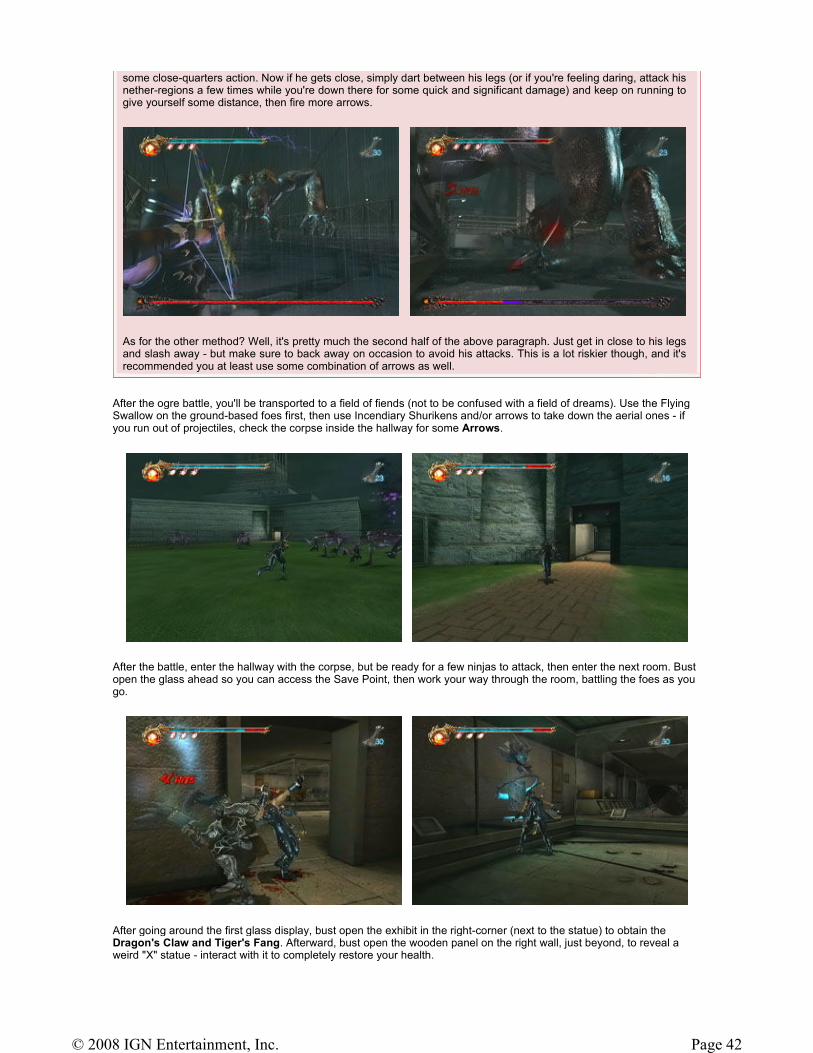
This angry ogre is more bark than bite. Okay, maybe that's not entirely true - his attacks are quite strong and can kill you with just a few hits. However, this lumbering giant's glacial speed leaves many opportunities for attack, whether from near or afar.
So first up: the giant's attacks. Pretty much everything this guy can do is close-range only, and even then, will typically only damage you if you're right in front of him. As such, you can avoid most of them by merely running & jumping away from him. But if he closes in, try dashing through his legs to get past.
As for damaging this guy, there are a couple of methods. The easiest and safest one is to simply get as far away from him as possible, then launch level 2 charged arrows into his ugly noggin. Each hit does a good amount of damage, and sometimes they'll even stun him, allowing you to either pummel him with more archery, or go in for
Page 41© 2008 IGN Entertainment, Inc.
After the ogre battle, you'll be transported to a field of fiends (not to be confused with a field of dreams). Use the Flying Swallow on the ground-based foes first, then use Incendiary Shurikens and/or arrows to take down the aerial ones - if you run out of projectiles, check the corpse inside the hallway for some Arrows.
After the battle, enter the hallway with the corpse, but be ready for a few ninjas to attack, then enter the next room. Bust open the glass ahead so you can access the Save Point, then work your way through the room, battling the foes as you go.
After going around the first glass display, bust open the exhibit in the right-corner (next to the statue) to obtain the Dragon's Claw and Tiger's Fang. Afterward, bust open the wooden panel on the right wall, just beyond, to reveal a weird "X" statue - interact with it to completely restore your health.
some close-quarters action. Now if he gets close, simply dart between his legs (or if you're feeling daring, attack his nether-regions a few times while you're down there for some quick and significant damage) and keep on running to give yourself some distance, then fire more arrows.
As for the other method? Well, it's pretty much the second half of the above paragraph. Just get in close to his legs and slash away - but make sure to back away on occasion to avoid his attacks. This is a lot riskier though, and it's recommended you at least use some combination of arrows as well.
Page 42© 2008 IGN Entertainment, Inc.

Continue through the nearby hallway, but watch out for some more ninjas and a pair of archers. The next room is quite large, and fittingly is home to several ninjas and wizards. As usual, the Flying Swallow is up to the task, but it can still be difficult - try mixing in a few Ultimate Techniques to clear the room quicker. If you run low on health, don't forget you can backtrack to the "X" statue in the previous room for a health boost.
With the room cleared, climb the stairwell and head right if you want an item - wall-run around the gap to find a corpse containing a Devil Way Mushroom. Now drop off and re-climb the stairs, but head left this time until you reach a gap - wall-run along the right-side to get across. Be careful after the next corner, as a purple fiend will jump at you from behind a window - take him down, then exit through the hole he created.
Page 43© 2008 IGN Entertainment, Inc.
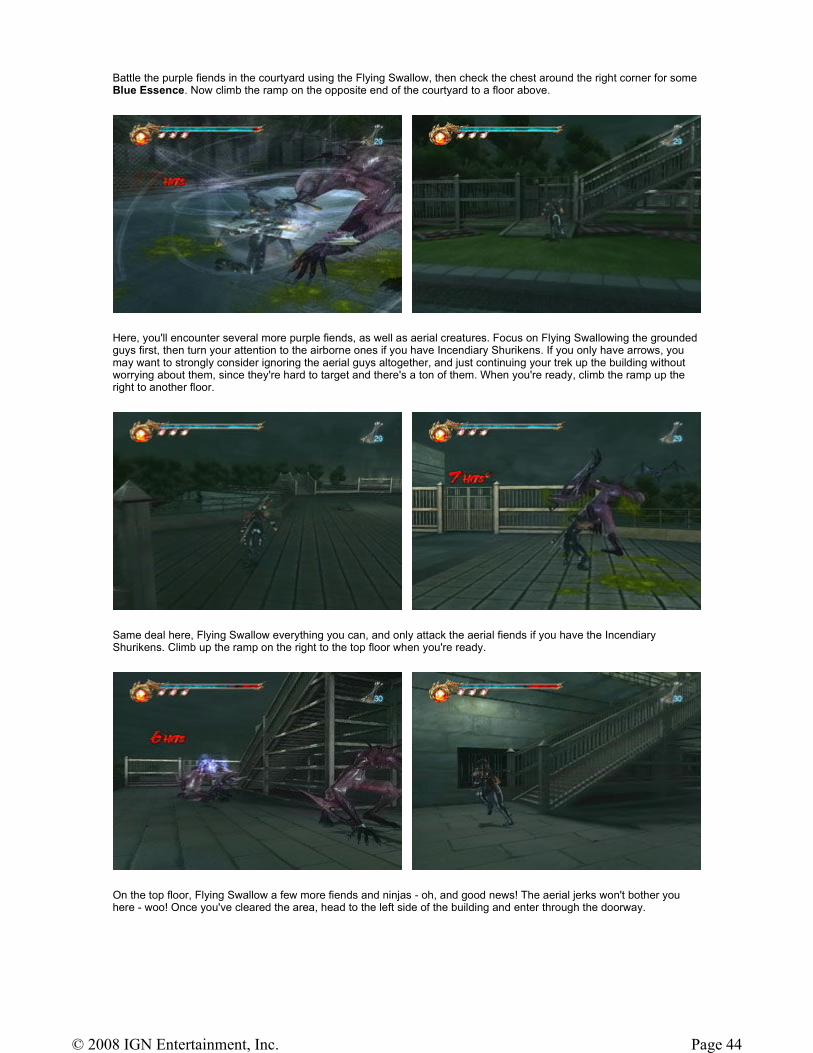
Battle the purple fiends in the courtyard using the Flying Swallow, then check the chest around the right corner for some Blue Essence. Now climb the ramp on the opposite end of the courtyard to a floor above.
Here, you'll encounter several more purple fiends, as well as aerial creatures. Focus on Flying Swallowing the grounded guys first, then turn your attention to the airborne ones if you have Incendiary Shurikens. If you only have arrows, you may want to strongly consider ignoring the aerial guys altogether, and just continuing your trek up the building without worrying about them, since they're hard to target and there's a ton of them. When you're ready, climb the ramp up the right to another floor.
Same deal here, Flying Swallow everything you can, and only attack the aerial fiends if you have the Incendiary Shurikens. Climb up the ramp on the right to the top floor when you're ready.
On the top floor, Flying Swallow a few more fiends and ninjas - oh, and good news! The aerial jerks won't bother you here - woo! Once you've cleared the area, head to the left side of the building and enter through the doorway.
Page 44© 2008 IGN Entertainment, Inc.
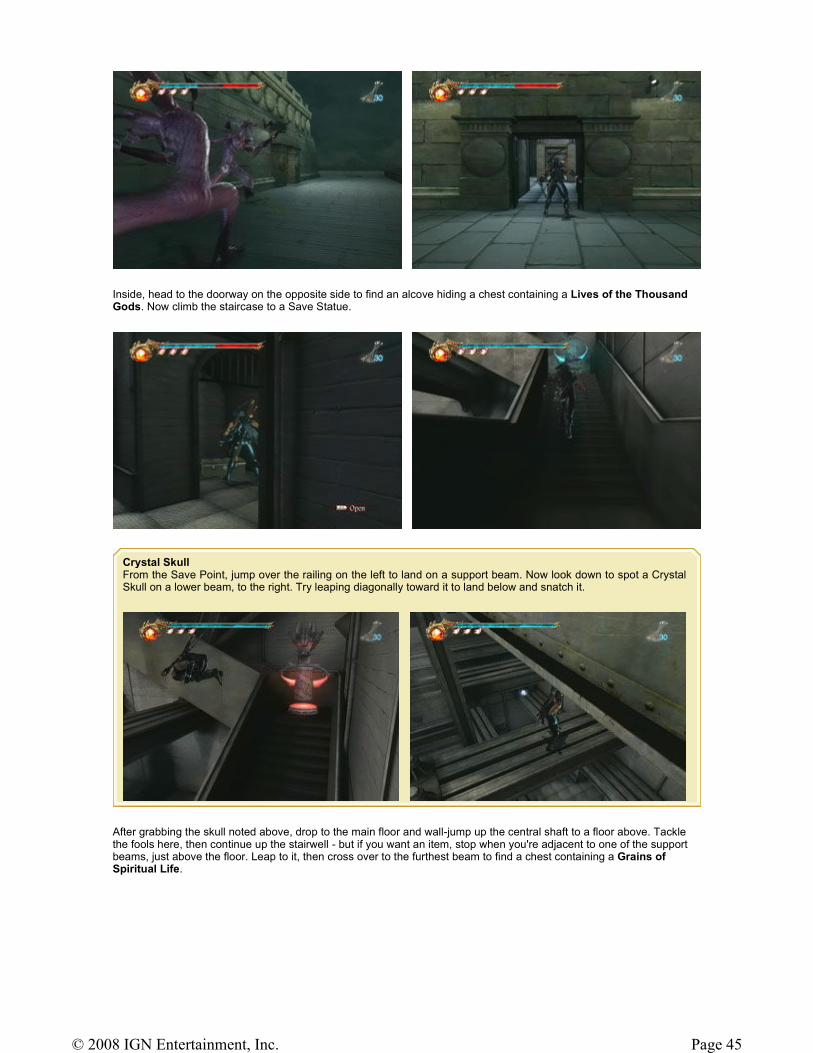
Inside, head to the doorway on the opposite side to find an alcove hiding a chest containing a Lives of the Thousand Gods. Now climb the staircase to a Save Statue.
After grabbing the skull noted above, drop to the main floor and wall-jump up the central shaft to a floor above. Tackle the fools here, then continue up the stairwell - but if you want an item, stop when you're adjacent to one of the support beams, just above the floor. Leap to it, then cross over to the furthest beam to find a chest containing a Grains of Spiritual Life.
Crystal Skull From the Save Point, jump over the railing on the left to land on a support beam. Now look down to spot a Crystal Skull on a lower beam, to the right. Try leaping diagonally toward it to land below and snatch it.
Page 45© 2008 IGN Entertainment, Inc.
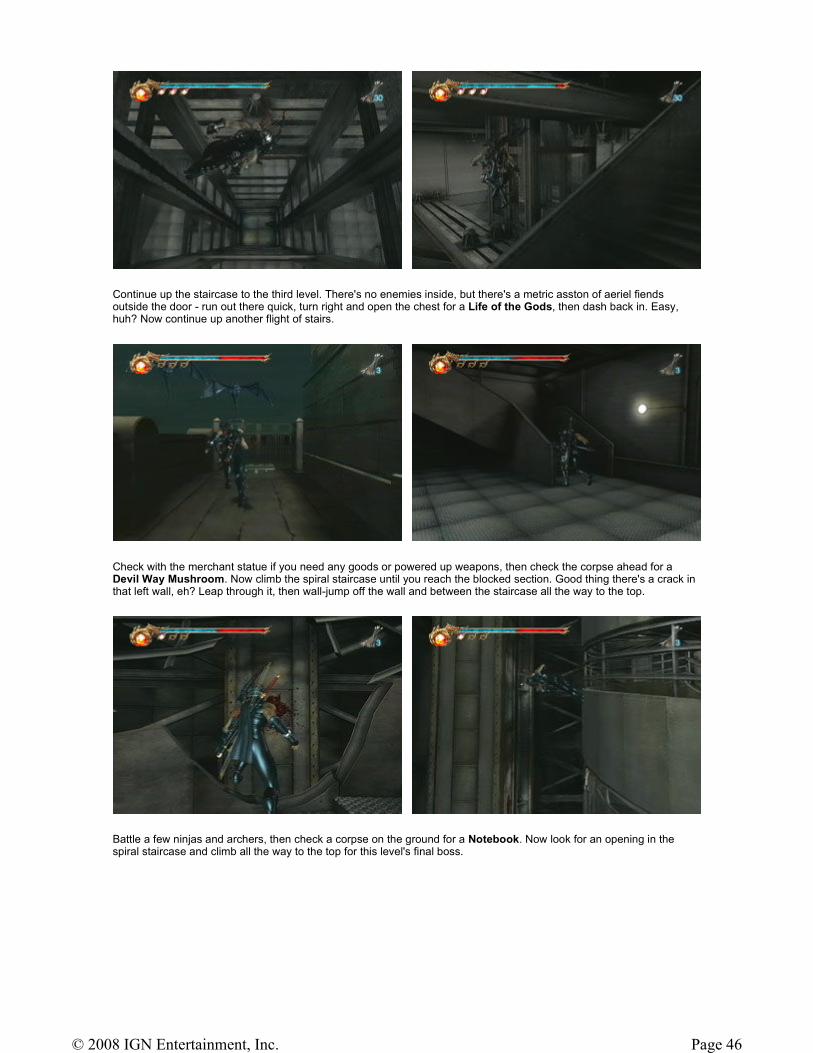
Continue up the staircase to the third level. There's no enemies inside, but there's a metric asston of aeriel fiends outside the door - run out there quick, turn right and open the chest for a Life of the Gods, then dash back in. Easy, huh? Now continue up another flight of stairs.
Check with the merchant statue if you need any goods or powered up weapons, then check the corpse ahead for a Devil Way Mushroom. Now climb the spiral staircase until you reach the blocked section. Good thing there's a crack in that left wall, eh? Leap through it, then wall-jump off the wall and between the staircase all the way to the top.
Battle a few ninjas and archers, then check a corpse on the ground for a Notebook. Now look for an opening in the spiral staircase and climb all the way to the top for this level's final boss.
Page 46© 2008 IGN Entertainment, Inc.

Boss
The winged Alexei possesses a combination of near and far attacks, the former of which can be brutal. Thankfully, he's practically vulnerable at all times, and like many of this game's foes, is particularly susceptible to your Flying Swallow attack.
The most important skill to use when battling Alexei is dodging - you should be blocking and dodging anytime you're not trying to attack. In fact, because he likes to open the battle with a quick-attack, dodge either left or right as soon as the fight begins, then immediately counter with the Flying Swallow (which you hopefully have at level 2 or 3, allowing for multiple pass-throughs). After attacking, quickly dodge around to avoid his next attack, then counter with the Flying Swallow again - with a few exceptions, you can repeat this pattern throughout the battle until victory.
Now Alexei does have a couple of mean moves up his sleeve. For his close-range attacks, just dodge around him, then counter with your own. If he takes to the air, get ready for a charge attack - dodge to the side, otherwise he'll grab you and toss you around. When he begins launch electrical orbs, quickly jump repeatedly to either side. When he turns into a whirlwind, wait for it get close, then jump out of the way - keep in mind he's usually vulnerable after each of his attacks.
Page 47© 2008 IGN Entertainment, Inc.
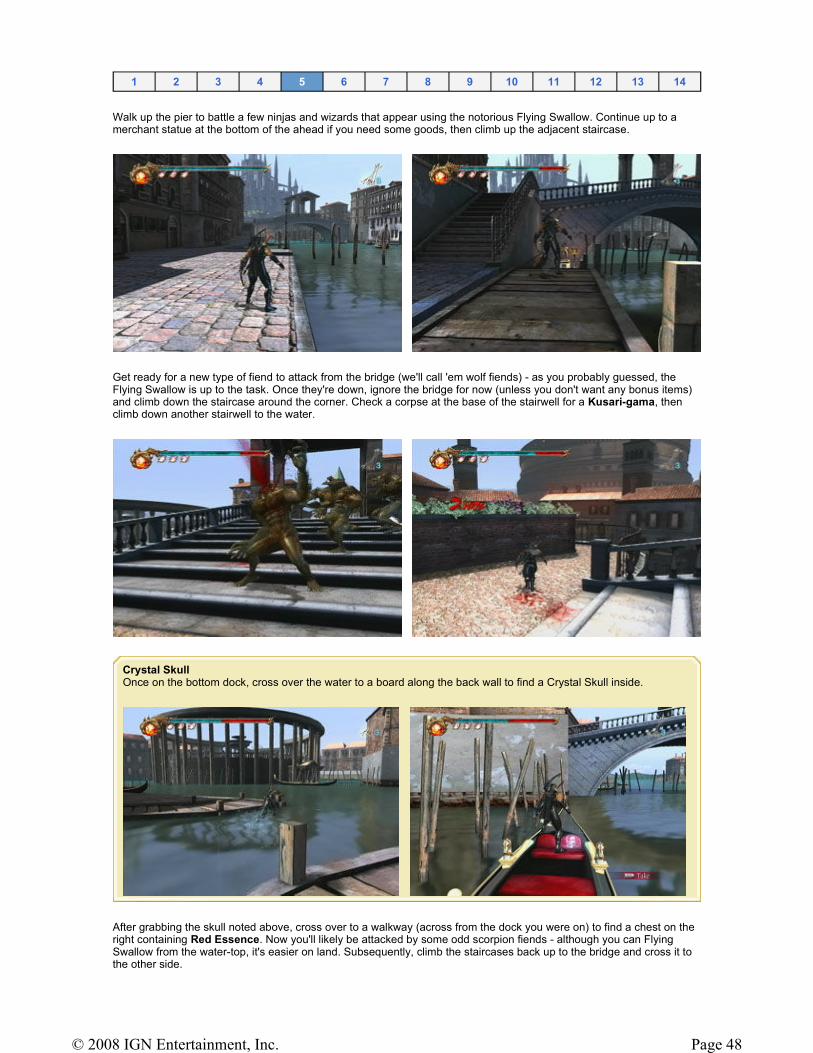
Walk up the pier to battle a few ninjas and wizards that appear using the notorious Flying Swallow. Continue up to a merchant statue at the bottom of the ahead if you need some goods, then climb up the adjacent staircase.
Get ready for a new type of fiend to attack from the bridge (we'll call 'em wolf fiends) - as you probably guessed, the Flying Swallow is up to the task. Once they're down, ignore the bridge for now (unless you don't want any bonus items) and climb down the staircase around the corner. Check a corpse at the base of the stairwell for a Kusari-gama, then climb down another stairwell to the water.
After grabbing the skull noted above, cross over to a walkway (across from the dock you were on) to find a chest on the right containing Red Essence. Now you'll likely be attacked by some odd scorpion fiends - although you can Flying Swallow from the water-top, it's easier on land. Subsequently, climb the staircases back up to the bridge and cross it to the other side.
1 2 3 4 5 6 7 8 9 10 11 12 13 14
Crystal Skull Once on the bottom dock, cross over the water to a board along the back wall to find a Crystal Skull inside.
Page 48© 2008 IGN Entertainment, Inc.
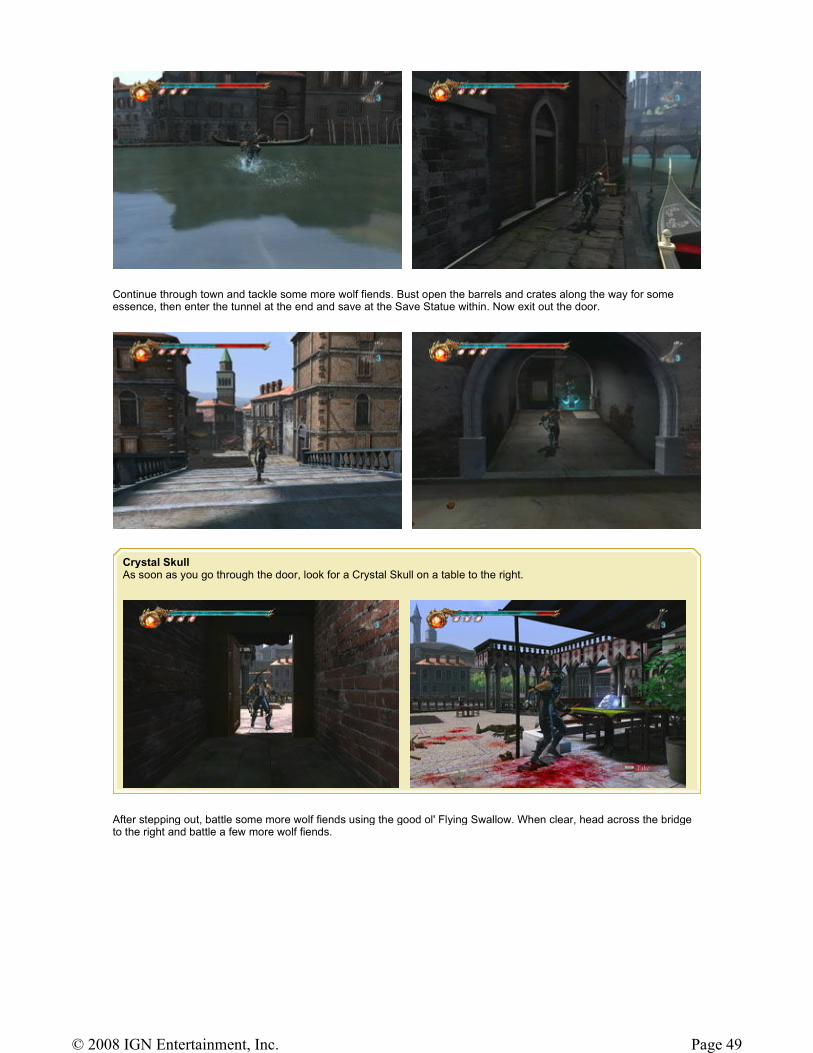
Continue through town and tackle some more wolf fiends. Bust open the barrels and crates along the way for some essence, then enter the tunnel at the end and save at the Save Statue within. Now exit out the door.
After stepping out, battle some more wolf fiends using the good ol' Flying Swallow. When clear, head across the bridge to the right and battle a few more wolf fiends.
Crystal Skull As soon as you go through the door, look for a Crystal Skull on a table to the right.
Page 49© 2008 IGN Entertainment, Inc.
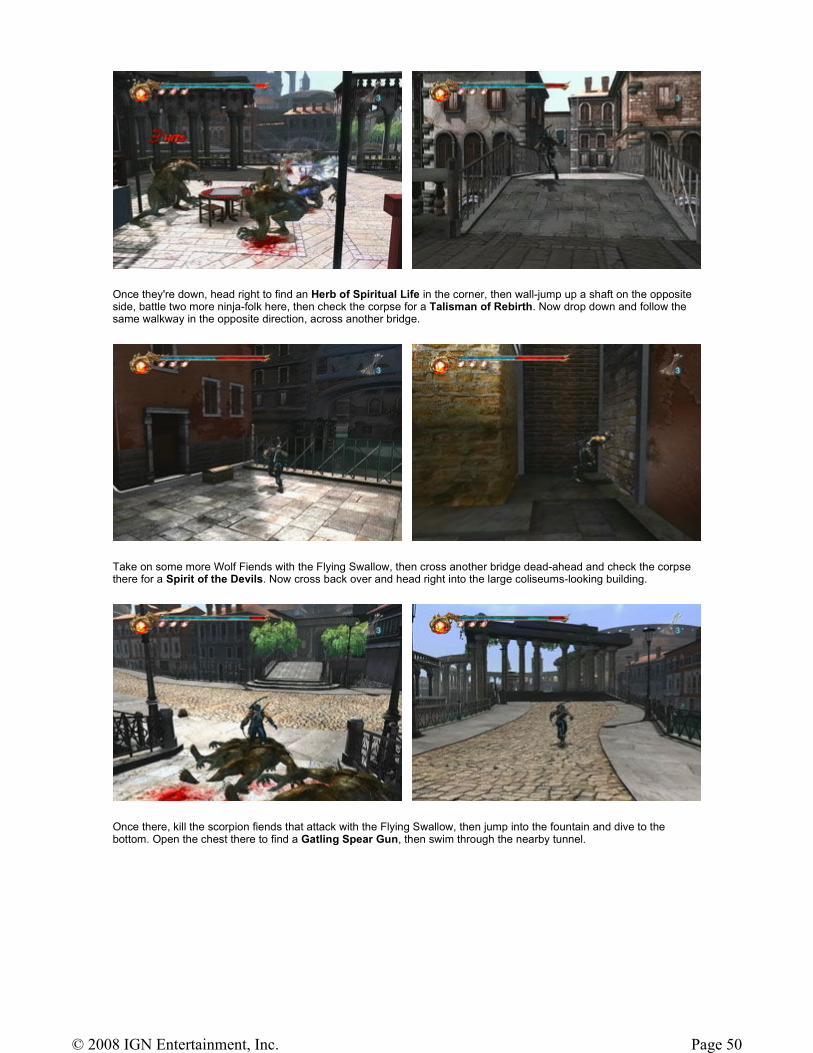
Once they're down, head right to find an Herb of Spiritual Life in the corner, then wall-jump up a shaft on the opposite side, battle two more ninja-folk here, then check the corpse for a Talisman of Rebirth. Now drop down and follow the same walkway in the opposite direction, across another bridge.
Take on some more Wolf Fiends with the Flying Swallow, then cross another bridge dead-ahead and check the corpse there for a Spirit of the Devils. Now cross back over and head right into the large coliseums-looking building.
Once there, kill the scorpion fiends that attack with the Flying Swallow, then jump into the fountain and dive to the bottom. Open the chest there to find a Gatling Spear Gun, then swim through the nearby tunnel.
Page 50© 2008 IGN Entertainment, Inc.
Page 51© 2008 IGN Entertainment, Inc.
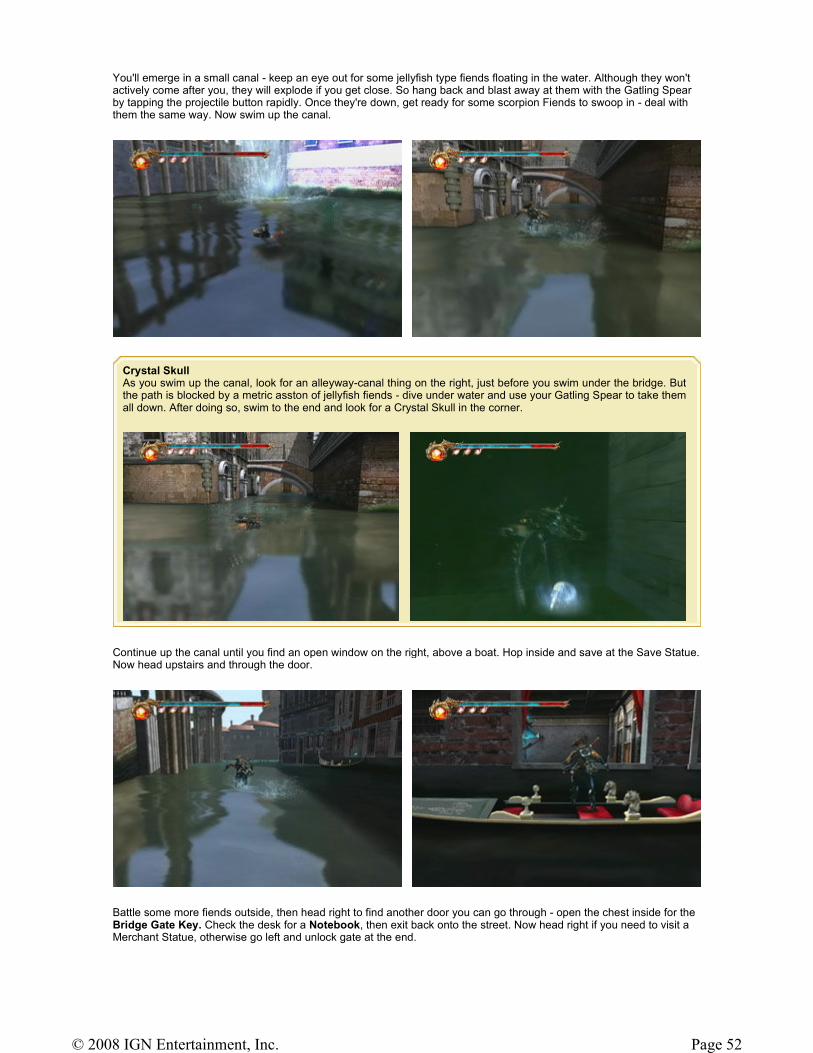
You'll emerge in a small canal - keep an eye out for some jellyfish type fiends floating in the water. Although they won't actively come after you, they will explode if you get close. So hang back and blast away at them with the Gatling Spear by tapping the projectile button rapidly. Once they're down, get ready for some scorpion Fiends to swoop in - deal with them the same way. Now swim up the canal.
Continue up the canal until you find an open window on the right, above a boat. Hop inside and save at the Save Statue. Now head upstairs and through the door.
Battle some more fiends outside, then head right to find another door you can go through - open the chest inside for the Bridge Gate Key. Check the desk for a Notebook, then exit back onto the street. Now head right if you need to visit a Merchant Statue, otherwise go left and unlock gate at the end.
Crystal Skull As you swim up the canal, look for an alleyway-canal thing on the right, just before you swim under the bridge. But the path is blocked by a metric asston of jellyfish fiends - dive under water and use your Gatling Spear to take them all down. After doing so, swim to the end and look for a Crystal Skull in the corner.
Page 52© 2008 IGN Entertainment, Inc.
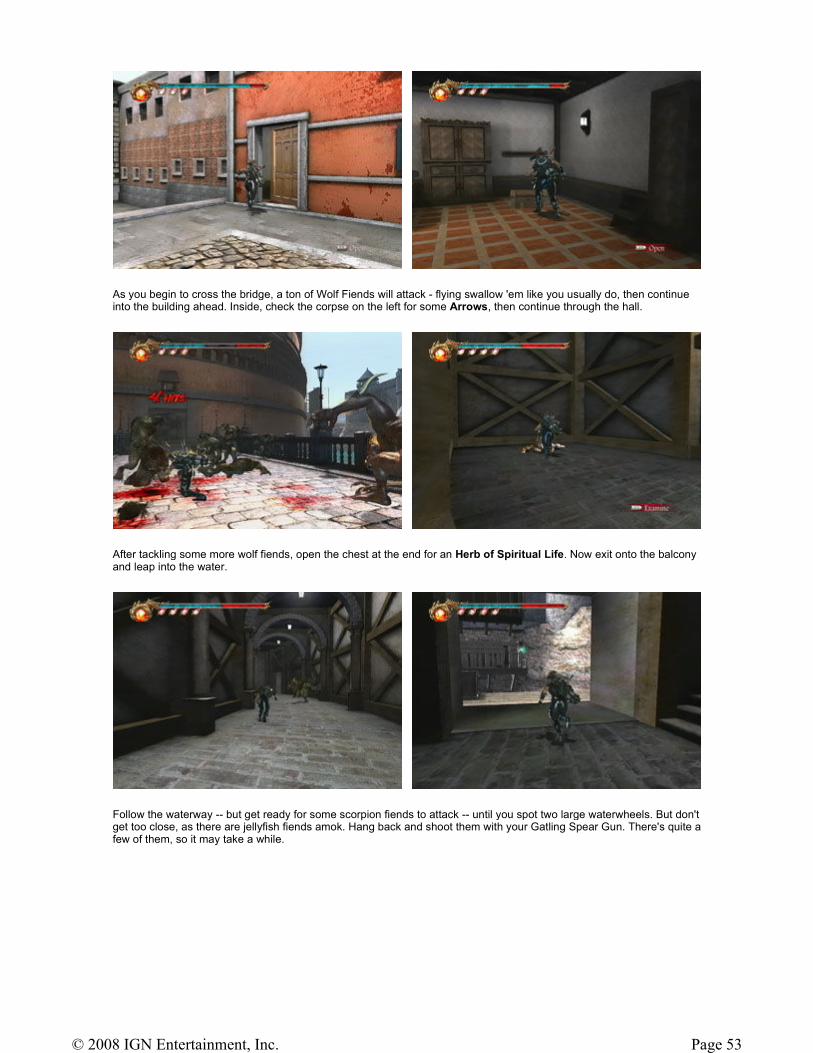
As you begin to cross the bridge, a ton of Wolf Fiends will attack - flying swallow 'em like you usually do, then continue into the building ahead. Inside, check the corpse on the left for some Arrows, then continue through the hall.
After tackling some more wolf fiends, open the chest at the end for an Herb of Spiritual Life. Now exit onto the balcony and leap into the water.
Follow the waterway -- but get ready for some scorpion fiends to attack -- until you spot two large waterwheels. But don't get too close, as there are jellyfish fiends amok. Hang back and shoot them with your Gatling Spear Gun. There's quite a few of them, so it may take a while.
Page 53© 2008 IGN Entertainment, Inc.
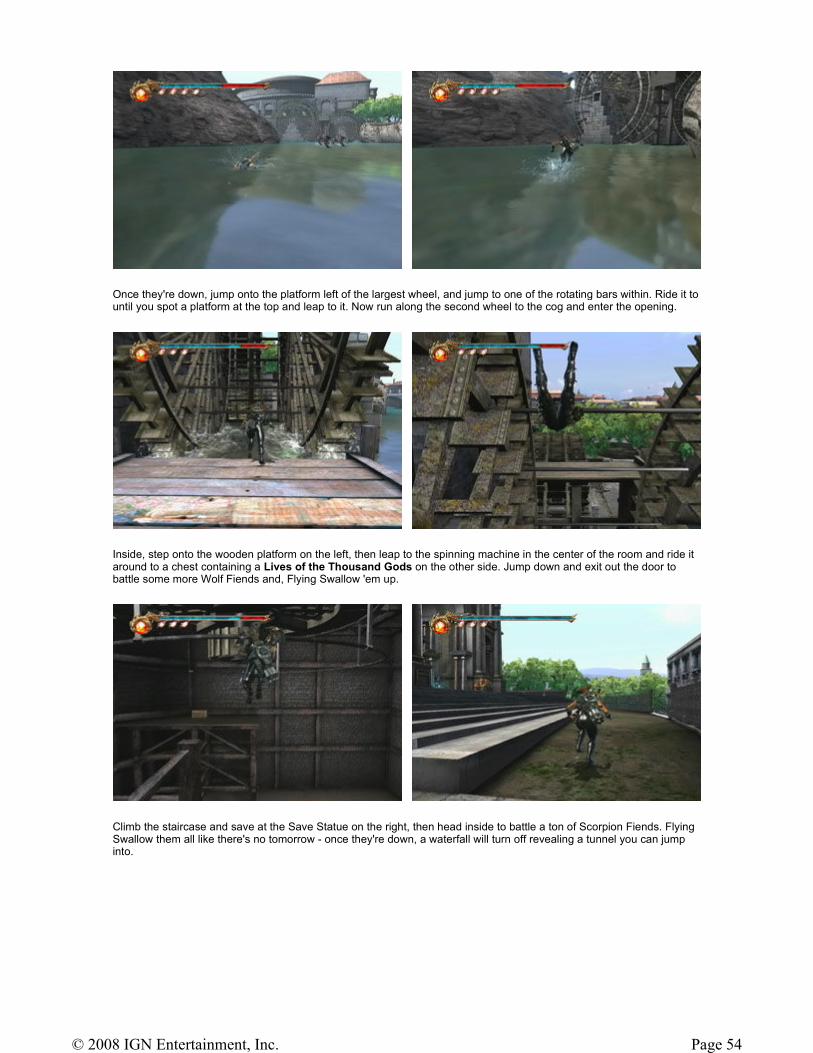
Once they're down, jump onto the platform left of the largest wheel, and jump to one of the rotating bars within. Ride it to until you spot a platform at the top and leap to it. Now run along the second wheel to the cog and enter the opening.
Inside, step onto the wooden platform on the left, then leap to the spinning machine in the center of the room and ride it around to a chest containing a Lives of the Thousand Gods on the other side. Jump down and exit out the door to battle some more Wolf Fiends and, Flying Swallow 'em up.
Climb the staircase and save at the Save Statue on the right, then head inside to battle a ton of Scorpion Fiends. Flying Swallow them all like there's no tomorrow - once they're down, a waterfall will turn off revealing a tunnel you can jump into.
Page 54© 2008 IGN Entertainment, Inc.
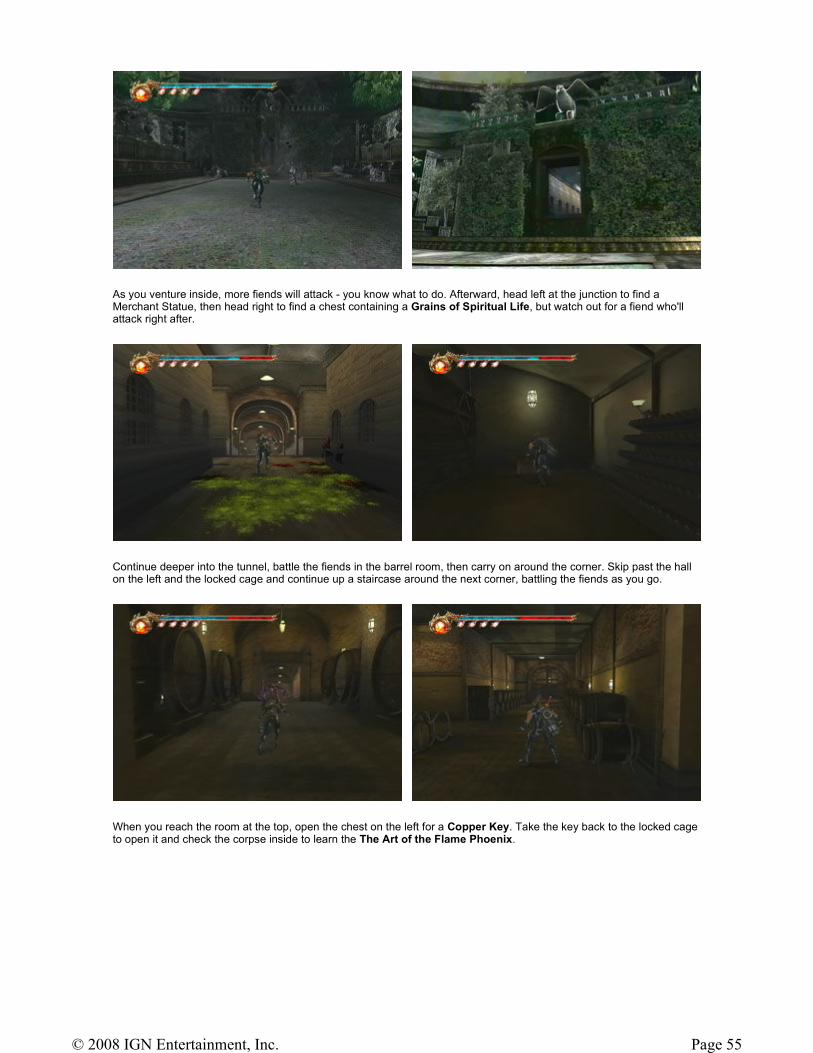
As you venture inside, more fiends will attack - you know what to do. Afterward, head left at the junction to find a Merchant Statue, then head right to find a chest containing a Grains of Spiritual Life, but watch out for a fiend who'll attack right after.
Continue deeper into the tunnel, battle the fiends in the barrel room, then carry on around the corner. Skip past the hall on the left and the locked cage and continue up a staircase around the next corner, battling the fiends as you go.
When you reach the room at the top, open the chest on the left for a Copper Key. Take the key back to the locked cage to open it and check the corpse inside to learn the The Art of the Flame Phoenix.
Page 55© 2008 IGN Entertainment, Inc.
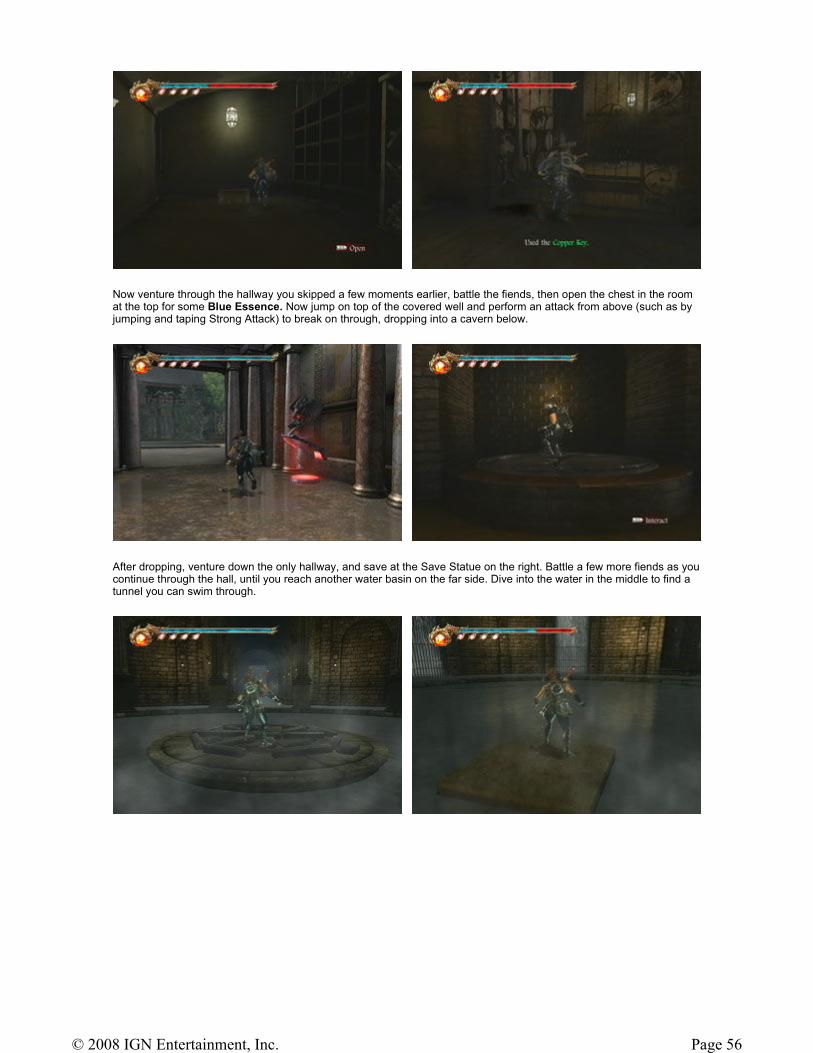
Now venture through the hallway you skipped a few moments earlier, battle the fiends, then open the chest in the room at the top for some Blue Essence. Now jump on top of the covered well and perform an attack from above (such as by jumping and taping Strong Attack) to break on through, dropping into a cavern below.
After dropping, venture down the only hallway, and save at the Save Statue on the right. Battle a few more fiends as you continue through the hall, until you reach another water basin on the far side. Dive into the water in the middle to find a tunnel you can swim through.
Page 56© 2008 IGN Entertainment, Inc.
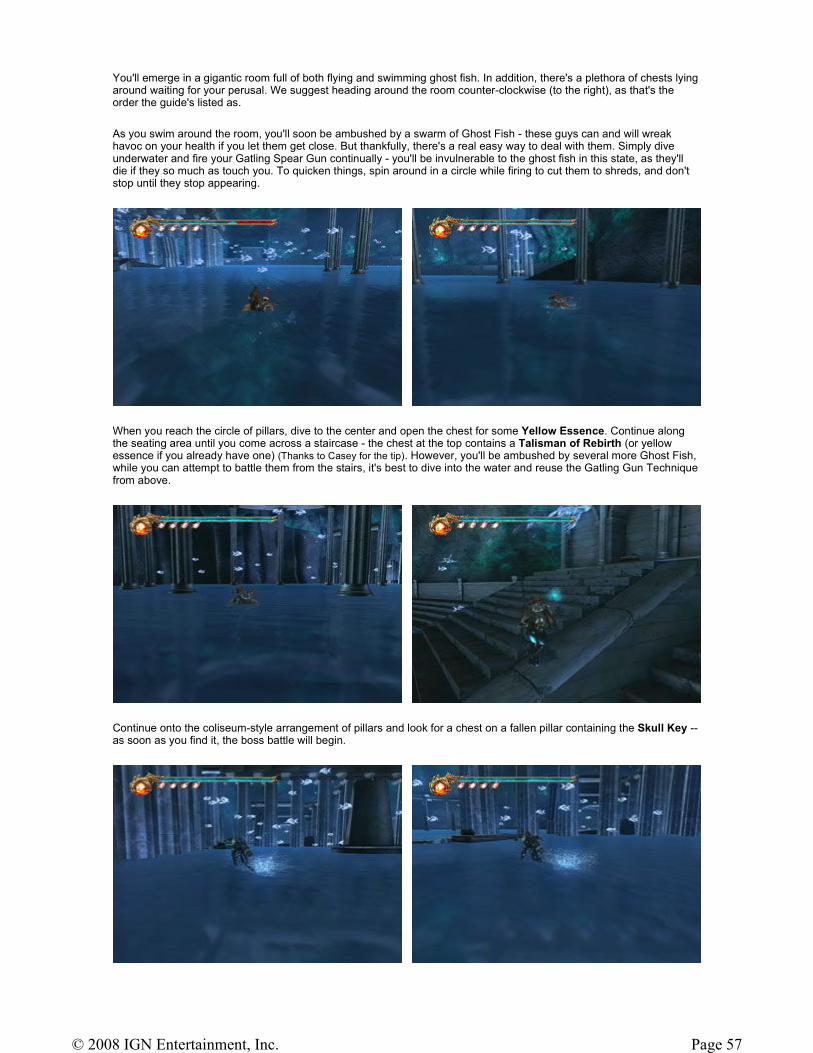
You'll emerge in a gigantic room full of both flying and swimming ghost fish. In addition, there's a plethora of chests lying around waiting for your perusal. We suggest heading around the room counter-clockwise (to the right), as that's the order the guide's listed as.
As you swim around the room, you'll soon be ambushed by a swarm of Ghost Fish - these guys can and will wreak havoc on your health if you let them get close. But thankfully, there's a real easy way to deal with them. Simply dive underwater and fire your Gatling Spear Gun continually - you'll be invulnerable to the ghost fish in this state, as they'll die if they so much as touch you. To quicken things, spin around in a circle while firing to cut them to shreds, and don't stop until they stop appearing.
When you reach the circle of pillars, dive to the center and open the chest for some Yellow Essence. Continue along the seating area until you come across a staircase - the chest at the top contains a Talisman of Rebirth (or yellow essence if you already have one) (Thanks to Casey for the tip). However, you'll be ambushed by several more Ghost Fish, while you can attempt to battle them from the stairs, it's best to dive into the water and reuse the Gatling Gun Technique from above.
Continue onto the coliseum-style arrangement of pillars and look for a chest on a fallen pillar containing the Skull Key -- as soon as you find it, the boss battle will begin.
Page 57© 2008 IGN Entertainment, Inc.
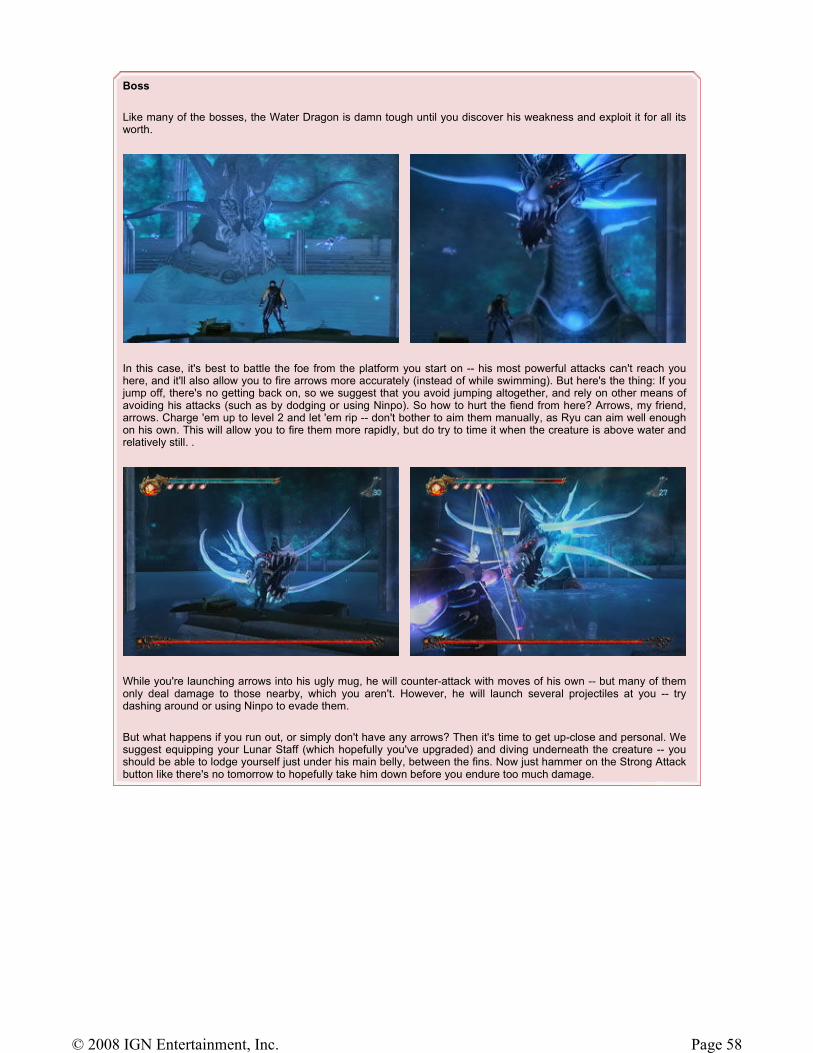
Boss
Like many of the bosses, the Water Dragon is damn tough until you discover his weakness and exploit it for all its worth.
In this case, it's best to battle the foe from the platform you start on -- his most powerful attacks can't reach you here, and it'll also allow you to fire arrows more accurately (instead of while swimming). But here's the thing: If you jump off, there's no getting back on, so we suggest that you avoid jumping altogether, and rely on other means of avoiding his attacks (such as by dodging or using Ninpo). So how to hurt the fiend from here? Arrows, my friend, arrows. Charge 'em up to level 2 and let 'em rip -- don't bother to aim them manually, as Ryu can aim well enough on his own. This will allow you to fire them more rapidly, but do try to time it when the creature is above water and relatively still. .
While you're launching arrows into his ugly mug, he will counter-attack with moves of his own -- but many of them only deal damage to those nearby, which you aren't. However, he will launch several projectiles at you -- try dashing around or using Ninpo to evade them.
But what happens if you run out, or simply don't have any arrows? Then it's time to get up-close and personal. We suggest equipping your Lunar Staff (which hopefully you've upgraded) and diving underneath the creature -- you should be able to lodge yourself just under his main belly, between the fins. Now just hammer on the Strong Attack button like there's no tomorrow to hopefully take him down before you endure too much damage.
Page 58© 2008 IGN Entertainment, Inc.
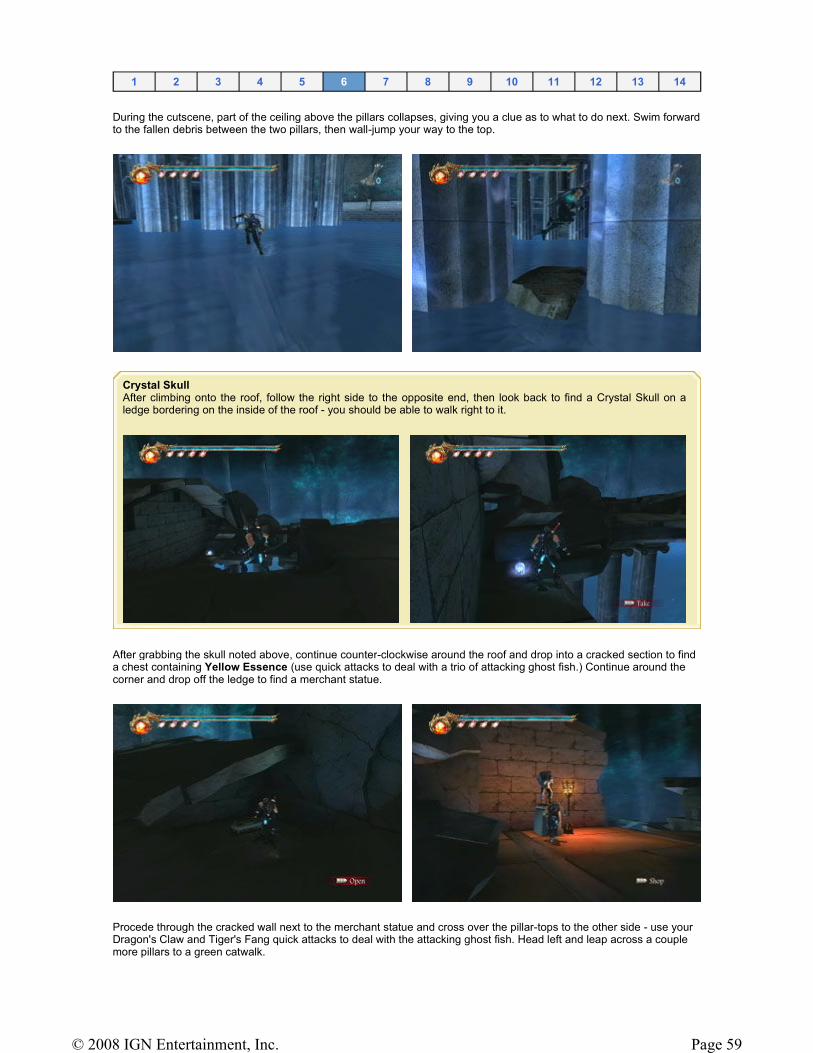
During the cutscene, part of the ceiling above the pillars collapses, giving you a clue as to what to do next. Swim forward to the fallen debris between the two pillars, then wall-jump your way to the top.
After grabbing the skull noted above, continue counter-clockwise around the roof and drop into a cracked section to find a chest containing Yellow Essence (use quick attacks to deal with a trio of attacking ghost fish.) Continue around the corner and drop off the ledge to find a merchant statue.
Procede through the cracked wall next to the merchant statue and cross over the pillar-tops to the other side - use your Dragon's Claw and Tiger's Fang quick attacks to deal with the attacking ghost fish. Head left and leap across a couple more pillars to a green catwalk.
1 2 3 4 5 6 7 8 9 10 11 12 13 14
Crystal Skull After climbing onto the roof, follow the right side to the opposite end, then look back to find a Crystal Skull on a ledge bordering on the inside of the roof - you should be able to walk right to it.
Page 59© 2008 IGN Entertainment, Inc.
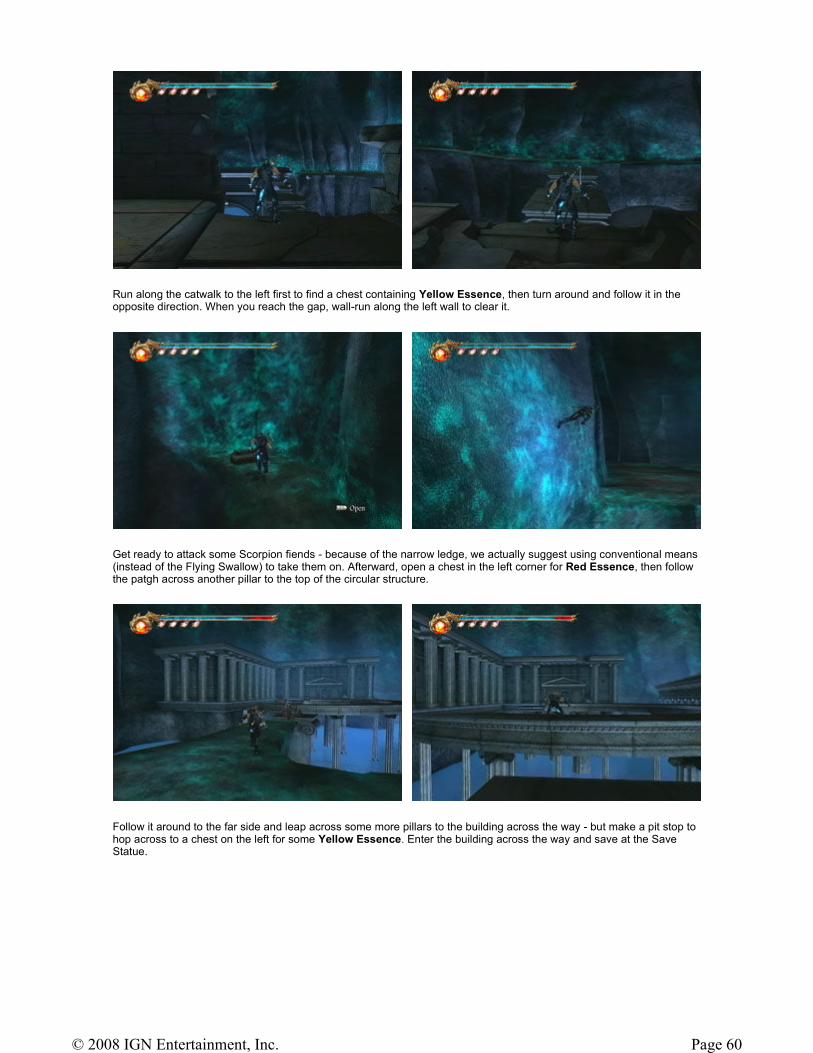
Run along the catwalk to the left first to find a chest containing Yellow Essence, then turn around and follow it in the opposite direction. When you reach the gap, wall-run along the left wall to clear it.
Get ready to attack some Scorpion fiends - because of the narrow ledge, we actually suggest using conventional means (instead of the Flying Swallow) to take them on. Afterward, open a chest in the left corner for Red Essence, then follow the patgh across another pillar to the top of the circular structure.
Follow it around to the far side and leap across some more pillars to the building across the way - but make a pit stop to hop across to a chest on the left for some Yellow Essence. Enter the building across the way and save at the Save Statue.
Page 60© 2008 IGN Entertainment, Inc.
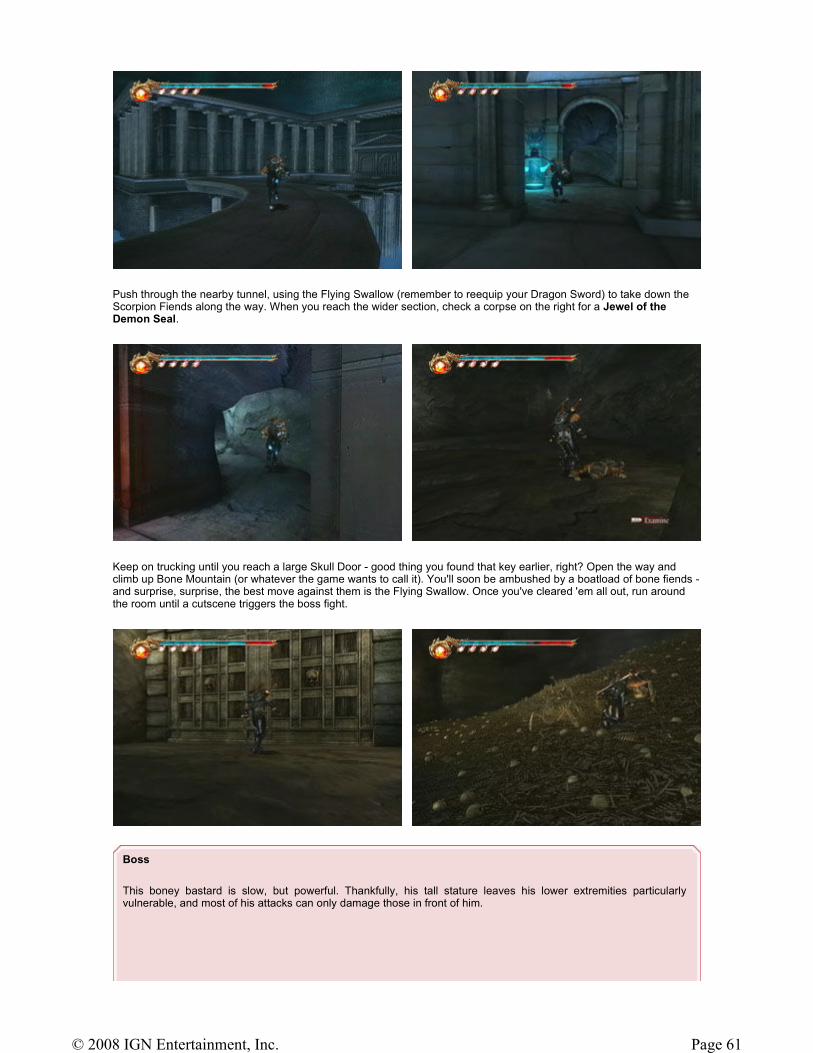
Push through the nearby tunnel, using the Flying Swallow (remember to reequip your Dragon Sword) to take down the Scorpion Fiends along the way. When you reach the wider section, check a corpse on the right for a Jewel of the Demon Seal.
Keep on trucking until you reach a large Skull Door - good thing you found that key earlier, right? Open the way and climb up Bone Mountain (or whatever the game wants to call it). You'll soon be ambushed by a boatload of bone fiends - and surprise, surprise, the best move against them is the Flying Swallow. Once you've cleared 'em all out, run around the room until a cutscene triggers the boss fight.
Boss
This boney bastard is slow, but powerful. Thankfully, his tall stature leaves his lower extremities particularly vulnerable, and most of his attacks can only damage those in front of him.
Page 61© 2008 IGN Entertainment, Inc.
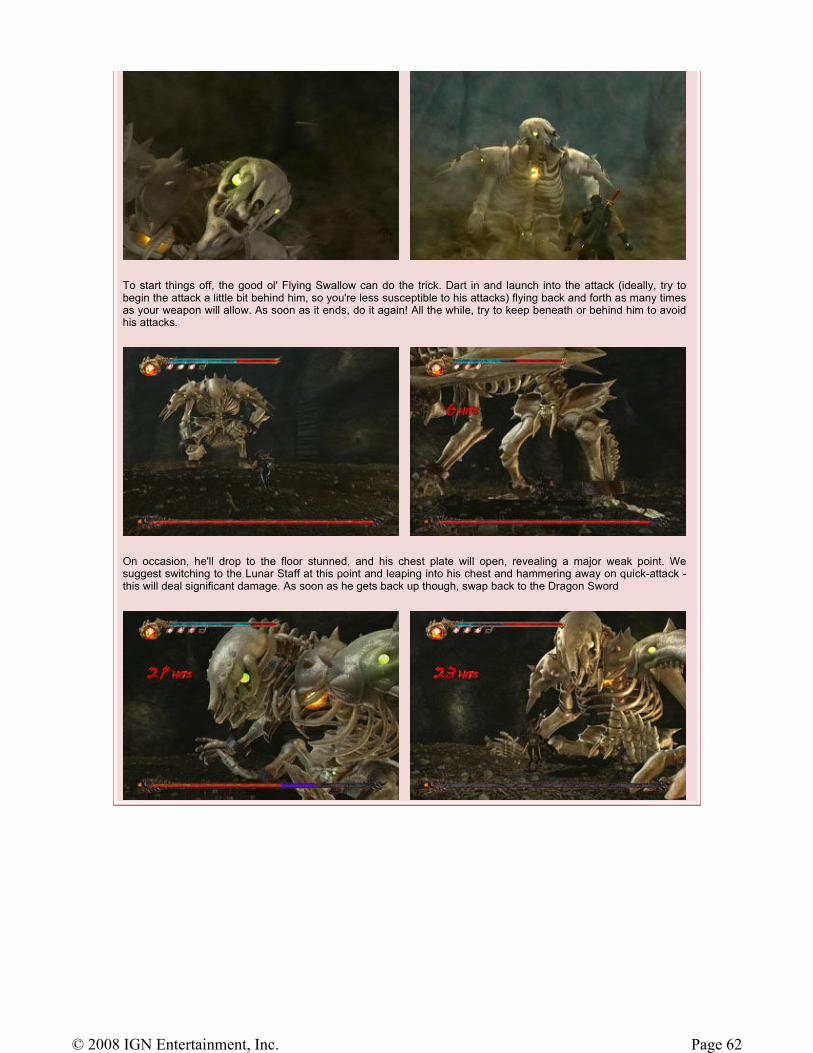
To start things off, the good ol' Flying Swallow can do the trick. Dart in and launch into the attack (ideally, try to begin the attack a little bit behind him, so you're less susceptible to his attacks) flying back and forth as many times as your weapon will allow. As soon as it ends, do it again! All the while, try to keep beneath or behind him to avoid his attacks.
On occasion, he'll drop to the floor stunned, and his chest plate will open, revealing a major weak point. We suggest switching to the Lunar Staff at this point and leaping into his chest and hammering away on quick-attack - this will deal significant damage. As soon as he gets back up though, swap back to the Dragon Sword
Page 62© 2008 IGN Entertainment, Inc.
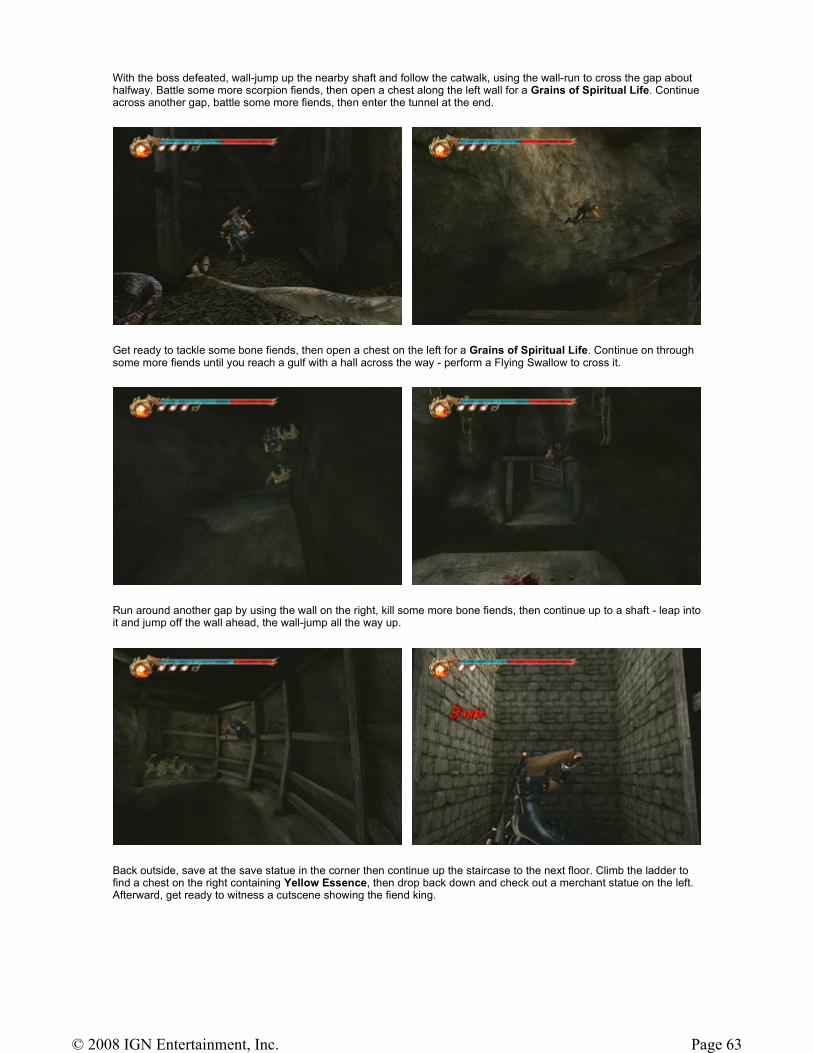
With the boss defeated, wall-jump up the nearby shaft and follow the catwalk, using the wall-run to cross the gap about halfway. Battle some more scorpion fiends, then open a chest along the left wall for a Grains of Spiritual Life. Continue across another gap, battle some more fiends, then enter the tunnel at the end.
Get ready to tackle some bone fiends, then open a chest on the left for a Grains of Spiritual Life. Continue on through some more fiends until you reach a gulf with a hall across the way - perform a Flying Swallow to cross it.
Run around another gap by using the wall on the right, kill some more bone fiends, then continue up to a shaft - leap into it and jump off the wall ahead, the wall-jump all the way up.
Back outside, save at the save statue in the corner then continue up the staircase to the next floor. Climb the ladder to find a chest on the right containing Yellow Essence, then drop back down and check out a merchant statue on the left. Afterward, get ready to witness a cutscene showing the fiend king.
Page 63© 2008 IGN Entertainment, Inc.
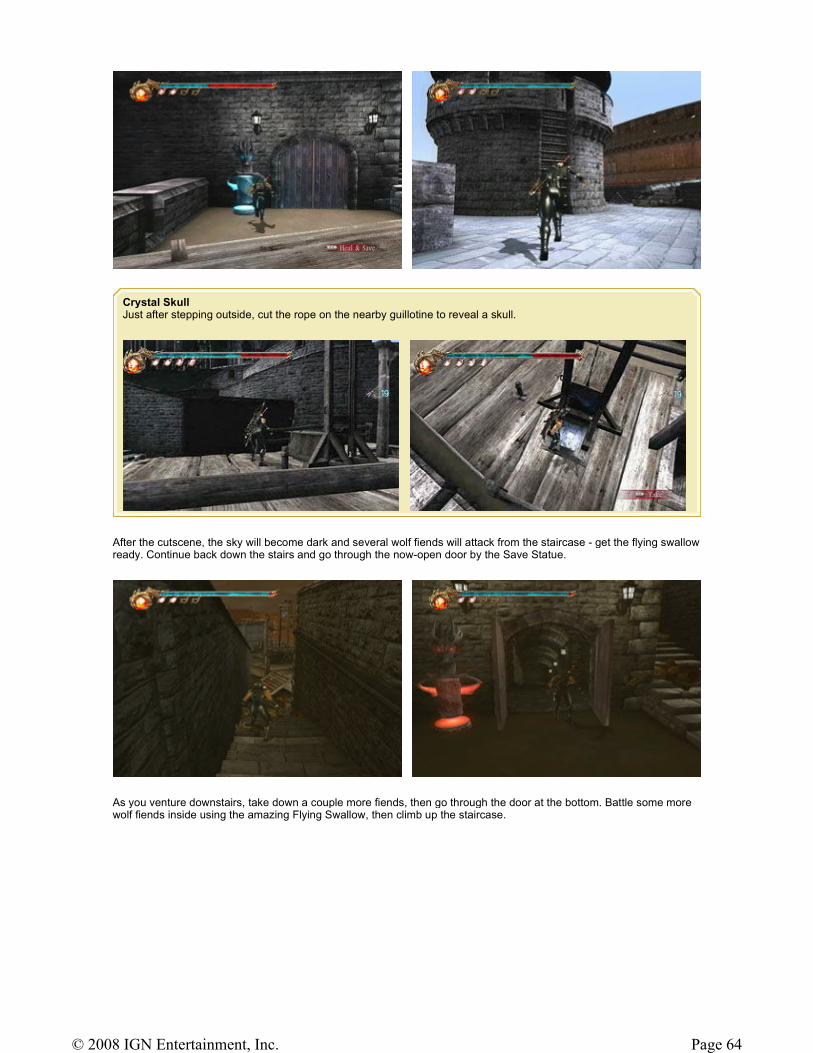
After the cutscene, the sky will become dark and several wolf fiends will attack from the staircase - get the flying swallow ready. Continue back down the stairs and go through the now-open door by the Save Statue.
As you venture downstairs, take down a couple more fiends, then go through the door at the bottom. Battle some more wolf fiends inside using the amazing Flying Swallow, then climb up the staircase.
Crystal Skull Just after stepping outside, cut the rope on the nearby guillotine to reveal a skull.
Page 64© 2008 IGN Entertainment, Inc.
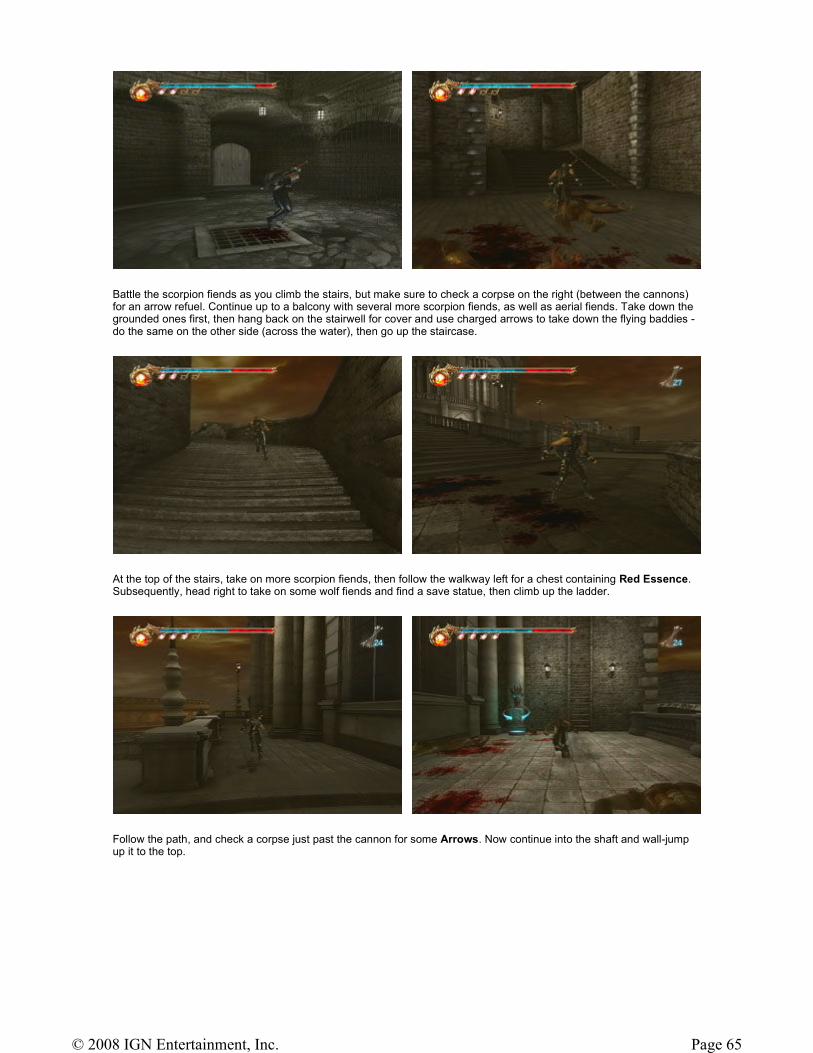
Battle the scorpion fiends as you climb the stairs, but make sure to check a corpse on the right (between the cannons) for an arrow refuel. Continue up to a balcony with several more scorpion fiends, as well as aerial fiends. Take down the grounded ones first, then hang back on the stairwell for cover and use charged arrows to take down the flying baddies - do the same on the other side (across the water), then go up the staircase.
At the top of the stairs, take on more scorpion fiends, then follow the walkway left for a chest containing Red Essence. Subsequently, head right to take on some wolf fiends and find a save statue, then climb up the ladder.
Follow the path, and check a corpse just past the cannon for some Arrows. Now continue into the shaft and wall-jump up it to the top.
Page 65© 2008 IGN Entertainment, Inc.
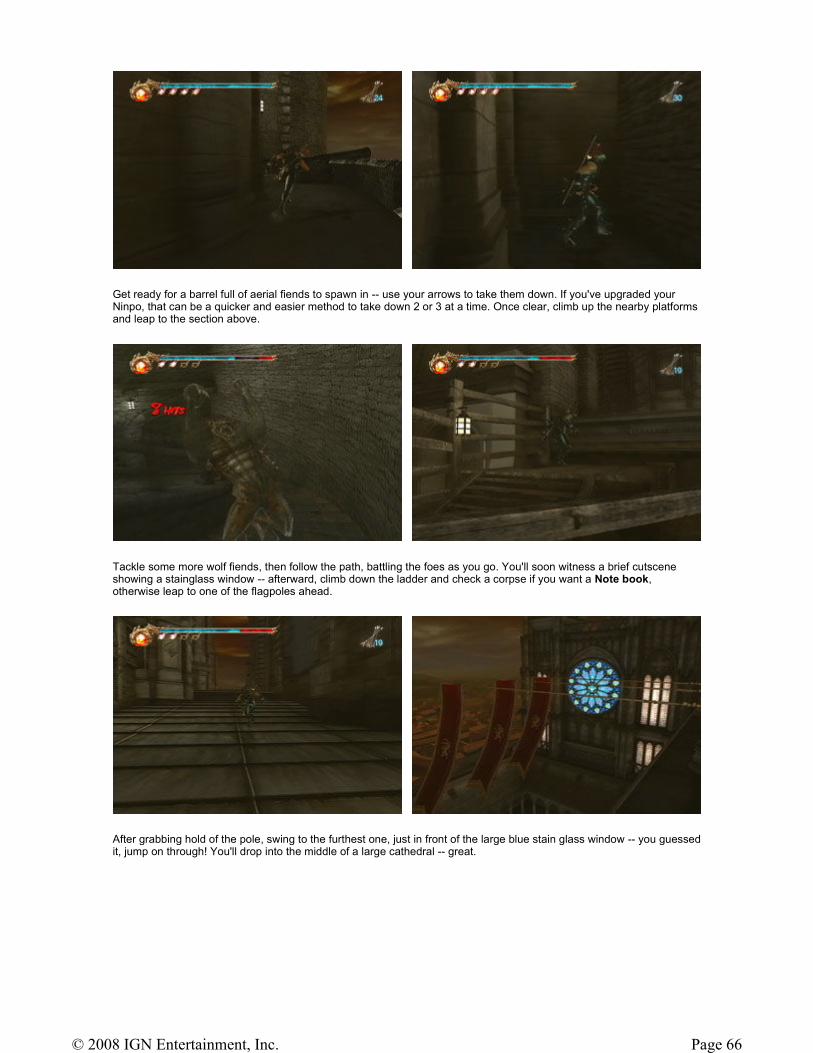
Get ready for a barrel full of aerial fiends to spawn in -- use your arrows to take them down. If you've upgraded your Ninpo, that can be a quicker and easier method to take down 2 or 3 at a time. Once clear, climb up the nearby platforms and leap to the section above.
Tackle some more wolf fiends, then follow the path, battling the foes as you go. You'll soon witness a brief cutscene showing a stainglass window -- afterward, climb down the ladder and check a corpse if you want a Note book, otherwise leap to one of the flagpoles ahead.
After grabbing hold of the pole, swing to the furthest one, just in front of the large blue stain glass window -- you guessed it, jump on through! You'll drop into the middle of a large cathedral -- great.
Page 66© 2008 IGN Entertainment, Inc.
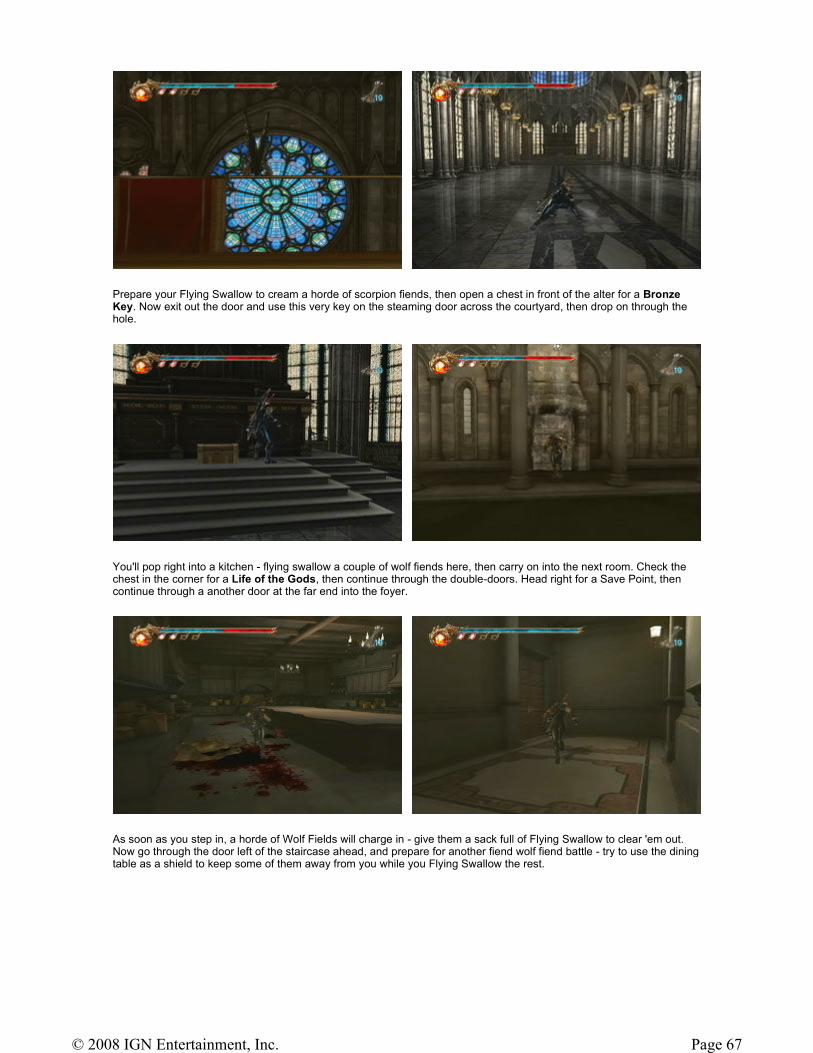
Prepare your Flying Swallow to cream a horde of scorpion fiends, then open a chest in front of the alter for a Bronze Key. Now exit out the door and use this very key on the steaming door across the courtyard, then drop on through the hole.
You'll pop right into a kitchen - flying swallow a couple of wolf fiends here, then carry on into the next room. Check the chest in the corner for a Life of the Gods, then continue through the double-doors. Head right for a Save Point, then continue through a another door at the far end into the foyer.
As soon as you step in, a horde of Wolf Fields will charge in - give them a sack full of Flying Swallow to clear 'em out. Now go through the door left of the staircase ahead, and prepare for another fiend wolf fiend battle - try to use the dining table as a shield to keep some of them away from you while you Flying Swallow the rest.
Page 67© 2008 IGN Entertainment, Inc.
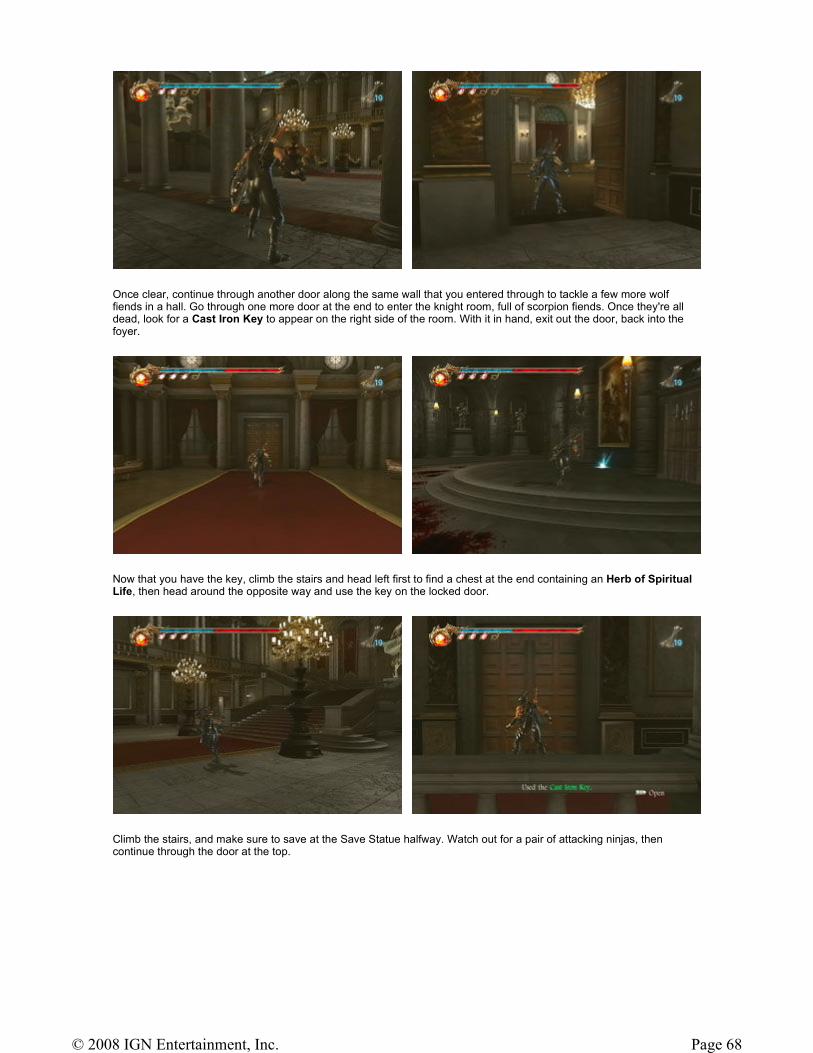
Once clear, continue through another door along the same wall that you entered through to tackle a few more wolf fiends in a hall. Go through one more door at the end to enter the knight room, full of scorpion fiends. Once they're all dead, look for a Cast Iron Key to appear on the right side of the room. With it in hand, exit out the door, back into the foyer.
Now that you have the key, climb the stairs and head left first to find a chest at the end containing an Herb of Spiritual Life, then head around the opposite way and use the key on the locked door.
Climb the stairs, and make sure to save at the Save Statue halfway. Watch out for a pair of attacking ninjas, then continue through the door at the top.
Page 68© 2008 IGN Entertainment, Inc.
Page 69© 2008 IGN Entertainment, Inc.
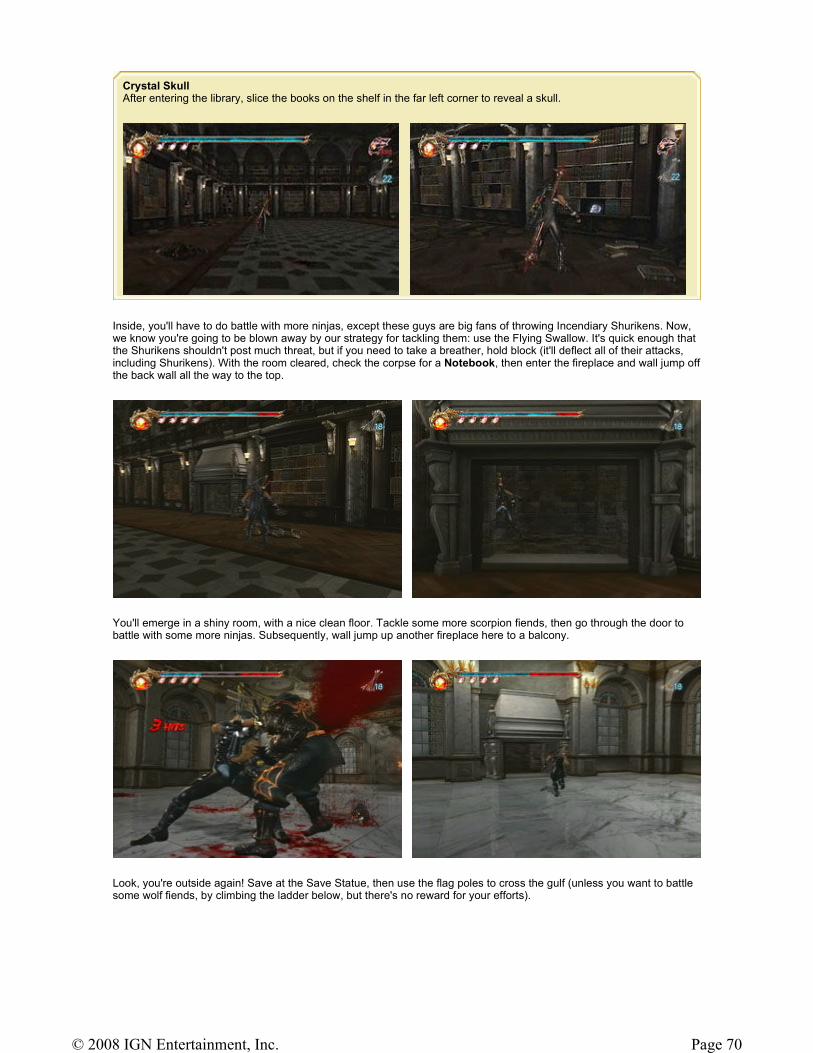
Inside, you'll have to do battle with more ninjas, except these guys are big fans of throwing Incendiary Shurikens. Now, we know you're going to be blown away by our strategy for tackling them: use the Flying Swallow. It's quick enough that the Shurikens shouldn't post much threat, but if you need to take a breather, hold block (it'll deflect all of their attacks, including Shurikens). With the room cleared, check the corpse for a Notebook, then enter the fireplace and wall jump off the back wall all the way to the top.
You'll emerge in a shiny room, with a nice clean floor. Tackle some more scorpion fiends, then go through the door to battle with some more ninjas. Subsequently, wall jump up another fireplace here to a balcony.
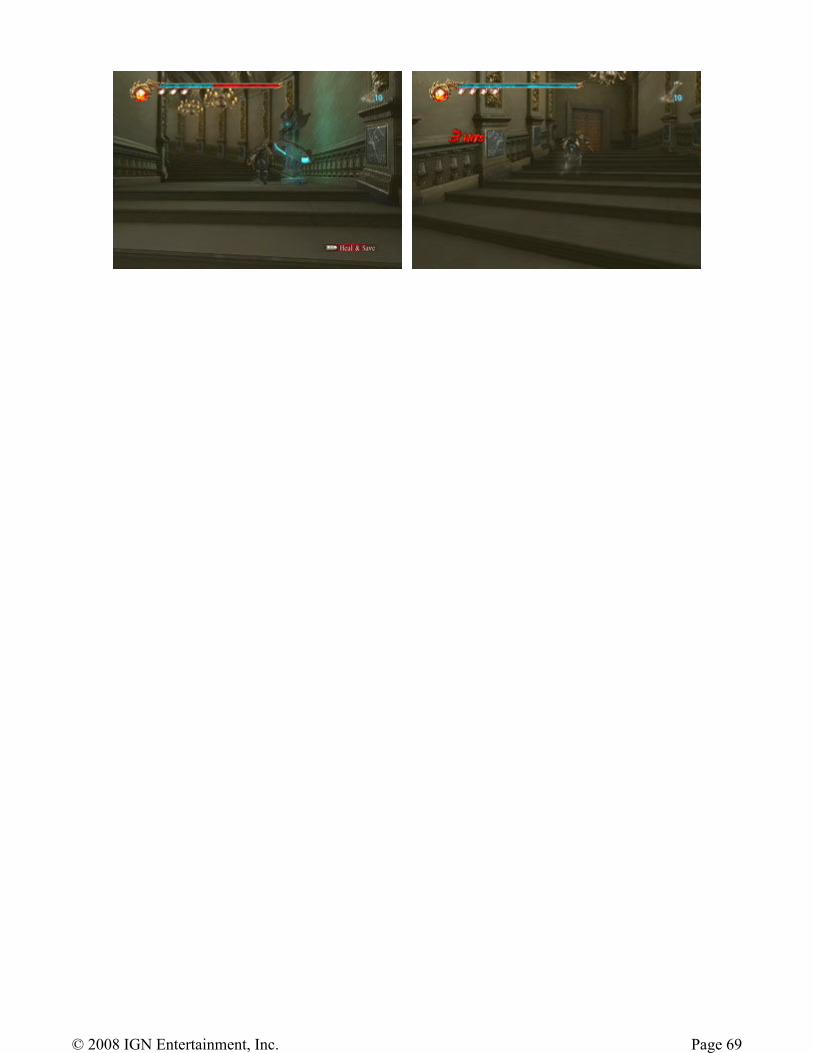
Look, you're outside again! Save at the Save Statue, then use the flag poles to cross the gulf (unless you want to battle some wolf fiends, by climbing the ladder below, but there's no reward for your efforts).
Crystal Skull After entering the library, slice the books on the shelf in the far left corner to reveal a skull.
Page 70© 2008 IGN Entertainment, Inc.
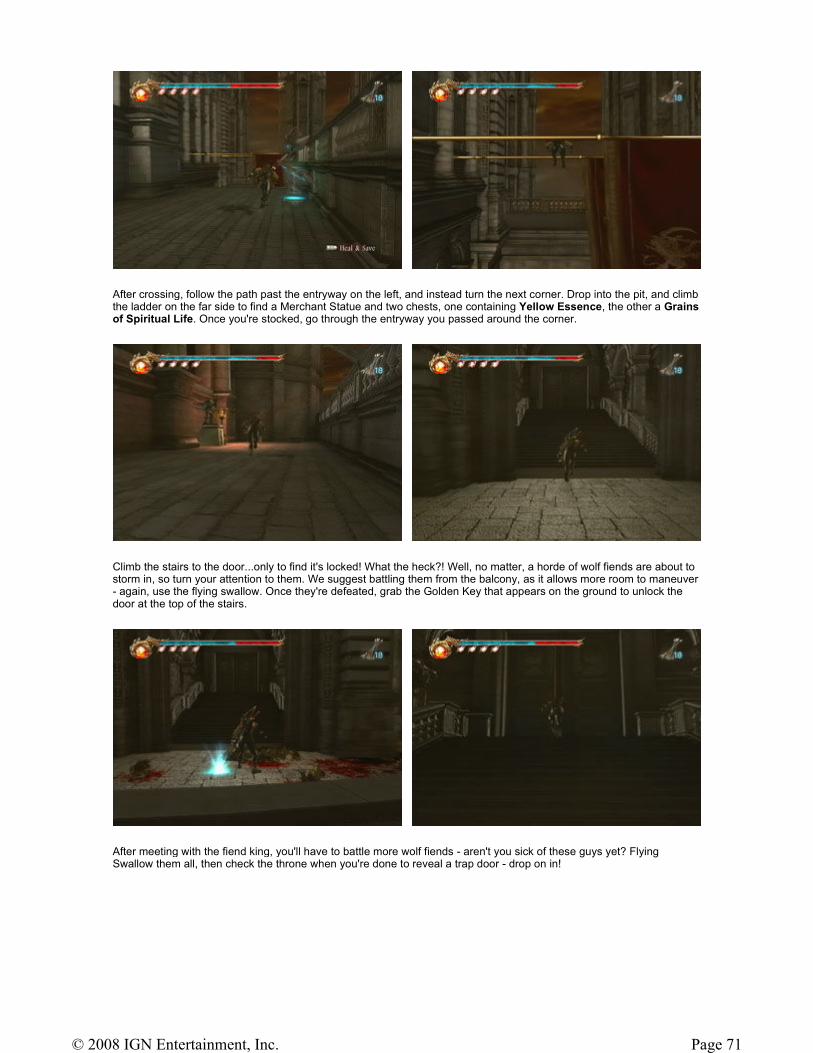
After crossing, follow the path past the entryway on the left, and instead turn the next corner. Drop into the pit, and climb the ladder on the far side to find a Merchant Statue and two chests, one containing Yellow Essence, the other a Grains of Spiritual Life. Once you're stocked, go through the entryway you passed around the corner.
Climb the stairs to the door...only to find it's locked! What the heck?! Well, no matter, a horde of wolf fiends are about to storm in, so turn your attention to them. We suggest battling them from the balcony, as it allows more room to maneuver - again, use the flying swallow. Once they're defeated, grab the Golden Key that appears on the ground to unlock the door at the top of the stairs.
After meeting with the fiend king, you'll have to battle more wolf fiends - aren't you sick of these guys yet? Flying Swallow them all, then check the throne when you're done to reveal a trap door - drop on in!
Page 71© 2008 IGN Entertainment, Inc.
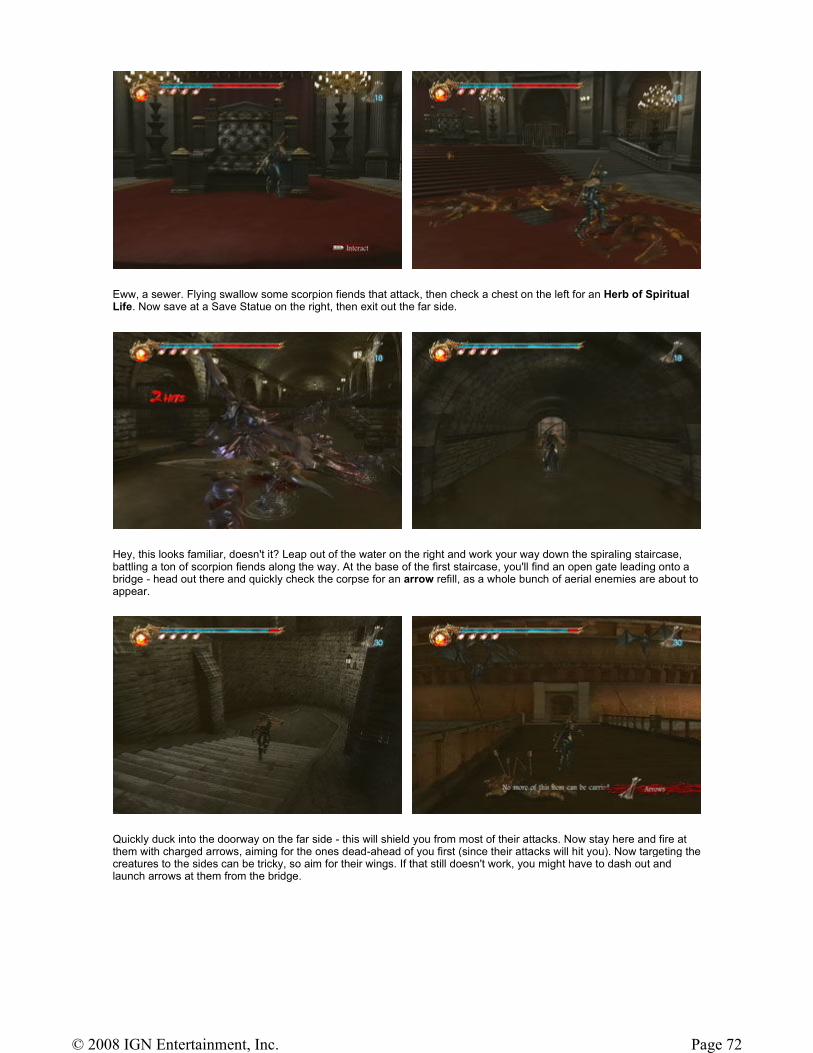
Eww, a sewer. Flying swallow some scorpion fiends that attack, then check a chest on the left for an Herb of Spiritual Life. Now save at a Save Statue on the right, then exit out the far side.
Hey, this looks familiar, doesn't it? Leap out of the water on the right and work your way down the spiraling staircase, battling a ton of scorpion fiends along the way. At the base of the first staircase, you'll find an open gate leading onto a bridge - head out there and quickly check the corpse for an arrow refill, as a whole bunch of aerial enemies are about to appear.
Quickly duck into the doorway on the far side - this will shield you from most of their attacks. Now stay here and fire at them with charged arrows, aiming for the ones dead-ahead of you first (since their attacks will hit you). Now targeting the creatures to the sides can be tricky, so aim for their wings. If that still doesn't work, you might have to dash out and launch arrows at them from the bridge.
Page 72© 2008 IGN Entertainment, Inc.
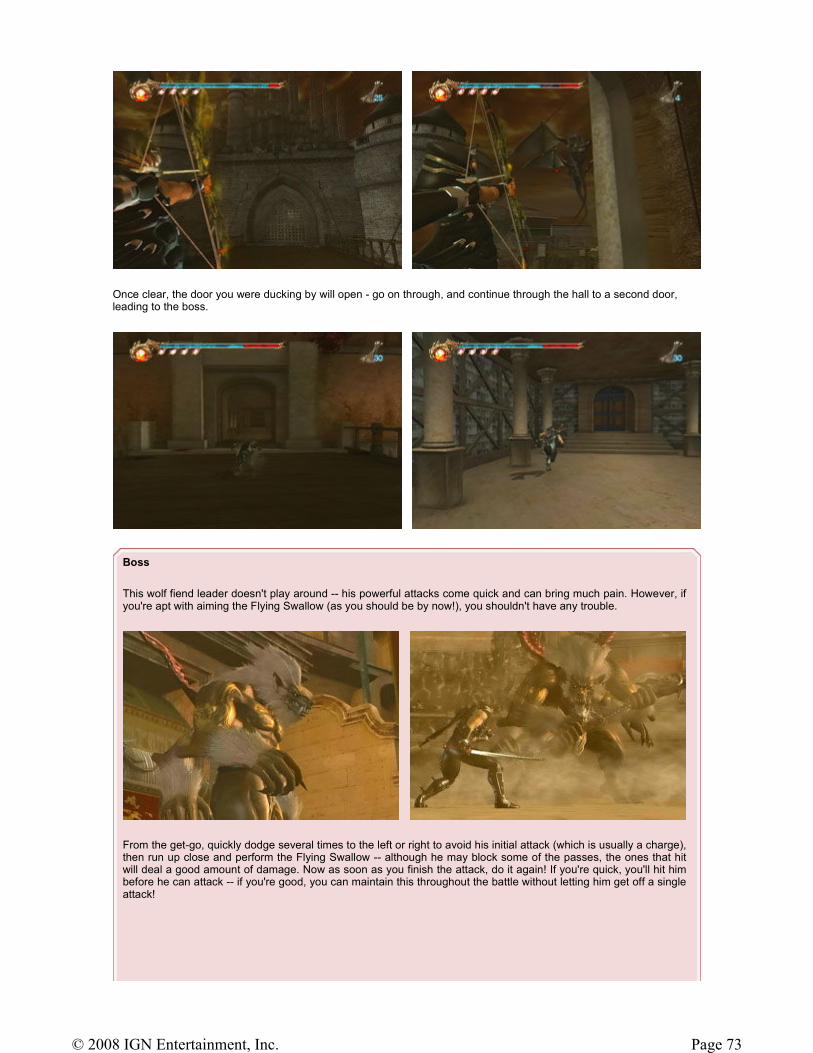
Once clear, the door you were ducking by will open - go on through, and continue through the hall to a second door, leading to the boss.
Boss
This wolf fiend leader doesn't play around -- his powerful attacks come quick and can bring much pain. However, if you're apt with aiming the Flying Swallow (as you should be by now!), you shouldn't have any trouble.
From the get-go, quickly dodge several times to the left or right to avoid his initial attack (which is usually a charge), then run up close and perform the Flying Swallow -- although he may block some of the passes, the ones that hit will deal a good amount of damage. Now as soon as you finish the attack, do it again! If you're quick, you'll hit him before he can attack -- if you're good, you can maintain this throughout the battle without letting him get off a single attack!
Page 73© 2008 IGN Entertainment, Inc.
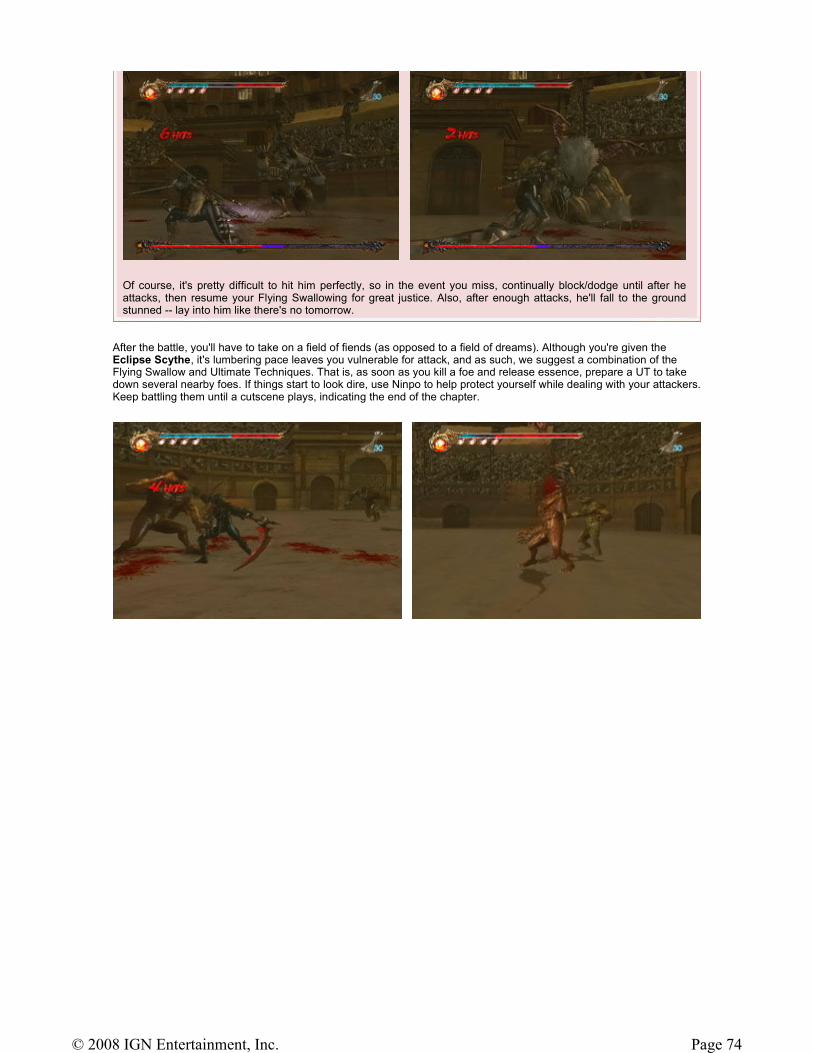
After the battle, you'll have to take on a field of fiends (as opposed to a field of dreams). Although you're given the Eclipse Scythe, it's lumbering pace leaves you vulnerable for attack, and as such, we suggest a combination of the Flying Swallow and Ultimate Techniques. That is, as soon as you kill a foe and release essence, prepare a UT to take down several nearby foes. If things start to look dire, use Ninpo to help protect yourself while dealing with your attackers. Keep battling them until a cutscene plays, indicating the end of the chapter.
Of course, it's pretty difficult to hit him perfectly, so in the event you miss, continually block/dodge until after he attacks, then resume your Flying Swallowing for great justice. Also, after enough attacks, he'll fall to the ground stunned -- lay into him like there's no tomorrow.
Page 74© 2008 IGN Entertainment, Inc.
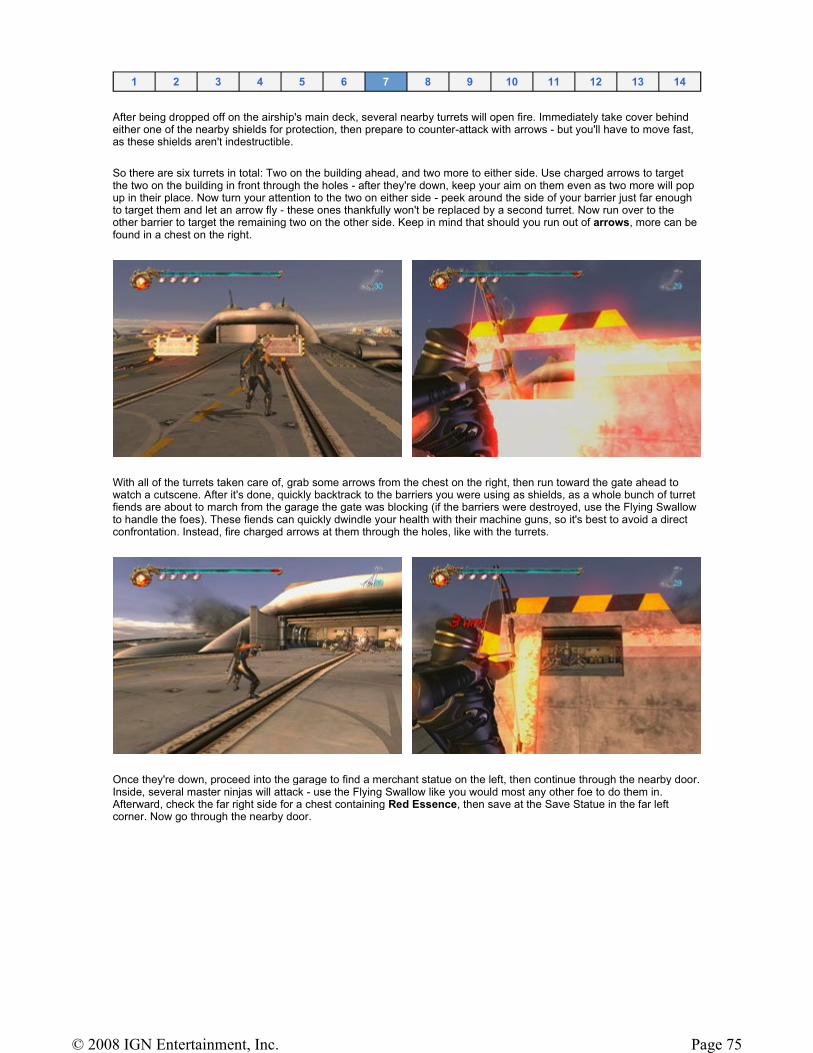
After being dropped off on the airship's main deck, several nearby turrets will open fire. Immediately take cover behind either one of the nearby shields for protection, then prepare to counter-attack with arrows - but you'll have to move fast, as these shields aren't indestructible.
So there are six turrets in total: Two on the building ahead, and two more to either side. Use charged arrows to target the two on the building in front through the holes - after they're down, keep your aim on them even as two more will pop up in their place. Now turn your attention to the two on either side - peek around the side of your barrier just far enough to target them and let an arrow fly - these ones thankfully won't be replaced by a second turret. Now run over to the other barrier to target the remaining two on the other side. Keep in mind that should you run out of arrows, more can be found in a chest on the right.
With all of the turrets taken care of, grab some arrows from the chest on the right, then run toward the gate ahead to watch a cutscene. After it's done, quickly backtrack to the barriers you were using as shields, as a whole bunch of turret fiends are about to march from the garage the gate was blocking (if the barriers were destroyed, use the Flying Swallow to handle the foes). These fiends can quickly dwindle your health with their machine guns, so it's best to avoid a direct confrontation. Instead, fire charged arrows at them through the holes, like with the turrets.
Once they're down, proceed into the garage to find a merchant statue on the left, then continue through the nearby door. Inside, several master ninjas will attack - use the Flying Swallow like you would most any other foe to do them in. Afterward, check the far right side for a chest containing Red Essence, then save at the Save Statue in the far left corner. Now go through the nearby door.
1 2 3 4 5 6 7 8 9 10 11 12 13 14
Page 75© 2008 IGN Entertainment, Inc.
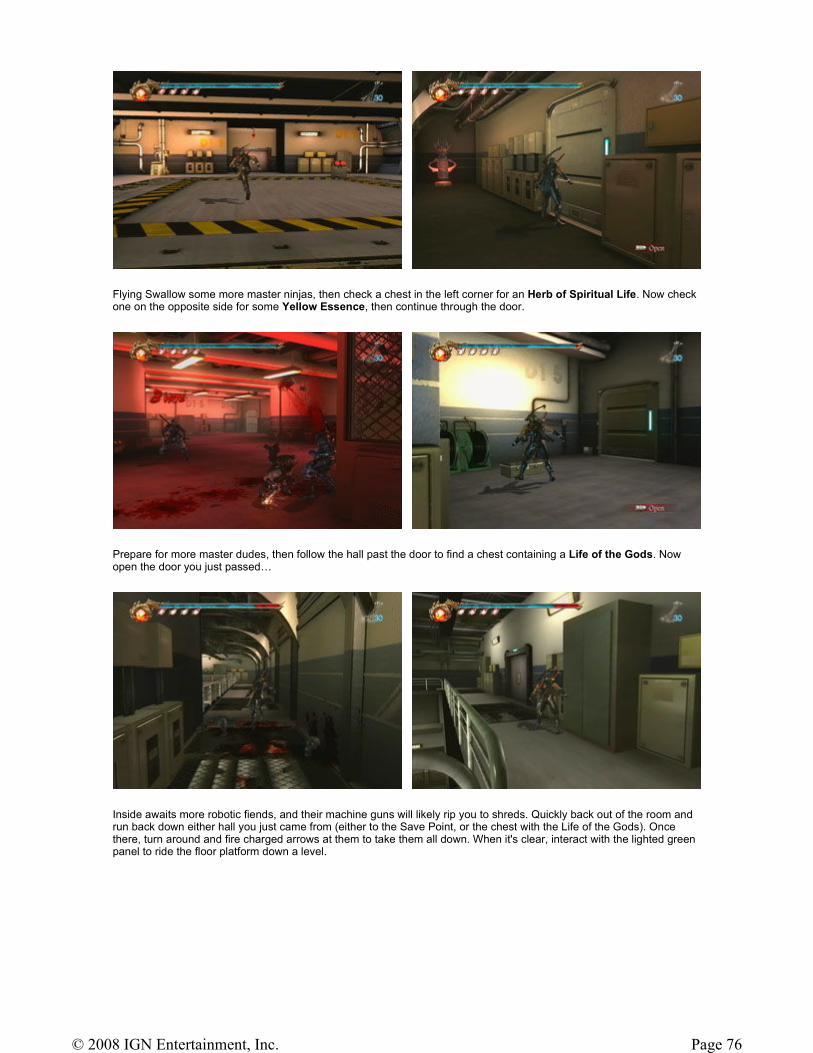
Flying Swallow some more master ninjas, then check a chest in the left corner for an Herb of Spiritual Life. Now check one on the opposite side for some Yellow Essence, then continue through the door.
Prepare for more master dudes, then follow the hall past the door to find a chest containing a Life of the Gods. Now open the door you just passed…
Inside awaits more robotic fiends, and their machine guns will likely rip you to shreds. Quickly back out of the room and run back down either hall you just came from (either to the Save Point, or the chest with the Life of the Gods). Once there, turn around and fire charged arrows at them to take them all down. When it's clear, interact with the lighted green panel to ride the floor platform down a level.
Page 76© 2008 IGN Entertainment, Inc.
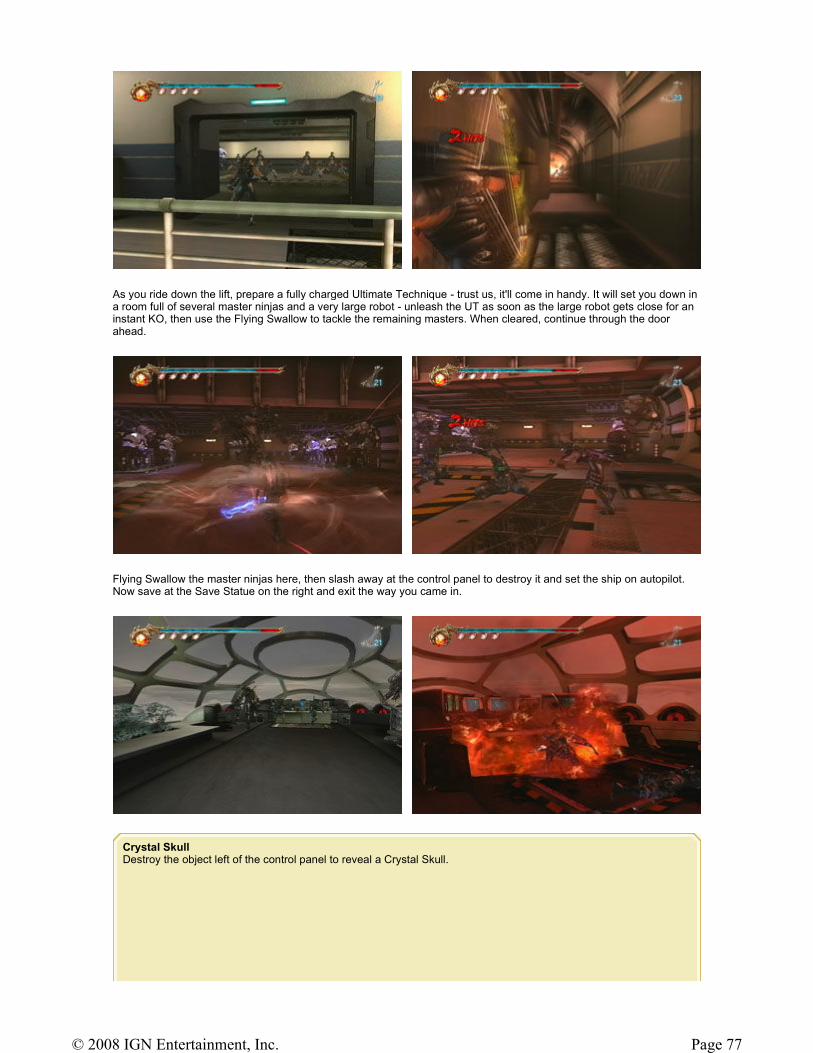
As you ride down the lift, prepare a fully charged Ultimate Technique - trust us, it'll come in handy. It will set you down in a room full of several master ninjas and a very large robot - unleash the UT as soon as the large robot gets close for an instant KO, then use the Flying Swallow to tackle the remaining masters. When cleared, continue through the door ahead.
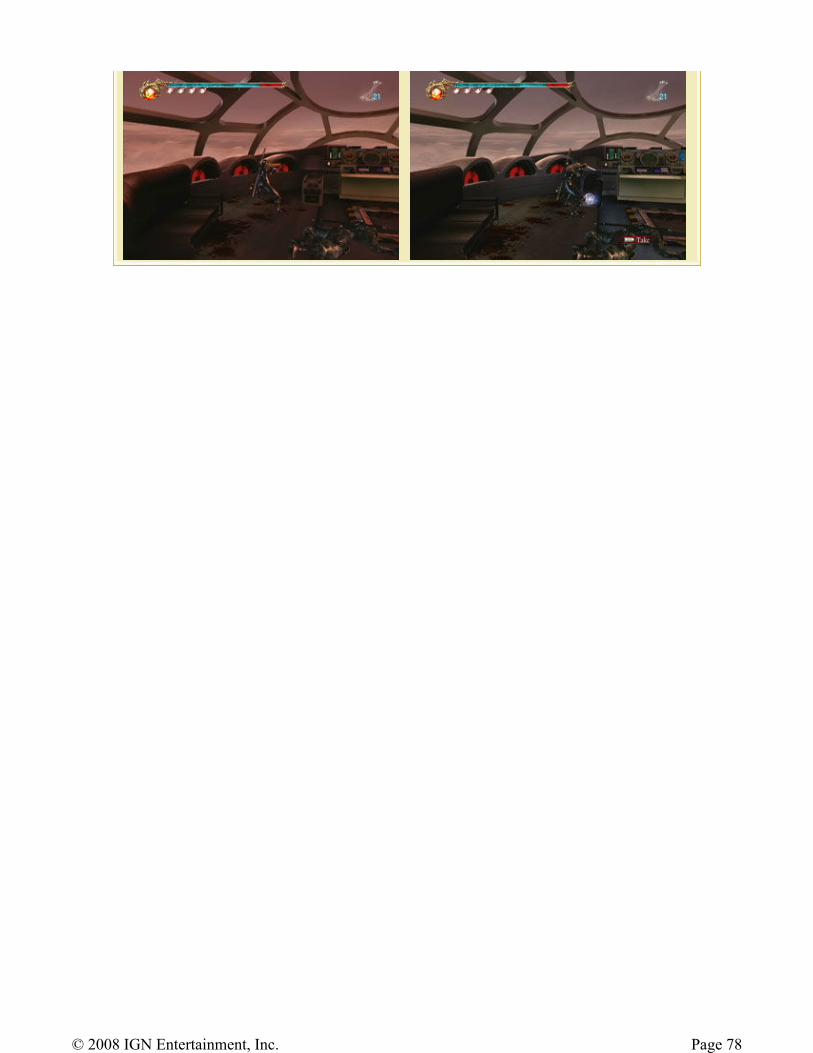
Flying Swallow the master ninjas here, then slash away at the control panel to destroy it and set the ship on autopilot. Now save at the Save Statue on the right and exit the way you came in.
Crystal Skull Destroy the object left of the control panel to reveal a Crystal Skull.
Page 77© 2008 IGN Entertainment, Inc.
Page 78© 2008 IGN Entertainment, Inc.
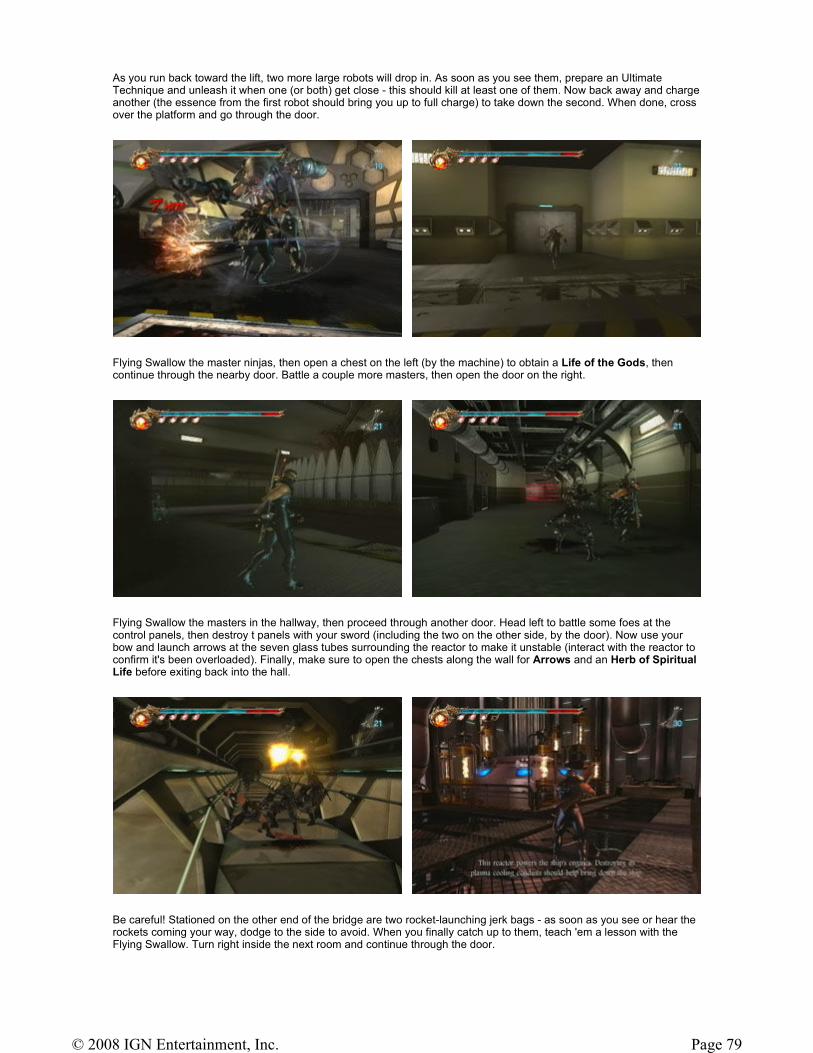
As you run back toward the lift, two more large robots will drop in. As soon as you see them, prepare an Ultimate Technique and unleash it when one (or both) get close - this should kill at least one of them. Now back away and charge another (the essence from the first robot should bring you up to full charge) to take down the second. When done, cross over the platform and go through the door.
Flying Swallow the master ninjas, then open a chest on the left (by the machine) to obtain a Life of the Gods, then continue through the nearby door. Battle a couple more masters, then open the door on the right.
Flying Swallow the masters in the hallway, then proceed through another door. Head left to battle some foes at the control panels, then destroy t panels with your sword (including the two on the other side, by the door). Now use your bow and launch arrows at the seven glass tubes surrounding the reactor to make it unstable (interact with the reactor to confirm it's been overloaded). Finally, make sure to open the chests along the wall for Arrows and an Herb of Spiritual Life before exiting back into the hall.
Be careful! Stationed on the other end of the bridge are two rocket-launching jerk bags - as soon as you see or hear the rockets coming your way, dodge to the side to avoid. When you finally catch up to them, teach 'em a lesson with the Flying Swallow. Turn right inside the next room and continue through the door.
Page 79© 2008 IGN Entertainment, Inc.

Head inside the room ahead first for a merchant statue and Save Statue, then proceed down the hallway on the right, but get ready for more masters and rocket launchers. Because the rocket launchers are the biggest threat, try to target them first with the Flying Swallow, then deal with the others later. If things get dicey, Ninpo can be a very effective way to take them down. Afterward, continue around the next corner to deal with one more rocket launcher. Now enter a door on the left at the end of the hall.
Check the corpse on the bottom bunk in the right corner for a Notebook, then interact with the panel on the wall to open an elevator and ride it up to the next floor.
Flying Swallow more master ninjas, then bust open the container, right of the control panels for some yellow essence. Now depart this rather plain room via the ladder near the door.
Page 80© 2008 IGN Entertainment, Inc.
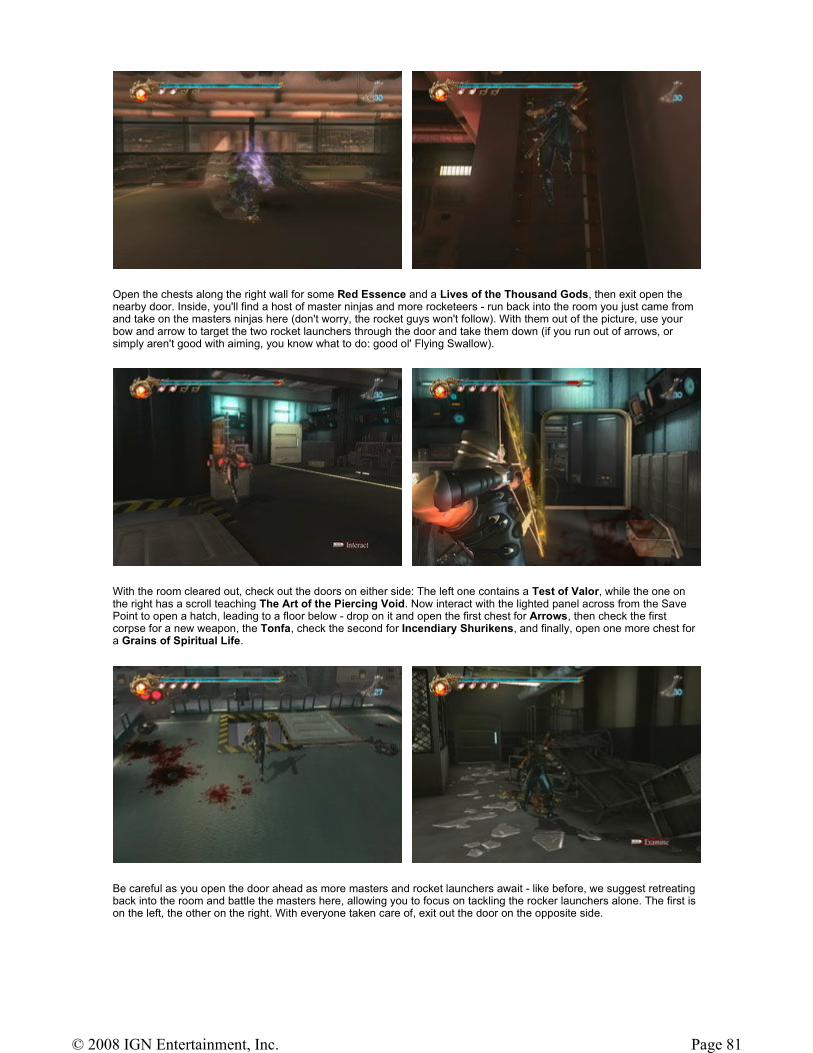
Open the chests along the right wall for some Red Essence and a Lives of the Thousand Gods, then exit open the nearby door. Inside, you'll find a host of master ninjas and more rocketeers - run back into the room you just came from and take on the masters ninjas here (don't worry, the rocket guys won't follow). With them out of the picture, use your bow and arrow to target the two rocket launchers through the door and take them down (if you run out of arrows, or simply aren't good with aiming, you know what to do: good ol' Flying Swallow).
With the room cleared out, check out the doors on either side: The left one contains a Test of Valor, while the one on the right has a scroll teaching The Art of the Piercing Void. Now interact with the lighted panel across from the Save Point to open a hatch, leading to a floor below - drop on it and open the first chest for Arrows, then check the first corpse for a new weapon, the Tonfa, check the second for Incendiary Shurikens, and finally, open one more chest for a Grains of Spiritual Life.
Be careful as you open the door ahead as more masters and rocket launchers await - like before, we suggest retreating back into the room and battle the masters here, allowing you to focus on tackling the rocker launchers alone. The first is on the left, the other on the right. With everyone taken care of, exit out the door on the opposite side.
Page 81© 2008 IGN Entertainment, Inc.

Crystal Skull Before leaving, check the rubble just around the corner (from the door you came through) for a Crystal Skull.
Page 82© 2008 IGN Entertainment, Inc.
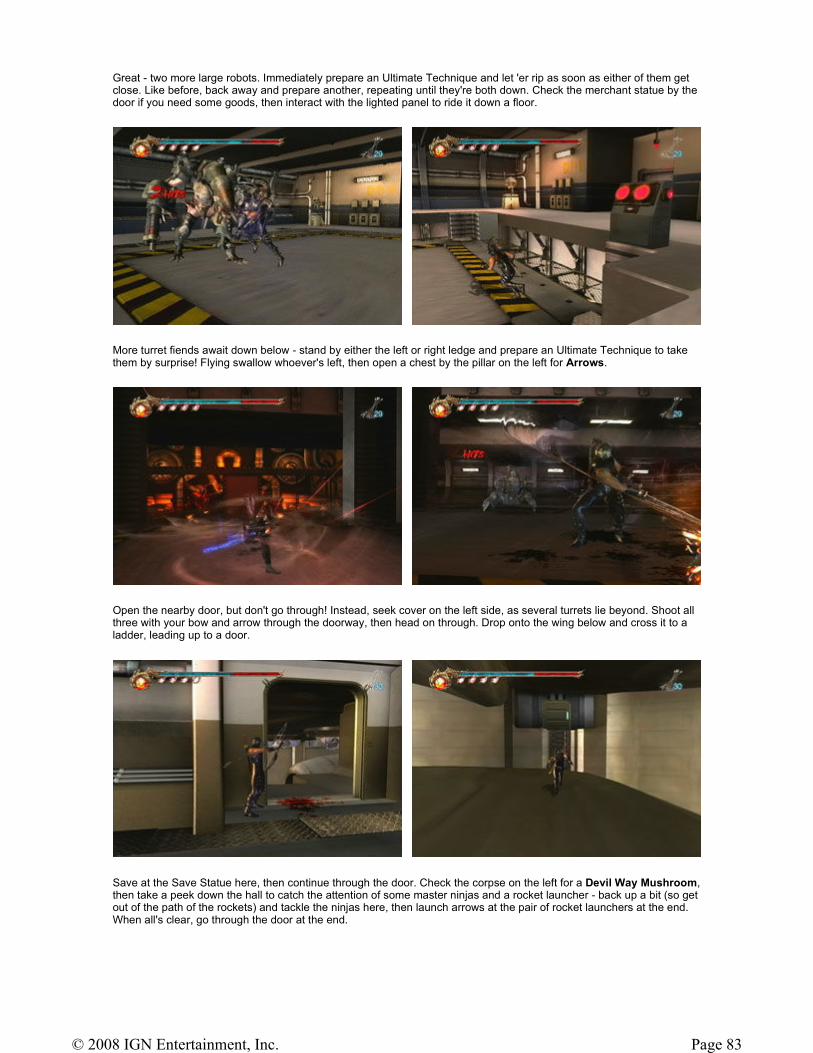
Great - two more large robots. Immediately prepare an Ultimate Technique and let 'er rip as soon as either of them get close. Like before, back away and prepare another, repeating until they're both down. Check the merchant statue by the door if you need some goods, then interact with the lighted panel to ride it down a floor.
More turret fiends await down below - stand by either the left or right ledge and prepare an Ultimate Technique to take them by surprise! Flying swallow whoever's left, then open a chest by the pillar on the left for Arrows.
Open the nearby door, but don't go through! Instead, seek cover on the left side, as several turrets lie beyond. Shoot all three with your bow and arrow through the doorway, then head on through. Drop onto the wing below and cross it to a ladder, leading up to a door.
Save at the Save Statue here, then continue through the door. Check the corpse on the left for a Devil Way Mushroom, then take a peek down the hall to catch the attention of some master ninjas and a rocket launcher - back up a bit (so get out of the path of the rockets) and tackle the ninjas here, then launch arrows at the pair of rocket launchers at the end. When all's clear, go through the door at the end.
Page 83© 2008 IGN Entertainment, Inc.
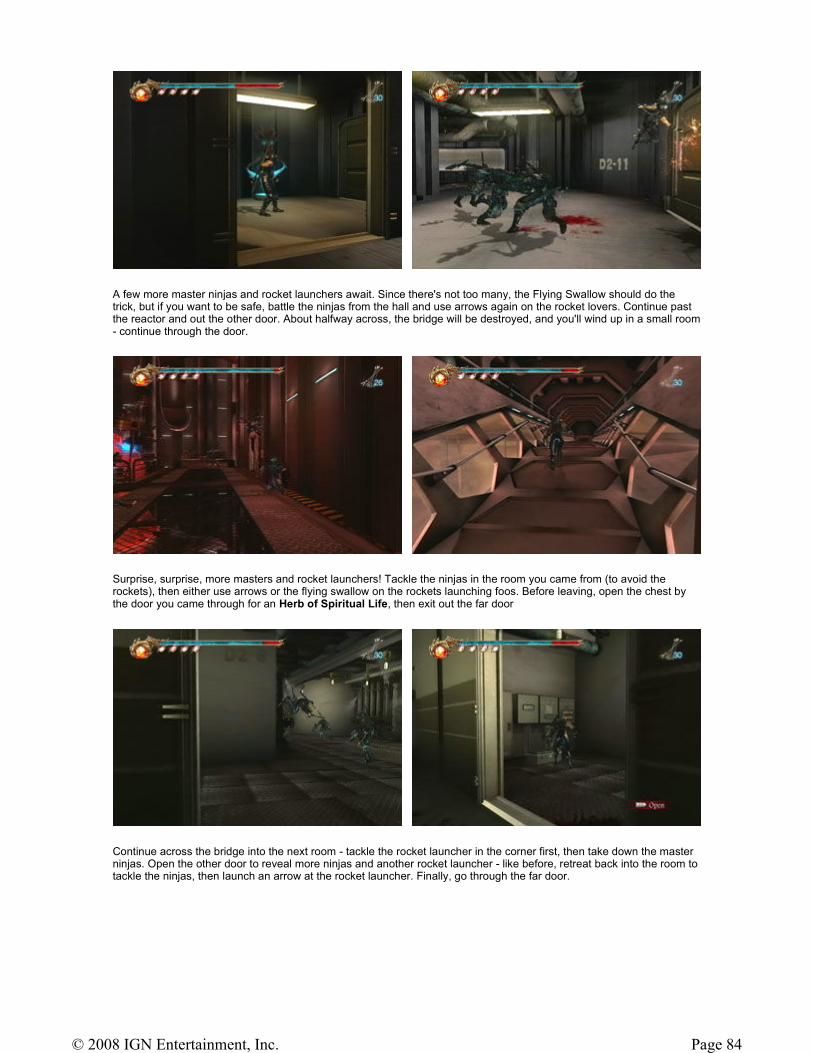
A few more master ninjas and rocket launchers await. Since there's not too many, the Flying Swallow should do the trick, but if you want to be safe, battle the ninjas from the hall and use arrows again on the rocket lovers. Continue past the reactor and out the other door. About halfway across, the bridge will be destroyed, and you'll wind up in a small room - continue through the door.
Surprise, surprise, more masters and rocket launchers! Tackle the ninjas in the room you came from (to avoid the rockets), then either use arrows or the flying swallow on the rockets launching foos. Before leaving, open the chest by the door you came through for an Herb of Spiritual Life, then exit out the far door
Continue across the bridge into the next room - tackle the rocket launcher in the corner first, then take down the master ninjas. Open the other door to reveal more ninjas and another rocket launcher - like before, retreat back into the room to tackle the ninjas, then launch an arrow at the rocket launcher. Finally, go through the far door.
Page 84© 2008 IGN Entertainment, Inc.
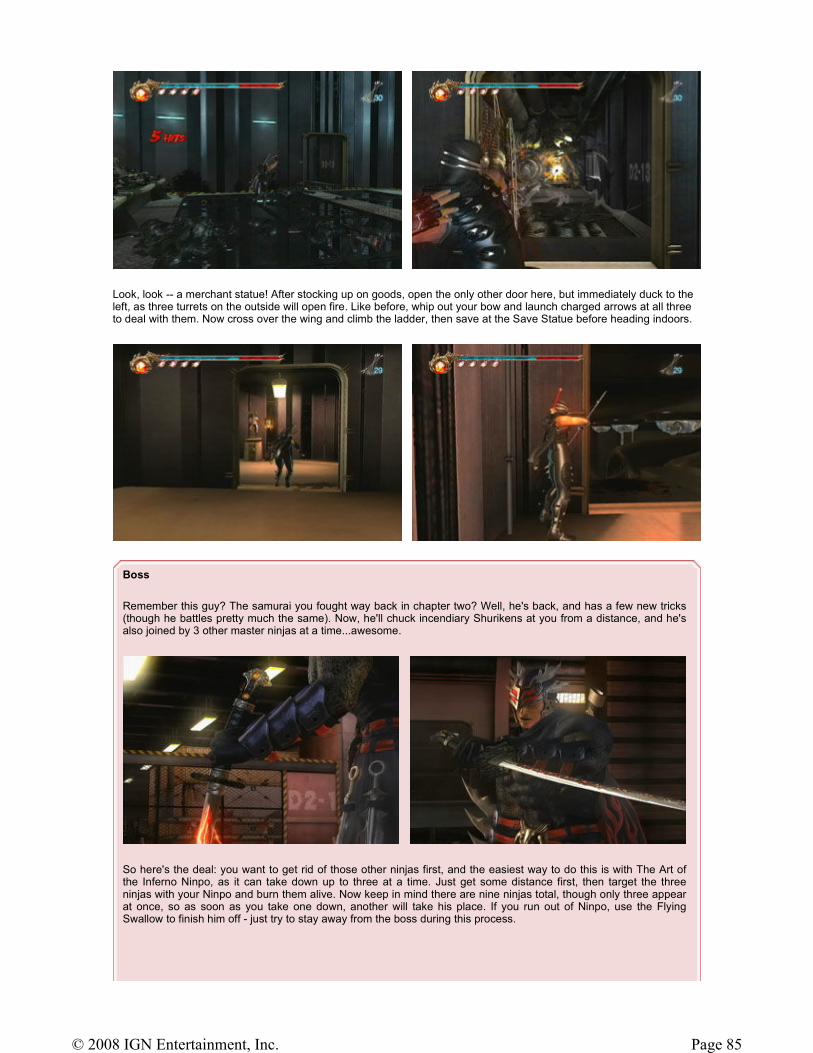
Look, look -- a merchant statue! After stocking up on goods, open the only other door here, but immediately duck to the left, as three turrets on the outside will open fire. Like before, whip out your bow and launch charged arrows at all three to deal with them. Now cross over the wing and climb the ladder, then save at the Save Statue before heading indoors.
Boss
Remember this guy? The samurai you fought way back in chapter two? Well, he's back, and has a few new tricks (though he battles pretty much the same). Now, he'll chuck incendiary Shurikens at you from a distance, and he's also joined by 3 other master ninjas at a time...awesome.
So here's the deal: you want to get rid of those other ninjas first, and the easiest way to do this is with The Art of the Inferno Ninpo, as it can take down up to three at a time. Just get some distance first, then target the three ninjas with your Ninpo and burn them alive. Now keep in mind there are nine ninjas total, though only three appear at once, so as soon as you take one down, another will take his place. If you run out of Ninpo, use the Flying Swallow to finish him off - just try to stay away from the boss during this process.
Page 85© 2008 IGN Entertainment, Inc.
After taking him down, you'll crash land in a snowy landscape where you'll get the special opportunity to take on a 2nd boss. Two for the price of one - how swell!
With the ninjas defeated, it's time to take on the big boy. You can battle him just like in chapter 2, but here's a reminder in case you've forgotten: First, equip the Lunar Staff - its fast jabs are cruial for killing this guy. The boss will often launch into numerous multi-hit combos that are brutal if they connect, which is why it's imperative you block and dodge almost constantly. The trick is to get close enough for the boss to attack, quickly side-step once or twice, then immediately counter with an attack of your own by mashing the quick-attack button. But don't get greedy! After 5 or 6 hits, stop and block and roll out of there and prepare for your next attack phase.
The boss is particularly vulnerable during his dash attack - if you see him stop moving and hunch over, get ready to roll to evade this attack. It'll take him a second or two or recover afterward, so lay into him!
Boss
This giant armadillo has more bark than bite, though he does conceal a nasty surprise after you've beaten him if you're not prepared (okay, we'll cut to the chase: hold block after killing him).
While practically his entire lower body is vulnerable (legs and tail), his head is his greatest weakness. And because
Page 86© 2008 IGN Entertainment, Inc.
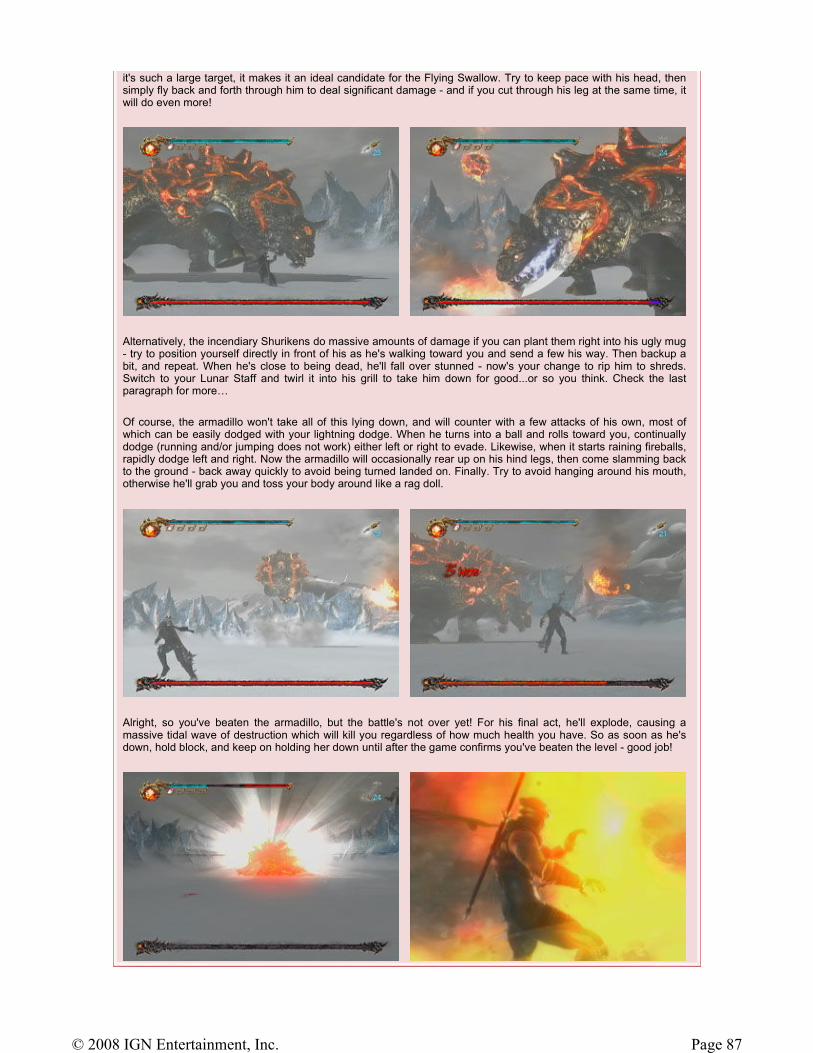
it's such a large target, it makes it an ideal candidate for the Flying Swallow. Try to keep pace with his head, then simply fly back and forth through him to deal significant damage - and if you cut through his leg at the same time, it will do even more!
Alternatively, the incendiary Shurikens do massive amounts of damage if you can plant them right into his ugly mug - try to position yourself directly in front of his as he's walking toward you and send a few his way. Then backup a bit, and repeat. When he's close to being dead, he'll fall over stunned - now's your change to rip him to shreds. Switch to your Lunar Staff and twirl it into his grill to take him down for good...or so you think. Check the last paragraph for more…
Of course, the armadillo won't take all of this lying down, and will counter with a few attacks of his own, most of which can be easily dodged with your lightning dodge. When he turns into a ball and rolls toward you, continually dodge (running and/or jumping does not work) either left or right to evade. Likewise, when it starts raining fireballs, rapidly dodge left and right. Now the armadillo will occasionally rear up on his hind legs, then come slamming back to the ground - back away quickly to avoid being turned landed on. Finally. Try to avoid hanging around his mouth, otherwise he'll grab you and toss your body around like a rag doll.
Alright, so you've beaten the armadillo, but the battle's not over yet! For his final act, he'll explode, causing a massive tidal wave of destruction which will kill you regardless of how much health you have. So as soon as he's down, hold block, and keep on holding her down until after the game confirms you've beaten the level - good job!
Page 87© 2008 IGN Entertainment, Inc.
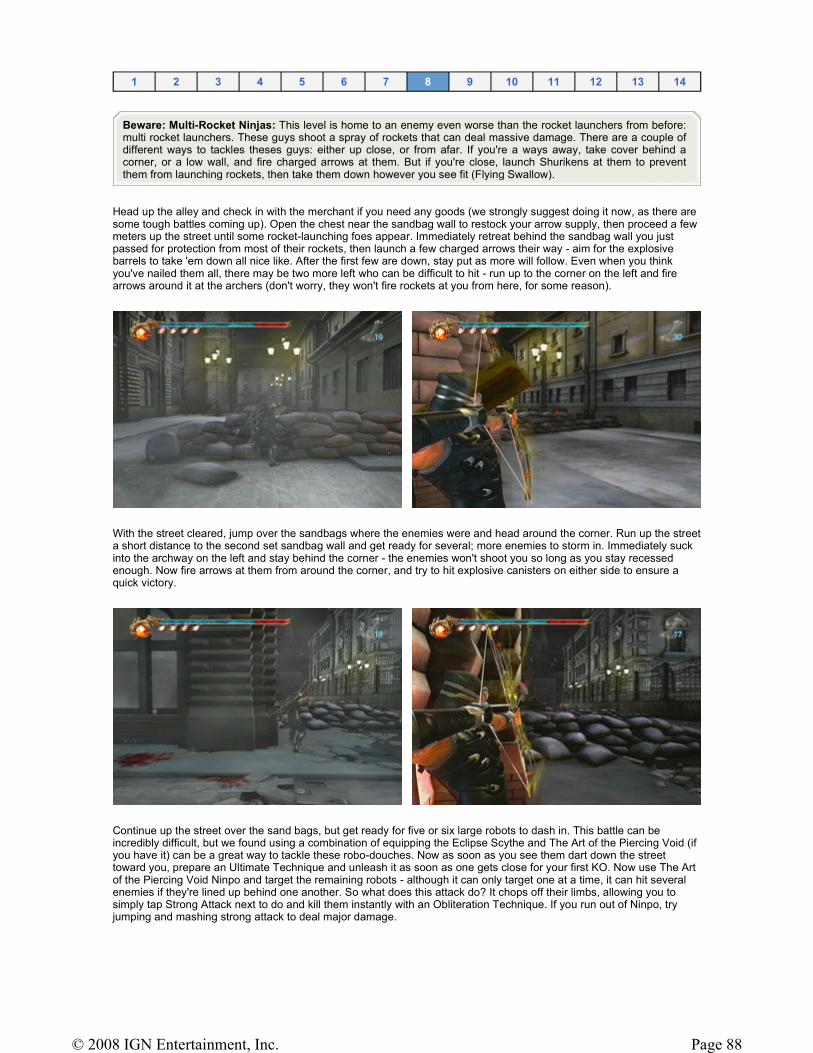
Head up the alley and check in with the merchant if you need any goods (we strongly suggest doing it now, as there are some tough battles coming up). Open the chest near the sandbag wall to restock your arrow supply, then proceed a few meters up the street until some rocket-launching foes appear. Immediately retreat behind the sandbag wall you just passed for protection from most of their rockets, then launch a few charged arrows their way - aim for the explosive barrels to take 'em down all nice like. After the first few are down, stay put as more will follow. Even when you think you've nailed them all, there may be two more left who can be difficult to hit - run up to the corner on the left and fire arrows around it at the archers (don't worry, they won't fire rockets at you from here, for some reason).
With the street cleared, jump over the sandbags where the enemies were and head around the corner. Run up the street a short distance to the second set sandbag wall and get ready for several; more enemies to storm in. Immediately suck into the archway on the left and stay behind the corner - the enemies won't shoot you so long as you stay recessed enough. Now fire arrows at them from around the corner, and try to hit explosive canisters on either side to ensure a quick victory.
Continue up the street over the sand bags, but get ready for five or six large robots to dash in. This battle can be incredibly difficult, but we found using a combination of equipping the Eclipse Scythe and The Art of the Piercing Void (if you have it) can be a great way to tackle these robo-douches. Now as soon as you see them dart down the street toward you, prepare an Ultimate Technique and unleash it as soon as one gets close for your first KO. Now use The Art of the Piercing Void Ninpo and target the remaining robots - although it can only target one at a time, it can hit several enemies if they're lined up behind one another. So what does this attack do? It chops off their limbs, allowing you to simply tap Strong Attack next to do and kill them instantly with an Obliteration Technique. If you run out of Ninpo, try jumping and mashing strong attack to deal major damage.
1 2 3 4 5 6 7 8 9 10 11 12 13 14
Beware: Multi-Rocket Ninjas: This level is home to an enemy even worse than the rocket launchers from before: multi rocket launchers. These guys shoot a spray of rockets that can deal massive damage. There are a couple of different ways to tackles theses guys: either up close, or from afar. If you're a ways away, take cover behind a corner, or a low wall, and fire charged arrows at them. But if you're close, launch Shurikens at them to prevent them from launching rockets, then take them down however you see fit (Flying Swallow).
Page 88© 2008 IGN Entertainment, Inc.
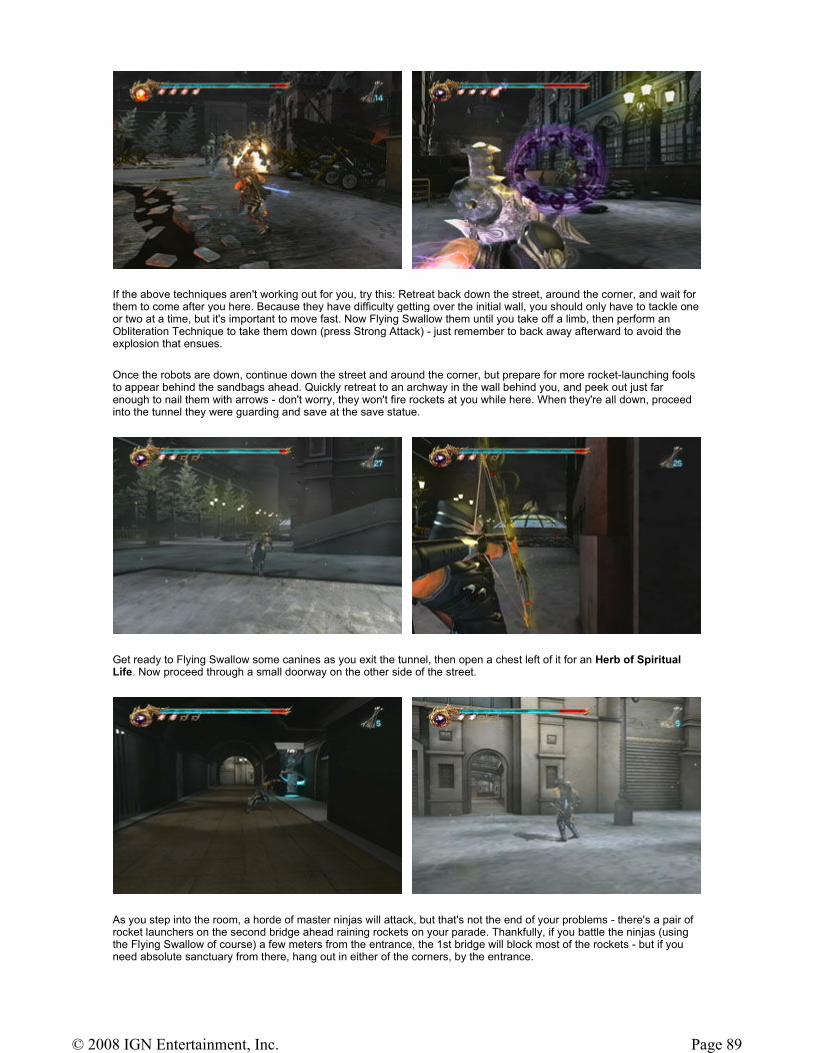
If the above techniques aren't working out for you, try this: Retreat back down the street, around the corner, and wait for them to come after you here. Because they have difficulty getting over the initial wall, you should only have to tackle one or two at a time, but it's important to move fast. Now Flying Swallow them until you take off a limb, then perform an Obliteration Technique to take them down (press Strong Attack) - just remember to back away afterward to avoid the explosion that ensues.
Once the robots are down, continue down the street and around the corner, but prepare for more rocket-launching fools to appear behind the sandbags ahead. Quickly retreat to an archway in the wall behind you, and peek out just far enough to nail them with arrows - don't worry, they won't fire rockets at you while here. When they're all down, proceed into the tunnel they were guarding and save at the save statue.
Get ready to Flying Swallow some canines as you exit the tunnel, then open a chest left of it for an Herb of Spiritual Life. Now proceed through a small doorway on the other side of the street.
As you step into the room, a horde of master ninjas will attack, but that's not the end of your problems - there's a pair of rocket launchers on the second bridge ahead raining rockets on your parade. Thankfully, if you battle the ninjas (using the Flying Swallow of course) a few meters from the entrance, the 1st bridge will block most of the rockets - but if you need absolute sanctuary from there, hang out in either of the corners, by the entrance.
Page 89© 2008 IGN Entertainment, Inc.
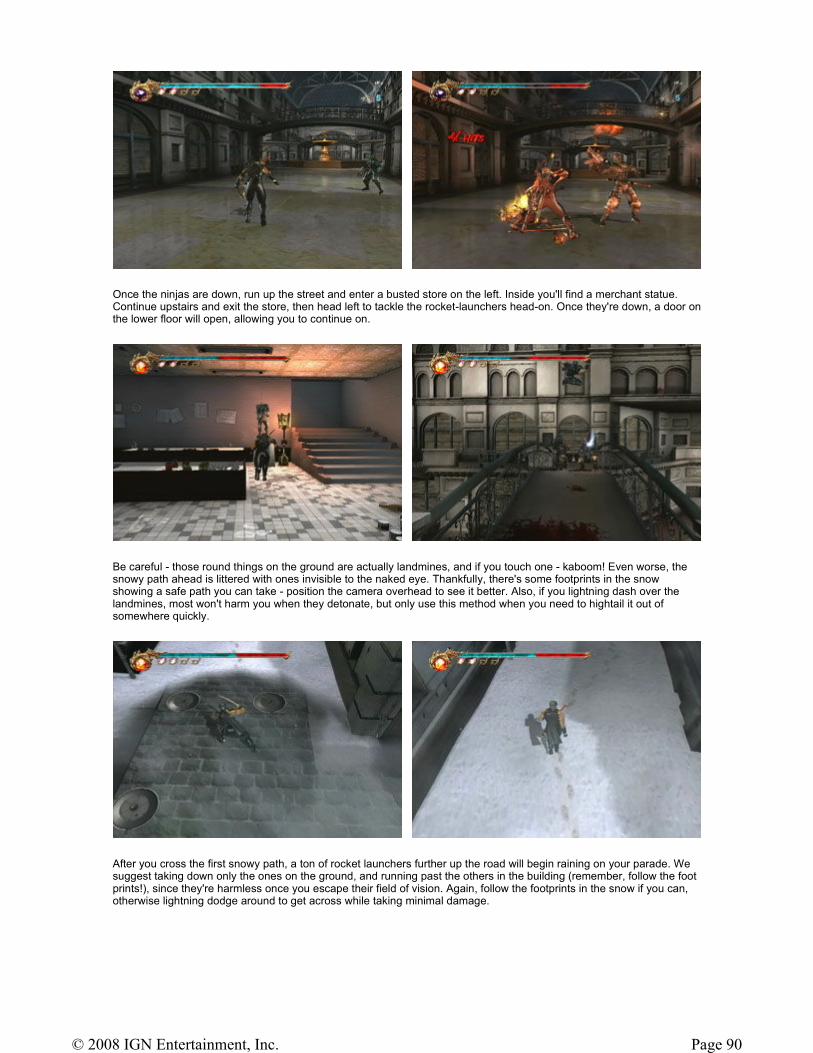
Once the ninjas are down, run up the street and enter a busted store on the left. Inside you'll find a merchant statue. Continue upstairs and exit the store, then head left to tackle the rocket-launchers head-on. Once they're down, a door on the lower floor will open, allowing you to continue on.
Be careful - those round things on the ground are actually landmines, and if you touch one - kaboom! Even worse, the snowy path ahead is littered with ones invisible to the naked eye. Thankfully, there's some footprints in the snow showing a safe path you can take - position the camera overhead to see it better. Also, if you lightning dash over the landmines, most won't harm you when they detonate, but only use this method when you need to hightail it out of somewhere quickly.
After you cross the first snowy path, a ton of rocket launchers further up the road will begin raining on your parade. We suggest taking down only the ones on the ground, and running past the others in the building (remember, follow the foot prints!), since they're harmless once you escape their field of vision. Again, follow the footprints in the snow if you can, otherwise lightning dodge around to get across while taking minimal damage.
Page 90© 2008 IGN Entertainment, Inc.
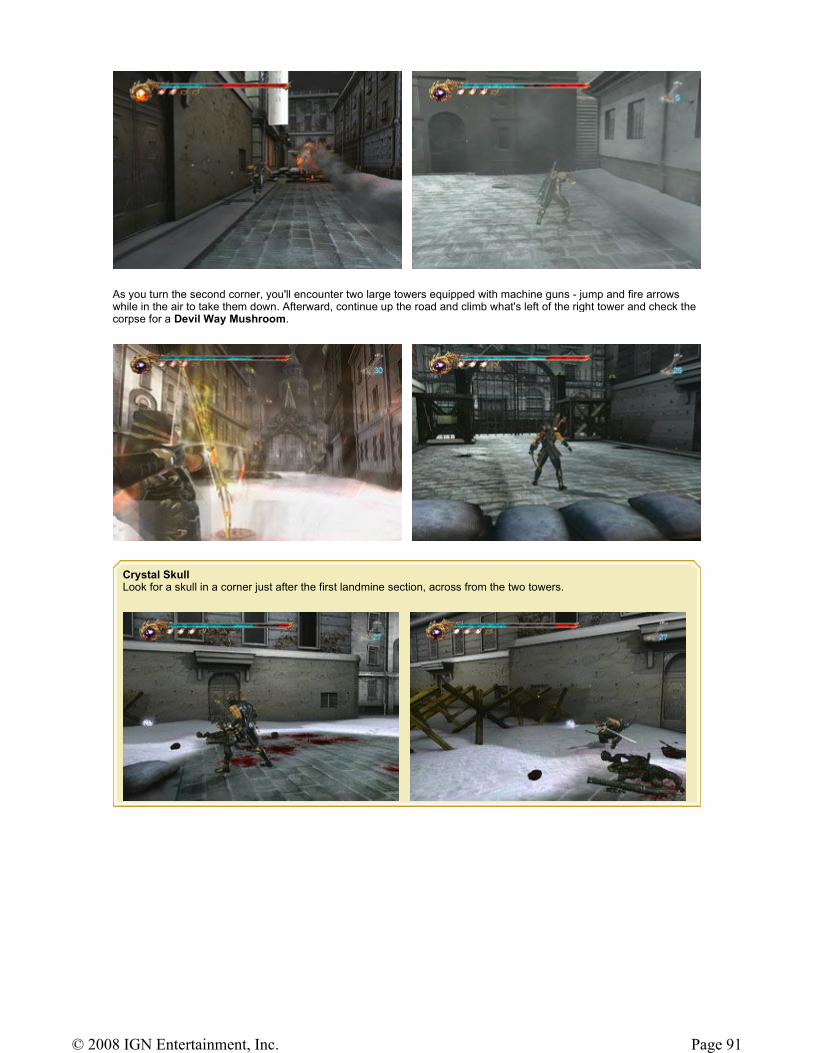
As you turn the second corner, you'll encounter two large towers equipped with machine guns - jump and fire arrows while in the air to take them down. Afterward, continue up the road and climb what's left of the right tower and check the corpse for a Devil Way Mushroom.
Crystal Skull Look for a skull in a corner just after the first landmine section, across from the two towers.
Page 91© 2008 IGN Entertainment, Inc.
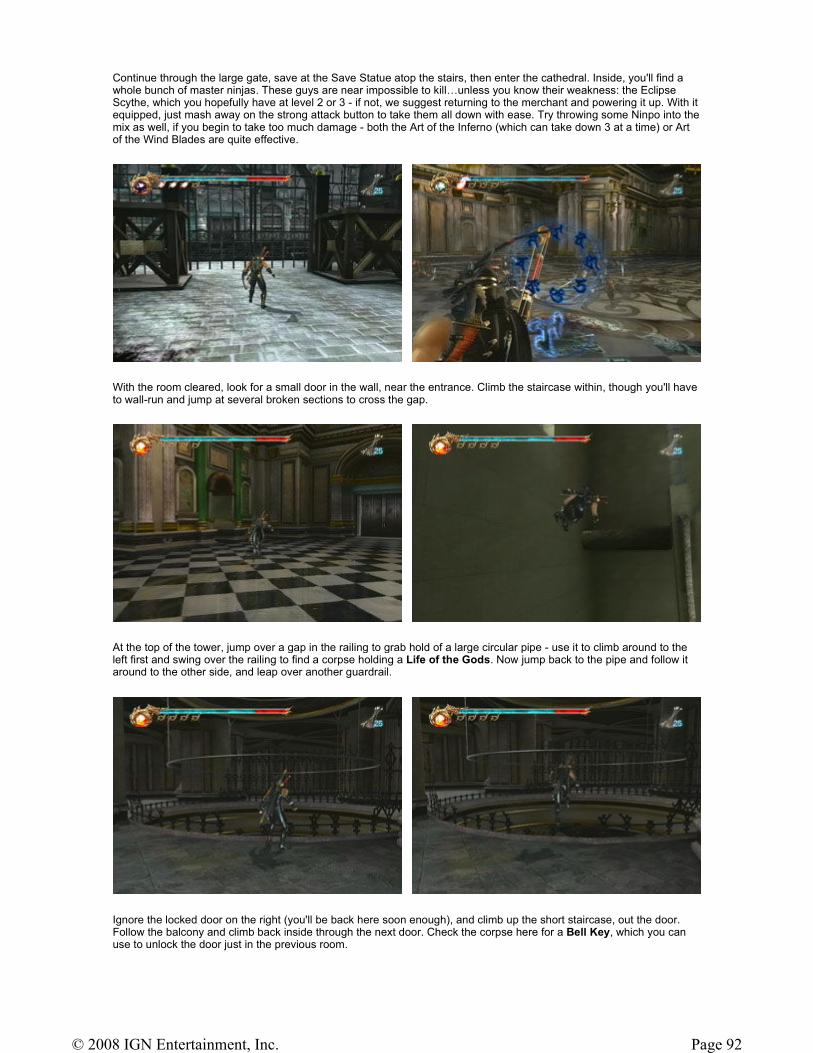
Continue through the large gate, save at the Save Statue atop the stairs, then enter the cathedral. Inside, you'll find a whole bunch of master ninjas. These guys are near impossible to kill…unless you know their weakness: the Eclipse Scythe, which you hopefully have at level 2 or 3 - if not, we suggest returning to the merchant and powering it up. With it equipped, just mash away on the strong attack button to take them all down with ease. Try throwing some Ninpo into the mix as well, if you begin to take too much damage - both the Art of the Inferno (which can take down 3 at a time) or Art of the Wind Blades are quite effective.
With the room cleared, look for a small door in the wall, near the entrance. Climb the staircase within, though you'll have to wall-run and jump at several broken sections to cross the gap.
At the top of the tower, jump over a gap in the railing to grab hold of a large circular pipe - use it to climb around to the left first and swing over the railing to find a corpse holding a Life of the Gods. Now jump back to the pipe and follow it around to the other side, and leap over another guardrail.
Ignore the locked door on the right (you'll be back here soon enough), and climb up the short staircase, out the door. Follow the balcony and climb back inside through the next door. Check the corpse here for a Bell Key, which you can use to unlock the door just in the previous room.
Page 92© 2008 IGN Entertainment, Inc.
Climb down the staircase and keep an eye out for the skull noted below.
Go through the door at the bottom, then interact with the alter to open the doors, revealing a hole you can drop down.
You'll land in some strange underground section - continue through the broken portion in the corner, and follow the path, killing the bats along the way. You'll eventually emerge in an old subway station. Head left to find the subway car...
Crystal Skull Look for a skull next to a candle as you near the bottom of the staircase.
Page 93© 2008 IGN Entertainment, Inc.
...and an ass-ton of master ninjas. While the Flying Swallow is capable of taking them down, you have to be damn good with your aiming for it to be effective. A better method, again, is to rely on your Ninpo (either Fire or Wind suggested). If you don't have any, run to the end of the subway and open a chest on the right for Red Essence, which will restock your Ki.
With the Master Ninjas dealt with, enter the now-unlocked subway car. Head left and enter the first room on the right - follow it to the back and check the corpse there for Dignitary's ID Card.
Exit back into the main hall of the train and open a chest at the end for a Grains of Spiritual Life. Now that you've cleaned the train out, disembark, but head to the end of the subway and climb the staircase at the end and use the ID Card on the door.
Crystal Skull Before exiting the section where you obtained the ID Card, look for a skull in the back corner (right of where you entered).
Page 94© 2008 IGN Entertainment, Inc.
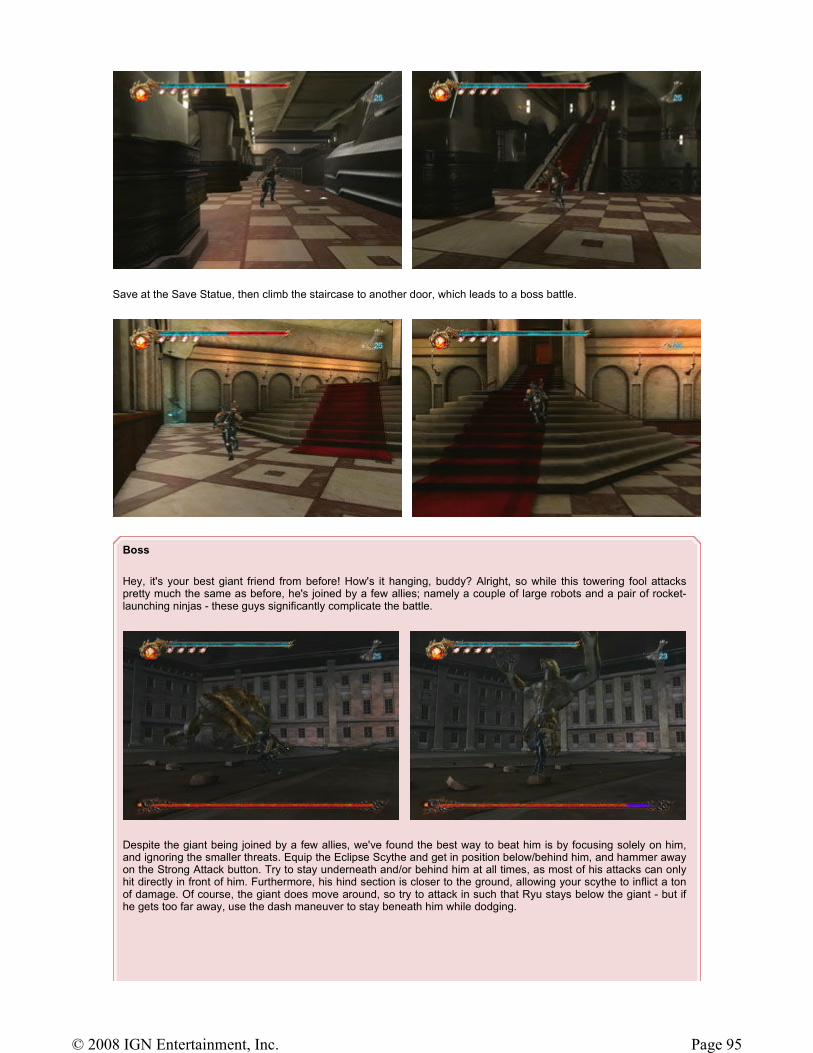
Save at the Save Statue, then climb the staircase to another door, which leads to a boss battle.
Boss
Hey, it's your best giant friend from before! How's it hanging, buddy? Alright, so while this towering fool attacks pretty much the same as before, he's joined by a few allies; namely a couple of large robots and a pair of rocket-launching ninjas - these guys significantly complicate the battle.
Despite the giant being joined by a few allies, we've found the best way to beat him is by focusing solely on him, and ignoring the smaller threats. Equip the Eclipse Scythe and get in position below/behind him, and hammer away on the Strong Attack button. Try to stay underneath and/or behind him at all times, as most of his attacks can only hit directly in front of him. Furthermore, his hind section is closer to the ground, allowing your scythe to inflict a ton of damage. Of course, the giant does move around, so try to attack in such that Ryu stays below the giant - but if he gets too far away, use the dash maneuver to stay beneath him while dodging.
Page 95© 2008 IGN Entertainment, Inc.
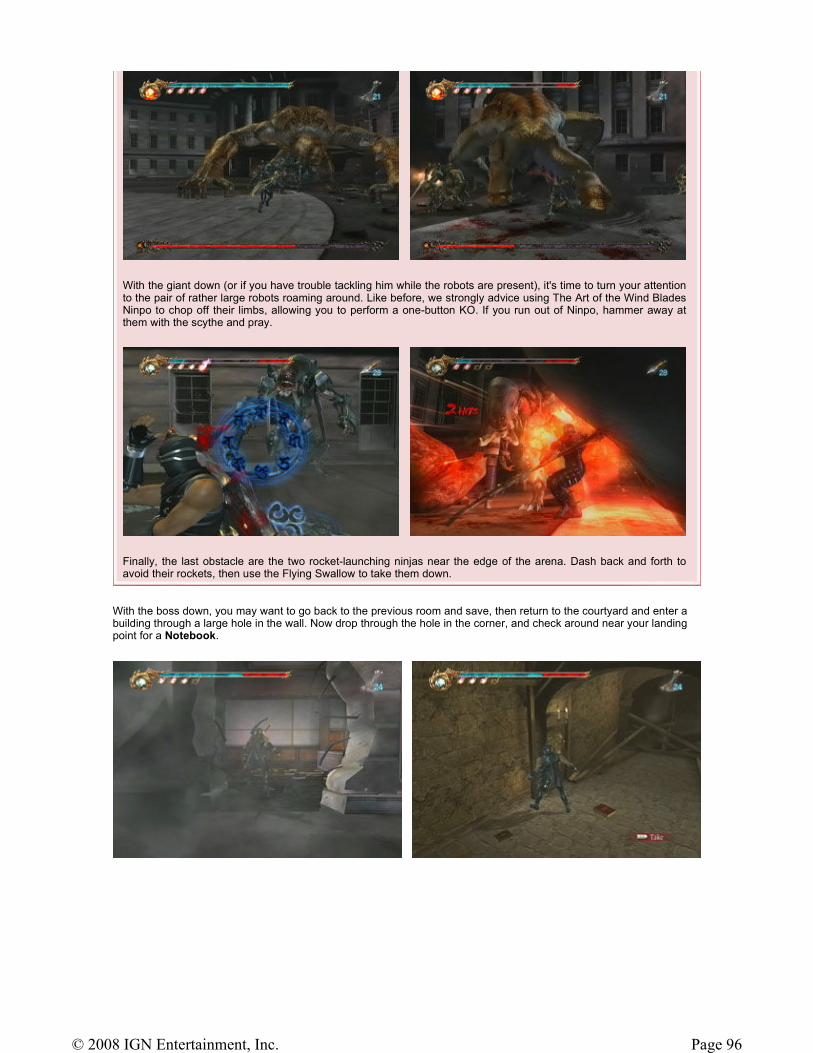
With the boss down, you may want to go back to the previous room and save, then return to the courtyard and enter a building through a large hole in the wall. Now drop through the hole in the corner, and check around near your landing point for a Notebook.
With the giant down (or if you have trouble tackling him while the robots are present), it's time to turn your attention to the pair of rather large robots roaming around. Like before, we strongly advice using The Art of the Wind Blades Ninpo to chop off their limbs, allowing you to perform a one-button KO. If you run out of Ninpo, hammer away at them with the scythe and pray.
Finally, the last obstacle are the two rocket-launching ninjas near the edge of the arena. Dash back and forth to avoid their rockets, then use the Flying Swallow to take them down.
Page 96© 2008 IGN Entertainment, Inc.
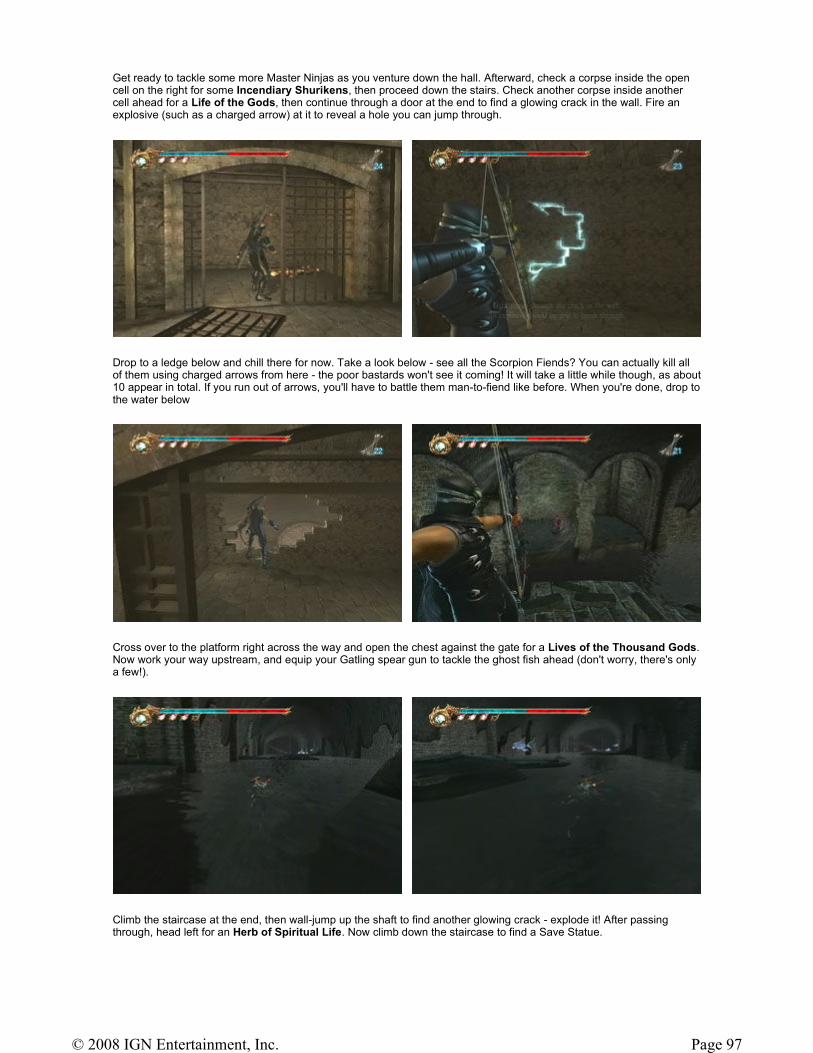
Get ready to tackle some more Master Ninjas as you venture down the hall. Afterward, check a corpse inside the open cell on the right for some Incendiary Shurikens, then proceed down the stairs. Check another corpse inside another cell ahead for a Life of the Gods, then continue through a door at the end to find a glowing crack in the wall. Fire an explosive (such as a charged arrow) at it to reveal a hole you can jump through.
Drop to a ledge below and chill there for now. Take a look below - see all the Scorpion Fiends? You can actually kill all of them using charged arrows from here - the poor bastards won't see it coming! It will take a little while though, as about 10 appear in total. If you run out of arrows, you'll have to battle them man-to-fiend like before. When you're done, drop to the water below
Cross over to the platform right across the way and open the chest against the gate for a Lives of the Thousand Gods. Now work your way upstream, and equip your Gatling spear gun to tackle the ghost fish ahead (don't worry, there's only a few!).
Climb the staircase at the end, then wall-jump up the shaft to find another glowing crack - explode it! After passing through, head left for an Herb of Spiritual Life. Now climb down the staircase to find a Save Statue.
Page 97© 2008 IGN Entertainment, Inc.

After saving, head through the giant door first to find another test of Valor, as well as a chest on the right containing Arrows. Afterward, climb the staircase inside by the save statue and exit onto the balcony. As you turn the next corner, get ready for more master ninjas. Equip the scythe, and hammer away on the strong attack button to do them in.
The path leads back inside the building, with a Merchant Statue dead-ahead. After stocking up, climb up the ladder on the right to find a room full of gears. You're going to have to climb this set of gears, while battling Master Ninjas, so keep your Scythe equipped and remember to hammer away on the strong attack button.
Begin your trek by crossing the mesh to the lowest gear and jump aboard. Kill the ninjas, then climb up two more gears. Now run up the tall, vertical gear spinning away from you, then leap from there to a series of poles ahead - use them to cross to a gear above.
Page 98© 2008 IGN Entertainment, Inc.
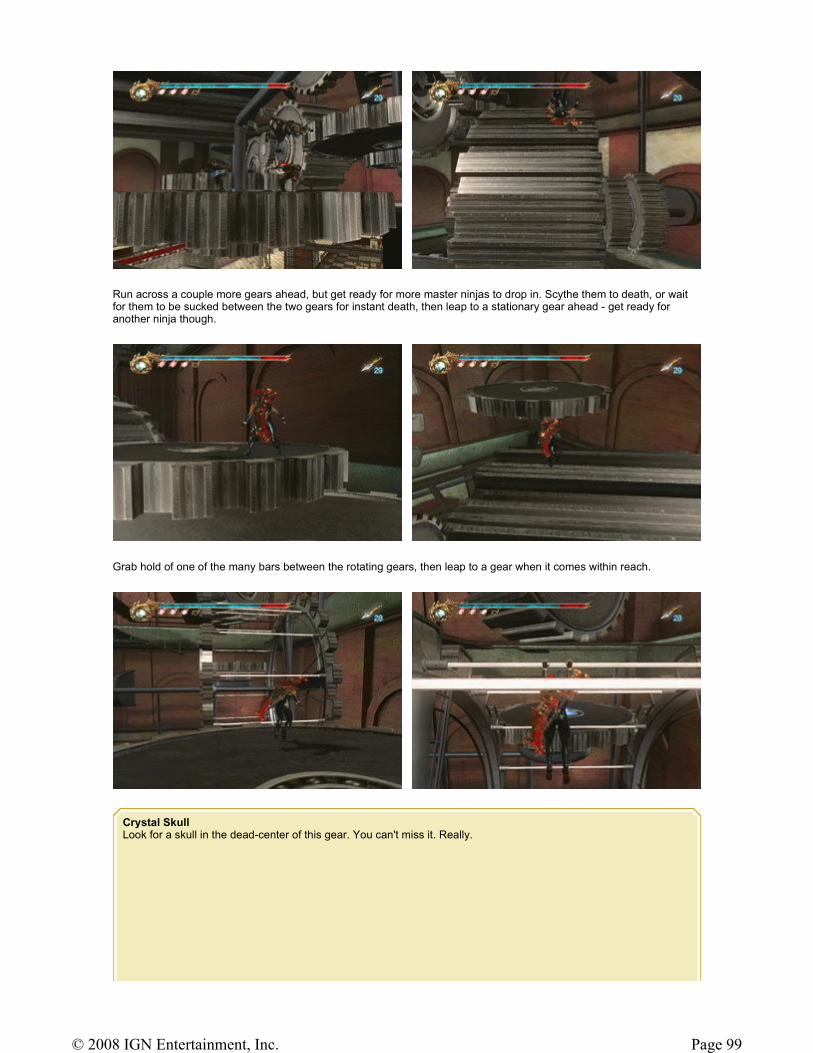
Run across a couple more gears ahead, but get ready for more master ninjas to drop in. Scythe them to death, or wait for them to be sucked between the two gears for instant death, then leap to a stationary gear ahead - get ready for another ninja though.
Grab hold of one of the many bars between the rotating gears, then leap to a gear when it comes within reach.
Crystal Skull Look for a skull in the dead-center of this gear. You can't miss it. Really.
Page 99© 2008 IGN Entertainment, Inc.
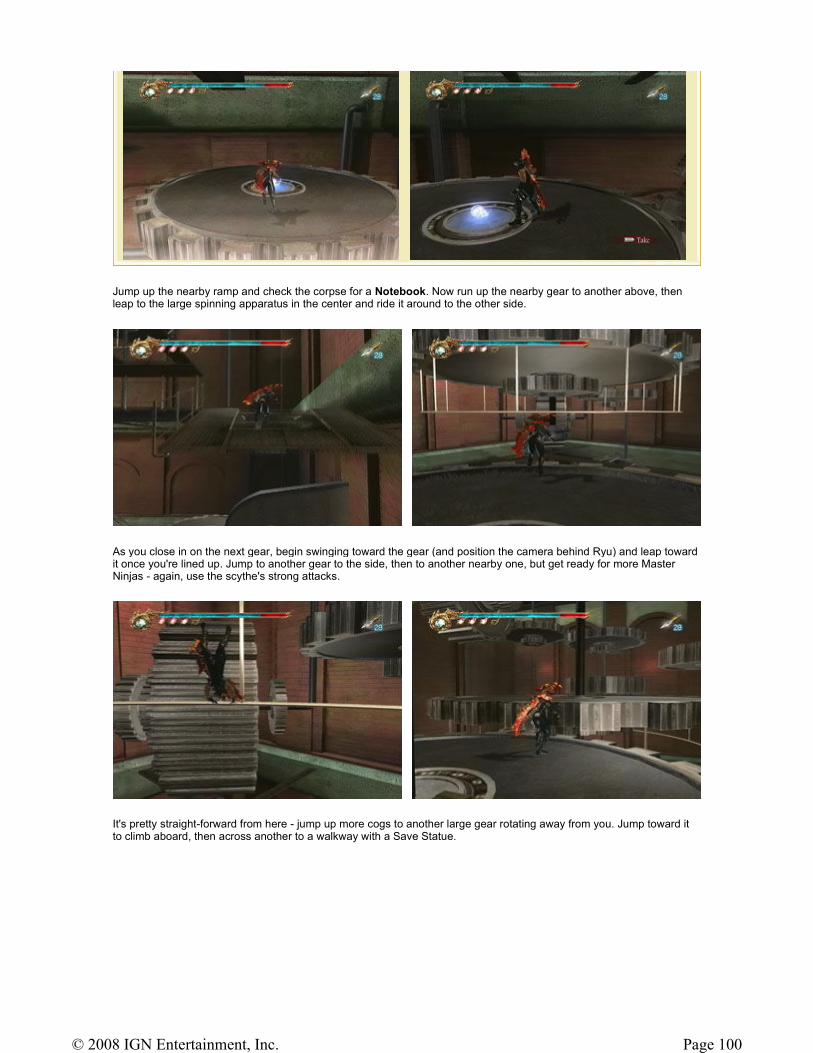
Jump up the nearby ramp and check the corpse for a Notebook. Now run up the nearby gear to another above, then leap to the large spinning apparatus in the center and ride it around to the other side.
As you close in on the next gear, begin swinging toward the gear (and position the camera behind Ryu) and leap toward it once you're lined up. Jump to another gear to the side, then to another nearby one, but get ready for more Master Ninjas - again, use the scythe's strong attacks.
It's pretty straight-forward from here - jump up more cogs to another large gear rotating away from you. Jump toward it to climb aboard, then across another to a walkway with a Save Statue.
Page 100© 2008 IGN Entertainment, Inc.
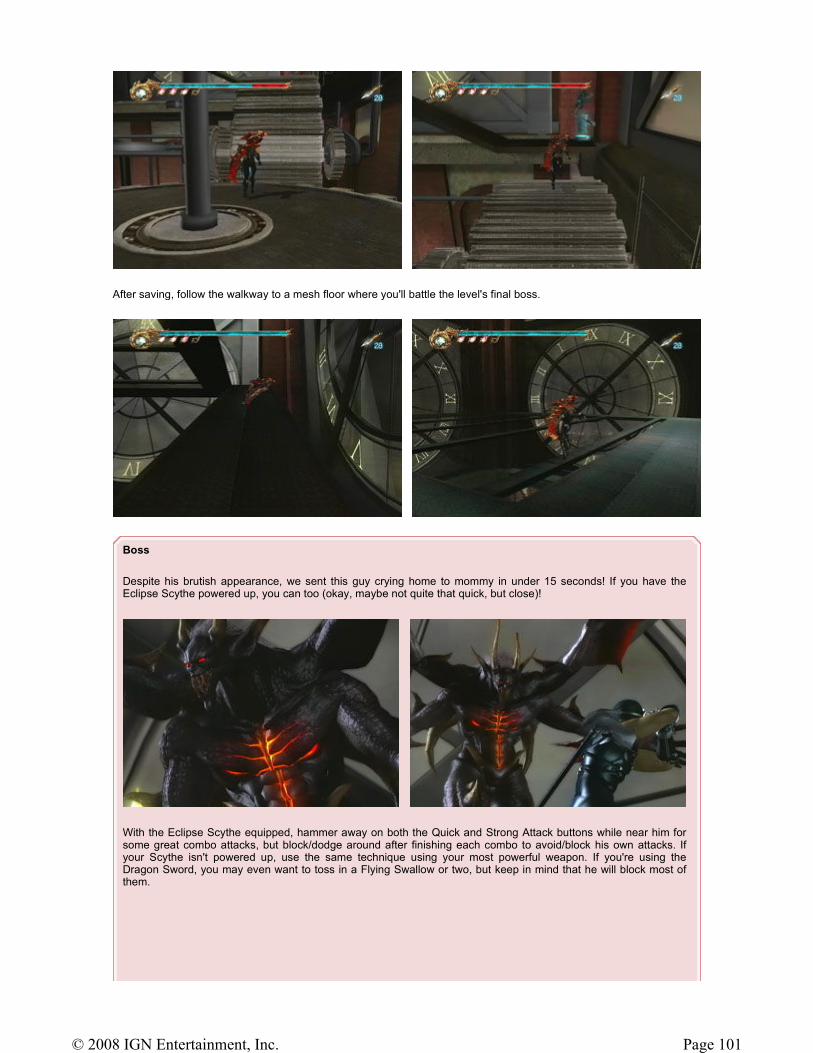
After saving, follow the walkway to a mesh floor where you'll battle the level's final boss.
Boss
Despite his brutish appearance, we sent this guy crying home to mommy in under 15 seconds! If you have the Eclipse Scythe powered up, you can too (okay, maybe not quite that quick, but close)!
With the Eclipse Scythe equipped, hammer away on both the Quick and Strong Attack buttons while near him for some great combo attacks, but block/dodge around after finishing each combo to avoid/block his own attacks. If your Scythe isn't powered up, use the same technique using your most powerful weapon. If you're using the Dragon Sword, you may even want to toss in a Flying Swallow or two, but keep in mind that he will block most of them.
Page 101© 2008 IGN Entertainment, Inc.
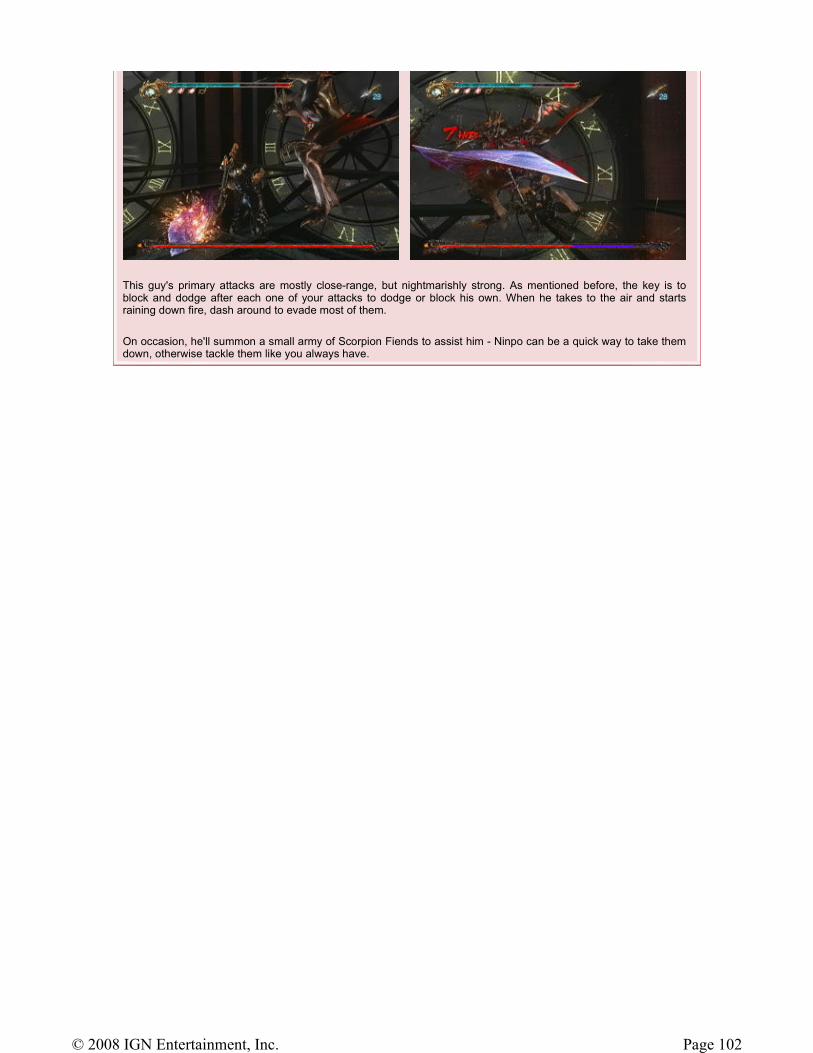
This guy's primary attacks are mostly close-range, but nightmarishly strong. As mentioned before, the key is to block and dodge after each one of your attacks to dodge or block his own. When he takes to the air and starts raining down fire, dash around to evade most of them.
On occasion, he'll summon a small army of Scorpion Fiends to assist him - Ninpo can be a quick way to take them down, otherwise tackle them like you always have.
Page 102© 2008 IGN Entertainment, Inc.
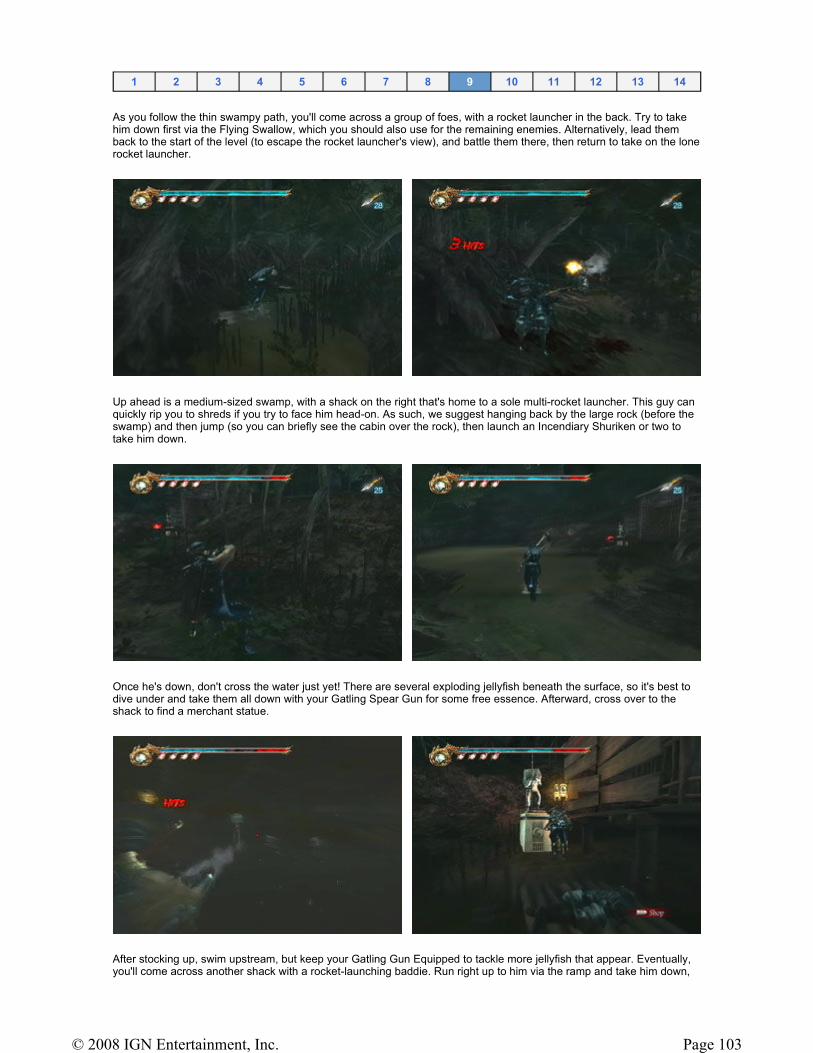
As you follow the thin swampy path, you'll come across a group of foes, with a rocket launcher in the back. Try to take him down first via the Flying Swallow, which you should also use for the remaining enemies. Alternatively, lead them back to the start of the level (to escape the rocket launcher's view), and battle them there, then return to take on the lone rocket launcher.
Up ahead is a medium-sized swamp, with a shack on the right that's home to a sole multi-rocket launcher. This guy can quickly rip you to shreds if you try to face him head-on. As such, we suggest hanging back by the large rock (before the swamp) and then jump (so you can briefly see the cabin over the rock), then launch an Incendiary Shuriken or two to take him down.
Once he's down, don't cross the water just yet! There are several exploding jellyfish beneath the surface, so it's best to dive under and take them all down with your Gatling Spear Gun for some free essence. Afterward, cross over to the shack to find a merchant statue.
After stocking up, swim upstream, but keep your Gatling Gun Equipped to tackle more jellyfish that appear. Eventually, you'll come across another shack with a rocket-launching baddie. Run right up to him via the ramp and take him down,
1 2 3 4 5 6 7 8 9 10 11 12 13 14
Page 103© 2008 IGN Entertainment, Inc.
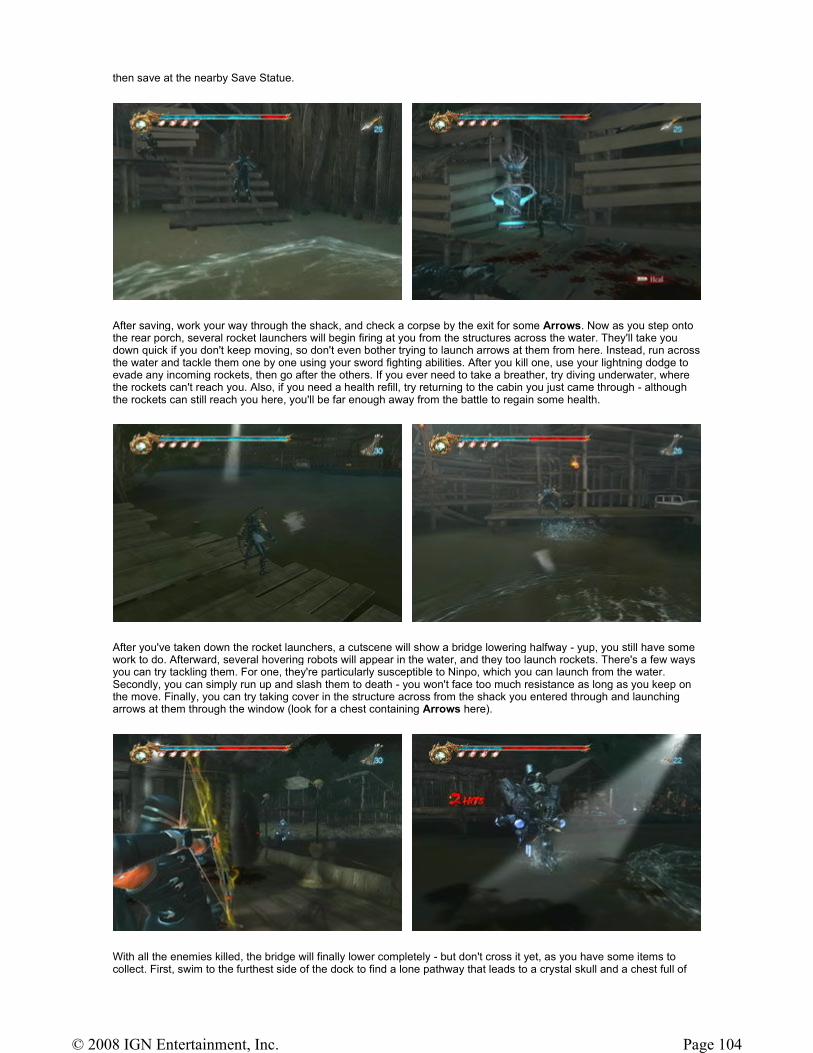
then save at the nearby Save Statue.
After saving, work your way through the shack, and check a corpse by the exit for some Arrows. Now as you step onto the rear porch, several rocket launchers will begin firing at you from the structures across the water. They'll take you down quick if you don't keep moving, so don't even bother trying to launch arrows at them from here. Instead, run across the water and tackle them one by one using your sword fighting abilities. After you kill one, use your lightning dodge to evade any incoming rockets, then go after the others. If you ever need to take a breather, try diving underwater, where the rockets can't reach you. Also, if you need a health refill, try returning to the cabin you just came through - although the rockets can still reach you here, you'll be far enough away from the battle to regain some health.
After you've taken down the rocket launchers, a cutscene will show a bridge lowering halfway - yup, you still have some work to do. Afterward, several hovering robots will appear in the water, and they too launch rockets. There's a few ways you can try tackling them. For one, they're particularly susceptible to Ninpo, which you can launch from the water. Secondly, you can simply run up and slash them to death - you won't face too much resistance as long as you keep on the move. Finally, you can try taking cover in the structure across from the shack you entered through and launching arrows at them through the window (look for a chest containing Arrows here).
With all the enemies killed, the bridge will finally lower completely - but don't cross it yet, as you have some items to collect. First, swim to the furthest side of the dock to find a lone pathway that leads to a crystal skull and a chest full of
Page 104© 2008 IGN Entertainment, Inc.
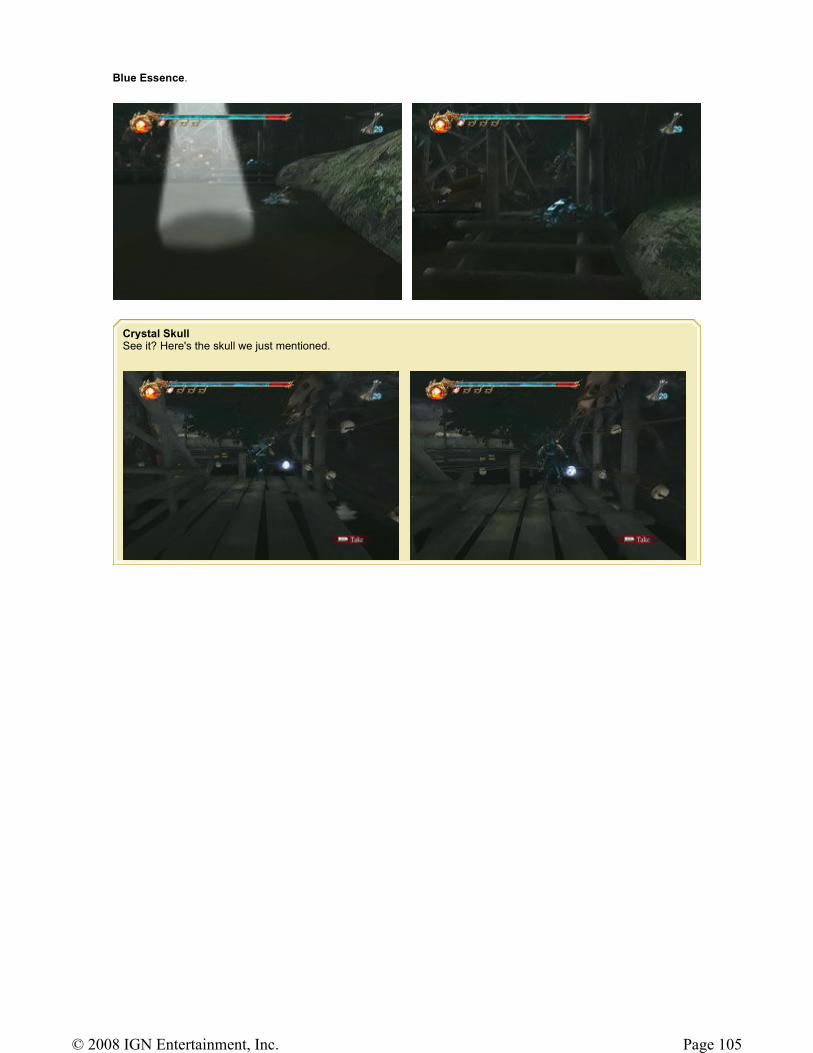
Blue Essence.
Crystal Skull See it? Here's the skull we just mentioned.
Page 105© 2008 IGN Entertainment, Inc.

Afterward, jump back into the water and follow the dock to another pathway which leads to a chest containing Blue Essence. Now head left and climb the staircase to find a chest with a Life of the Gods. Go back down, head right and open the chest for Red Essence. Jump up the nearby wall to find another chest with more Red Essence, then wall-run along the right wall and leap into a hallway. Check the corpse on the right for an Herb of Spiritual Life, then open a chest further in for another Herb of Spiritual Life.
Finally, follow the dock to the far end (parallel to the bridge) and knock down the door blocking the path. Follow it to a chest containing the Jade Mask. But be aware, when you return to the lake in preparation of crossing the bridge, more hovering robots will appear. Take them down like before, the continue across the bridge.
Cross the water and interact with the emblem on the wall to open a path under the water, to the left. Swim through this tunnel to emerge on the other side.
Check the chest around the left corner for some Yellow Essence, then use the tree branches ahead to swing over the river to a high pathway. Flying Swallow some ninjas here, then continue onto a rope. Use projectiles to take down a pair of rocket launchers on the other side, then grab hold and work your way across.
Page 106© 2008 IGN Entertainment, Inc.
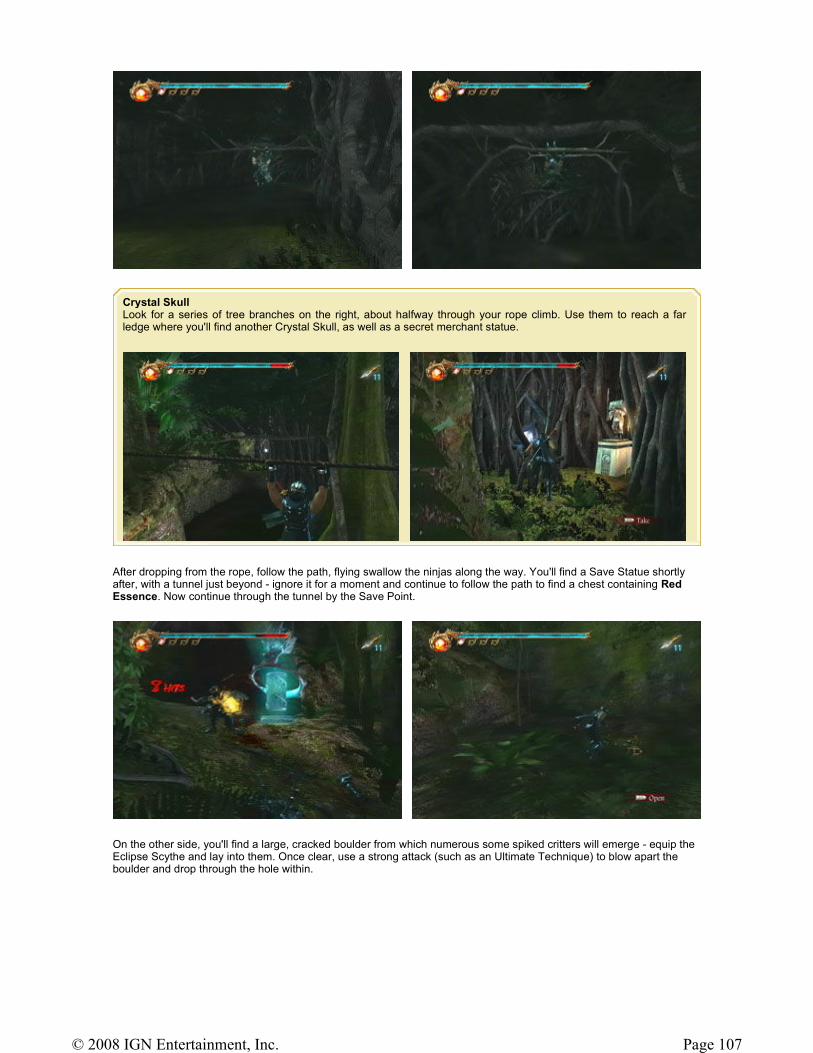
After dropping from the rope, follow the path, flying swallow the ninjas along the way. You'll find a Save Statue shortly after, with a tunnel just beyond - ignore it for a moment and continue to follow the path to find a chest containing Red Essence. Now continue through the tunnel by the Save Point.
On the other side, you'll find a large, cracked boulder from which numerous some spiked critters will emerge - equip the Eclipse Scythe and lay into them. Once clear, use a strong attack (such as an Ultimate Technique) to blow apart the boulder and drop through the hole within.
Crystal Skull Look for a series of tree branches on the right, about halfway through your rope climb. Use them to reach a far ledge where you'll find another Crystal Skull, as well as a secret merchant statue.
Page 107© 2008 IGN Entertainment, Inc.
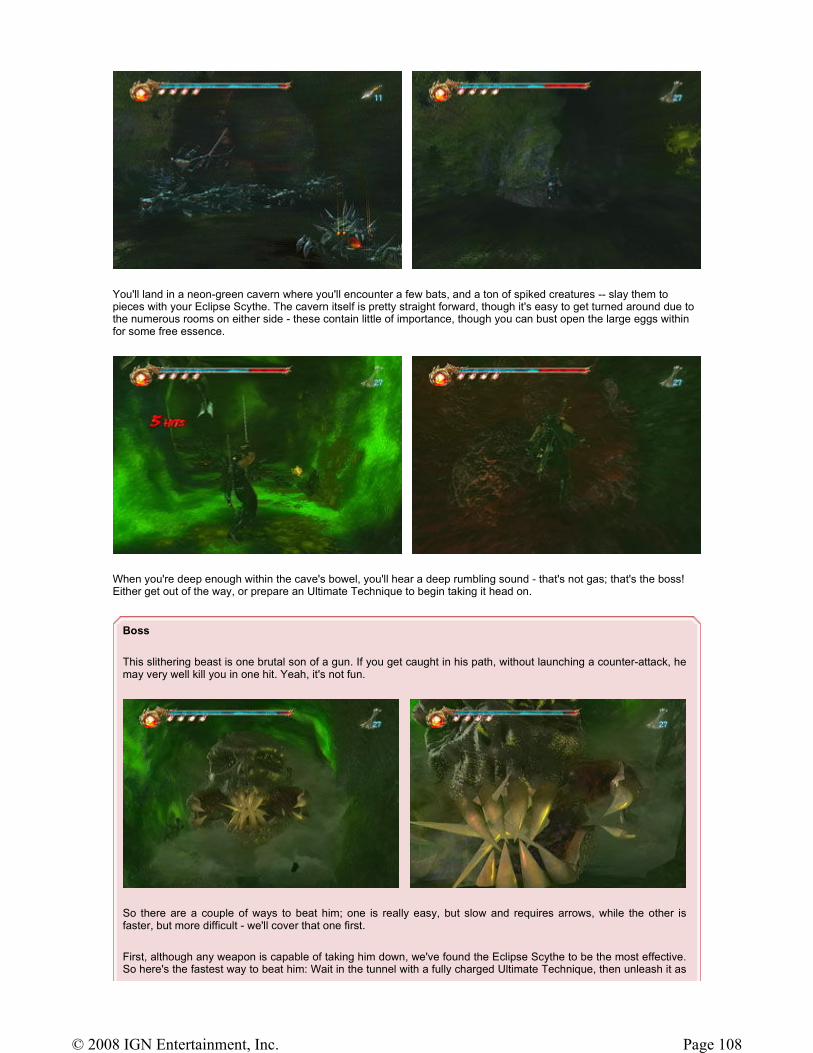
You'll land in a neon-green cavern where you'll encounter a few bats, and a ton of spiked creatures -- slay them to pieces with your Eclipse Scythe. The cavern itself is pretty straight forward, though it's easy to get turned around due to the numerous rooms on either side - these contain little of importance, though you can bust open the large eggs within for some free essence.
When you're deep enough within the cave's bowel, you'll hear a deep rumbling sound - that's not gas; that's the boss! Either get out of the way, or prepare an Ultimate Technique to begin taking it head on.
Boss
This slithering beast is one brutal son of a gun. If you get caught in his path, without launching a counter-attack, he may very well kill you in one hit. Yeah, it's not fun.
So there are a couple of ways to beat him; one is really easy, but slow and requires arrows, while the other is faster, but more difficult - we'll cover that one first.
First, although any weapon is capable of taking him down, we've found the Eclipse Scythe to be the most effective. So here's the fastest way to beat him: Wait in the tunnel with a fully charged Ultimate Technique, then unleash it as
Page 108© 2008 IGN Entertainment, Inc.
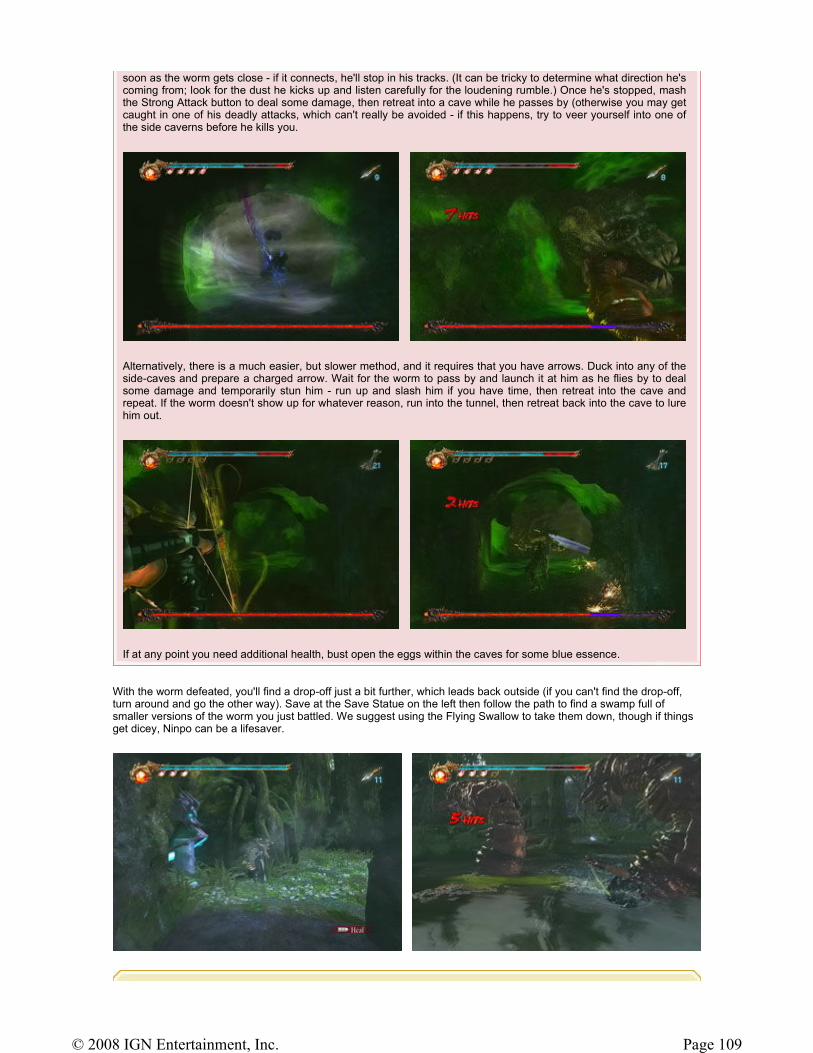
With the worm defeated, you'll find a drop-off just a bit further, which leads back outside (if you can't find the drop-off, turn around and go the other way). Save at the Save Statue on the left then follow the path to find a swamp full of smaller versions of the worm you just battled. We suggest using the Flying Swallow to take them down, though if things get dicey, Ninpo can be a lifesaver.
soon as the worm gets close - if it connects, he'll stop in his tracks. (It can be tricky to determine what direction he's coming from; look for the dust he kicks up and listen carefully for the loudening rumble.) Once he's stopped, mash the Strong Attack button to deal some damage, then retreat into a cave while he passes by (otherwise you may get caught in one of his deadly attacks, which can't really be avoided - if this happens, try to veer yourself into one of the side caverns before he kills you.
Alternatively, there is a much easier, but slower method, and it requires that you have arrows. Duck into any of the side-caves and prepare a charged arrow. Wait for the worm to pass by and launch it at him as he flies by to deal some damage and temporarily stun him - run up and slash him if you have time, then retreat into the cave and repeat. If the worm doesn't show up for whatever reason, run into the tunnel, then retreat back into the cave to lure him out.
If at any point you need additional health, bust open the eggs within the caves for some blue essence.
Page 109© 2008 IGN Entertainment, Inc.
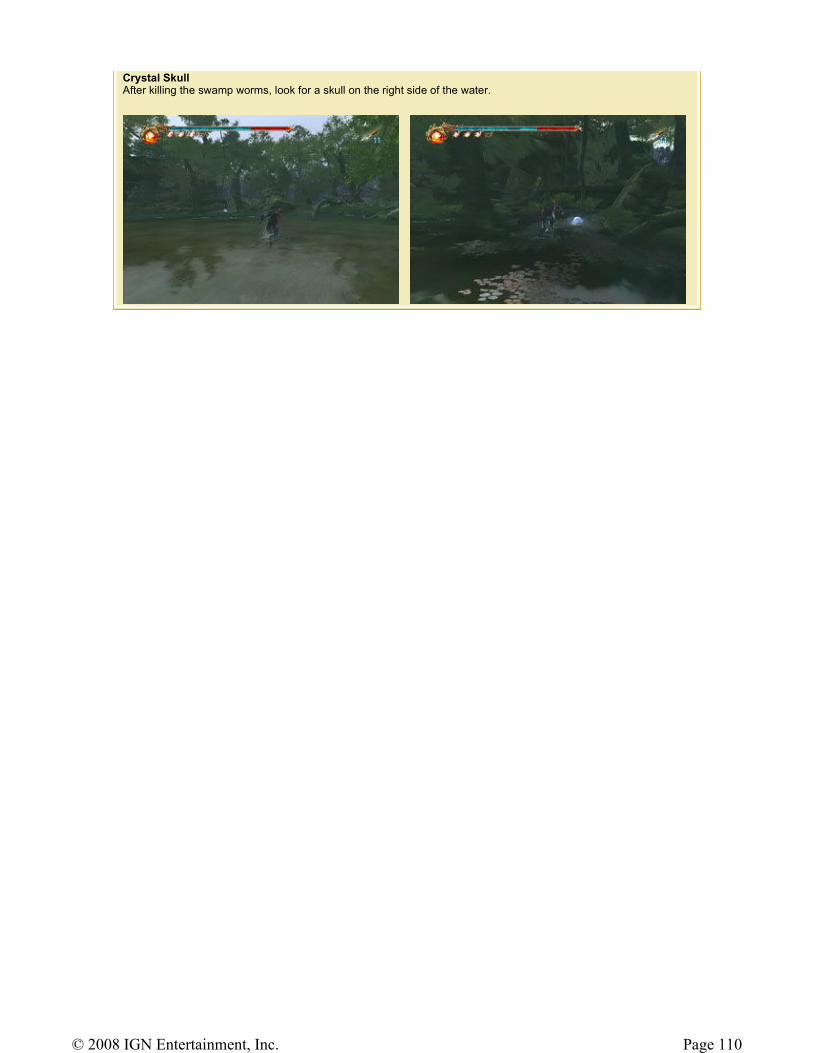
Crystal Skull After killing the swamp worms, look for a skull on the right side of the water.
Page 110© 2008 IGN Entertainment, Inc.
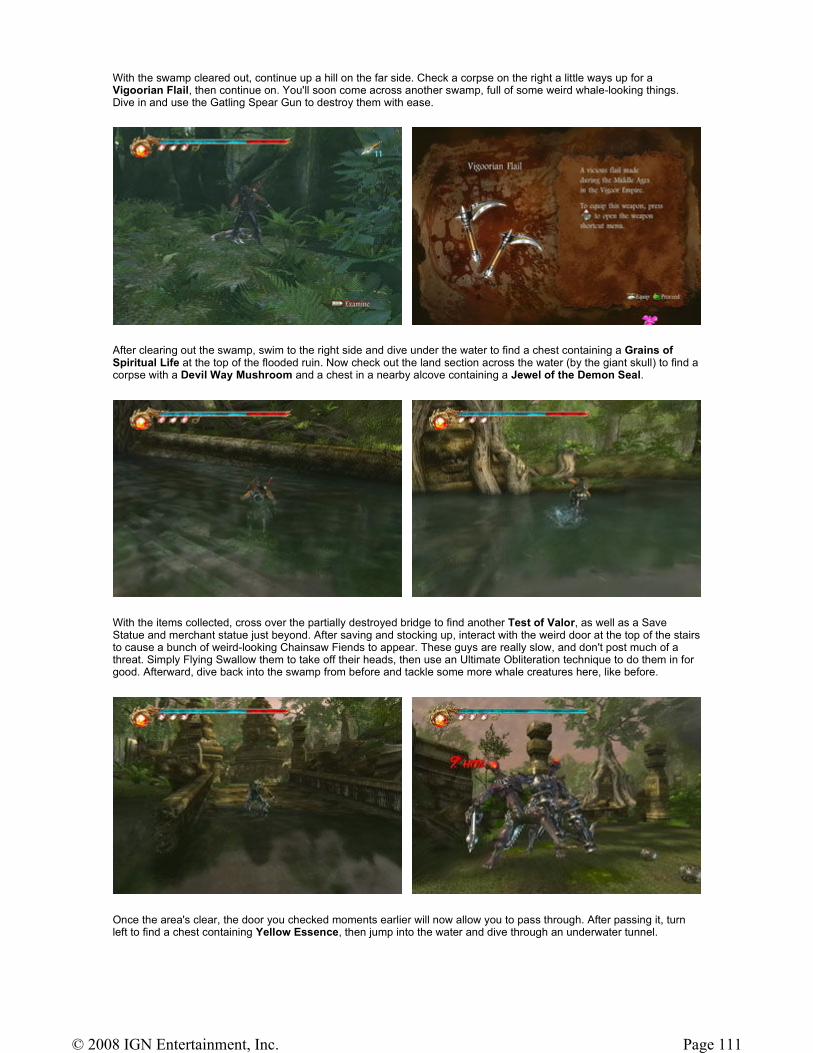
With the swamp cleared out, continue up a hill on the far side. Check a corpse on the right a little ways up for a Vigoorian Flail, then continue on. You'll soon come across another swamp, full of some weird whale-looking things. Dive in and use the Gatling Spear Gun to destroy them with ease.
After clearing out the swamp, swim to the right side and dive under the water to find a chest containing a Grains of Spiritual Life at the top of the flooded ruin. Now check out the land section across the water (by the giant skull) to find a corpse with a Devil Way Mushroom and a chest in a nearby alcove containing a Jewel of the Demon Seal.
With the items collected, cross over the partially destroyed bridge to find another Test of Valor, as well as a Save Statue and merchant statue just beyond. After saving and stocking up, interact with the weird door at the top of the stairs to cause a bunch of weird-looking Chainsaw Fiends to appear. These guys are really slow, and don't post much of a threat. Simply Flying Swallow them to take off their heads, then use an Ultimate Obliteration technique to do them in for good. Afterward, dive back into the swamp from before and tackle some more whale creatures here, like before.
Once the area's clear, the door you checked moments earlier will now allow you to pass through. After passing it, turn left to find a chest containing Yellow Essence, then jump into the water and dive through an underwater tunnel.
Page 111© 2008 IGN Entertainment, Inc.
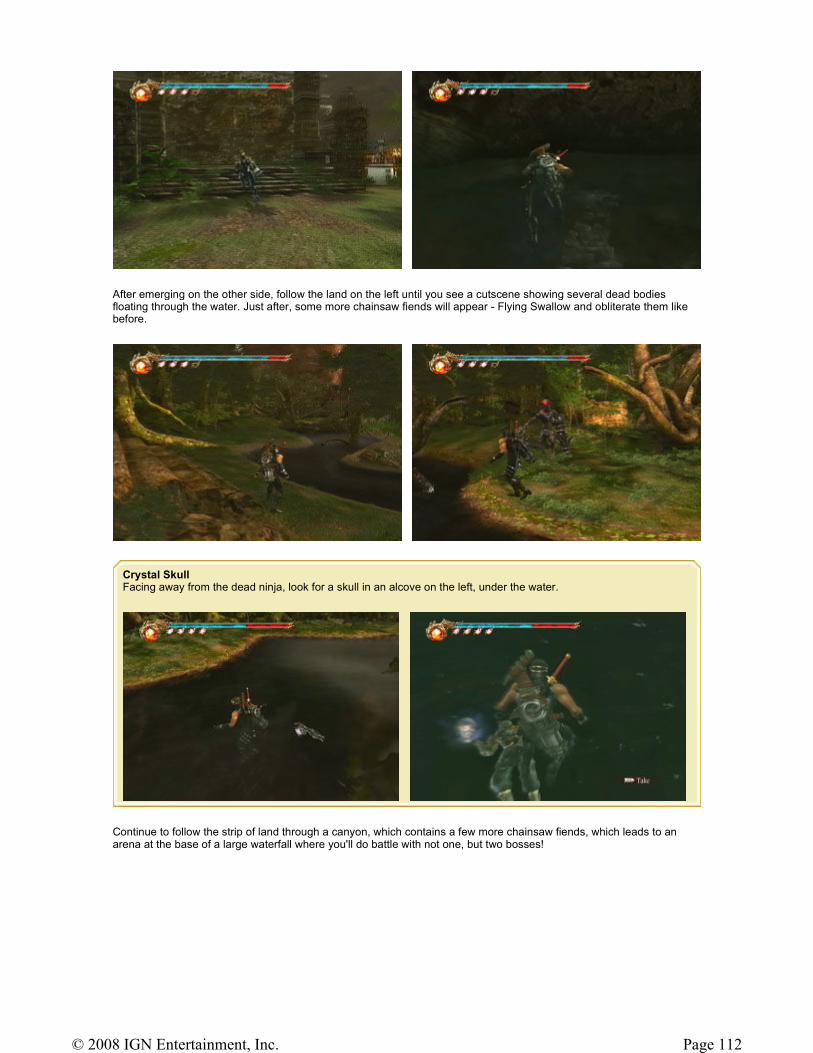
After emerging on the other side, follow the land on the left until you see a cutscene showing several dead bodies floating through the water. Just after, some more chainsaw fiends will appear - Flying Swallow and obliterate them like before.
Continue to follow the strip of land through a canyon, which contains a few more chainsaw fiends, which leads to an arena at the base of a large waterfall where you'll do battle with not one, but two bosses!
Crystal Skull Facing away from the dead ninja, look for a skull in an alcove on the left, under the water.
Page 112© 2008 IGN Entertainment, Inc.
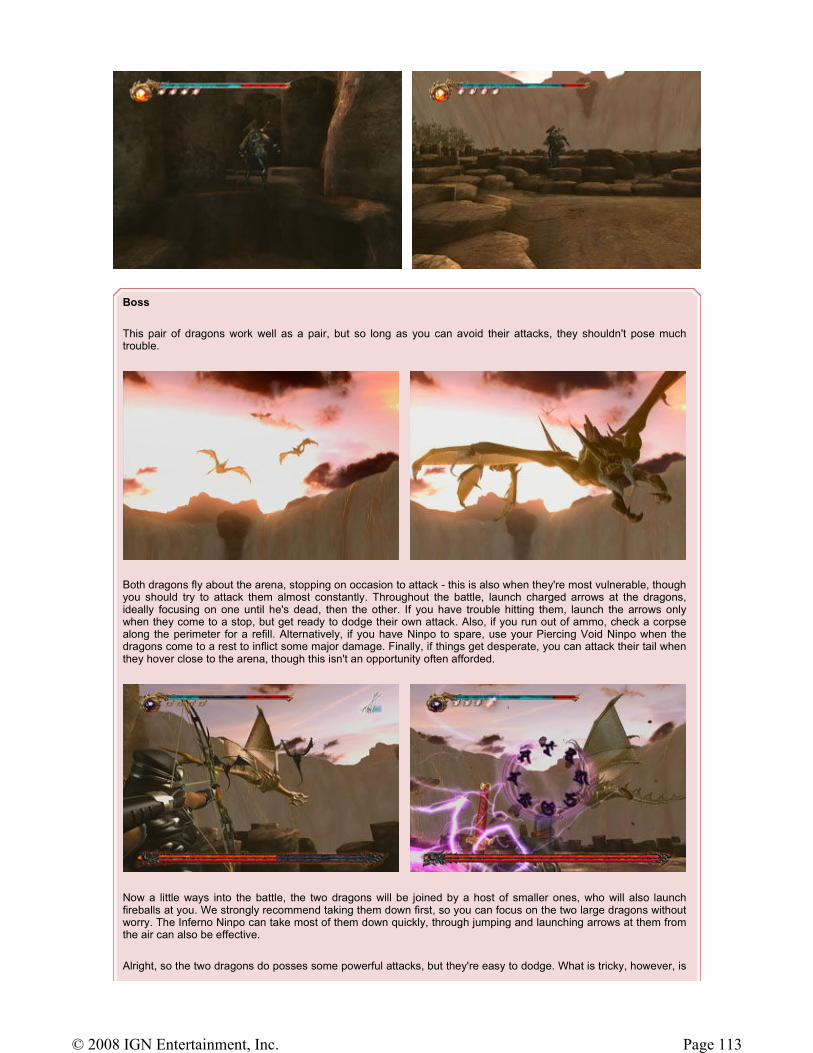
Boss
This pair of dragons work well as a pair, but so long as you can avoid their attacks, they shouldn't pose much trouble.
Both dragons fly about the arena, stopping on occasion to attack - this is also when they're most vulnerable, though you should try to attack them almost constantly. Throughout the battle, launch charged arrows at the dragons, ideally focusing on one until he's dead, then the other. If you have trouble hitting them, launch the arrows only when they come to a stop, but get ready to dodge their own attack. Also, if you run out of ammo, check a corpse along the perimeter for a refill. Alternatively, if you have Ninpo to spare, use your Piercing Void Ninpo when the dragons come to a rest to inflict some major damage. Finally, if things get desperate, you can attack their tail when they hover close to the arena, though this isn't an opportunity often afforded.
Now a little ways into the battle, the two dragons will be joined by a host of smaller ones, who will also launch fireballs at you. We strongly recommend taking them down first, so you can focus on the two large dragons without worry. The Inferno Ninpo can take most of them down quickly, through jumping and launching arrows at them from the air can also be effective.
Alright, so the two dragons do posses some powerful attacks, but they're easy to dodge. What is tricky, however, is
Page 113© 2008 IGN Entertainment, Inc.
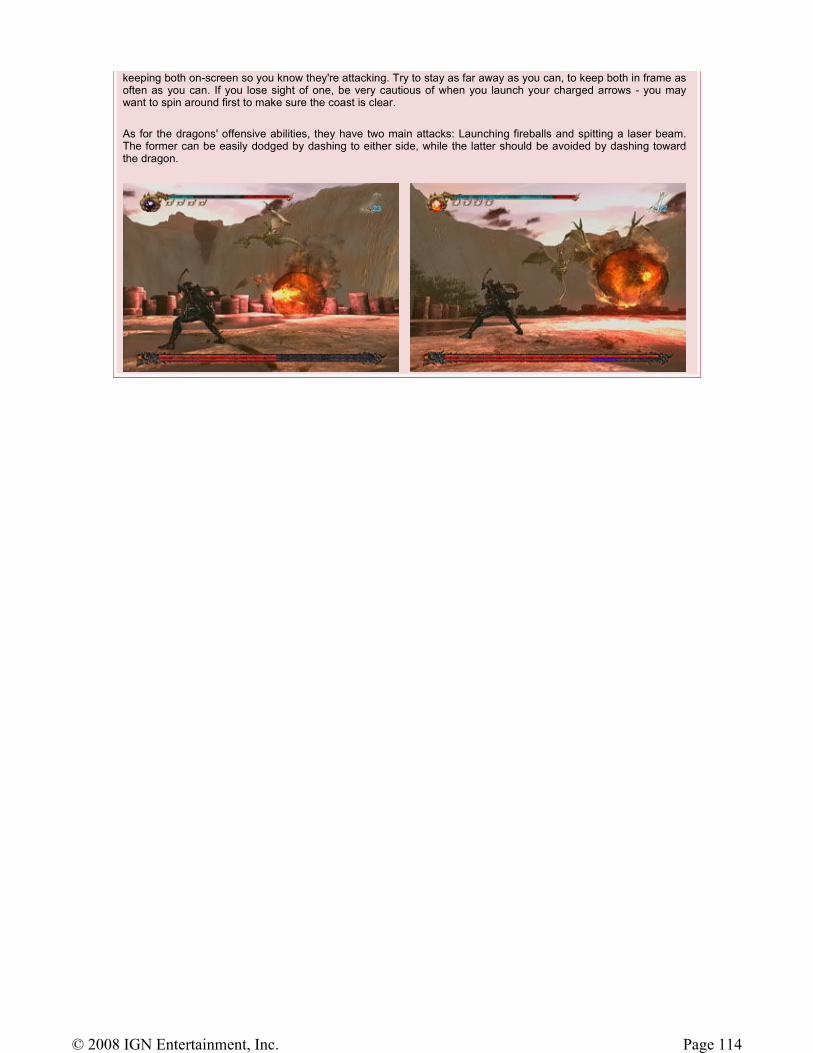
keeping both on-screen so you know they're attacking. Try to stay as far away as you can, to keep both in frame as often as you can. If you lose sight of one, be very cautious of when you launch your charged arrows - you may want to spin around first to make sure the coast is clear.
As for the dragons' offensive abilities, they have two main attacks: Launching fireballs and spitting a laser beam. The former can be easily dodged by dashing to either side, while the latter should be avoided by dashing toward the dragon.
Page 114© 2008 IGN Entertainment, Inc.
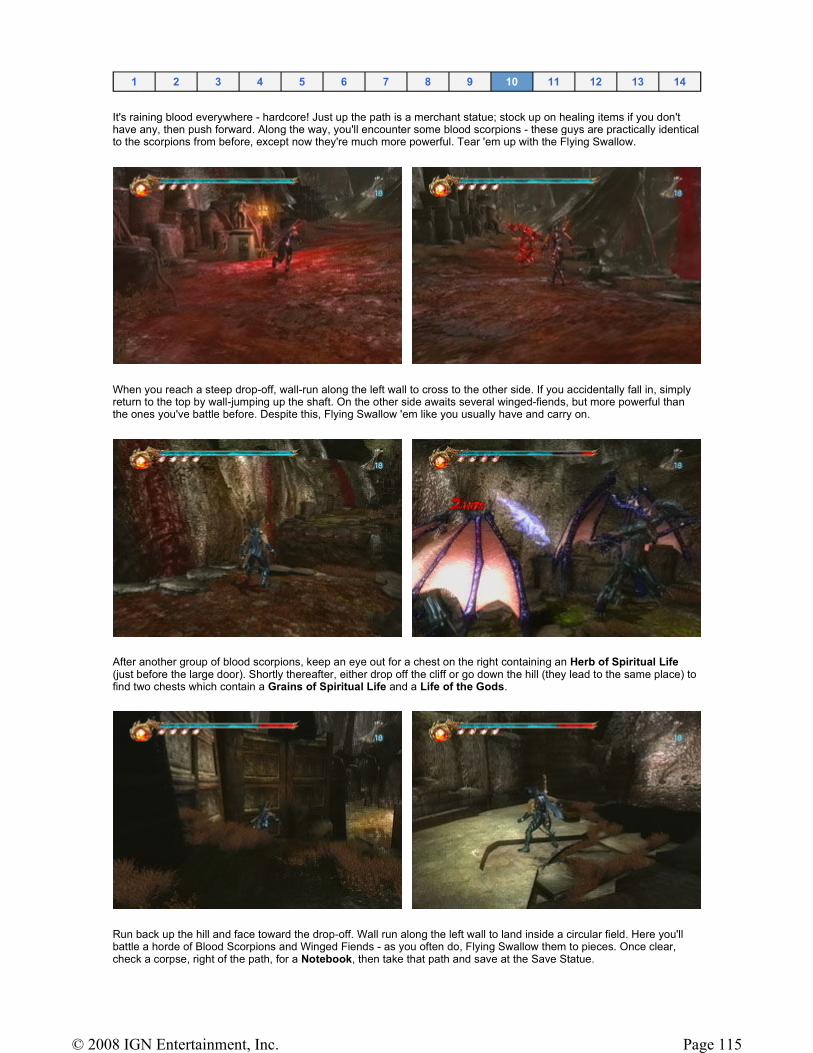
It's raining blood everywhere - hardcore! Just up the path is a merchant statue; stock up on healing items if you don't have any, then push forward. Along the way, you'll encounter some blood scorpions - these guys are practically identical to the scorpions from before, except now they're much more powerful. Tear 'em up with the Flying Swallow.
When you reach a steep drop-off, wall-run along the left wall to cross to the other side. If you accidentally fall in, simply return to the top by wall-jumping up the shaft. On the other side awaits several winged-fiends, but more powerful than the ones you've battle before. Despite this, Flying Swallow 'em like you usually have and carry on.
After another group of blood scorpions, keep an eye out for a chest on the right containing an Herb of Spiritual Life (just before the large door). Shortly thereafter, either drop off the cliff or go down the hill (they lead to the same place) to find two chests which contain a Grains of Spiritual Life and a Life of the Gods.
Run back up the hill and face toward the drop-off. Wall run along the left wall to land inside a circular field. Here you'll battle a horde of Blood Scorpions and Winged Fiends - as you often do, Flying Swallow them to pieces. Once clear, check a corpse, right of the path, for a Notebook, then take that path and save at the Save Statue.
1 2 3 4 5 6 7 8 9 10 11 12 13 14
Page 115© 2008 IGN Entertainment, Inc.
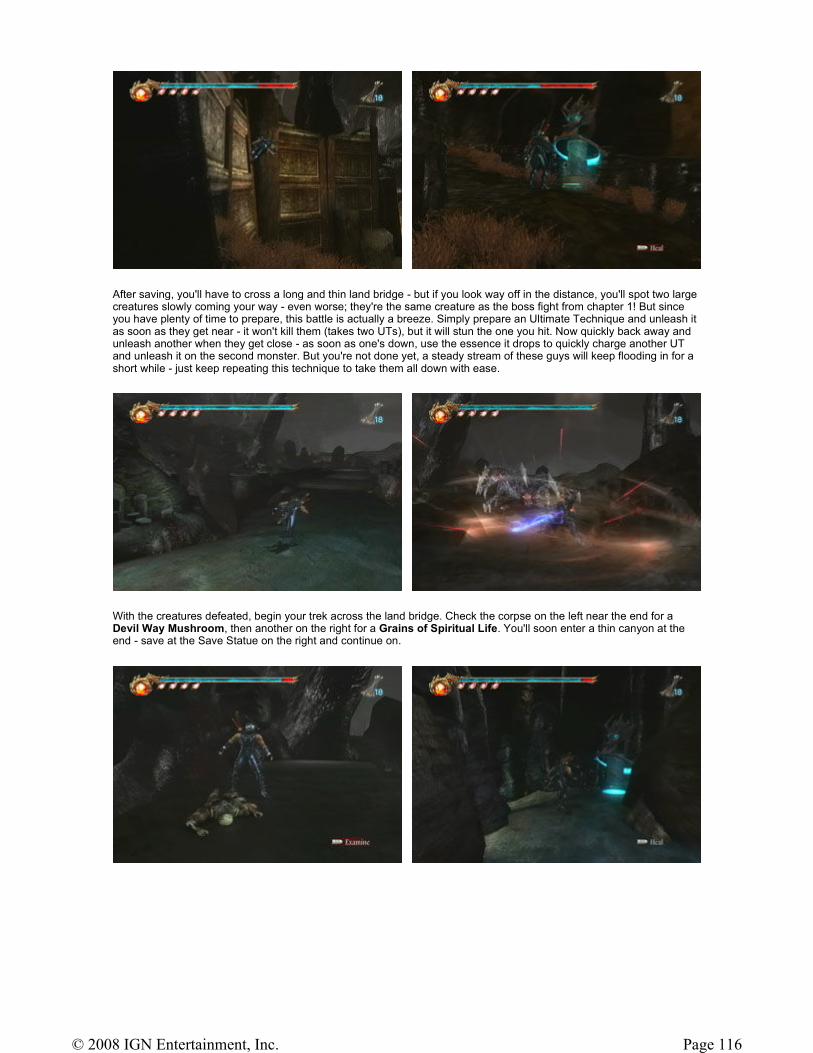
After saving, you'll have to cross a long and thin land bridge - but if you look way off in the distance, you'll spot two large creatures slowly coming your way - even worse; they're the same creature as the boss fight from chapter 1! But since you have plenty of time to prepare, this battle is actually a breeze. Simply prepare an Ultimate Technique and unleash it as soon as they get near - it won't kill them (takes two UTs), but it will stun the one you hit. Now quickly back away and unleash another when they get close - as soon as one's down, use the essence it drops to quickly charge another UT and unleash it on the second monster. But you're not done yet, a steady stream of these guys will keep flooding in for a short while - just keep repeating this technique to take them all down with ease.
With the creatures defeated, begin your trek across the land bridge. Check the corpse on the left near the end for a Devil Way Mushroom, then another on the right for a Grains of Spiritual Life. You'll soon enter a thin canyon at the end - save at the Save Statue on the right and continue on.
Page 116© 2008 IGN Entertainment, Inc.
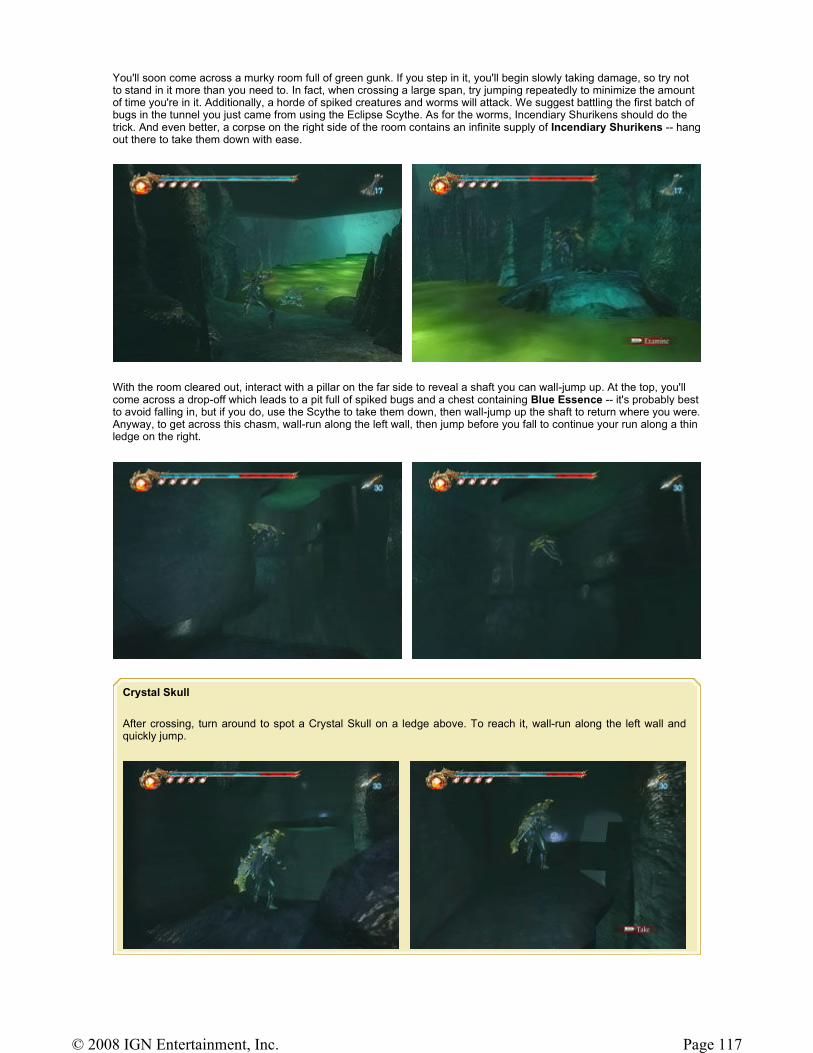
You'll soon come across a murky room full of green gunk. If you step in it, you'll begin slowly taking damage, so try not to stand in it more than you need to. In fact, when crossing a large span, try jumping repeatedly to minimize the amount of time you're in it. Additionally, a horde of spiked creatures and worms will attack. We suggest battling the first batch of bugs in the tunnel you just came from using the Eclipse Scythe. As for the worms, Incendiary Shurikens should do the trick. And even better, a corpse on the right side of the room contains an infinite supply of Incendiary Shurikens -- hang out there to take them down with ease.
With the room cleared out, interact with a pillar on the far side to reveal a shaft you can wall-jump up. At the top, you'll come across a drop-off which leads to a pit full of spiked bugs and a chest containing Blue Essence -- it's probably best to avoid falling in, but if you do, use the Scythe to take them down, then wall-jump up the shaft to return where you were. Anyway, to get across this chasm, wall-run along the left wall, then jump before you fall to continue your run along a thin ledge on the right.
Crystal Skull
After crossing, turn around to spot a Crystal Skull on a ledge above. To reach it, wall-run along the left wall and quickly jump.
Page 117© 2008 IGN Entertainment, Inc.
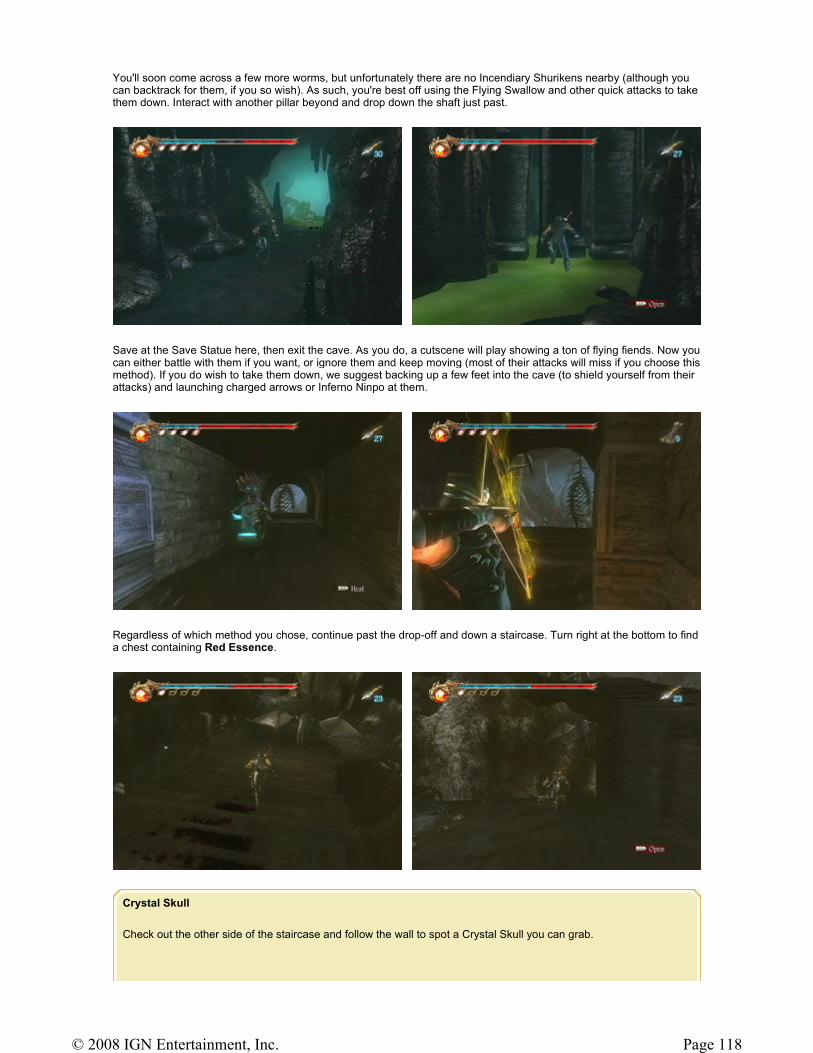
You'll soon come across a few more worms, but unfortunately there are no Incendiary Shurikens nearby (although you can backtrack for them, if you so wish). As such, you're best off using the Flying Swallow and other quick attacks to take them down. Interact with another pillar beyond and drop down the shaft just past.
Save at the Save Statue here, then exit the cave. As you do, a cutscene will play showing a ton of flying fiends. Now you can either battle with them if you want, or ignore them and keep moving (most of their attacks will miss if you choose this method). If you do wish to take them down, we suggest backing up a few feet into the cave (to shield yourself from their attacks) and launching charged arrows or Inferno Ninpo at them.
Regardless of which method you chose, continue past the drop-off and down a staircase. Turn right at the bottom to find a chest containing Red Essence.
Crystal Skull
Check out the other side of the staircase and follow the wall to spot a Crystal Skull you can grab.
Page 118© 2008 IGN Entertainment, Inc.
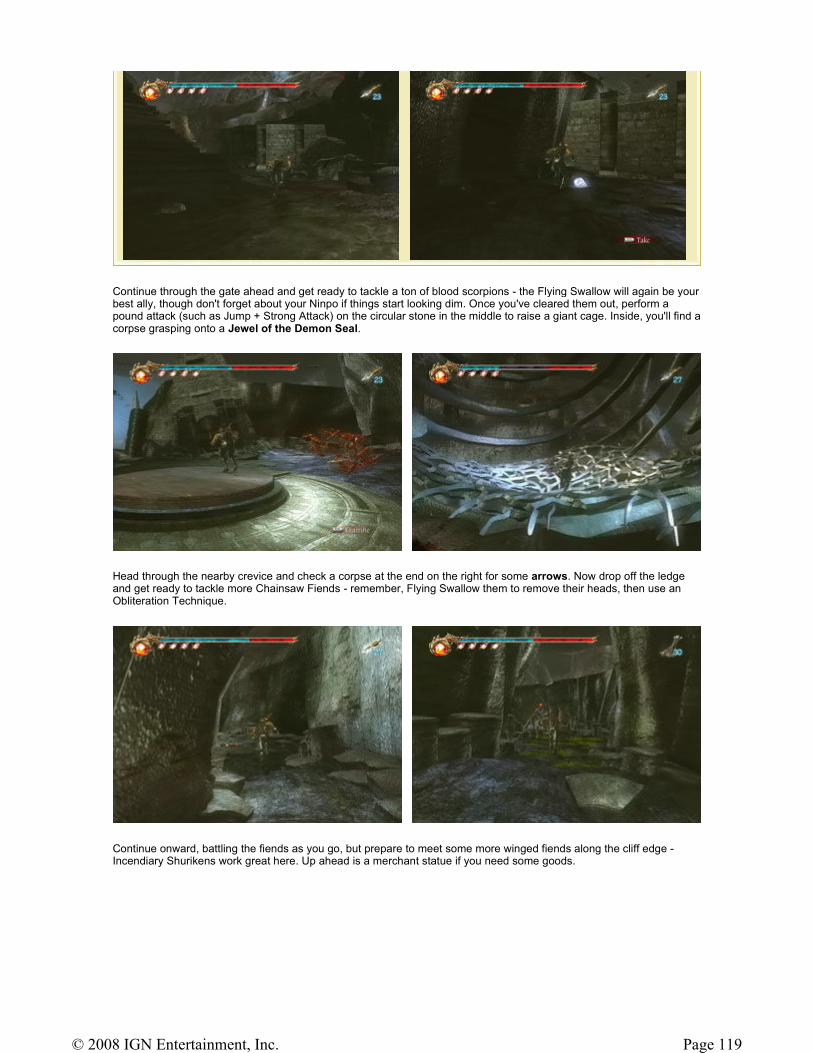
Continue through the gate ahead and get ready to tackle a ton of blood scorpions - the Flying Swallow will again be your best ally, though don't forget about your Ninpo if things start looking dim. Once you've cleared them out, perform a pound attack (such as Jump + Strong Attack) on the circular stone in the middle to raise a giant cage. Inside, you'll find a corpse grasping onto a Jewel of the Demon Seal.
Head through the nearby crevice and check a corpse at the end on the right for some arrows. Now drop off the ledge and get ready to tackle more Chainsaw Fiends - remember, Flying Swallow them to remove their heads, then use an Obliteration Technique.
Continue onward, battling the fiends as you go, but prepare to meet some more winged fiends along the cliff edge - Incendiary Shurikens work great here. Up ahead is a merchant statue if you need some goods.
Page 119© 2008 IGN Entertainment, Inc.
Cross over the neighboring bridge, and tackle the purple fiends that attack (using the Flying Swallow). Just beyond await more chainsaw fiends - murder them, then save at the Save Statue and keep an eye out for another Test of Valor on the right.
Proceed up the path until another circular switch - perform another pound attack on it (such as Jump + Strong Attack) to raise another cage - battle the blood scorpions inside, then check the corpse for a Grains of Spiritual Life.
Page 120© 2008 IGN Entertainment, Inc.

Head inside the busted tower and work your way to the base. Battle some more Chainsaw Fiends, then follow the path to find a chest containing an Herb of Spiritual Life. Head left, across the busted bridge, and check a corpse on the right for some Arrows.
Up ahead are some more flying fiends; again, Incendiary Shurikens are the best method to deal with them. Prepare for some more blood scorpion fiends just beyond then continue onward to find a chest (just right of some pillars) containing an Herb of Spiritual Life.
Continue on until you see a cutscene. Subsequently, proceed further up, past the stone circle, to find a corpse containing an Herb of Spiritual Life. Now perform a pound attack on the stone circle to cause a boss to appear - oh no!!!
Boss
Okay, this guy is easy - EASY. He fights just like one of the dragons you faced in the previous level, so repay him in kind. Just pound him with fully charged arrows, moving only to dodge his fireball attack. You really shouldn't have any trouble.
Page 121© 2008 IGN Entertainment, Inc.
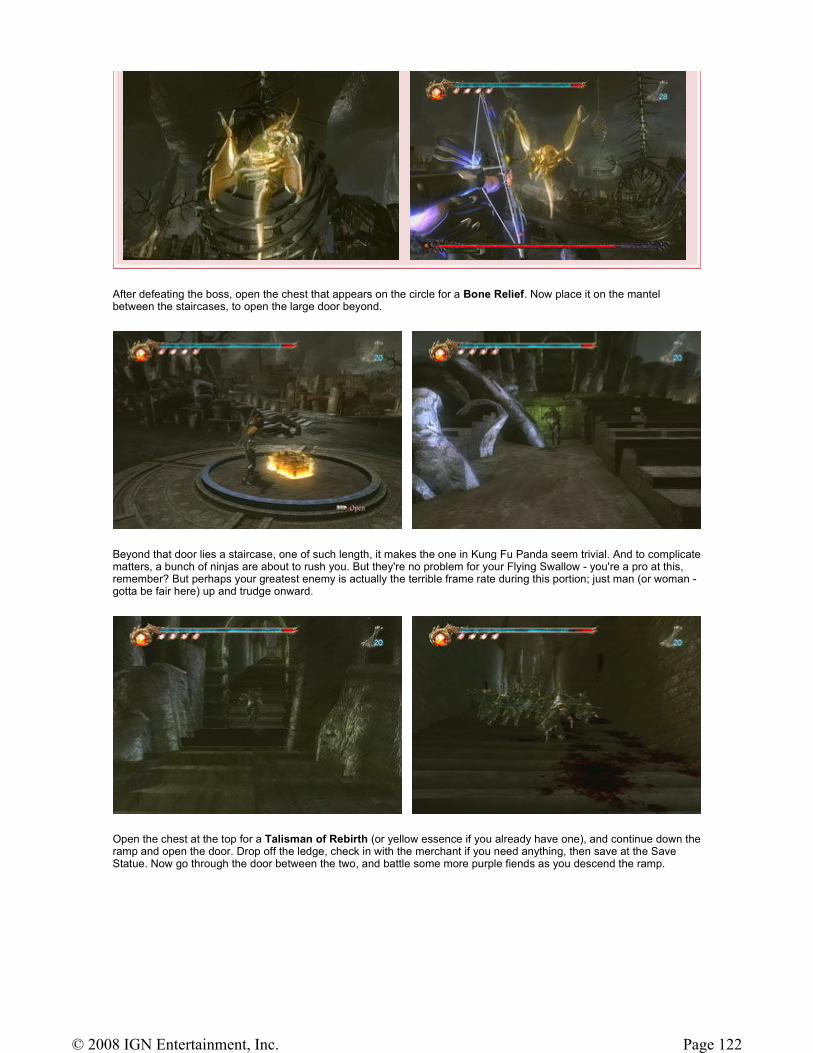
After defeating the boss, open the chest that appears on the circle for a Bone Relief. Now place it on the mantel between the staircases, to open the large door beyond.
Beyond that door lies a staircase, one of such length, it makes the one in Kung Fu Panda seem trivial. And to complicate matters, a bunch of ninjas are about to rush you. But they're no problem for your Flying Swallow - you're a pro at this, remember? But perhaps your greatest enemy is actually the terrible frame rate during this portion; just man (or woman - gotta be fair here) up and trudge onward.
Open the chest at the top for a Talisman of Rebirth (or yellow essence if you already have one), and continue down the ramp and open the door. Drop off the ledge, check in with the merchant if you need anything, then save at the Save Statue. Now go through the door between the two, and battle some more purple fiends as you descend the ramp.
Page 122© 2008 IGN Entertainment, Inc.

At the base, check on either side for chests containing Blue Essence and Red Essence, then look for a Notebook on the right side of the staircase. Climb it to the next level and open the door at the top for the boss fight.
Boss
The intro to this boss battle is reminiscent of the final scene of the movie Carrie, and is just as deadly.
You'll want to battle her much like you battled the annoying boss from Chapter 2. In short, stay a few meters away from her at all times and wait for her to fly-dash toward you - avoid this by dodging to the side, then follow-up with a series of quick attacks using your Scythe while she's recovering - this should deal some pretty heavy damage. Quickly back away afterward and repeat.
Page 123© 2008 IGN Entertainment, Inc.
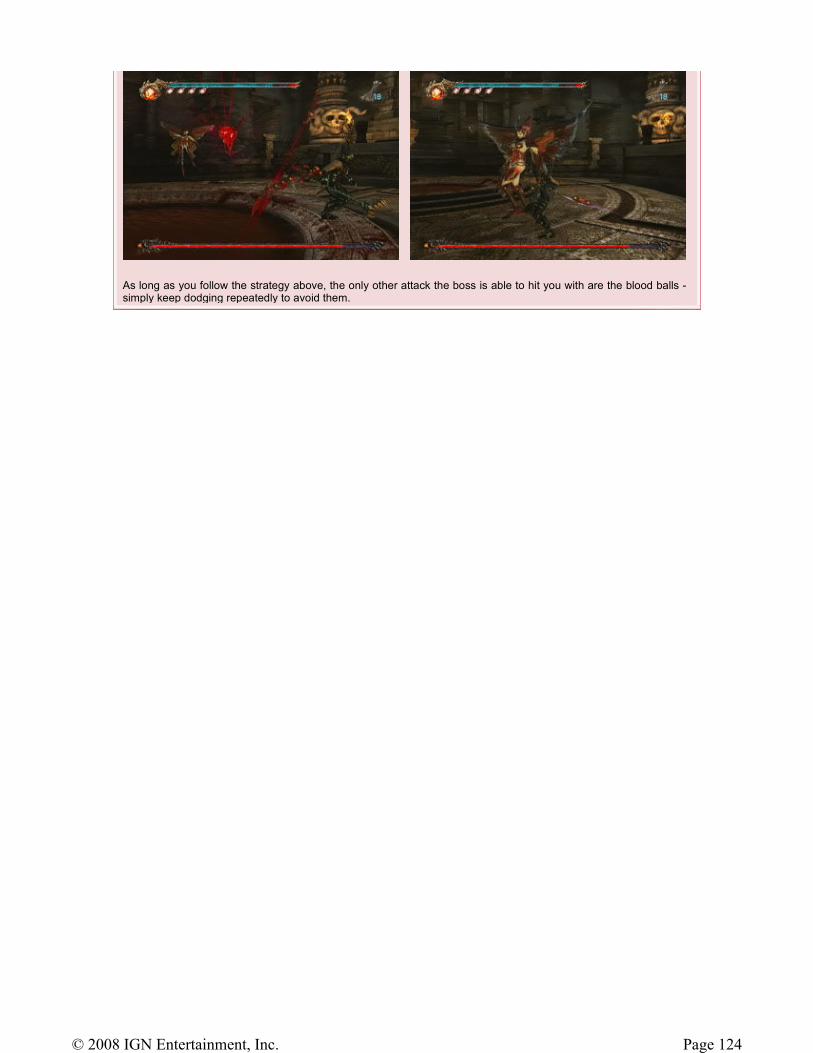
As long as you follow the strategy above, the only other attack the boss is able to hit you with are the blood balls - simply keep dodging repeatedly to avoid them.
Page 124© 2008 IGN Entertainment, Inc.
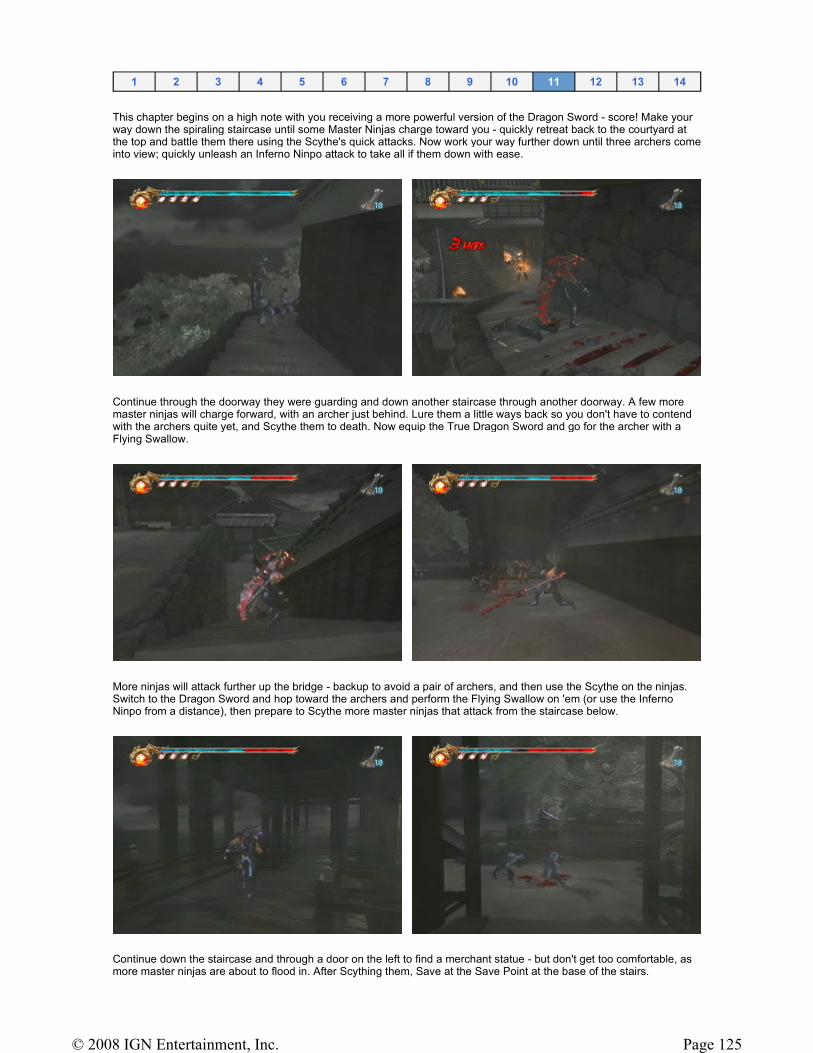
This chapter begins on a high note with you receiving a more powerful version of the Dragon Sword - score! Make your way down the spiraling staircase until some Master Ninjas charge toward you - quickly retreat back to the courtyard at the top and battle them there using the Scythe's quick attacks. Now work your way further down until three archers come into view; quickly unleash an Inferno Ninpo attack to take all if them down with ease.
Continue through the doorway they were guarding and down another staircase through another doorway. A few more master ninjas will charge forward, with an archer just behind. Lure them a little ways back so you don't have to contend with the archers quite yet, and Scythe them to death. Now equip the True Dragon Sword and go for the archer with a Flying Swallow.
More ninjas will attack further up the bridge - backup to avoid a pair of archers, and then use the Scythe on the ninjas. Switch to the Dragon Sword and hop toward the archers and perform the Flying Swallow on 'em (or use the Inferno Ninpo from a distance), then prepare to Scythe more master ninjas that attack from the staircase below.
Continue down the staircase and through a door on the left to find a merchant statue - but don't get too comfortable, as more master ninjas are about to flood in. After Scything them, Save at the Save Point at the base of the stairs.
1 2 3 4 5 6 7 8 9 10 11 12 13 14
Page 125© 2008 IGN Entertainment, Inc.
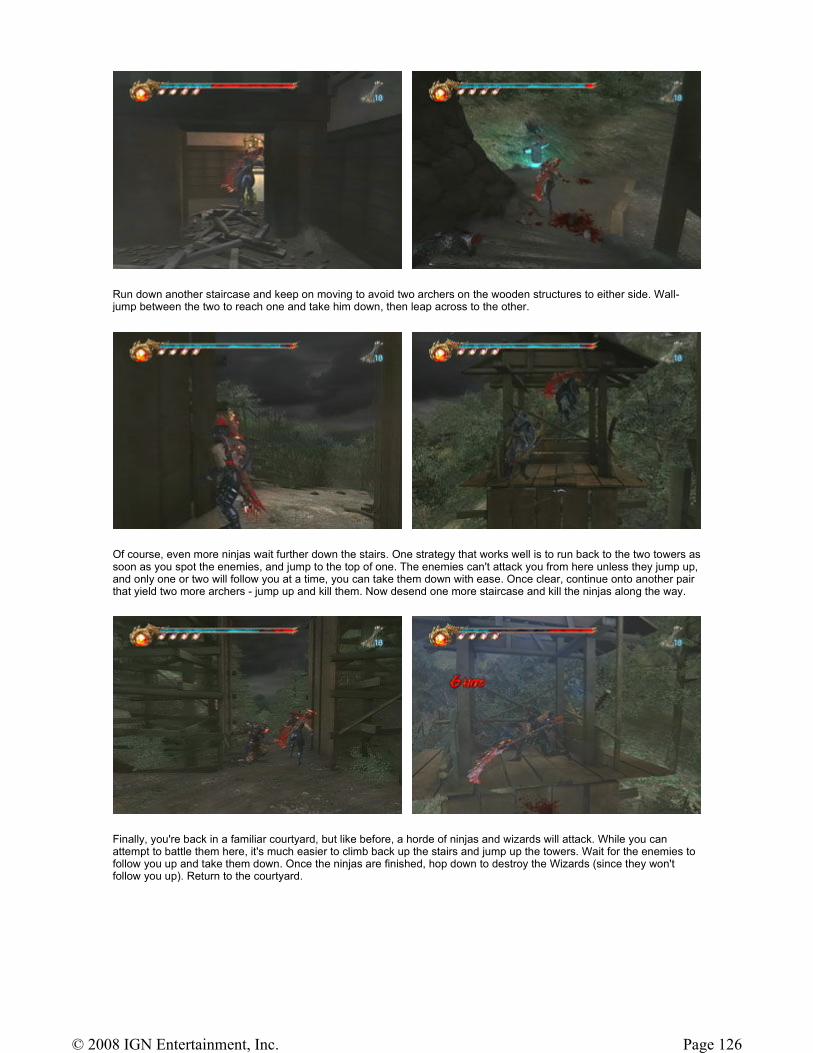
Run down another staircase and keep on moving to avoid two archers on the wooden structures to either side. Wall-jump between the two to reach one and take him down, then leap across to the other.
Of course, even more ninjas wait further down the stairs. One strategy that works well is to run back to the two towers as soon as you spot the enemies, and jump to the top of one. The enemies can't attack you from here unless they jump up, and only one or two will follow you at a time, you can take them down with ease. Once clear, continue onto another pair that yield two more archers - jump up and kill them. Now desend one more staircase and kill the ninjas along the way.
Finally, you're back in a familiar courtyard, but like before, a horde of ninjas and wizards will attack. While you can attempt to battle them here, it's much easier to climb back up the stairs and jump up the towers. Wait for the enemies to follow you up and take them down. Once the ninjas are finished, hop down to destroy the Wizards (since they won't follow you up). Return to the courtyard.
Page 126© 2008 IGN Entertainment, Inc.
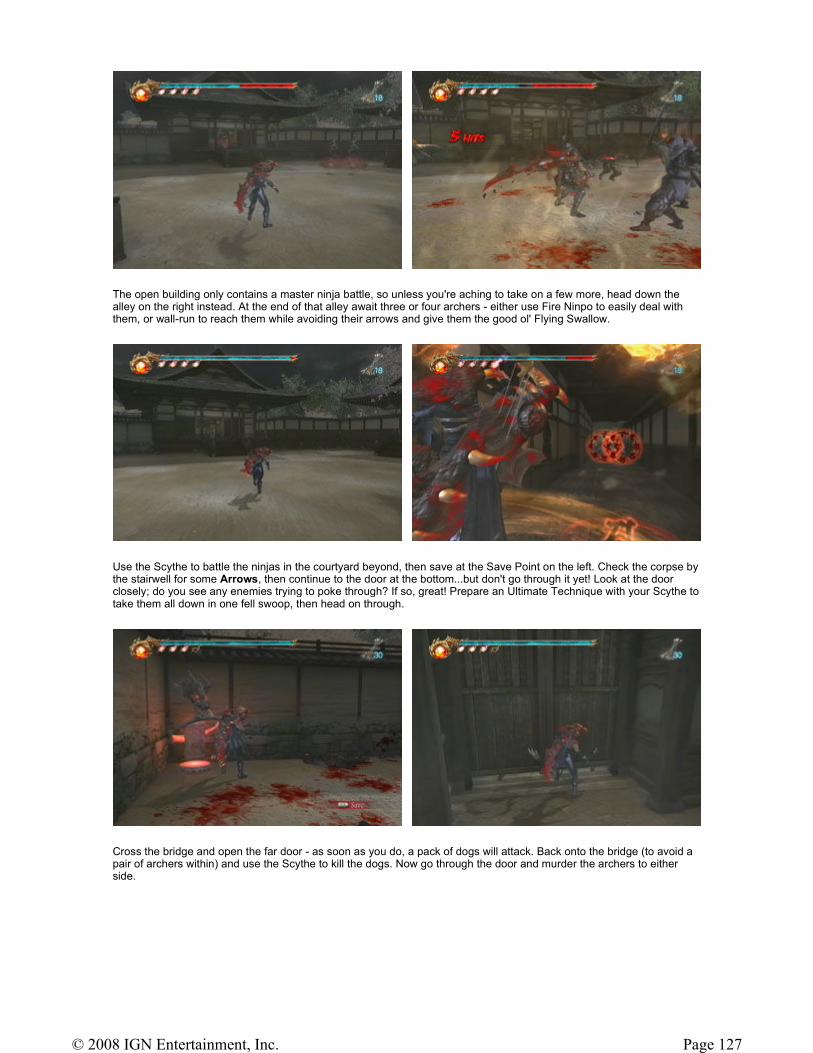
The open building only contains a master ninja battle, so unless you're aching to take on a few more, head down the alley on the right instead. At the end of that alley await three or four archers - either use Fire Ninpo to easily deal with them, or wall-run to reach them while avoiding their arrows and give them the good ol' Flying Swallow.
Use the Scythe to battle the ninjas in the courtyard beyond, then save at the Save Point on the left. Check the corpse by the stairwell for some Arrows, then continue to the door at the bottom...but don't go through it yet! Look at the door closely; do you see any enemies trying to poke through? If so, great! Prepare an Ultimate Technique with your Scythe to take them all down in one fell swoop, then head on through.
Cross the bridge and open the far door - as soon as you do, a pack of dogs will attack. Back onto the bridge (to avoid a pair of archers within) and use the Scythe to kill the dogs. Now go through the door and murder the archers to either side.
Page 127© 2008 IGN Entertainment, Inc.
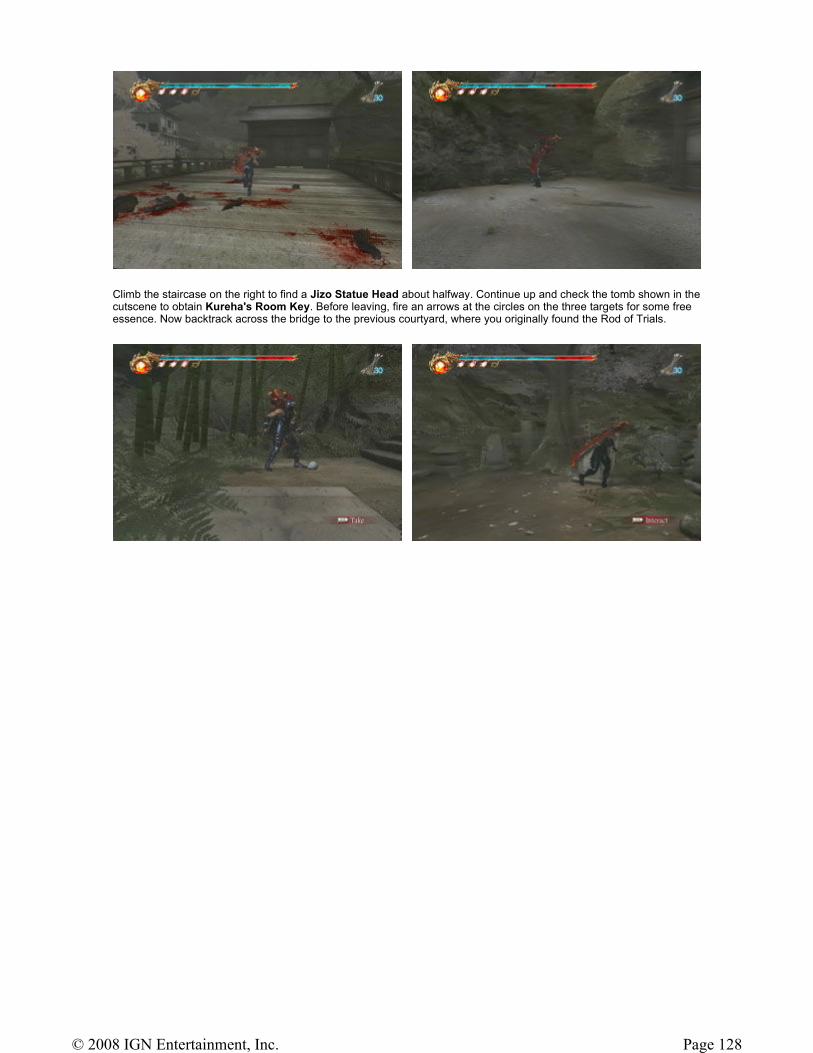
Climb the staircase on the right to find a Jizo Statue Head about halfway. Continue up and check the tomb shown in the cutscene to obtain Kureha's Room Key. Before leaving, fire an arrows at the circles on the three targets for some free essence. Now backtrack across the bridge to the previous courtyard, where you originally found the Rod of Trials.
Page 128© 2008 IGN Entertainment, Inc.
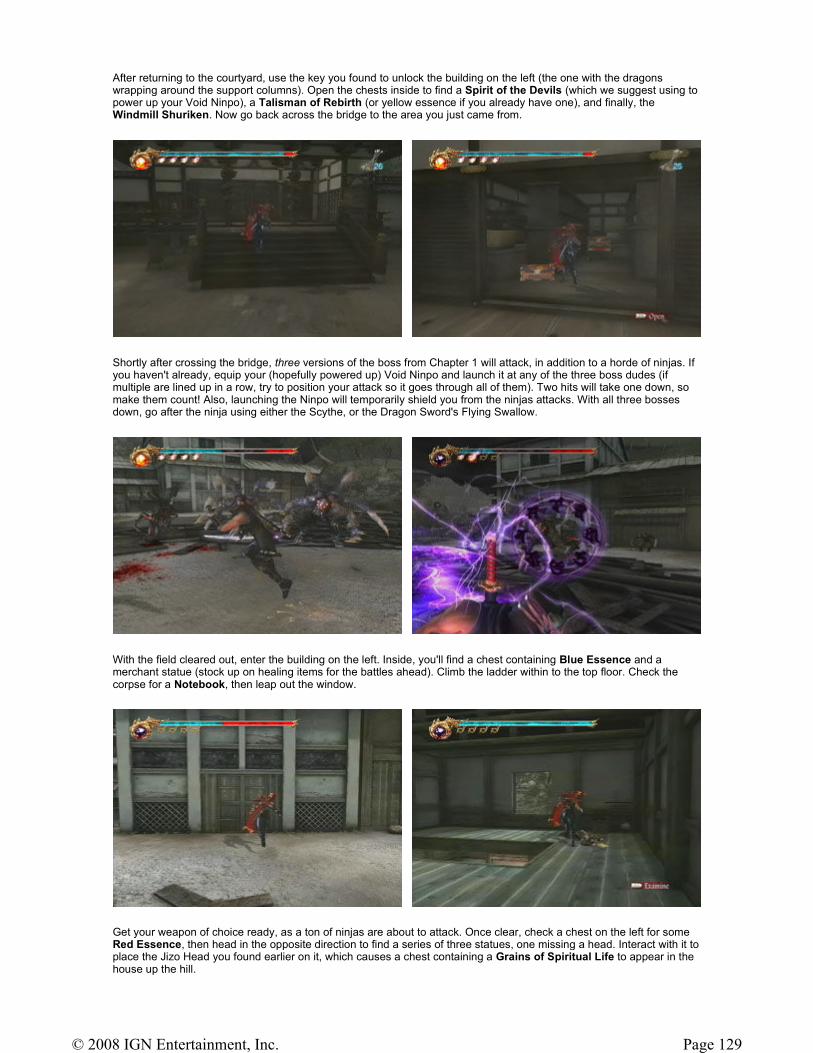
After returning to the courtyard, use the key you found to unlock the building on the left (the one with the dragons wrapping around the support columns). Open the chests inside to find a Spirit of the Devils (which we suggest using to power up your Void Ninpo), a Talisman of Rebirth (or yellow essence if you already have one), and finally, the Windmill Shuriken. Now go back across the bridge to the area you just came from.
Shortly after crossing the bridge, three versions of the boss from Chapter 1 will attack, in addition to a horde of ninjas. If you haven't already, equip your (hopefully powered up) Void Ninpo and launch it at any of the three boss dudes (if multiple are lined up in a row, try to position your attack so it goes through all of them). Two hits will take one down, so make them count! Also, launching the Ninpo will temporarily shield you from the ninjas attacks. With all three bosses down, go after the ninja using either the Scythe, or the Dragon Sword's Flying Swallow.
With the field cleared out, enter the building on the left. Inside, you'll find a chest containing Blue Essence and a merchant statue (stock up on healing items for the battles ahead). Climb the ladder within to the top floor. Check the corpse for a Notebook, then leap out the window.
Get your weapon of choice ready, as a ton of ninjas are about to attack. Once clear, check a chest on the left for some Red Essence, then head in the opposite direction to find a series of three statues, one missing a head. Interact with it to place the Jizo Head you found earlier on it, which causes a chest containing a Grains of Spiritual Life to appear in the house up the hill.
Page 129© 2008 IGN Entertainment, Inc.
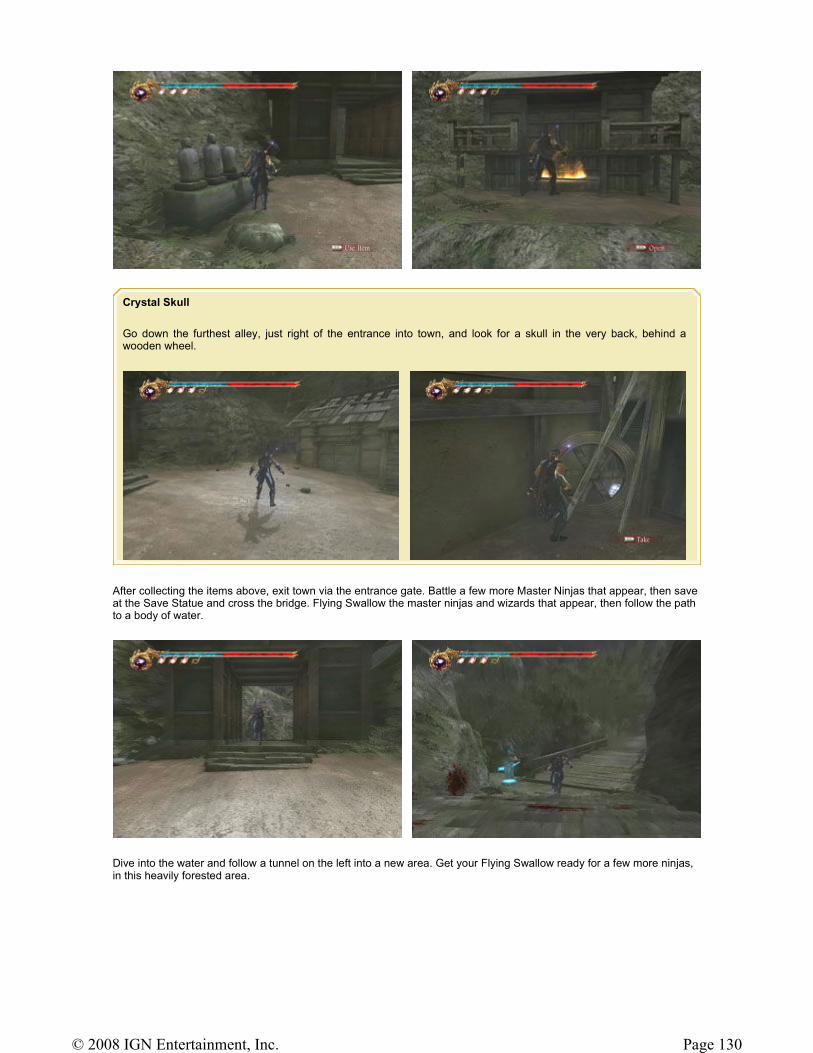
After collecting the items above, exit town via the entrance gate. Battle a few more Master Ninjas that appear, then save at the Save Statue and cross the bridge. Flying Swallow the master ninjas and wizards that appear, then follow the path to a body of water.
Dive into the water and follow a tunnel on the left into a new area. Get your Flying Swallow ready for a few more ninjas, in this heavily forested area.
Crystal Skull
Go down the furthest alley, just right of the entrance into town, and look for a skull in the very back, behind a wooden wheel.
Page 130© 2008 IGN Entertainment, Inc.
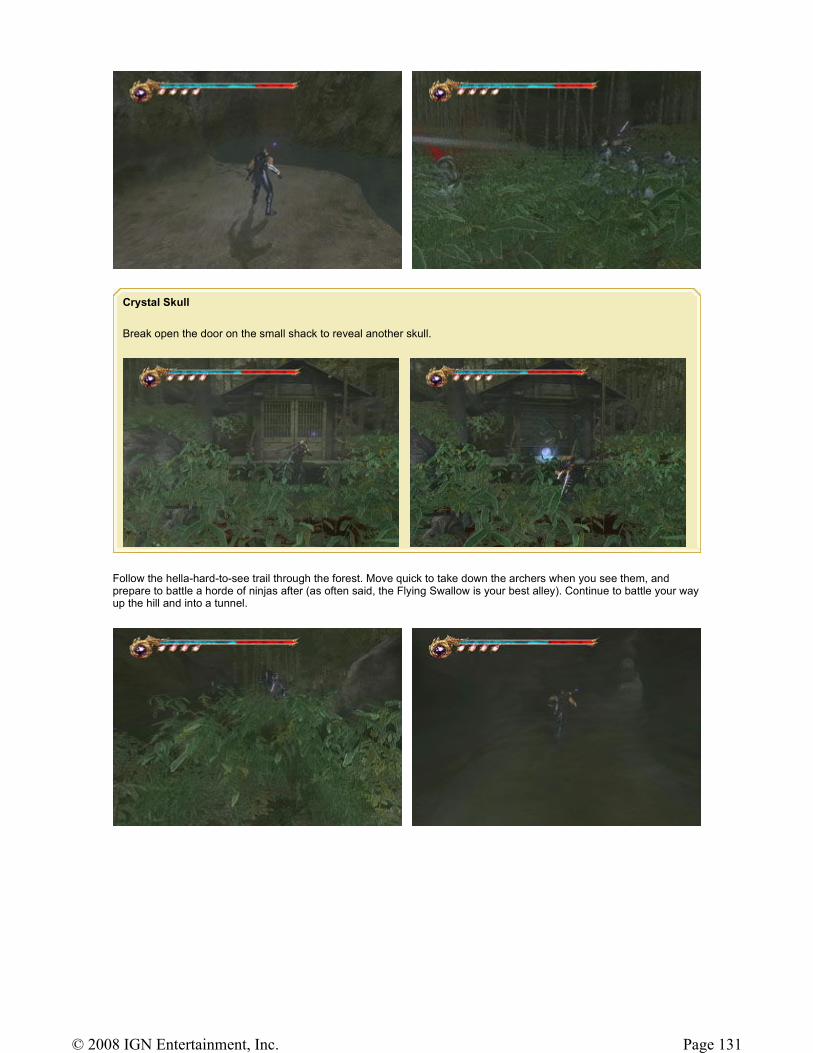
Follow the hella-hard-to-see trail through the forest. Move quick to take down the archers when you see them, and prepare to battle a horde of ninjas after (as often said, the Flying Swallow is your best alley). Continue to battle your way up the hill and into a tunnel.
Crystal Skull
Break open the door on the small shack to reveal another skull.
Page 131© 2008 IGN Entertainment, Inc.
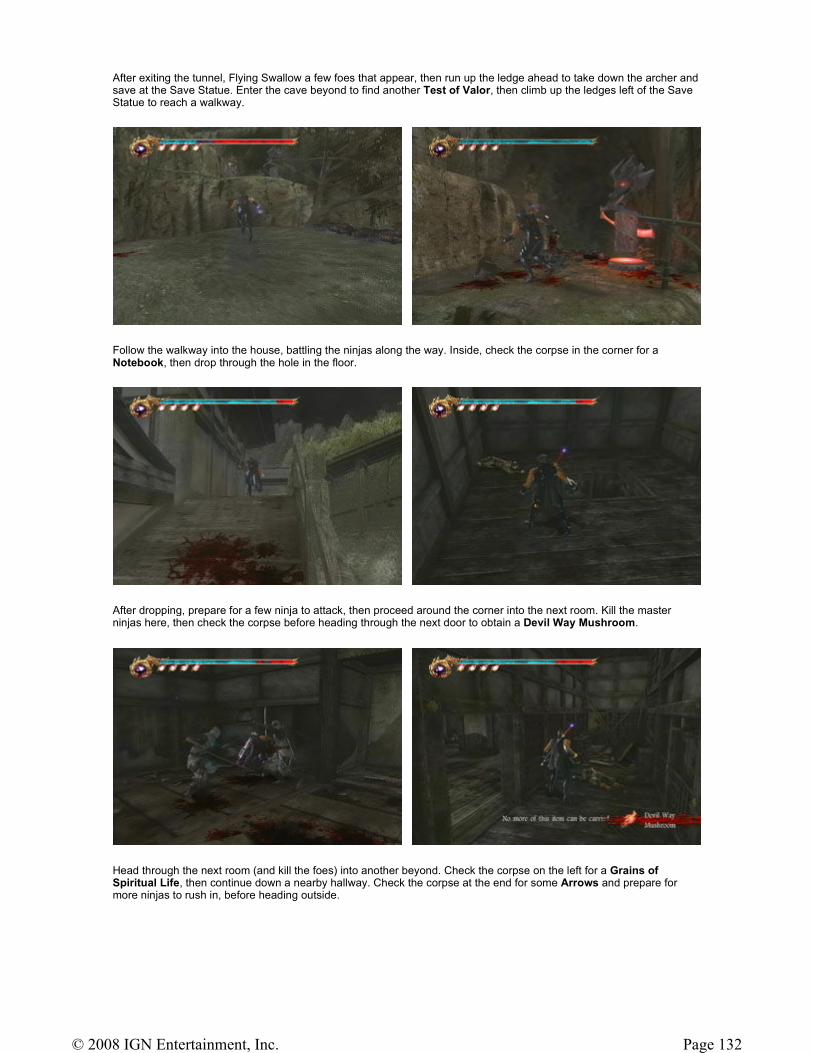
After exiting the tunnel, Flying Swallow a few foes that appear, then run up the ledge ahead to take down the archer and save at the Save Statue. Enter the cave beyond to find another Test of Valor, then climb up the ledges left of the Save Statue to reach a walkway.
Follow the walkway into the house, battling the ninjas along the way. Inside, check the corpse in the corner for a Notebook, then drop through the hole in the floor.
After dropping, prepare for a few ninja to attack, then proceed around the corner into the next room. Kill the master ninjas here, then check the corpse before heading through the next door to obtain a Devil Way Mushroom.
Head through the next room (and kill the foes) into another beyond. Check the corpse on the left for a Grains of Spiritual Life, then continue down a nearby hallway. Check the corpse at the end for some Arrows and prepare for more ninjas to rush in, before heading outside.
Page 132© 2008 IGN Entertainment, Inc.
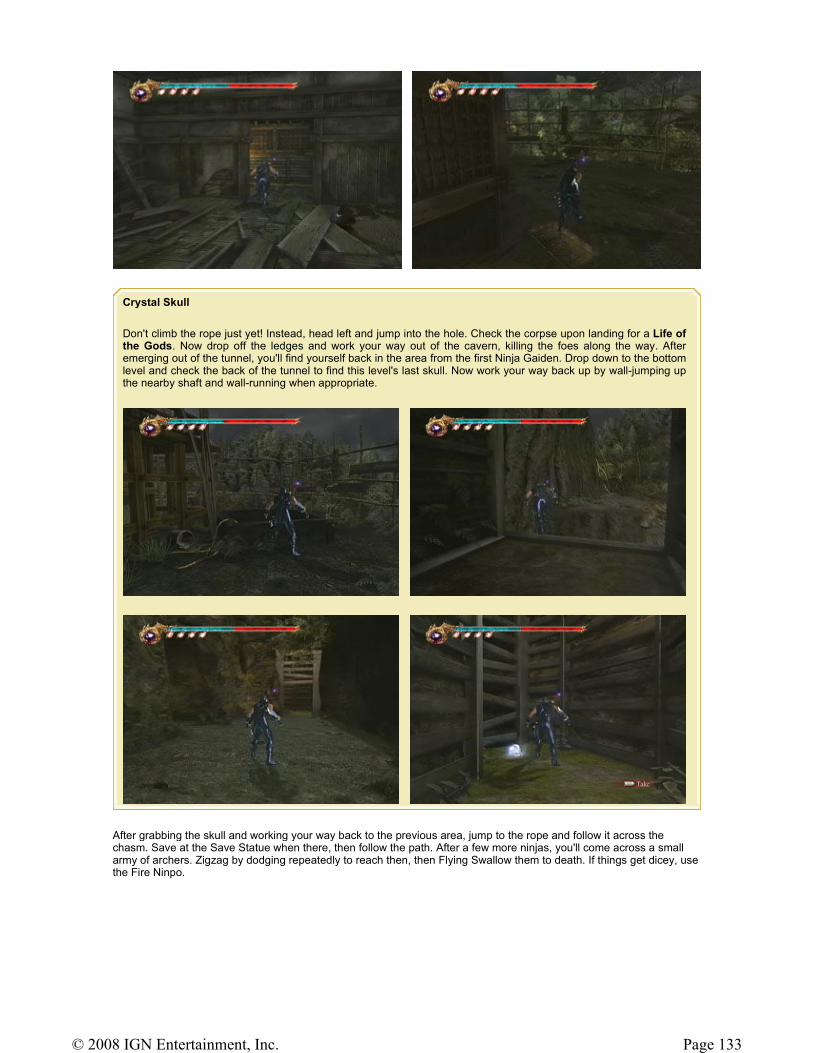
After grabbing the skull and working your way back to the previous area, jump to the rope and follow it across the chasm. Save at the Save Statue when there, then follow the path. After a few more ninjas, you'll come across a small army of archers. Zigzag by dodging repeatedly to reach then, then Flying Swallow them to death. If things get dicey, use the Fire Ninpo.
Crystal Skull
Don't climb the rope just yet! Instead, head left and jump into the hole. Check the corpse upon landing for a Life of the Gods. Now drop off the ledges and work your way out of the cavern, killing the foes along the way. After emerging out of the tunnel, you'll find yourself back in the area from the first Ninja Gaiden. Drop down to the bottom level and check the back of the tunnel to find this level's last skull. Now work your way back up by wall-jumping up the nearby shaft and wall-running when appropriate.
Page 133© 2008 IGN Entertainment, Inc.

Battle any more foes you come across - eventually, you'll see a cutscene with the now-badass merchant. He'll award you with Muramasa's Omusubi, a item that will completely restore your health. Afterward, save the Save Statue, then proceed up the hill battling the ninjas as you go (use the Flying Swallow).
After a drop-off, you'll find another merchant statue, as well as a fork in the road. Head right first to find a corpse at the end holding a Grains of Spiritual Life, then turn around and check out the other route.
After a long downhill slide, a pack of dogs will attack, along with an archer on the left. Try to take him down first, then Flying Swallow the canines. Continue through the center of the valley, and look for a corpse holding onto a Notebook.
Page 134© 2008 IGN Entertainment, Inc.
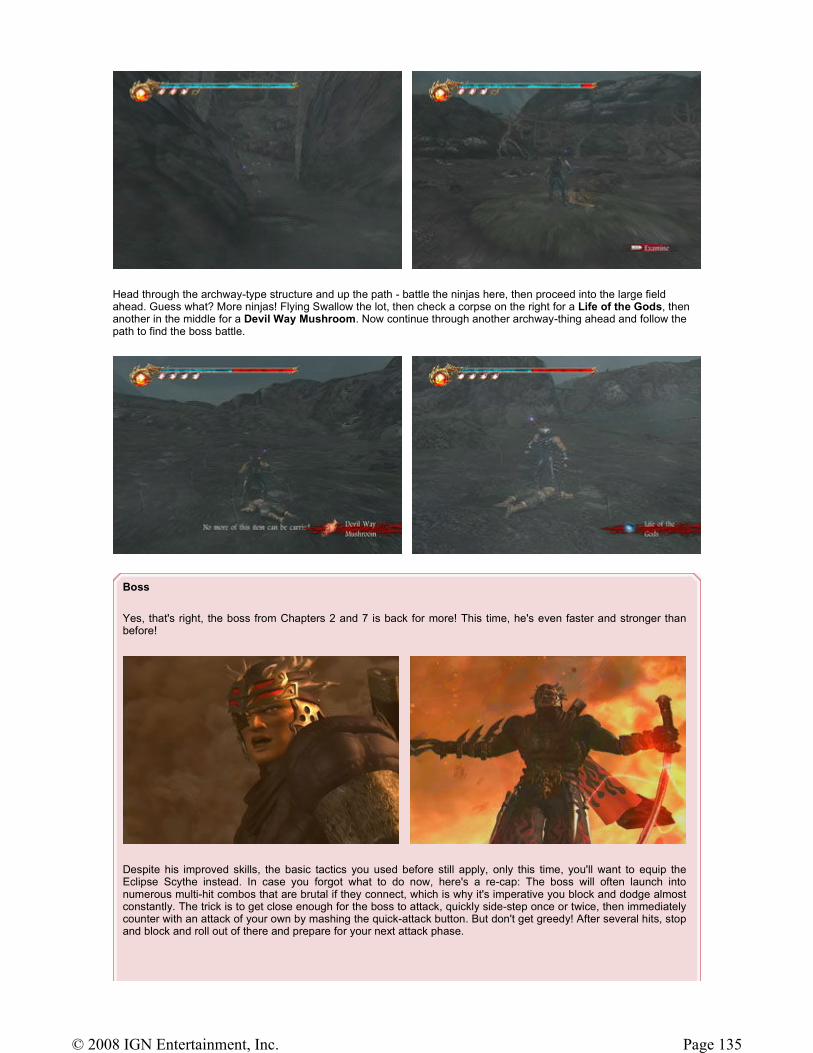
Head through the archway-type structure and up the path - battle the ninjas here, then proceed into the large field ahead. Guess what? More ninjas! Flying Swallow the lot, then check a corpse on the right for a Life of the Gods, then another in the middle for a Devil Way Mushroom. Now continue through another archway-thing ahead and follow the path to find the boss battle.
Boss
Yes, that's right, the boss from Chapters 2 and 7 is back for more! This time, he's even faster and stronger than before!
Despite his improved skills, the basic tactics you used before still apply, only this time, you'll want to equip the Eclipse Scythe instead. In case you forgot what to do now, here's a re-cap: The boss will often launch into numerous multi-hit combos that are brutal if they connect, which is why it's imperative you block and dodge almost constantly. The trick is to get close enough for the boss to attack, quickly side-step once or twice, then immediately counter with an attack of your own by mashing the quick-attack button. But don't get greedy! After several hits, stop and block and roll out of there and prepare for your next attack phase.
Page 135© 2008 IGN Entertainment, Inc.
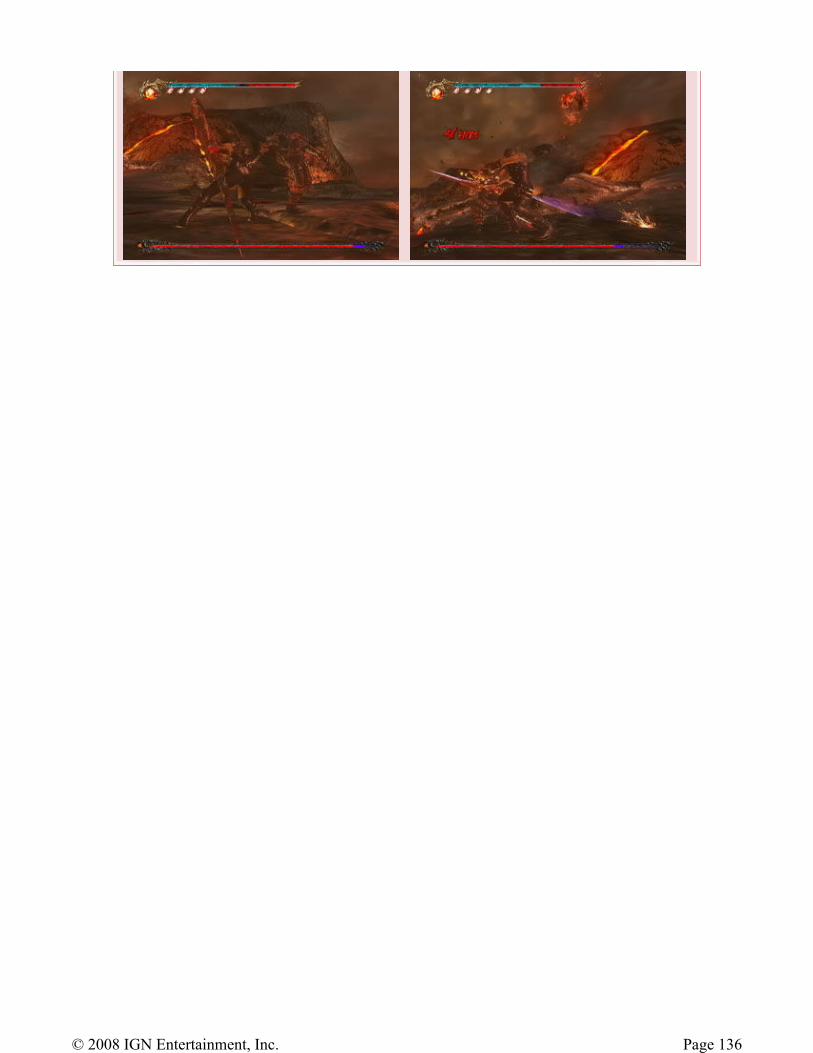
Page 136© 2008 IGN Entertainment, Inc.
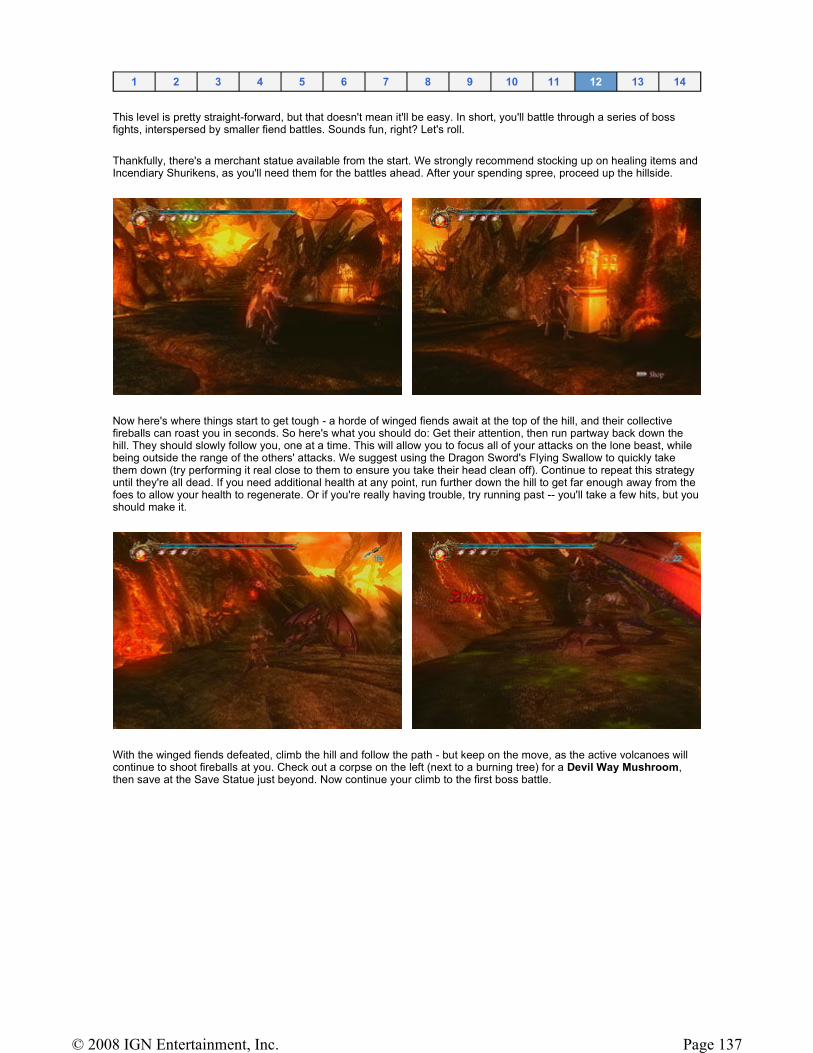
This level is pretty straight-forward, but that doesn't mean it'll be easy. In short, you'll battle through a series of boss fights, interspersed by smaller fiend battles. Sounds fun, right? Let's roll.
Thankfully, there's a merchant statue available from the start. We strongly recommend stocking up on healing items and Incendiary Shurikens, as you'll need them for the battles ahead. After your spending spree, proceed up the hillside.
Now here's where things start to get tough - a horde of winged fiends await at the top of the hill, and their collective fireballs can roast you in seconds. So here's what you should do: Get their attention, then run partway back down the hill. They should slowly follow you, one at a time. This will allow you to focus all of your attacks on the lone beast, while being outside the range of the others' attacks. We suggest using the Dragon Sword's Flying Swallow to quickly take them down (try performing it real close to them to ensure you take their head clean off). Continue to repeat this strategy until they're all dead. If you need additional health at any point, run further down the hill to get far enough away from the foes to allow your health to regenerate. Or if you're really having trouble, try running past -- you'll take a few hits, but you should make it.
With the winged fiends defeated, climb the hill and follow the path - but keep on the move, as the active volcanoes will continue to shoot fireballs at you. Check out a corpse on the left (next to a burning tree) for a Devil Way Mushroom, then save at the Save Statue just beyond. Now continue your climb to the first boss battle.
1 2 3 4 5 6 7 8 9 10 11 12 13 14
Page 137© 2008 IGN Entertainment, Inc.
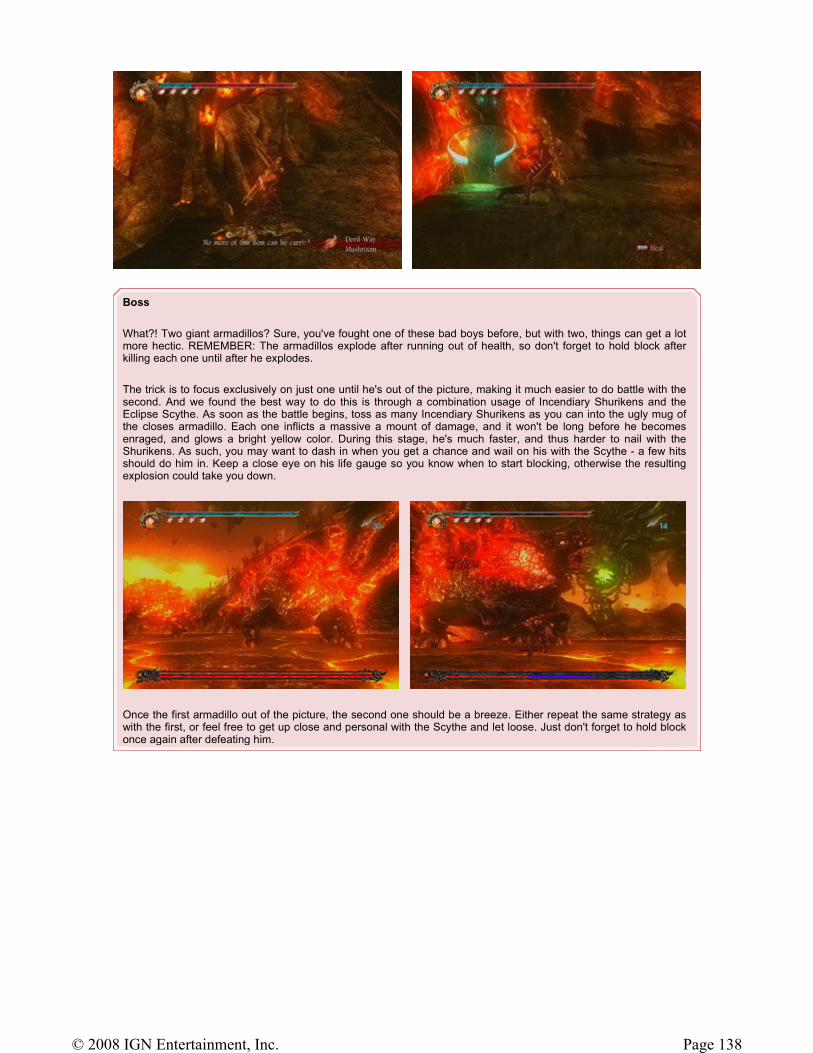
Boss
What?! Two giant armadillos? Sure, you've fought one of these bad boys before, but with two, things can get a lot more hectic. REMEMBER: The armadillos explode after running out of health, so don't forget to hold block after killing each one until after he explodes.
The trick is to focus exclusively on just one until he's out of the picture, making it much easier to do battle with the second. And we found the best way to do this is through a combination usage of Incendiary Shurikens and the Eclipse Scythe. As soon as the battle begins, toss as many Incendiary Shurikens as you can into the ugly mug of the closes armadillo. Each one inflicts a massive a mount of damage, and it won't be long before he becomes enraged, and glows a bright yellow color. During this stage, he's much faster, and thus harder to nail with the Shurikens. As such, you may want to dash in when you get a chance and wail on his with the Scythe - a few hits should do him in. Keep a close eye on his life gauge so you know when to start blocking, otherwise the resulting explosion could take you down.
Once the first armadillo out of the picture, the second one should be a breeze. Either repeat the same strategy as with the first, or feel free to get up close and personal with the Scythe and let loose. Just don't forget to hold block once again after defeating him.
Page 138© 2008 IGN Entertainment, Inc.
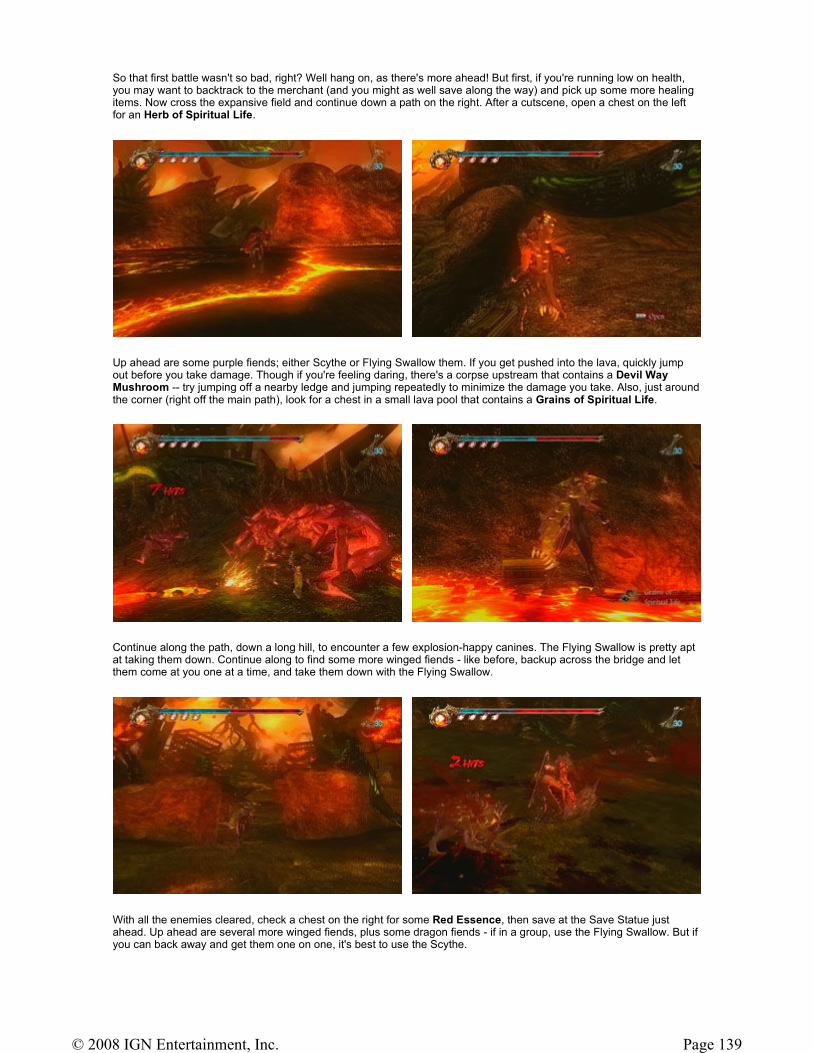
So that first battle wasn't so bad, right? Well hang on, as there's more ahead! But first, if you're running low on health, you may want to backtrack to the merchant (and you might as well save along the way) and pick up some more healing items. Now cross the expansive field and continue down a path on the right. After a cutscene, open a chest on the left for an Herb of Spiritual Life.
Up ahead are some purple fiends; either Scythe or Flying Swallow them. If you get pushed into the lava, quickly jump out before you take damage. Though if you're feeling daring, there's a corpse upstream that contains a Devil Way Mushroom -- try jumping off a nearby ledge and jumping repeatedly to minimize the damage you take. Also, just around the corner (right off the main path), look for a chest in a small lava pool that contains a Grains of Spiritual Life.
Continue along the path, down a long hill, to encounter a few explosion-happy canines. The Flying Swallow is pretty apt at taking them down. Continue along to find some more winged fiends - like before, backup across the bridge and let them come at you one at a time, and take them down with the Flying Swallow.
With all the enemies cleared, check a chest on the right for some Red Essence, then save at the Save Statue just ahead. Up ahead are several more winged fiends, plus some dragon fiends - if in a group, use the Flying Swallow. But if you can back away and get them one on one, it's best to use the Scythe.
Page 139© 2008 IGN Entertainment, Inc.
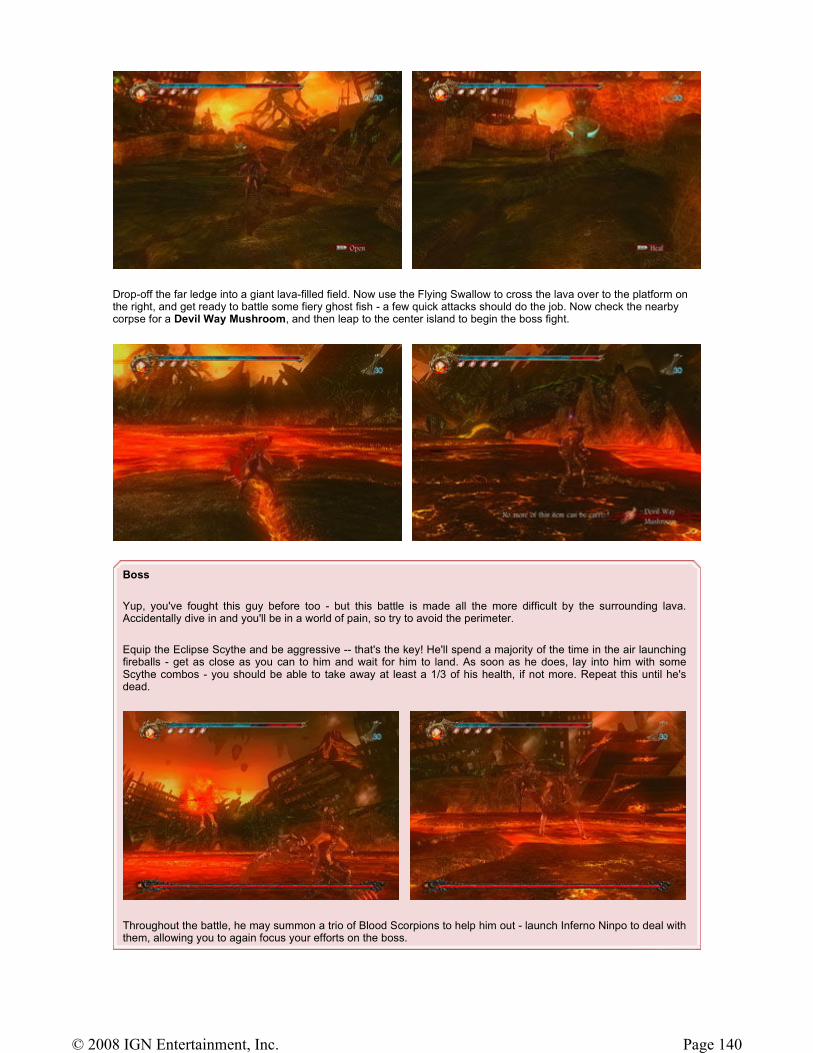
Drop-off the far ledge into a giant lava-filled field. Now use the Flying Swallow to cross the lava over to the platform on the right, and get ready to battle some fiery ghost fish - a few quick attacks should do the job. Now check the nearby corpse for a Devil Way Mushroom, and then leap to the center island to begin the boss fight.
Boss
Yup, you've fought this guy before too - but this battle is made all the more difficult by the surrounding lava. Accidentally dive in and you'll be in a world of pain, so try to avoid the perimeter.
Equip the Eclipse Scythe and be aggressive -- that's the key! He'll spend a majority of the time in the air launching fireballs - get as close as you can to him and wait for him to land. As soon as he does, lay into him with some Scythe combos - you should be able to take away at least a 1/3 of his health, if not more. Repeat this until he's dead.
Throughout the battle, he may summon a trio of Blood Scorpions to help him out - launch Inferno Ninpo to deal with them, allowing you to again focus your efforts on the boss.
Page 140© 2008 IGN Entertainment, Inc.
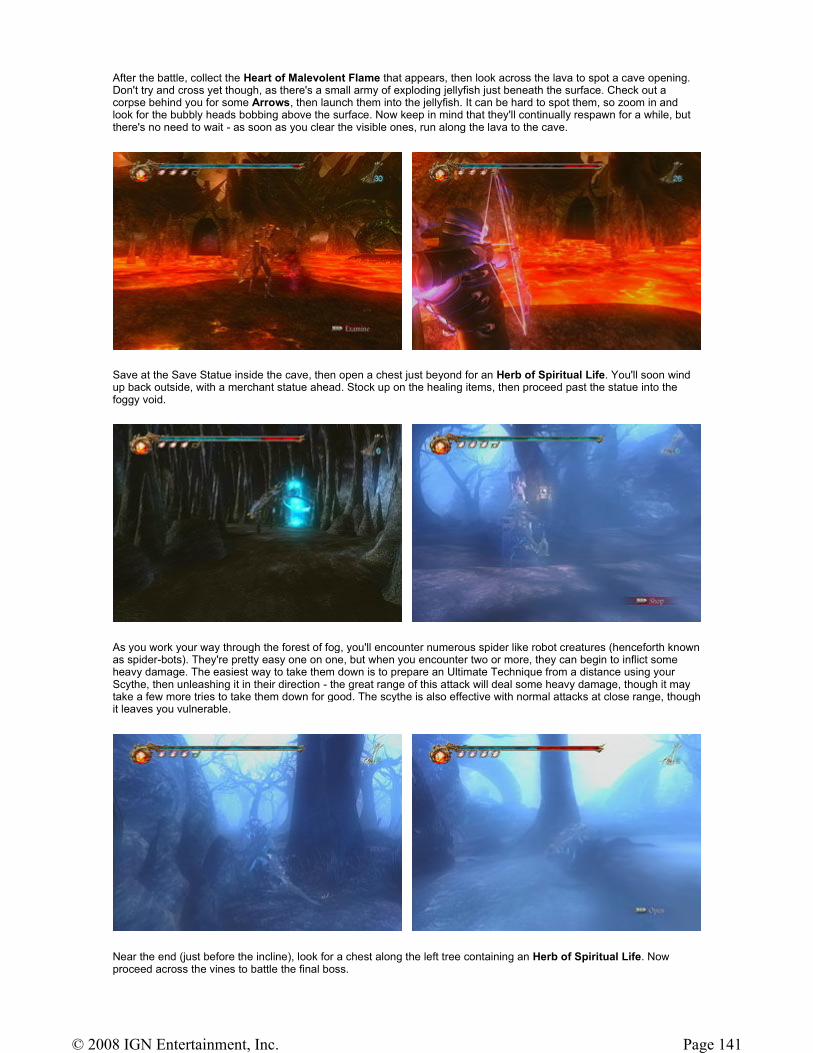
After the battle, collect the Heart of Malevolent Flame that appears, then look across the lava to spot a cave opening. Don't try and cross yet though, as there's a small army of exploding jellyfish just beneath the surface. Check out a corpse behind you for some Arrows, then launch them into the jellyfish. It can be hard to spot them, so zoom in and look for the bubbly heads bobbing above the surface. Now keep in mind that they'll continually respawn for a while, but there's no need to wait - as soon as you clear the visible ones, run along the lava to the cave.
Save at the Save Statue inside the cave, then open a chest just beyond for an Herb of Spiritual Life. You'll soon wind up back outside, with a merchant statue ahead. Stock up on the healing items, then proceed past the statue into the foggy void.
As you work your way through the forest of fog, you'll encounter numerous spider like robot creatures (henceforth known as spider-bots). They're pretty easy one on one, but when you encounter two or more, they can begin to inflict some heavy damage. The easiest way to take them down is to prepare an Ultimate Technique from a distance using your Scythe, then unleashing it in their direction - the great range of this attack will deal some heavy damage, though it may take a few more tries to take them down for good. The scythe is also effective with normal attacks at close range, though it leaves you vulnerable.
Near the end (just before the incline), look for a chest along the left tree containing an Herb of Spiritual Life. Now proceed across the vines to battle the final boss.
Page 141© 2008 IGN Entertainment, Inc.
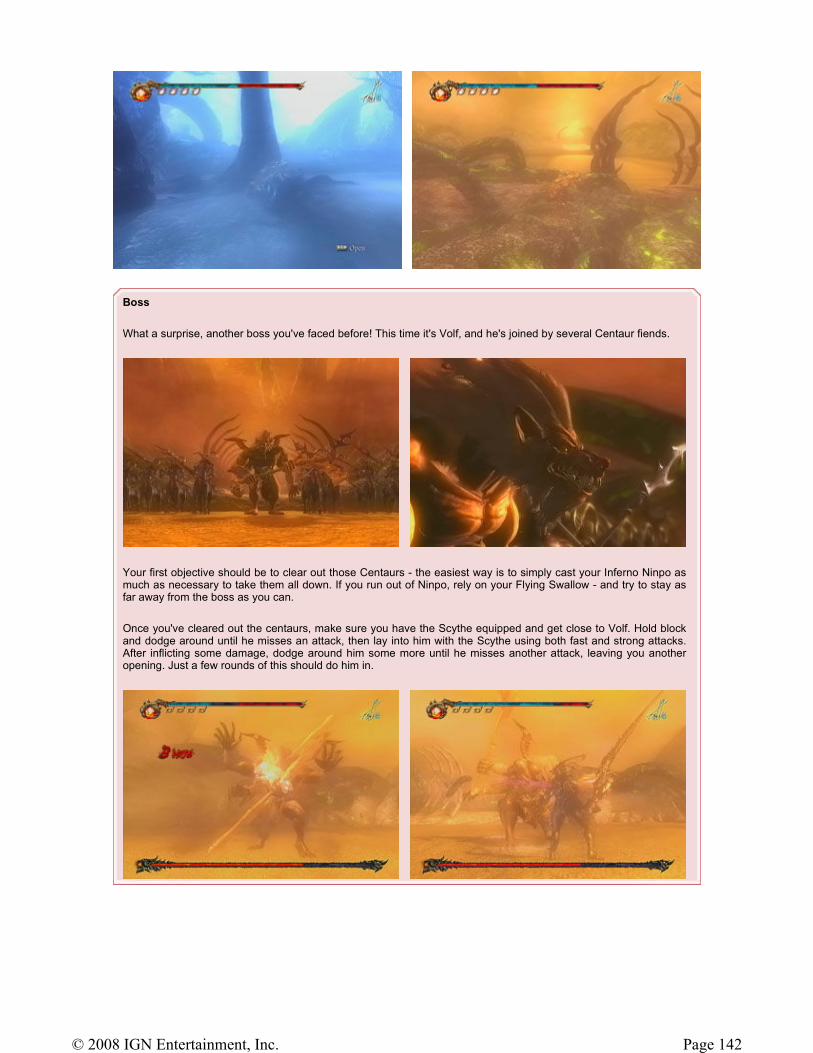
Boss
What a surprise, another boss you've faced before! This time it's Volf, and he's joined by several Centaur fiends.
Your first objective should be to clear out those Centaurs - the easiest way is to simply cast your Inferno Ninpo as much as necessary to take them all down. If you run out of Ninpo, rely on your Flying Swallow - and try to stay as far away from the boss as you can.
Once you've cleared out the centaurs, make sure you have the Scythe equipped and get close to Volf. Hold block and dodge around until he misses an attack, then lay into him with the Scythe using both fast and strong attacks. After inflicting some damage, dodge around him some more until he misses another attack, leaving you another opening. Just a few rounds of this should do him in.
Page 142© 2008 IGN Entertainment, Inc.
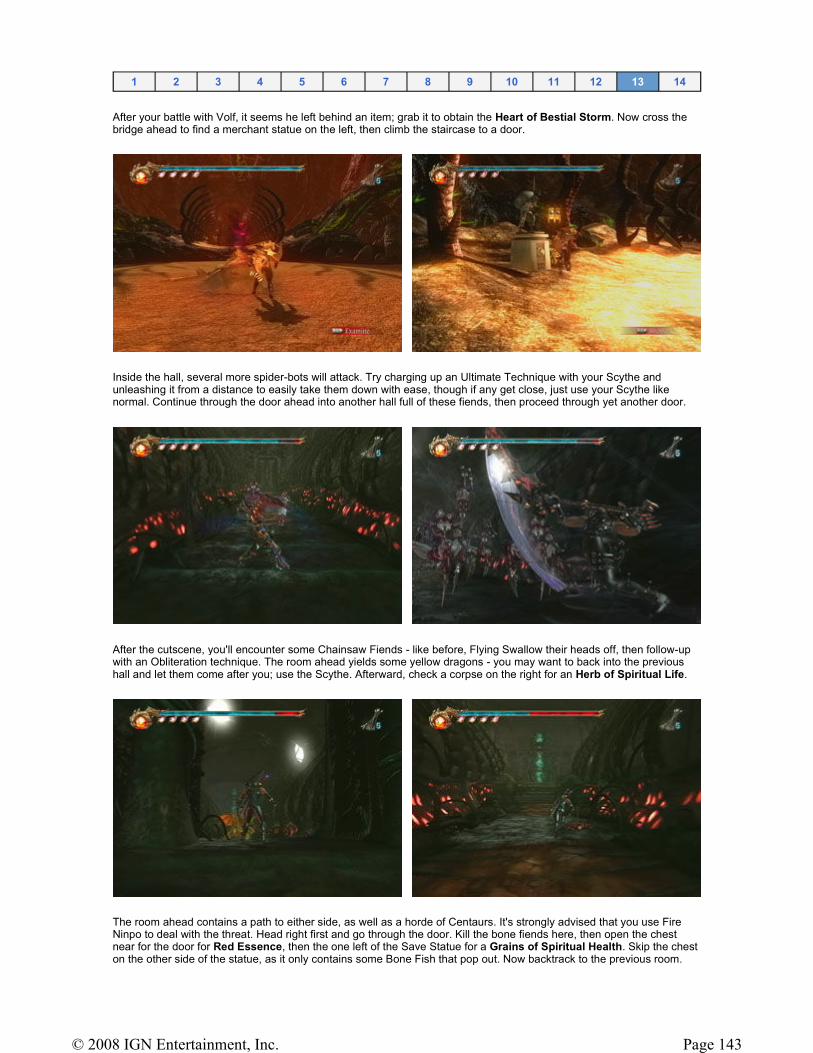
After your battle with Volf, it seems he left behind an item; grab it to obtain the Heart of Bestial Storm. Now cross the bridge ahead to find a merchant statue on the left, then climb the staircase to a door.
Inside the hall, several more spider-bots will attack. Try charging up an Ultimate Technique with your Scythe and unleashing it from a distance to easily take them down with ease, though if any get close, just use your Scythe like normal. Continue through the door ahead into another hall full of these fiends, then proceed through yet another door.
After the cutscene, you'll encounter some Chainsaw Fiends - like before, Flying Swallow their heads off, then follow-up with an Obliteration technique. The room ahead yields some yellow dragons - you may want to back into the previous hall and let them come after you; use the Scythe. Afterward, check a corpse on the right for an Herb of Spiritual Life.
The room ahead contains a path to either side, as well as a horde of Centaurs. It's strongly advised that you use Fire Ninpo to deal with the threat. Head right first and go through the door. Kill the bone fiends here, then open the chest near for the door for Red Essence, then the one left of the Save Statue for a Grains of Spiritual Health. Skip the chest on the other side of the statue, as it only contains some Bone Fish that pop out. Now backtrack to the previous room.
1 2 3 4 5 6 7 8 9 10 11 12 13 14
Page 143© 2008 IGN Entertainment, Inc.
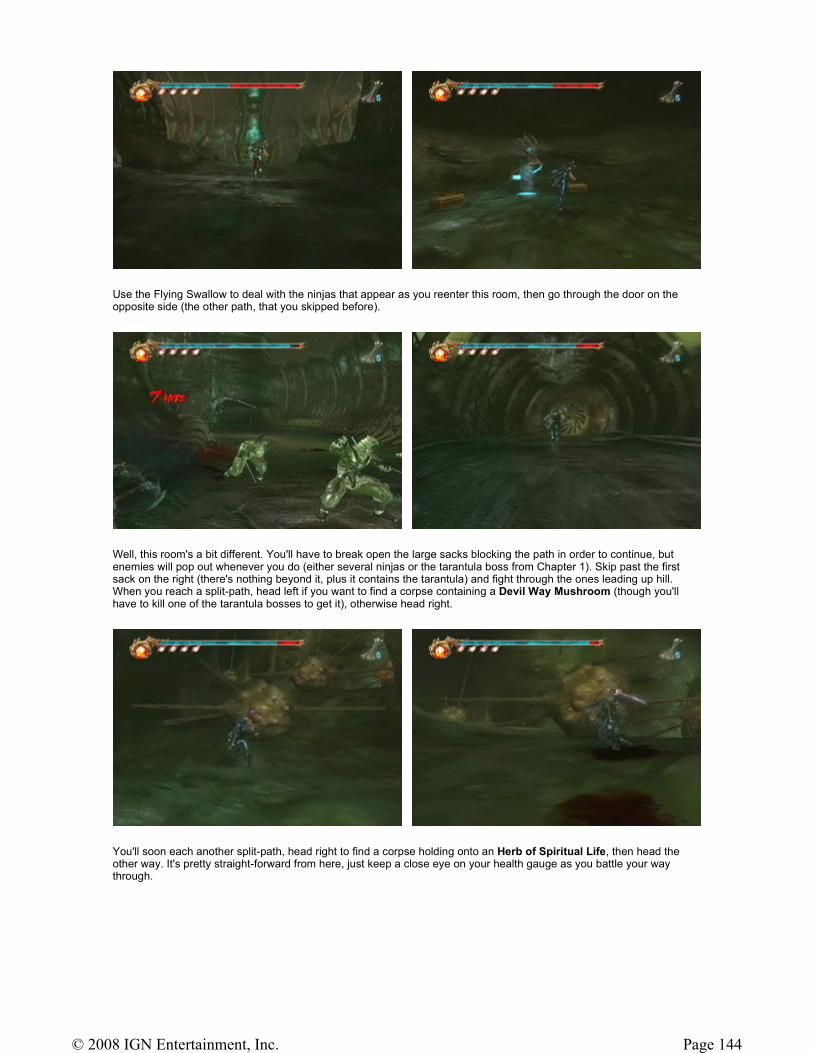
Use the Flying Swallow to deal with the ninjas that appear as you reenter this room, then go through the door on the opposite side (the other path, that you skipped before).
Well, this room's a bit different. You'll have to break open the large sacks blocking the path in order to continue, but enemies will pop out whenever you do (either several ninjas or the tarantula boss from Chapter 1). Skip past the first sack on the right (there's nothing beyond it, plus it contains the tarantula) and fight through the ones leading up hill. When you reach a split-path, head left if you want to find a corpse containing a Devil Way Mushroom (though you'll have to kill one of the tarantula bosses to get it), otherwise head right.
You'll soon each another split-path, head right to find a corpse holding onto an Herb of Spiritual Life, then head the other way. It's pretty straight-forward from here, just keep a close eye on your health gauge as you battle your way through.
Page 144© 2008 IGN Entertainment, Inc.
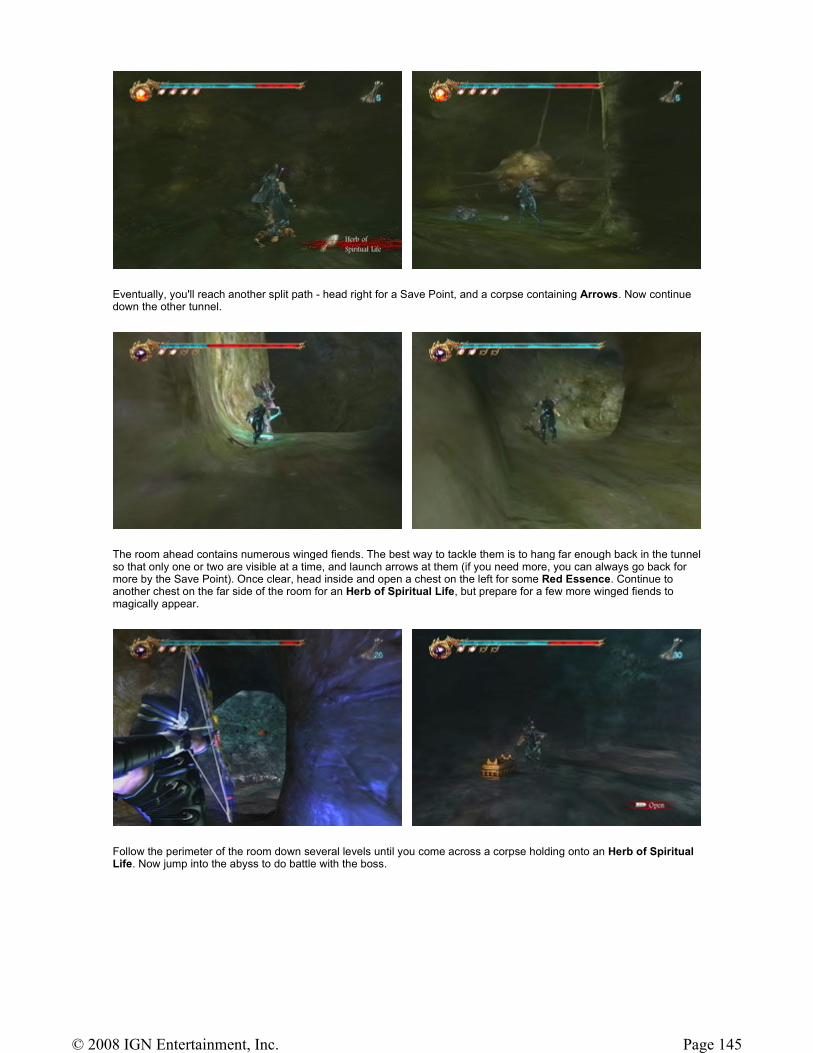
Eventually, you'll reach another split path - head right for a Save Point, and a corpse containing Arrows. Now continue down the other tunnel.
The room ahead contains numerous winged fiends. The best way to tackle them is to hang far enough back in the tunnel so that only one or two are visible at a time, and launch arrows at them (if you need more, you can always go back for more by the Save Point). Once clear, head inside and open a chest on the left for some Red Essence. Continue to another chest on the far side of the room for an Herb of Spiritual Life, but prepare for a few more winged fiends to magically appear.
Follow the perimeter of the room down several levels until you come across a corpse holding onto an Herb of Spiritual Life. Now jump into the abyss to do battle with the boss.
Page 145© 2008 IGN Entertainment, Inc.
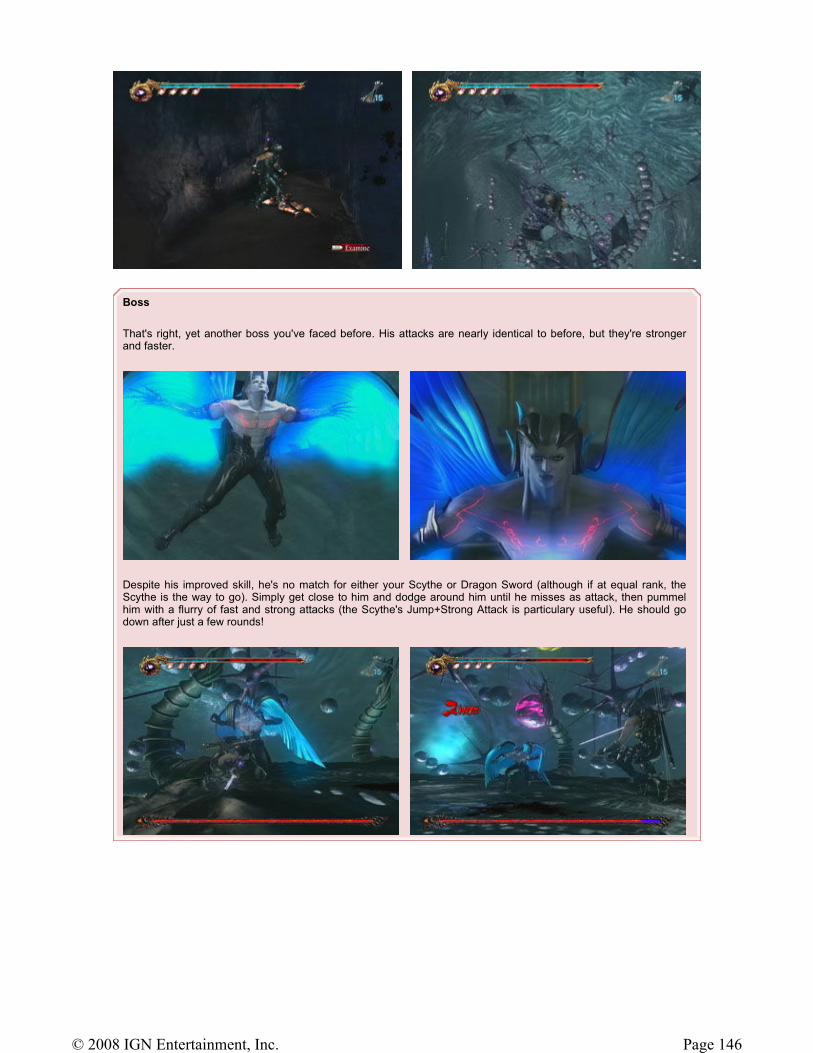
Boss
That's right, yet another boss you've faced before. His attacks are nearly identical to before, but they're stronger and faster.
Despite his improved skill, he's no match for either your Scythe or Dragon Sword (although if at equal rank, the Scythe is the way to go). Simply get close to him and dodge around him until he misses as attack, then pummel him with a flurry of fast and strong attacks (the Scythe's Jump+Strong Attack is particulary useful). He should go down after just a few rounds!
Page 146© 2008 IGN Entertainment, Inc.
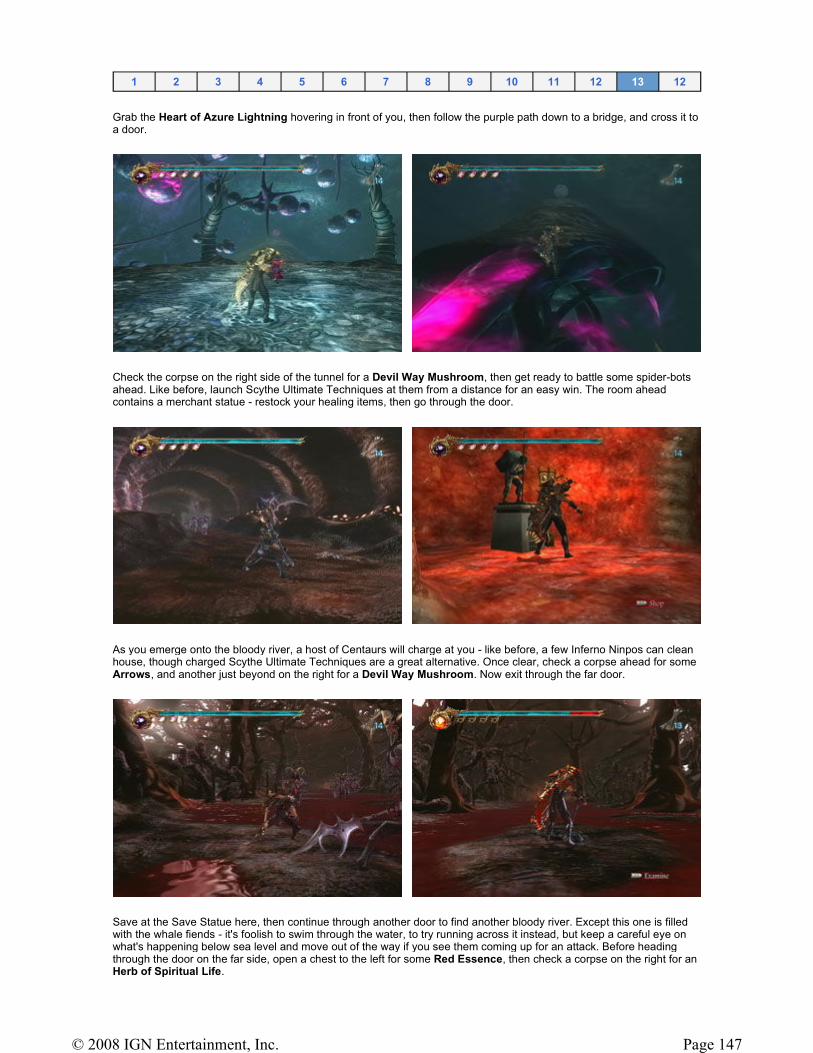
Grab the Heart of Azure Lightning hovering in front of you, then follow the purple path down to a bridge, and cross it to a door.
Check the corpse on the right side of the tunnel for a Devil Way Mushroom, then get ready to battle some spider-bots ahead. Like before, launch Scythe Ultimate Techniques at them from a distance for an easy win. The room ahead contains a merchant statue - restock your healing items, then go through the door.
As you emerge onto the bloody river, a host of Centaurs will charge at you - like before, a few Inferno Ninpos can clean house, though charged Scythe Ultimate Techniques are a great alternative. Once clear, check a corpse ahead for some Arrows, and another just beyond on the right for a Devil Way Mushroom. Now exit through the far door.
Save at the Save Statue here, then continue through another door to find another bloody river. Except this one is filled with the whale fiends - it's foolish to swim through the water, to try running across it instead, but keep a careful eye on what's happening below sea level and move out of the way if you see them coming up for an attack. Before heading through the door on the far side, open a chest to the left for some Red Essence, then check a corpse on the right for an Herb of Spiritual Life.
1 2 3 4 5 6 7 8 9 10 11 12 13 12
Page 147© 2008 IGN Entertainment, Inc.
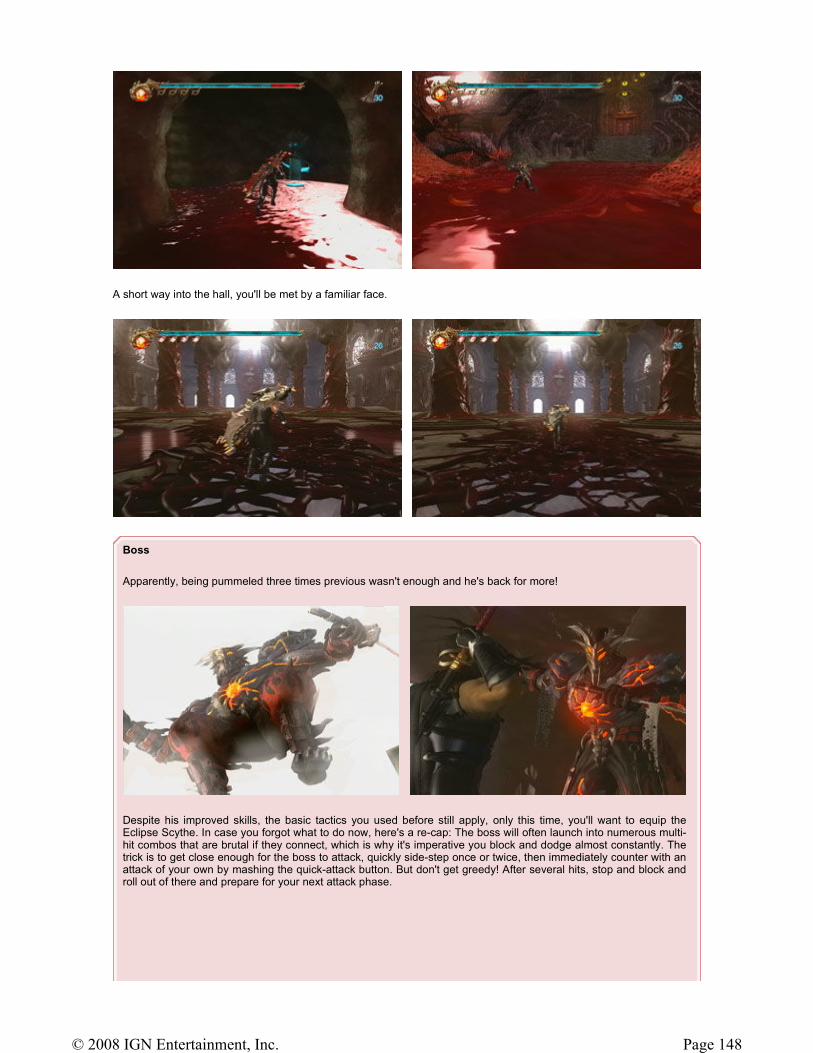
A short way into the hall, you'll be met by a familiar face.
Boss
Apparently, being pummeled three times previous wasn't enough and he's back for more!
Despite his improved skills, the basic tactics you used before still apply, only this time, you'll want to equip the Eclipse Scythe. In case you forgot what to do now, here's a re-cap: The boss will often launch into numerous multi-hit combos that are brutal if they connect, which is why it's imperative you block and dodge almost constantly. The trick is to get close enough for the boss to attack, quickly side-step once or twice, then immediately counter with an attack of your own by mashing the quick-attack button. But don't get greedy! After several hits, stop and block and roll out of there and prepare for your next attack phase.
Page 148© 2008 IGN Entertainment, Inc.
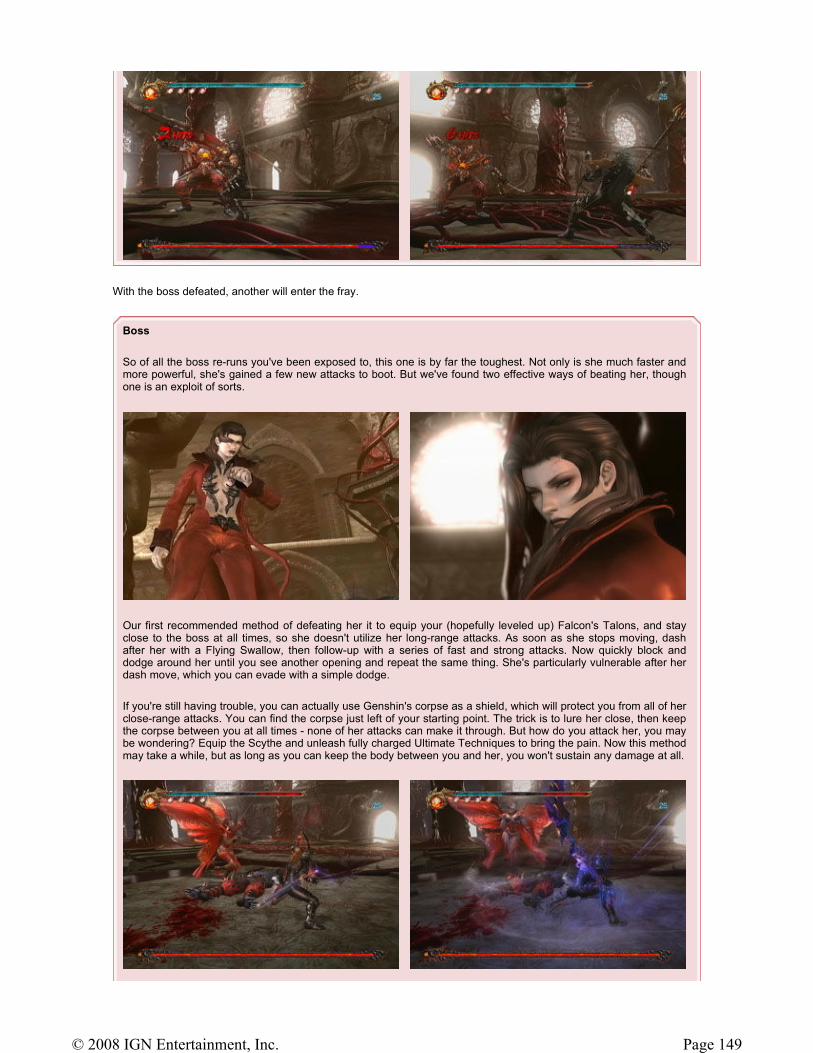
With the boss defeated, another will enter the fray.
Boss
So of all the boss re-runs you've been exposed to, this one is by far the toughest. Not only is she much faster and more powerful, she's gained a few new attacks to boot. But we've found two effective ways of beating her, though one is an exploit of sorts.
Our first recommended method of defeating her it to equip your (hopefully leveled up) Falcon's Talons, and stay close to the boss at all times, so she doesn't utilize her long-range attacks. As soon as she stops moving, dash after her with a Flying Swallow, then follow-up with a series of fast and strong attacks. Now quickly block and dodge around her until you see another opening and repeat the same thing. She's particularly vulnerable after her dash move, which you can evade with a simple dodge.
If you're still having trouble, you can actually use Genshin's corpse as a shield, which will protect you from all of her close-range attacks. You can find the corpse just left of your starting point. The trick is to lure her close, then keep the corpse between you at all times - none of her attacks can make it through. But how do you attack her, you may be wondering? Equip the Scythe and unleash fully charged Ultimate Techniques to bring the pain. Now this method may take a while, but as long as you can keep the body between you and her, you won't sustain any damage at all.
Page 149© 2008 IGN Entertainment, Inc.
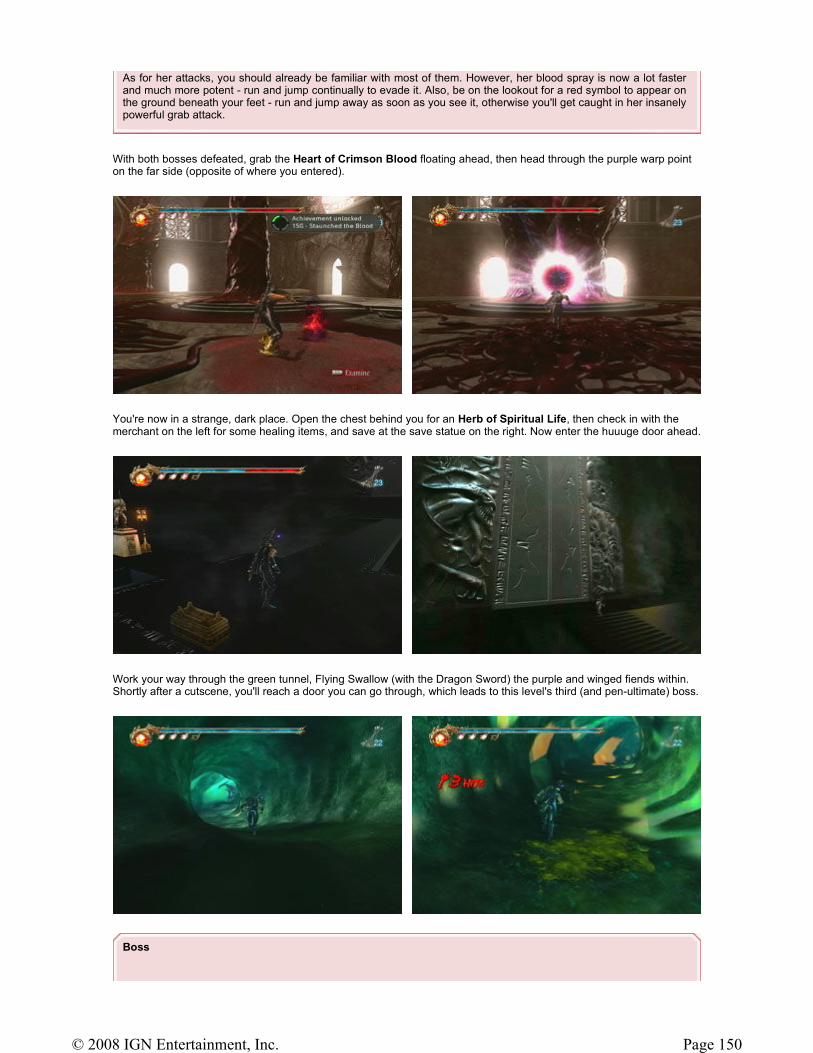
With both bosses defeated, grab the Heart of Crimson Blood floating ahead, then head through the purple warp point on the far side (opposite of where you entered).
You're now in a strange, dark place. Open the chest behind you for an Herb of Spiritual Life, then check in with the merchant on the left for some healing items, and save at the save statue on the right. Now enter the huuuge door ahead.
Work your way through the green tunnel, Flying Swallow (with the Dragon Sword) the purple and winged fiends within. Shortly after a cutscene, you'll reach a door you can go through, which leads to this level's third (and pen-ultimate) boss.
As for her attacks, you should already be familiar with most of them. However, her blood spray is now a lot faster and much more potent - run and jump continually to evade it. Also, be on the lookout for a red symbol to appear on the ground beneath your feet - run and jump away as soon as you see it, otherwise you'll get caught in her insanely powerful grab attack.
Boss
Page 150© 2008 IGN Entertainment, Inc.
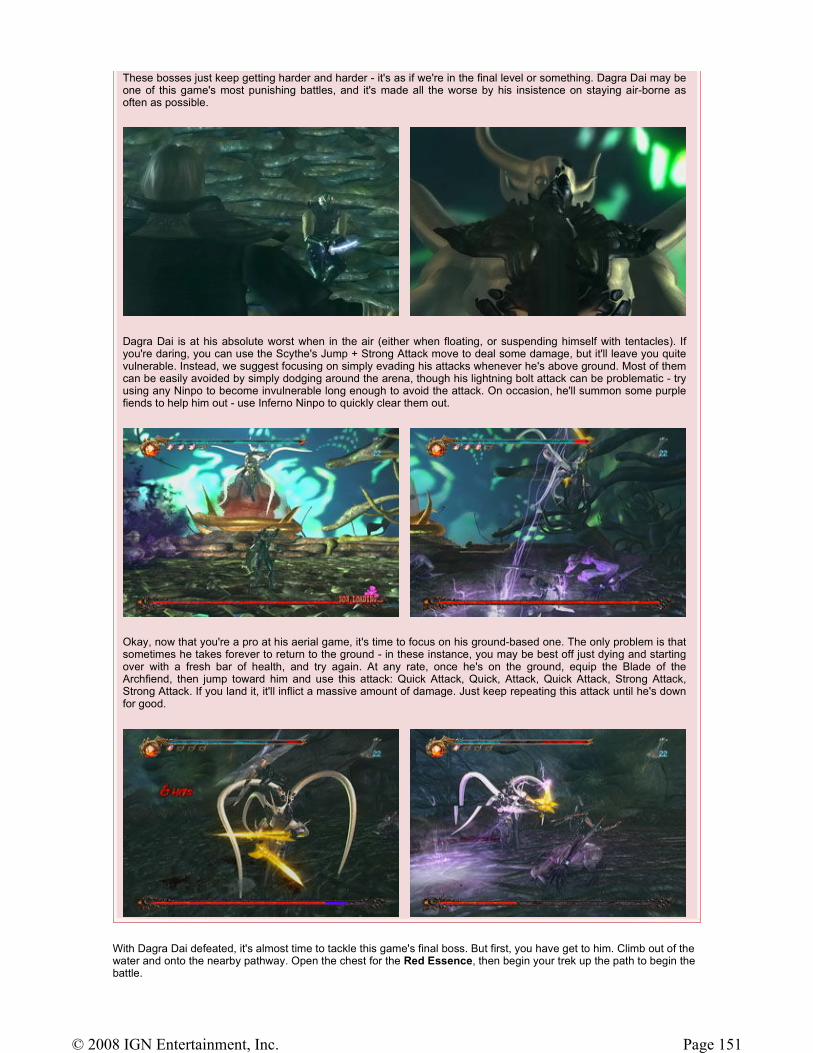
With Dagra Dai defeated, it's almost time to tackle this game's final boss. But first, you have get to him. Climb out of the water and onto the nearby pathway. Open the chest for the Red Essence, then begin your trek up the path to begin the battle.
These bosses just keep getting harder and harder - it's as if we're in the final level or something. Dagra Dai may be one of this game's most punishing battles, and it's made all the worse by his insistence on staying air-borne as often as possible.
Dagra Dai is at his absolute worst when in the air (either when floating, or suspending himself with tentacles). If you're daring, you can use the Scythe's Jump + Strong Attack move to deal some damage, but it'll leave you quite vulnerable. Instead, we suggest focusing on simply evading his attacks whenever he's above ground. Most of them can be easily avoided by simply dodging around the arena, though his lightning bolt attack can be problematic - try using any Ninpo to become invulnerable long enough to avoid the attack. On occasion, he'll summon some purple fiends to help him out - use Inferno Ninpo to quickly clear them out.
Okay, now that you're a pro at his aerial game, it's time to focus on his ground-based one. The only problem is that sometimes he takes forever to return to the ground - in these instance, you may be best off just dying and starting over with a fresh bar of health, and try again. At any rate, once he's on the ground, equip the Blade of the Archfiend, then jump toward him and use this attack: Quick Attack, Quick, Attack, Quick Attack, Strong Attack, Strong Attack. If you land it, it'll inflict a massive amount of damage. Just keep repeating this attack until he's down for good.
Page 151© 2008 IGN Entertainment, Inc.
Boss
It's the final battle -- are you ready? This one revolves around your bow and arrow, and thankfully a corpse on the right provides an infinite supply. But before you get started, you need to make sure you're properly equipped. Don the Vigoorian Flail as your primary weapon, the Fiend's Bane Bow as your projectile, then the Art of the Void as your Ninpo.
As soon as the battle begins, charge up an arrow to level 2 and release it (without aiming manually - Ryu will take care of it for you). This will launch an arrow into the beast's eye, temporarily stunning him. Now immediately launch an Art of the Piercing Void attack toward the glowing orb on his chest - if you're quick, you can launch a second one just after. But any more than two will be a waste, since the orb is only vulnerable for a short period of time. If you run out of Ninpo (and Ninpo restoring items) charged arrows can also damage his core, but they do leave you vulnerable to attack, so make sure to time it well.
After this first round, he'll counter with some attacks of his own. When he spews blood, block and dodge around. He'll also often release a horde of flying blue skulls; just mash the fast attack button to fling the flails around, destroying them all (they'll often drop blue essence too!). As soon as you get an opening, launch another charged arrow and repeat the above.
Page 152© 2008 IGN Entertainment, Inc.
Congratulations! You've beaten the Archfiend…or have you?
Once the Archfiend has lost about a 1/3 of his health, he'll climb up to a higher level. Hold block when he does this, as he'll also destroy a nearby path-blocking boulder, which's remnants can hurt you. Once it's destroyed, follow the path the boulder was blocking and wall-jump up several shafts to resume the battle. Use the same tactics as before. When he's almost out of health, block to avoid another busted boulder, and chase him to the final level - do the same thing here, too.
Boss
Yup, you're not done yet. The second form of the archfiend is incredibly vicious, with the most powerful attacks yet seen. However, he's no match for a particular combo involving your Scythe.
So this version of the Archfiend has three main stances that he alternates between: Holding onto the ledge, flying around outside the perimeter, and hovering above the main arena. Except for when he's flying outside the perimeter, he can be easily attacked, but the tough part is avoiding his own advances.
Anyway, the Archfiend always begins by holding onto the ledge directly in front of you, and he'll remain in this position long enough for you to kill him using our strategy. Equip the Eclipse Scythe, jump toward him and press Quick Attack, Quick, Attack, Strong Attack - this combo will keep Ryu in the air high enough to evade most of the Archfiend's attacks. In addition, it deals a good amount of damage. Repeat this as much as you can to do him in.
Page 153© 2008 IGN Entertainment, Inc.
Now while the above strategy (if performed correctly) will allow you to evades most of his attacks, there's one you still have to watch out for: the energy beam. This insanely powerful move can nearly kill you in one hit! As soon as you see the first signs of this attack, drop whatever you're doing and launch a Ninpo - since you're invulnerable while casting a spell, you won't take any damage. If you're out of Ninpo, a well-timed jump can also work, though this isn't recommended. As soon as the attack's over, return to the above strategy.
If the Archfiend does wind up switching to one of his other positions before you can finish him off, there's a few other things to keep in mind. Remember, you can't attack him (short of using Ninpo) when he's flying outside the arena, so focus on dodging his attacks. This includes a vicious series of fireball - continually dodge around to evade them. When he begins hovering over the arena itself, use the same attack as when he's holding onto the ledge to do him in.
Page 154© 2008 IGN Entertainment, Inc.
Ninja Gaiden 2 Secrets
Crystal Skulls are hidden all over the place in Ninja Gaiden II, and it takes a watchful eye to spot them all. What do they do? Unlock achievements of course! Check out the list below to find the Crystal Skulls. If you're still not quite sure where one is, check the level walkthroughs to be shown a more precise location.
Chapter 1: Just across the gap awaits a Crystal Skull -- run toward the ledge it's on and jump to reach it.
Crystal Skull After taking down the archers, wall-run up the tree with your back to the walkway the archers were on to land on an awning. Follow this to that very walkway to find a Crystal Skull in the corner.
Chapter 2 As you swim up the river, look for a Crystal Skull on the riverbed, just before the bridge - dive down to grab it.
Chapter 2
Page 155© 2008 IGN Entertainment, Inc.
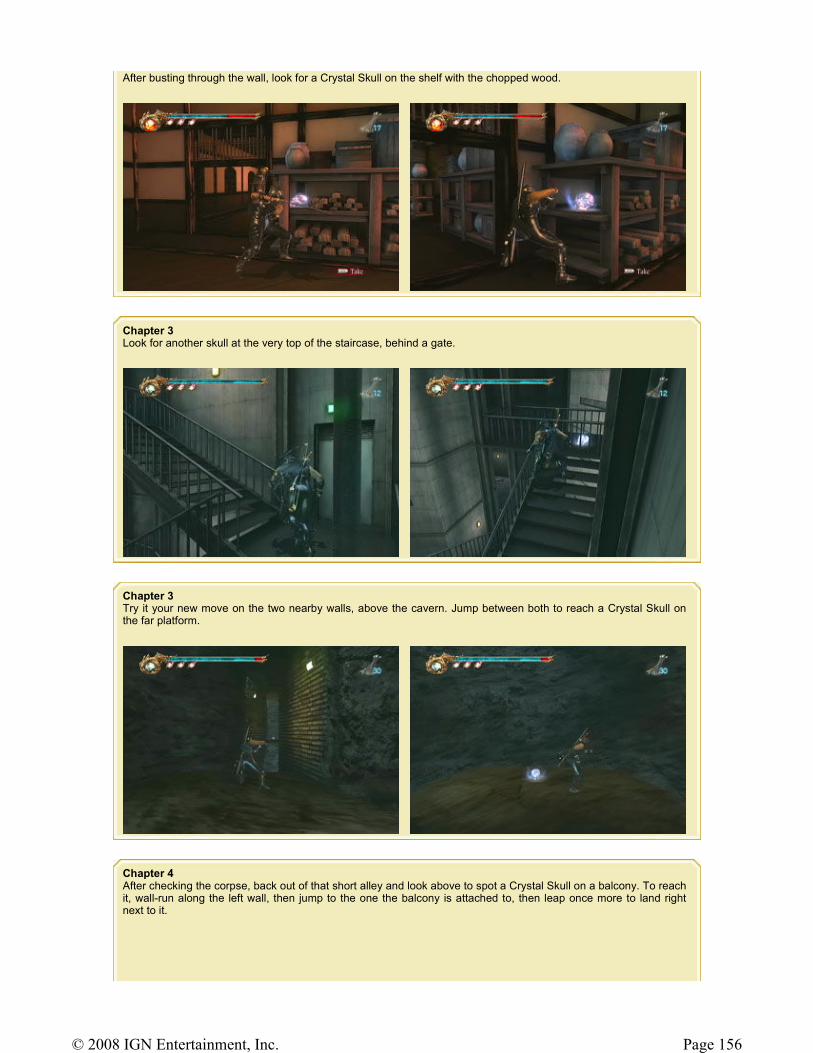
After busting through the wall, look for a Crystal Skull on the shelf with the chopped wood.
Chapter 3 Look for another skull at the very top of the staircase, behind a gate.
Chapter 3 Try it your new move on the two nearby walls, above the cavern. Jump between both to reach a Crystal Skull on the far platform.
Chapter 4 After checking the corpse, back out of that short alley and look above to spot a Crystal Skull on a balcony. To reach it, wall-run along the left wall, then jump to the one the balcony is attached to, then leap once more to land right next to it.
Page 156© 2008 IGN Entertainment, Inc.
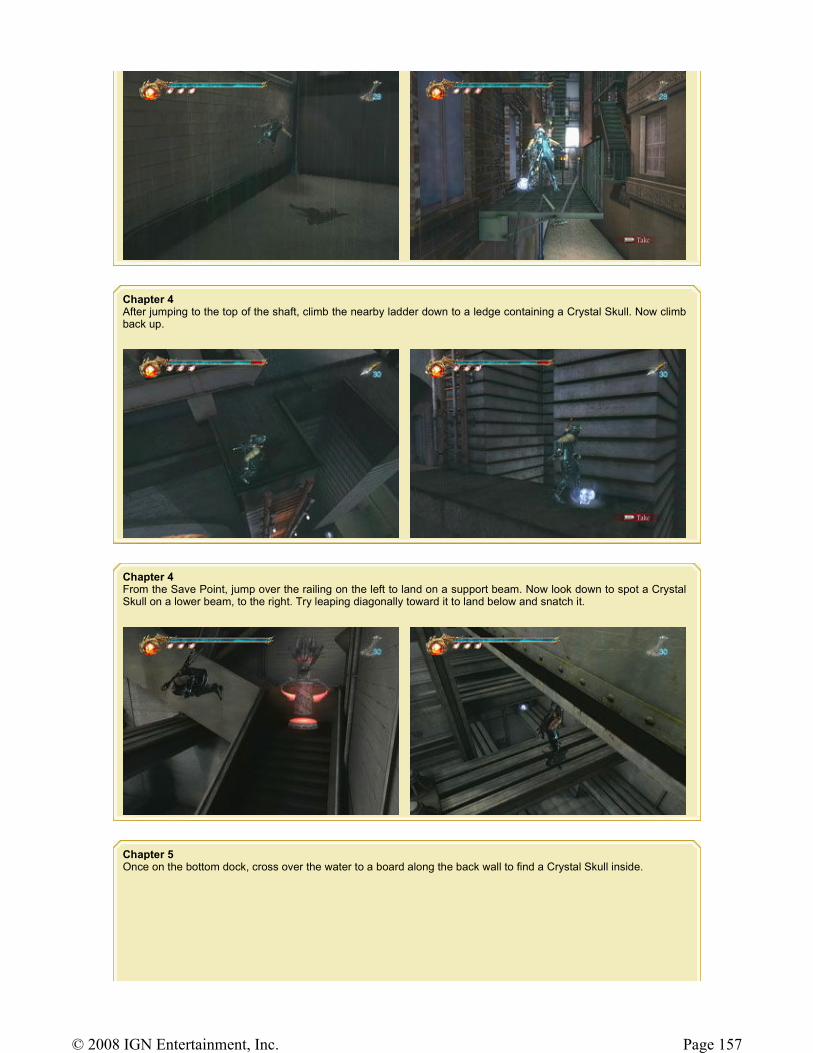
Chapter 4 After jumping to the top of the shaft, climb the nearby ladder down to a ledge containing a Crystal Skull. Now climb back up.
Chapter 4 From the Save Point, jump over the railing on the left to land on a support beam. Now look down to spot a Crystal Skull on a lower beam, to the right. Try leaping diagonally toward it to land below and snatch it.
Chapter 5 Once on the bottom dock, cross over the water to a board along the back wall to find a Crystal Skull inside.
Page 157© 2008 IGN Entertainment, Inc.
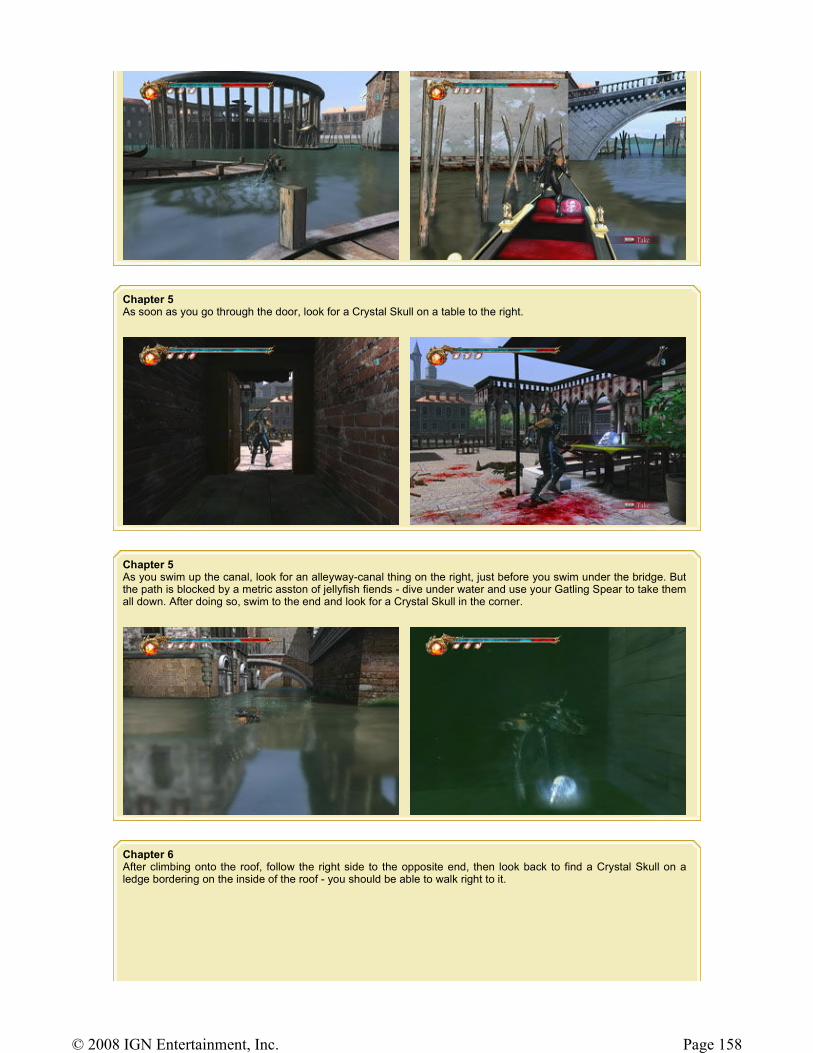
Chapter 5 As soon as you go through the door, look for a Crystal Skull on a table to the right.
Chapter 5 As you swim up the canal, look for an alleyway-canal thing on the right, just before you swim under the bridge. But the path is blocked by a metric asston of jellyfish fiends - dive under water and use your Gatling Spear to take them all down. After doing so, swim to the end and look for a Crystal Skull in the corner.
Chapter 6 After climbing onto the roof, follow the right side to the opposite end, then look back to find a Crystal Skull on a ledge bordering on the inside of the roof - you should be able to walk right to it.
Page 158© 2008 IGN Entertainment, Inc.
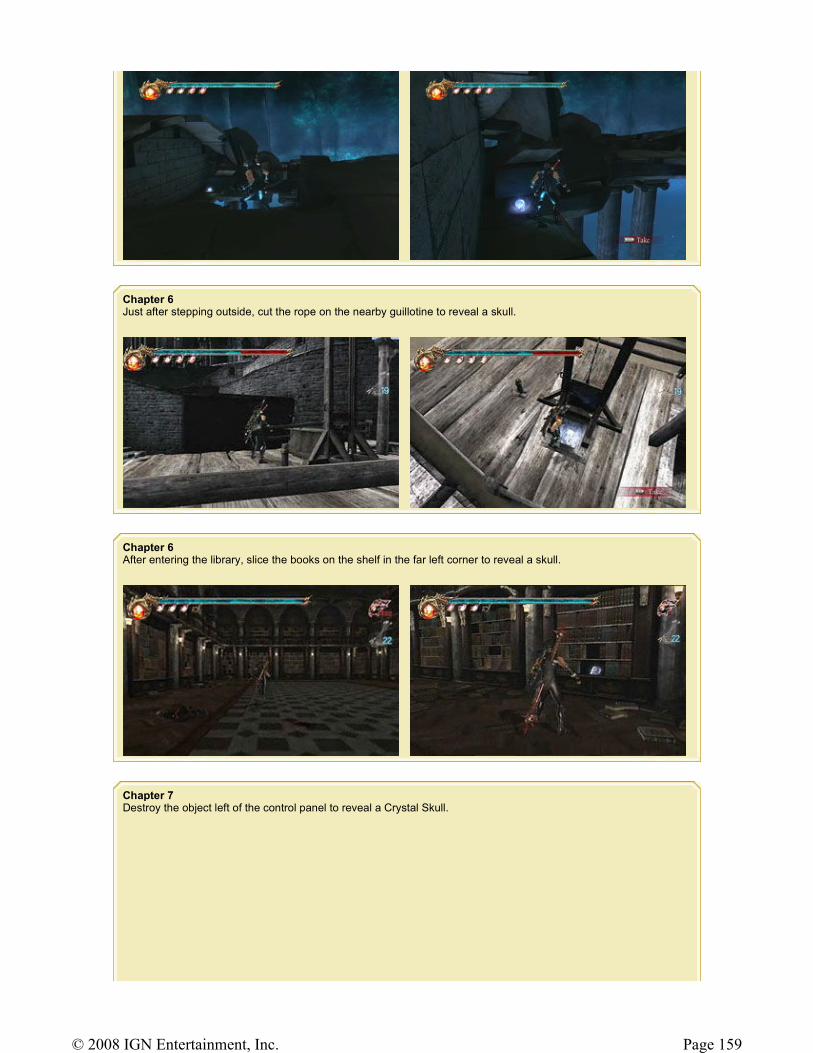
Chapter 6 Just after stepping outside, cut the rope on the nearby guillotine to reveal a skull.
Chapter 6 After entering the library, slice the books on the shelf in the far left corner to reveal a skull.
Chapter 7 Destroy the object left of the control panel to reveal a Crystal Skull.
Page 159© 2008 IGN Entertainment, Inc.
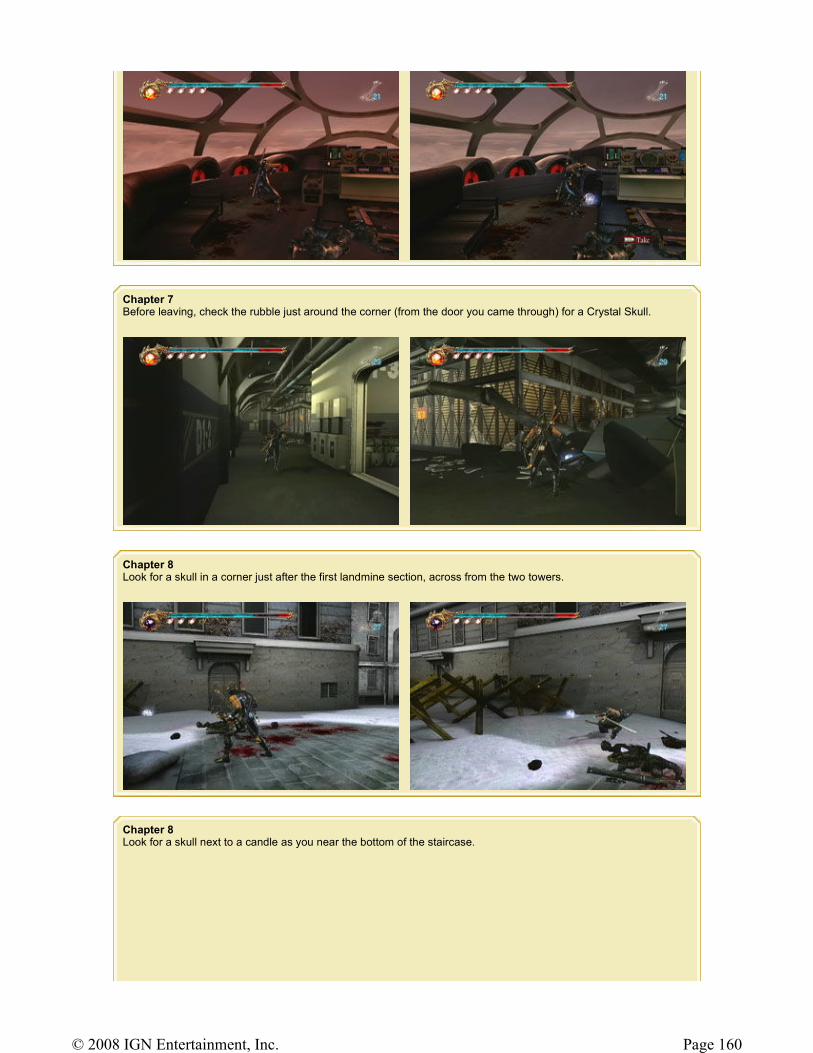
Chapter 7 Before leaving, check the rubble just around the corner (from the door you came through) for a Crystal Skull.
Chapter 8 Look for a skull in a corner just after the first landmine section, across from the two towers.
Chapter 8 Look for a skull next to a candle as you near the bottom of the staircase.
Page 160© 2008 IGN Entertainment, Inc.
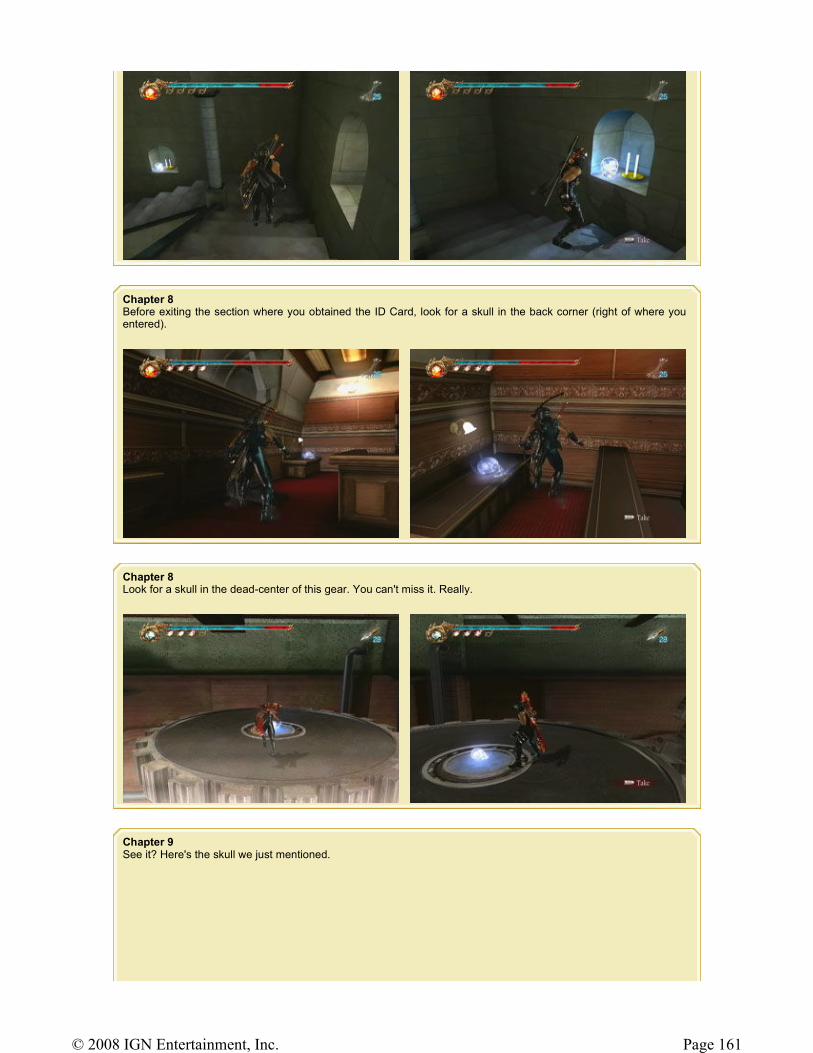
Chapter 8 Before exiting the section where you obtained the ID Card, look for a skull in the back corner (right of where you entered).
Chapter 8 Look for a skull in the dead-center of this gear. You can't miss it. Really.
Chapter 9 See it? Here's the skull we just mentioned.
Page 161© 2008 IGN Entertainment, Inc.
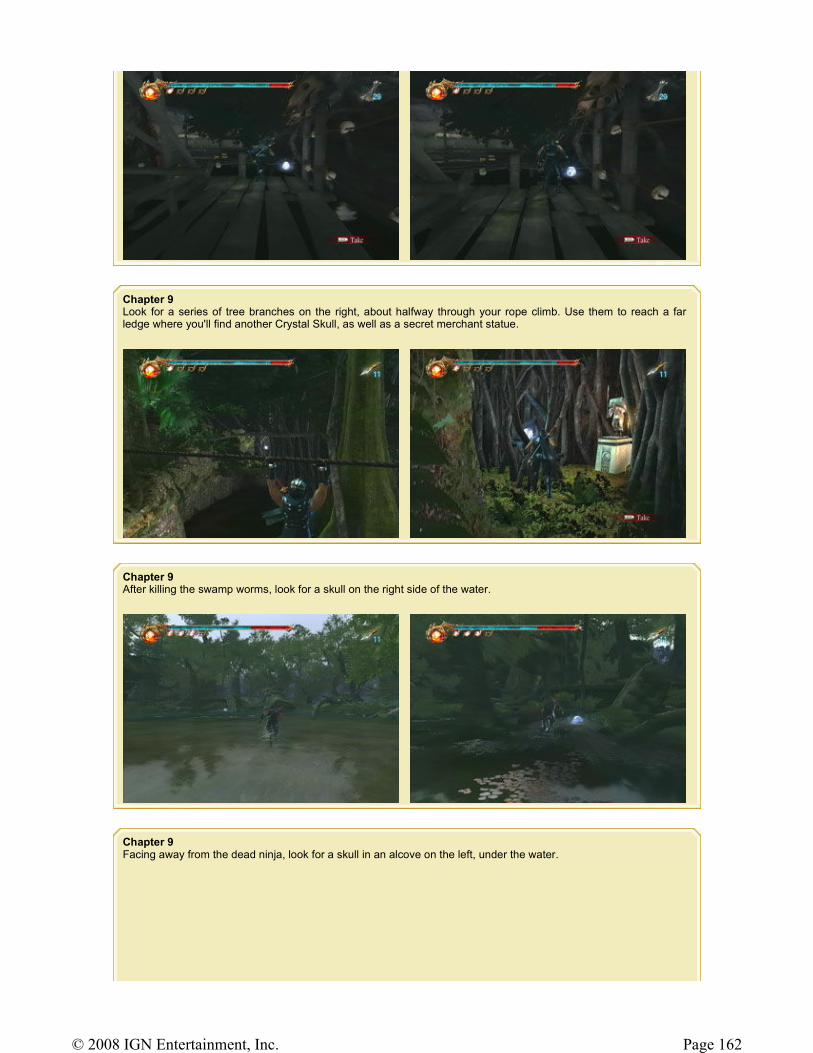
Chapter 9 Look for a series of tree branches on the right, about halfway through your rope climb. Use them to reach a far ledge where you'll find another Crystal Skull, as well as a secret merchant statue.
Chapter 9 After killing the swamp worms, look for a skull on the right side of the water.
Chapter 9 Facing away from the dead ninja, look for a skull in an alcove on the left, under the water.
Page 162© 2008 IGN Entertainment, Inc.
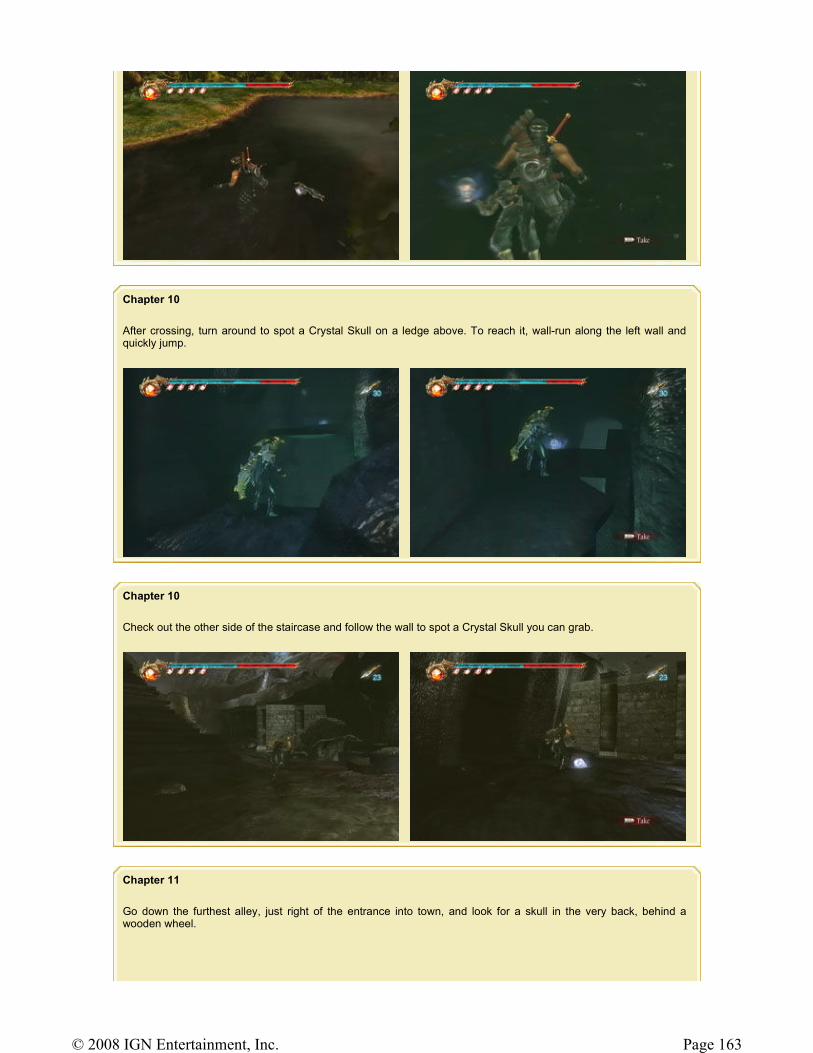
Chapter 10
After crossing, turn around to spot a Crystal Skull on a ledge above. To reach it, wall-run along the left wall and quickly jump.
Chapter 10
Check out the other side of the staircase and follow the wall to spot a Crystal Skull you can grab.
Chapter 11
Go down the furthest alley, just right of the entrance into town, and look for a skull in the very back, behind a wooden wheel.
Page 163© 2008 IGN Entertainment, Inc.
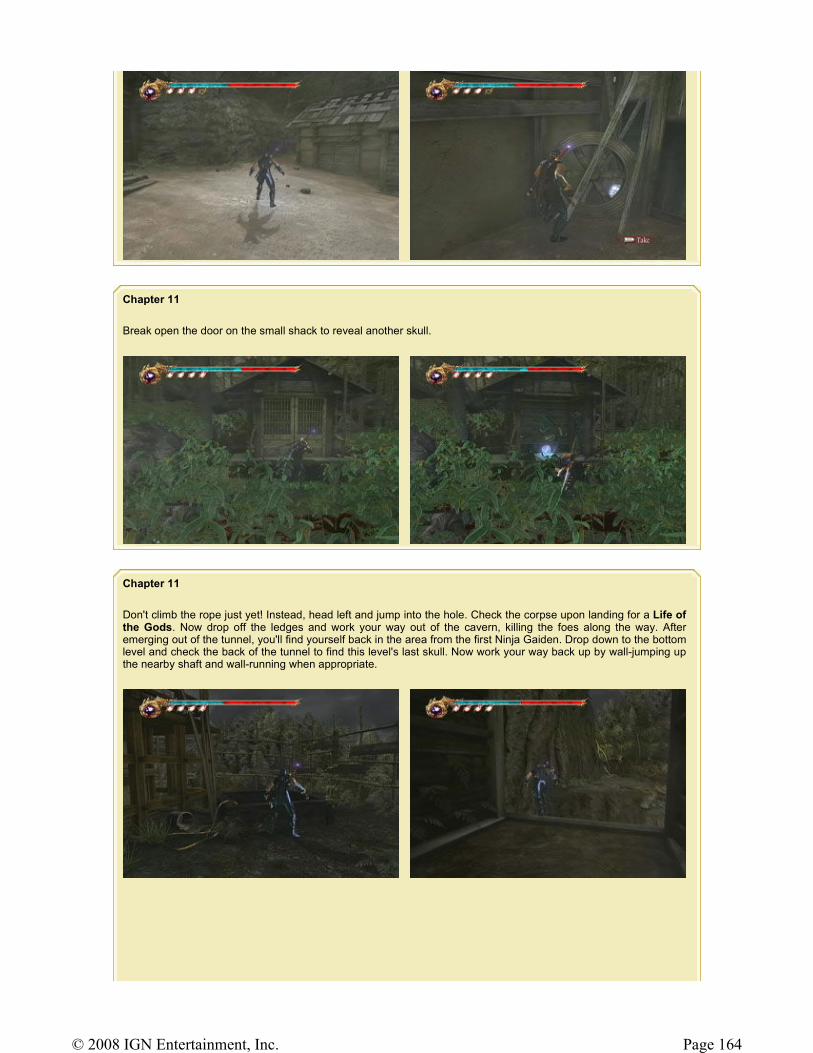
Chapter 11
Break open the door on the small shack to reveal another skull.
Chapter 11
Don't climb the rope just yet! Instead, head left and jump into the hole. Check the corpse upon landing for a Life of the Gods. Now drop off the ledges and work your way out of the cavern, killing the foes along the way. After emerging out of the tunnel, you'll find yourself back in the area from the first Ninja Gaiden. Drop down to the bottom level and check the back of the tunnel to find this level's last skull. Now work your way back up by wall-jumping up the nearby shaft and wall-running when appropriate.
Page 164© 2008 IGN Entertainment, Inc.
Page 165© 2008 IGN Entertainment, Inc.