introduction to iot reverse engineering•introduction •information gathering •emulation...
TRANSCRIPT

Introduction To IoT Reverse Engineering with an example on a home router
Valerio Di Giampietro Linux enthusiast since 1993
http://va.ler.io
@valerio
©Valerio Di Giampietro - This work is licensed under a Creative Commons Attribution 4.0 International License
Workshop 20
19

• Introduction
• Information gathering
• Emulation environment using QEMU
• Analyze how the device works
• Modify the firmware
What we will talk about …
Firenze, December 3rd 2018 – Pag. 2 ● ○ ○ ○ ○ - Introduction Firenze, December 3rd 2018 – Pag. 2
http://va.ler.io – Pag. 2
● ○ ○ ○ ○ - Introduction
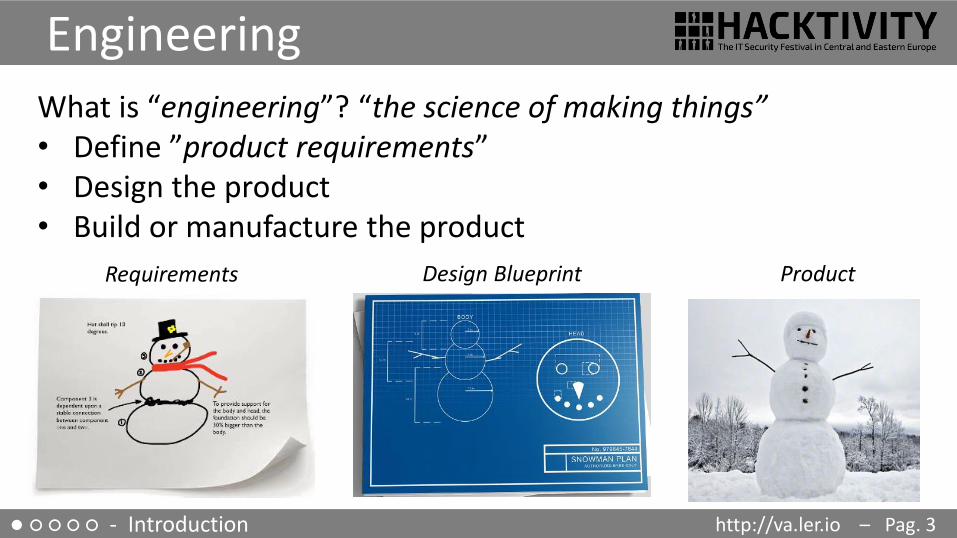
What is “engineering”? “the science of making things” • Define ”product requirements” • Design the product • Build or manufacture the product
Engineering
Requirements Design Blueprint Product
http://va.ler.io – Pag. 3

What is ”reverse engineering”?
• It is the ”engineering” process done in reverse order and, usually, with limited scope
What is this example project “limited scope”?
• modify the router firmware to add features and programs
● ○ ○ ○ ○ - Introduction
Reverse Engineering
Requirements Design Blueprint Product
http://va.ler.io – Pag. 4

• Who makes the device?
• Is there an ODM (Original Design Manufacturer)?
• Open the case
• Identify main device components
• Locate UART and possibly JTAG Interfaces
• Get the firmware and the root file system
○ ● ○ ○ ○ - Information Gathering
Information Gathering
http://va.ler.io – Pag. 5
Gemtek/Linkem WVRTM-127ACN example home router

○ ● ○ ○ ○ - Information Gathering
Mainboard Top
RAM 128Mb Winbond
W971GG6SB
http://va.ler.io – Pag. 6
System On Chip
Mediatek MT7621AT
JTAG?
UART
74HC164

○ ● ○ ○ ○ - Information Gathering
Mainboard Bottom
128Mb NAND Flash F59L1G81LA
http://va.ler.io – Pag. 7

○ ● ○ ○ ○ - Information Gathering
Locate the UART interface
• Search on Internet
• Identify potential serial headers candidates
• Sometimes marked in the PCB’s silkscreen
• Usually 4 pins: Vcc, Gnd, Tx, Rx
• Use a multimeter to find potential candidates
• Locate pins on SOC and follow PCB traces
• Use tools like Jtagulator
• Oscilloscope or Logic Analyzer to locate Tx (a little overkill)
UART on various boards
http://va.ler.io – Pag. 8

Pin RGND RVCC V Notes
1 29KΩ 0Ω 3.3V Vcc
2 4.7KΩ 33kΩ 3.3V 0-3.3V on boot (TX?)
3 ∞Ω ∞Ω 3.3V RX?
4 0Ω 29KΩ 0V Gnd
Gemtek router UART Pin Candidates

○ ● ○ ○ ○ - Information Gathering
The JTAG interface • JTAG is an industry standard for testing PCB after manufacture
• Allows access to read/write flash memory contents and can be used as a primary means for an in-circuit emulator
• Multiple devices are daisy-chained together
• Pins: TCK test clock TDI test data in TDO test data out TMS test mode sel. TRST test reset (opt.)
http://va.ler.io – Pag. 10

○ ● ○ ○ ○ - Information Gathering
Locate the JTAG interface • No standard pinout, but few popular pinouts: http://www.jtagtest.com/pinouts/
• Search on the Internet
• Look for headers labeled TCK, TDI, TDO, TMS
• Look for 1x5/6, 2x5, 2x7, 2x10 pin headers and, with a multimeter,
– Look for GND and VCC and compare to popular pinouts
– Often there are pullups (1-100k) for TMS, TDI and TRST, TRST can also be pulled low
– TDO should be high impedance
• Locate pins on SOC and follow PCB traces
• Use tools like Jtagulator
http://va.ler.io – Pag. 11

○ ● ○ ○ ○ - Information Gathering
Repopulate the interfaces
Connect the serial cable
http://va.ler.io – Pag. 12

○ ● ○ ○ ○ - Information Gathering
Why repopulate the interfaces? • UART (Serial Interface)
– Watch what is printed on the serial console during the boot cycle and find bootloader and OS version
– Watch the firmware upgrade cycle
– Use a USB TTL serial adapter and a terminal emulator on the PC
• JTAG
– Read the firmware out of the flash eeprom
– Break into the boot cycle and use JTAG to do ”in circuit debugging”
– Attach an interface board, like Bus Pirate, to the JTAG interface
– Use OpenOCD, to dump eeprom and to do ”in circuit debugging”
http://va.ler.io – Pag. 13

○ ● ○ ○ ○ - Information Gathering
Getting the firmware file
• Follow the easiest path first
• If the supplier has a website with firmware updates go and download the firmware file
• If the firmware update can be downloaded directly only by the device, sniff the communication with wireshark
• If the bootloader has a CLI and a dump flash command, use the bootloader CLI
• Otherwise, download the eeprom image through the JTAG connector using Bus Pirate and OpenOCD
http://va.ler.io – Pag. 14

• Bootloader name and version • System On Chip (SOC) model
and architecture • Amount of RAM and
EEPROM installed • Linux Kernel version • File system types • NAND partition details • Init process software • Is the bootloader CLI
available?
Assignment 1 get info from what is printed during boot
Download boot.log.gz from: http://va.ler.io/ws or http://116.203.78.185

○ ● ○ ○ ○ - Information Gathering
Boot output on serial console - 1 U-Boot 1.1.3 (Oct 23 2015 - 16:03:05)
...
mtd->writesize=2048 mtd->oobsize=64, mtd->erasesize=131072
...
Ralink UBoot Version: 4.3.2.0
ASIC MT7621A DualCore (MAC to MT7530 Mode)
...
##### The CPU freq = 880 MHZ ####
estimate memory size =128 Mbytes
...
NAND device: Manufacturer ID: 0xc8, Chip ID: 0xd1 (Unknown
NAND 128MiB 3,3V 8-bit)
http://va.ler.io – Pag. 16

○ ● ○ ○ ○ - Information Gathering
Boot output on serial console - 2
Please choose the operation:
1: Load system code to SDRAM via TFTP.
2: Load system code then write to Flash via TFTP.
3: Boot system code via Flash (default).
4: Entr boot command line interface.
9: Load Boot Loader code then write to Flash via TFTP.
http://va.ler.io – Pag. 17
U-Boot Menu

○ ● ○ ○ ○ - Information Gathering
Boot output on serial console - 3
3: System Boot system code via Flash.
## Booting image at 81000000 ...
Image Name: =01.01.02.090
Image Type: MIPS Linux Multi-File Image(lzma compressed
Data Size: 19062732 Bytes = 18.2 MB
Load Address: 80001000
Entry Point: 8000f540
Image 0: 1966004 Bytes = 1.9 MB
Image 1: 17096704 Bytes = 16.3 MB
Verifying Checksum ... OK
Uncompressing Multi-File Image ... OK
## Transferring control to Linux (at address 8000f540) ...
## Giving linux memsize in MB, 128
Starting kernel ...
http://va.ler.io – Pag. 18
Booting kernel details

○ ● ○ ○ ○ - Information Gathering
Boot output on serial console - 4
Linux version 2.6.36 …(gcc 4.5.4 (Buildroot 2015.02-svn12502)
...
Kernel command line: console=ttyS0,115200n8
console=ttyS0,115200n8
...
CPU revision is: 0001992f (MIPS 1004Kc)
...
squashfs: version 4.0 (2009/01/31) Phillip Lougher
...
RAMDISK: squashfs filesystem found at block 0
RAMDISK: Loading 16696KiB [1 disk] into ram disk... done.
VFS: Mounted root (squashfs) readonly on device 1:0.
http://va.ler.io – Pag. 19
Kernel, CPU and root file system details

○ ● ○ ○ ○ - Information Gathering
Boot output on serial console - 5
[ 2.760000] Creating 9 MTD partitions on "MT7621-NAND":
[ 2.764000] 0x000000000000-0x000000100000 : "Bootloader"
[ 2.772000] 0x000000100000-0x000000200000 : "Bootloader2"
[ 2.776000] 0x000000200000-0x000000300000 : "Config"
[ 2.784000] 0x000000300000-0x000000580000 : "Env1"
[ 2.788000] 0x000000580000-0x000000800000 : "Env2"
[ 2.792000] 0x000000800000-0x000002800000 : "Kernel"
[ 2.800000] 0x000002800000-0x000004800000 : "Kernel2"
[ 2.804000] 0x000004800000-0x000006400000 : "Storage1"
[ 2.808000] 0x000006400000-0x000007f80000 : "Storage2"
http://va.ler.io – Pag. 20
NAND Partitions

○ ● ○ ○ ○ - Information Gathering
Boot output on serial console - 6
init started: BusyBox v1.23.1 (2016-01-22 15:02:56 CST)
...
UBI: attached mtd8 to ubi8
UBI: MTD device name: "Storage2"
...
UBIFS: mounted UBI device 8, volume 0, name "mtd8"
UBIFS: file system size: 23744512 bytes (23188 KiB, 22 MiB,
…
UBIFS: journal size: 1142784 bytes (1116 KiB, 1 MiB)
UBIFS: default compressor: lzo
...
http://va.ler.io – Pag. 21
UBIFS read/write File System

○ ● ○ ○ ○ - Information Gathering
Boot output on serial console - 7
[TR069_A4] ACS Connect Failed: … acs.linkem.com[TR069_A4]
[TR069_A4] ACS Connect Failed: … acs.linkem.com[TR069_A4]
...
buildroot login: admin
Challenge code:
mZkq7ohJax+YwmOgTHSTRwdKotmQkVqX4tOZQt0ypomSRQz6RkKsj/TAOD3
focWSRrrIUFEeqQaShH3+xZHFe8znuCYBfZrdXdyzTShql0OpT+i62XRwLb
ptcOpWX6dANtb612WXLEFaLfL4yEBDbChVSKVrre9RsrKFL4YblAPKGDQEd
lC2ZDX0TNQOgWKkarAAVgHO5LnOdgyPT4SakKzZfH2JmYEbRhbCBRTVhYkq
NqT0lI5QKcWwYURE0foJc7+YCm7NU+MPzyt/3tEl5l8JjjZLxgg8p2xBX9/
pcE3rtIoUWGT6/2l5hN6eA
Authentication code: admin
Fail!
http://va.ler.io – Pag. 22
TR069 protocol and login prompt

http://va.ler.io – Pag. 23 ○ ● ○ ○ ○ - Information Gathering
Boot Loader Main Menu MT7621 # help
? - alias for 'help'
bootm - boot application image from memory
go - start application at address 'addr'
help - print online help
md - memory display
mdio - Ralink PHY register R/W command !!
mm - memory modify (auto-incrementing)
nand - nand command
nm - memory modify (constant address)
printenv- print environment variables
reset - Perform RESET of the CPU
saveenv - save environment variables to persistent storage
setenv - set environment variables
tftpboot- boot image via network using TFTP protocol
version - print monitor version

○ ● ○ ○ ○ - Information Gathering
Boot Loader Nand Menu MT7621 # help nand
nand nand usage:
nand id
nand read <flash_offset> <len> [dst_addr]
nand write <flash_offset> <src_addr> <len>
nand erase_write <flash_offset> <src_addr> <len>
nand page <number>
nand erase <addr> <len>
nand erase_ignore_bad_block <flash_offset> <len>
nand list_bad_block
nand oob <number>
nand dump
nand init
http://va.ler.io – Pag. 24

○ ● ○ ○ ○ - Information Gathering
Boot Loader Env Variables MT7621 # printenv
...
fileaddr=81000000
ipaddr=10.10.10.123
serverip=10.10.10.3
...
mtddevnum=6
root_chain_cert=QlpoOTFBWSZTWYDk05wABNX/lOiQAEDAC//iP///
...
...
Environment size: 3108/131067 bytes
http://va.ler.io – Pag. 25
○ ● ○ ○ ○ - Information Gathering
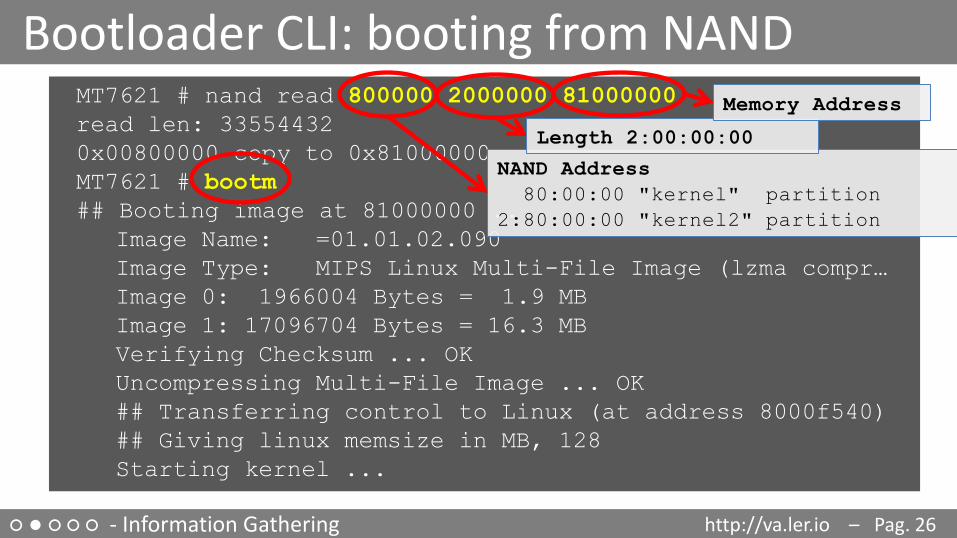
Bootloader CLI: booting from NAND MT7621 # nand read 800000 2000000 81000000
read len: 33554432
0x00800000 copy to 0x81000000
MT7621 # bootm
## Booting image at 81000000 ...
Image Name: =01.01.02.090
Image Type: MIPS Linux Multi-File Image (lzma compr…
Image 0: 1966004 Bytes = 1.9 MB
Image 1: 17096704 Bytes = 16.3 MB
Verifying Checksum ... OK
Uncompressing Multi-File Image ... OK
## Transferring control to Linux (at address 8000f540)
## Giving linux memsize in MB, 128
Starting kernel ...
http://va.ler.io – Pag. 26
NAND Address
80:00:00 "kernel" partition
2:80:00:00 "kernel2" partition
Length 2:00:00:00
Memory Address

○ ● ○ ○ ○ - Information Gathering
Bootloader CLI: booting from TFTP Server MT7621 # tftpboot 81000000 kernel.bin
...
TFTP from server 10.10.10.3;our IP address is 10.10.10.123
Filename 'kernel.bin’.
...
###################################################### ...
32 MB reveived
...
MT7621 # bootm
## Booting image at 81000000 ...
Image Name: =01.01.02.090
## Transferring control to Linux (at address 8000f540) ...
## Giving linux memsize in MB, 128
Starting kernel ...
http://va.ler.io – Pag. 27
Memory Address

○ ● ○ ○ ○ - Information Gathering
Getting EEPROM firmware - 1 MT7621 # nand page 0
page 0x0:
27 05 19 56 42 ee ee b3 56 29 e9 b9 00 02 25 fc a0 20 00 …
4e 41 4e 44 20 46 6c 61 73 68 20 49 00 00 00 00 00 00 00 …
...
00 00 5b af 21 d8 e0 03 21 f8 c0 03 08 00 60 03 00 00 00 …
00 00 00 00 00 00 00 00 08 00 c1 28 2e 00 20 14 21 10 80 …
#
oob:
ff ff ff ff ff ff ff ff ff ff ff ff ff ff ff ff ff ff ff …
db 15 b2 47 1b fc f3 ff 7e dd 57 a5 d2 3d fb ff 5e 31 c4 …
http://va.ler.io – Pag. 28

○ ● ○ ○ ○ - Information Gathering
Getting EEPROM firmware - 2
expect "Load Boot Loader code then write to Flash via TFTP"
send "4"
for {set i 0} {$i<65537} {incr i} {
expect "MT7621 # "
set ihex [format %x $i]
send "nand page $ihex\r"
}
http://va.ler.io – Pag. 29
Expect script
Execute the script and convert to bin $ ./serial-flash-dump.expect /dev/ttyUSB0 | tee eeprom.txt
$ cat eeprom.txt | ./hexdump2bin.pl > eeprom.bin
SUCCESS 65536 pages dumped, 134217728 bytes

○ ● ○ ○ ○ - Information Gathering
Splitting EEPROM into partitions
dd if=ee.bin of=01-bootloader bs=1024 skip=0 count=1024
dd if=ee.bin of=02-bootloader2 bs=1024 skip=1024 count=1024
dd if=ee.bin of=03-config bs=1024 skip=2048 count=1024
dd if=ee.bin of=04-env1 bs=1024 skip=3072 count=2560
dd if=ee.bin of=05-env2 bs=1024 skip=5632 count=2560
dd if=ee.bin of=06-kernel bs=1024 skip=8192 count=32768
dd if=ee.bin of=07-kernel2 bs=1024 skip=40960 count=32768
dd if=ee.bin of=08-storage1 bs=1024 skip=73728 count=28672
dd if=ee.bin of=09-storage2 bs=1024 skip=102400 count=28160
http://va.ler.io – Pag. 30
These commands are included in the “hg-config.sh” script

○ ● ○ ○ ○ - Information Gathering
Identify Partition Contents - 1
http://va.ler.io – Pag. 31
• ”file” command $ file 01-bootloader.bin
u-boot legacy uImage, NAND Flash I, Linux/MIPS …
• “strings” command $ strings 04-env1.bin
)bootdelay=1
baudrate=115200
• ”hexdump” command $ hexdump -C 01-bootloader.bin
00000000 27 05 19 56 42 ee ee b3 56 29 e9 b9 00 02 25 fc
|'..VB...V)....%.|
00000020 4e 41 4e 44 20 46 6c 61 73 68 20 49 00 00 00 00
|NAND Flash I....|

○ ● ○ ○ ○ - Information Gathering
Identify Partition Contents - 2
http://va.ler.io – Pag. 32
• ”binwalk” command $ binwalk 06-kernel.bin
DECIMAL HEXADECIMAL DESCRIPTION
----------------------------------------------------------
0 0x0 uImage header, header size: 64 bytes,
header CRC: 0x2A25C931, created: 2016-01-22 07:35:54, image
size: 19062732 bytes, Data Address: 0x80001000, Entry Point:
0x8000F540, data CRC: 0xA80AE4A8, OS: Linux, CPU: MIPS,
image type: Multi-File Image, compression type: lzma, image
name: "=01.01.02.090”
88 0x58 LZMA compressed data …
1966092 0x1E000C Squashfs filesystem, little endian,
version 4.0, compression:xz, size: 17096020 bytes, 2776
inodes, blocksize: 131072 bytes, created: 2016-01-22

○ ● ○ ○ ○ - Information Gathering
Identify Partition Contents - 3
http://va.ler.io – Pag. 33
• 01-bootloader.bin is the U-Boot bootloader for Linux MIPS
• 02-bootloader2.bin is unused, it has all bytes at default value (0xff)
• 03-config.bin probably contains some router configuration
• 04-env1.bin contains U-Boot environment variables
• 05-env2.bin only one byte is different from the previous file
• 06-kernel.bin U-Boot header, Linux kernel, Squashfs file system. It is the boot image

○ ● ○ ○ ○ - Information Gathering
Identify Partition Contents - 3
http://va.ler.io – Pag. 34
• 07-kernel2.bin is exactly, bit by bit, the same content as the previous partition
• 08-storage1.bin is an empty UBIFS file system (writable, optimized NAND Flash file system)
• 09-storage2.bin is another UBIFS file system, the one that contains data

○ ● ○ ○ ○ - Information Gathering
The Boot Image
http://va.ler.io – Pag. 35
Binwalks helps identifying the Boot Image:
• U-Boot header (64 bytes)
• Images lengths (24 bytes, 8 bytes for first image, 8 bytes for second image and 8 bytes, all "0", as terminator)
• Kernel image, lzma compressed
• Squashfs, root file system image. Can be extracted and analyzed

○ ● ○ ○ ○ - Information Gathering
What was found
• 32 bit MIPS 1004Kc processor, Little Endian
• 128Mb NAND Flash
• Linux version 2.6.36 (October 2010)
• uClibc version 0.9.33.2 (May 2012)
• BusyBox version 1.23.1 (January 2015)
• System built with Buildroot-2015.02
http://va.ler.io – Pag. 36

○ ○ ● ○ ○ - Emulation Environment using QEMU
QEMU Emulation
• Choosing Board and CPU emulation in QEMU
$ qemu-system-mipsel -M help
Supported machines are:
malta MIPS Malta Core LV (default)
mips mips r4k platform
mipssim MIPS MIPSsim platform
none empty machine
http://va.ler.io – Pag. 37

○ ○ ● ○ ○ - Emulation Environment using QEMU
Choosing a Build System
• The Yocto Project very powerful, builds a root file system and create a custom Linux distribution. But it has a steep learning curve
• Buildroot builds the root file system and the kernel, easy and fast to learn, very good user manual
• Openwrt/LEDE Build System tailored to build a replacement router firmware, documentation scattered in the web site, requires more time to learn compared to Buildroot
http://va.ler.io – Pag. 38

○ ○ ● ○ ○ - Emulation Environment using QEMU
Choosing a Buildroot version • Based on uClibc 0.9.33.2
• With kernel version 2.6.36
• Other libraries with compatible versions
• The version to use is: buildroot-2015.02
• This version doesn’t run on Ubuntu 16.04 or 18.04
• Use Debian Wheezy (2013) in a docker Container
http://va.ler.io – Pag. 39

• The Dockerfile builds a minimal Debian Wheezy container to run Buildroot FROM debian:wheezy
...
RUN apt-get update
RUN apt-get upgrade
RUN apt-get install -y -q \
bash \
...
RUN mkdir -p /src/misc
ADD startup.sh /src/misc/startup.sh
RUN chmod a+x /src/misc/startup.sh
ENTRYPOINT cd /src/misc ; ./startup.sh
○ ○ ● ○ ○ - Emulation Environment using QEMU
The Dockerfile
http://va.ler.io – Pag. 40

The Docker run command docker run -h BRHOST \
--rm \
-v /tmp/.X11-unix:/tmp/.X11-unix \
-v $HOME:$HOME \
-e DISPLAY=$GDISPLAY \
-e GUSERNAME=$GUSERNAME \
-e GUID=$GUID \
-e GGROUP=$GGROUP \
-e GGID=$GGID \
-e GHOME=$GHOME \
-e GSHELL=$SHELL \
-e GRUNXTERM=$GRUNXTERM \
-e GPWD=$GPWD \
-it digiampietro/buildroot-armv7

○ ○ ● ○ ○ - Emulation Environment using QEMU
Docker run in action valerio@ubuntu-hp:~$ ls -ld br
drwxrwxr-x 6 valerio valerio 4096 ott 26 22:30 br
valerio@ubuntu-hp:~$ grep VERSION /etc/os-release
VERSION="18.04.1 LTS (Bionic Beaver)"
VERSION_ID="18.04"
VERSION_CODENAME=bionic
valerio@ubuntu-hp:~$ br/..../docker/dockrun.sh
valerio@BRHOST:~$ ls -ld br
drwxrwxr-x 6 valerio valerio 4096 Oct 26 20:30 br
valerio@BRHOST:~$ grep VERSION /etc/os-release
VERSION_ID="7"
VERSION="7 (wheezy)"
http://va.ler.io – Pag. 42

○ ○ ● ○ ○ - Emulation Environment using QEMU
Buildroot configuration • Based on “qemu_mipsel_malta_defconfig”
• With the following main modifications – Build packages and libraries with debugging symbols,
don’t strip binaries, no gcc optimization
– Build gdb, gdbserver, ltrace, strace and cross gdb for the host
– Include mtd drivers, UBIFS and squashfs file system and tools also for the host
– Include main libraries used in the router (libcrypt, libsha1, libssh2, openssl, expat, json-c)
http://va.ler.io – Pag. 43

○ ○ ● ○ ○ - Emulation Environment using QEMU
Linux kernel configuration
• With the following additional settings
– Preemptible Kernel
– NAND Device Support and Support for NAND Flash Simulator
– UBIFS file system with LZMA compression and squashfs file system
http://va.ler.io – Pag. 44

○ ○ ● ○ ○ - Emulation Environment using QEMU
uClibc configuration • Minor modifications to be compatible with the
router's binaries (like linuxthreads etc.) • To include debugging symbols, uClibc don't obey
to the general option included in the Buildroot configuration, has his own flag for this purpose; the problem is that enabling his own flag the compilation gives impossible to fix errors
• in Compiler Warnings add the string "-ggdb", this is the work around to compile the uClibc with debugging symbols
http://va.ler.io – Pag. 45

○ ○ ○ ● ○ - Analyze how the device works
Startup Scripts - 1 • /etc/inittab, snippet:
::sysinit:/sbin/sysctl –p
::sysinit:/etc/init.d/rcS
# Put a getty on the serial port
ttyS0::respawn:/sbin/getty -L ttyS0 115200 vt100
• /etc/init.d/rcS for i in /etc/init.d/S??* ;do
$i start
done
• /bin/login $ ls -l bin/login
lrwxrwxrwx 1 root root bin/login -> /bin/shell_auth
http://va.ler.io – Pag. 46

○ ○ ○ ● ○ - Analyze how the device works
Startup Scripts - 2 S10mountstorage S11mountexternalusb S13portmap S15create_account.sh S20urandom S40network S49ntp S59snmpd S90crond S99gemtek.sh
http://va.ler.io – Pag. 47

○ ○ ○ ● ○ - Analyze how the device works
Startup Scripts - 3
S15create_account.sh
• during first boot it copies to /mnt/jffs2/etc
– /etc/passwd.default
– /etc/group.default
– /etc/shadow.default
• /etc/passwd is a link to /mnt/jffs2/etc/passwd
• other files in /etc are links to corresponding files in /mnt/jffs2/etc/
http://va.ler.io – Pag. 48

○ ○ ○ ● ○ - Analyze how the device works
Startup Scripts - 4
S99gemtek.sh
• initialize and starts router specific services:
– configures specific router hardware
– inserts Gemtek specific modules into the kernel
– modifies some kernel parameters
– executes some interesting programs:
http://va.ler.io – Pag. 49

• Analyzing the startup scripts in /etc/init.d directory, identify how to get a root shell
• Hint #1: search for a telnetd invocation
• Hint #2: U-Boot env variables are available as bash env variables
Assignment 2 how to become root analyzing /etc/init.d scripts
Download etc.tar.gz from: http://va.ler.io/ws or http://116.203.78.185

○ ○ ○ ● ○ - Analyze how the device works
Startup Scripts - 5 S99gemtek.sh: in /etc/profile U-Boot env vars becomes shell vars FACTORY="$factory”
if [ "$FACTORY" -ge "1" ]; then
DEF_LAN_IP=192.168.15.1
fi
if [ "$FACTORY" ] && [ "$FACTORY" -ge "1" ]; then
echo "### FACTORY mode ###”
telnetd -l /bin/sh & \
udp_sender -udp_sender $DEF_LAN_IP 255.255.255.255 \
978 "Gemtek Hello" > /dev/null 2>&1 &
[ "$FACTORY" == "2" ] && fw_setenv factory
exit 0
fi
http://va.ler.io – Pag. 51

○ ○ ○ ● ○ - Analyze how the device works
Startup Scripts - 6
http://va.ler.io – Pag. 52
A simple way to become root:
• Enter the U-Boot CLI
• Set the U-Boot var factory at value 2: "setenv factory 2"
• Permanently save the U-Uboot env: "saveenv"
• power down the router, then power up again
• from the PC connect to the router using telnet and you will have a root shell prompt. It is not possible to modify the read only squashfs root file system, but it is possible to explore the system and to modify the content of the UBIFS file system mounted under /mnt/jffs2

○ ○ ○ ● ○ - Analyze how the device works
Startup Scripts - 7
S99gemtek.sh: at the end it executes the 2 processes managing the router proc_mon &
msg_center &
• proc_mon monitors some processes and restarts them if needed
• msg_center is the process that manages the router doing practically anything. It is really really interesting to analyze the embedded strings in msg_center
http://va.ler.io – Pag. 53

Reverse engineering shell_auth shell_auth is a stripped binary, but calls library functions. We put breakpoints on these calls in the emulation environment $ mipsel-linux-readelf --sym -D shell_auth
Symbol table for image:
Num Buc Value Size Type Bind Vis Ndx Name
36 0: 00401ba0 0 FUNC GLOBAL DEFAULT UND OPENSSL_add_all_algo…
26 1: 00401c30 0 FUNC GLOBAL DEFAULT UND RSA_public_encrypt
39 1: 00401b70 0 FUNC GLOBAL DEFAULT UND BIO_set_flags
44 1: 00000000 0 NOTYPE WEAK DEFAULT UND _Jv_RegisterClasses
48 1: 00401af0 0 FUNC GLOBAL DEFAULT UND strcmp
14 2: 00401ce0 0 FUNC GLOBAL DEFAULT UND memcpy
9 3: 00412040 0 OBJECT GLOBAL DEFAULT 19 __RLD_MAP
29 4: 00000000 0 FUNC WEAK DEFAULT UND __register_frame_info
42 4: 00401b40 0 FUNC GLOBAL DEFAULT UND strrchr
43 4: 00401b30 0 FUNC GLOBAL DEFAULT UND RSA_private_decrypt
1 4: 004018cc 356 FUNC GLOBAL DEFAULT 9 main
33 9: 00401bd0 0 FUNC GLOBAL DEFAULT UND BN_bin2bn

○ ○ ○ ● ○ - Analyze how the device works
Running shell_auth in GDB - 1 Start gdb server in the emulation environment # gdbserver :9000 ./shell_auth Process ./shell_auth created; pid = 840
Listening on port 9000
Start gdb in the host machine $ arm-linux-gdb --ex="target remote :9000" \ --ex="set sysroot $SYSROOT"\
--ex="directory $MYDIR" \
--ex="directory $TOOLBIN" \
-x shell_auth.gdb
http://va.ler.io – Pag. 55

○ ○ ○ ● ○ - Analyze how the device works
Running shell_auth in GDB - 2
1. it calls RSA_new to allocate a public/private key: generated_rsa
2. it calls RSA_new to allocate a public/private key: eprom_rsa
3. it calls RSA_generate_key_ex to generate a new RSA public/private key at address generated_rsa
4. the modulus of the generated-rsa is serialized with BN_bn2bin and stored at address generated-rsa.modulus
5. a modulus, stored inside the shell_auth binary, is copied into the eprom-rsa, initializing only the public key
http://va.ler.io – Pag. 56

○ ○ ○ ● ○ - Analyze how the device works
Running shell_auth in GDB - 3
6. RSA_public_encrypt is used to encrypt the generated-rsa.modulus with the public key eprom-rsa
7. the encrypted generated-rsa.modulus is base64 encoded and printed as the challenge string
8. the login prompt does expect a base64 string of 128 original bytes. If shorter login is aborted writing "Fail!”
9. if the login input has the correct length, it is base64 decoded and decrypted with RSA_private_decrypt using the private key generated-rsa
http://va.ler.io – Pag. 57

○ ○ ○ ● ○ - Analyze how the device works
shell_auth summary
1. the challenge code is the public key to use to encrypt the login user's password
2. the challenge code is encrypted with the Gemtek public key stored inside the shell_auth binary and base64 encoded
3. to decrypt the challenge code we need the Gemtek private key
4. we don't know the Gemtek private key, this means that there is no way to successfully login with shell_auth
5. we can defeat this protection modifying the firmware replacing shell_auth with standard /bin/login
http://va.ler.io – Pag. 58

○ ○ ○ ● ○ - Analyze how the device works
Analyzing msg_center $ strings msg_center | grep assist
/bin/assistant -p hO2PHGNmaX0Ww!v0eqD8 -w xvoip_password_1
-t xvoip_plaintext_pw_1
/bin/assistant -p hO2PHGNmaX0Ww!v0eqD8 -w xvoip_password_2
-t xvoip_plaintext_pw_2
/bin/assistant -p hO2PHGNmaX0Ww!v0eqD8 -w iad_xvoip_password_1
-t iad_xvoip_plaintext_pw_1
/bin/assistant -p hO2PHGNmaX0Ww!v0eqD8 -w iad_xvoip_password_2
-t iad_xvoip_plaintext_pw_2
/bin/assistant -p hO2PHGNmaX0Ww!v0eqD8 -g
assistant -p hO2PHGNmaX0Ww!v0eqD8
-w wifi -h "$serial" -s %s 2> dev/null |
cut -c1-8 | tr 'A-Z' 'a-z'
http://va.ler.io – Pag. 59

○ ○ ○ ● ○ - Analyze how the device works
Analyzing ”assistant”
# ./assistant -p hO2PHGNmaX0Ww!v0eqD8 \
-w wifi -h "GMK170210005623" -s A8D9A6
WSAgj2ZZ
# ./assistant -p hO2PHGNmaX0Ww!v0eqD8 \
-w wifi -h "GMK170210005623" -s A8D9A6 \
2> /dev/null | cut -c1-8 | tr 'A-Z' 'a-z’
wsagj2zz
http://va.ler.io – Pag. 60
SSID: Linkem2.4GHz_A8D9A6 S/N: GMK170210005623 WPA2-Personal: wsagj2zz

○ ○ ○ ● ○ - Analyze how the device works
Reverse engineering “assistant” 1. it calculates the SHA1 digest for the router's serial number 2. Breakpoint 36, SHA1 (d=0x7fff63ec "GMK170210005623", n=15,
md=0x7fff618c "") at sha1_one.c:70. SHA1 (20 bytes):
c4 0d e4 96 16 20 cf bc c6 c9 05 66 54 4a 8f 8f 2a 59 25 d8
3. A8D9A6 is used to pickup 6 bytes from the SHA1 ‘A’-’0’=17; ‘8’-’0’=8; ‘D’-’0’=20; ‘9’-’0’=9; ‘A’-’0’=17; ‘6’-’0’=6
4. Bin password: 59 20 20 8f 66 59
5. the bin password is base64 encoded and transformed in lowercase
6. $ echo "5920 208f 6659" | xxd -r -p | base64
WSAgj2ZZ
wsagj2zz (lowercase version)
http://va.ler.io – Pag. 61

Firmware Modification Kit - 1
Image Lengths
Kernel Image LZMA Compressed
Kernel/Boot Partition
U-Boot Header
SquashFS Root File System
Firmware modification kit - 1

○ ○ ○ ○ ● - Create a Firmware Modification Kit
Firmware Modification Kit - 2
• Extract the squashfs root file system, modify it
• Create the new root file system image
• Reassemble the firmware file putting together all the pieces using the ”dd” command
• Recalculate header checksums and image lengths
• The new kernel/boot image is ready
• Script the process and create the firmware mod kit
http://va.ler.io – Pag. 63

○ ○ ○ ○ ● - Create a Firmware Modification Kit
Flash the new firmware
• With file system analysis we discover the command fwupgrade mtdn boot-image-file [startaddress] [endaddress]
• Copy the new kernel/boot image into the device # cd /tmp
# tftp -r kernel.bin -l kernel.bin -g 192.168.1.100
kernel.bin |************************| 32768k 0:00:00 ETA
• Flash the new image # echo $mtddevnum
6
# fwupgrade mtd6 kernel.bin
Erasing 128 Kibyte @ 2000000 - 100% complete.
# reboot
http://va.ler.io – Pag. 64

○ ○ ○ ○ ○ - Summary
Summary
• Reverse engineering can be really challenging
• Clearly define the limited scope of the project
• Start gathering information following the easiest path first
• If some information is missing or difficult to get move forward, go back only if absolutely needed
• Search on Internet for known vulnerabilities
• Select to hack processes running as root and with a large attack surface
http://va.ler.io – Pag. 65

○ ○ ○ ○ ○
Useful Links & Documentation - 1 GitHub repositories related to the Home Router Example • Hacking-gemtek: a complete reverse engineering project on the home router
example: https://github.com/digiampietro/hacking-gemtek • Adbtools2, Tools for hacking another ADB Epicentro routers, including firmware
modification: https://github.com/digiampietro/adbtools2 • Buildroot-armv7: a set of scripts, configuration files and Buildroot external tree
to setup a Qemu emulation environment to run and reverse engineer the Netgear DVA 5592 executables: https://github.com/digiampietro/buildroot-armv7
Reverse engineering and physical disassembly • Introduction to reverse engineering, Mike Anderson, Embedded Linux Conference
2018, slides and videos: https://elinux.org/images/c/c5/IntroductionToReverseEngineering_Anderson.pdf https://www.youtube.com/watch?v=7v7UaMsgg_c http://va.ler.io – Pag. 66

○ ○ ○ ○ ○
Useful Links & Documentation - 2 Recommended Books • Chris Simmonds - Mastering Embedded Linux Programming - Second Edition -
Packt Publishing 2017 • Norman Matloff , Peter Jay Salzman - The Art of Debugging with GDB , DDD and
Eclipse - NO STARCH PRESS 2008 Hardware tools • Bus Pirate: http://dangerousprototypes.com/docs/Bus_Pirate • Jtagulator: http://www.grandideastudio.com/jtagulator/ • J-Link debug probes: https://www.segger.com/products/debug-probes/j-link/
JTAG and UART interfaces • Popular pinouts: http://www.jtagtest.com/pinouts/
http://va.ler.io – Pag. 67

○ ○ ○ ○ ○
Useful Links & Documentation - 3
Software • Buildroot: https://buildroot.org/ • Putty terminal emulator: https://www.putty.org/ • OpenOCD (Open On-Chip Debugger) provides debugging, in-system
programming and boundary-scan testing for embedded target devices: http://openocd.org/
• Wireshark, network protocol analyzer: https://www.wireshark.org/ • Binwalk, firmware analysis tool: https://github.com/ReFirmLabs/binwalk • Jefferson, JFFS2 filesystem extraction tool: https://github.com/sviehb/jefferson
http://va.ler.io – Pag. 68

○ ○ ○ ○ ○
Question Time
? Question Time
http://va.ler.io – Pag. 69

○ ○ ○ ○ ○
The End
Thank You
http://va.ler.io – Pag. 70
Valerio Di Giampietro
http://va.ler.io
@valerio